Supplies of the Ship Modeler's Handbook are running out. Get your copy NOW before they are gone! Click on photo to order.
×


Glenn-UK
-
Posts
3,021 -
Joined
-
Last visited
Content Type
Profiles
Forums
Gallery
Events
Everything posted by Glenn-UK
-
 Peter Have a look at Gil' s Victory build log as he has plenty of advice about staining the rigging.
 -
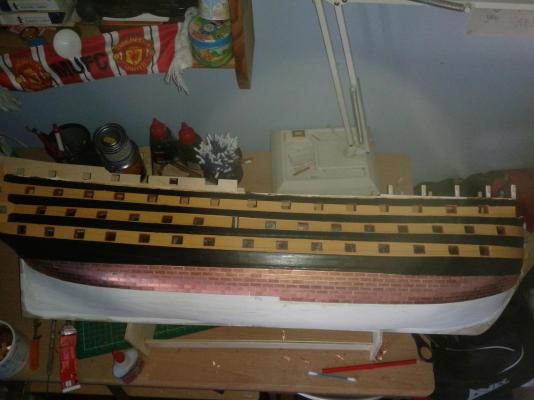
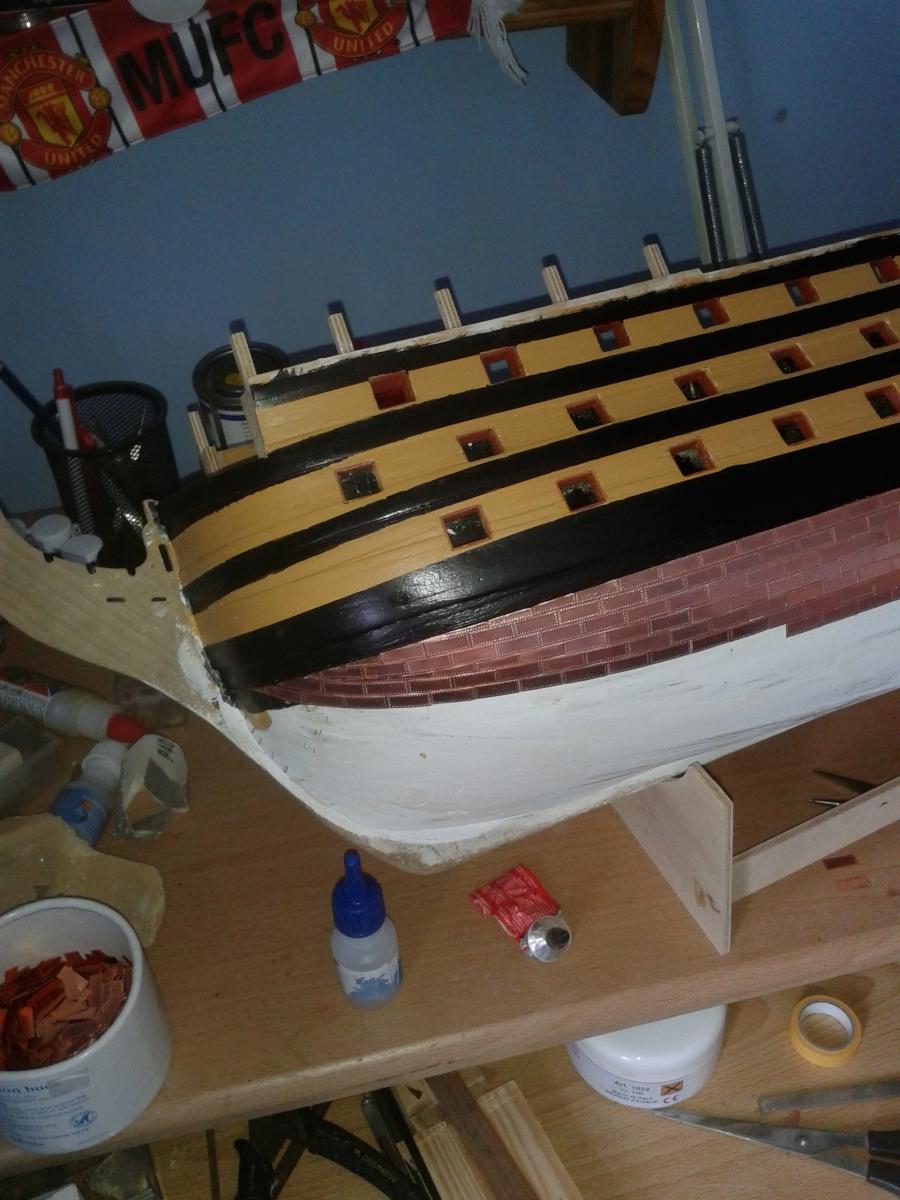
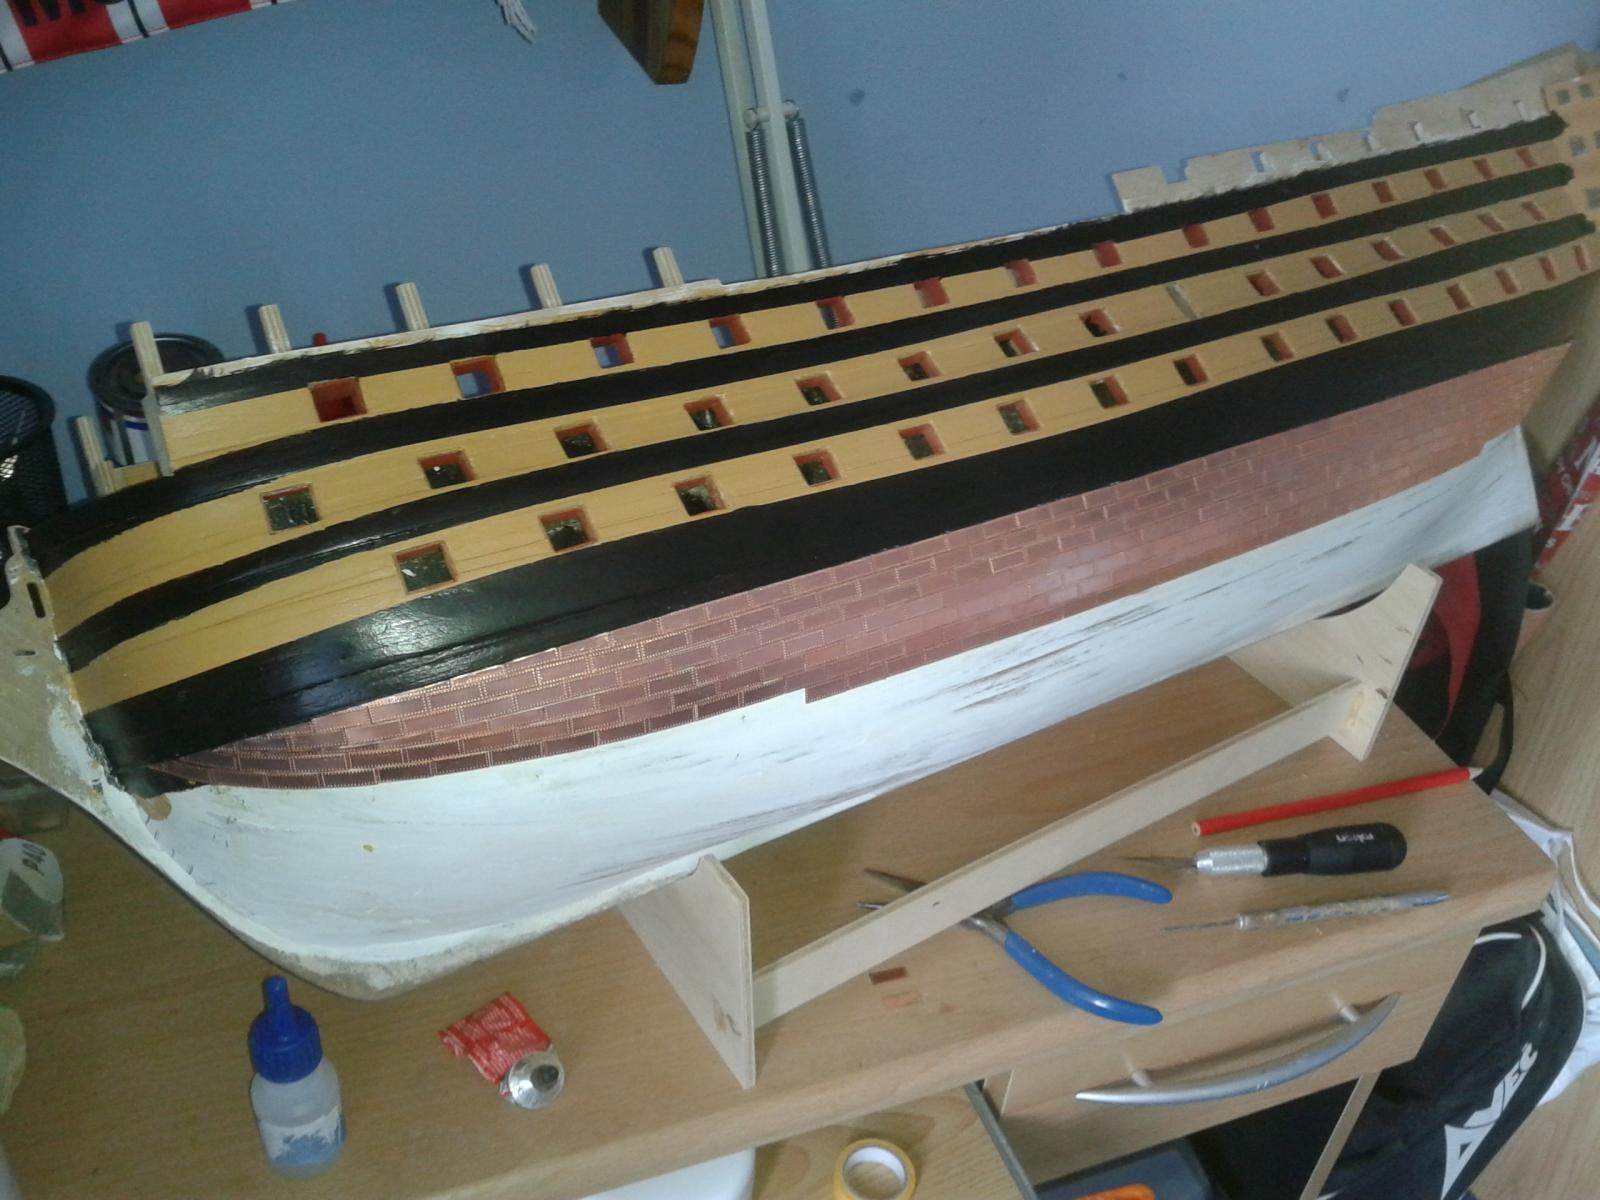
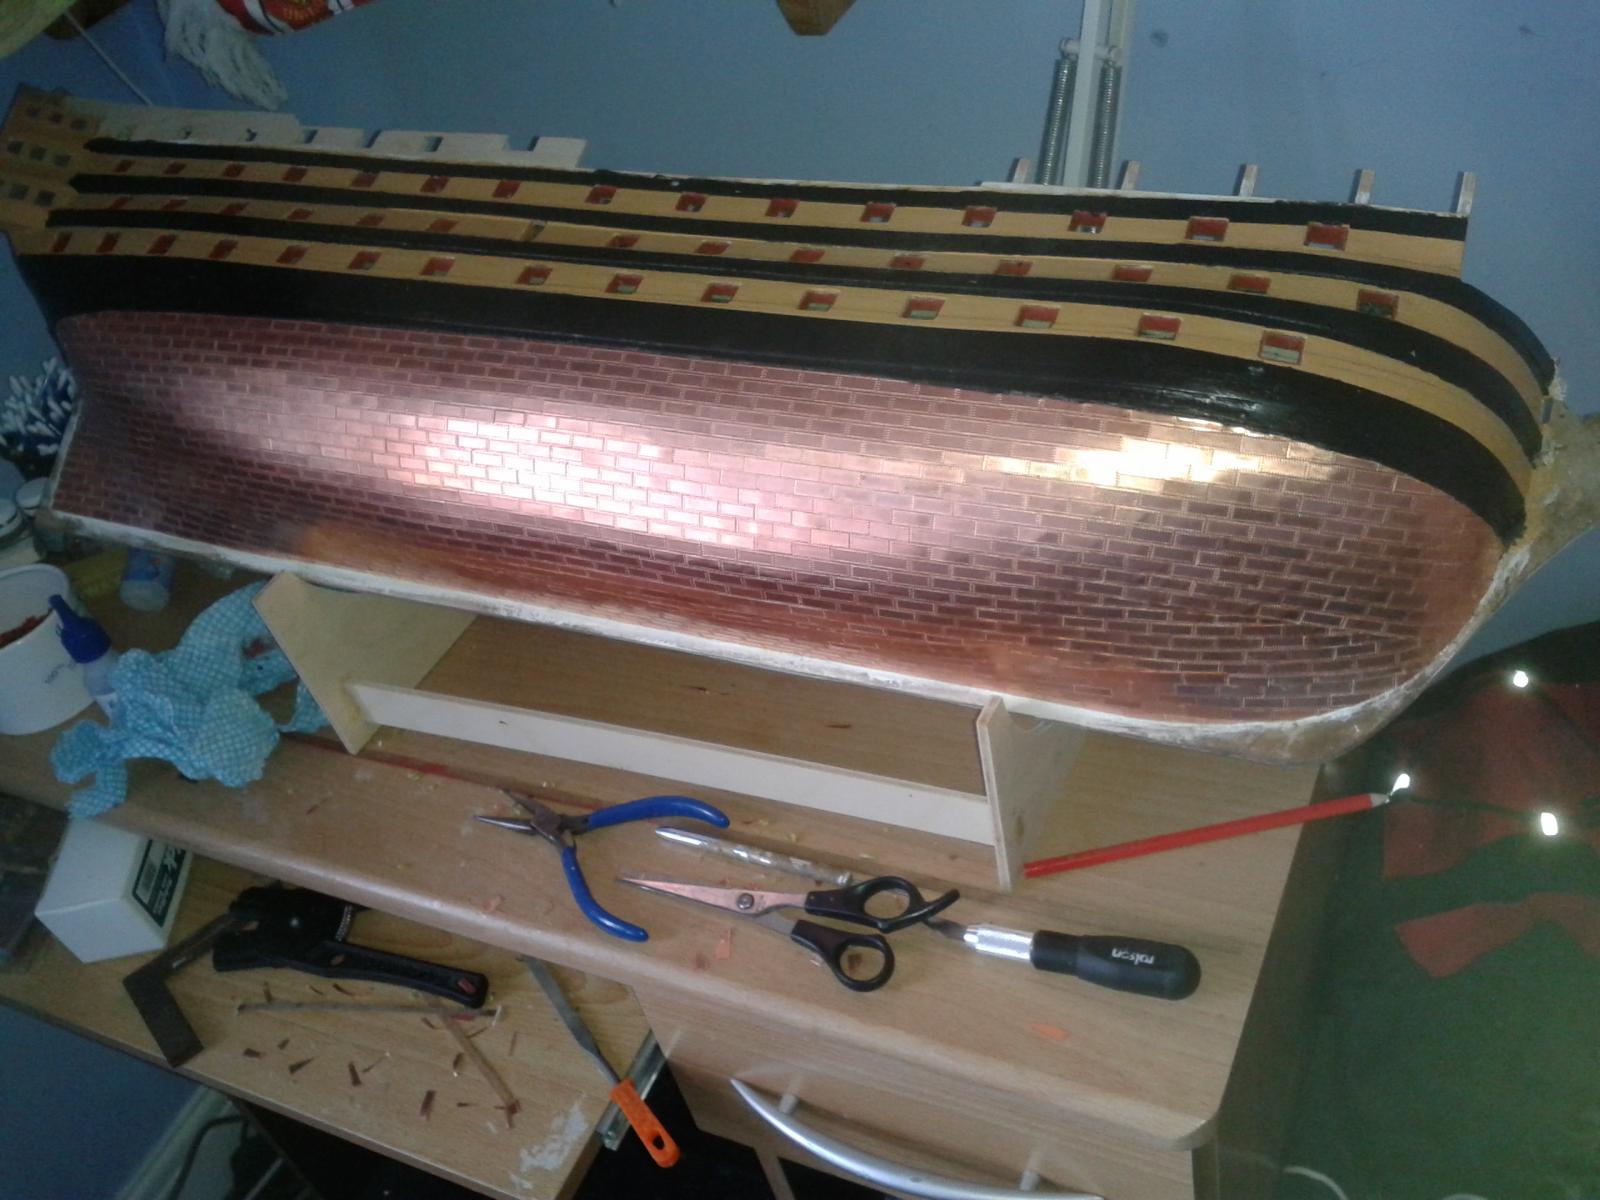
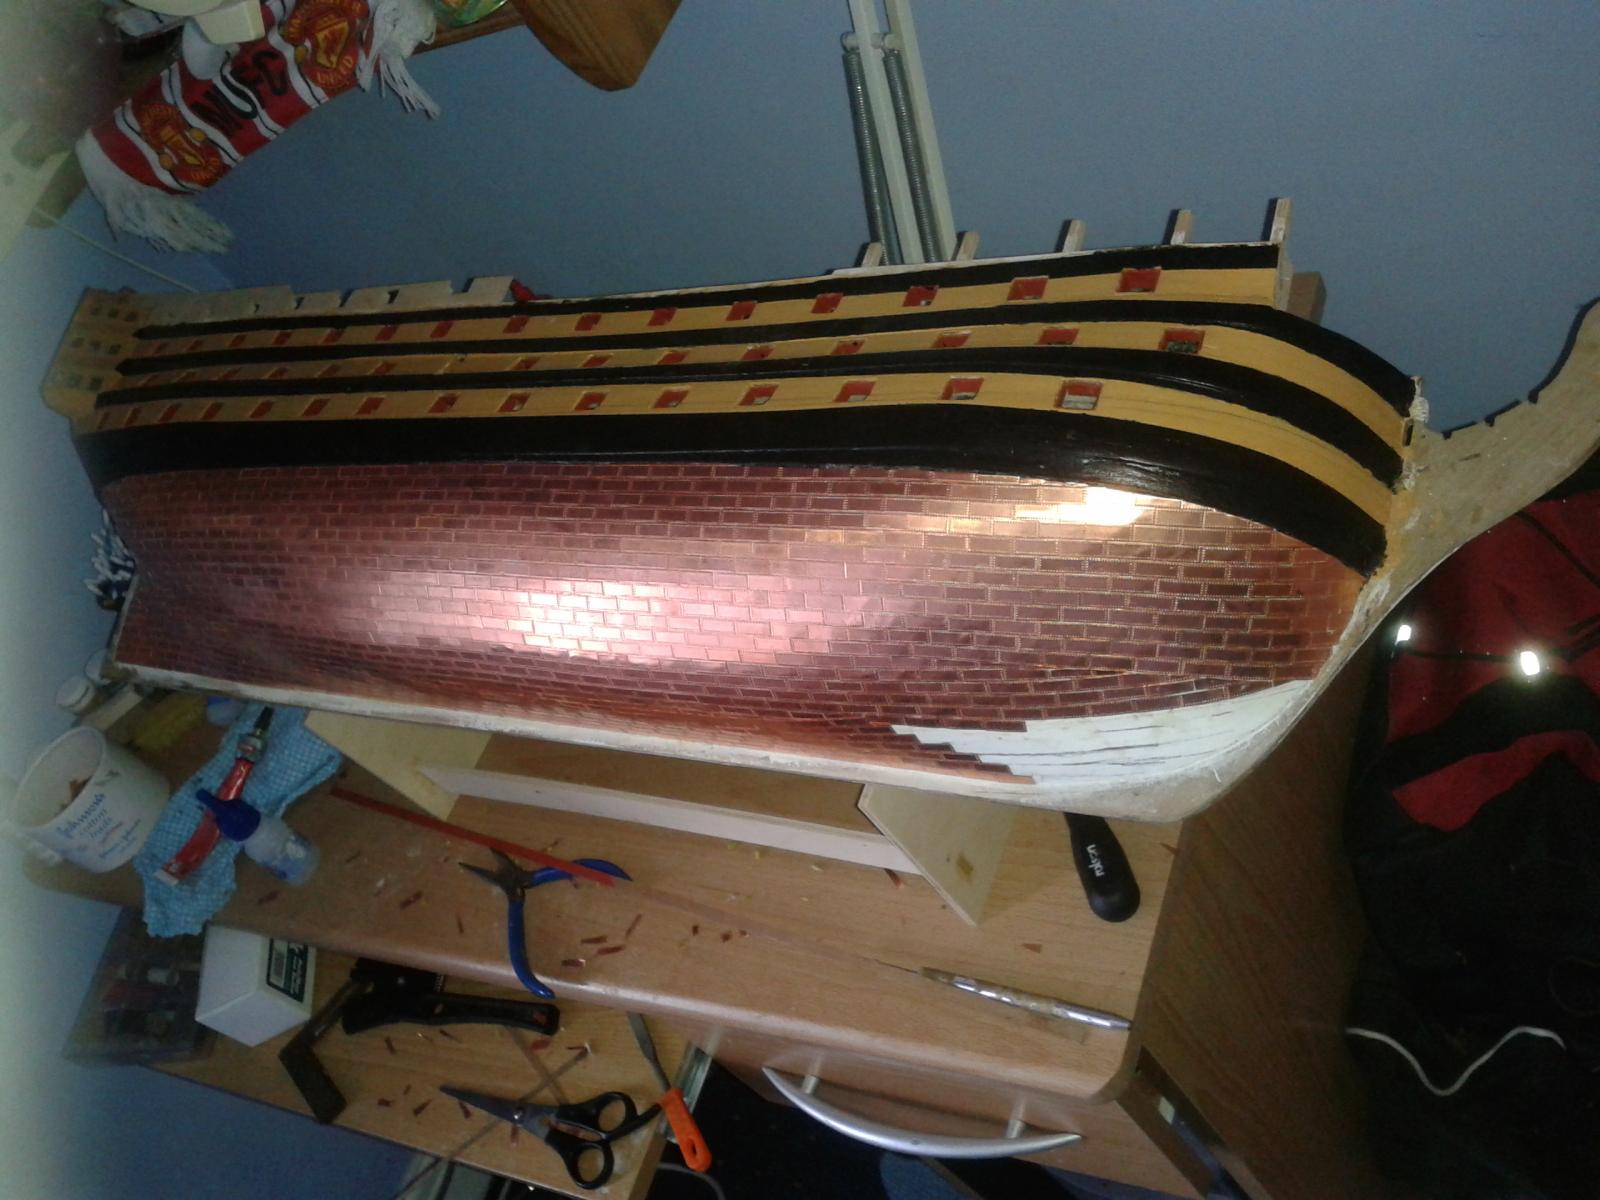
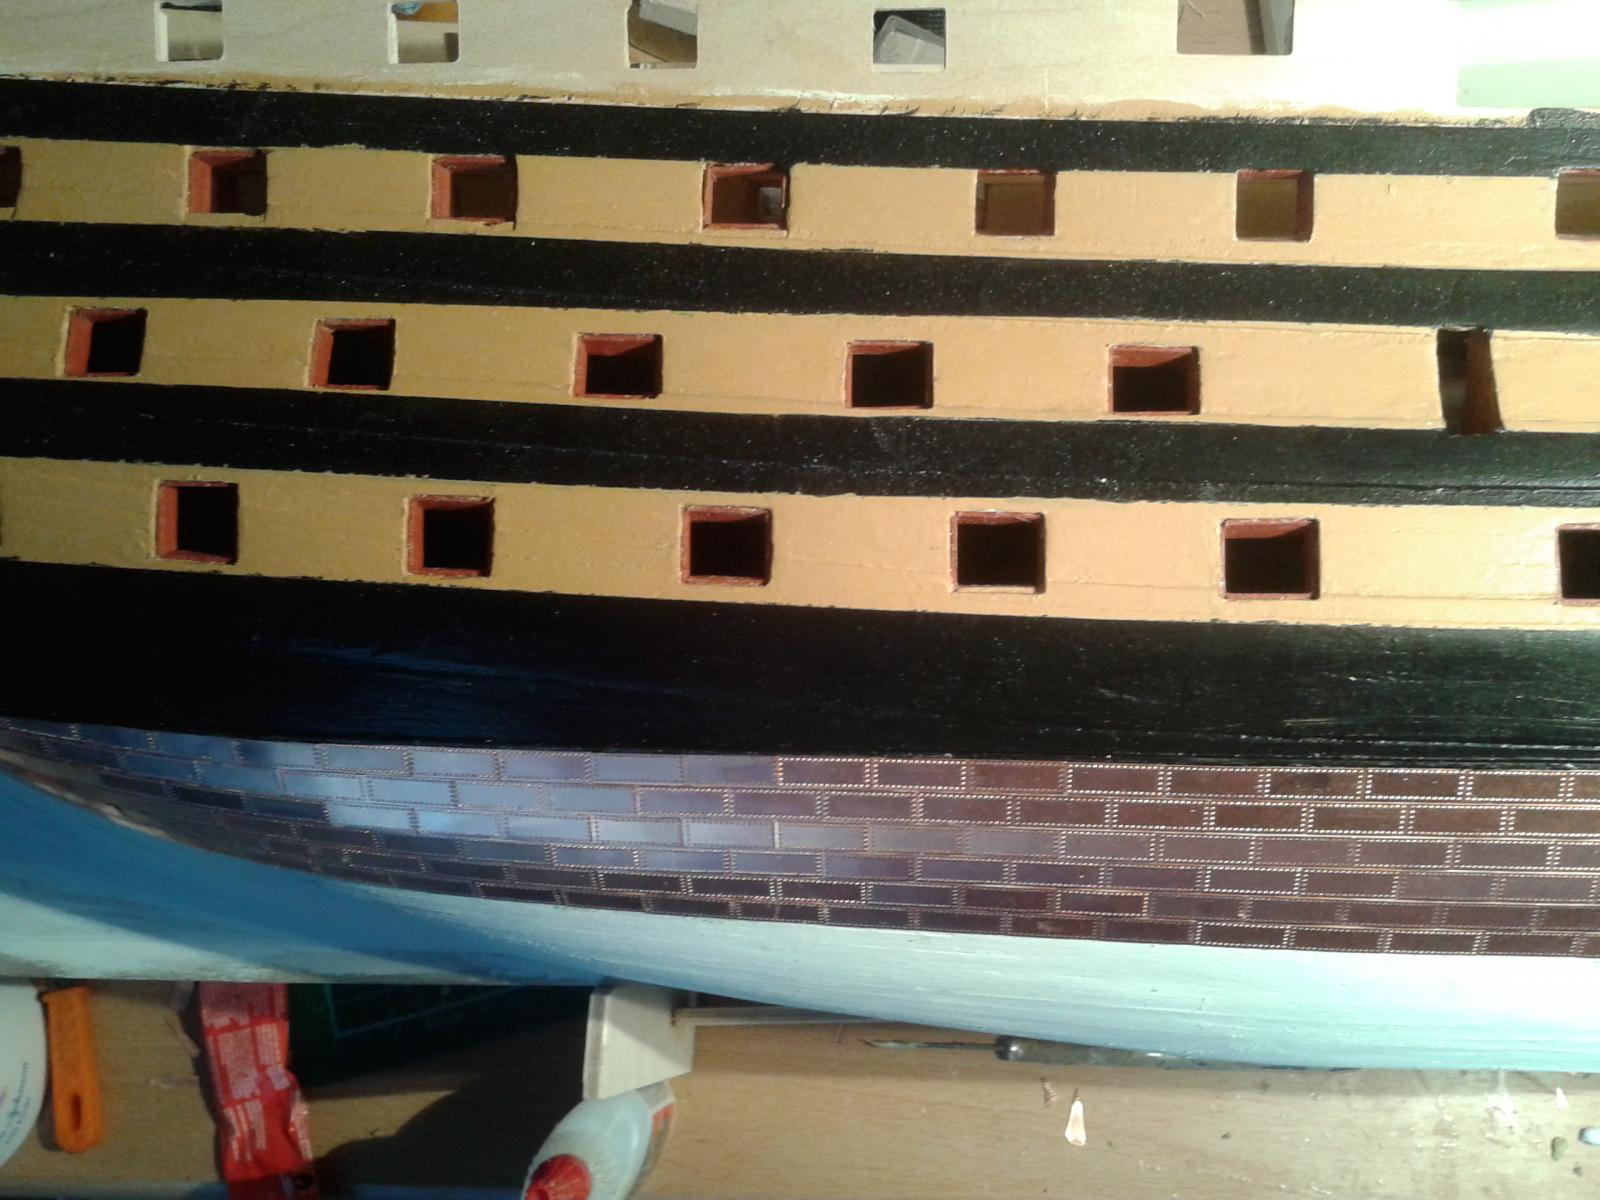
Work still progressing on the post side copper plating.

-
Thanks for the visit and kind comments Lawrence. Thankfully I'm enjoying the copper plating task, and aim to be complete with the next 2 or 3 weeks then I'm off on holiday for a week.
-
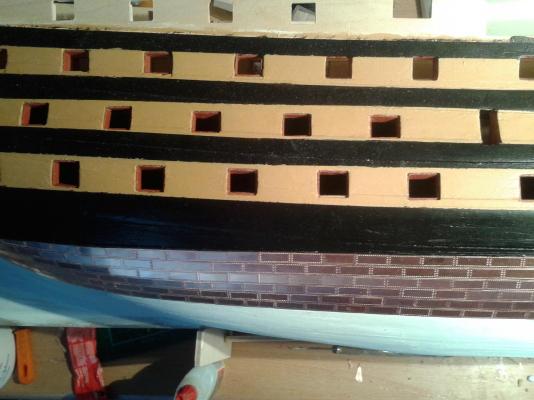
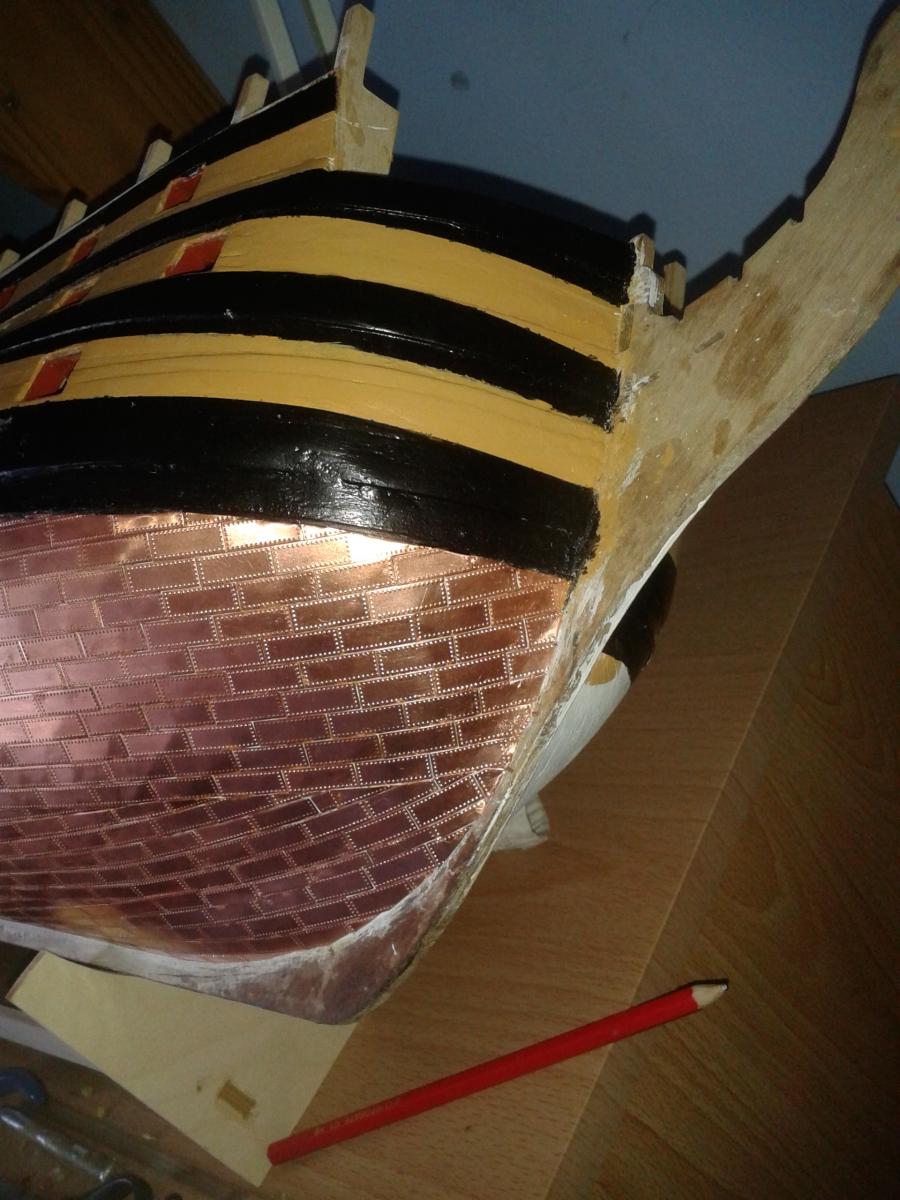
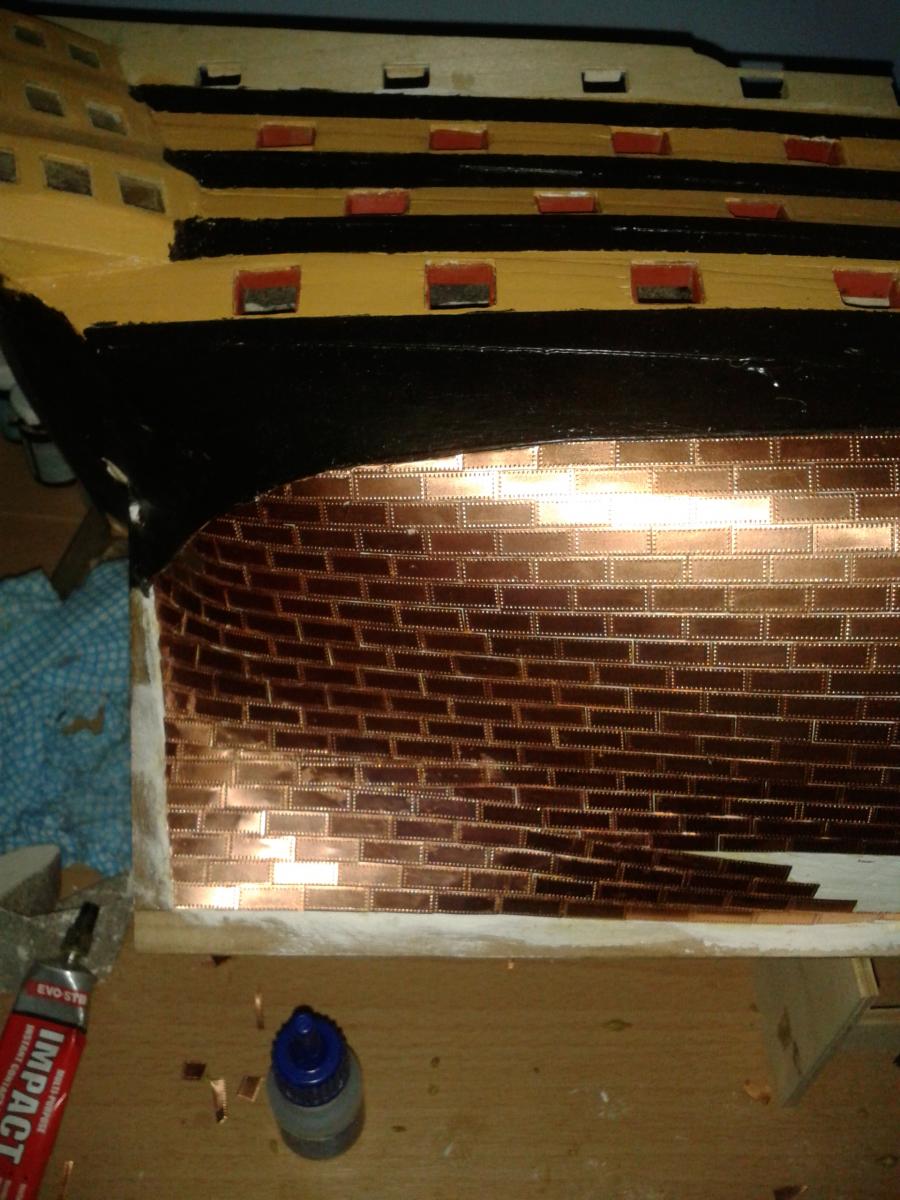
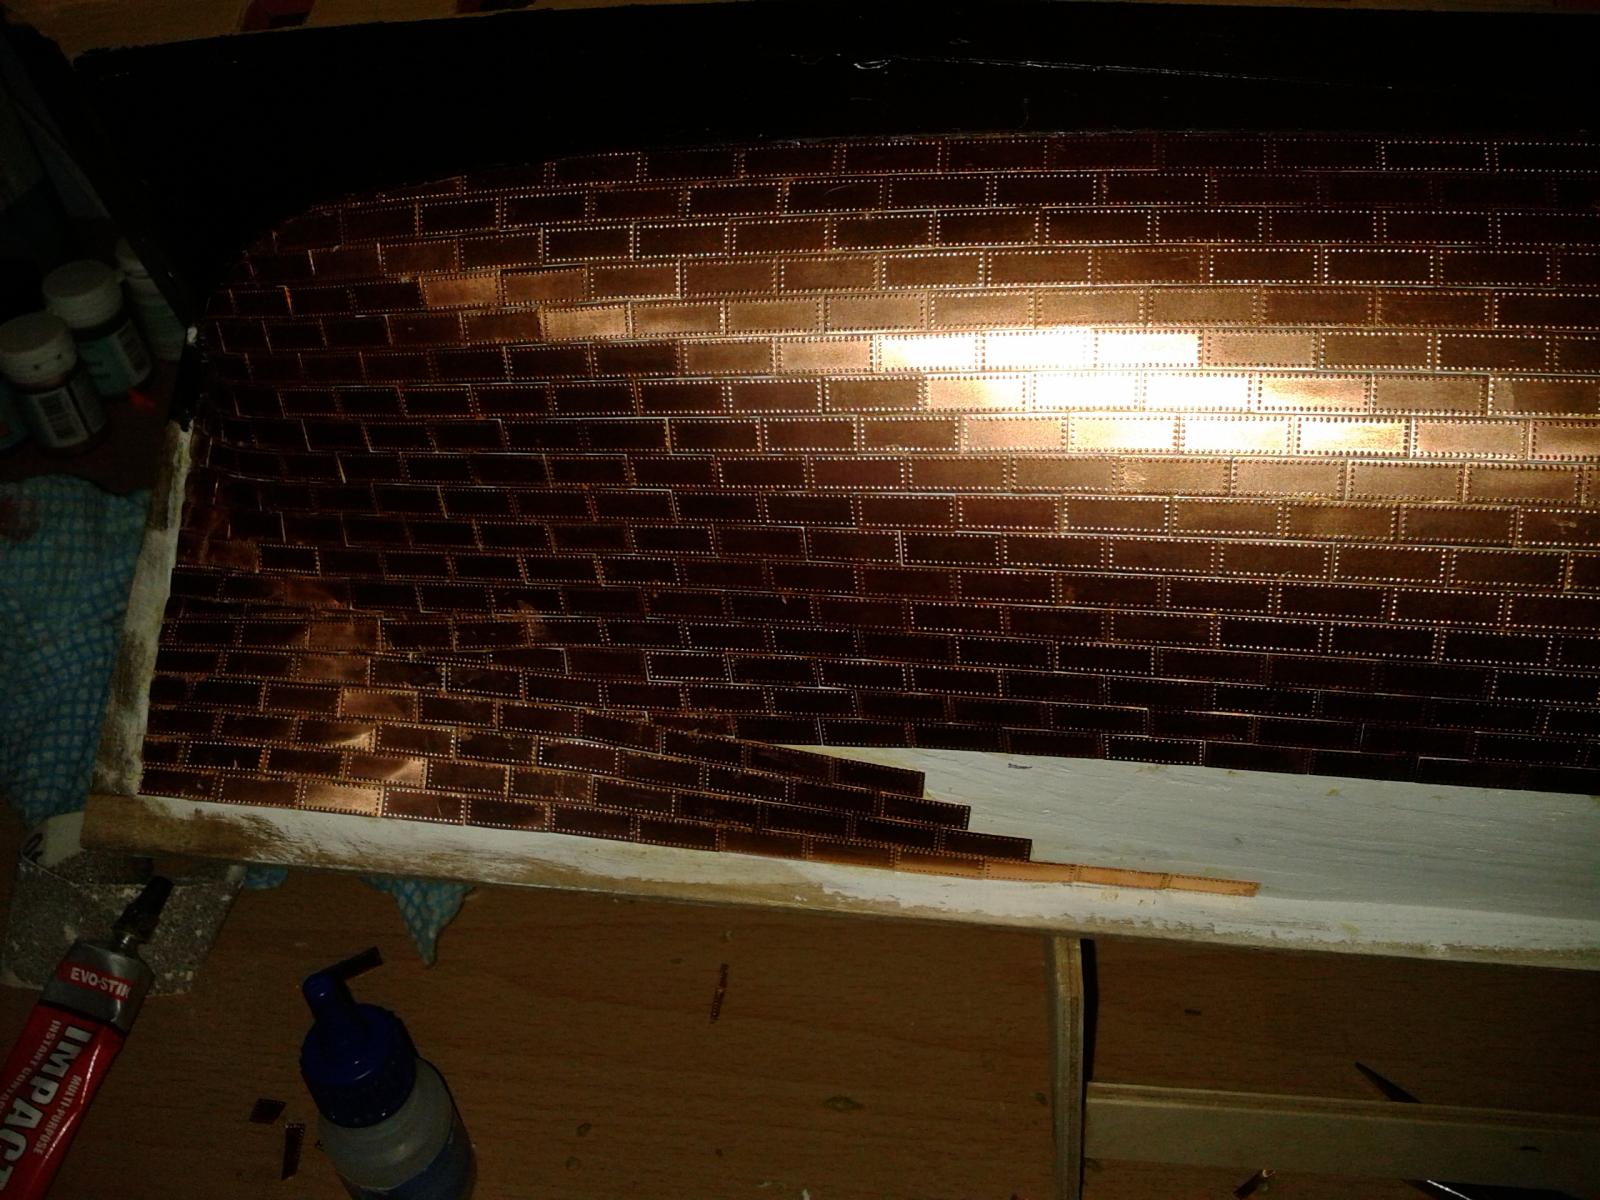
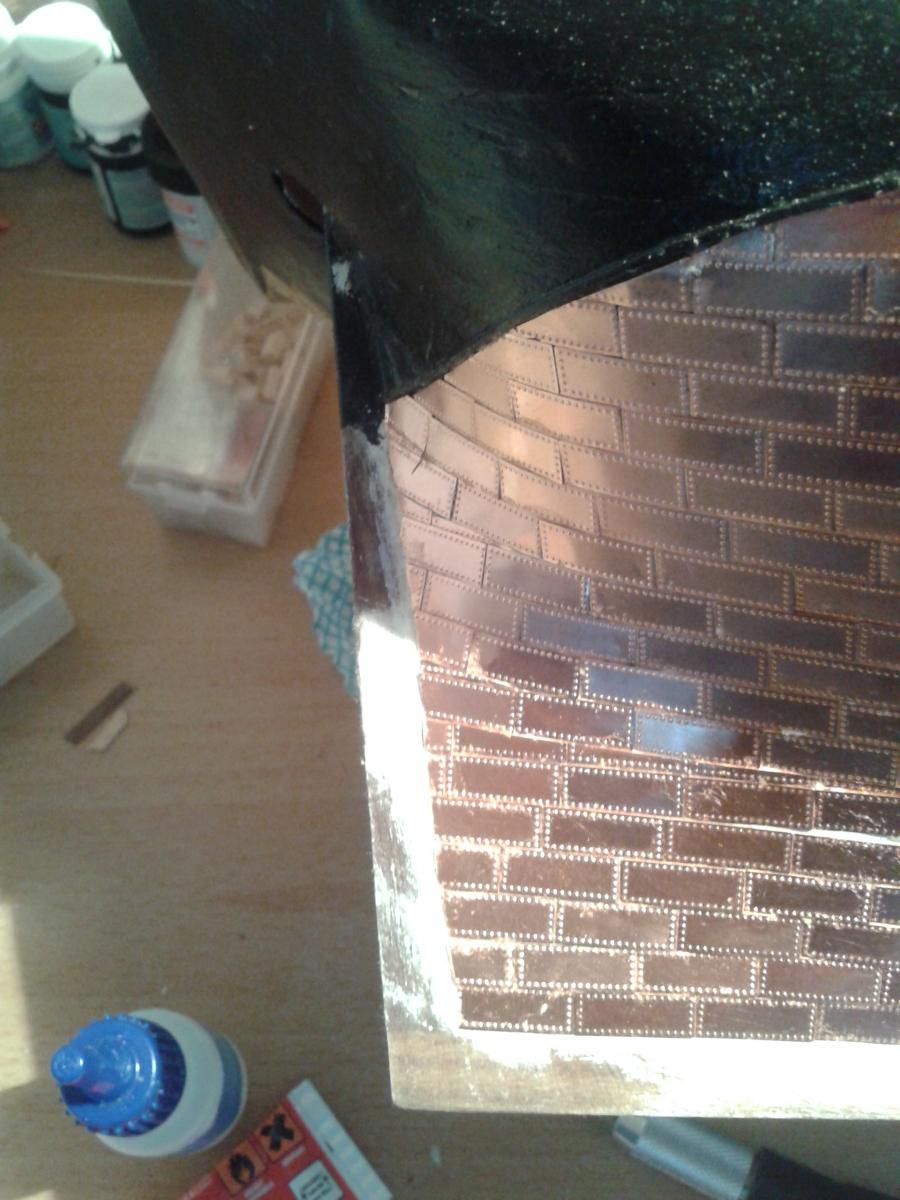
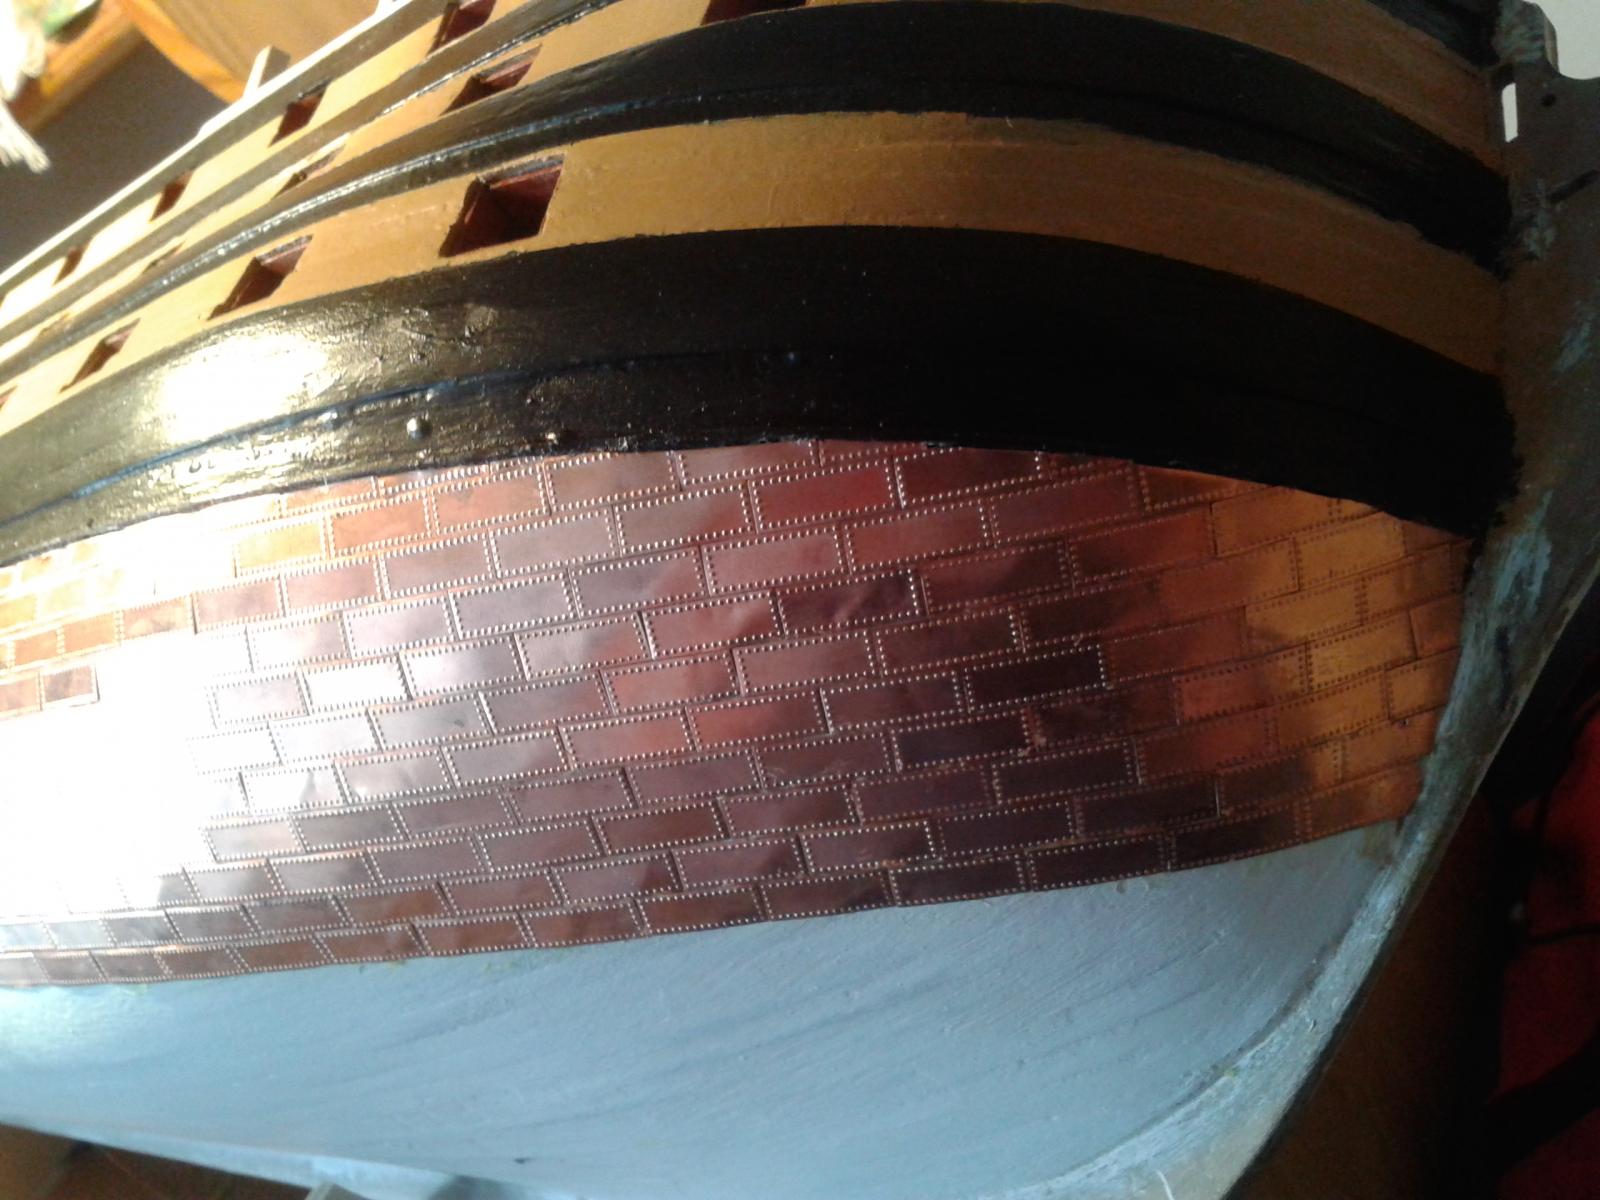
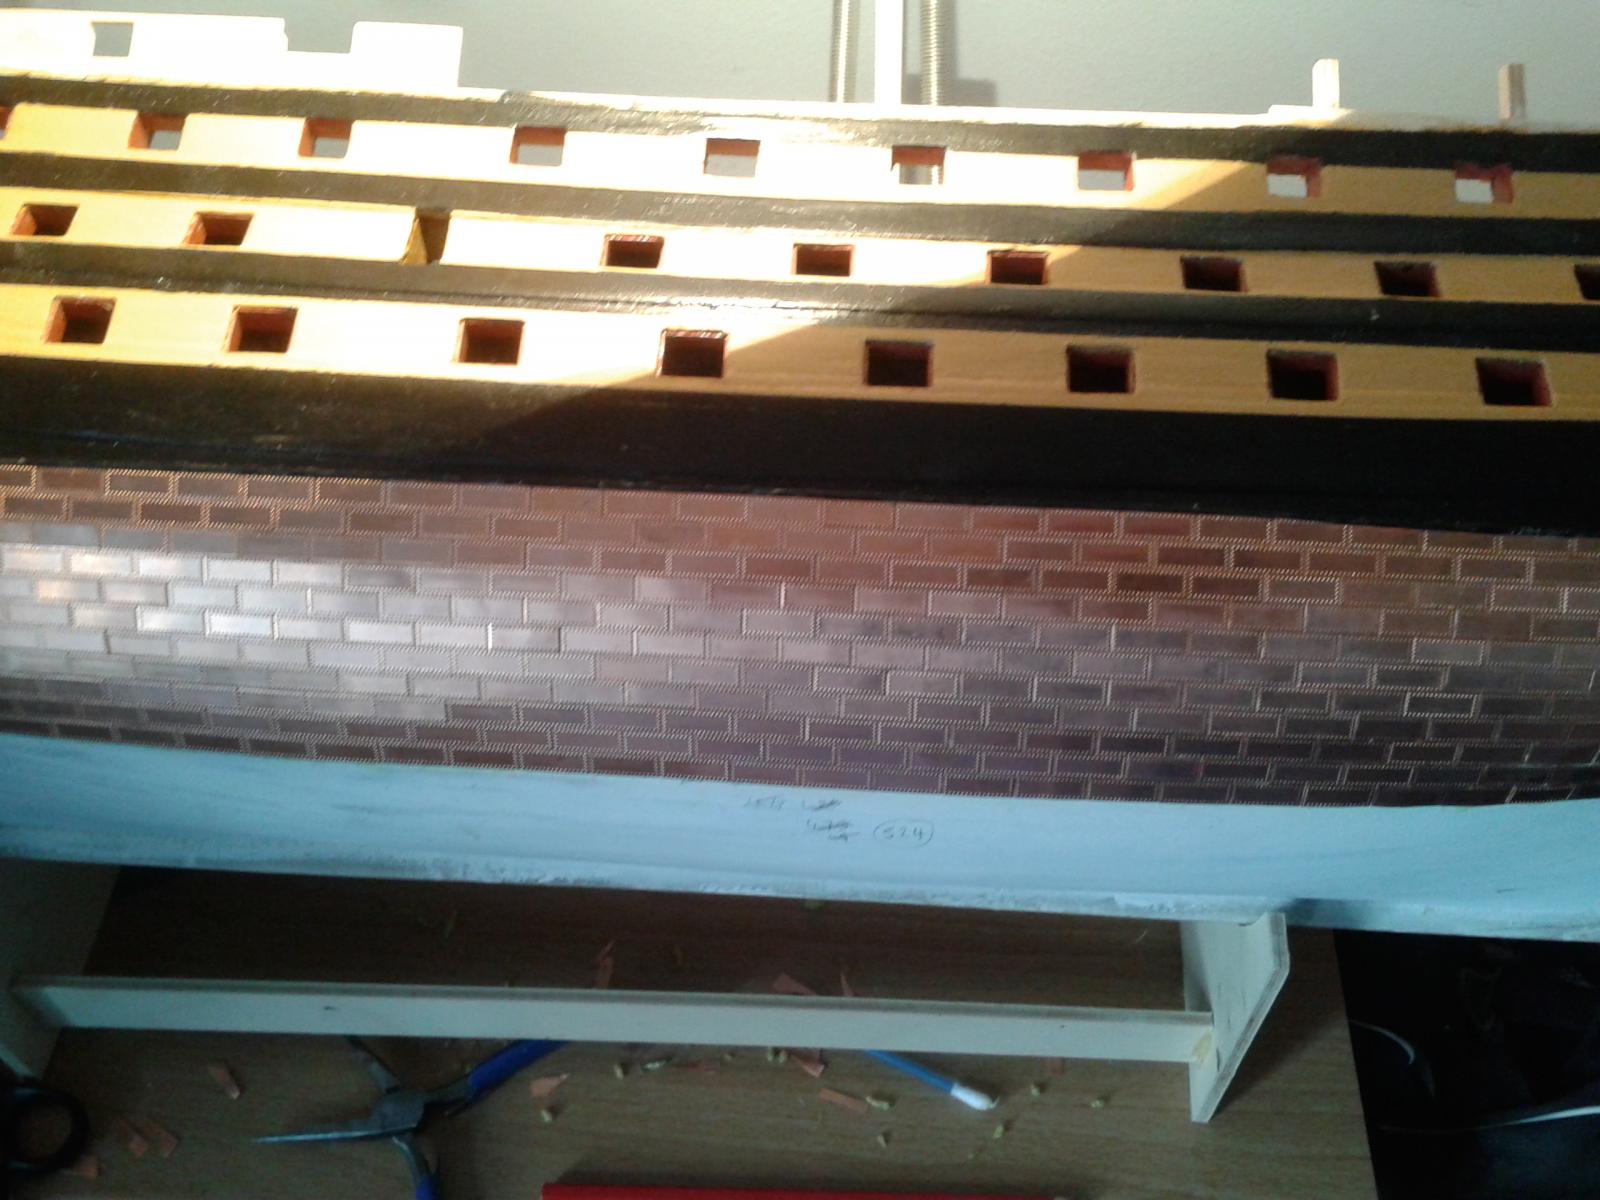
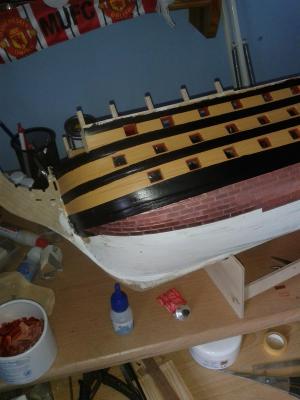
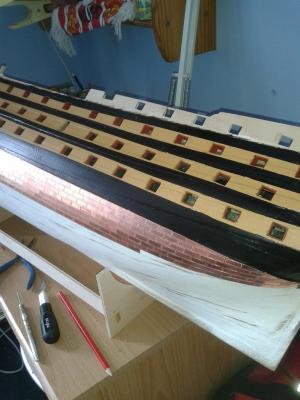
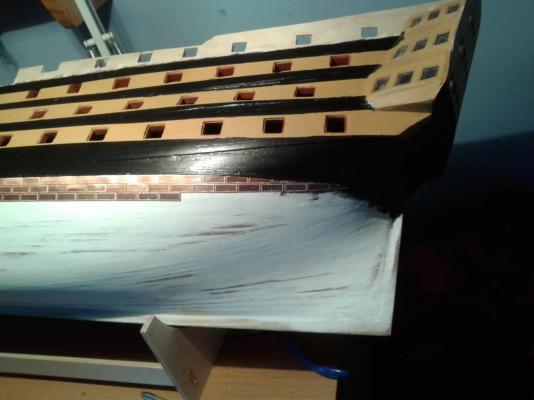
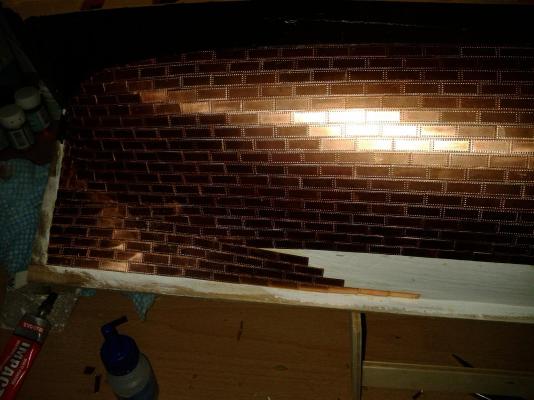
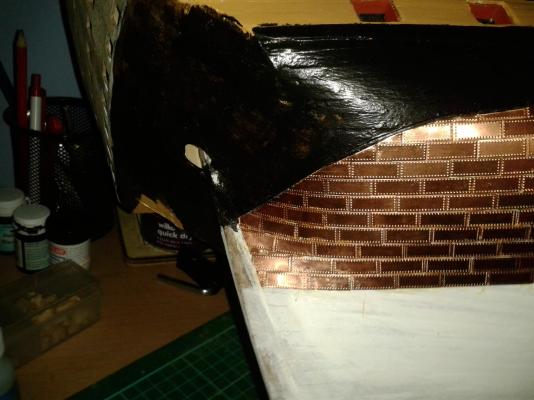
Work has now commenced on the port side of the hull with the seemingly never ending task of installing the copper plating. Slow progress as I have been making sure the platingfollows the same lines as the starboard side. You can see the pencil marks on the first photo where I'm planning the copper plates to run to. There are similar marks on the stern but not seem visible of these photos but they are there.


-
Hi Nick Thanks for the comment I have hotel in Fareham booked for the Friday night so all systems go for HMS Victory on Saturday. I should be Ok with the transport as I have the car, satnav and a fading memory from my times down there in the 80's, but I really appreciate you kind offer. Also hotel booked for Saturday night in London (plus a West End show) as we prepare for the long drive back to Scarborough on the Sunday.
-
Tulle is the way to go, based on information provided by other builders. It's readily available and not very expensive. I had not heard the tip about soaking in diluted glue but I think it sounds like a good idea to try, nothing ventured nothing gained.
-
Hello Rich Glad to see you have got it sorted, good luck with the next phase of your build. I've booked a night in Fareham toward the end of next month so my wife and I can visit HMS Victory. Last time I was down there was in the early 80's when I doing some work on the old navel bases HMS Dryad and HMS Vernon, use to stay in the Ocean hotel in Southsea.
-
Holiday booked for next month which includes a 1 day visit to Portsmouth to look around HMS Victory.
-
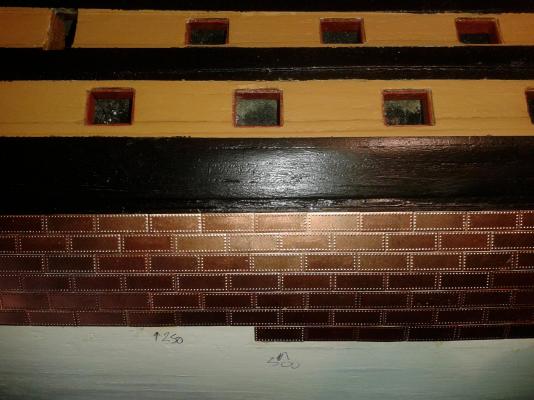
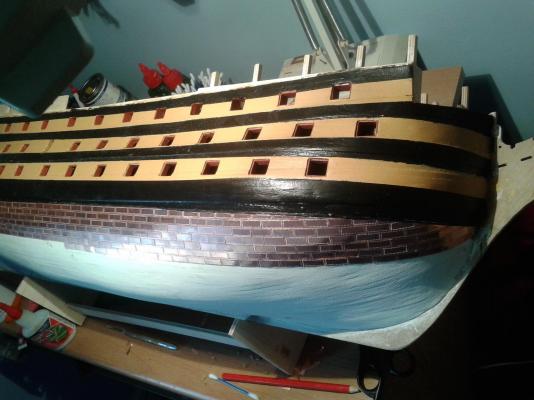
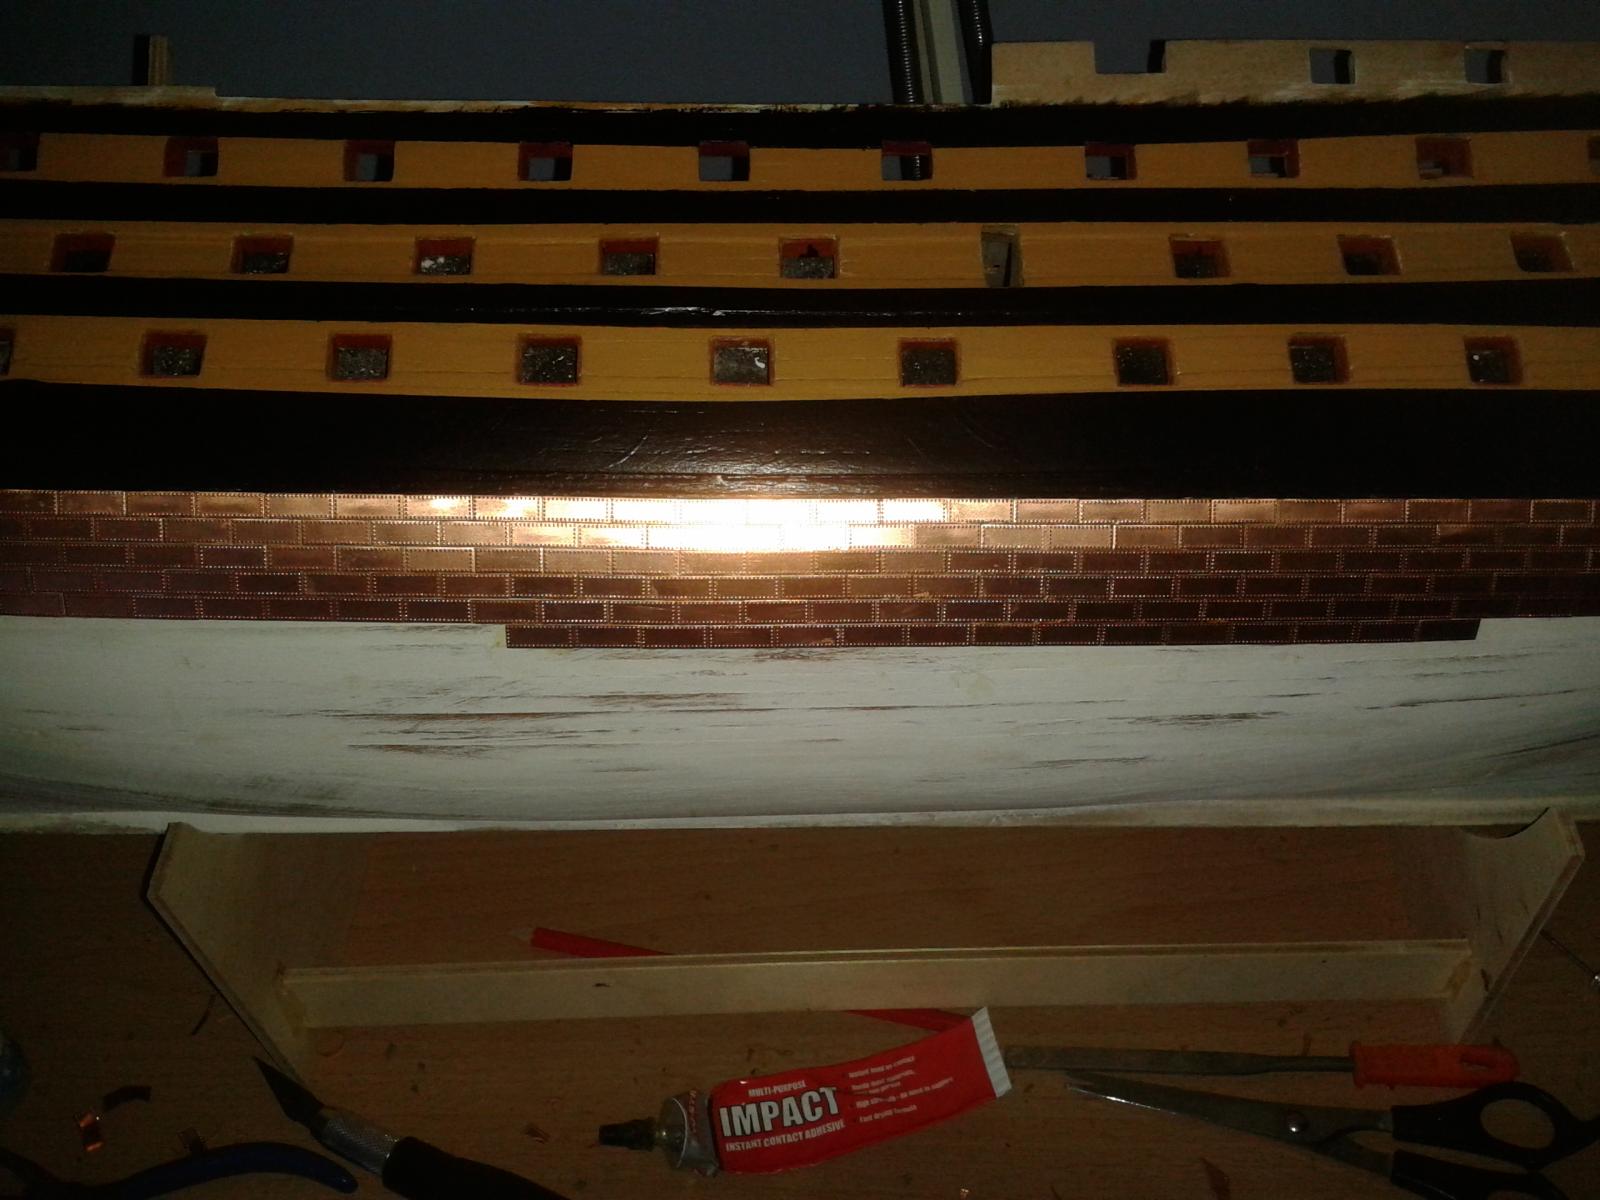
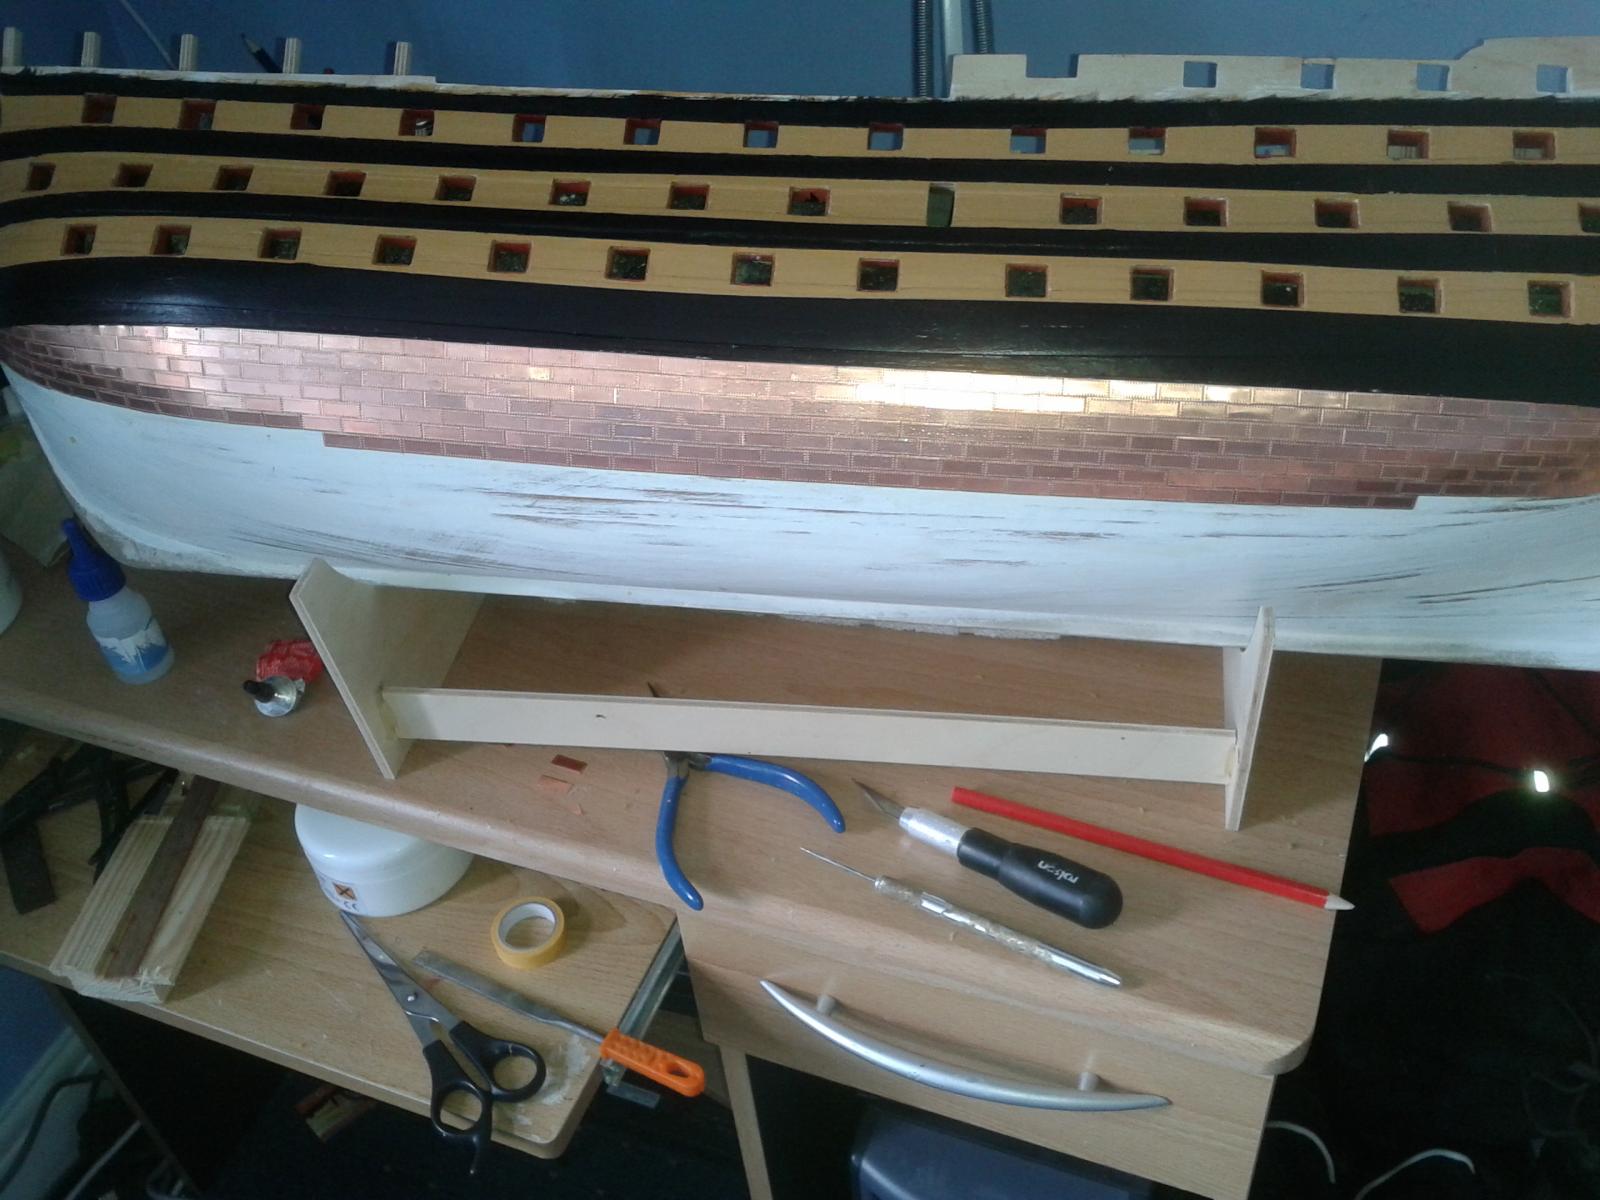
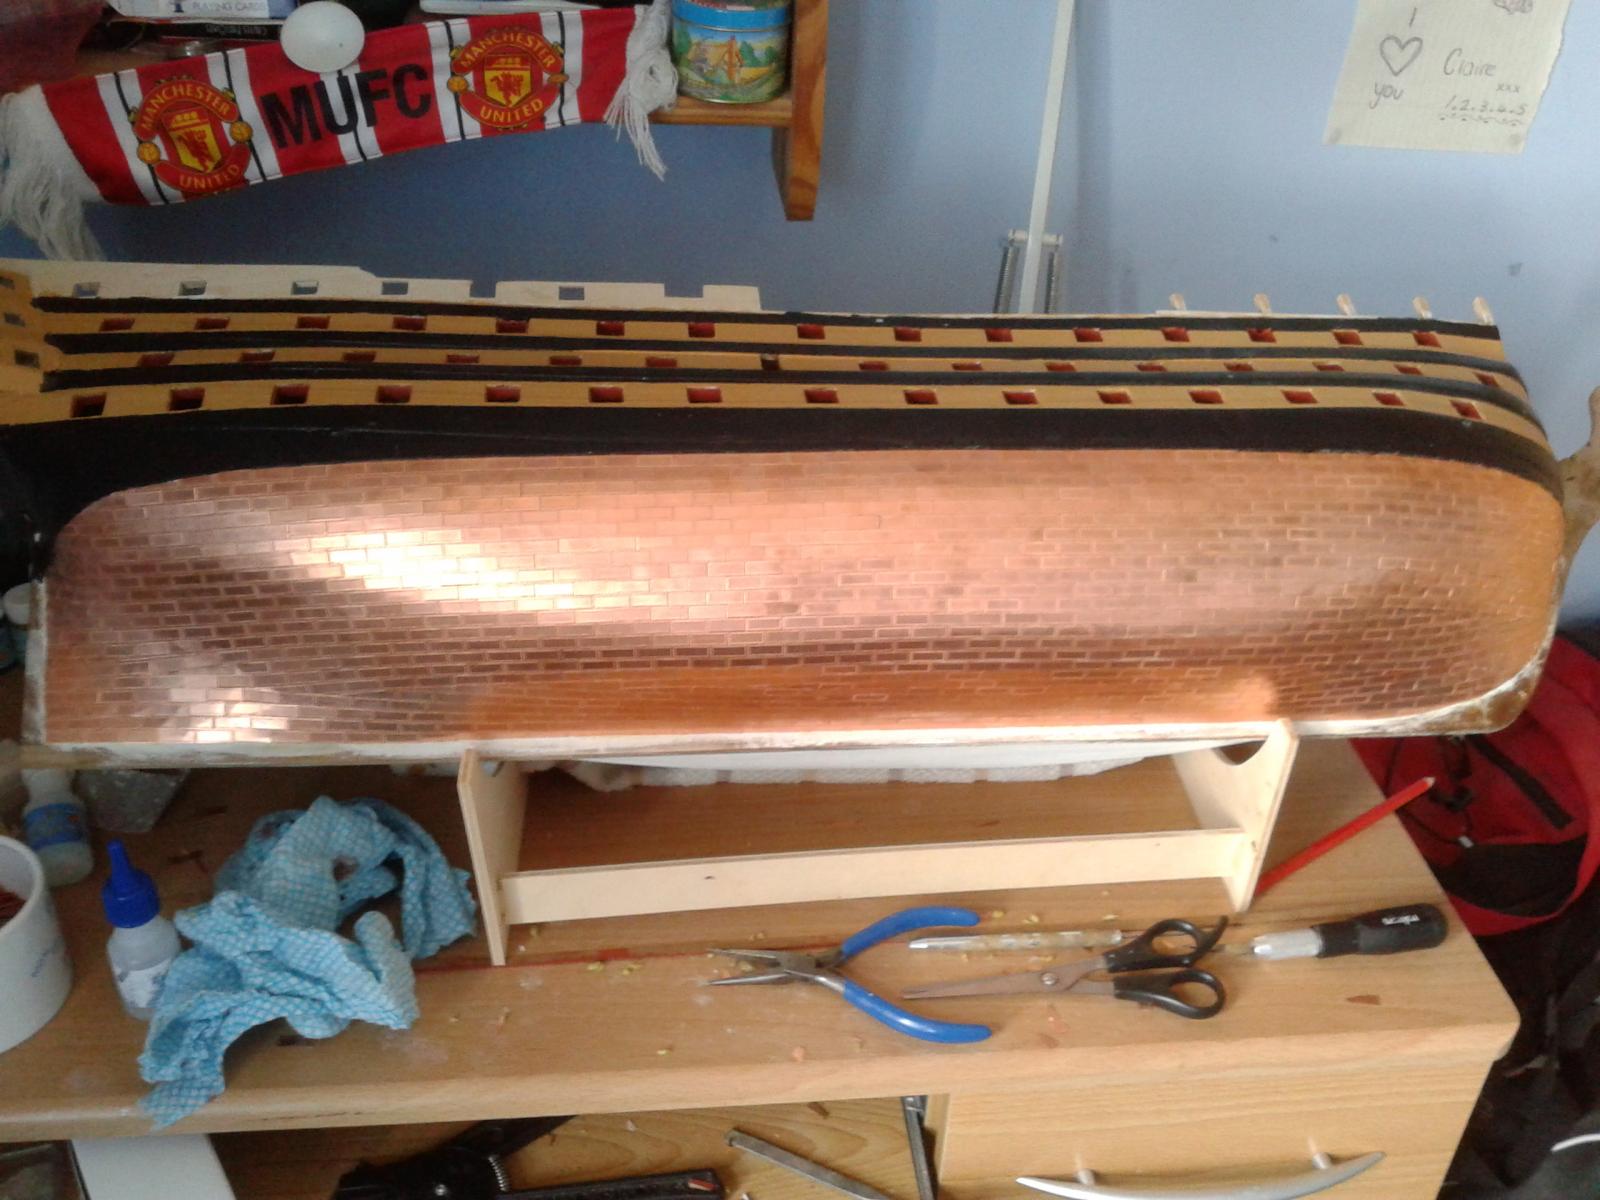
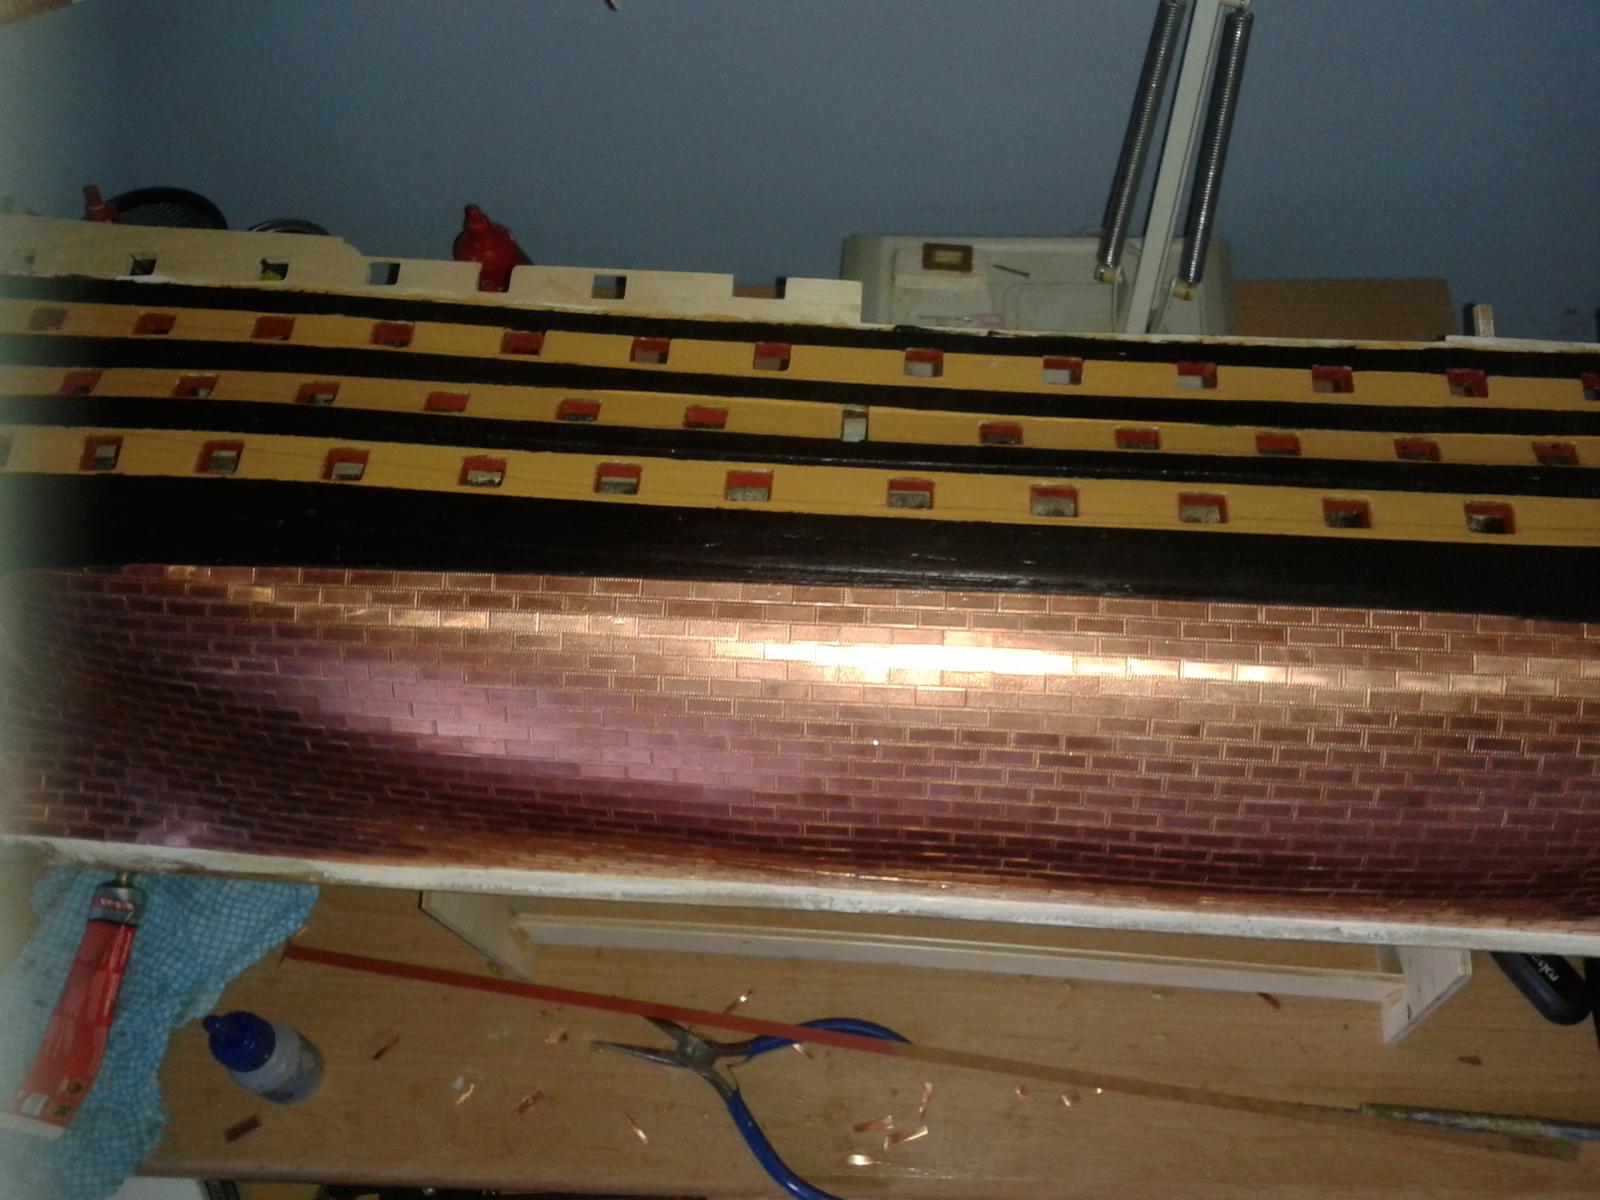
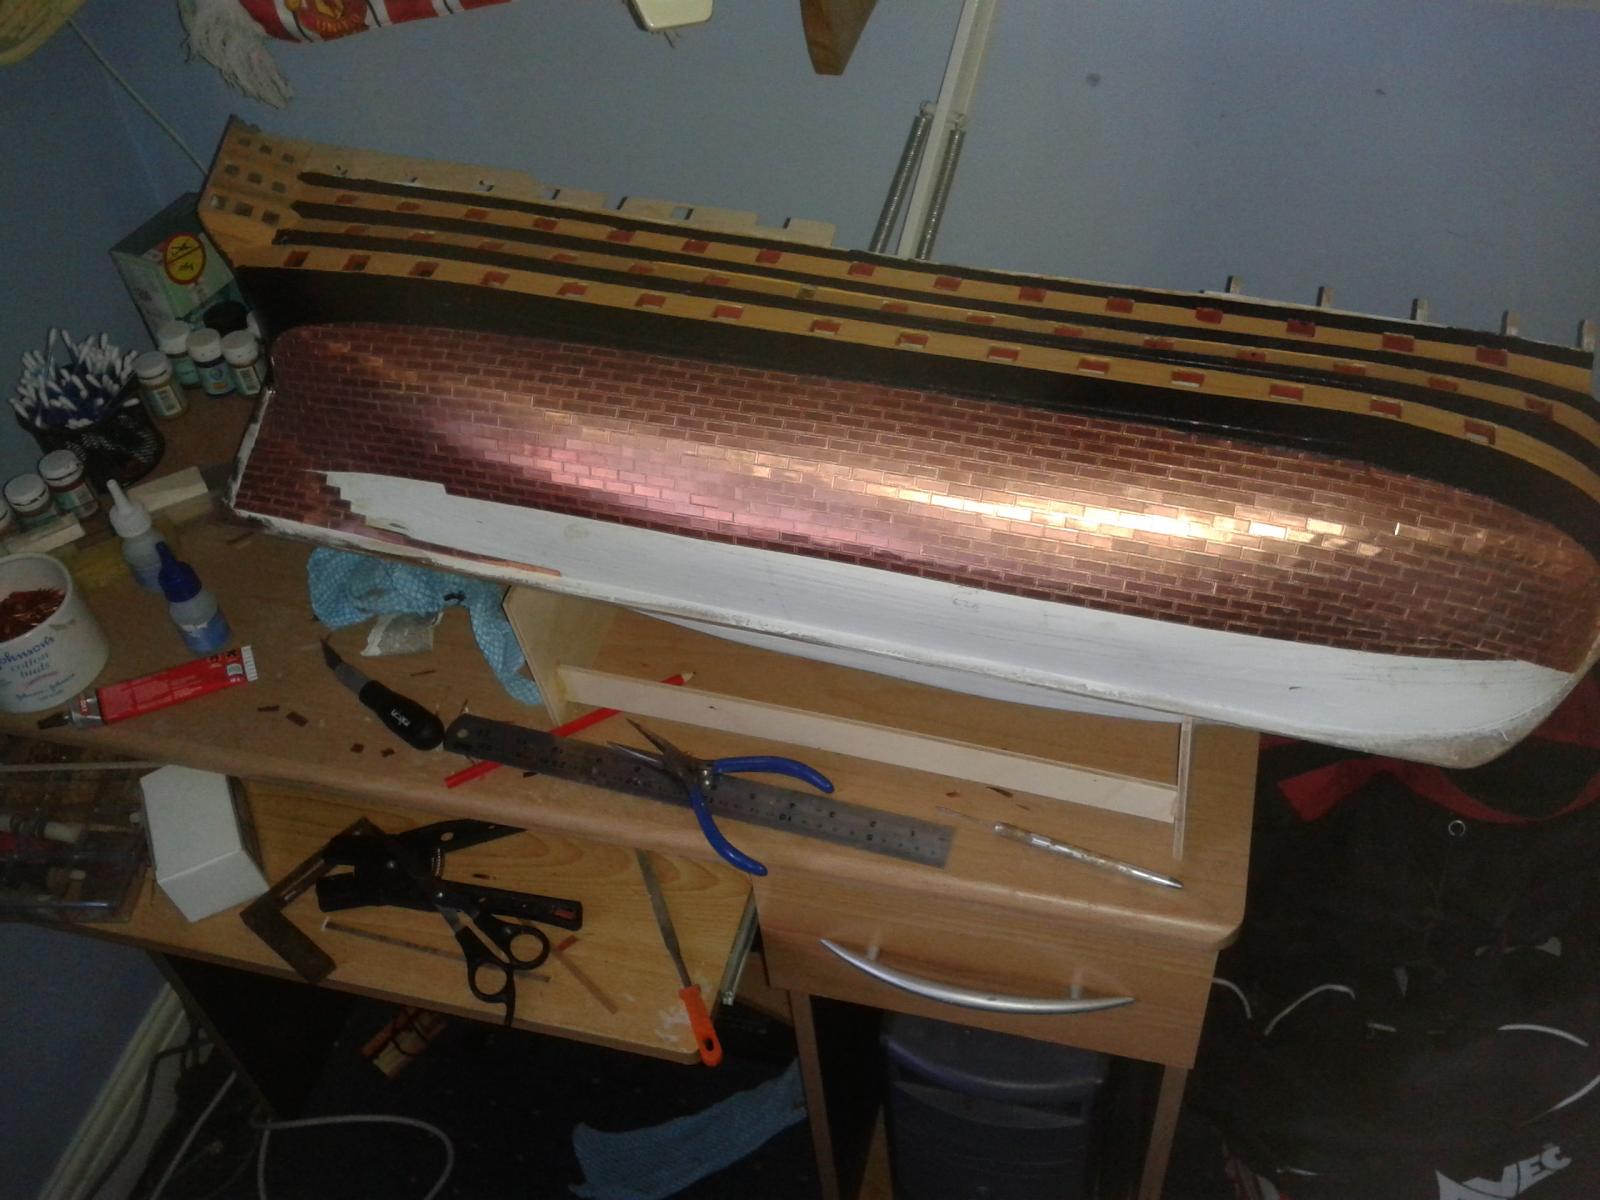
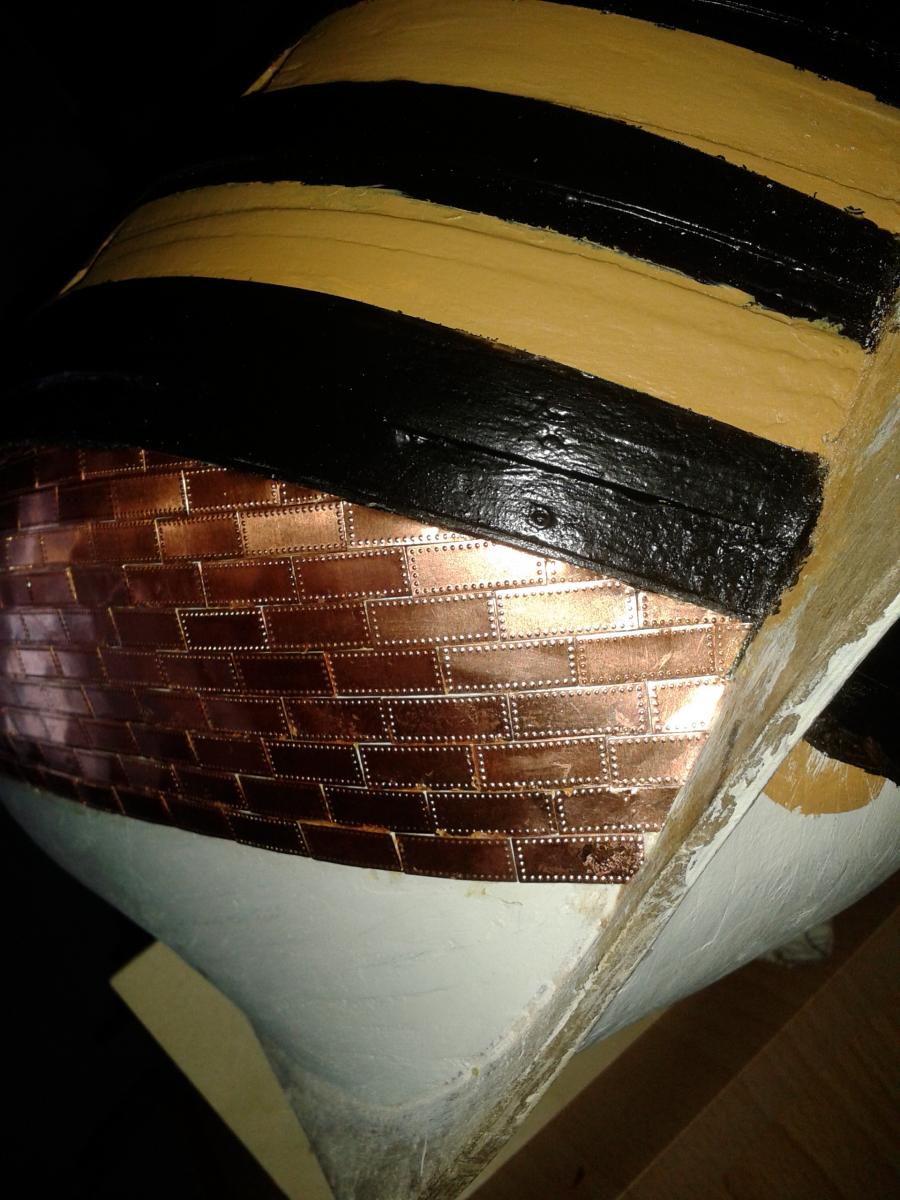
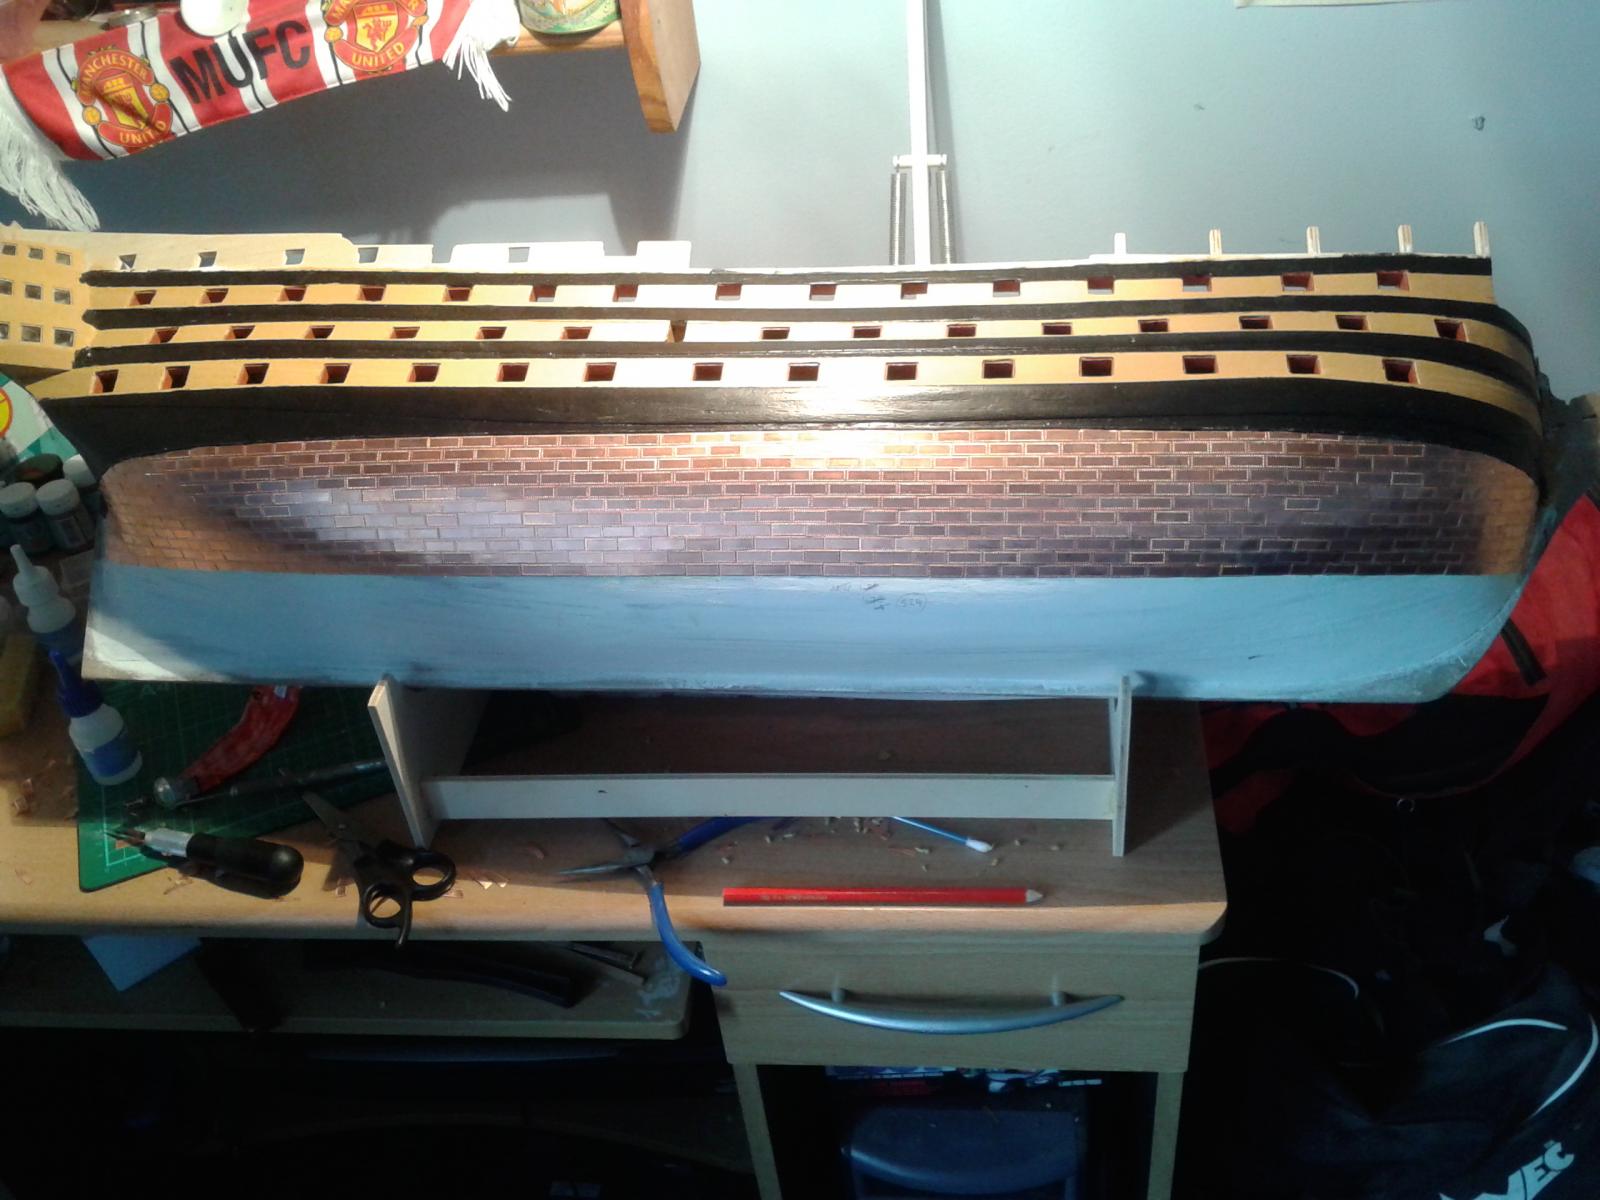
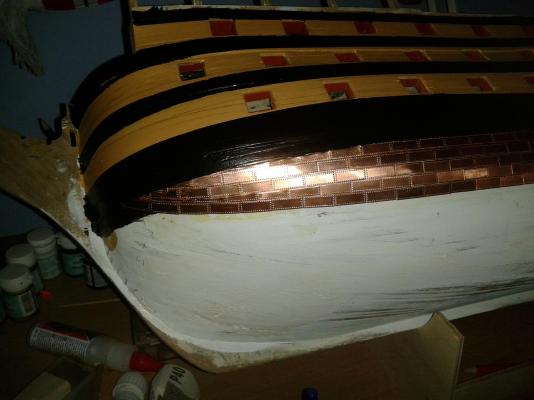
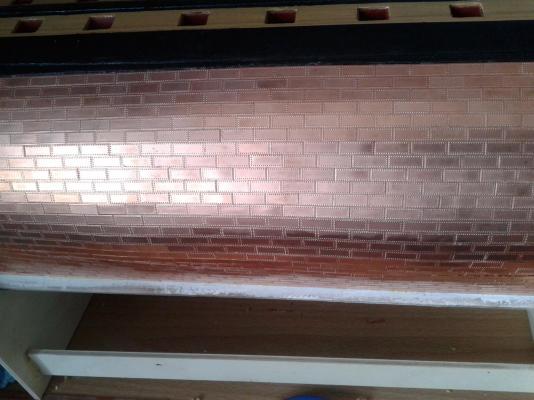
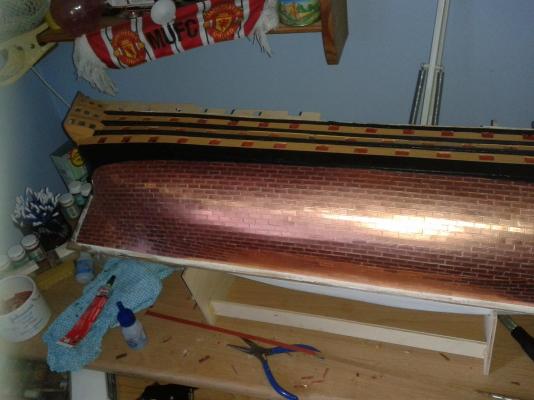
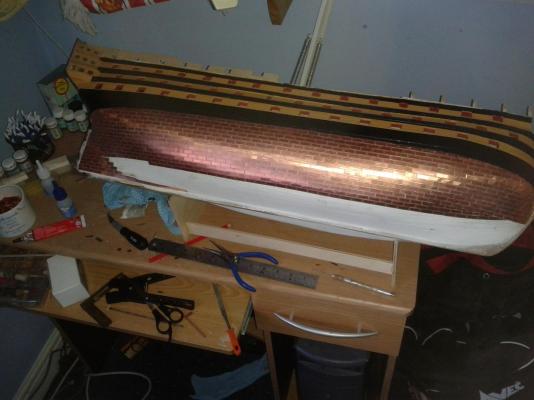
Finally complete the starboard side copper plating. I felt this was a major milestone until I realised I have it all to do again on the port side and then have to plate the stern post and keelson. My plating may not be up to the standard of some of the more accomplished builders but it looks OK, and as was commented on yesterday by my eldest son the plating looks 100% better in real life.


-
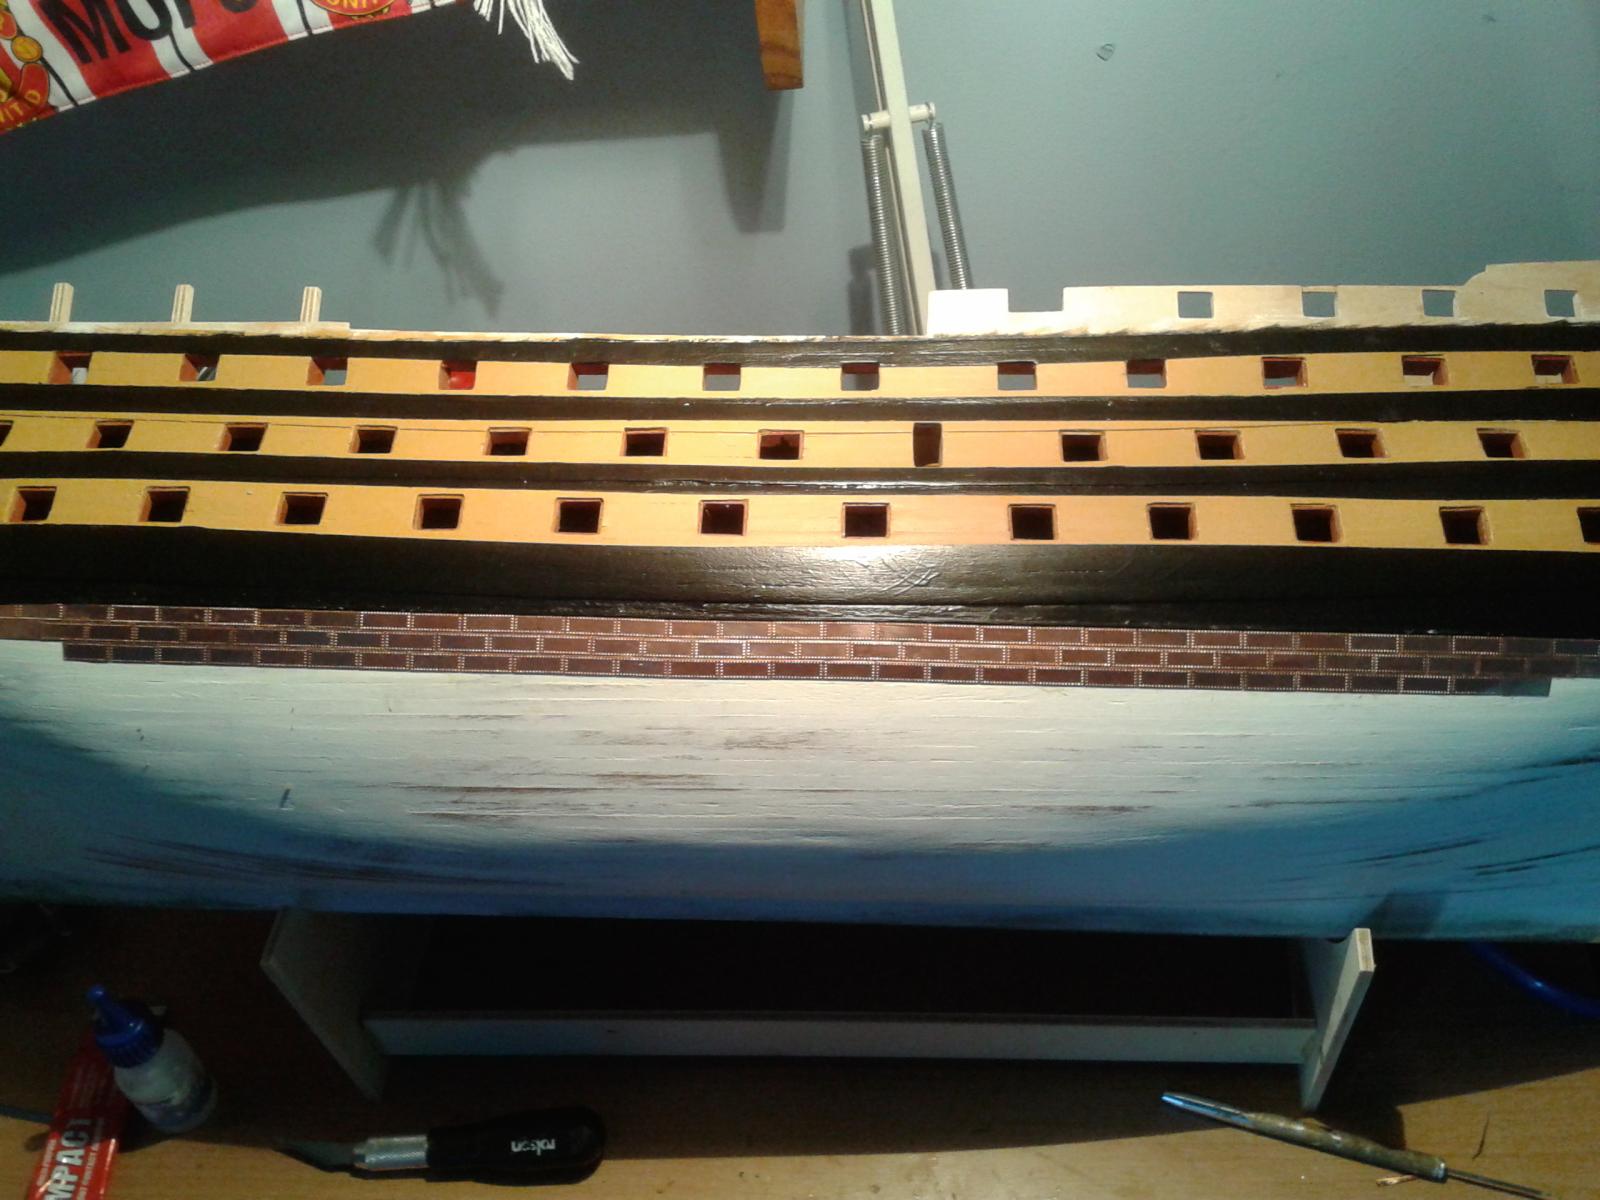
Hello Rich I totally agree with David's advise. My inner bulwarks sat high so I also had to trim the bottom edge to get the gun ports to align correctly.
-
Thanks Jerry It is starting to look better now the plating is nearing completion. Have a great holiday.
-
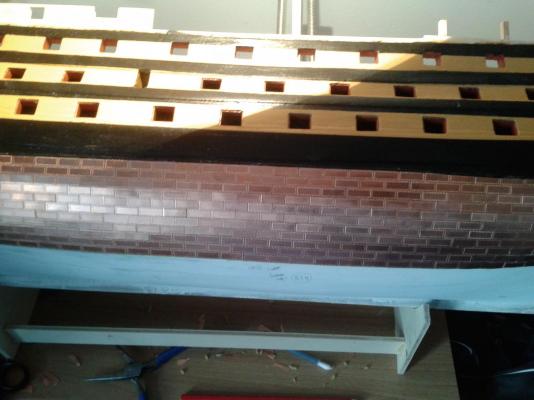
Just a quick update, I have just about completed the copper plating on the starboard side, just a bit to finish around the bow section. I was very pleasantly surprised that, at the widest point, the copper plating was an exact fit between the water line and keel, no trimming or overlapping required!


-
Hello Lawrence Many thanks for your visit to my to and your kind comments. I think CA is better in terms of getting the plates to adhere to the hull around the curves, and I have used for sitting some of the plates. The Evostick glue, which is readily available in the UK, works fine for the majority of the plates, and is easy to clean of plates and fingers. I'm really impressed with your build.
-
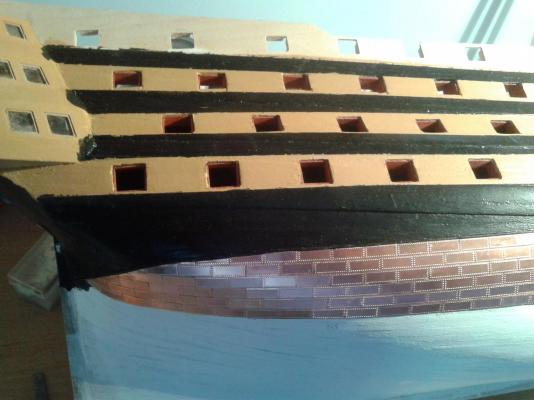
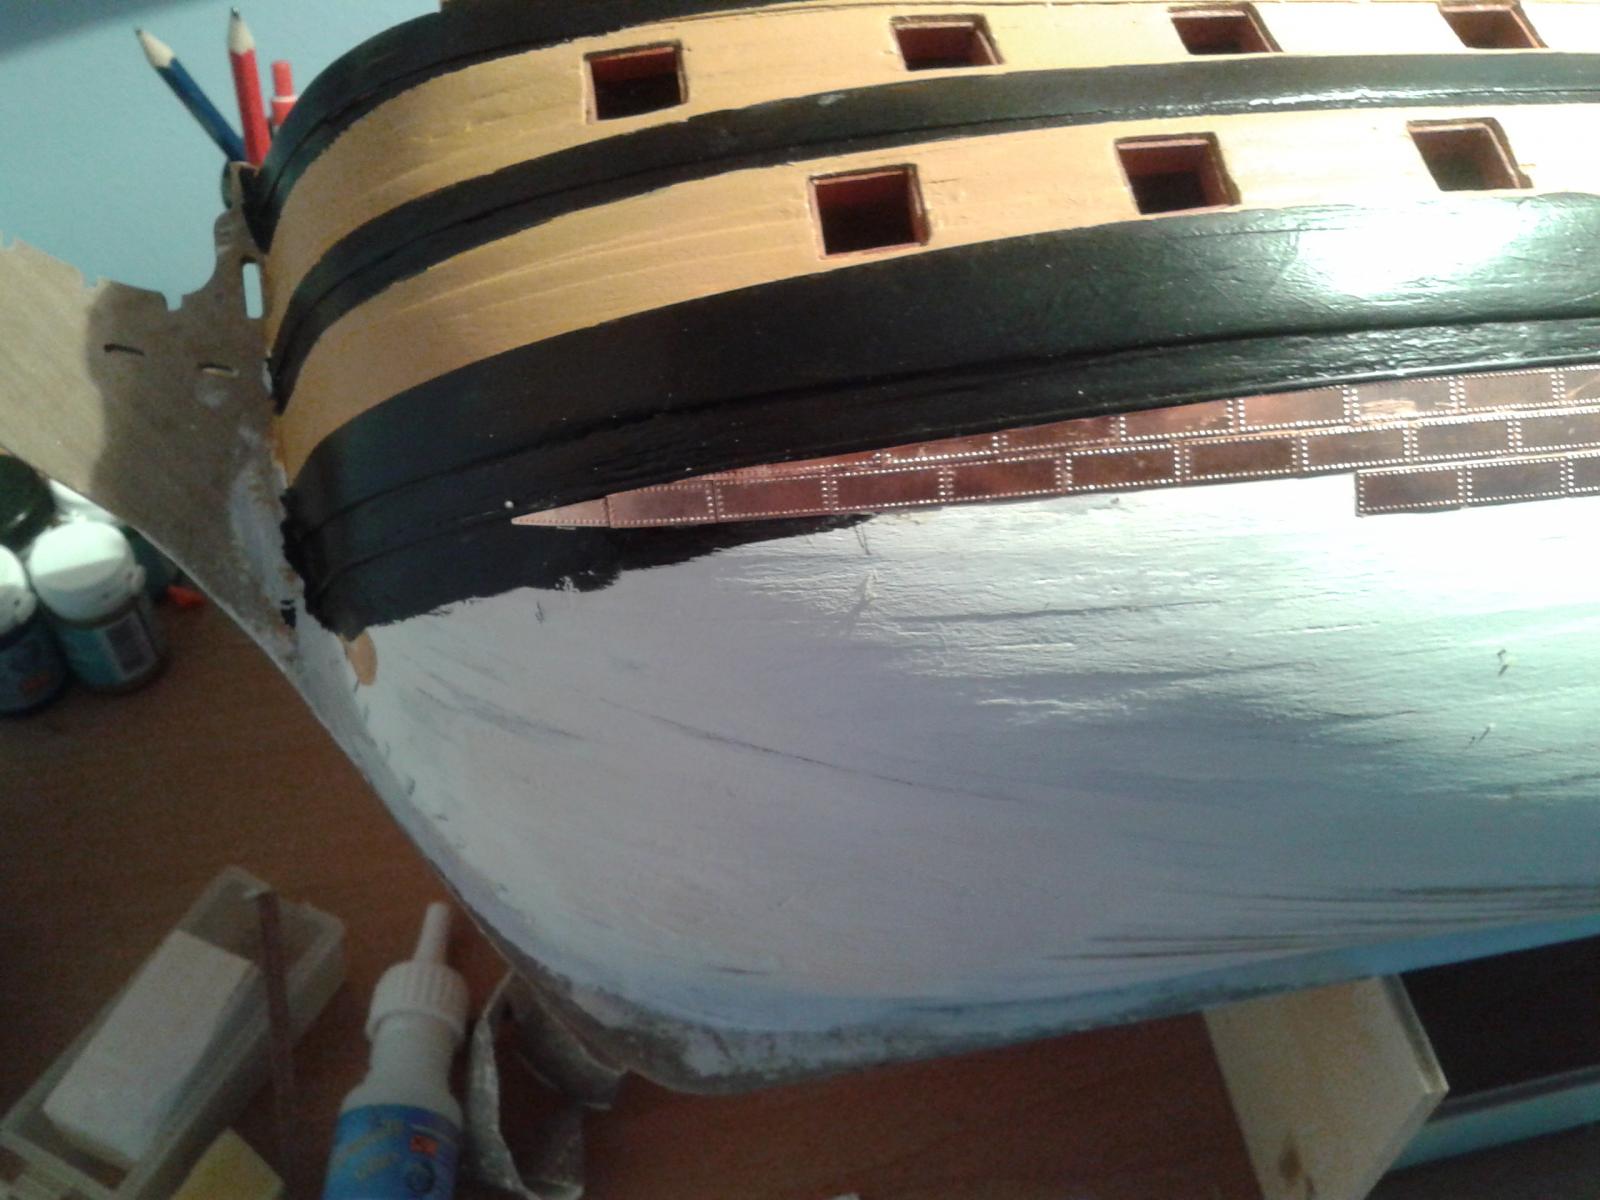
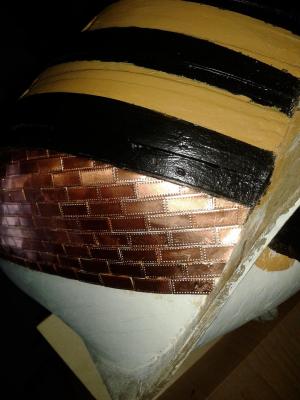
Hi Rich. Many thanks for the view and kind comment. I'm leaving plating the stern post and keelson until I have finished plating the hull (both sides)
-
Hi Jerry I'm pleased I'm getting near the end of completion of the copper plating, however I have it all to do again for the port side, so should be getting near completion when you return from your European holiday. Have a great time. I more than ready for the next phase of the build but will press on with the copper plating to its conclusion.
-
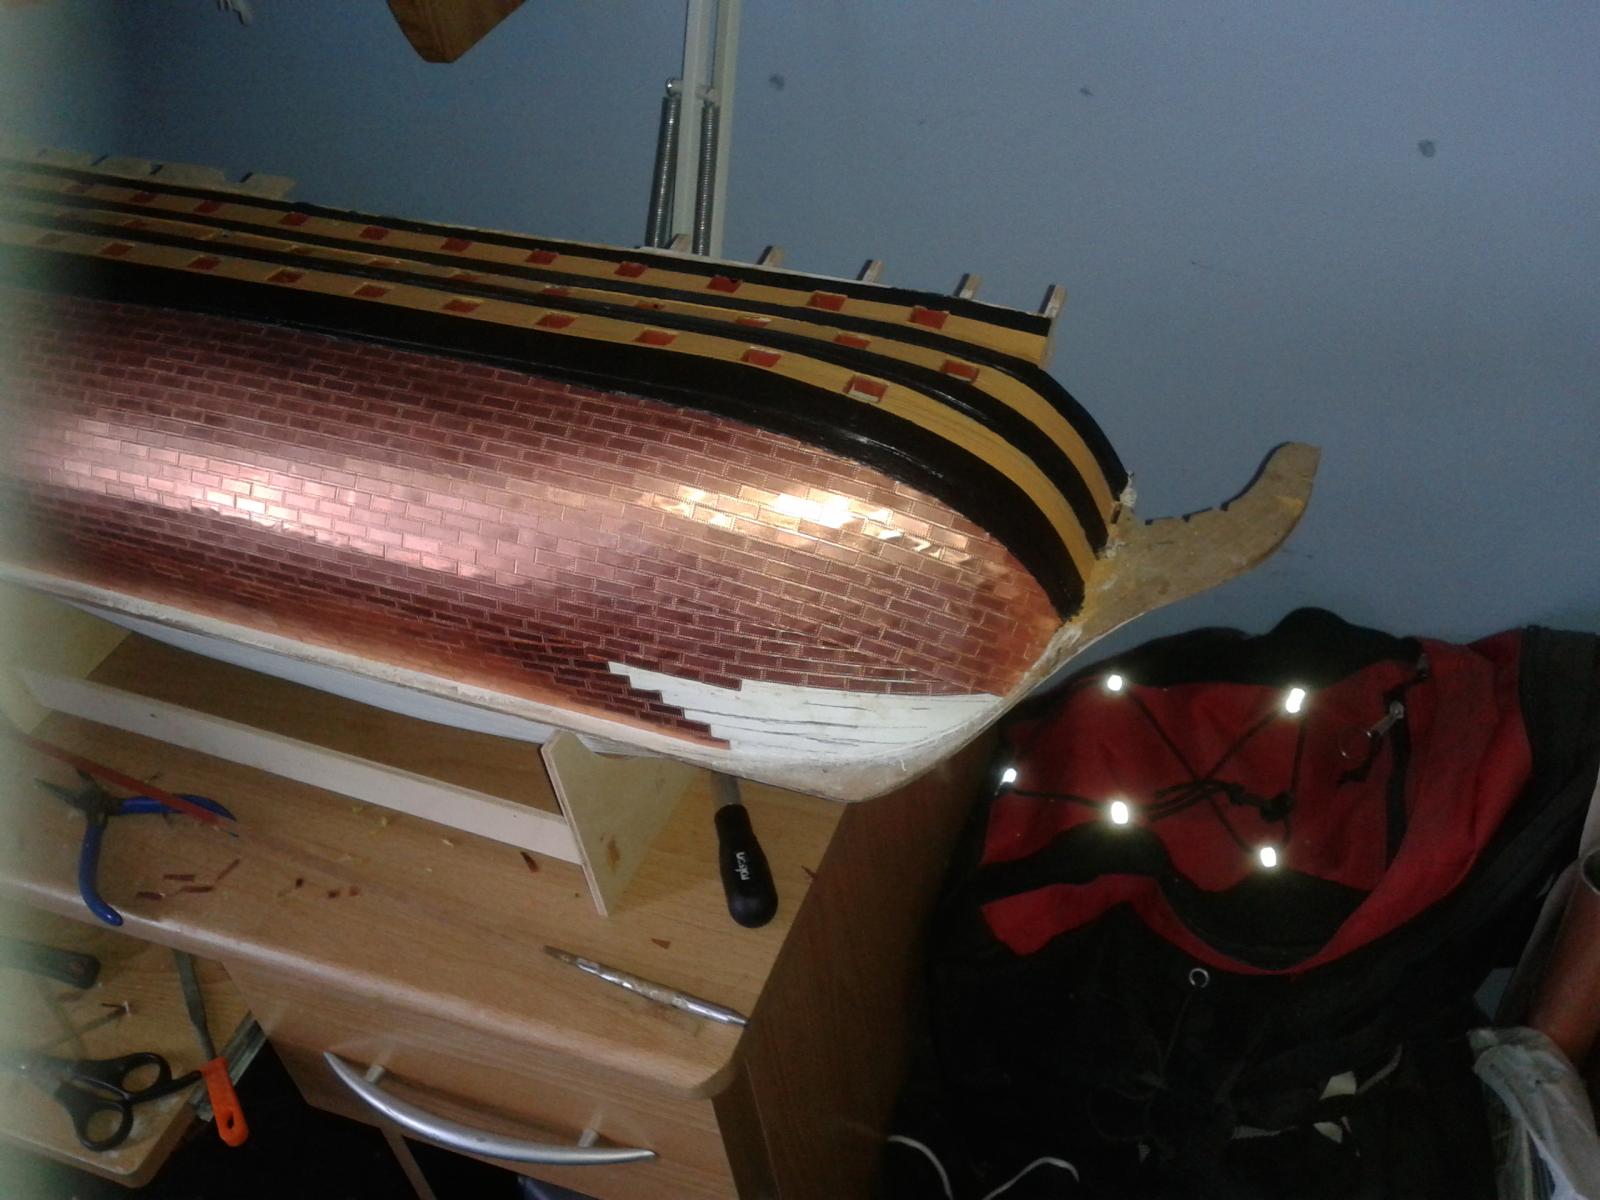
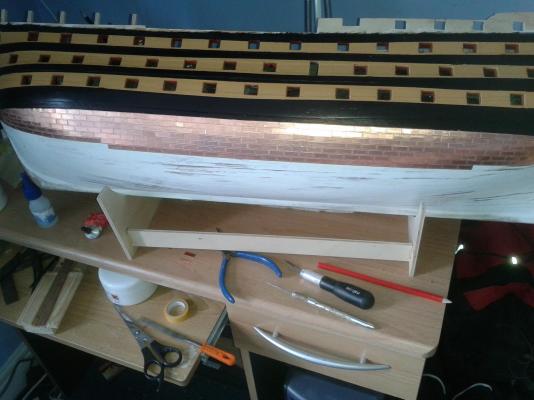
I love it when a plan comes together, the copper plates seems to be aligning as I continue with the infill at the keel. Given my past history with measurements around the house with various DIY tasks I'm surprised and very pleased. Will continue to build up from the keel as work continues on the infill.

-
Good morning Rich and Jerry Many thanks for your visit to my log and kind words. I really appreciate my work being compared with Lawrence as he is a true master of the art of model ship building. Glenn
-
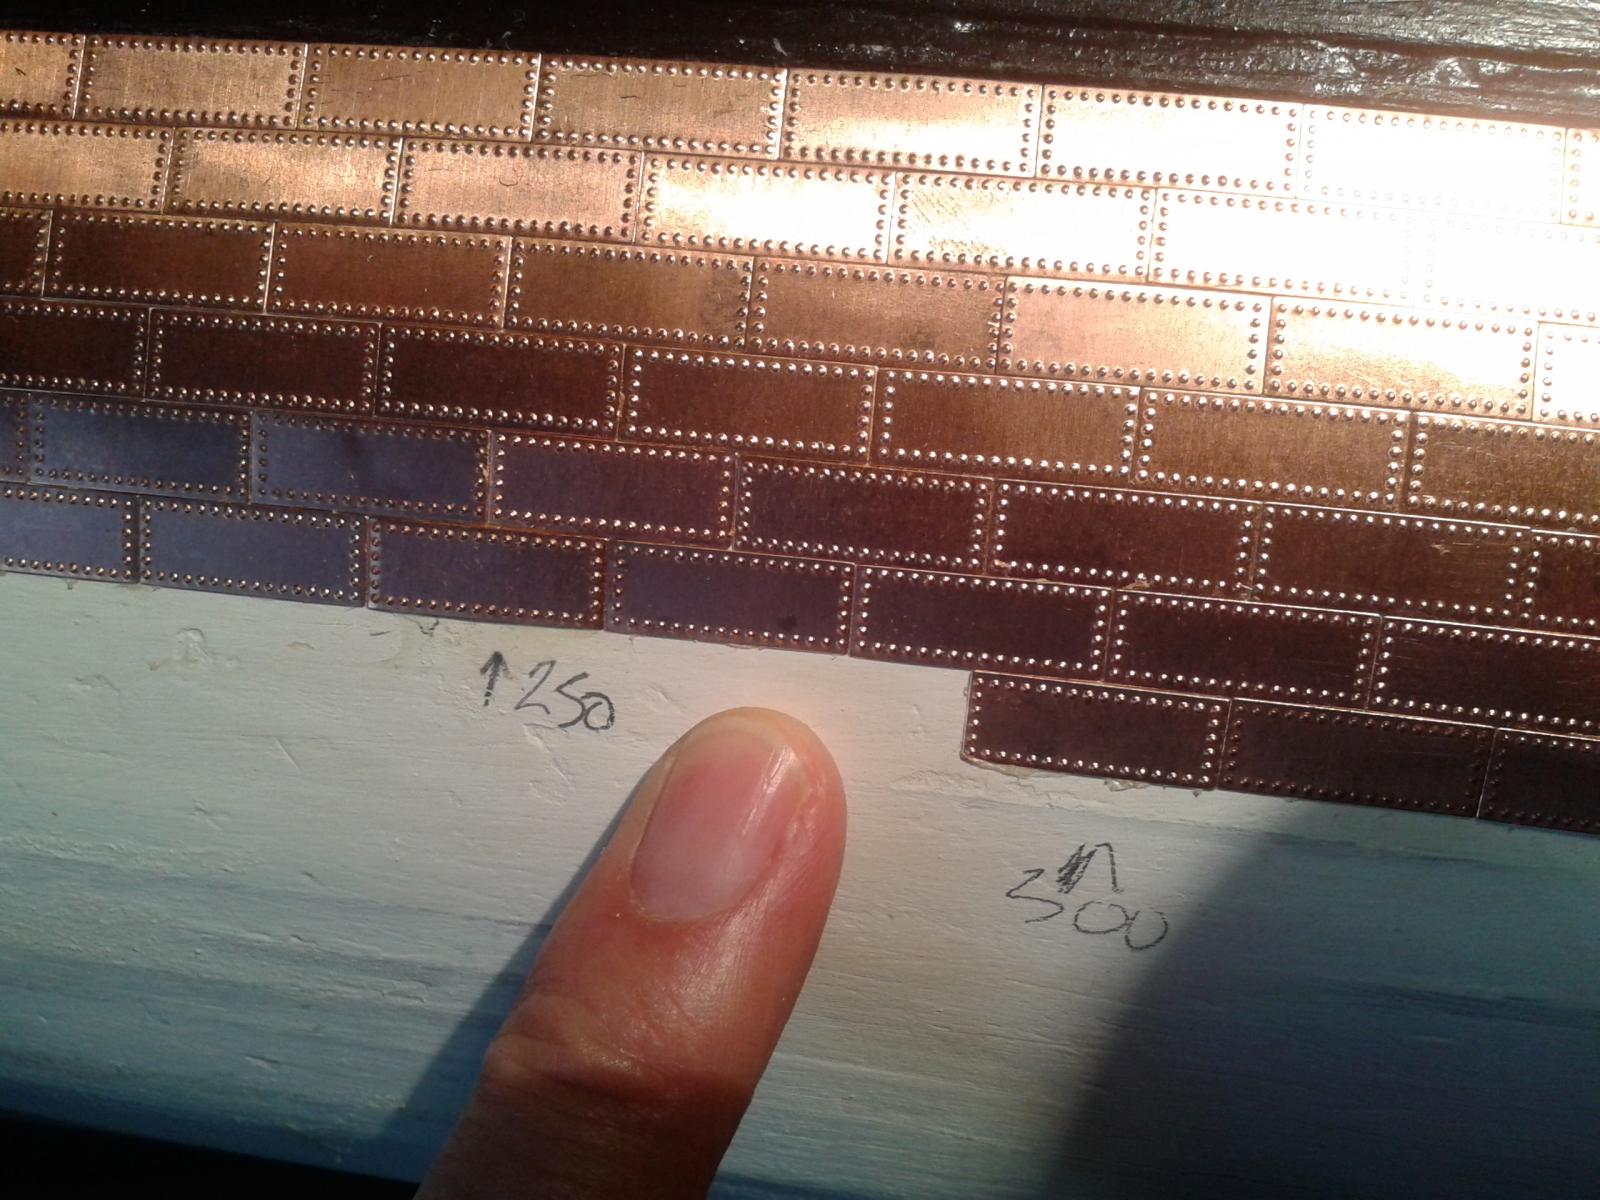
Complete the copper plating at the starboard keel end tonight. I have drawn lines on the hull to show the copper plateruns which has been a big help aligning the plates. Still a quite few more days work left to complete the starboard copper plating before I start over again on port side.


-
Just found your build log, welcome to the HMS Victory build, there is a wealth of experience on this site from other HMS Victory builders, such as Shipyard Sid, Gil and Jerry which I have found to be invaluable as I progress with my build.
-
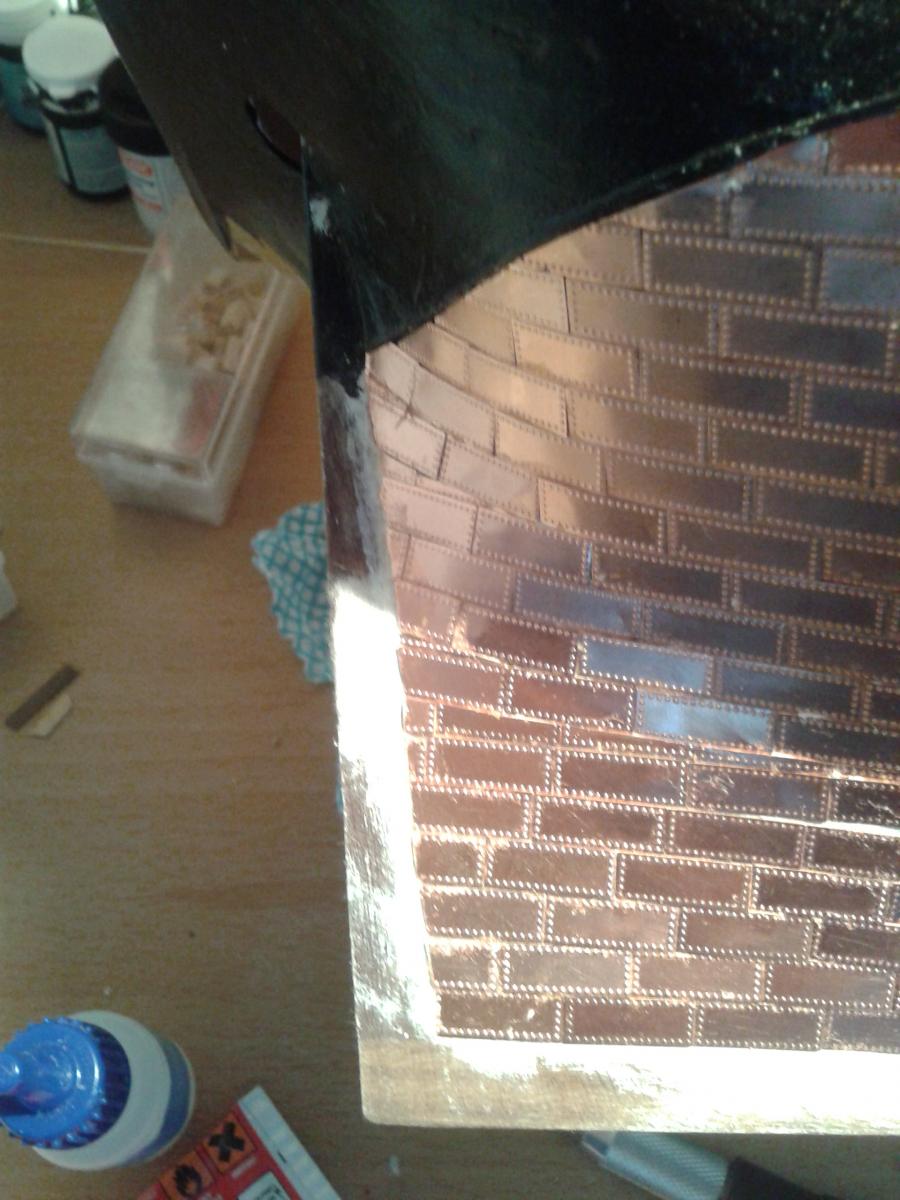
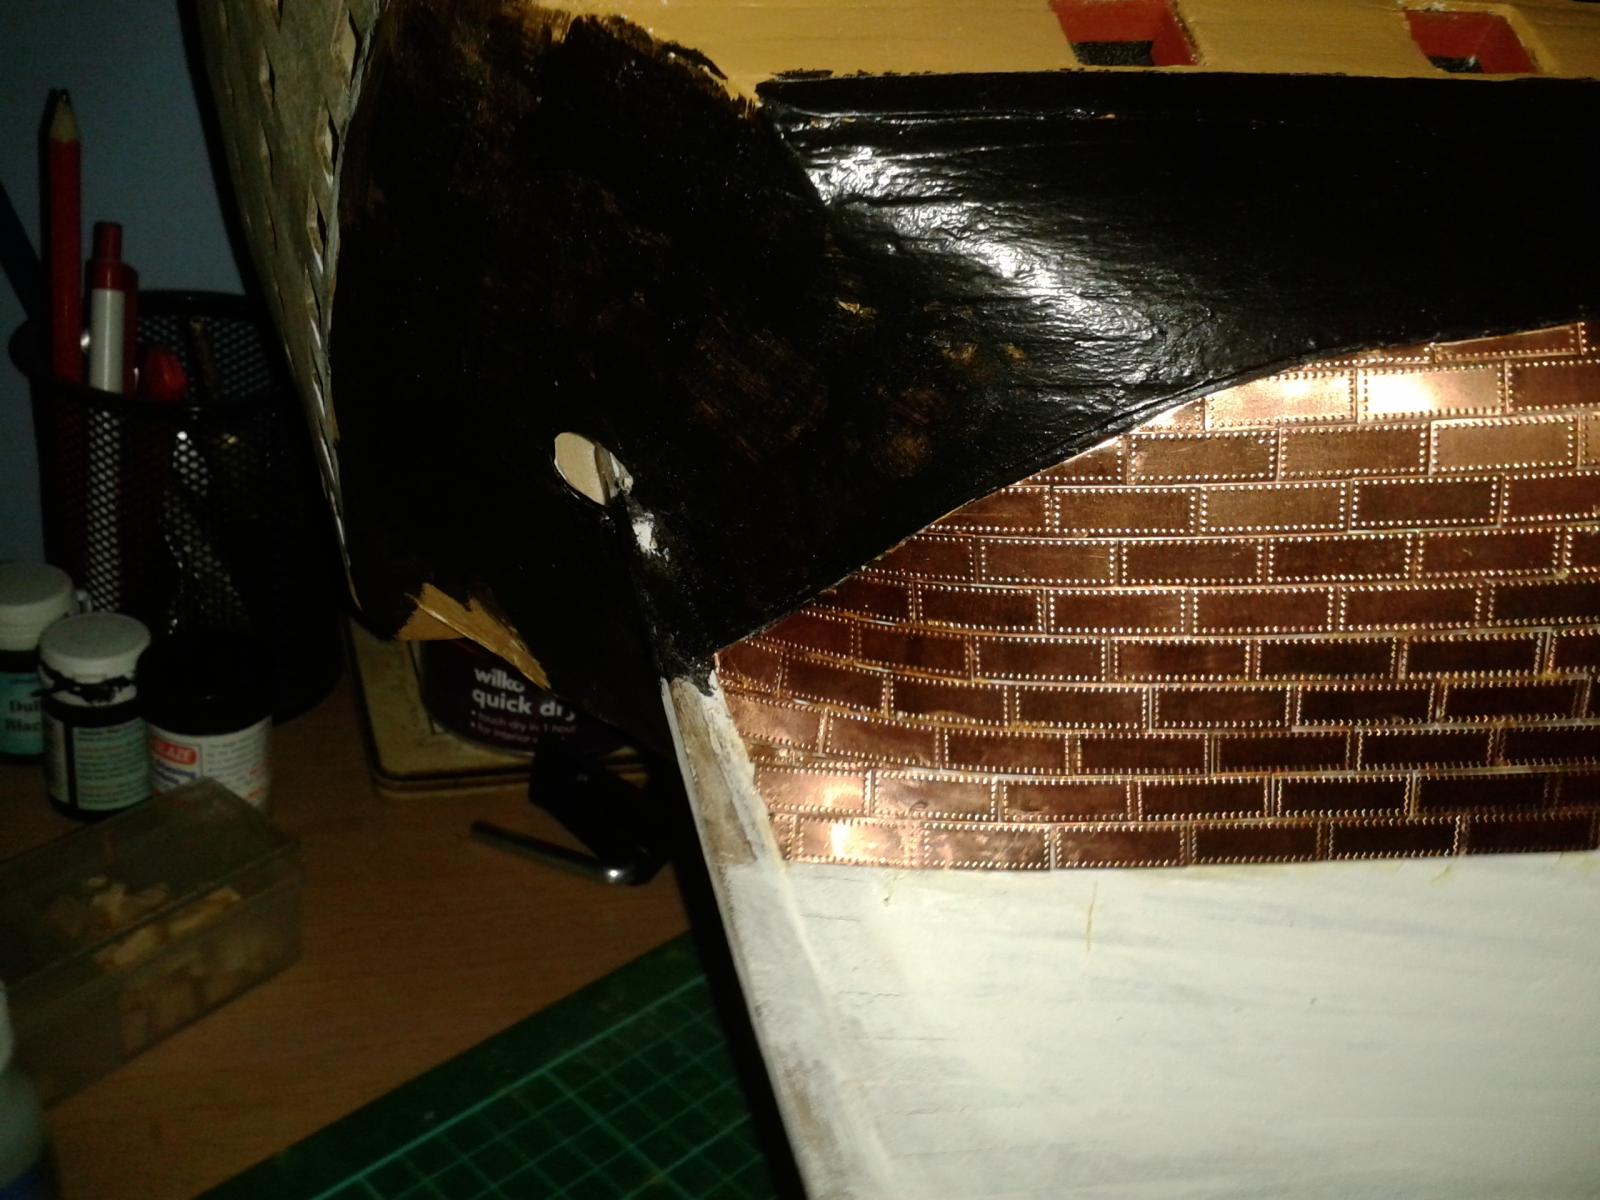
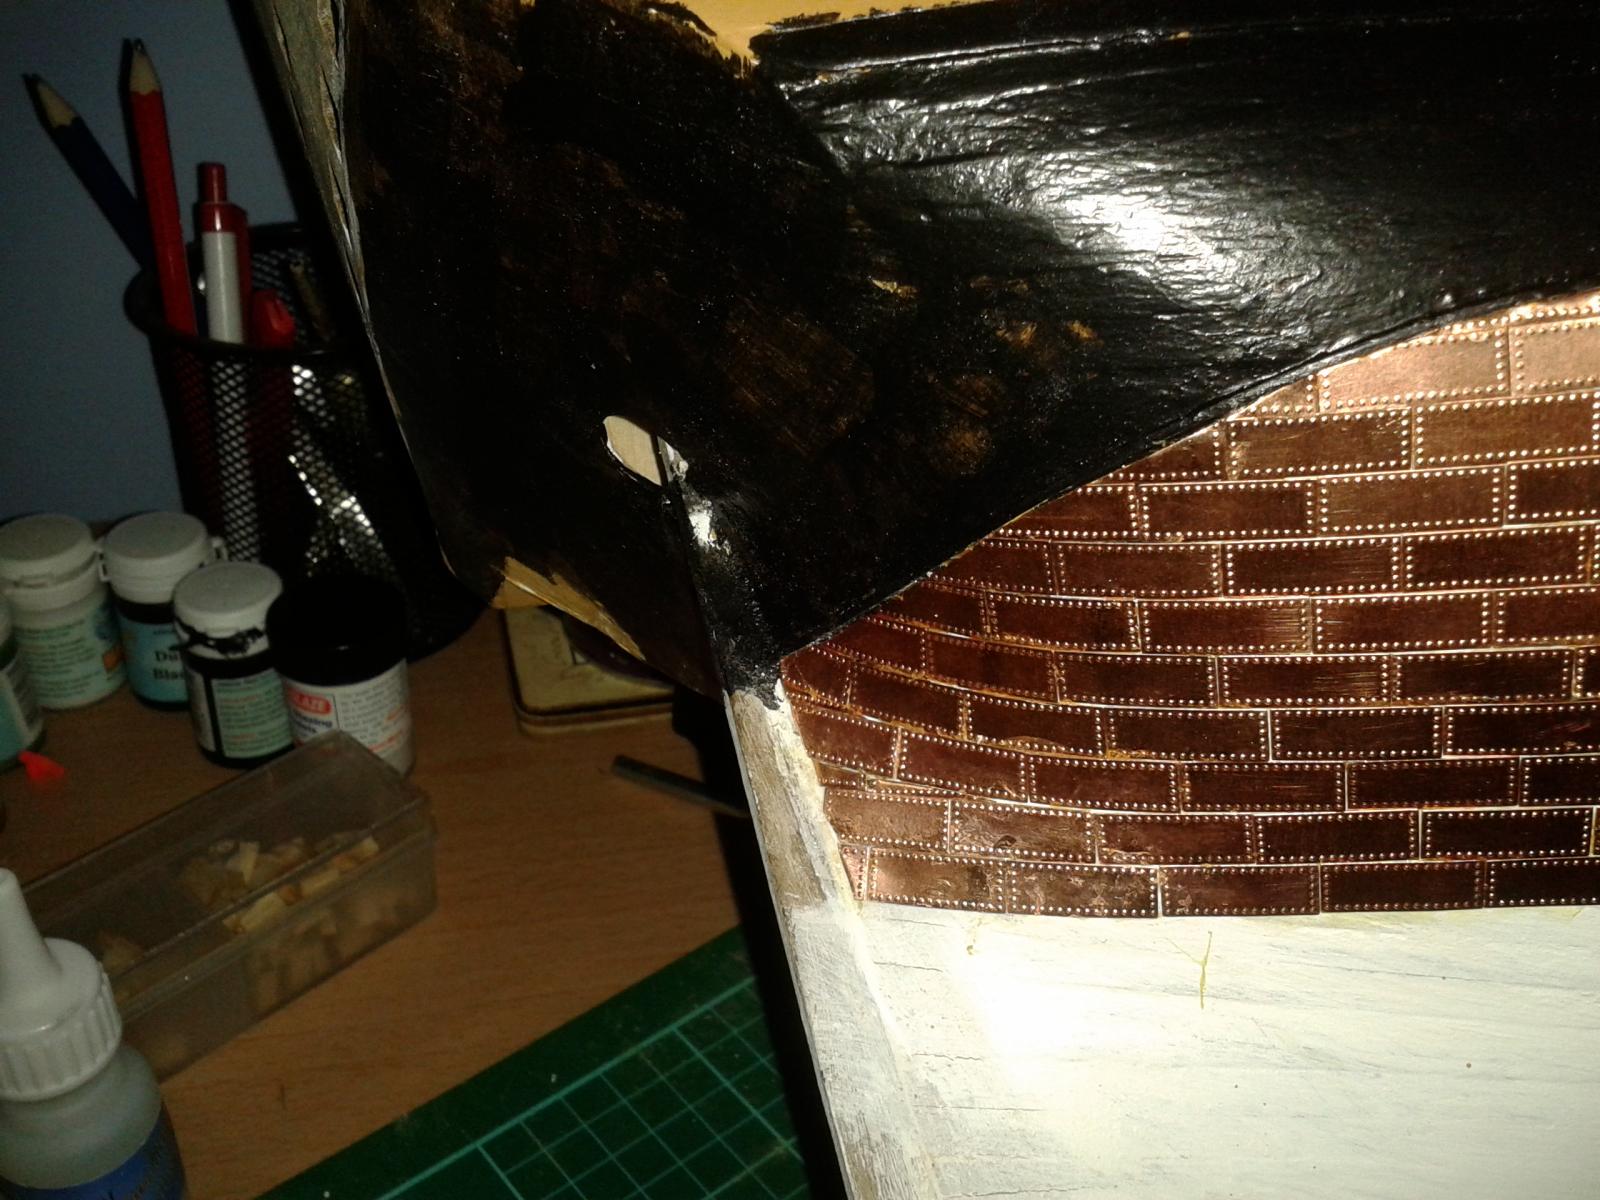
David You were correct it has been a bit awkward today as I progress very slowly and carefully south toward the keel. I have sorted out the copper plating line at stern post down to keel, so last row of plates will run true with the keel and should also be an exact plate width so no trimming or overlapping required (best laid plans of mice & men!). Also started sorting out the bow rows which will take a bit more time complete for the next three rows. I then plan to plate up a few rows from keel until I reach the completed plates at the bow. This in theory should just leave a few rows in the central area to complete. No ship build work scheduled for tomorrow as the admiral has booked tickets to see a play in our local theatre. Build time may also slow down a bit as I understand there is a football (soccer for my Amercian friends) tournament starting later in the week in Brazil which will command some of my valuable time, but not to much hopefully as I have installed a tv in the workshop so I can multitask!
-
Many thanks David. It is fiddley work cuting the end plates for stern post and bow but I'm taking time to check fit before I apply the glue. The bow has been more challenging than the stern and your pictures have helped me out. I'm also taking time to bend the plates before fitting as necessary. How is the barge build progressing? Will be interested to know where/how you fitted bulkhead 6.
-
Hi Jerry The rigging looks amazing, what's happened to the long pointy thing?
-
Many thanks for your very kind comments. I will be very happy if my build turns out as good as yours look.
-
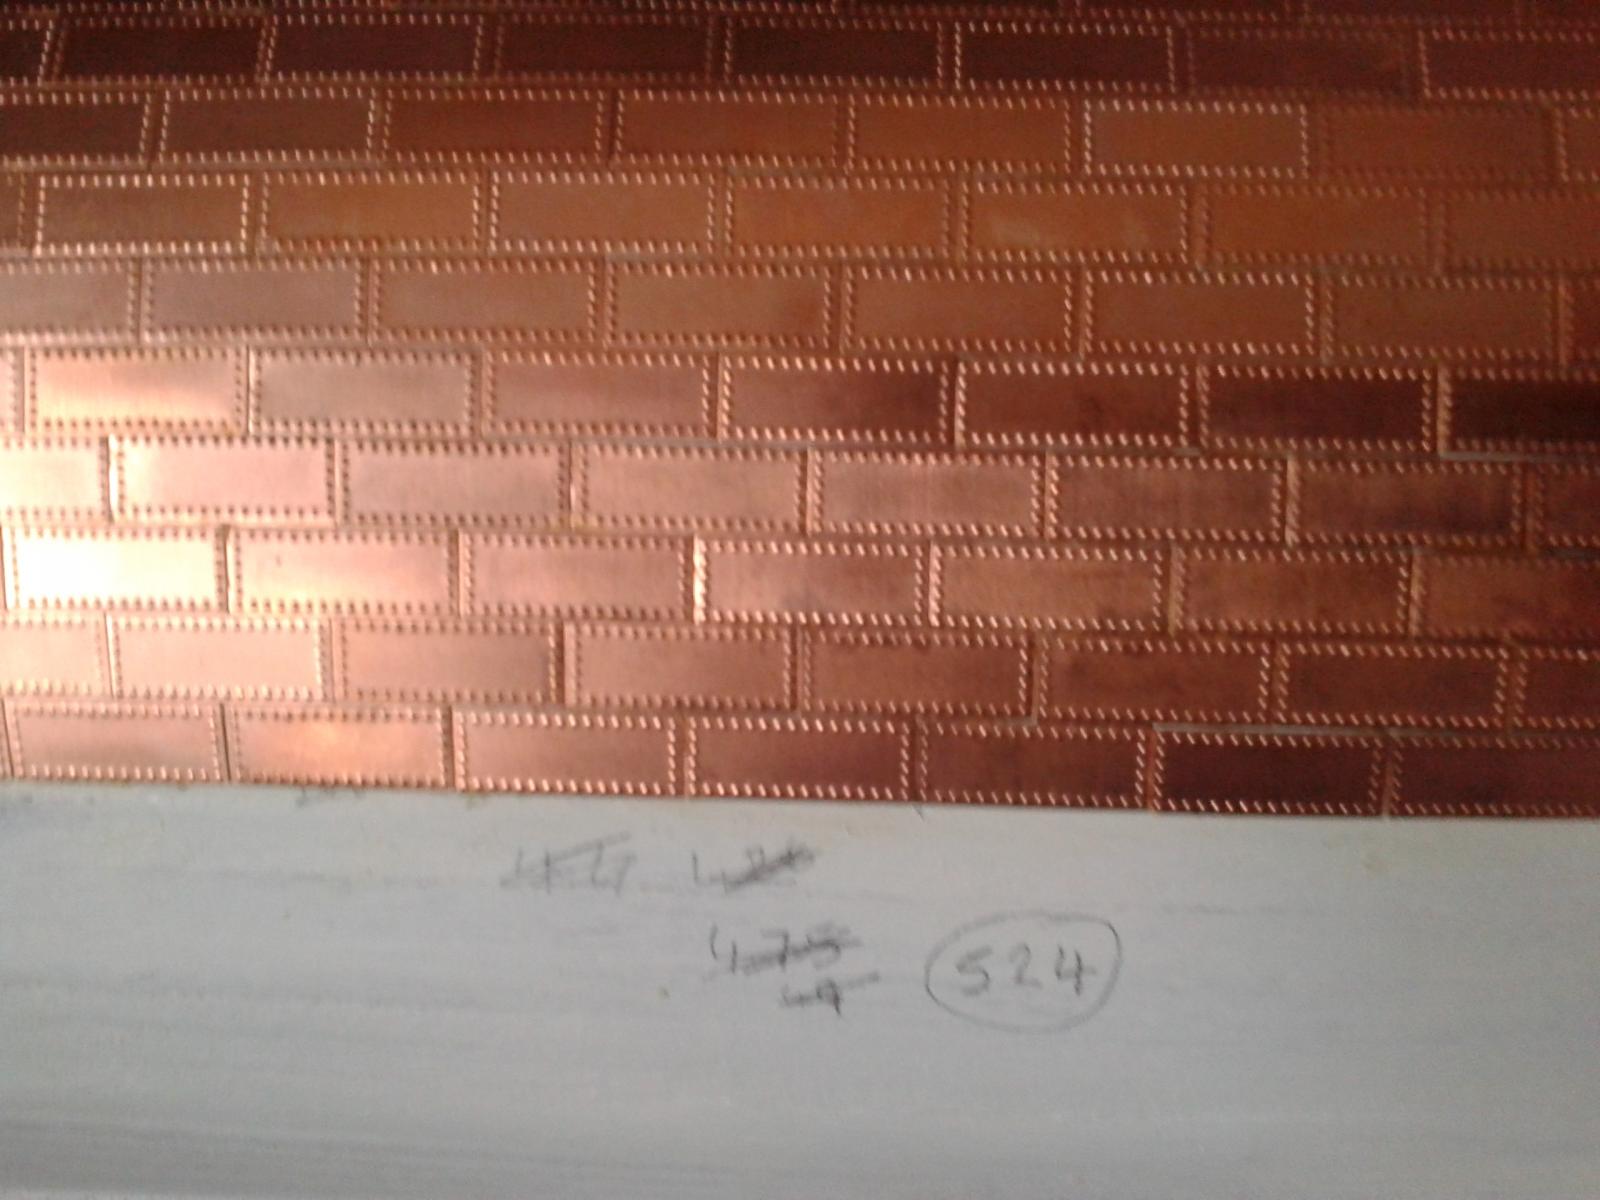
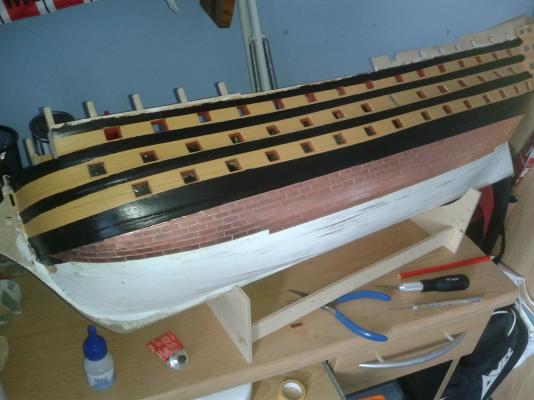
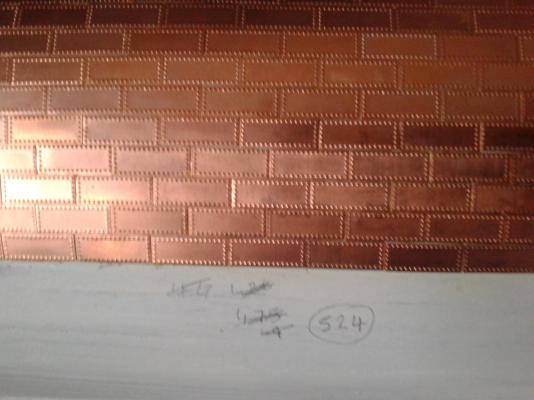
524 copper plates now fitted. I think I'm about 40% complete on the port side. I think the Evostick instant glue, as recommended by Shipyard Ship has proven to be a sound choice, although I have found it necessary to use ca glue for the odd copper plate at stern and bow end. My hat goes off to the builders, like Jerry, who used ca for fixing all the copper plates. Here are some up to date pictures, I think I will replace one of the plates at the stern as I'm not totally happy with the fit.


-
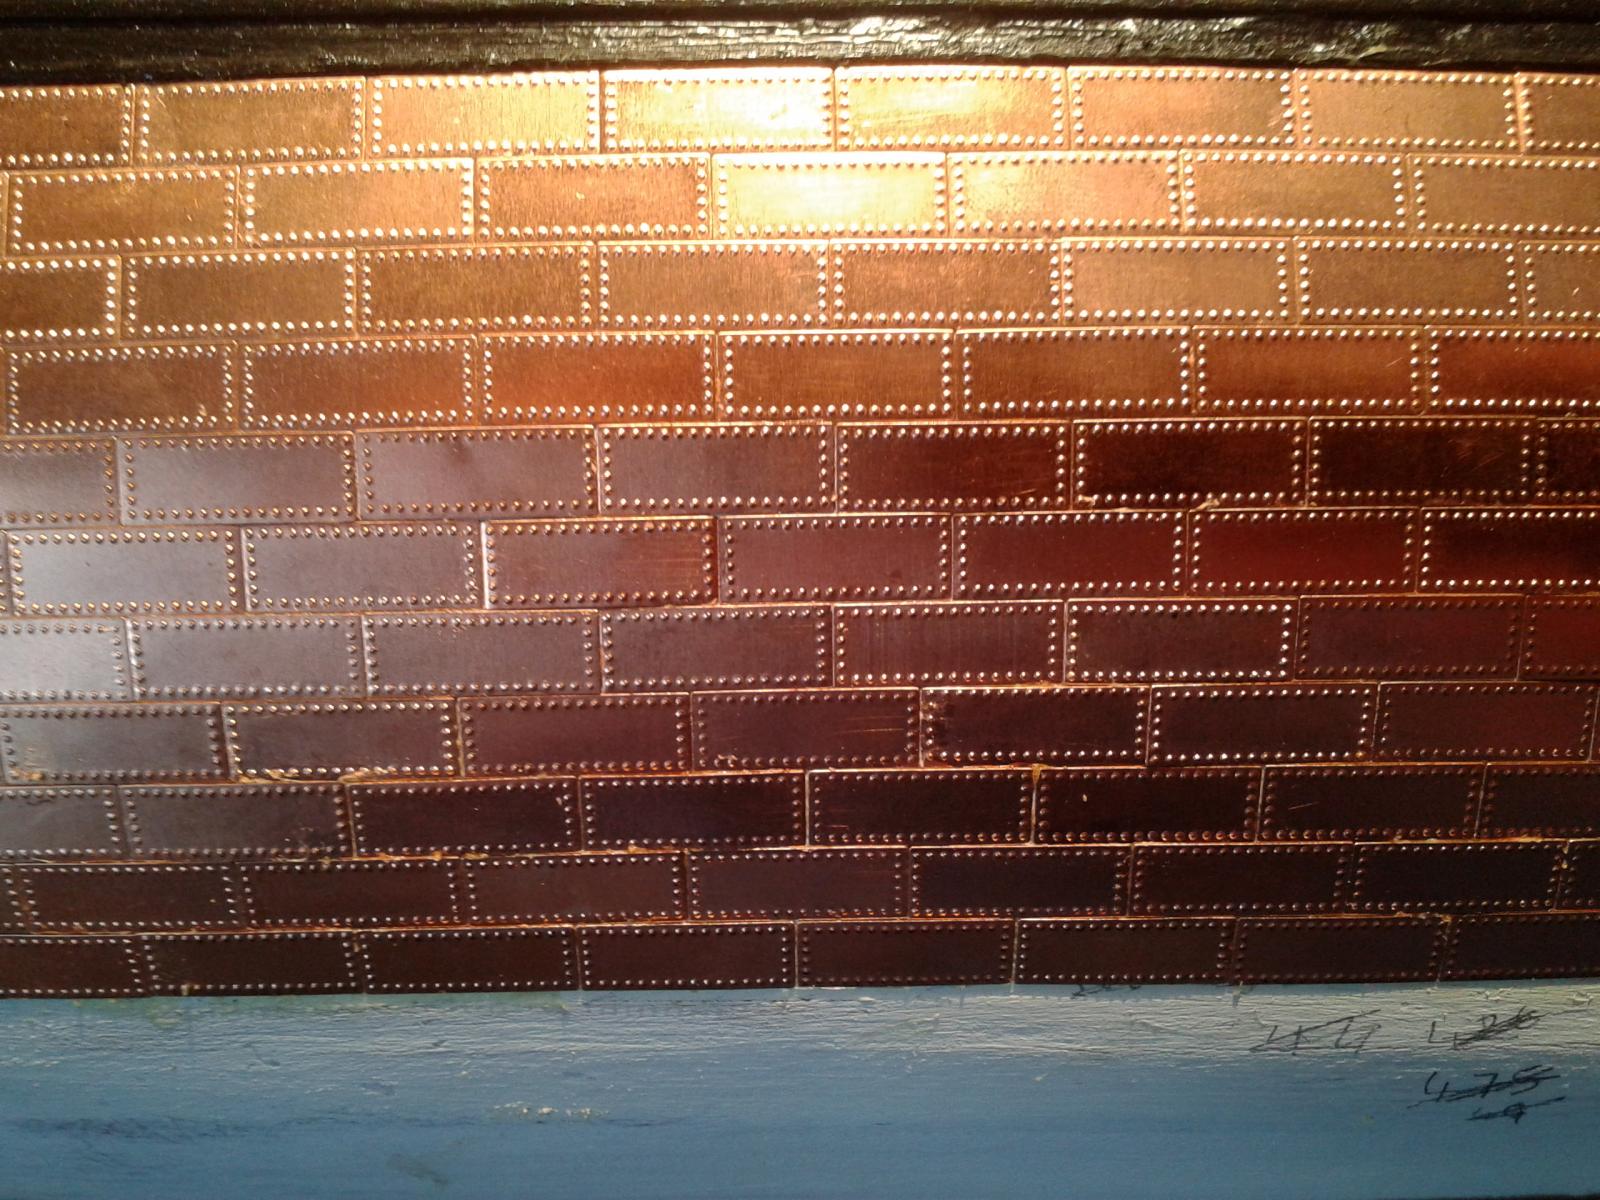
300 copper plates fitted and counting. Hope to spend a good few hours tomorrow but will not keep posting updates.