HOLIDAY DONATION DRIVE - SUPPORT MSW - DO YOUR PART TO KEEP THIS GREAT FORUM GOING! (89 donations so far out of 49,000 members - C'mon guys!)
×


Glenn-UK
-
Posts
3,163 -
Joined
-
Last visited
Content Type
Profiles
Forums
Gallery
Events
Everything posted by Glenn-UK
-
 It goes against my nature to be be slow and steady but also but I know through experience taking ones time is the right way to go.
- 476 replies
-
- 2
-

-
- sphinx
- vanguard models
- (and 1 more)
-
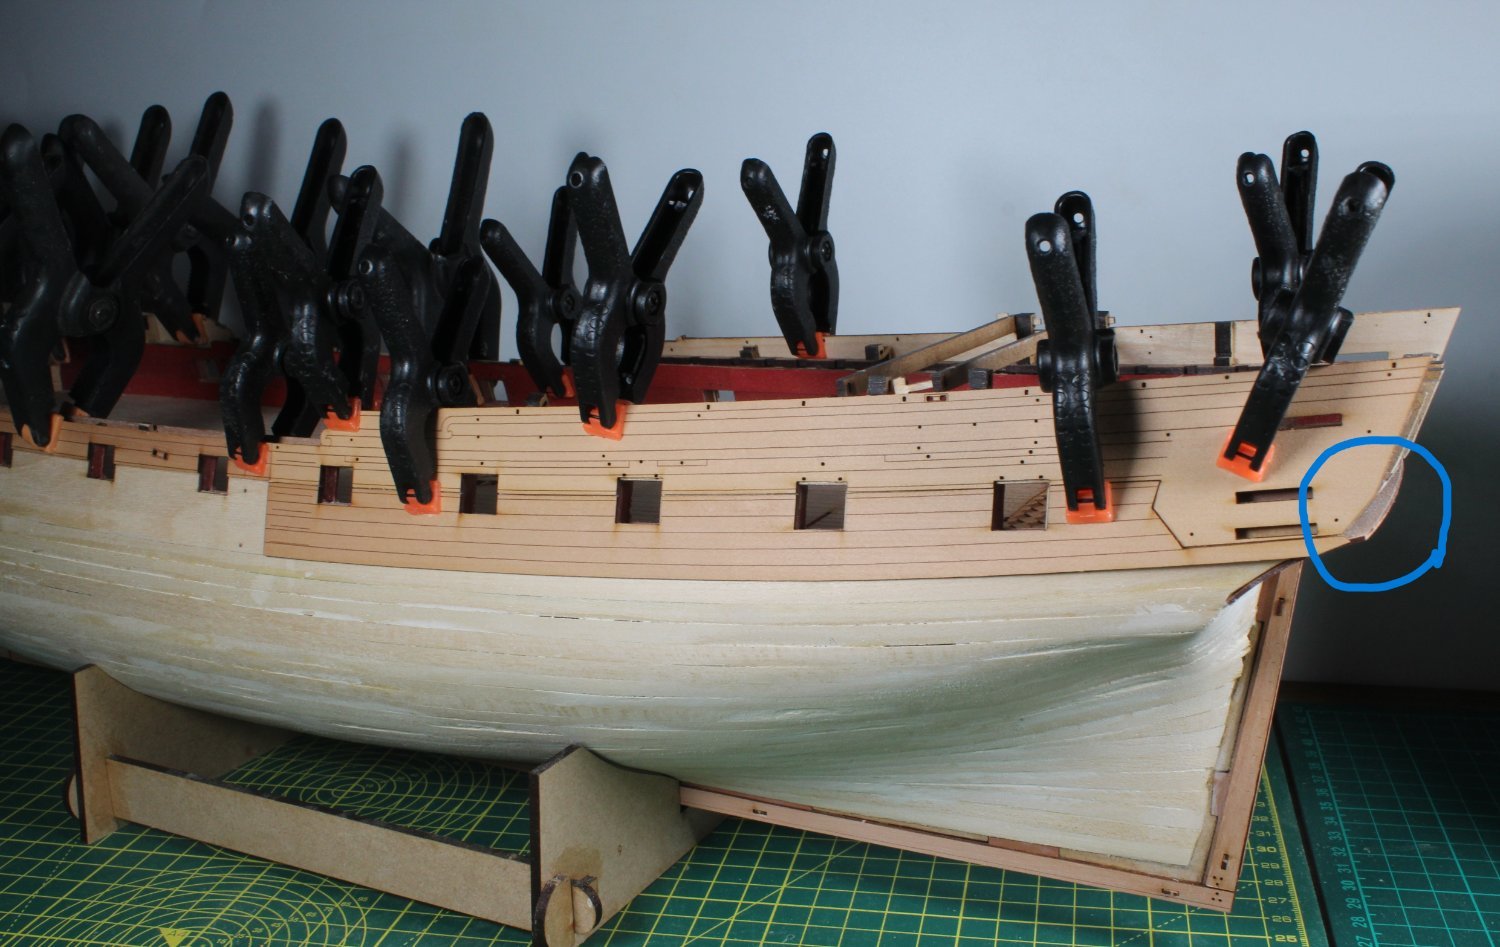
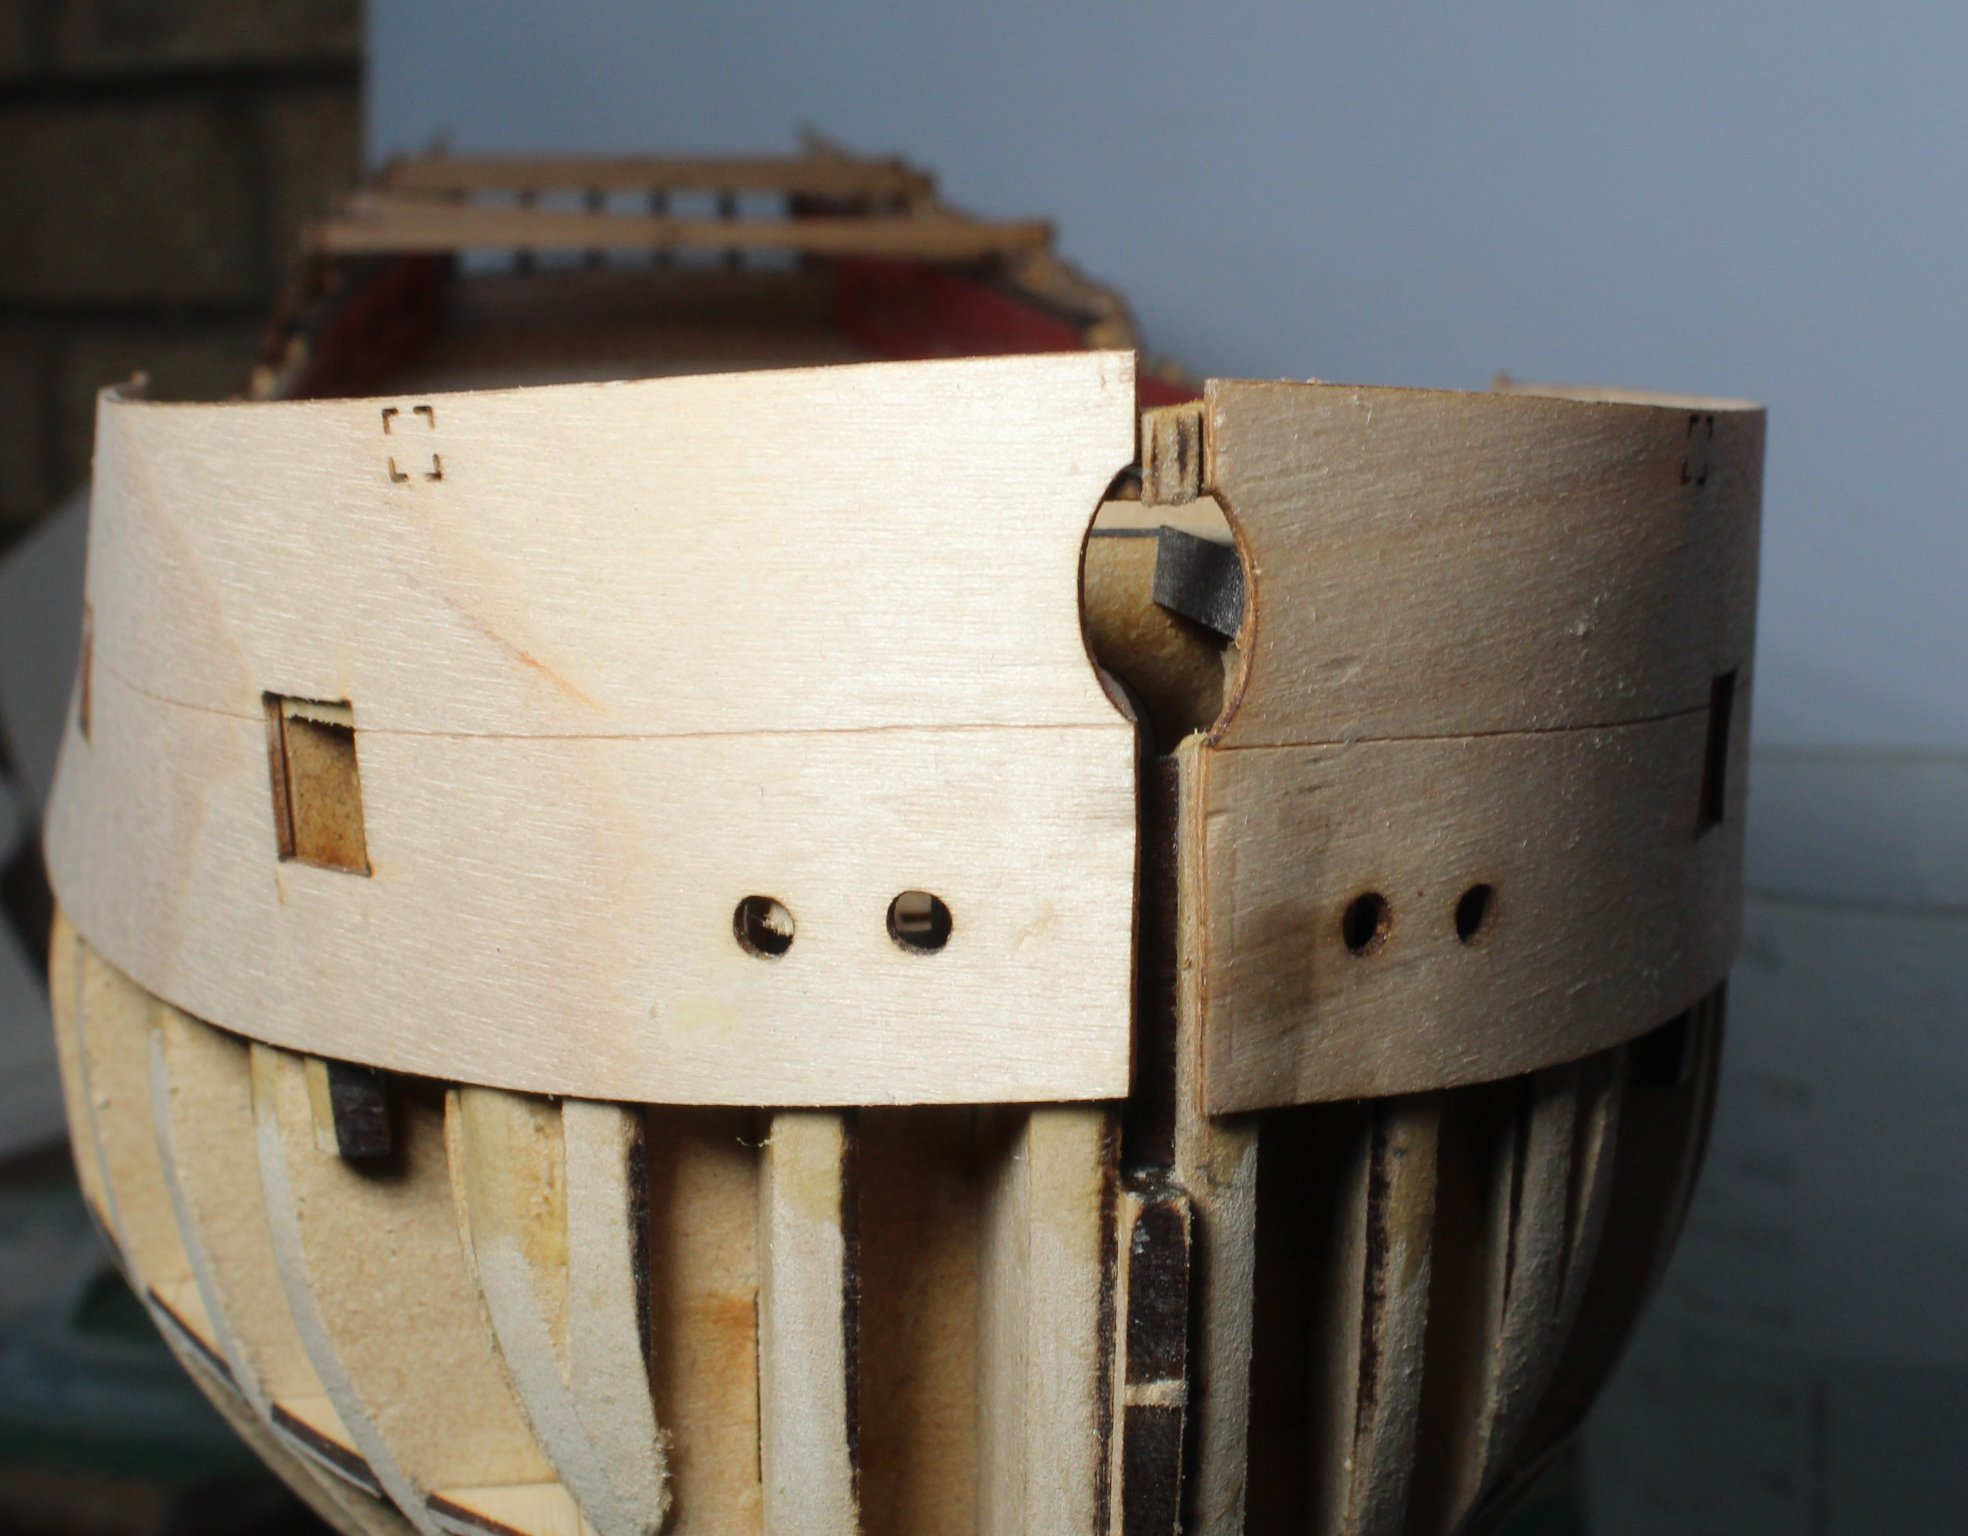
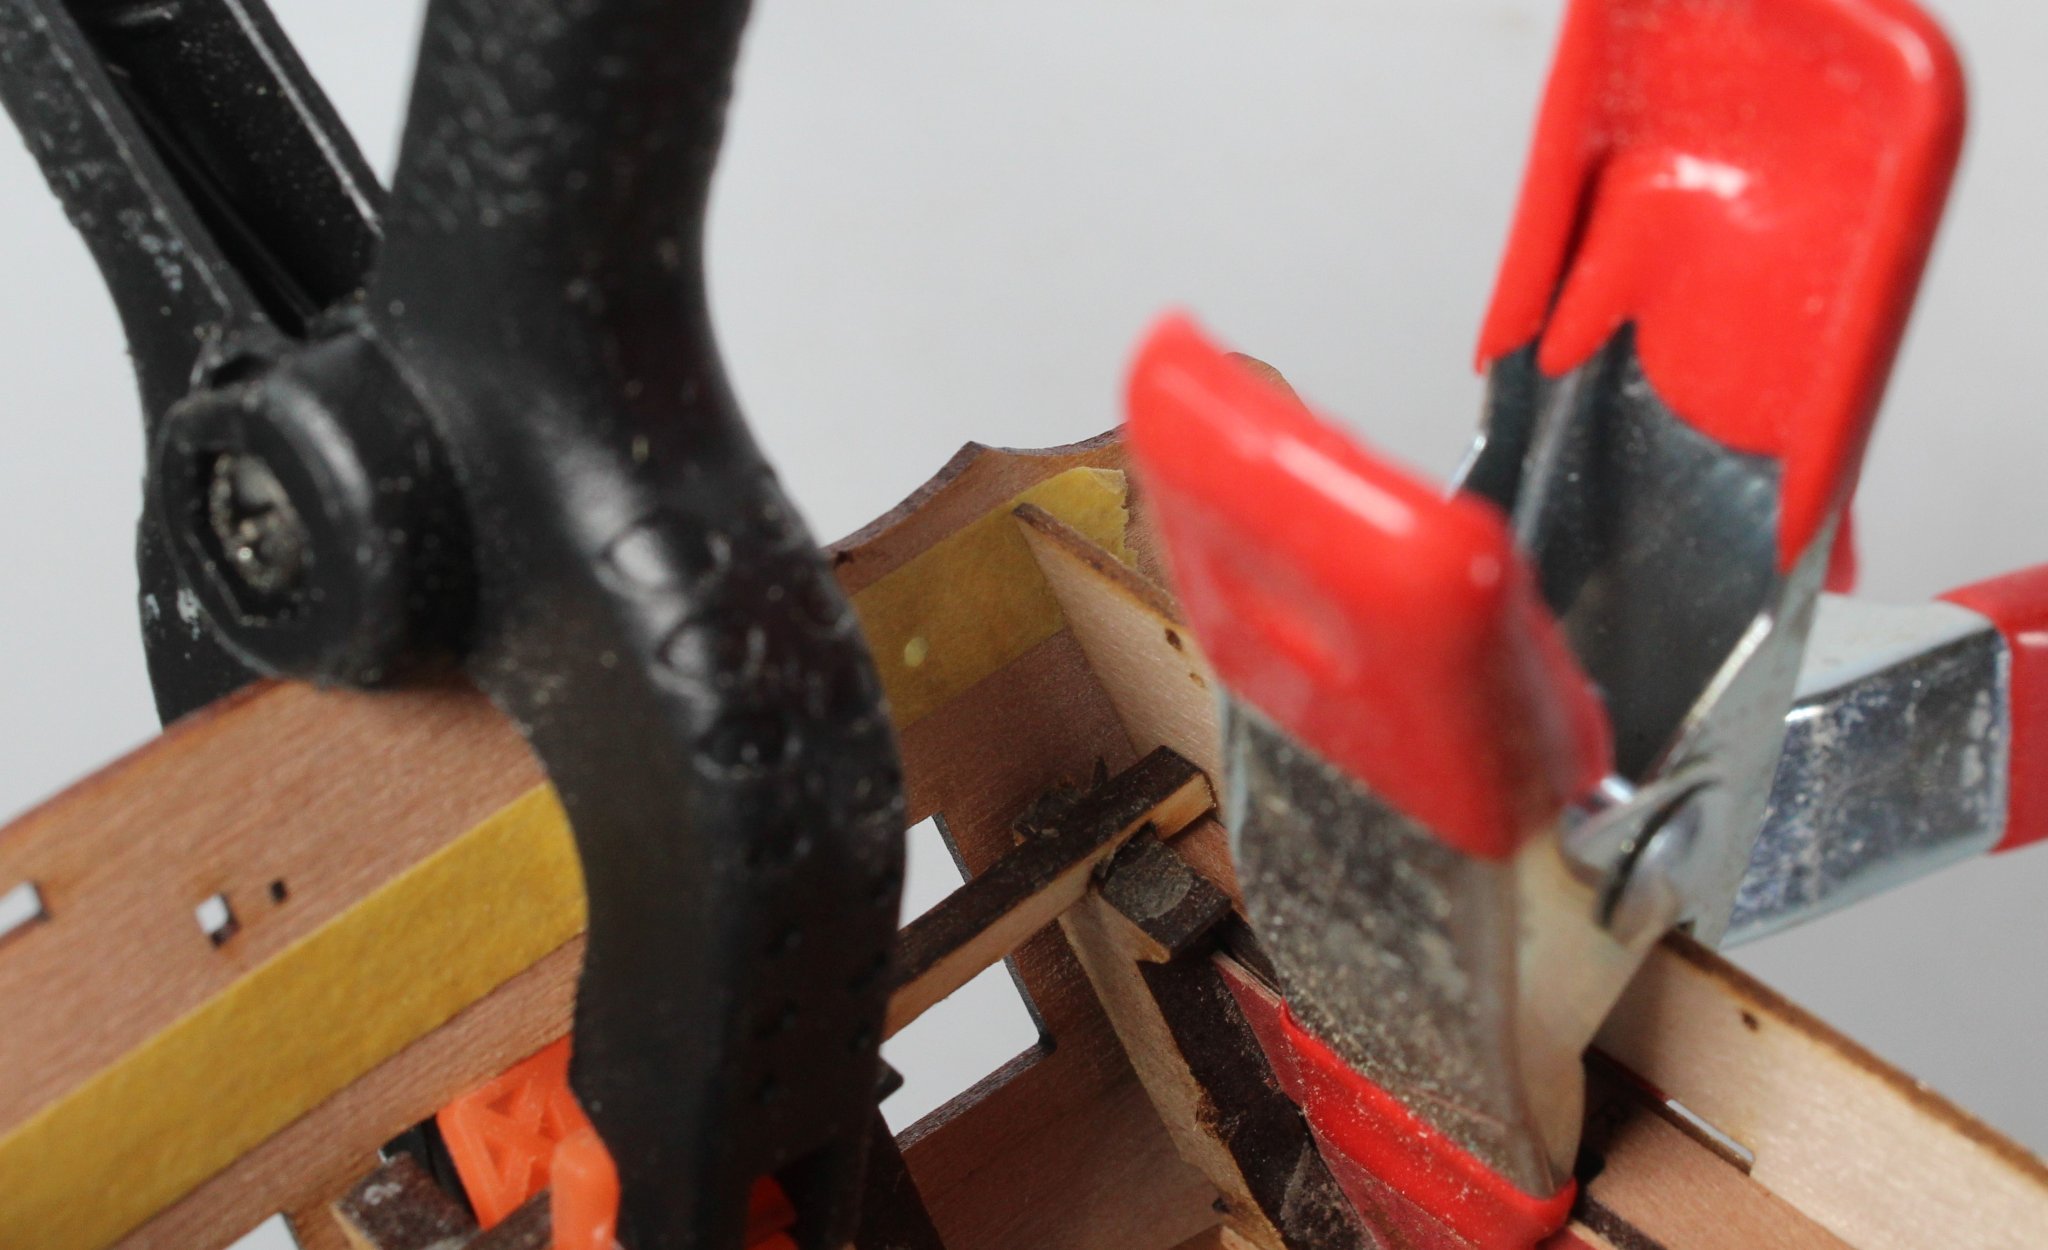
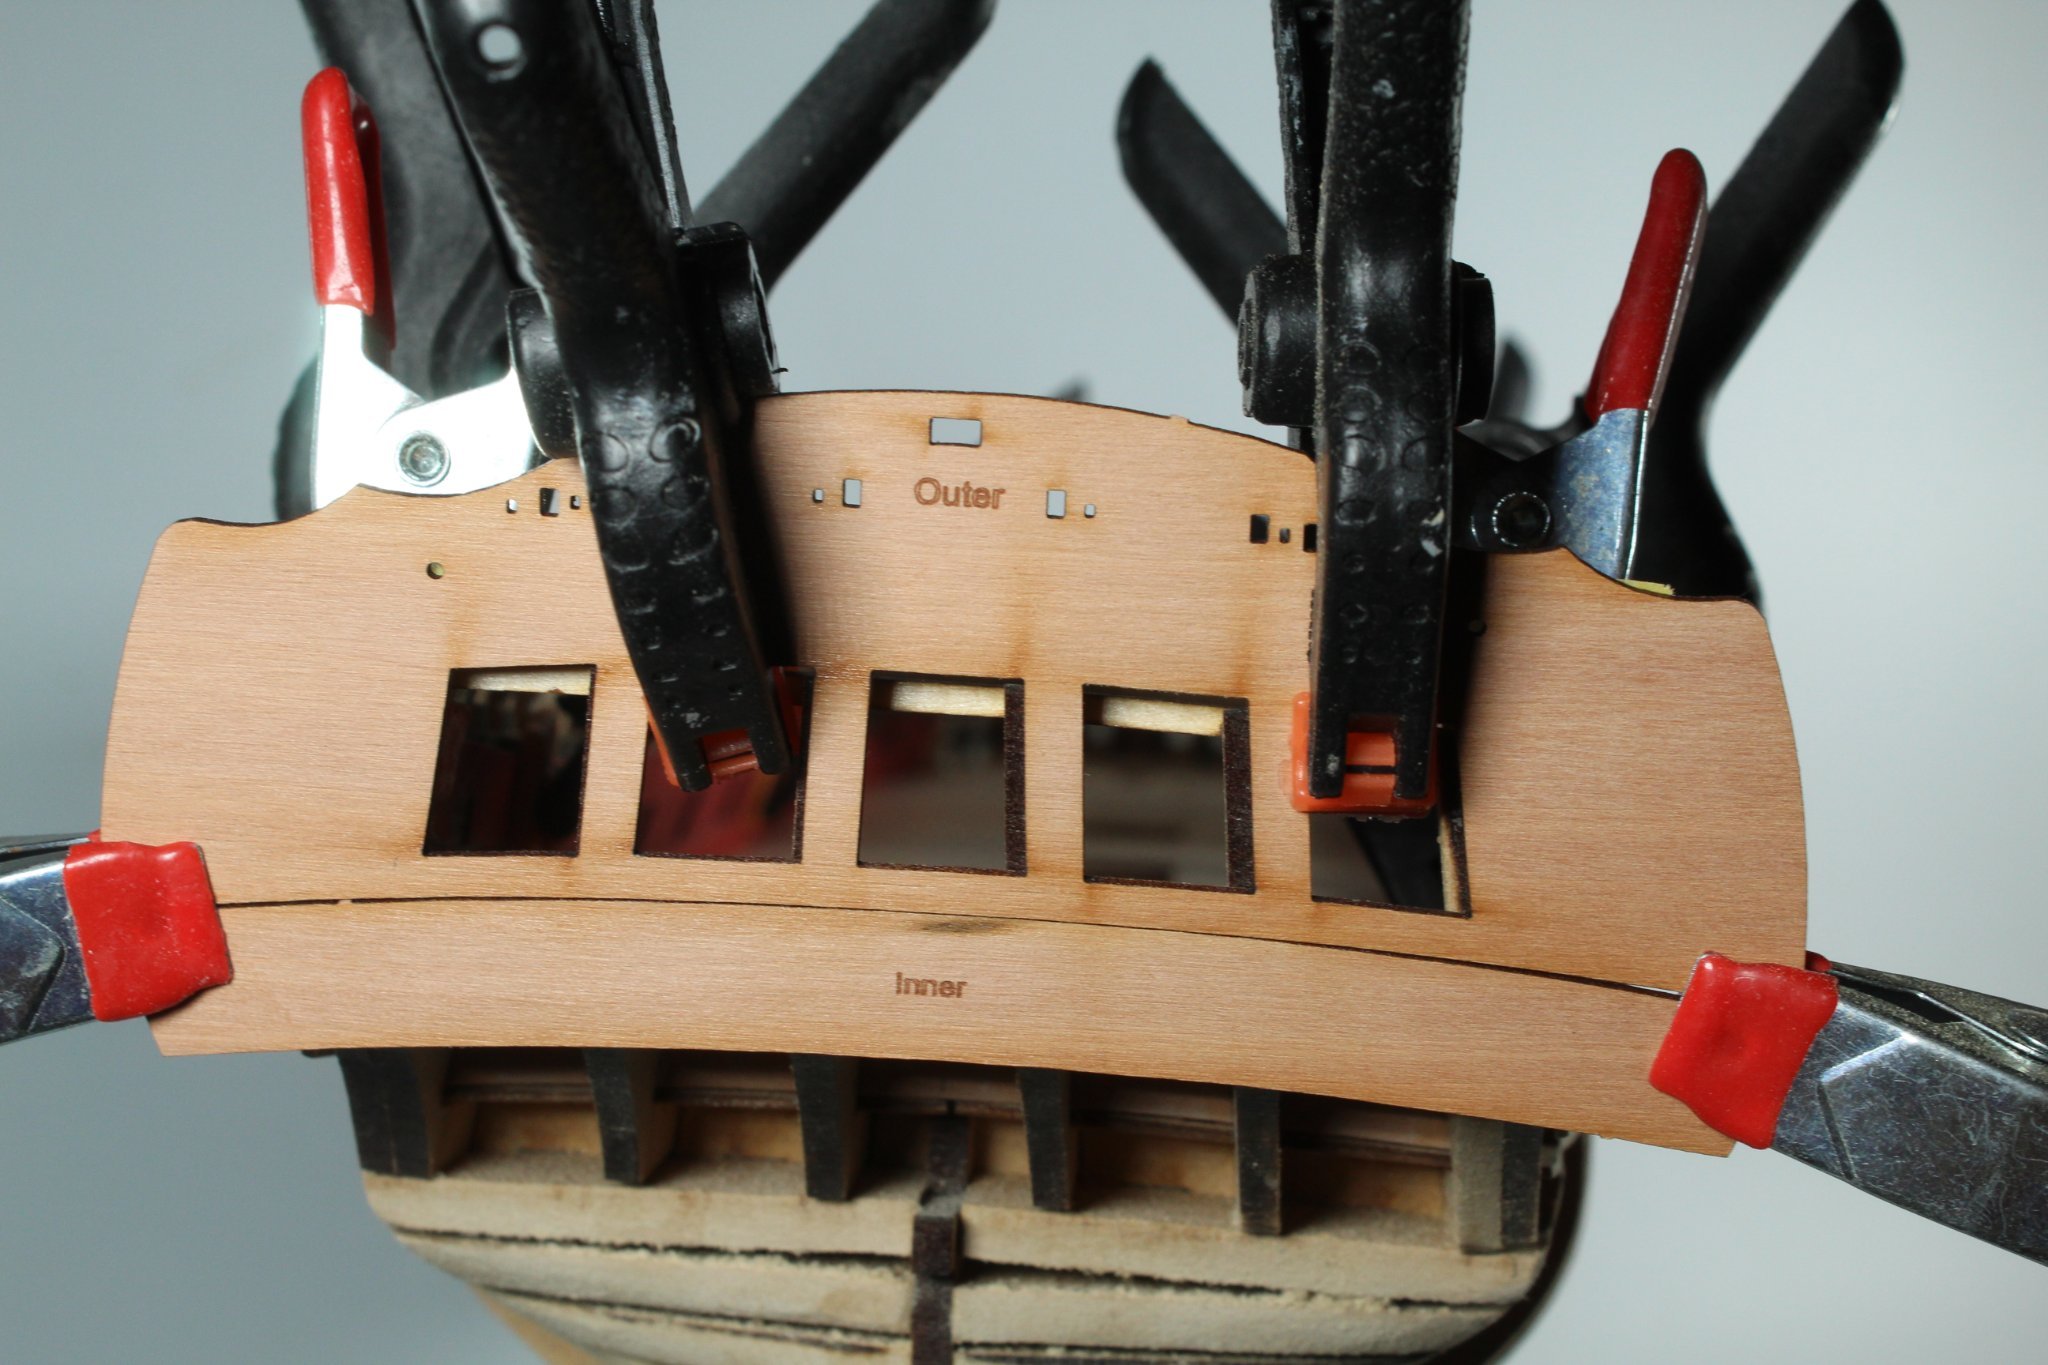
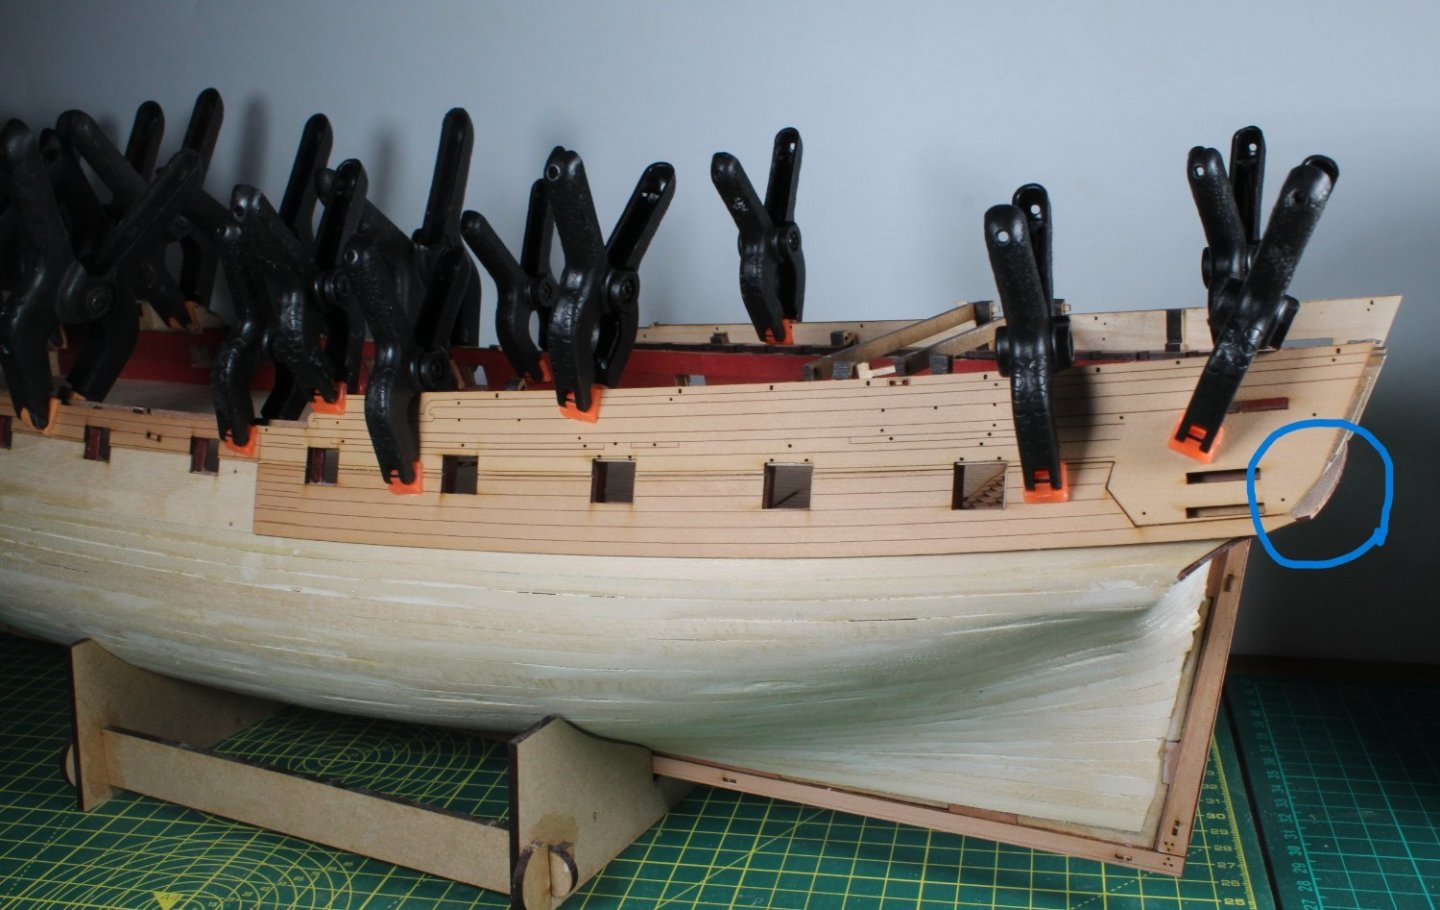
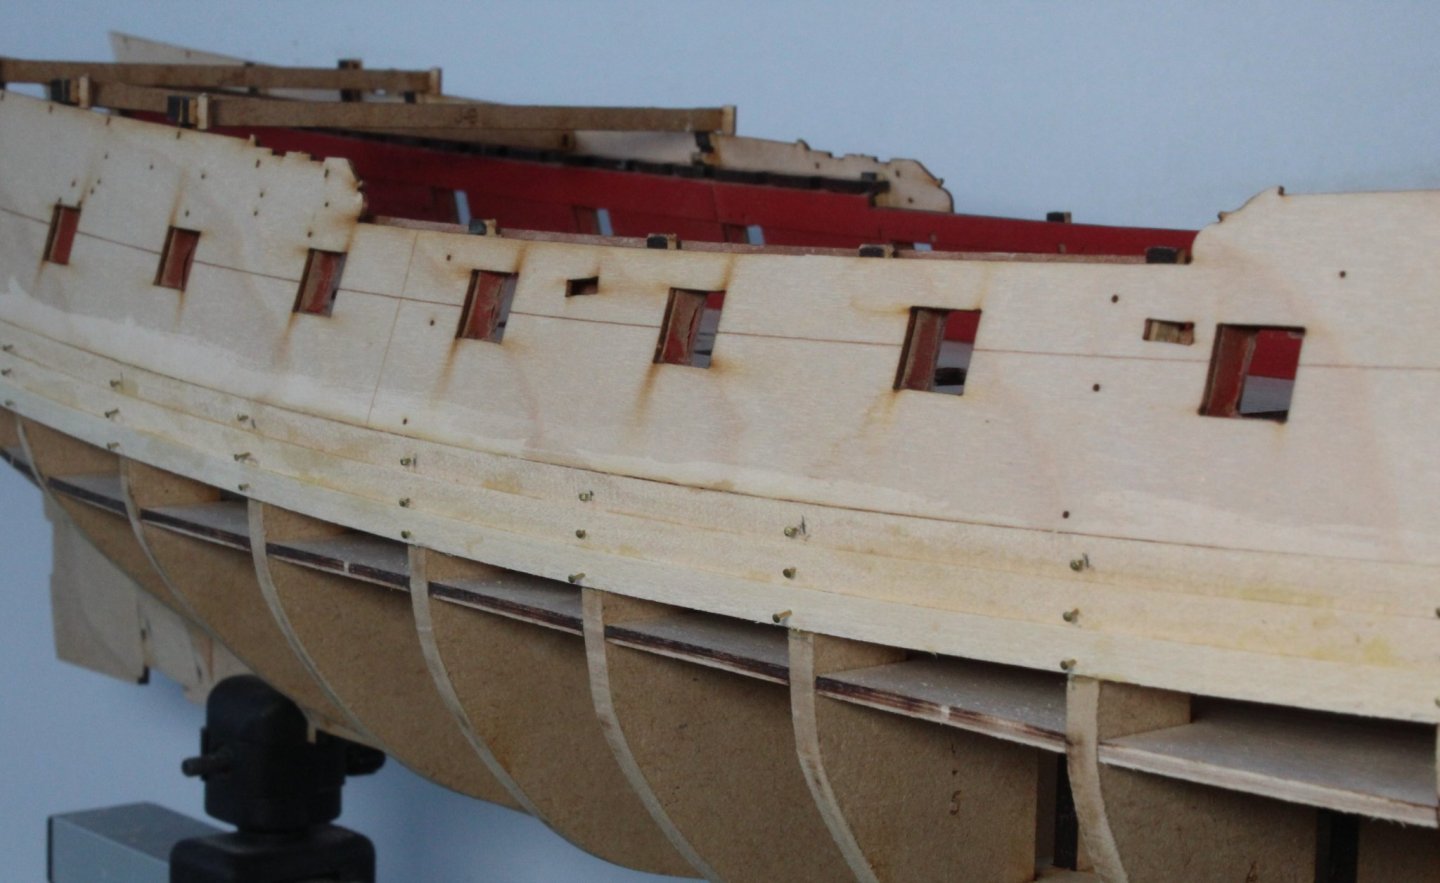
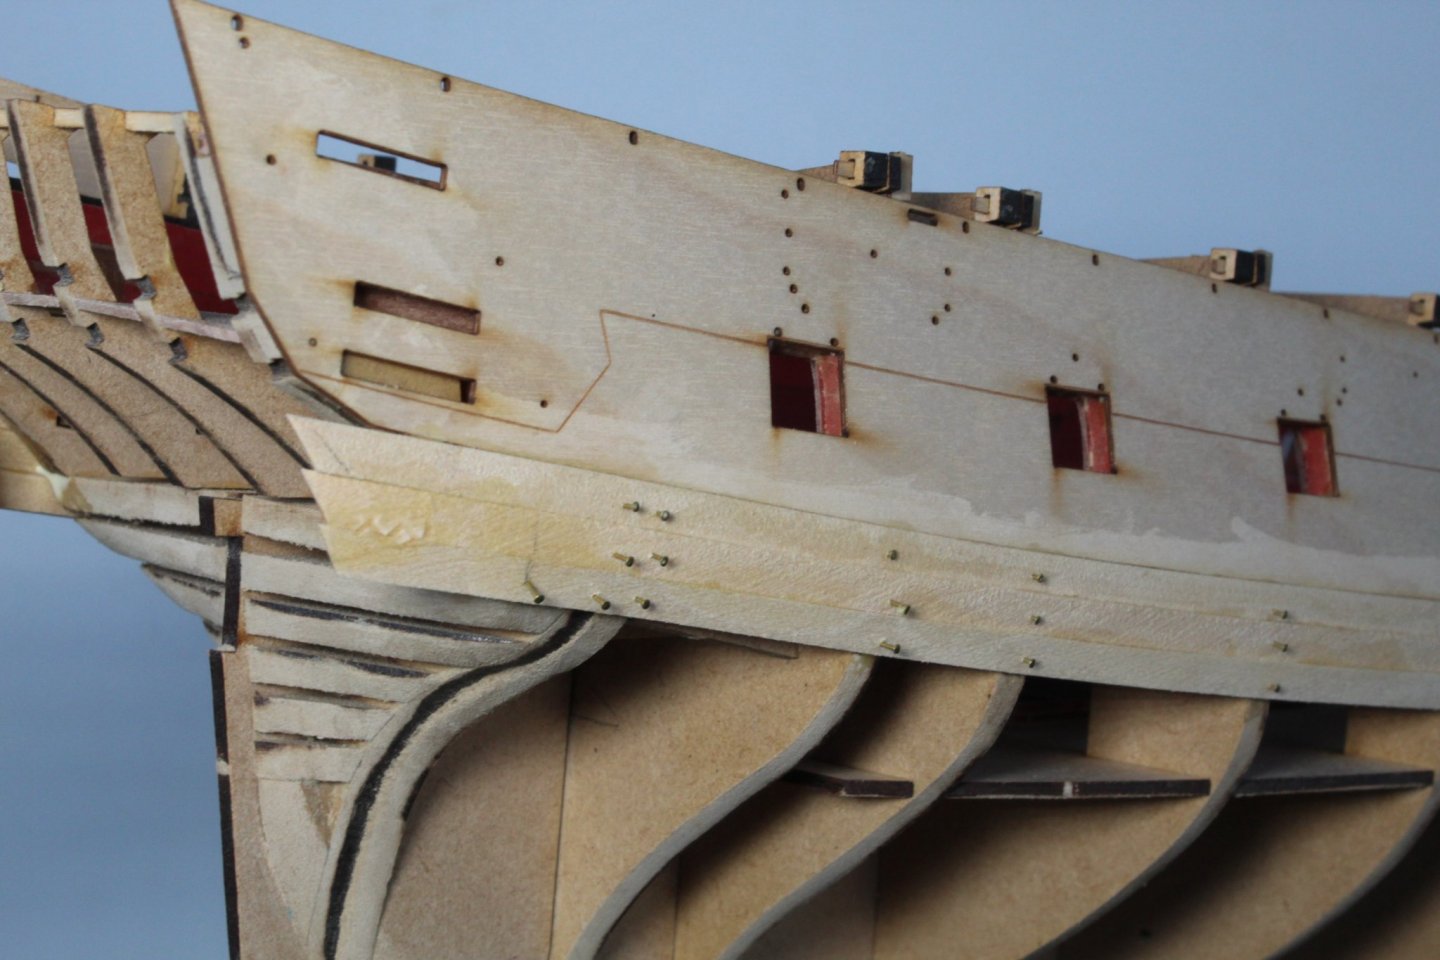
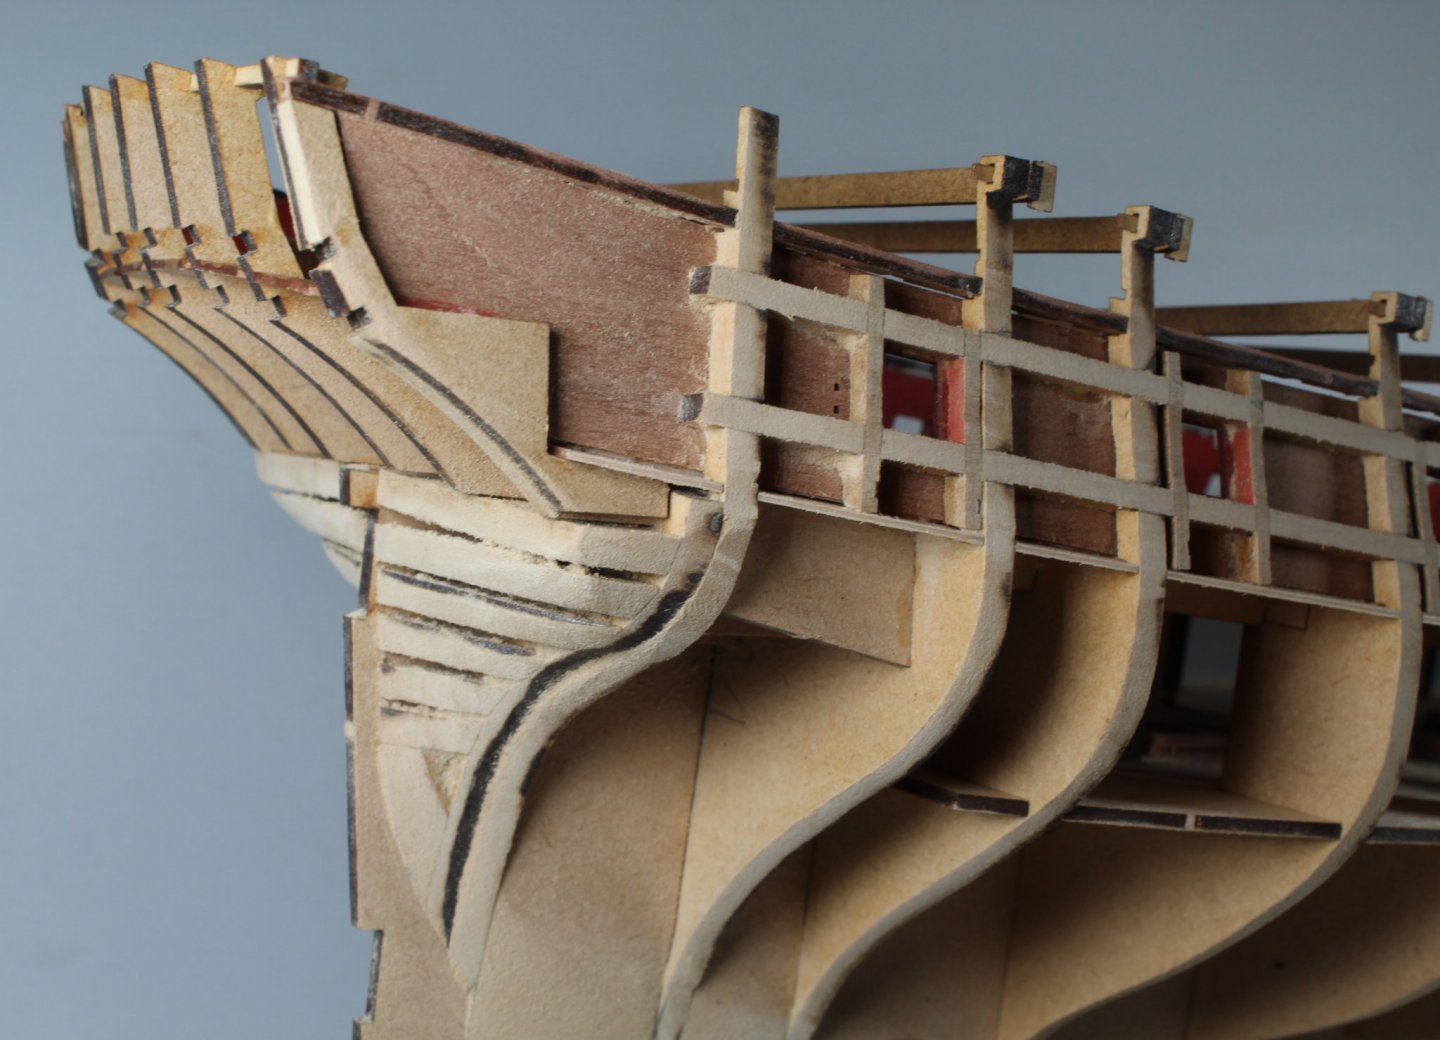
Progress is going to be slow for the next couple of days as I soak, bend and allow time for the upper and lower outer patterns to dry before fitting. After soaking the top upper patterns in hot water for 30 minutes they were carefully clamped to the hull and they will be left for approx. 18 hours to fully dry out. Before I glue these patterns in place I will soak, bend, clamp and allow time for the lower outer patterns to dry out. This will ensure that when I glue these patterns to the hull I can confident everything is correctly aligned. The picture below shows the right-hand side upper outer pattern clamped to the hull. The next photo is a view from the left-hand side. You will note I used a map pin to hold the bottom edge of the left hand upper outer pattern in place. I also clamped the stern upper and lower patterns in place to double check if there were any alignment issues. Everything looked good. In the next photo you will see I have added the stern post outer patterns. I did ensure the 1st planking terminated before the stern post and keel which should ensure the 2nd planking will be flush with the stern post and keel. When looking at the photo I have highlighted an area which looks wrong. The actual model looks fine and the highlighted area which seems to stick out is an optical illusion, related with the lower stern counter.

- 476 replies
-
- 7
-
-
- sphinx
- vanguard models
- (and 1 more)
-
Once the outer patterns have been fitted I will start the second planking. The lower counter pattern is correctly positioned (I think) this time around so I think all is good.
- 476 replies
-
- 1
-
-
- sphinx
- vanguard models
- (and 1 more)
-
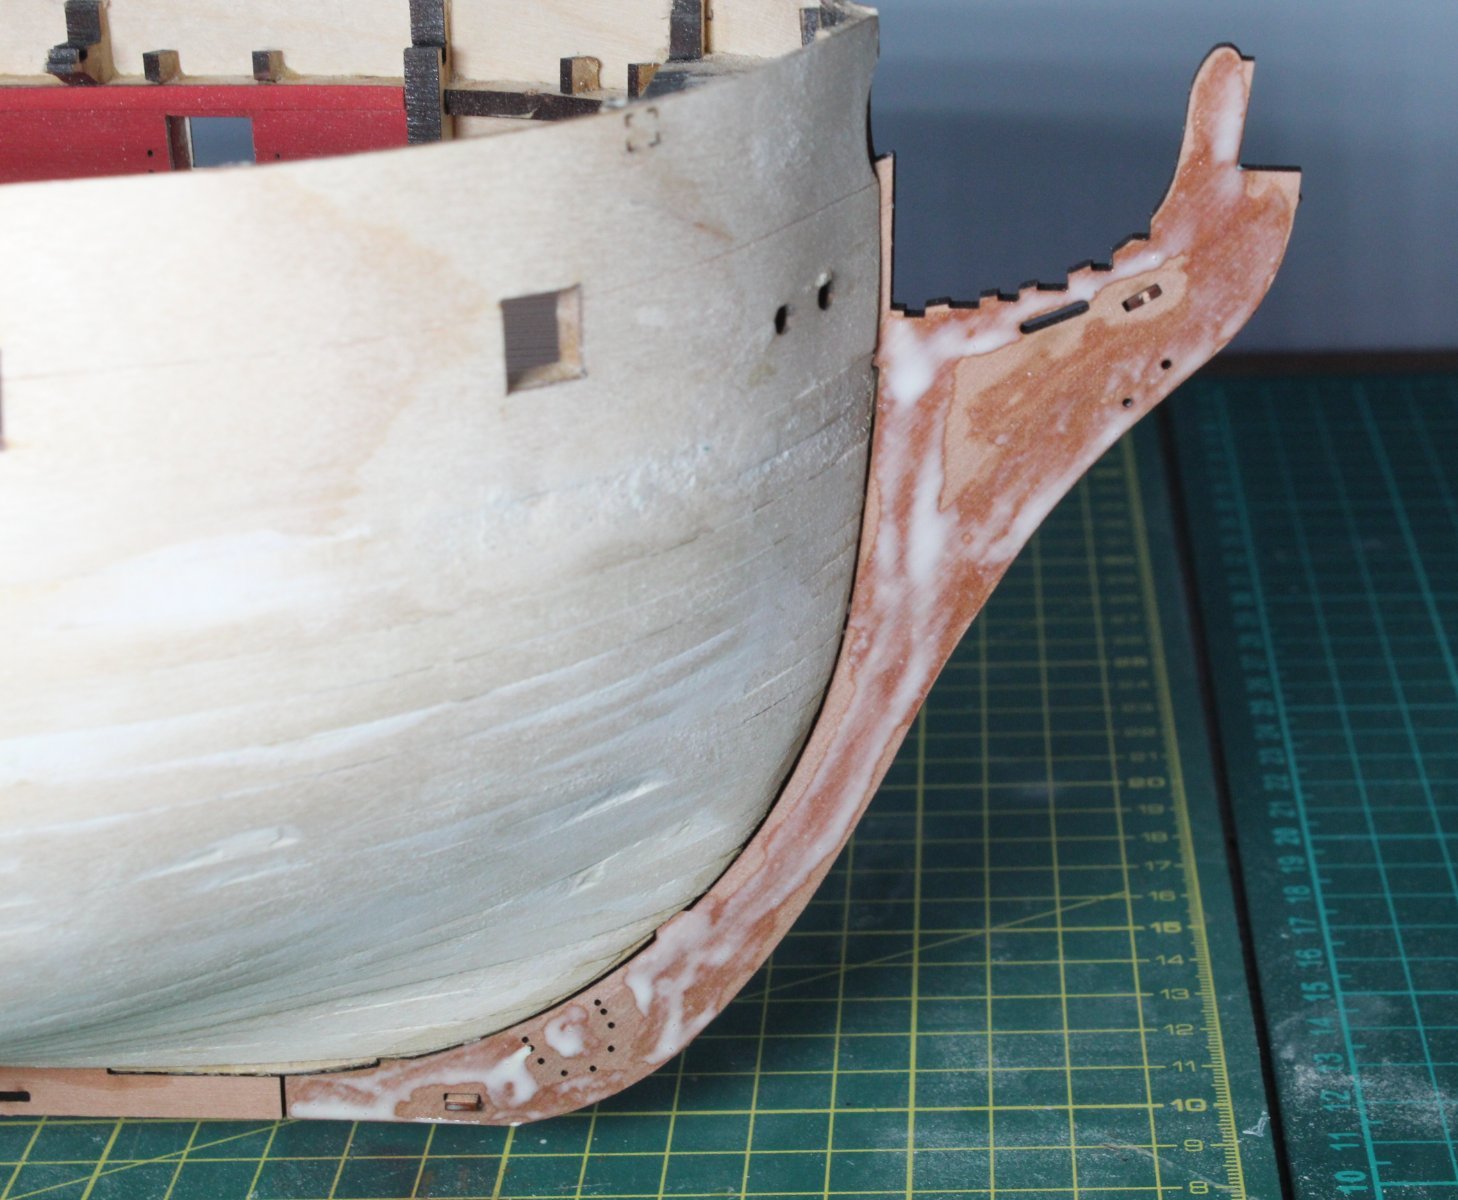
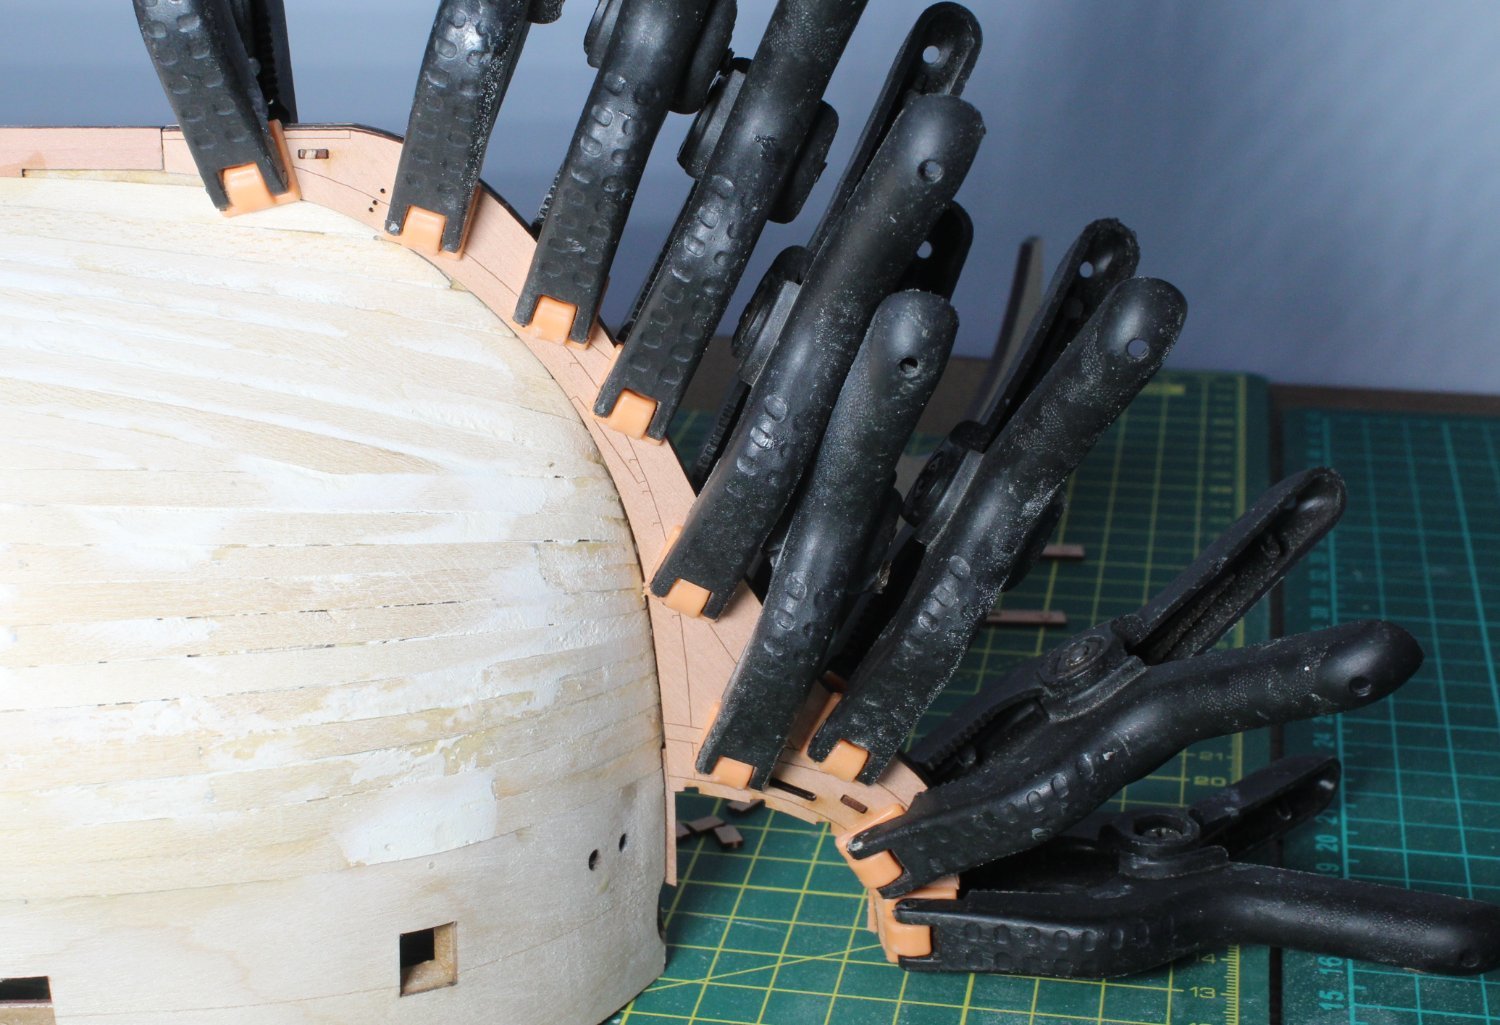
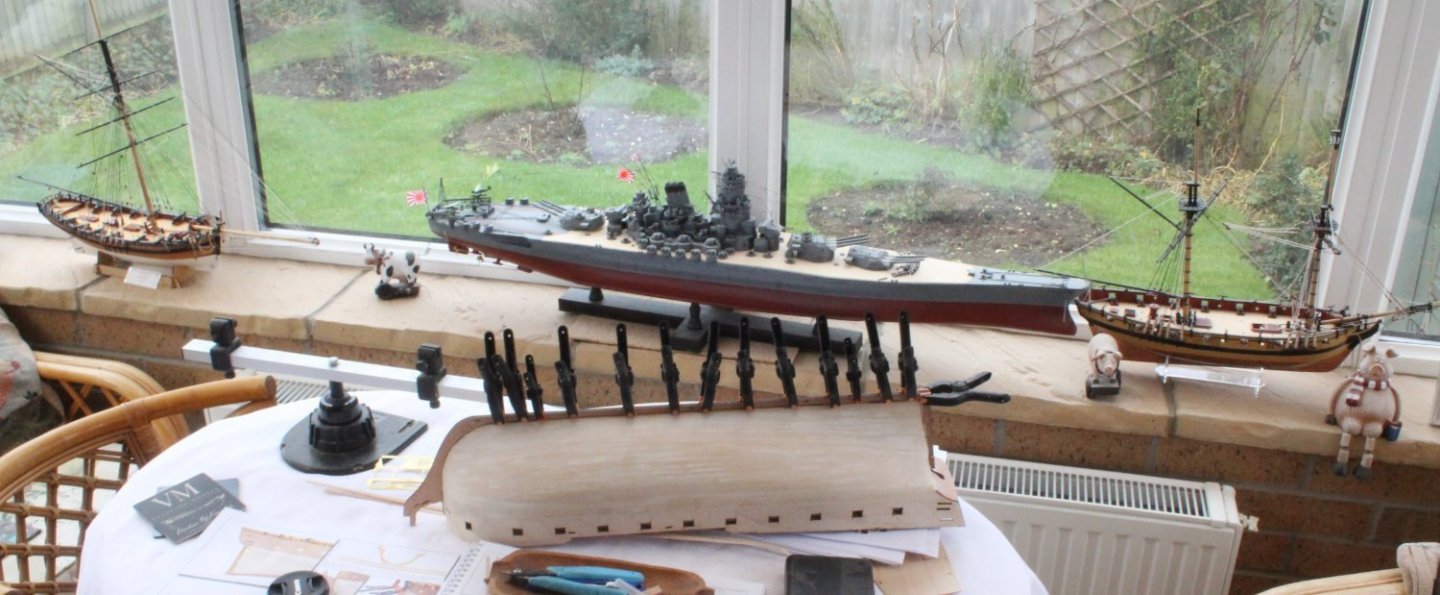
I have started to add the outer patterns. Starting with the prow patterns after a dry fit to make sure the parts would fit OK I applied a liberal coat of glue to the stem post with the two locating tabs also added to the stem post. The two outer prow patterns were then fitted. In addition to using the two locating tabs I also check the patterns were aligned by running some brass pins through the horseshoe holes. The prow patterns were then held in place using a few clamps. The above process was then repeated for the keel outer patterns, plenty of clamps used. The Alert, IJN Yamato and Speedy can be seen in the background The V1 Sphinx build is also looking on with great interest.


- 476 replies
-
- 3
-
-
- sphinx
- vanguard models
- (and 1 more)
-
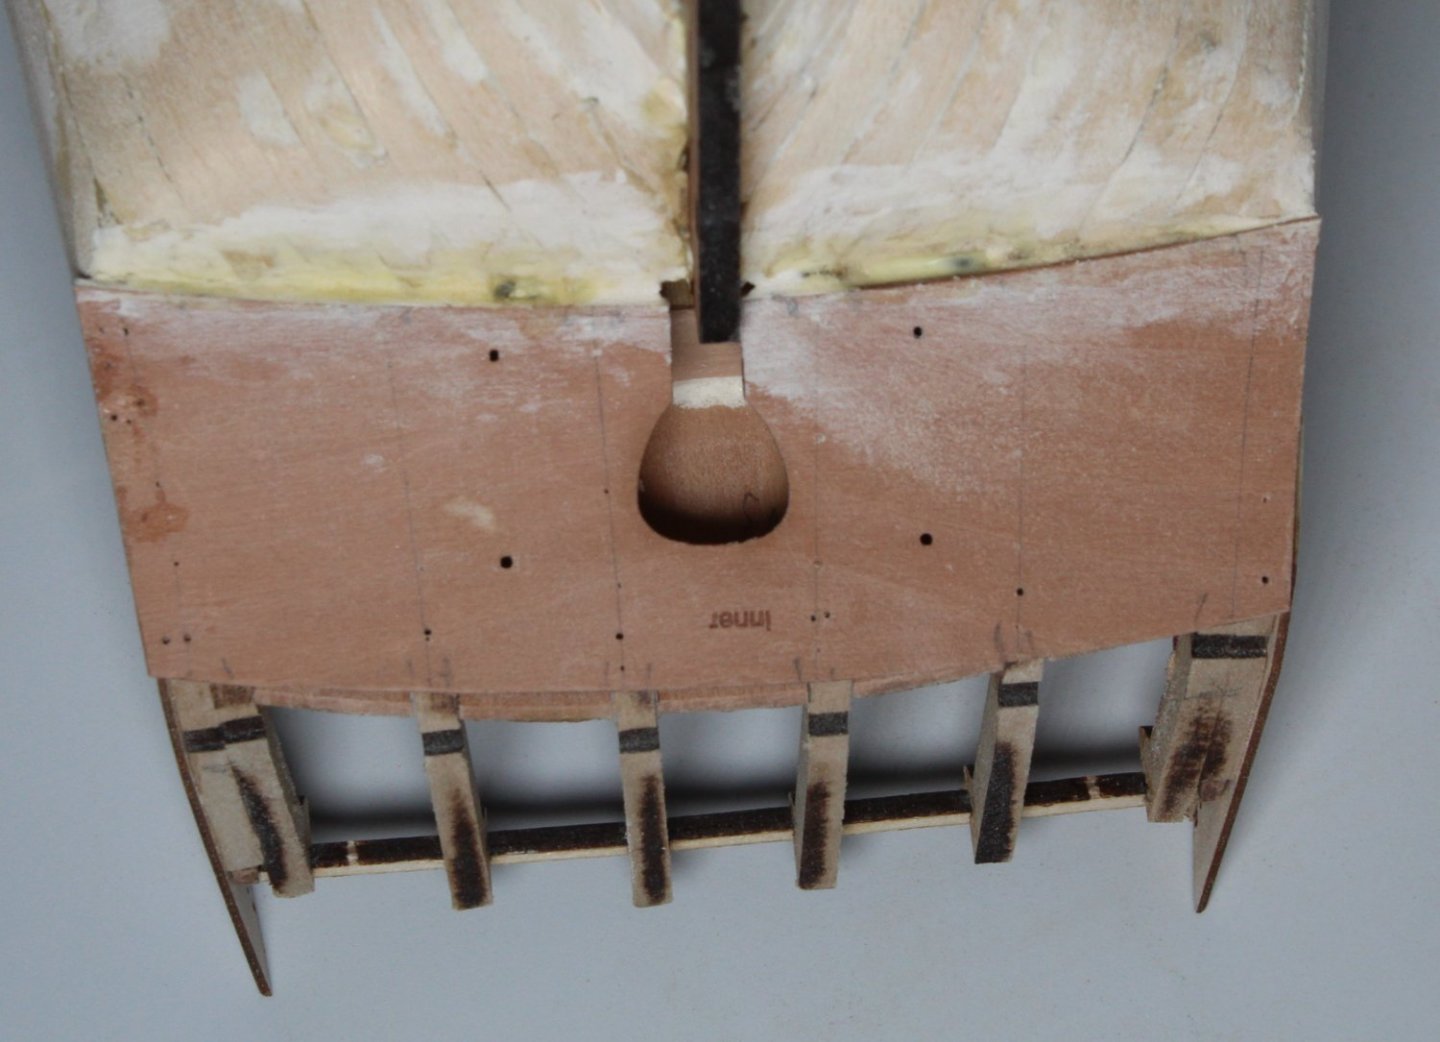
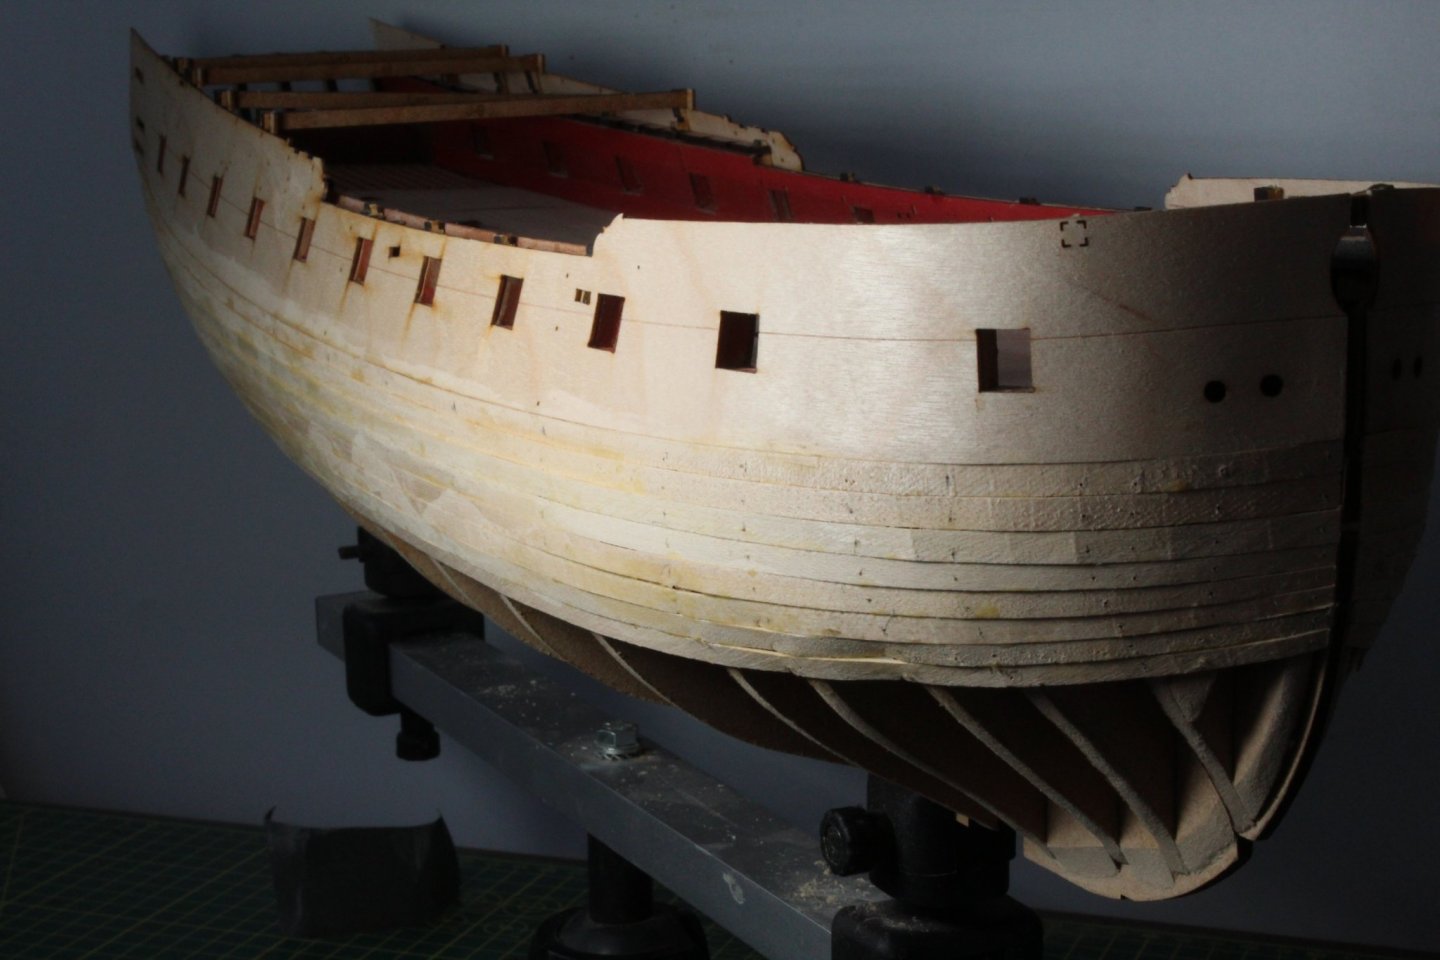
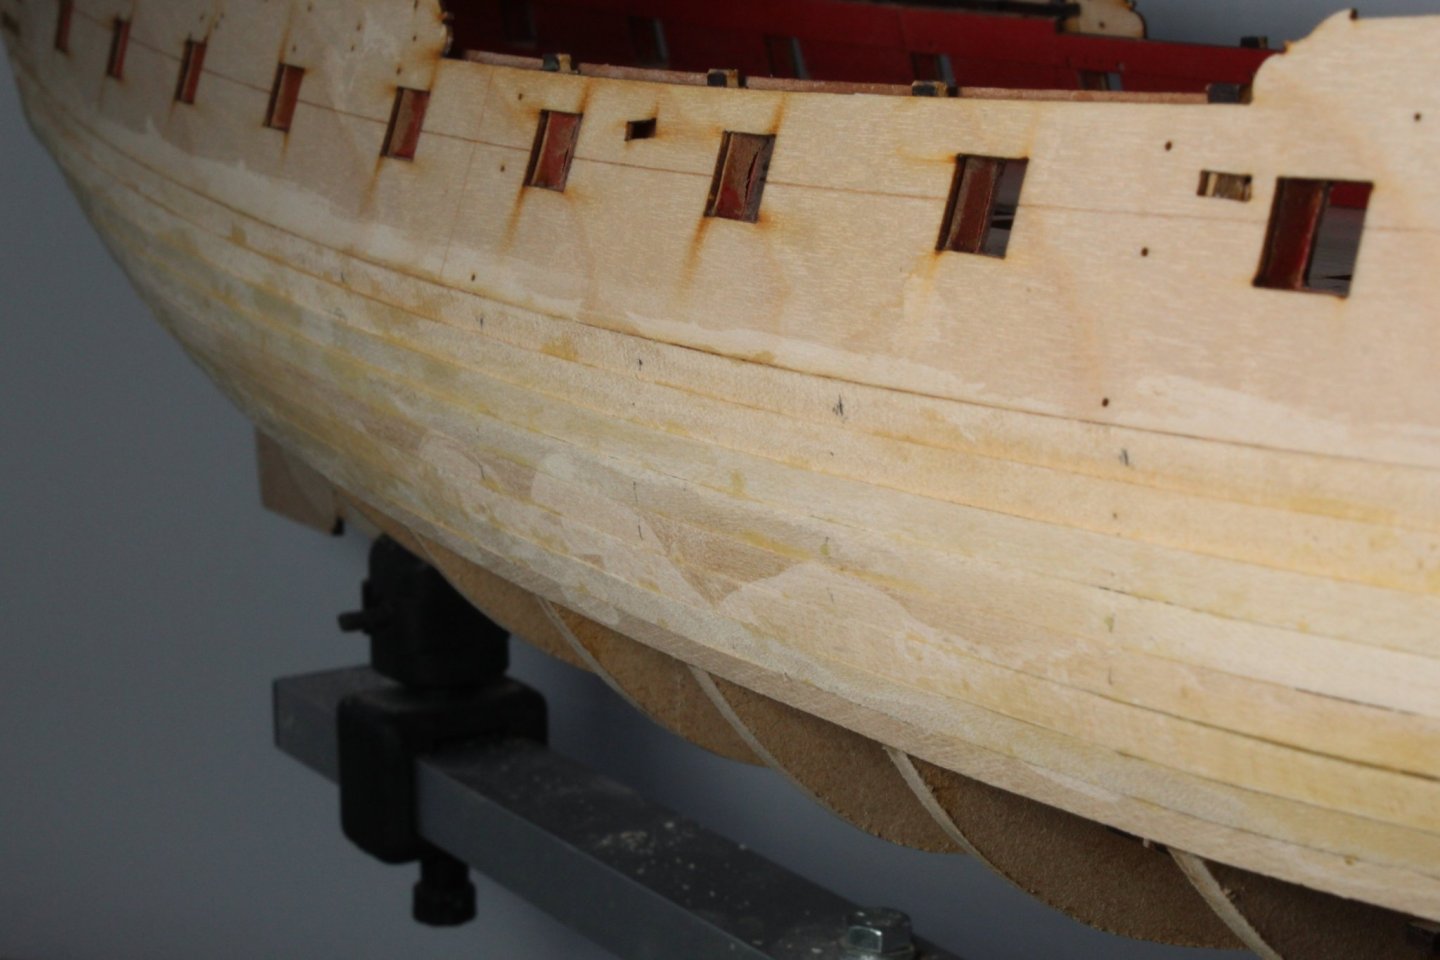
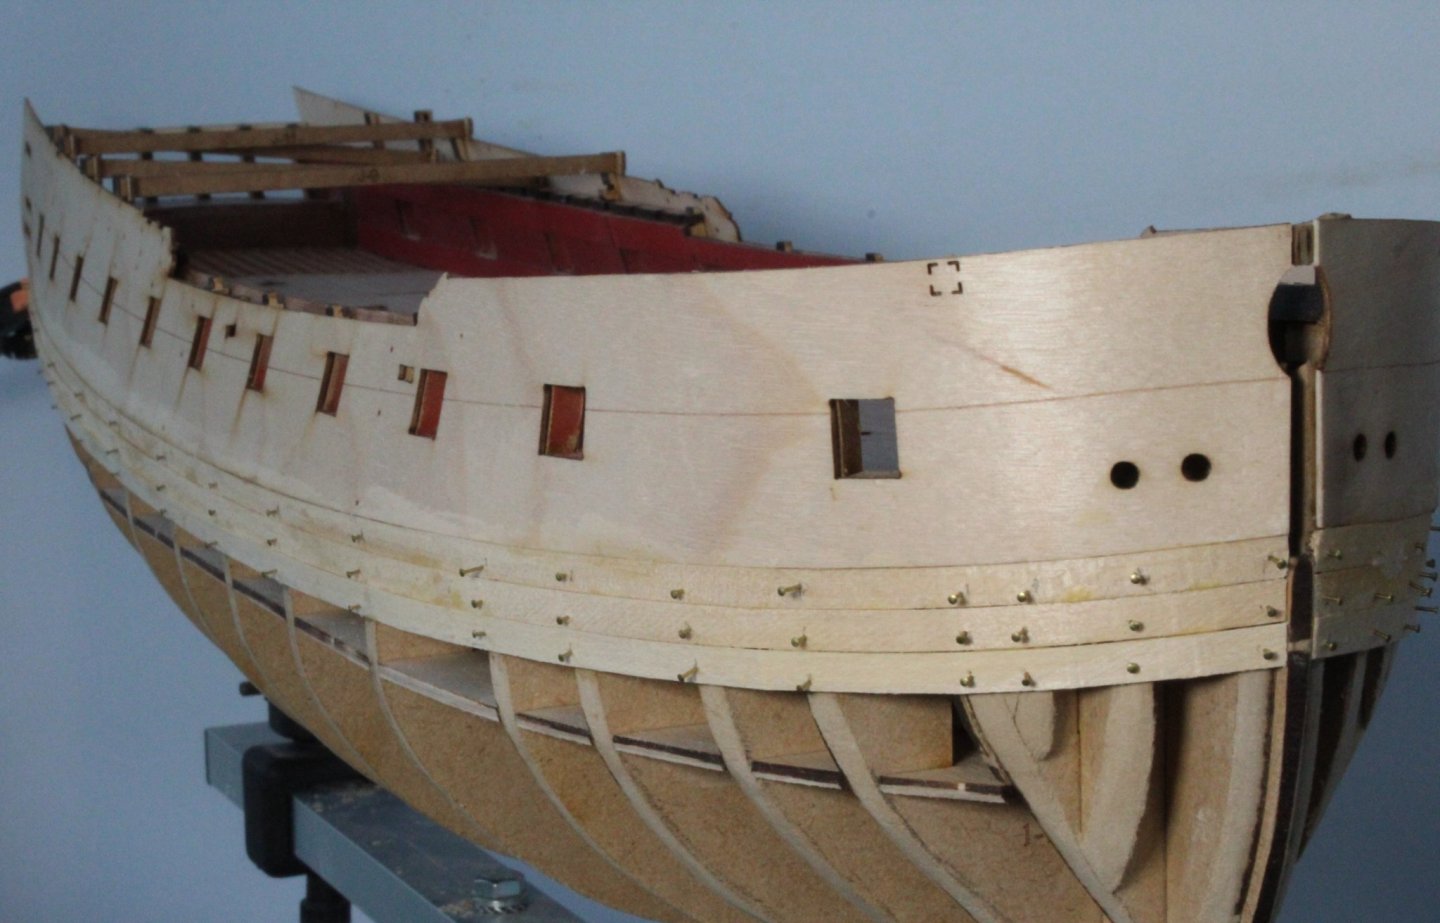
I have spent some time sanding the hull smooth after completing the first planking. I am pleased with how the first planking turned out and did not require a great deal of sanding. I also added a solution made up of wood filler, mixed with glue and water to fill some gaps and depressions. I then added the lower stern counter. After soaking the pattern in hot water for 30 minutes the pattern was taped to a tin of custard and left to dry overnight. This resulted in a nicely bent lower counter which was glued into place. I did check that it was correctly positioned after it was glued in place. I was not totally happy with the position when I checked with the upper counter pattern and stern fascia held in place so I carefully removed the lower pattern and readjusted the position. I was happy with the position 2nd time around. I then added a filler / glue mix to fill the gap between the planking and lower stern counter. I have just noticed it is a tad off centre Next I fitted the prow pattern. The lower keel pattern was then glued in place. Finally the stern post was glued in place. Next up will be to add the outer patterns to the prow, keel and stern. Progress is slow at the moment but I feel I am making a much better job of this build compared with my V1 build.


- 476 replies
-
- 10
-
-
- sphinx
- vanguard models
- (and 1 more)
-
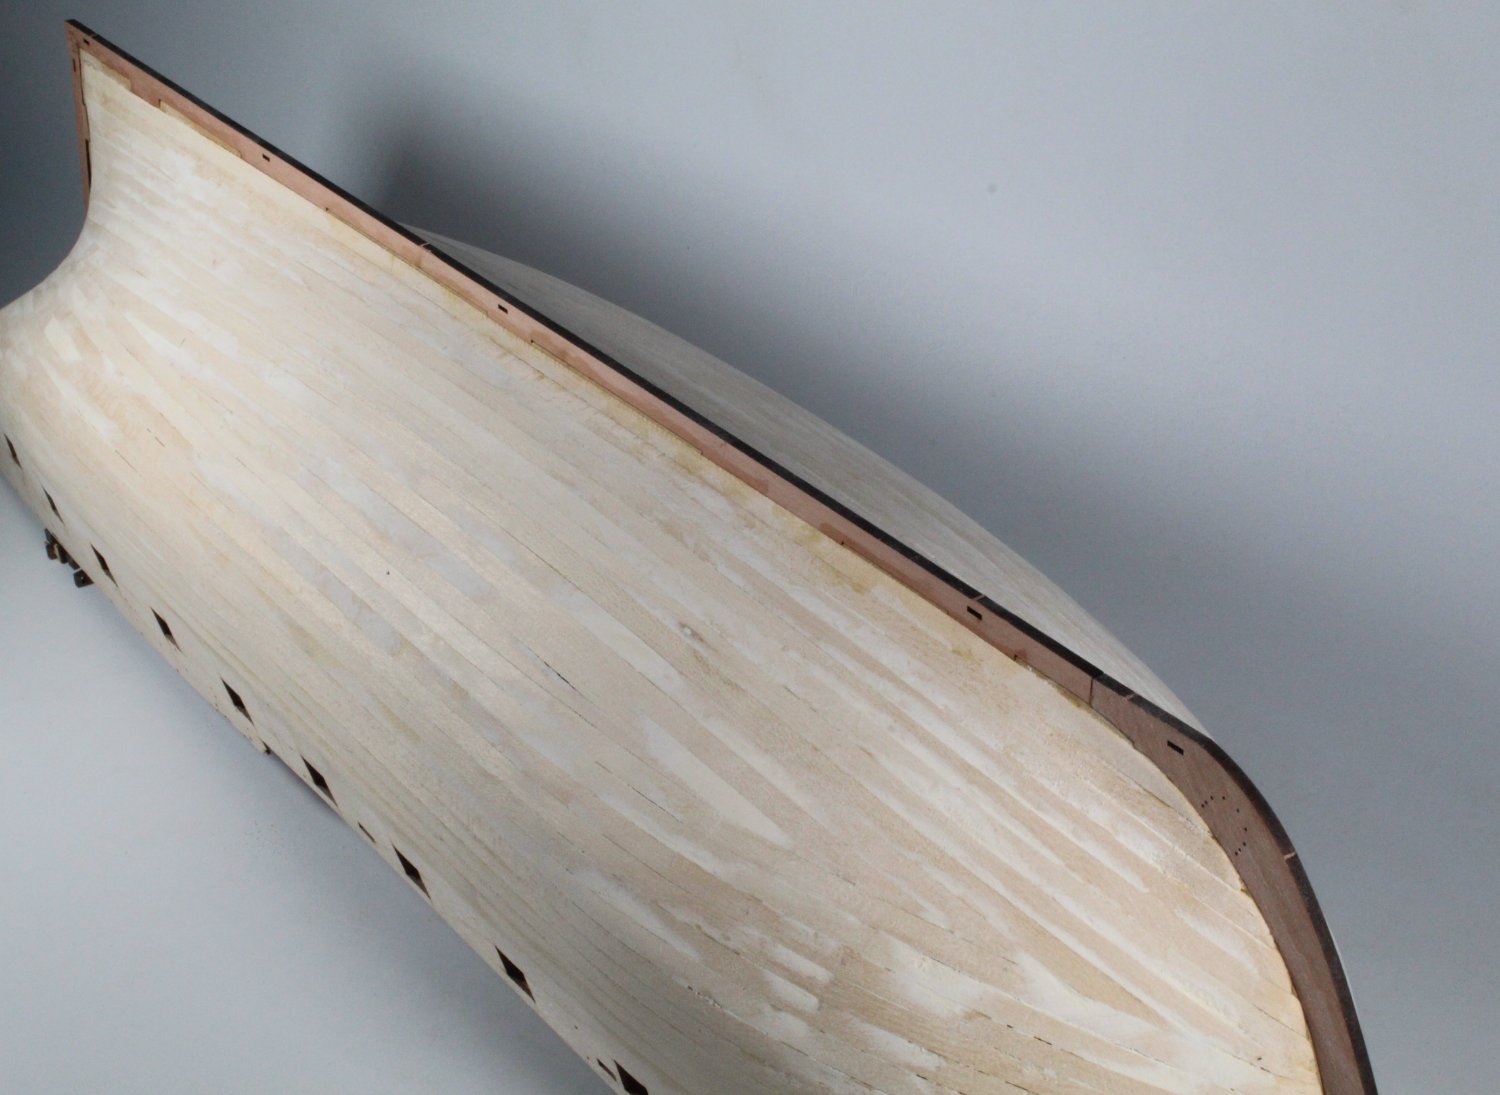
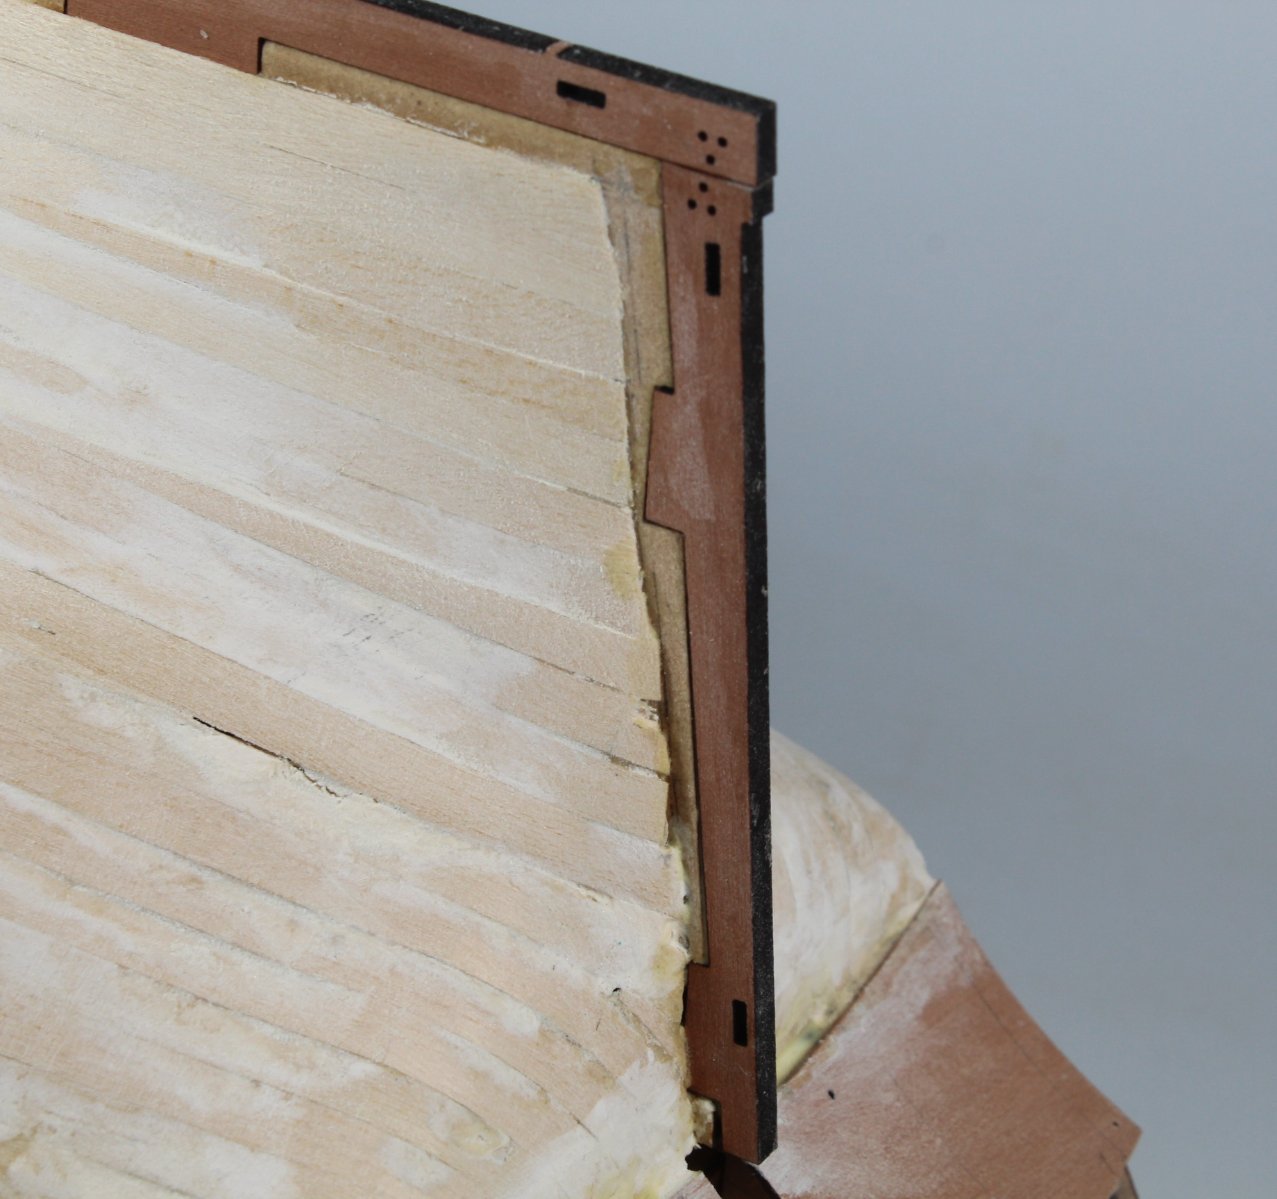
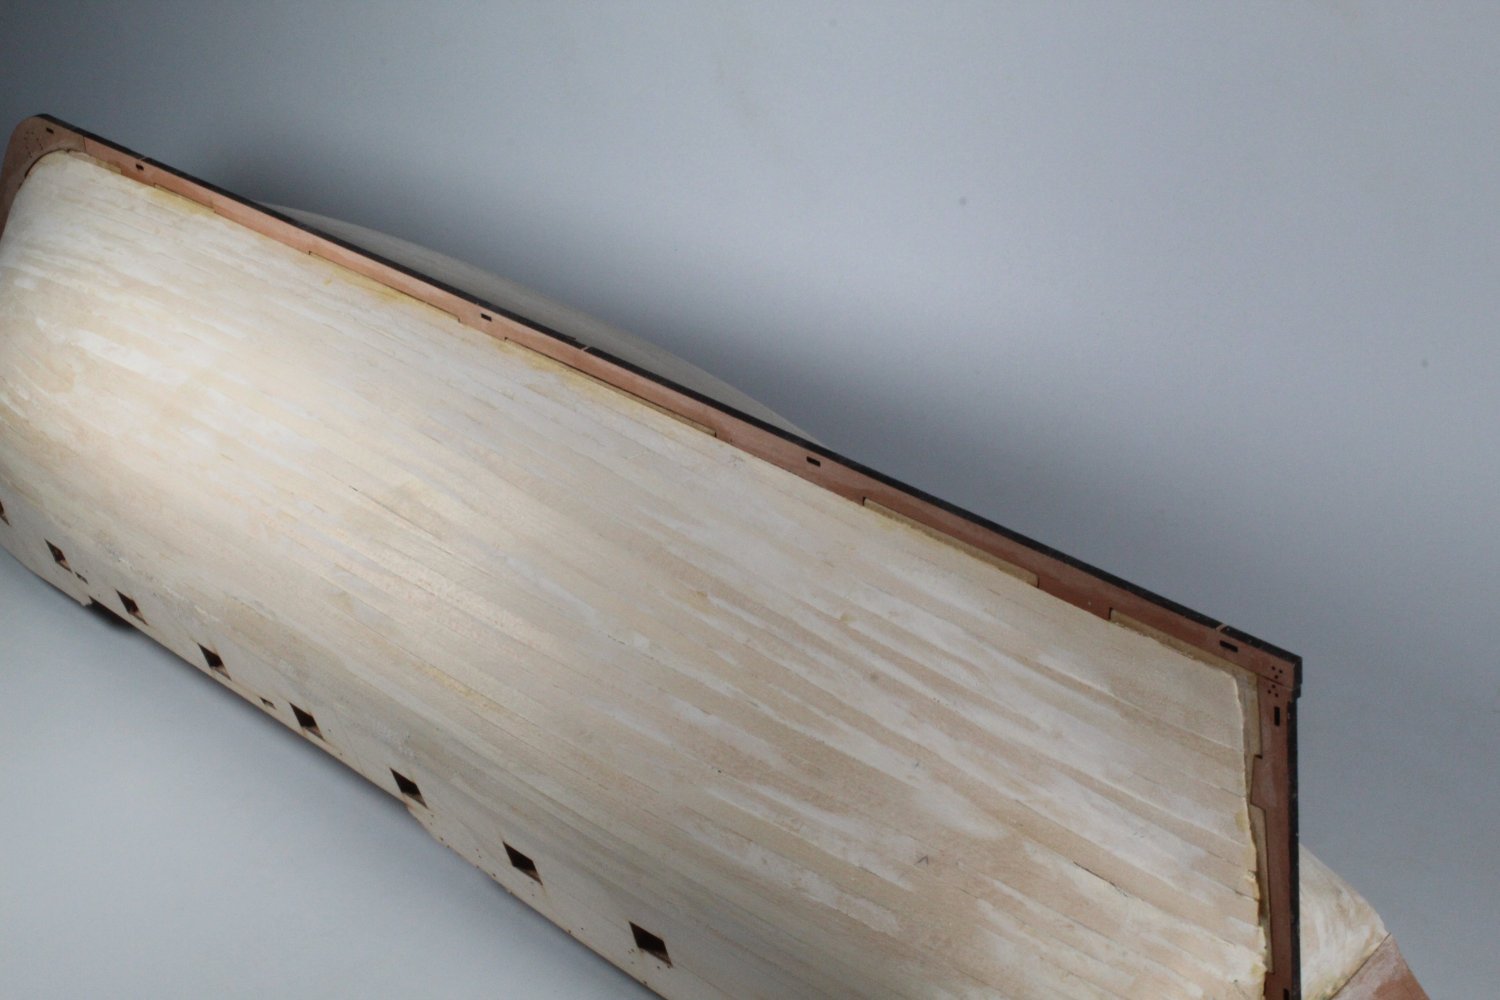
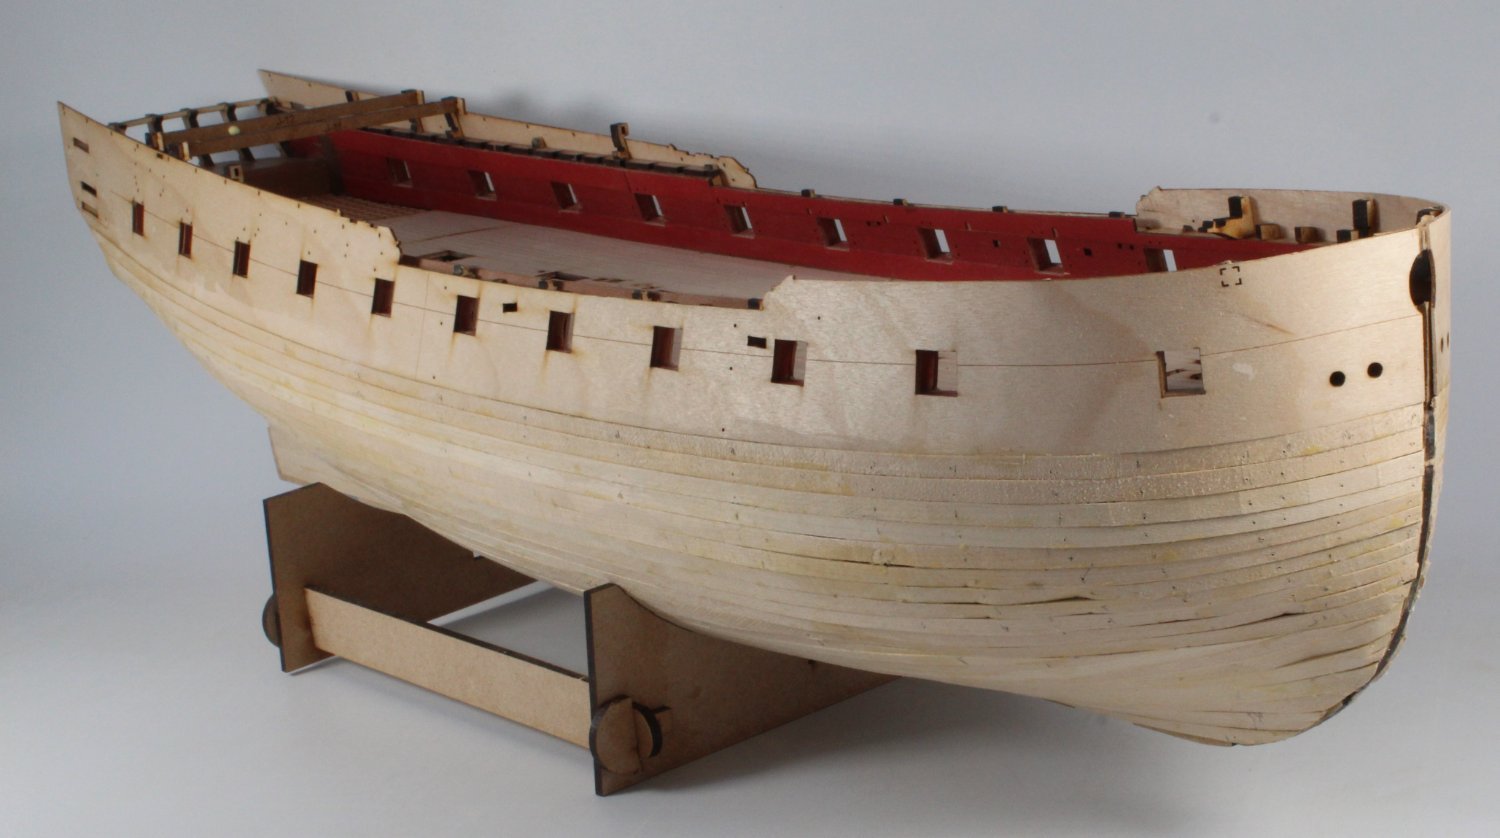
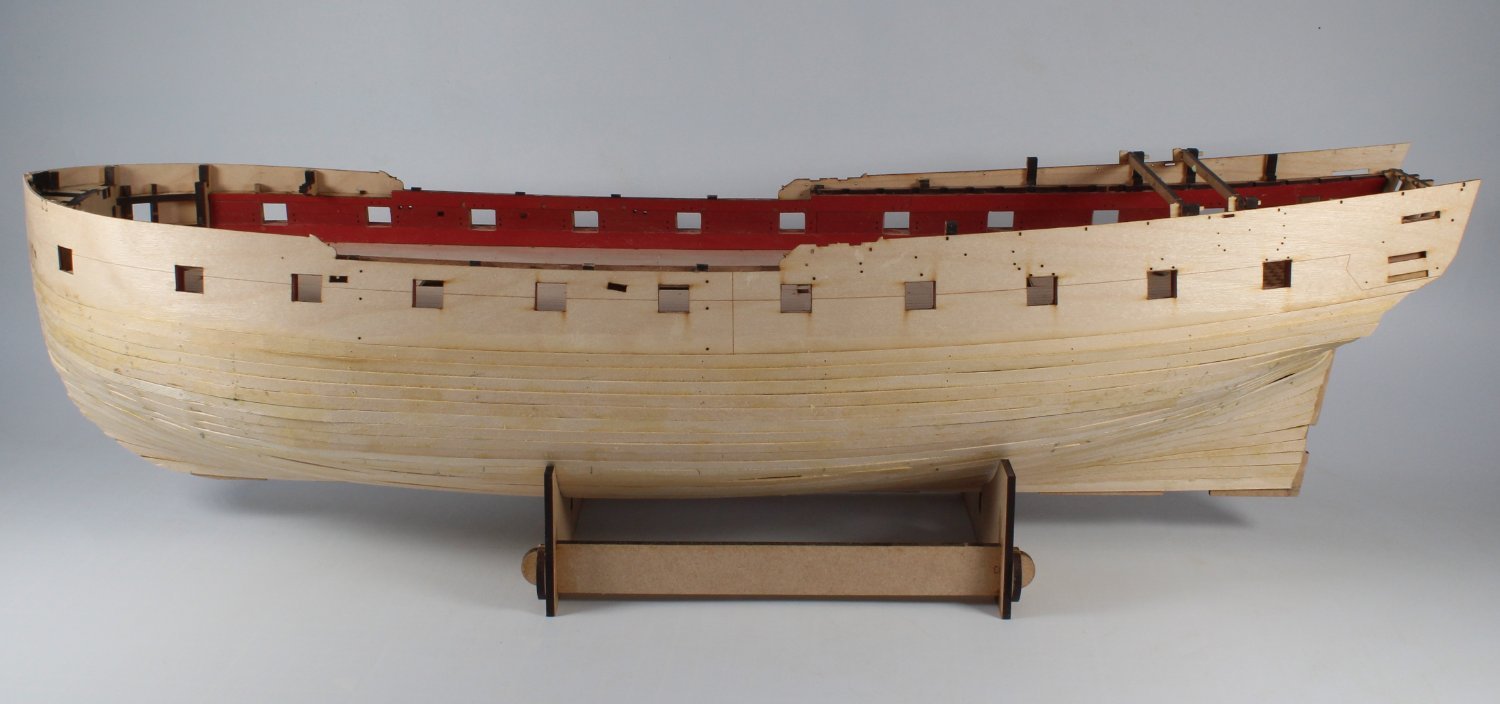
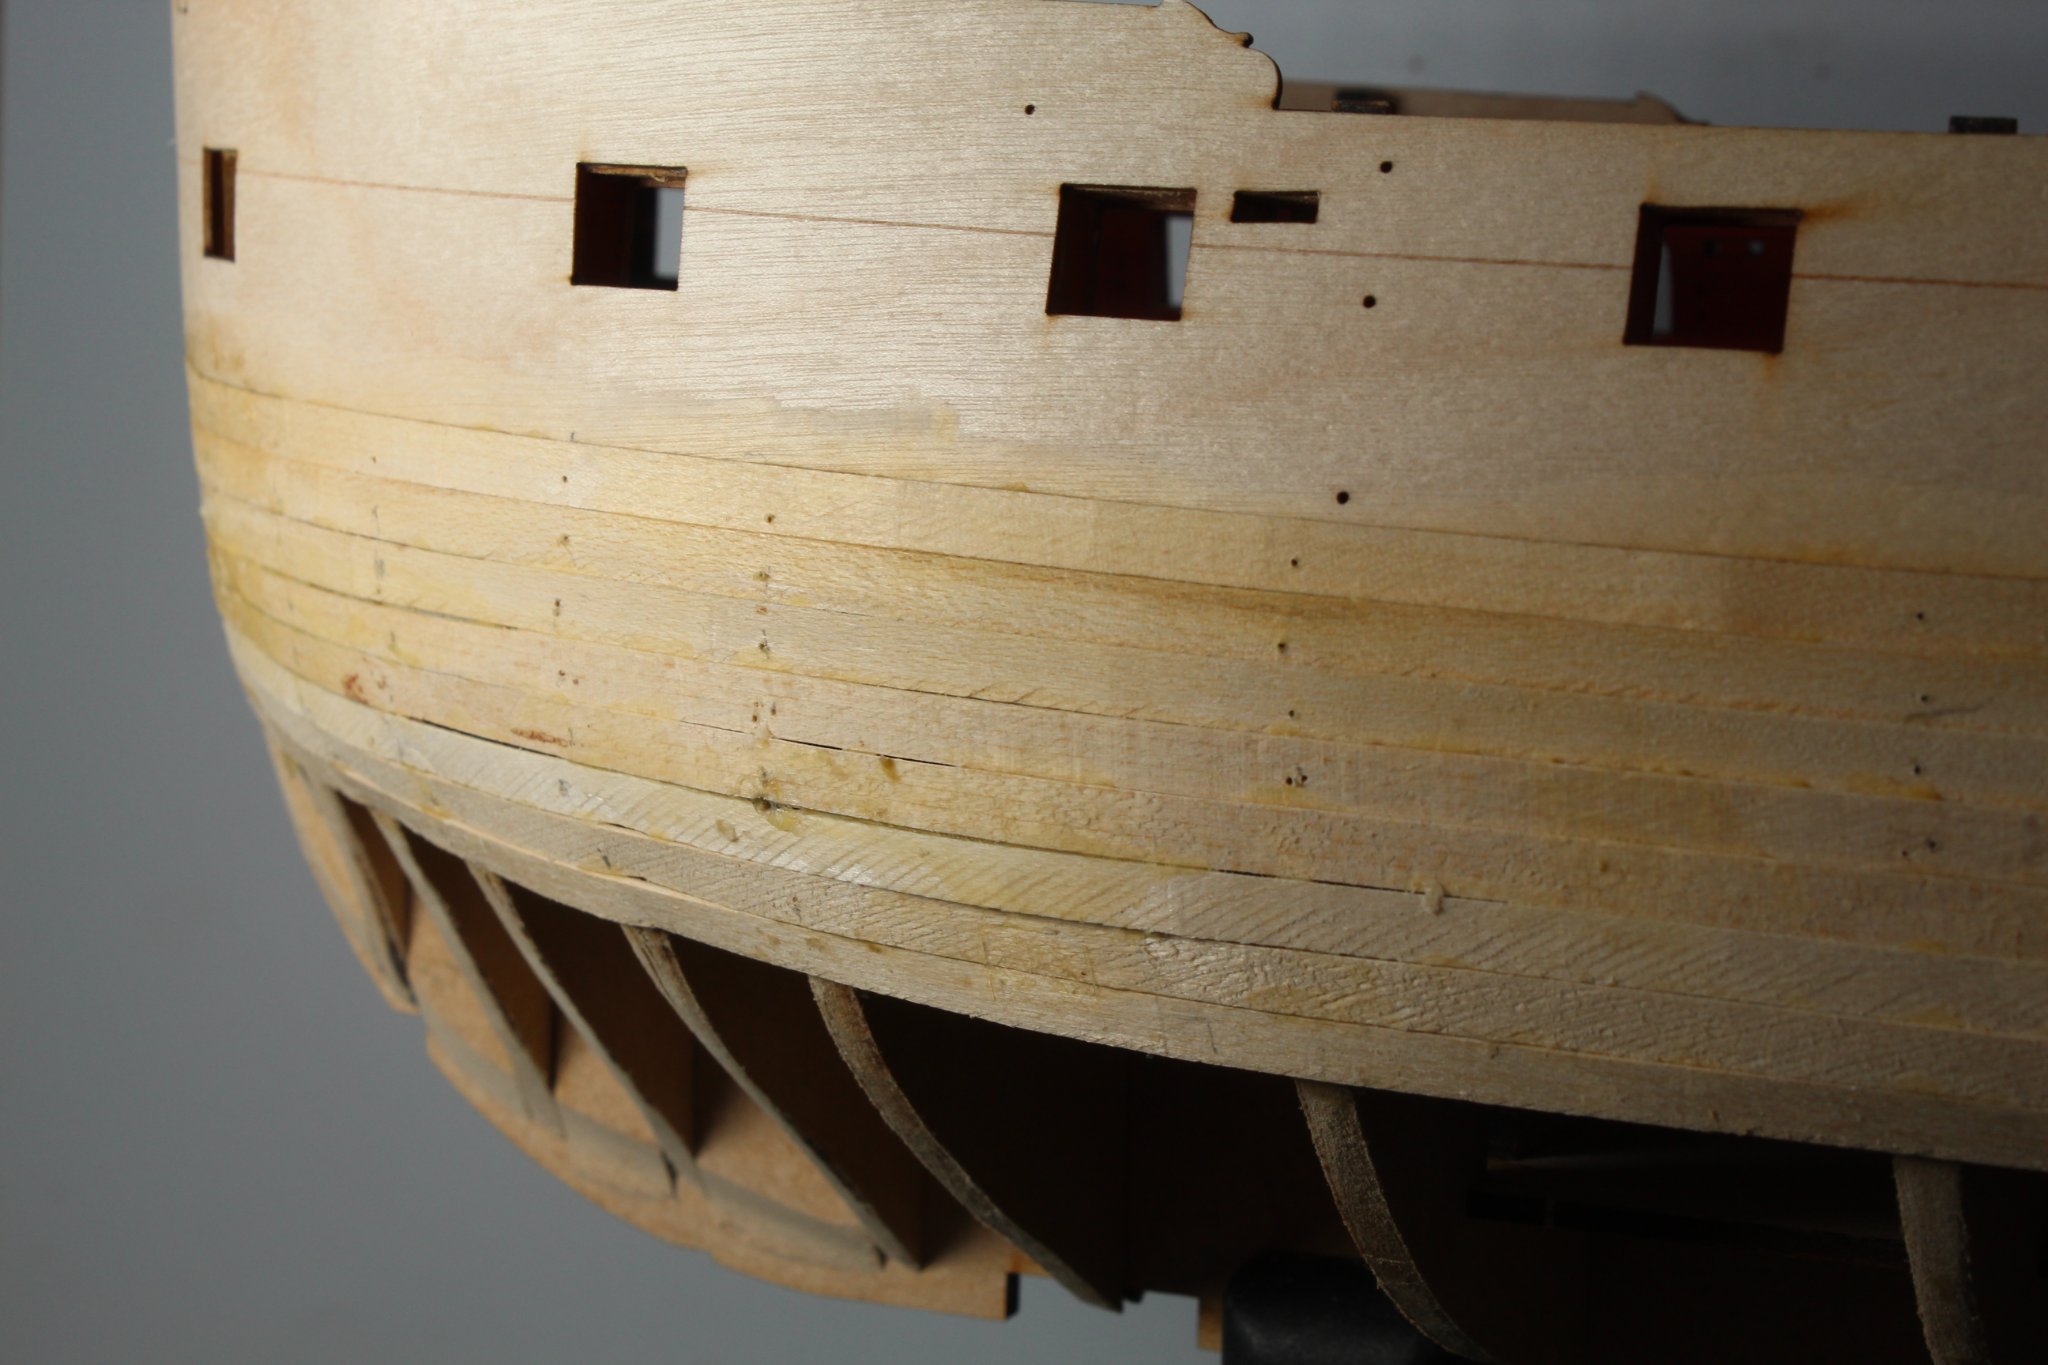
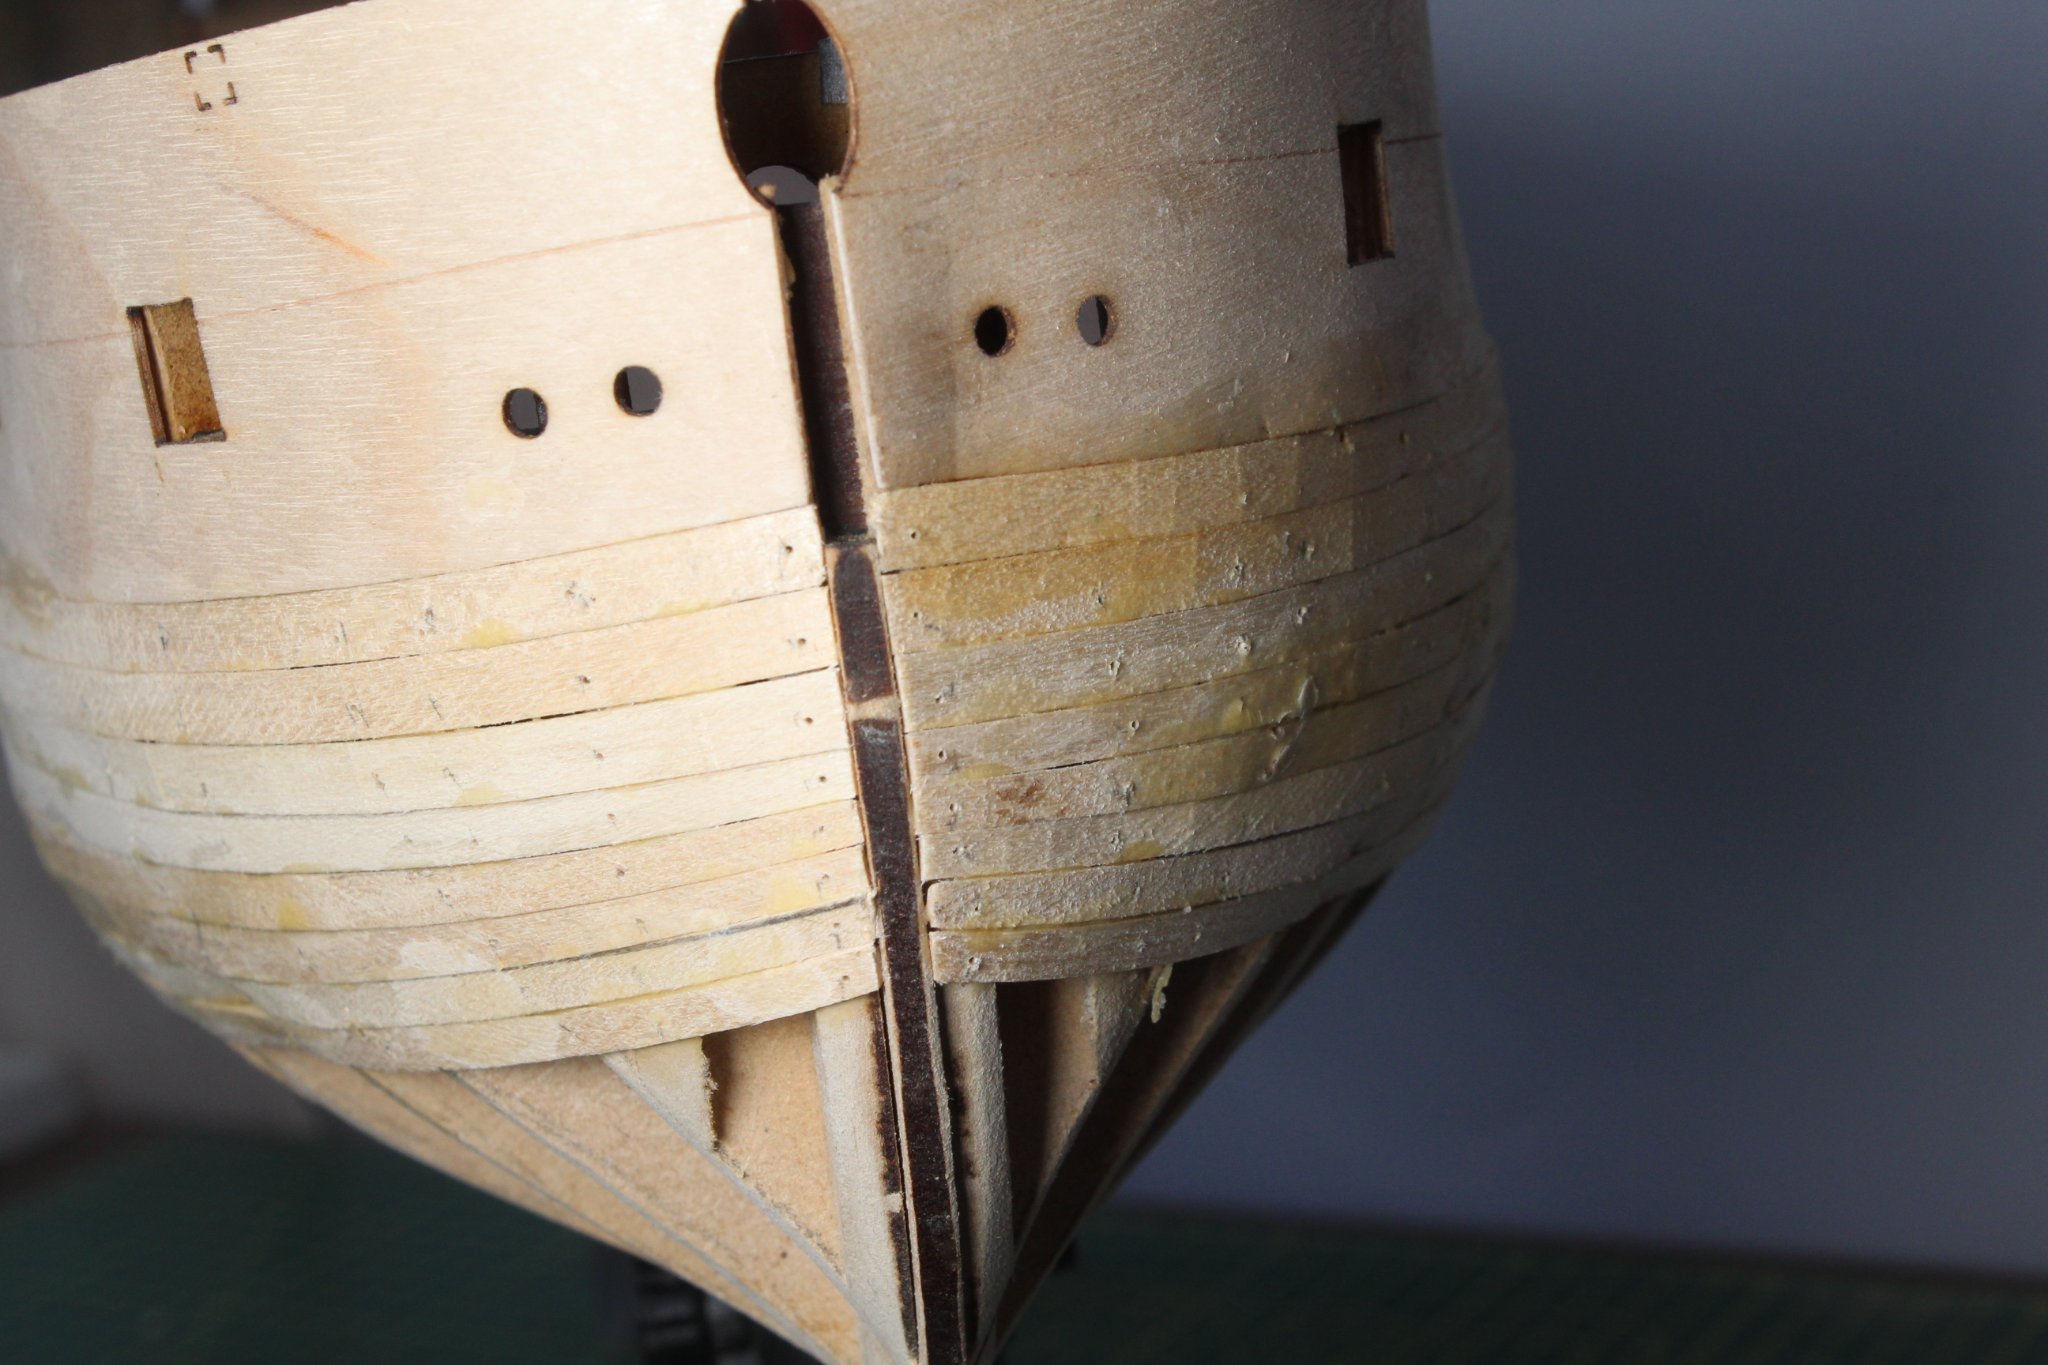
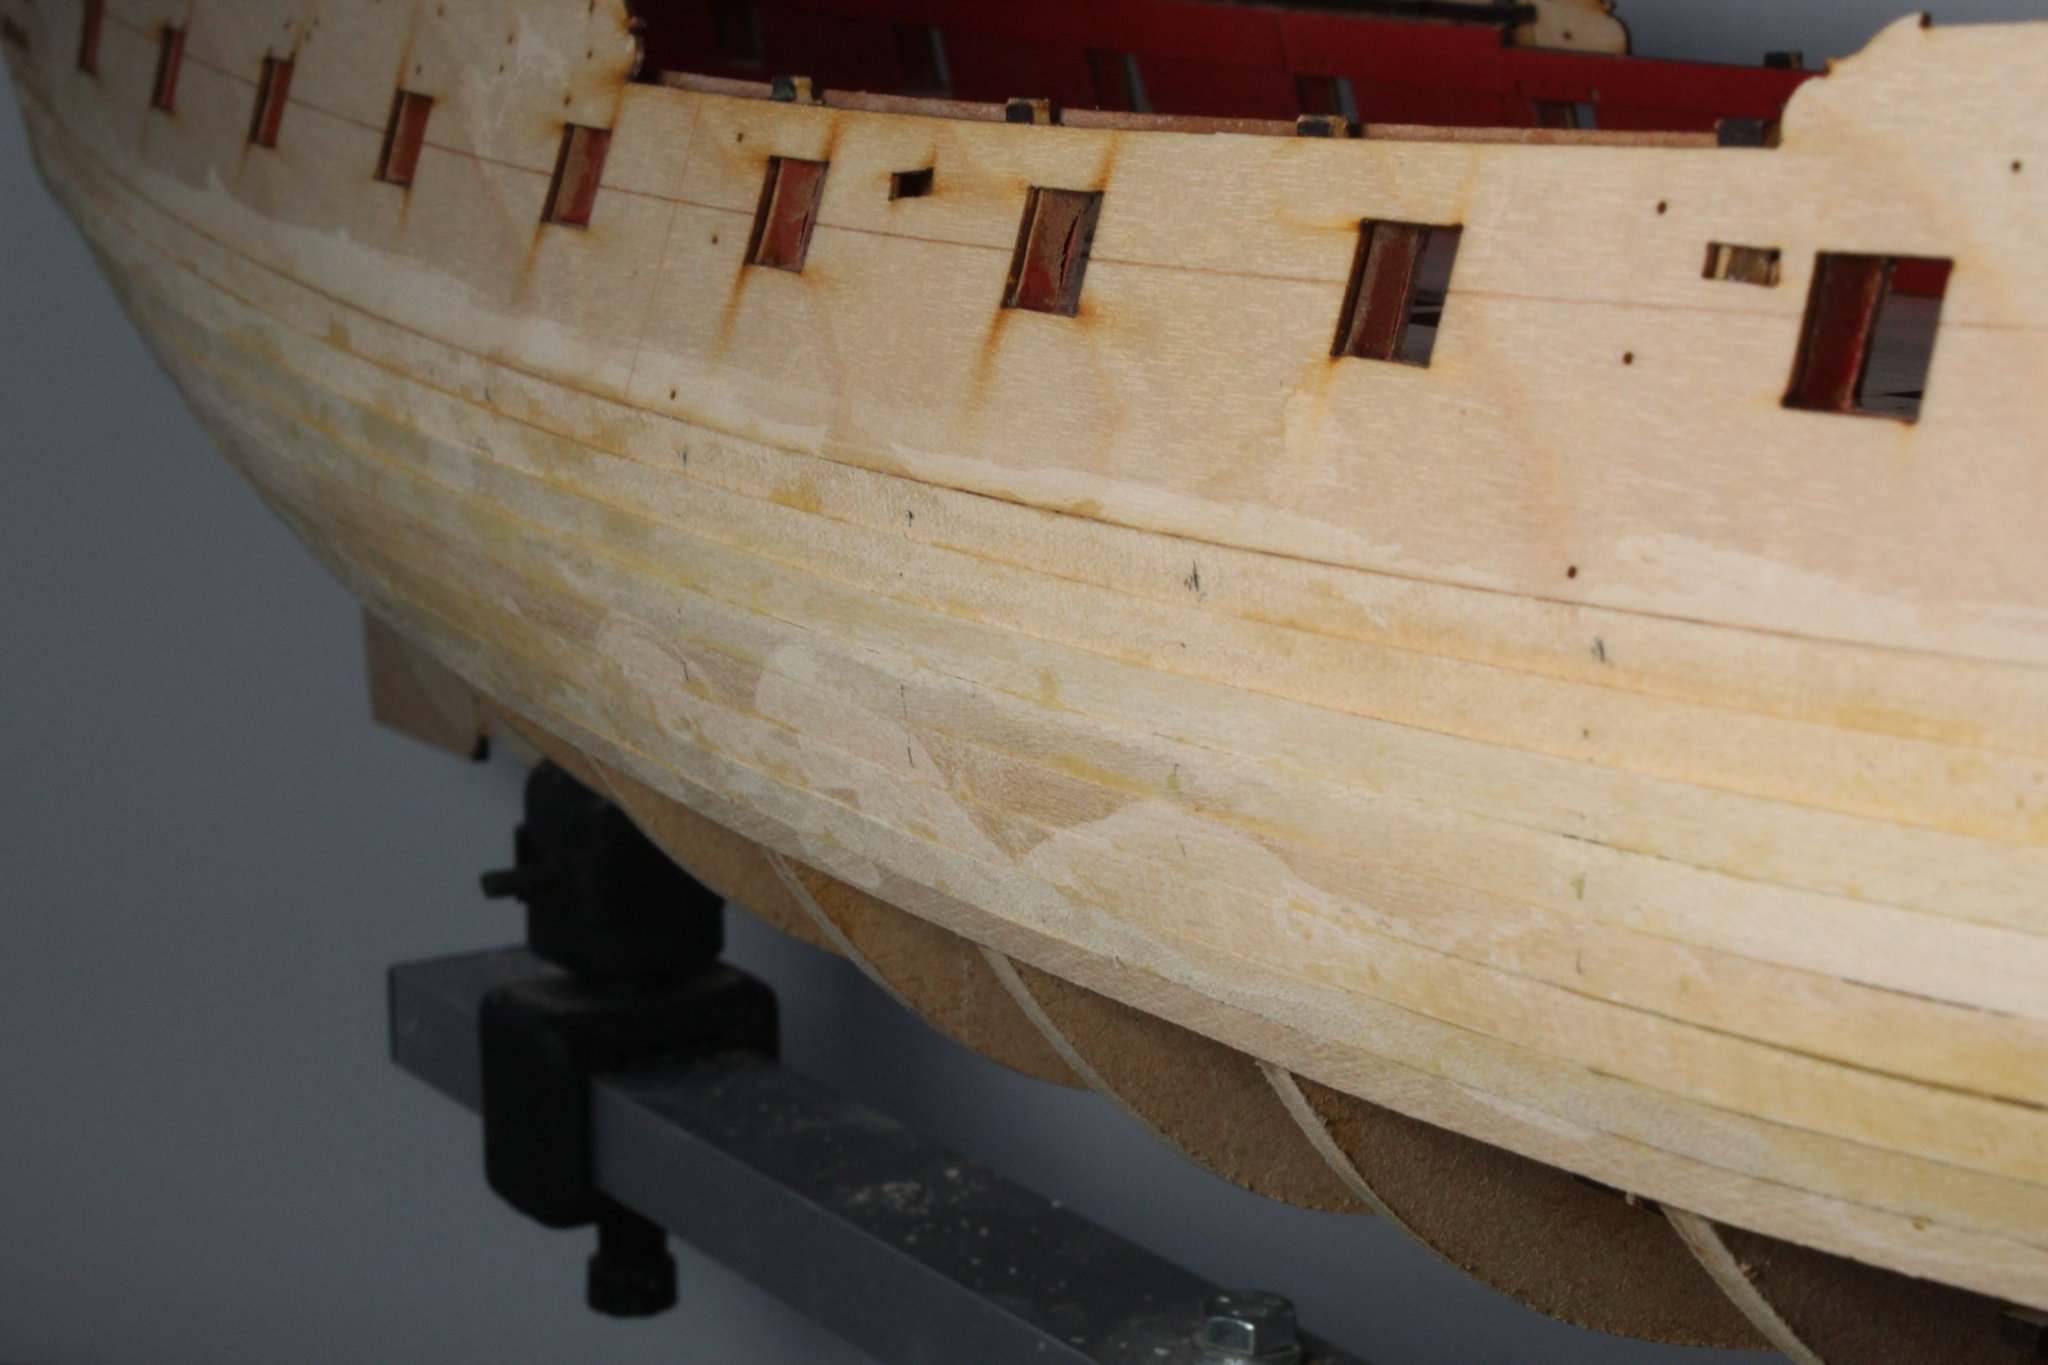
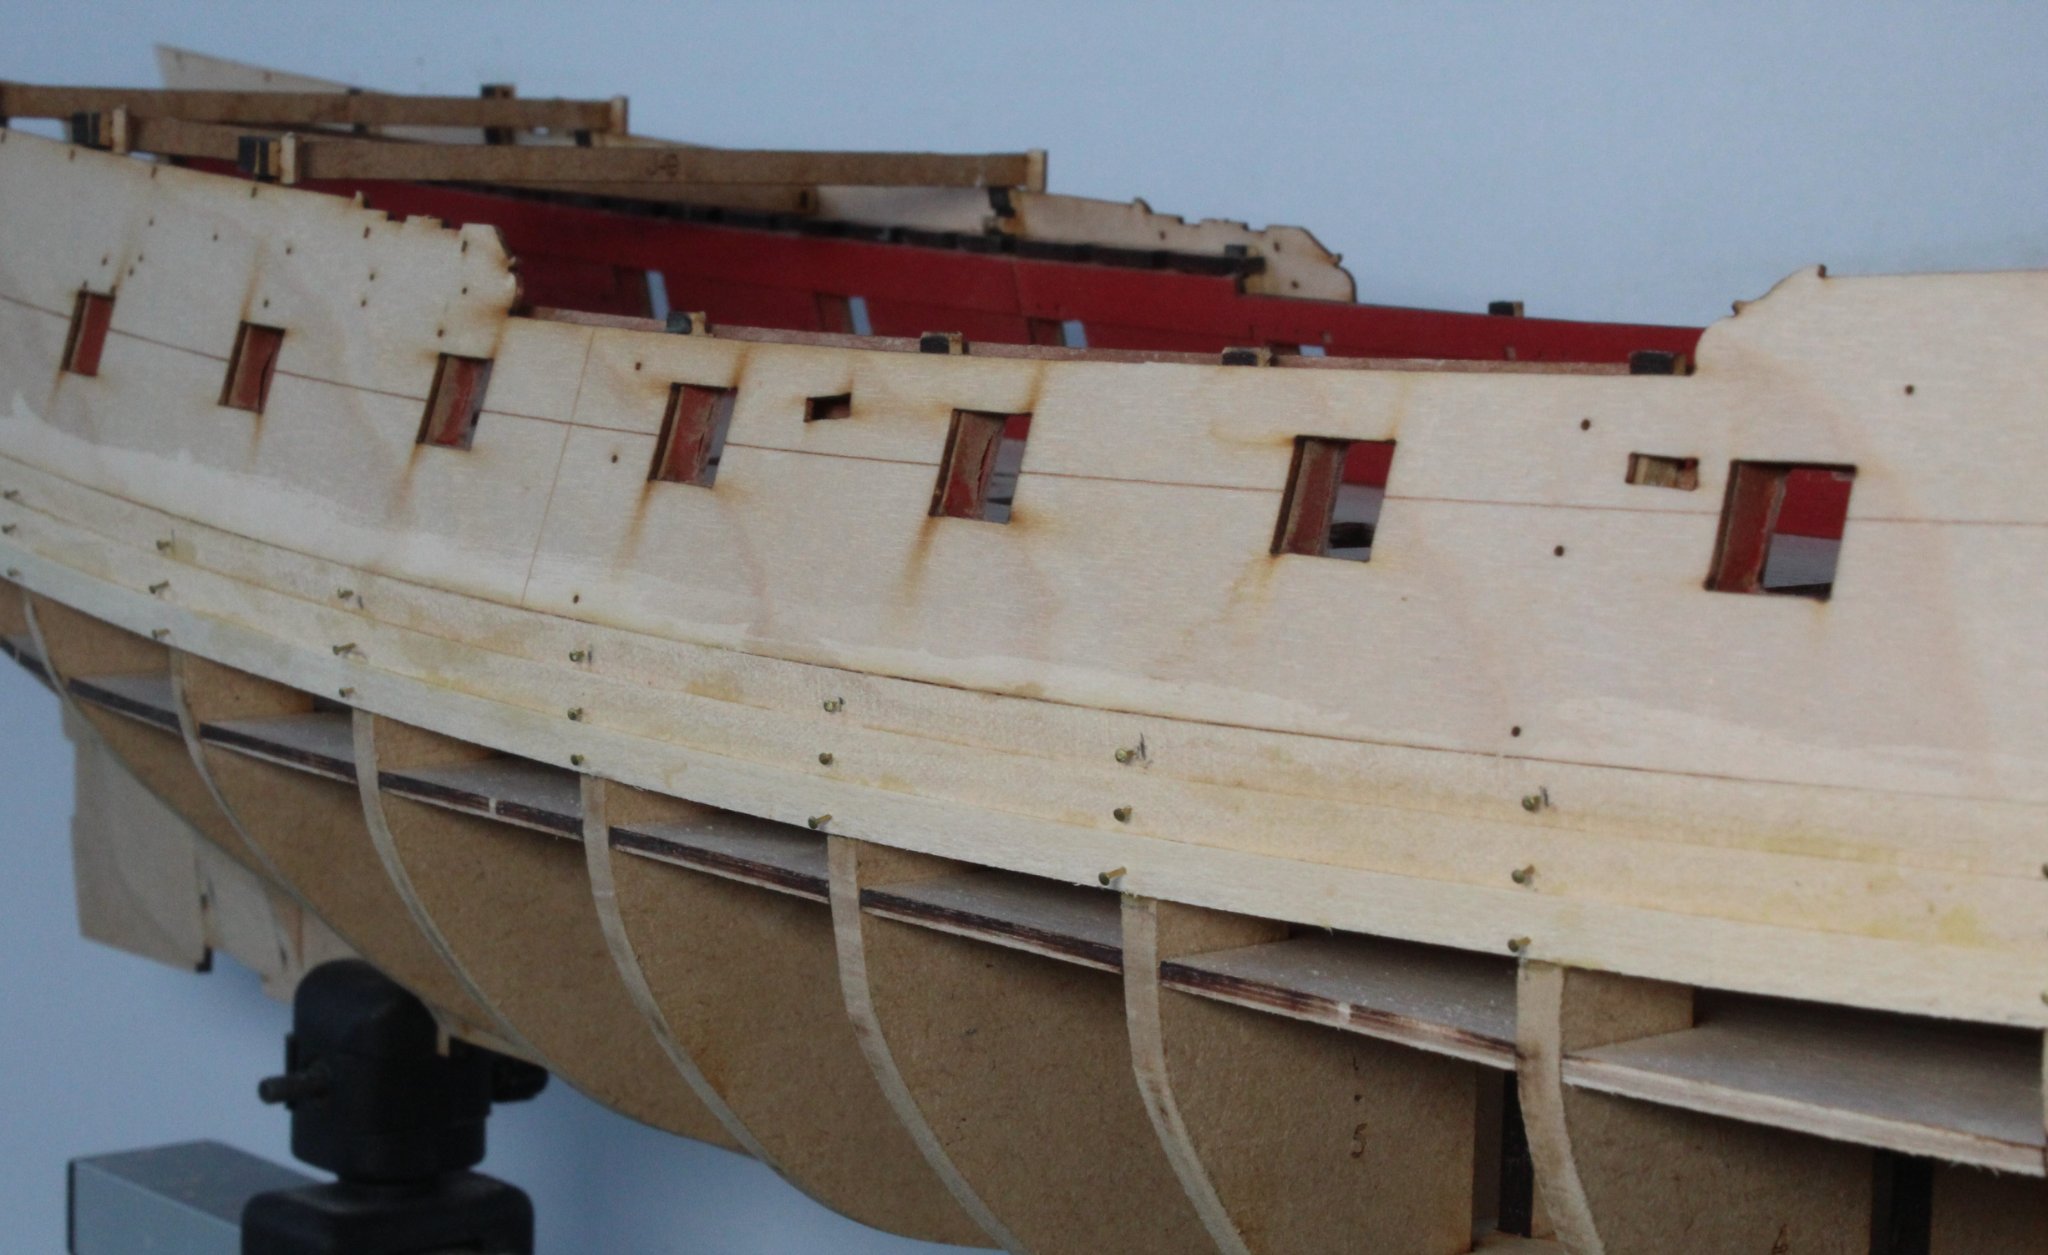
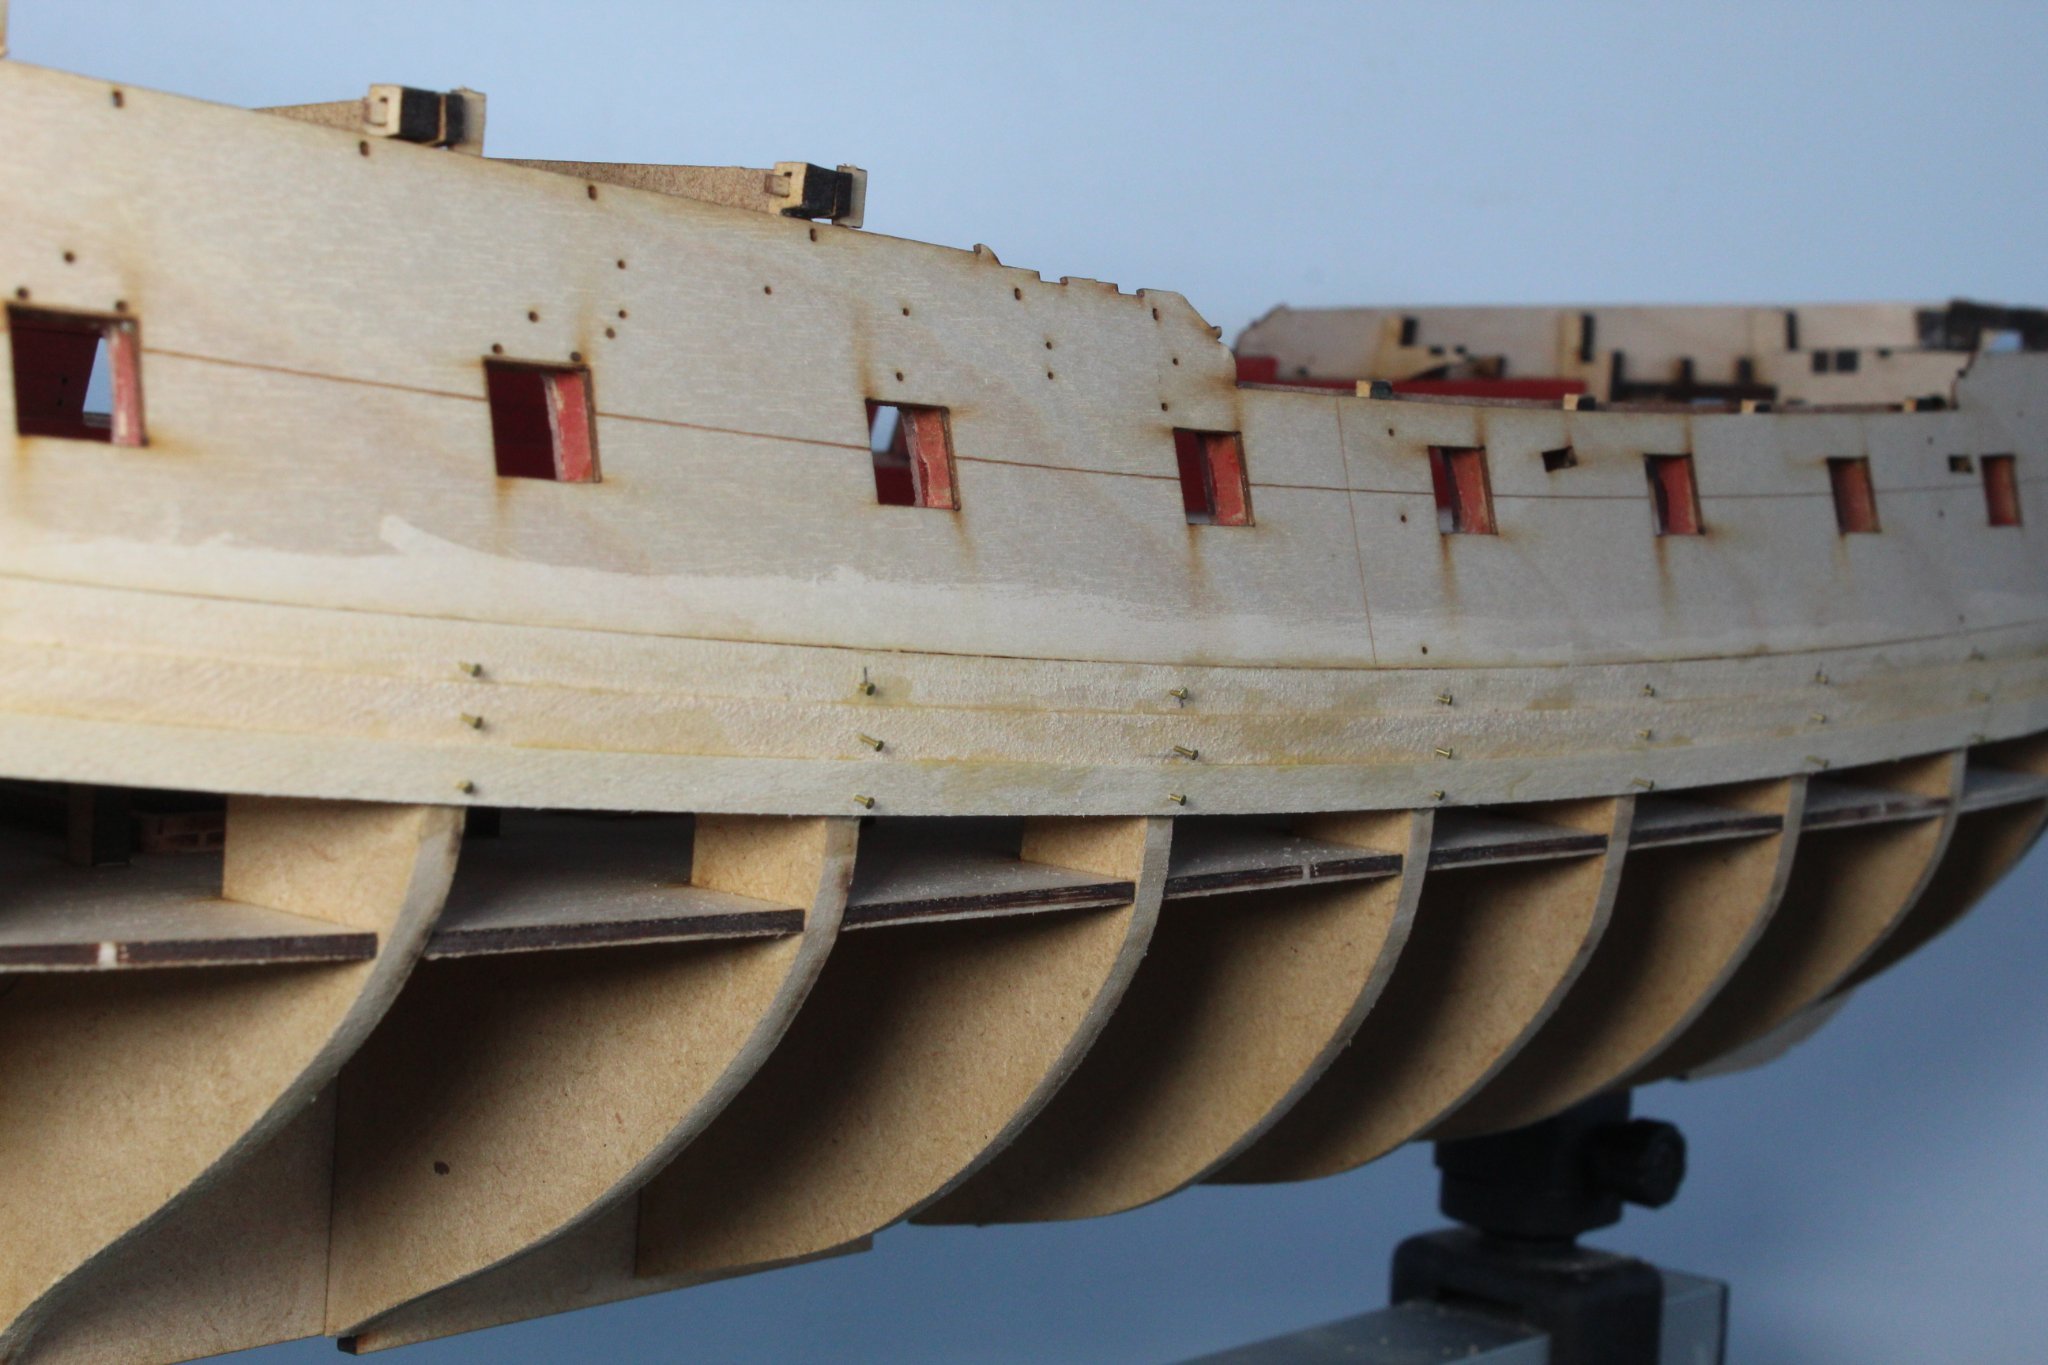
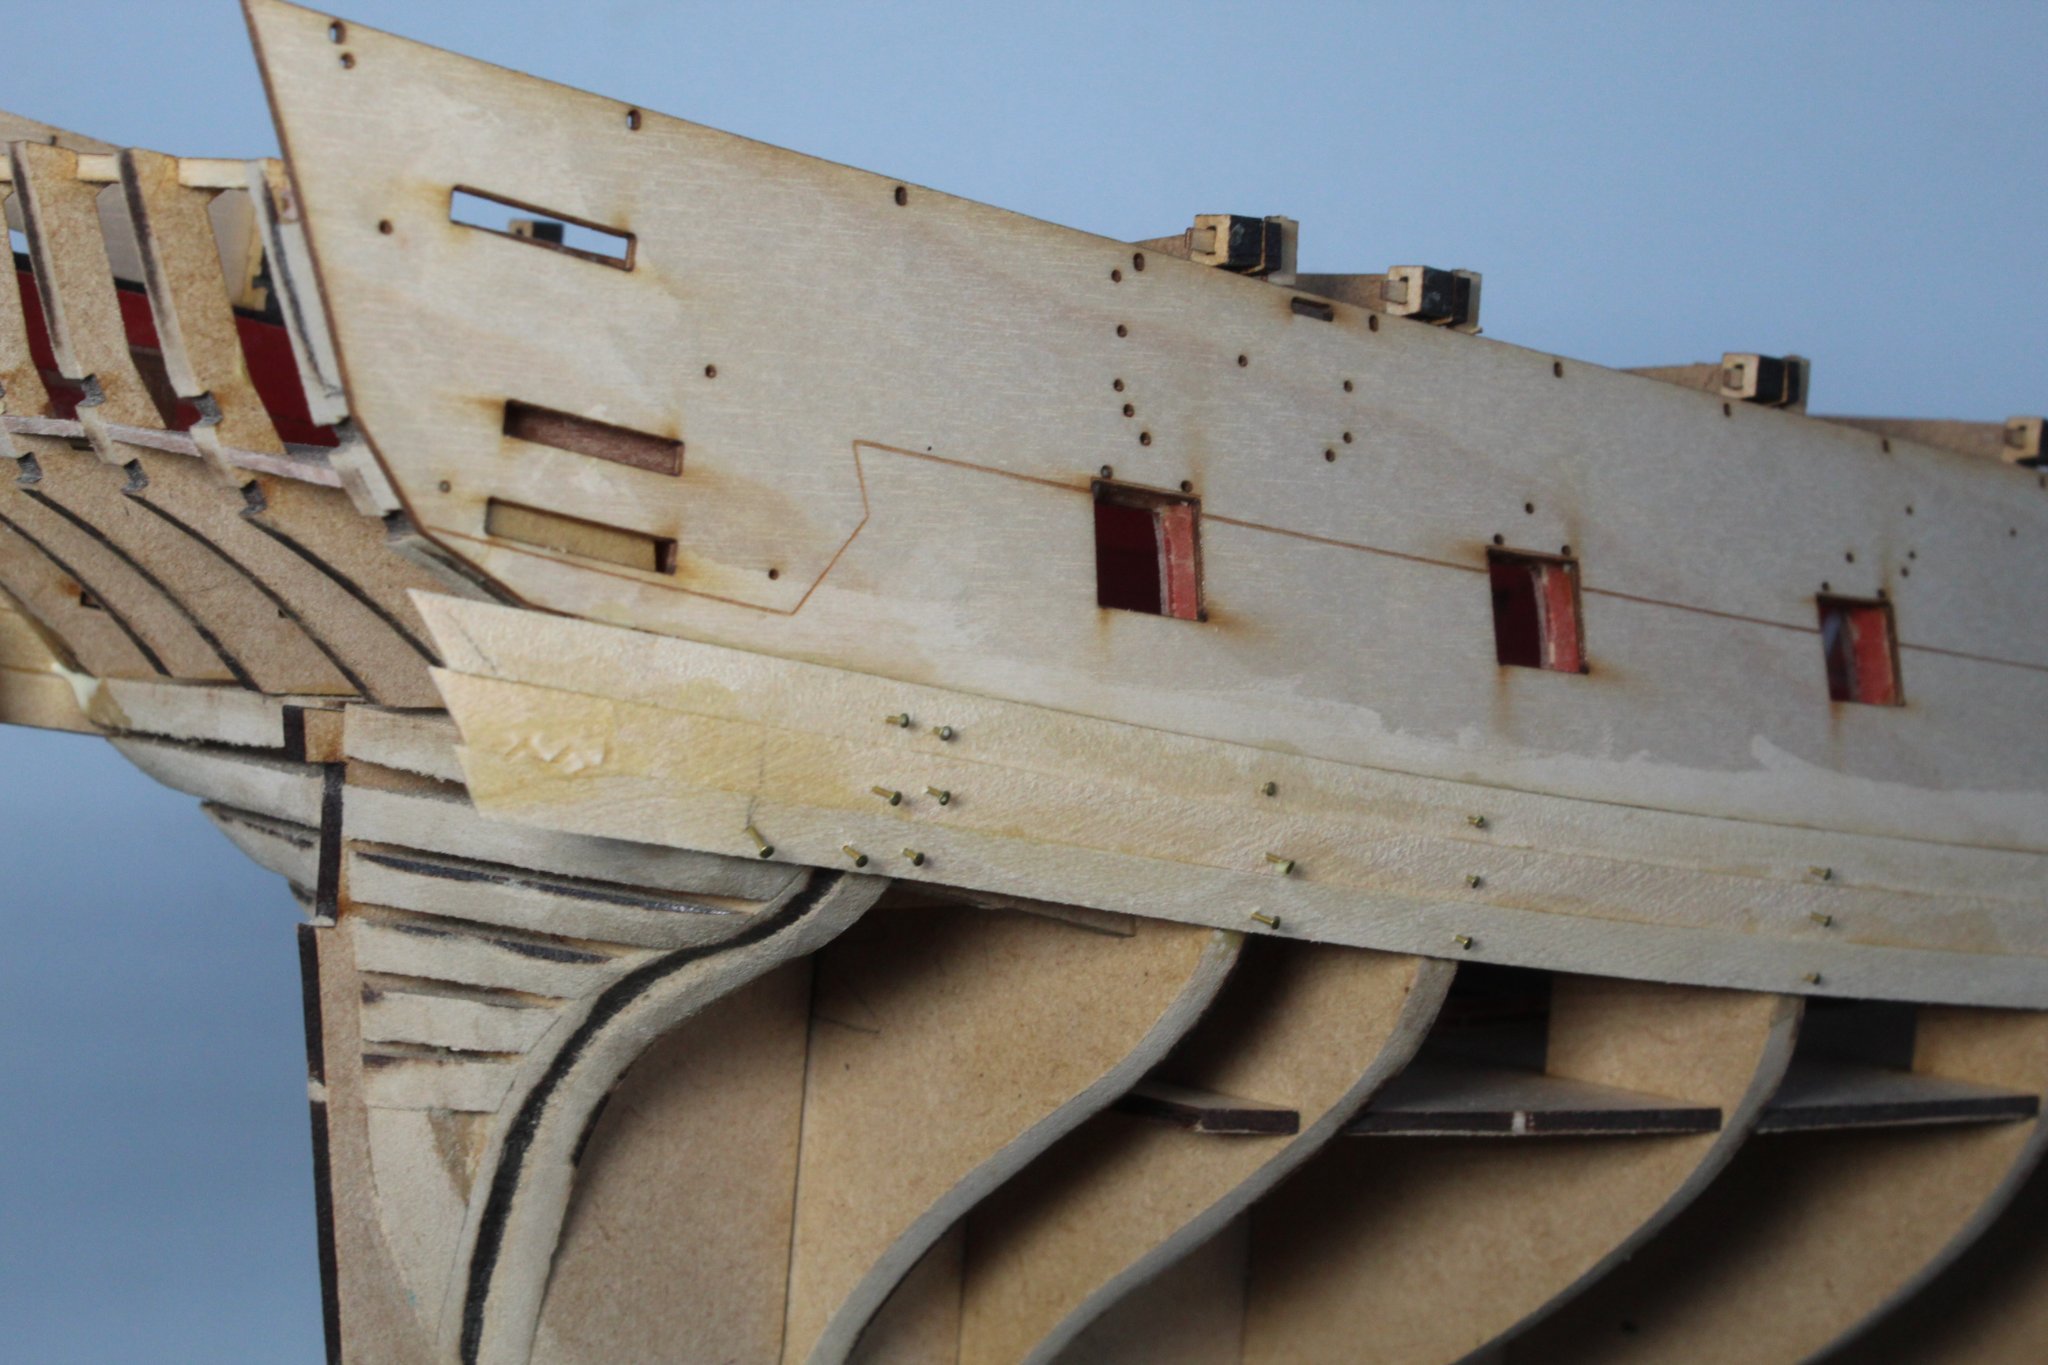
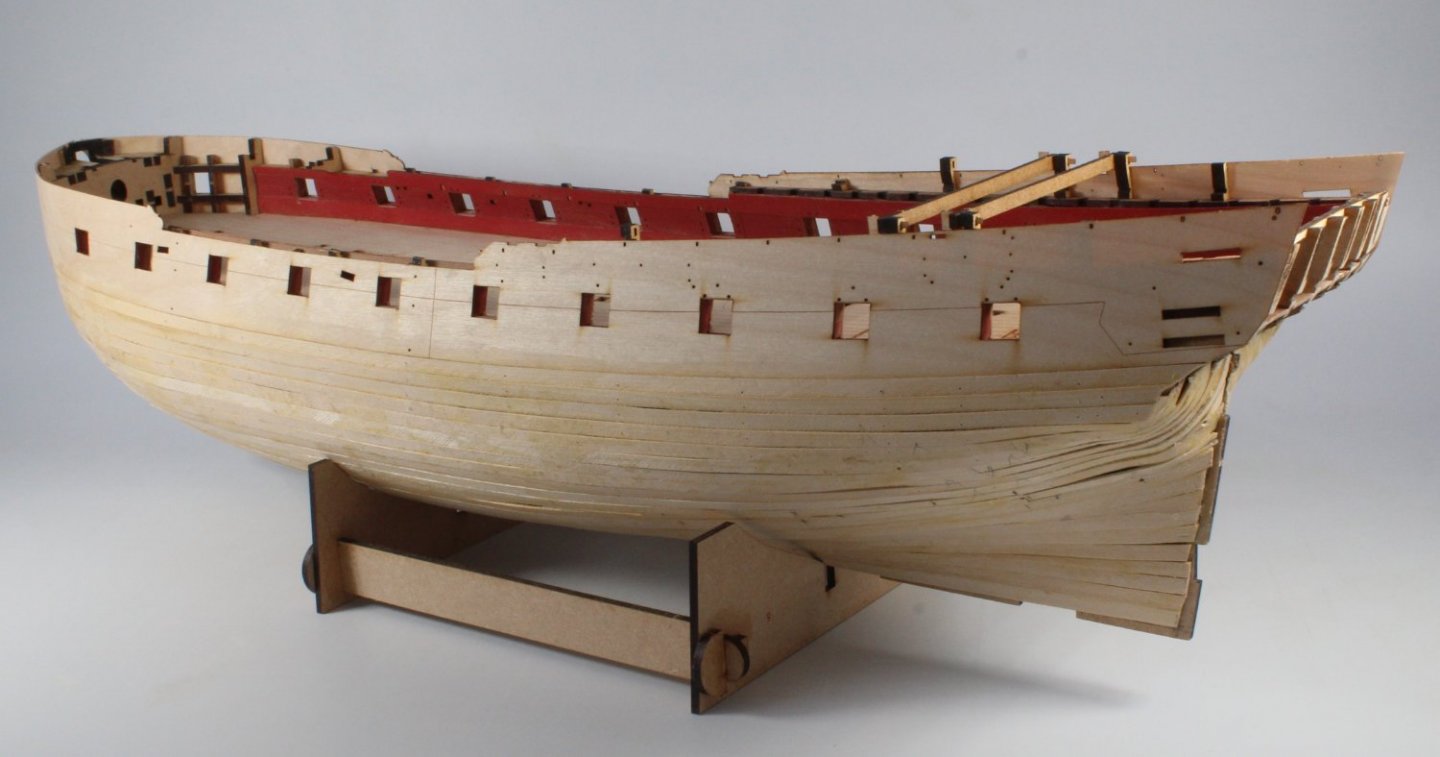
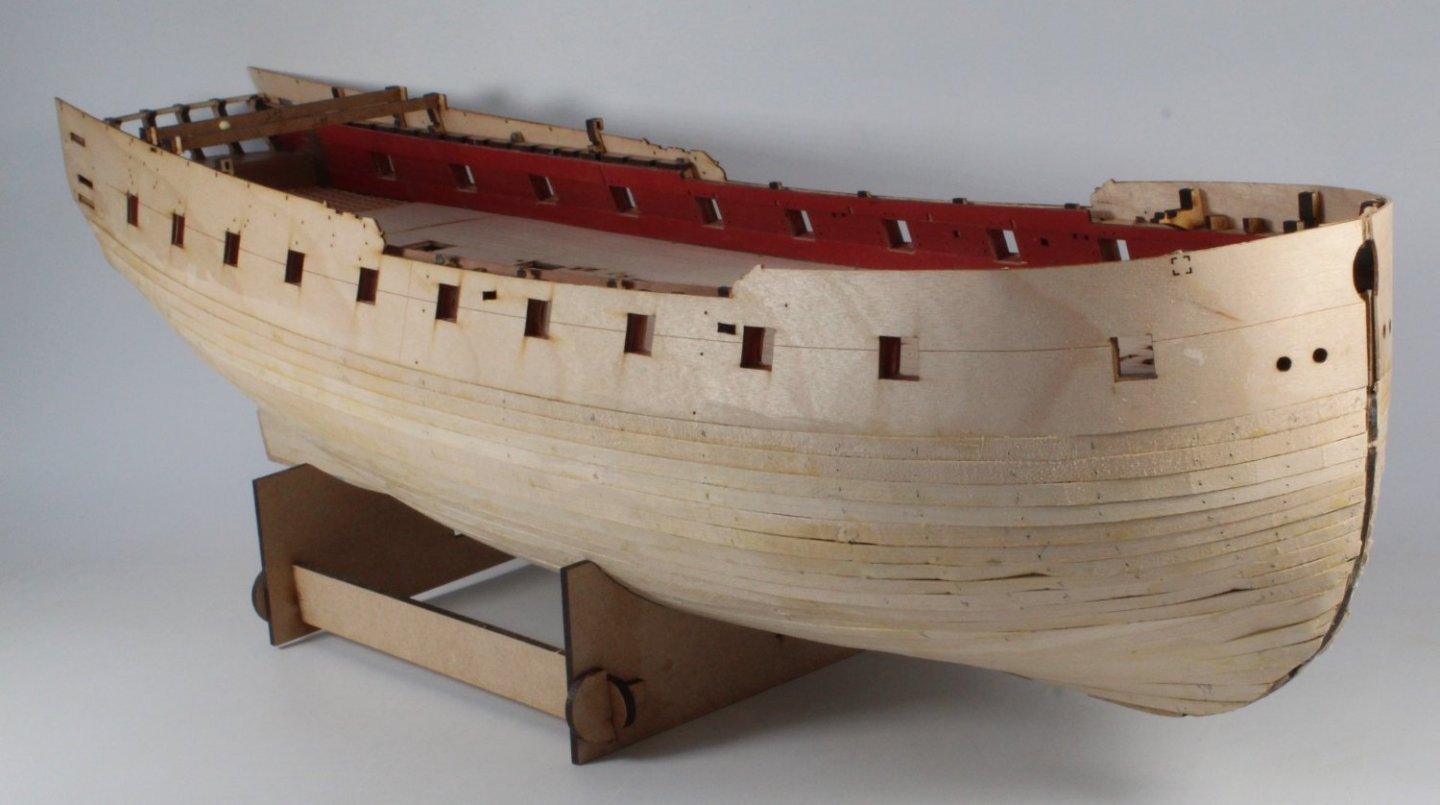
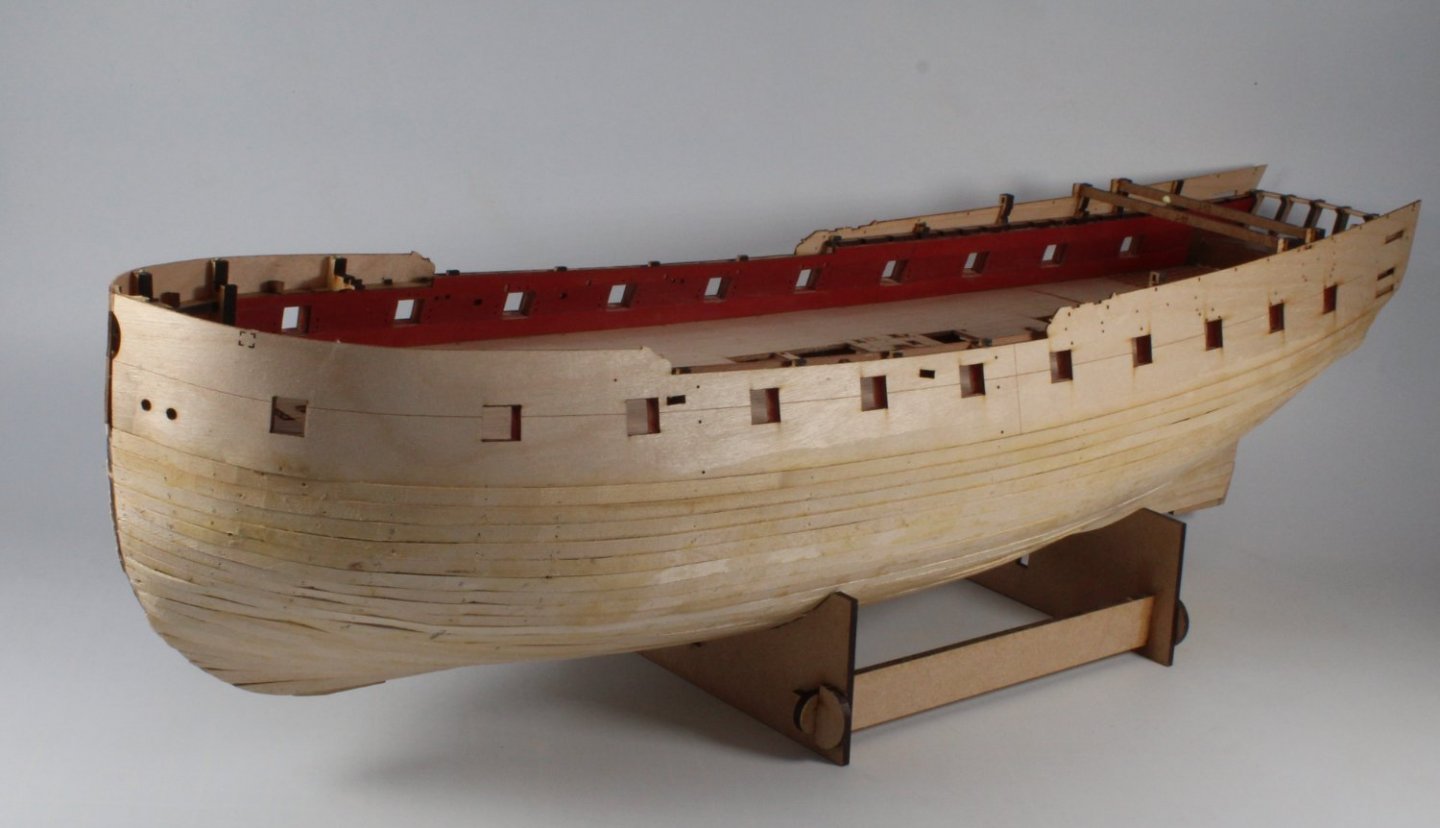
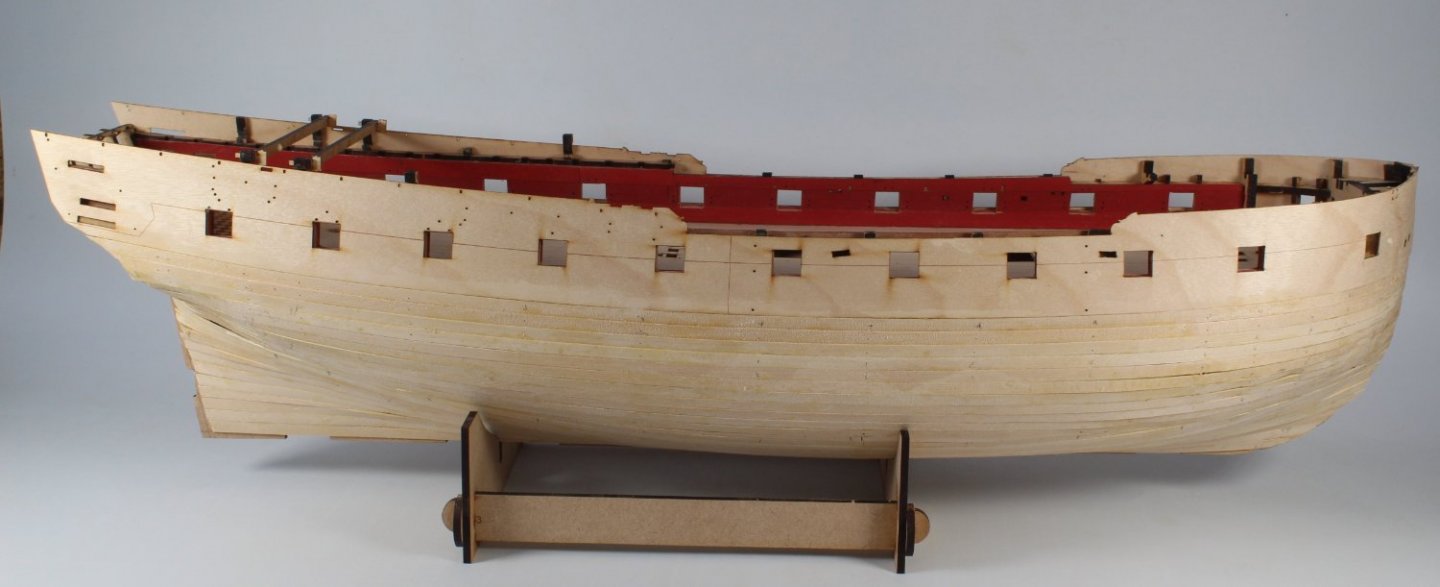
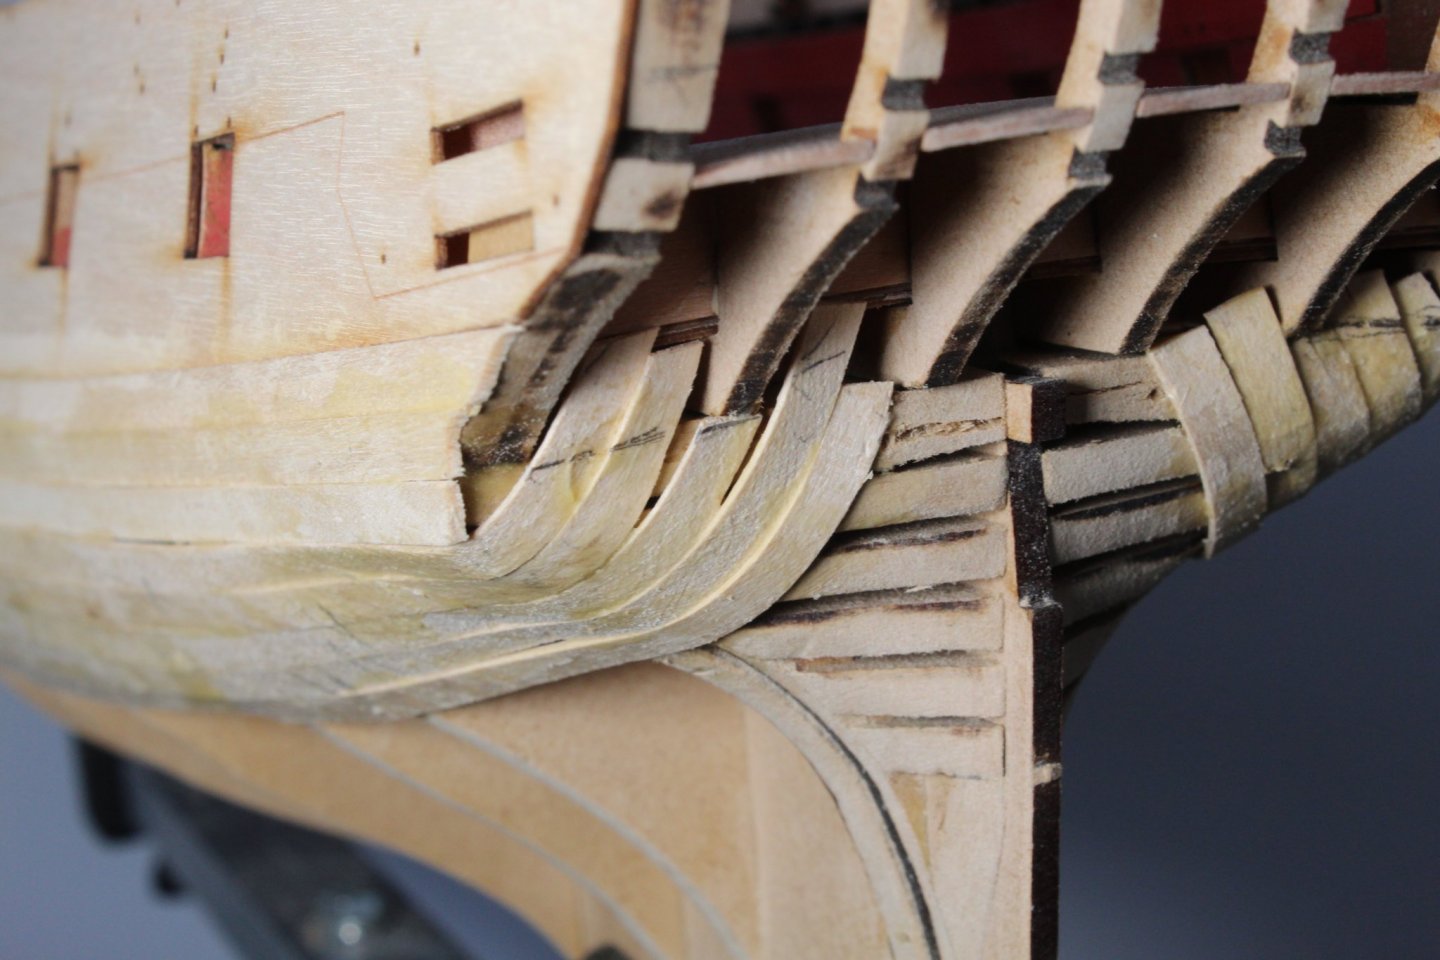
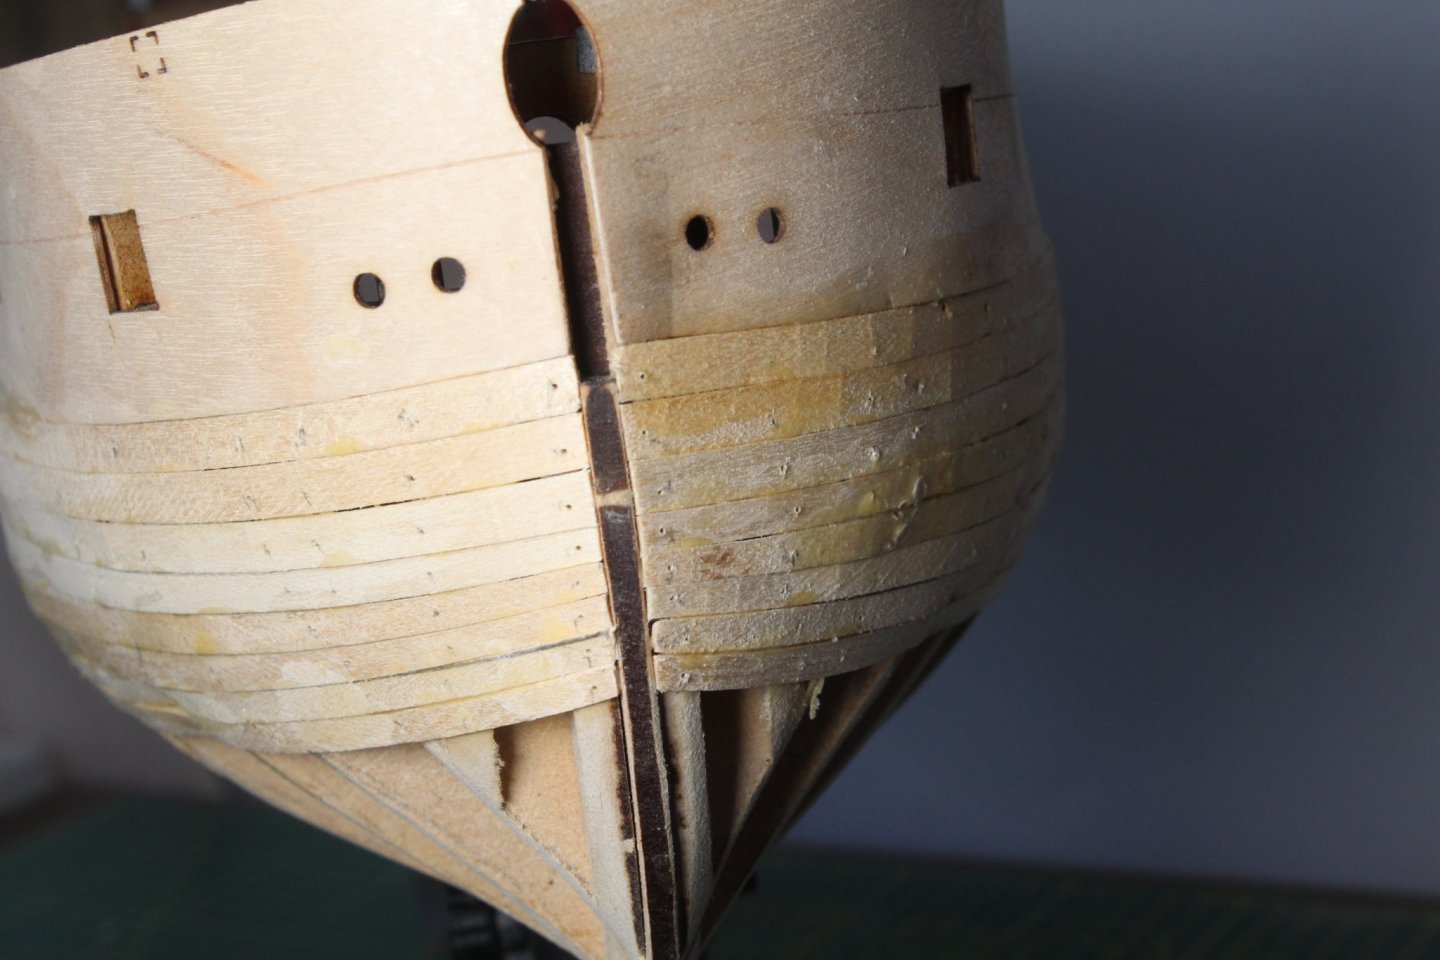
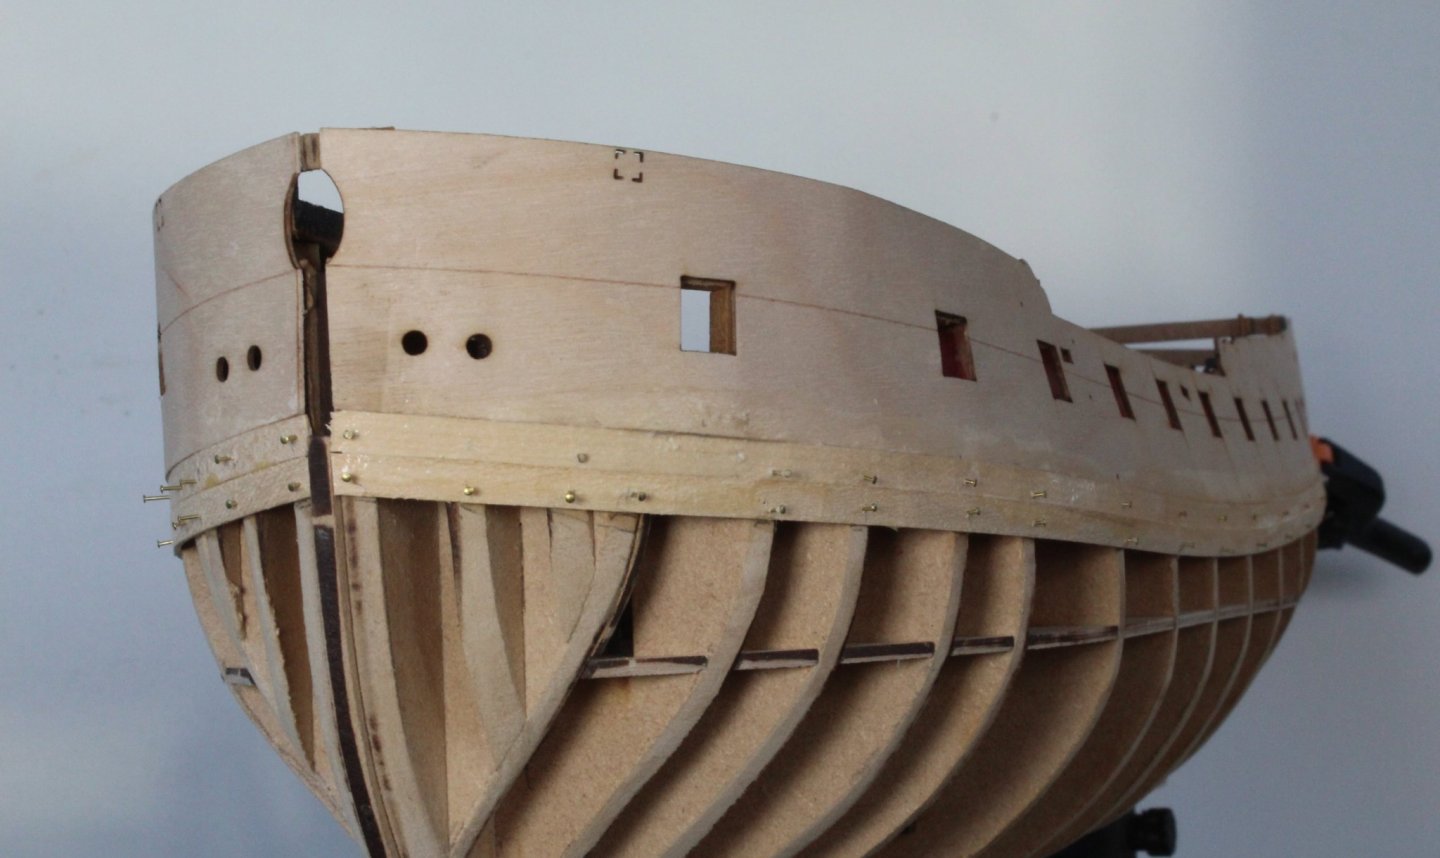
It has been a while since my last post. I have been working on finishing the 1st planking which is now complete. My completed planking is not great but it is much improved compared to my 1st planking on my previous models. Of course as this is only a base for the 2nd planking the standard of the 1st planking is not a big issue once hull has been sanded smooth. Picture of right-hand bow, now ready to be sanded smooth Picture of left-hand bow, now ready to be sanded smooth Picture of left-hand side, now ready to be sanded smooth Picture of right-hand side, now ready to be sanded smooth The stern does not look pretty, but will be Ok once sanded smooth. You will note I stopped the planks short of the stern edge so they can be tapered to allow the 2nd planking to sit flush with the stern post and keel.

- 476 replies
-
- 11
-
-
- sphinx
- vanguard models
- (and 1 more)
-
Progress has been slow over the last few days as we have a little chaos merchant staying with us for a few day, our 13 month old granddaughter. I have been able to make some progress with the build and I have now completed the 1st planking in the band 1 area. For the most part it has gone reasonably well, and is without doubt my best attempt at the 1st planking a model. I started tapering the planks after the first 3 planks had been fitted. The stern area does not look brilliant and will require a couple of small filler pieces. The right side is much better The midships is looking good and should not require too much sanding or filler The bow area is looking good (on the left hand side). Again should not require too much sanding or filler to get a nice smooth finish. I have been fitting planks in pairs, left and right and although this will be covered by the 2nd planking it is quite symmetrical. As can been seen I managed to damage a plank on the right hand bow area. I could remove /repair the damage plank and replace with a small replacement piece, but I will probably just use some filler to correct as the 2nd planking will cover up the damaged area The right side looks better midships to stern


- 476 replies
-
- 11
-
-
- sphinx
- vanguard models
- (and 1 more)
-
That is the plan, based on 7 planks per band I am aiming for around 17.5mm to 21mm at the stem post. It will be a case of trial and error before I decide on banding.
- 476 replies
-
- 1
-
-
- sphinx
- vanguard models
- (and 1 more)
-
I have made a start on the first planking today. I took my time with fitting each plank. The first task was to add a chamfer to the top edge of each plank. With the plank held in position I marked the start of the curve required for the bow section. I used my planking bending tool to create the required shape. Next I trimmed the edge of the plank so it was a nice fit at the stem post. With the plank held in place I marked the position of each bulkhead on the plank, and also the bottom edge of the plank on the bulkhead. Next I applied some titebond original to the bulkheads (up to the midpoint) and pinned the plank in place. I then added glue from the mid point to the stern and pinned the plank to the bulkheads. The first plank have been fitted to both the right and left hand side The next row of planks have been fitted. There is a slight issue with the upper pattern just below gun port 1 where it is a bit proud. I have a plan to resolve this issue without the need to fill using wood filler. The third row of planks have now been fitted, no tapers required so far.

- 476 replies
-
- 9
-
-
- sphinx
- vanguard models
- (and 1 more)
-
Thanks, still baffled how I missed it when I first fitted them.
- 476 replies
-
- 2
-
-
- sphinx
- vanguard models
- (and 1 more)
-
I am much happier this time around than I was after my first attempt. Should be able to start the 1st planking now.
- 476 replies
-
- 3
-
-
- sphinx
- vanguard models
- (and 1 more)
-
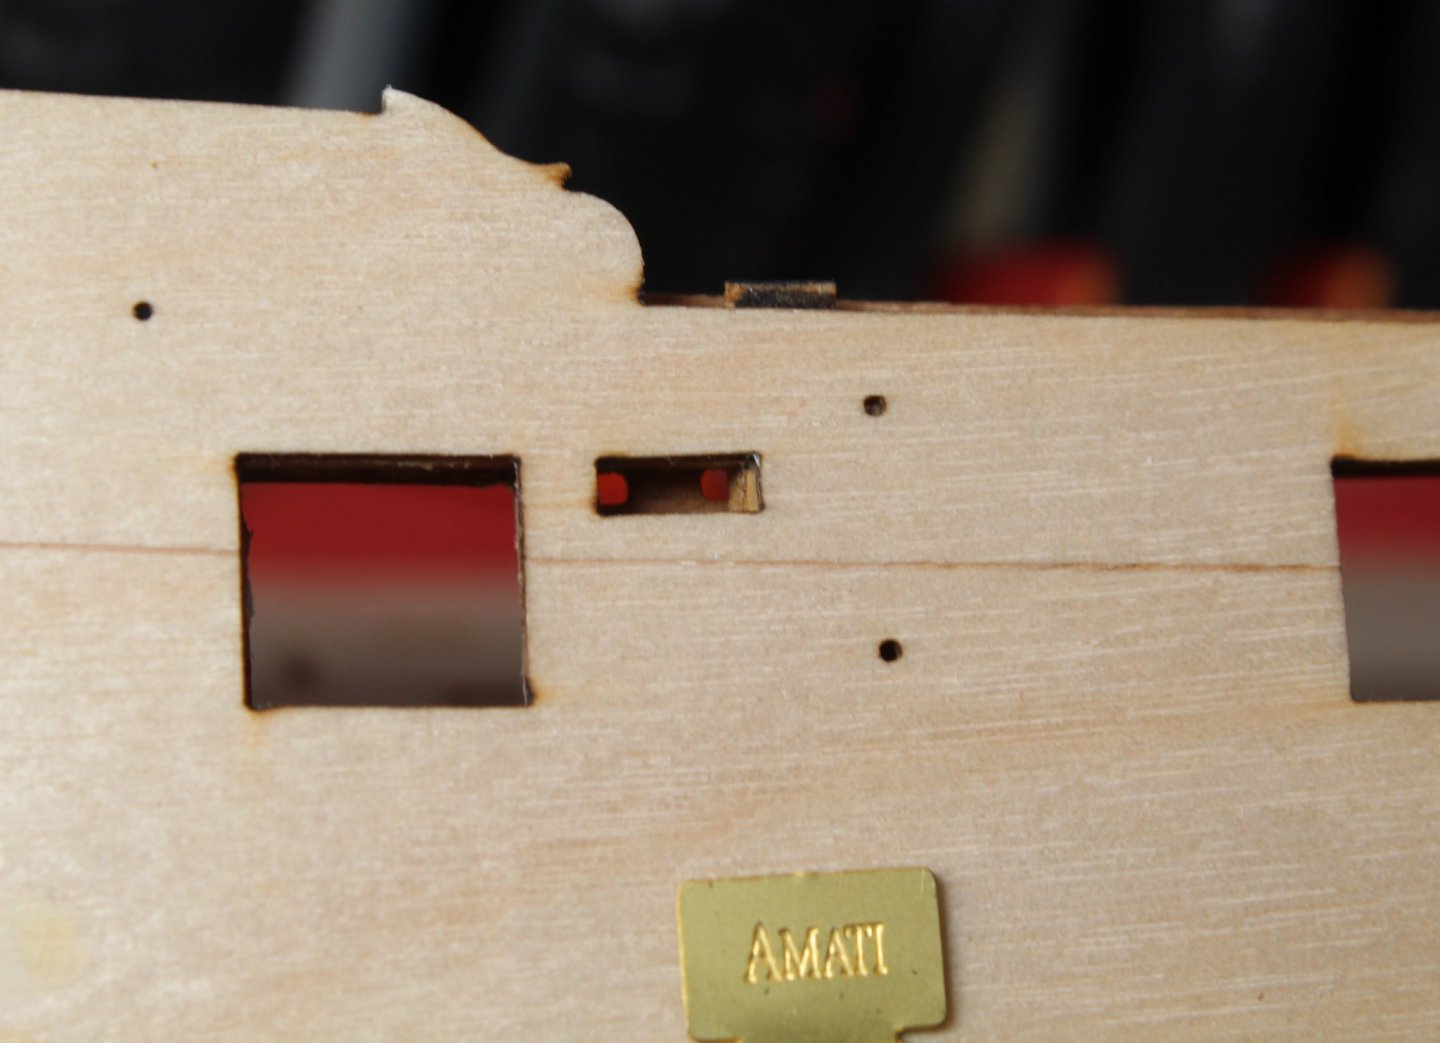
Attempt two at fitting the upper side patterns has gone much better. @DelF I have not used all my clamps as I had 20 unused clamps, but I still used quite a few. The bow looks much better, the left hand pattern is perhaps a tad high, but I'm happy with how it looks. The MDF part (sitting proud) can be trimmed. It looks worse on the photo. The left hand pattern is correctly aligned with all the gun ports this time around. Gun port alignment on the left hand side.

- 476 replies
-
- 5
-
-
- sphinx
- vanguard models
- (and 1 more)
-
Great advice. I have marked the position and done another trial fit. The left hand pattern has now been glued in place. I have done a few visual checks and everything looks good so far. Rather than starting midships and clamping fore and aft this time I started at the bow and worked my way back.
- 476 replies
-
- 3
-
-
- sphinx
- vanguard models
- (and 1 more)
-
Thanks, I do feel better now both patterns have been removed without any damage to the hull or patterns.
- 476 replies
-
- 2
-
-
- sphinx
- vanguard models
- (and 1 more)
-
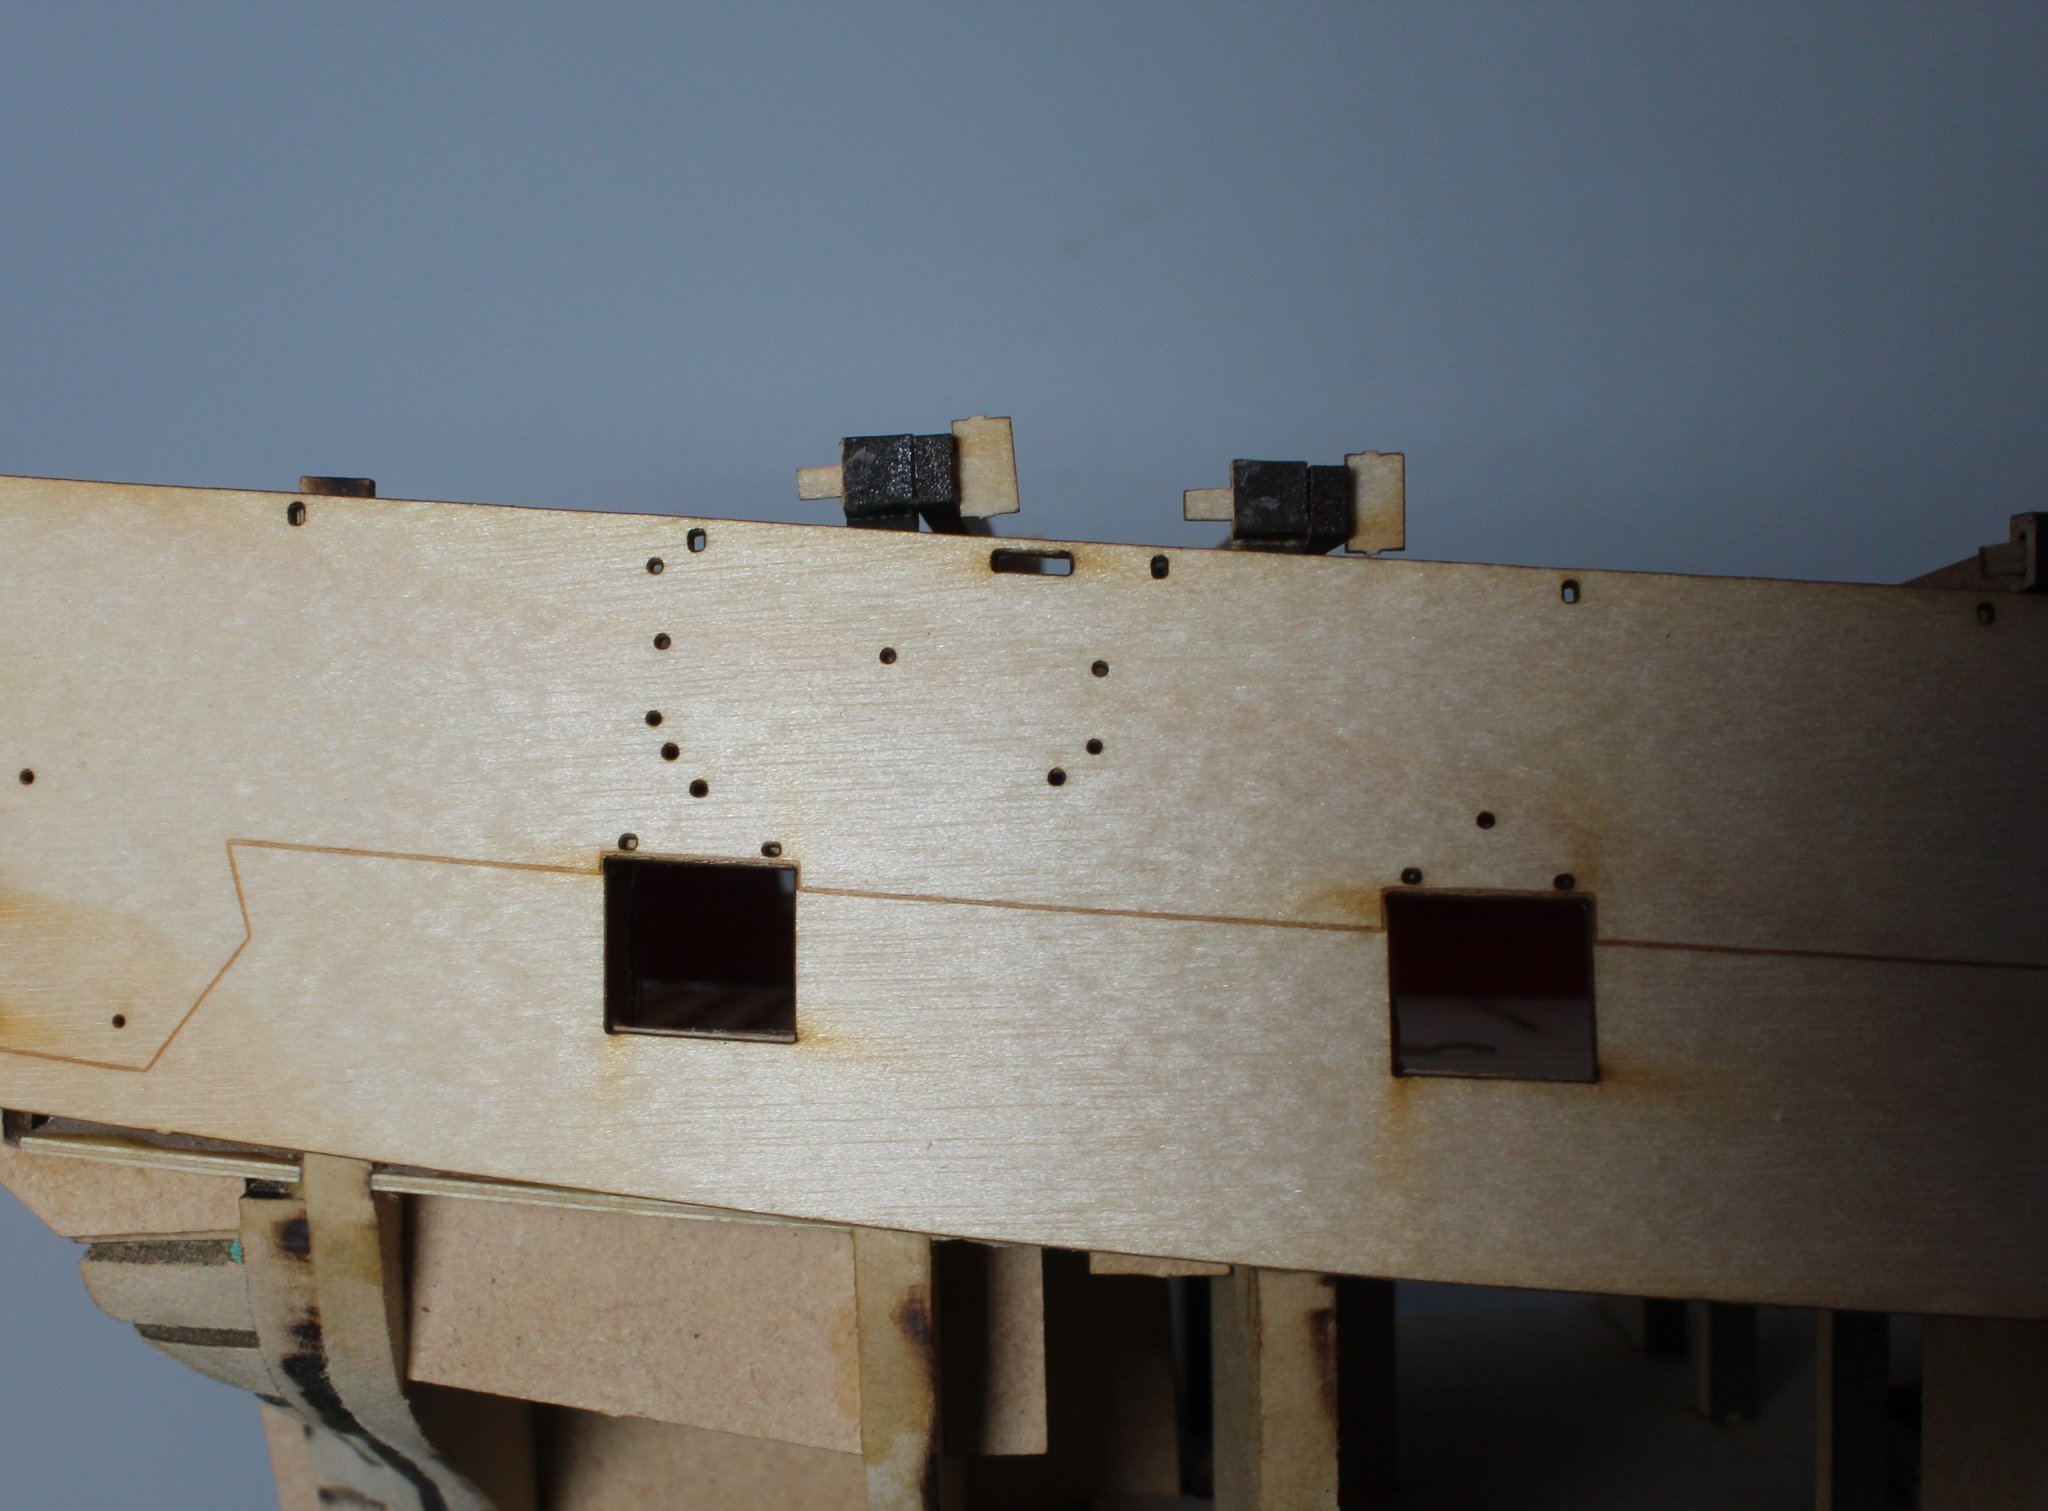
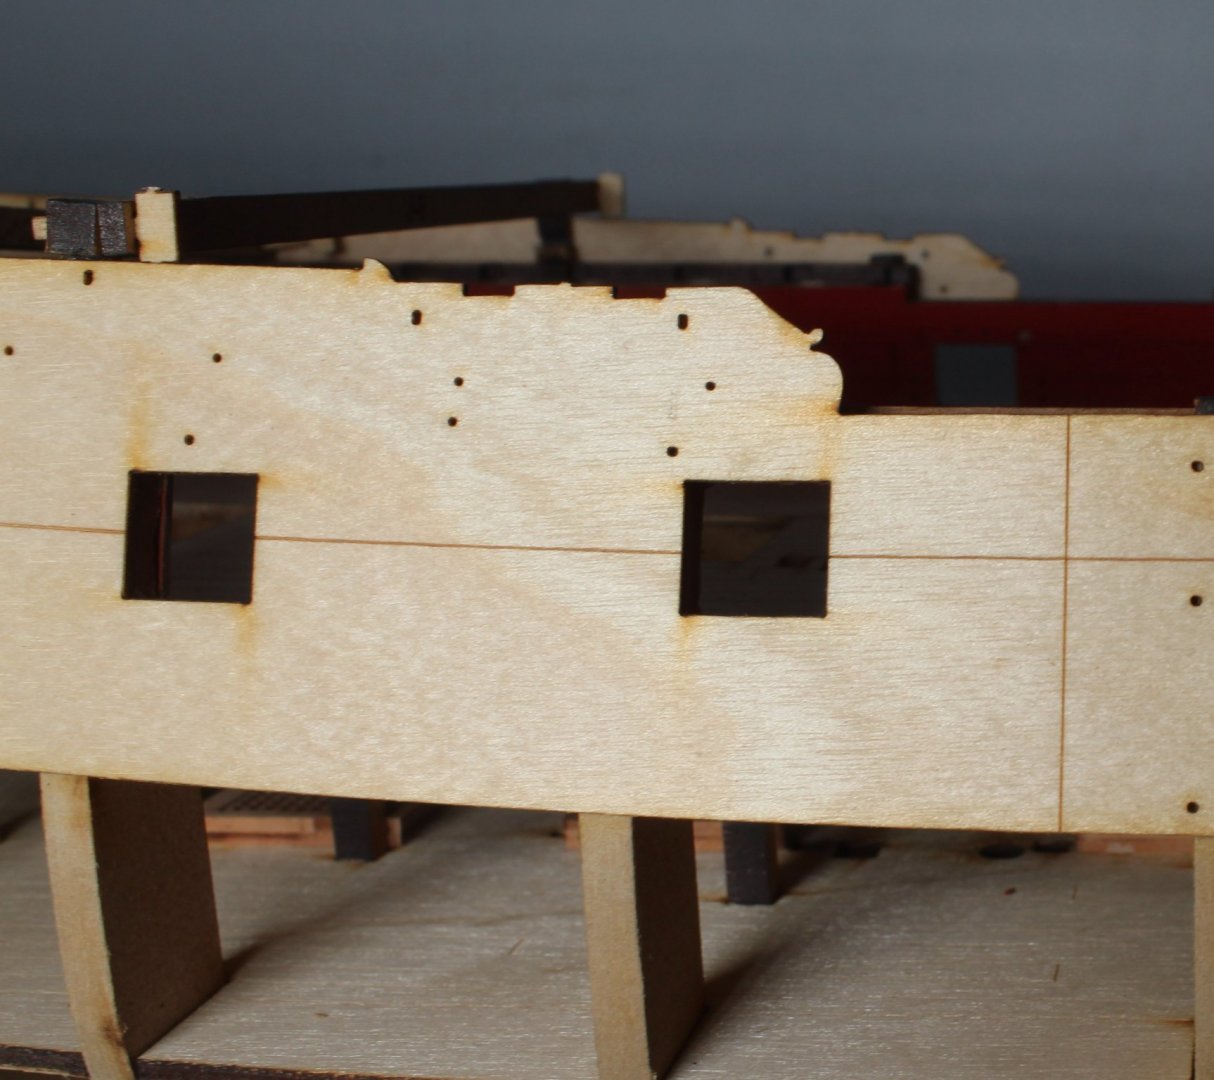
I started sorting through the 1mm x 650mm by 5mm 1st planking strips this morning, 24 were measured at greater than 1mm thick, 19 were measured at being between 0.9 and 0.99mm thick and the remaining 6 were between 0.8 and 0.89mm thick and 1 measured 0.75mm thick. I also have 11 x 1m x 5mm planking strips from my stock of materials which are greater than 1mm thick. I can plank the hull starting with the either the 0.8 to 0.89mm group (or the > 1mm group) and then move to the 0.9 and 0.99mm group and finally using the remaining group. Next I removed all the clamps from the upper patterns. It turns out I made a really mess of fitting the upper patterns. It is clear I did not pay as much detail to fitting the patterns as I thought I had. The right hand pattern look good at the midships which is where I started with the the glue and clamping process. It looks Ok at the stern also, maybe a fraction low at the last gun port opening but that could just be the camera angle Now take a look at the bow. I have no idea how I managed to misalign the pattern. I was convinced I had checked and checked again as the patterns were being clamped, but clearly this was not the case. I do remember releasing the clamps and around the bow at one point as I needed to readjust the position of a couple of them. I assume this is where the error occured. It is not a good look. I then took a closer look at the left hand pattern I noticed it would need shifting both vertically (around the bow) and laterally as a small edge of the right hand edge of the vertical gun port patterns were visible. In the past I would have lived with this error and attempt to cover up the mistake my trimming the gun ports and top edge of the upper patterns. Armed with a jug of warm water, a paint brush and craft knife I decided I should try to remove the upper patterns and start over again. Starting at the bow end I brush copious amount of water into the glued joints and then very gently eased the upper pattern away from the hull using the craft knife blade to break the glue seal. In what seemed like an eternity, but was probably about 15 minutes the left hand upper pattern was successfully removed and no damage done. I repeated the process for the right hand pattern up to the the midships. When test refitting the the released pattern end it would run true and align around the bow area as designed. That said it is probably going to be much better to remove the right hand pattern. Once the hull has dried out it will require a light sand to remove any remains of the old glue before both patterns can be reattached.


- 476 replies
-
- 9
-
-
- sphinx
- vanguard models
- (and 1 more)
-
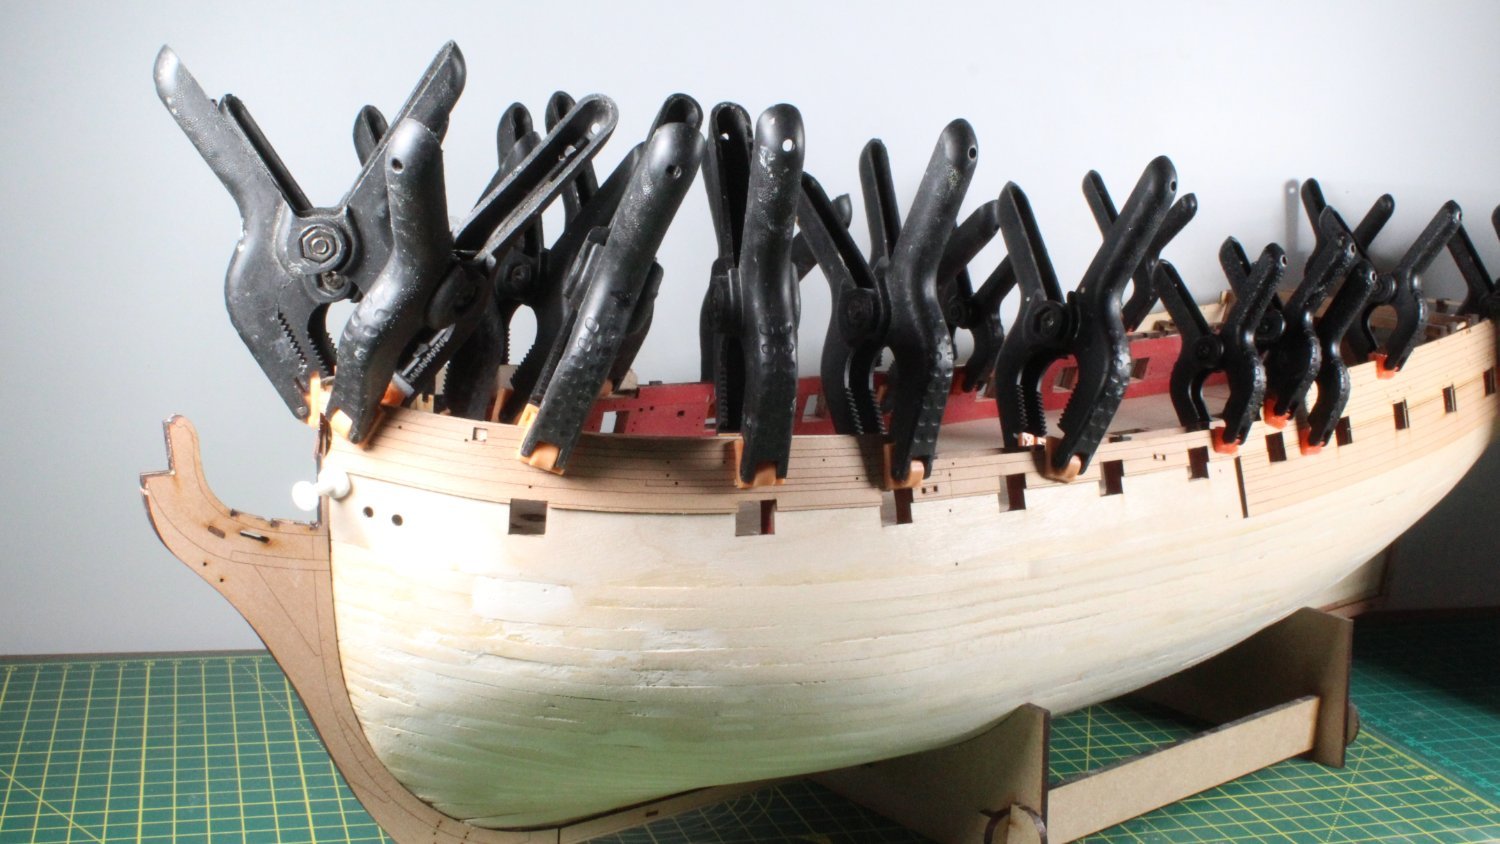
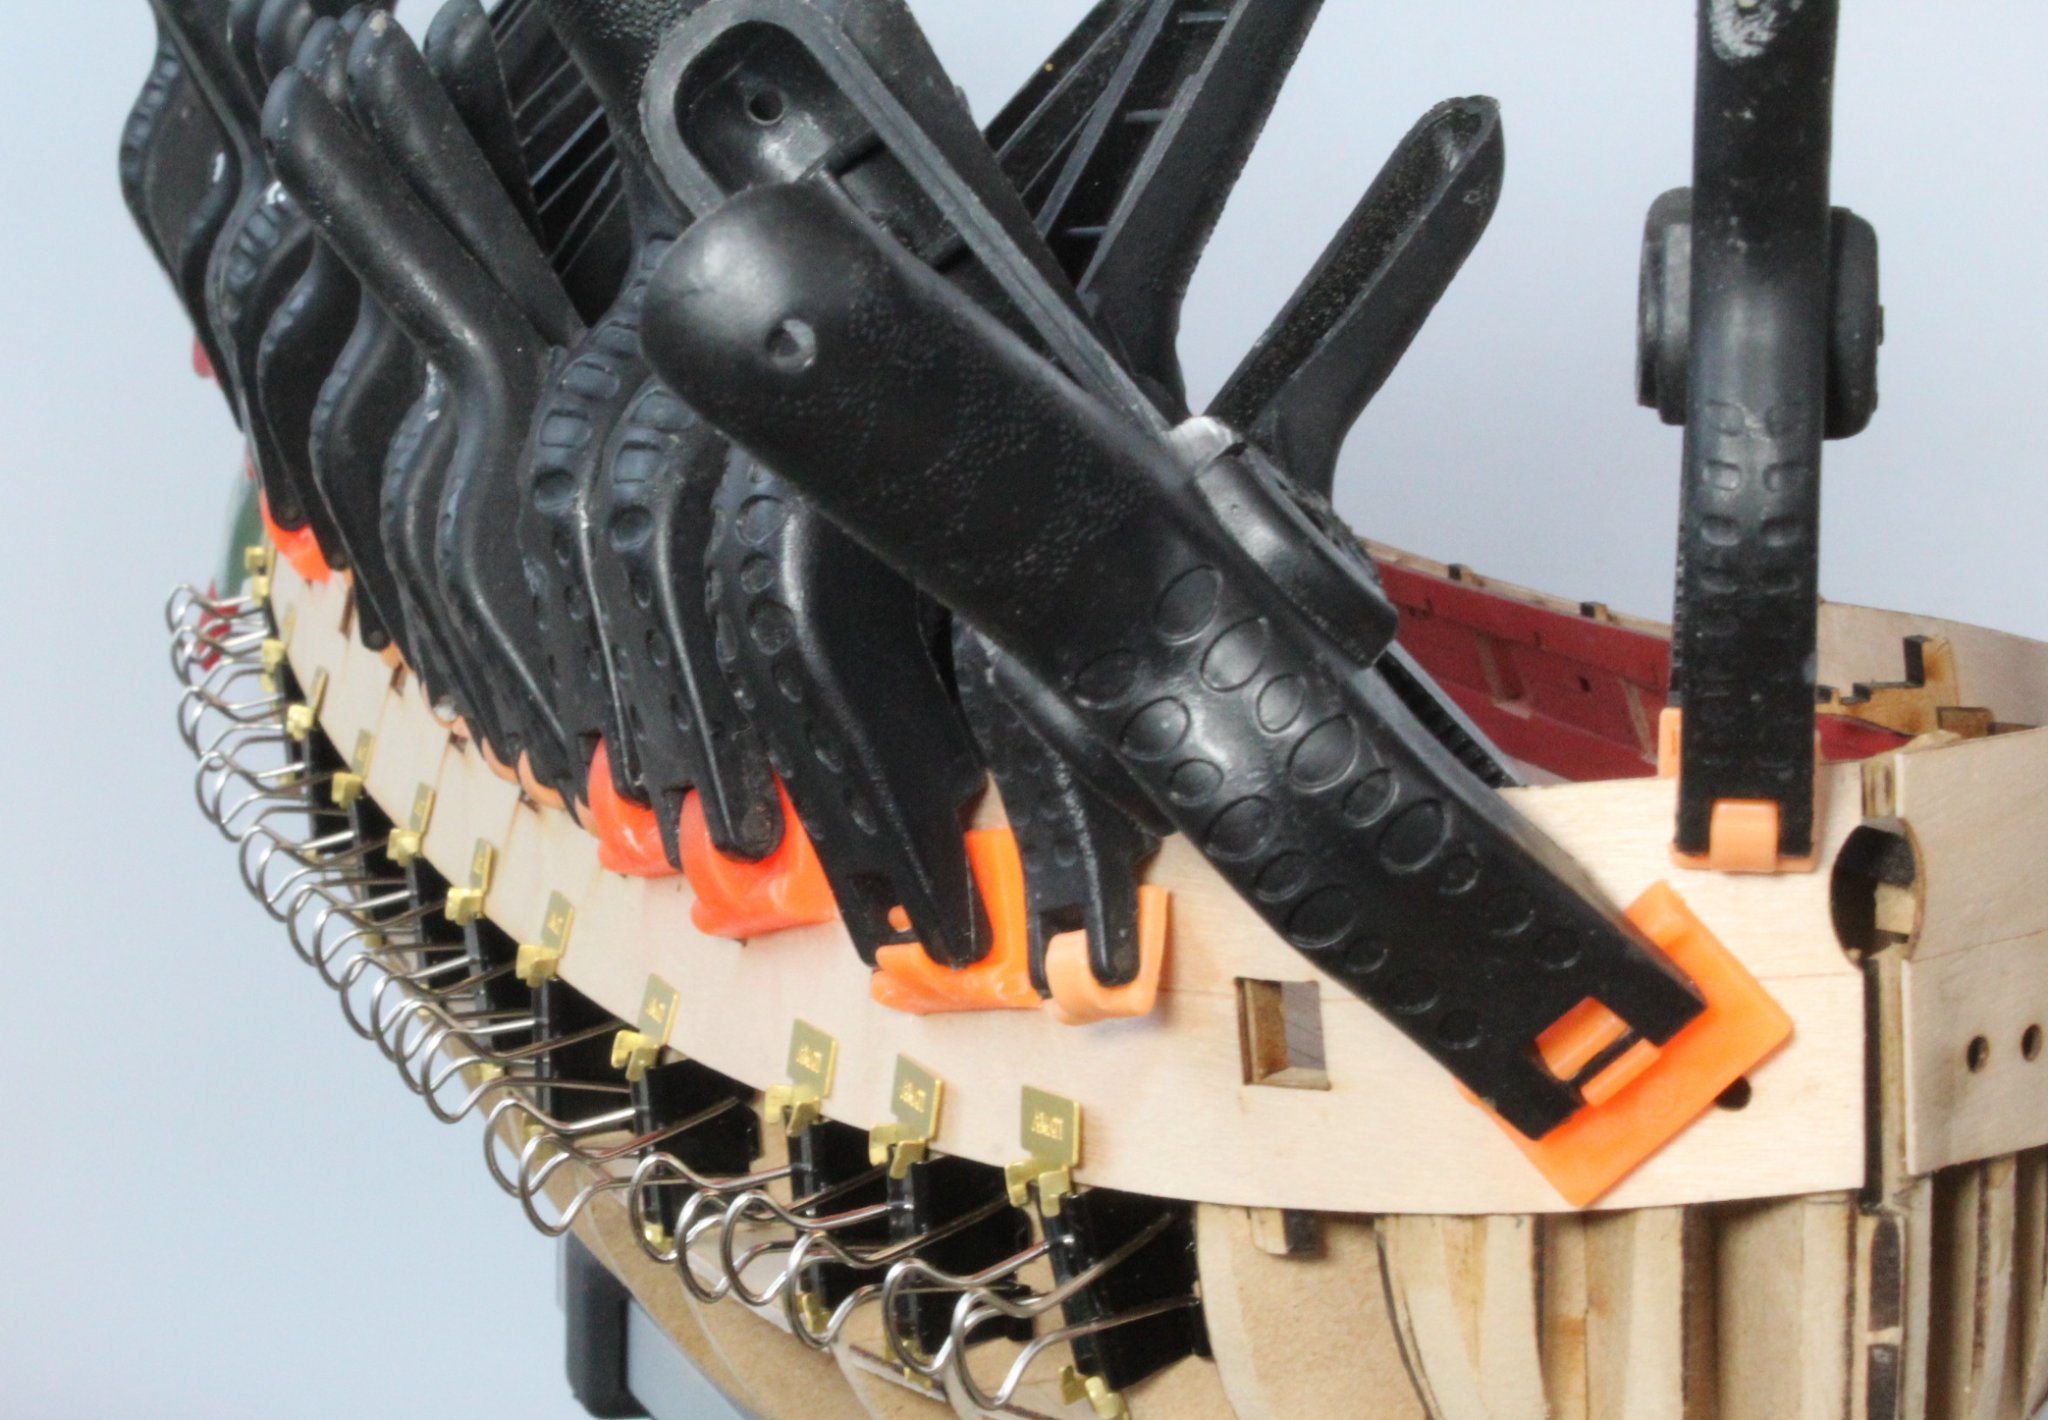
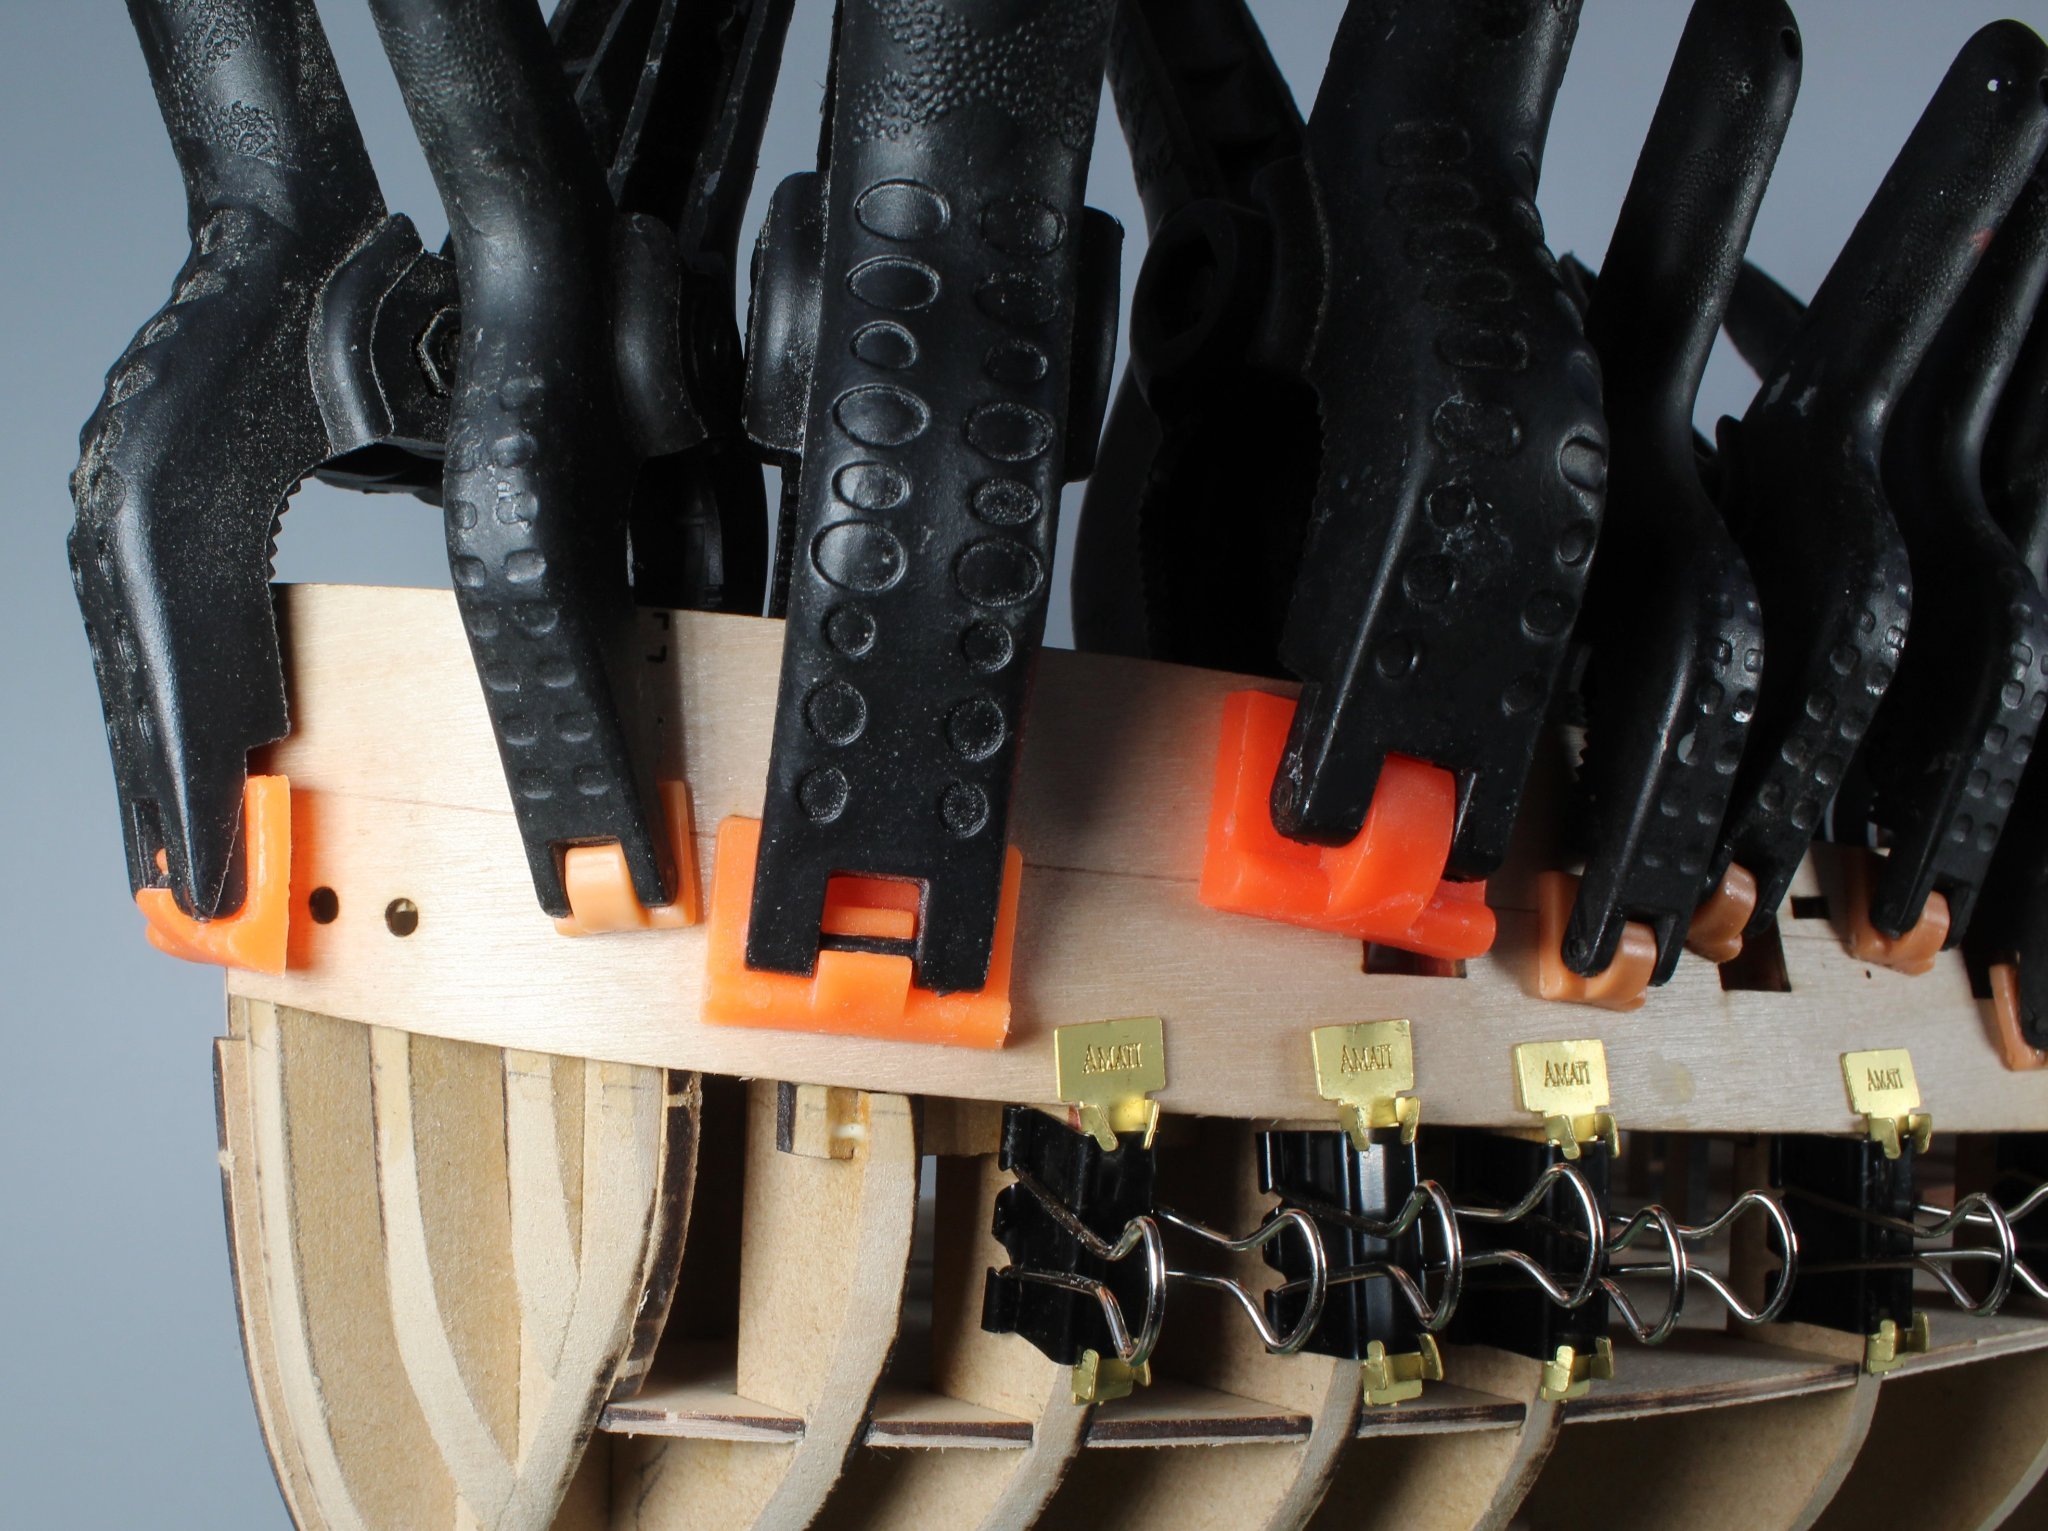
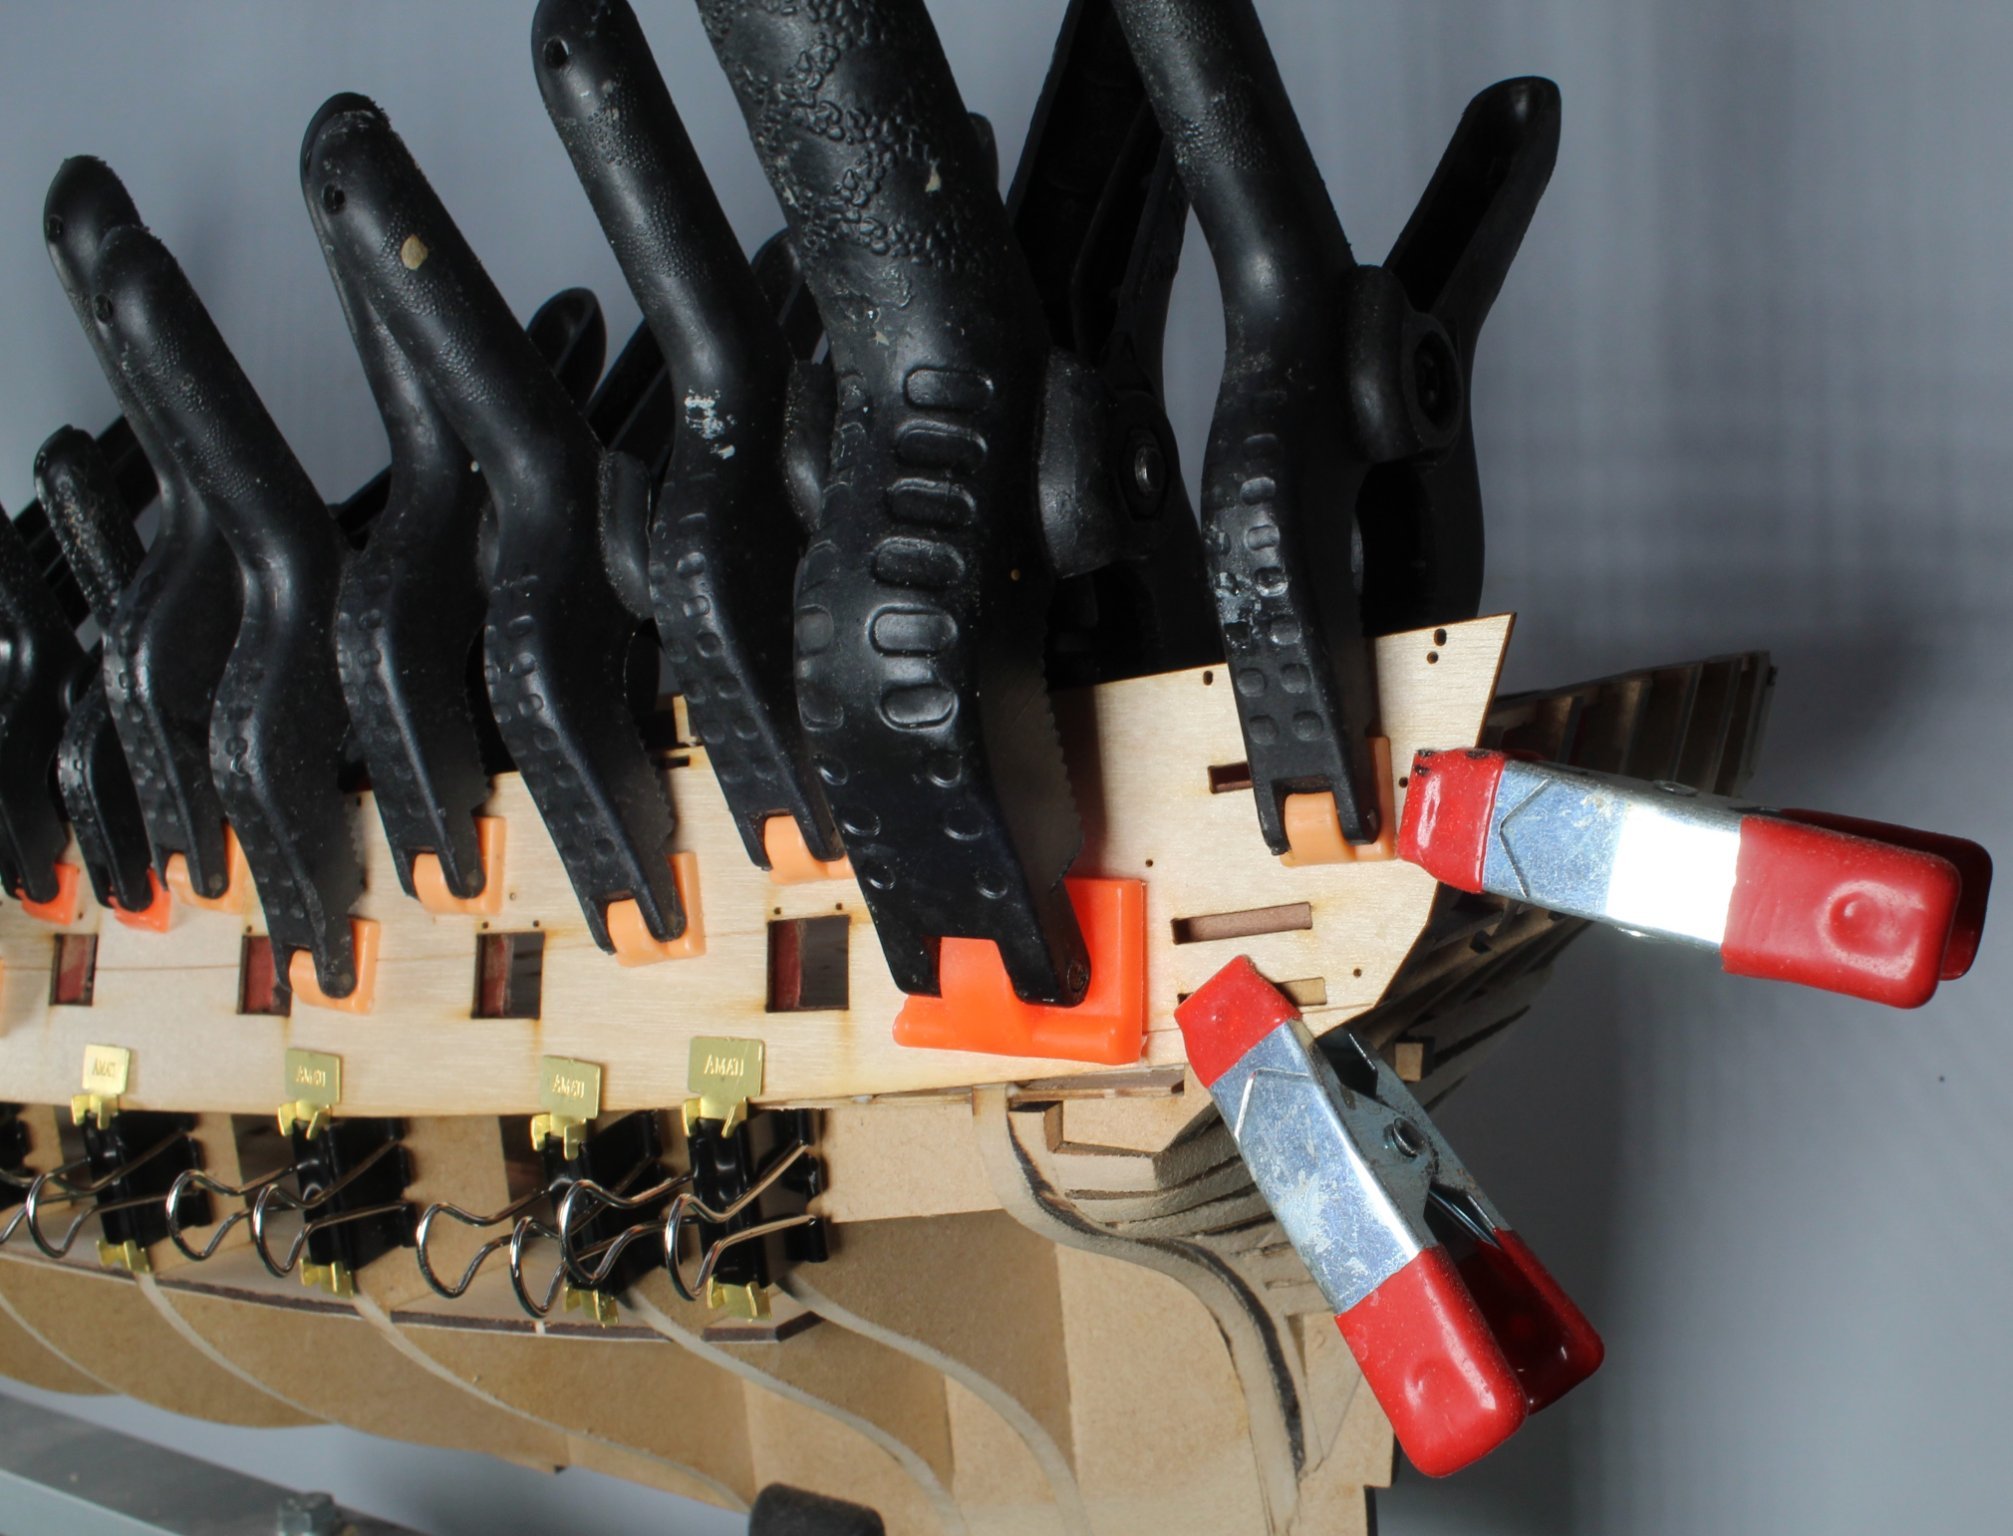
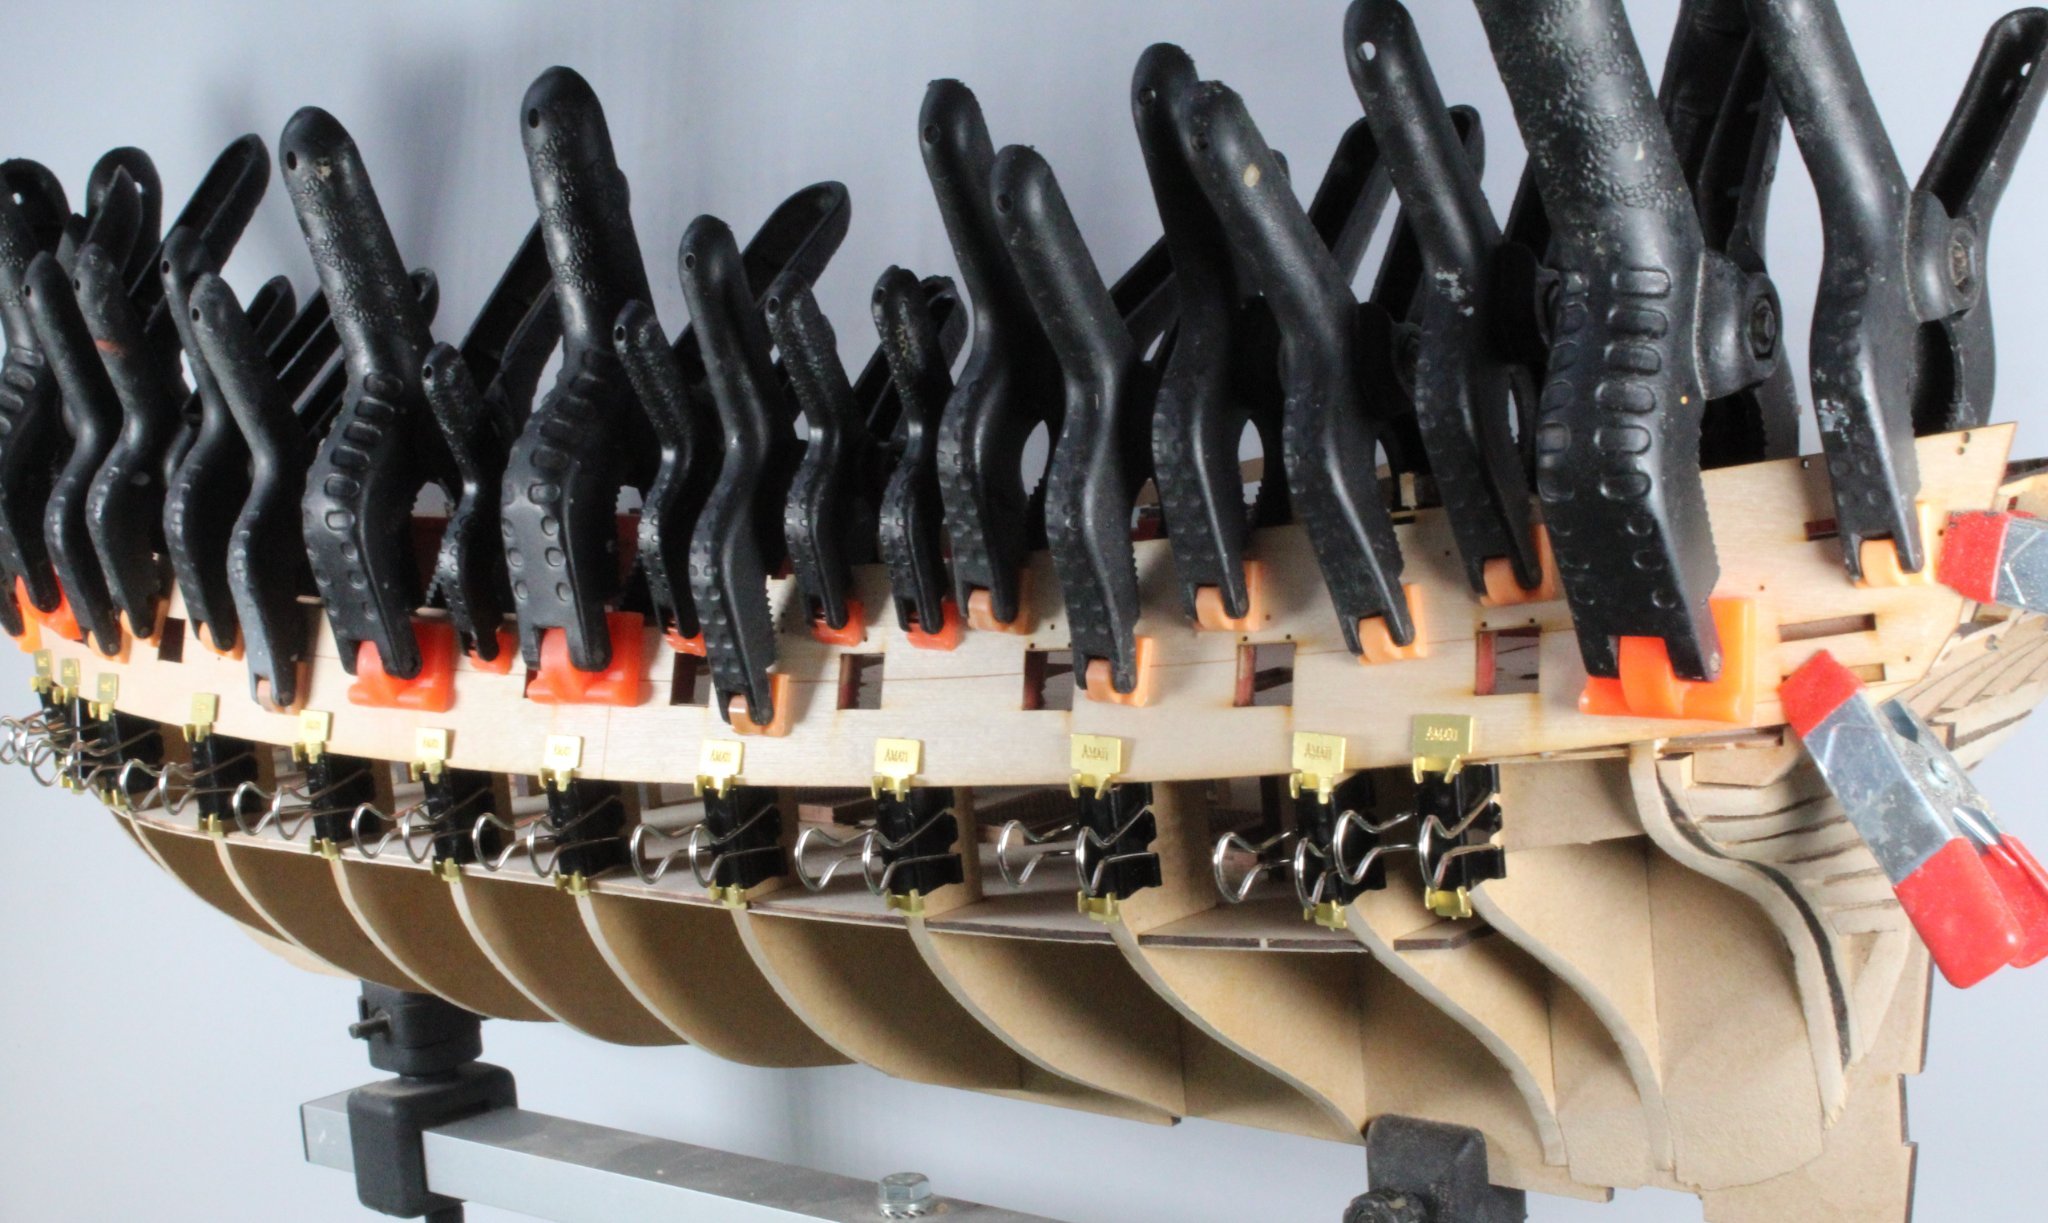
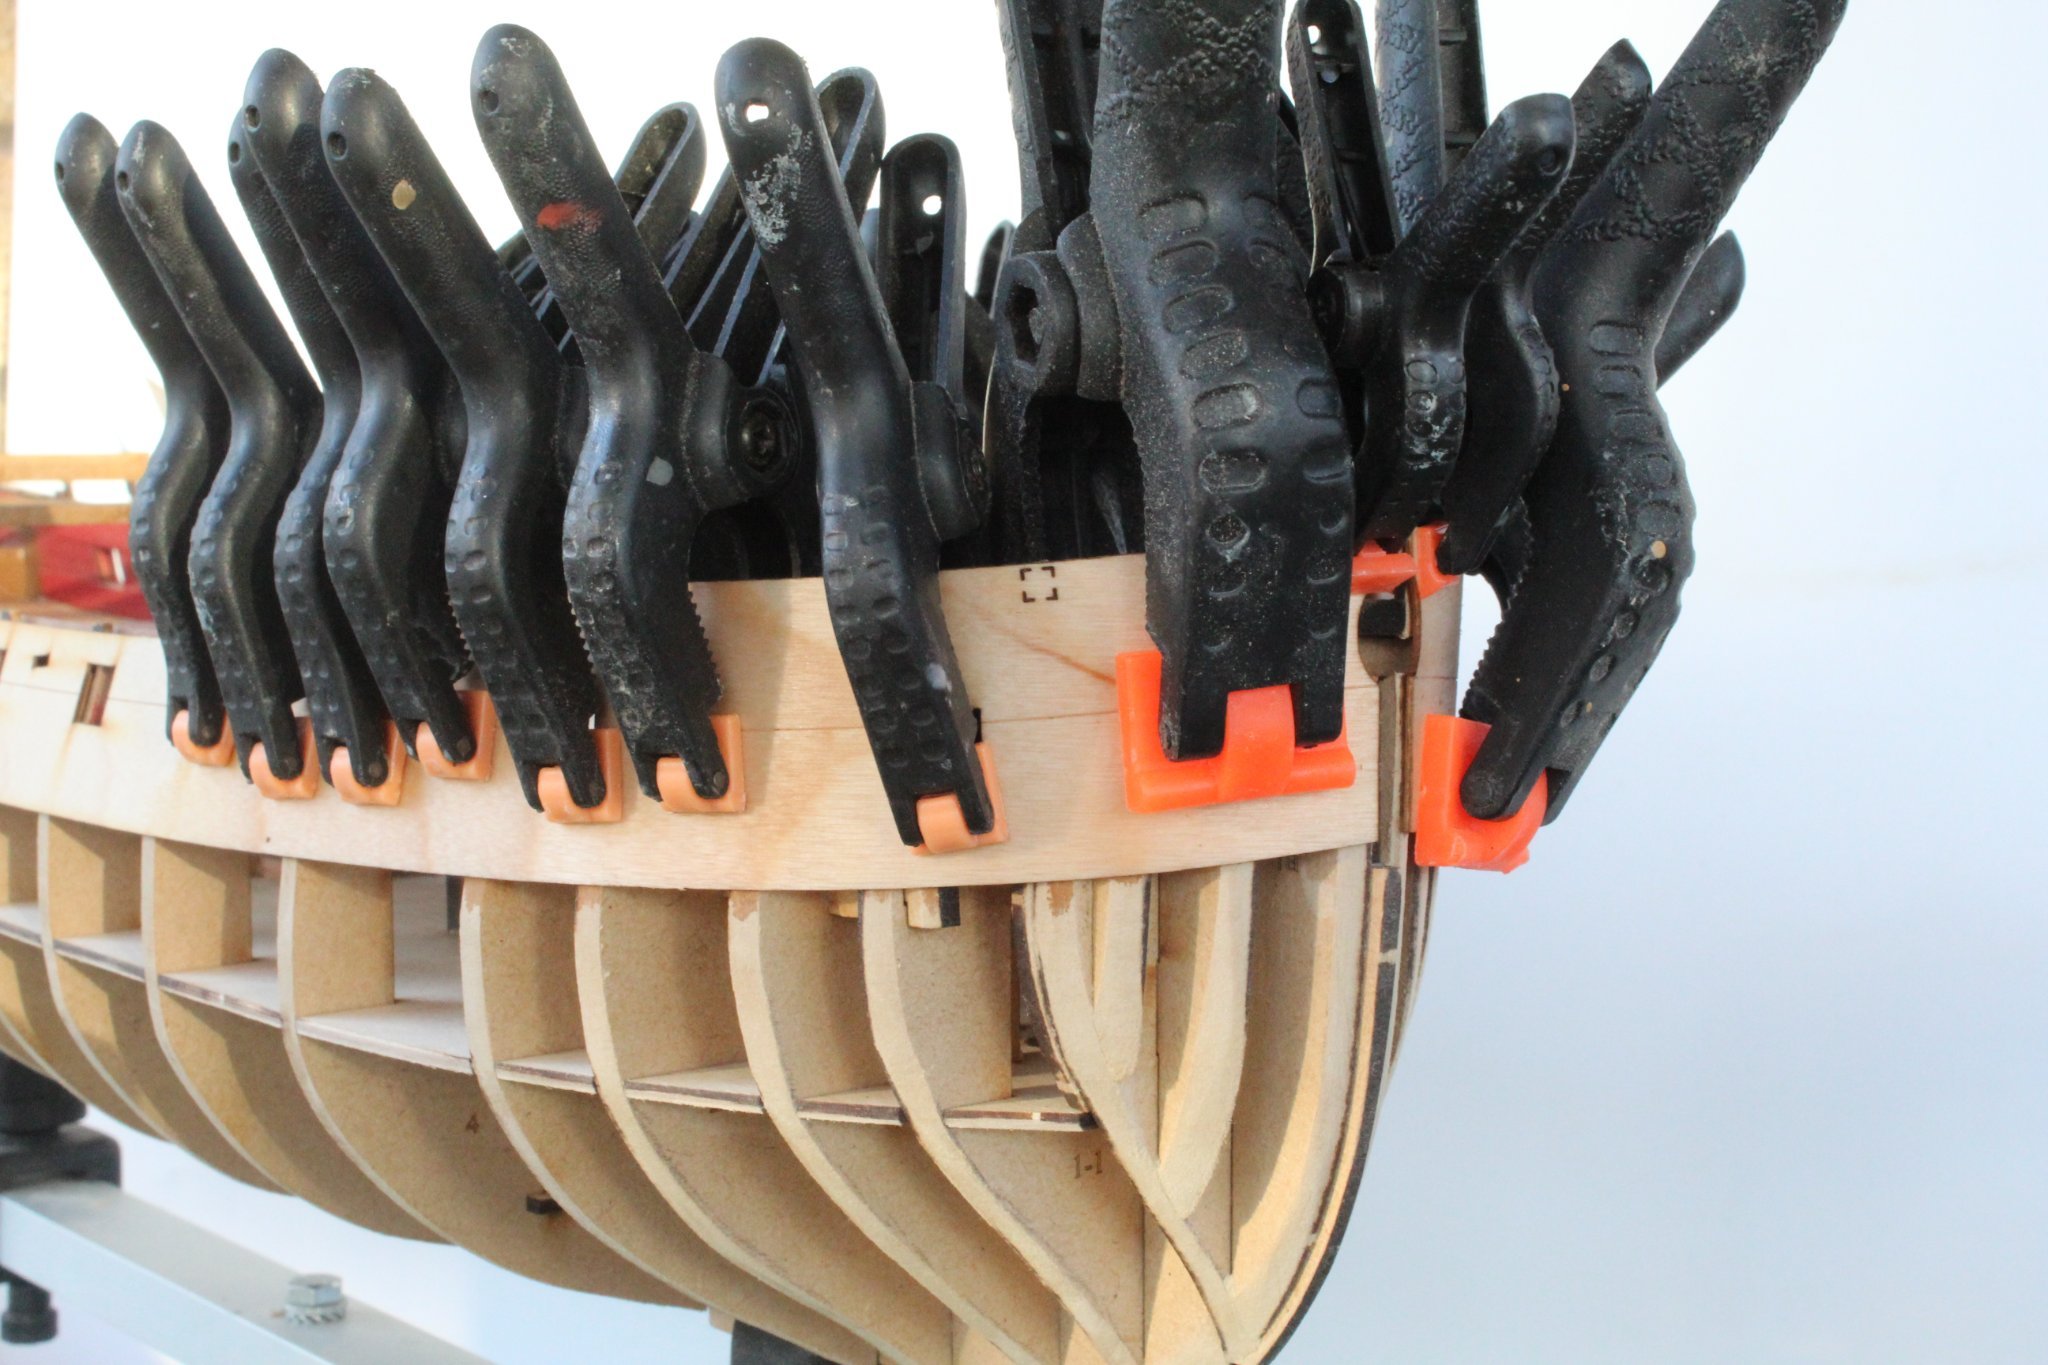
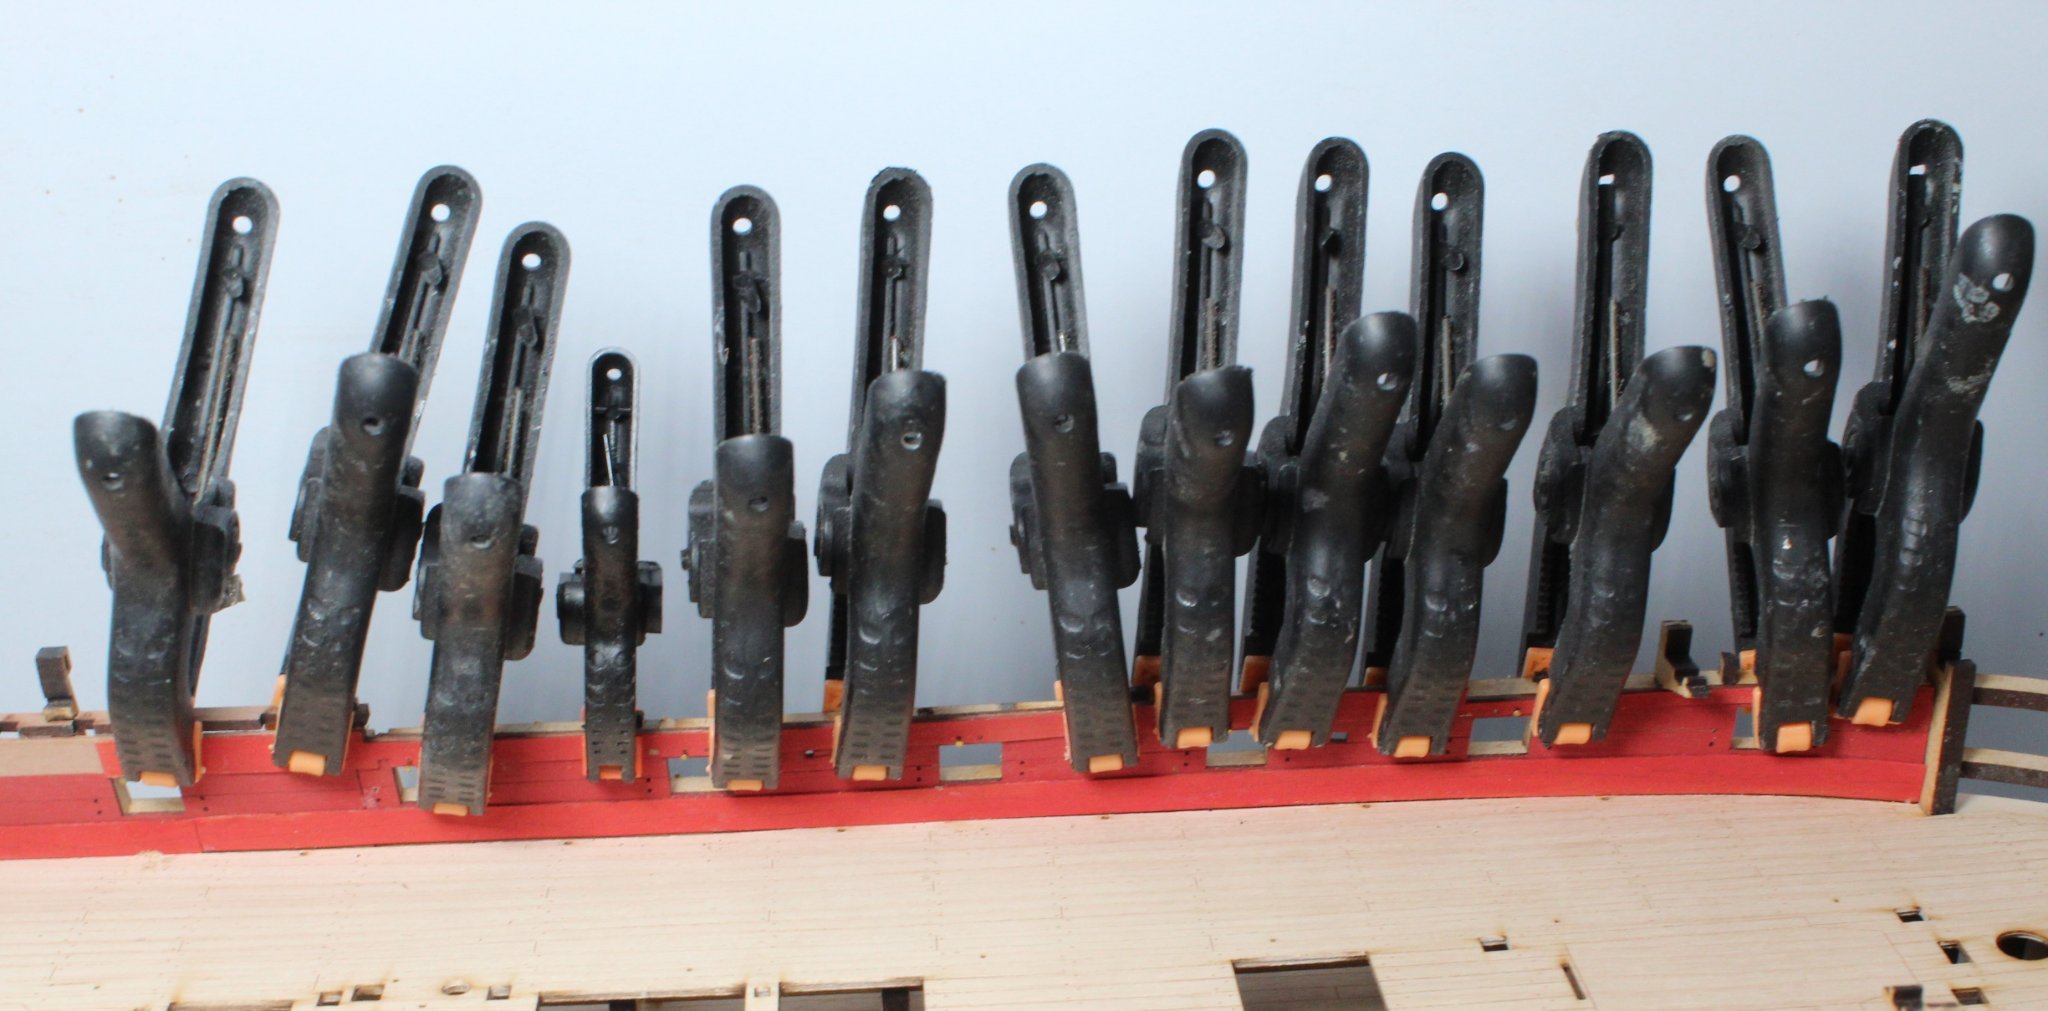
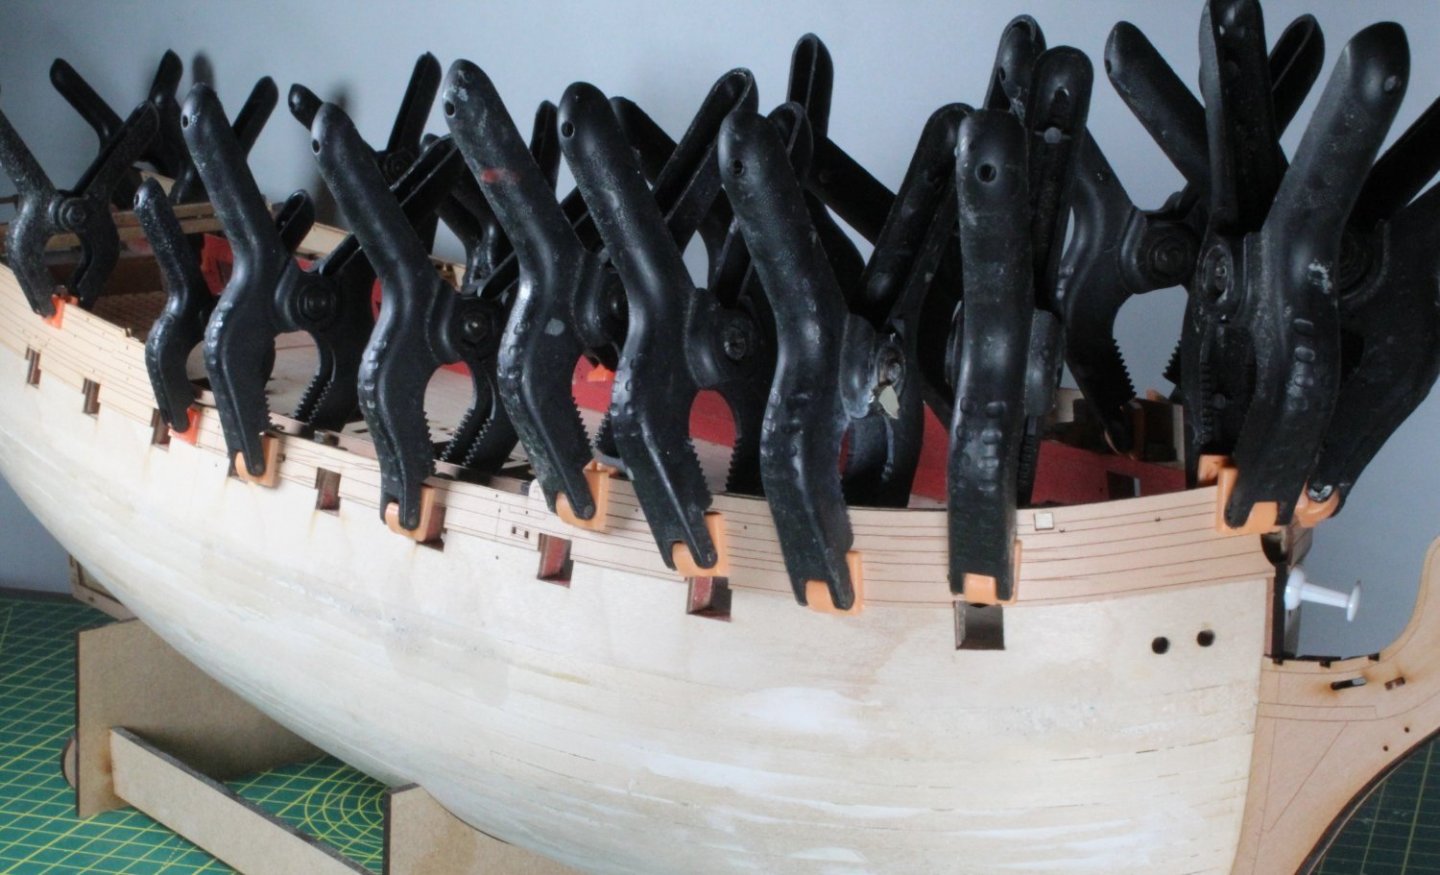
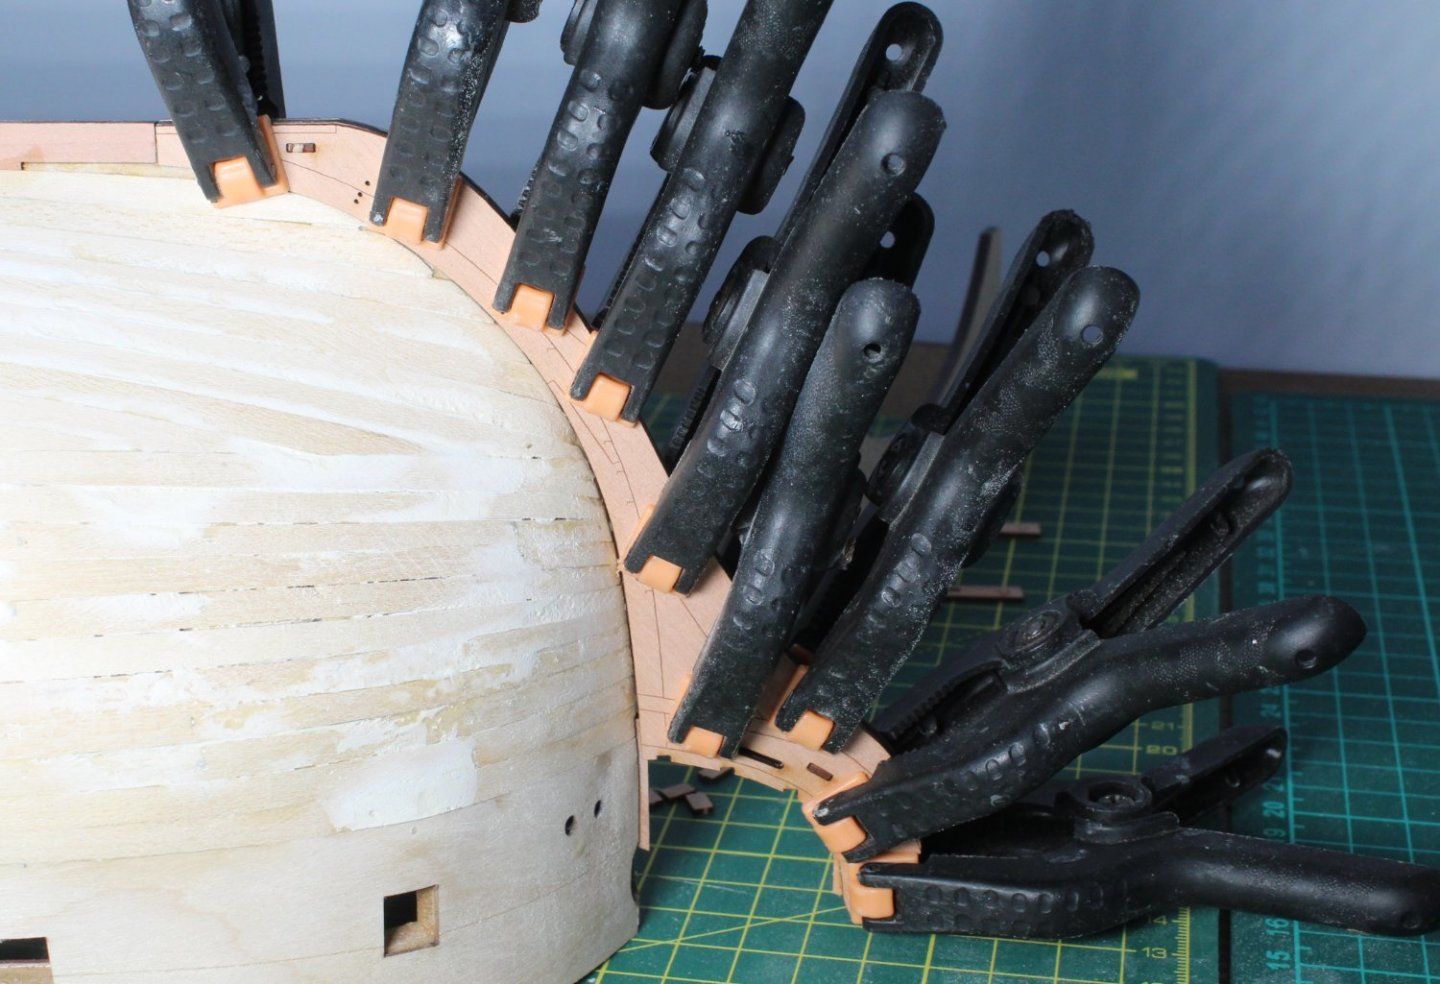
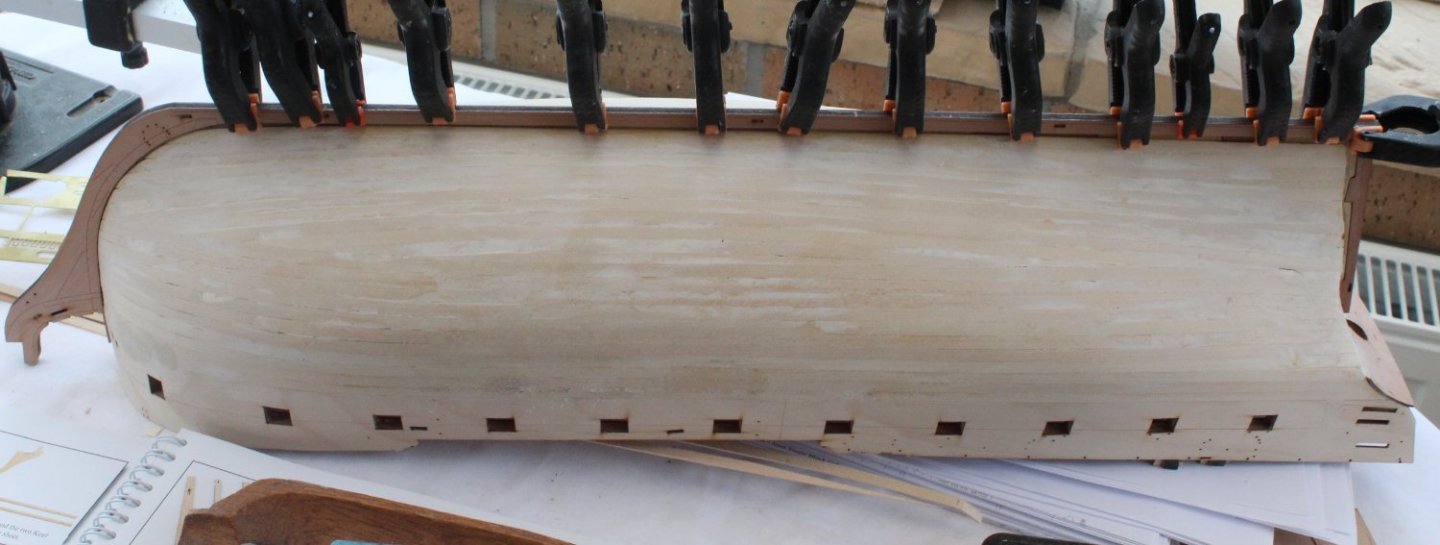
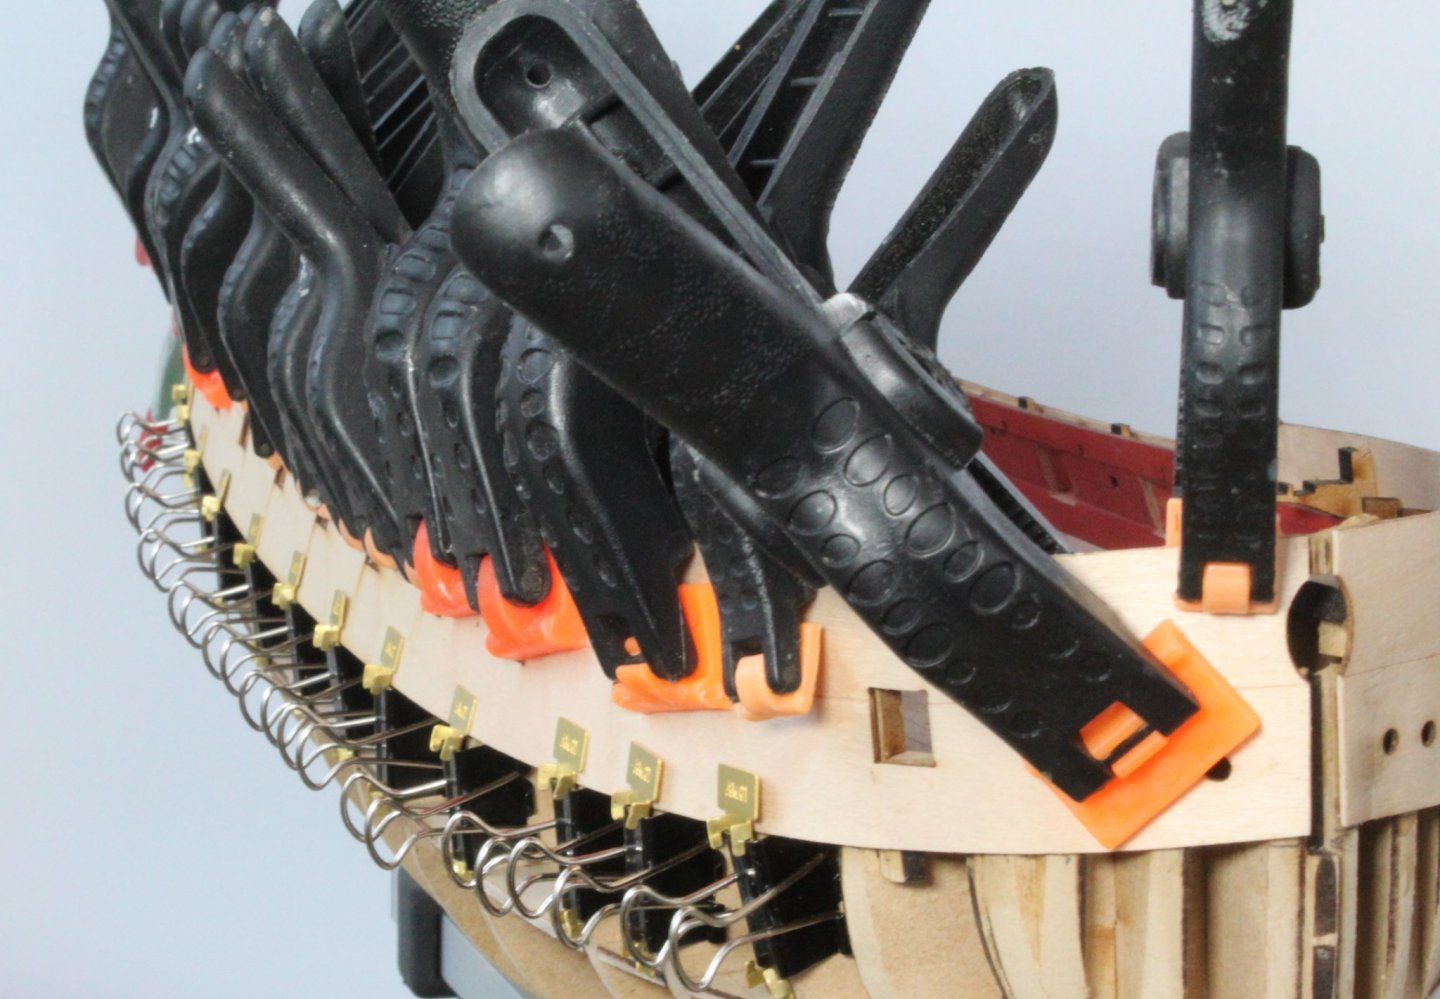
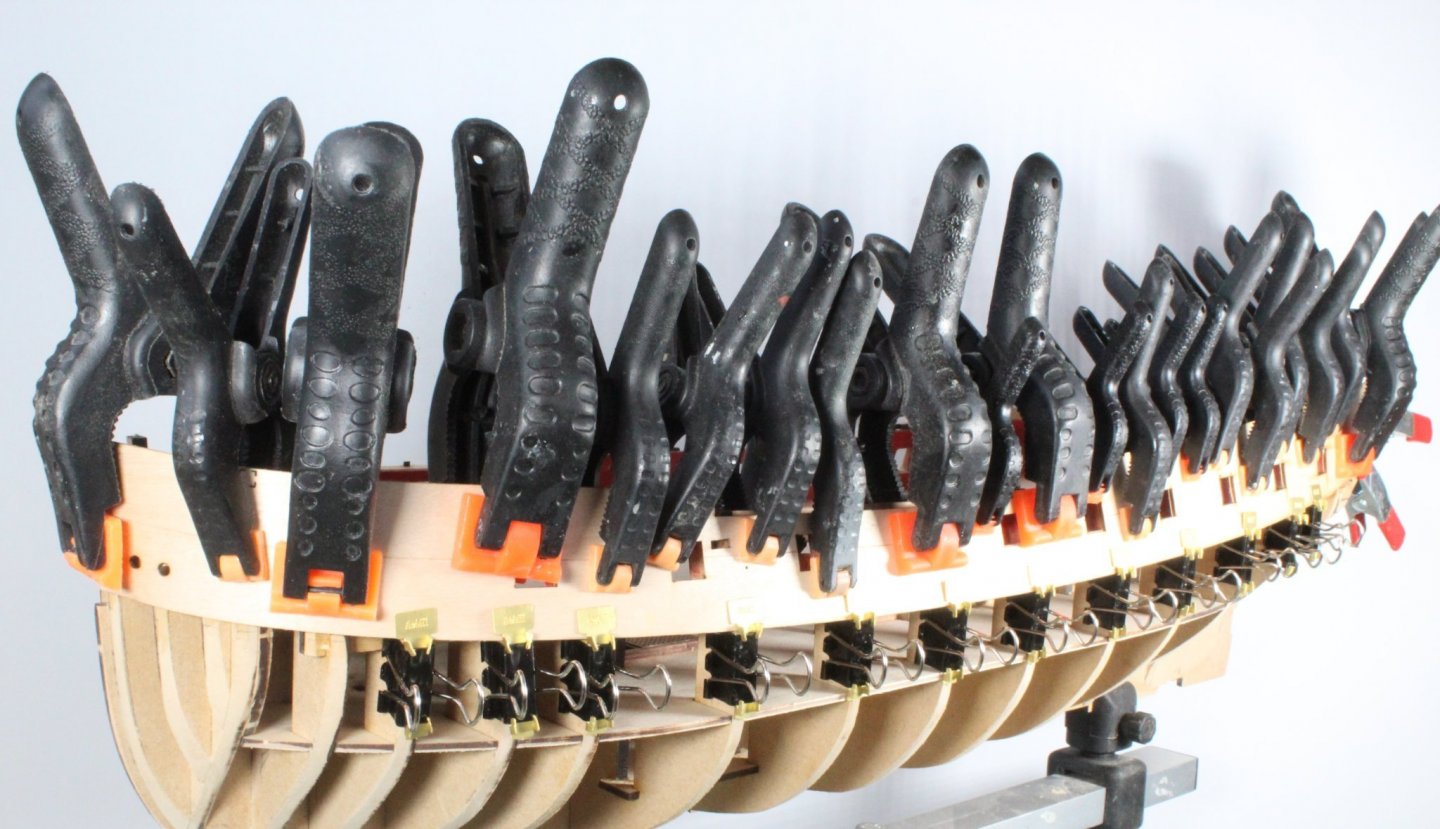
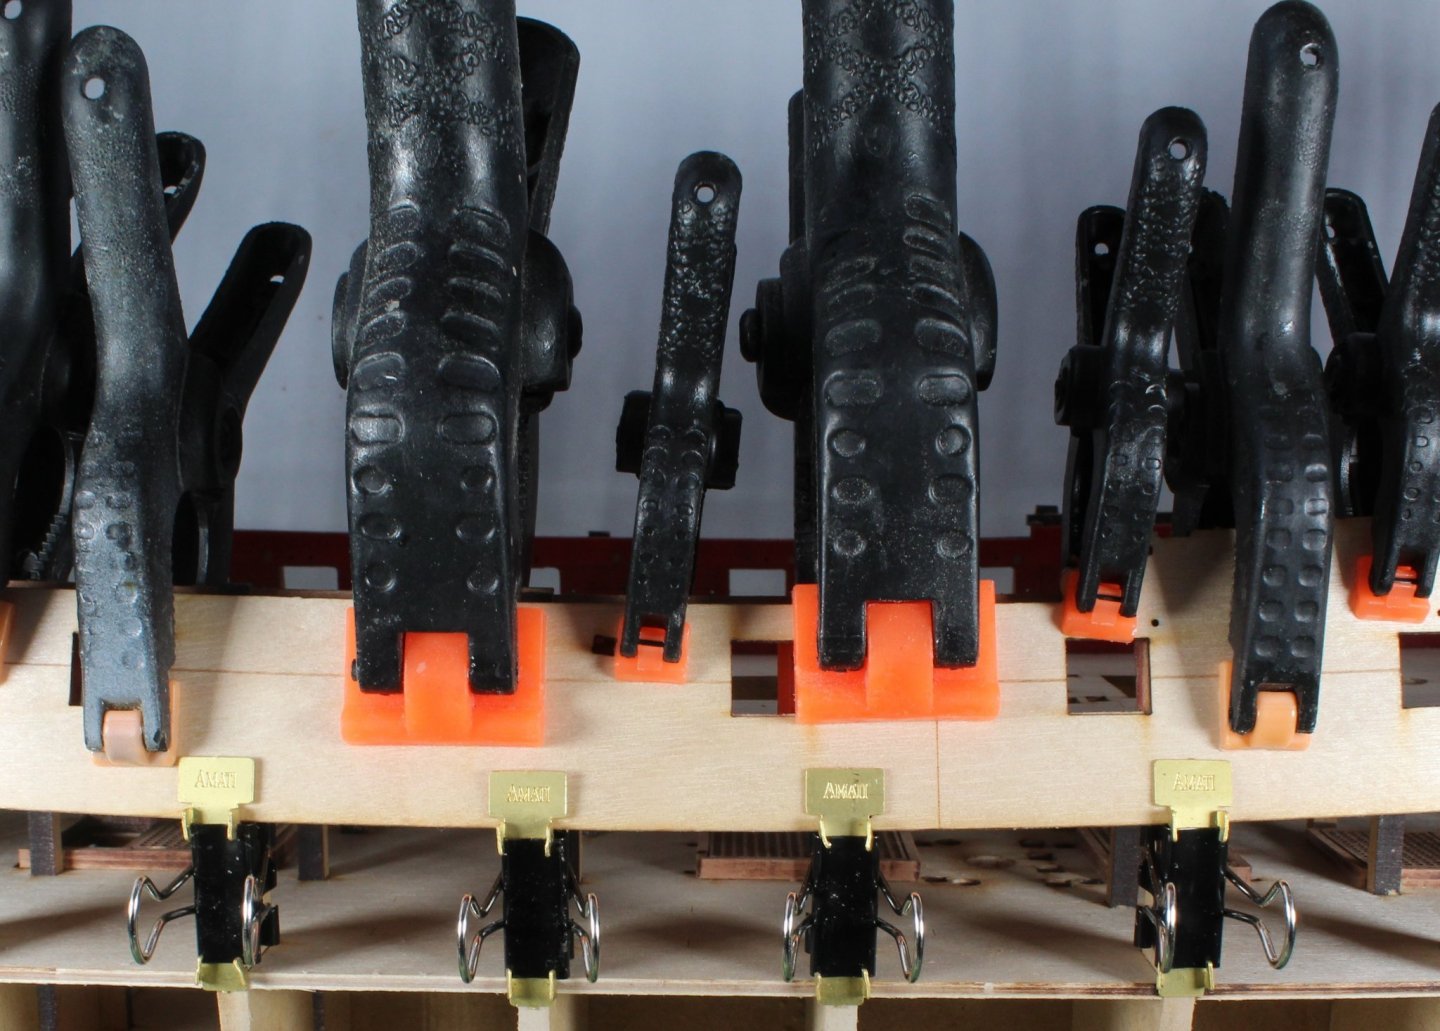
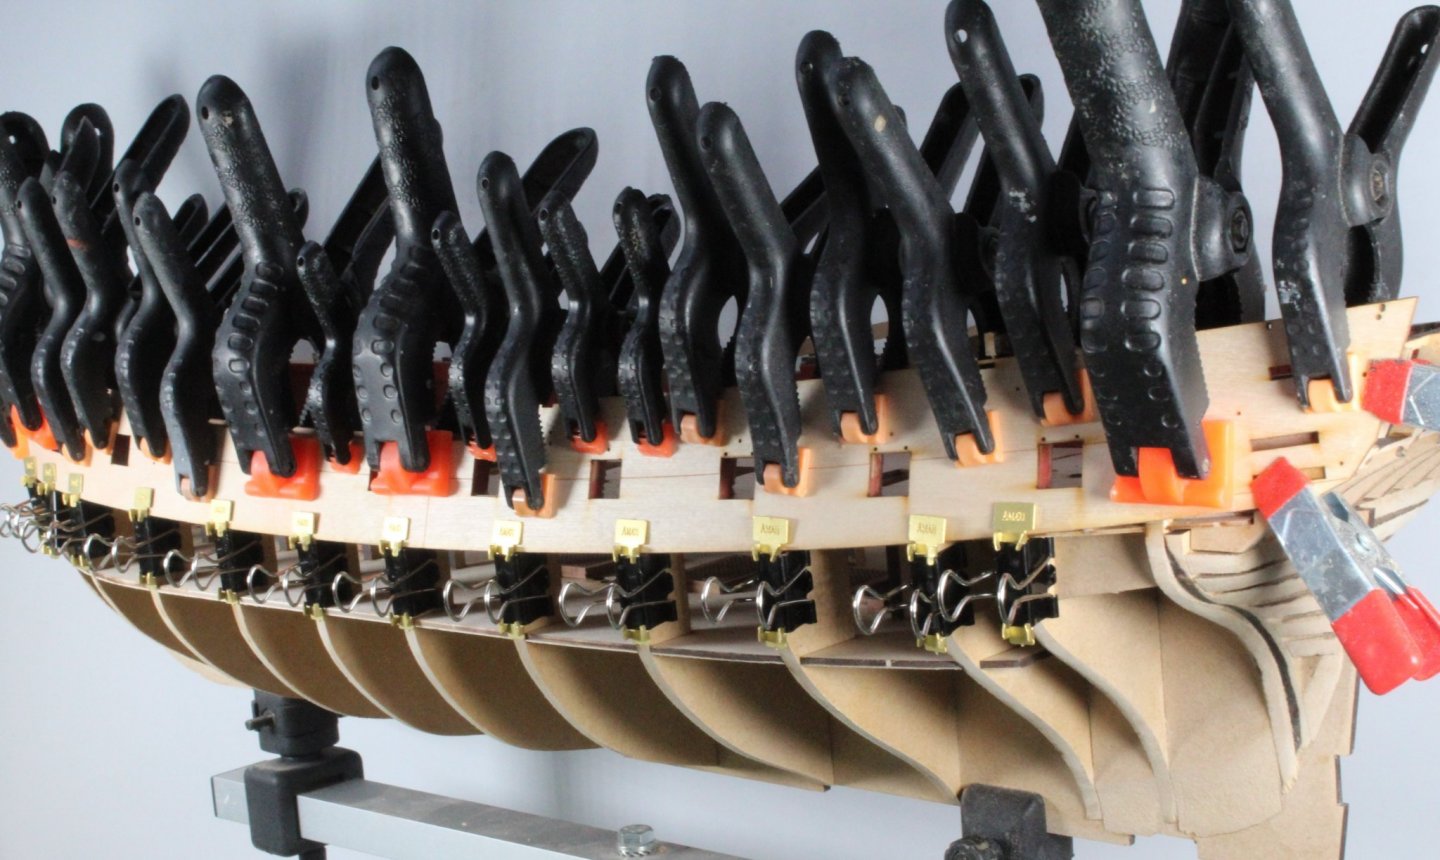
A few weeks ago I added to my tool collection when I ordered 2 sets of Amati clamps from CMB. I spent a couple of hours bending the clamp plates and fitting them to the clips over the weekend as I thought they would be useful when gluing the upper side patterns to the hull I had left the soaked upper side patterns clamped to the hull for 24 hours to allow them time to fully dry out. With the patterns still clamped in place I then used a hair dryer to blow hot air on the bow area's. After removing the clamps I was happy with the shaping of the patterns and so the left pattern has now been glued in place. I used an old paint brush to apply the glue to the hull and then carefully positioned the pattern and used several clamps to hold the pattern in place. I will allow time for the glue to cure before moving the clamps and repeating the process for the right hand upper side pattern. A sea of clamps, I think the pattern should be well secured once the glue has had time to cure. Close up of the bow Midships, the Amati clamps are really good for securing the bottom edge The stern area A final shot of all the clamps.


- 476 replies
-
- 8
-
-
- sphinx
- vanguard models
- (and 1 more)
-
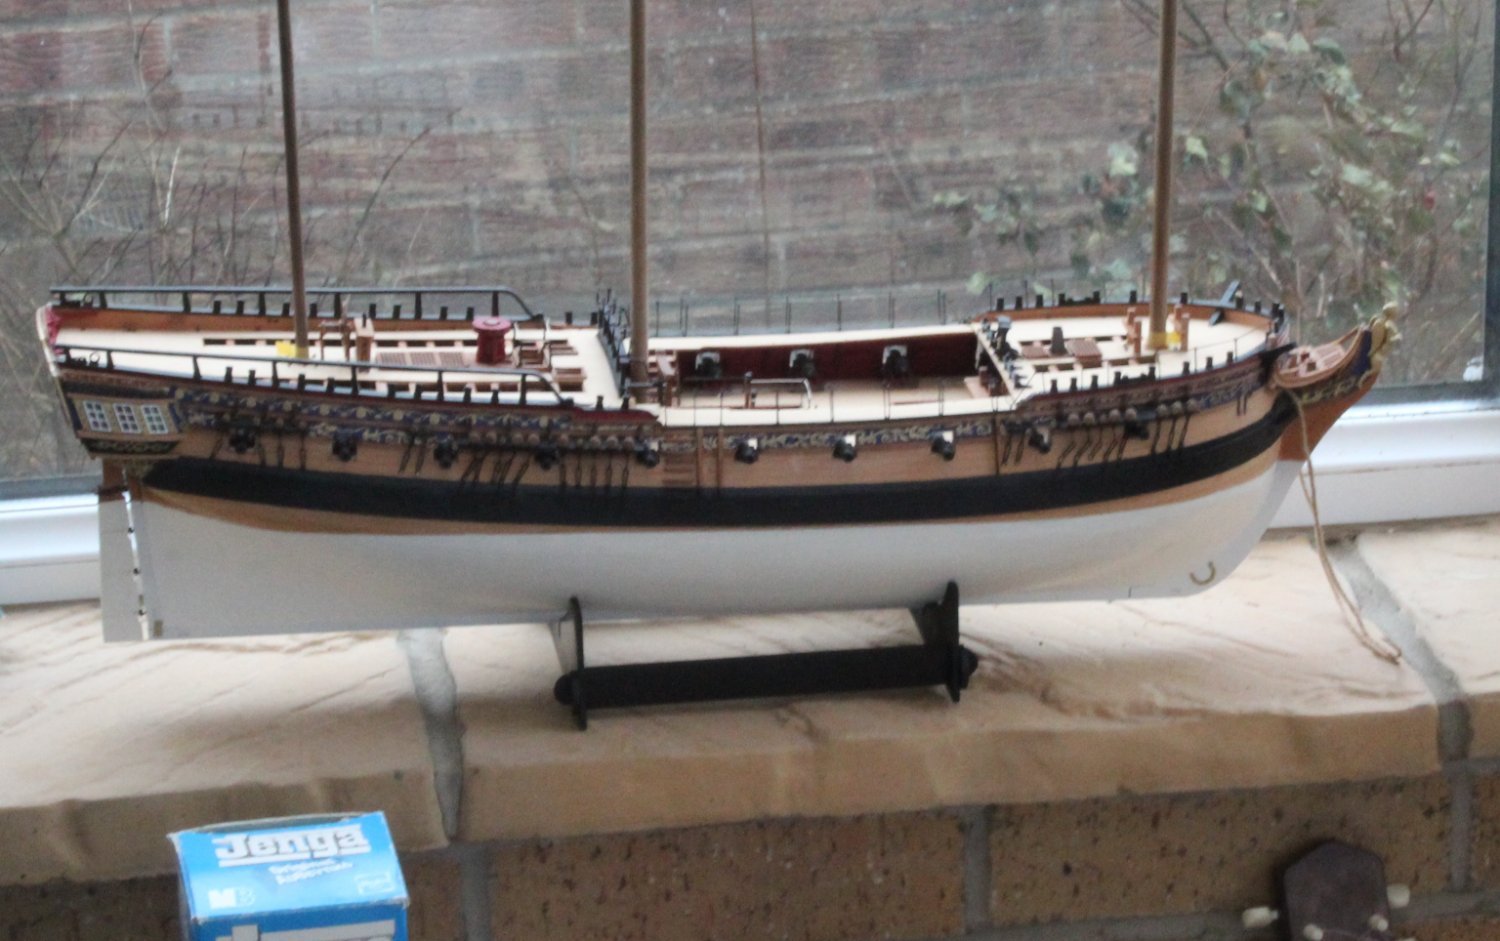
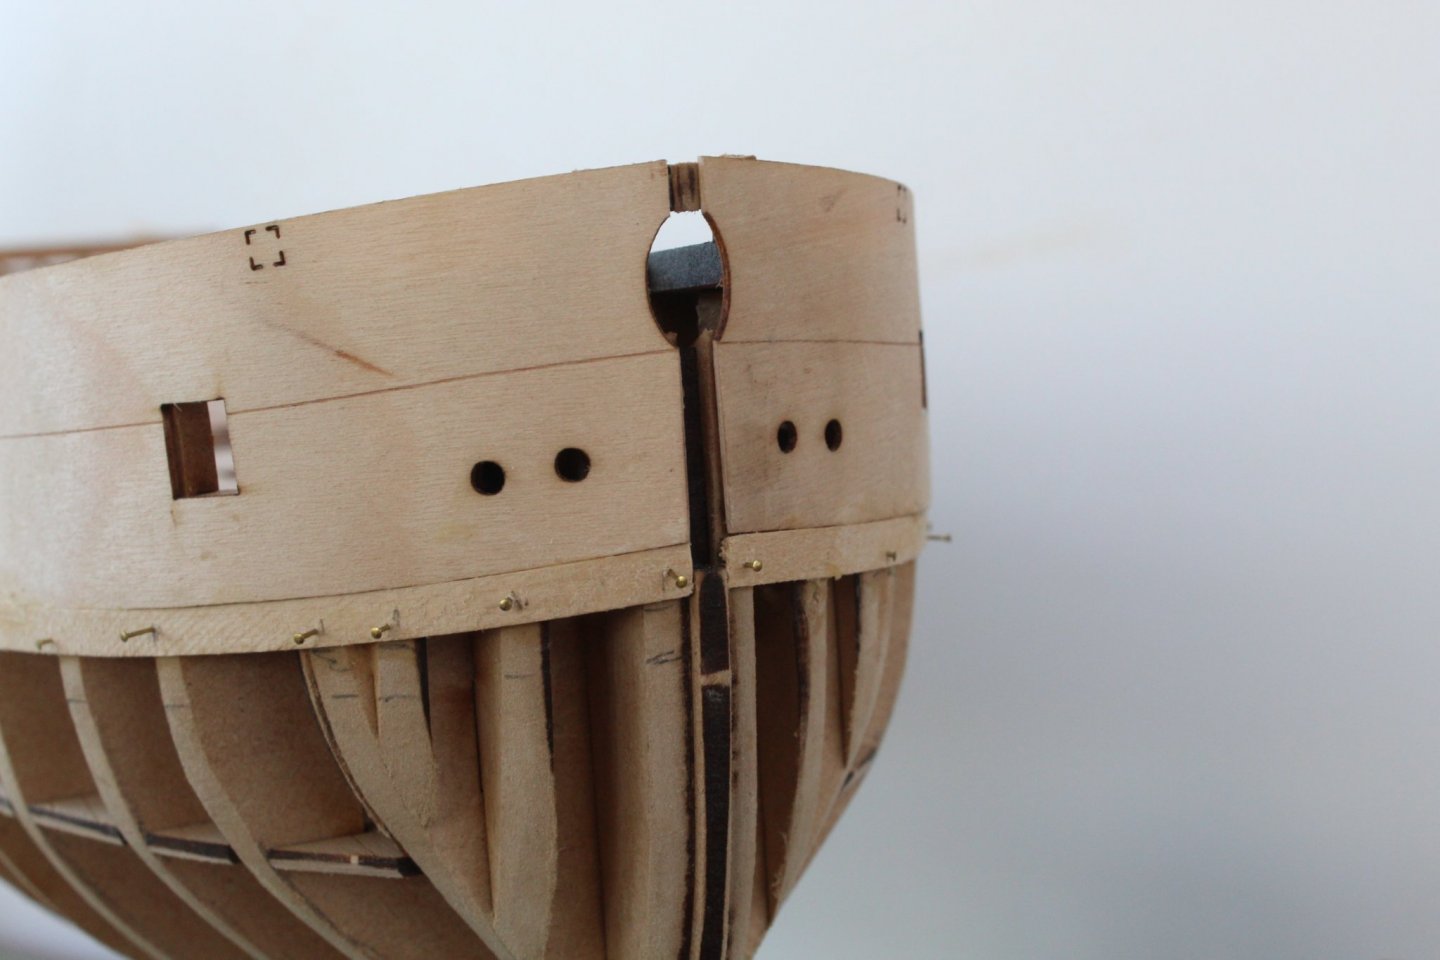
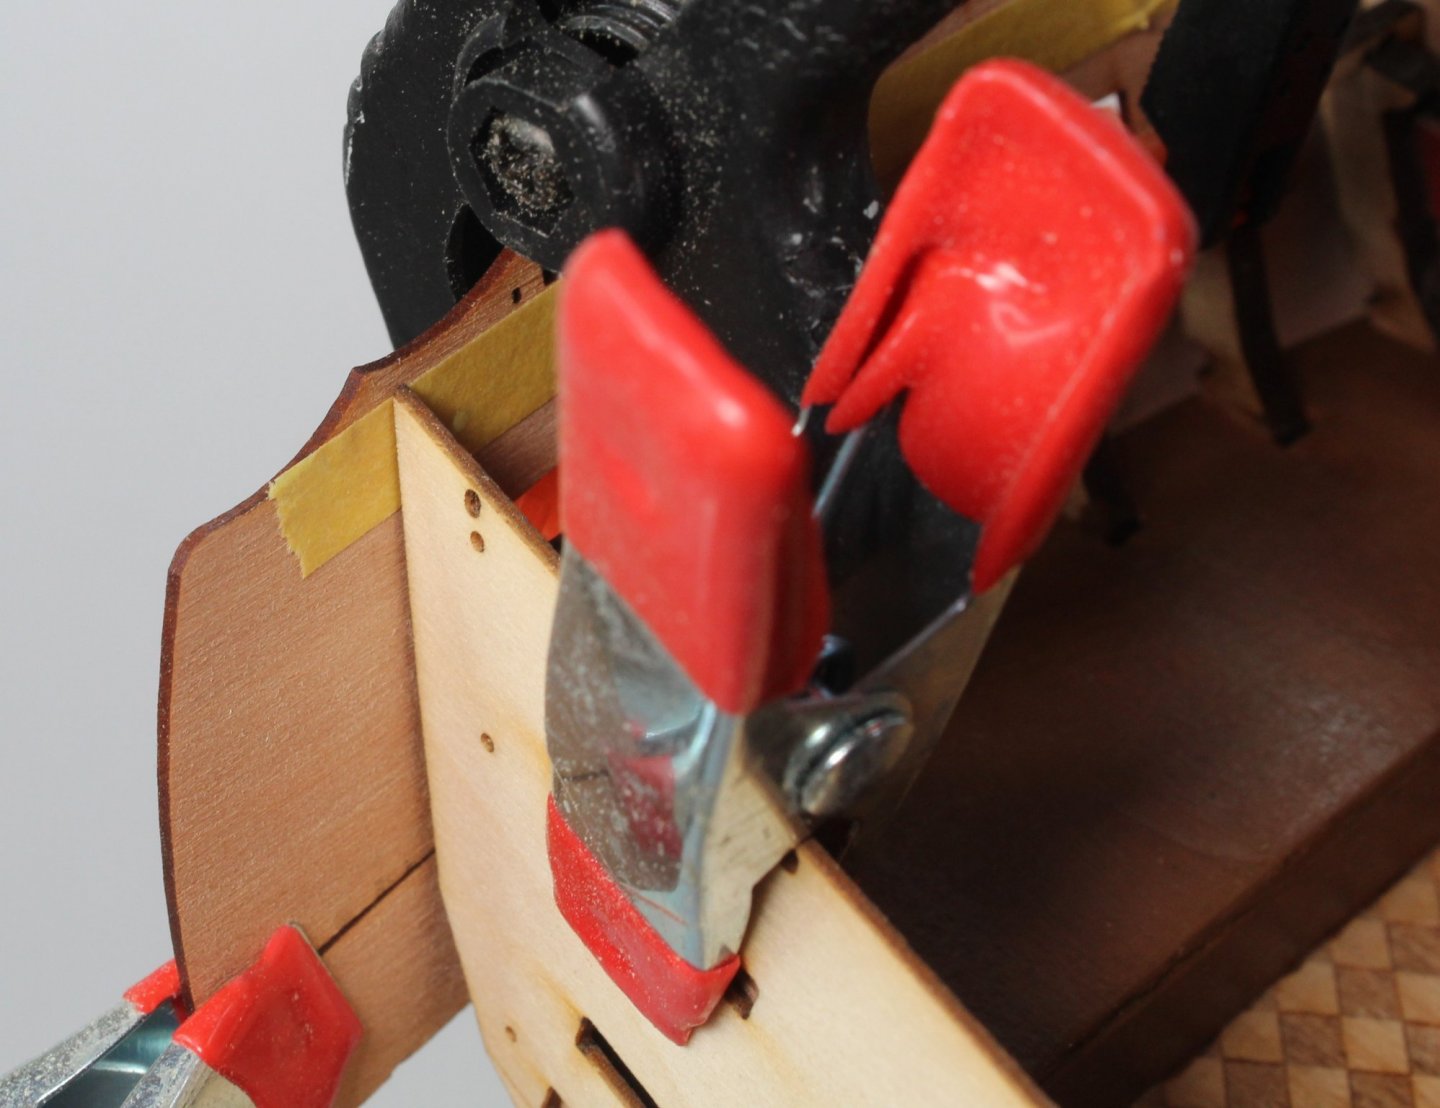
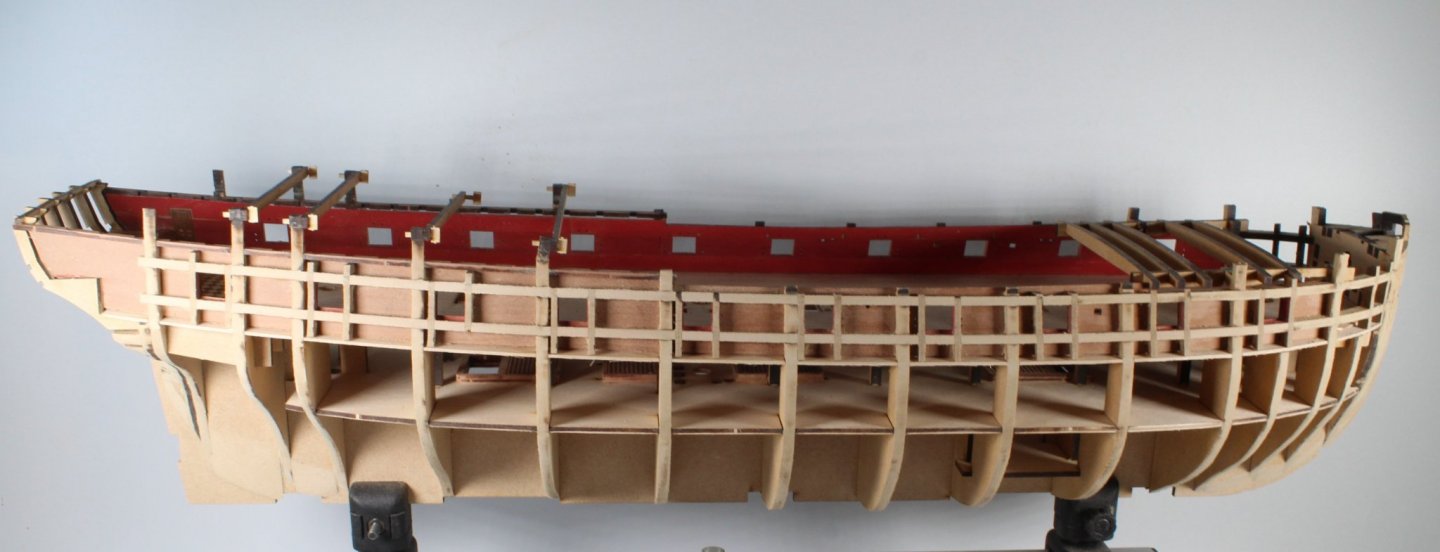
With my V1 build complete, I am not adding the masts, yards and rigging I have been making slow and steady progress on my V2 build which will be rigged. So far on the V2 build I have avoided many of the silly errors I made on my V1 build. I have reached the stage of soaking and clamping the upper hull side patterns to the hull, which will be left overnight to dry. I have done some checks and marked the correct position of the lower stern counter. To do this I clamped the stern fascia to the hull, ensuring it sat 2mm above the bulwark pattern as per steps 149, 202 and 313 of the build manual. I then added the upper counter pattern followed by the lower counter pattern. By taking much more time and care I believe I will not repeat my V1 build errors on the V2 build. Click on the following link for my V2 build log V2 Build Log


-
The excess material on the inner bulwark gun port openings were trimmed so they are now the same size as the MDF framing. I started with a craft knife to remove the bulk of the excess material and then switched to my needle files to neaten the edges. I have also sanded the stern frame patterns and marked the position of the lower counter pattern, please see my previous post in relation to this. Next up is the fitting of the upper hull side patterns. To start this process both the left and right side patterns were soaked in hot water for 45 mins. The Sphinx hull is looking on with baited breath It was then a simple case of clamping both patterns in position. I will now leave these parts clamped until tomorrow so they have plenty of time to dry out and shrink back down to size. Once I am happy with how these patterns fit they will be glued in place. It will then be time to start the first planking.


- 476 replies
-
- 5
-
-
- sphinx
- vanguard models
- (and 1 more)
-
You could use yellow ochre between the blue and black. I did that on Speedy and it looked ok
- 505 replies
-
- 5
-
-
- vanguard models
- Sphinx
- (and 1 more)
-
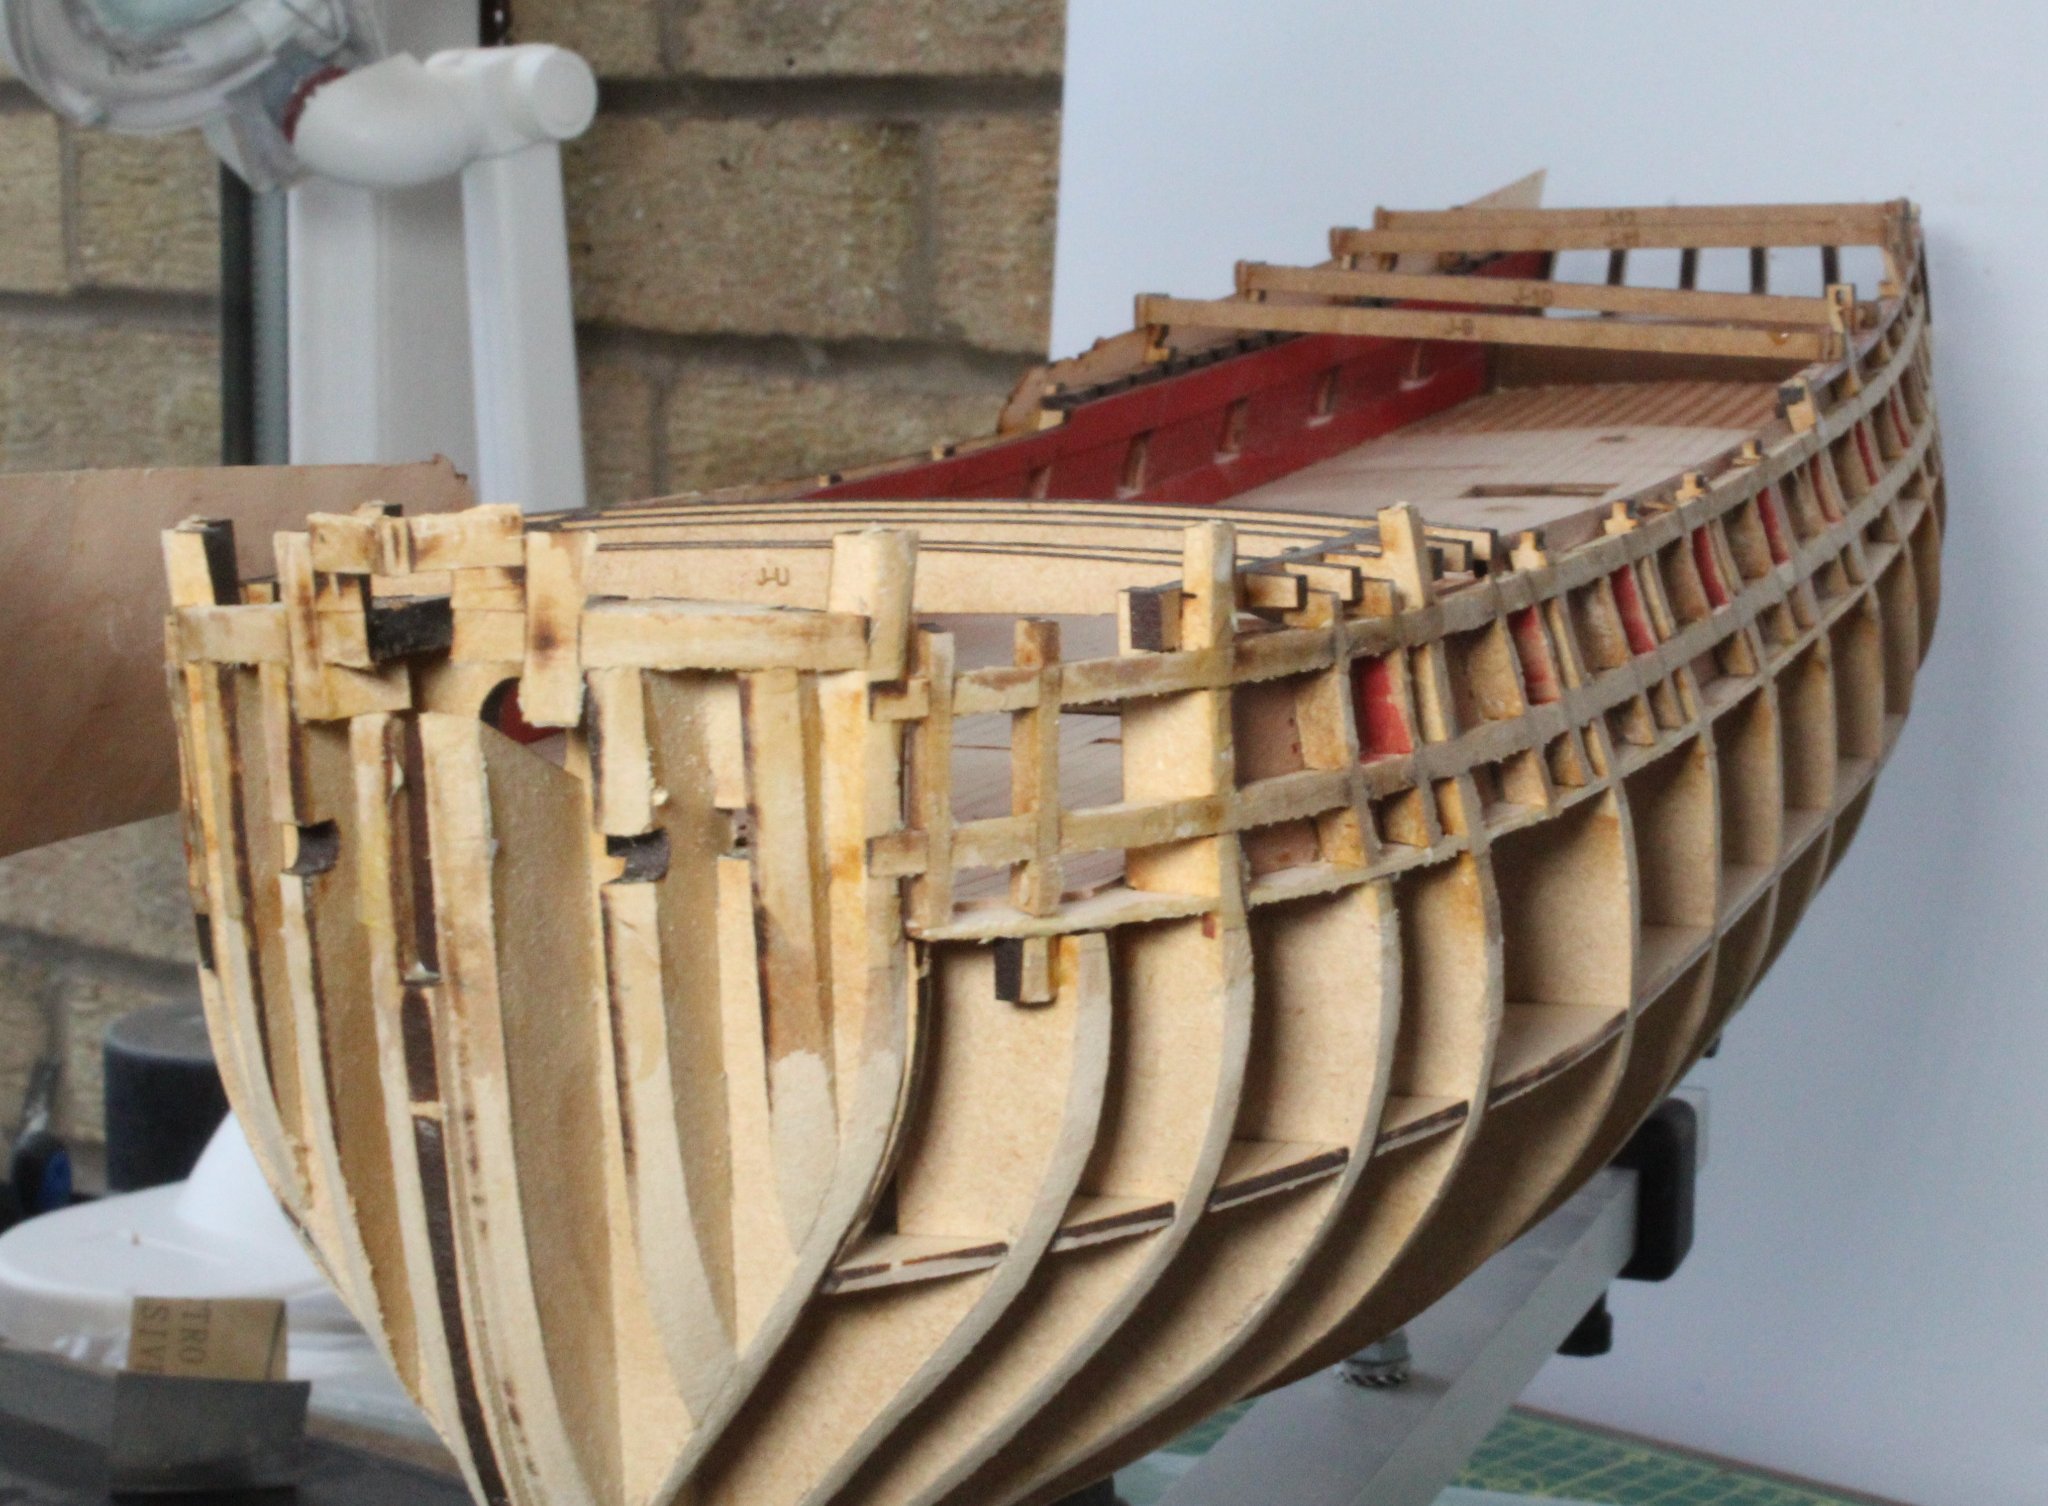
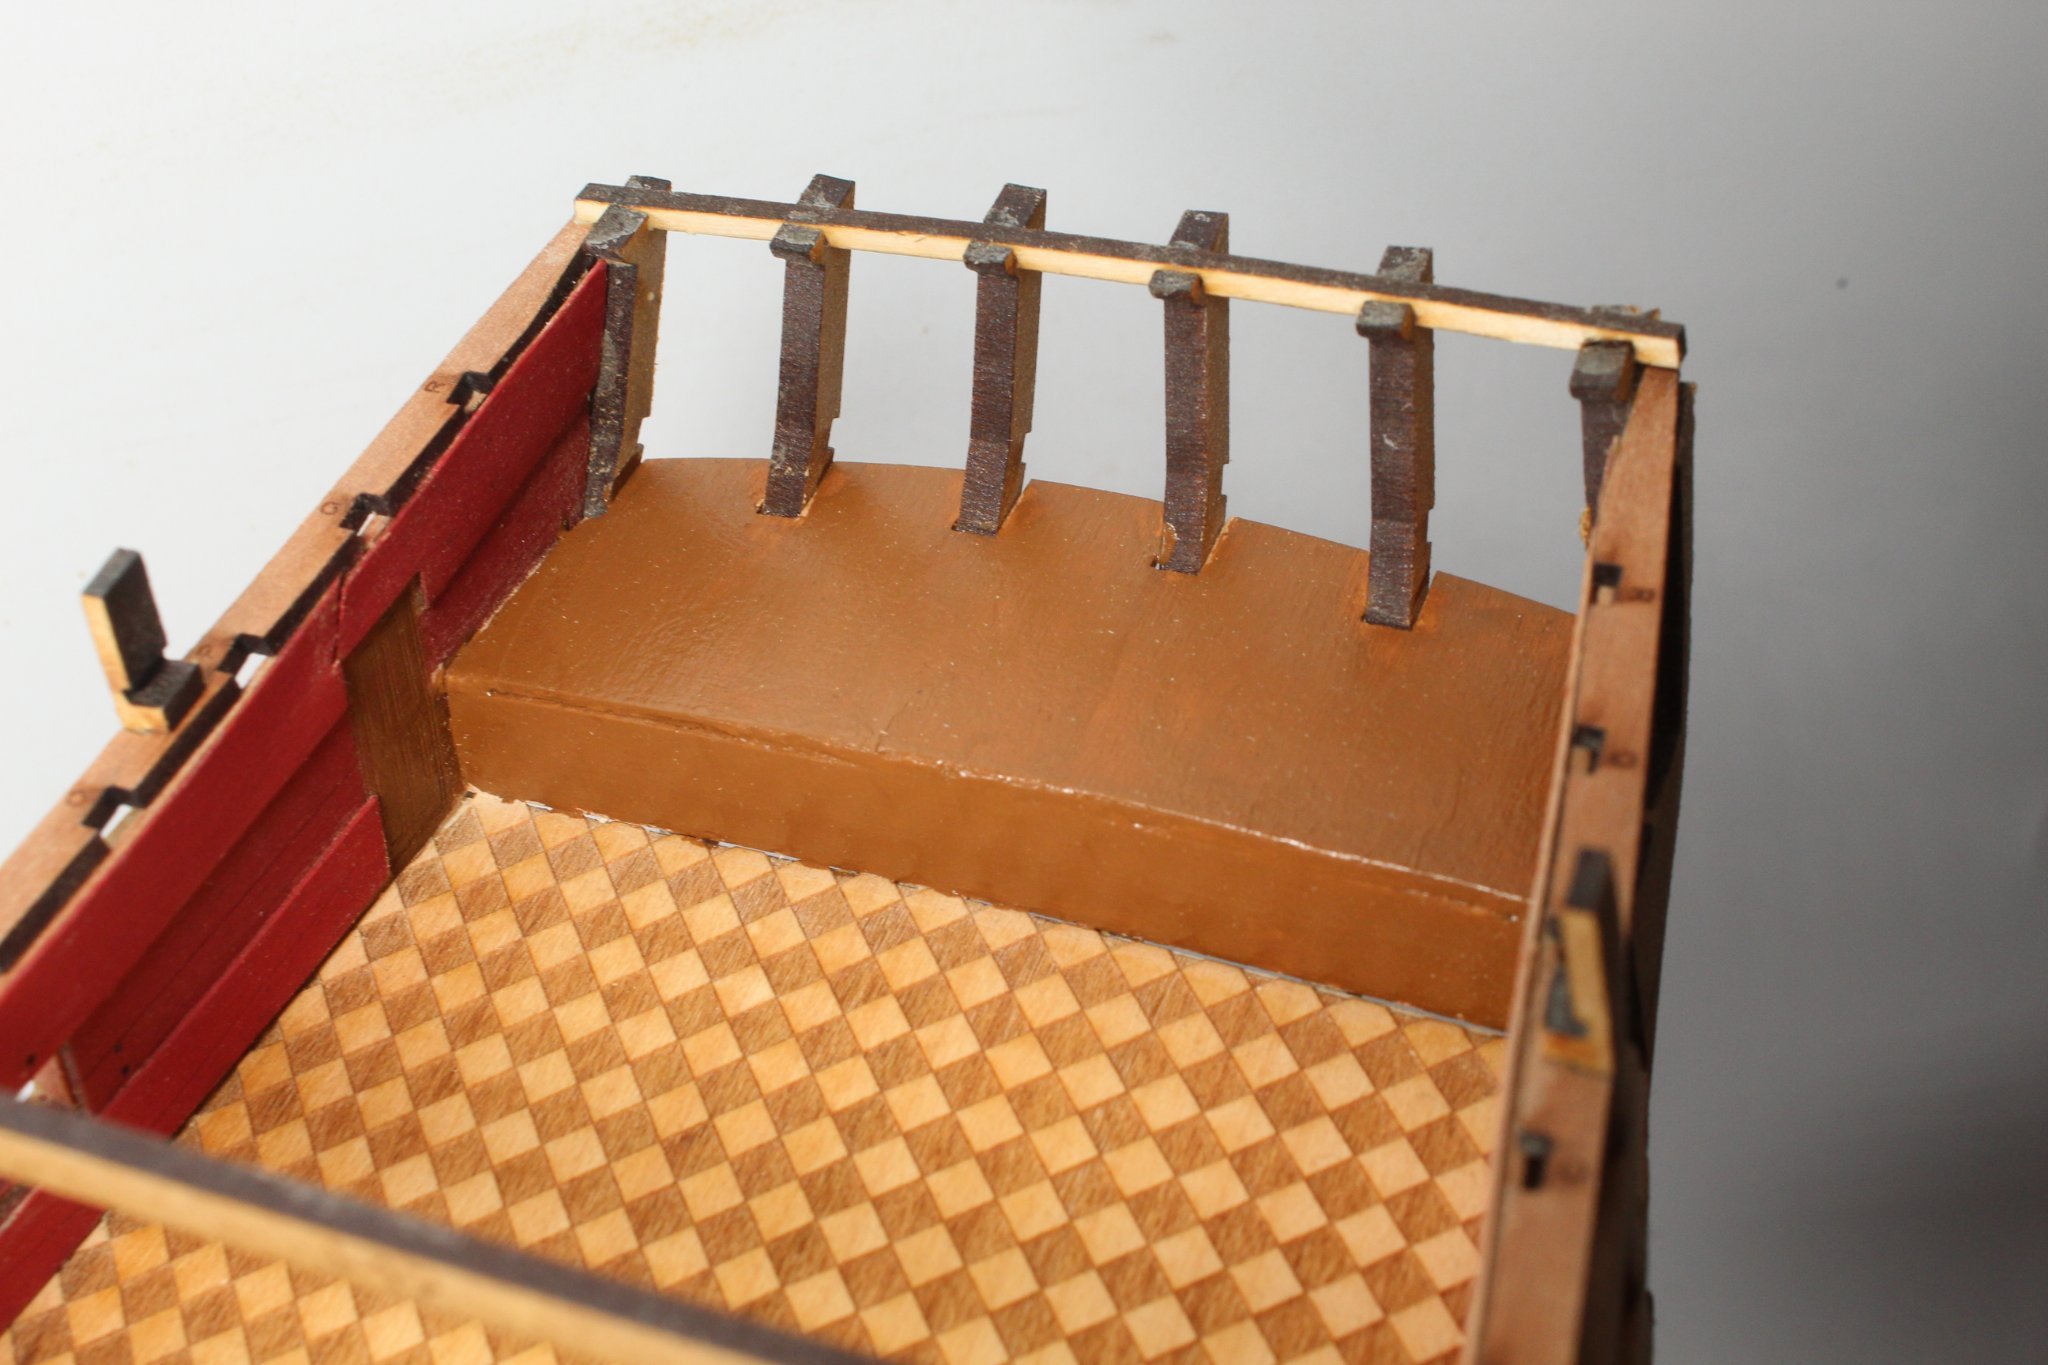
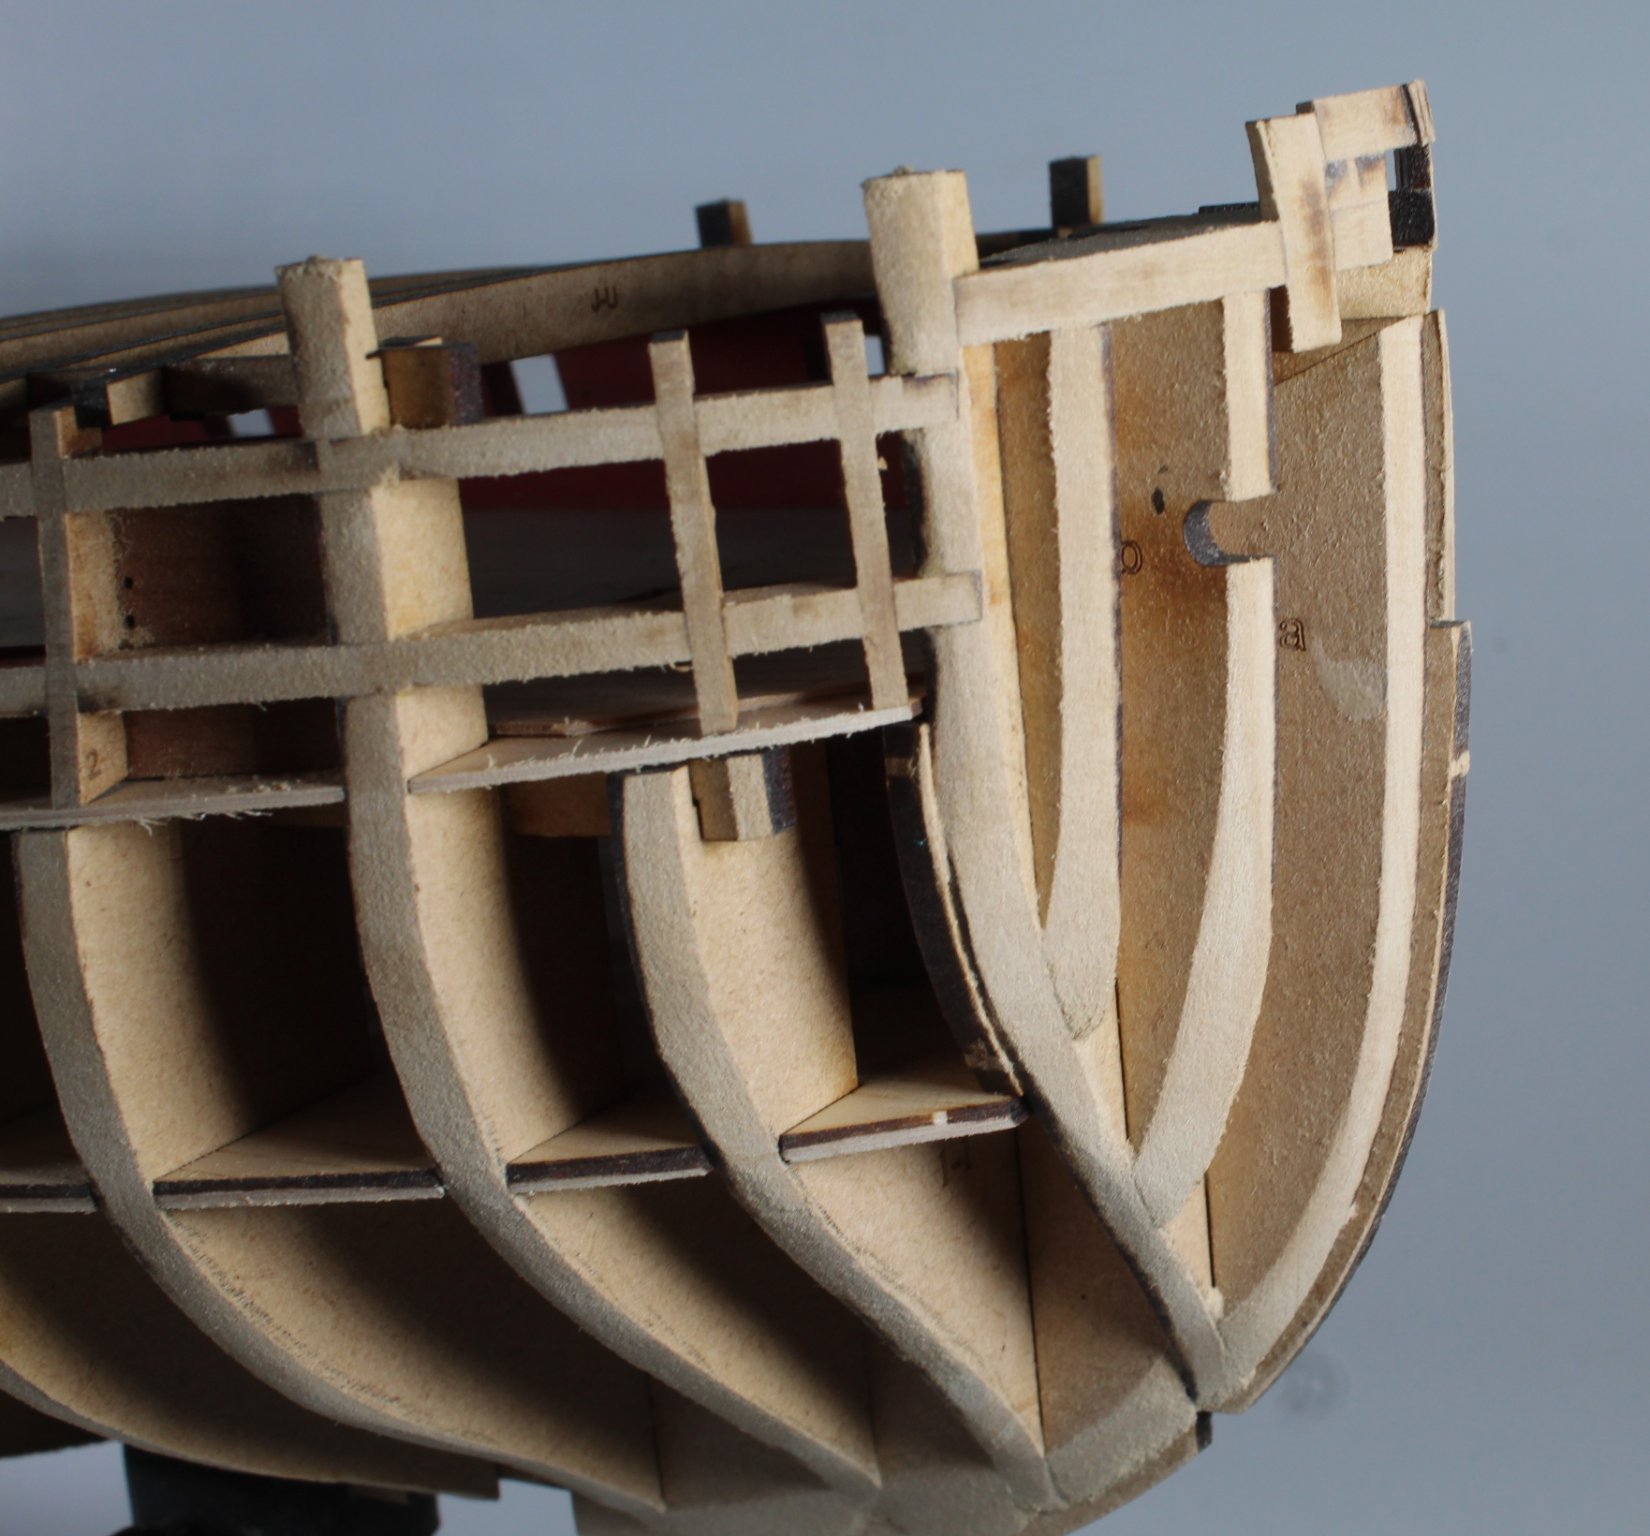
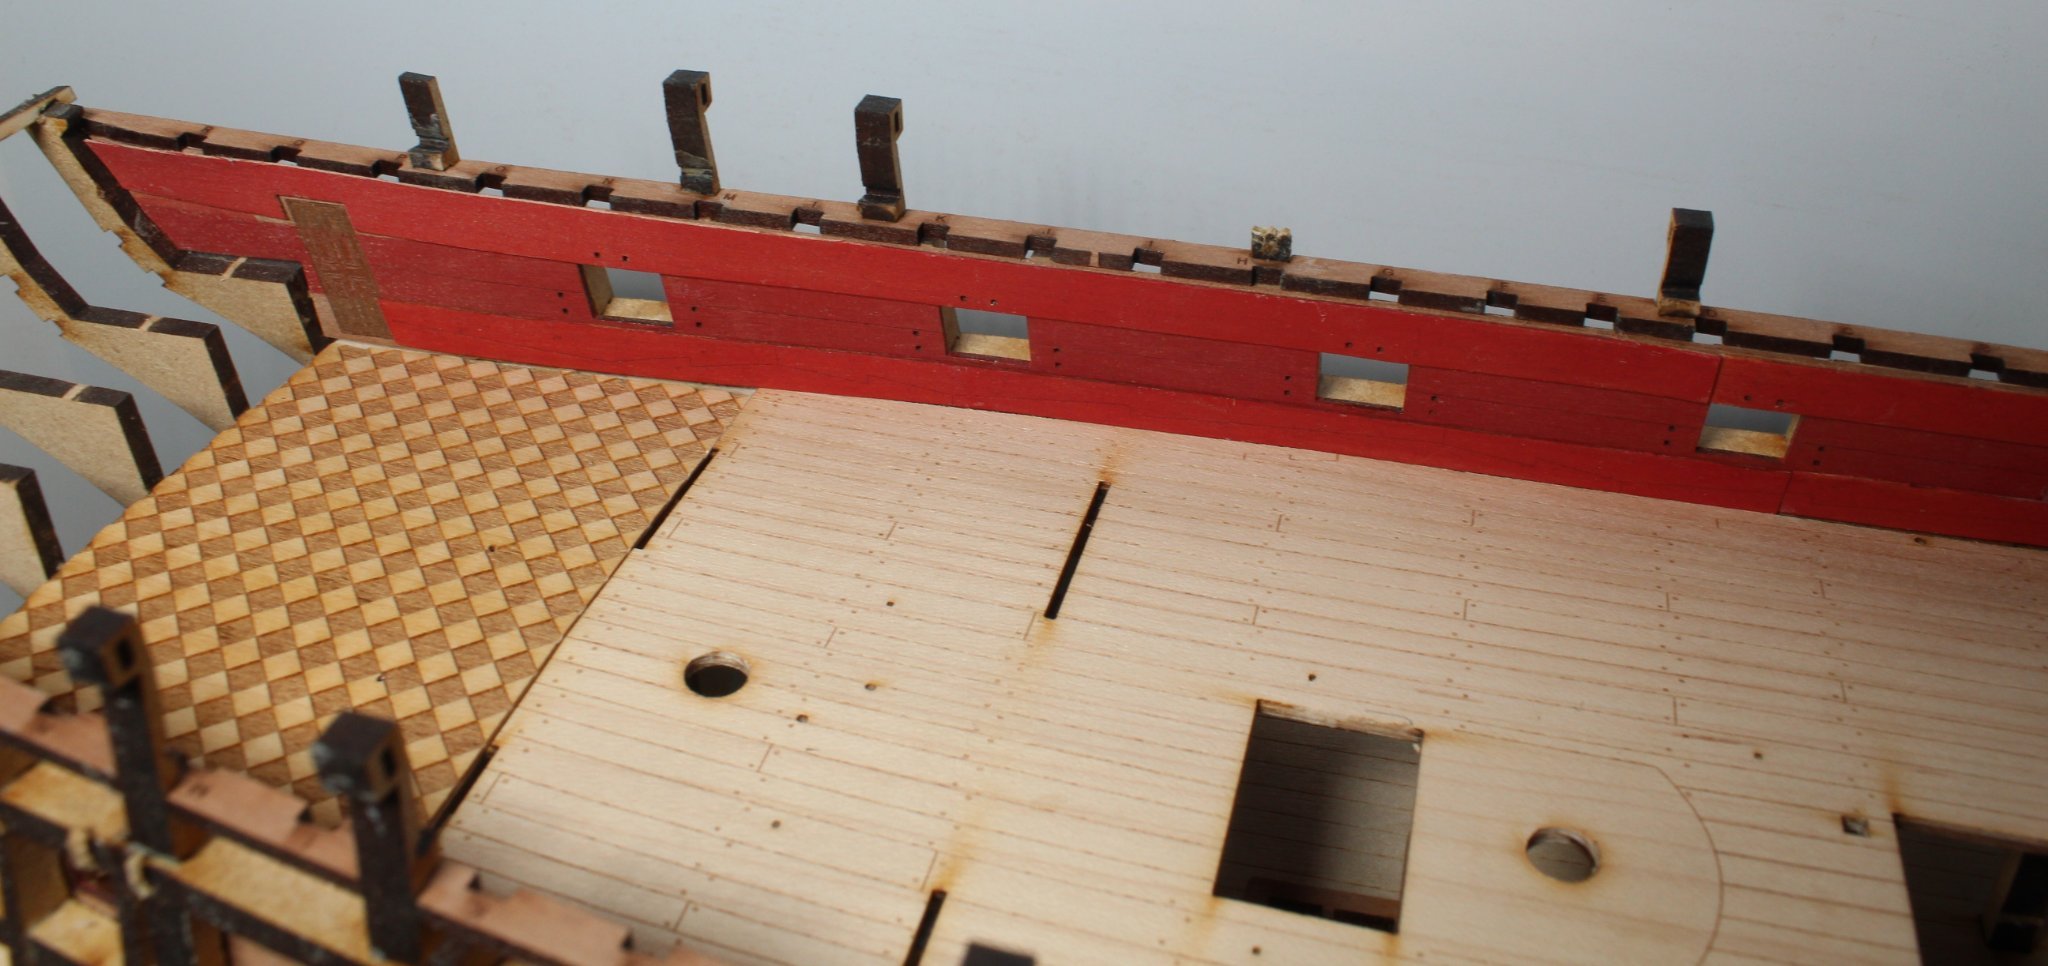
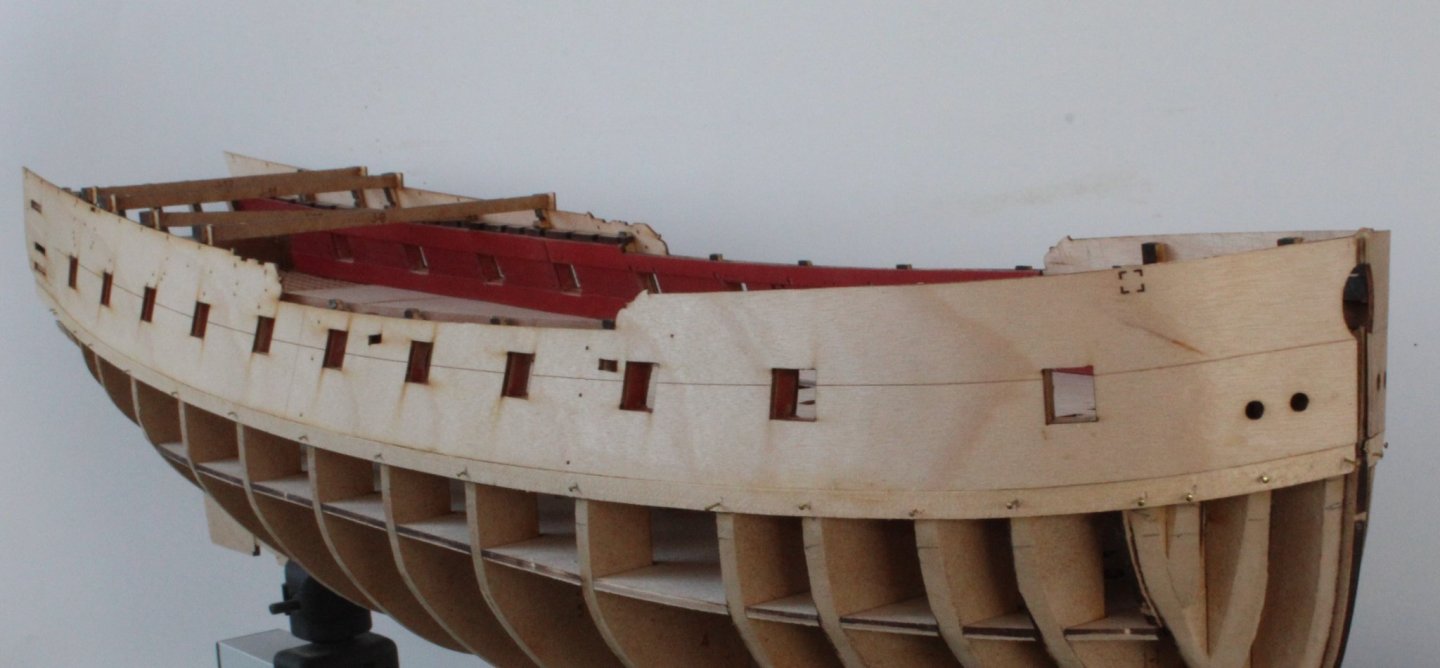
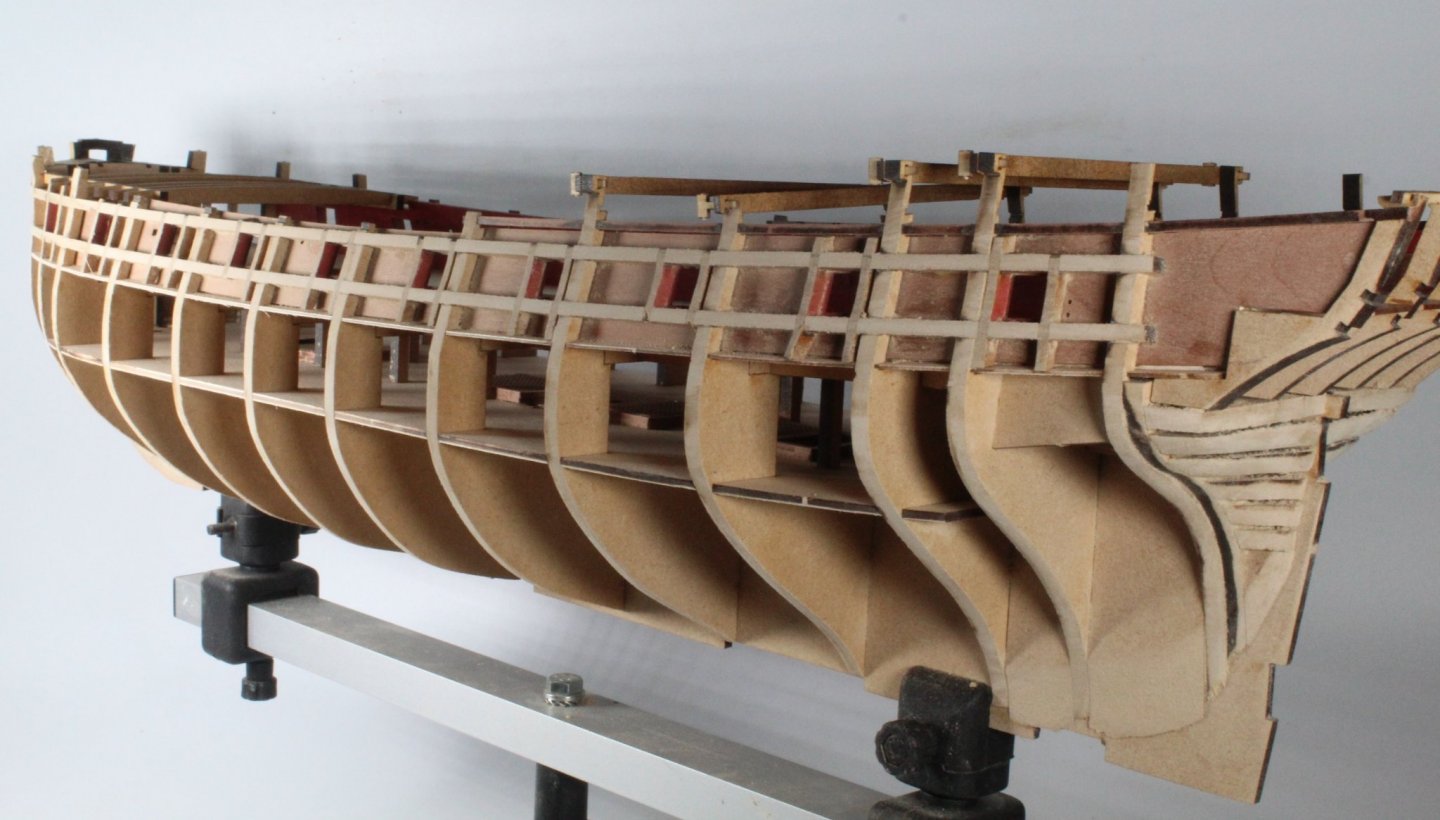
I have been able to resist my normal "bish bash bosh" building method so far and I am trying to take much more time and care with my V2 build. For the last couple of days I have been fairing the hull. I started this process by using my rotary tool to remove the excess material from vertical gun port strips. It was then a case of using 120 grit sandpaper in conjunction with my Amati Special Cleaner B7140 and florey sanding sticks to fair the hull. It took quite a bit of effort to sand the areas where the gun port strips crossed the bulkheads smooth, i.e. so there was no laser char. I only broke one of the jig holding ears during the fairing process, as can be seen below (J10) I have tried a few planks around the bow area and as far as I can I have good contact between the planks and bulkheads The stern area I have also fitted the stern cabin bulkhead and stern cabin seat patterns. Although this is not going to be visible once the quarterdeck has been fitted I debated adding some panelling to enhance the stern cabin bulkhead and stern cabin seat but in the end I opted for a WOP coat followed with a walnut paint finish. I then clamped the upper hull side patterns to the hull from midships to stern. I then took the stern fascia panel and added some tape 2mm below the top edge and clamped the fascia panel to the hull. This needs a slight adjustment as the fascia needs to be raised up a bit on this side. This side also needs a slight adjustment as it is a fraction too high at the moment. I also clamped the upper stern counter to the fascia panel. This will enable me to workout the position of the lower counter pattern. I need to remove some laser char before I can add some pencil marks to indicate the where the lower counter will be positioned.


- 476 replies
-
- 7
-
-
- sphinx
- vanguard models
- (and 1 more)
-
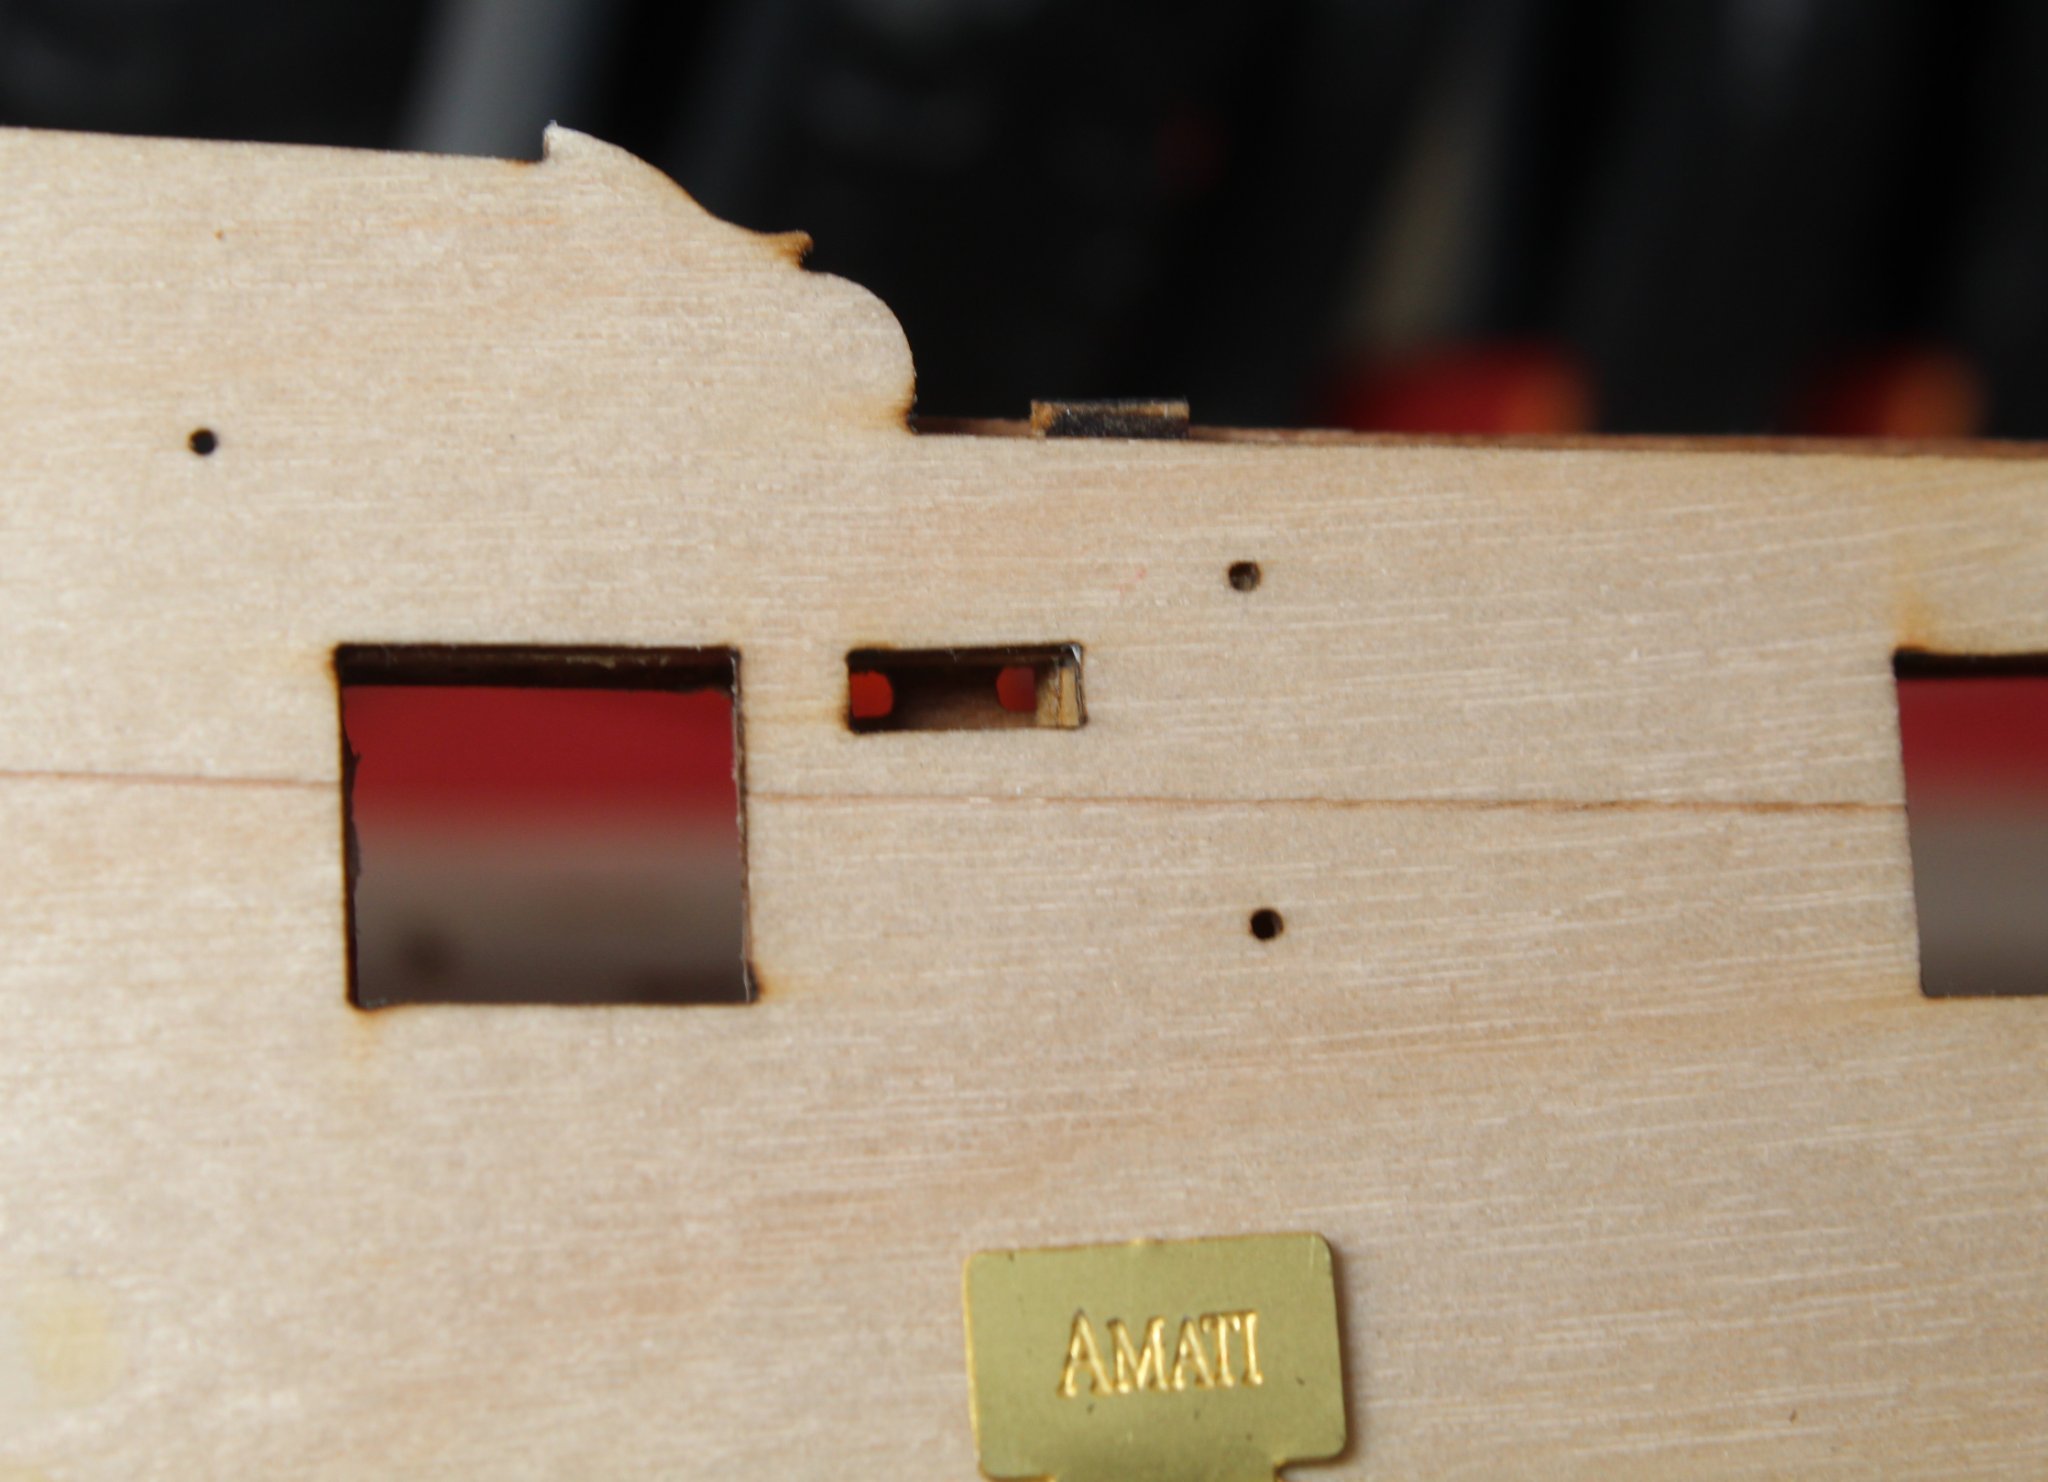
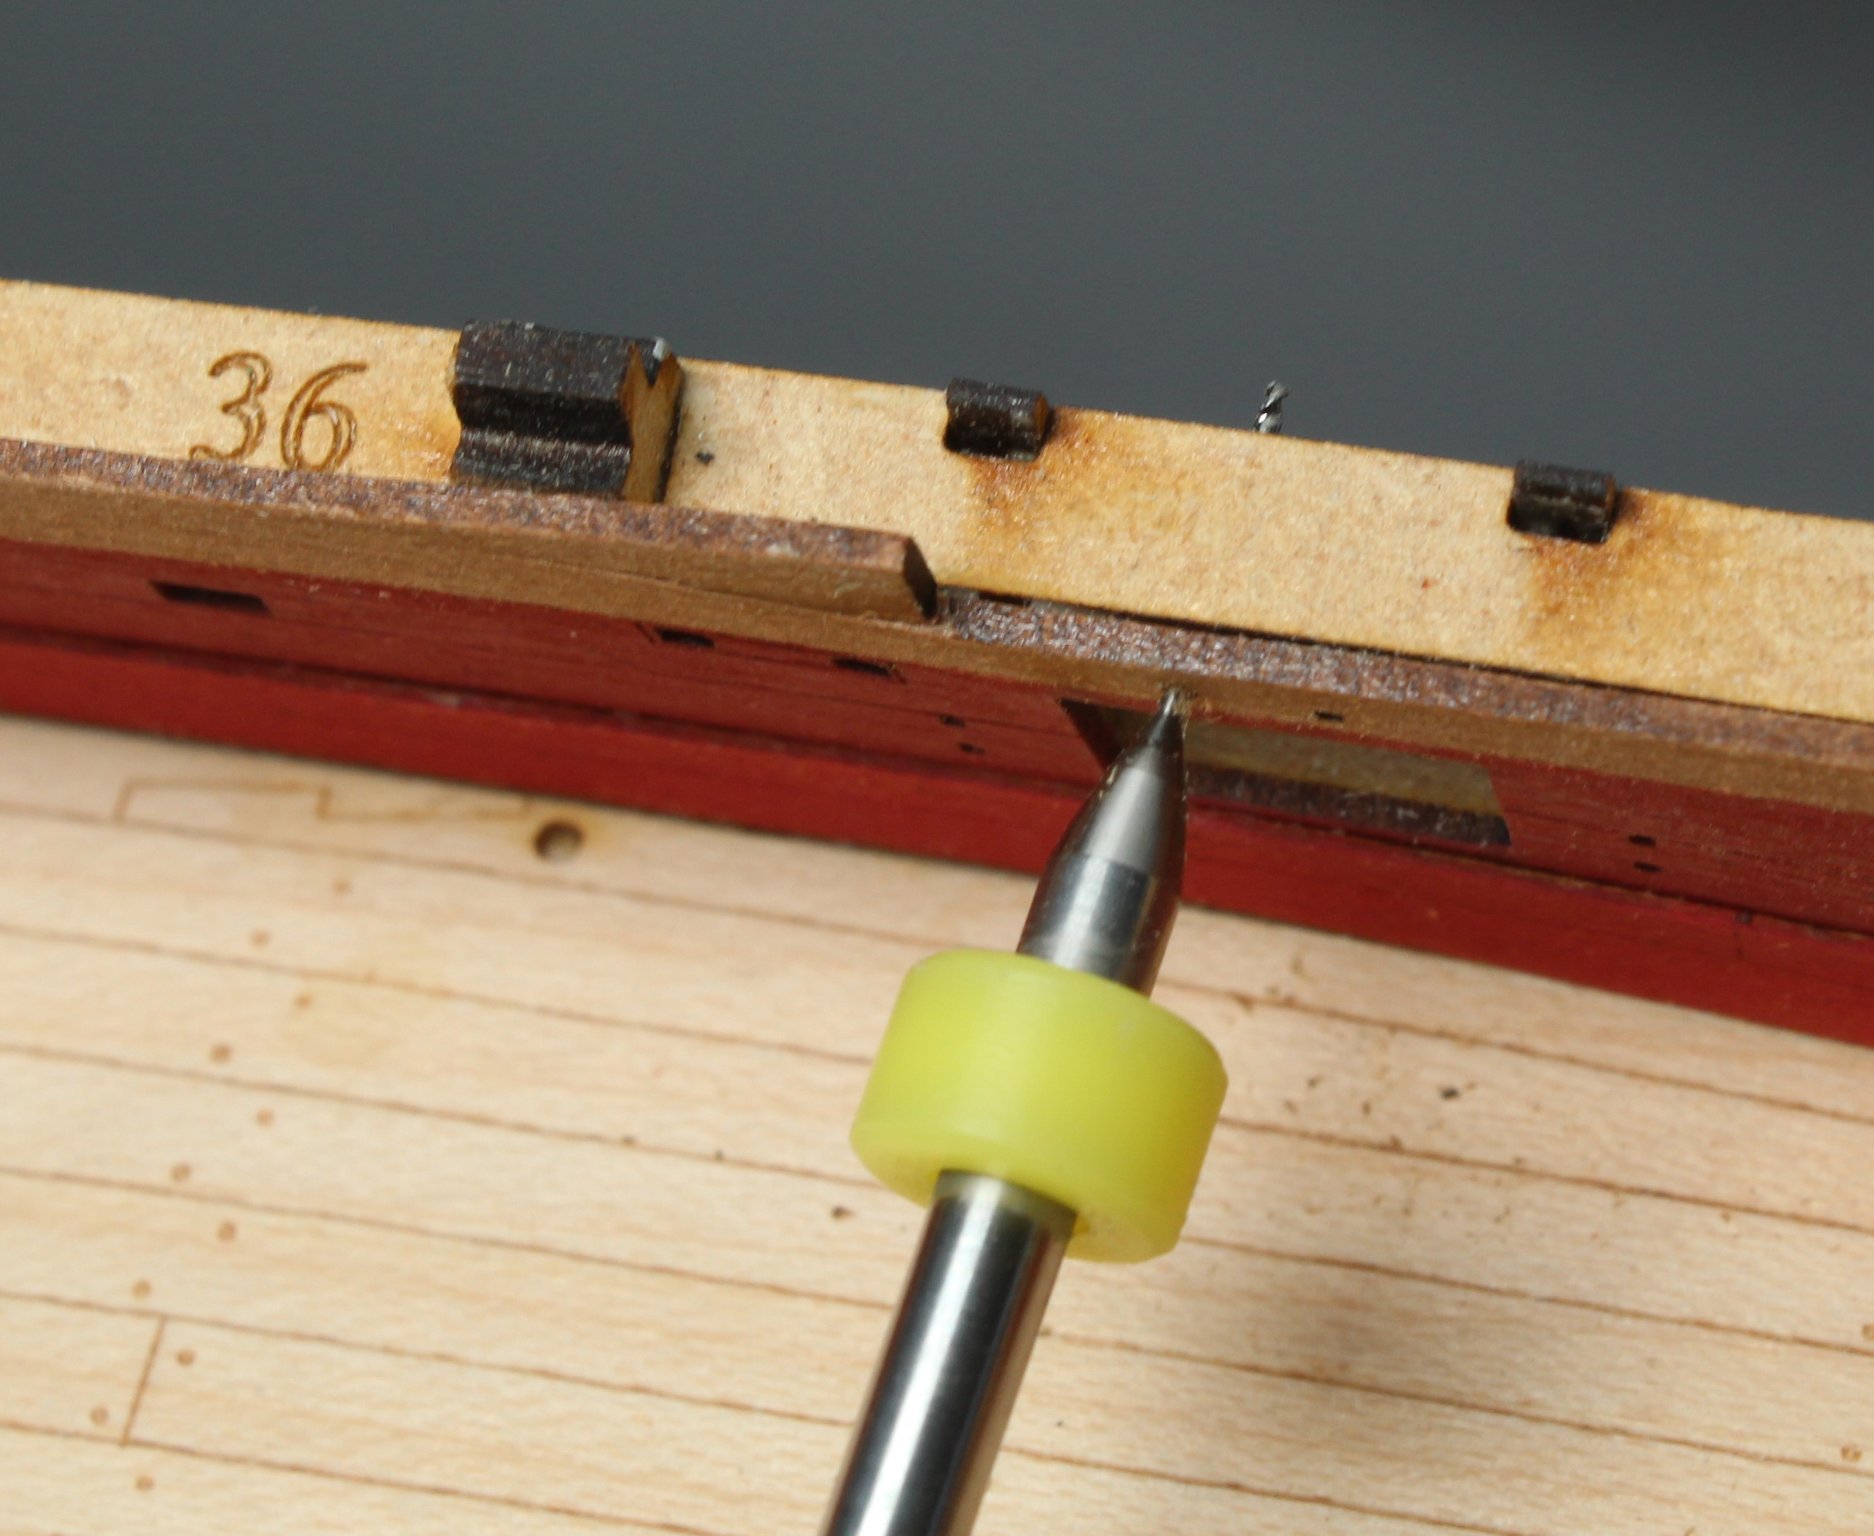
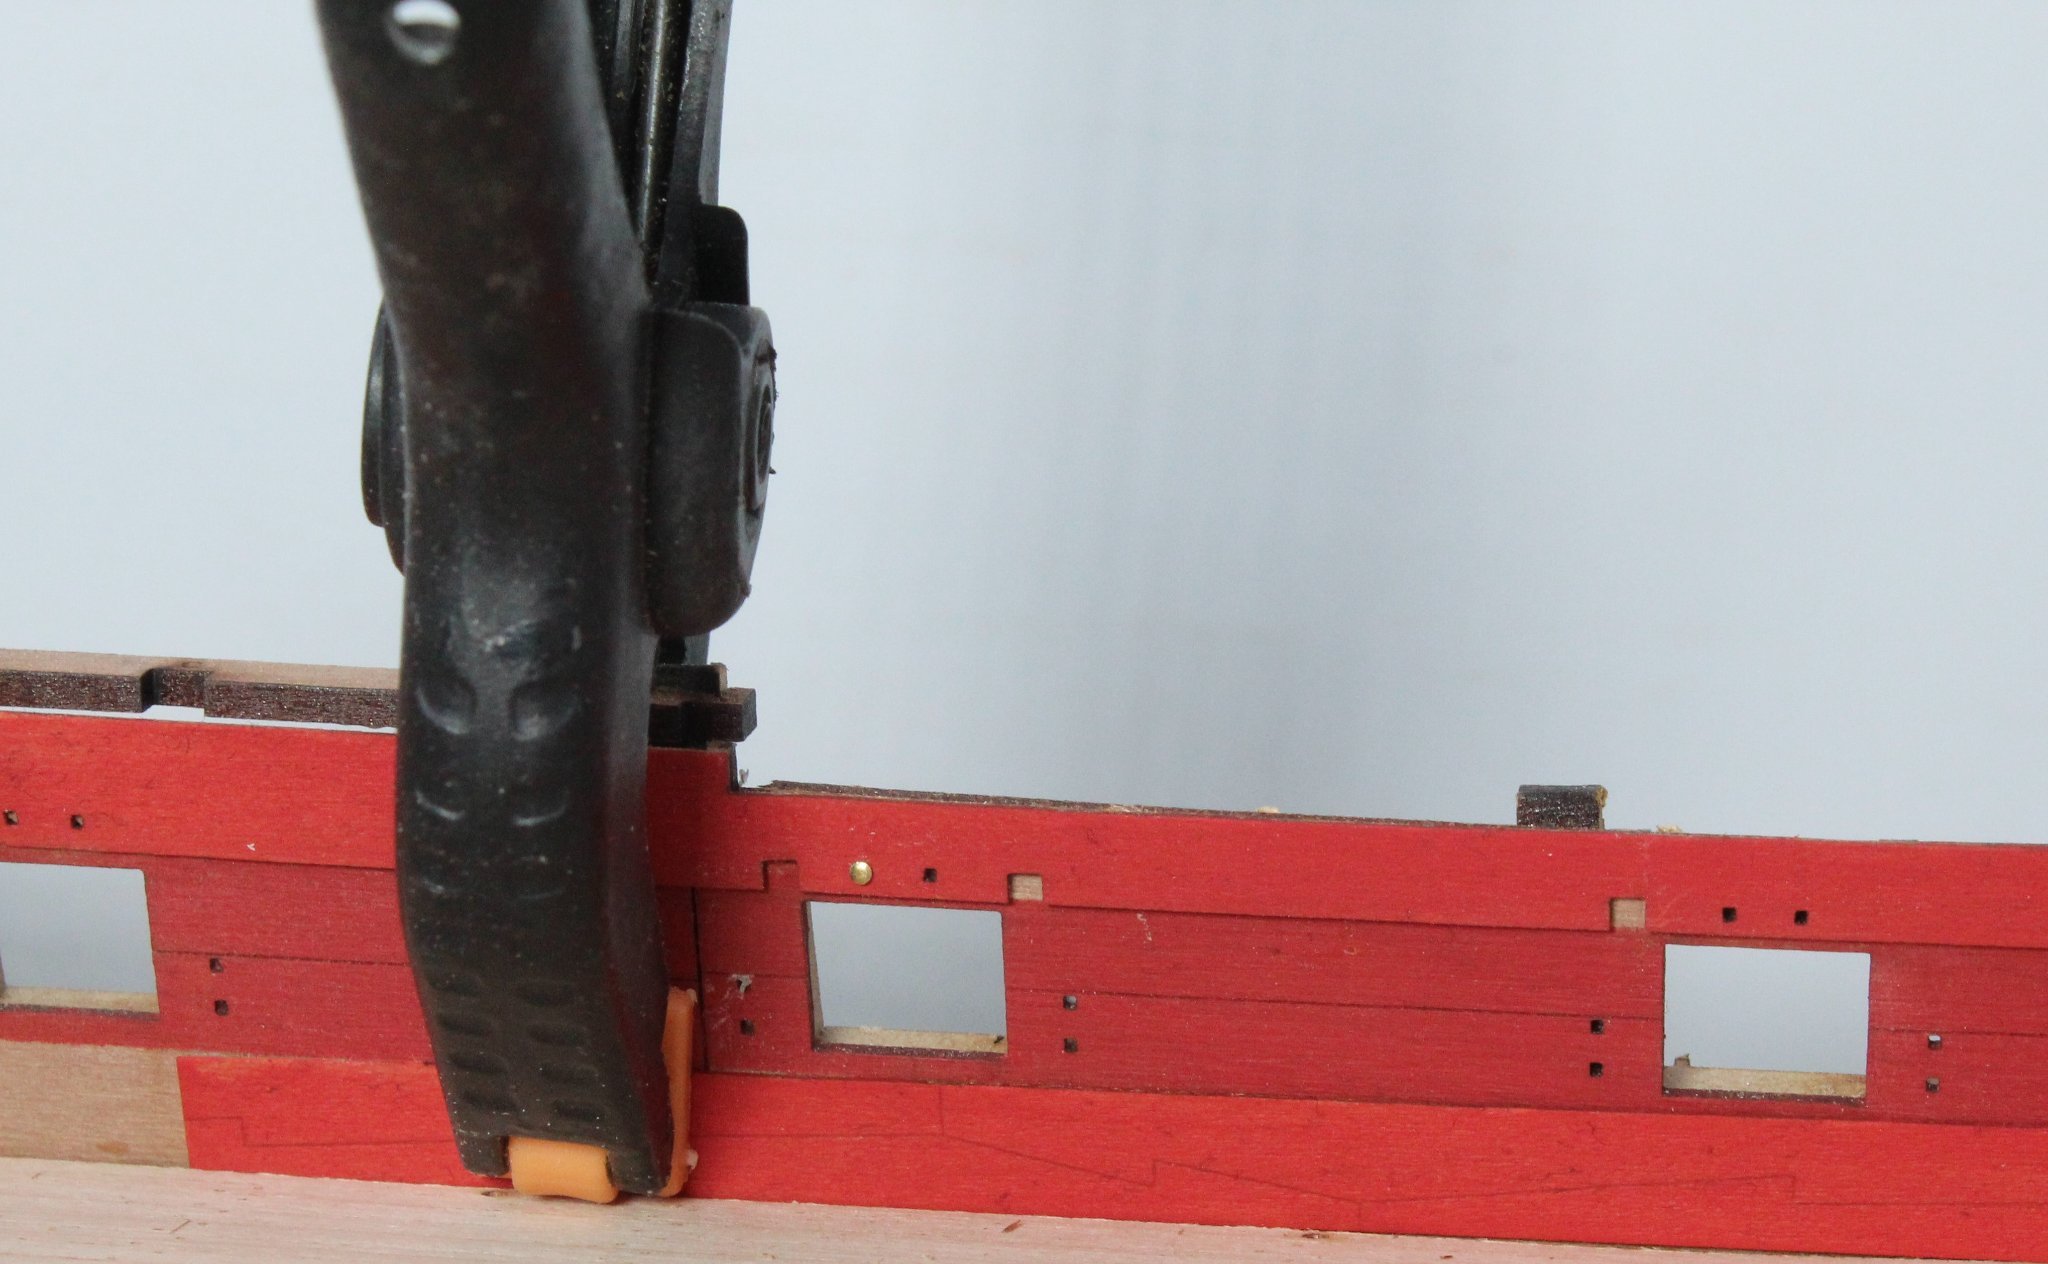
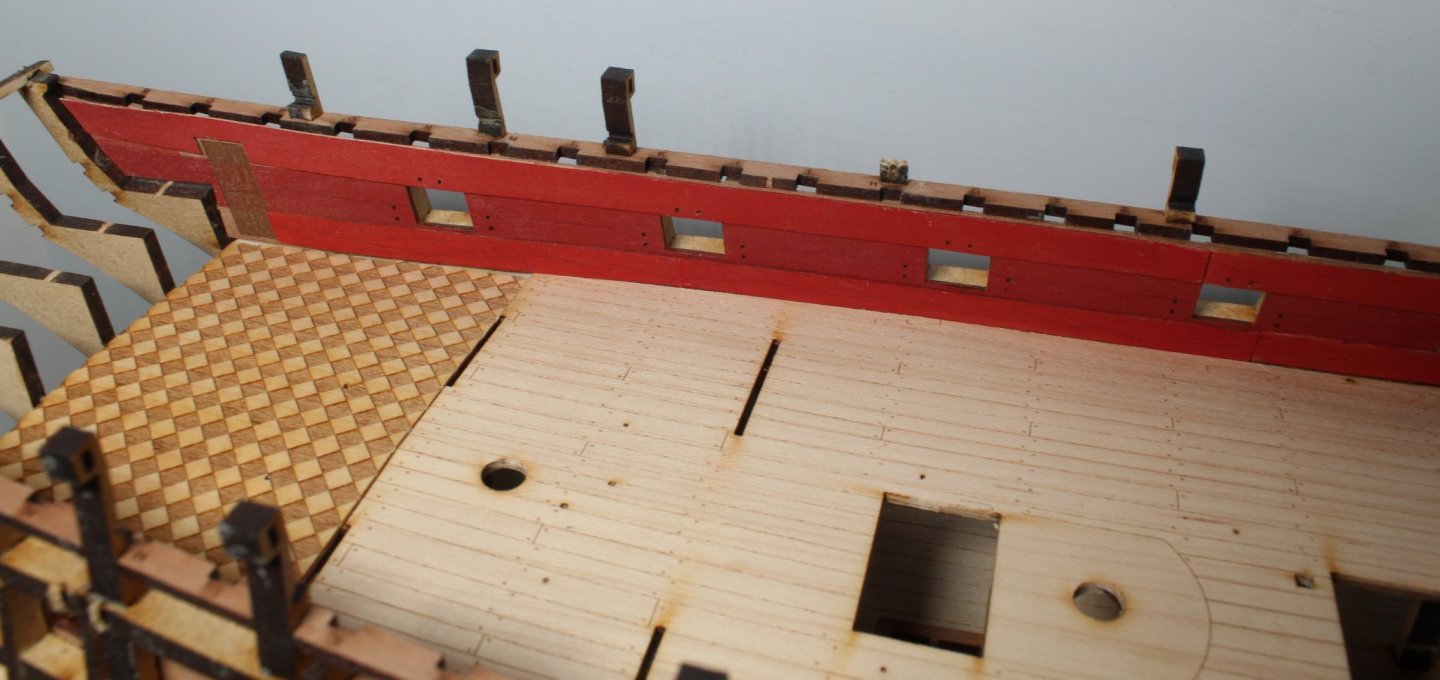
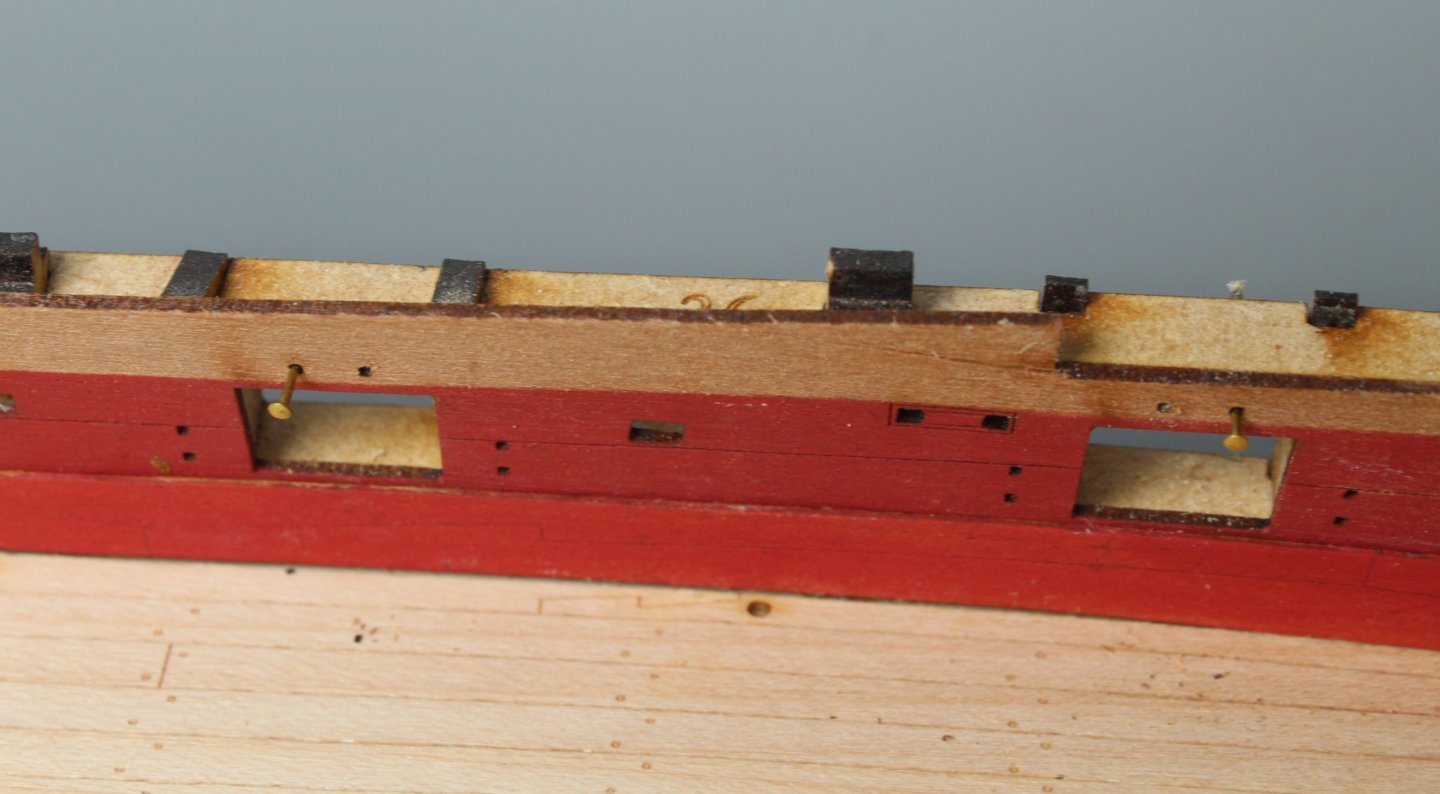
Today I started work on fitting the Lower Spirketting and Deck Clamp Patterns to the left hand side. Before proceeding with the gluing phase there were a few things I wanted to do / check. The first task was to drill through the eyebolt holes above each gun port so locating pins can be used when fitting the Deck Clamp Patterns, as can be seen in the photo below With each hole drilled I checked the pins would fit. I also test fitted an eyebolt. Using the holes the Deck Clamp Patterns were dry fitted. I decided to test fit some of the gangway deck support knees. I soon realised that I had not correctly fitted these parts on my V1 build. Now that I was happy with how the support knees should be installed the Lower Spirketting and Deck Clamp Patterns were coated with a slightly diluted pva glue mix and clamped to the hull, using the pins to ensure the Deck Clamp Patterns were correctly positioned. Front Deck Clamp Pattern clamped in place, with pins used to locate the pattern can be seen The rear Lower Spirketting and Deck Clamp Patterns Tomorrow I will repeat the above process for fitting the right hand side Lower Spirketting and Deck Clamp Patterns, noting I have already run the micro drill through the eyebolts holes so it should be a simple task of applying the glue and clamping each part in turn. When complete I might add a final coat of diluted flat red paint before applying a WOP coat.


- 476 replies
-
- 4
-
-
- sphinx
- vanguard models
- (and 1 more)