HOLIDAY DONATION DRIVE - SUPPORT MSW - DO YOUR PART TO KEEP THIS GREAT FORUM GOING! (Only 20 donations so far - C'mon guys!)
×


Glenn-UK
-
Posts
3,154 -
Joined
-
Last visited
Content Type
Profiles
Forums
Gallery
Events
Everything posted by Glenn-UK
-
 Good luck with your second planking, fingers crossed for a fab unpainted finish
- 505 replies
-
- 4
-

-
- vanguard models
- Sphinx
- (and 1 more)
-
Better to paint with a brush and build up the coats gradually as I tend to use too much when spraying from a tin
-
The better I can get this one the better the 2nd one will turn out
-
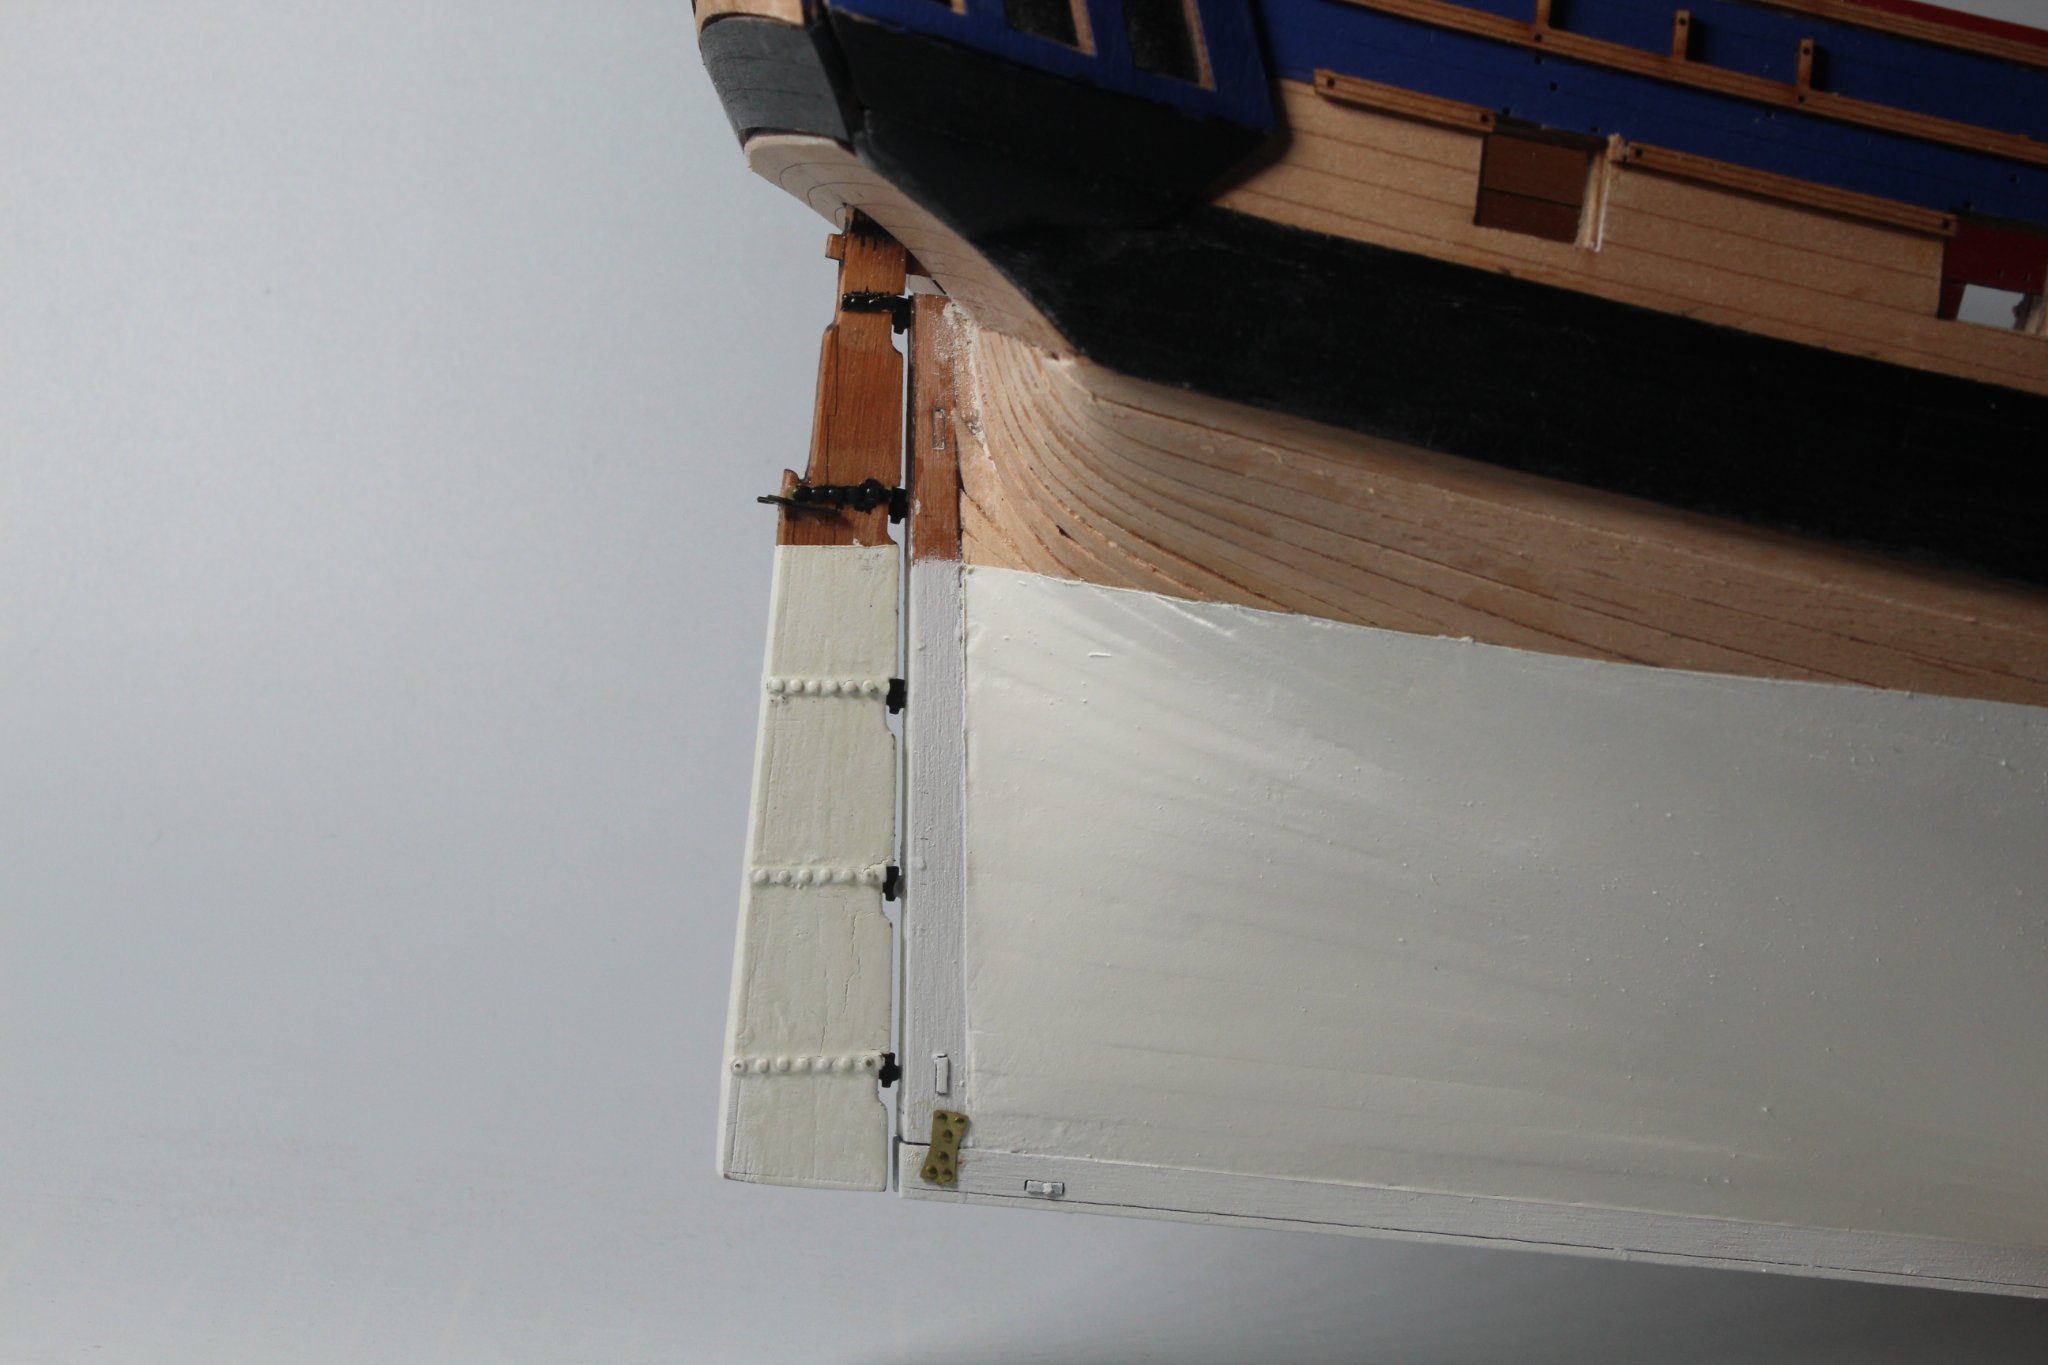
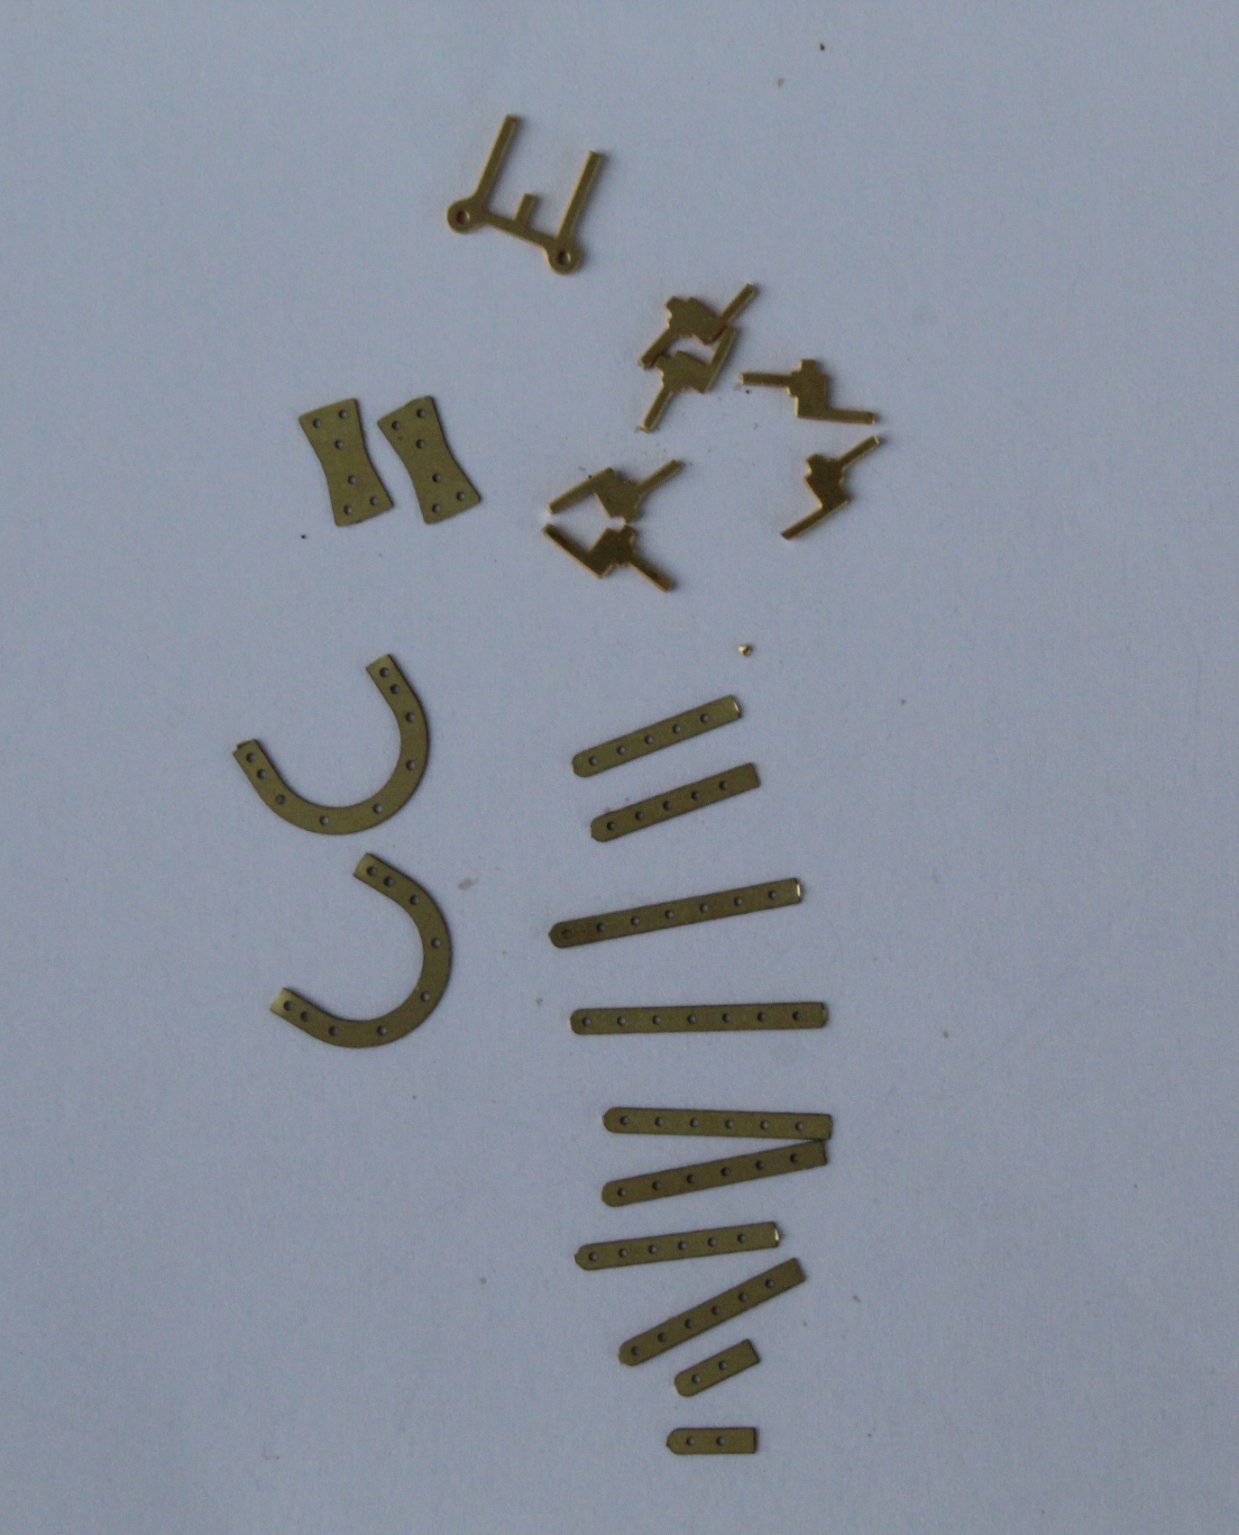
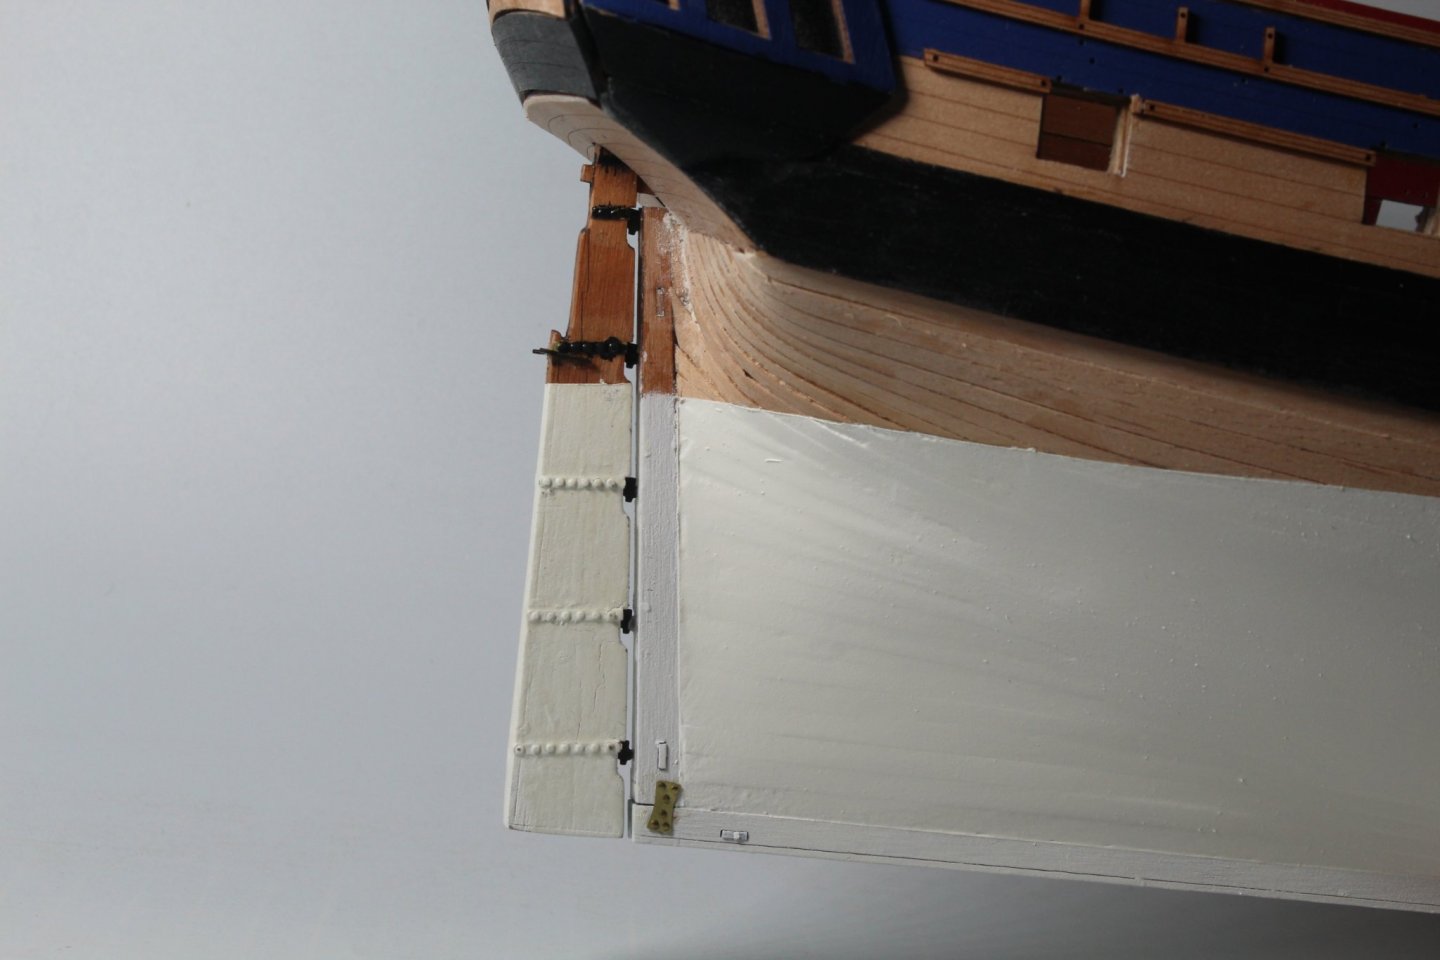
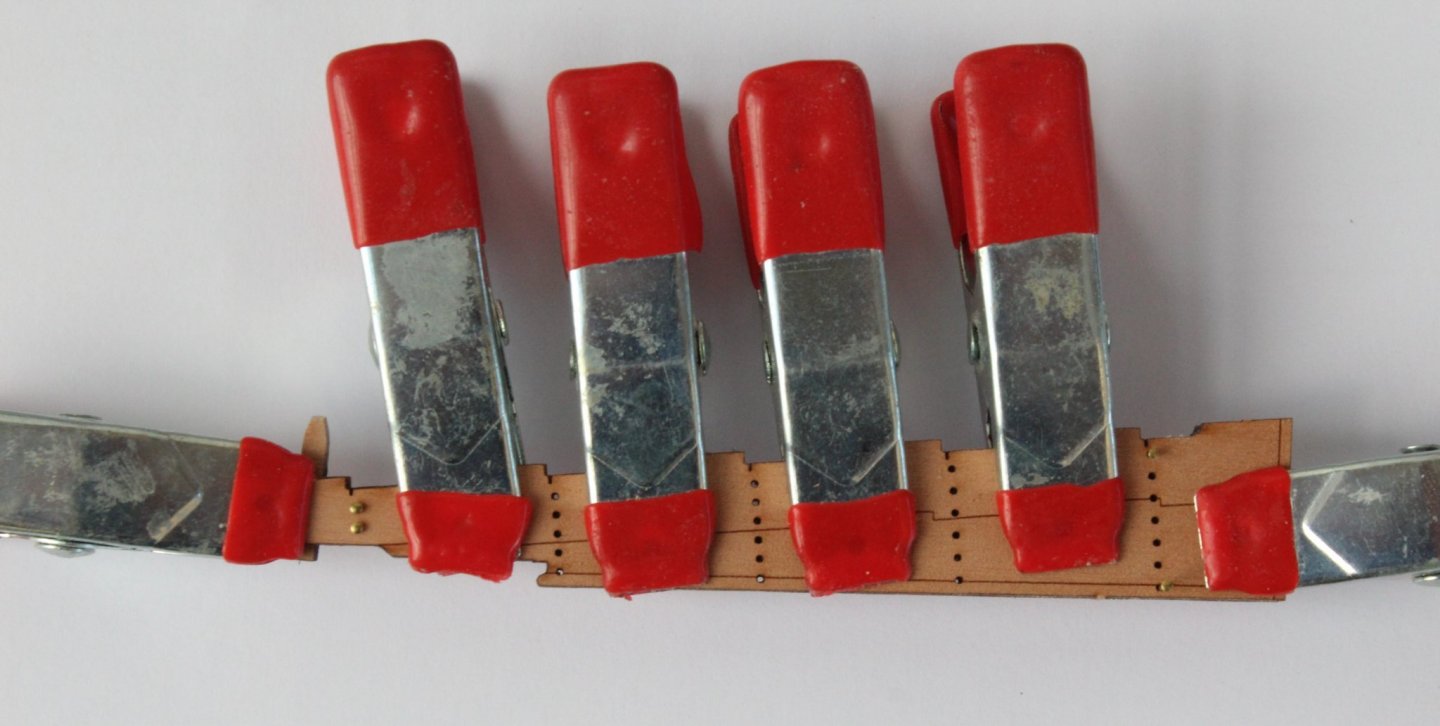
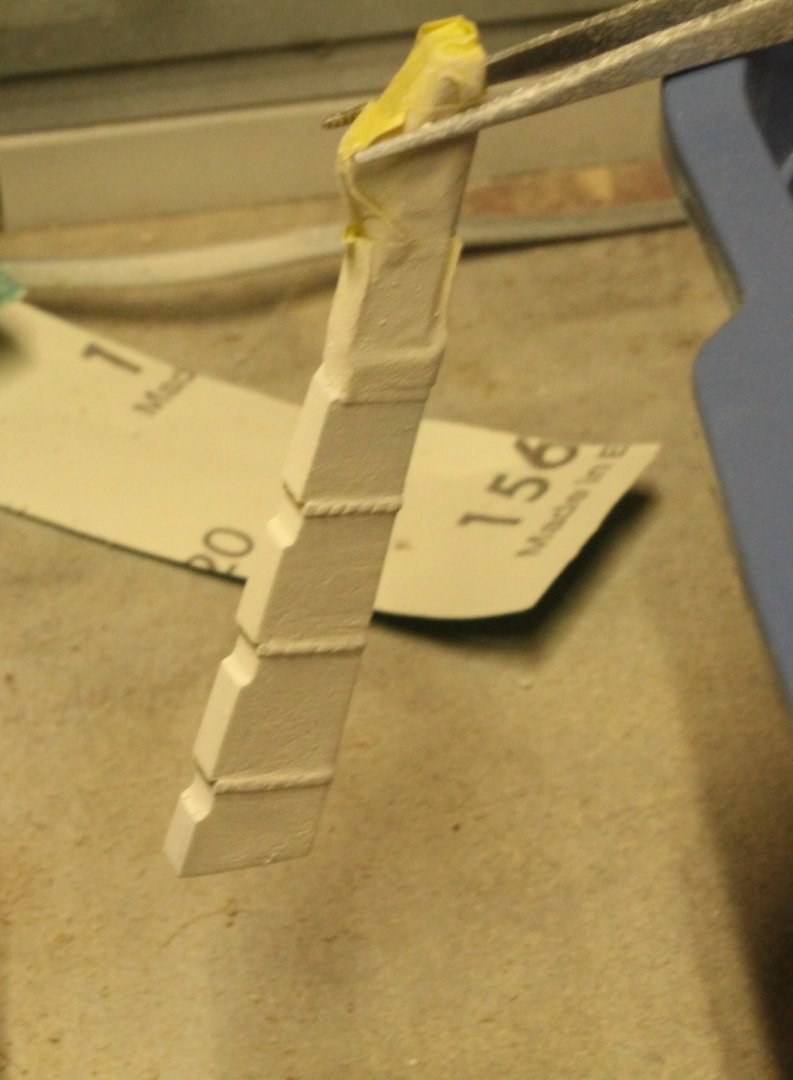
HULL WORK RUDDER ASSEMBLY BUILD MANUAL STEPS 250 – 261 PLAN SHEET 14 LINK TO MY BUILD LOG INDEX Tools Used Craft knife Super phatic glue Acetone & soapy water Brass pins White and black paint Chemical blackener Clamps Varnish Micro drill Gathering the materials required 448, 194, 195, PE-31-40 (x2), PE153, PE-156 (x5) Assembly Process The two patterns were glued to the rudder, clamps were used to hold the patterns in place as the glue cured. Pins were used to ensure the patterns were correctly aligned. Using super phatic glue the various pintle strips were added to the rudder assembly, brass pins were used to ensure they were correctly aligned. Once the glue had cured the laser char was removed from the rudder edges. The various photo etch parts were cleaned, starting with a soak in acetone followed by hot soapy water. The top two pintle strips, the 5 x rudder gudgeon & pintles and the rudder spectacle plate were then chemically blackened. The PE parts are ready for cleaning The brass pins were trimmed to approx. 2 to 3mm long, and then using my round nose pliers they were added to the rudder assembly. As the brass pins were a tight fit I did not use any adhesive. The rudder assembly was then coated with thin coat of varnish. Once the varnish had dried the rudder was taped so the part below the water line could be painted white. I have managed to lose all the etched lines, too much paint added! After painting the lower section of the rudder white the upper part of the rudder was taped so the black bands could be painted. Using a micro drill the holes were drilled in the rudder and the stern post, using the guides provided. The rudder spectacle plate and rudder gudgeon & pintles were then added to the rudder assembly. The rudder assembly was then added to the hull and I was please to see how well the rudder lined up. All that is left to do is to add the rudder brace strips to the hull.

-
I think bit I you are on about is different to the bit I thought it was.
-
From what I can see from the build log and manual photos I think it was just sanded smooth, blended and painted black with the gunwales. Your solution looks good also.
-
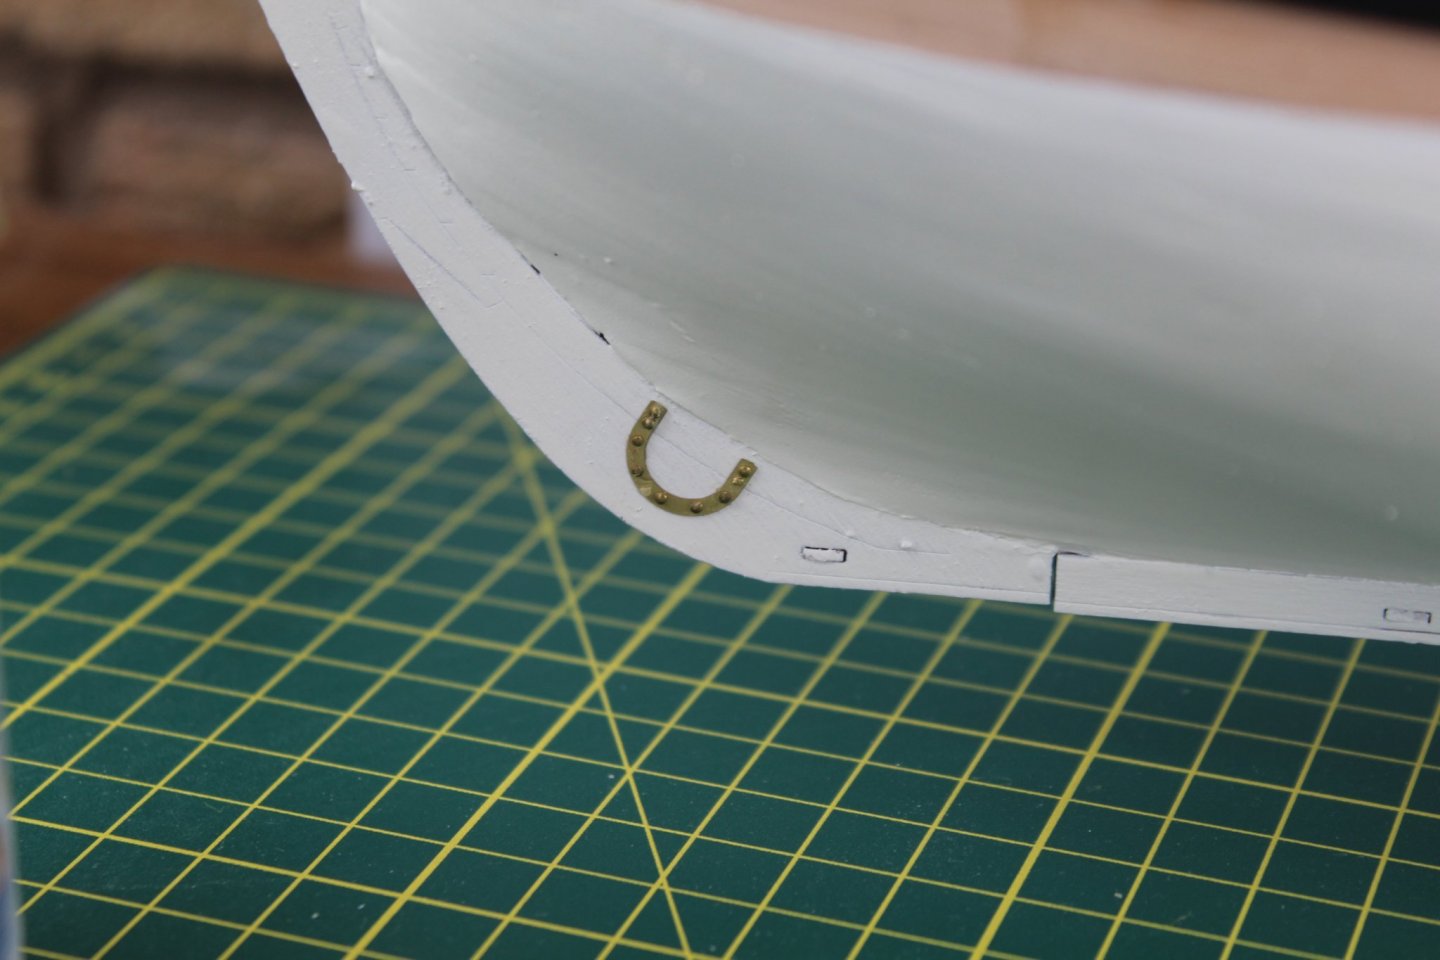
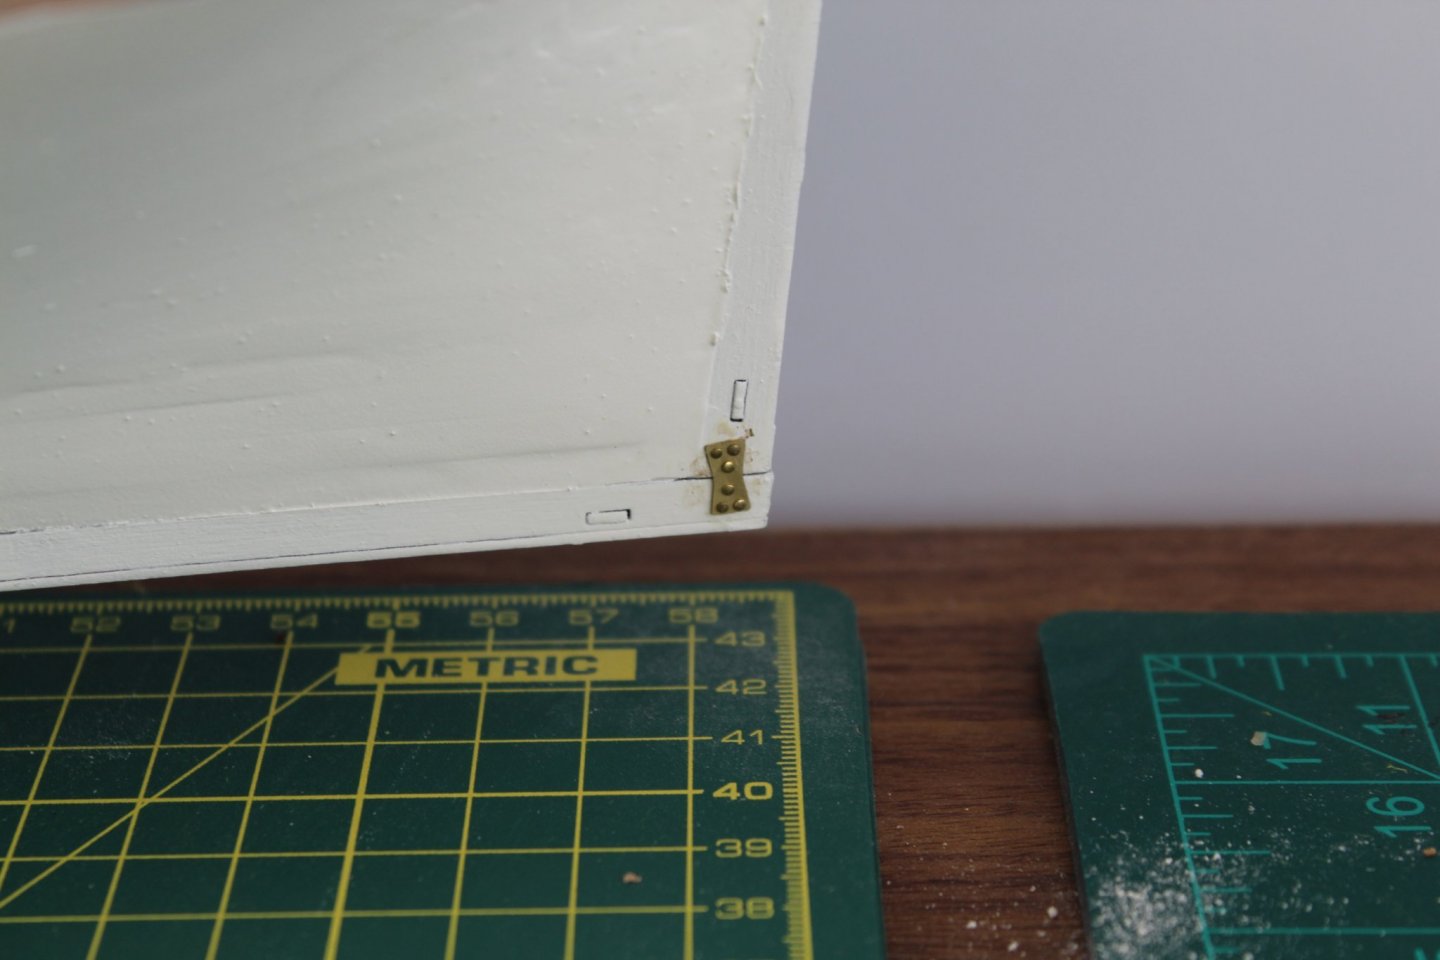
HULL WORK HULL PLATES BUILD MANUAL STEPS 262 - 264 LINK TO MY BUILD LOG INDEX Tools Used Craft knife Super phatic glue Acetone & soapy water Brass pins Clamps Varnish Gathering the materials required PE-27 (x2), PE-28 (x2) Assembly Process I am currently working on the rudder assembly, which is currently in the painting phase and should be ready to be installed tomorrow. I will post details of my rudder assembly once complete. The two prow horseshoe plates and two stern fishplates were cleaned, first in a solution of acetone and then in some soapy water. For this prototype build I opted not to paint the plates copper, but I might paint them later on if I feel so inclined to do so. Each plate was fitted in the same way, which was to apply a thin coat of super phatic glue to the hull area and to then position the plate, using brass pins to ensure then were correctly aligned. With the plate in place two clamps were used to hold the plate in the place and the brass pins were then removed to avoid them being glued in place. Once the glue had cured the clamps were removed. 30 x brass pins were then trimmed to approx. 2 to 3mm in length. Using my round nose pliers the brass pin were carefully inserted into the holes in the plates. I did not use any glue when pushing the pins in as they were all a nice tight fit and would be held in place once a coat of varnish had been added to finish task. The stern fishplate. You can see the hull is not totally smooth, but it is ok for this prototype build. The bow horseshow plate. Not a great joint between stem post and keel.
-
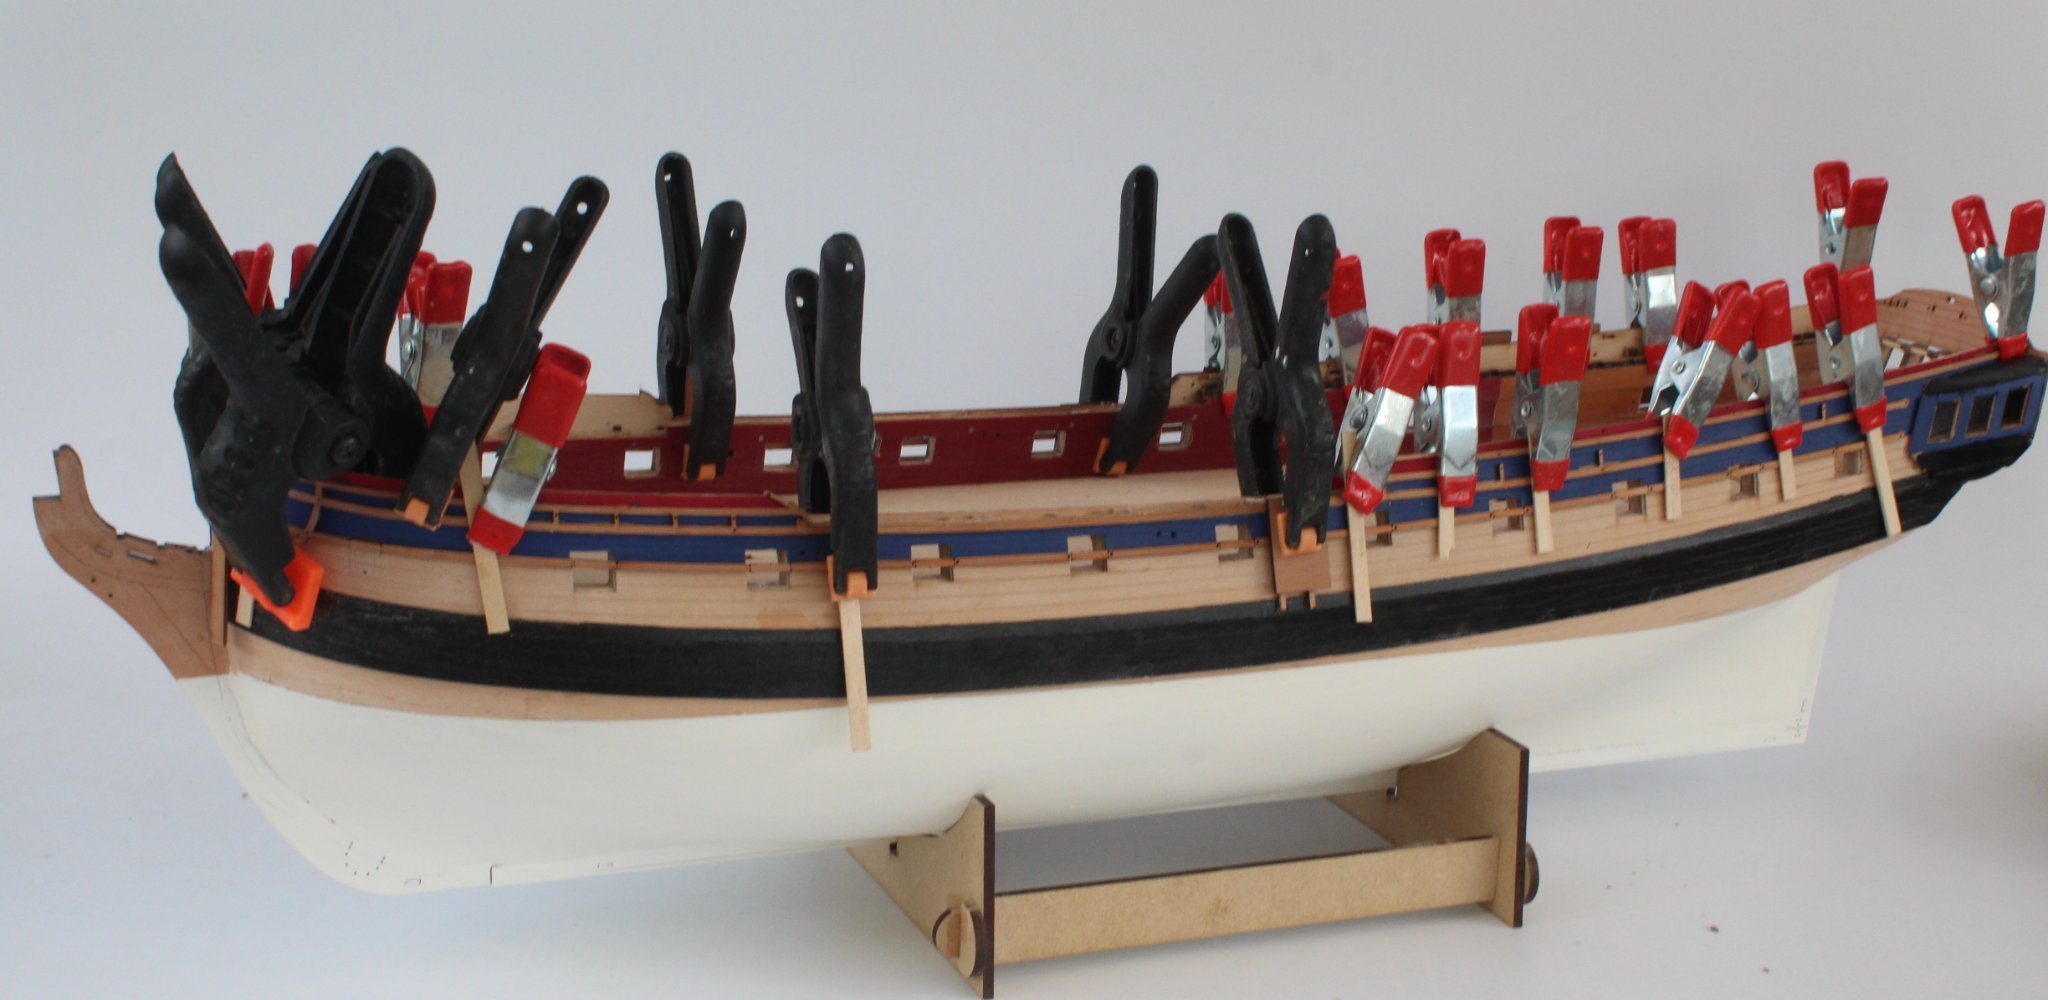
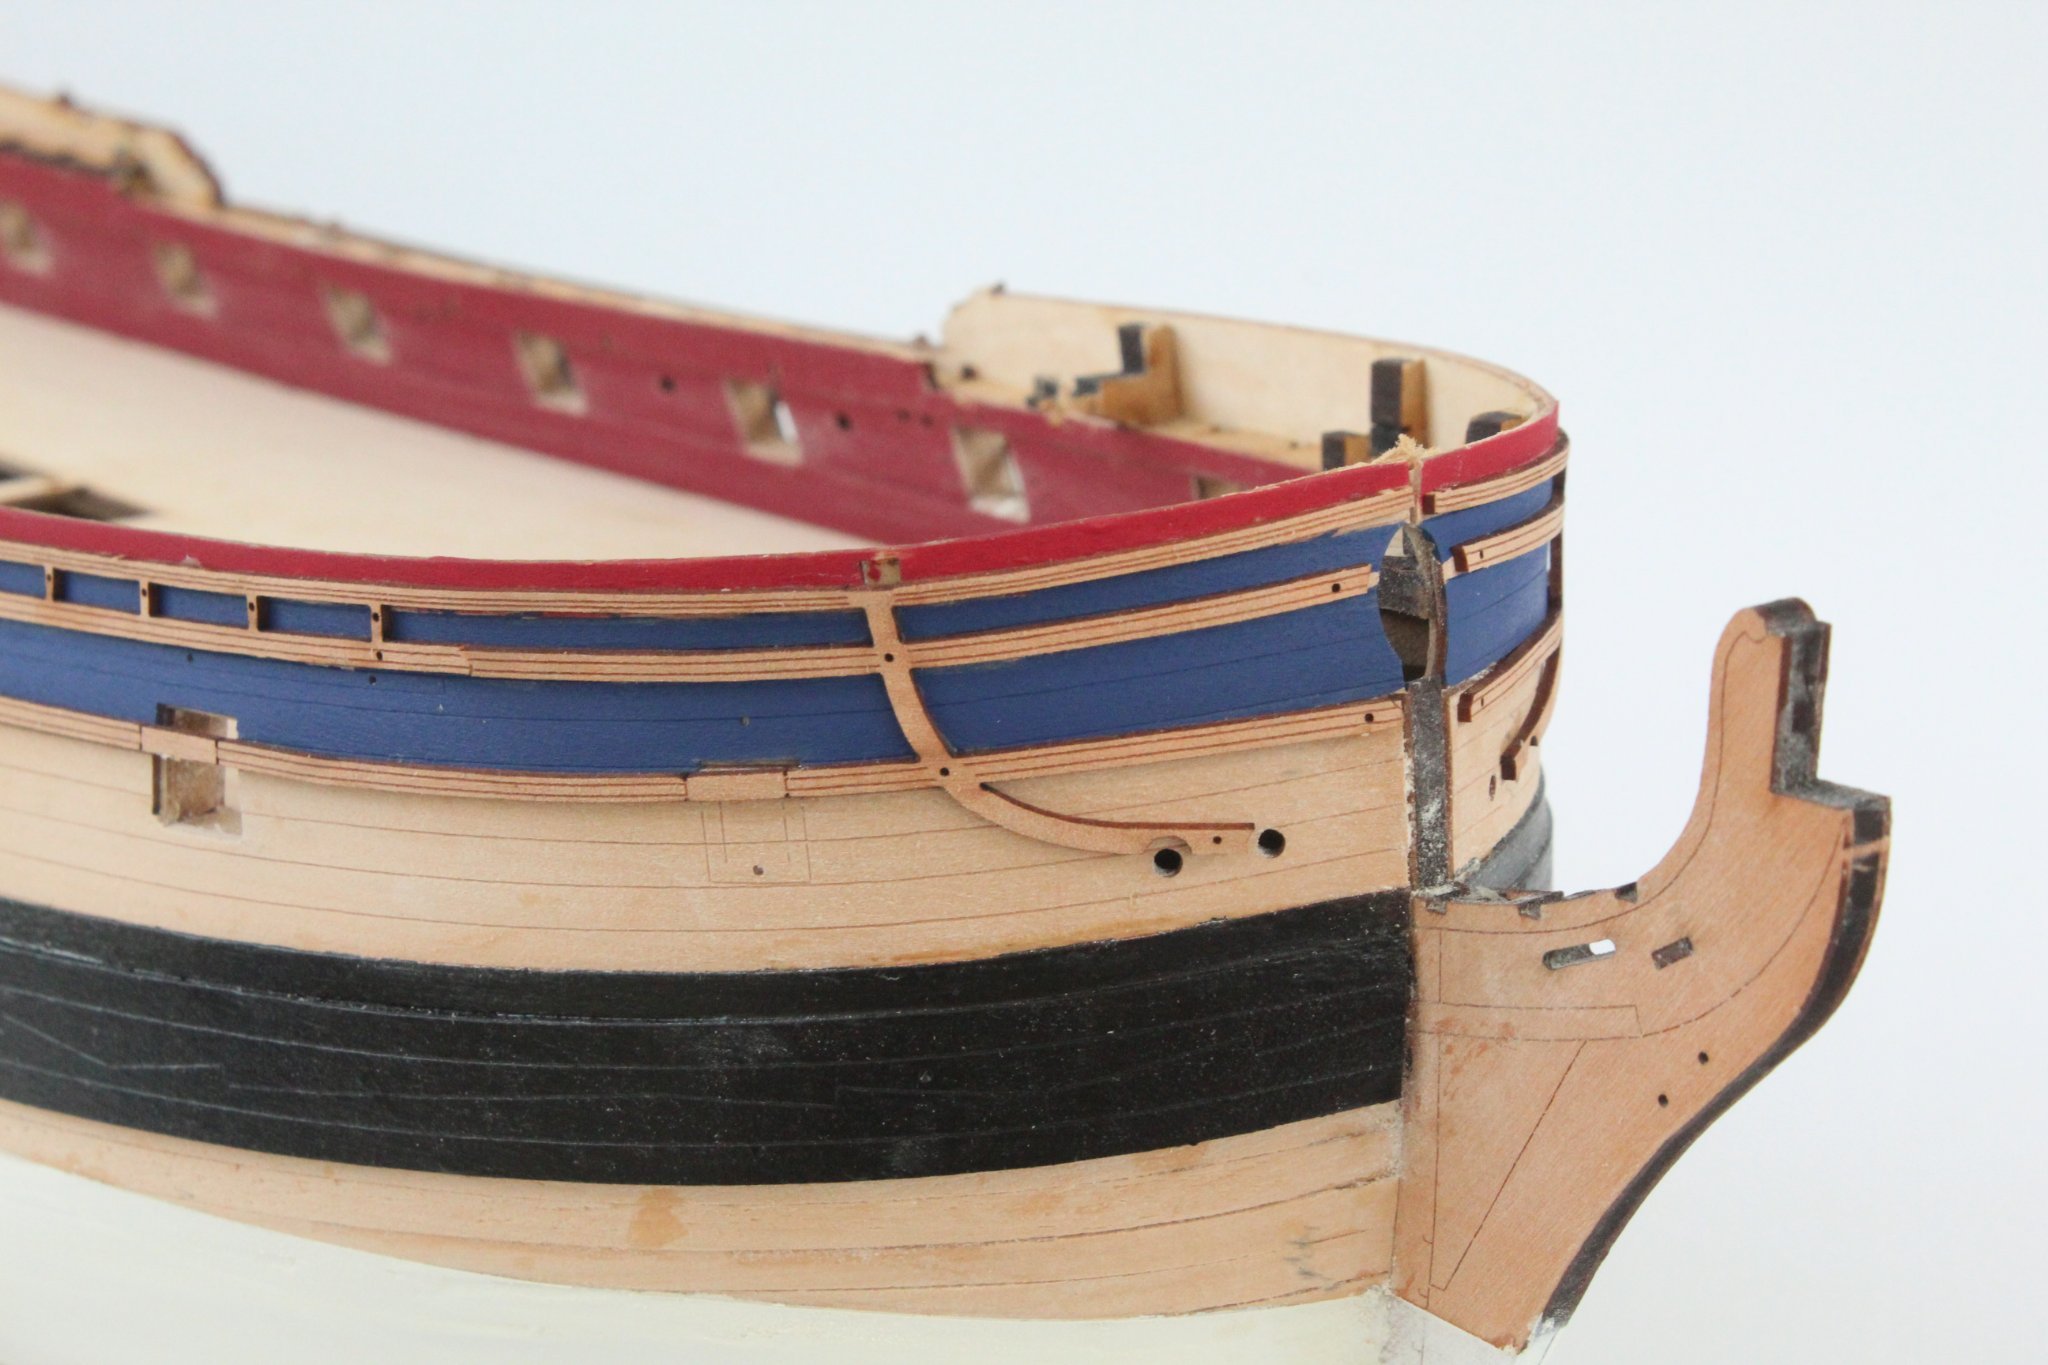
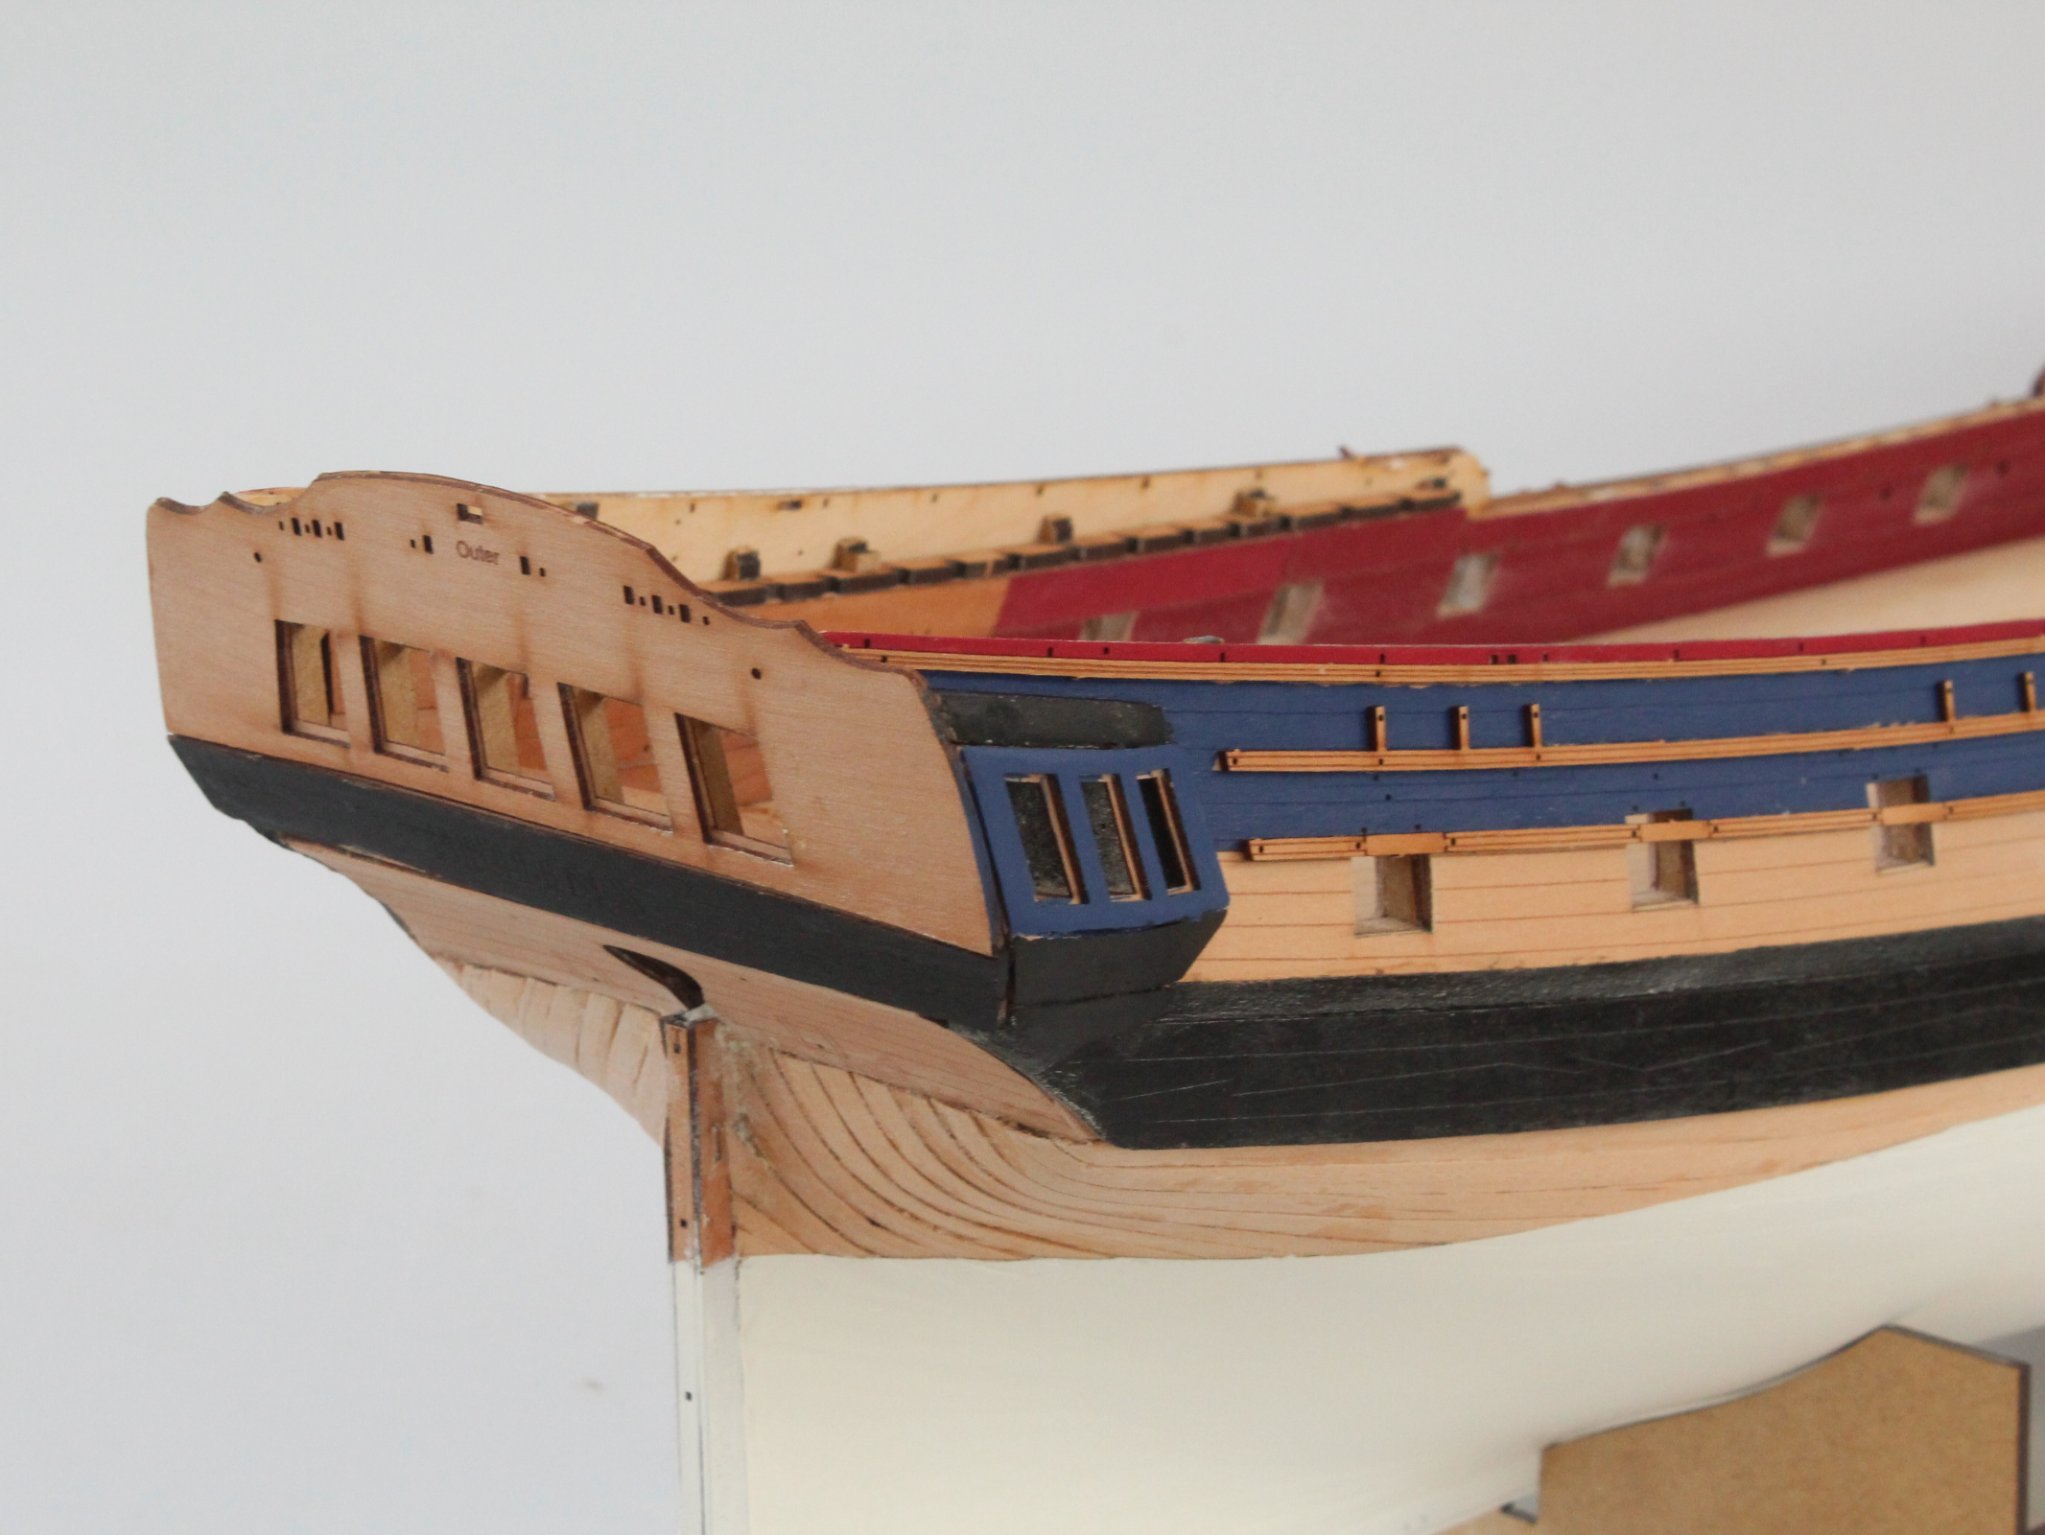
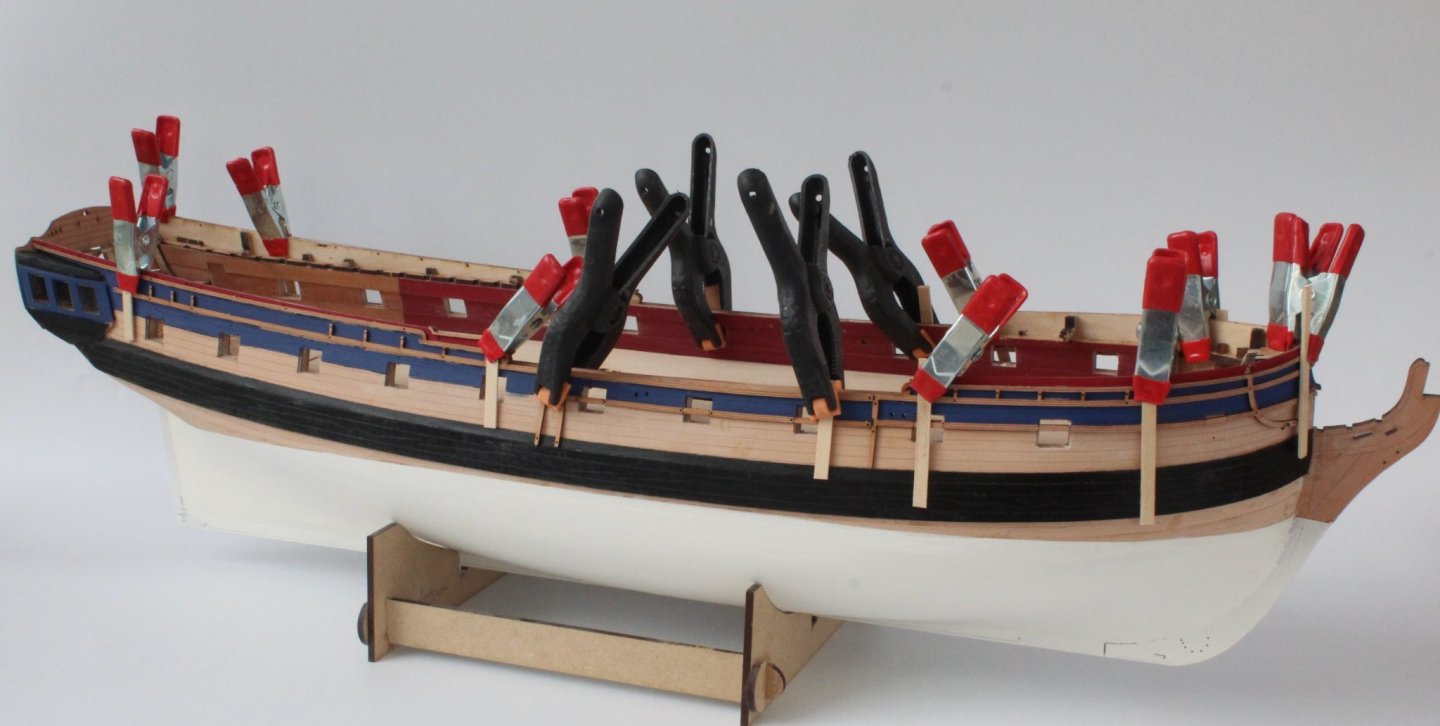
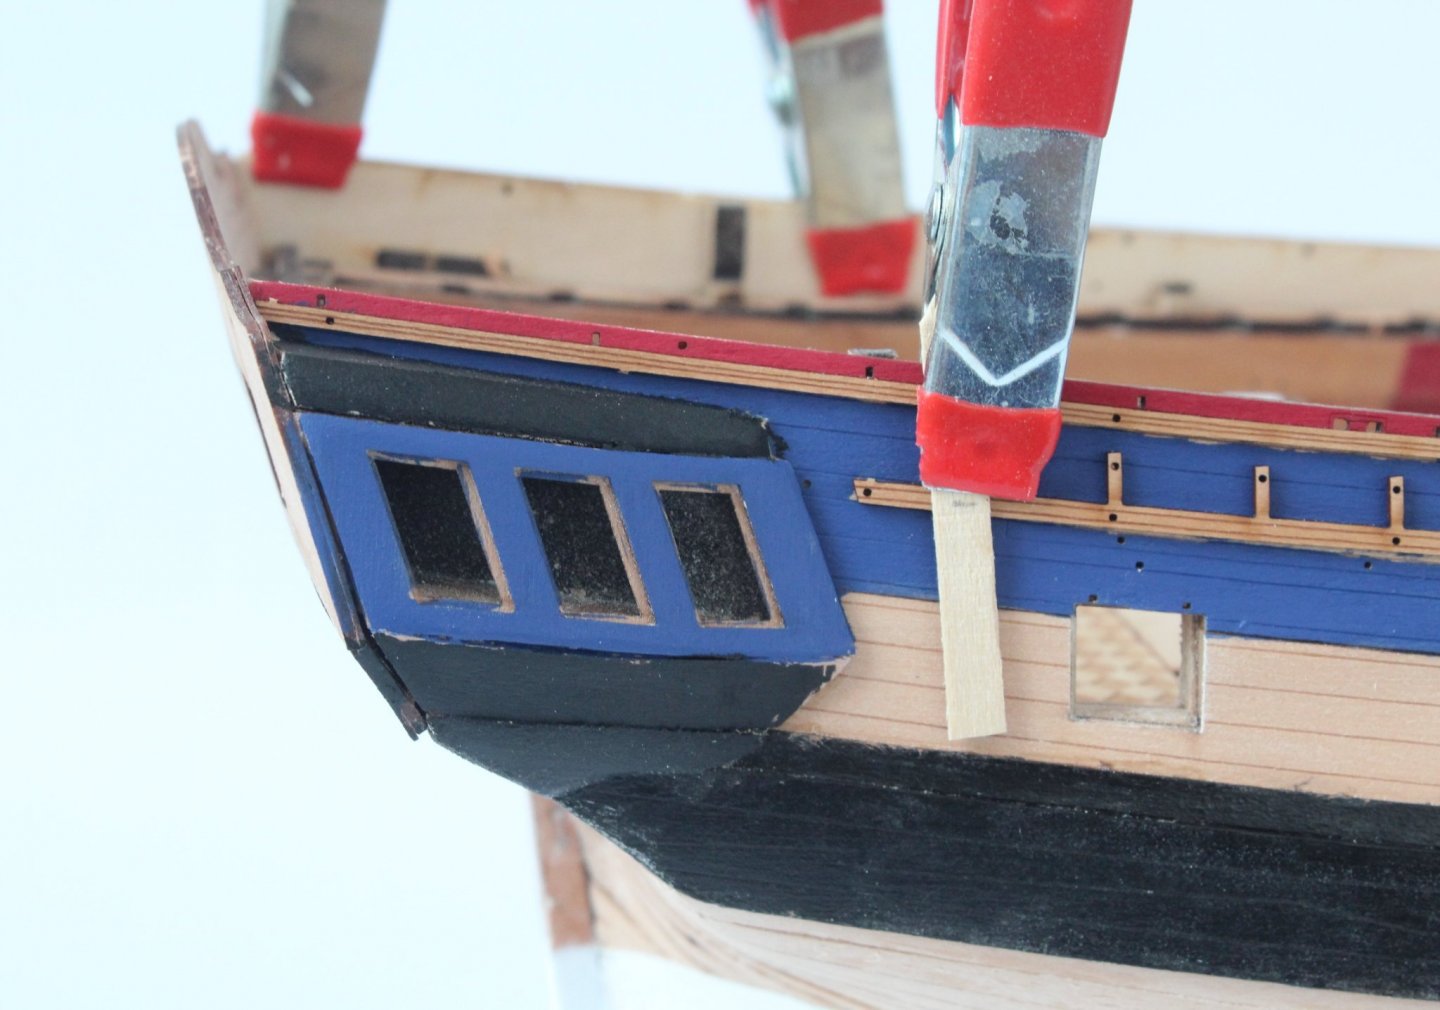
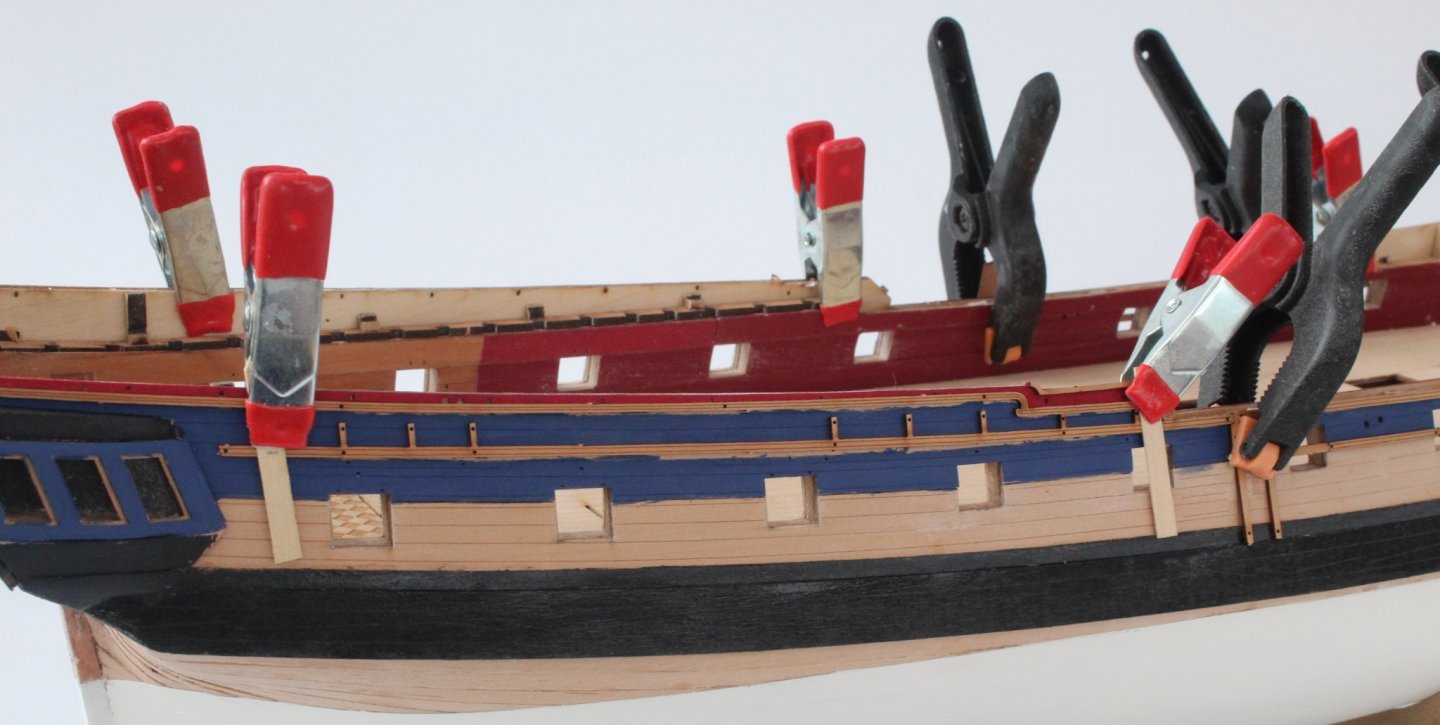
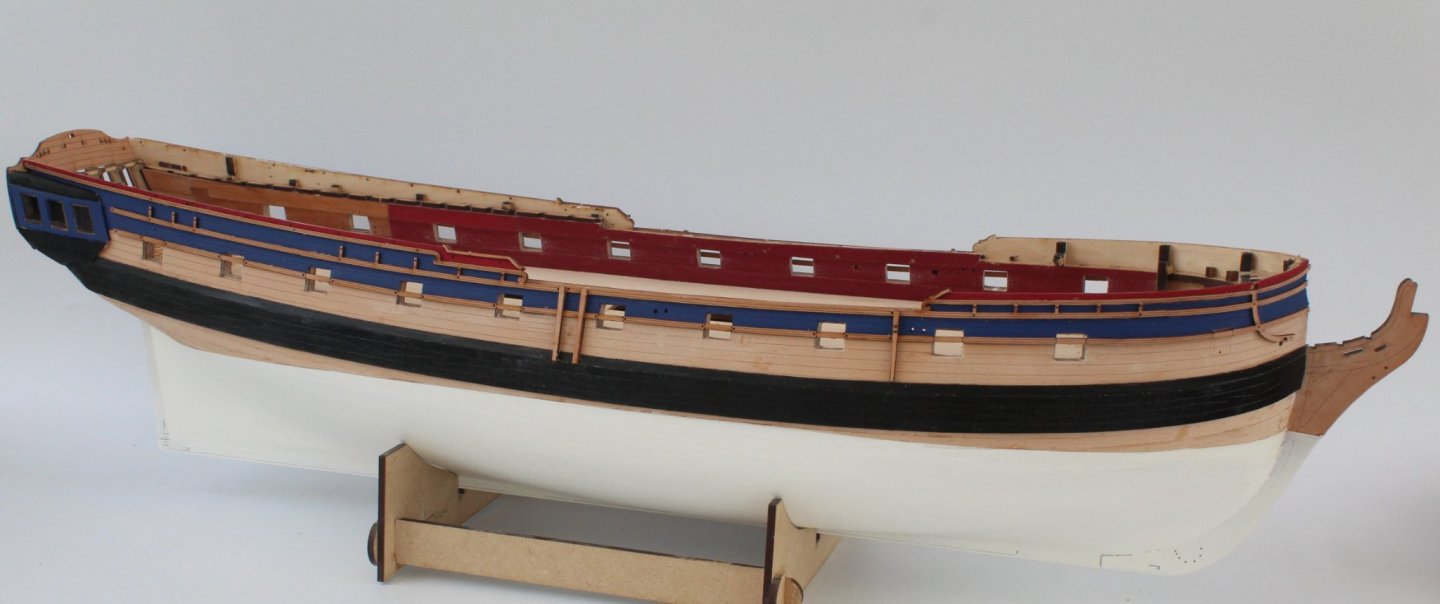
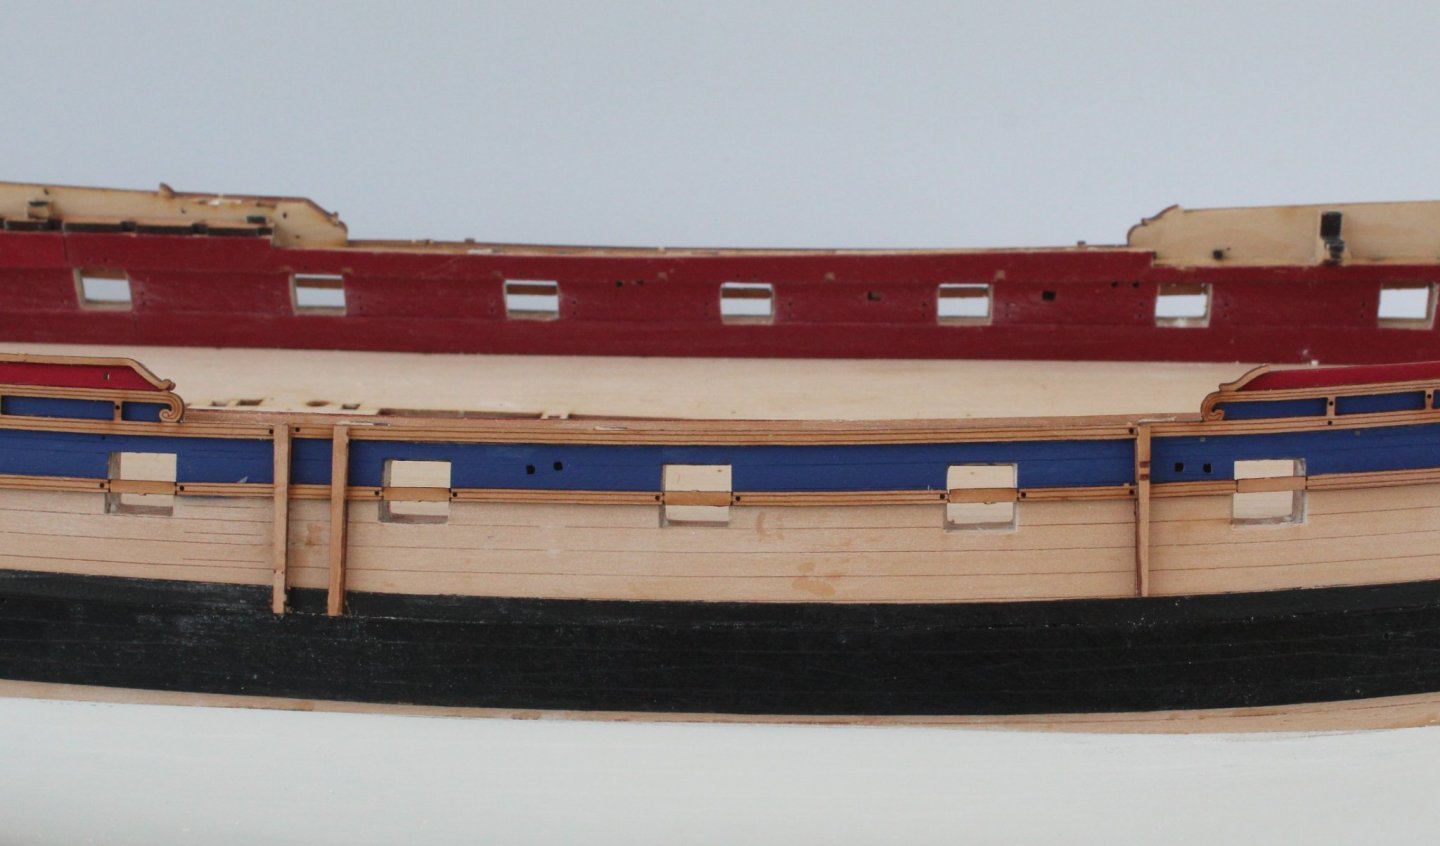
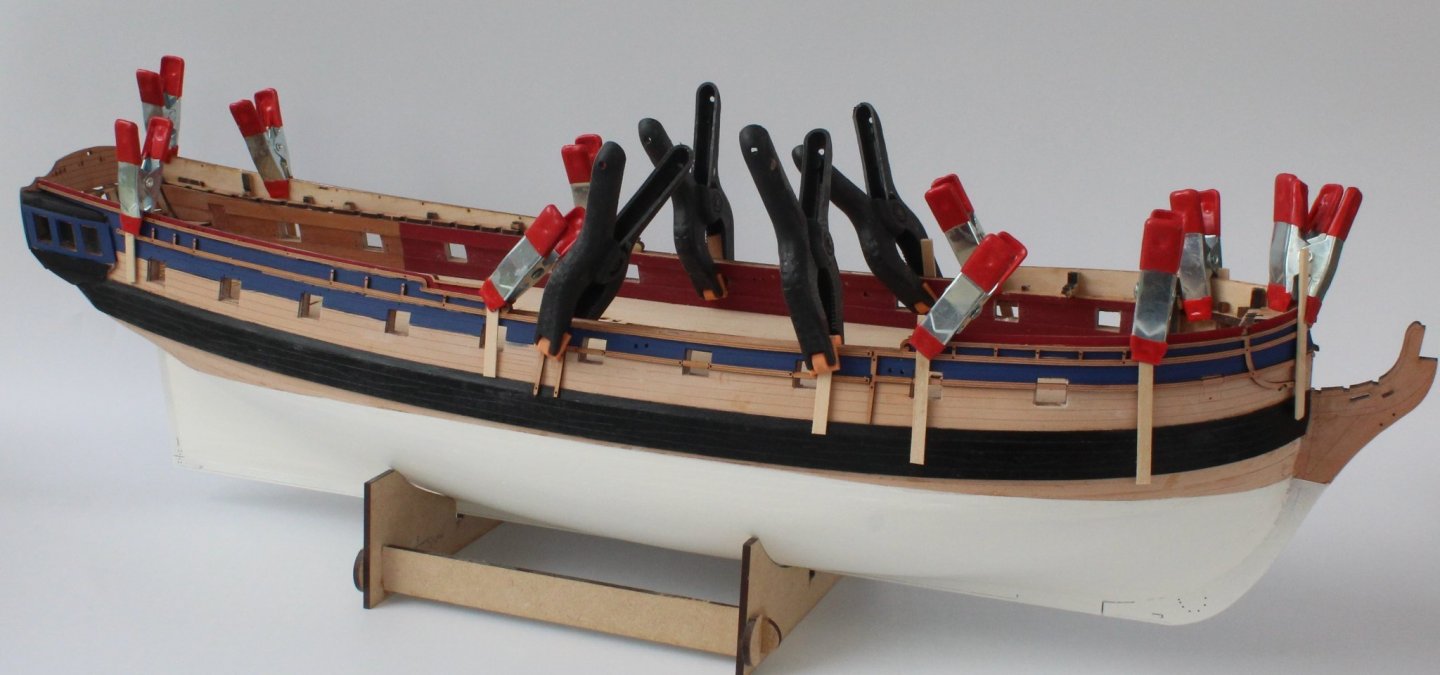
HULL WORK ADDING RAILS BUILD MANUAL STEPS 233 - 249 LINK TO MY BUILD LOG INDEX Tools Used Craft knife Waterline marker Wood filler Titebond original Red, blue, and black paints Varnish Tape Gathering the materials required 140, 141,142, 143, 144, 145, 146, 147, 148 (x4), 383 (x2) Assembly Process The two sheer and waist patterns had been soaked in hot water and then clamped to the hull and left to dry overnight. I then moved on to painting the upper patterns red, blue and black as required. The various rail patterns were clamped in place to check the painting for the red and blue sections. In hindsight, and certainly when I get around to this stage on the next build, I will use some tape to get better lines as it looks a tad messy now. It can be tidied. I brushed some glue on the back of the various rail patterns and fixed them to the hull, using clamps. Take great care with these patterns as they are very fragile. The final task was to add the 4 side fender patterns and 2 chess tree patterns to the rails. This picture show the rails dry fitted after the painting phase A close up of the messy stern area This dry fit of the rails photo shows my bad line painting, without tape. The rails have been glued and clamped in the photo below The completed rails, noting I have not cut away the rails from the gun ports Bow area The stern area Midships with fenders and cross tree patterns fitted to the rails. Gun ports still need to be cleared of rail Another stern picture


-
James indeed did the heavy lifting and producing a stunning model and brilliant manual
-
HULL WORK PAINTING HULL BUILD MANUAL STEPS 229 - 232 LINK TO MY BUILD LOG INDEX Tools Used Craft knife Waterline marker Wood filler Sandpaper (110 and 400 grit) Titebond original Varnish Tape Gathering the materials required No parts required Assembly Process After I had added the waterline I applied plenty of tape to the hull, replicating the picture shown on step 230 of the build manual. Using the same Matt Super white paint as shown in the picture for step 231 in the build manual I sprayed a thin coat on the exposed hull. I then spent a lot of time sanding, then applying filler (diluted with water and titebond) to fill any dips and then sanding the filled area smooth. This process was repeated several times. Once I was happy with how the hull was looking I removed the tape from the stem, keel and stern posts below the waterline. A thin coat of varnish was applied to the bare wood areas and the hull was then sprayed a couple more times with the matt super white paint. Due to the dust cloud in the shipyard during the process I did not risk taking pictures. OK I simply forgot to take some pictures😇. As can be seen in the photo below I have actually done a bit more work which will be covered in my next post.
-
Looking good, great progress
-
It is important to get the position of the lower counter pattern correct. I set mine a bit too low, your looks well positioned which is good. When I do this stage again I will dry fit the parts of the quarter gallery so I know where the quarter gallery berthing pattern will be positioned. I will then dry fit the upper counter pattern and stern fascia patterns as the berthing pattern needs to be aligned with the upper counter pattern and the stern fascial pattern needs to be 2mm above the transom. When this has been checked the correct position of the lower counter pattern will be known.
- 505 replies
-
- 8
-
-
- vanguard models
- Sphinx
- (and 1 more)
-
I will continue with this build log as my prototype build. I am currently waiting for some blue paint as my current supply had dried out.
-
Great job, always good to complete the 1st planking
- 505 replies
-
- 5
-
-
- vanguard models
- Sphinx
- (and 1 more)
-
Nice planking, I am a bit unsure what you mean. With the preformed plank is pinned / clamped in place are you then applying a blast of hot air to reinforce the bend?
- 857 replies
-
- 2
-
-
- Sphinx
- Vanguard Models
- (and 1 more)
-
No reason at all and is more realistic, especially when looking at HMS Victory's cannons. I removed the char on my previous DOK build but thought some wheels become a bit less round after sanding. I noted James had left the char on his prototype build and thought it looked Ok.
-
It is looking very good, great progress. I have built one cannon, click on the link to see my cannon assembly. I have also started work on the 28 foot pinnace.
-
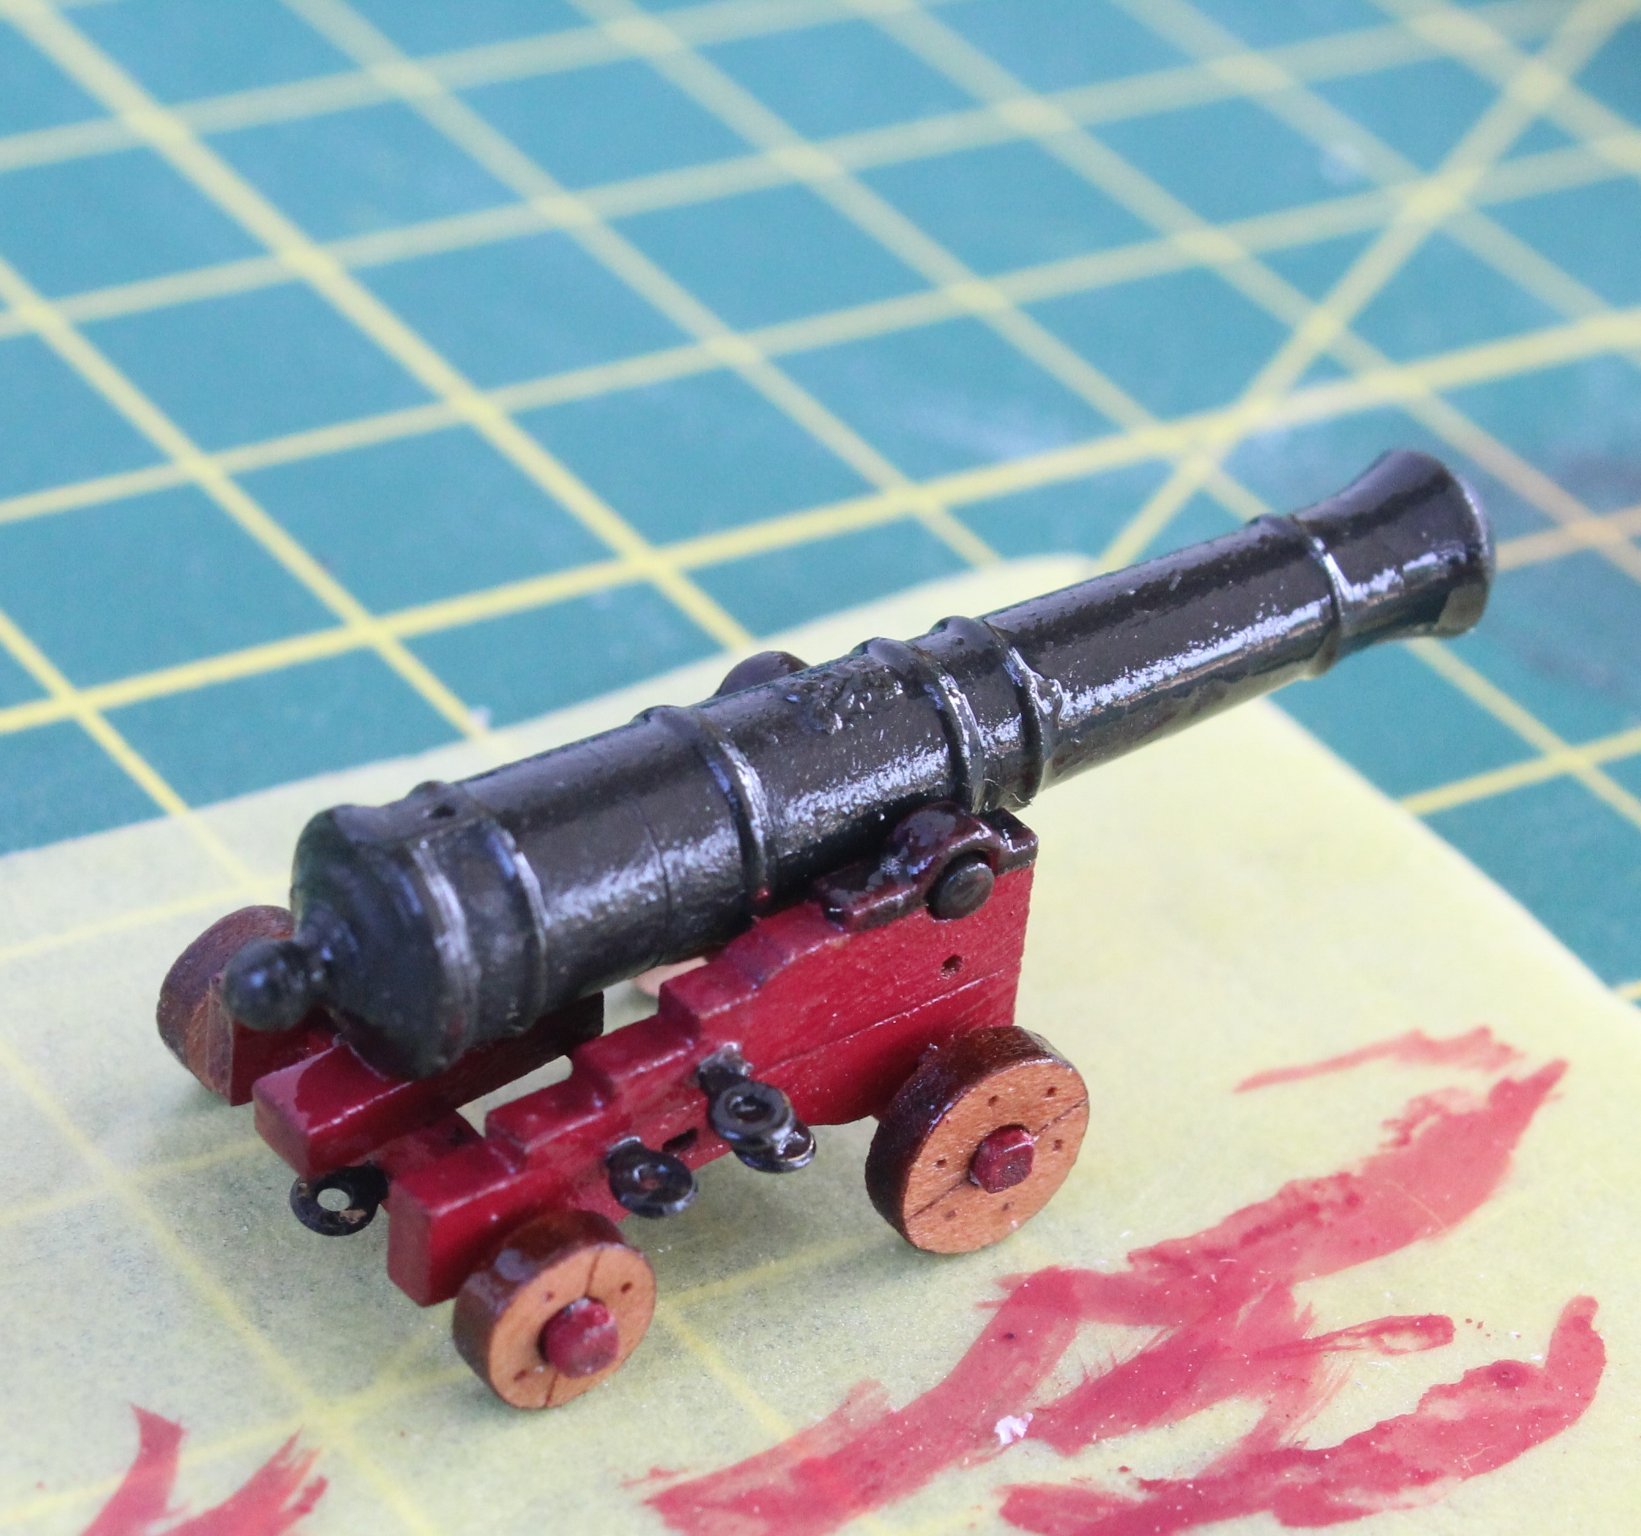
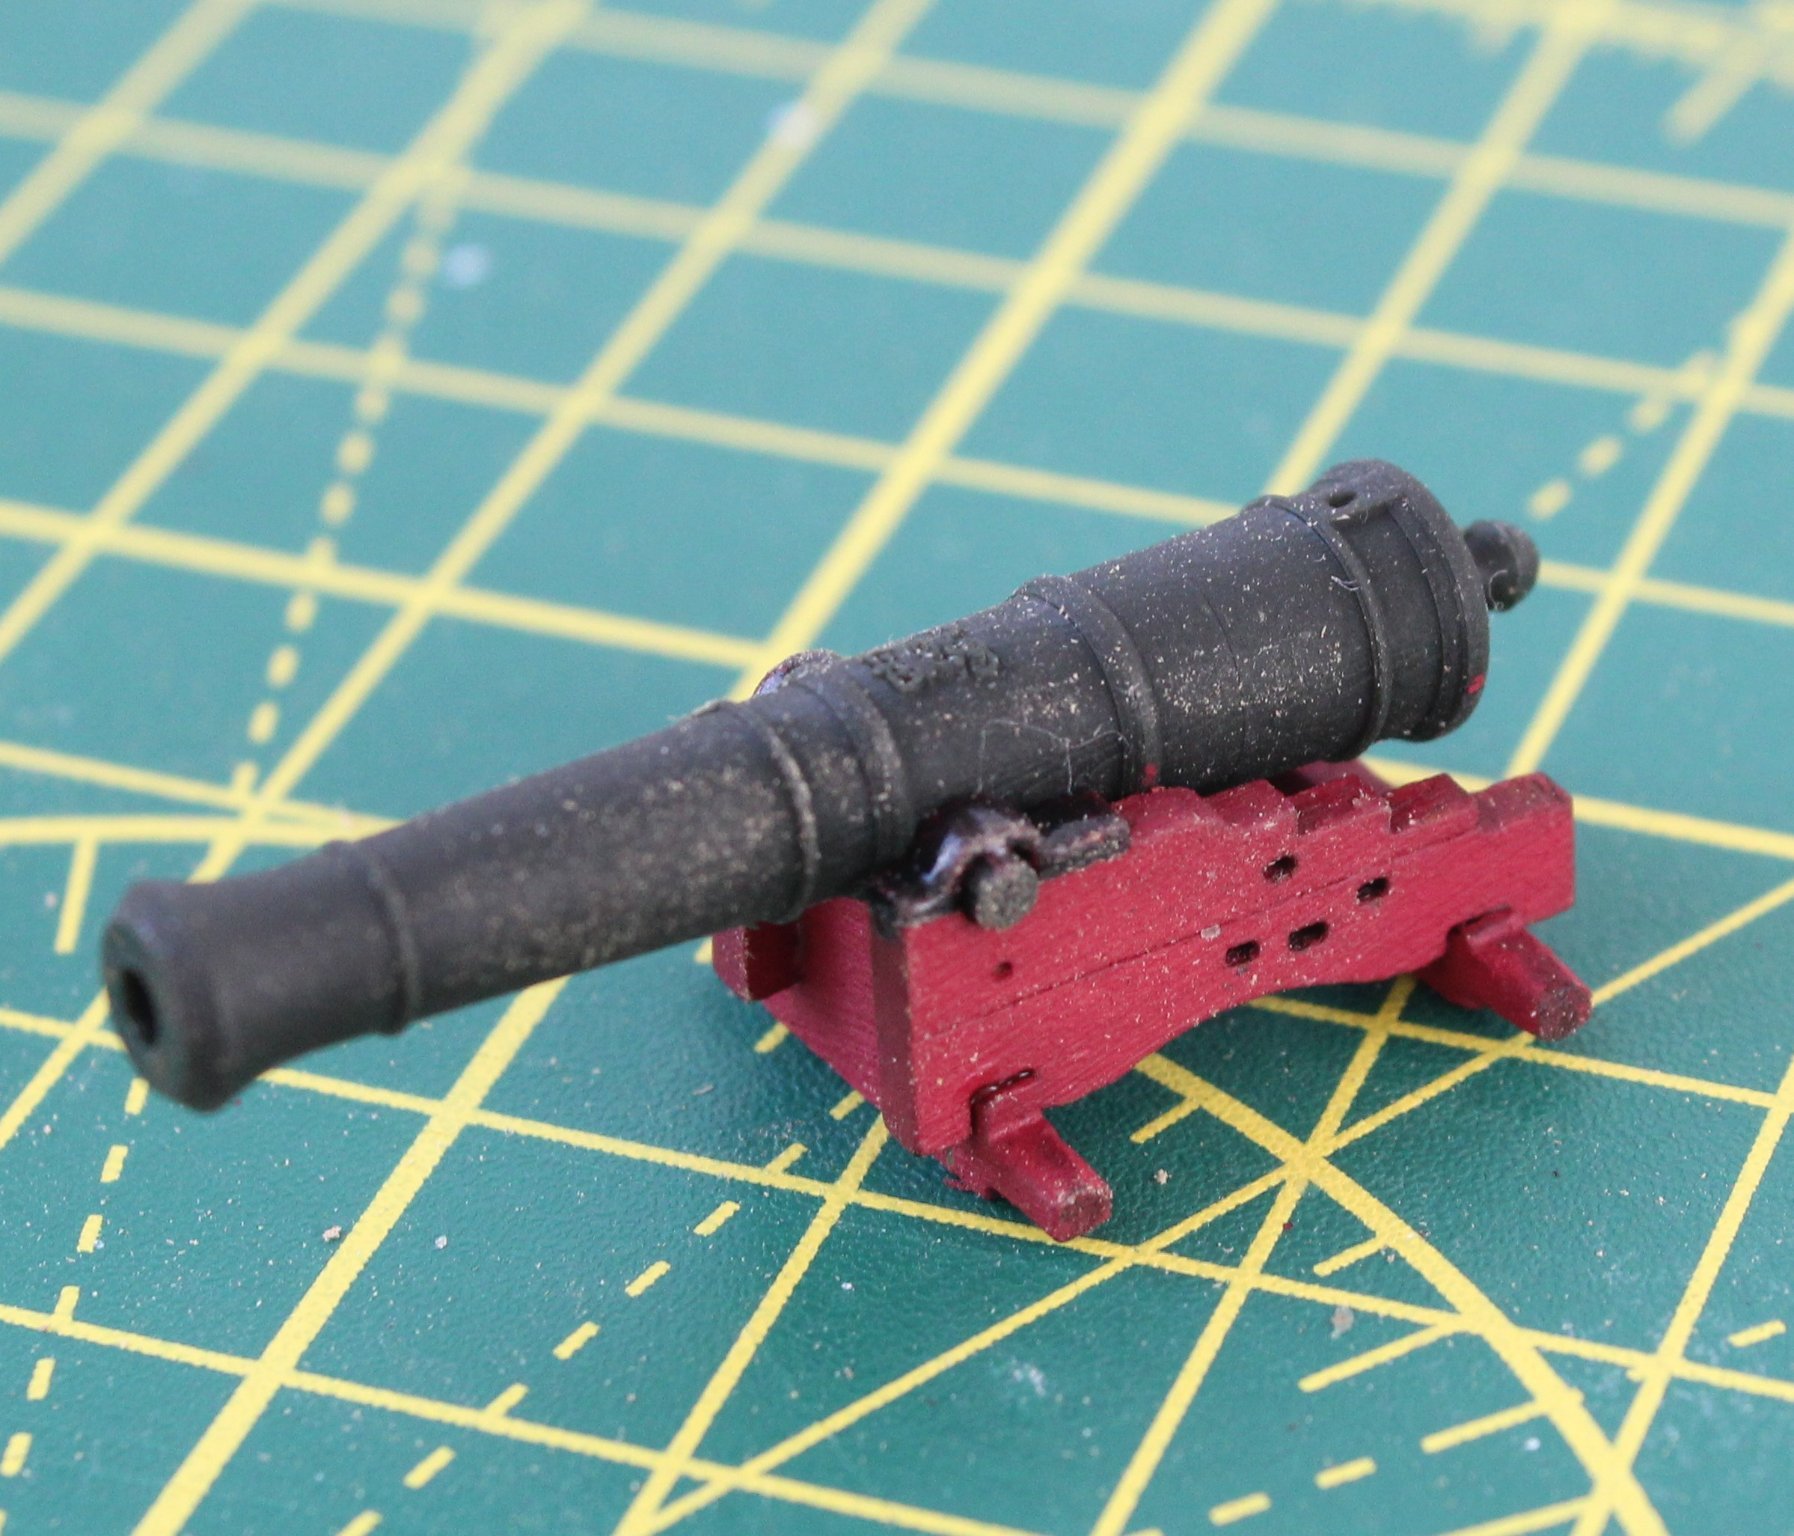
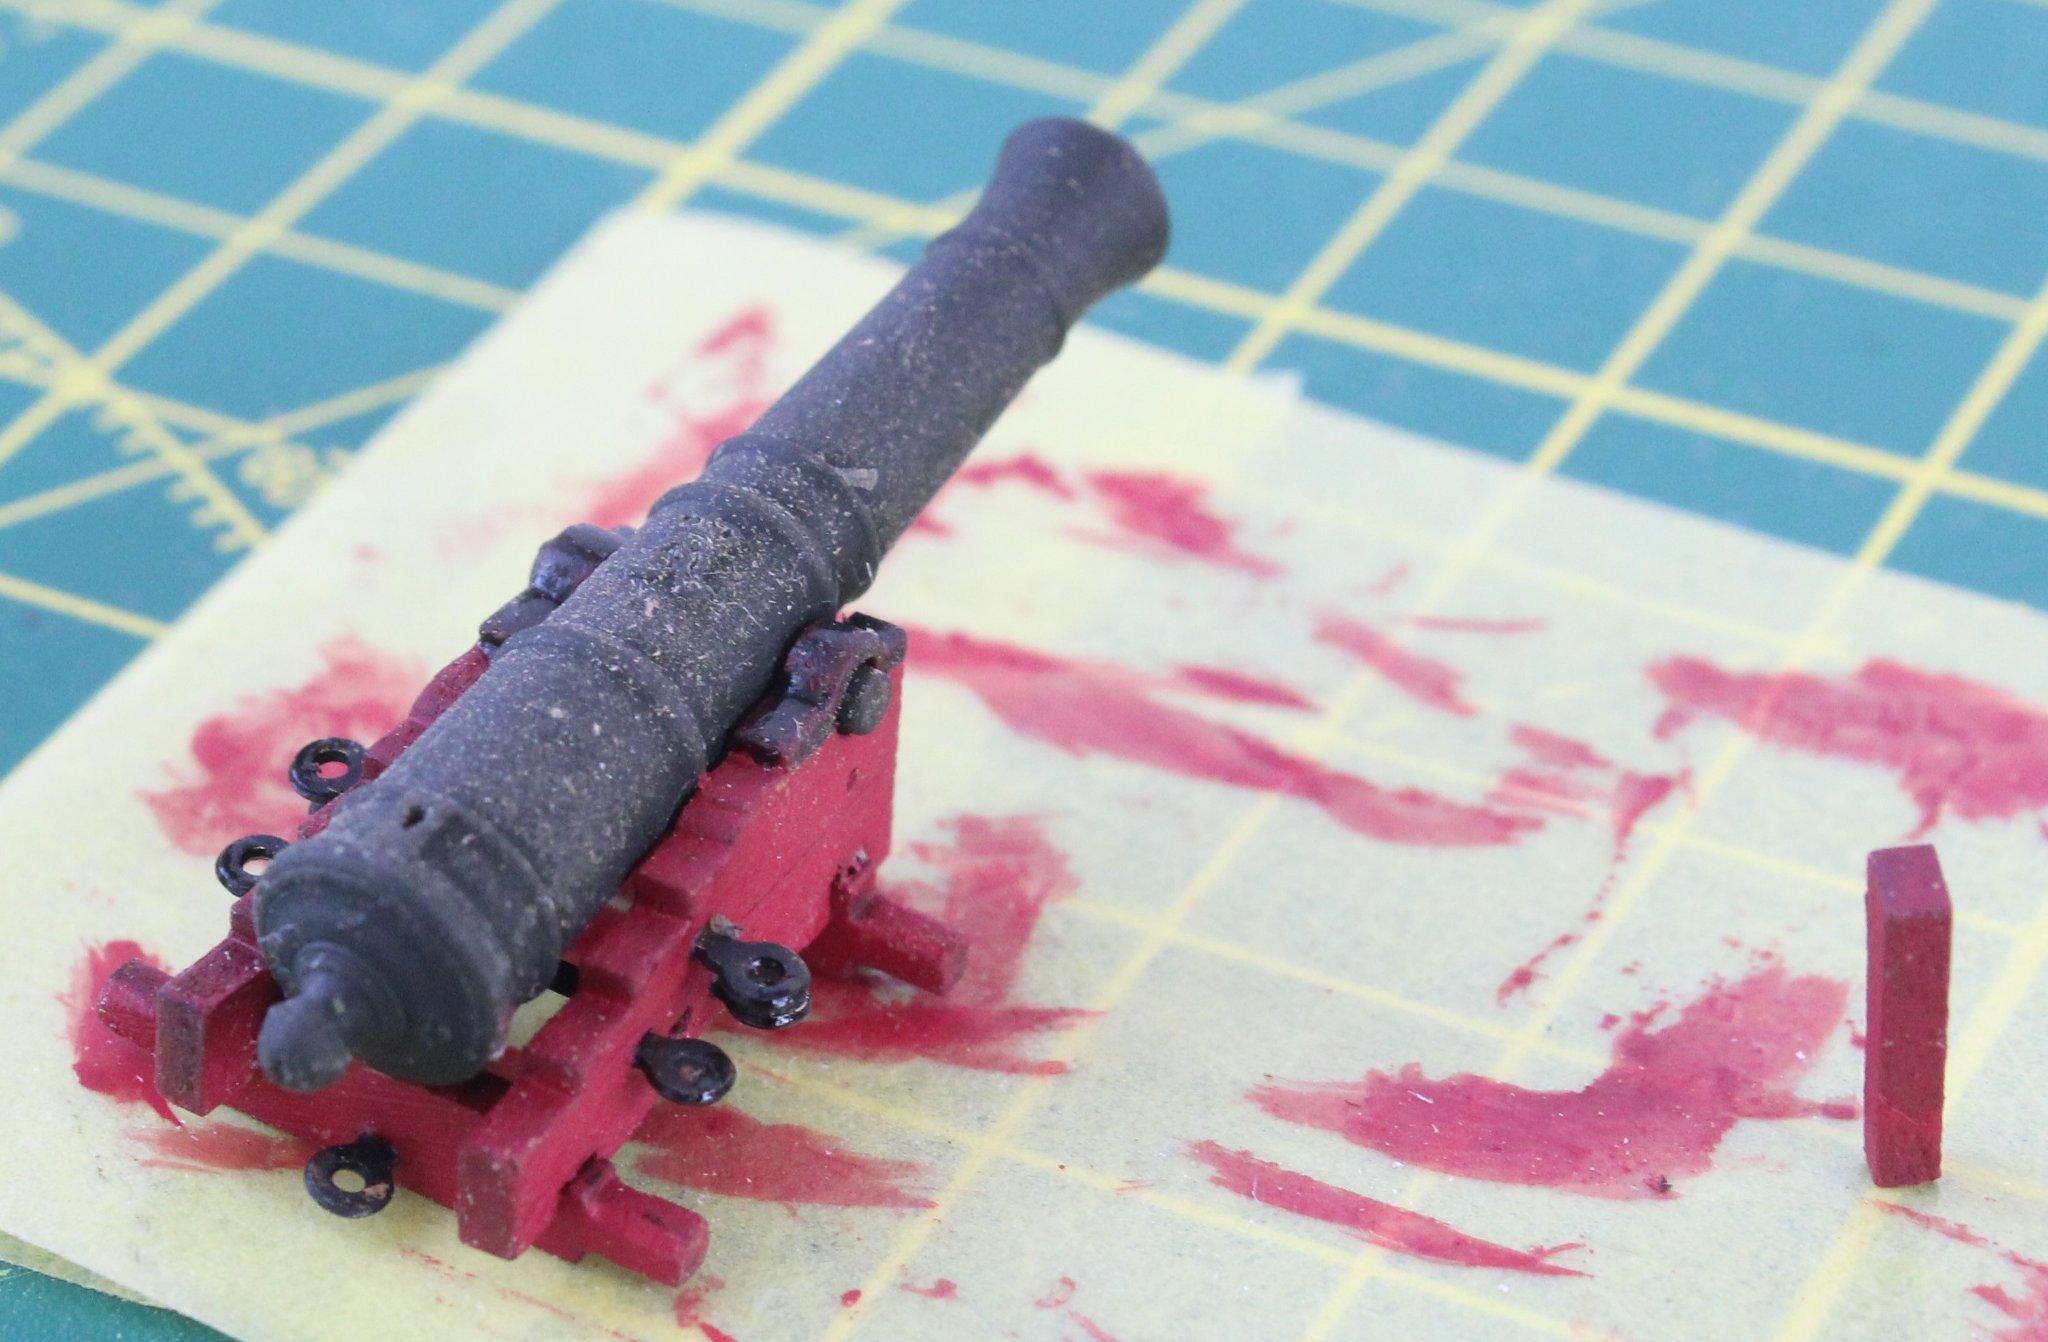
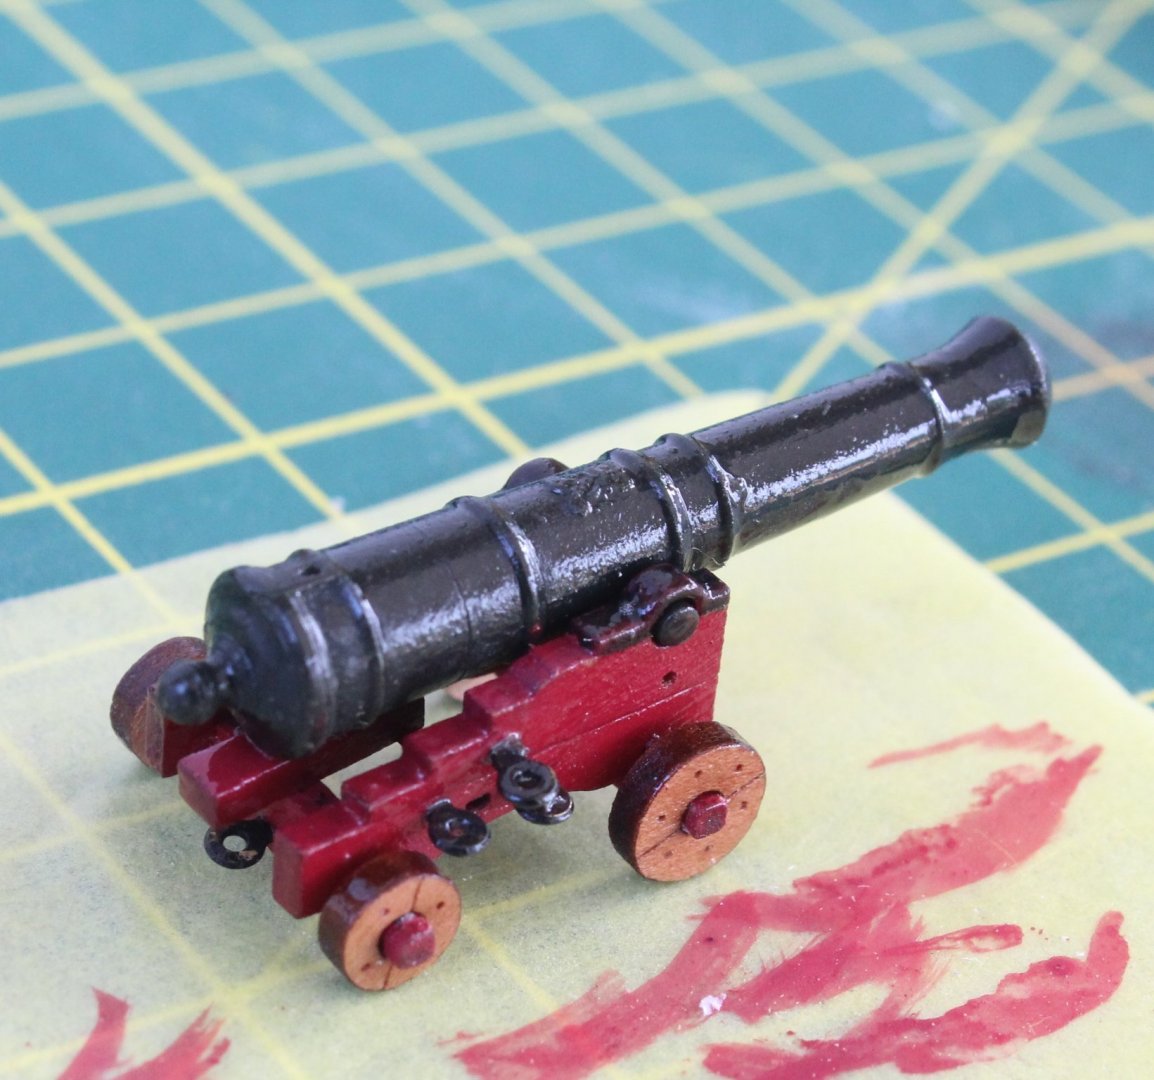
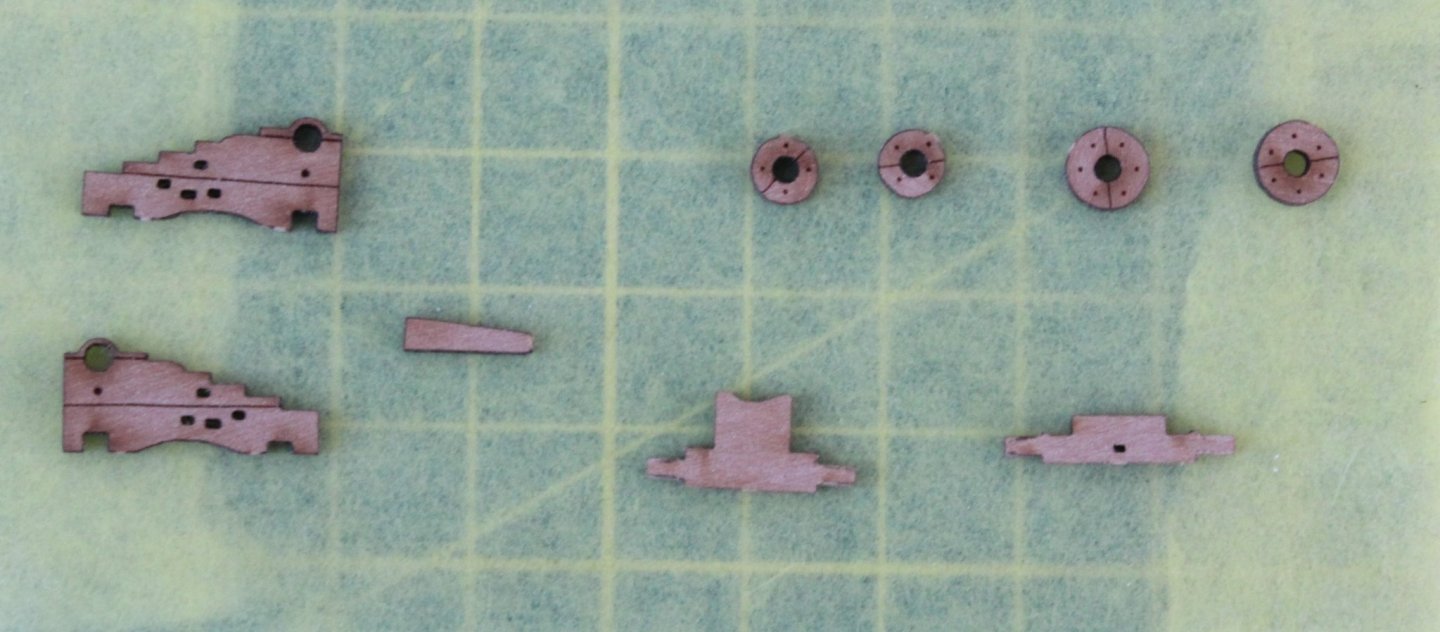
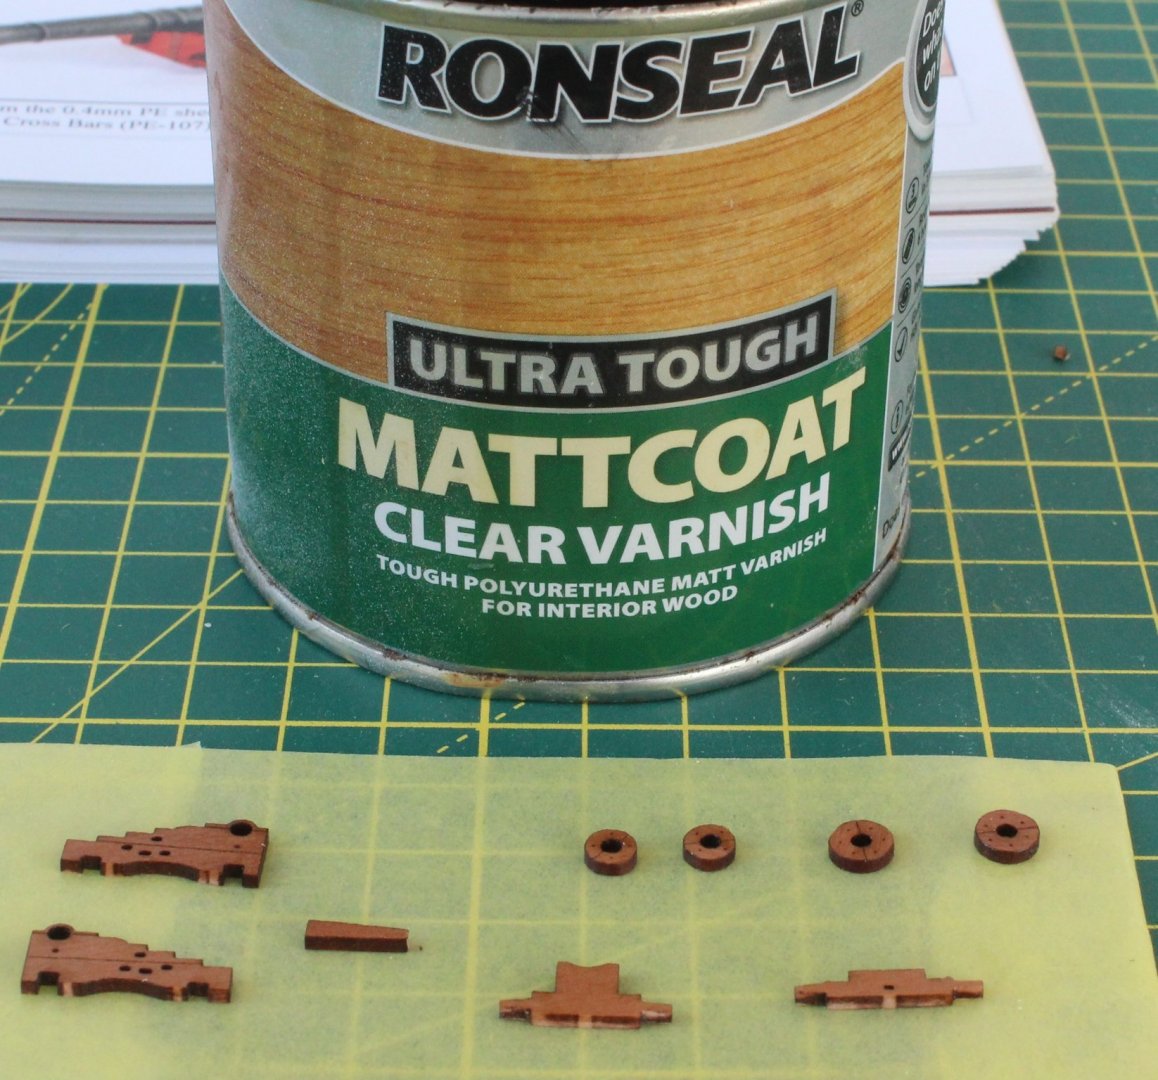
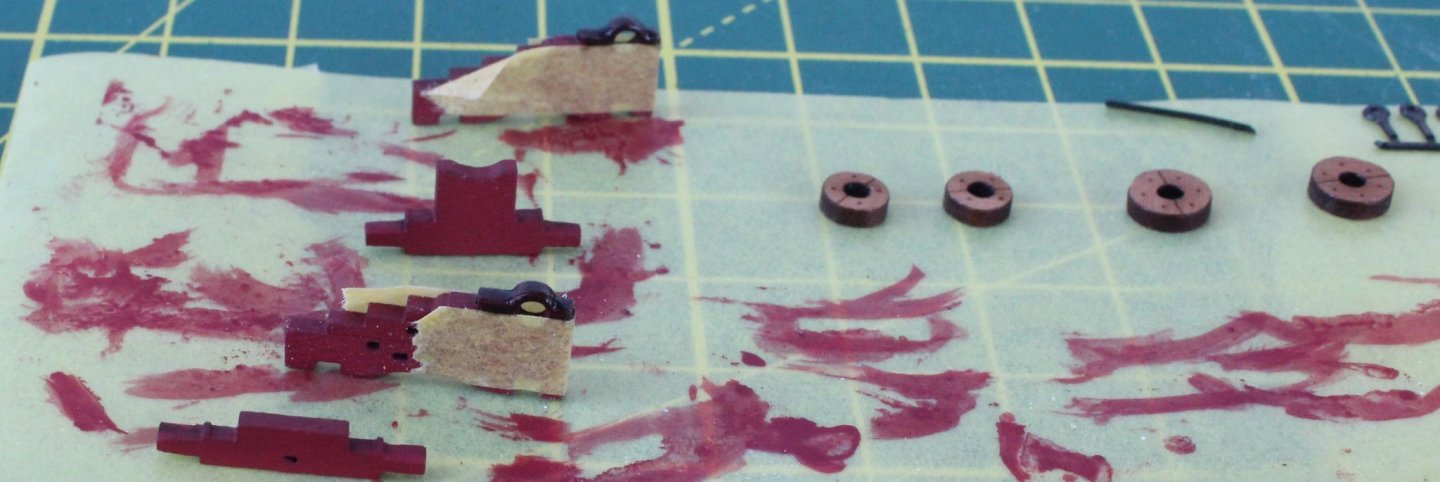
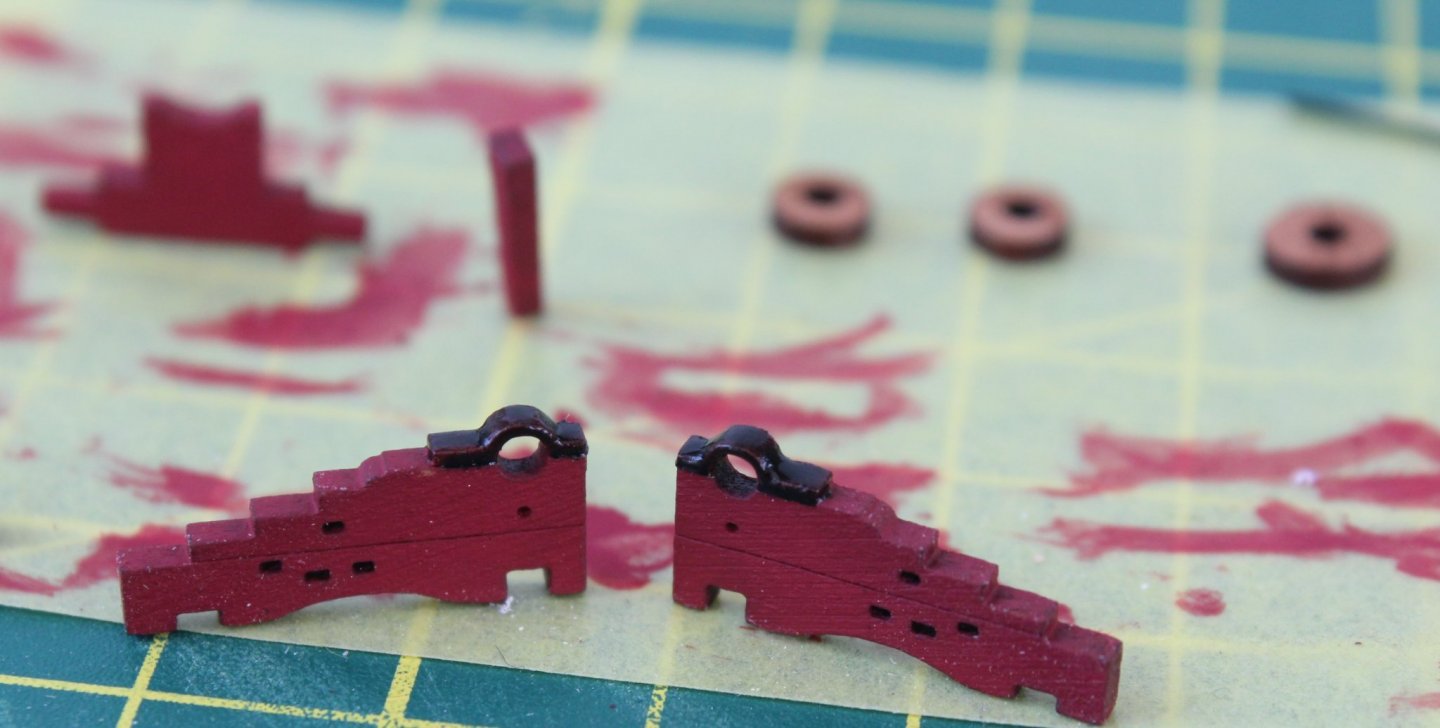
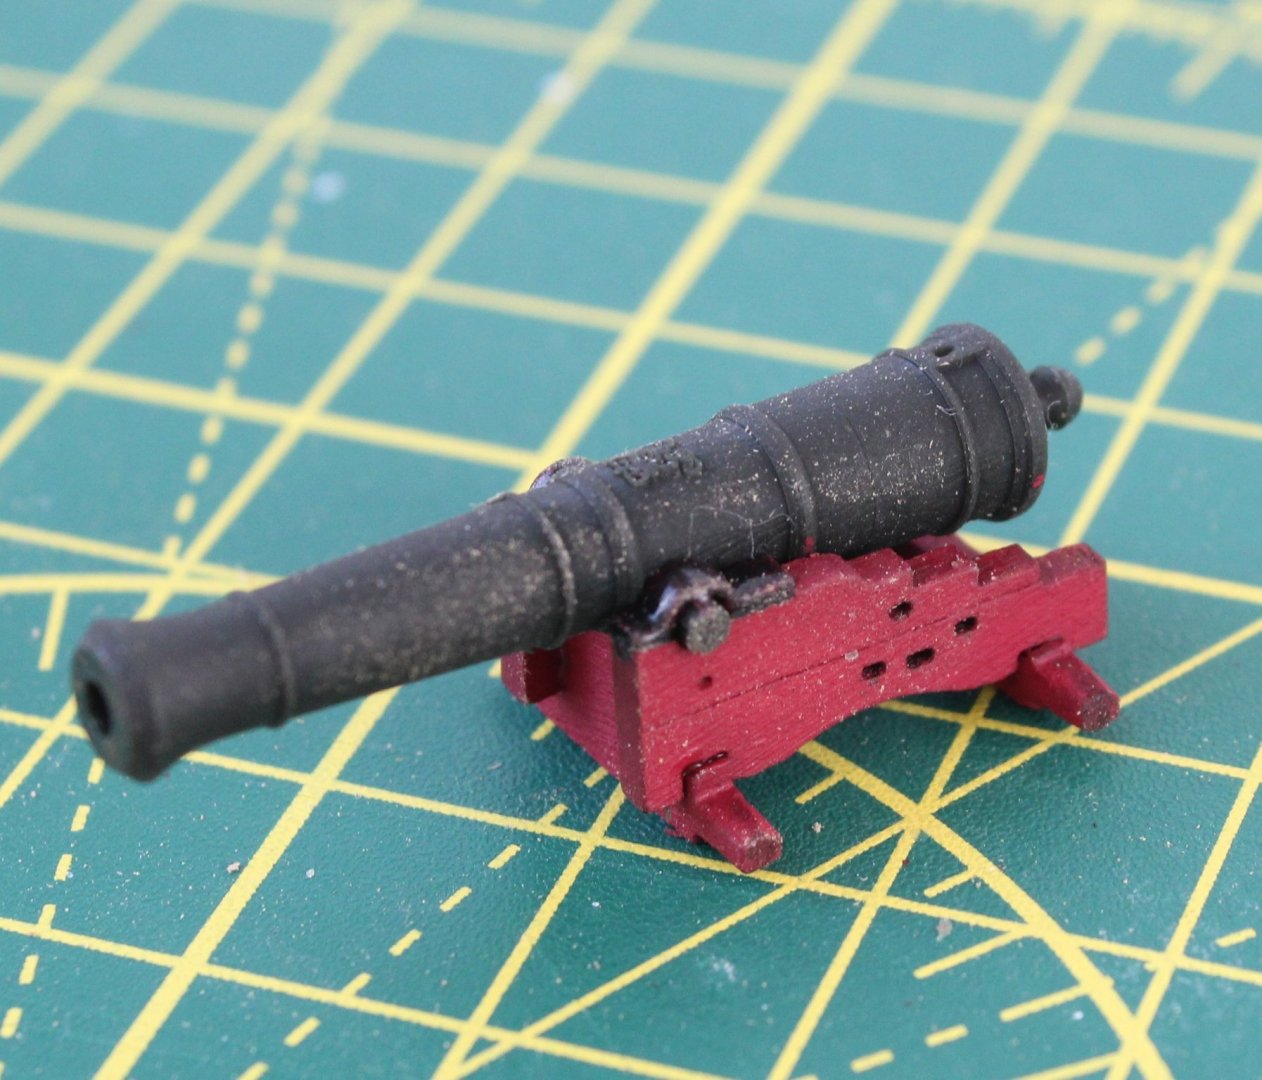
DECK ITEMS CANNON ASSEMBLY BUILD MANUAL STEPS 479 - 491 LINK TO MY BUILD LOG INDEX Tools Used Craft knife Titebond original Red Paint Varnish Tape Gathering the materials required 366-372, PE-107, F-5 (Cannon), PE-81 (x7) Assembly Process There are 20 cannons to make. I have built one to make sure I can follow the build instructions correctly. The wooden parts were removed from the sheet. I sanded a very slight chamfer to the wheel axles to make the fitting of the wheels a tad easier. The wooden parts were then placed on tape to ensure they did not move when I applied a thin coat of varnish to seal the wood prior to painting. Once all the parts had been varnished the following items were paint red, with three very light coats: a) Carriage sides left and right b) Carriage front and rear axles c) Carriage quoin The PE parts were cleaned in acetone and soapy water and then chemically blackened. The carriage sides incorporate the cap squares, which is an innovative design idea and much very appreciated by me. The cap square section of the carriage sides have to be painted black. I taped the carriage sides prior to brushing on the black paint to get a clean finish. The front and rear axle was then glued to the left-hand carriage side and the cannon was inserted in the into the locating hole. Once I was happy with the alignment the right-hand carriage side was added. Next up was fitting the PE parts, starting with the cross bar and then the 7 x eyebolts. And this was followed by adding the quoin. The final assembly task was to add the 4 wheels. The wheels were rotated as they were pushed on the axles, so that the connecting tabs were at the bottom. I then applied a thin coat of varnish to the completed assembly, one down nineteen to go The varnish has just been applied in the photo below, hence the wet shiny look

-
I am not disheartened, veey happy to continue the first kit to iron out my building bugs, and then to build better one.
-
Hi Glenn (USA) I wish it was that simple, the two quarter gallery berthing patterns are misaligned with the upper counter pattern, the outer bulwarks are misaligned with the lower counter pattern. To fix the problem I would need to remove and reposition the lower and upper counter patterns and the stern fascia pattern. This then affects the planking which would need to be extended once the lower counter pattern is repositioned.
-
After much debate, soul searching and reviewing the alternatives I have realised I have made really made a mess of my current Sphinx build, and have been left with no alterative but to buy another kit as I do not think I can realistically recover the situation and build this wonderful model to the standard it merits or I desire. This came to light as work progressed on the quarter galleries. I have seriously considered seeing if I remove all the parts incorrectly fitted, ordering some replacement parts where necessary and then fix the problem. This, in my opinion, is a none starter as I think there is too many parts to remove to fix the problems. I must stress the problems with my Sphinx are purely down to my building skills and not with the quality of design of the kit which is outstanding. I think the Vanguard Models are the best kits on the market and I have enjoyed all my previous builds. My plan on moving forward is to continue with this current build (and build log) and to treat it as a prototype build and to learn from the mistakes I have made, and I will probably make many more mistakes as my prototype build progresses. Once the new Sphinx kit arrives I will start the build in parallel, taking greater care and more time with the build to avoid the mistakes made with my current build. My mantra will be "check, check again and to then check again"
-
I'm glad to be the builder making all the mistakes, it is my trademark.🤣