Glenn-UK
-
Posts
3,169 -
Joined
-
Last visited
Content Type
Profiles
Forums
Gallery
Events
Everything posted by Glenn-UK
-
 Hello Derek Many thanks for your very kind comments. There are a few flaws as I continue to learn and adapt my methods so I can enhance my rigging skills. Overall I am very pleased with how the Duchess has turned out so far.
- 382 replies
-
- 1
-

-
- Vanguard Models
- Duchess of Kingston
- (and 1 more)
-
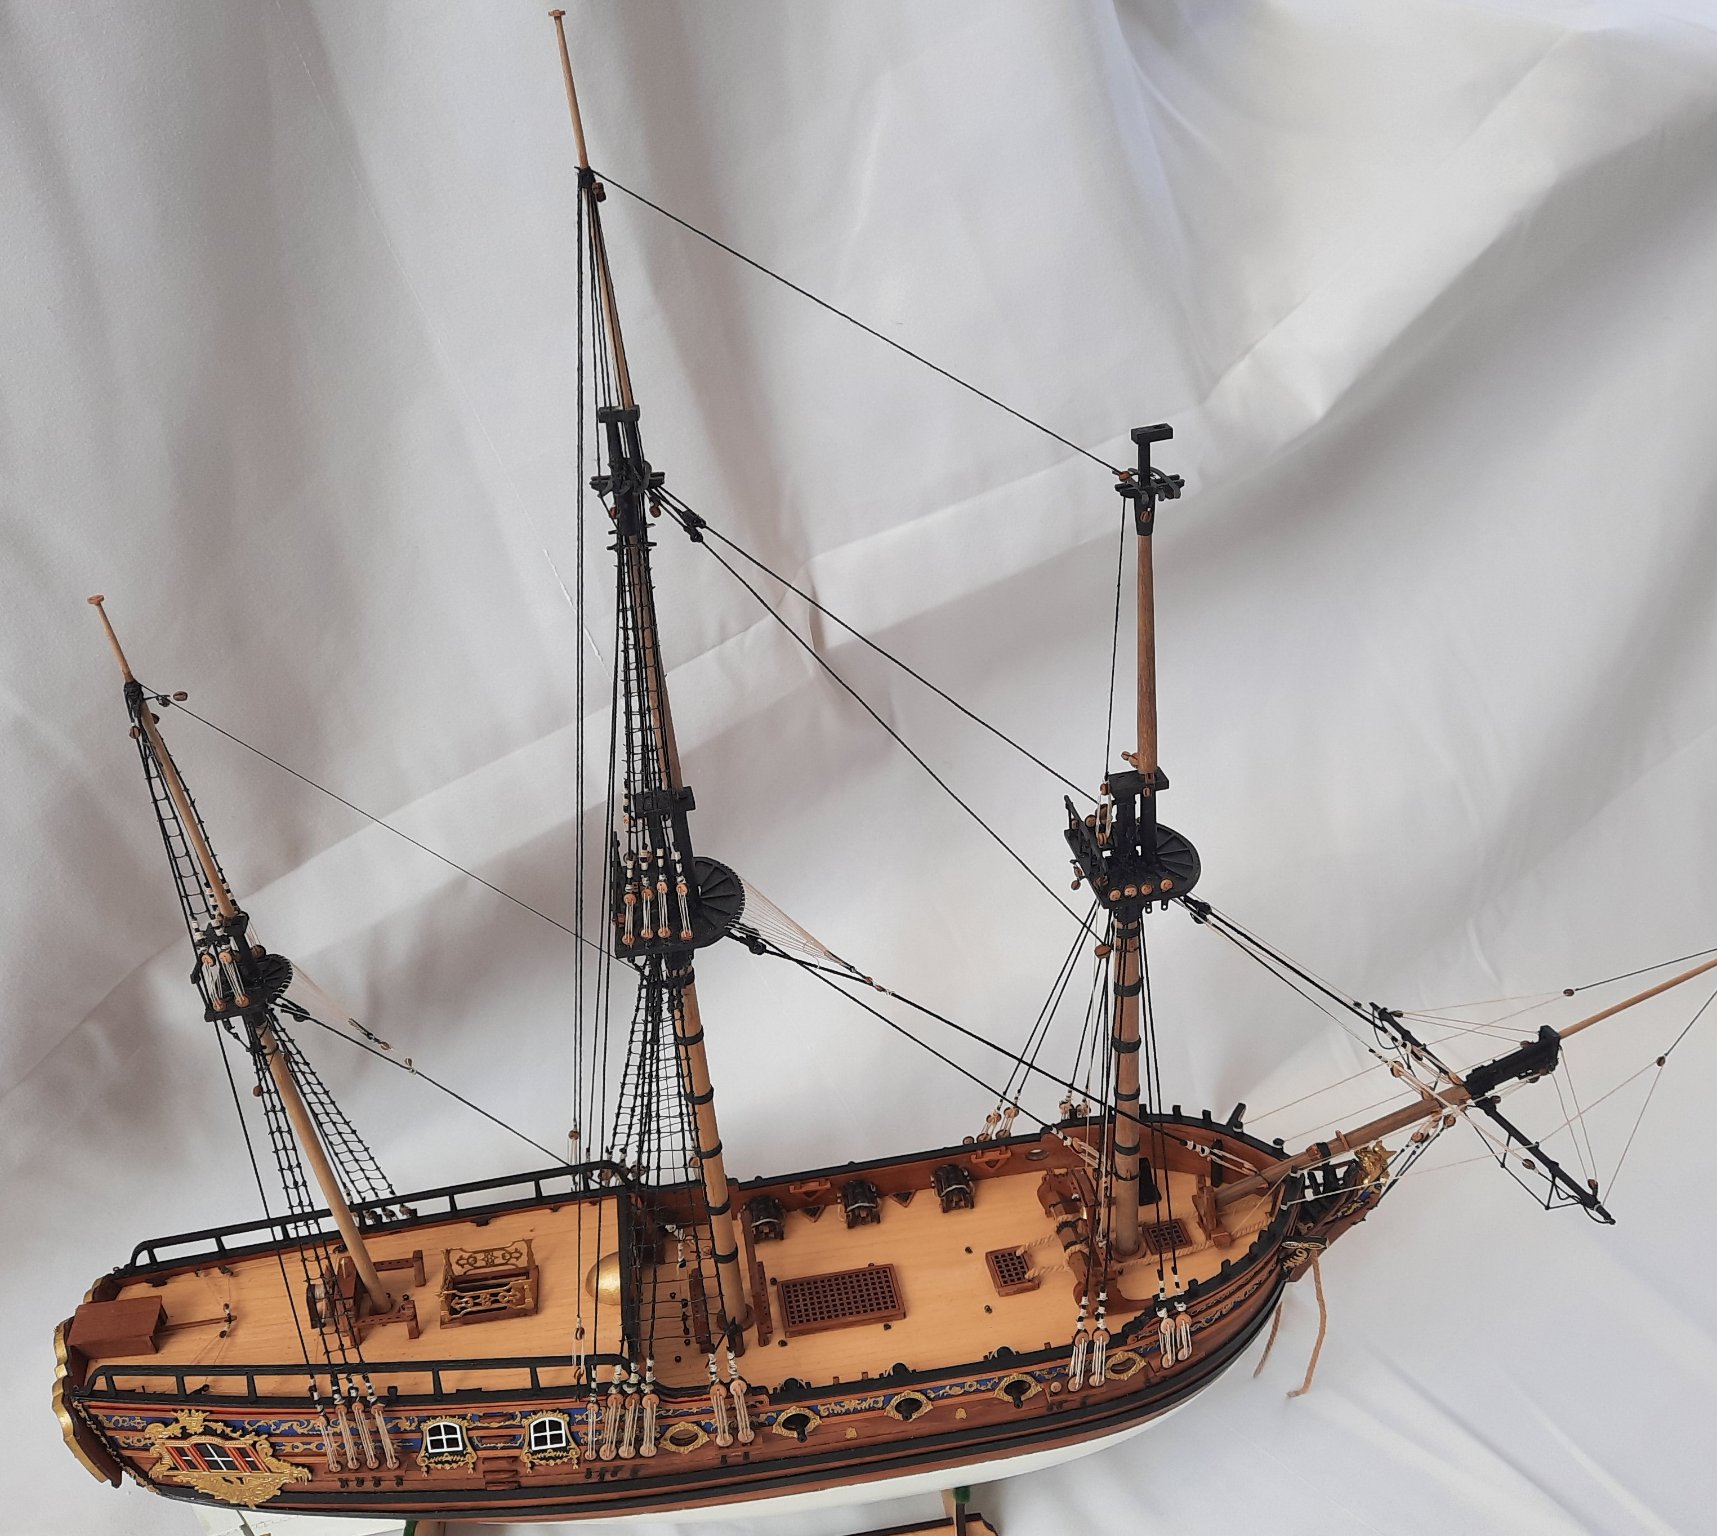
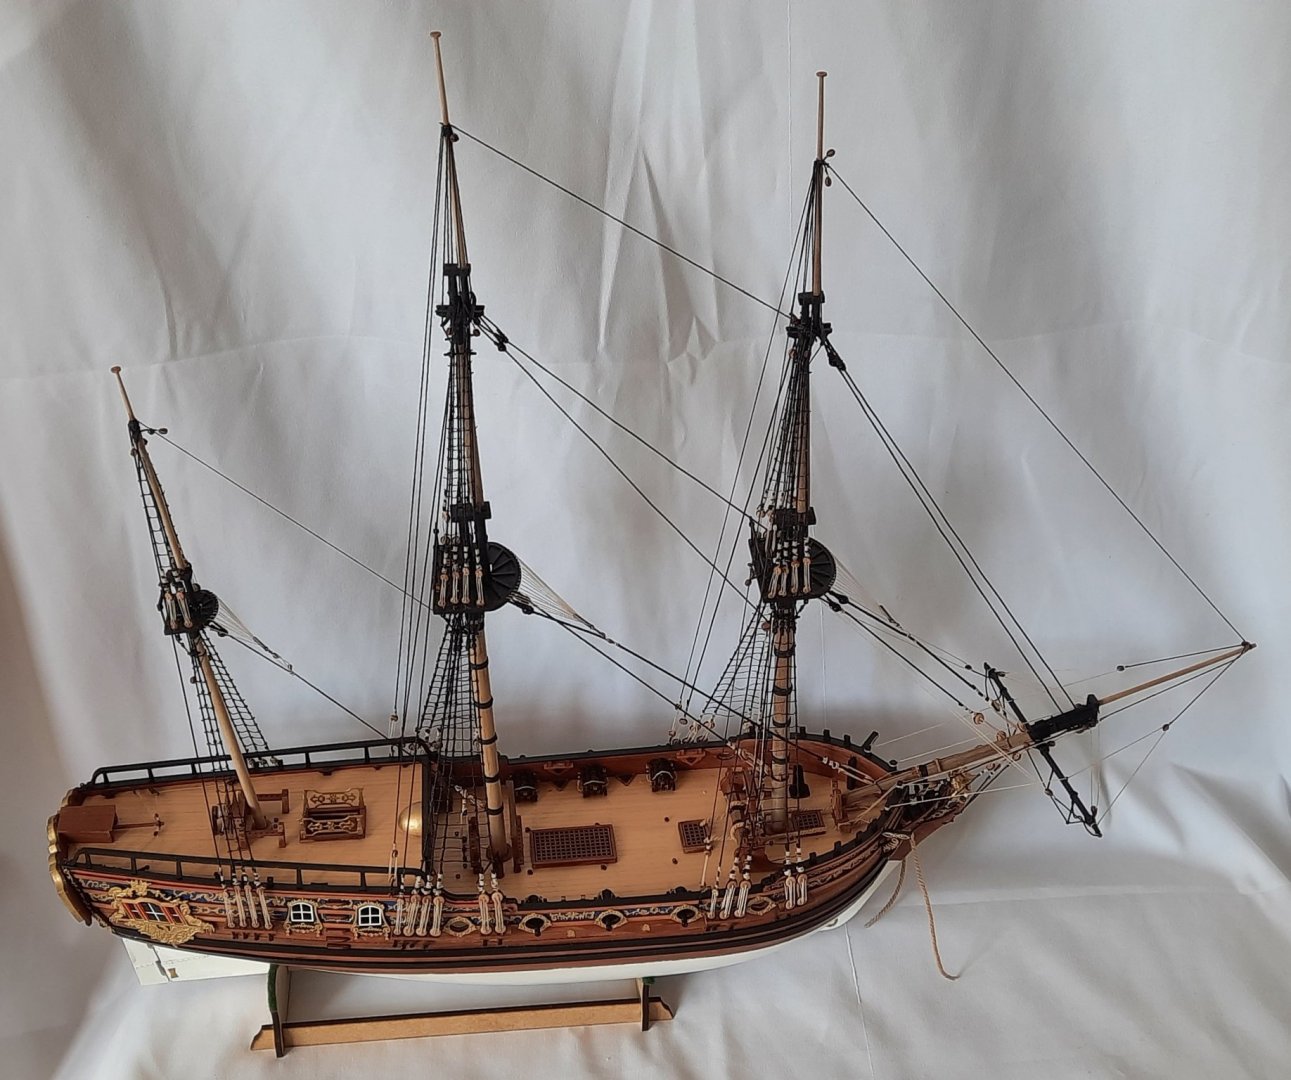
I have now finished rigging all the masts which for me is a major milestone completed. I will now be moving on adding the yards to the masts however I have to finish making all the yards before they can be pinned to the masts which should keep me busy for the next few days. Here are some pictures of the completed mast rigging. Sorry this picture is a bit of out of focus

- 382 replies
-
- 11
-
-
- Vanguard Models
- Duchess of Kingston
- (and 1 more)
-
Thanks Bob My pictures do not show the model in the best light or the justice it deserves. It is a excellent model and full credit must go to Chris Watton for his design work and quality of materials. Also many thanks to Jim Hatch for his build log for the prototype which has been essential reading.
- 382 replies
-
- 3
-
-
- Vanguard Models
- Duchess of Kingston
- (and 1 more)
-
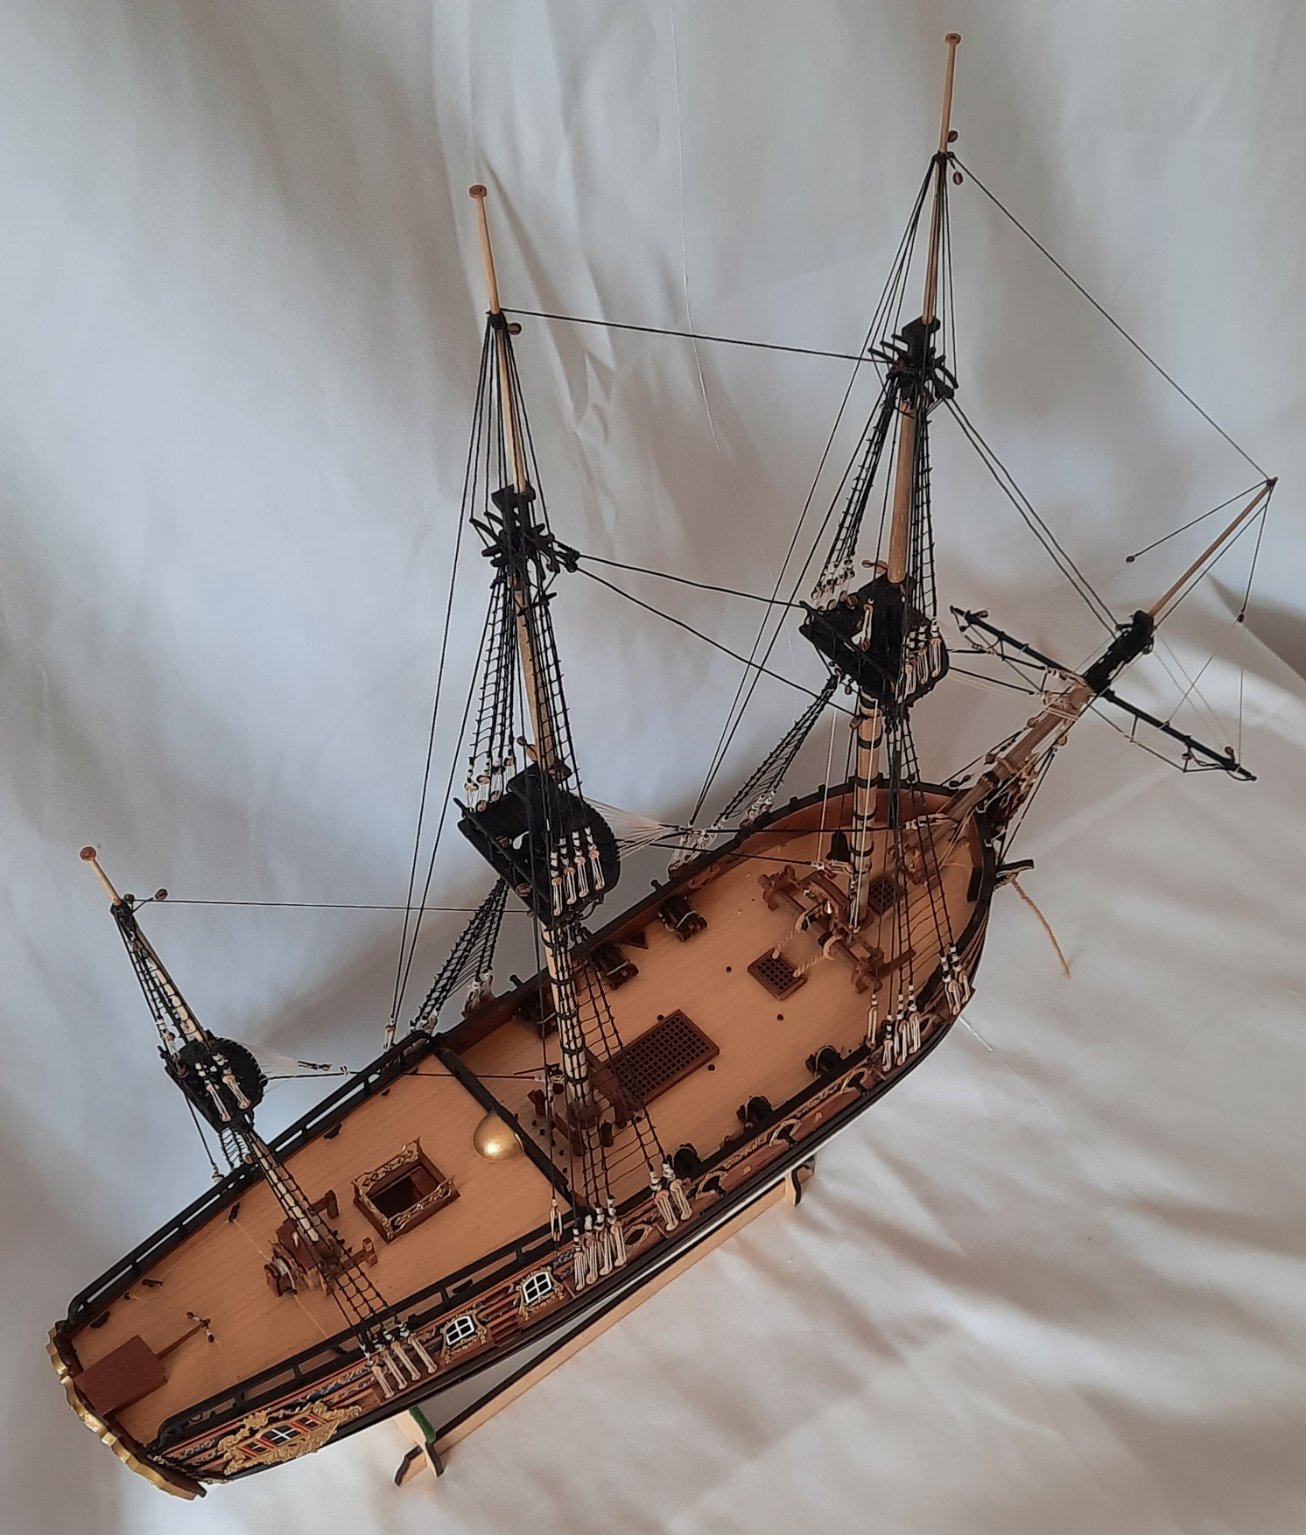
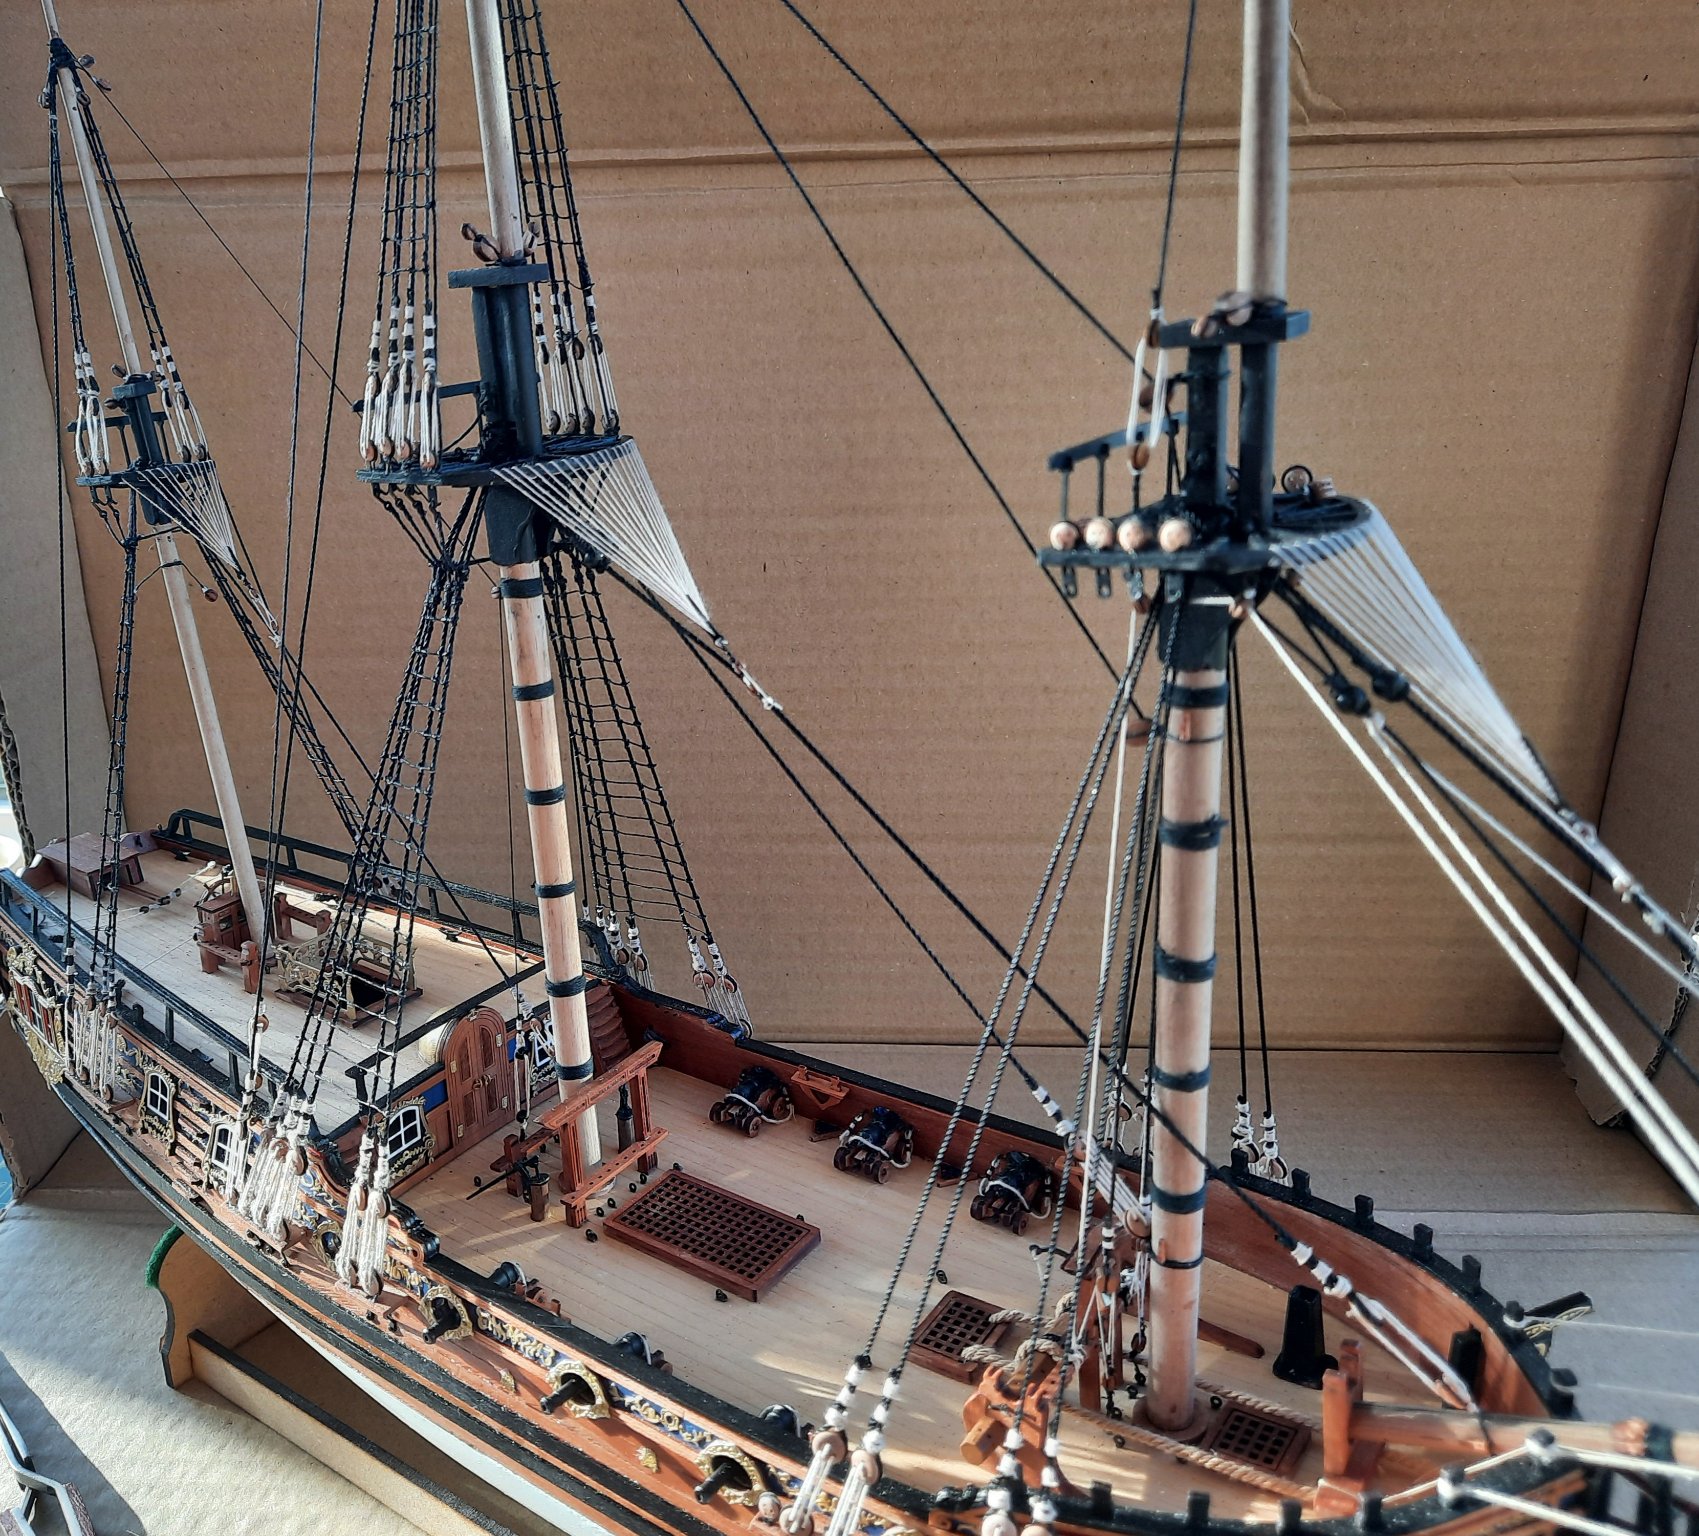
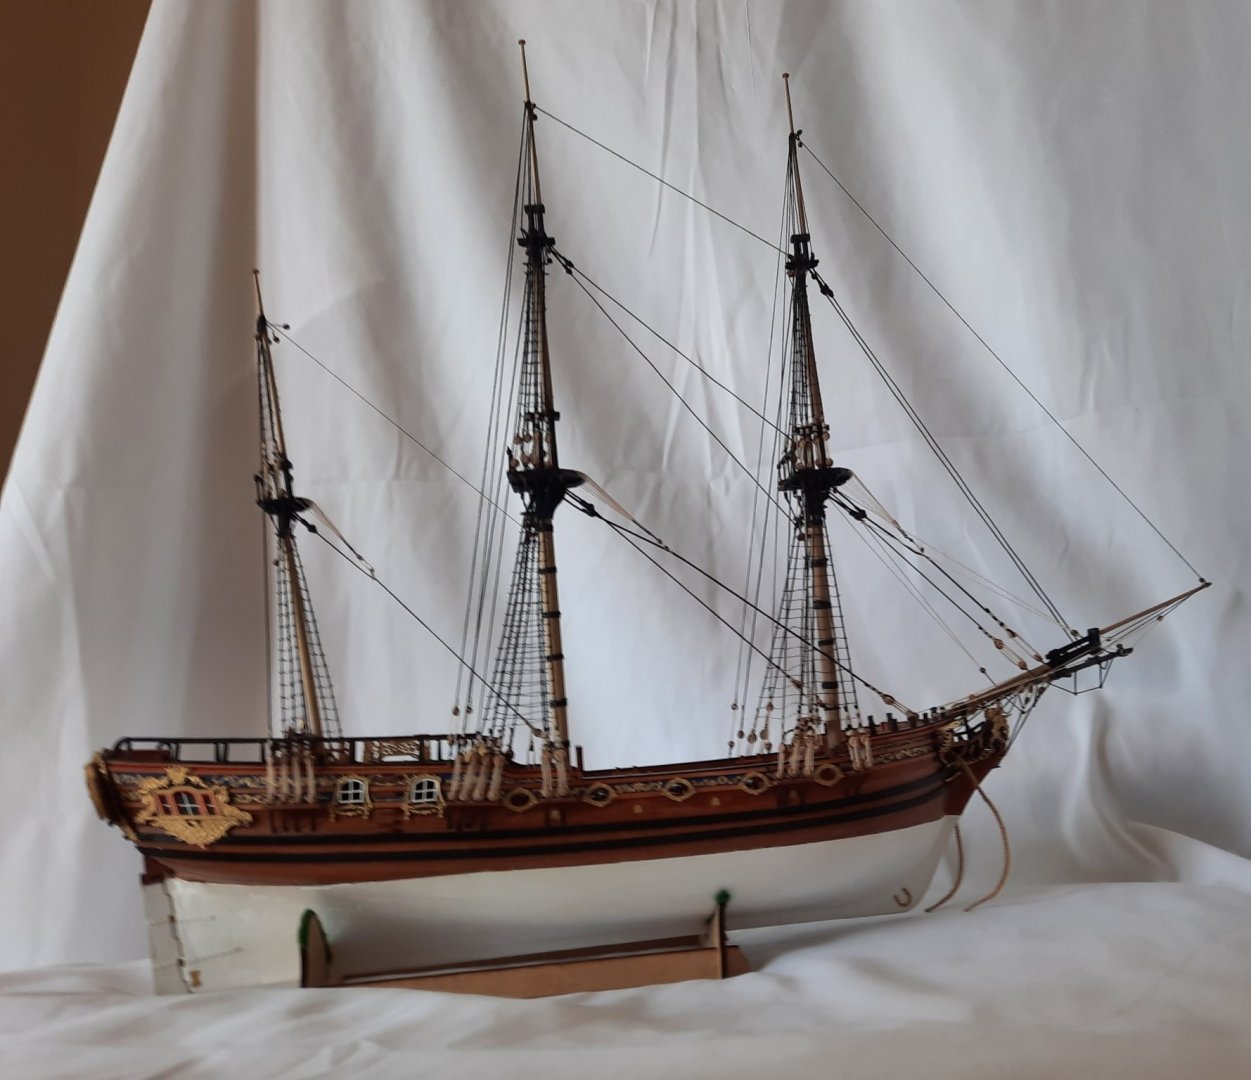
I have continued to make good progress with the rigging phase of the Duchess of Kingston. All the shrouds, lanyards and ratlines have now been installed. All the stays have been rigged apart from the 3 off required for the fore topgallant mast which I plan to add in the morning. I have provided some pictures of the current stay of play. Once I have added the fore topgallant stays I can move on to rigging the 9 yards (three per mast) and then finally the anchor. I am expecting to spend 2 or 3 days per mast (famous last words) so hopefully the Duchess will be completed within the next 3 to 4 weeks

- 382 replies
-
- 13
-
-
- Vanguard Models
- Duchess of Kingston
- (and 1 more)
-
Great work Derek, your Speedy build is looking amazing.
-
The build is coming along very nicely. Very impressed with both your speed and workmanship with this build.
- 355 replies
-
- 6
-
-
- vanguard models
- Sphinx
- (and 1 more)
-
I use a spray can of primer which is designed for photo etched parts. I gave a quick spray over and was not too bothered about the inner strips for this part as the skylight was cleaned in acetone prior to adding the primers. The red paint was applied with a paint brush to the skylight without any issues. The finished part will get a thin coat of polyurethane varnish to protect it.
-
Currently I am adding the ratlines to the foremast shrouds. This is a task I really like doing. I decided to try and record a video of me installing the ratlines. Although I did my best to stop my hands obscuring the view, at times it was impossible to do so. The quality of the video is not very good but hopefully you may find it interesting and useful. Adding ratline video With reference to the video content I start the process by securing the ratline with a simple half hitch knot which I position behind the shroud line which is then adjusted to the correct horizontal position (as provided by the paper ratline template). The line is then tied to the next shroud line using a standard clove hitch knot. As can be seen in the video I use the tweezer's to position and tie the clove hitch knot. This process is then repeated to tie the ratline to the other shroud lines. A touch of ga is applied to the first and last knot before the excess thread is trimmed away. Finally the lines are coated with a diluted pva solution.
- 382 replies
-
- 1
-
-
- Vanguard Models
- Duchess of Kingston
- (and 1 more)
-
Great to see the progress you've made and there is plenty of very useful build information.
- 355 replies
-
- 7
-
-
- vanguard models
- Sphinx
- (and 1 more)
-
I can confirm the cutters are brilliant. Best I have.
- 725 replies
-
- 1
-
-
- vanguard models
- speedy
- (and 1 more)
-
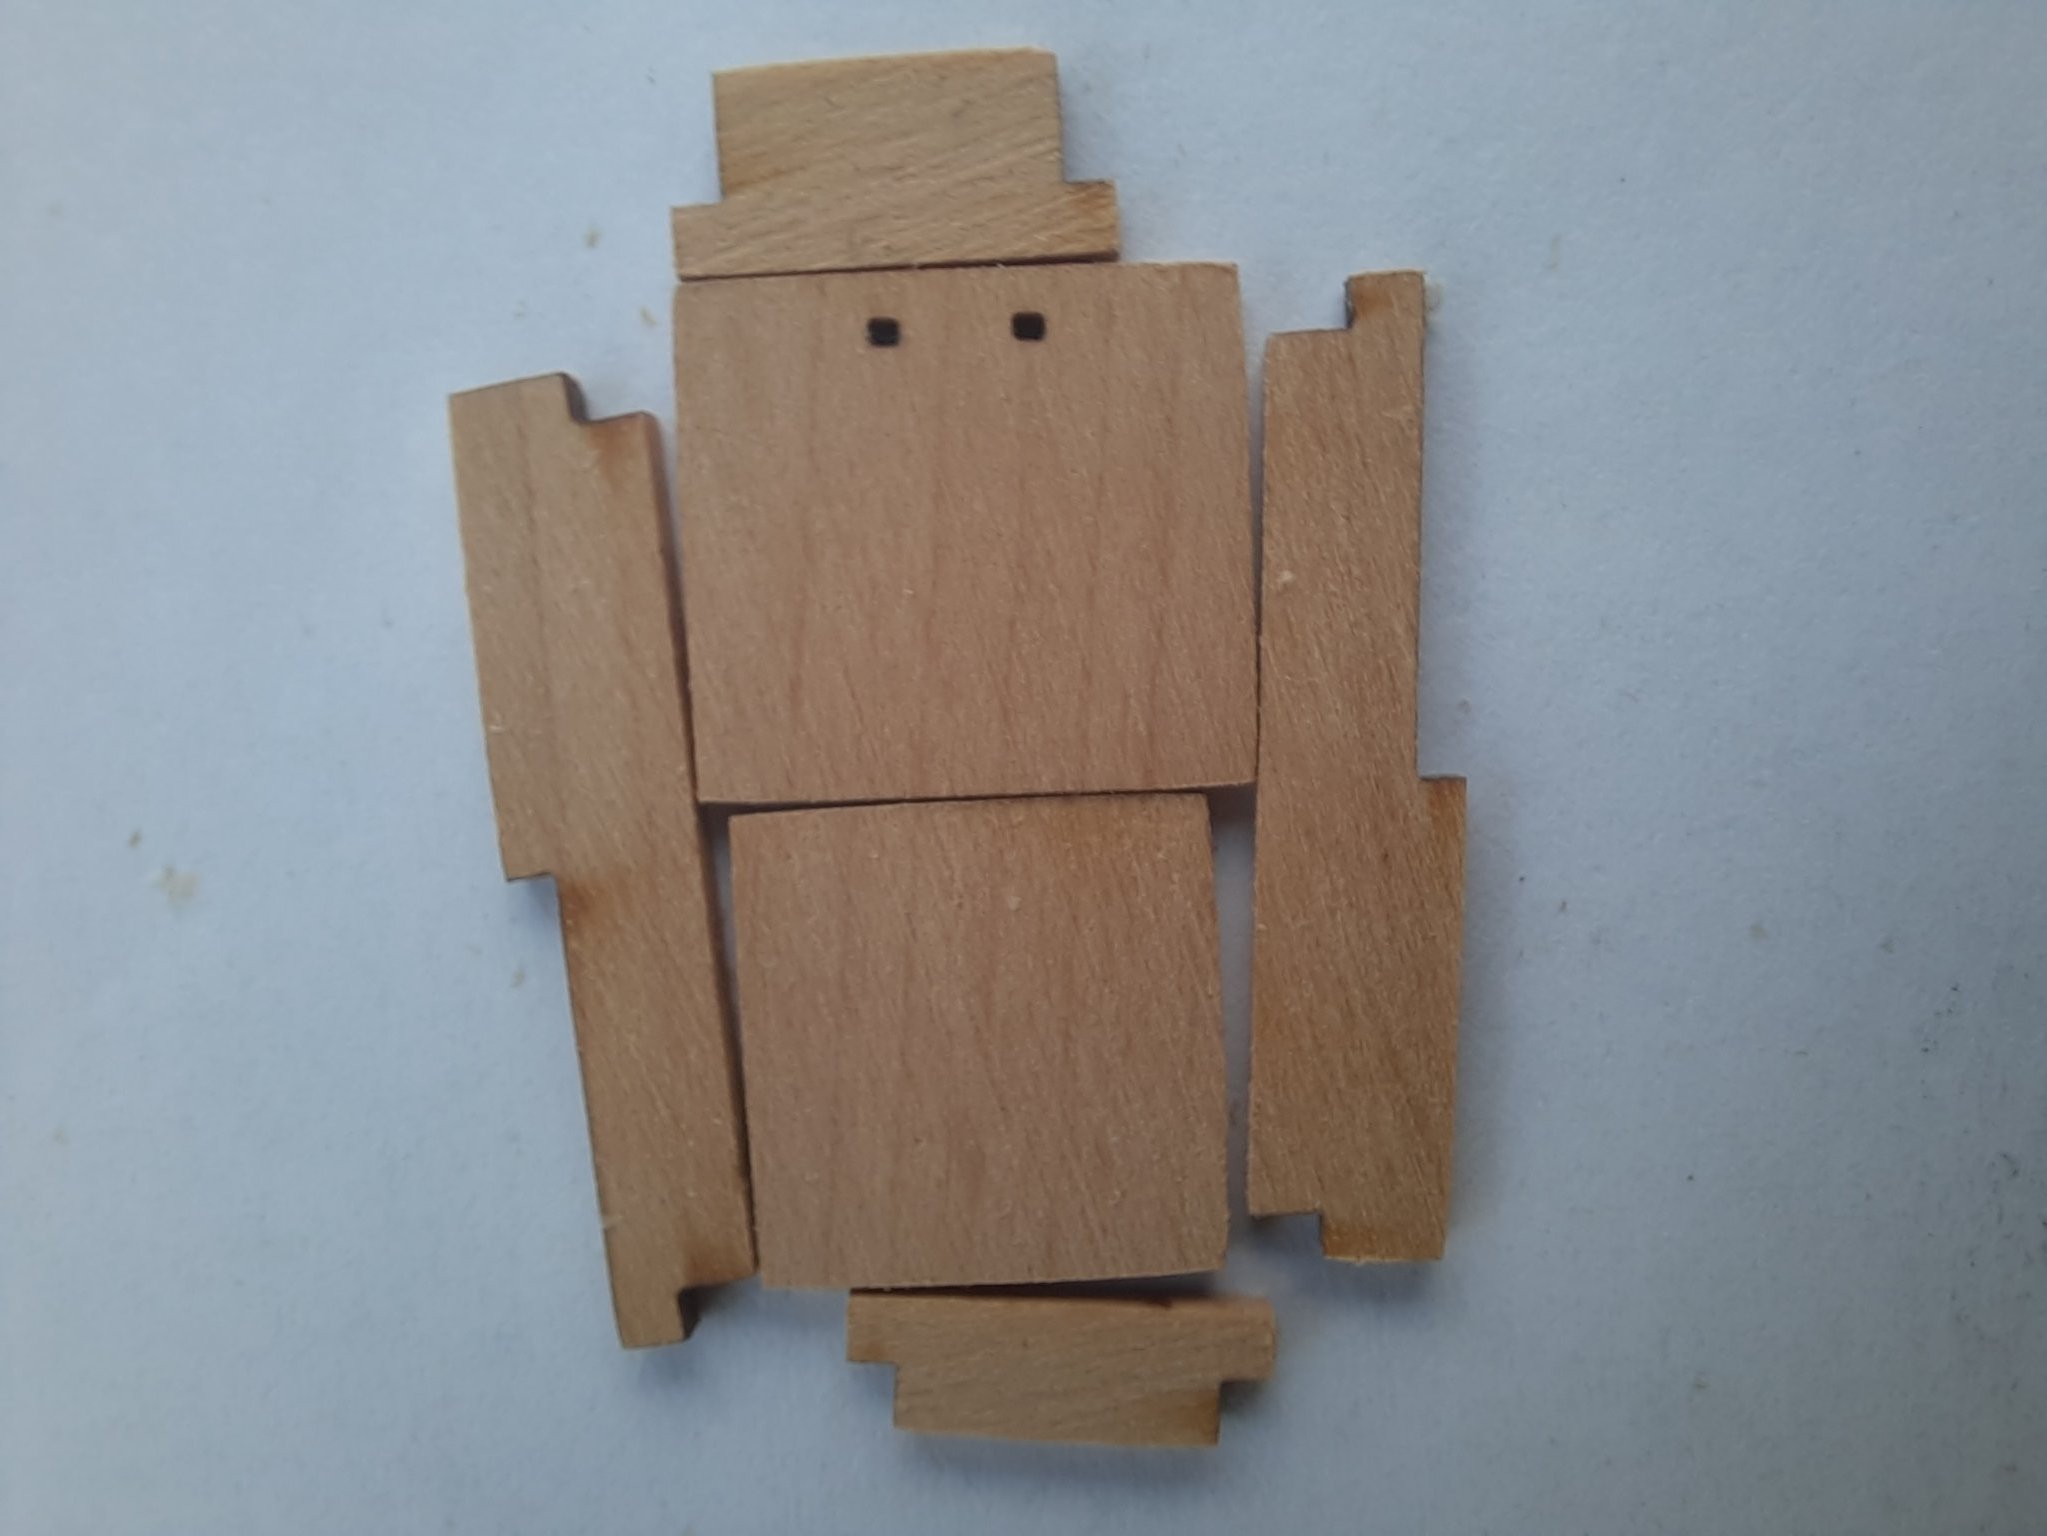
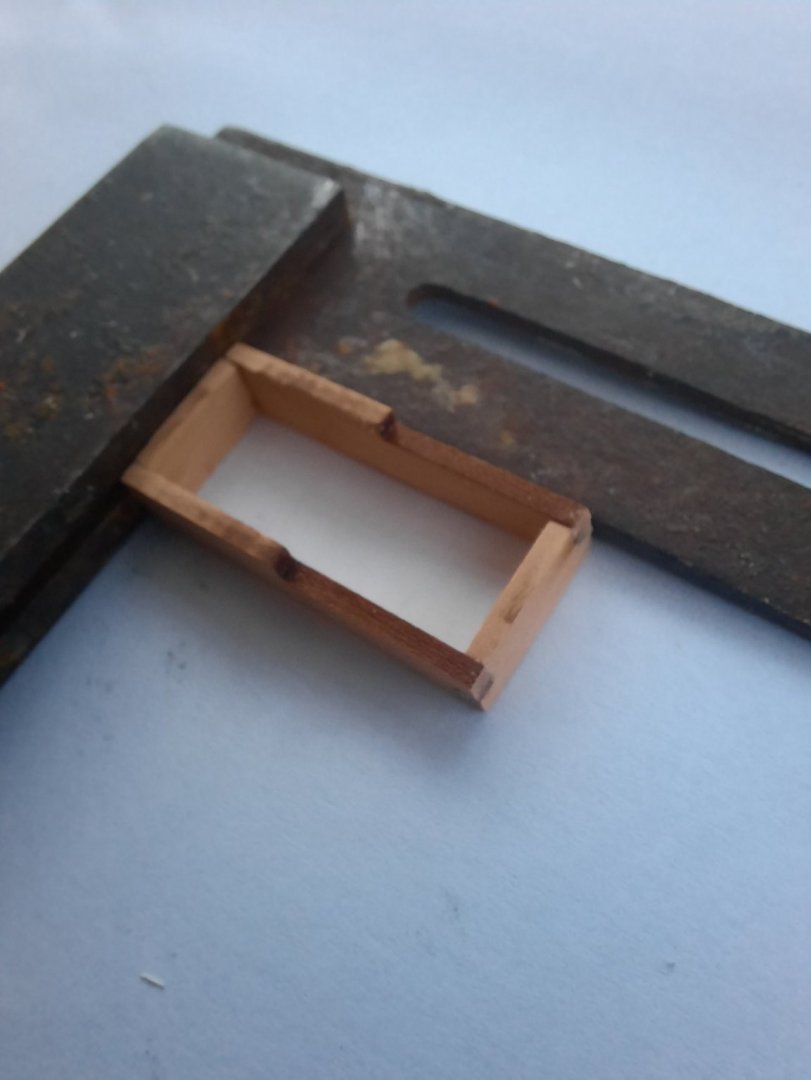
Main and Fore Companionway Hatches I will not add a lot of detail of the build process as they are both essentially a repeat of the rear hatch skylight build process. The only difference is there is an inner and outer framework which allows the hatches to be seated. My jig was adjusted slightly so that the inner main hatch frame assembly could be positioned and held secure once the glue had been applied to the joints. Once the glue had cured the outer frames were attached to the inner framework. The main hatch was dry fitted in the framework. It is a nice tight fit. I repeated the main hatch build process for the fore companionway hatch. The assembled frameworks were painted ochre red. The hatches are only dry fitted at this stage. Another assembly task completed. The only deck items still to build are the 12 sets of the 6-Pounder cannon and carriage assembly.

- 160 replies
-
- 2
-
-
- Alert
- vanguard models
- (and 1 more)
-
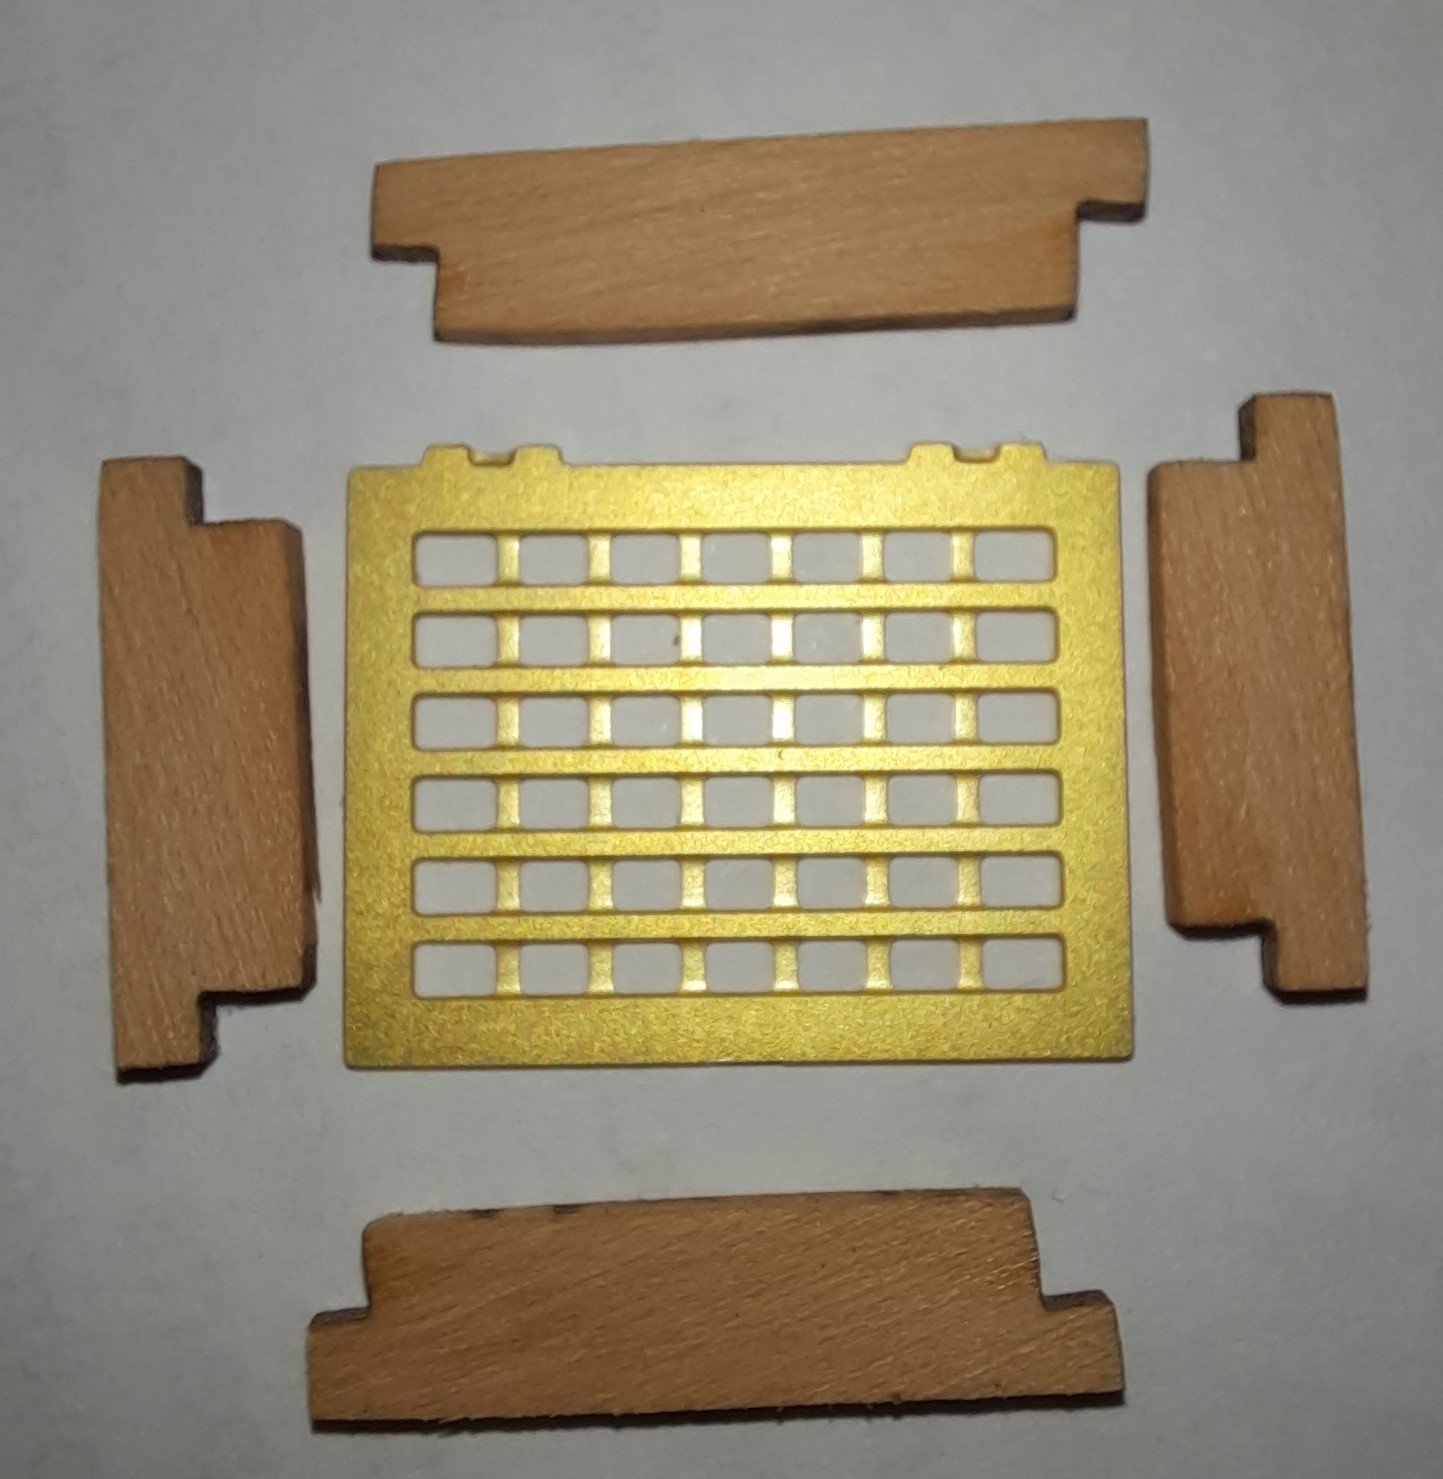
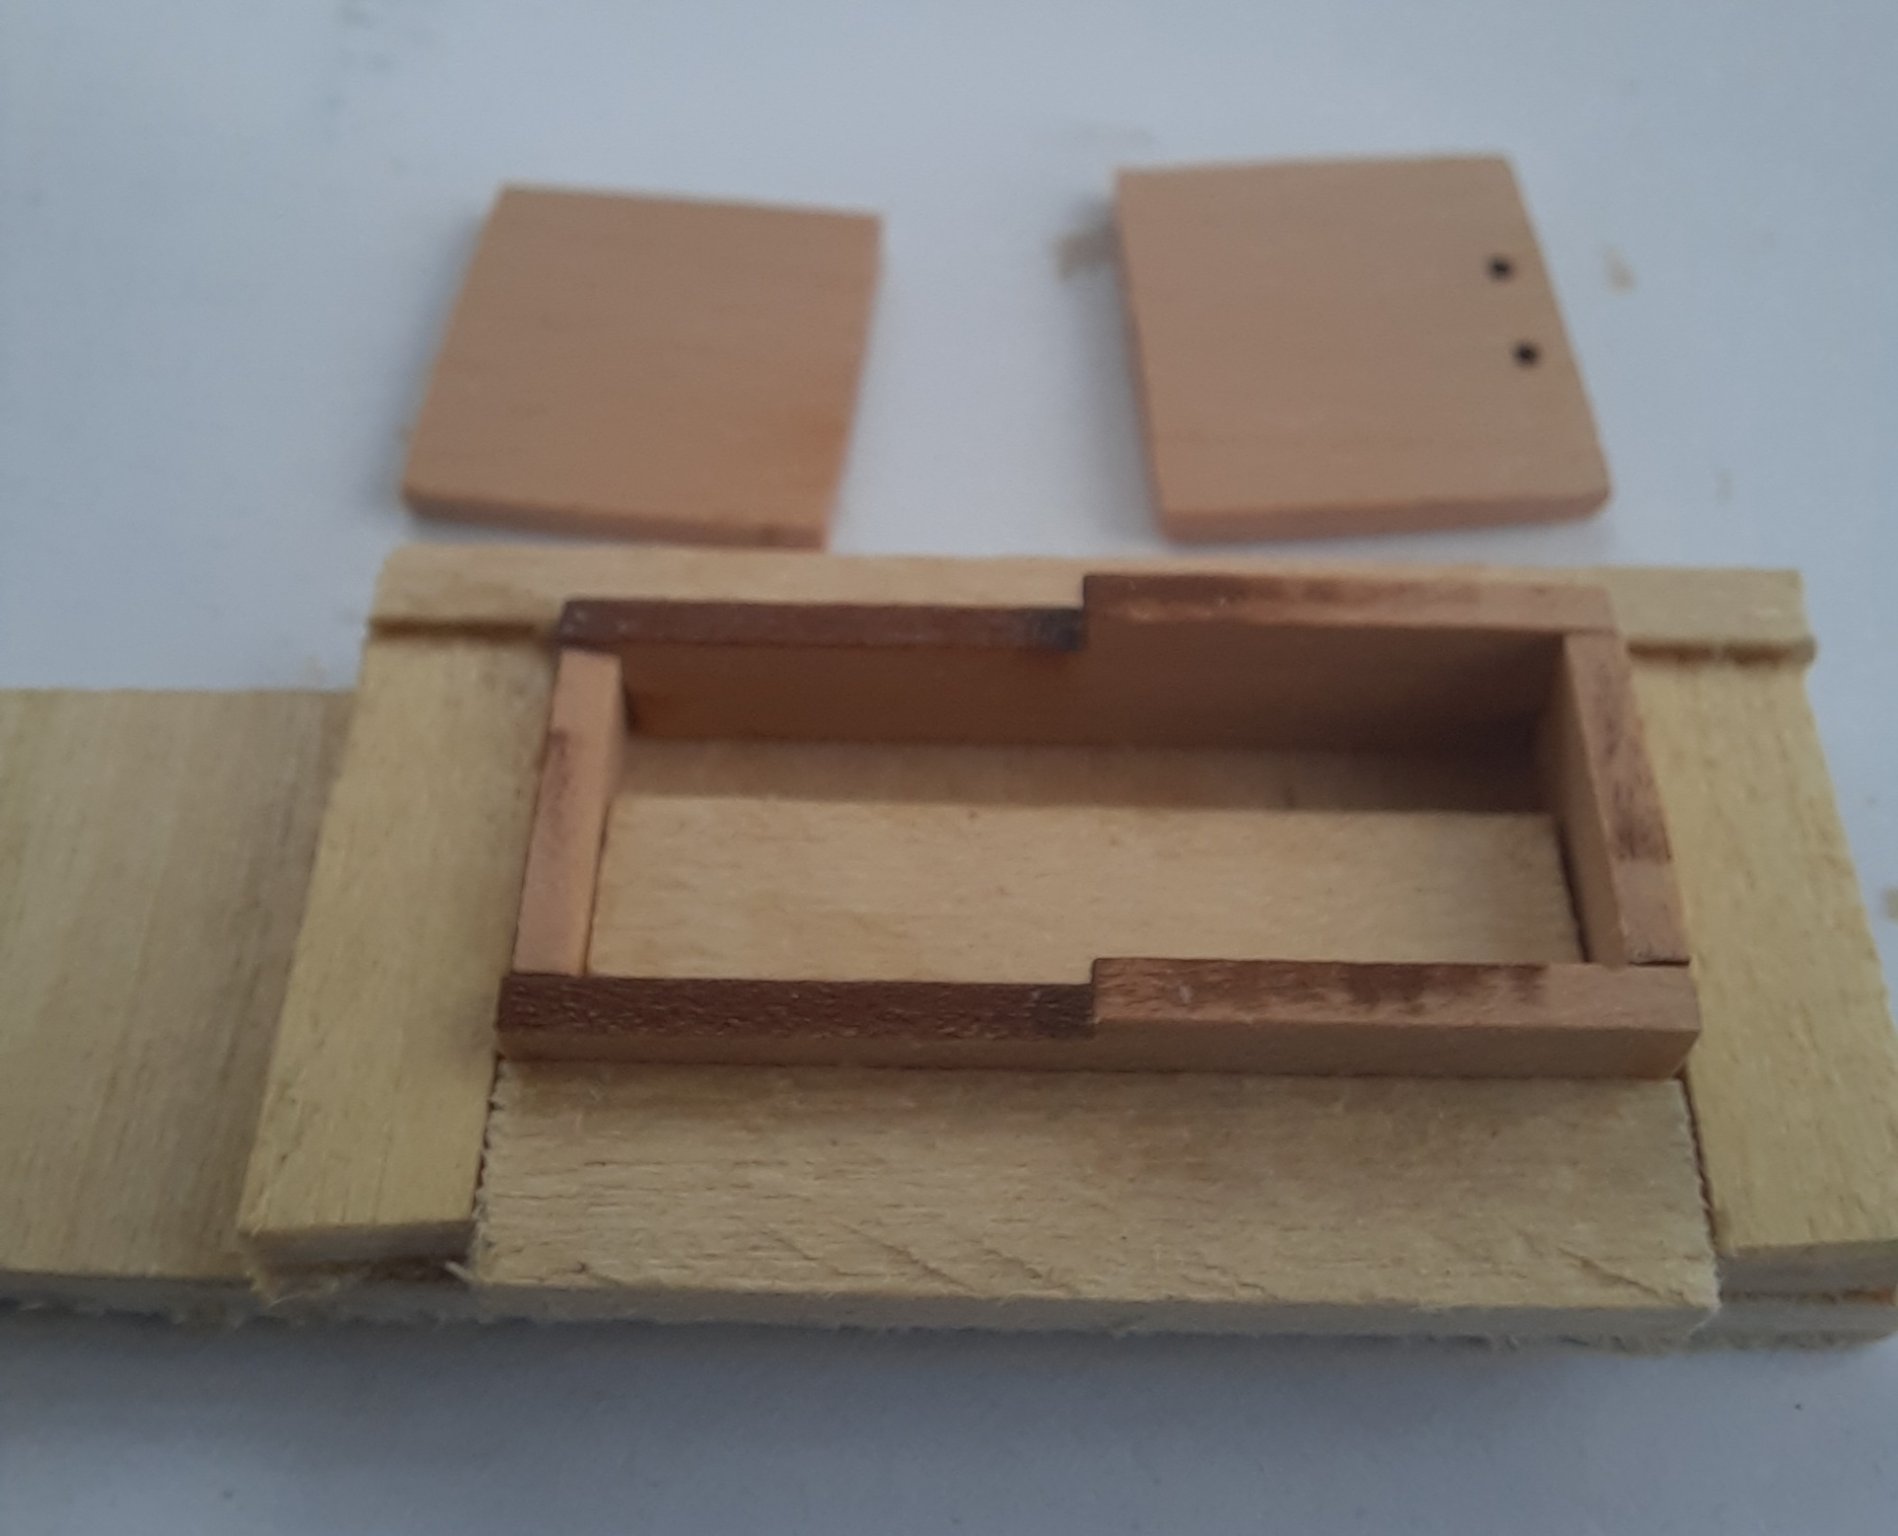
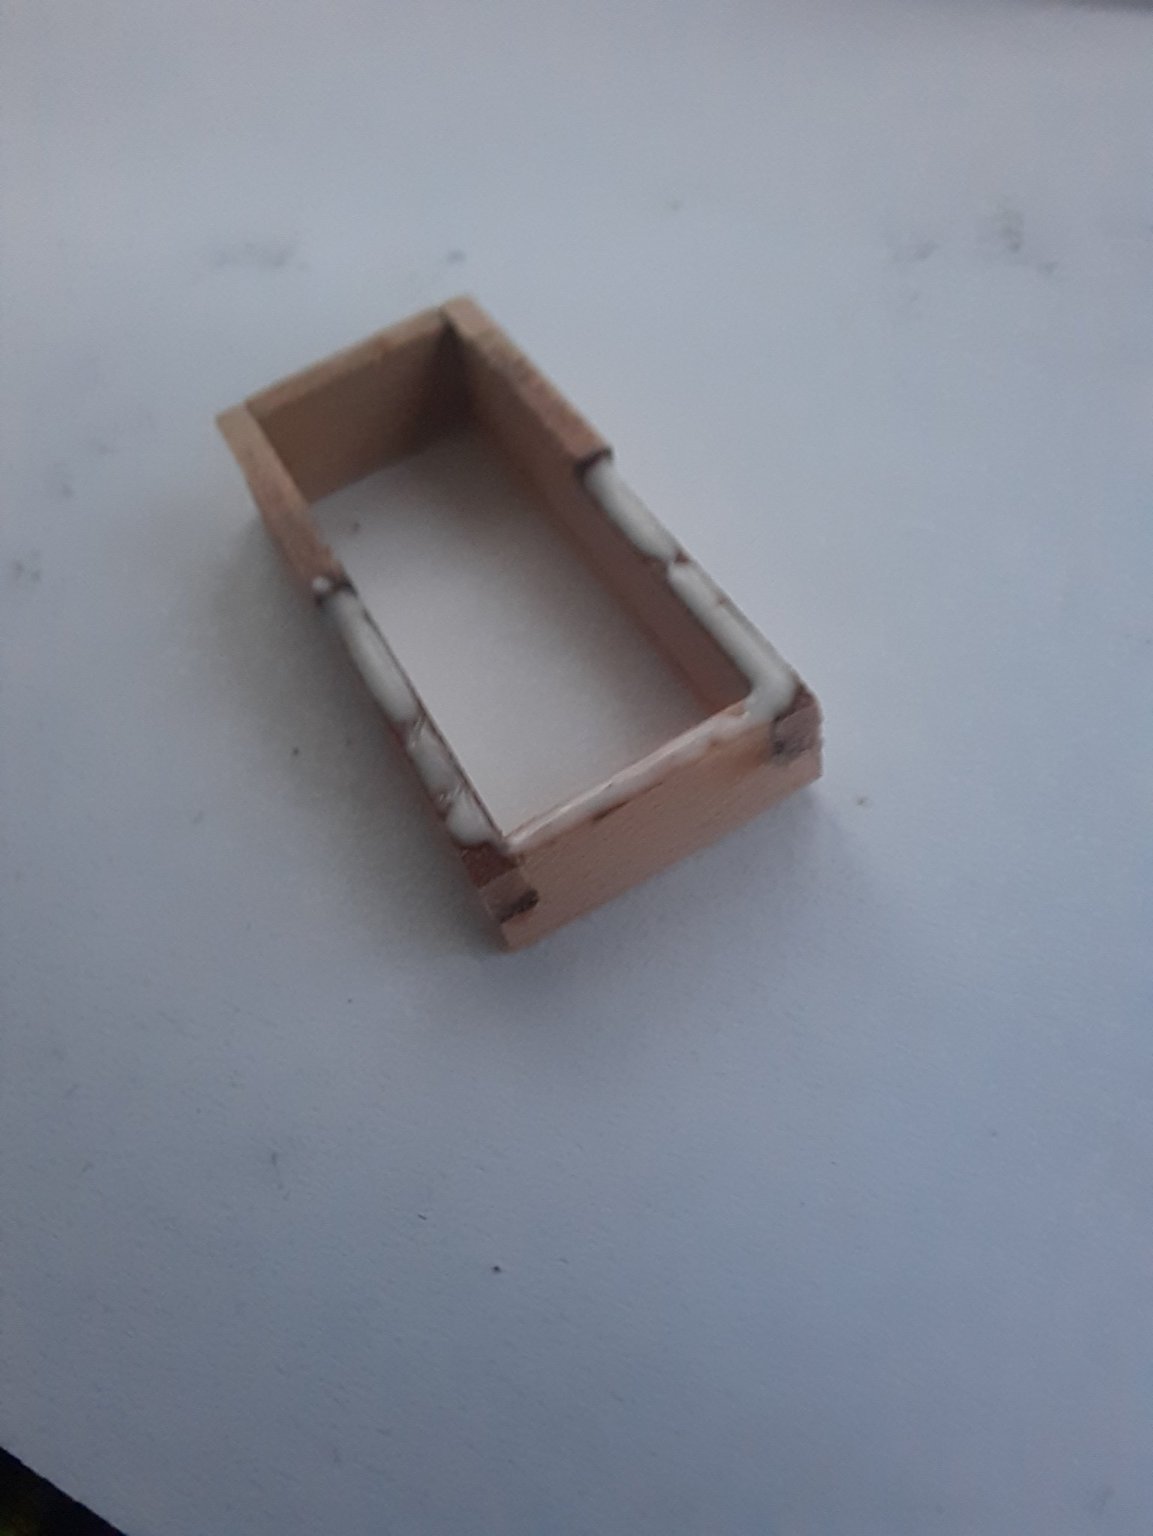
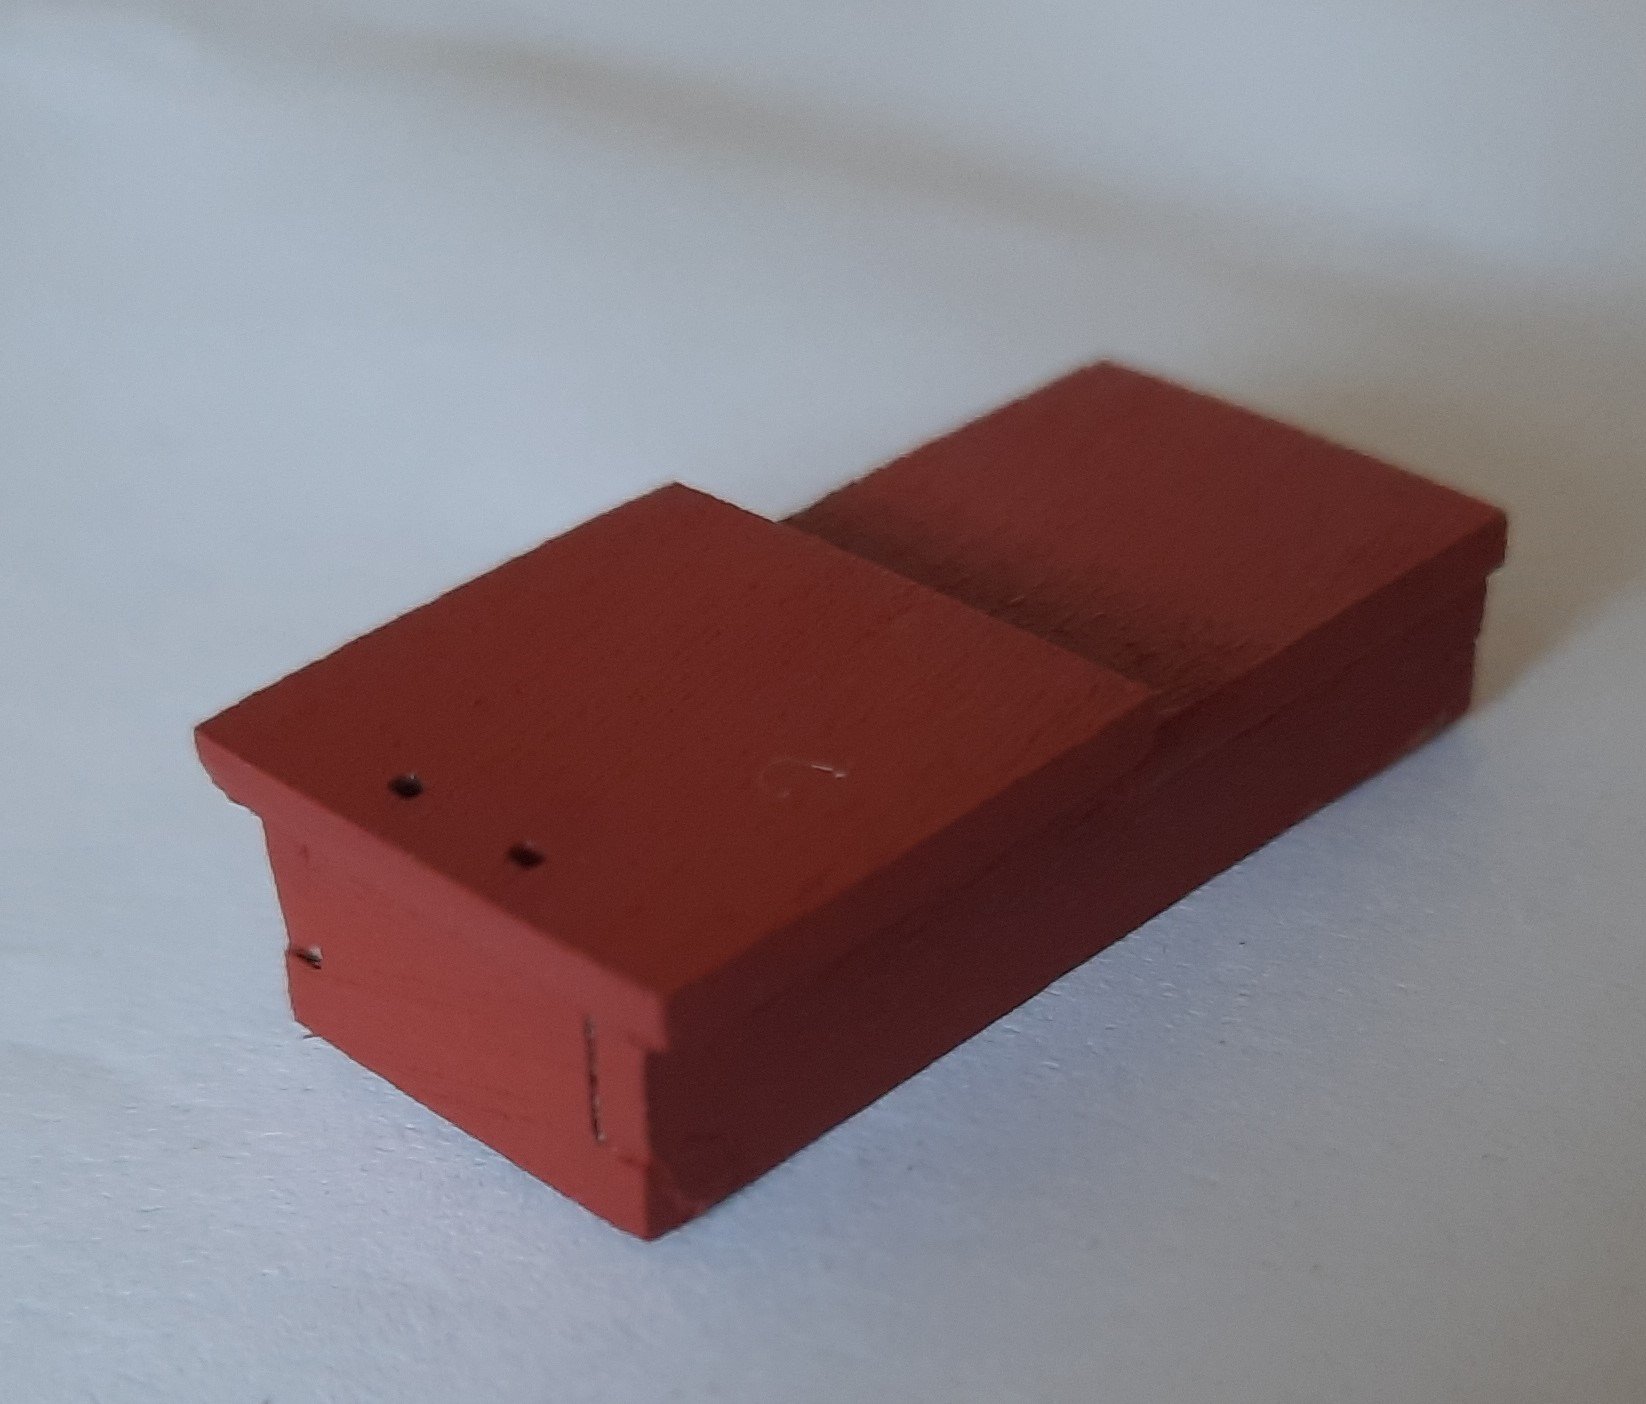
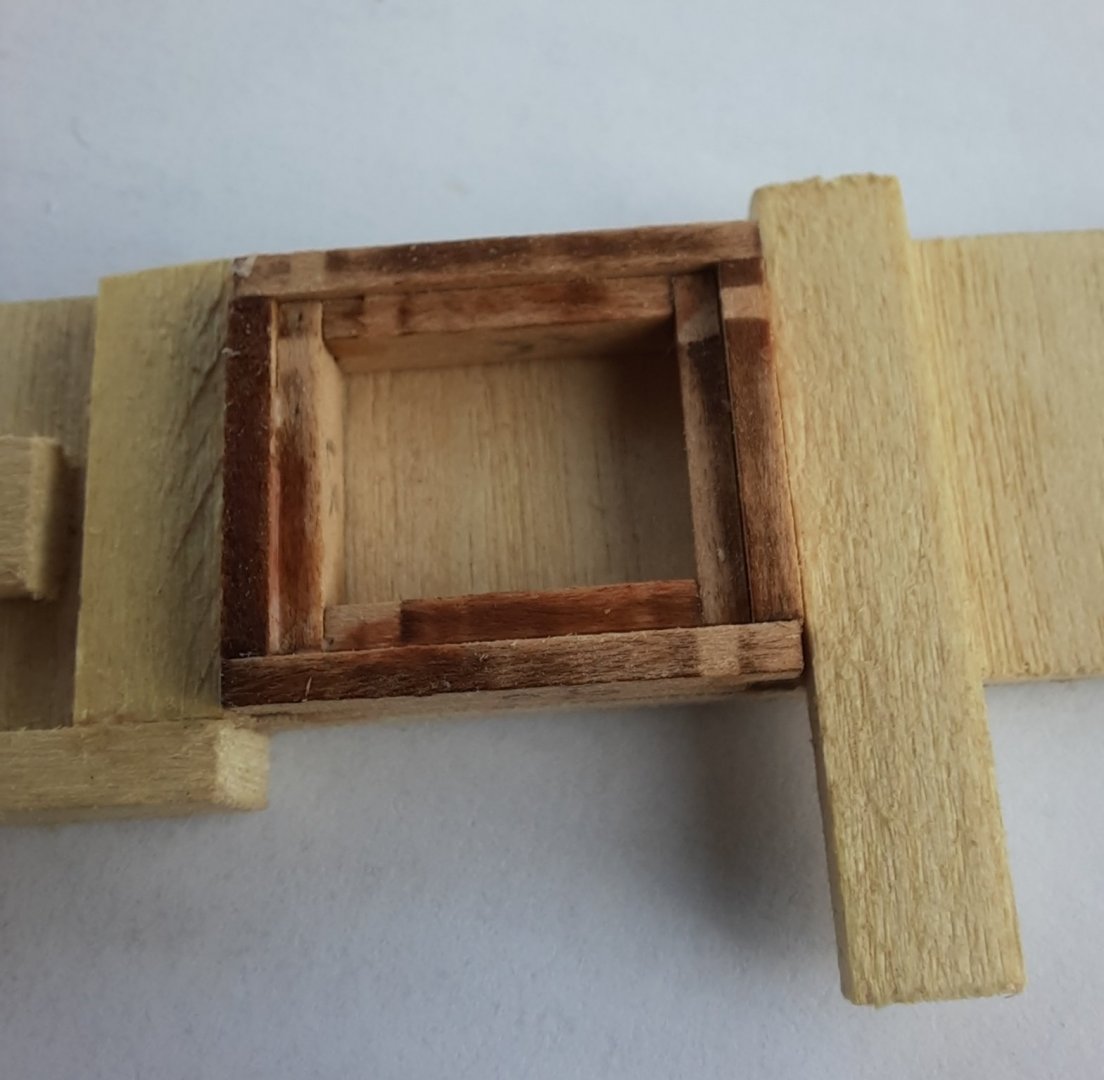
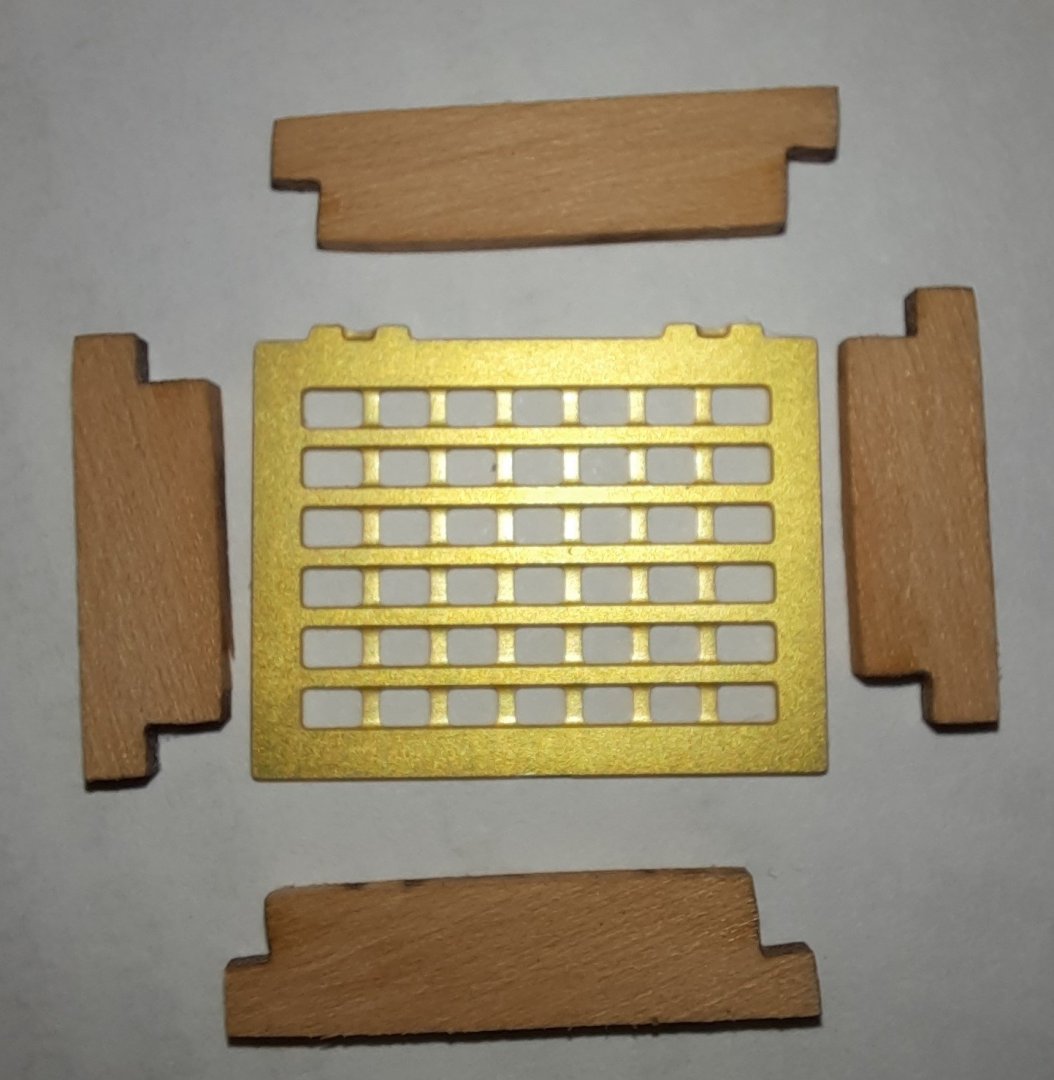
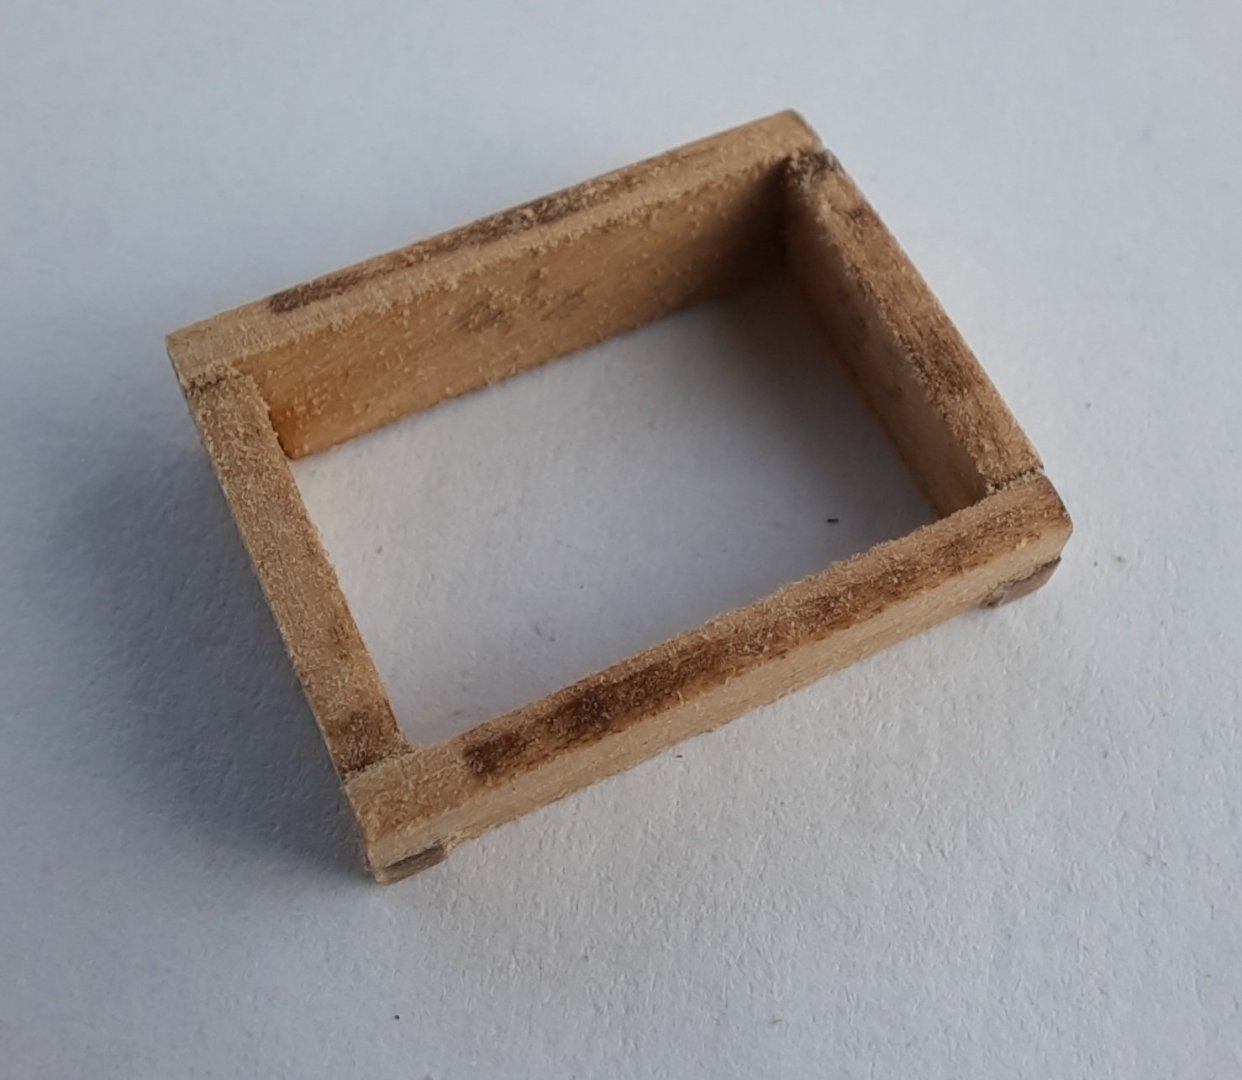
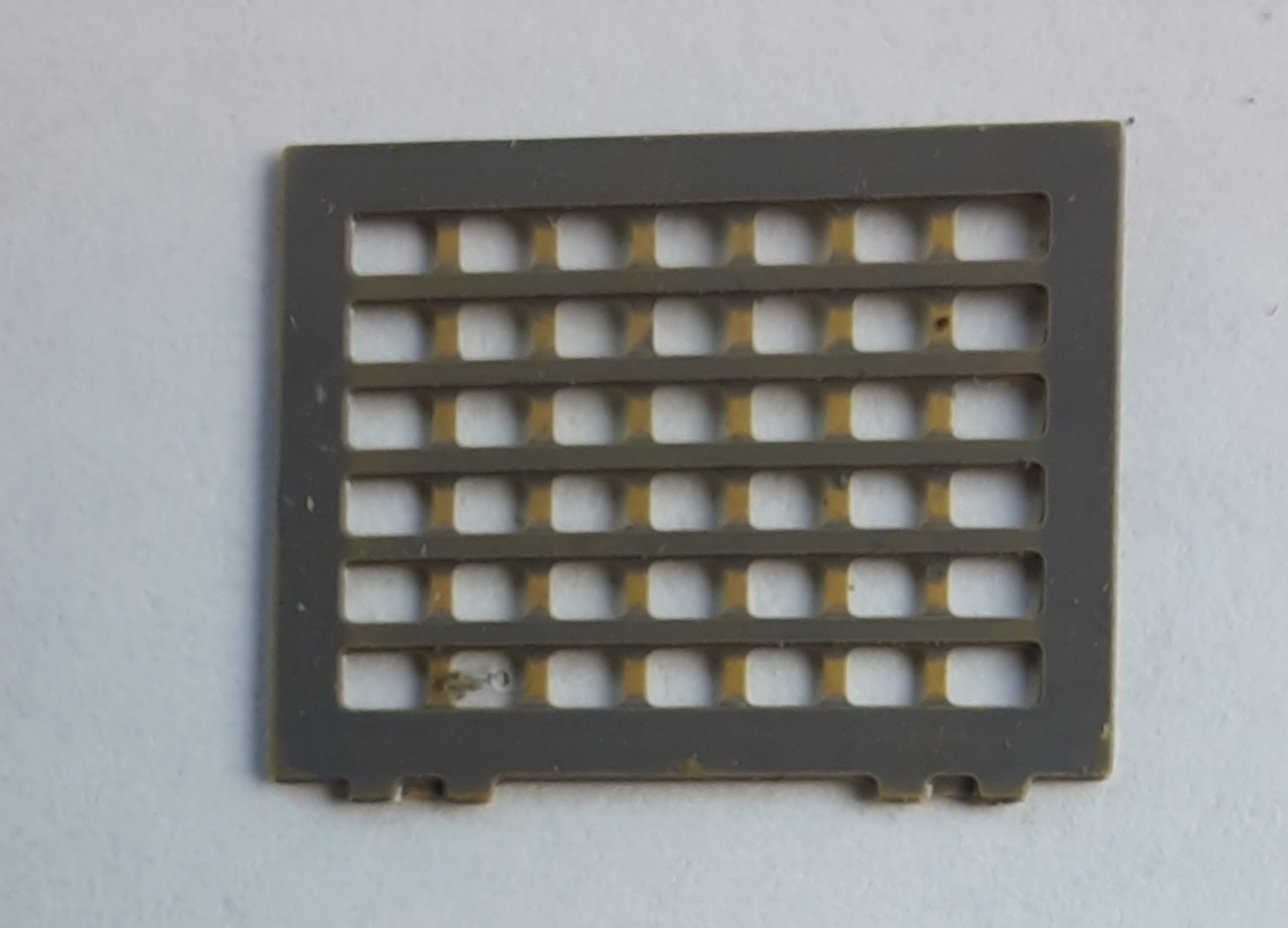
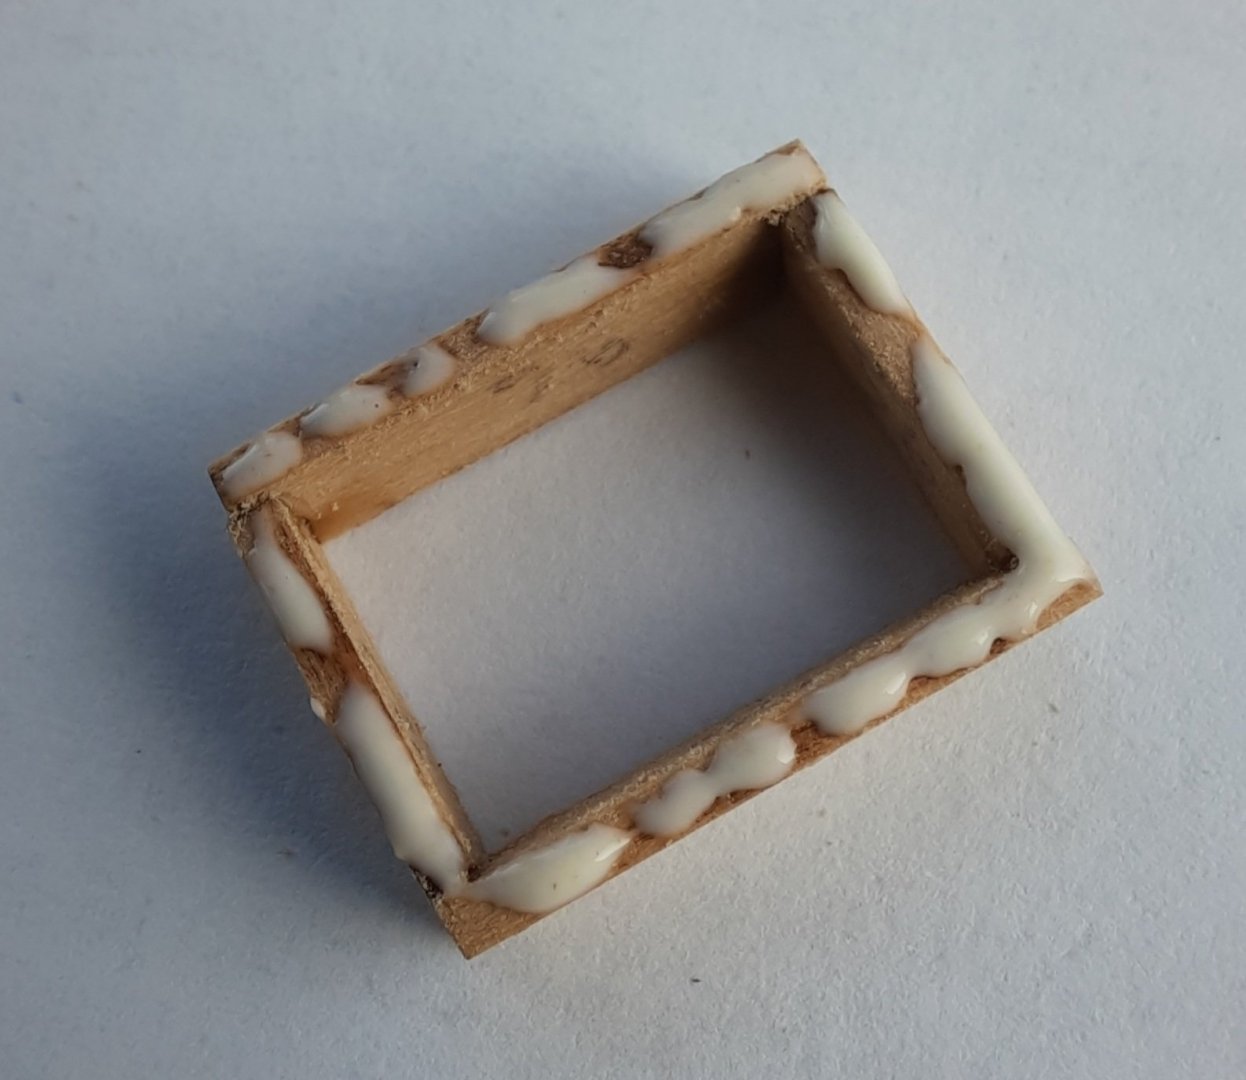
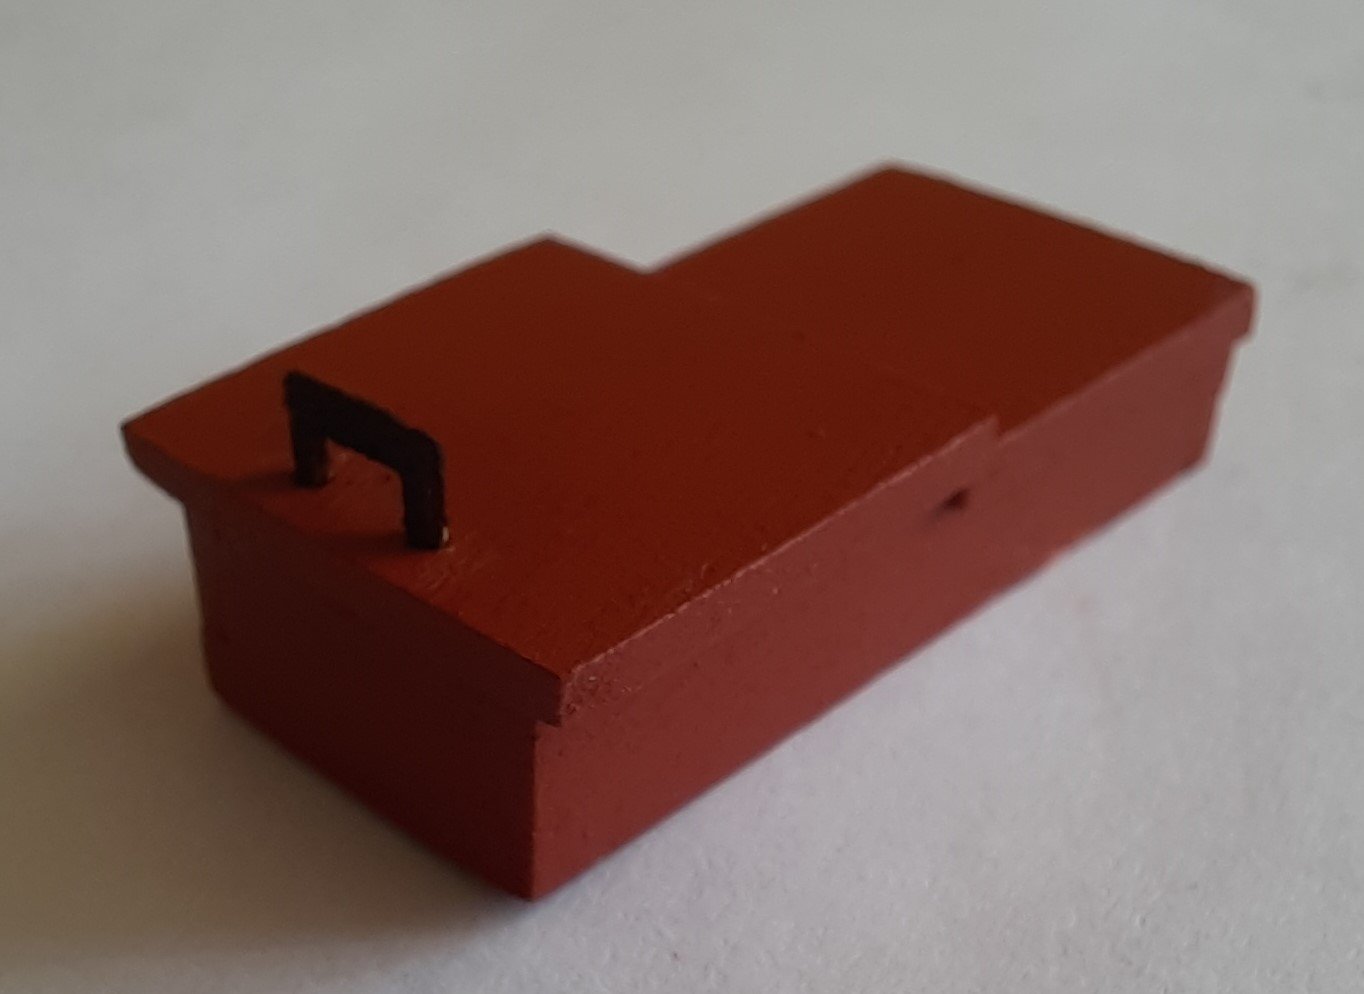
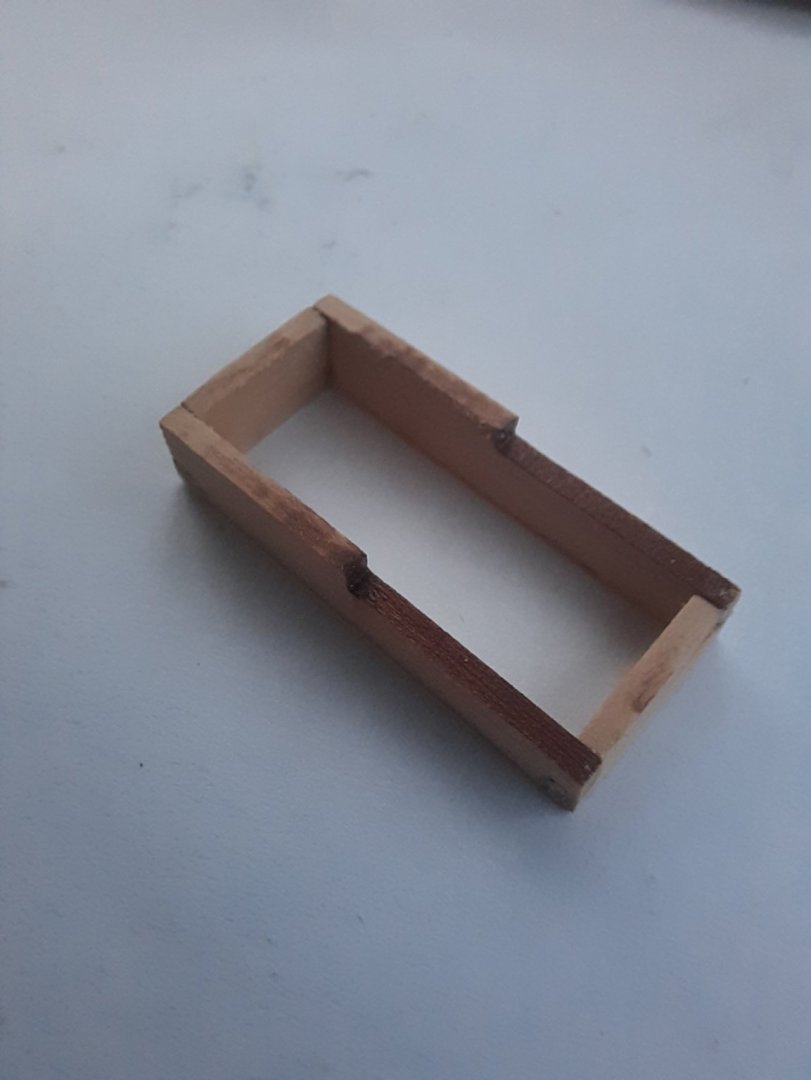
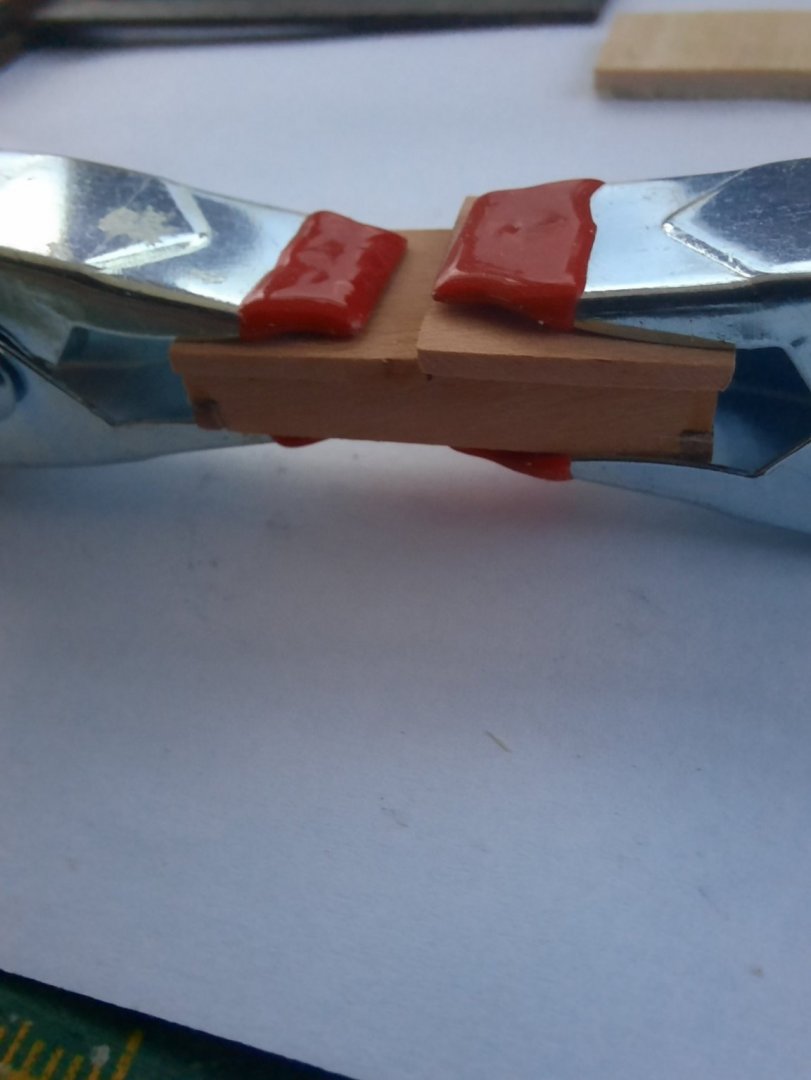
Rear Hatch / Skylight Assembly This is another simple deck item build. The rear hatch / skylight assembly comprises the following parts: 2 x Rear Hatch Combing End (wooden part) 2 x Rear Hatch Combing Side (wooden part) 1 x rear hatch skylight (photo etch part) These parts were removed from their respective sheets and the laser car was removed from the visible edges of the rear hatch combings. The photoetched rear hatch skylight part was cleaned in acetone and then given a coat of grey etch primer. It is now ready for painting. The jig I used aft companionway assembly was modified so the rear hatch combing parts could be aligned and held in place. Once I was happy with the fit in the jig a touch of pva glue was applied to all the joints. The rear hatch frame was then removed from the jig after the glue had cured. Next a thin layer of pva was applied to the top edge of the frame assembly and the skylight was positioned and clamped. The completed assembly was painted red ochre. Another simple deck item assembly successfully completed.


- 160 replies
-
- 3
-
-
- Alert
- vanguard models
- (and 1 more)
-
They are nice to build. They are also a welcome distraction when I need a small break from rigging the DOK.
-
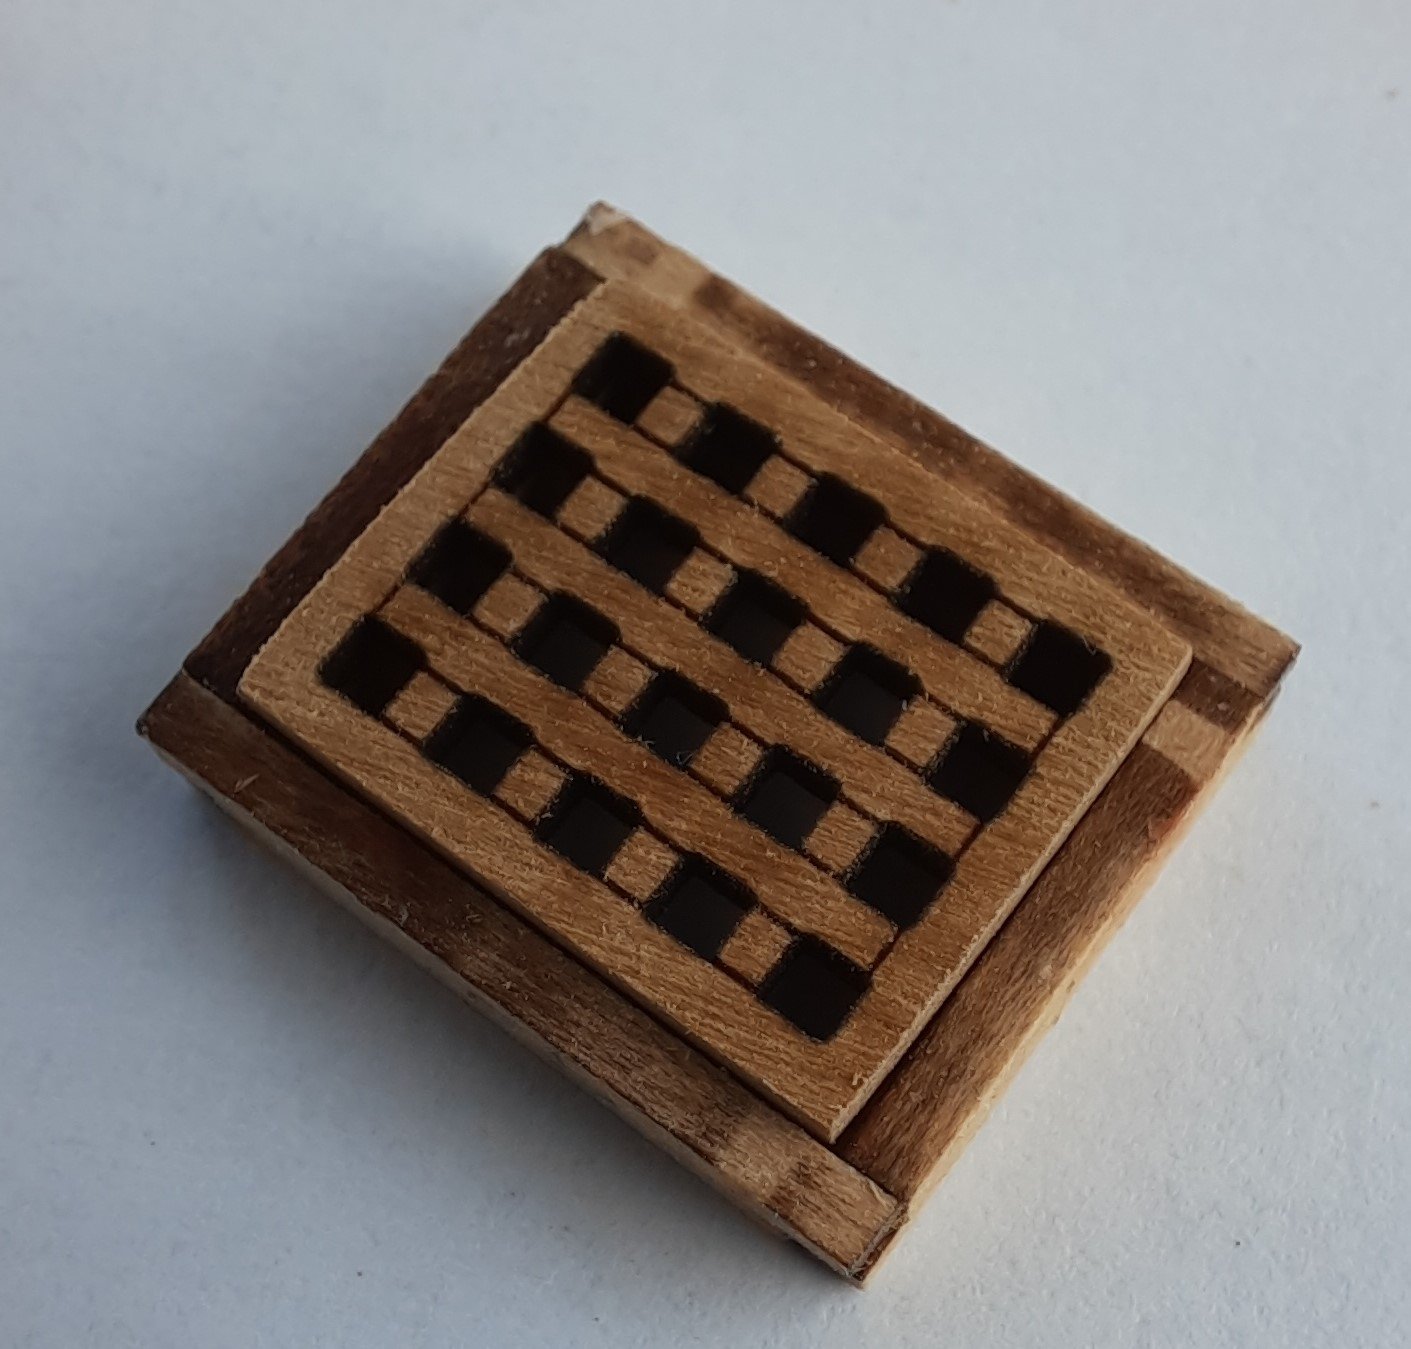
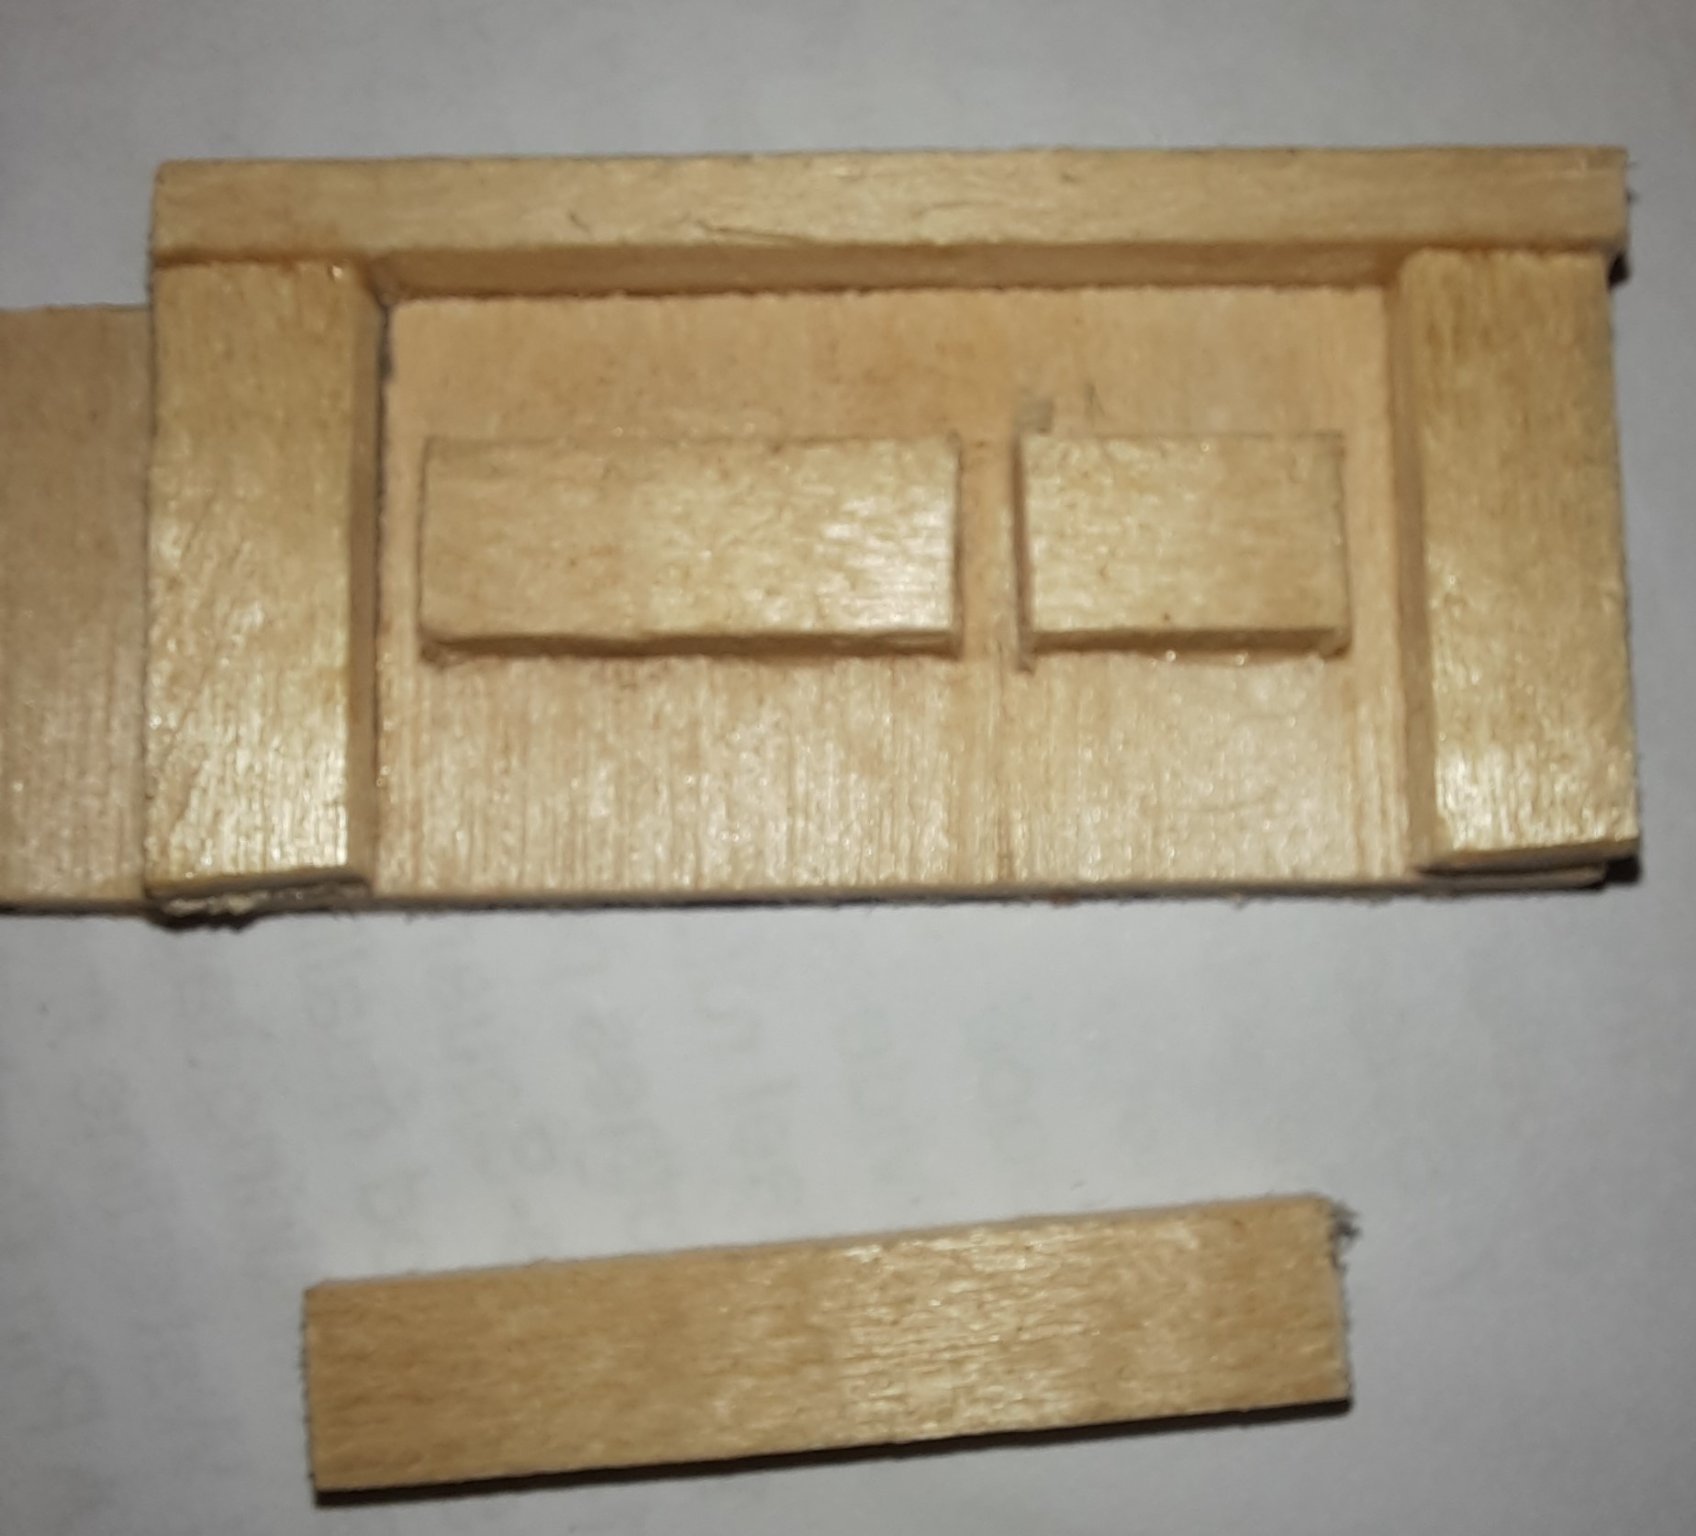
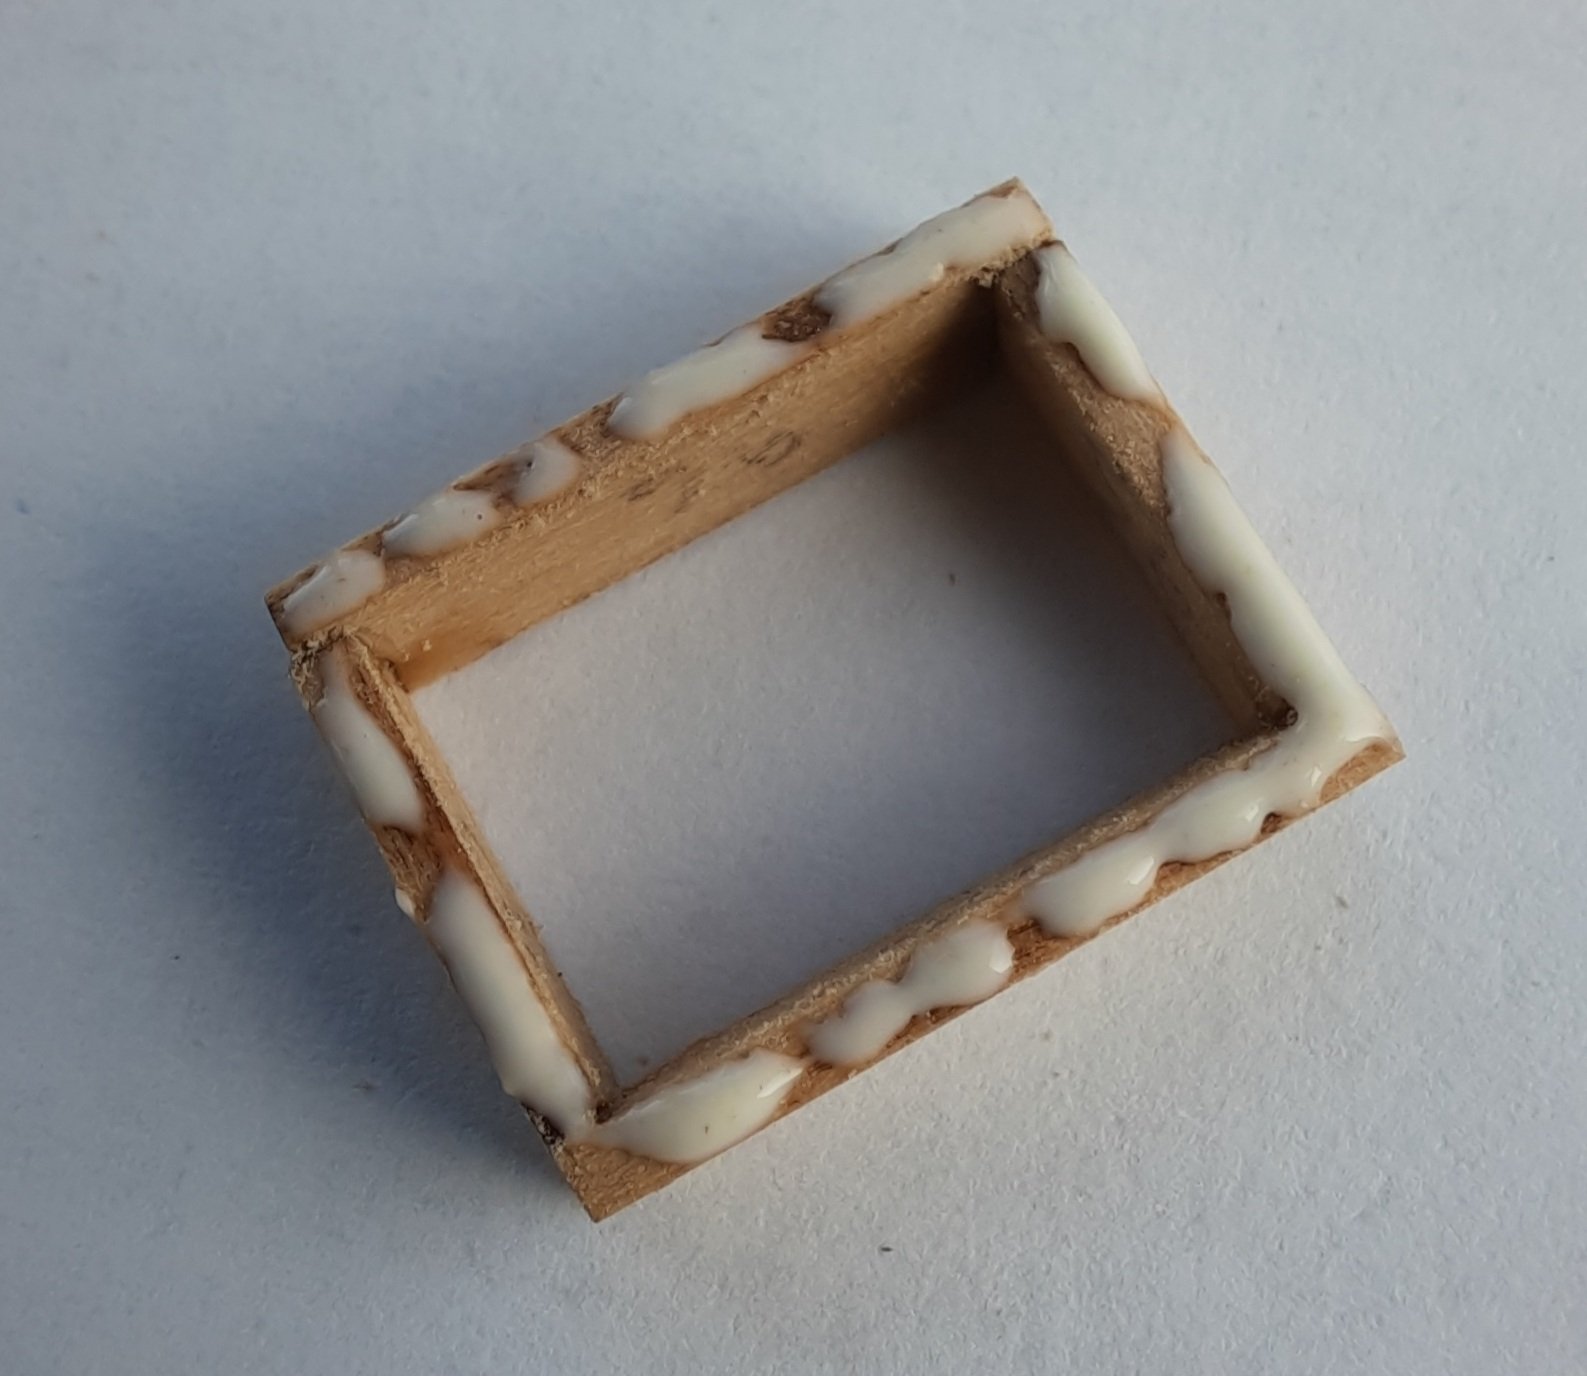
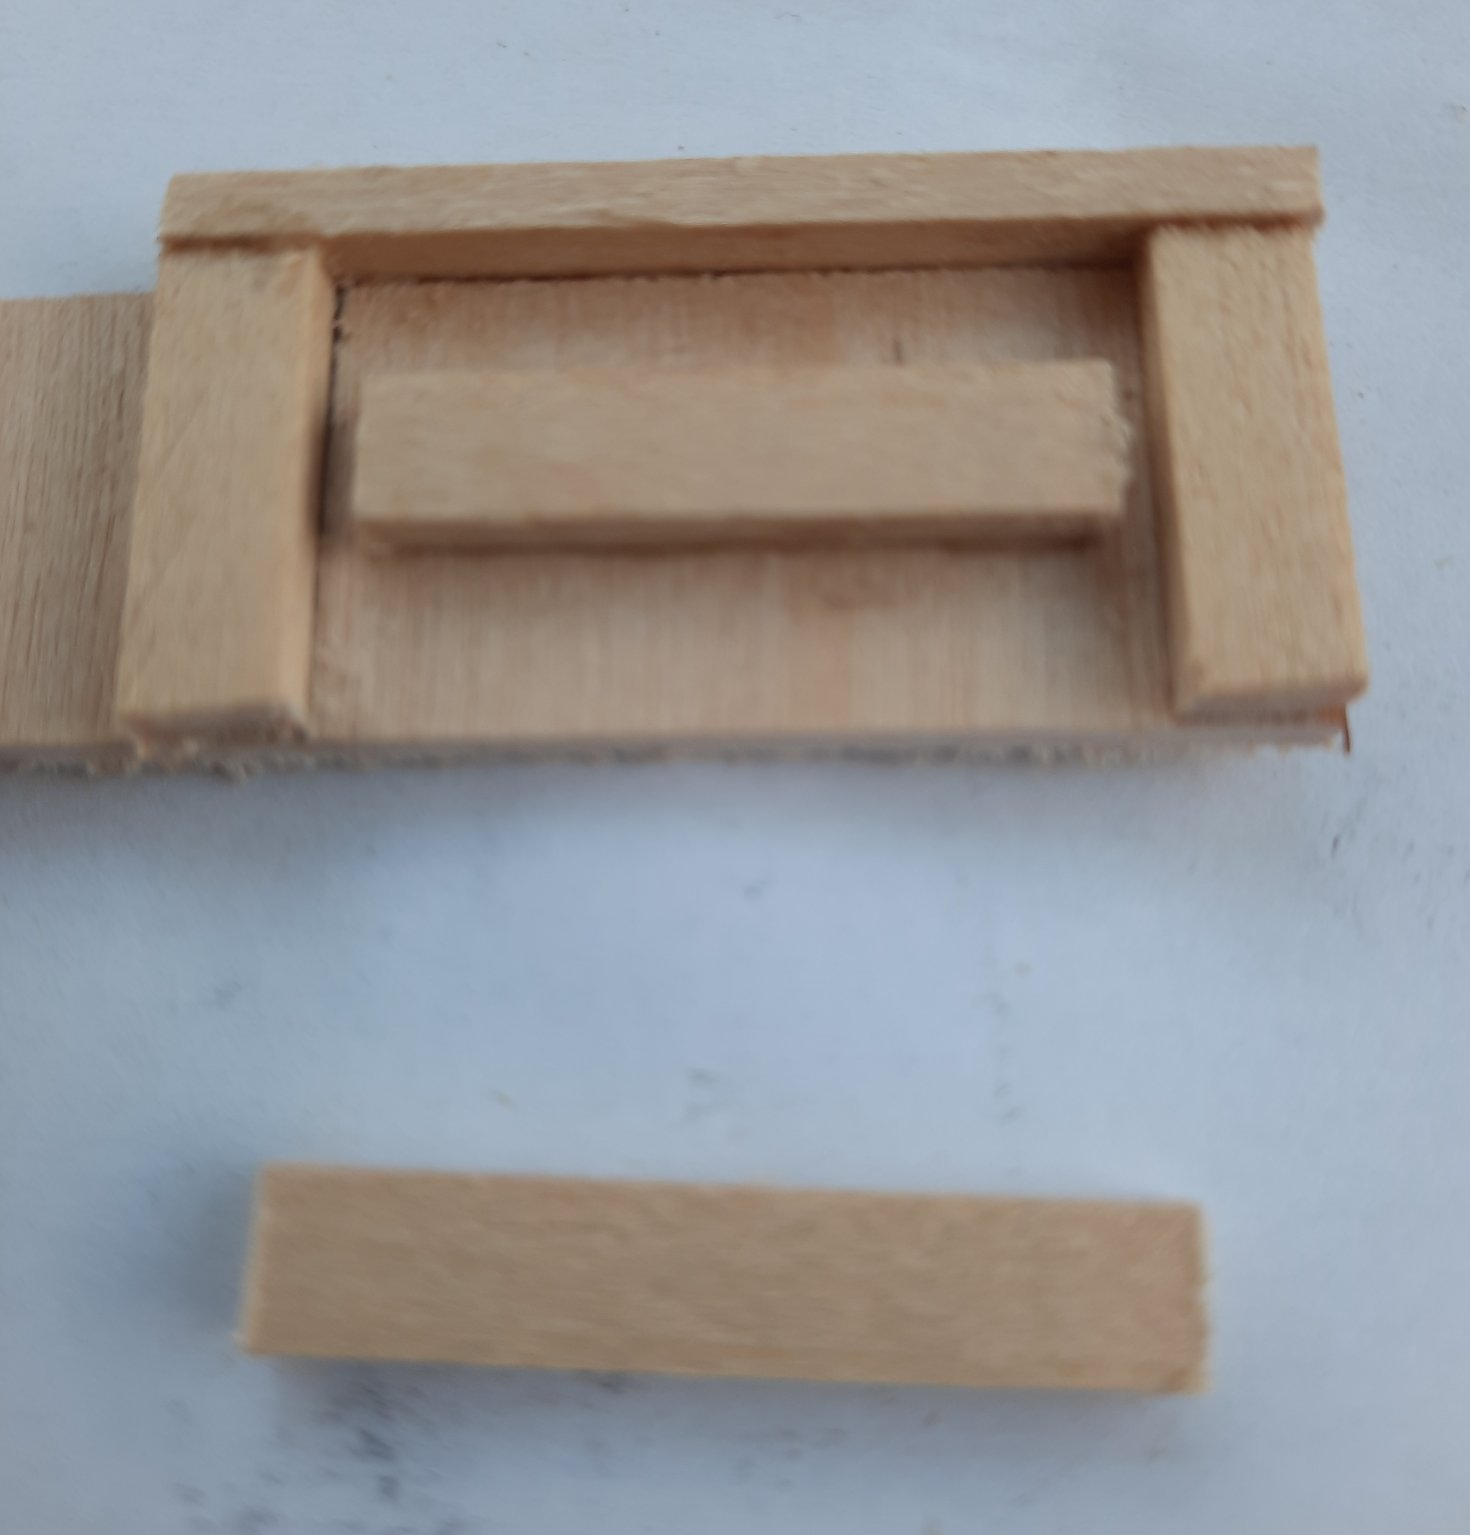
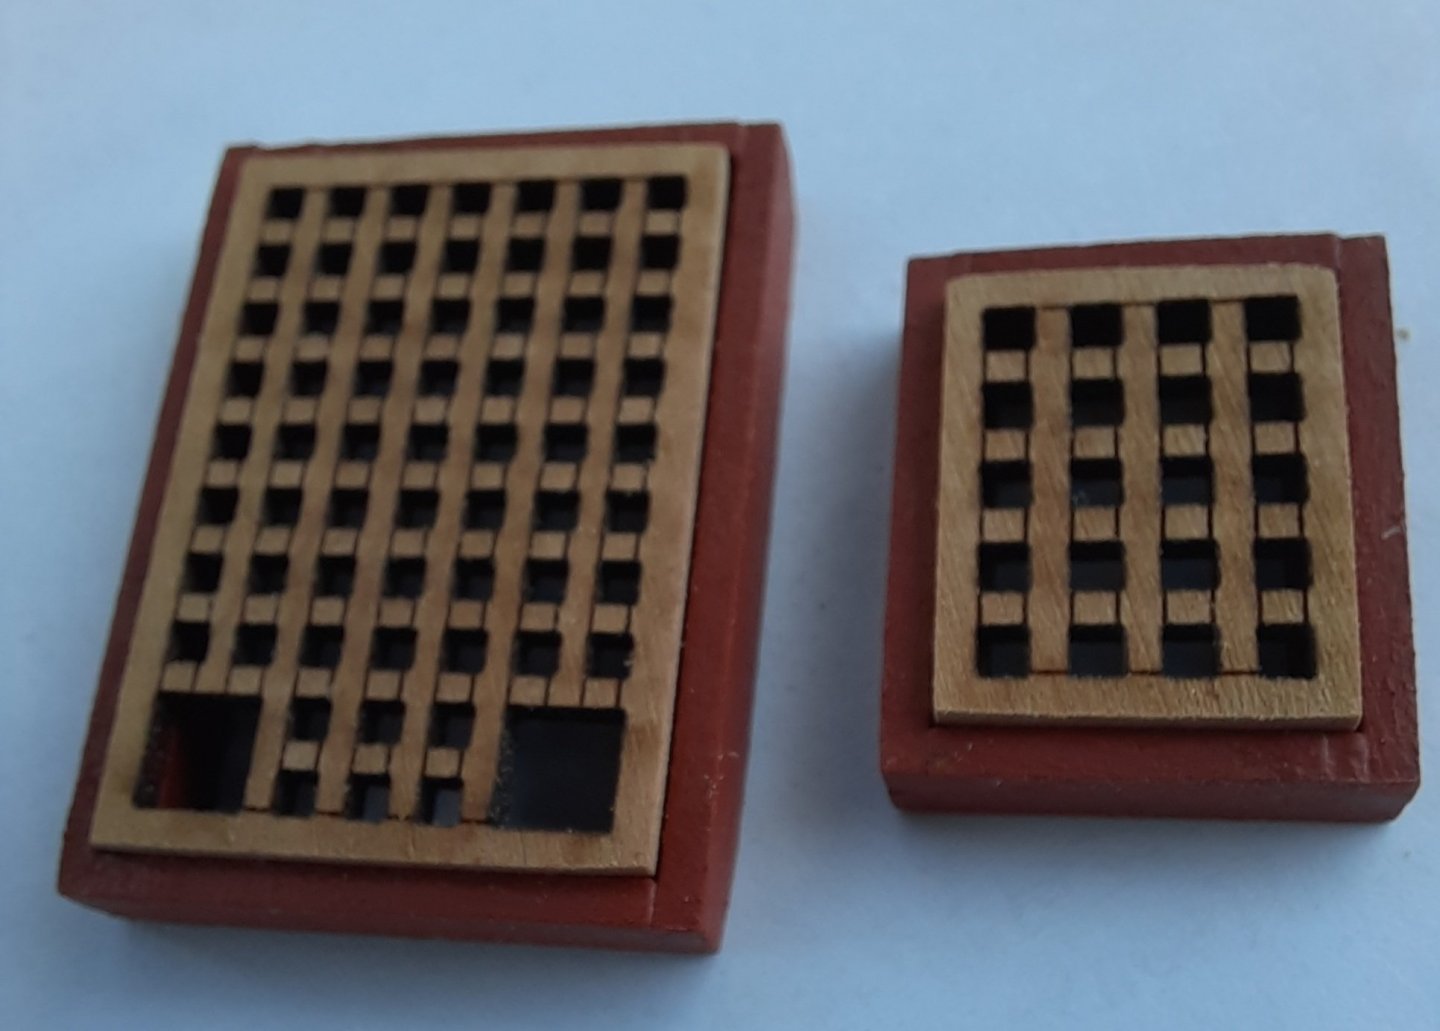
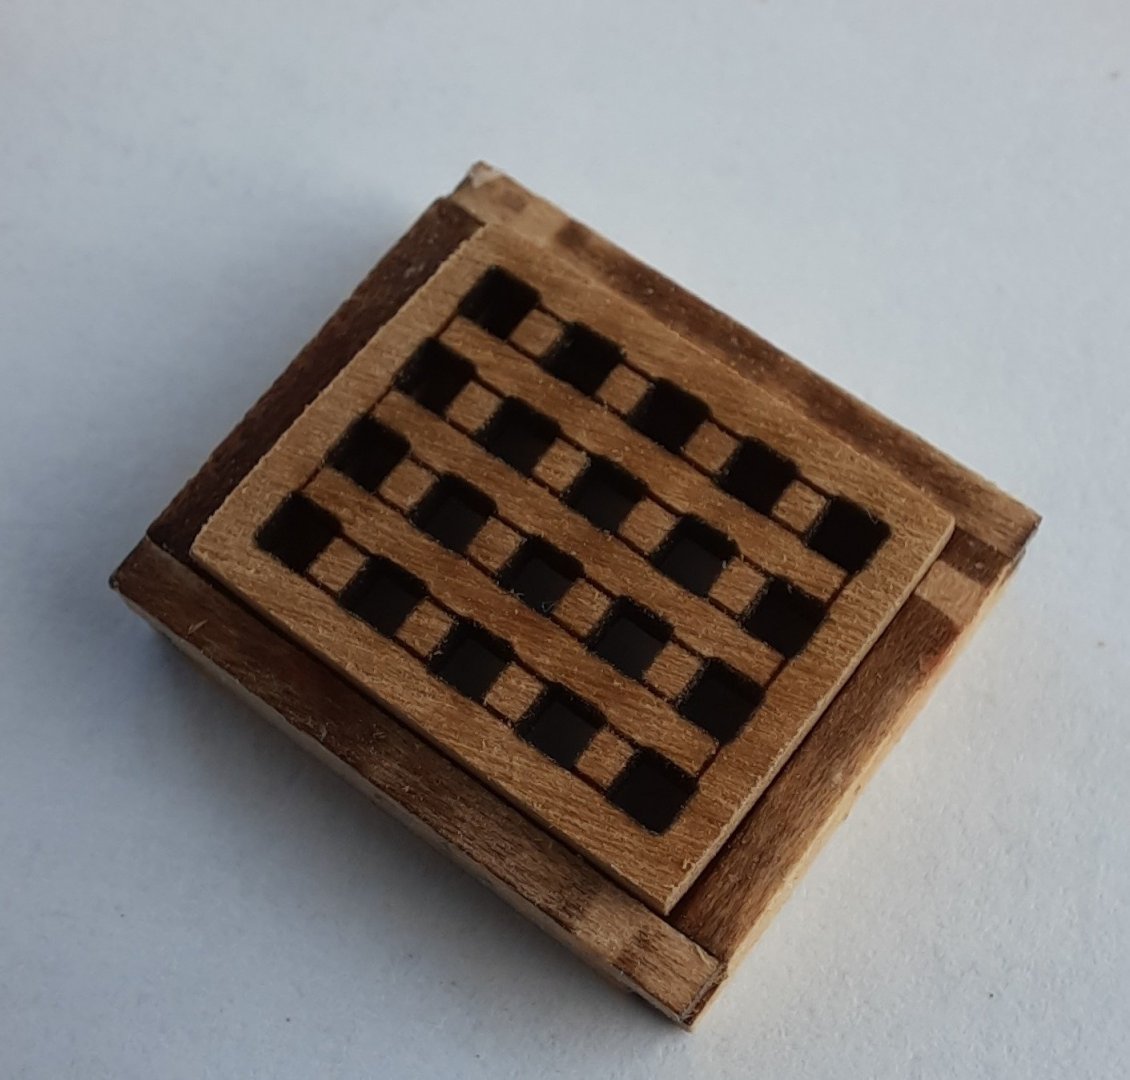
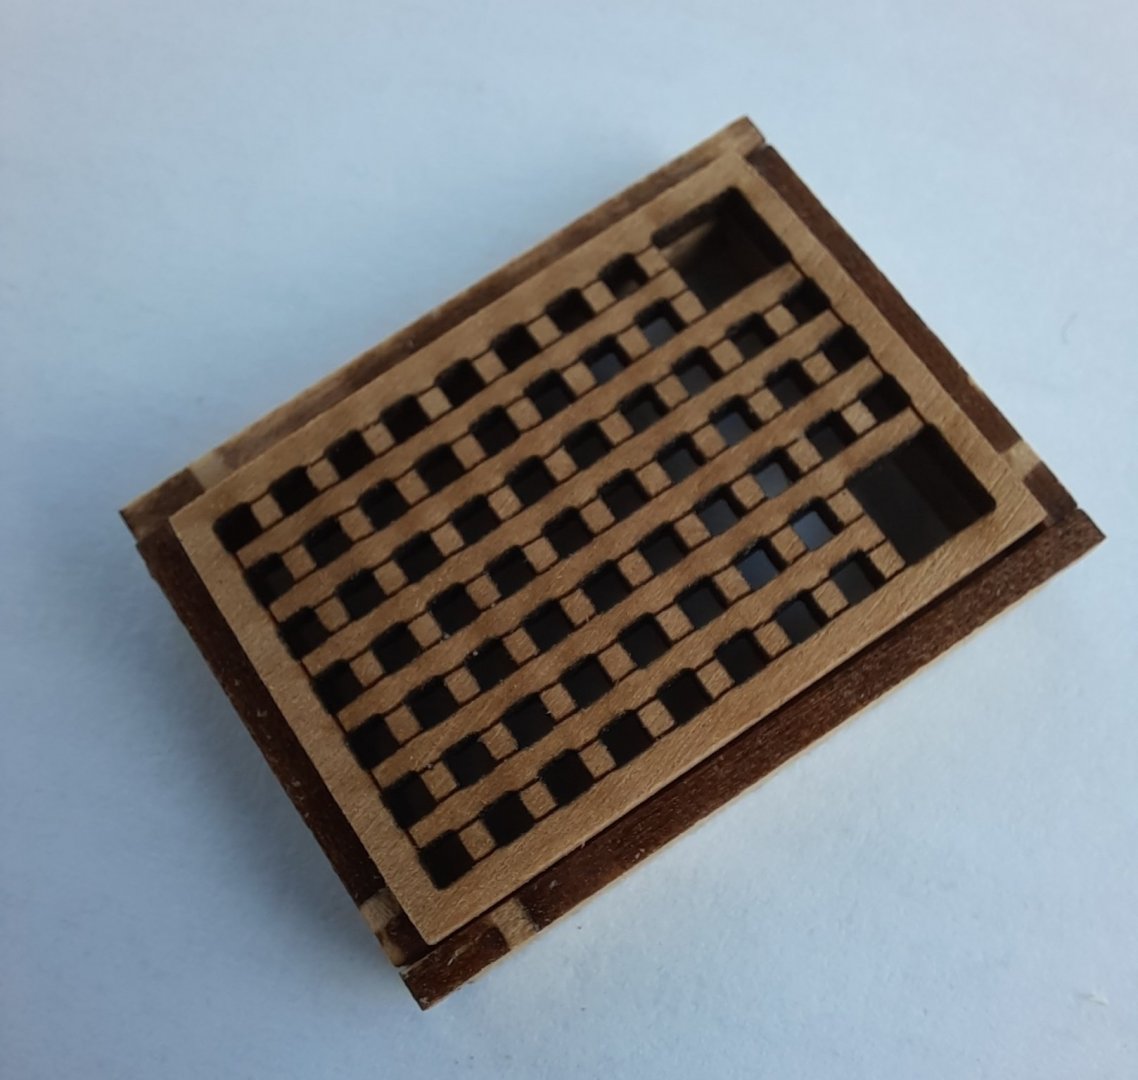
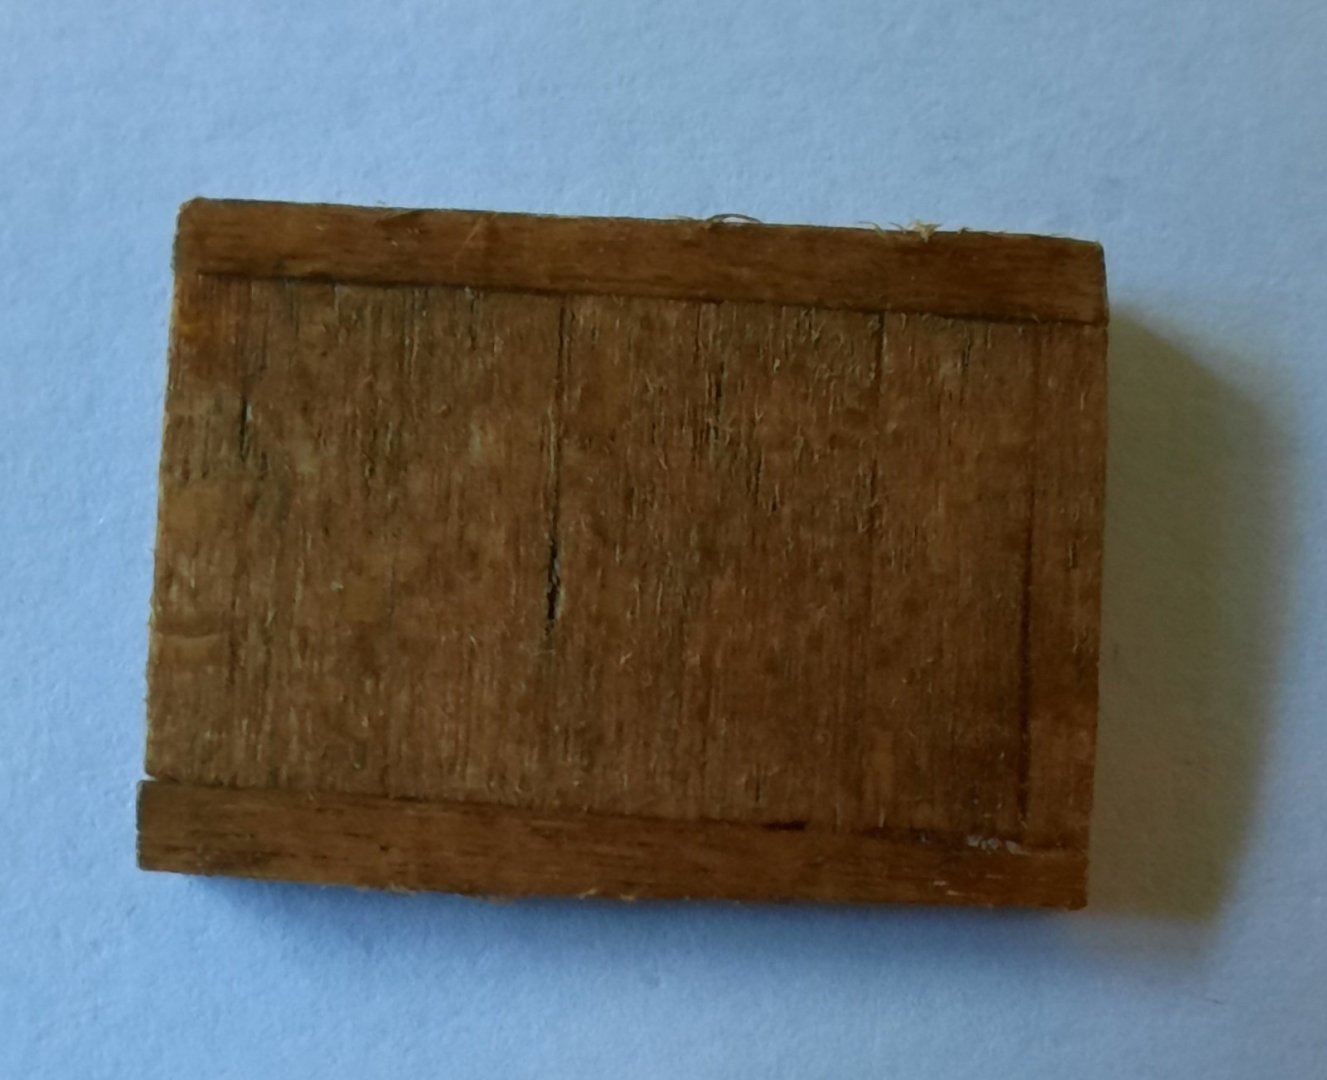
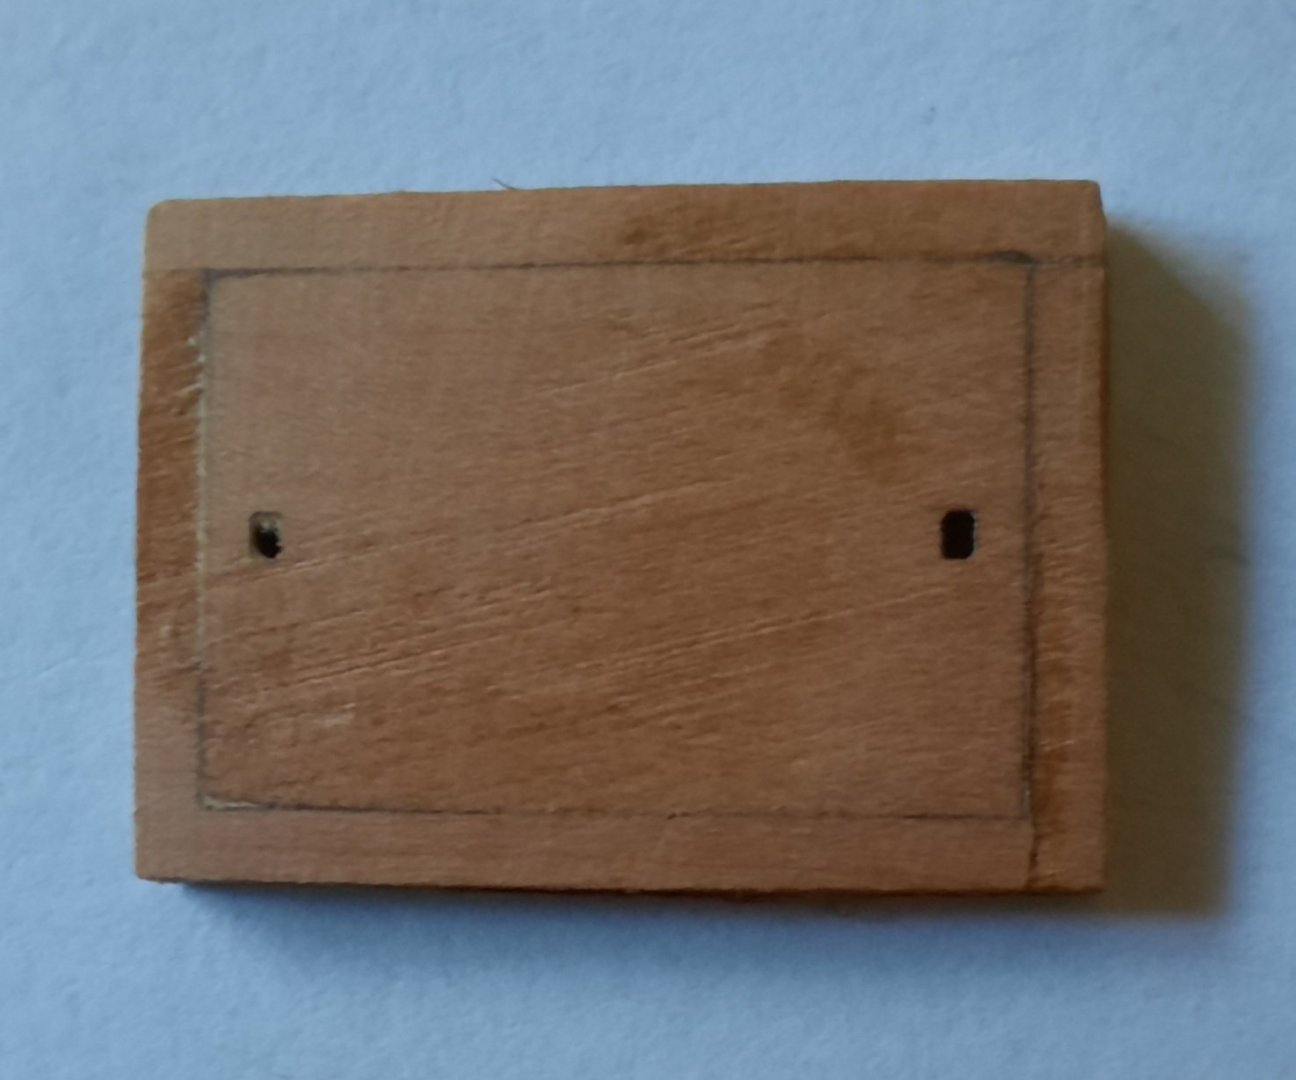
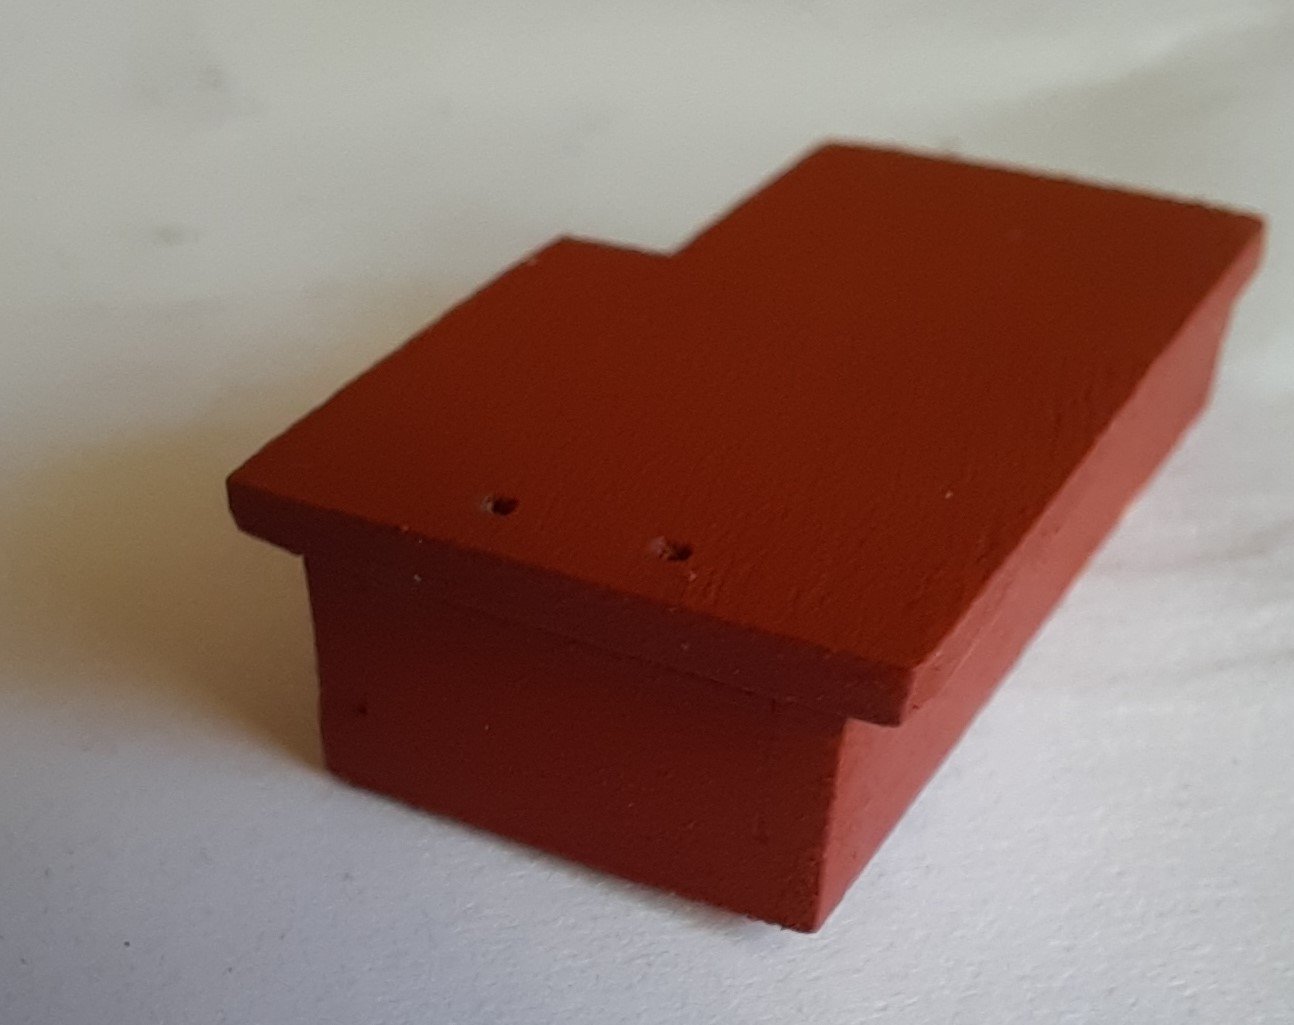
Batch Hatch Assembly Today I have built the batch hatch. This only comprises two wooden parts. The hatch fits inside the combing. When complete there are two eyebolts and rings to be added to the hatch. This is a picture of the Batch Hatch Assembly (minus the eyebolts and rings) I thought I would try enhancing this part, so I added some thin wooden strips to simulate wooden construction. The instructions require the wooden parts to be painted red. I added an oak stain which I think think looks quite nice. This is a picture of the modified Batch Hatch Assembly (minus the eyebolts and rings).
- 160 replies
-
- 1
-
-
- Alert
- vanguard models
- (and 1 more)
-
Great work Derek. I always need new tools so I have ordered the cutter😀
- 725 replies
-
- 1
-
-
- vanguard models
- speedy
- (and 1 more)
-
Sorry Alan I'm not. I normally spend about 3 hours a day on the build
-
I have built the Aft Companionway Assembly which was a nice simple task. Aft Companionway Assembly Video The wooden parts were removed from the sheet, and the laser char removed from the visible edges. To make the assembly easier I decided to make a simple jig to hold the frame in place whilst the parts were glued. PVA glue was applied to all the joints and the assembly aft companionway frame was then securely positioned in the frame. Once the glue had had time to cure the frame was removed from the jig. It was checked to make sure it was square. The completed frame assembly A thin layer of pva glue was place on the top edges so that the two roof parts could be fixed in place The roof parts were clamped in place while the glue was curing The first coat of red ochre paint was applied, which highlights any defects which may need attention, as can be seen in the photo below. A second coat of paint was applied after a quick fix with a sanding stick. It looks much better now. The photoetched handle was cleaned in acetone and blackened. It was then fixed in place. The deck item is now complete. https://youtu.be/BayCkBRd-PQ


- 160 replies
-
- 4
-
-
- Alert
- vanguard models
- (and 1 more)
-
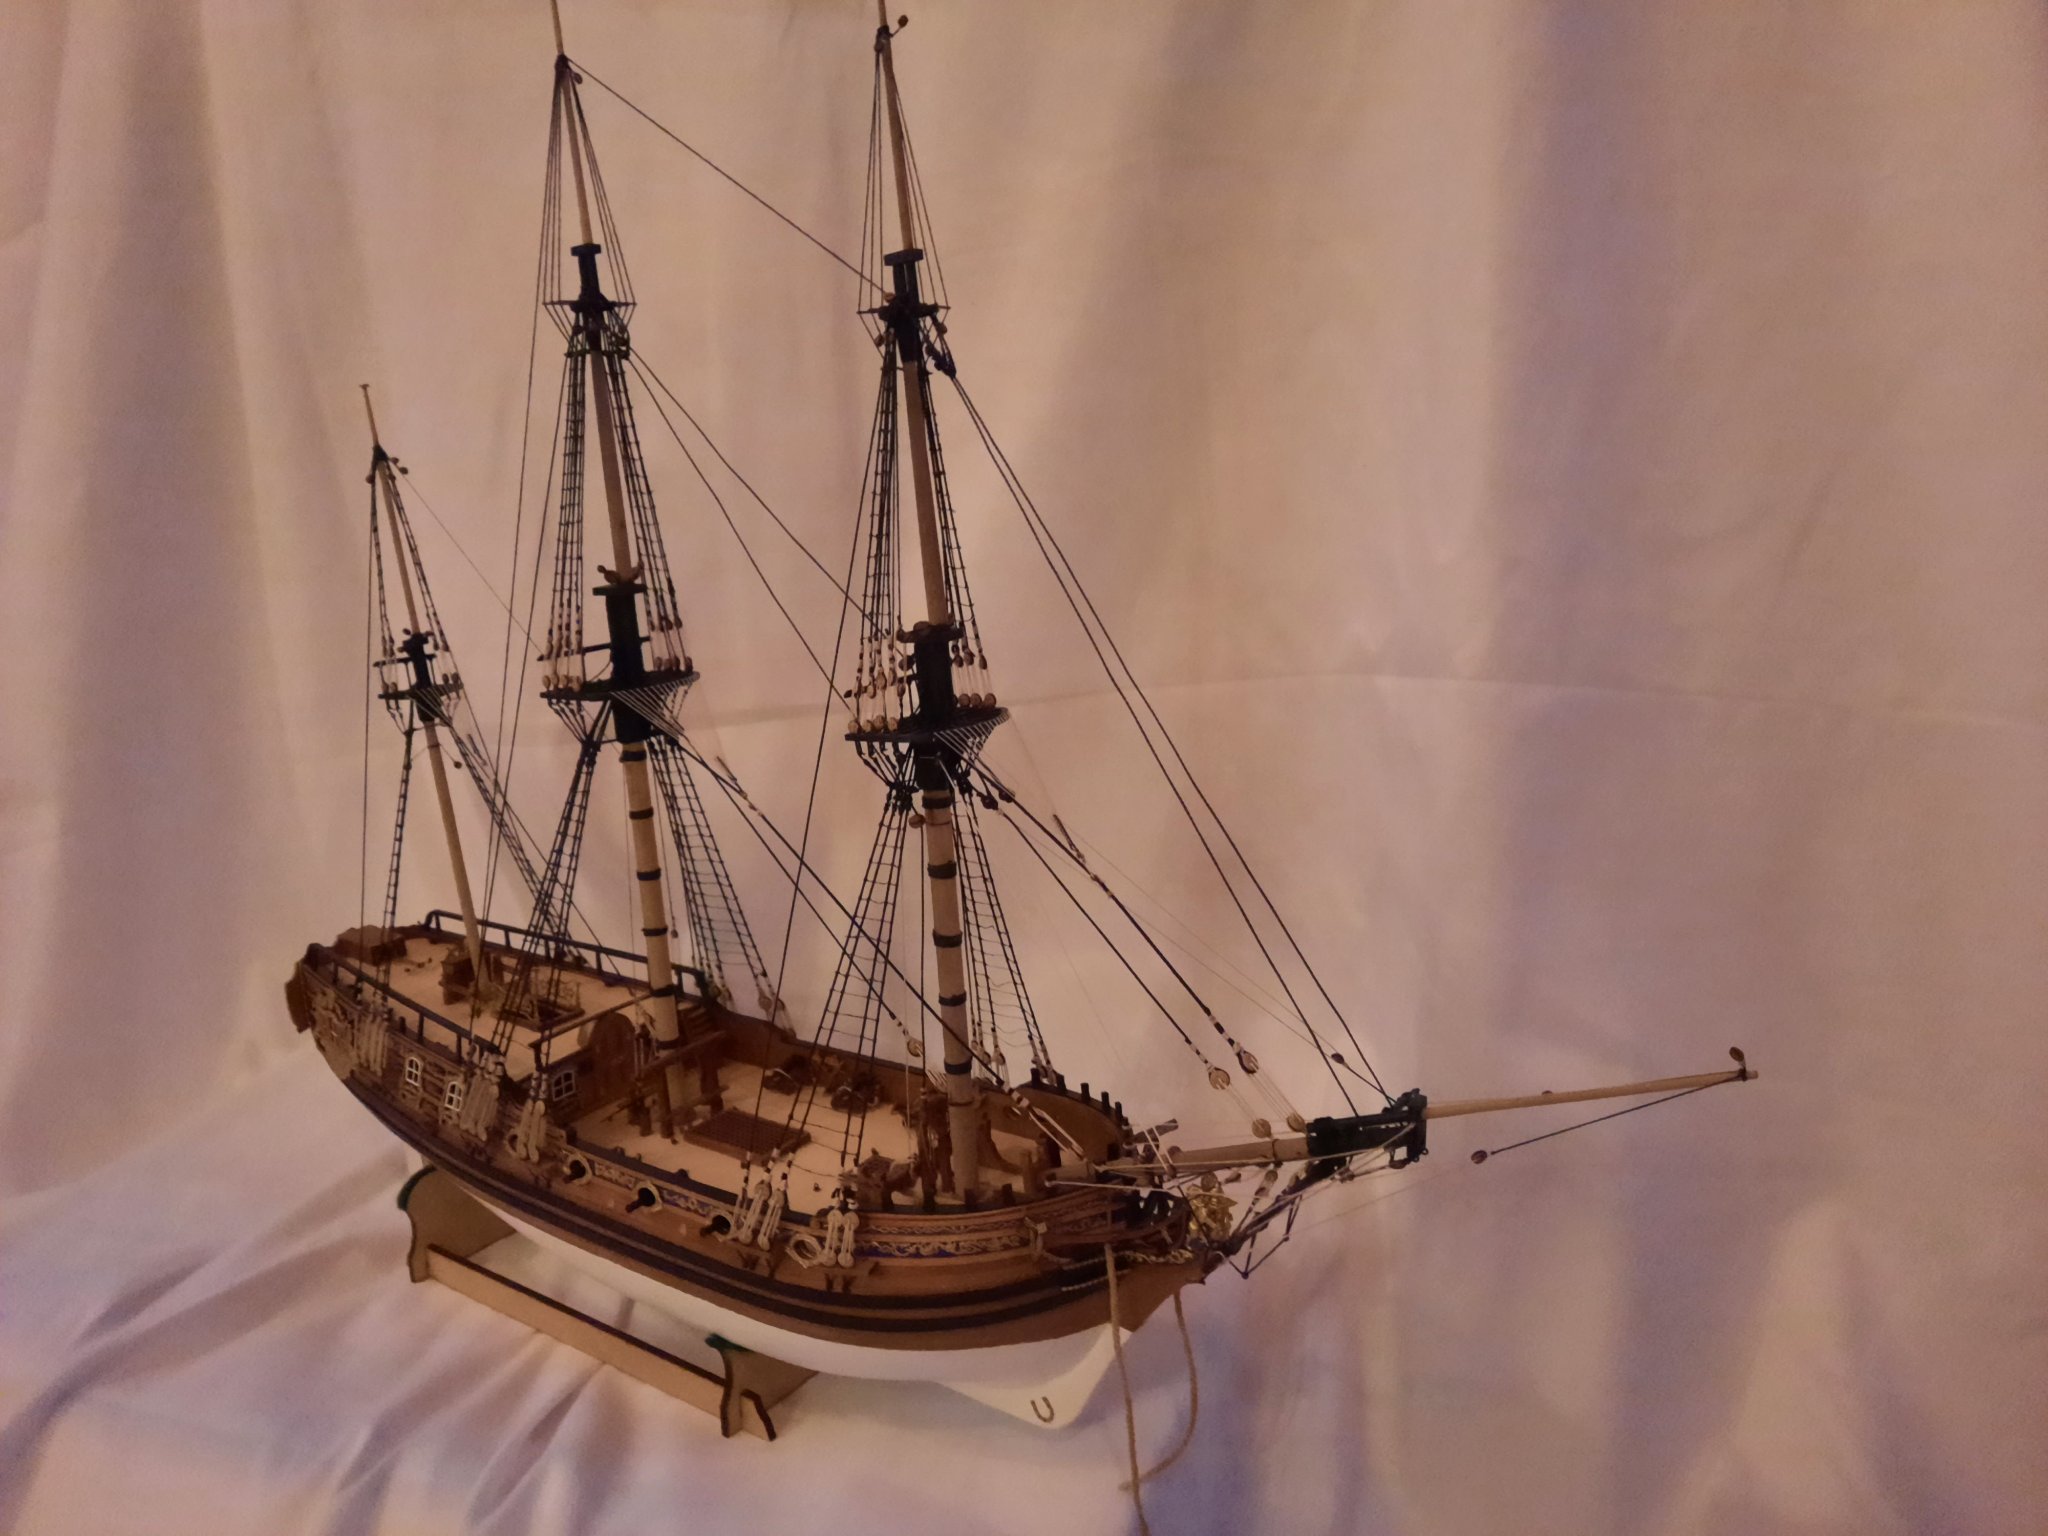
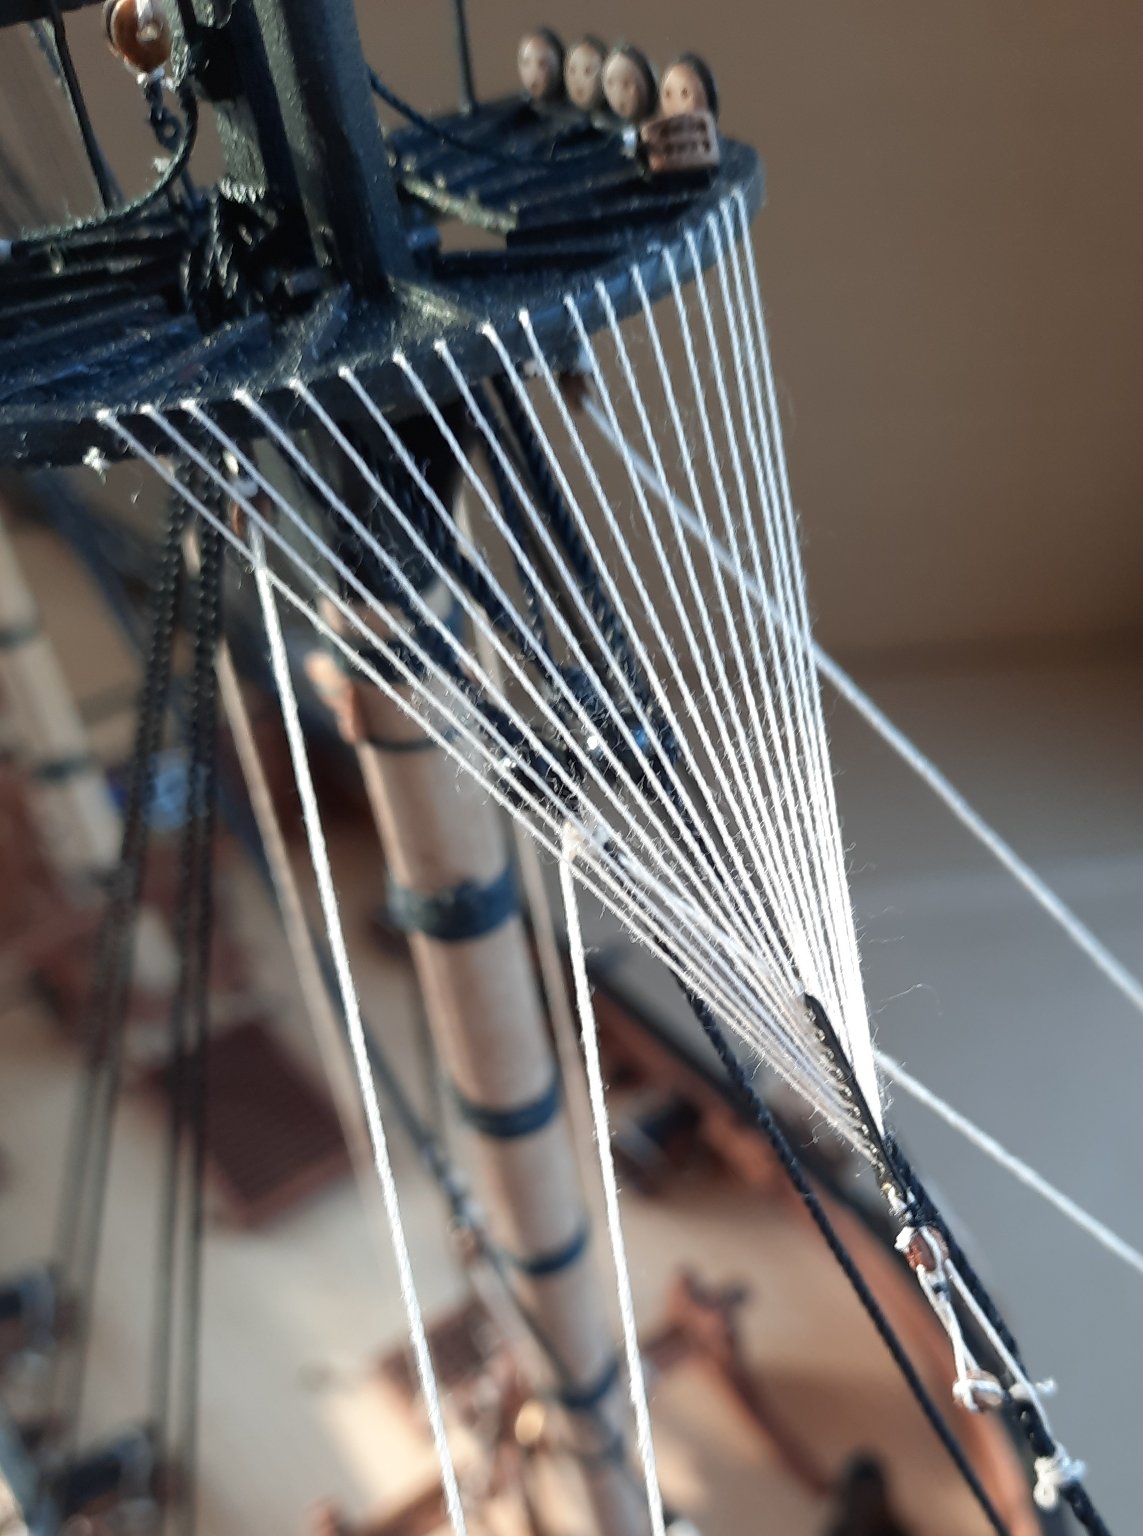
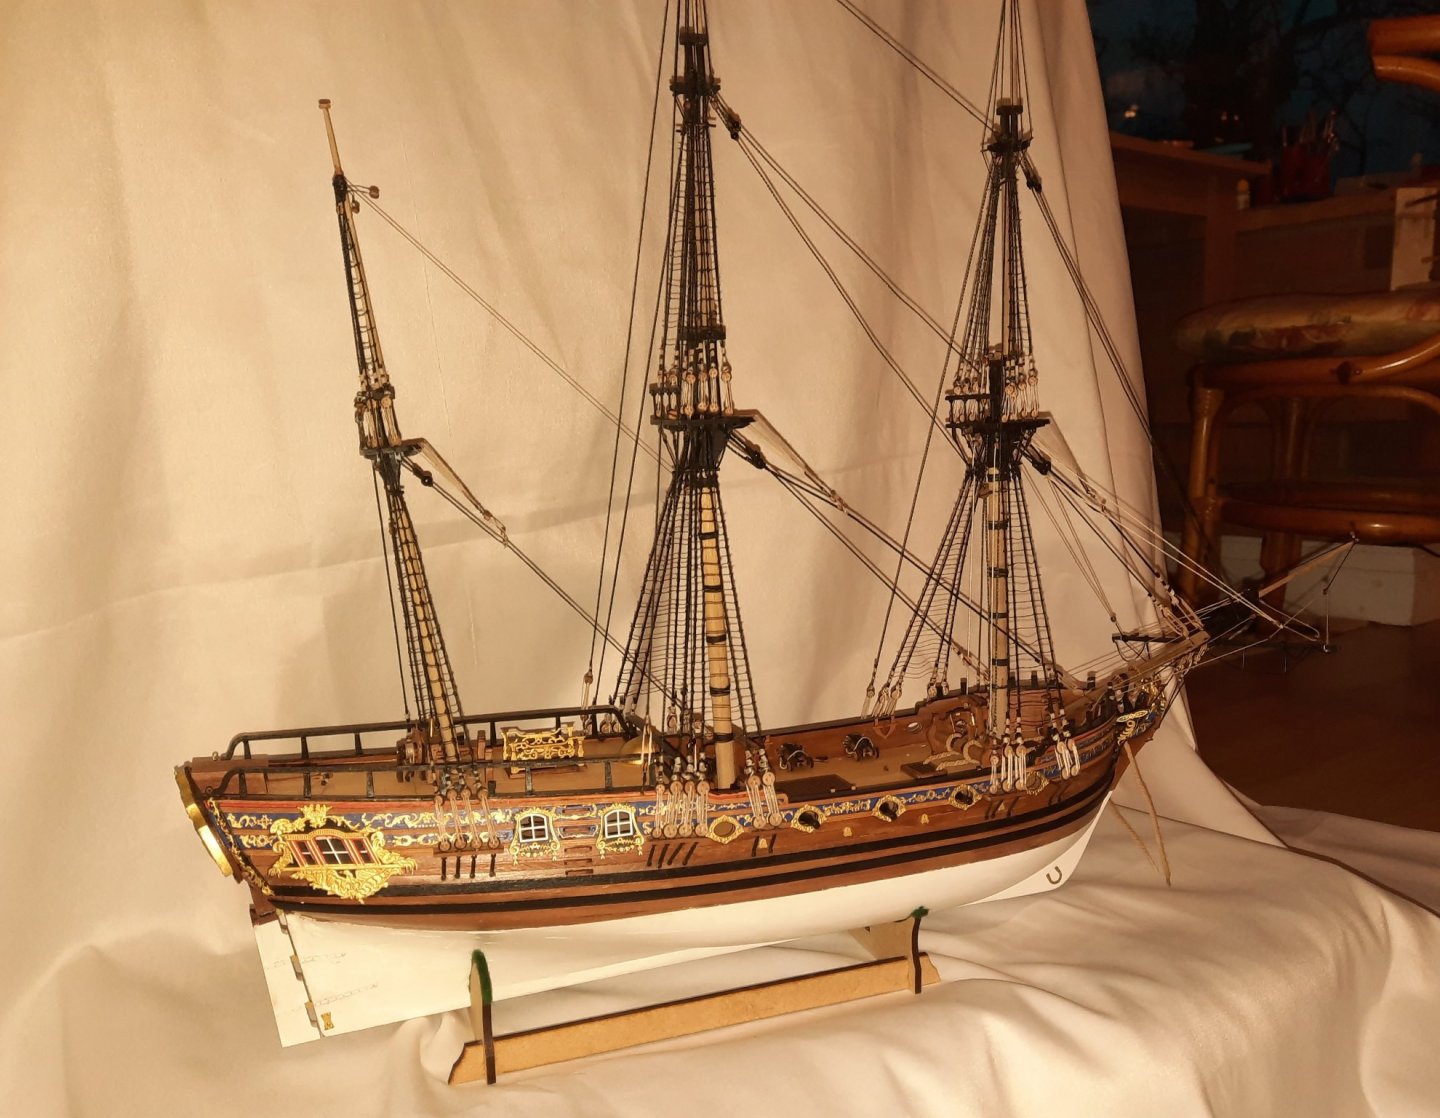
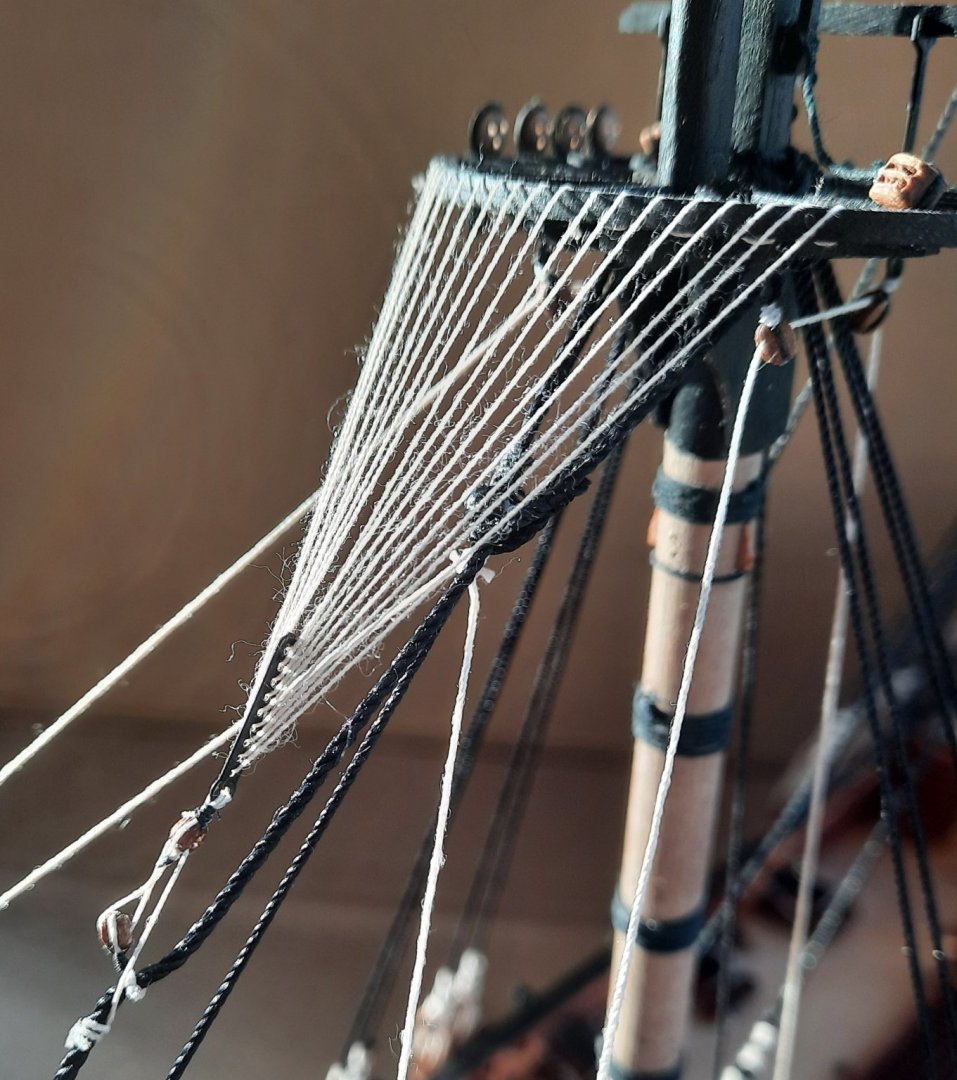
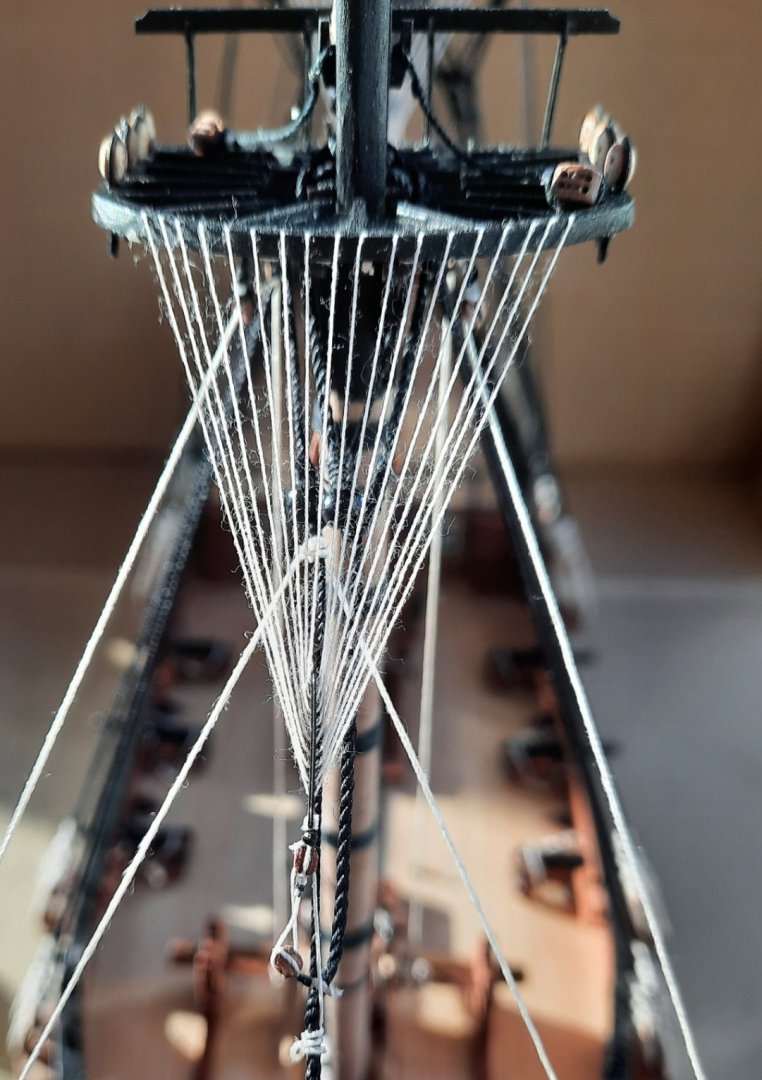
Today I have added the crows feet rigging to the foremast on my Duchess Of Kingston build. I have added a some of pictures of the completed rigging. Next I will add the fore topmast and fore topgallant shrouds. A picture which shows all three masts crows feet rigging. I have also added a video showing my full rigging process in this rigging aspect. It might not be the best or correct rigging method but it works well for me. Crows Feet Rigging Video Another angle of the completed crows feet rigging A head on view of the crows feet rigging


- 382 replies
-
- 10
-
-
- Vanguard Models
- Duchess of Kingston
- (and 1 more)
-
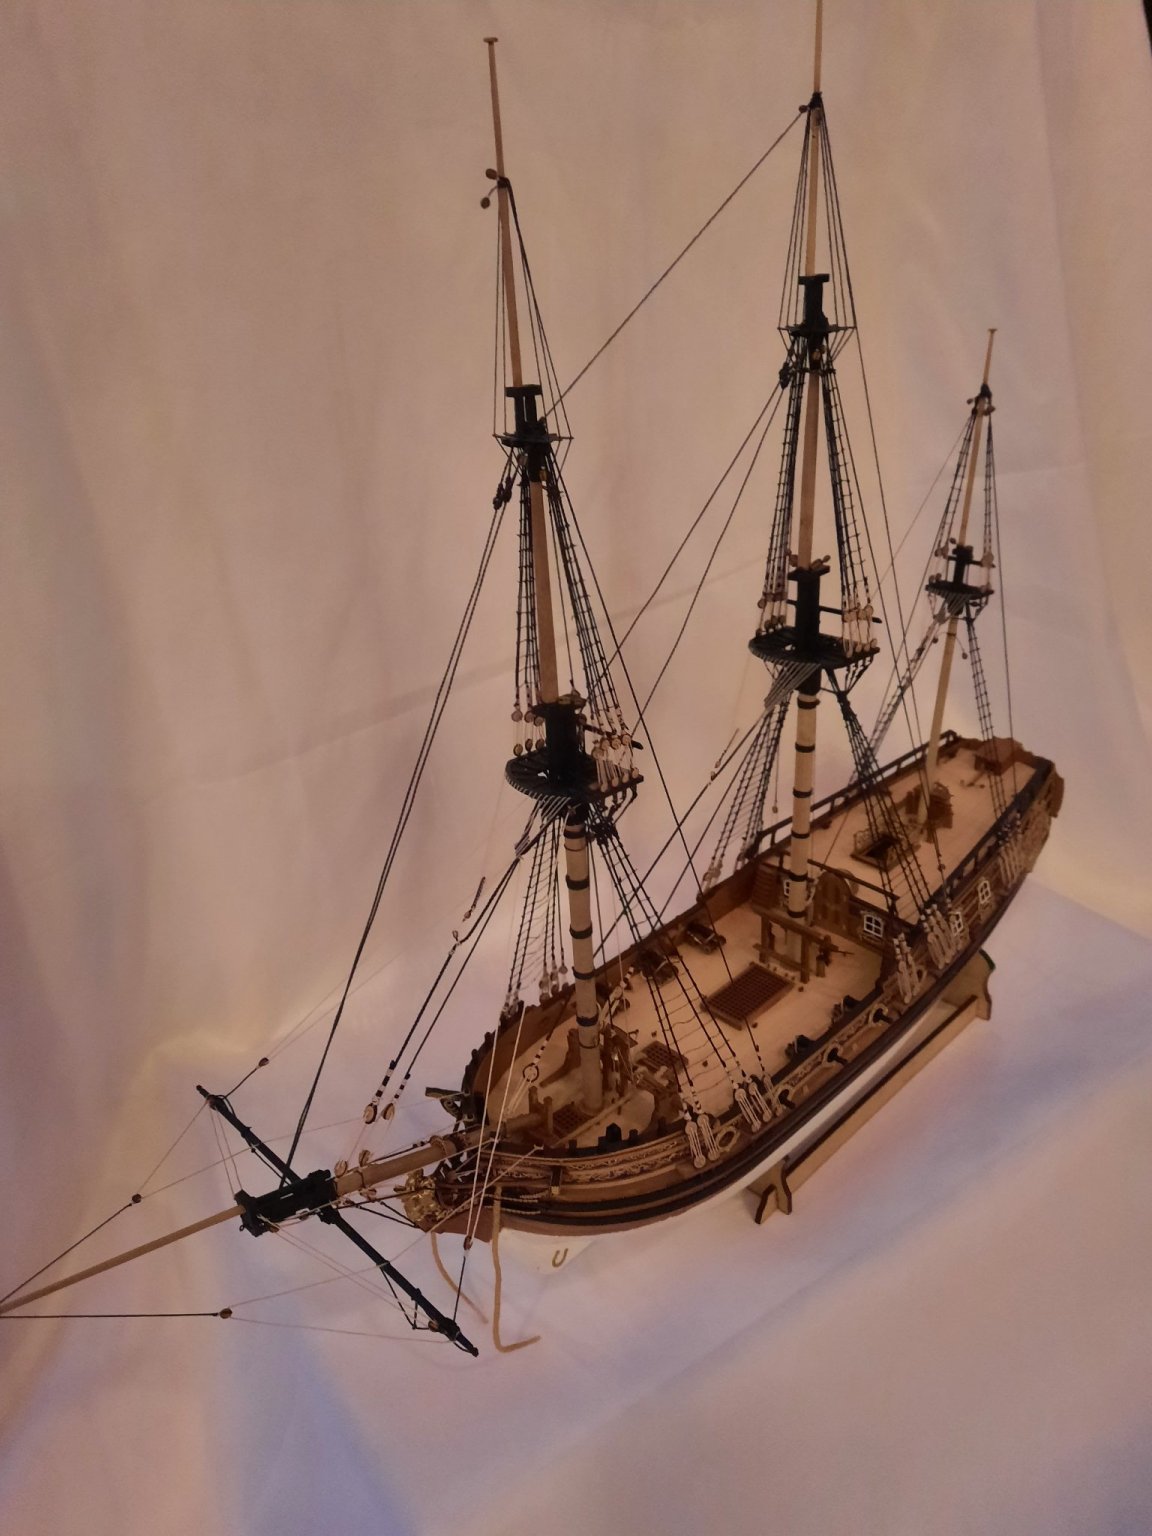
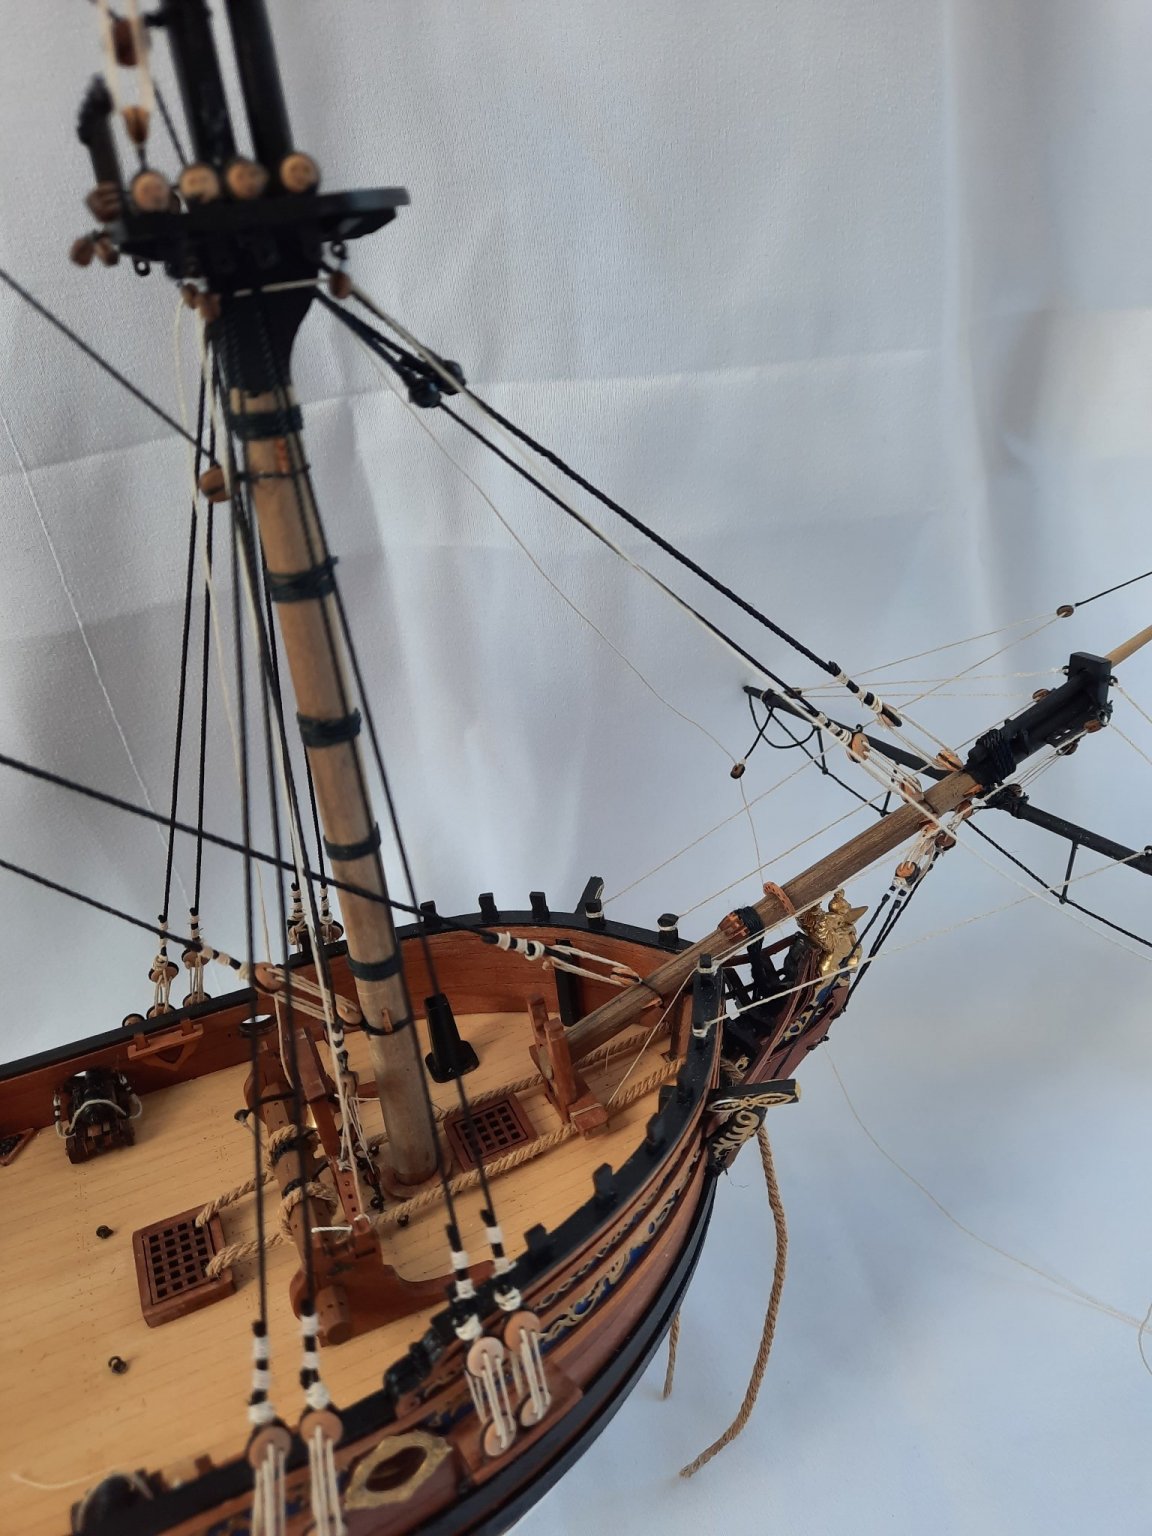
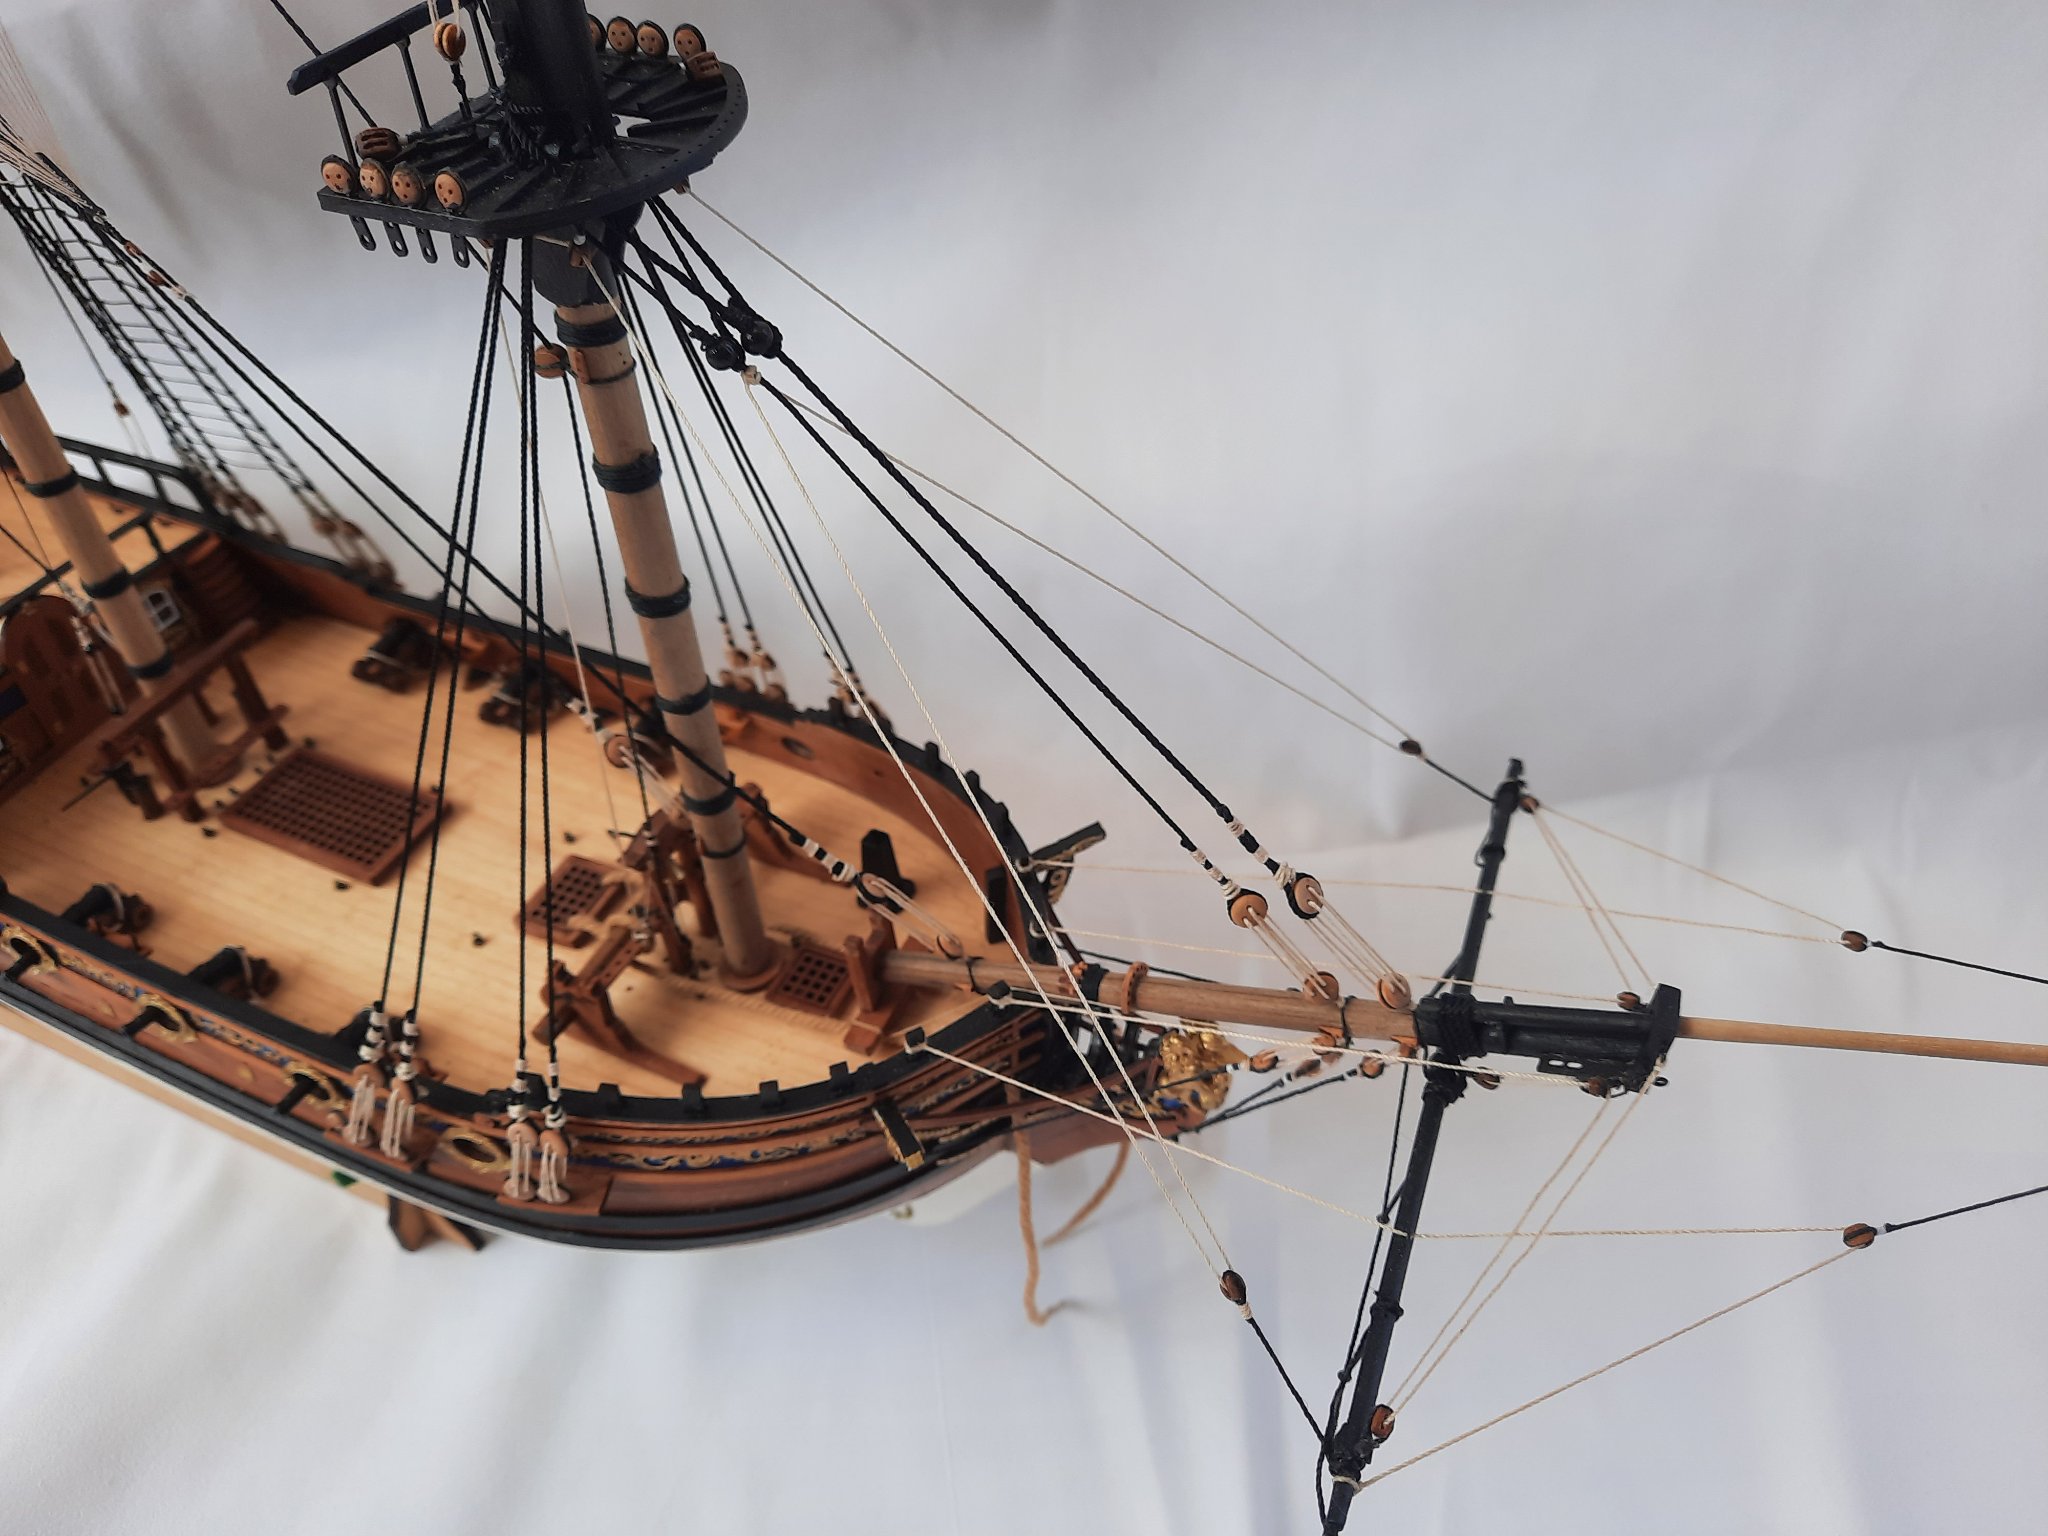
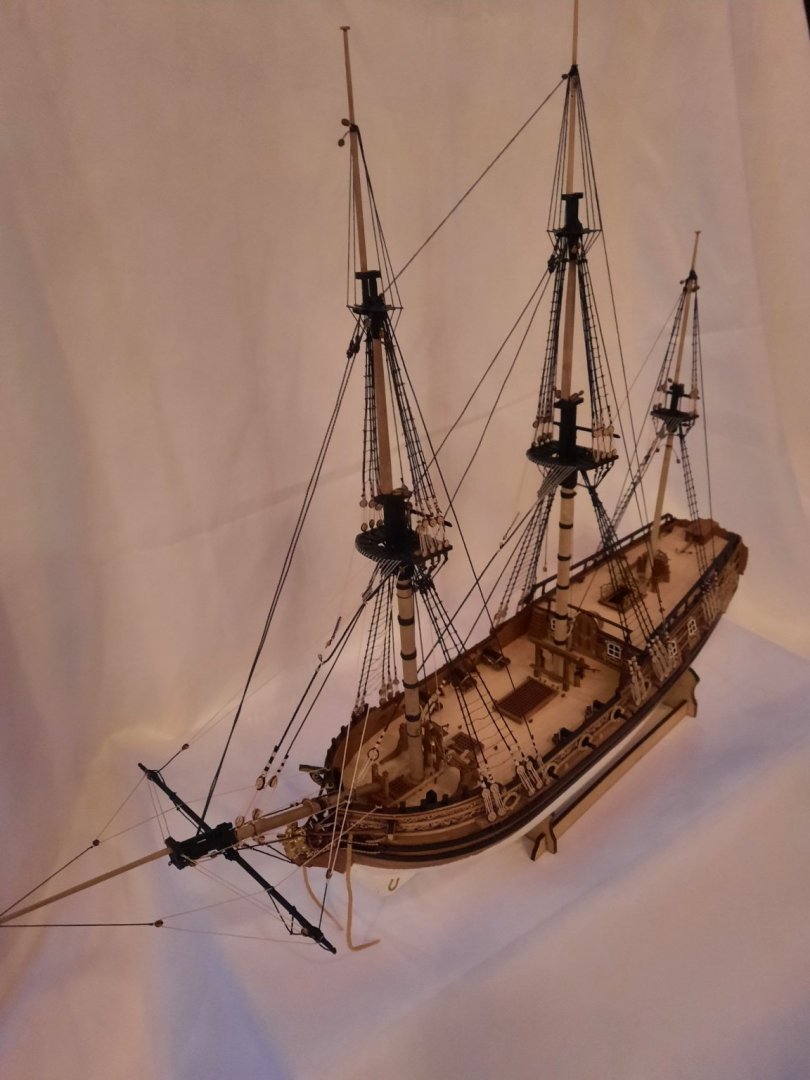
Progress update on the rigging of the Duchess. I am taking small breaks from the rigging to build some of the deck items for the HM Cutter Alert but I am spending the majority of my build time on completing the DOK rigging. I have now added the shrouds to the foremast. I still have to add the shrouds to the fore topmast and fore topgallant mast. Once all the shrouds have been installed I will have add all the ratlines. I do like the process of adding the ratlines as I find it quite relaxing and therapeutic. Prior to adding the foremast shrouds I did pre run the spritsail yard brace lines through the platform blocks. I think this proved to be a good call. Before moving on to the adding the fore topmast and fore topgallant mast I decided to fit the foremast stay and foremast preventor stay. I found this a good way to rig before the futtock staves and shrouds are added as it less cluttered. This is a picture showing foremast shrouds and 2 x foremast stays. The rigging of the 2 x spritsail yard braces had not been completed when this picture was taken, but the lines have been run in ready. I like the angle of this picture showing the foremast stays and shrouds The two spritsail yard brace lines were fastened to the foremast stay just below the mouse. The lines were tensioned and then belayed to the appropriate belaying pins. This is a picture showing the spritsail yard braces This picture shows the current progress of the rigging


- 382 replies
-
- 7
-
-
- Vanguard Models
- Duchess of Kingston
- (and 1 more)
-
I used the quadhands base to aid the clamping of the sheets. I am only doing bits and pieces on the Cutter Alert at the moment when I feel the need to take a small break from the rigging of the DOK. It should be a nice build.
-
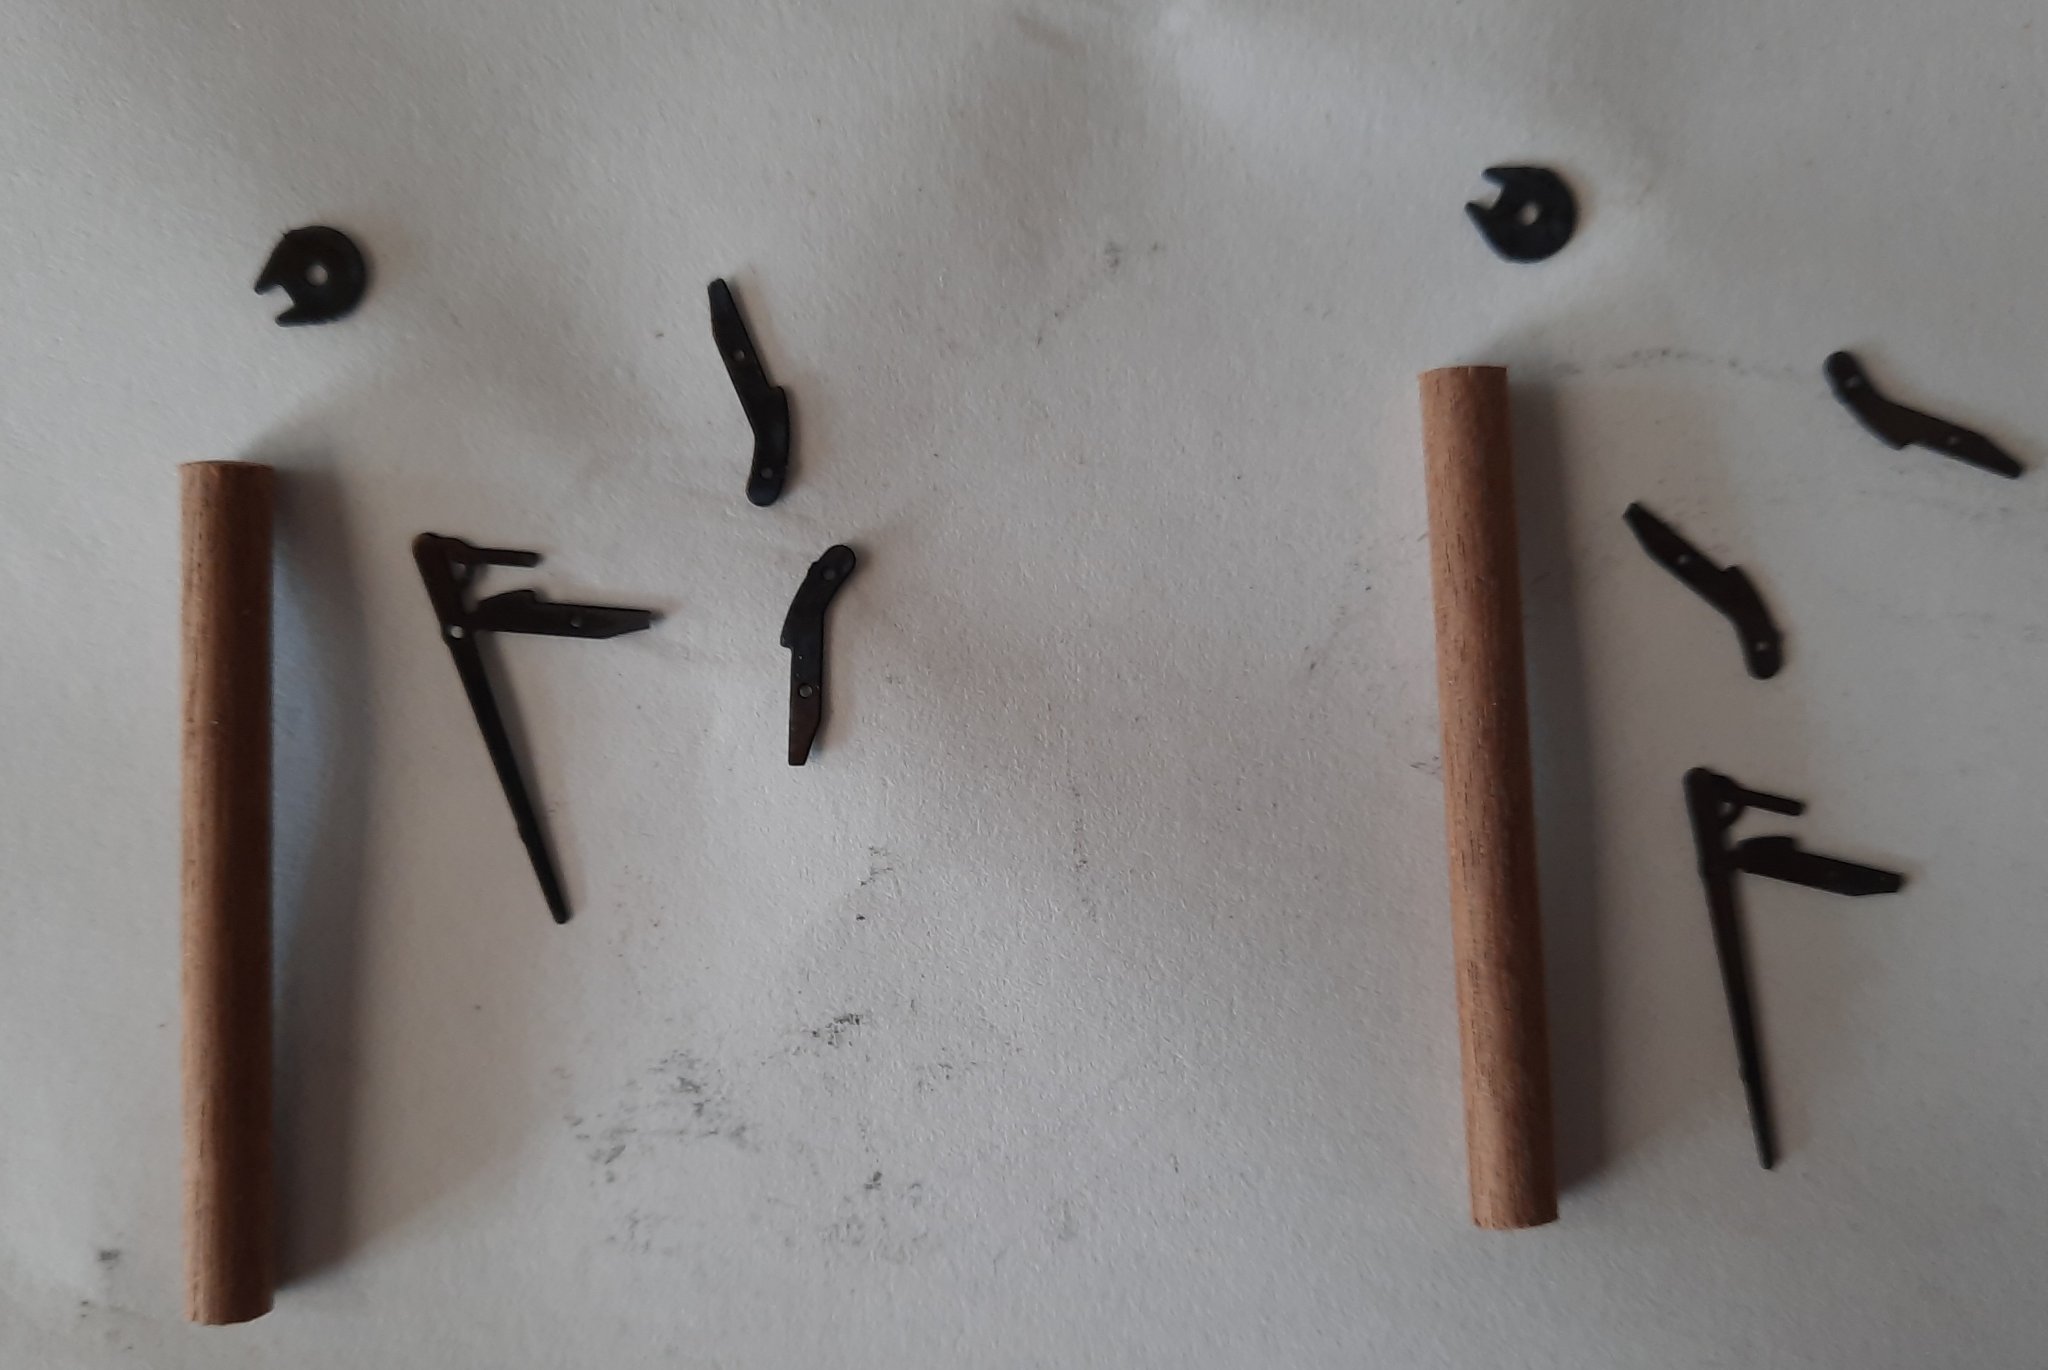
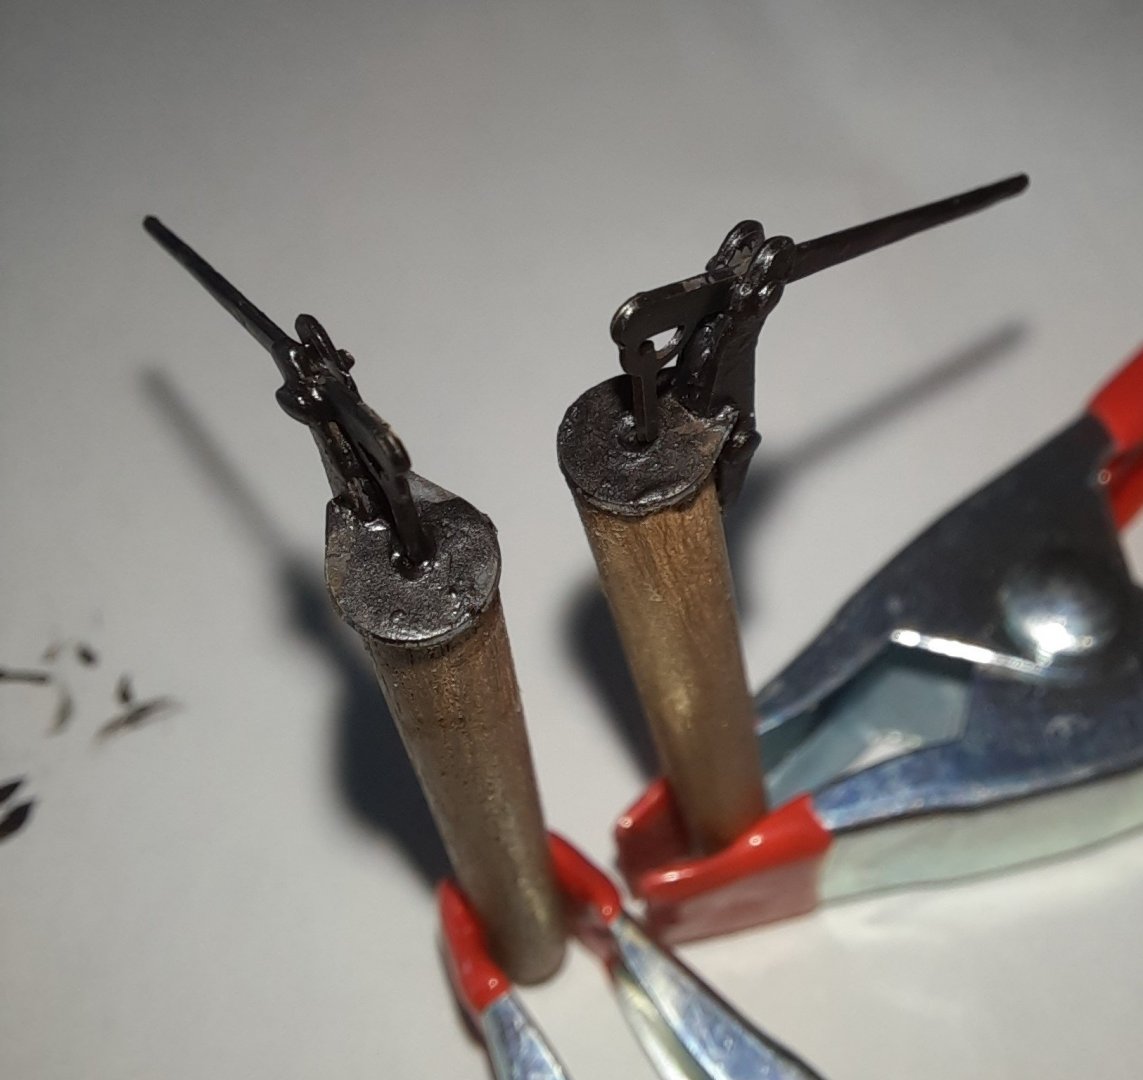
I took a 15 min break from the DOK this morning to build another deck item for the Cutter Alert, namely the two deck hand pumps. Deck Pump Assembly There are two identical deck pump assemblies. Each deck pump requires the following parts: 1 x 40mm length of 4mm dowel. 2 x hand pump upper side bracket (photoetch part) 1 x hand pump upper main body (photoetch part) 1 x hand pump top cap (photoetch part) 2 x small pins The photoetch items for both deck pumps were cleaned in acetone and then blackened using a photo etch burnishing solution. The 2 x 40mm lengths were cut from a piece of 4mm dowel. The parts are now ready for the assembly phase. I started the assembly process by gluing (ca gel) each hand pump top cap to the top of their respective dowel, ensuring the hole in hand pump top cap was positioned in the centre of the dowel. Next the hand pump upper side brackets were fitted to each side of the hand pump upper main body using ca gel. The small pins were used to ensure these parts were correctly aligned. The small pins were also glued in place and the excess pin material was trimmed flush with the side of the hand pump upper side brackets. I always like to test fit items before adding any glue to ensure everything is a good fit. When doing this I noted the hand pump assembly did not quite fit in the hand pump top cap locating slot. I solved this by running a needle file through the top cap locating slot. After a few quick passes of the file the hand pump assembly was a perfect fit and could be glued in place, again using a ca gel. 2 x Completed Deck Pump Assemblies

- 160 replies
-
- 5
-
-
- Alert
- vanguard models
- (and 1 more)
-
Thanks for your comment. I hope you enjoy the rest of the build as it progresses. The instructions simply state: "The handles (PE-33) are to be bent and glued to each end of the shaft on F-2". The picture in the manual does however show the handles placed at 180 degrees opposite each other. I opted to have the handles placed inline with each other as I liked it that way. I don't think it matters either way in my opinion.
- 160 replies
-
- 1
-
-
- Alert
- vanguard models
- (and 1 more)
-
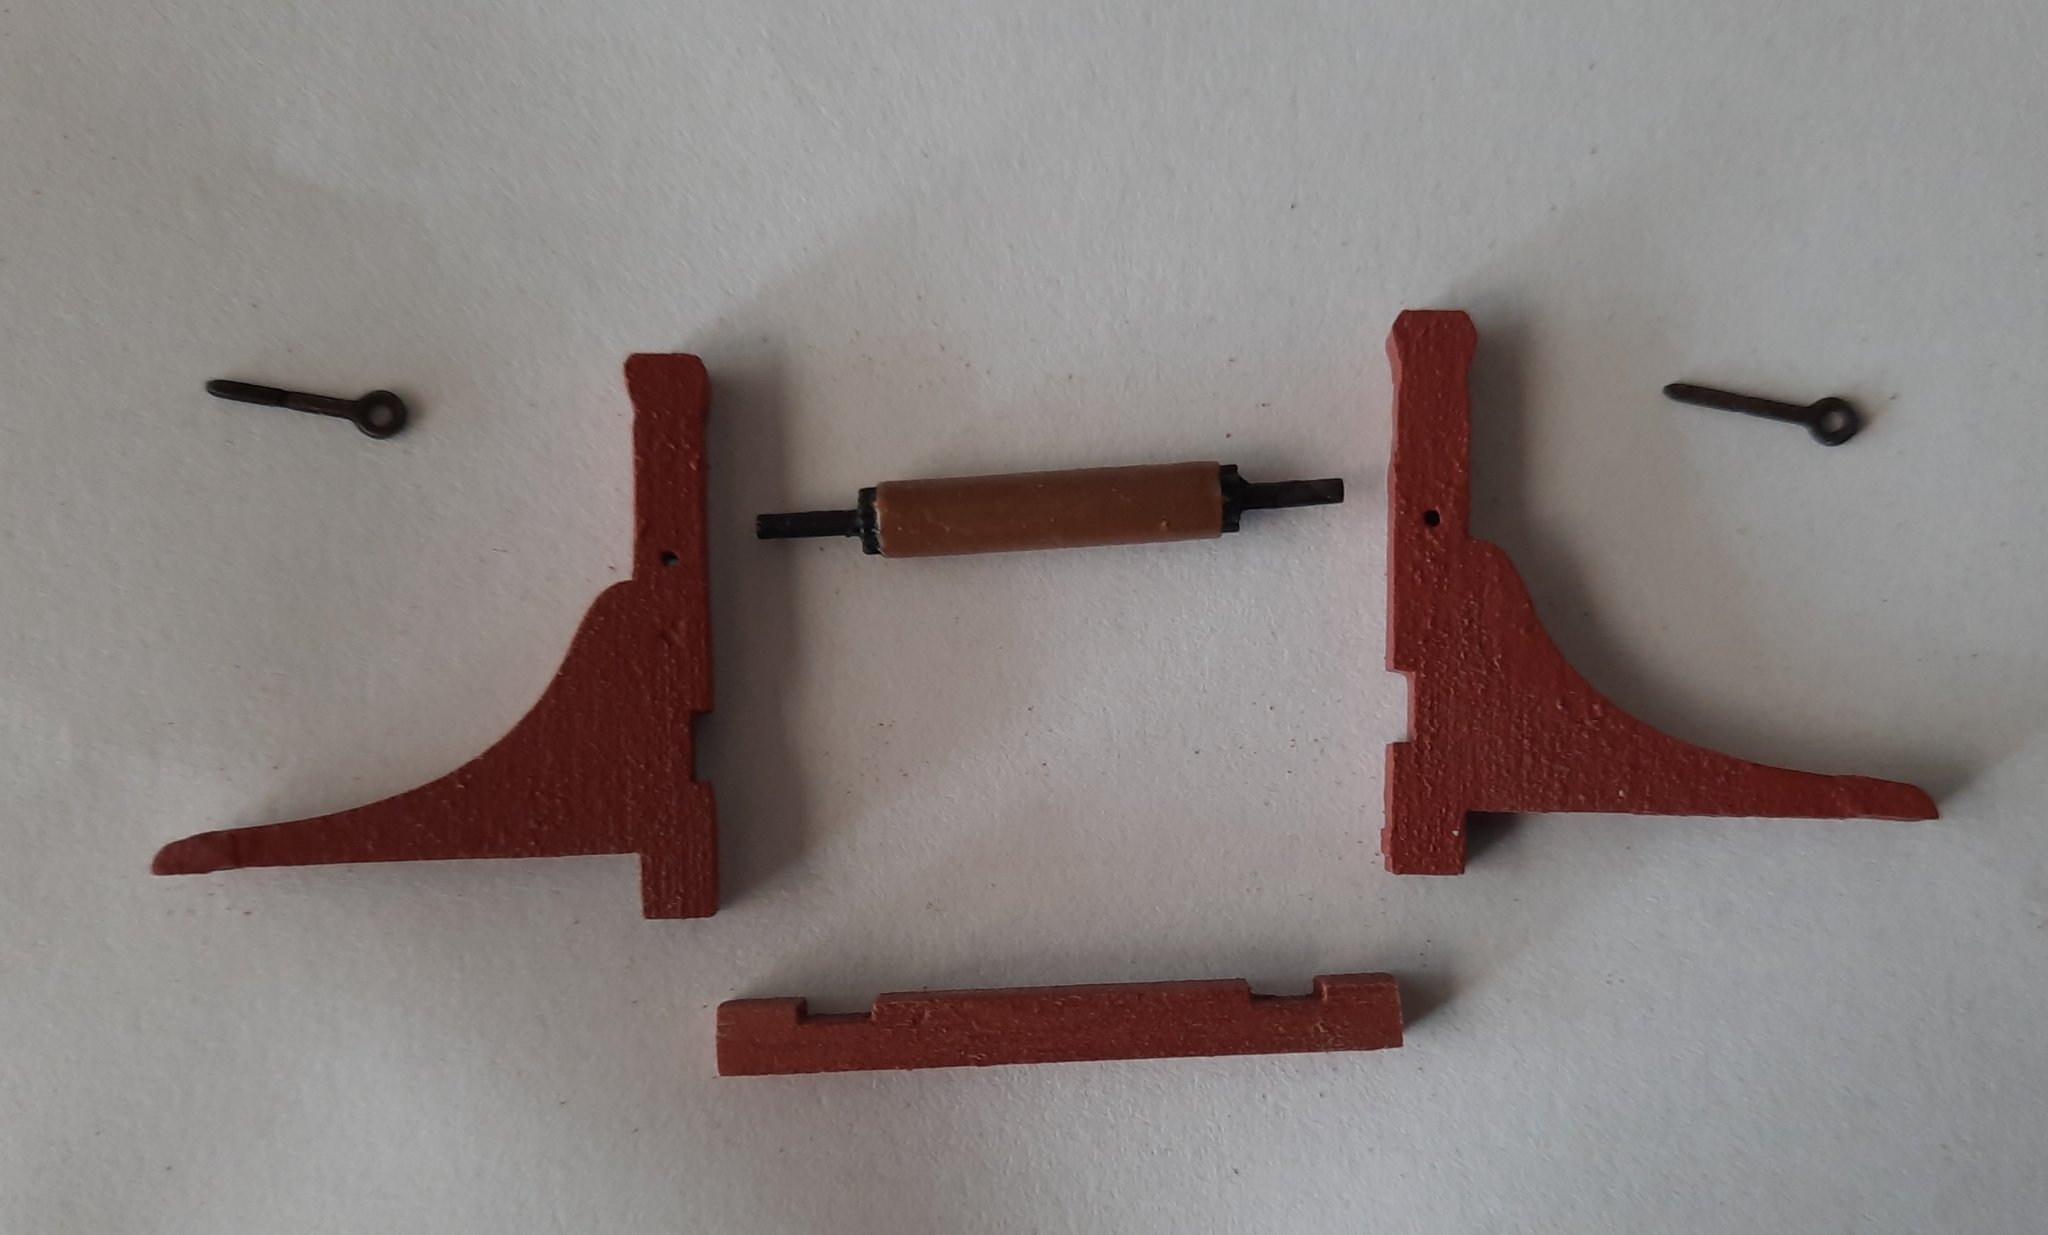
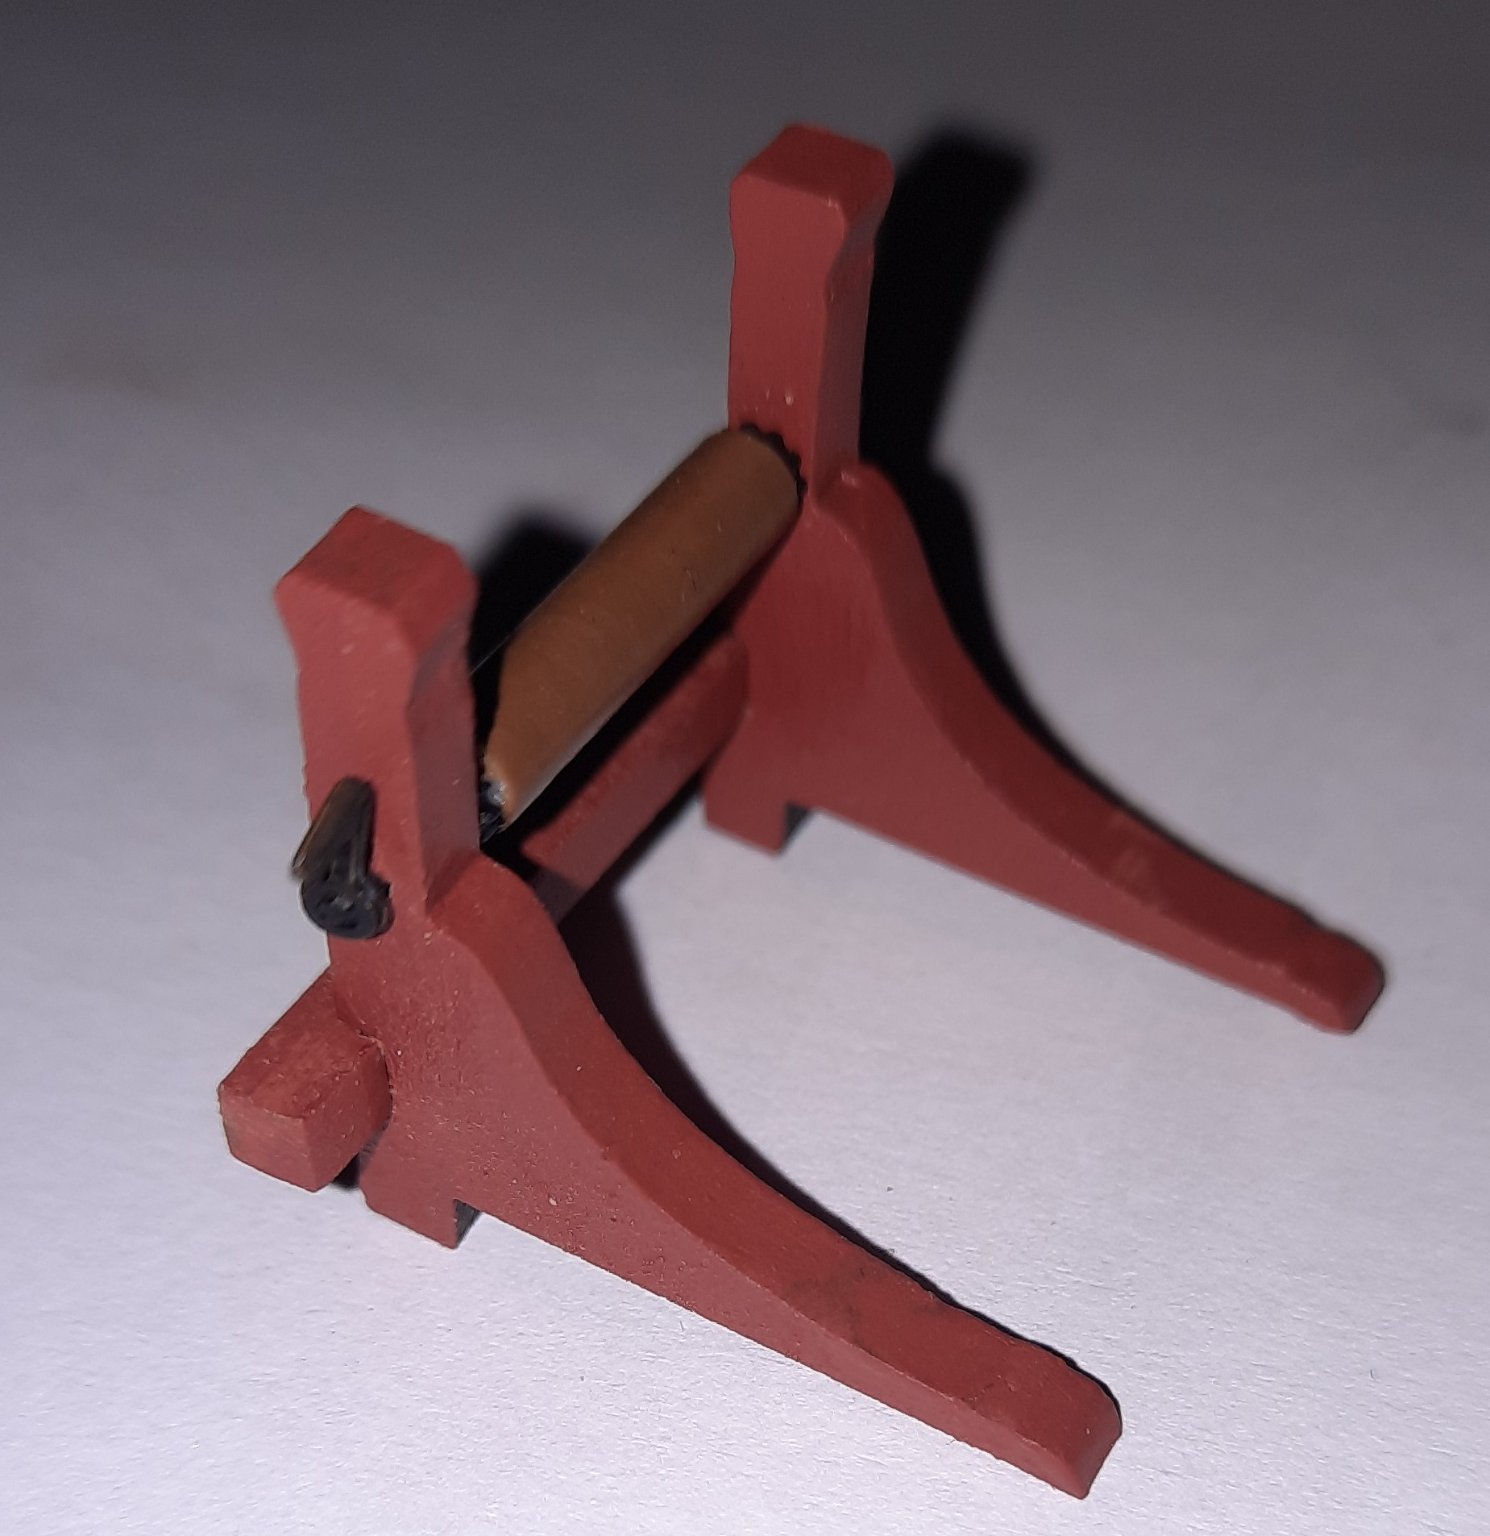
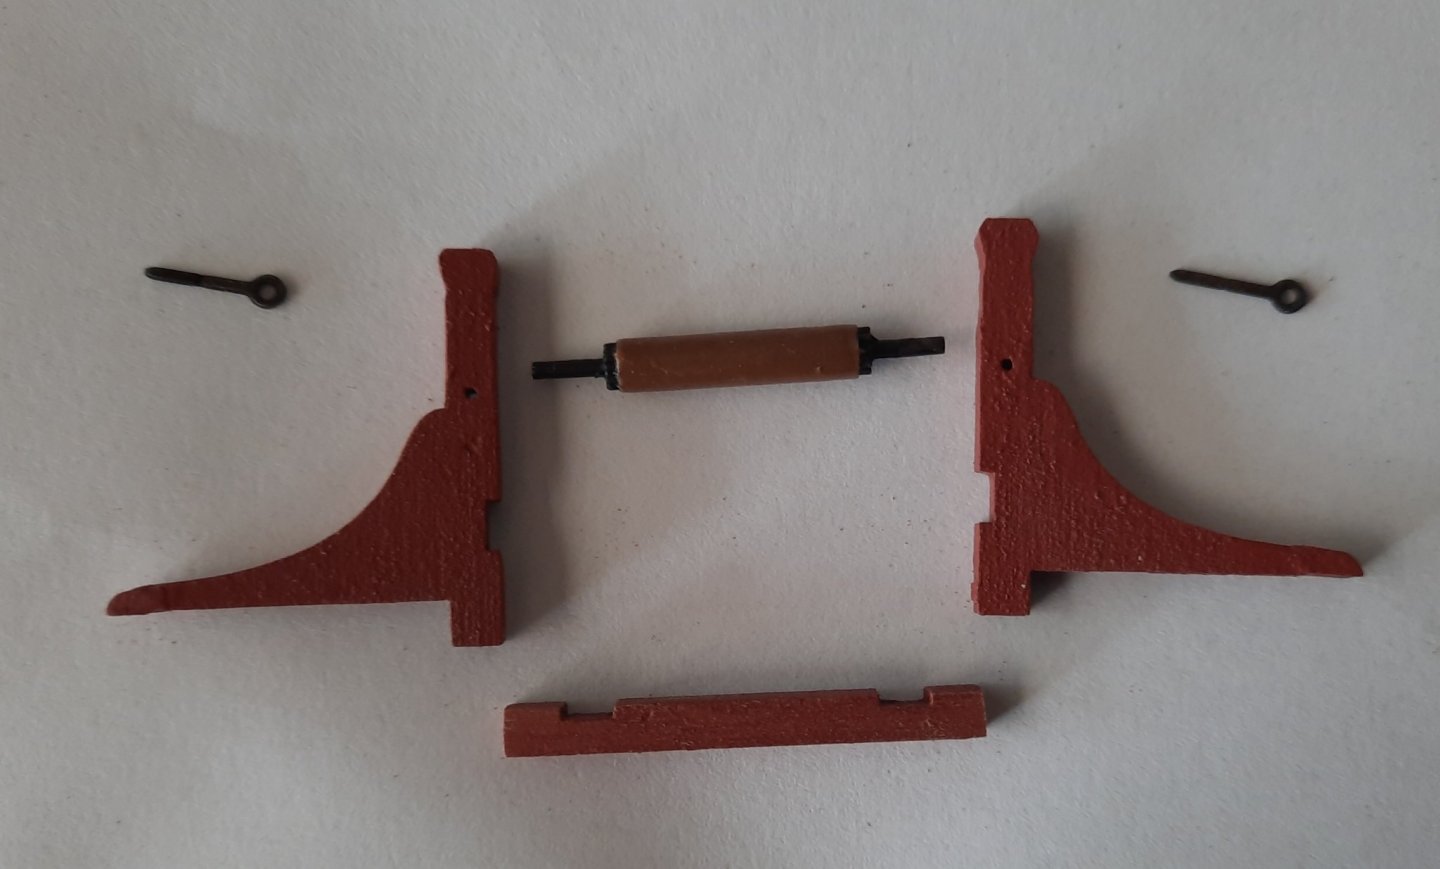
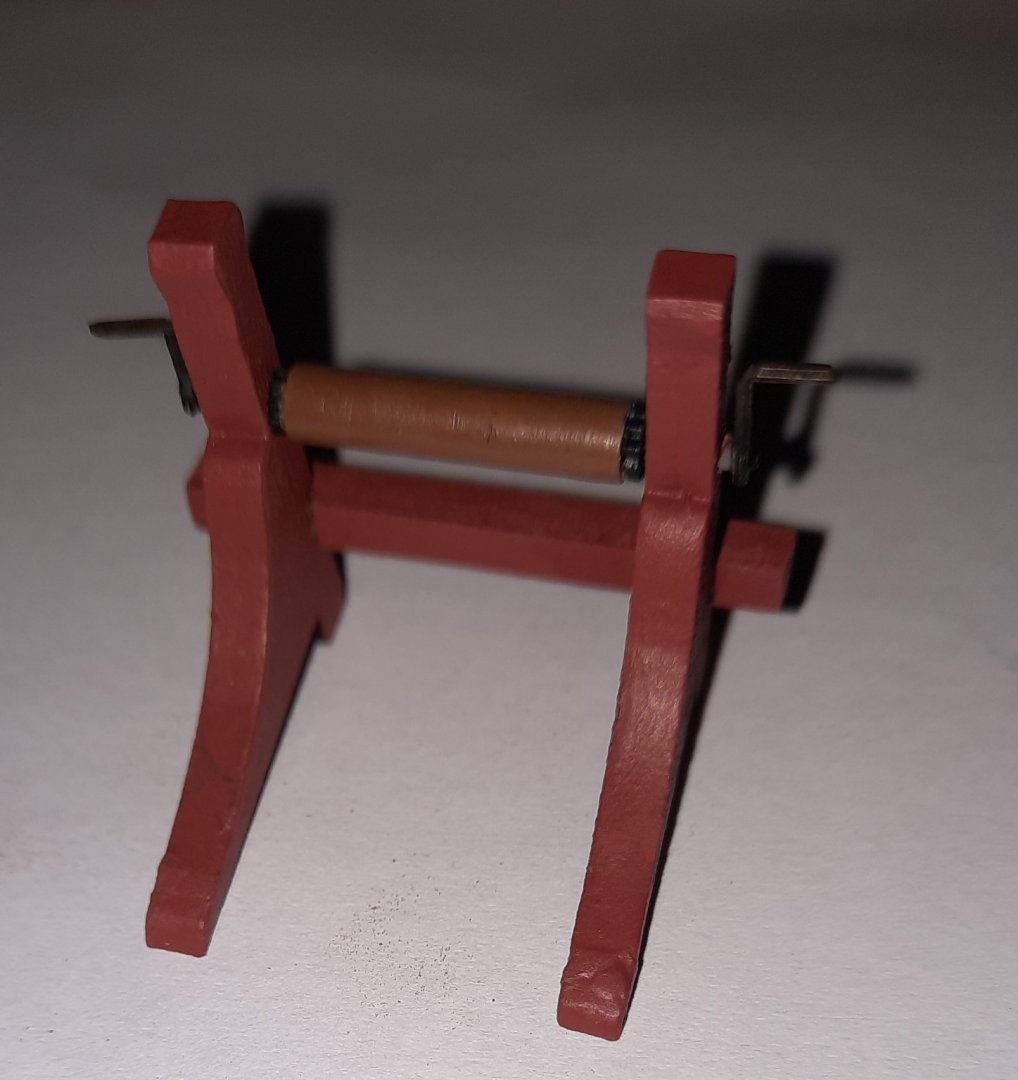
I completed adding the foremast shrouds to the DOK build this afternoon so I had a little bit of time to kill so I decided to build another deck item for the Cutter Alert, which was the Jeer and Topsail Bitt. Jeer and Topsail Bitts Assembly This assembly comprises: 1 x mast bitt cross piece (3mm wood) 2 x mast bitt and standard (3mm wood) 1 x jeer and topsail bitt windlass (resin cast item) 2 x handles (photoetch parts) The wooden parts were painted ochre red. Once the excess casting resin had been removed from the windlass resin part the central barrel part was painted walnut brown and the spindles and gears were painted metalwork (iron) black. The two photoetch handles were cleaned in acetone and then blackened using a photo etch burnishing solution. The parts are now ready for assembly. Before committing the parts to the glue process, I tried a dry fit. I noted the windlass spindle would not locate in the respective holes of the mast bitt and standard wooden parts. I ran a 0.8mm micro drill bit through the holes which solved the problem. I used some wood glue to secure the mast bitt cross piece to the mast bitt and standards, ensuring the jeer and topsail bitt was fitted at the same time. Once the wood glue had cured the two photoetch handles were bent to 90 degrees along the fold line and glued (ca gel) to either end of the jeer and topsail bitt windlass spindles. This was a simple build and produced a very pleasing deck item as can be seen in the photos below.

- 160 replies
-
- 3
-
-
- Alert
- vanguard models
- (and 1 more)