Glenn-UK
-
Posts
3,169 -
Joined
-
Last visited
Content Type
Profiles
Forums
Gallery
Events
Everything posted by Glenn-UK
-
 Thank you very much, it is a very nice model to build.
 -
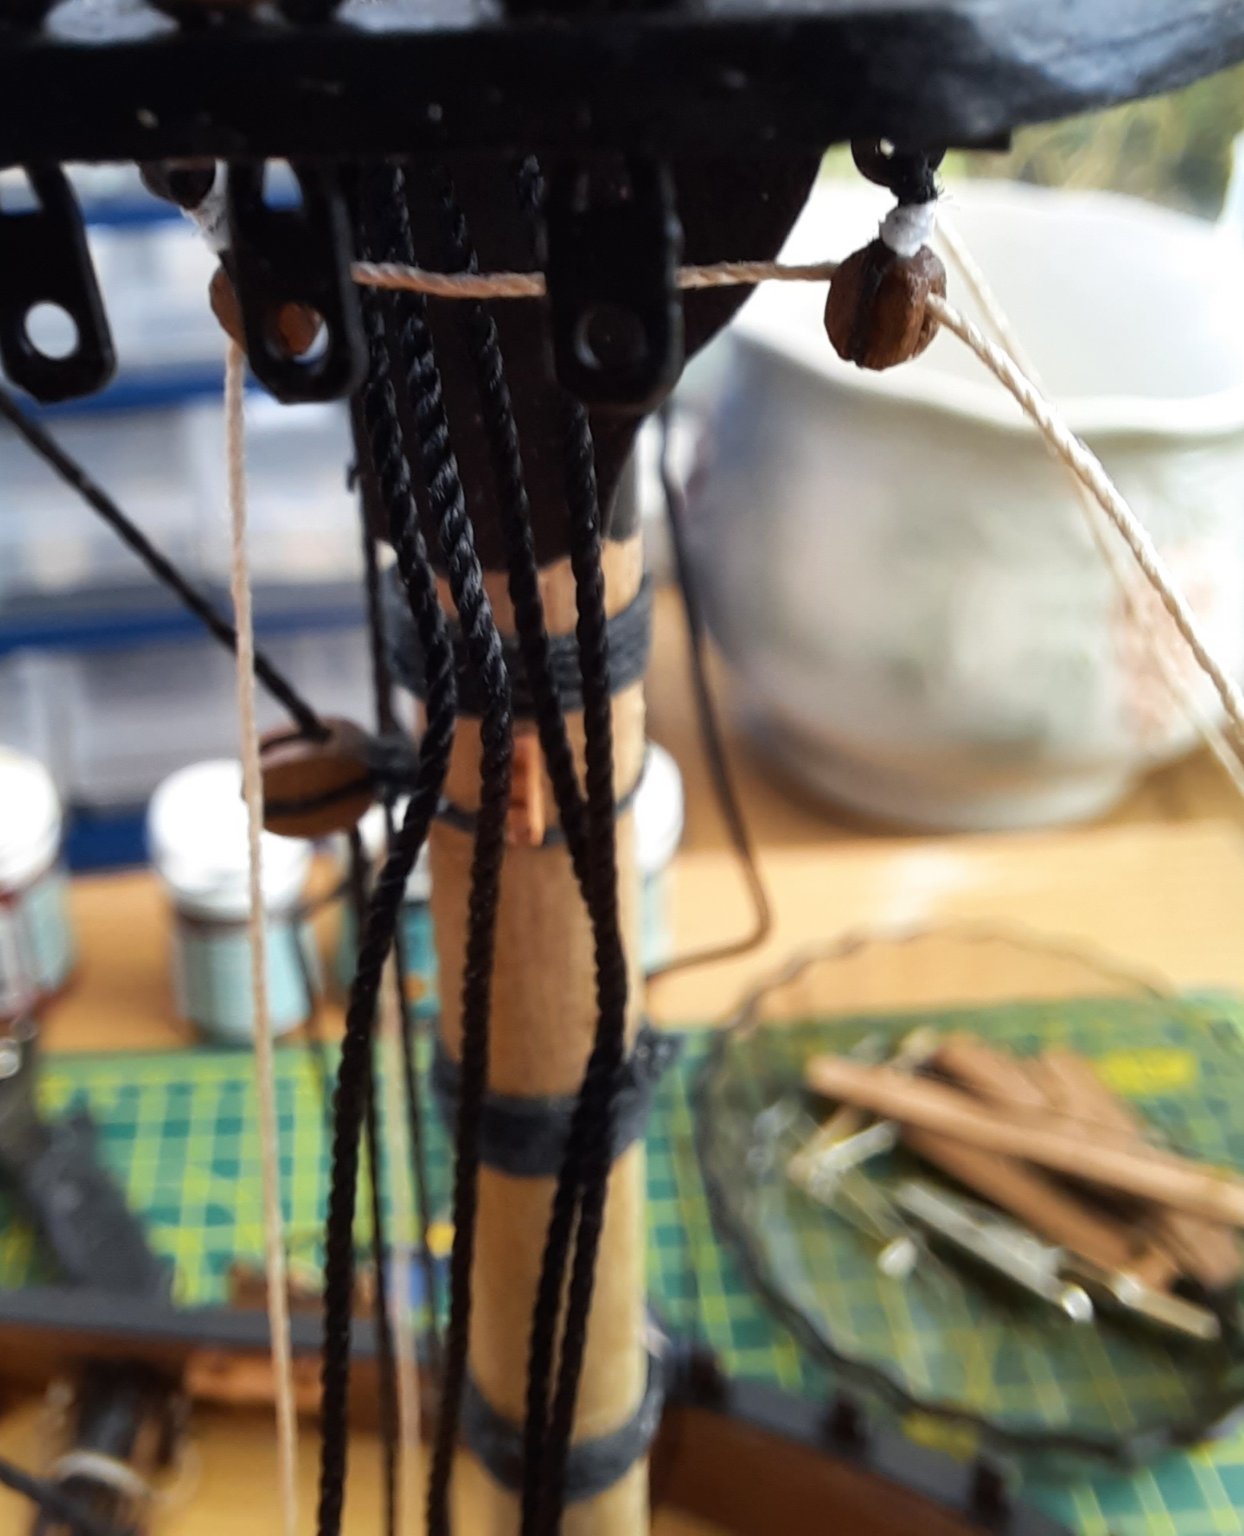
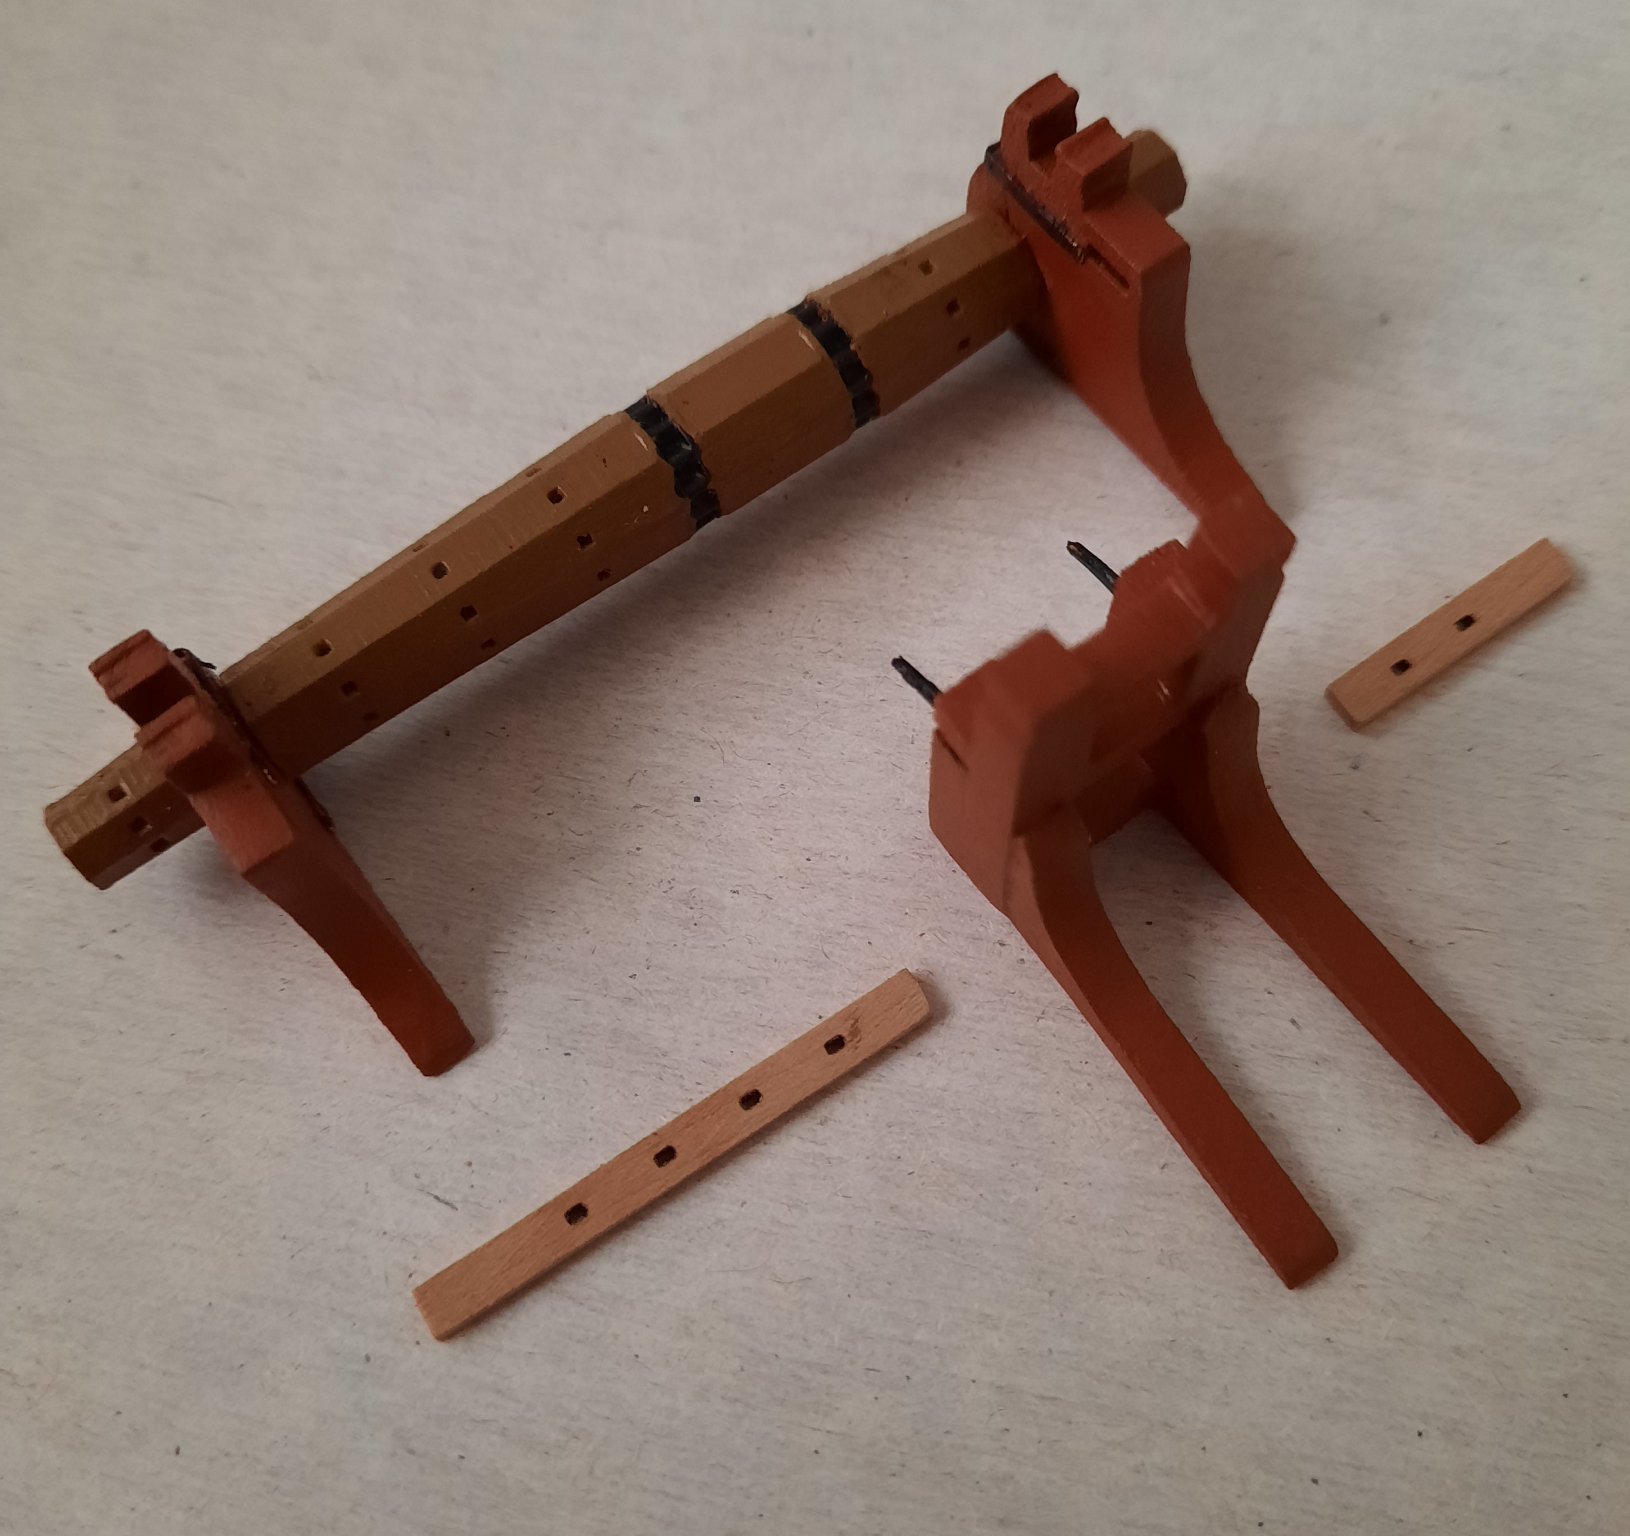
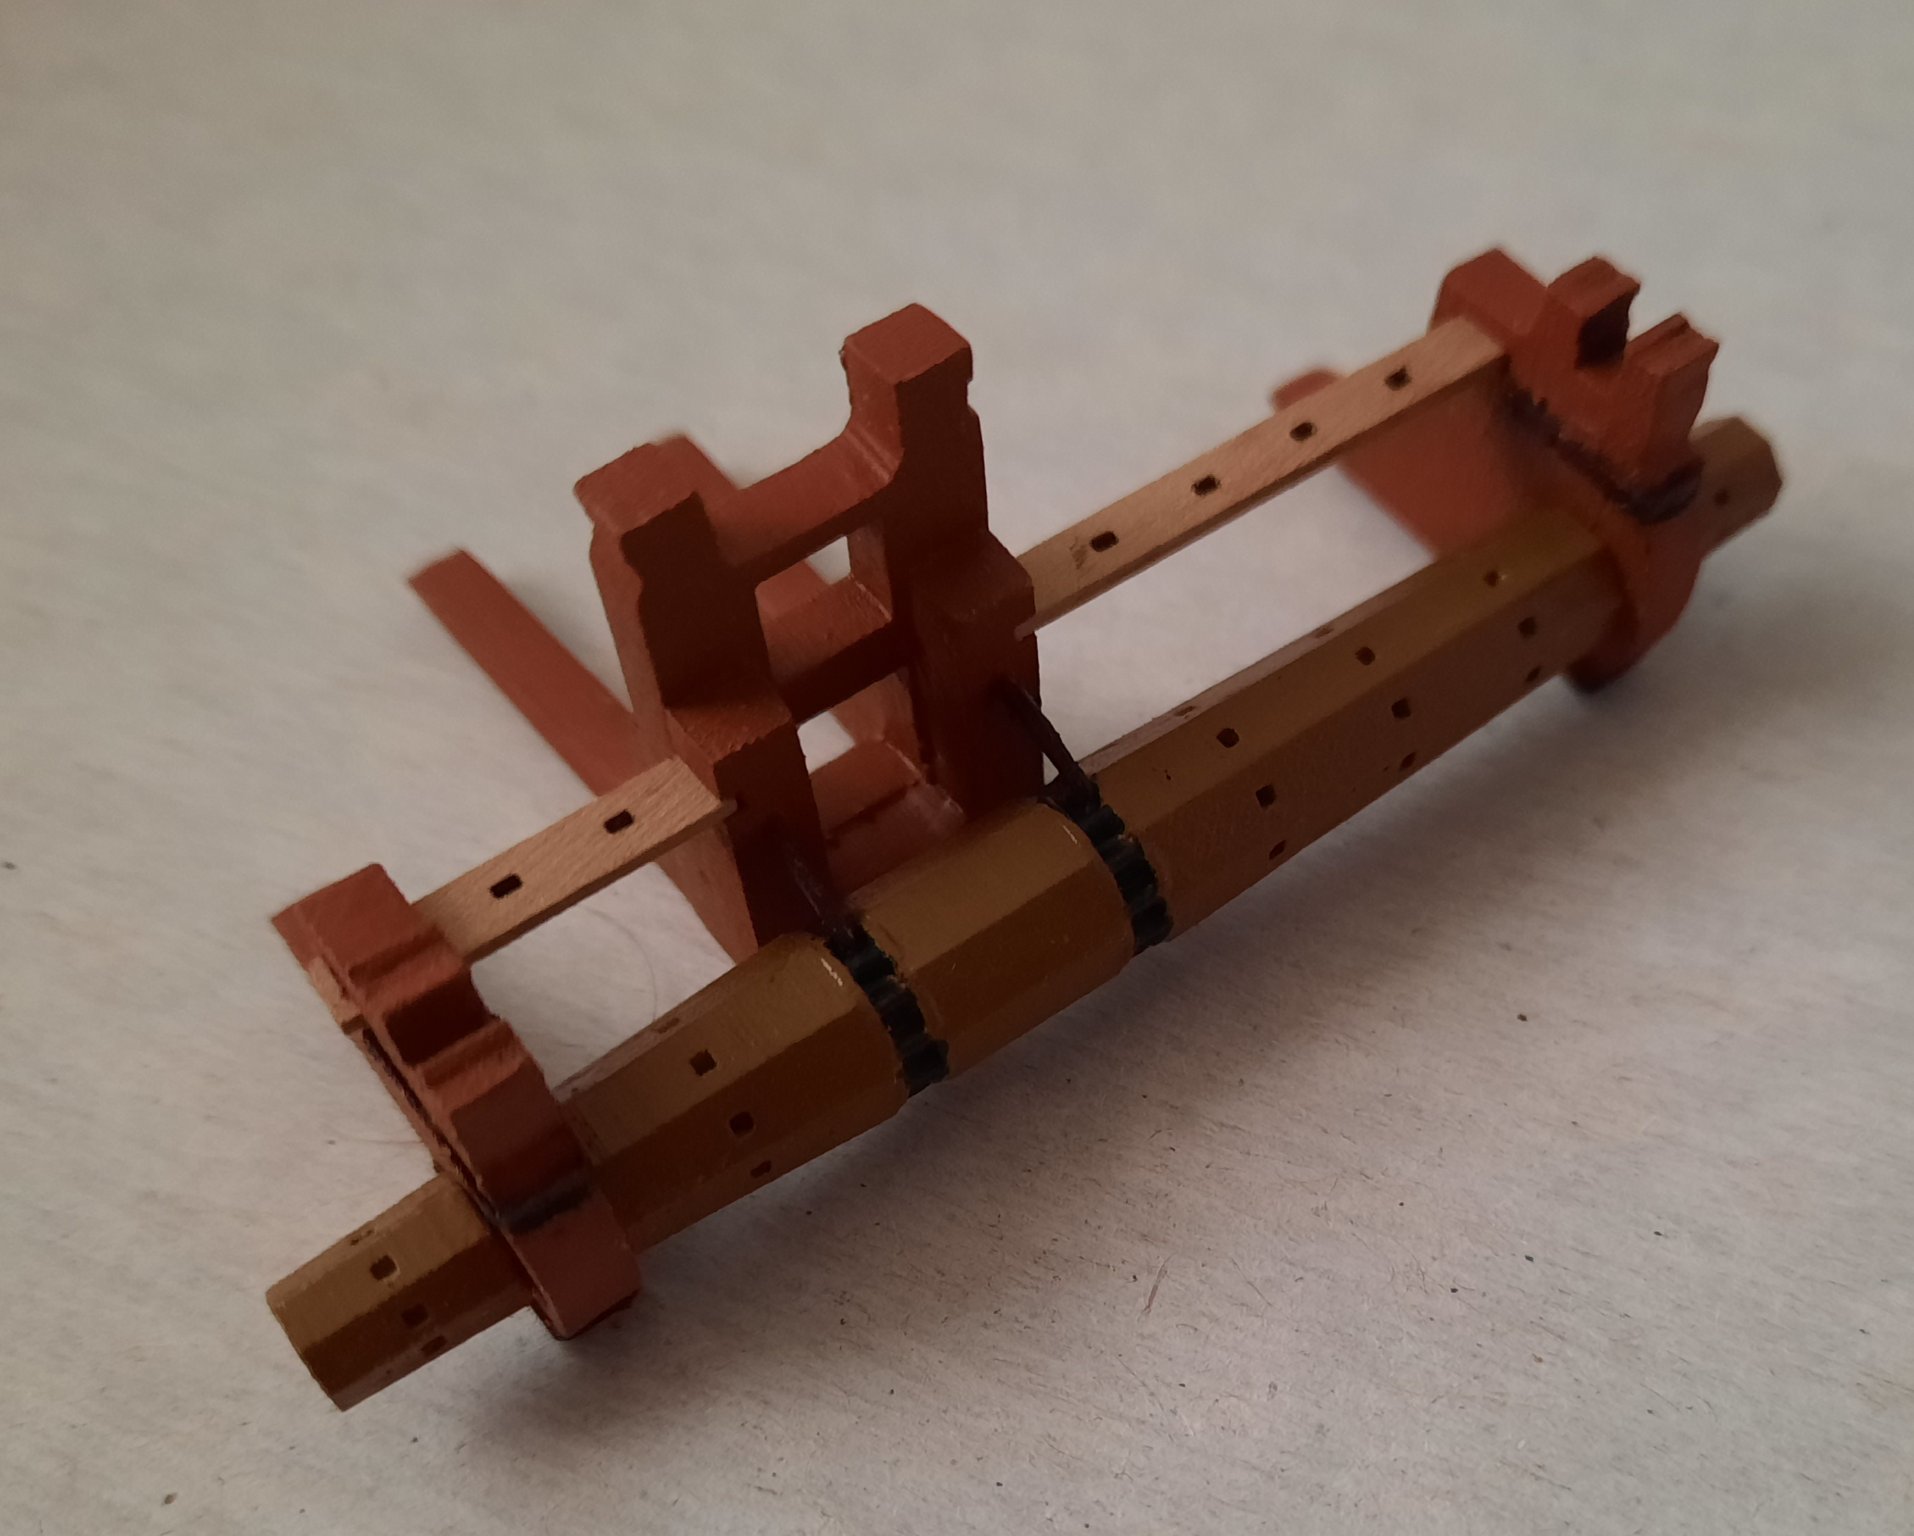
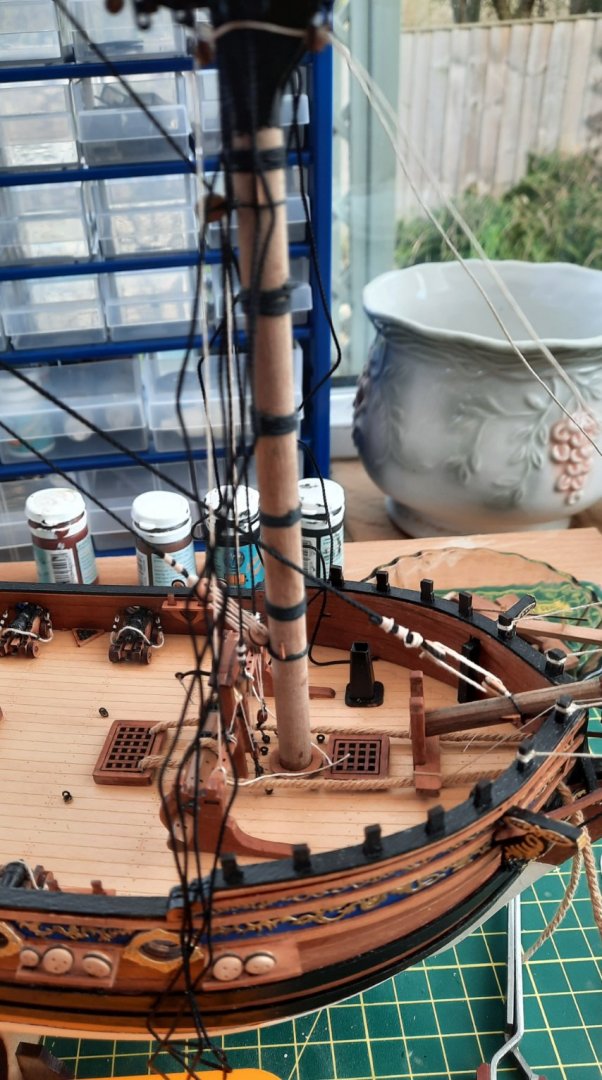
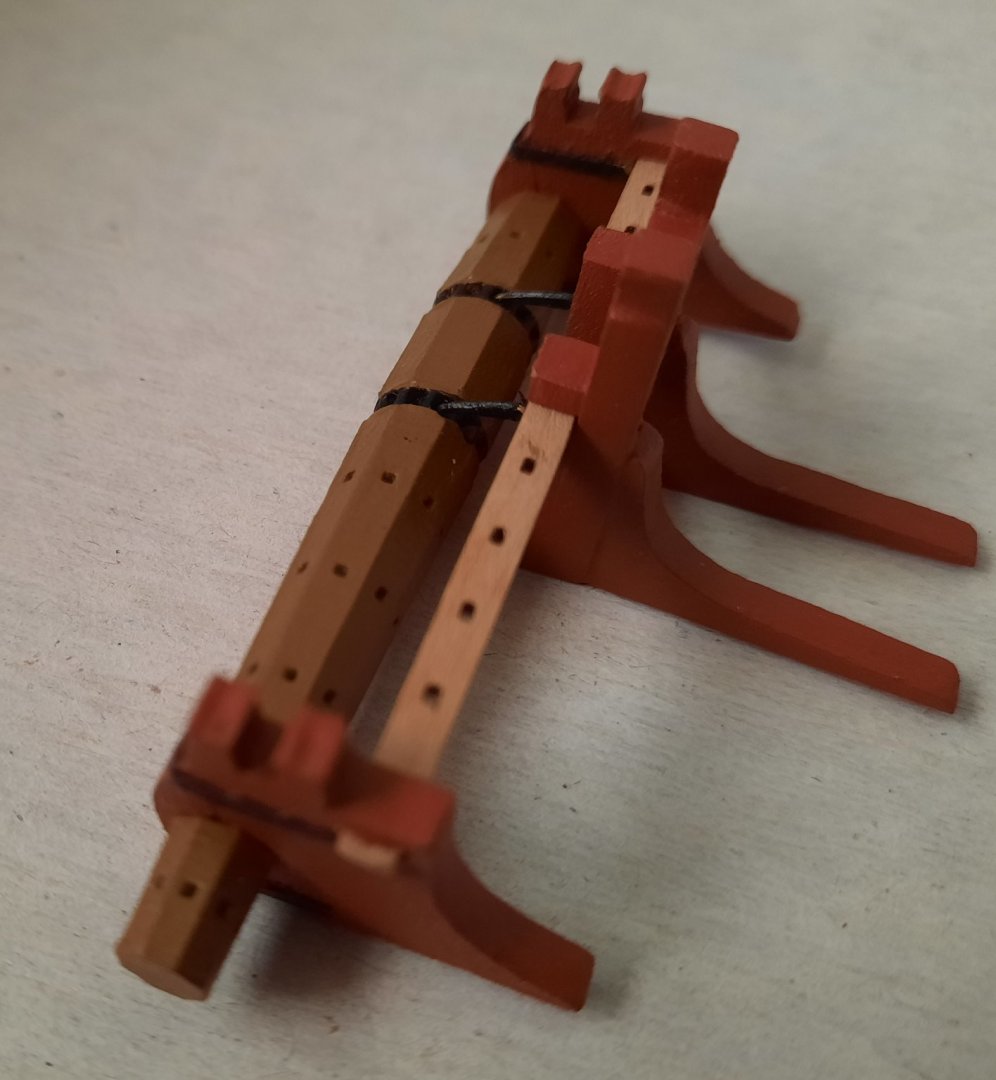
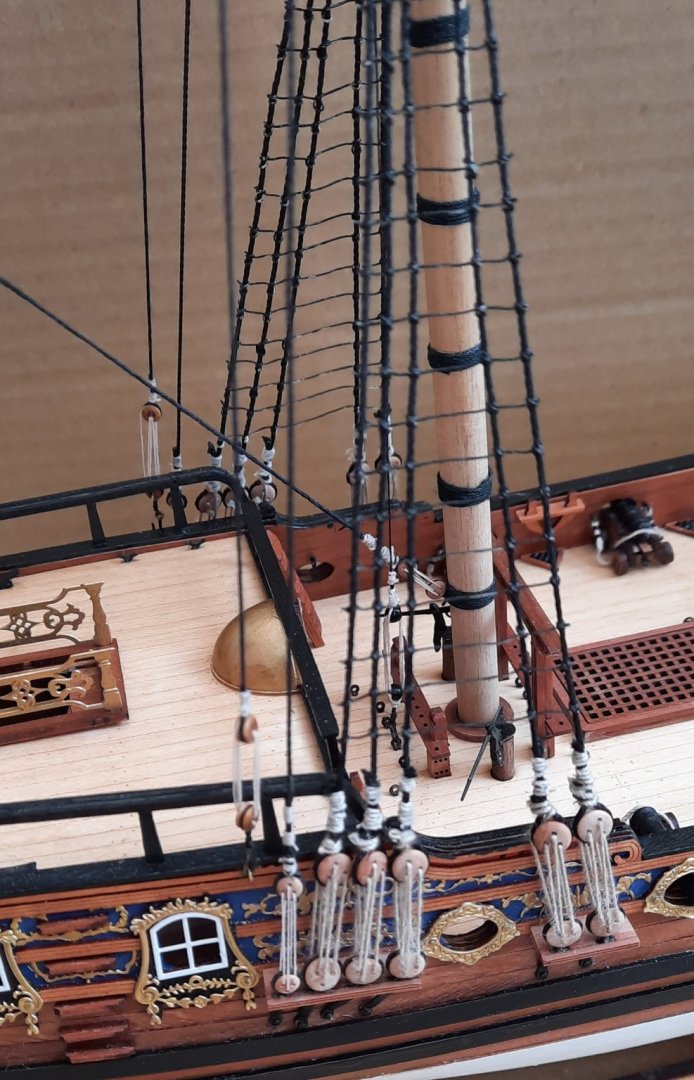
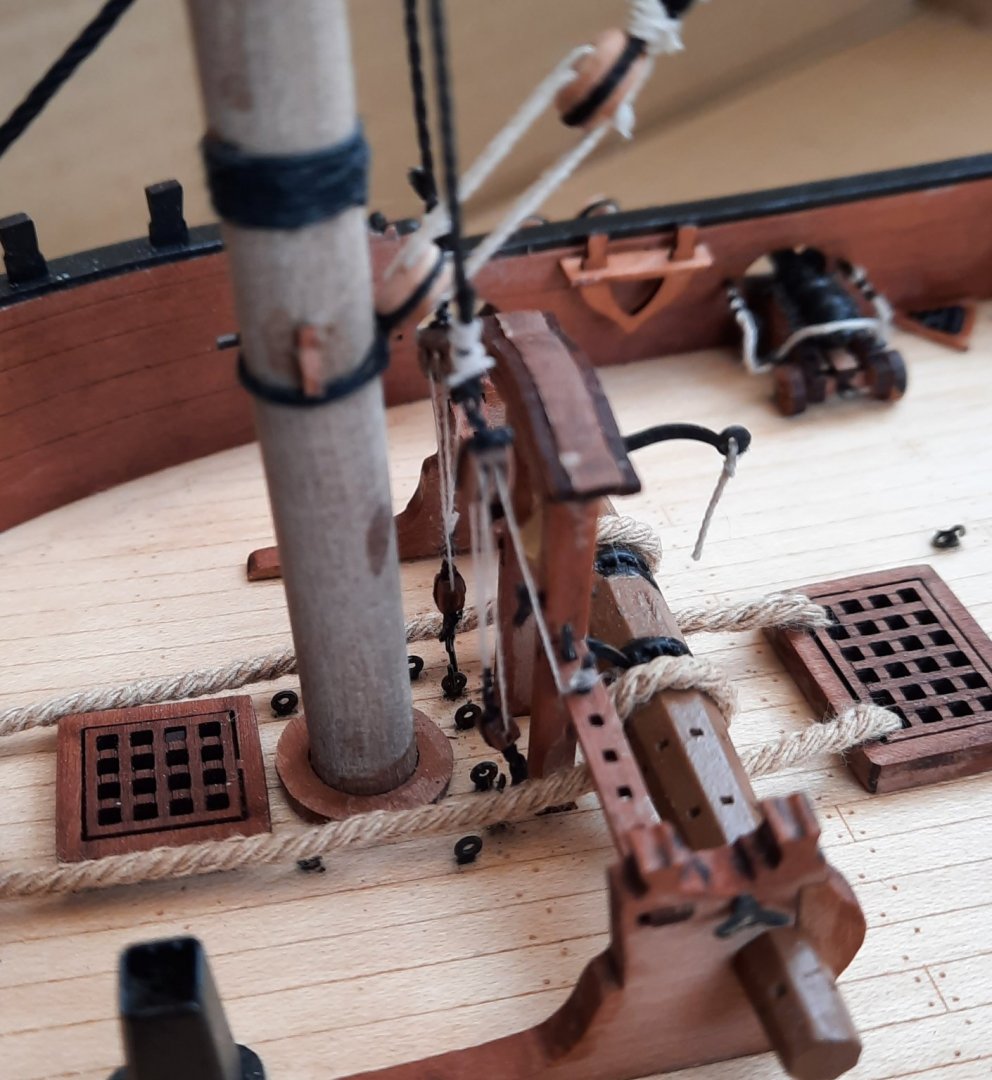
I took a day off from the DOK rigging yesterday and spent a couple of hours on the Cutter Alert, building the winch drum and pawl bitt which was a nice distraction. Cutter Alert Winch Drum and Pawl Bitt assembly post Today I returned to the DOK rigging and commenced rigging the foremast shrouds. Before I started with adding the shrouds I decided it would be a good idea to run 2 lengths of 0.25mm natural thread for the spritsail yard braces through the 3mm blocks as it would be tricky to run the thread through these 3mm blocks later as they located behind the shrouds. I have temporarily belayed the each thread to the bitt rail to keep a little bit of tension in the line. These lines cannot be fully rigged until the foremast stays have been rigged as the other end of the spritsail yard braces are secured to the foremast stay. This picture shows one of spritsail yard brace thread which has been run through the two 3mm blocks. The shroud lines have been added but need to positioned in front of the spritsail yard brace thread, and not behind it has shown in the picture. I have also added all the foremast shroud lines and they are now ready for 5mm deadeyes to be fitted.

- 382 replies
-
- 4
-

-
- Vanguard Models
- Duchess of Kingston
- (and 1 more)
-
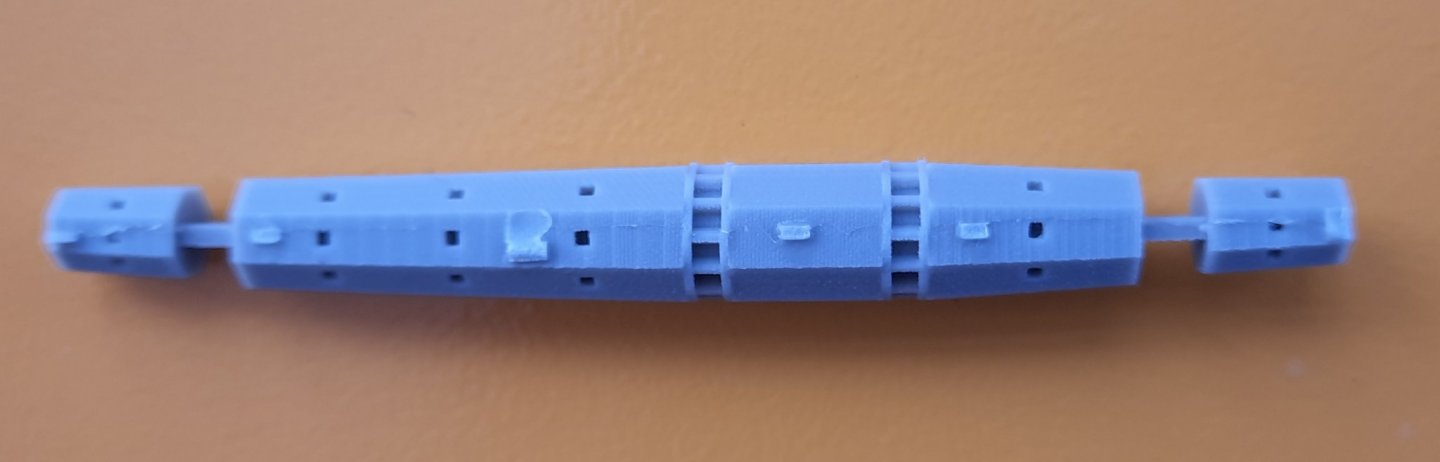
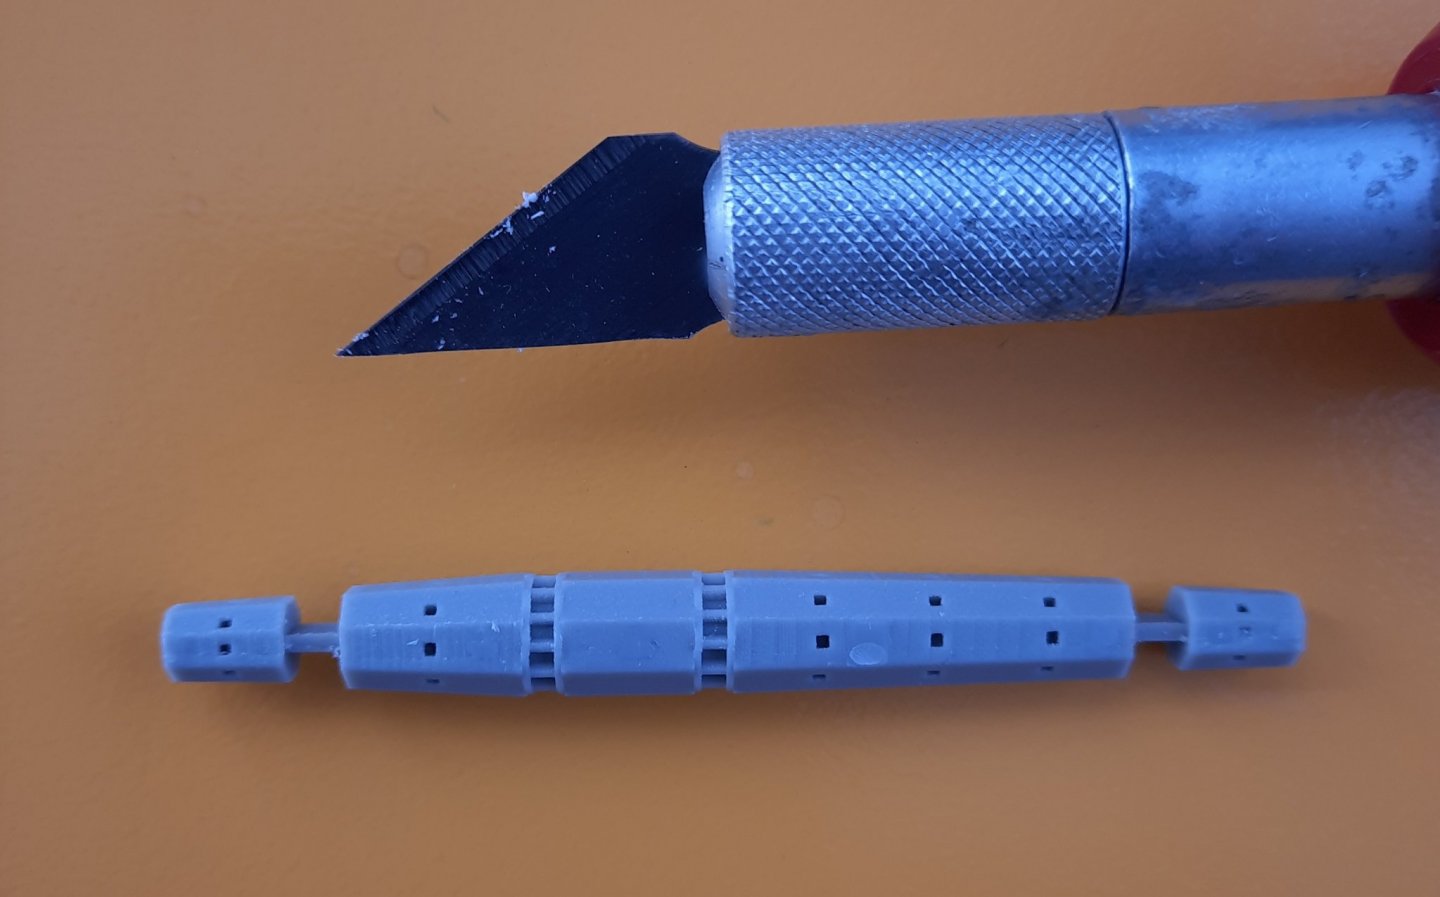
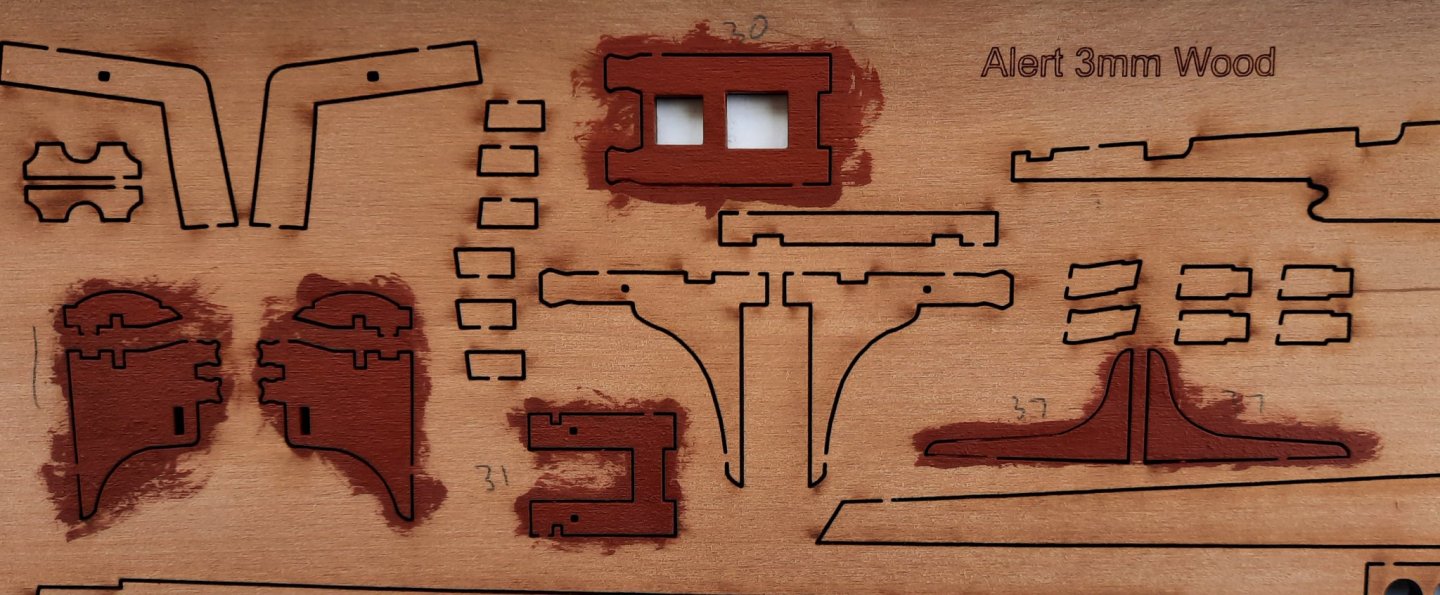
My main priority at the moment is completing the DOK rigging therefore I will only be tackling some easy sub projects on the Alert. Today I decided to build the winch drum and pawl bitt assembly. I have uploaded a video to YouTube which contains more images and commentary of the build process. Winch drum and pawl assembly - YouTube The winch drum is a nice resin item, however there is some excess resin left from the mould. I used a craft knife fitted with a brand new blade to excess the resin. The winch drum needs to be painted a dark wood colour. I opted for a walnut finish. I used an iron metalwork black for the teeth. There are 4 x carrick bitt iron straps and 2 x pawls which are photoetched parts which need to be painted black. I opted to clean these parts in acetone and then used a photoetch burnishing solution to blacken them. All the wooden parts, with the exception of the two belaying pin racks, need to be painted red. I have decided to use Red Ochre for all the deck fittings. I decided to paint the pieces in situ before removing them for the 3mm sheet. The edges can be painted red during the assembly phase. As I removed the wood parts I did remove the laser char from the exposed edges this will be better when the edges are painted red. The various parts required for the build were checked against the build instruction. The 6 x belaying pins required for the 2 racks will be fitted when I'm ready to start the rigging phase. The parts are now ready for the assembly phase. The winch drum assembly and pawl bitt head assemblies are complete and ready to be joined together using the 2 belaying pin racks The two belaying racks were fitting to the winch drum assembly and their positions adjusted so the two pawls lined up with the winch drums teeth.


- 160 replies
-
- 10
-
-
- Alert
- vanguard models
- (and 1 more)
-
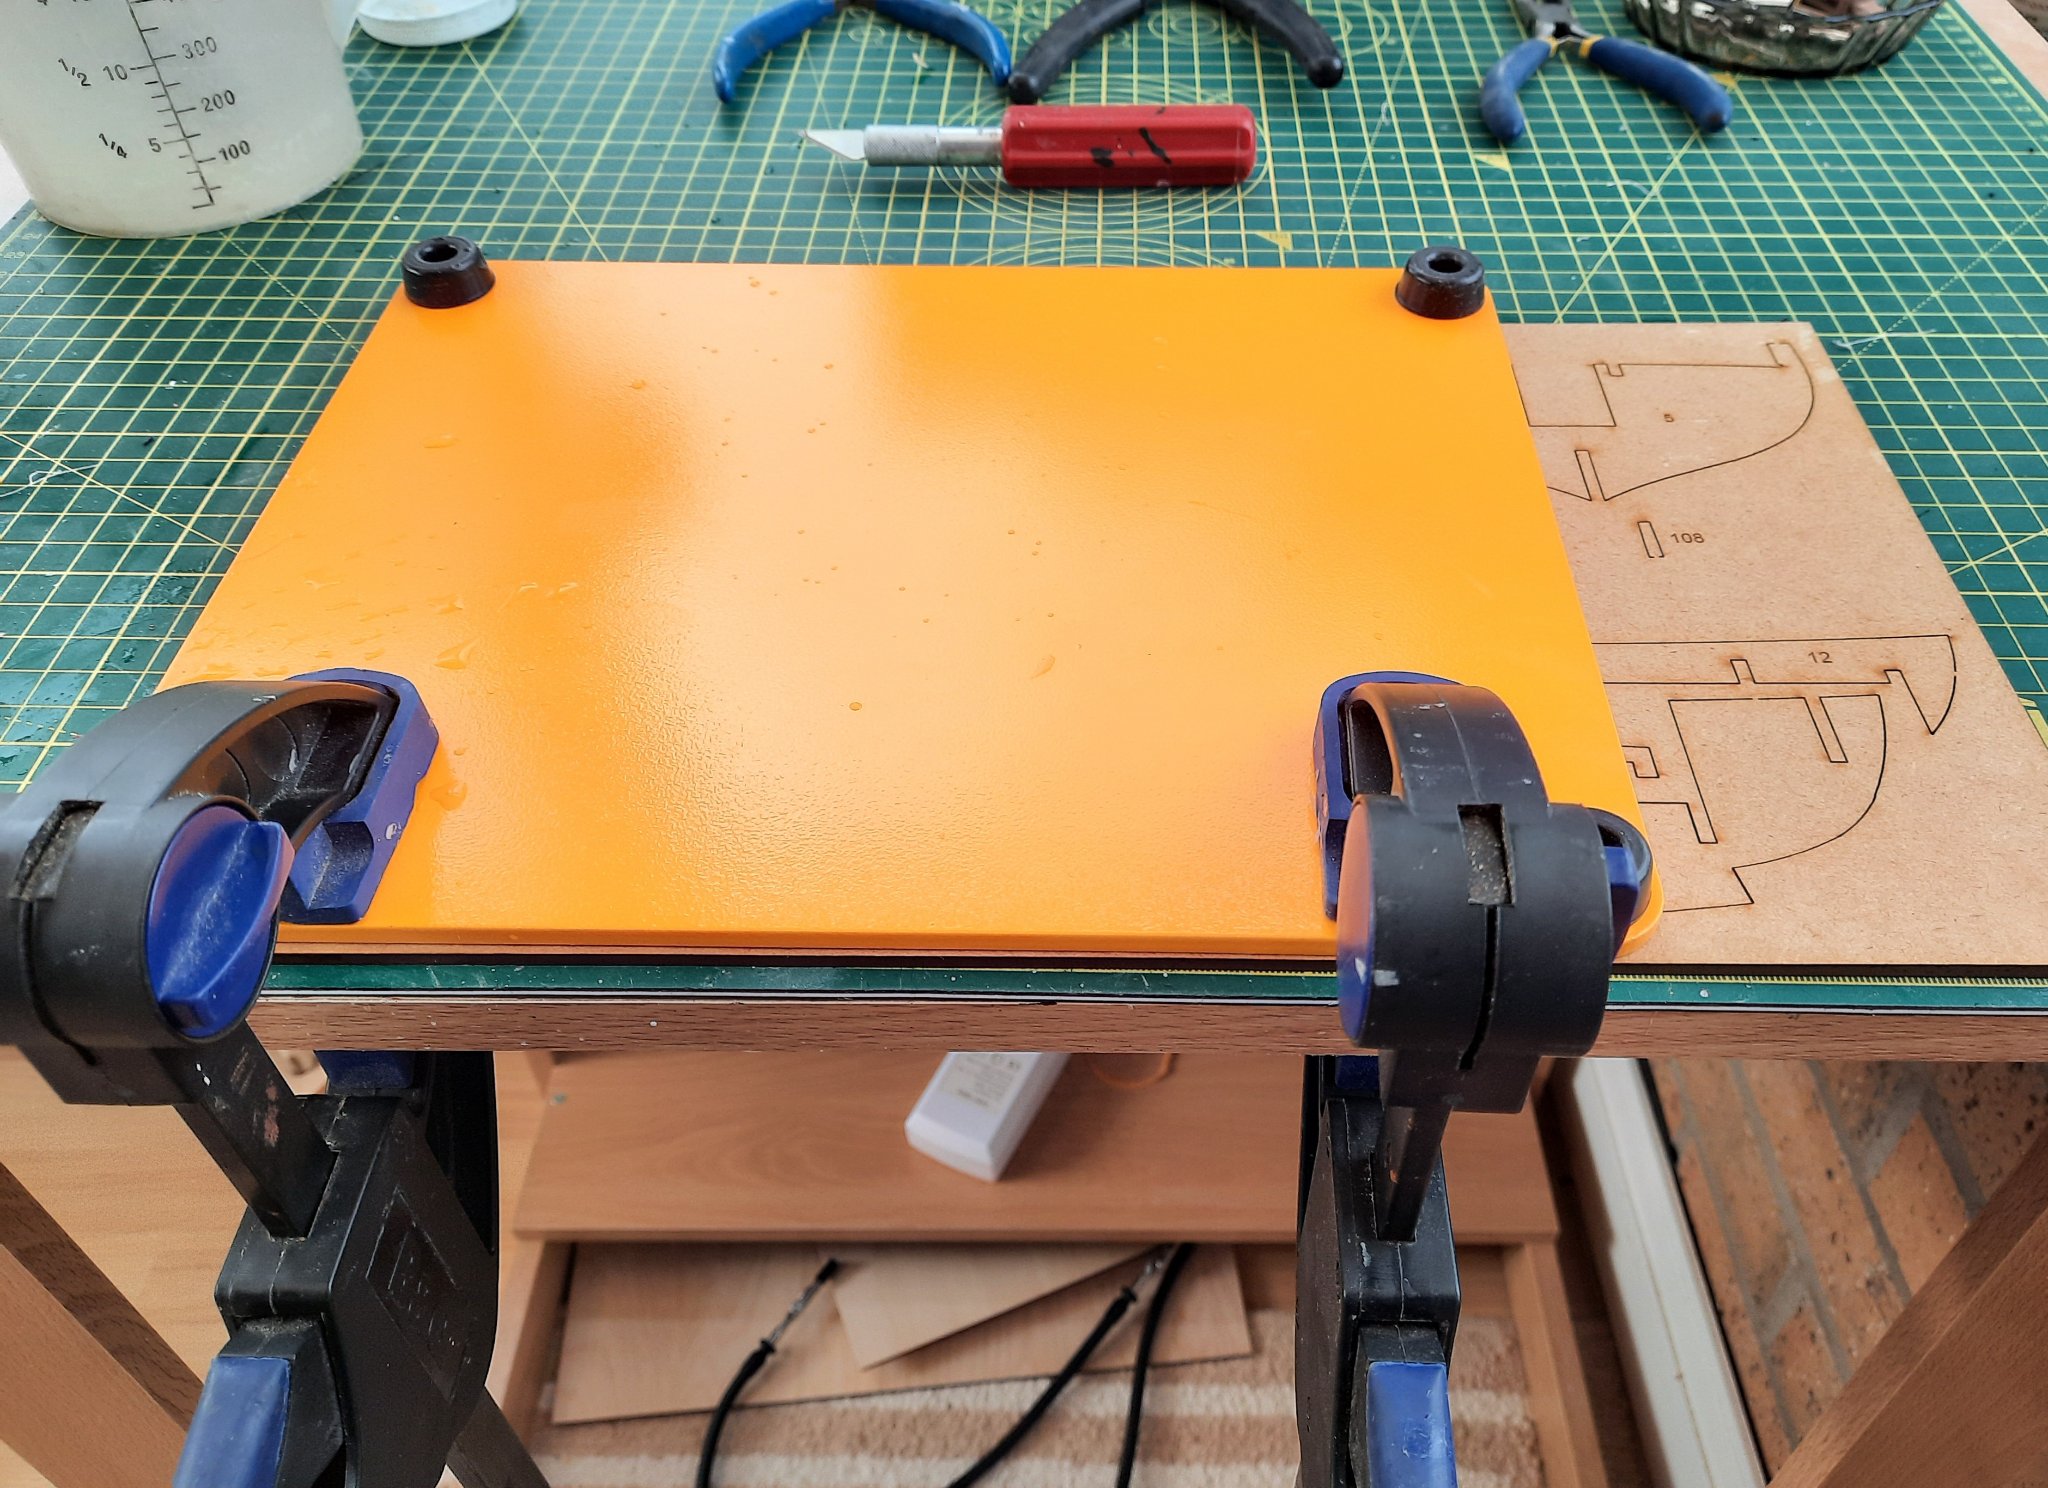
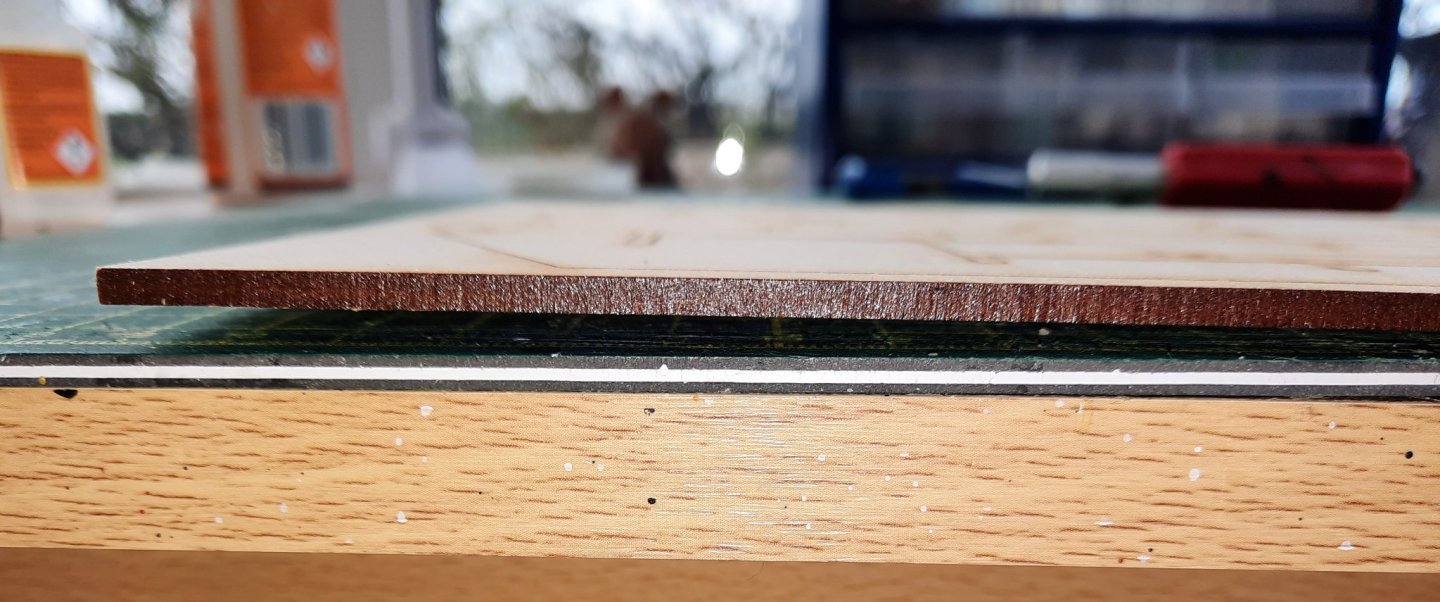
Thanks Bruce, Jim and Chris. I only brushed on some water, I did not wish to saturate the sheets. When I removed the clamps and metal plate this morning the warp had been removed.
- 160 replies
-
- 1
-
-
- Alert
- vanguard models
- (and 1 more)
-
Thanks Uwe. I hope to produce a detailed build log, detailing all aspects of my build for the Cutter Alert which I hope other modellers will find helpful and informative.
-
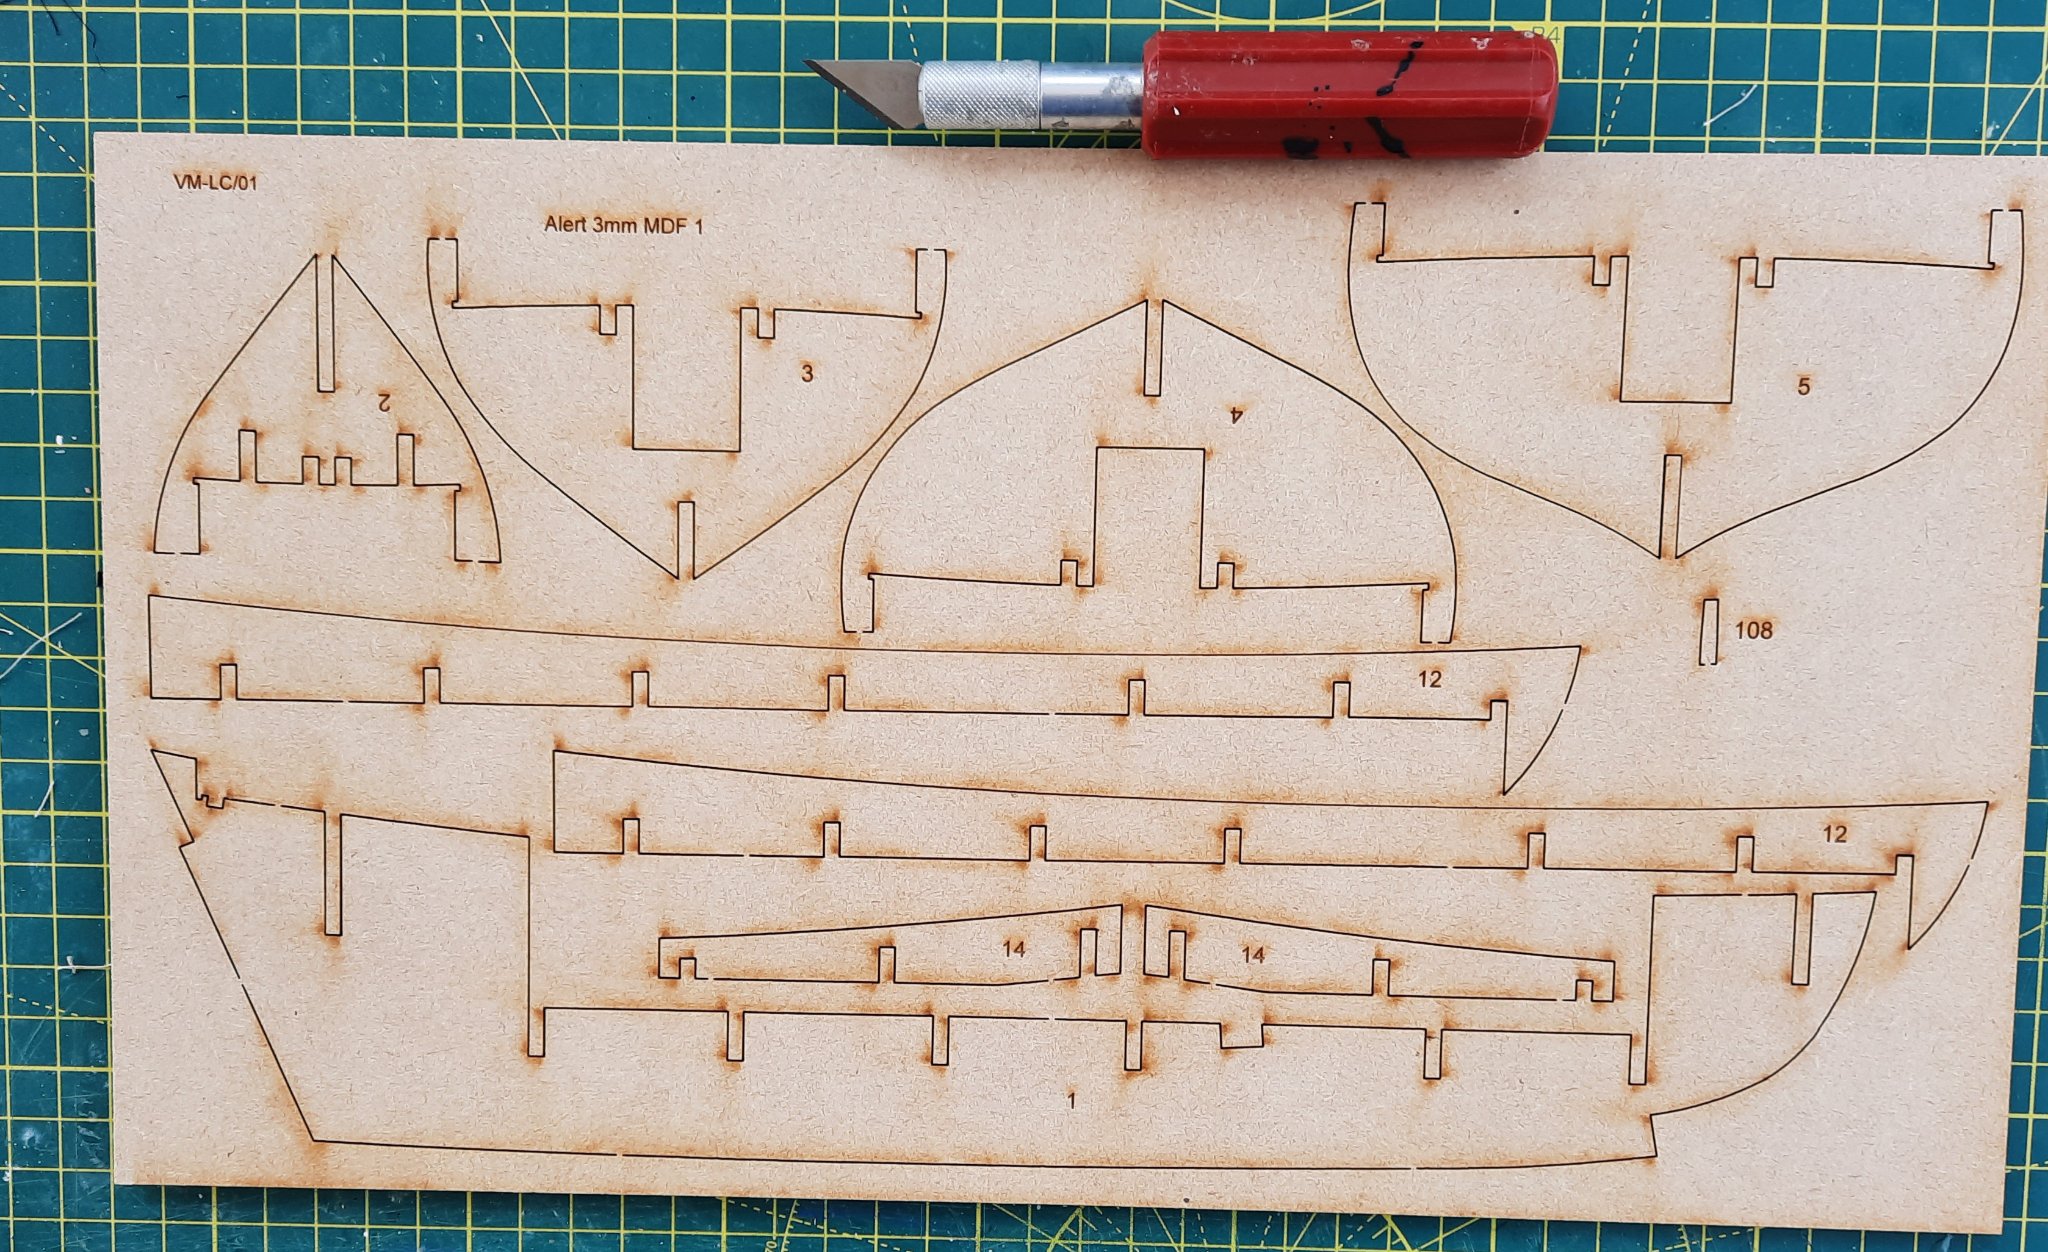
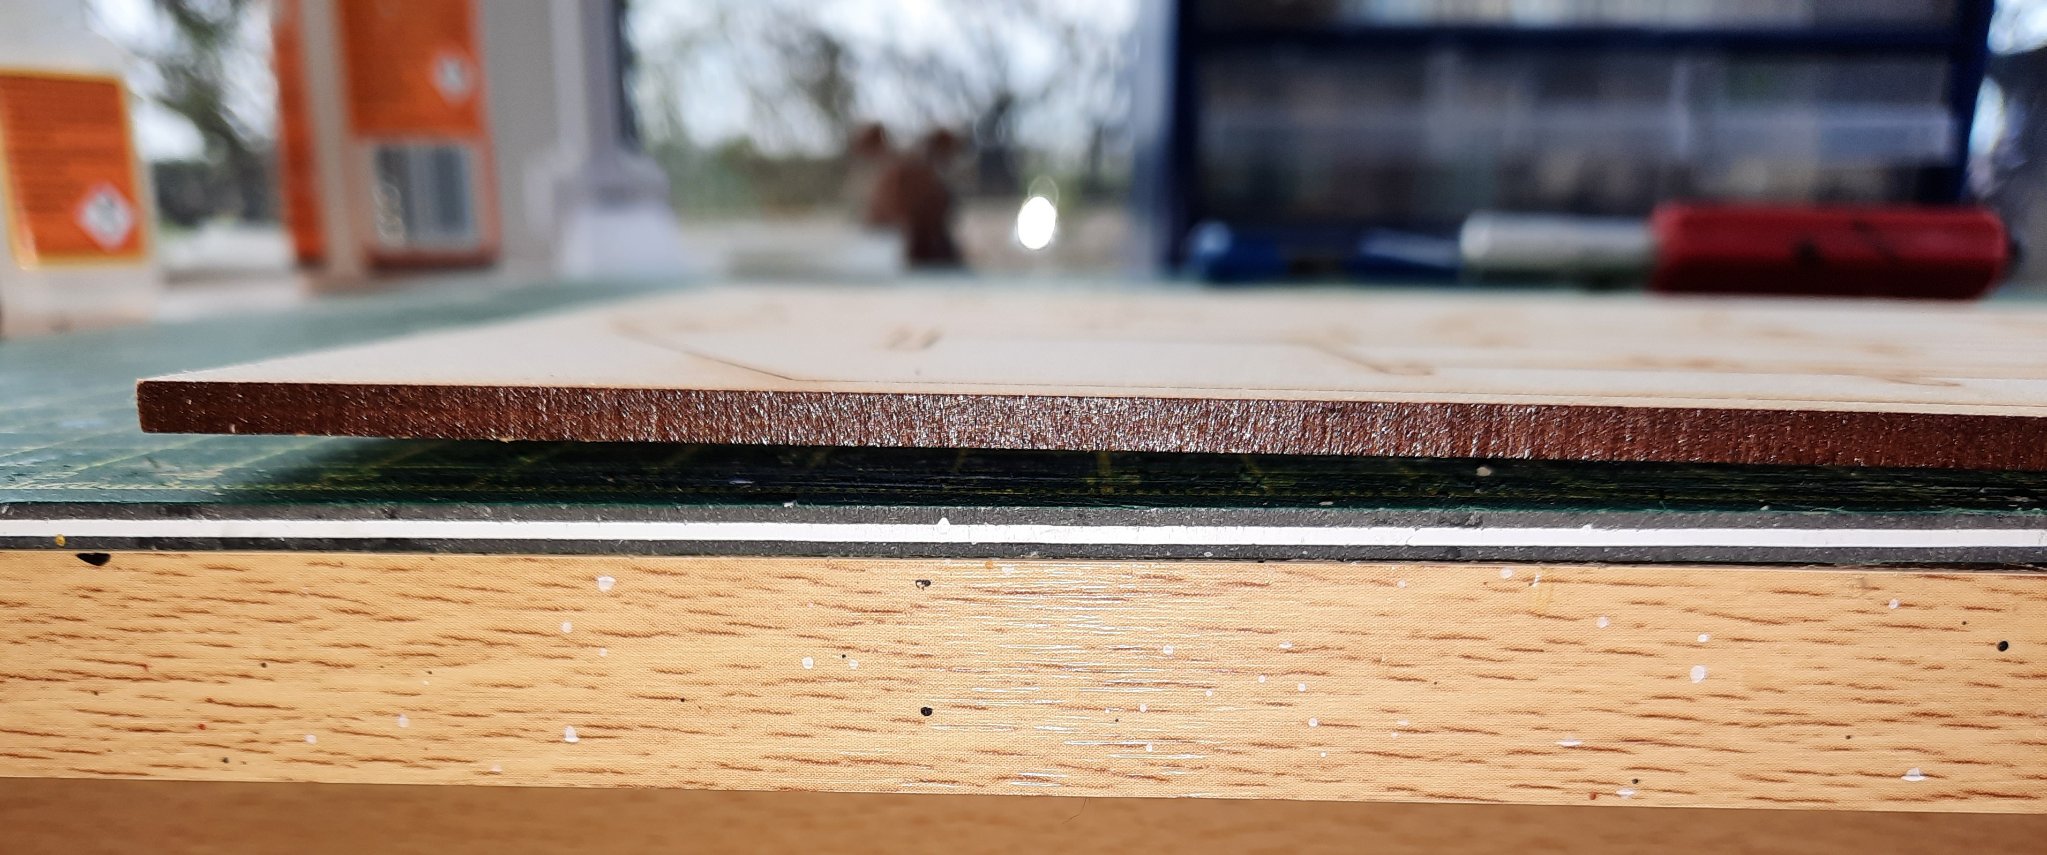
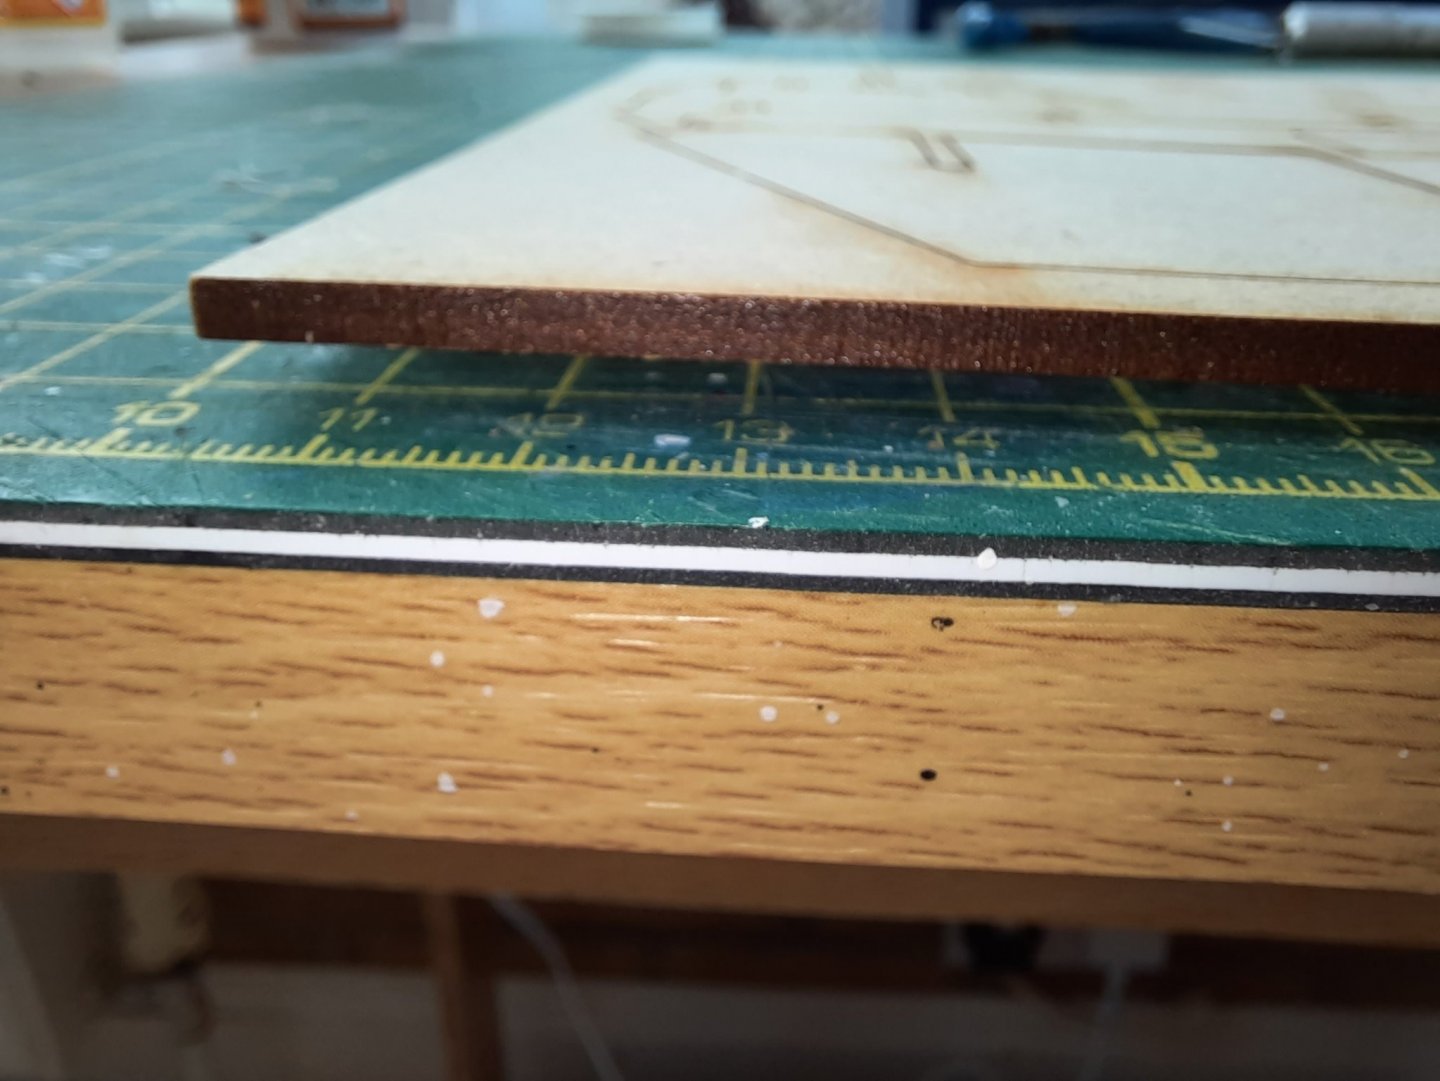
As I had completed the work on the DOK main mast rigging earlier than planned today I thought I would start the Cutter Alert build process with a complete dry fit of the bulkheads and various securing patterns to the false keel. I placed sheet 1 of the 3mm MDF on my cutting mat and fitted a brand new blade fitted to my craft knife, I was all set to make the first cut. However before making the first cut I noticed the sheet was not laying flat on the mat. On closer inspection I noted there was quite a significant warp to the sheet and more to the point it ran along the length of the false keel. I also checked sheet 2 3mm MDF sheet which was also warped. Sometimes this is not an issue with kits as the assembly process will naturally straighten the parts during the assembly process. Having a quick look at the build manual I was not sure if this would be the case with this kit. There are two securing patterns (part 12 bow and bulkhead securing pattern and part 14 bow pattern) which may take care of any warping issues. I decided to air of the side of caution before removing any parts from either sheet and applied some water to both sides of the MDF sheets. I then clamped both sheets together with a heavy metal plate on top. I will now leave the sheets to fully dry out, whilst clamped. Fingers crossed this does the trick.


- 160 replies
-
- 1
-
-
- Alert
- vanguard models
- (and 1 more)
-
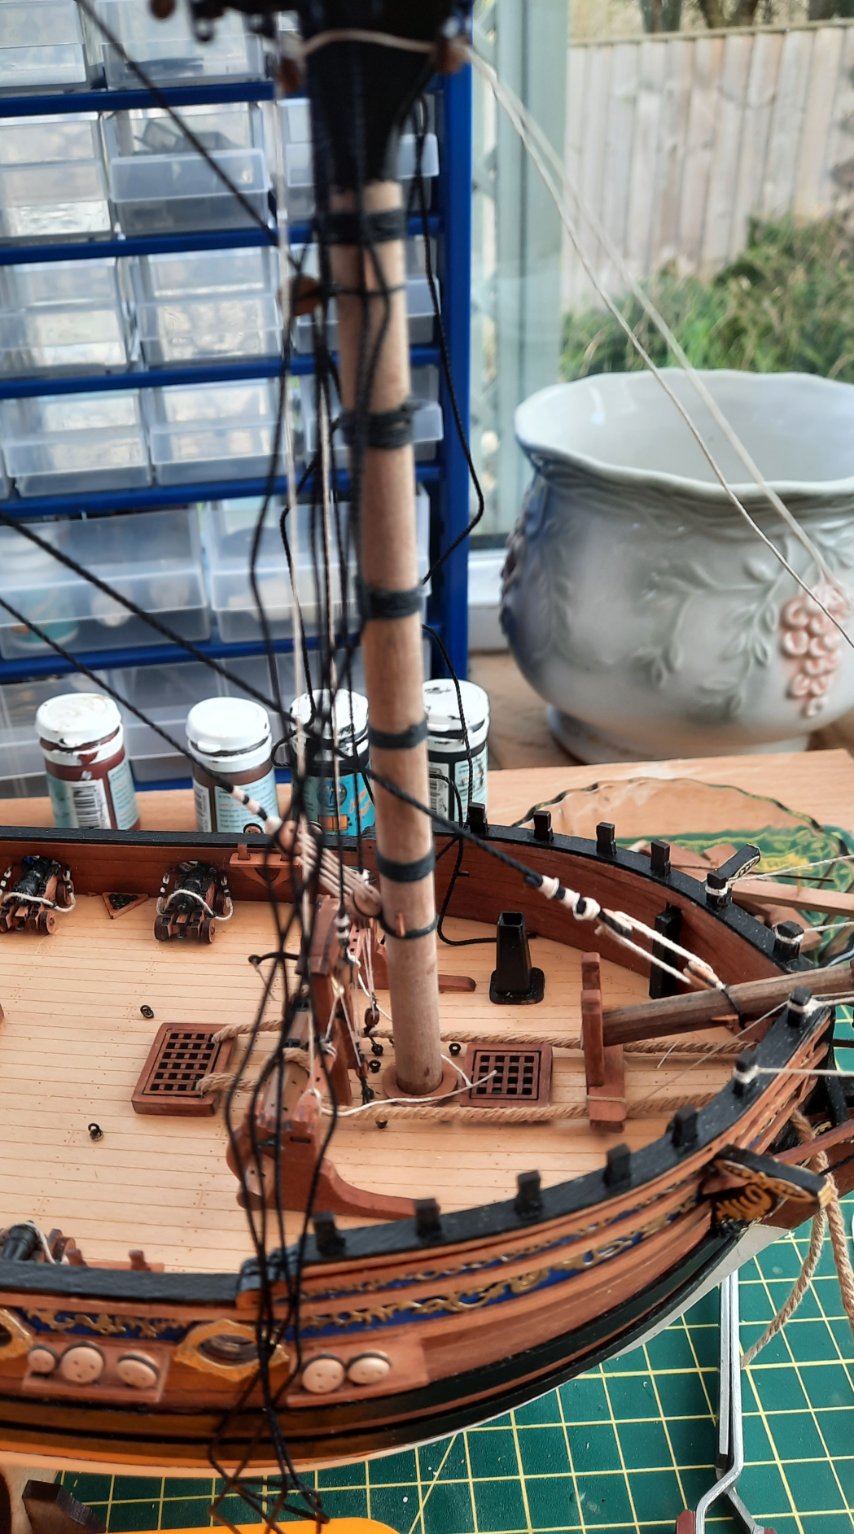
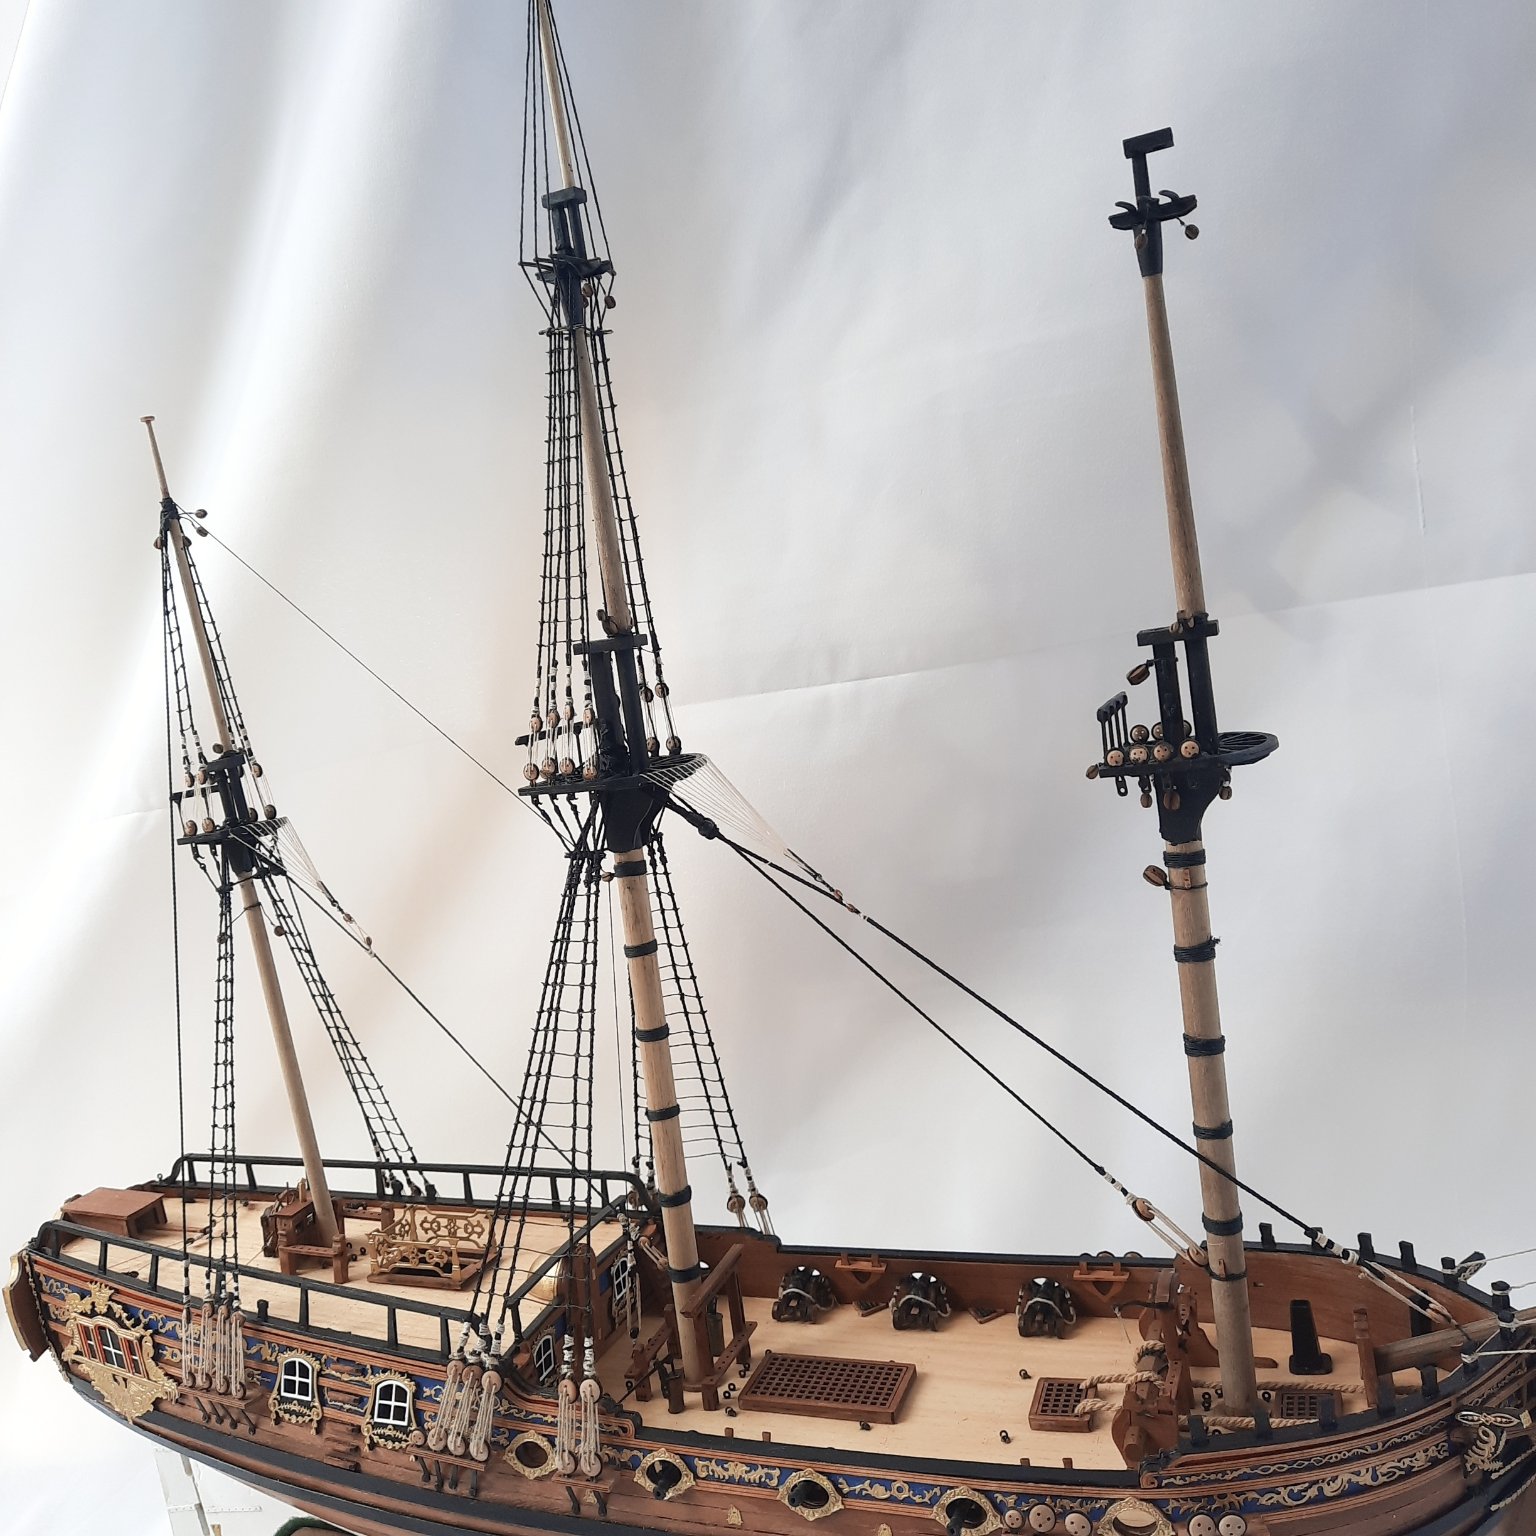
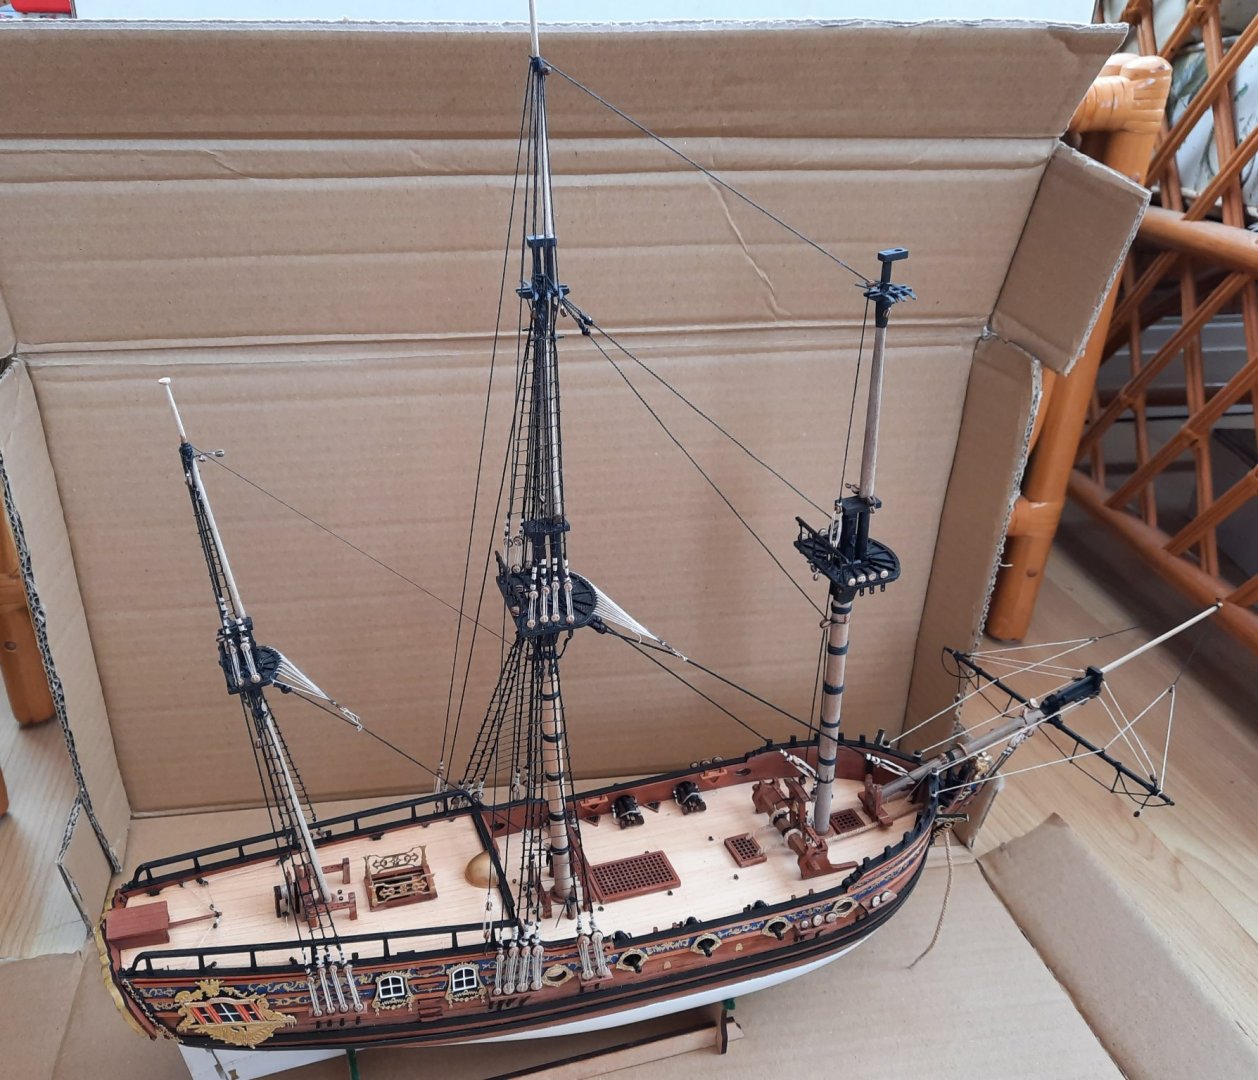
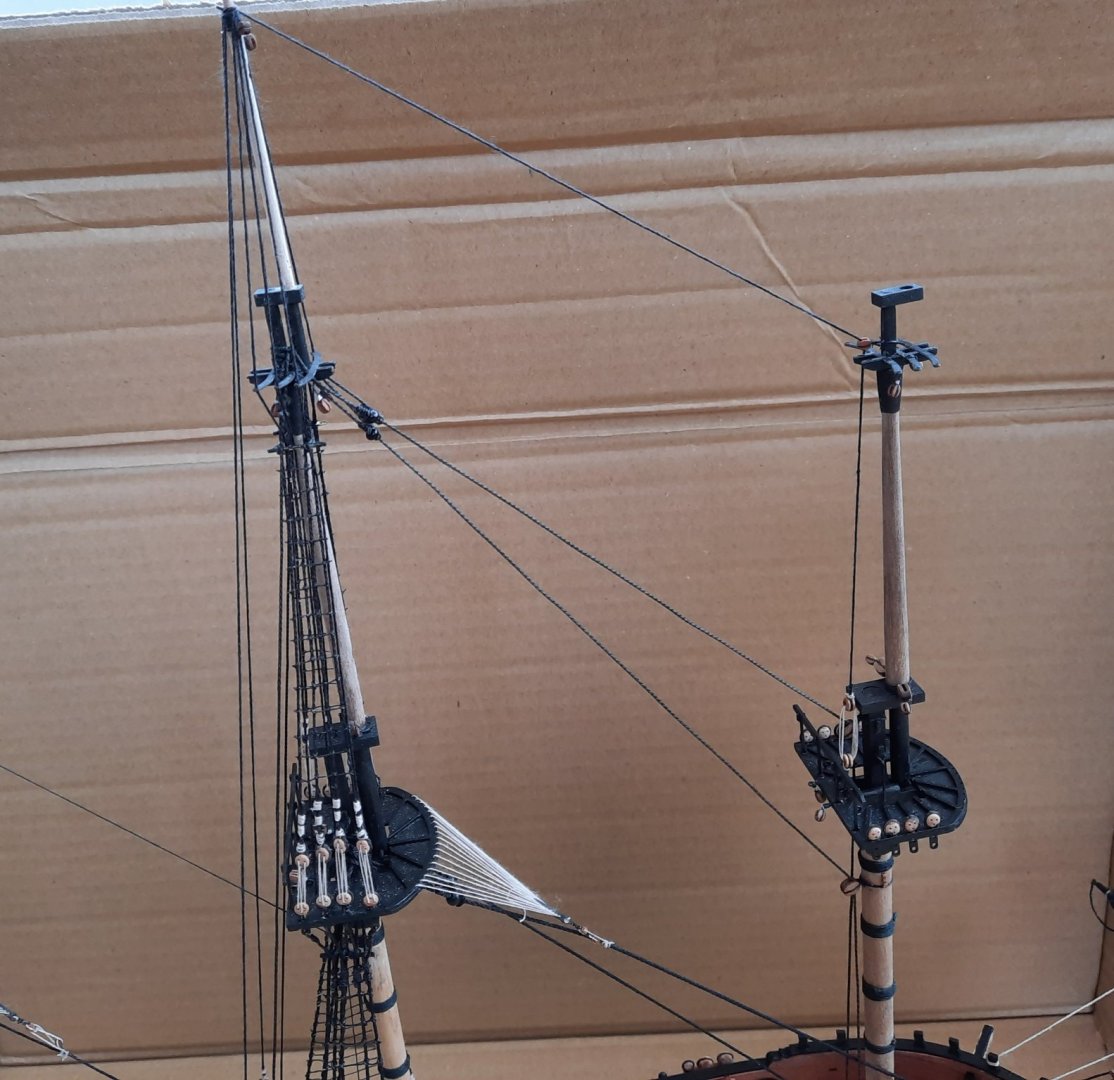
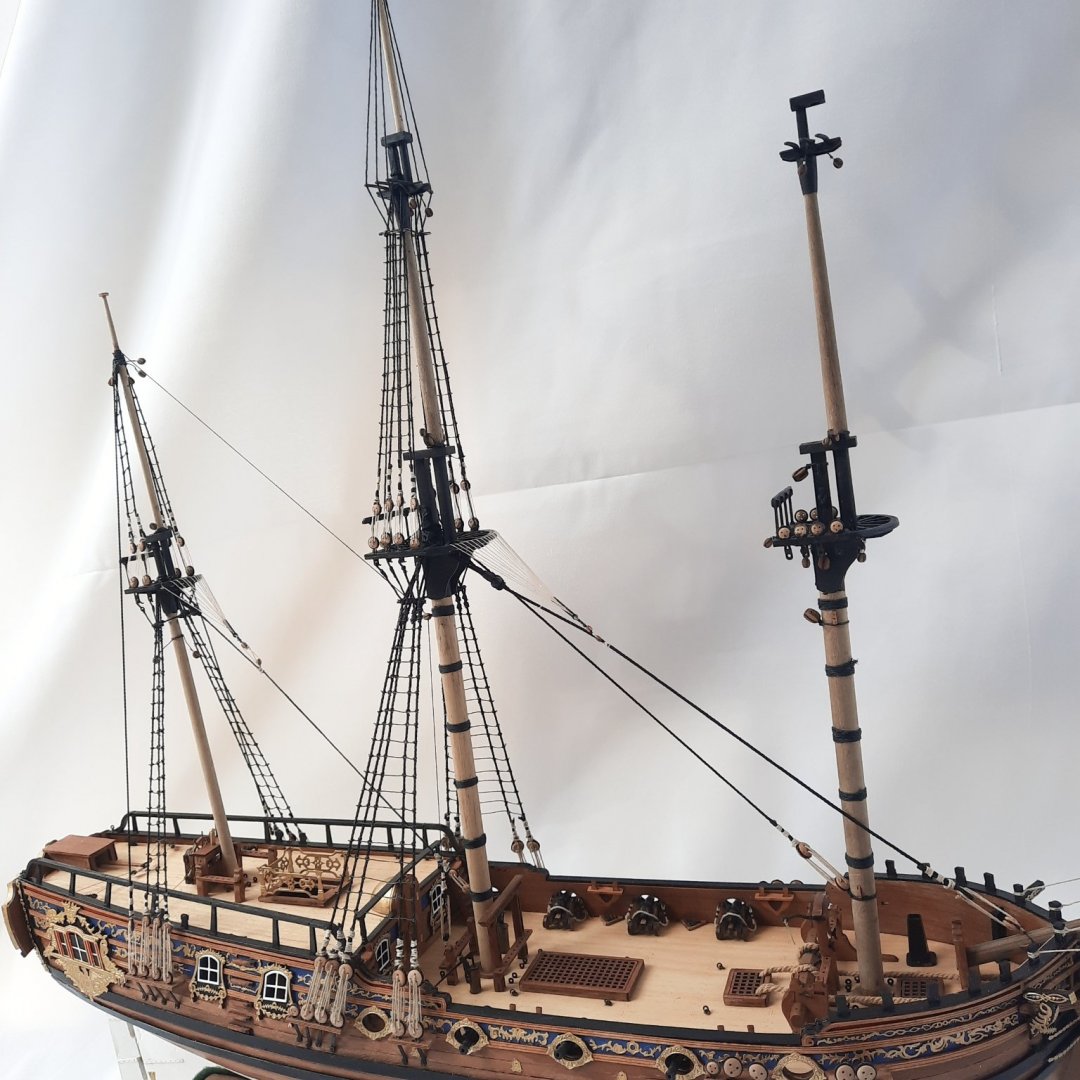
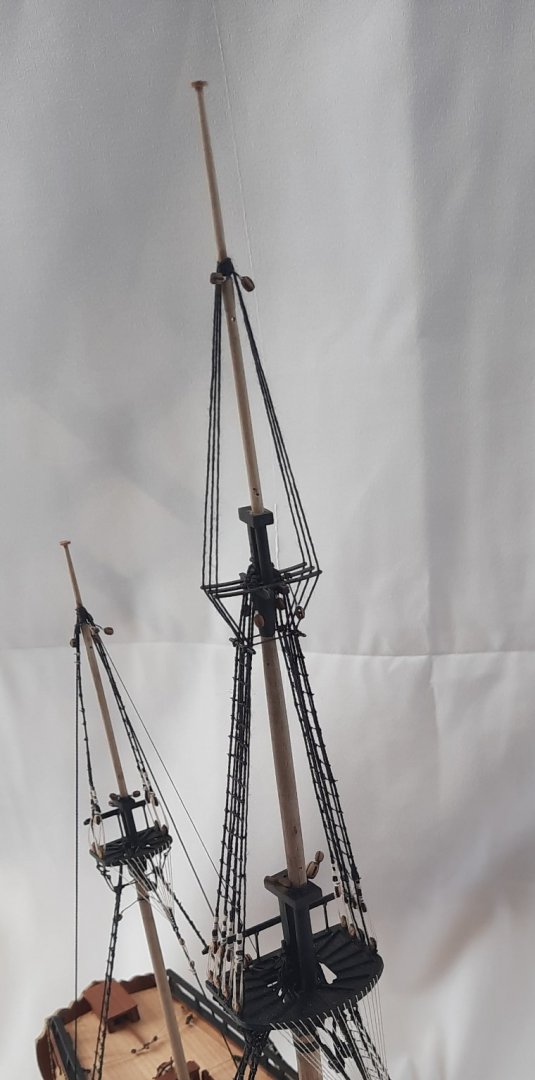
Today I completed adding the main topmast stay, main topmast preventor stay and the main topgallant mast stay. I also completed adding the two main mast back stays. I am now ready to add the all the shrouds, lanyards and ratlines to the foremast assembly. I expect this will take me around a week to complete before moving on to adding the various yards. I have attached a few pictures showing the current state of play. Experimenting with the Cutter Alert packing box as the backdrop Main topmast and main topgallant mast stays Main mast backstays Belaying of main mast stays I have also taken delivery of the Cutter Alert from Vanguard Models which I will start build in earnest once the DOK is complete. I think this will be a nice filler project as we all wait for the release of Chris's next design (Sphinx) in a few months time.
- 382 replies
-
- 9
-
-
- Vanguard Models
- Duchess of Kingston
- (and 1 more)
-
The Cutter Alert kit arrived safe and sound this morning. I have made a very quick video of the kit's contents which can be found on YouTube. Work will be slow to start with on this kit as I am currently rigging the Duchess of Kingston which should take me around another 4 to 6 weeks to complete.
- 160 replies
-
- 2
-
-
- Alert
- vanguard models
- (and 1 more)
-
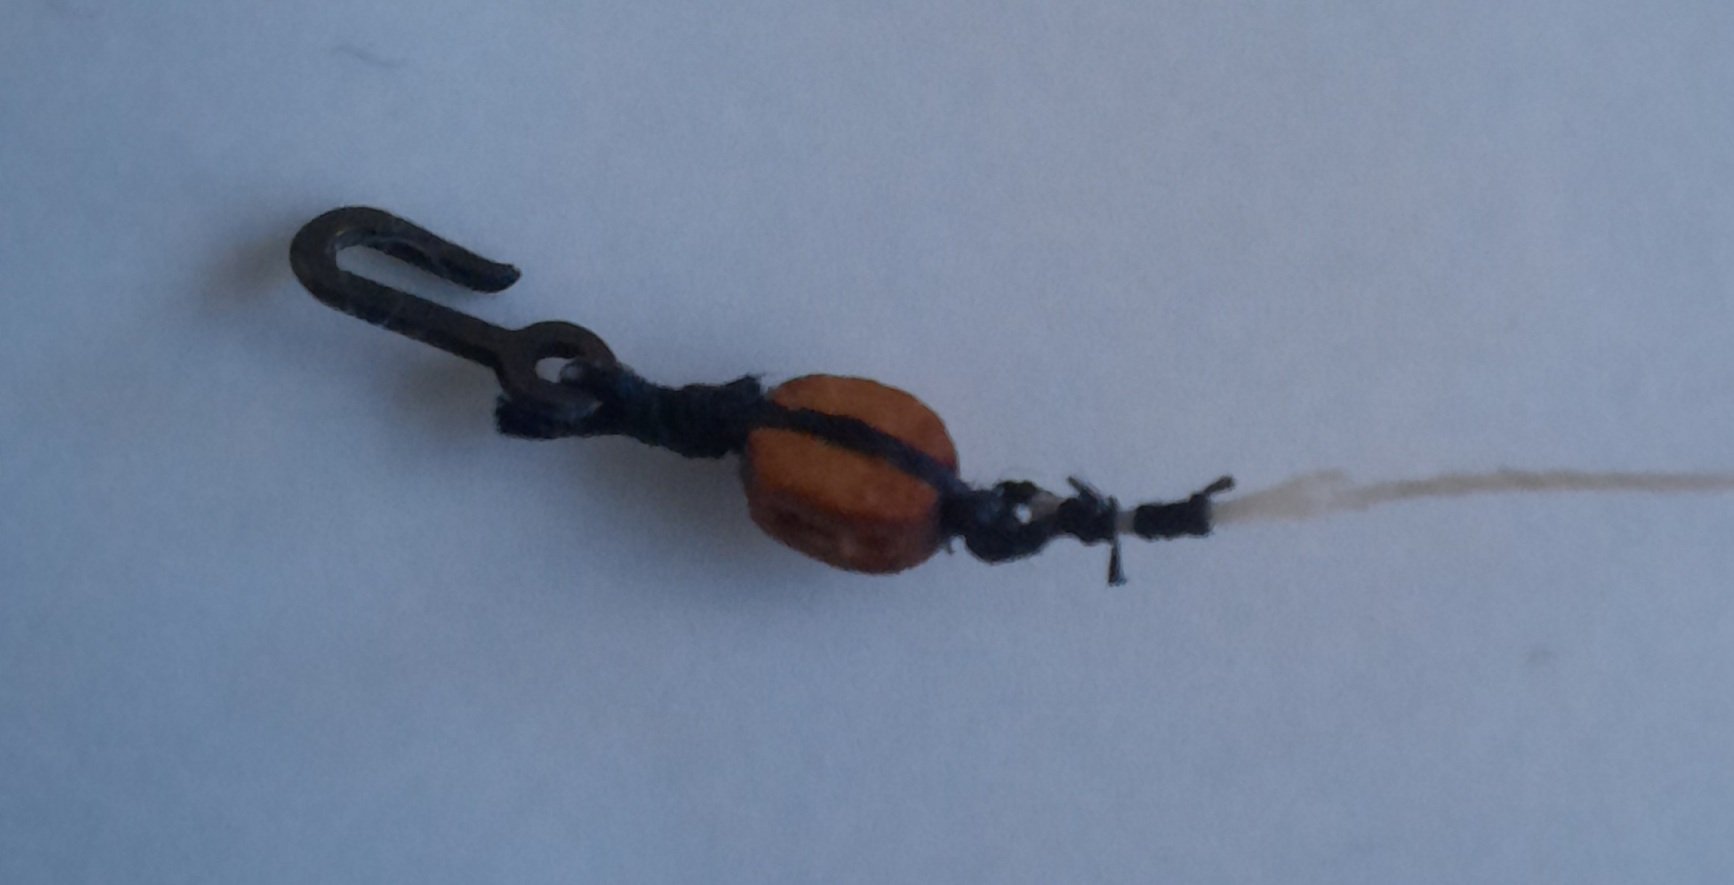
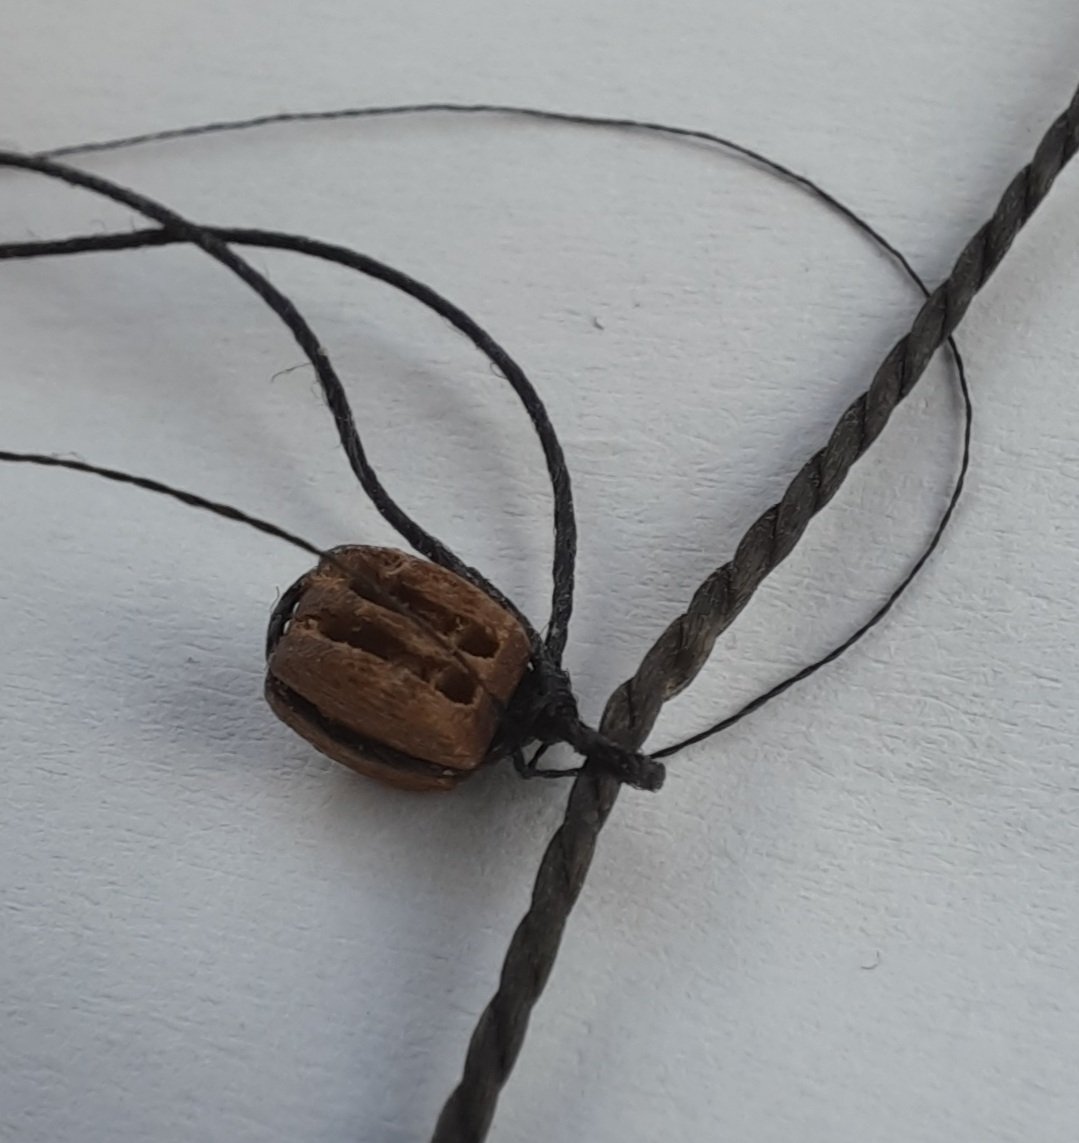
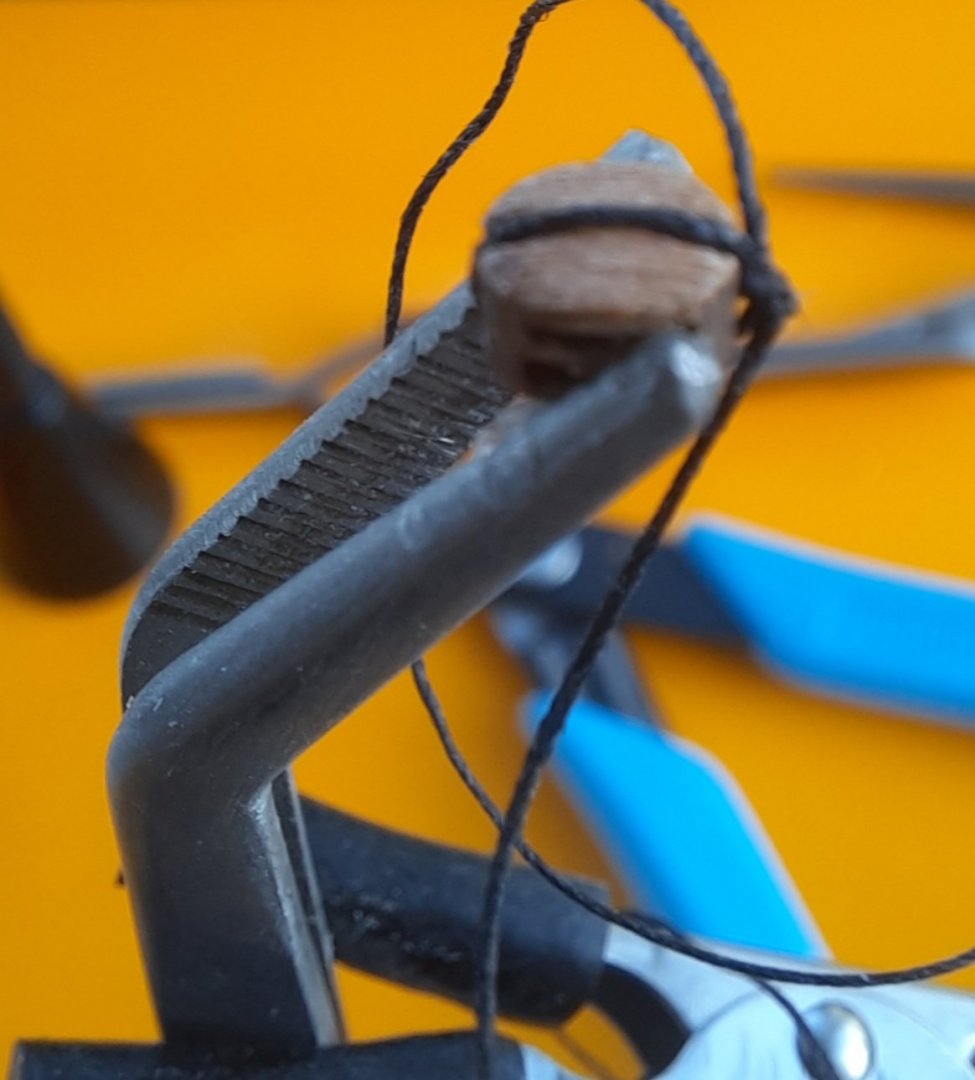
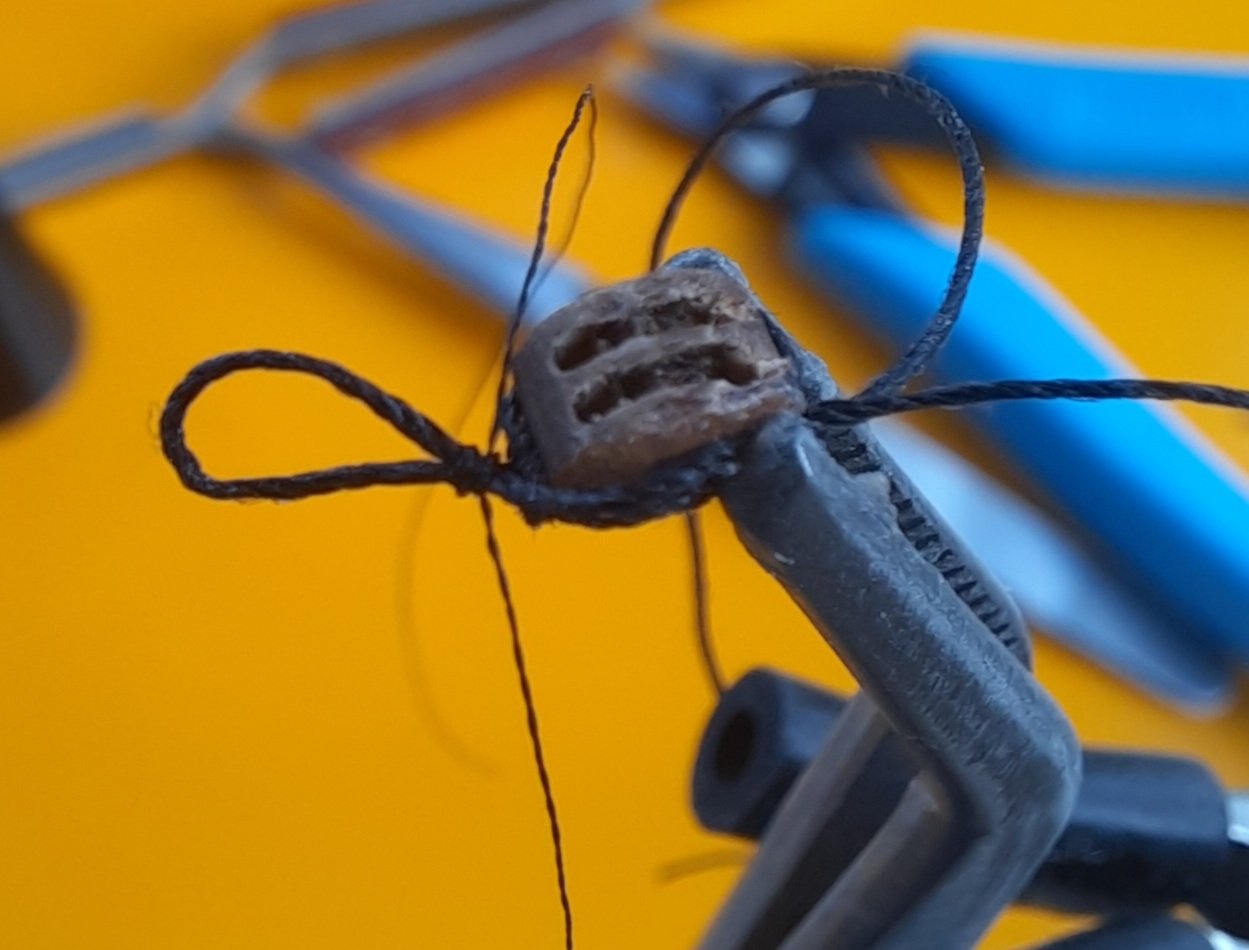
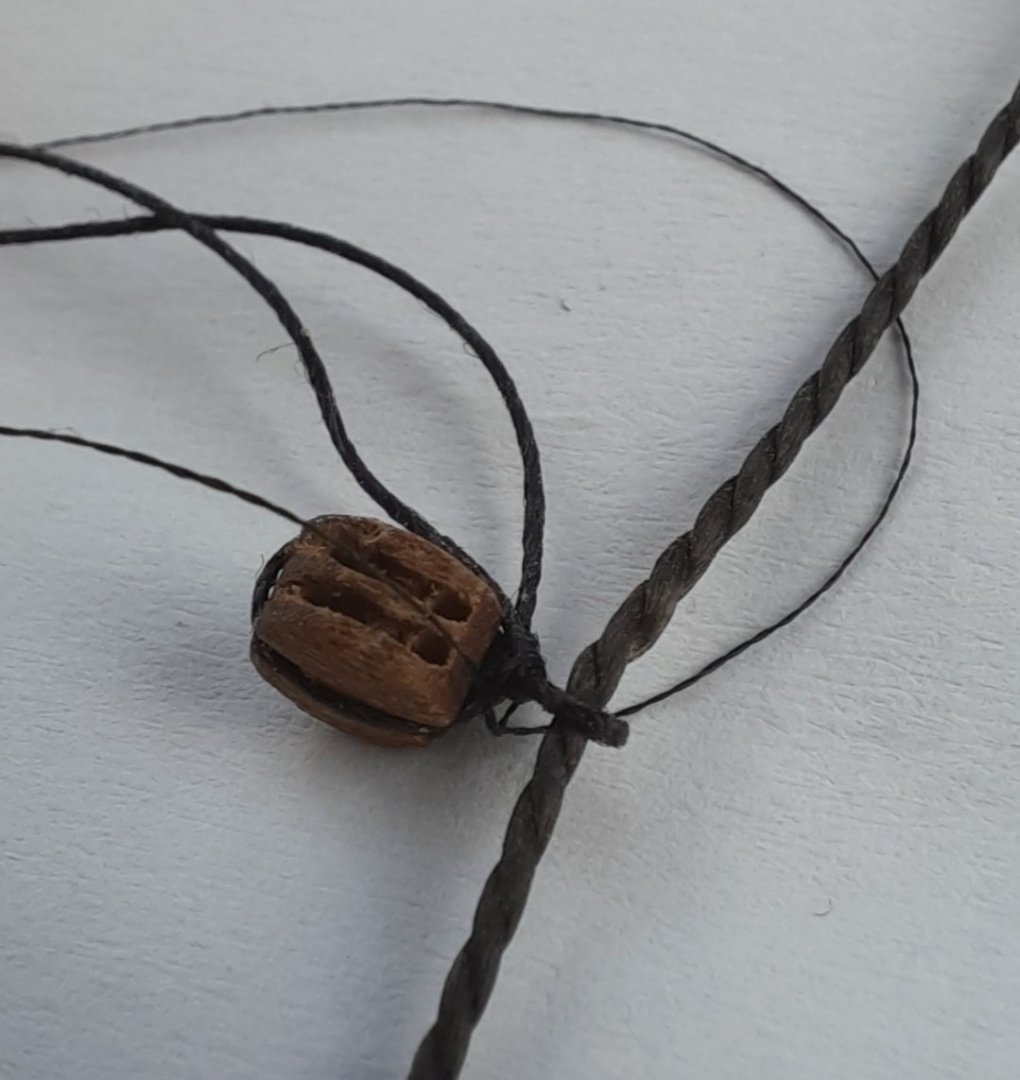
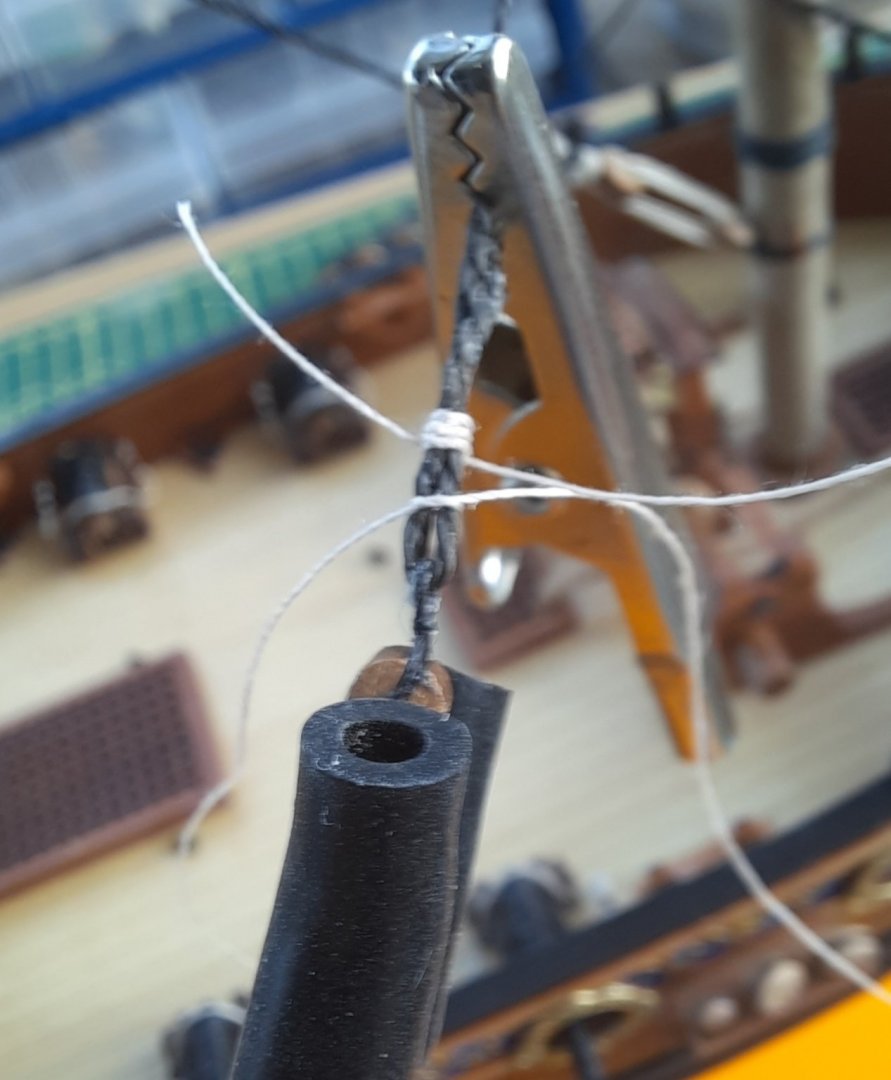
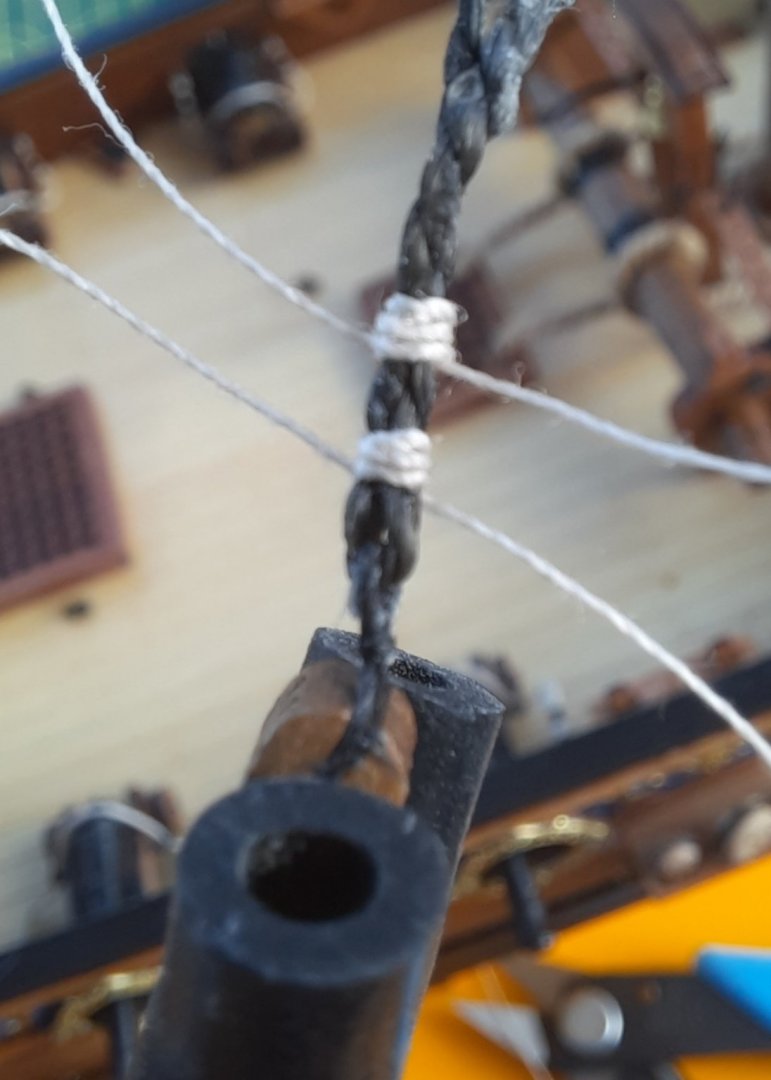
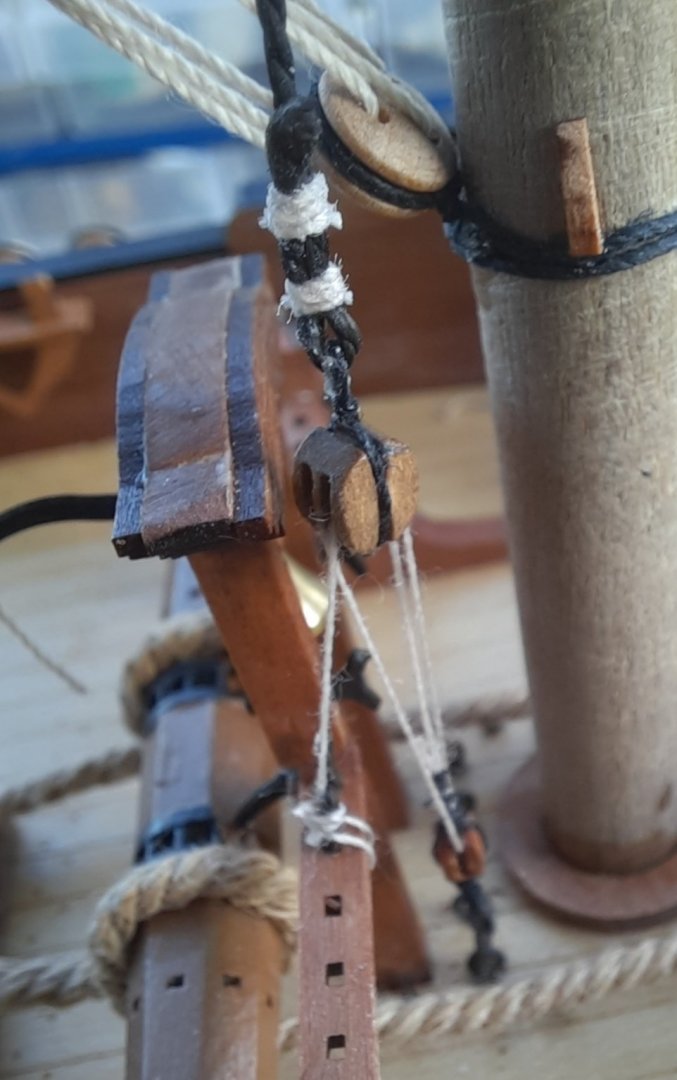
Work is progressing well on adding the main topmast stay and main topmast preventor stay. Each of these stays are secured at the deck using 1 x 4mm double block and 1 x 3mm single block arrangement. To start with the 3mm block requires a hook and loop at either end. A length of 0.1mm natural thread is then fed through the loop and secured. A picture of a completed arrangement is shown below. The 4mm double block requires a single loop which the stay line will be seized to. To start with I secured a length of 0.25mm black thread around the 4mm double block using a simple reef knot. Next I formed a loop, noting the loop is on the big side to start with With a spare length of 0.75mm black thread the loop is closed up to the right size and then a drop of ca gel is applied to the knot. The 4mm double block is then added to the main topmast stay line Once the 4mm block has been secured the 3mm block positioned and the natural thread is thread through one side of the 4mm double block Tension is then applied to all the lines as the thread is then passed through the 3mm block and then back through the 4mm double block. All the lines are then readjusted as necessary before finally belaying the 0.1mm natural thread.


- 382 replies
-
- 8
-
-
- Vanguard Models
- Duchess of Kingston
- (and 1 more)
-
I have now completed adding the shrouds and ratlines to the main mast. I did find it tricky to tie off the topgallant shroud line to the lower deadeyes but managed to do so eventually. The fore topgallant mast is missing in the following photo as I damaged it when rigging the main mast. Thankfully it was a fairly easy task to remove it. DOK Main topmast and topgallant shrouds Next on the agenda will be to add both the top main mast and topgallant mast backstays. After that I will move on to adding the main topmast stay, main topmast preventor stay and main topgallant mast stay before starting work adding all the shrouds the foremast assembly.

- 382 replies
-
- 12
-
-
- Vanguard Models
- Duchess of Kingston
- (and 1 more)
-
Thanks, I should have at looked at pictures closer. I can now see the pins.
- 355 replies
-
- 5
-
-
- vanguard models
- Sphinx
- (and 1 more)
-
I'm not I understand what you meant when you said "It is also pinned through the pear." Nice looking work bench. Mine gets a clean and tidy every couple of weeks, though I do try to be tidy but fail repeatedly 🤣
- 355 replies
-
- 4
-
-
- vanguard models
- Sphinx
- (and 1 more)
-
I really love your attention to detail. Very impressive.
-
Great build information, and very nice looking cannons.
- 355 replies
-
- 6
-
-
- vanguard models
- Sphinx
- (and 1 more)
-
I was experimenting with a photo editor this morning and decided to import a selection of my build photo's into a video. The build sequence goes a bit awry at times, due to an error when initially saving the photo's. I thought I would upload the video to YouTube, see link below. https://youtu.be/81qTGQlQoGA I would like to try to make some video's showing some of my build methods. As I only use my phone to take the pictures / videos I have to rely on the auto focus feature. I have found, at times, the phone does not focus where I would like. I have used the back of the plan drawings to try to overcome this issue which has helped to a degree. I have now bought a photo backdrop kit to try to improve the quality of my photos further. I have completed adding the top mast and top gallant mast shrouds to the starboard side and I only have two deadeye to fit to the port side main top mast shrouds before I add the ratlines. I will then add the two back stays. Once that is complete I will move on to adding the foremast shrouds, ratlines and stays. Once that is complete all that remains is adding the various yards. Fingers crossed I will complete this model by the end of the month. I have the Cutter Alert waiting in the wings which will fill the void until the Sphinx kit is released.
- 382 replies
-
- 4
-
-
- Vanguard Models
- Duchess of Kingston
- (and 1 more)
-
Nice work. It will not long before you start adding the rigging.
- 201 replies
-
- 1
-
-
- Duchess of Kingston
- Vanguard Models
- (and 1 more)
-
Great work, and I'm glad my method has helped you. I have learnt so much from your build which has greatly improved my rigging skills. Thanks Glenn
- 725 replies
-
- 1
-
-
- vanguard models
- speedy
- (and 1 more)
-
Hello John. I had noticed that when I started to add the next lanyard. Many thanks and a great spot. It has been corrected.
-
Thanks Theodosius. I did apply some tension to the lines as they were rigged. Before adding the final securing knot I pulled the lines in turn to get additional tension. Very similar to tensioning lanyards, just a few more line to pull.
-
Hopefully the Alert build time will fit in perfectly with the Sphinx release date, no pressure Jim😃. I am planning a slightly differerent build sequence for the Alert and I will also use the Alert to refine and improve my modelling skills.
- 160 replies
-
- 2
-
-
- Alert
- vanguard models
- (and 1 more)
-
Thanks Rusty, the shroud work is slow progress but I think it will be completed in the next couple of weeks.