HOLIDAY DONATION DRIVE - SUPPORT MSW - DO YOUR PART TO KEEP THIS GREAT FORUM GOING! (89 donations so far out of 49,000 members - C'mon guys!)
×


MrBlueJacket
-
Posts
1,312 -
Joined
-
Last visited
Content Type
Profiles
Forums
Gallery
Events
Everything posted by MrBlueJacket
-
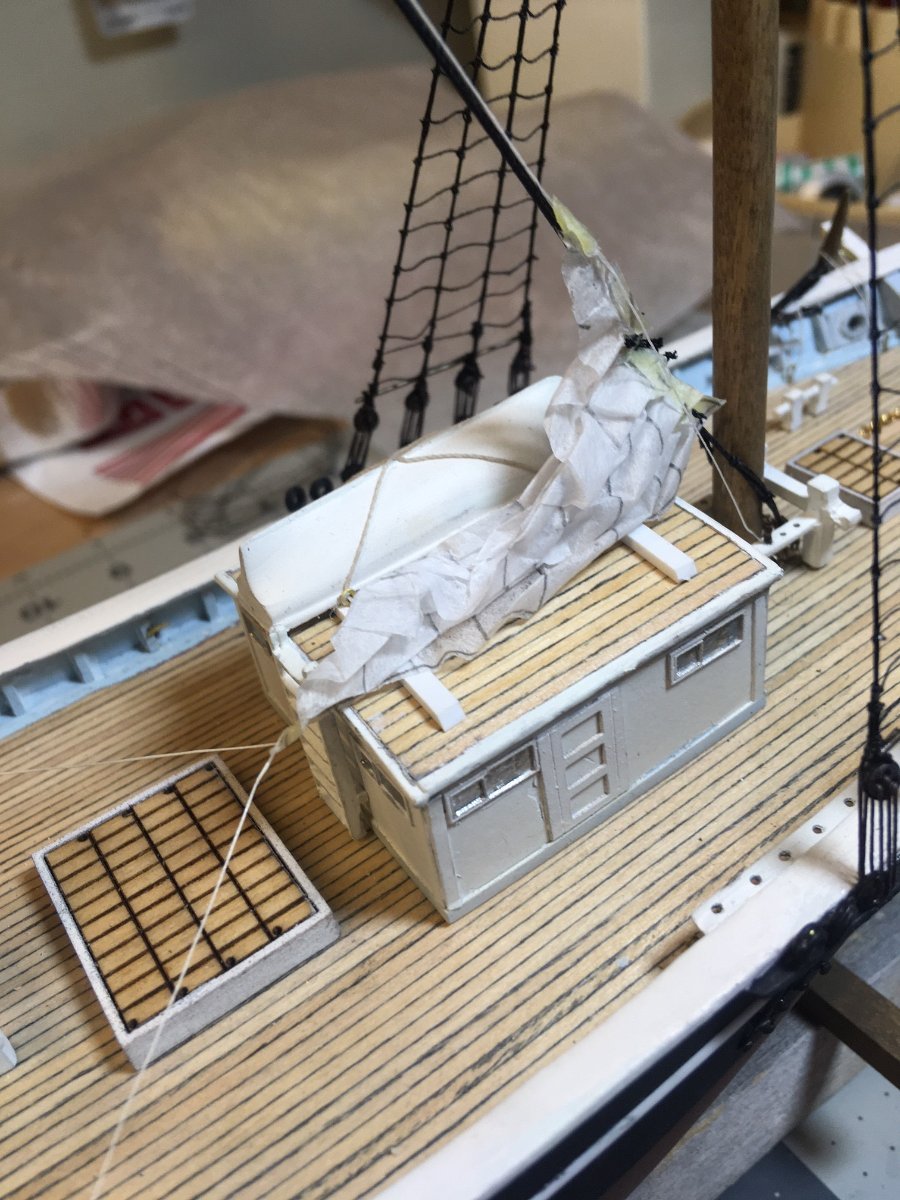
 Furling the sail to my satisfaction took about 1/2 hour. I'm happy with the way it looks. Now to do 4 more, then the jibs.
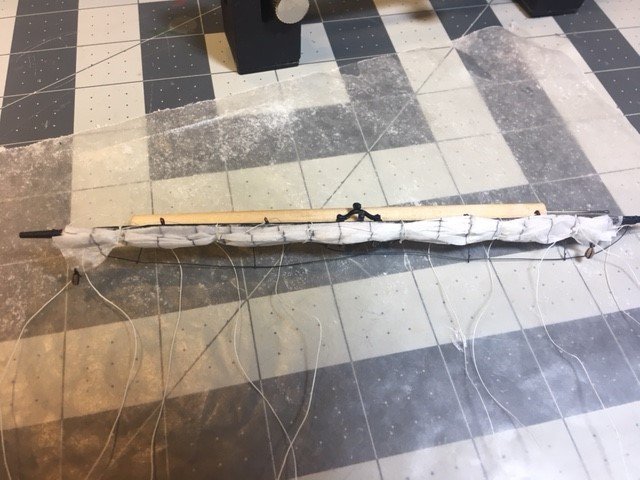
- 121 replies
-
- 3
-

-
- Newsboy
- Model Shipways
- (and 2 more)
-
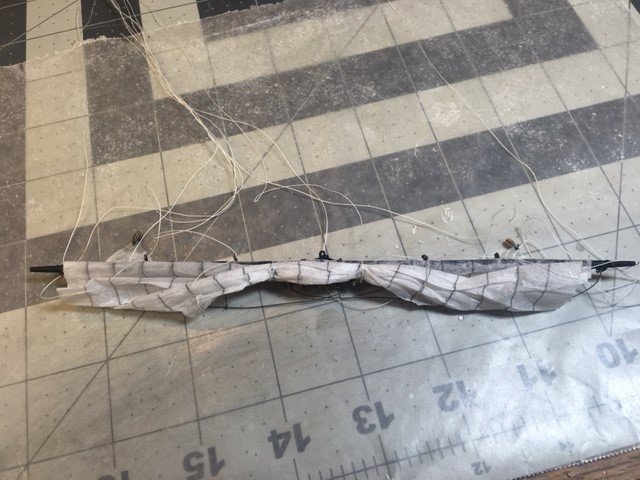
Starting to furl the sail. You have to dampen (not soak) the silkspan to get it to co-operate.
- 121 replies
-
- 3
-
-
- Newsboy
- Model Shipways
- (and 2 more)
-
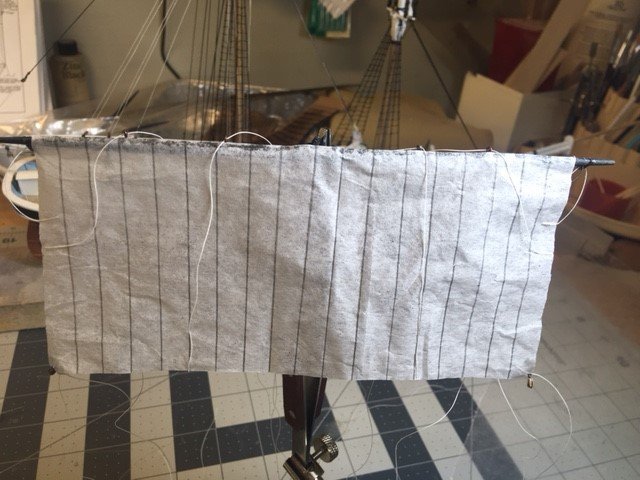
Getting ready to furl the sail. You can see the leech and bunt lines going up through the bullseyes on the top of the yard. Hard to see, but the reef line goes through a block at the end of the yard.
- 121 replies
-
- 2
-
-
- Newsboy
- Model Shipways
- (and 2 more)
-
Yes, the plans are done to the proper perspective. Nic
-
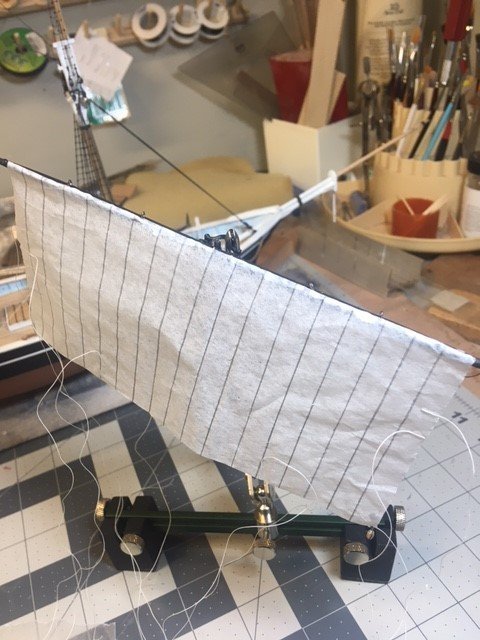
All the lines and blocks attached. now it is time to glue the sail to the yard. I'm using Aleen's Tacky glue, which is like Elmer's on steroids. I lay a thin bead at the top of the sail. Next I place it on the yard, which is held up with an alligator clip stand (3rd hand) At this scale, jackstays would be parctically invisible.
- 121 replies
-
- 7
-
-
- Newsboy
- Model Shipways
- (and 2 more)
-
Did some work on the main fore course this weekend. Attached the leech, bunt, and reef lines. Then I will need to turn it over to do the clew and tack lines. Then need to attach the sheet blocks to the corners (reinforced with a bit of CA)
- 121 replies
-
- 5
-
-
- Newsboy
- Model Shipways
- (and 2 more)
-
Nice work!
-
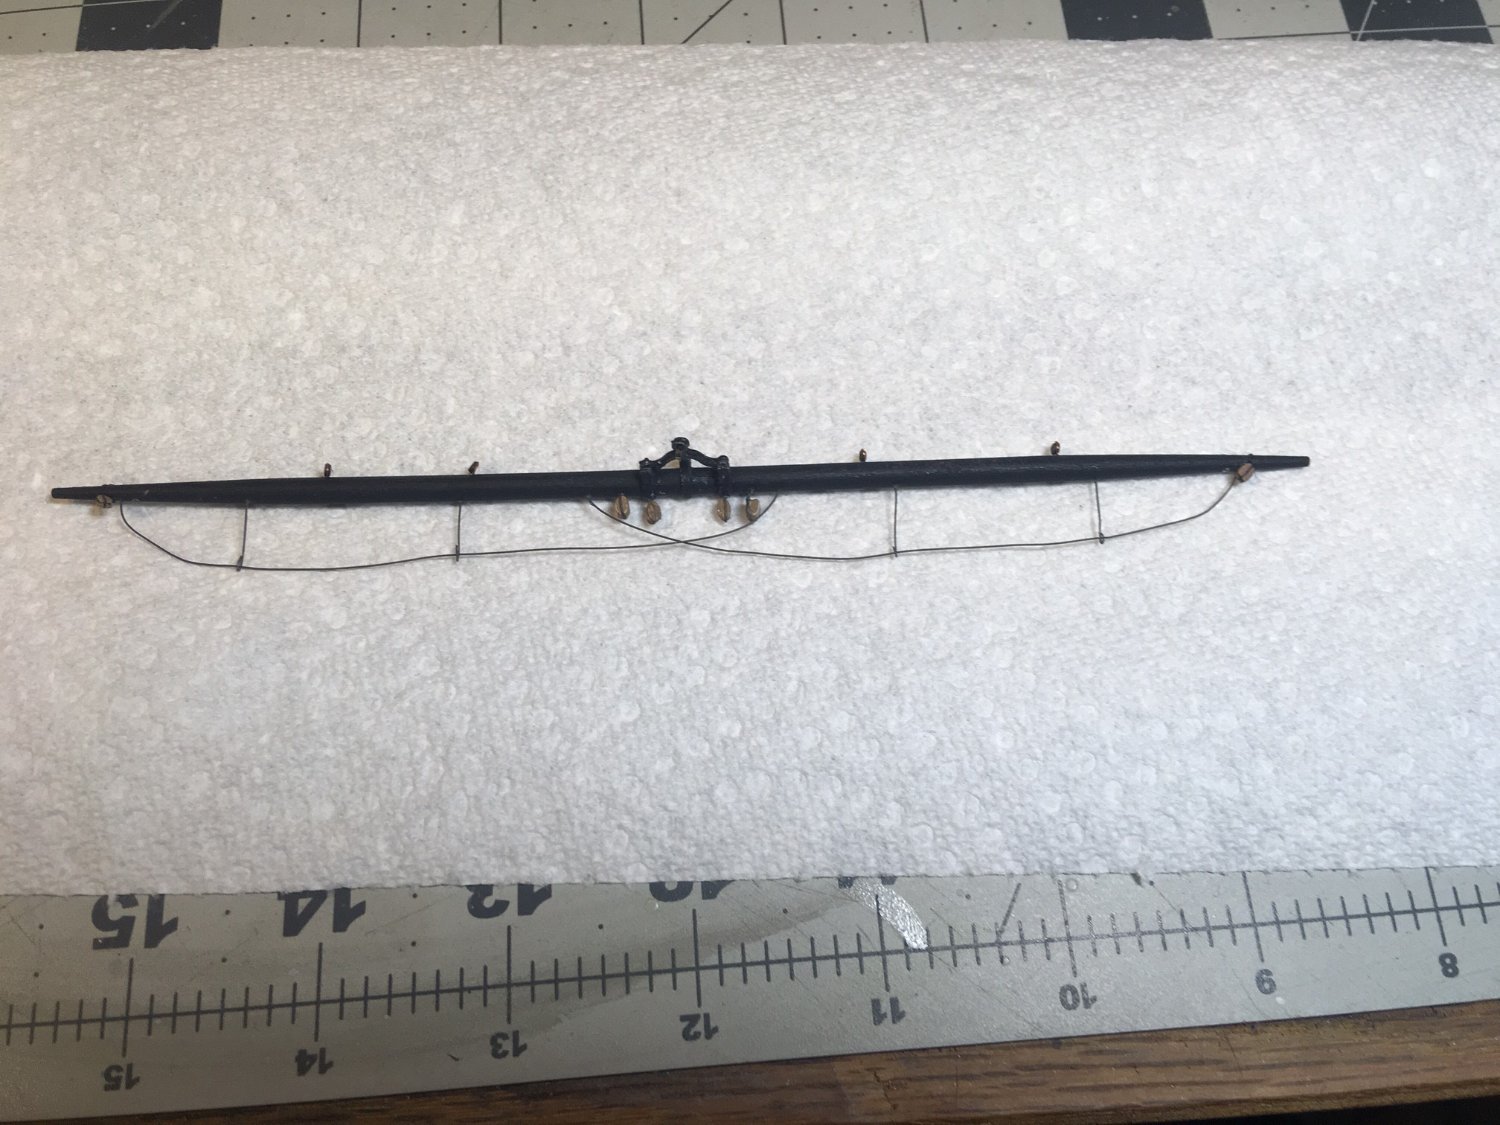
Lower yard finished and ready to attach the sail. Footropes are .010 wire.

- 121 replies
-
- 4
-
-
- Newsboy
- Model Shipways
- (and 2 more)
-
Here's the blocks for the leech and bunt lines And the tiny 1/16" OD bullseyes for the same lines.

- 121 replies
-
- 2
-
-
- Newsboy
- Model Shipways
- (and 2 more)
-
Next NRG Conference
MrBlueJacket replied to YankeeClipper's topic in NAUTICAL RESEARCH GUILD - News & Information
In the Northeast we hold an annual joint clubs meeting at the same place and time every year, and it draws 100 modelers. Always the last Saturday in April, at the Port & Starboard convention center in New London CT. Here is a video of this year's conference: So the idea of a rotating but repeat location is very attractive.- 20 replies
-
- 11
-
-

-
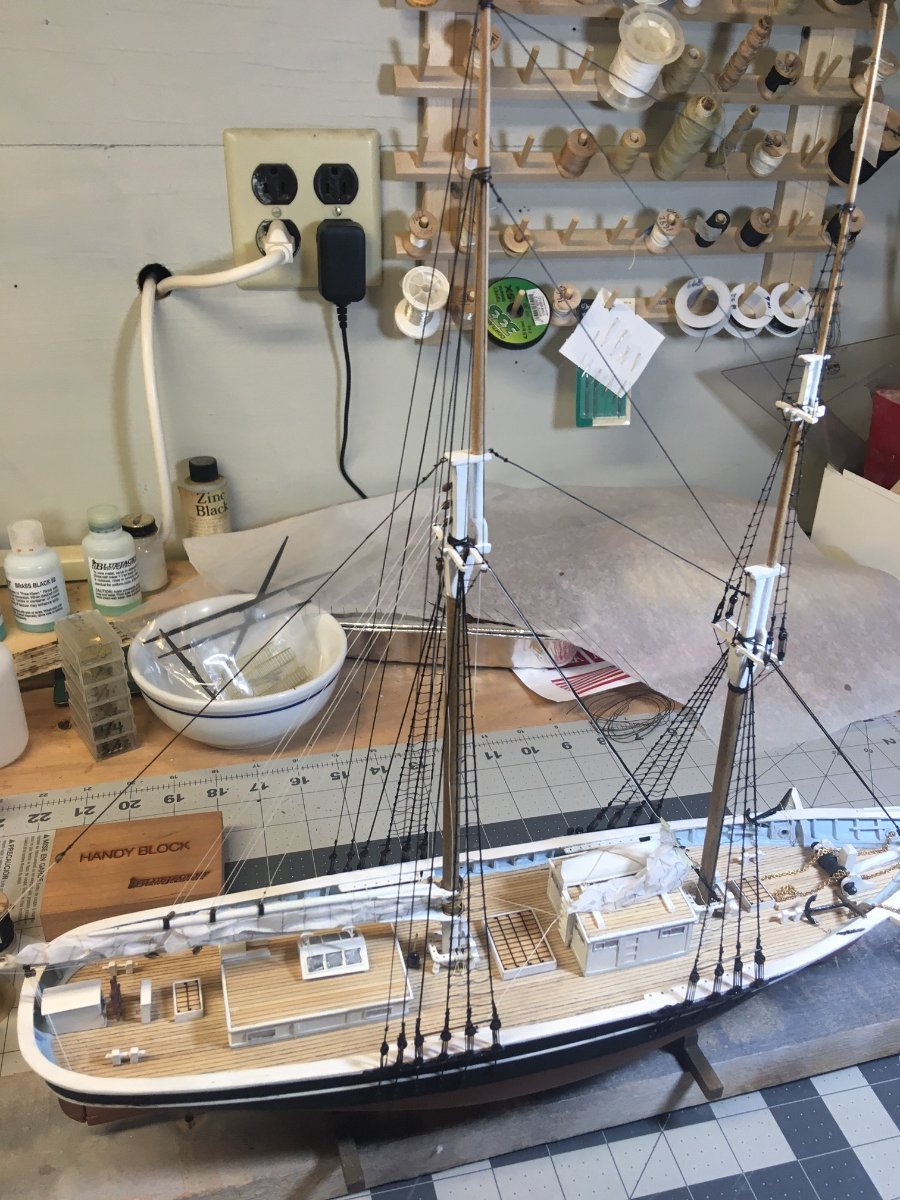
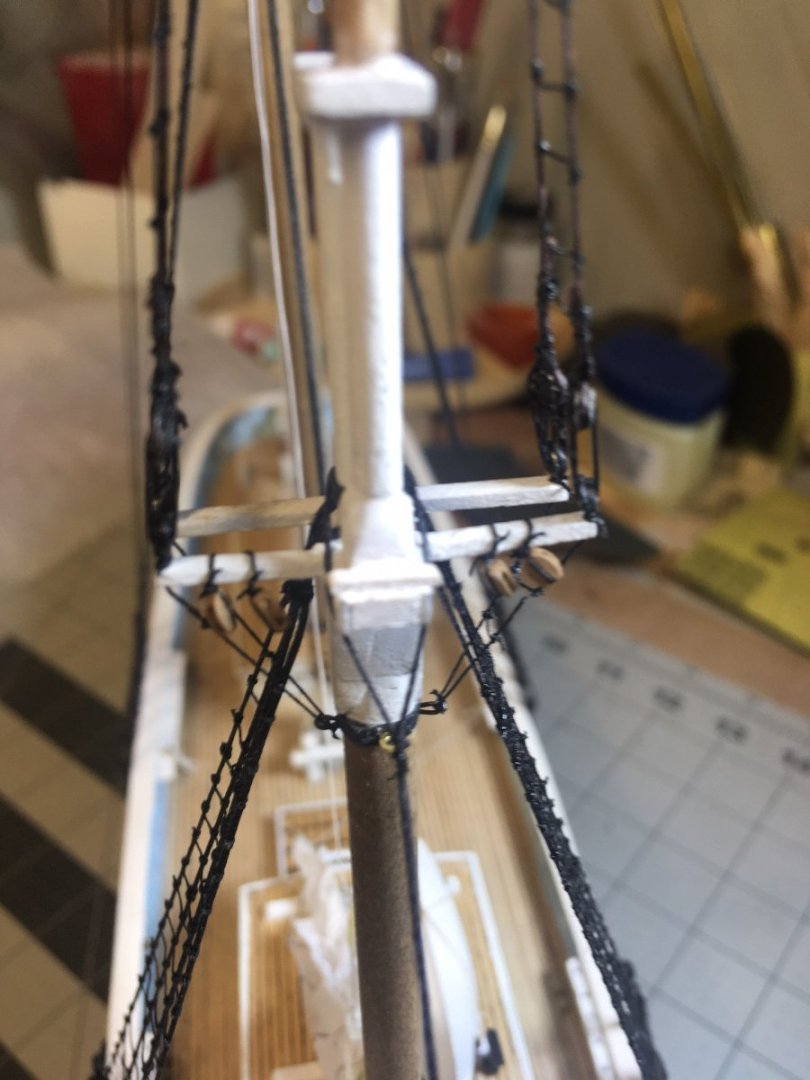
With that sail in place, I can now install all the main stays. The lower one, installed earlier, is .025" thread, doubled. The next one up is .020 and above that, .015 and the last two are .010 line.

- 121 replies
-
- 3
-
-
- Newsboy
- Model Shipways
- (and 2 more)
-
Over the weekend, furled the sail, added the topping lift, throat and peak halyards, and a few other things.
- 121 replies
-
- 4
-
-
- Newsboy
- Model Shipways
- (and 2 more)
-
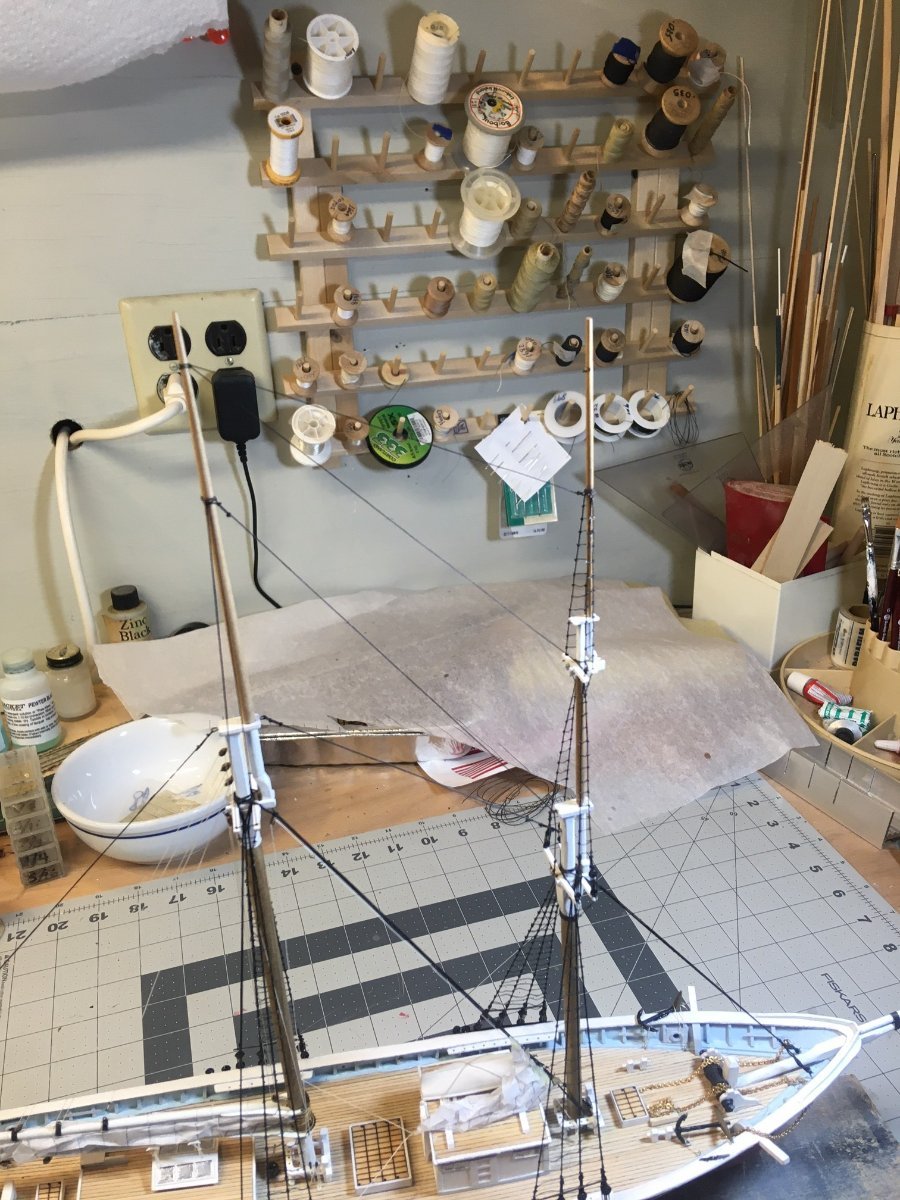
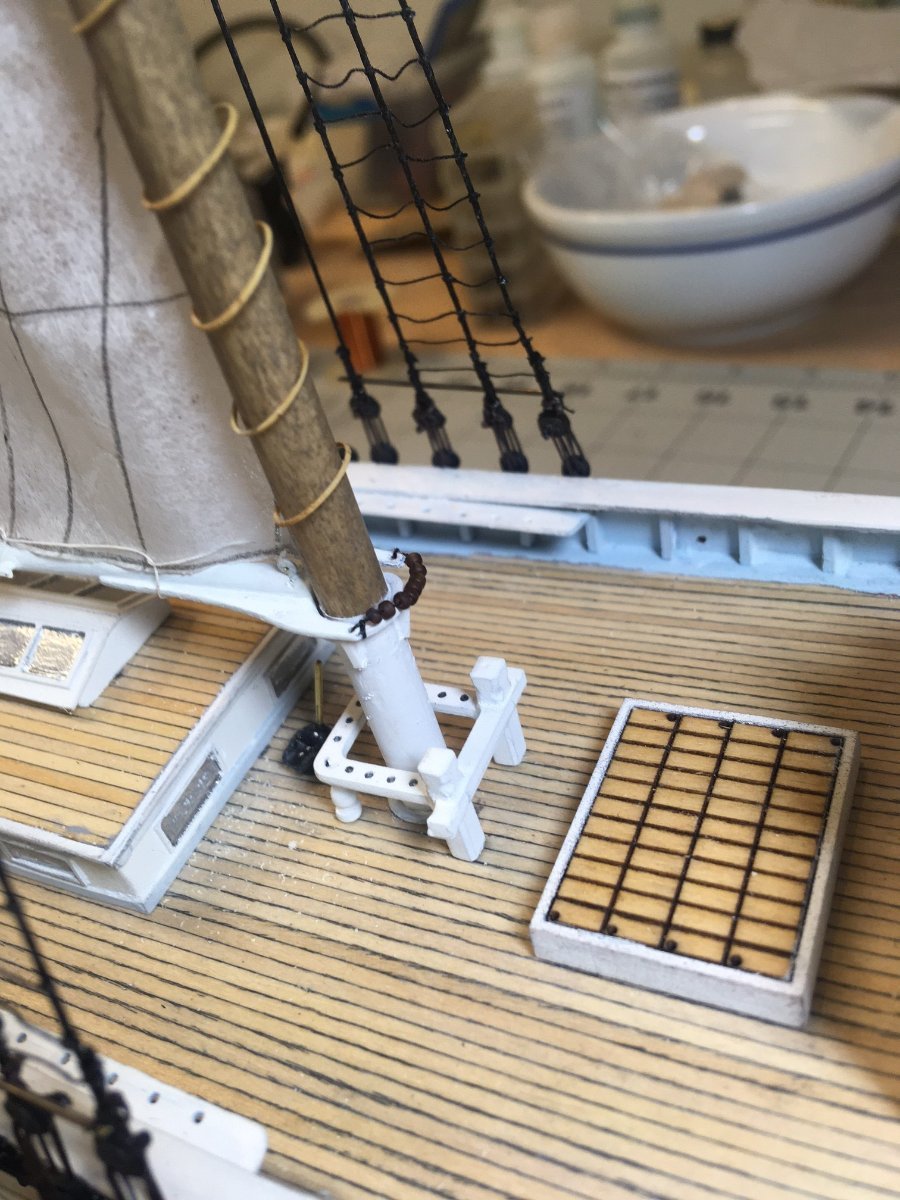
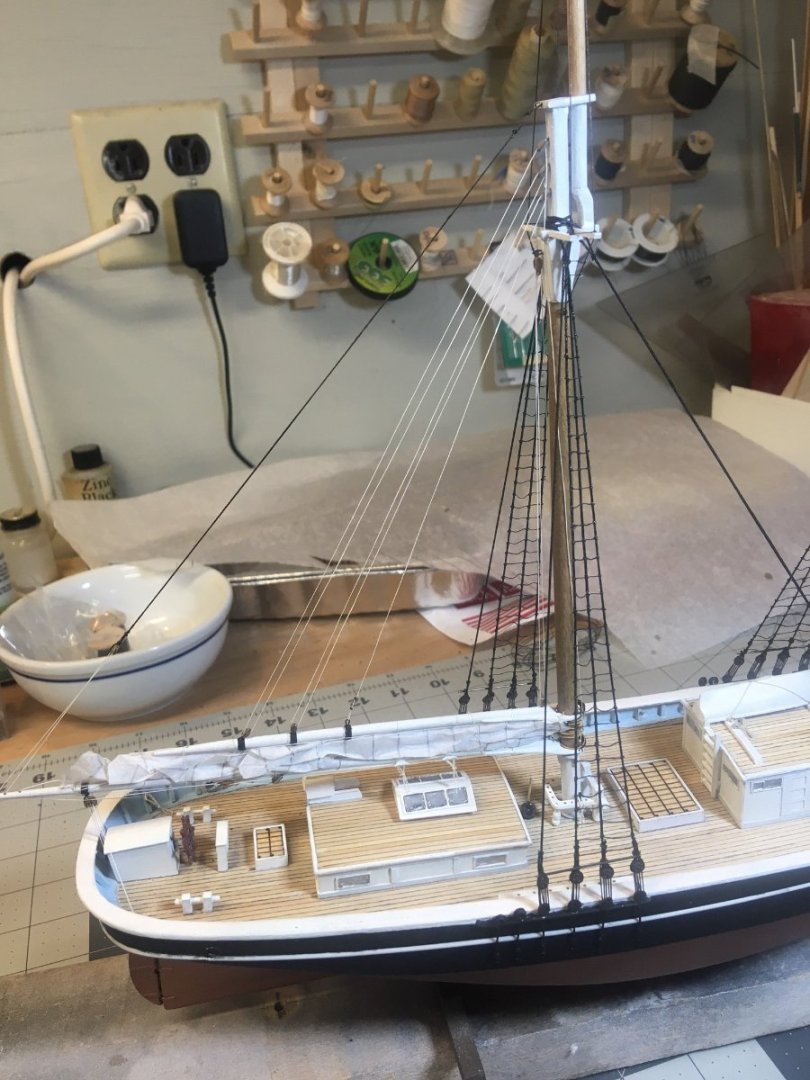
Finished the mast hoops and strung the parrel beads to the boom and gaff. These tiny beads came from a craft store (many years ago - I don't remember which one)

- 121 replies
-
- 3
-
-
- Newsboy
- Model Shipways
- (and 2 more)
-
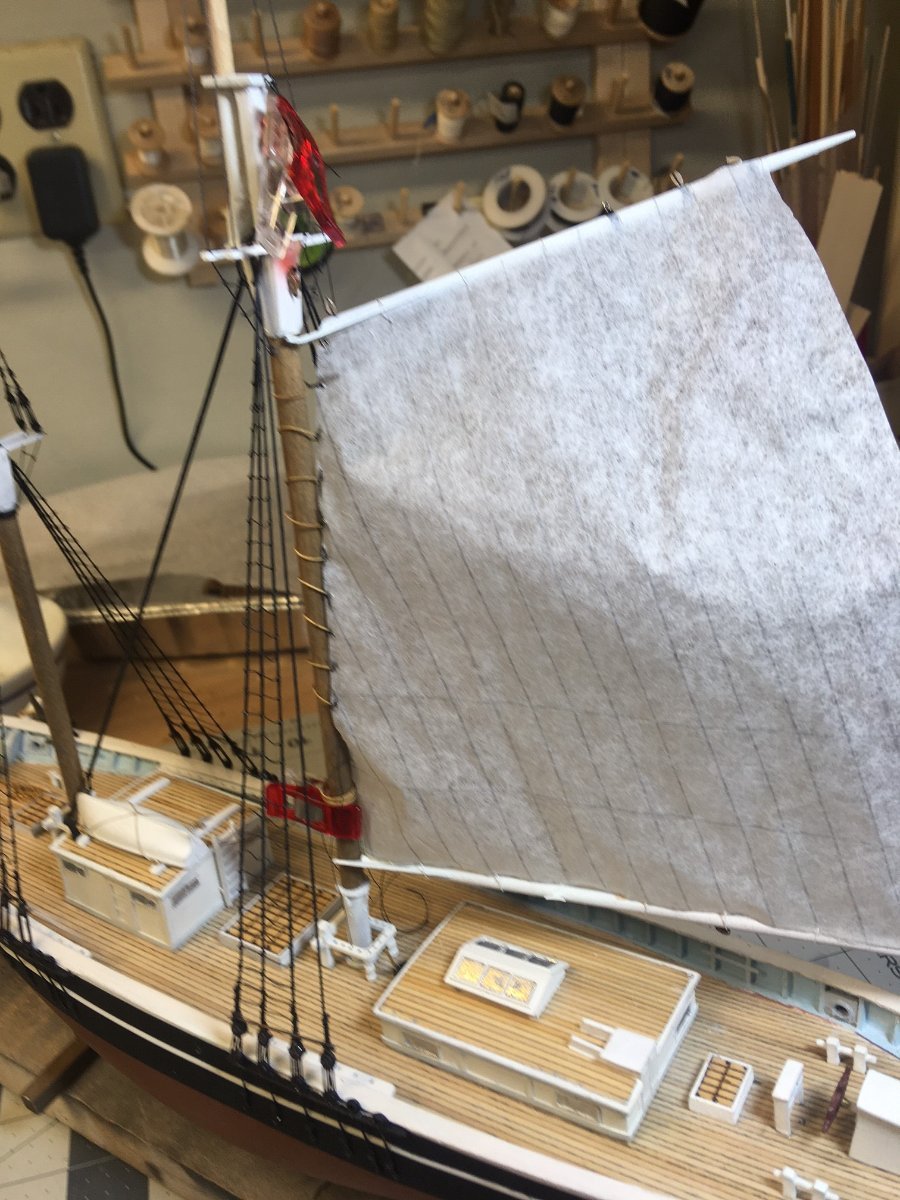
laced the sail to the boom and gaff, then started to attach it to the mast hoops.

- 121 replies
-
- 4
-
-
- Newsboy
- Model Shipways
- (and 2 more)
-
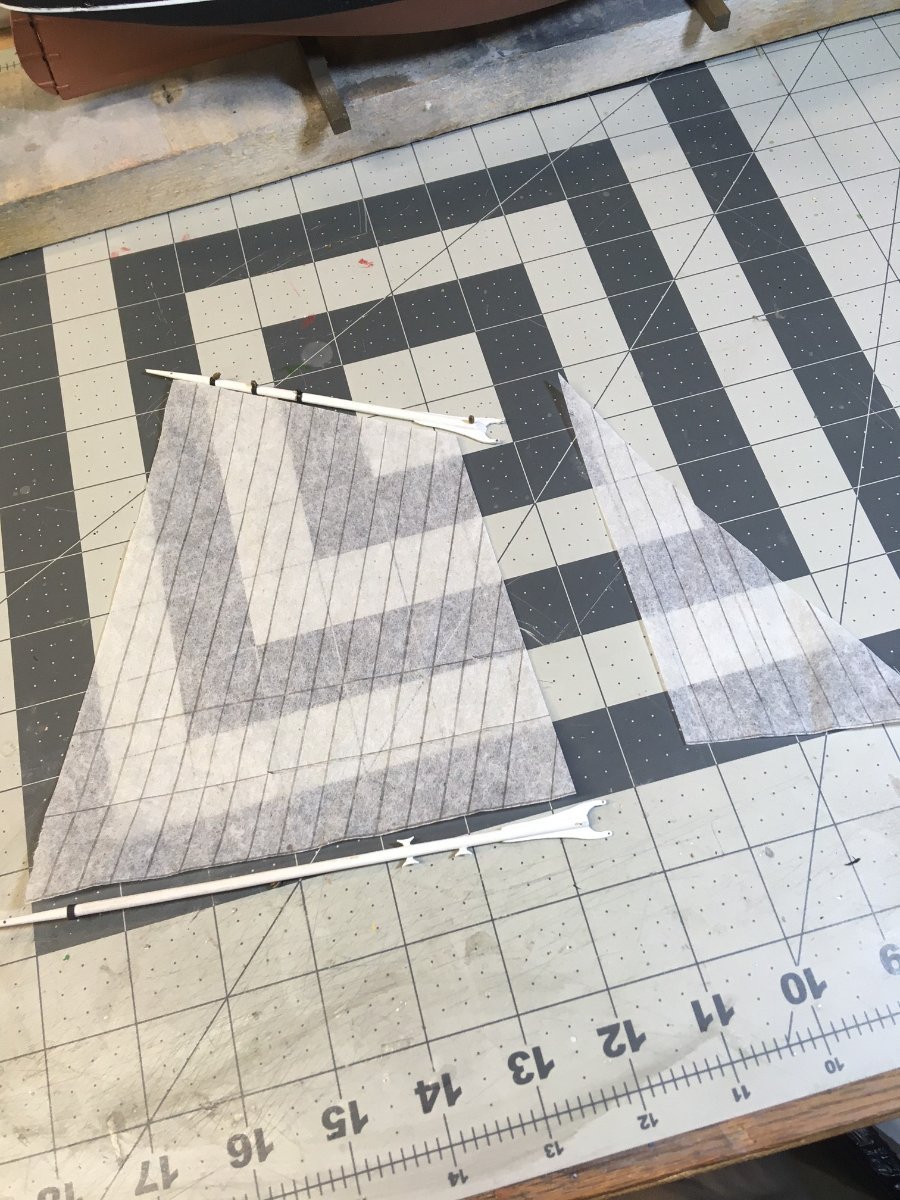
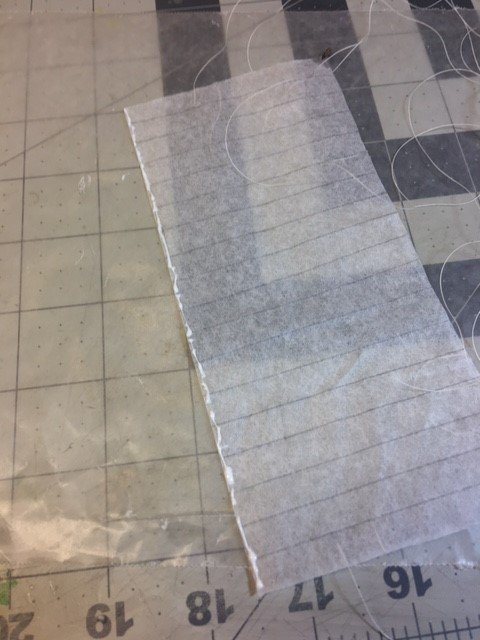
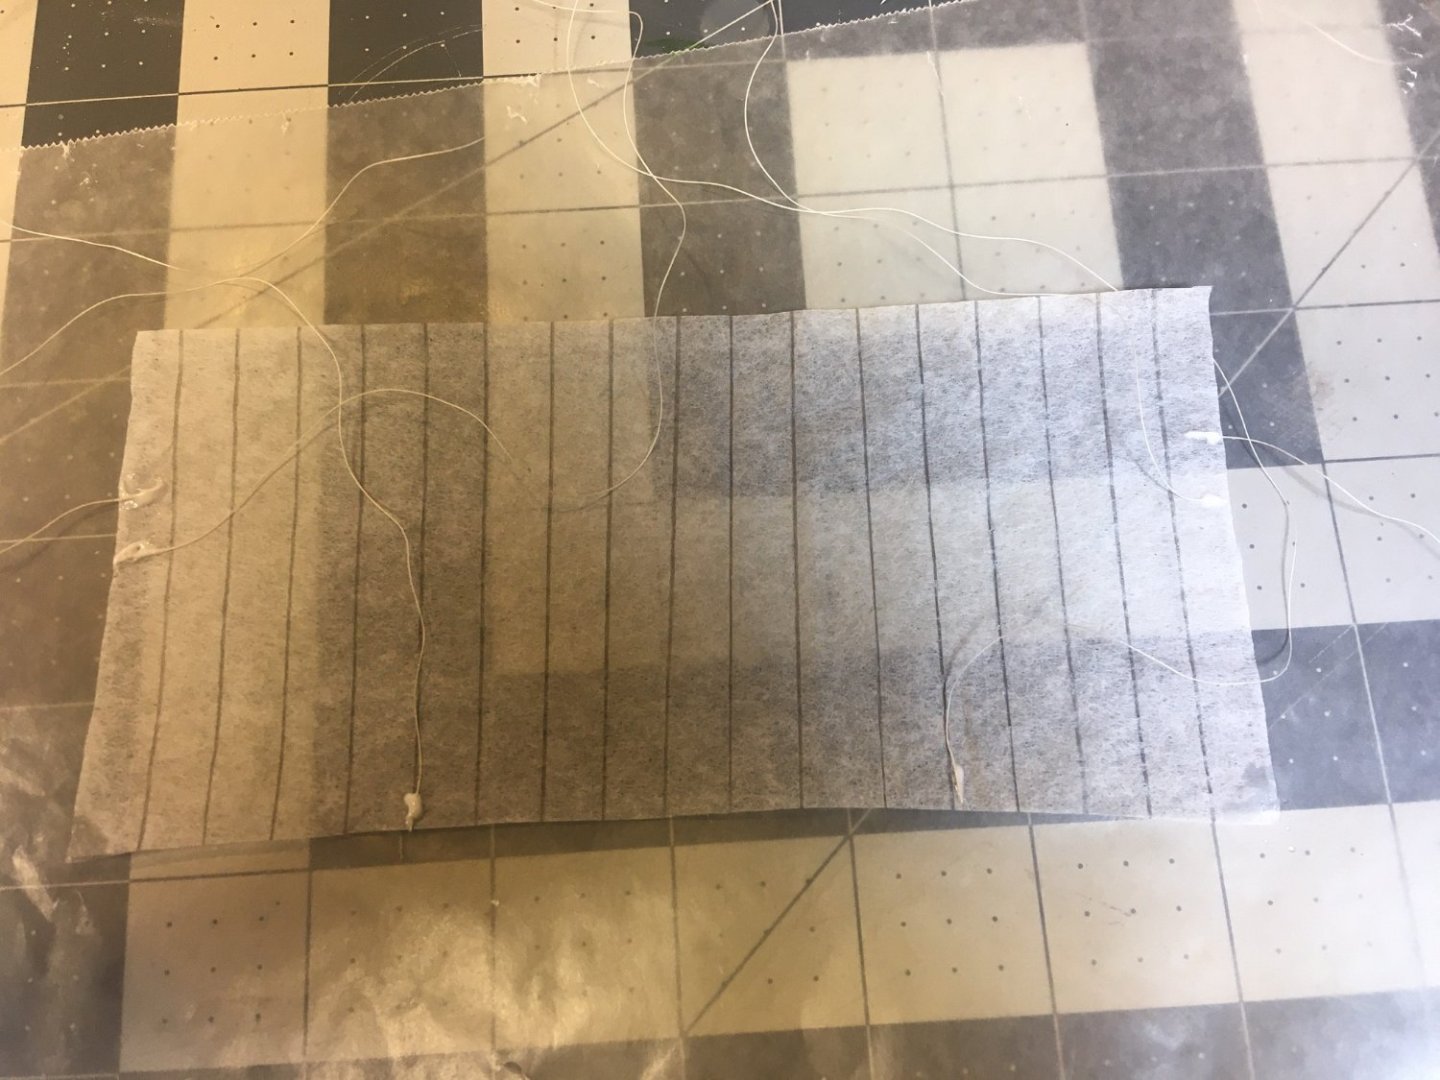
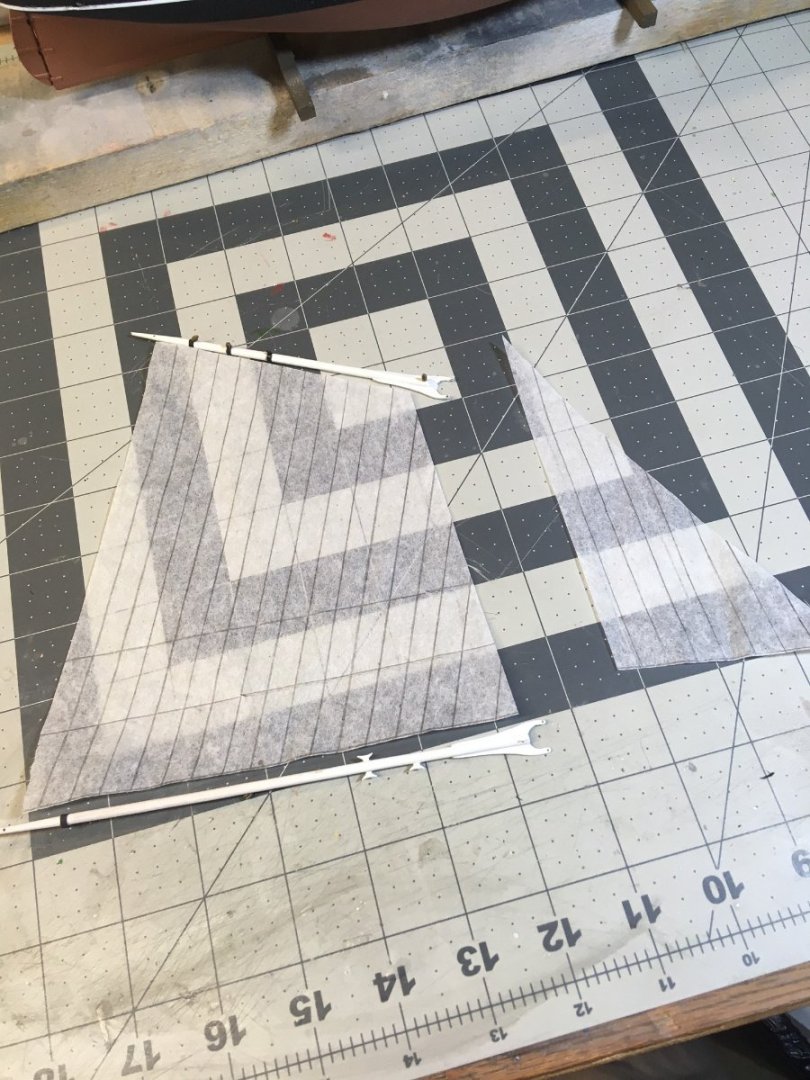
Cut the main sail and the main staysail from silkspan after marking the panel and reef lines.
- 121 replies
-
- 3
-
-
- Newsboy
- Model Shipways
- (and 2 more)
-
Nice to see you stepping up to the task!
-
If the parts are clean, no need to prime them. And for "considering not priming...." I call that inspired laziness, I do it all the time. Nic
- 48 replies
-
- 3
-
-
- Bowdoin
- BlueJacket Shipcrafters
- (and 1 more)
-
All seems OK. Remember, no-one will take a ruler to your hull and tell you it's 1/32" off !
-
Just a guess, but I've seen numerous examples of lines going to blocks on the deck, then up to a belaying point. I think it is because you can pull up with more force than you can pull down, being limited by your weight.
-
We already have the USS Perry, similar in size and complexity. https://www.bluejacketinc.com/shop/model-ships/kits-model-ships/naval-vessels/uss-perry/
- 121 replies
-
- 2
-
-
- Newsboy
- Model Shipways
- (and 2 more)
-
It was a B***h to get the double sheet block tucked behind the wheelhouse. Attached with fine thread into an eyebolt.
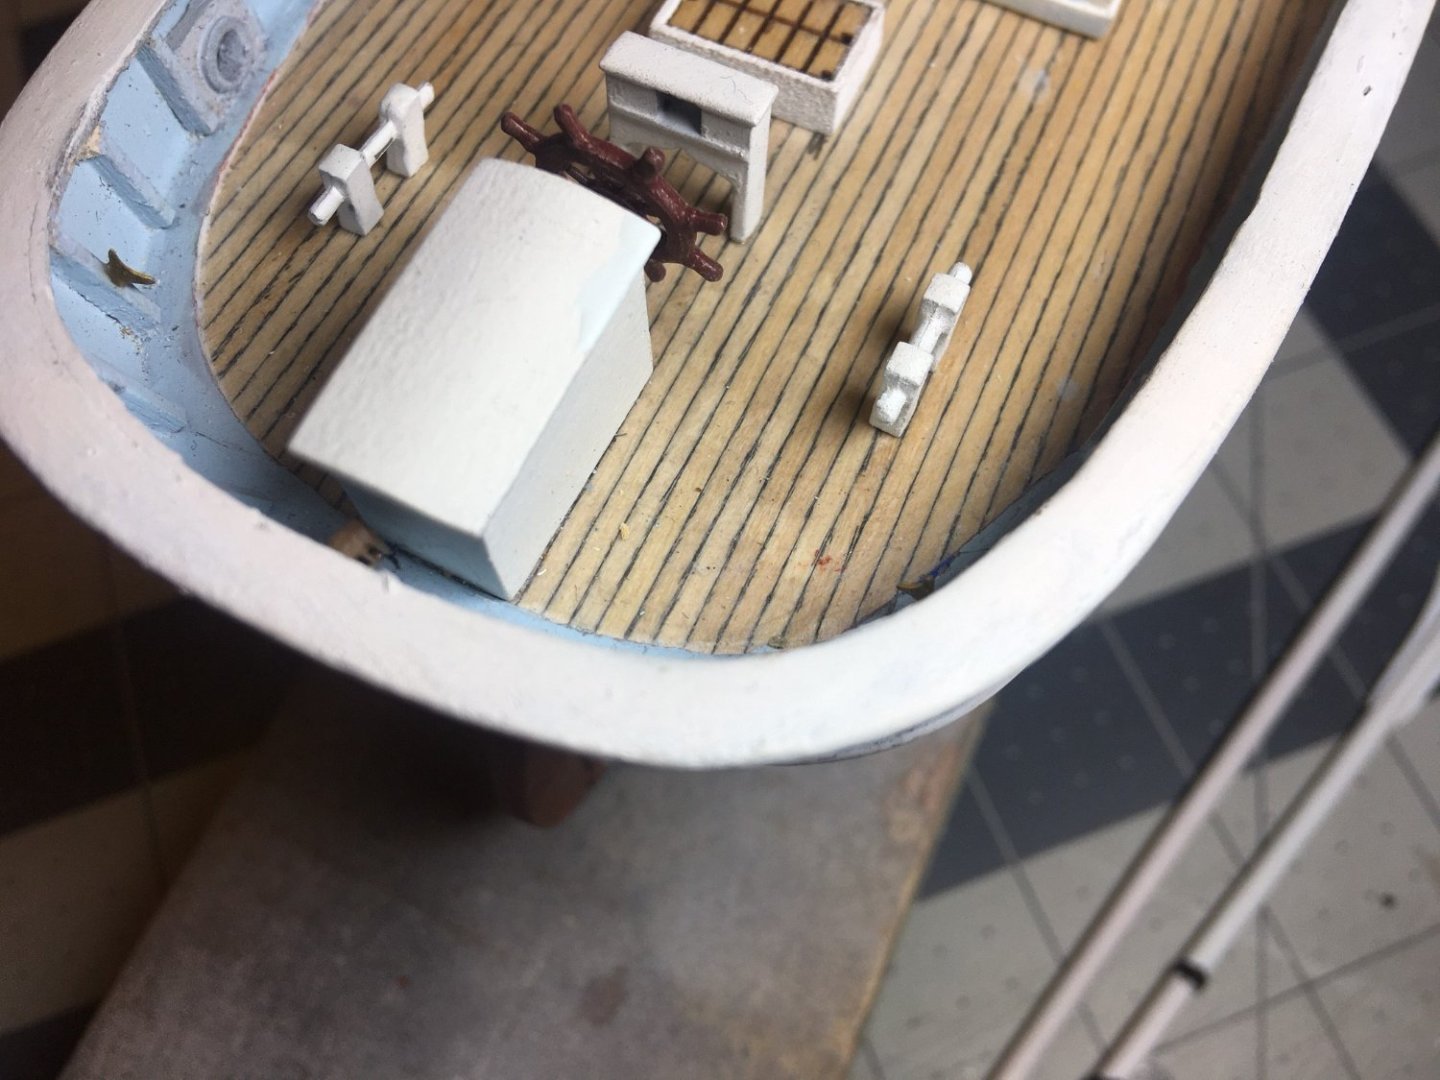
- 121 replies
-
- 2
-
-
- Newsboy
- Model Shipways
- (and 2 more)