


tarbrush
-
Posts
437 -
Joined
-
Last visited
Content Type
Profiles
Forums
Gallery
Events
Posts posted by tarbrush
-
-
ok, all the damage from before has been repaired and I am pretty much back to where I was a week ago. Rather than start gluing the forward frames on again though I am going to get the stern pre-fit just in case something else goes wrong.

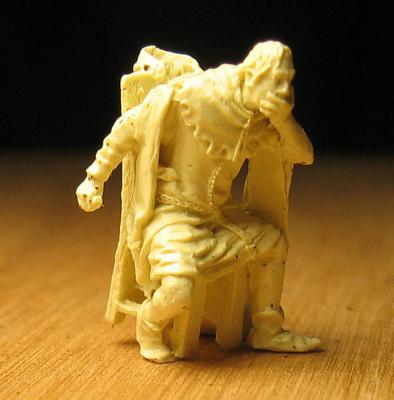
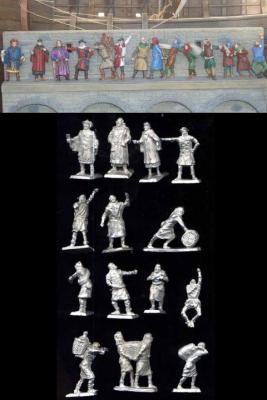
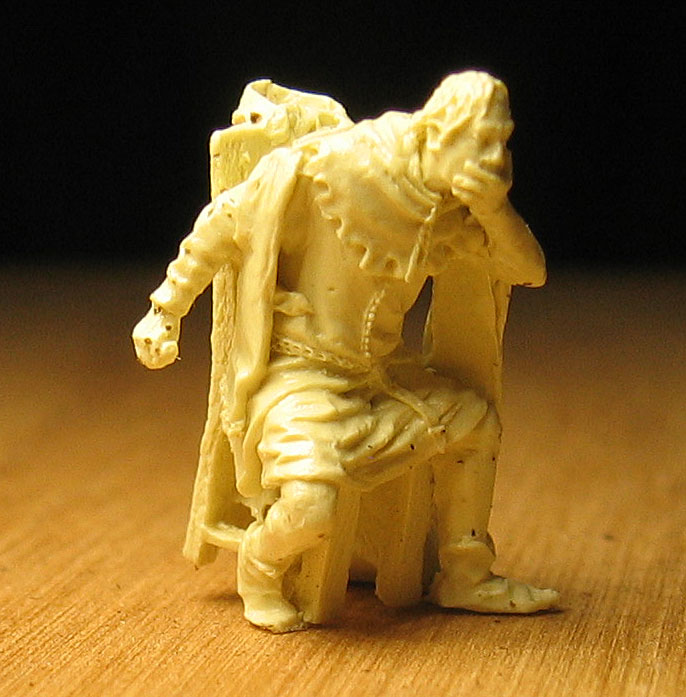
Today I received my first order from Fredericus Max that I put in for figures and I am delighted with them! The cast metal figures are very good but the resin chess player figures I ordered just blew me away, They are a bit hard for me to photograph with my cheapo camera, the pics on Fredericus Max website are much better but I couldn't resist posting one.
Web site for Fredericus Max: http://www.fredericus-rex.de/Valdemar-Miniaturen/?XTCsid=cdascfi2hv8a40r4nubmr3o9t1
-
Hi Buck,
just found your build log today and I look forward to you build of this interesting ship, just love this era!
-
Sounds really interesting, thanks for posting the link!
-
-
Hi Brian,
I love Dutch yachts! best of luck with your build, I will be watching with great interest!
-
-
-
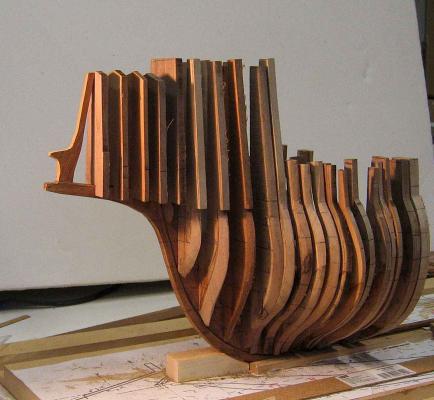
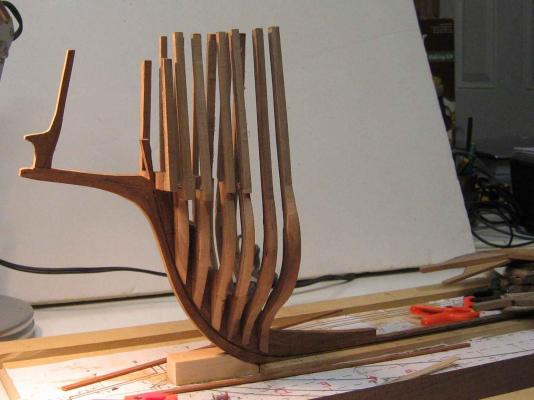
Well I am making one step forward and two steps back lately. I have been putting off gluing frames to the keel for fear that I had forgotten something to be done before adding frames. I got several of the forward frames cut and sanded with their proper bevel. This was an interesting point when I got the bevel sanded in I could really see the shape of the bow, Mary Rose in not a bluff bowed ship, she really has quite a fine entrance.
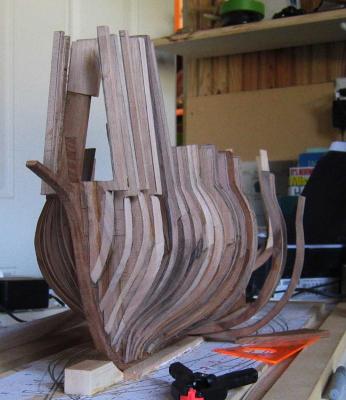
Finally yesterday I got up the nerve to begin gluing frames on, got the first 6 glued and and discovered I had made a mistake in height location for either the first three or the last three. Anyway wound up tearing them all off and will have to re-make them. If you happened to notice a blue glow in the sky last night that wasn't the northern lights, it was the glow from all the bad language that accompanied tearing the frames off.


All my previous models have been small workboats so Mary Rose is a new challenge to me. I hope I am going about framing the forecastle correctly. Any one have any suggestions?
- firdajan, qwerty2008, mtaylor and 6 others
-
 9
9
-
Your figures came out great Tim! I checked on my order from Fredericus-Rex and they have shipped. here is a pic of one of the sets I ordered
-
-
Hi Steven,
could you work on your model in the house if you didn't use any stinky paints or glue?
I switched to using acrylics about a year ago and I can't see ever going back to oils. For glue I use CA adhesives mostly, especially on plastic. They may be a little stinky to you working on the model but your wife in another room won't complain abut the smell.
-
-
Very nice Mauro, I like the color of the walnut decking.
-
-
-
great pictures Louie!! loved the giant size so you can see the detail, I've downloaded them to my Mary Rose photo collection.
My wife had a digital picture frame that she got tired of and gave to me. I download all my photos of Mary Rose that I get online and have them playing on the picture frame while I am out in the shop. Everytime I stop working for a moment and glance up I am seeing a photo of a painting, sketch, model, or the real thing. It's kind of fun and will help keep the goal in front of me.
-
Hi Kieth,
well your post inspired me to order the ships crew and chess players from Fredericus Rex today. in hand I have "Age of Tudors" an inexpensive set of 1/72 scale figures. They don't look any where near as good as the Valdemar figures I just ordered.
Can't wait to get those, Fredericus Rex is a real candy store for figures, I could have spent a fortune there. If only I had a fortune to spend.

Which set of figures did you order? will be looking forward to your opinion when you get them!
Good luck with your 1/48 build!! Please start a build log so I can follow along, it sounds like it will be a very impressive size. It will be great to have 3 of us on the forum building Mary Rose!
john
-
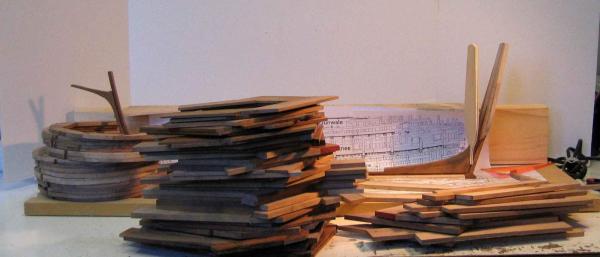
Hi Mark, yeah it really is a pile of frames, I am using black walnut for the frames, thinking of using english brown oak for the interior and planking.
-
-
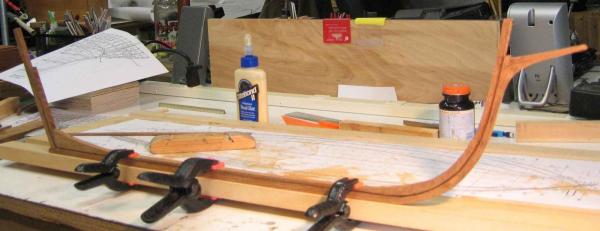
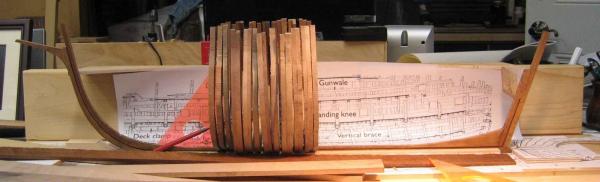
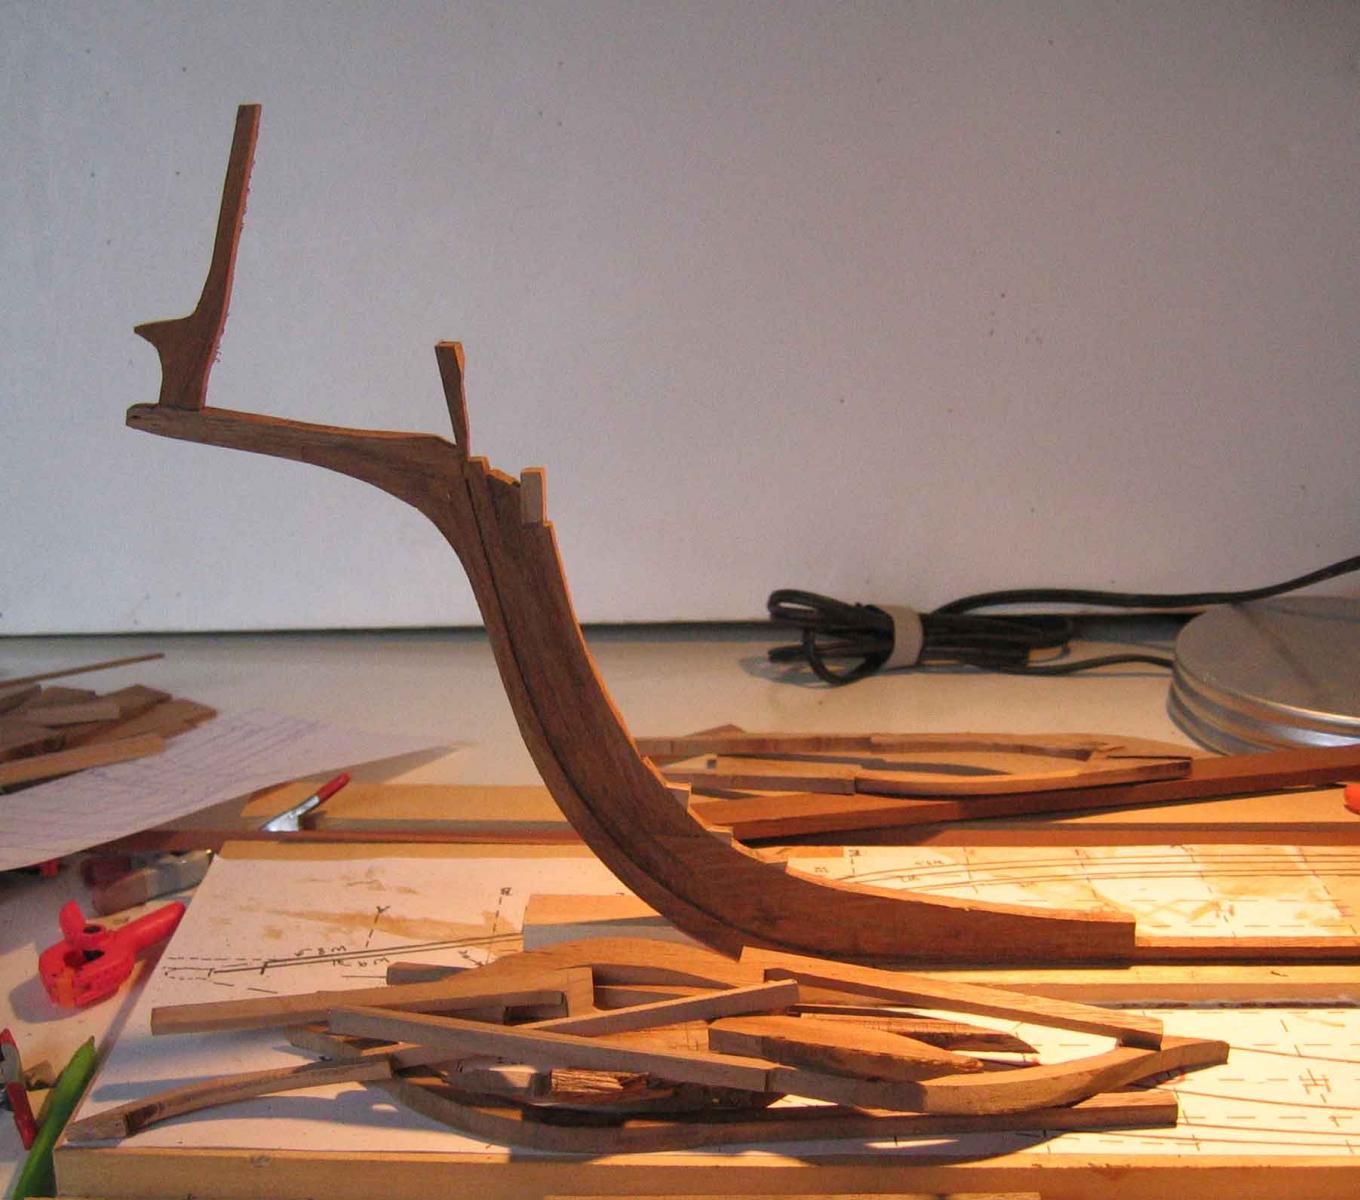
Working on the keel stem & sternpost the shortcuts begin right off.
Quoting from Peter Marsden's book Mary Rose Your Noblest Shippe : "The cross section of the keel varies throughout it's length. It's midship portion has an uneven hexagonal shape whereas fore and aft of this it becomes deeper and narrower with rebates for stealer planks cut into the upper part of it's sides".
hmmmmm.... ok, at the bow and stern it is rectangular as you move amidships it becomes hexagonal in shape that changes over the length of the keel. Well, Chidoken did it for his cross section.
I thought about it overnight. Not whether I would try it, but if I should switch to something easier. That made my eyes go crossed just reading the description. I knew I didn't want to try that.
By the next morning I decided that as I am modeling the whole ship the keel shape isn't going to be that noticeable a detail for the amount of effort it was going to require and I made the keel assembly as would on any other model.
Next up are the frames.
Although there is a great deal of information on Mary Rose there are still many questions. After reading through the information I had I am still not entirely sure of the framing arrangement. So rather then display the framing by leaving one side unplanked I will just have viewing ports on one side to enable the interior to be seen and leave off strips of ceiling
so that the framing is an interesting bit of detail behind the ceiling planks.
OK, to get started with the framing.
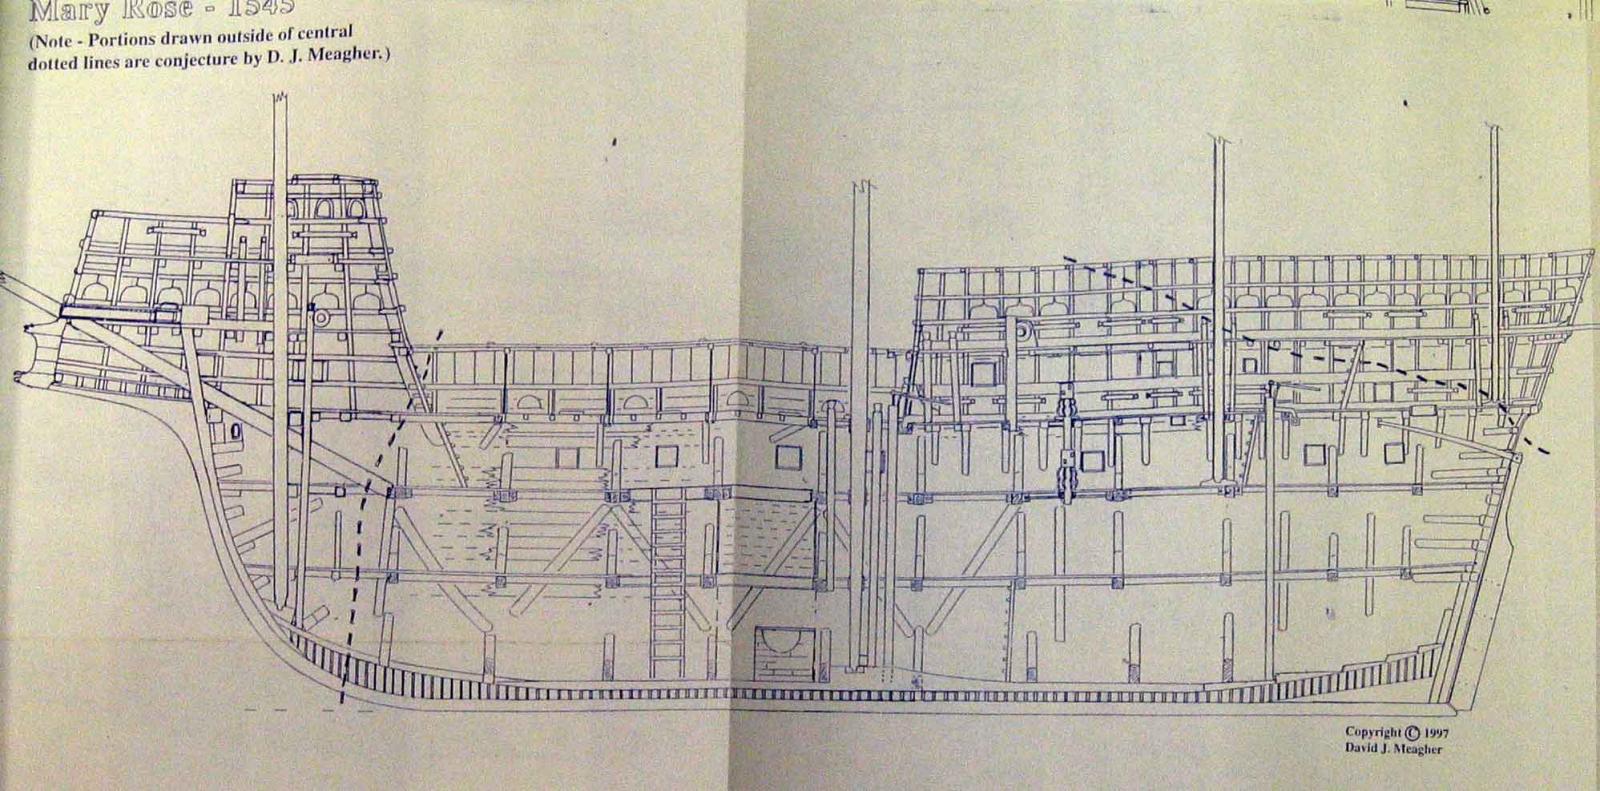
The plans showed the frames to be fairly evenly sided and spaced.

But on drawing on page 105 of Mary Rose Your Noblest Shippe show something far different. I will use this drawing as the basis for my frames sided dimensions and location, of course forward and aft of the diagram will just be a guess.
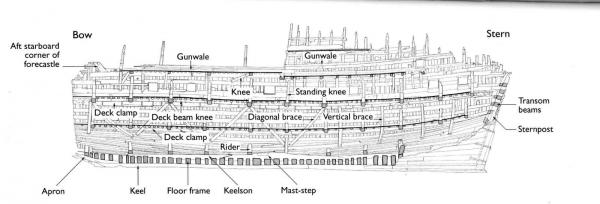
Mary Rose's framing was unique for a vessel of her time. An article I found online gave a good explanation of this.
The Structures of Atlantic Shipbuilding in the 16th Century, by Brad Lowen:
"In the case of the Mary Rose, the concept of tying each frame timber to a specific element in the frames design had become impracticable because the arcs were too long for the available timber supply. In particular, long enough first futtocks could not be found to cover the bilge arc, the futtock arc and overlap with the clamps at the first deck. The solution adopted by the builders was in some ways a precursor to the double-sawn frame. Instead of overlapping the the floor timber and the first futtock, these pieces were laid end-to-end, and a second timber laid between the frames in order to reinforce the area of the end-to-end joint".
This illustration from Marsden's book shows this and the hexagonal keel.

So far I have sawn and sanded several of the midship frames and most of the frame blanks for the rest of the hull, haven't begun to glue any on yet though.
- marktiedens, Salty Sea Dog, Archi and 8 others
-
11
-
thanks Louie, any idea when you will get back to working on your Henry Grace a Dieu?
-
Hi Mark,
The plans and the book Mary Rose your nobelest shippe seem to be the most up to date info so I am just going to go with that. The rest of the focsle is scattered in pieces in the mud but I have heard they bringing up more of it. There is a new Anatomy of the Ship book due out next spring, on Mary Rose.
I have already pre-ordered it.
-
the figures look great. can't wait to see them painted, they should look awesome on the cross section. Is this the cannon that is to have the fancy twisted barrel?
looking good.
john
-


Mary Rose 1545 by tarbrush - Scale 1:72
in - Build logs for subjects built 1501 - 1750
Posted
thanks Nigel I like that plan!