


Old Collingwood
-
Posts
11,534 -
Joined
-
Last visited
Content Type
Profiles
Forums
Gallery
Events
Posts posted by Old Collingwood
-
-
Looking great Collingwood!
hamilton
Many thanks, the planking of the hull around the bow has/is being a pain even with soaking the planks in boiling water, as at this scale 1.5mm x 5mm is abit un-flexible to bend, i should/have cut them in half to aid bending.
C.
-
More progress over the last two days, i have decked the forecastle with the correct planks
 and carried on with parts of the first hull planking and sections of the second, i have also finished the inner bulwark planks and sanded ready for painting red ocre, i will do this before planking the main deck to keep piant off it.
Any way heres some pics.
C.


-
-
really nice work u have got going there its nice and clean keep up the great work
Thank you, its sometimes quite hard at this scale but i try my best.
C.
-
-
I have carried on planking the inside bulwarks and have reached the poop deck area, here i have stopped and concentrated on planking the poop deck instead, but - after checking the kits wood stock i noticed that i had used the wrong wood to deck the forecastle and the start of the poop deck, so off it came with a sharp blade underneath and abit of a light sanding and with the corect planks i started, after several hours i reached the outer edges and i decided to try to fit an outer edge of planking and cut the normal lengths into them, this was hard going at such a scale and thiness of planks
 anyway i think i have done a fair job of it, so i sighed a deep breath and sanded and added a light wash of diluted pva to seal it.
I ve also revised my plans abit.
Hers the pics


-
-
Looks good Collingwood - I think your initial modifications and measurements have paid off. I would recommend at this point that you build one of the cannons and put together a few of the deck planking strips to set it on and measure the height of the gunports to see what kinds of adjustments (if any) are needed for the planking - particularly at mid-ships where you'll have the open ports....keep up the good work
hamilton
Thank you hamilton, hope all is good with you and the little one, thank you for the compliment, i have looked into the correct gun port hight to cannon sizing and have done just as you suggested(great minds think alike lol) and the top of the darker strip represents the hight of the bottom edge of where the gun ports will be cut out to, and i will add a flat finishing wood rail supported on square section stubs that will go across the top of the gun ports.
Whats your feeling about the correct scale thickness of the tops of the hull walls? i think about 12-15 inches or 3-4mm & 100 scale, if this is so it gives me scope to put in three thicknesses of planks - two outside(first and second planking) and an internal bulwark section, also what kind of hight would you construct both the poop deck and forecastle? i think about 6 feet.
C.
-
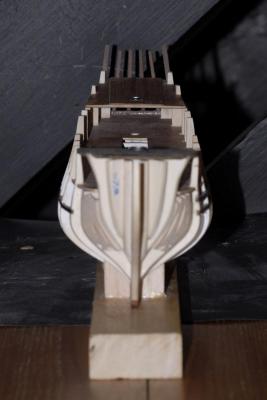
I have been carrying on with my first planking and managed to bend the second level around the bow/bowsprit and continued my way up the poop deck area so i could cut away the bulkhead extrusions stopping me from planking the deck of the poop deck over its full width, as i want to do this with the deck away from the build, to aid test bleaching to get the correct weathered finish i am after.
I just hope i am achieving the right look and shape of these attractive frigates?
Here's some pics...
C.


- NMBROOK, popeye the sailor, Sargon and 1 other
-
 4
4
-
Hi hank,
Great build a very interesting a mighty ship to build, have you also considered getting hold of a copy of Under Siege, as i believe that was filmed on NJ and should give some interesting viewpoints.
C.
-
I have been carrying on with my first planking of the hull, with bending thinner strips one at a time(three in total) around the sharp angle of the bow, i have left them slightly thicker than the thickness of the normal first planking strips so i can sand them back to get a nice smooth equal profile, this has worked quite well as trying to bend the thicker planks around sutch a tight profile is tricky and the planks just kept bouncing back when set even with ca/strong gp and wood glue.
I have cut a bearding line into the bowsprit now and this does help with holding the planks, so the desision now is - do i go with the normal thickness of first planking for the rest of the bow sections, or spend more time with thinner strips and as i have done just cut these back to the first buklhead, and join the normal planks thier?.
Anyway its coming on ok i think, slow but methodical and going in the right direction.
-
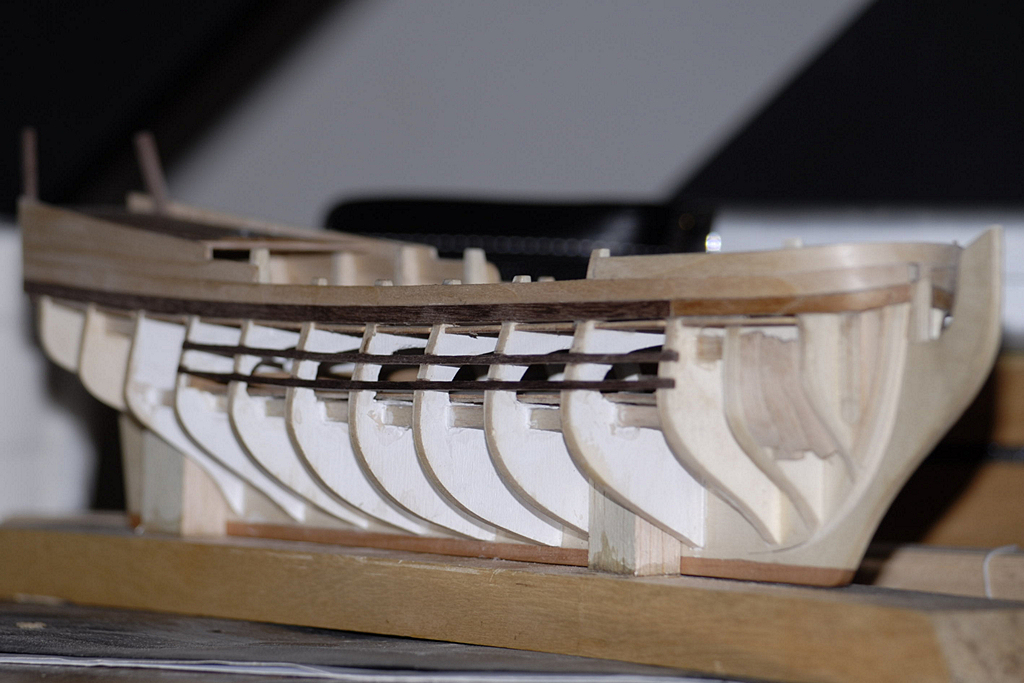
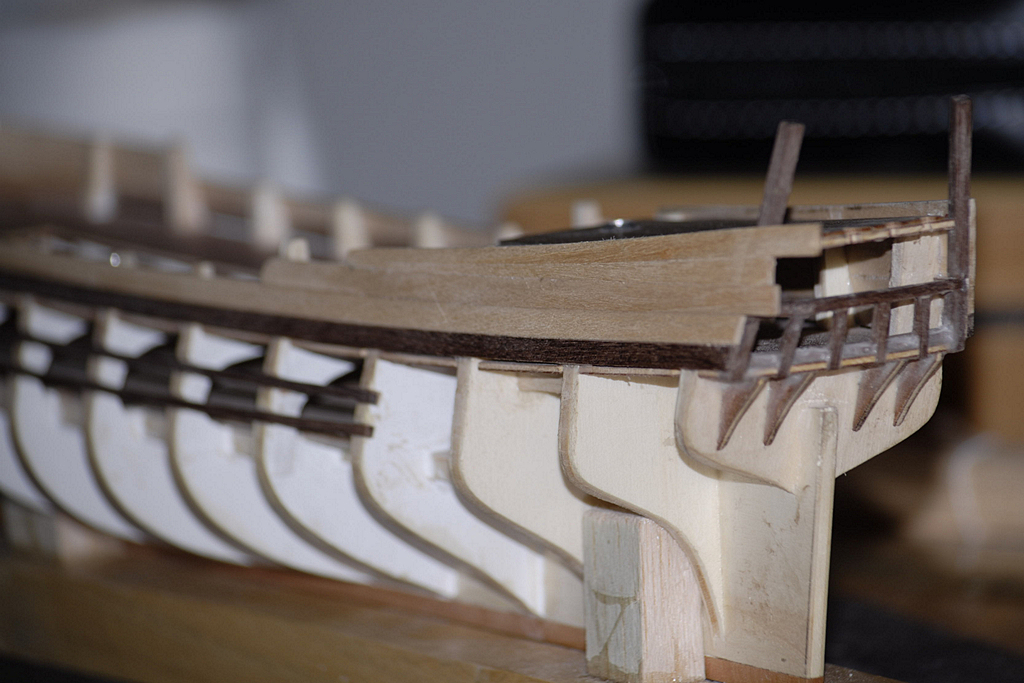
I have started working on the top section of hull panking stage 1, so i decided to construct the bottom gun port rail first, i have had the most incredible head ache trying to bend this plank around the forward bulkheads to meet the bowsprite as i did not cut in a channel on the bowsprite to anchor the planks into at that stage. I remedied this by cutting back this piece of planking to the first b,h, then i am fitting 3 strips of deck planking as they are the same width, and with them stuck together they are about the same thickness as the original, it helps bending around the bow aswel being thinner.
C.
-
Well i managed to get a nice wethered grey/aged look to a section of my forecastle decking, but it does seem too dark and almost like a battleship grey in shade, i have tried a rough sanding with a salt paste to try to lighten but not much has happened, does anyone have any ideas of anything i could use to almost bleach the deck lighter, to a light grey shade as wood goes naturaly with age and the elements.
C.
-
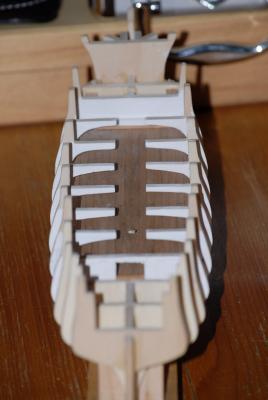
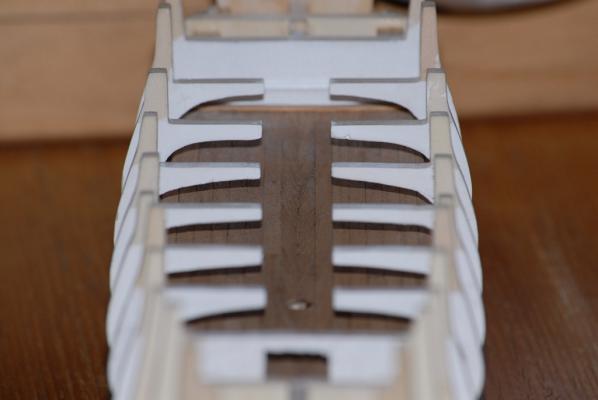
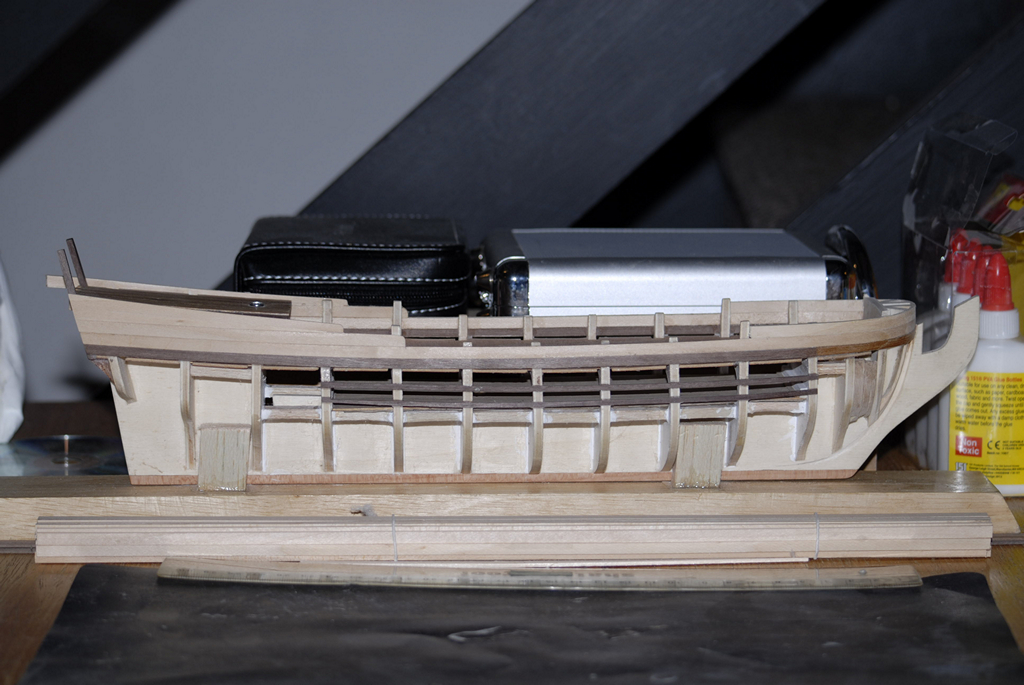
I have continued my build by fitting the false main deck and checking for acurate line and shape, i think it has settled quite well apart from needing abit more shaping and sanding around the bulkheads, i have then started dry fitting both the forecastle deck and poop deck to check for alignment and camber, i have needed to take the hight down abit, as they were giving a scale hight from the bottom of the poop deck and forecastle deck to the main deck of about 9 feet, so i sanded the bulkhead tops down to a scale hight of about 6 feet.
Next i decided to attack the rear cabin window frame work, by fitting a horizontal support roughly half way between decks, i have also added two small supports on the sides.
I've also added the oar cutout framework for the horizontal lengths, i have worked on a scale gap of two feet, i imagine this would be about right allowing a two foot square oar opening.
Here are the pics.
C.

- NMBROOK, popeye the sailor, mtaylor and 2 others
-
5
-
Here is a quick picture to show the first attempt on the forecastle deck with the weathering agent applied.
C.
-
Well ive sorted out how to age planks and simulate the silver/grey color that wood goes when open to the elements, - firstly i purchsed a bottle of cooking vinegar and some metal washing up pan scourers, i found a container with a secure air tight lid and emptied the vinegar into it acompanied by the scourers and left for two days, then today i tested on my completed forward planking area that has been just left un treated, after letting it dry(with the aid of a hairdryer) i was amazed at the effect-its gone light-to mid silver grey just like old wood, i dare say with more applications it might lighten even more, but it depends on how light it should be?
C.
-
^^^Thank you very much for taking a look at my build and the references you posted, i have seen the pics of the museum model before, it is basicaly what i am building except i am extending the poop deck a little further to include the mizzan mast, and putting the steps on the edge instead of through the roof.
C.
-
-
I have been pushing a head with my build and have finaly finished planking the lower deck, i have added a small edge strip against the forward bh, and a similar strip further back although these wont be seen they have helped to strengthen things abit, i have decided after cleaning the deck down, to leave it un-treated as it will not be seen to a great degree.
Here are the current pics...
C.


- popeye the sailor, Sargon, hamilton and 2 others
-
5
-
Collingwood - looks like you're motoring along...I've never seen or heard of any techniques for lightening the blanks (though I imagine if it's been done then someone on this forum has done it...maybe post a question in the the forum area dedicated to questions about planking.
The first thought that comes to my mind is - replace the planking! That might not be an option. Anyway - best of luck
hamilton
Thanks hamilton, i will have a look, ive been off a day or two as i have had first a virus attack on my laptop(got that fixed) then a complete windows crash, that even booting could'nt fix so i had to have a new windows instalation.
C.
-
I have started on setting some planking on the lower deck, i have done this by creating a template then transfering to card, this i have split in two equal sections to aid placing through the bh sections, i have planked one side of the lower deck and sanded, i have decided to leave the decking a natural wood color and just treat with a plain clear mat varnish/clear cote.
When i plank the upper deck i would like to replicate the bleached effect as seen on real decks, due to years of salt water holy stoning, not sure how i can lighten the deck planks that come with the kit (any ideas folks)?
C.
-
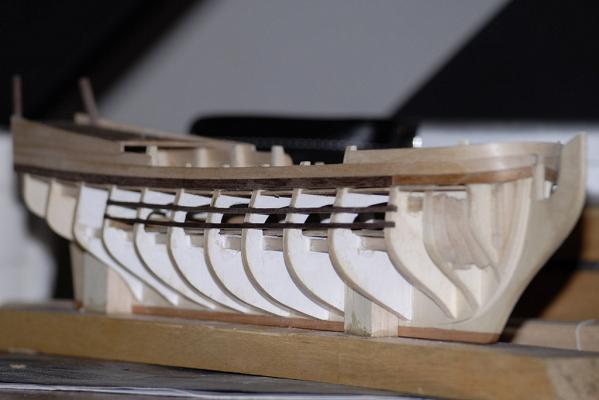
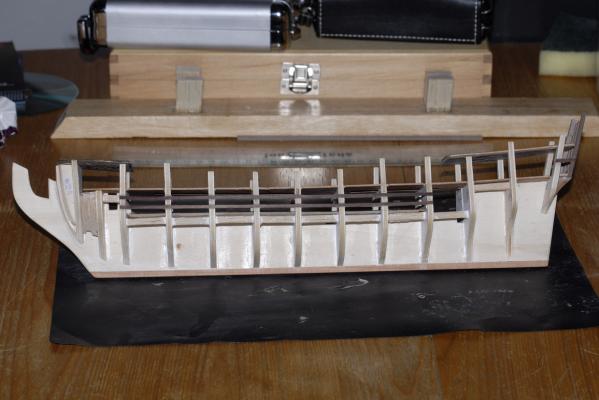
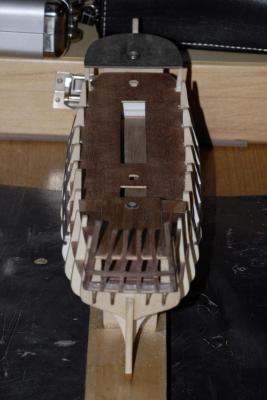
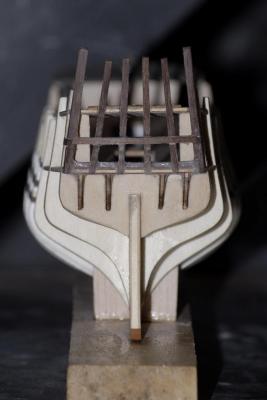
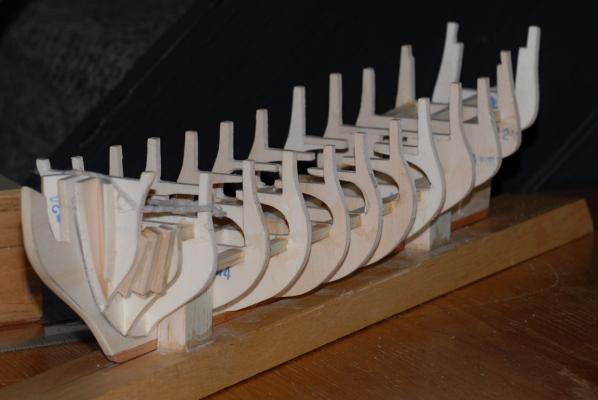
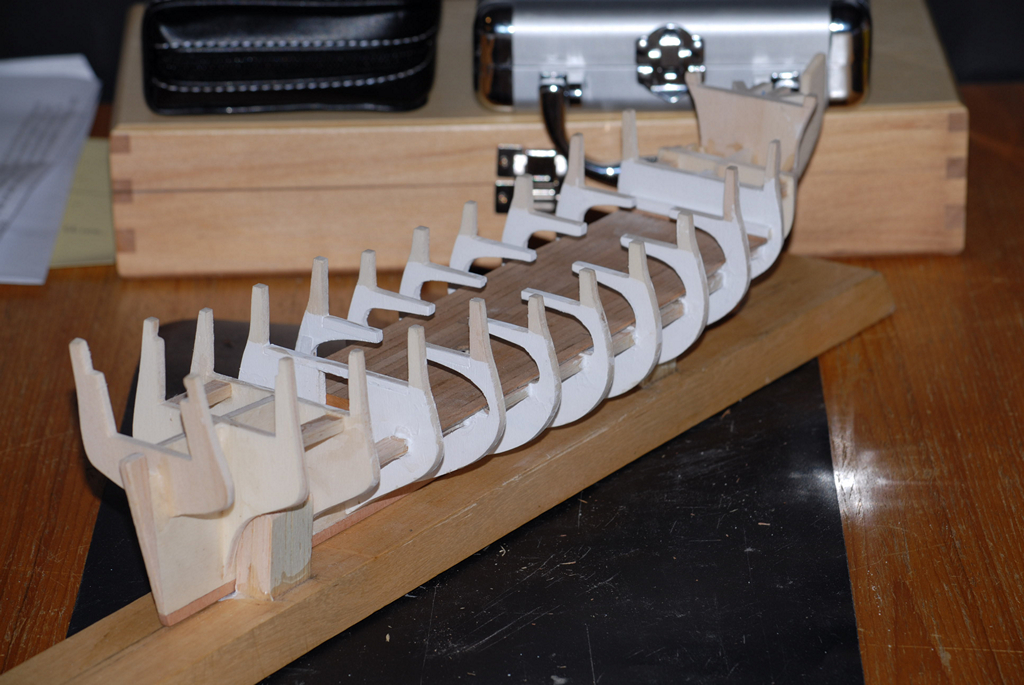
I have just finished farring the hull bh frames, only took 10 hours of sanding - checking - sanding etc etc(talk about saw hands) anyway i think i have gotten away with out any frame fillers and all frames now look online and thier bottoms lign up with the bearding line and show a nice equal gap for the keel extension, i have also checked the reference points and sanded back the decks where they meet the frames, some small sections of the frame have a gap around the frame extrusions but these will be covered by the planking, i also achieved a nice even curve around the bow(the filler sections realy helped here).
Next will be to remove the decks as they are only dry fitted, then when my paint arrives i will give the lower deck frame sections a lick of whitewash then start decking the lower deck area.
C.
- NMBROOK, popeye the sailor and bp1535
-
3
-
Absolutly Stunning what you are and have achieved with your beautiful victory, i think the victory trust would be proud to have a model like yours representing thier fine ship.
Fantastic
C.
-
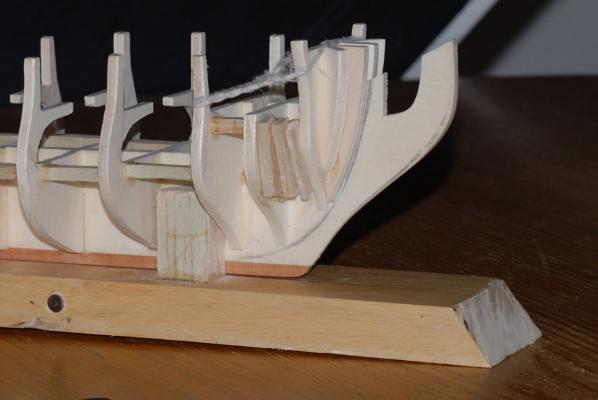
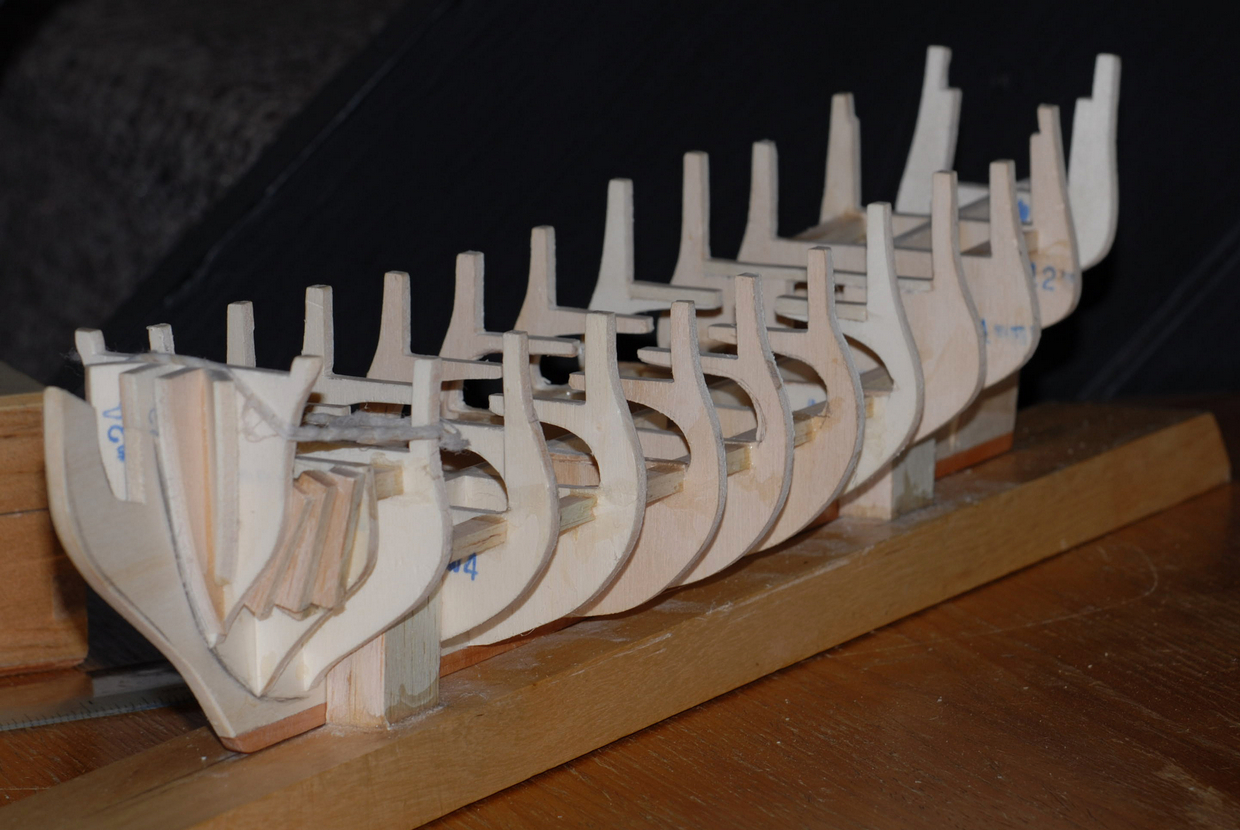
Thanks for that hamilton, i see quite abit of work in the bh department, that is why i have tried to take 9/10 down as far as i can and correct the upper section more so, i have found a wondefull painting of frigates in 1720s era being built on the thames and it shows these ships had such a dramatic amount of sheer compared to alter period ships.
Anyway i have continued onwards today with strengthening the hull, and helping to keep everything square and plumb by cutting and fitting lengths of balsa between the bh's, then to help with planking around the bow towards the bowspite i have fitted some strips of balsa that i will sand back to form a rounded shape.
Here are the pics...
C.


HMS Greyhound by Old Collingwood - Corel
in - Kit build logs for subjects built from 1501 - 1750
Posted
Many thanks.
C.