HOLIDAY DONATION DRIVE - SUPPORT MSW - DO YOUR PART TO KEEP THIS GREAT FORUM GOING!
×


RMC
-
Posts
933 -
Joined
-
Last visited
Content Type
Profiles
Forums
Gallery
Events
Everything posted by RMC
-
Chris: you may not have seen my edit. As a period modeller (Vanguard at the moment) it didn't occur to me that you may be after rigging for a modern ship. Bob (rmc)
-
I have a copy of Peterson. It's very good for period ships (18th/early 19thC). (I'm not sure what you mean by "modern book"). Highly recommended if that is the period you are after.. Good luck Bob (rmc)
-
Yes, you're right about the 0.5x1mm strip. I was wrong. In fact I cut down the 0.5mm stuff so that it was the same depth as the channel. - - ie: about 0.5x2mm. I will experiment with one of the channels to see if I can fit the whole assembly with the capping. If it doesn't work, I can always take the capping off. I agree with your point about the gap in the links being a bit unsightly, (it also would make the whole assembly more fragile, which is a concern) but I think soldering is a bit beyond me. I may try to bridge the gap with a bit of gel CA that I can then touch up with a drop of black paint, though this is probably guiding the lily. (I have used brass blackening on all the assembly components.)
-
Arthur: I am debating whether to put the covering (the 1x2mm strip) over the edges of the channels. I would like to do it off the model if possible. It appears to me that it would be possible to put in the chain assemblies in after the gaps in the channels to receive them are closed. Given your experience, does this appear to be practical? It would be nice to have the channels and all the hardware more or less installed before putting the lot on the model. Incidentally, trying to bend a piece of 1x2mm strip at 90 degrees around the edges of the channels seems a bit ambitious. I have already cut down some spare stuff to be 0.5x1mm, and put it ammonia to soak - it goes around the edges beautifully. In any event, I seem to be short of the 1x2mm, so unless there is some compelling reason not to, I'll use the 0.5x1mm stuff.
-
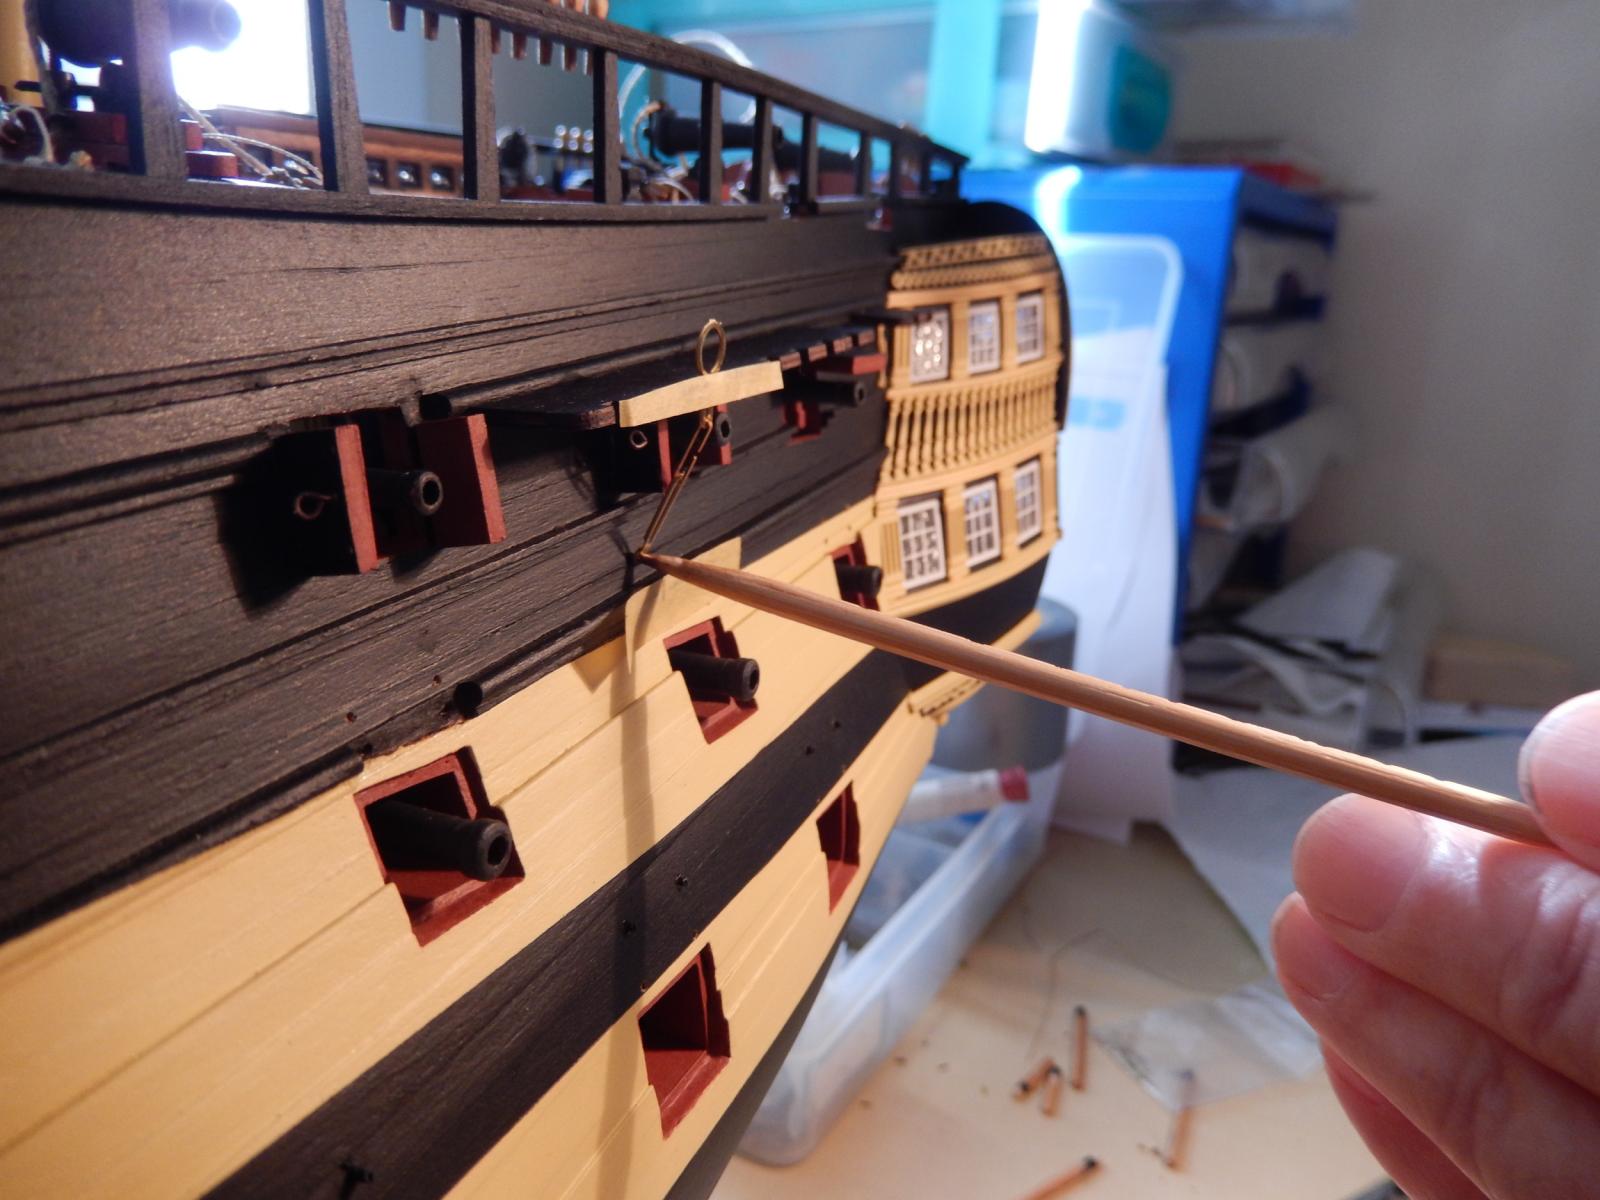
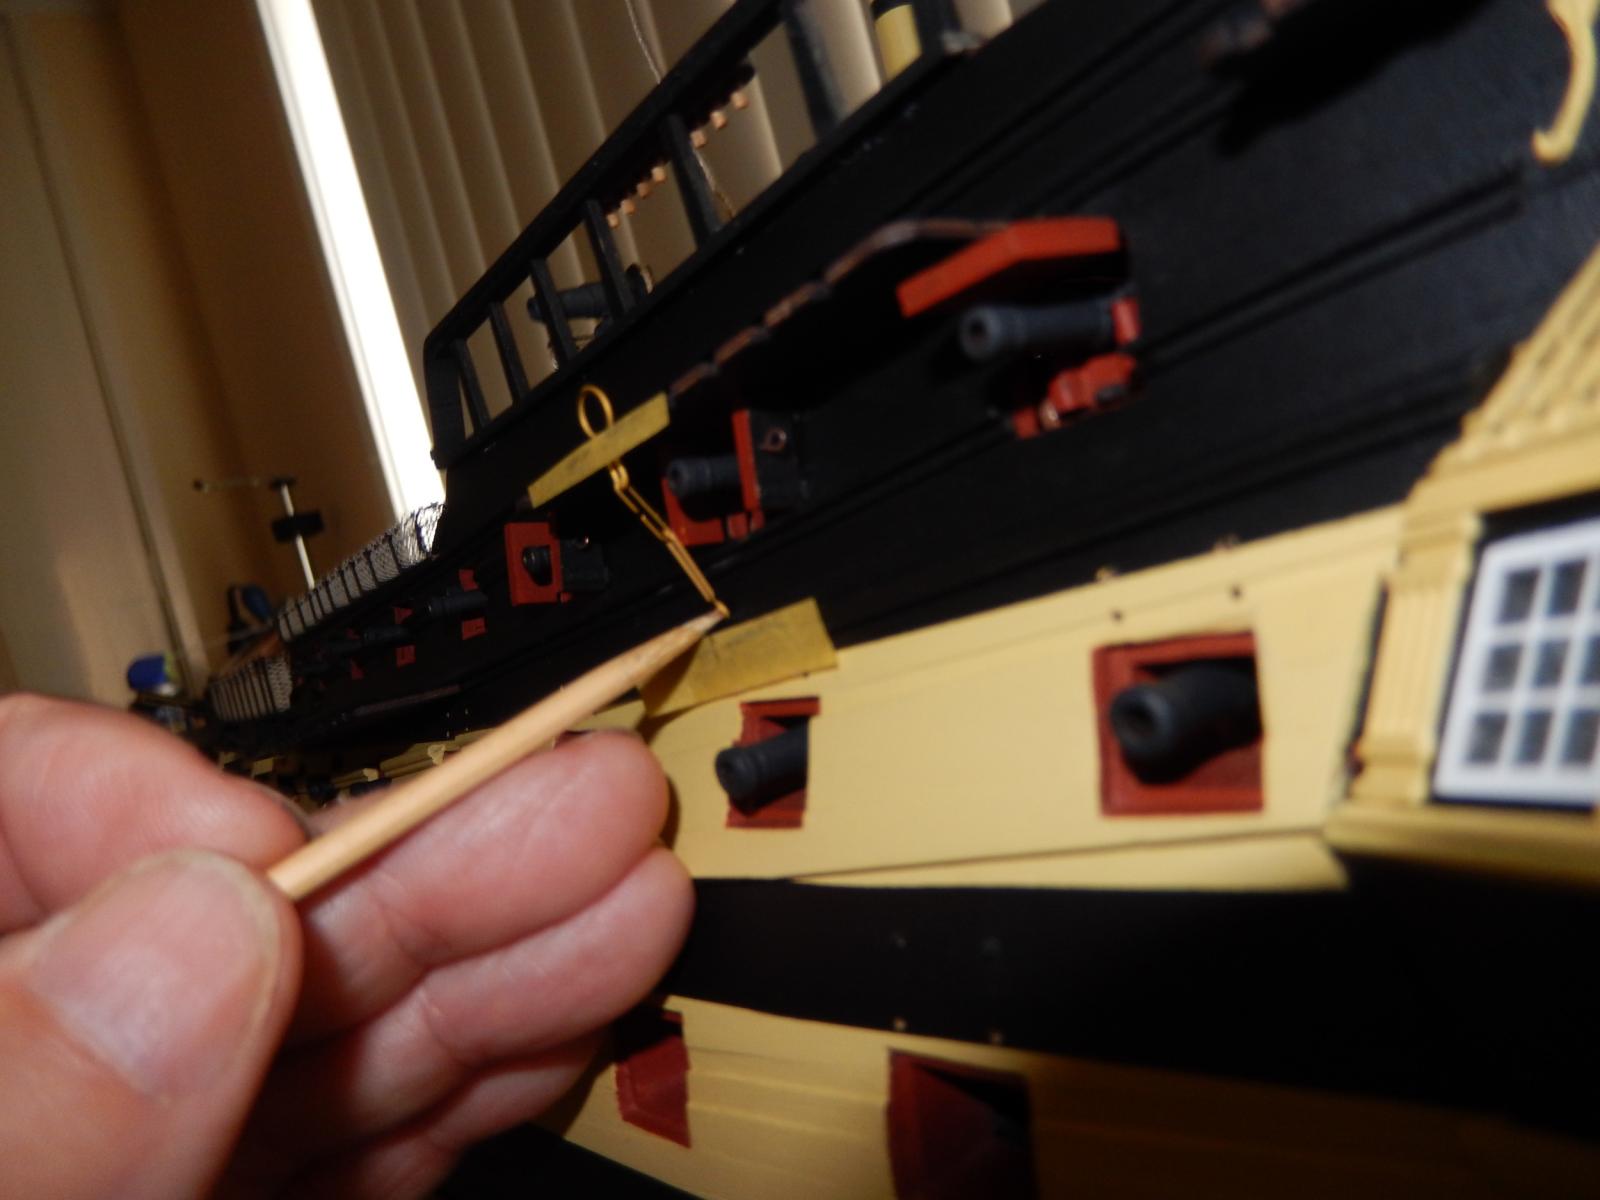
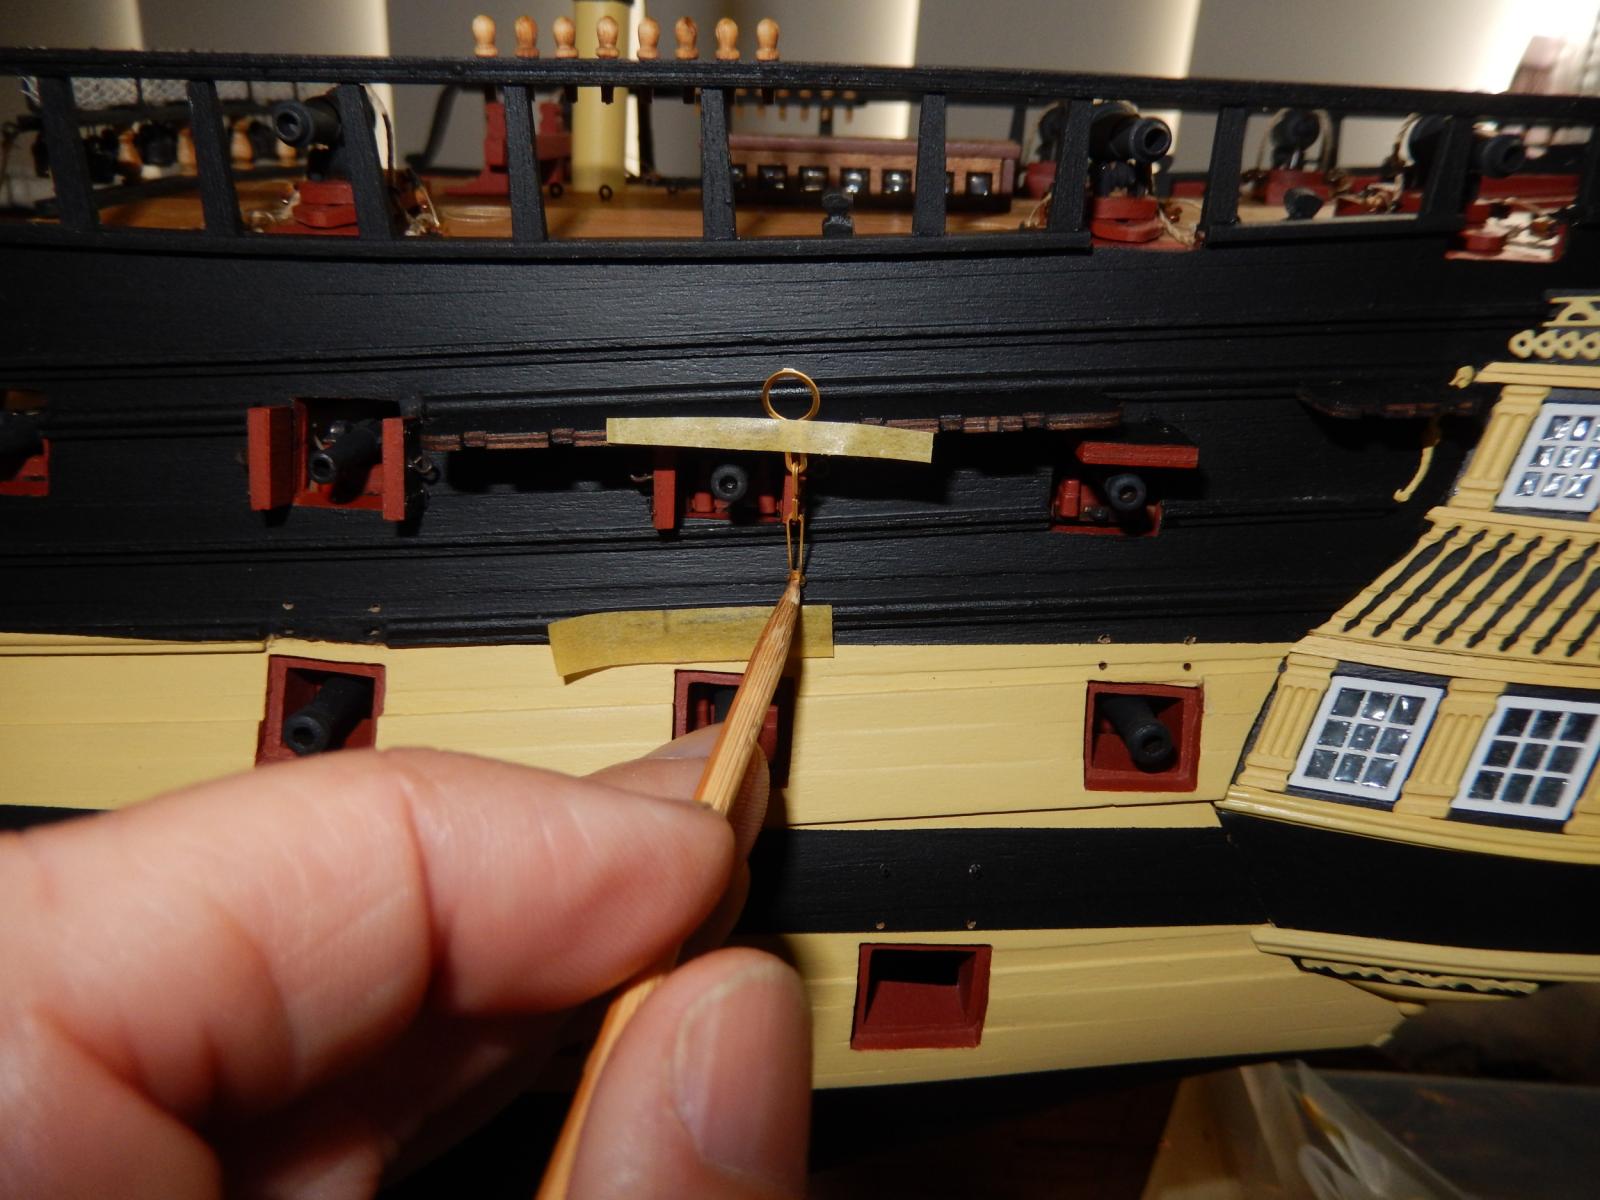
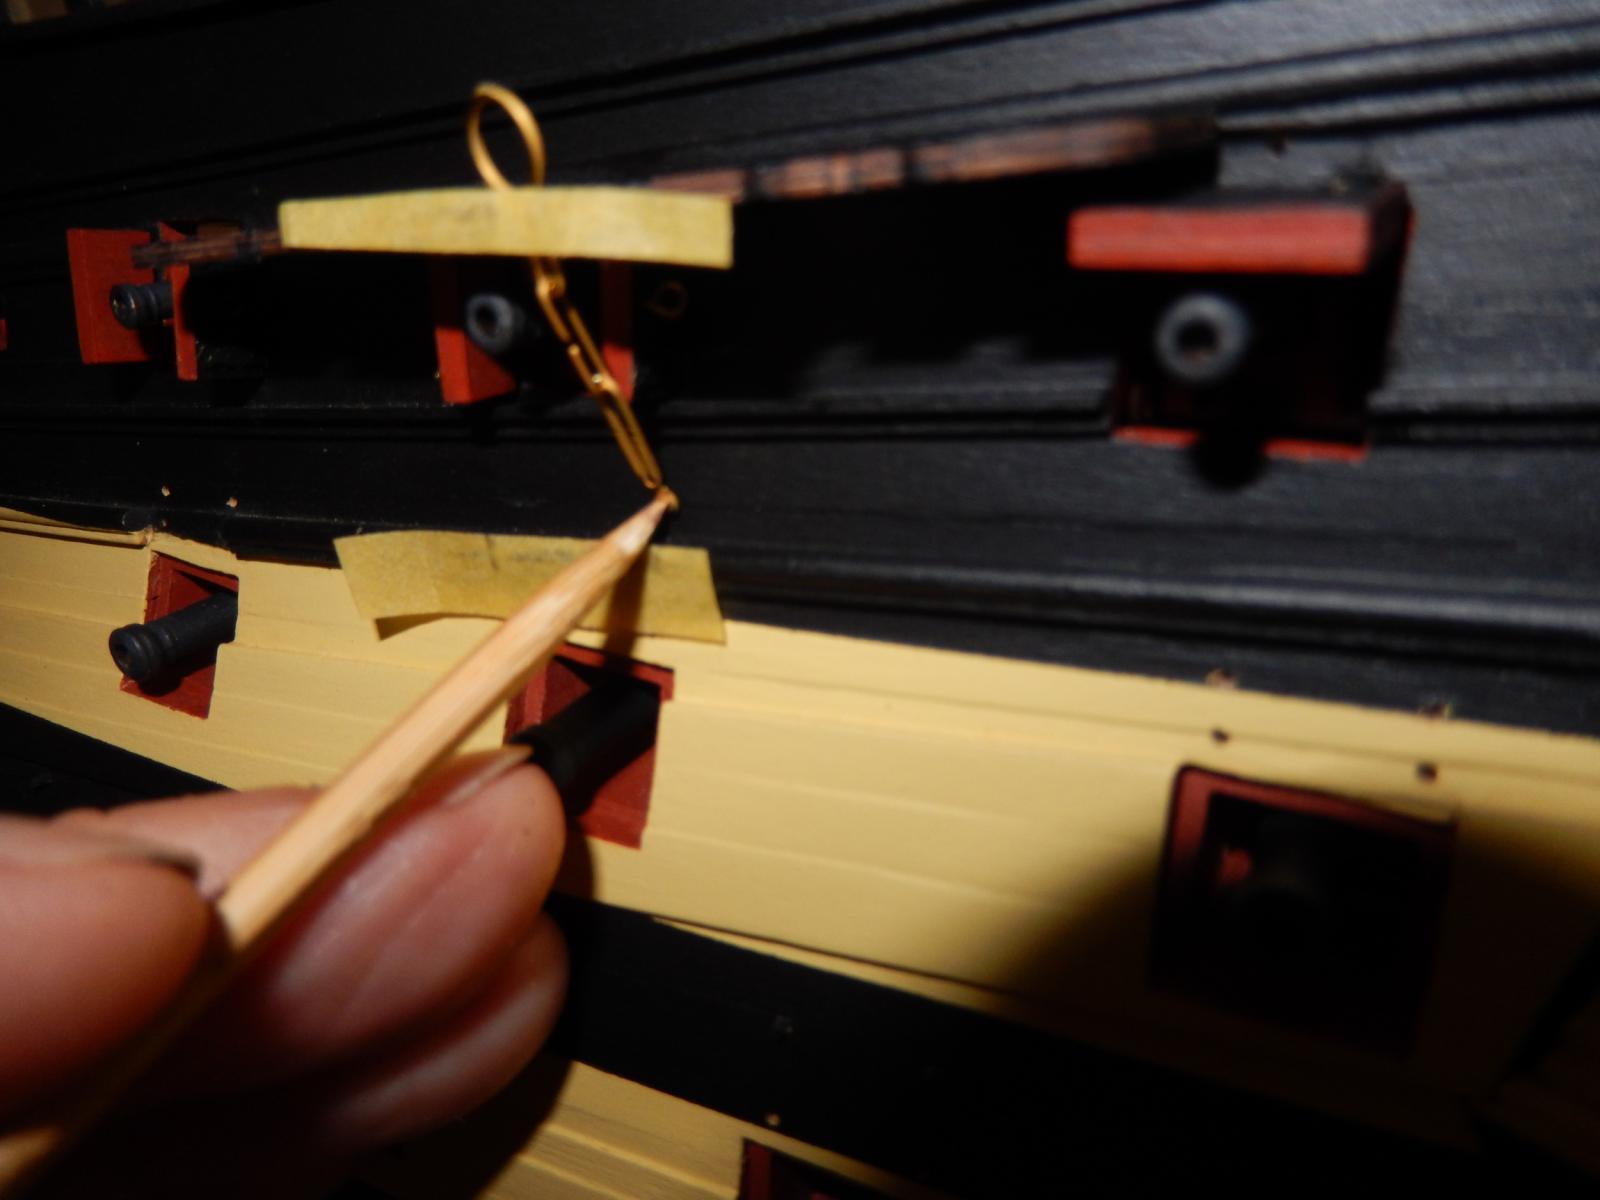
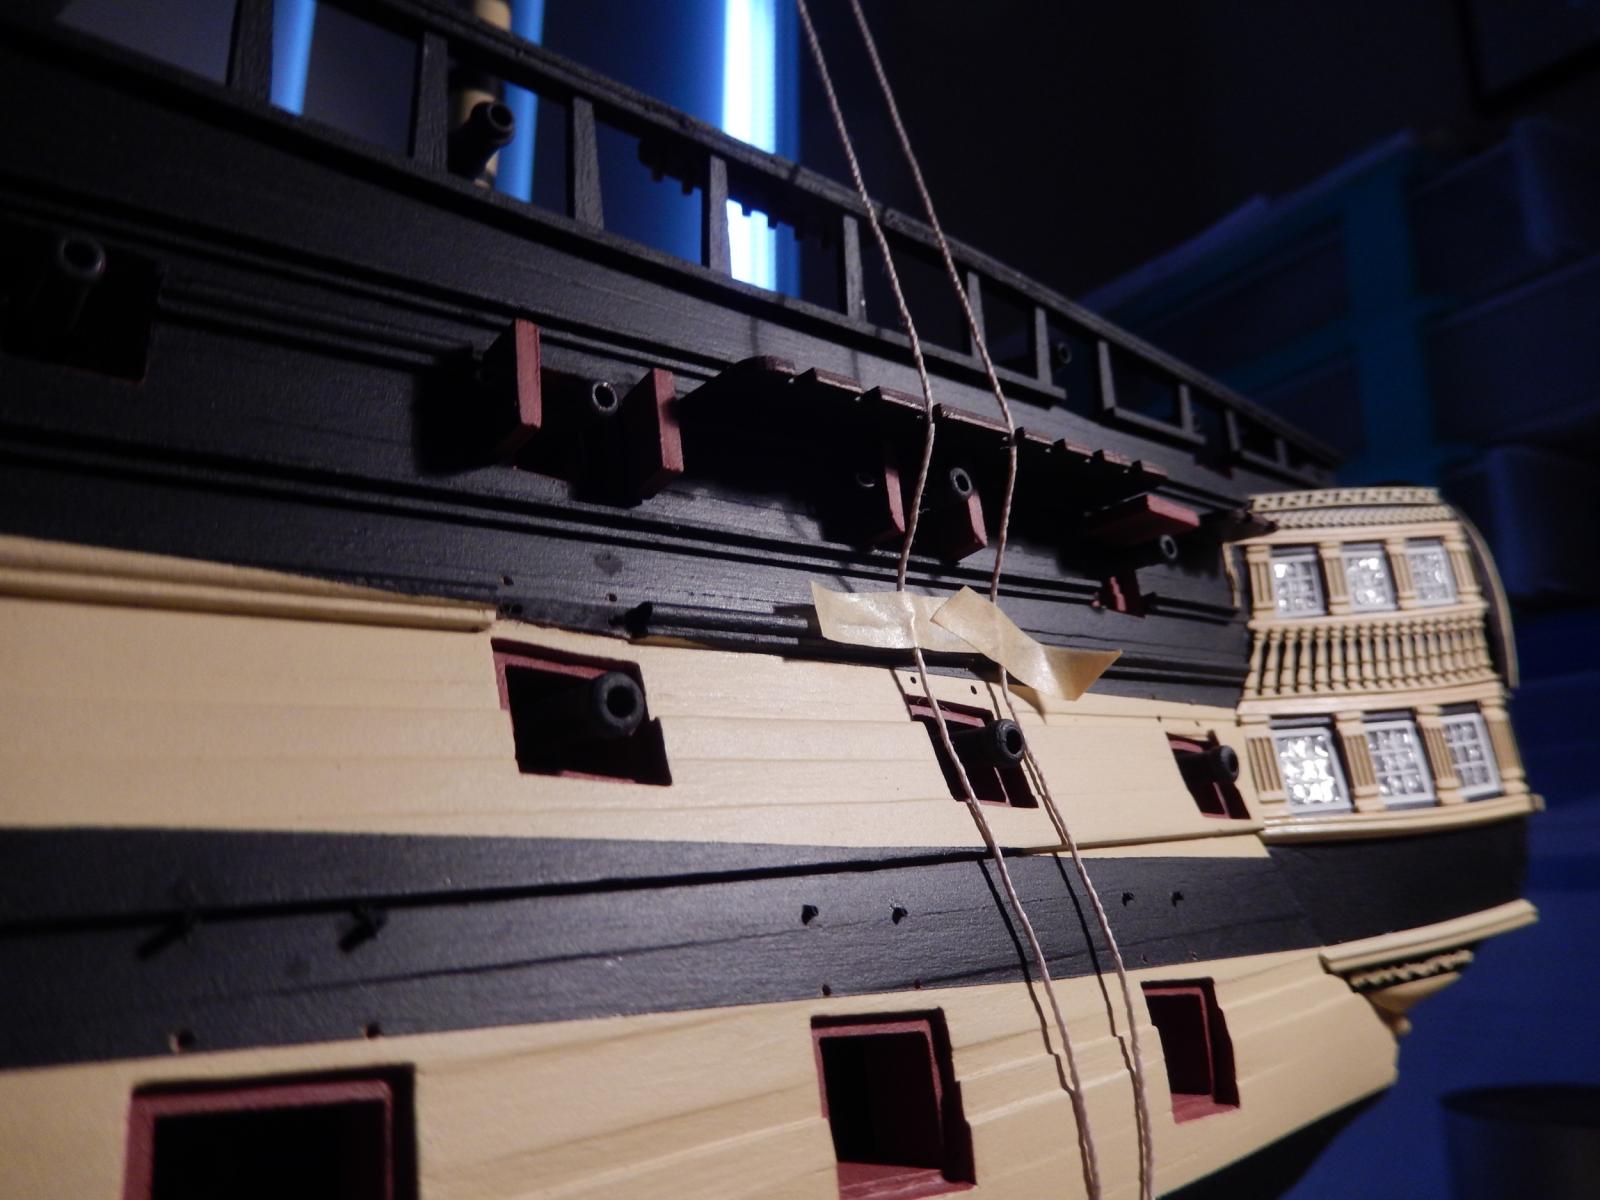
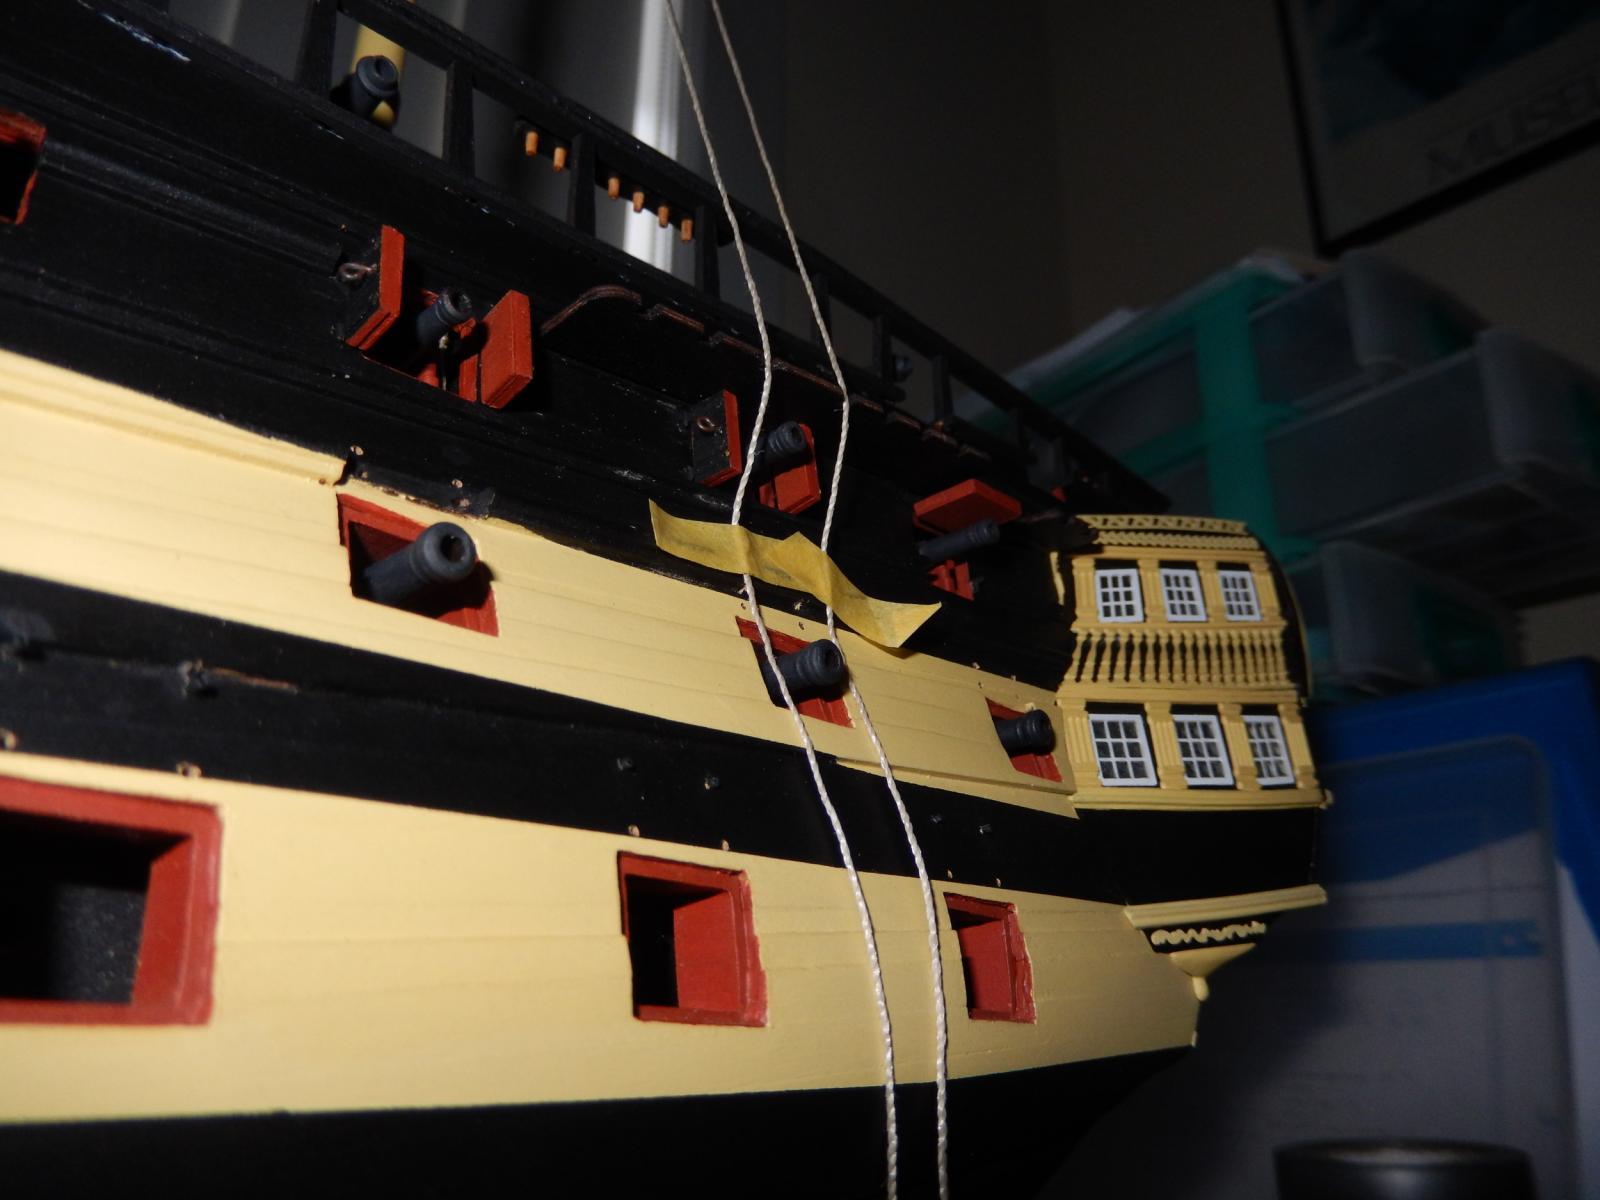
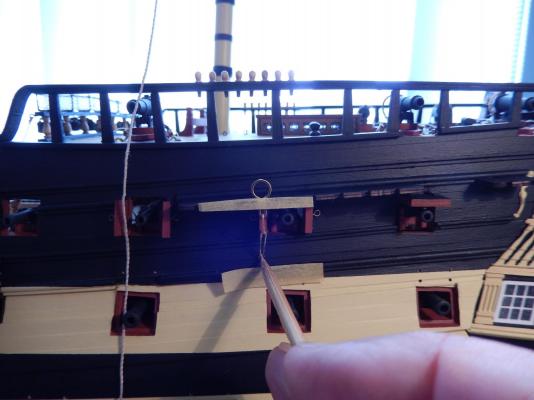
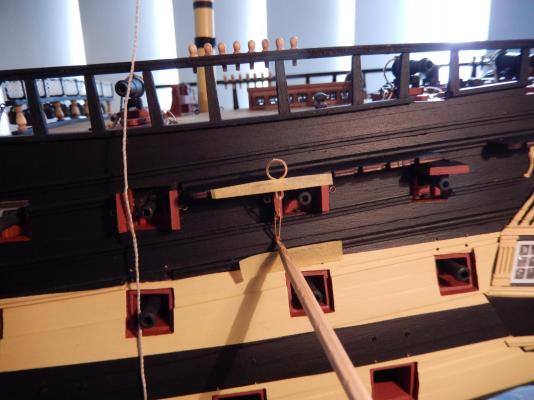
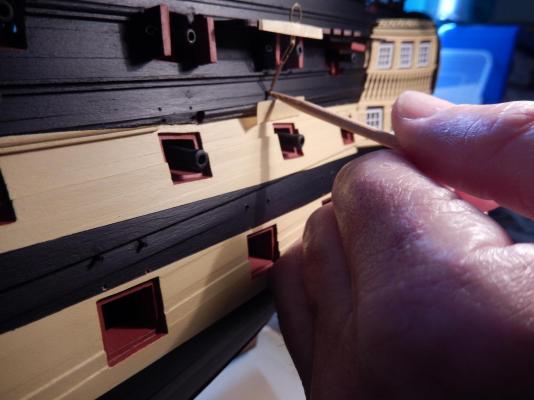
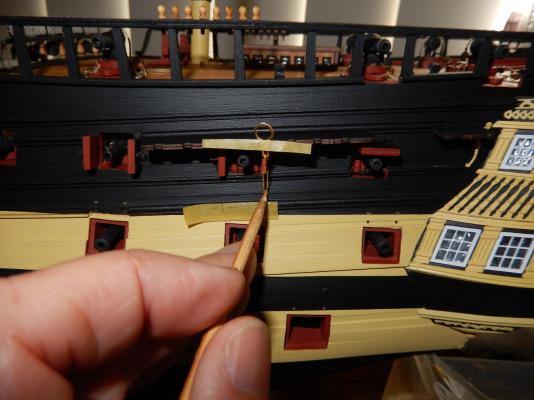
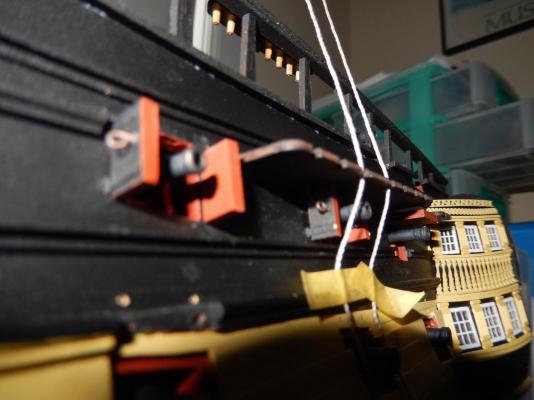
I have experimentally fitted the chainplates over the two open gun port doors to the correct angles. As well I played with the angle of the deadeye (part 340) - angling it towards the mast as it would be when properly rigged (not shown in the photos). In all cases the assembly just missed (by about 1/2 mill) the doors. In the following photos, there really is a gap! Here is the rear door - again, the assembly just misses. I just looked at the post and the last photo is out of order for some reason.


-
Arthur: I did my best to measure (conservatively) how long the chain plate assembly is. My measurement does go about 2-3mm above the lower molding (I hope.). I measured from the parts plan showing the dimensions of the three components(340, 292, and 293) allowing for the thickness of the material, rather than the front elevation of the hull plan which, because of the angle of the assembly, would foreshorten its true length. I guess the obvious answer is to make up one of the assemblies and see what happens. I'll do that tomorrow if I get a chance. (it's now nearly 10pm). If that doesn't answer, as I said in my post, lengthening part 292 is the obvious solution though I will not be happy to do it. I shall report the result.
-
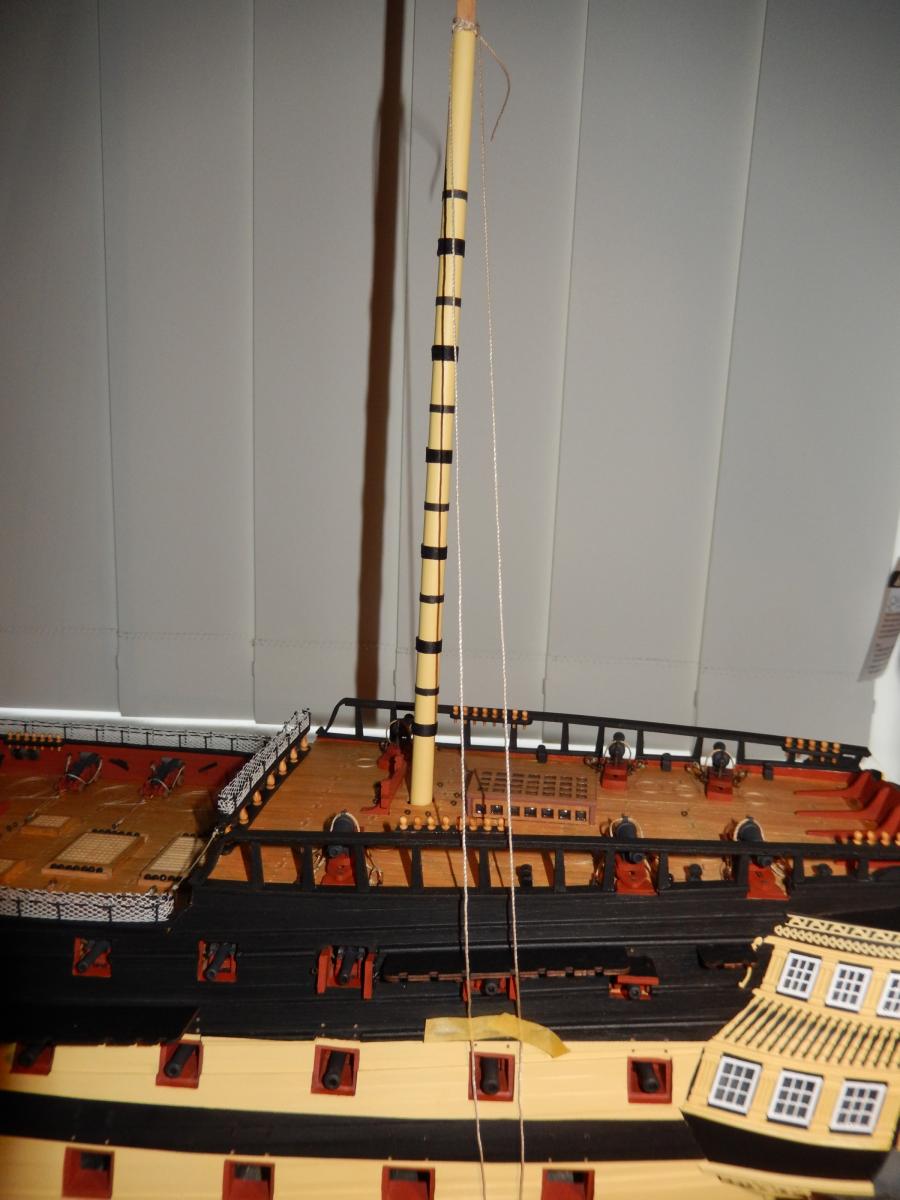
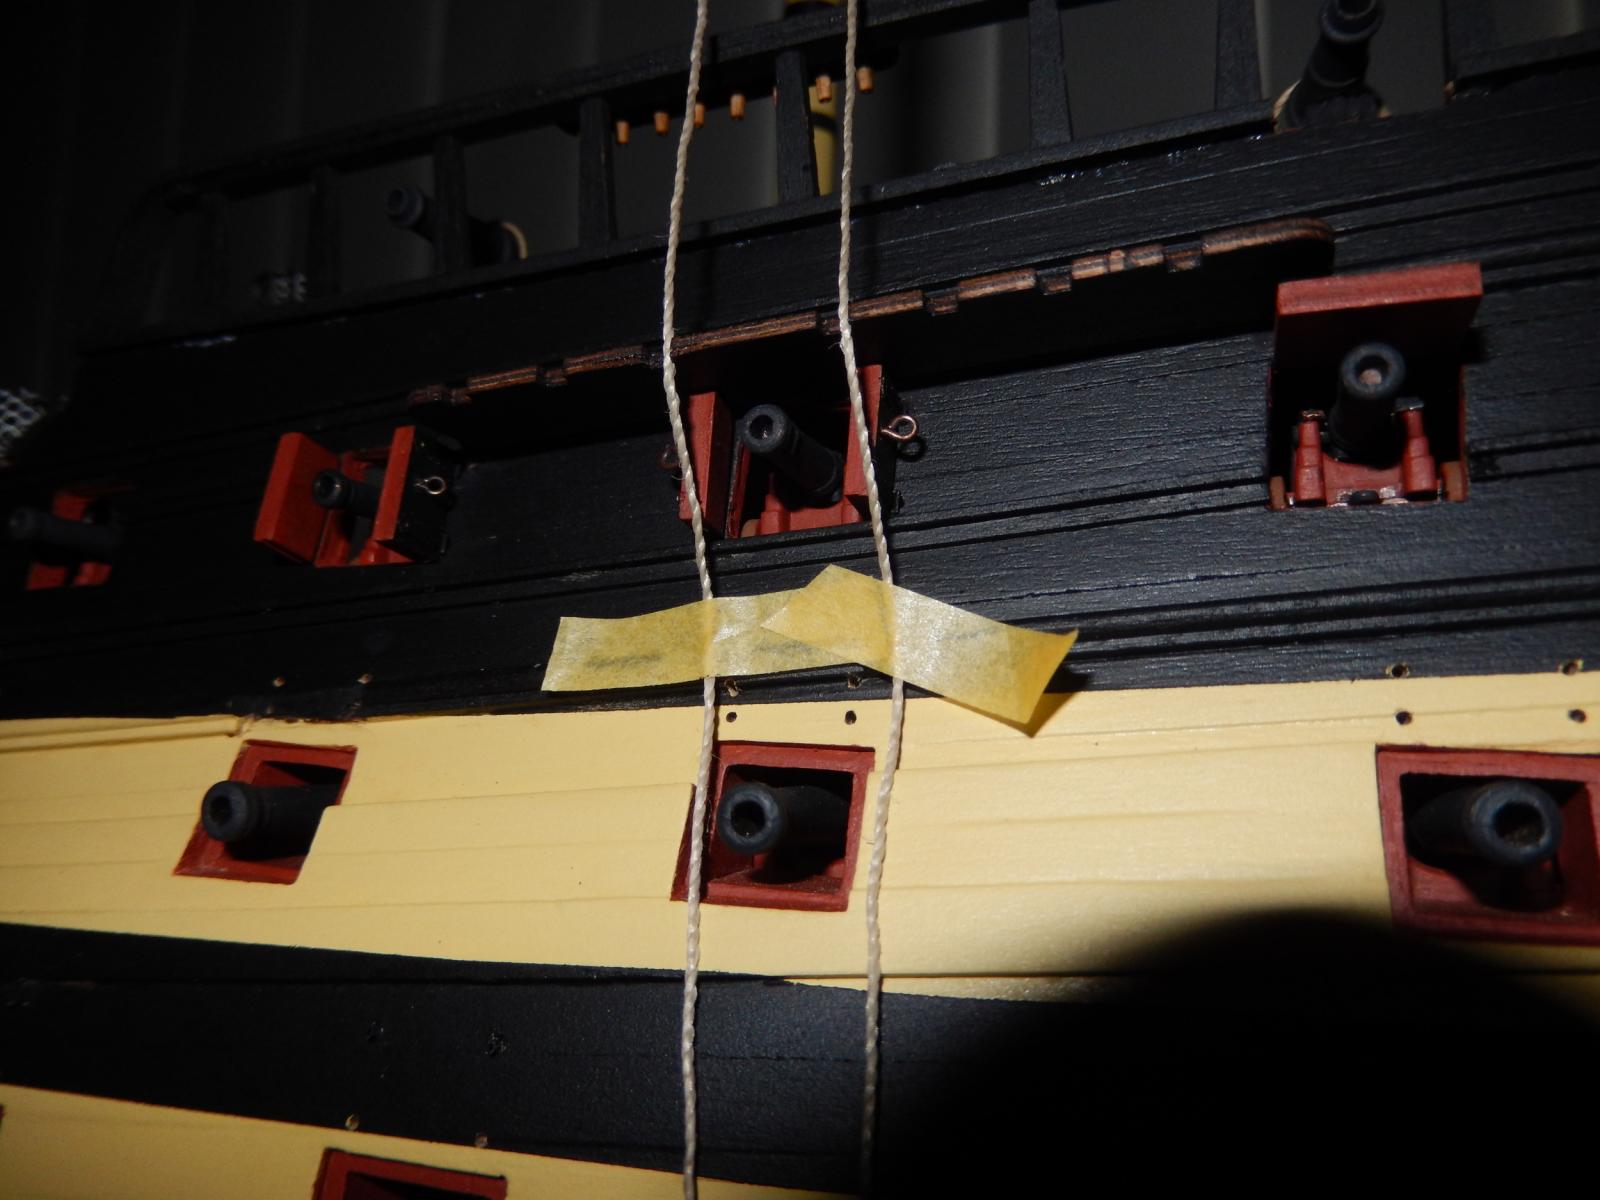
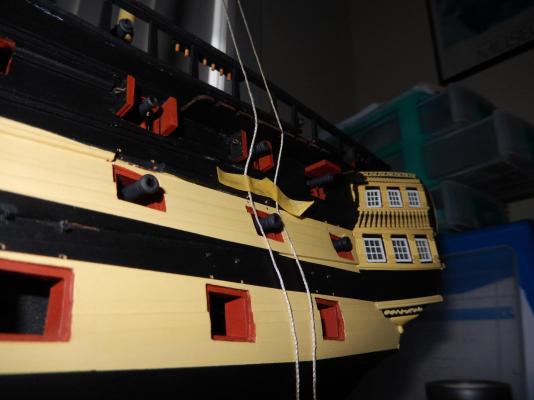
I have dry-fitted the gun port lids on the rearmost ports and the channel. My concern is that the channel will impede the opening of the lids. I ran some thread from the mast through the channel to an estimate of where the chainplate assembly would be attached to the hull. Only the split doors on middle port seem likely to be a problem and I MAY just get away with it. The middle part of the chainplate assembly (part 292) is the most likely to cause trouble. Replacing it with some brass wire and making the assembly slightly longer may do the job. All of the assemblies will be blackened so I hope if this is necessary it won't be noticeable. The left hand door will be very close indeed. The right hand door is probably OK. Now to see how the other channels go.


-
Solder and brass blackening
RMC replied to Cabbie's topic in Metal Work, Soldering and Metal Fittings
There is a gun shop in Beverly Hills in Sydney that has the Birchwell Casey stuff. It works quite well but make sure you wash it off after you get the required degree of black, otherwise the residual material will rub off - it makes dirty marks where you certainly don't want them. Bob (rmc) -
Bettina: 14 likes? Your keyboard must have stuck. Hi Arthur: I see you're online. I hope you find my recent post useful when you get around todoing your open gun -port lids.. If it would further help I'll try to take some better photos of the potential channel/lanyard/gun port problem. It may be that I have put the molding on a mill or two too low so it may not be a problem for you.
-
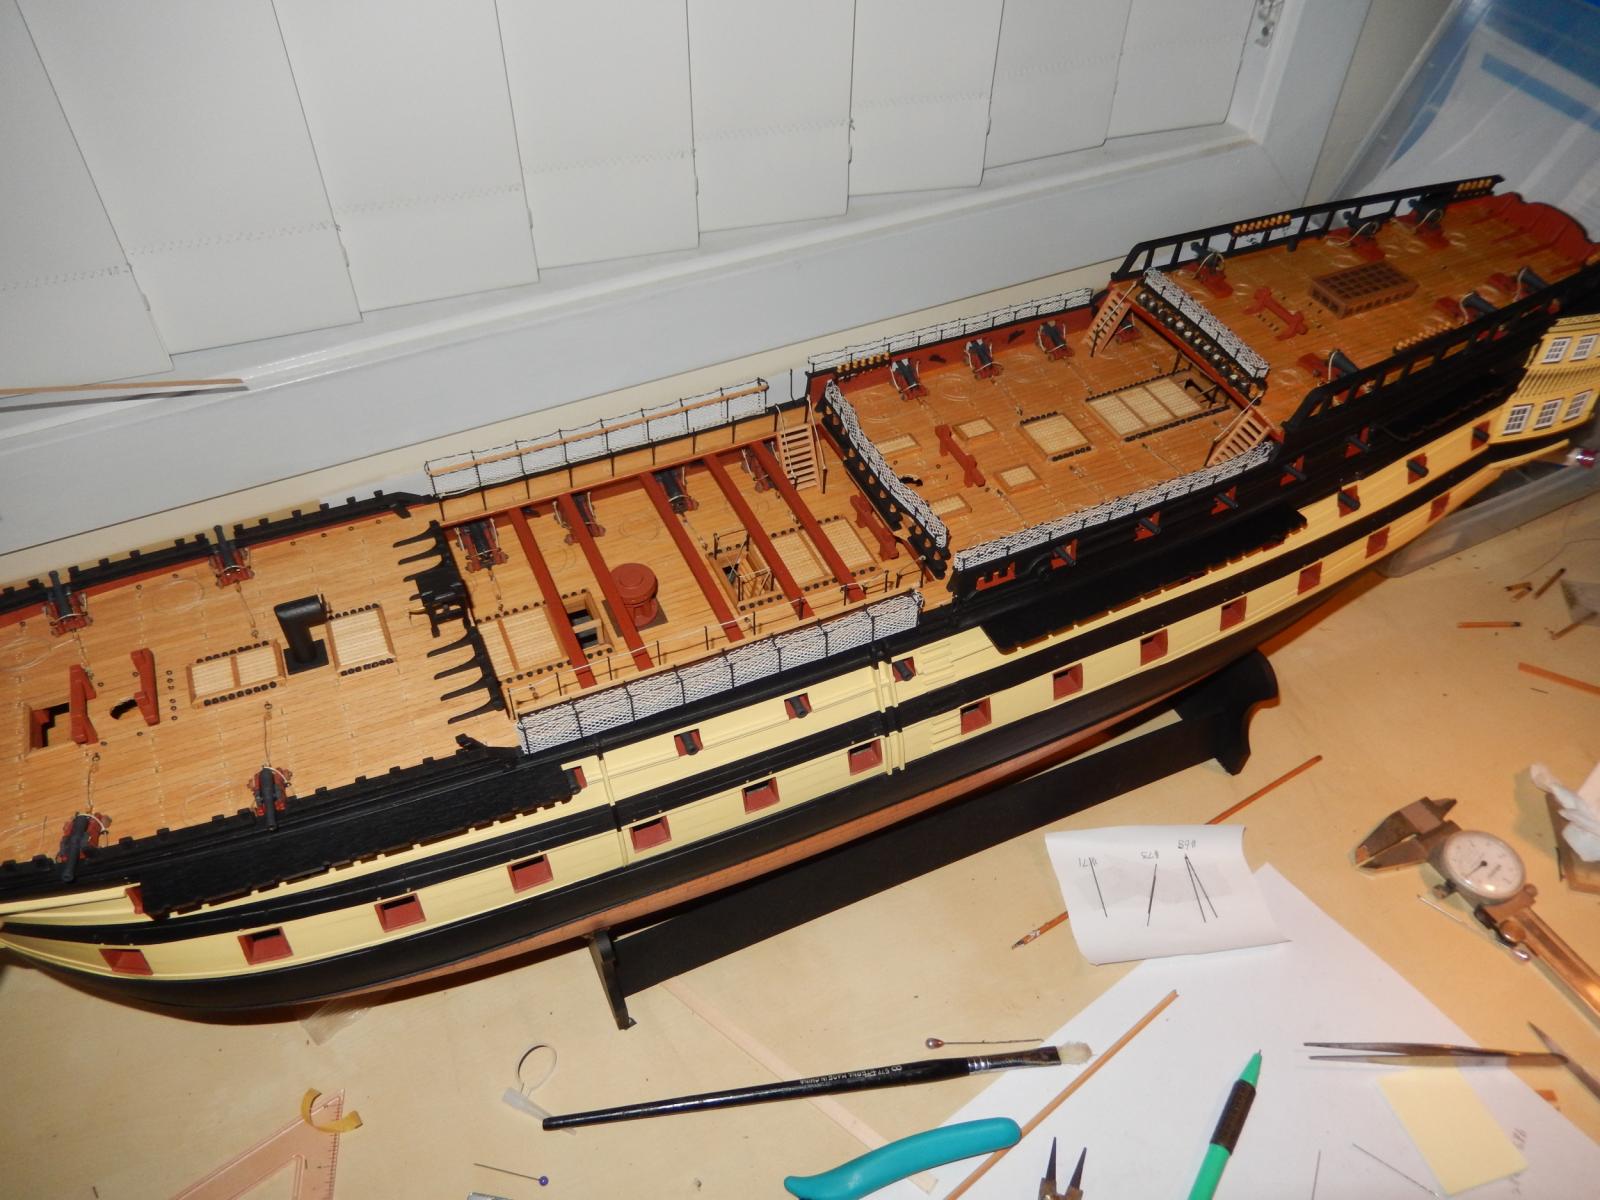
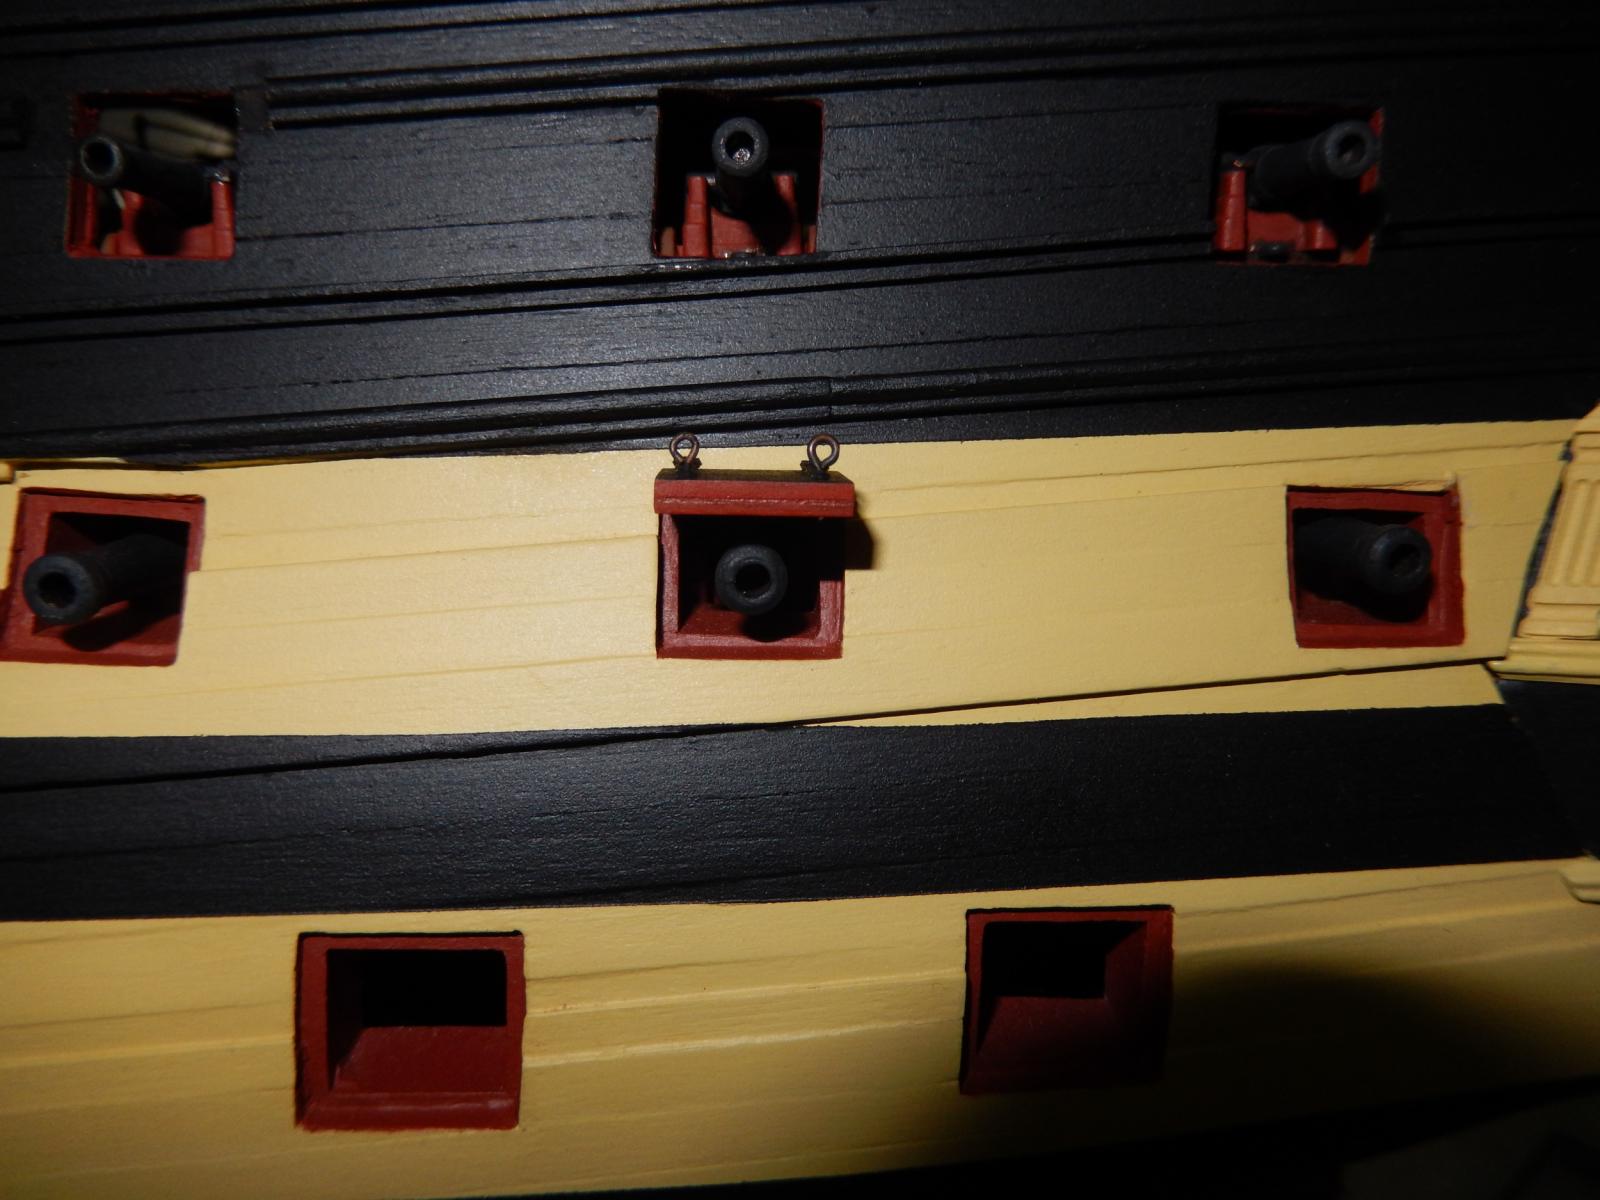
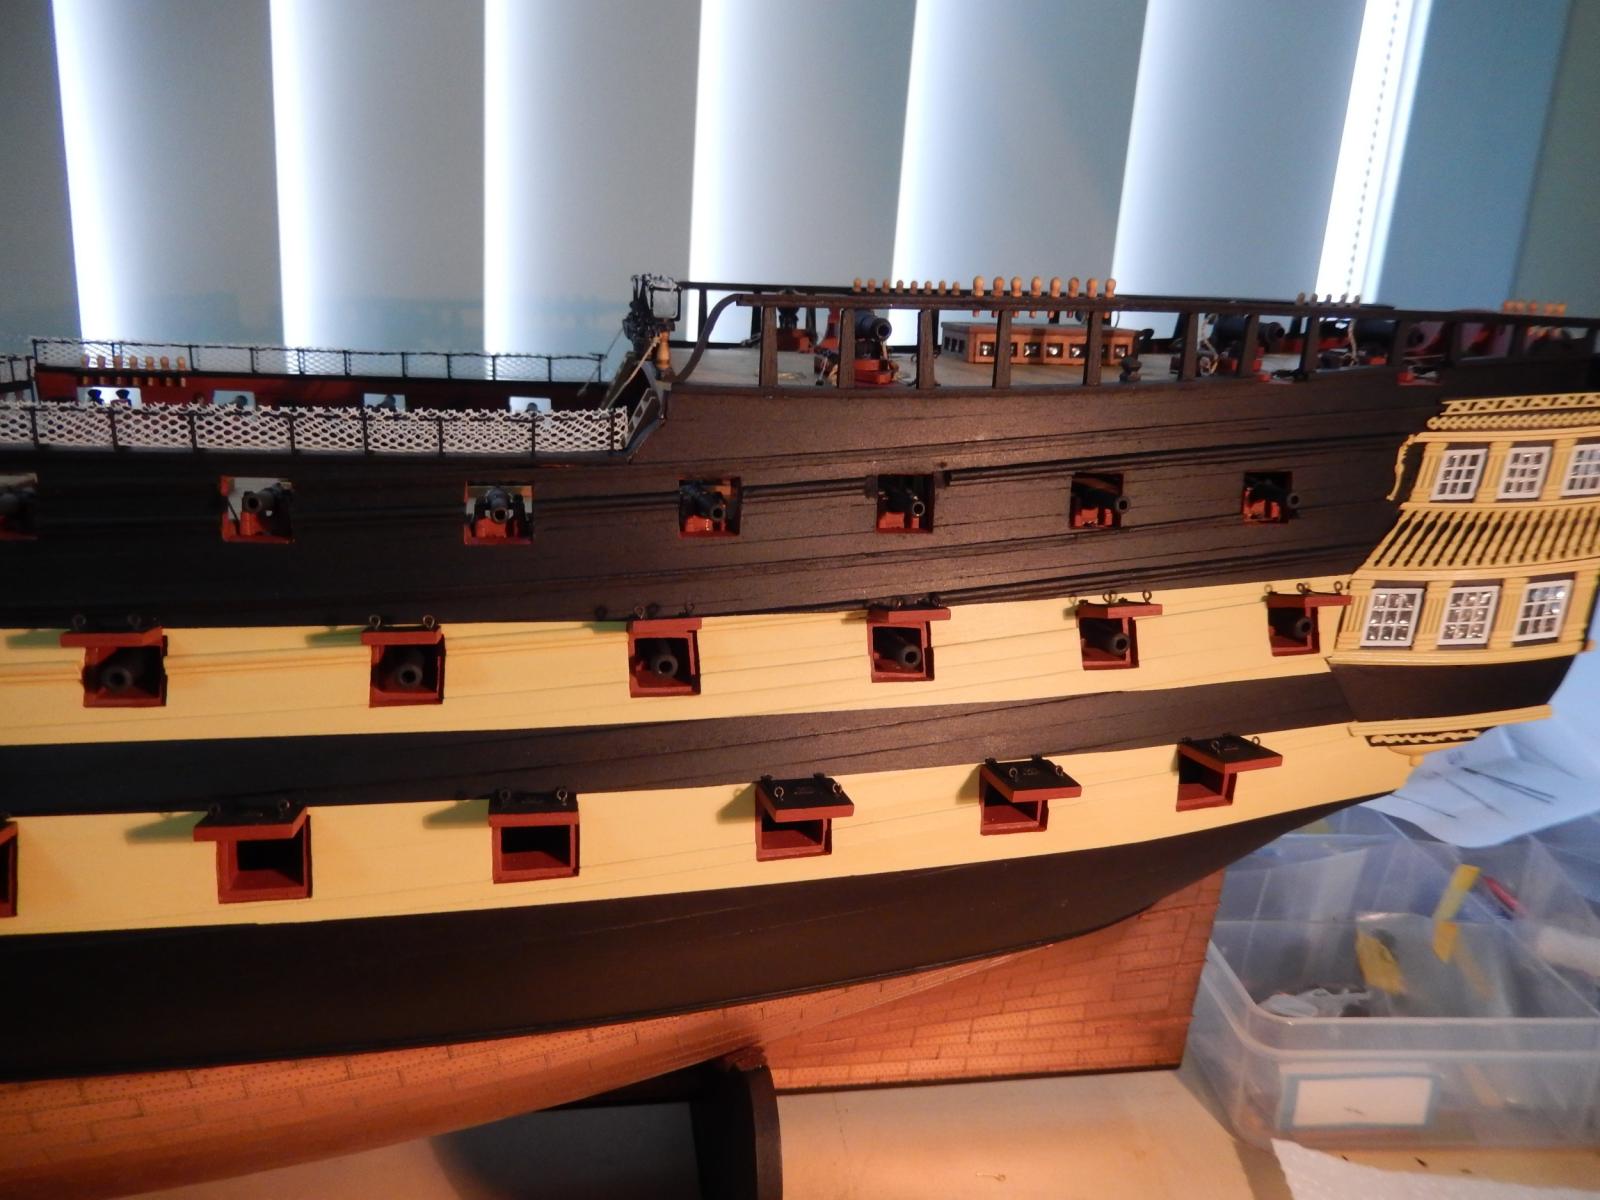
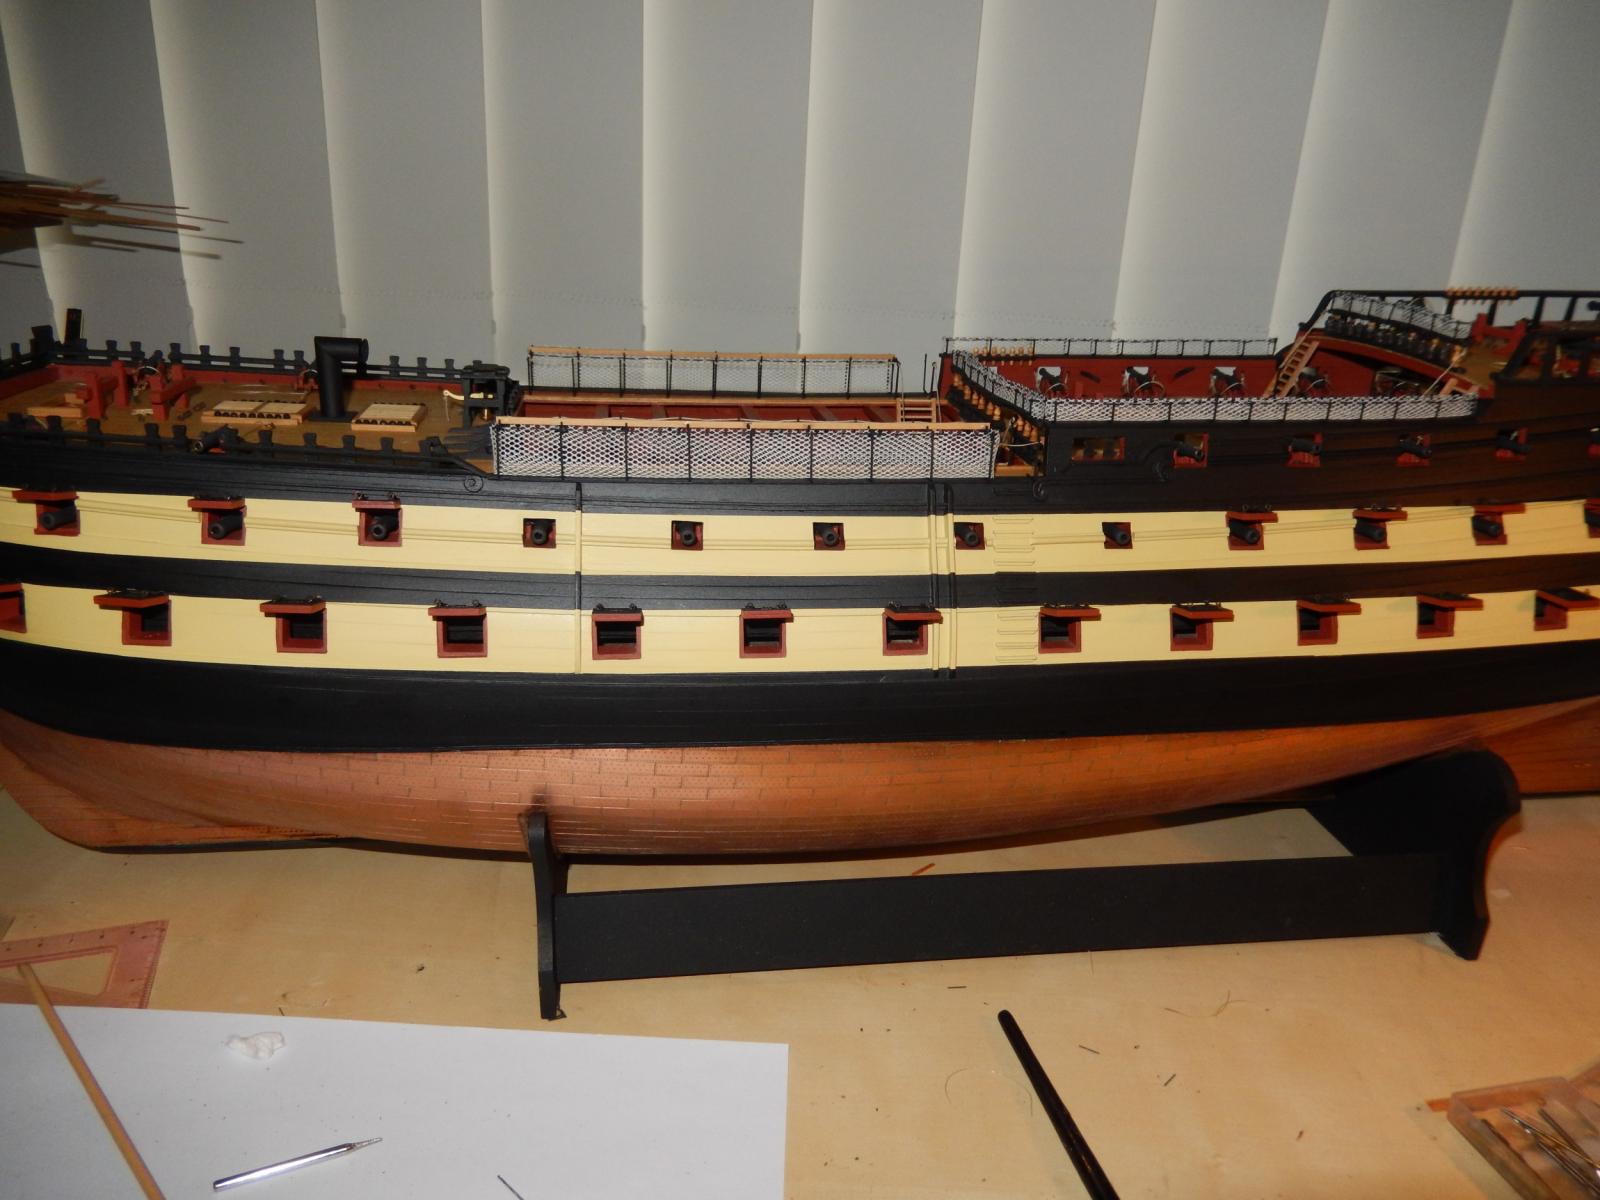
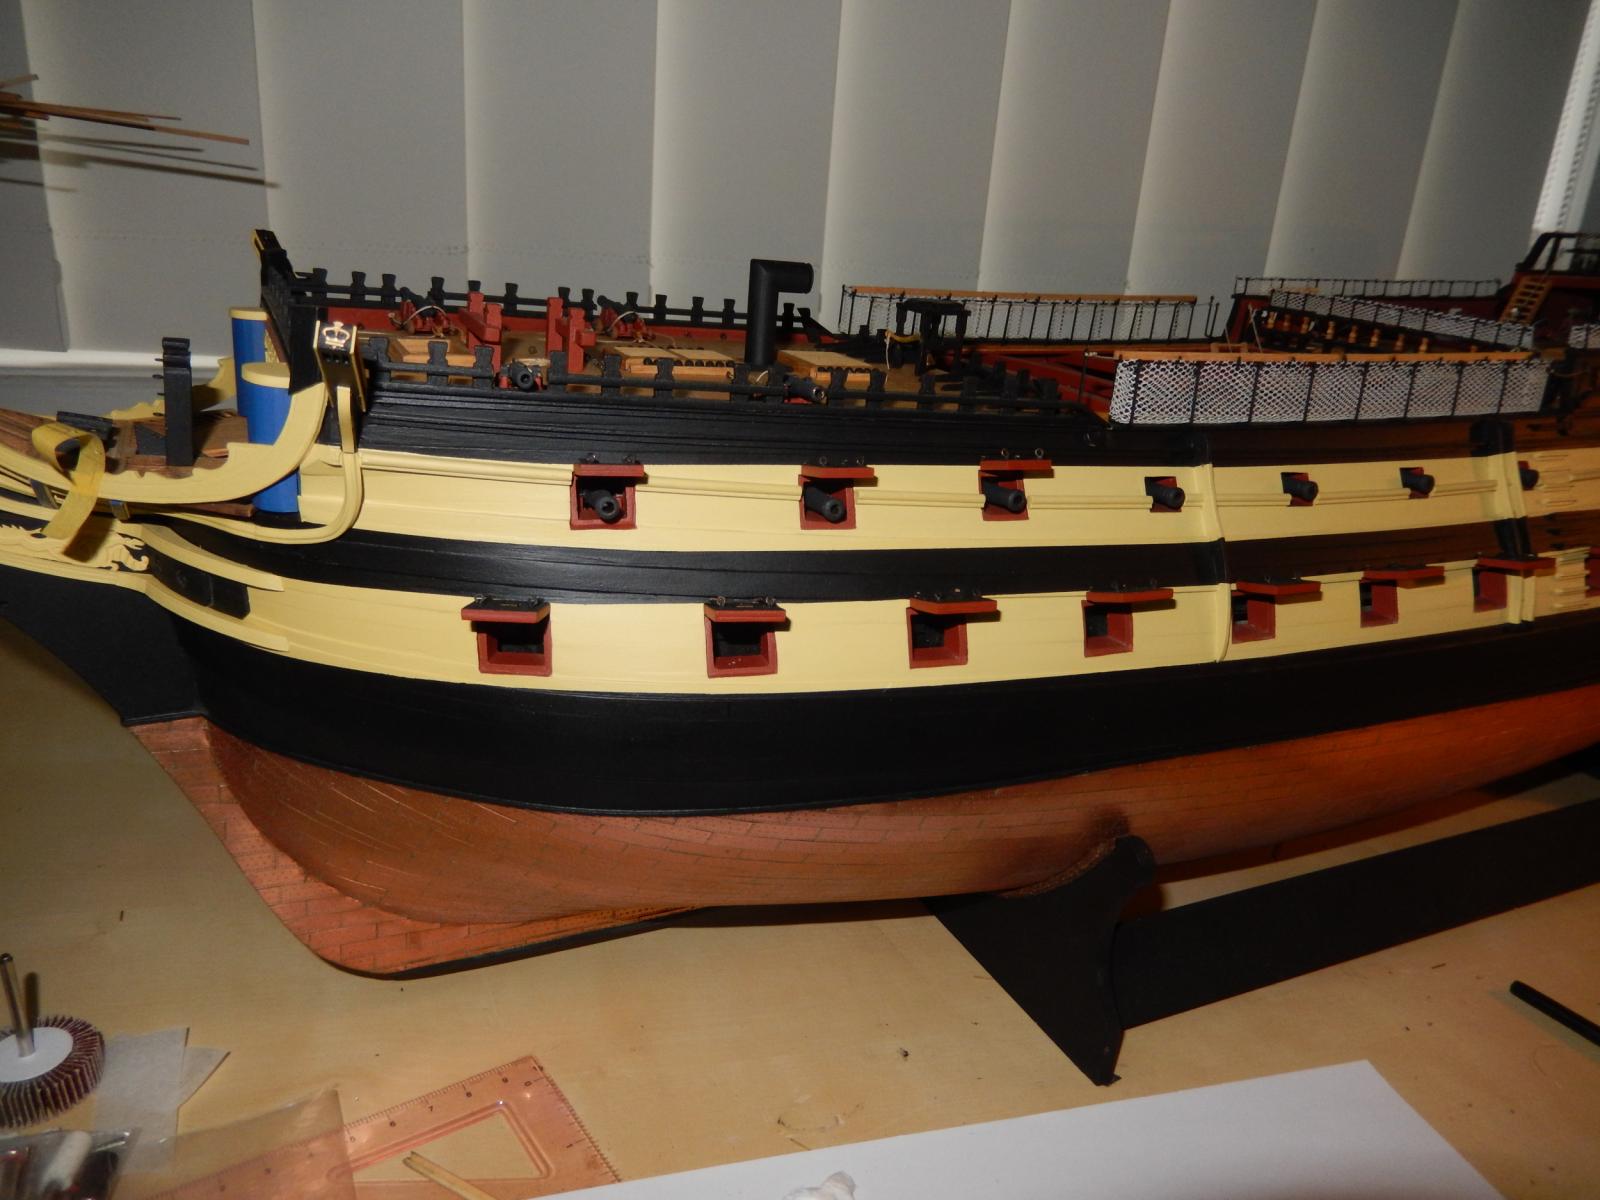
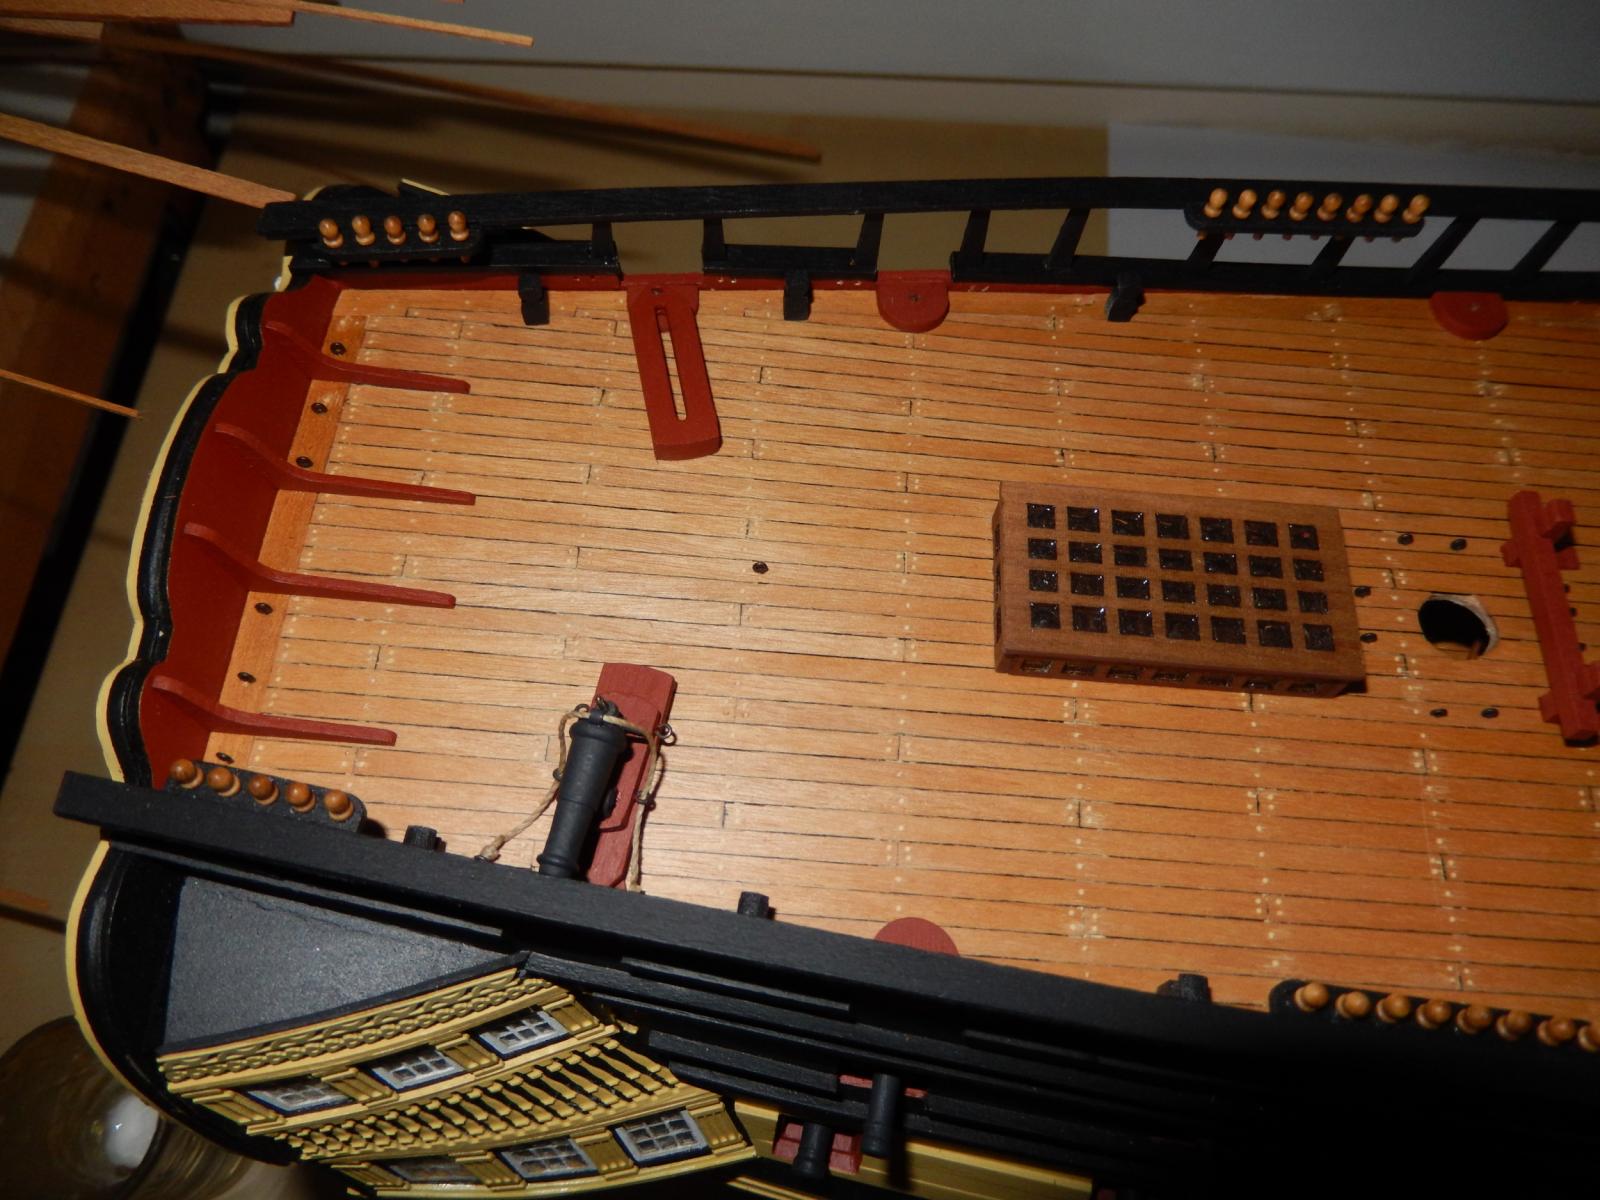
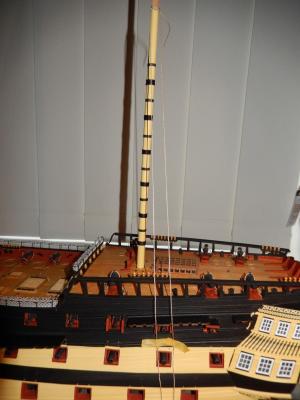
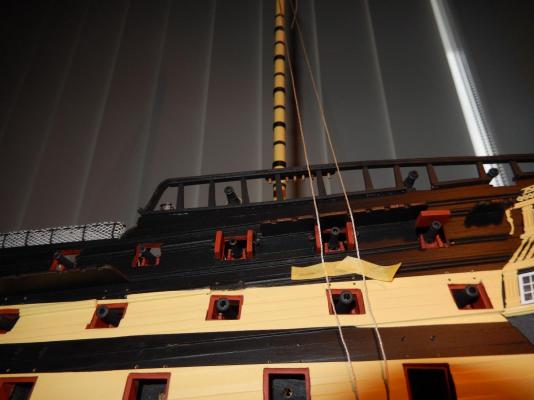
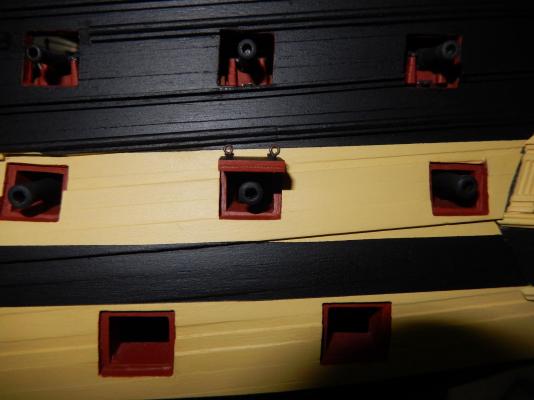
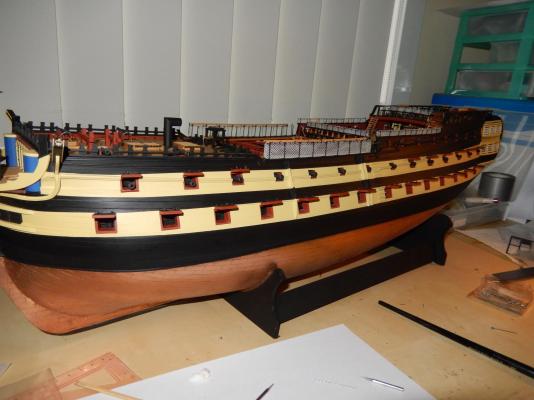
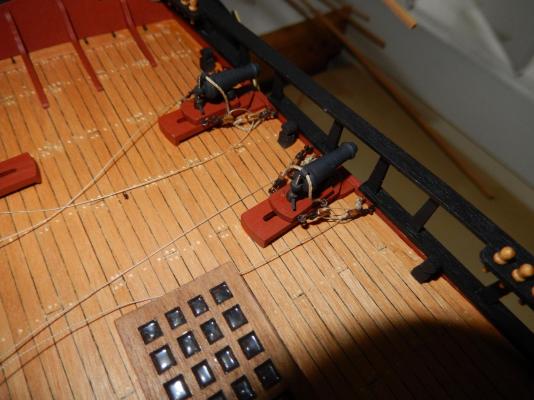
I have now dry-fitted the channels. The main reason for fitting them is to see how, or if the channels impede the opening of the gun port lids; and for some, of course they do. The lanyards that support the lids above the port hinges provide the real difficulty. The following photos try to show how closely the protruding channels will be to the open lids - in effect they will determine the angle of the lids when they are open. Unfortunately despite my efforts to properly light the underside of the channels, I didn't have much success, though I hope the photos give some idea of how close they are to some of the gun ports. I strongly suggest at least dry-fitting the channels before finally rigging the gun port lids. Here, the problem is with the two rear ports at the top. Here, the middle two ports. Here, the second and third ports. None of the problems are insurmountable; they just make things rather awkward. The following gives an idea of how the channels will look, though again the pictures have not turned out as well as I had hoped.

-
Thanks for the comment Timmo, and to others for the likes. I was too optimistic regarding the amount of wood work I have to do to fit the gun port lids. Once I started drilling holes for the lanyards it became apparent that some trimming would be necessary of the moldings above a few of the ports. Again I strongly advise those who are not up to the painting stage, to dry fit the gun port lids, and to drill all the required holes BEFORE painting. Fortunately there have been no disasters so far, but the process is quite risky. I have found that heat-shrink tubing that is used in electrical work does a really nice job in finishing off the holes for the lanyards. It starts at 1.5 mm in diameter and is supposed the shrink to 0.8mm. Using my wife's hair dryer (god knows what it does to her hair) I have been able to get it down to ).76mm which is certainly not noticeably different to the 0.7 recommended in the instructions. I had hoped to have a few photos of progress, but odd things are happening to the program I use to bring the photos under 2 megs.
-
comparison of masking tapes
RMC replied to vaddoc's topic in Painting, finishing and weathering products and techniques
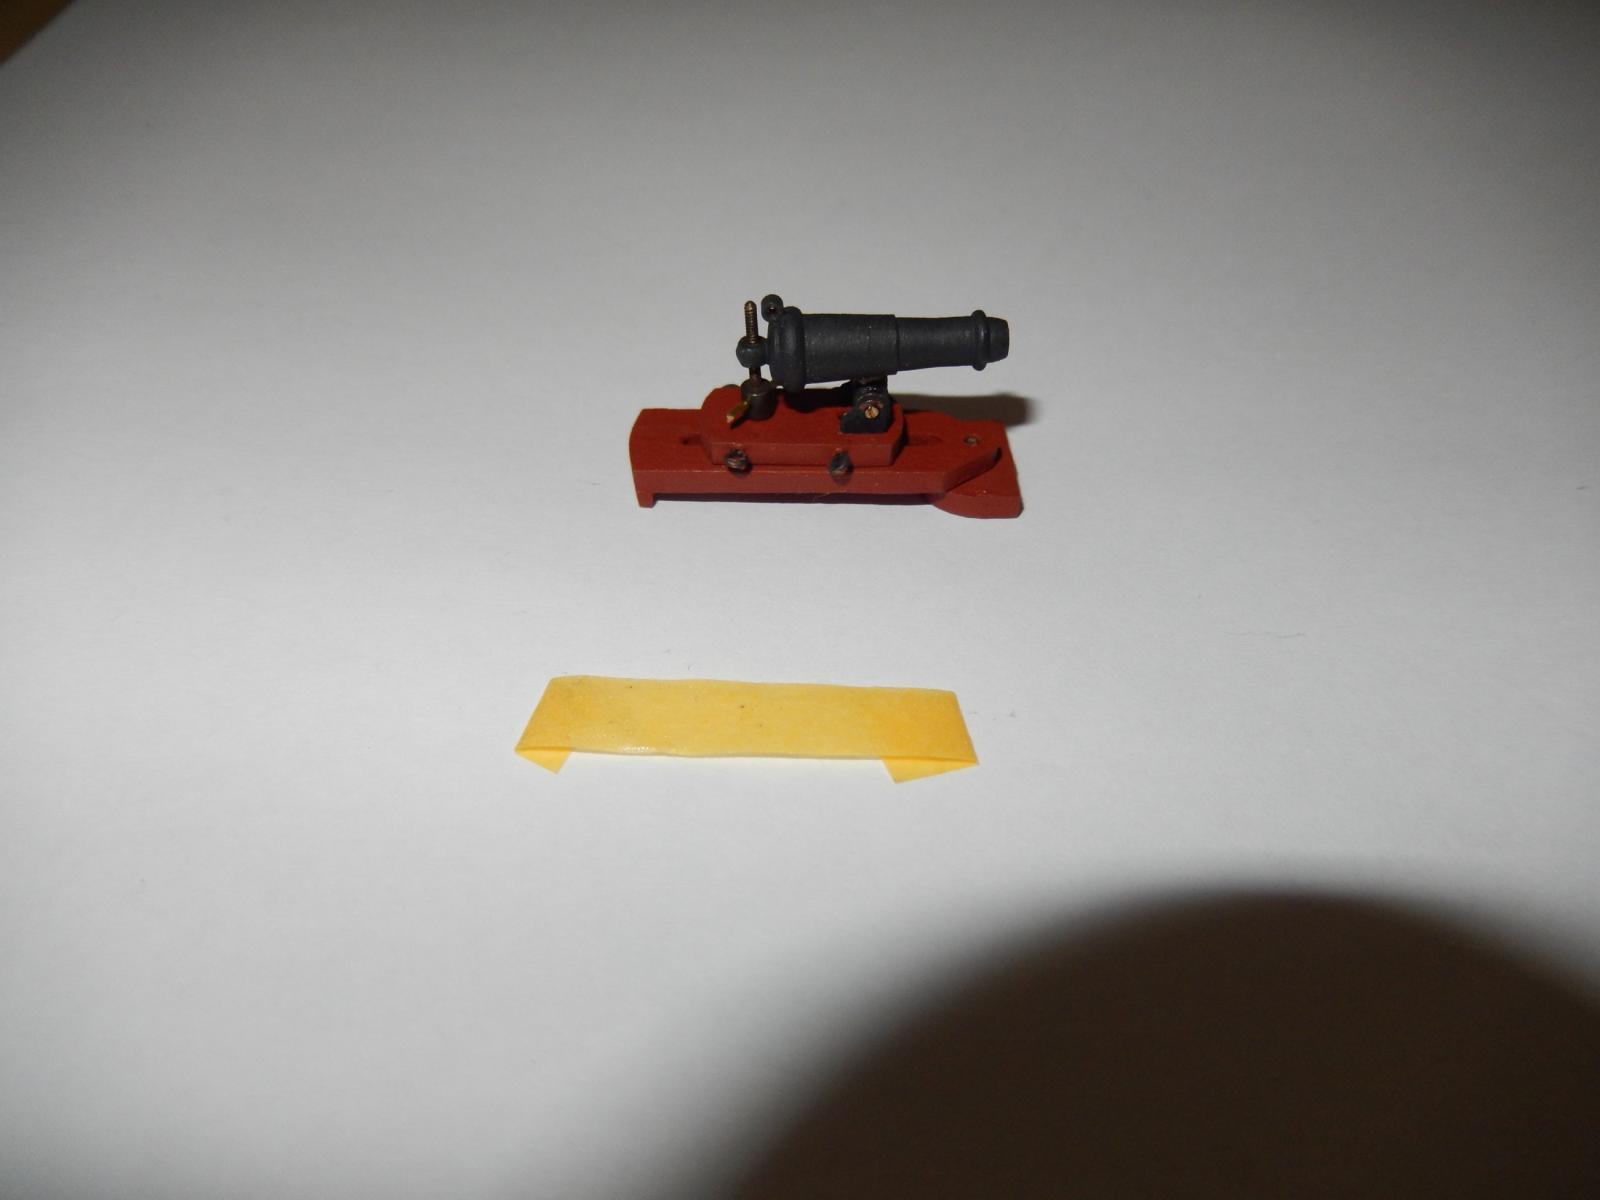
I use Tamiya tape for almost all painting jobs where a clean line is required. The only drawback is that the narrowest Tamiya is 5mm wide. Sometimes you need something narrower. For this you could try Pactra which is also excellent. Bob (RMC) -
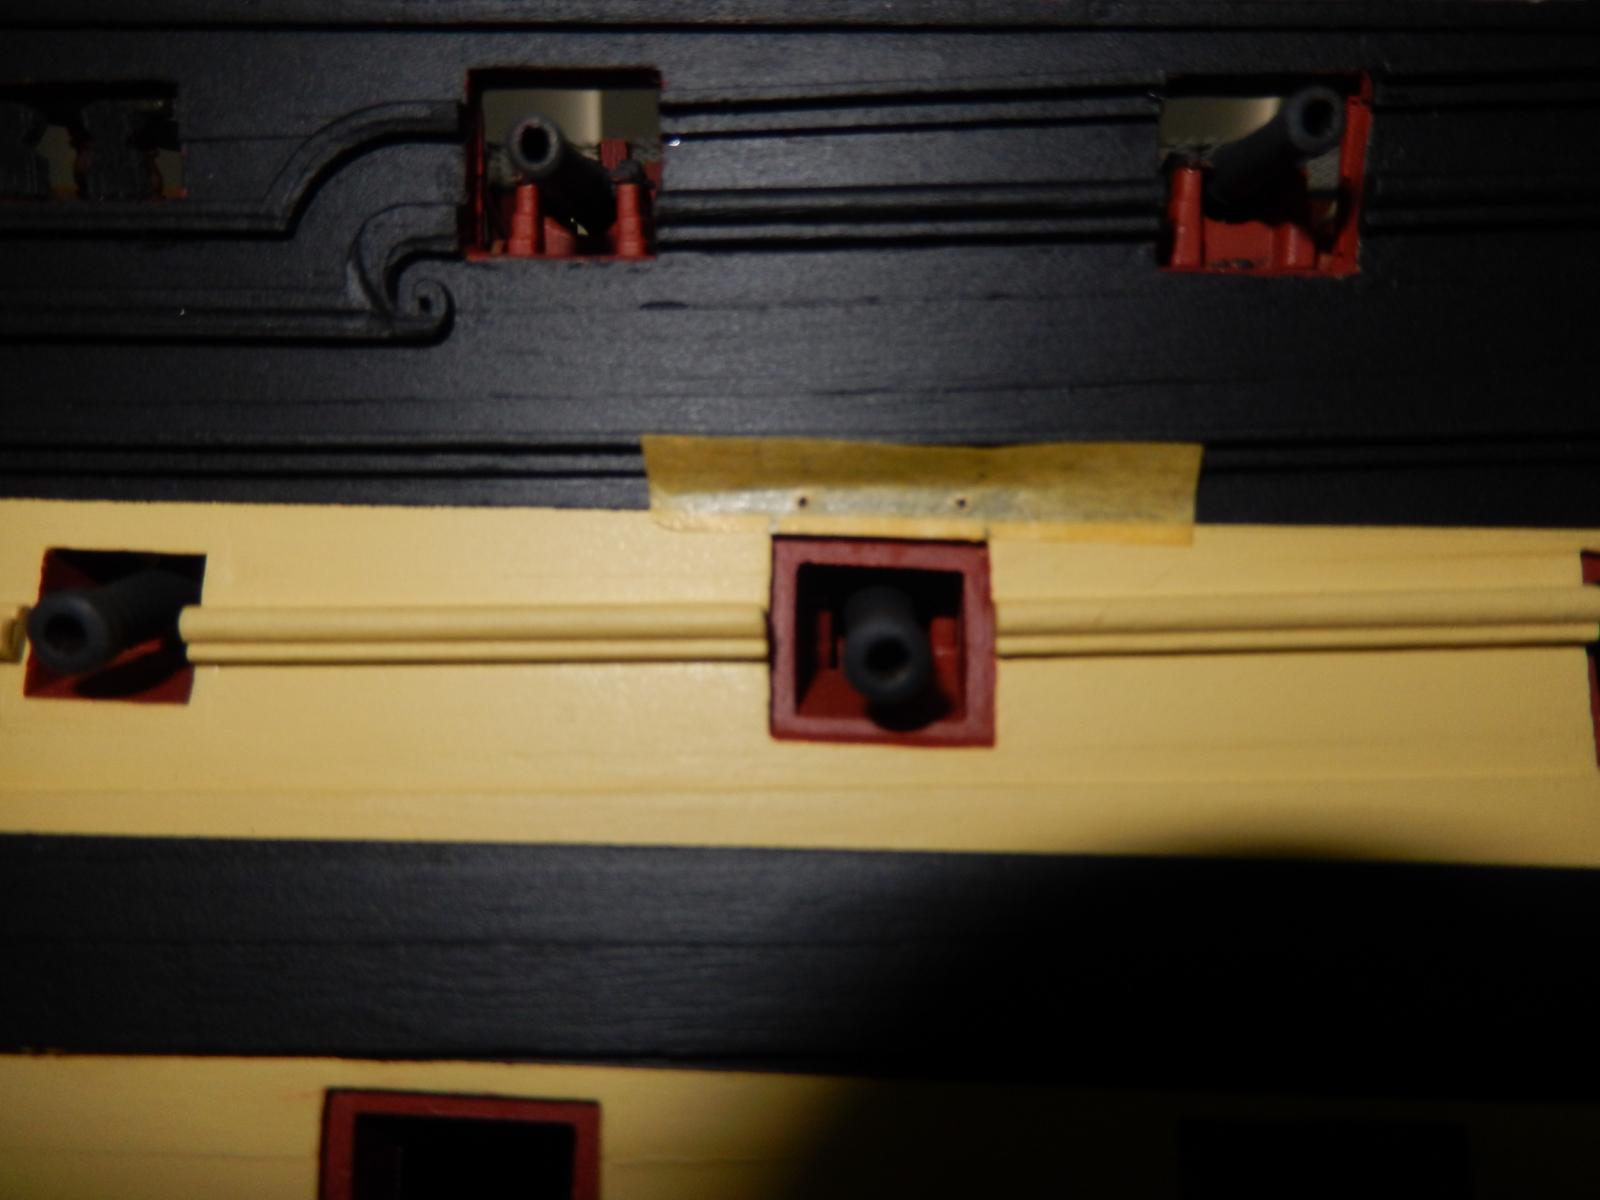
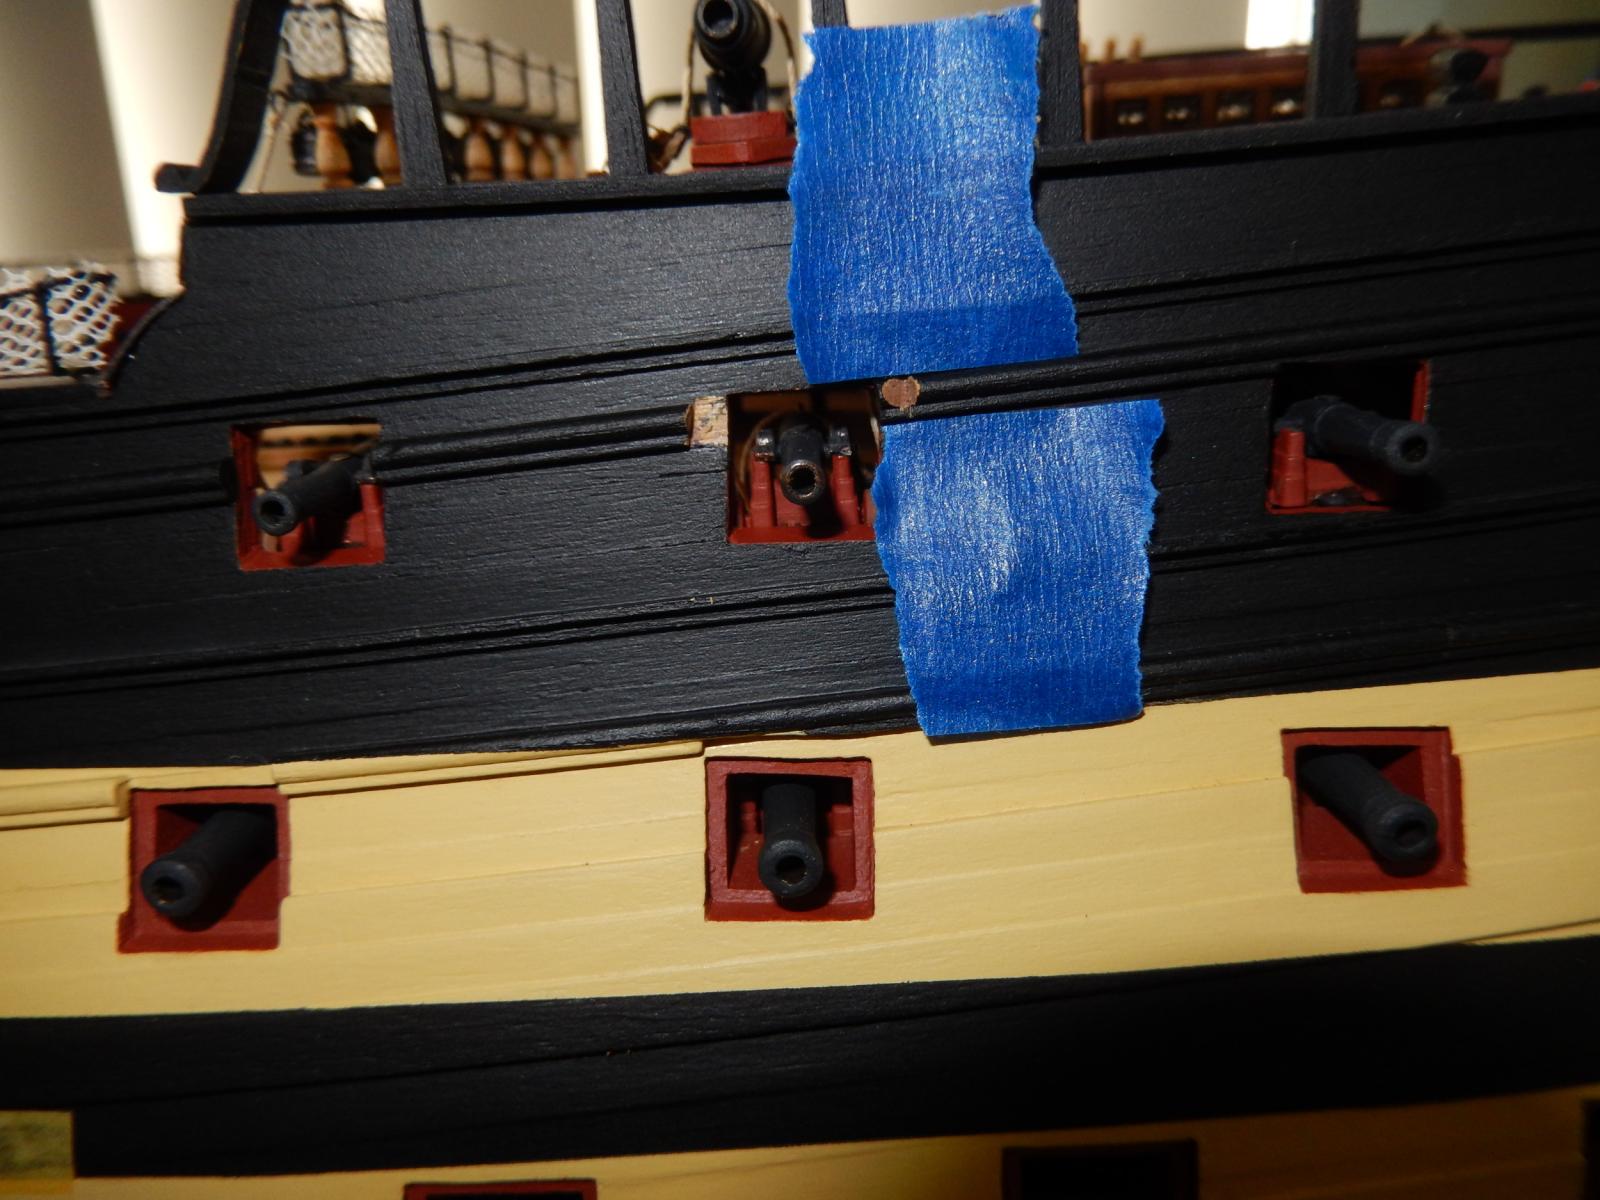
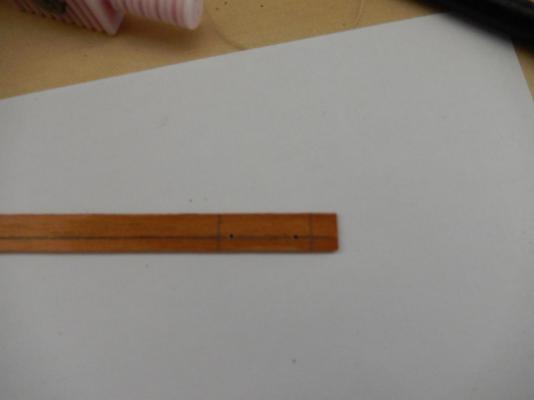
Drilling the holes for the gun port lids on the left side went surprisingly well, though with the usual quota of small dramas. With one exception, I was able to get away with not having to cut into the hull, though it was a close run thing. The exception is shown below where the molding is cut away completely to provide for the lid. I used a very sharp chisel-shaped craft knife, making a shallow cut where required, then cutting a wedge up to the cut, then repeating until the required depth was reached. My idea of using a piece of wood strip with two holes as a jig to mark the holes for the lid hinges of course didn't work. However a variation on the theme did. Marking a piece of Tamiya tape with the width of the gun port and the position of the required holes worked well. I marked the hull though the holes on the tape with a fine pin. These marks were then used as guides for the drill bit. Here is how it has all worked out. At this stage, all of the lids are just dry-fitted. There is still much work on them to be done. When finally fitted there will be some minor touching up to be done, and some small adjustments to be made in positioning and in the angle of the lids to the hull. Regarding the angle, having looked at lids all over the internet, setting them a little above the horizontal seems to be a good compromise (roughly where they are in the photos). I have yet to decide if I will fit eyelets to the bottom of the lids. It seems a bit like overkill with so many other bits and pieces going on around them. But then .....


- 949 replies
-
- 11
-

-
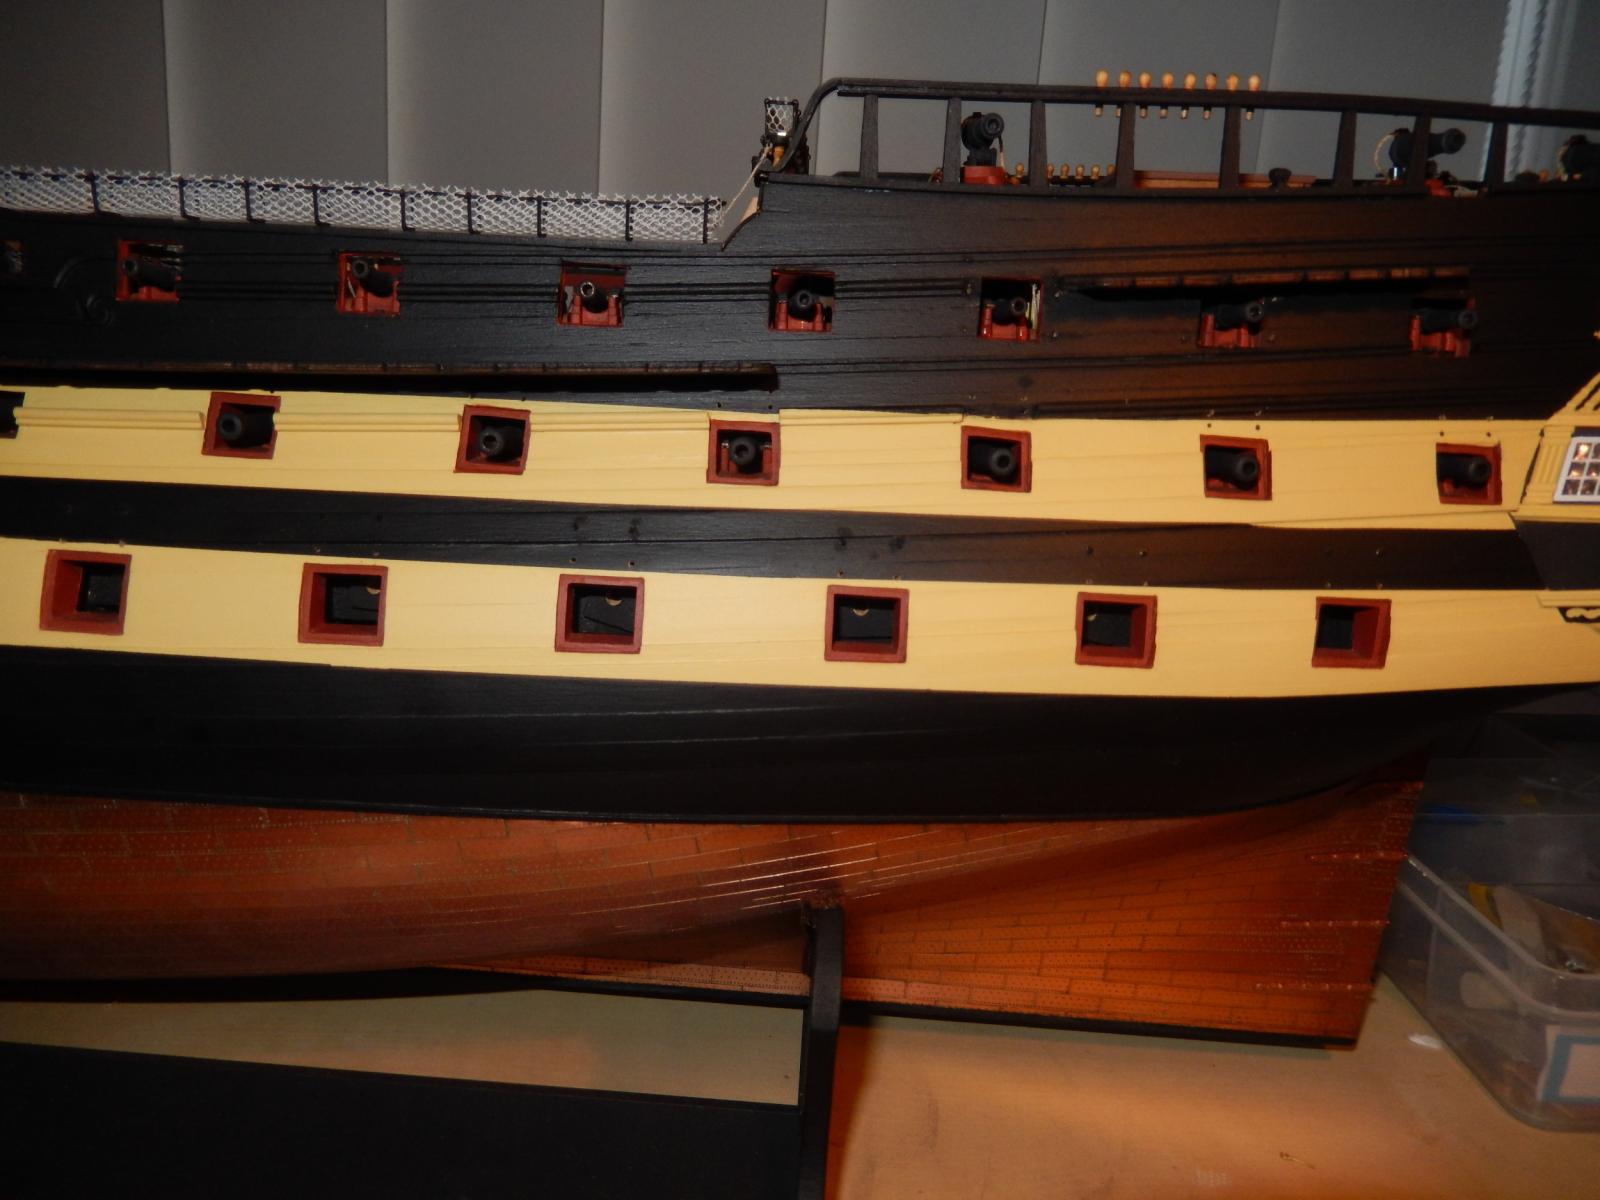
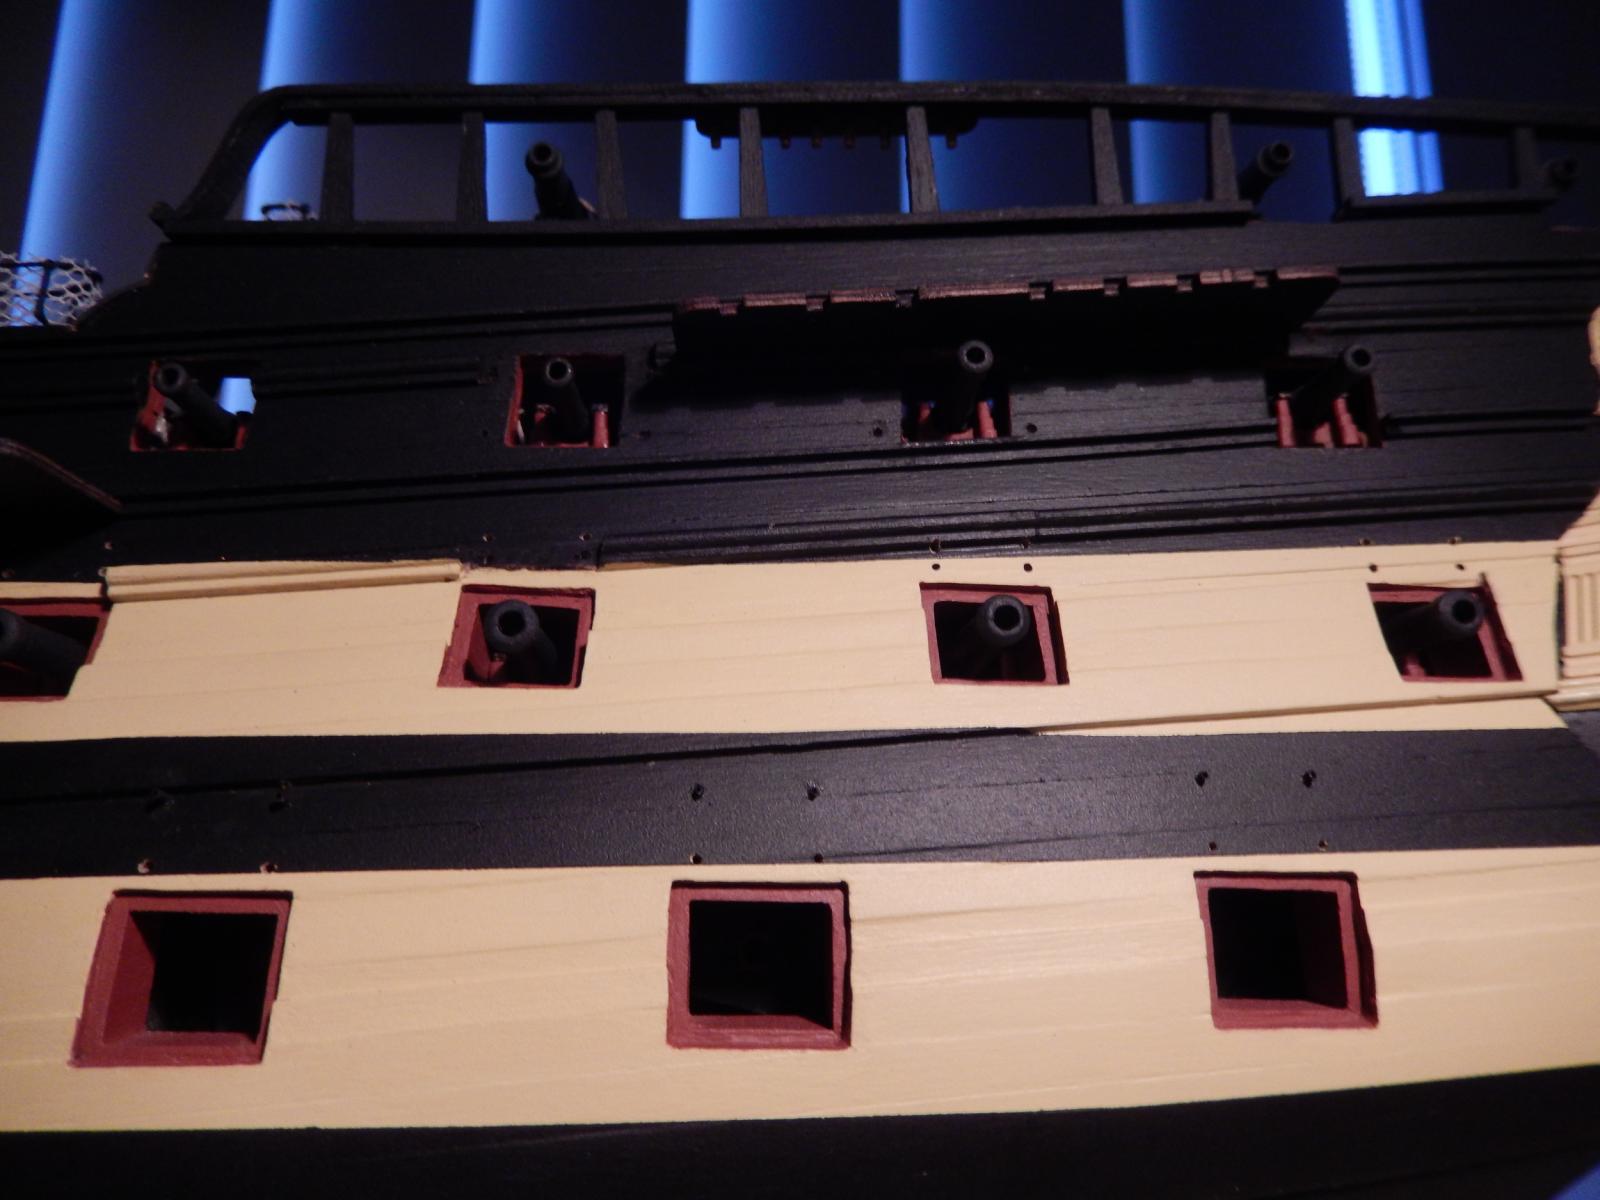
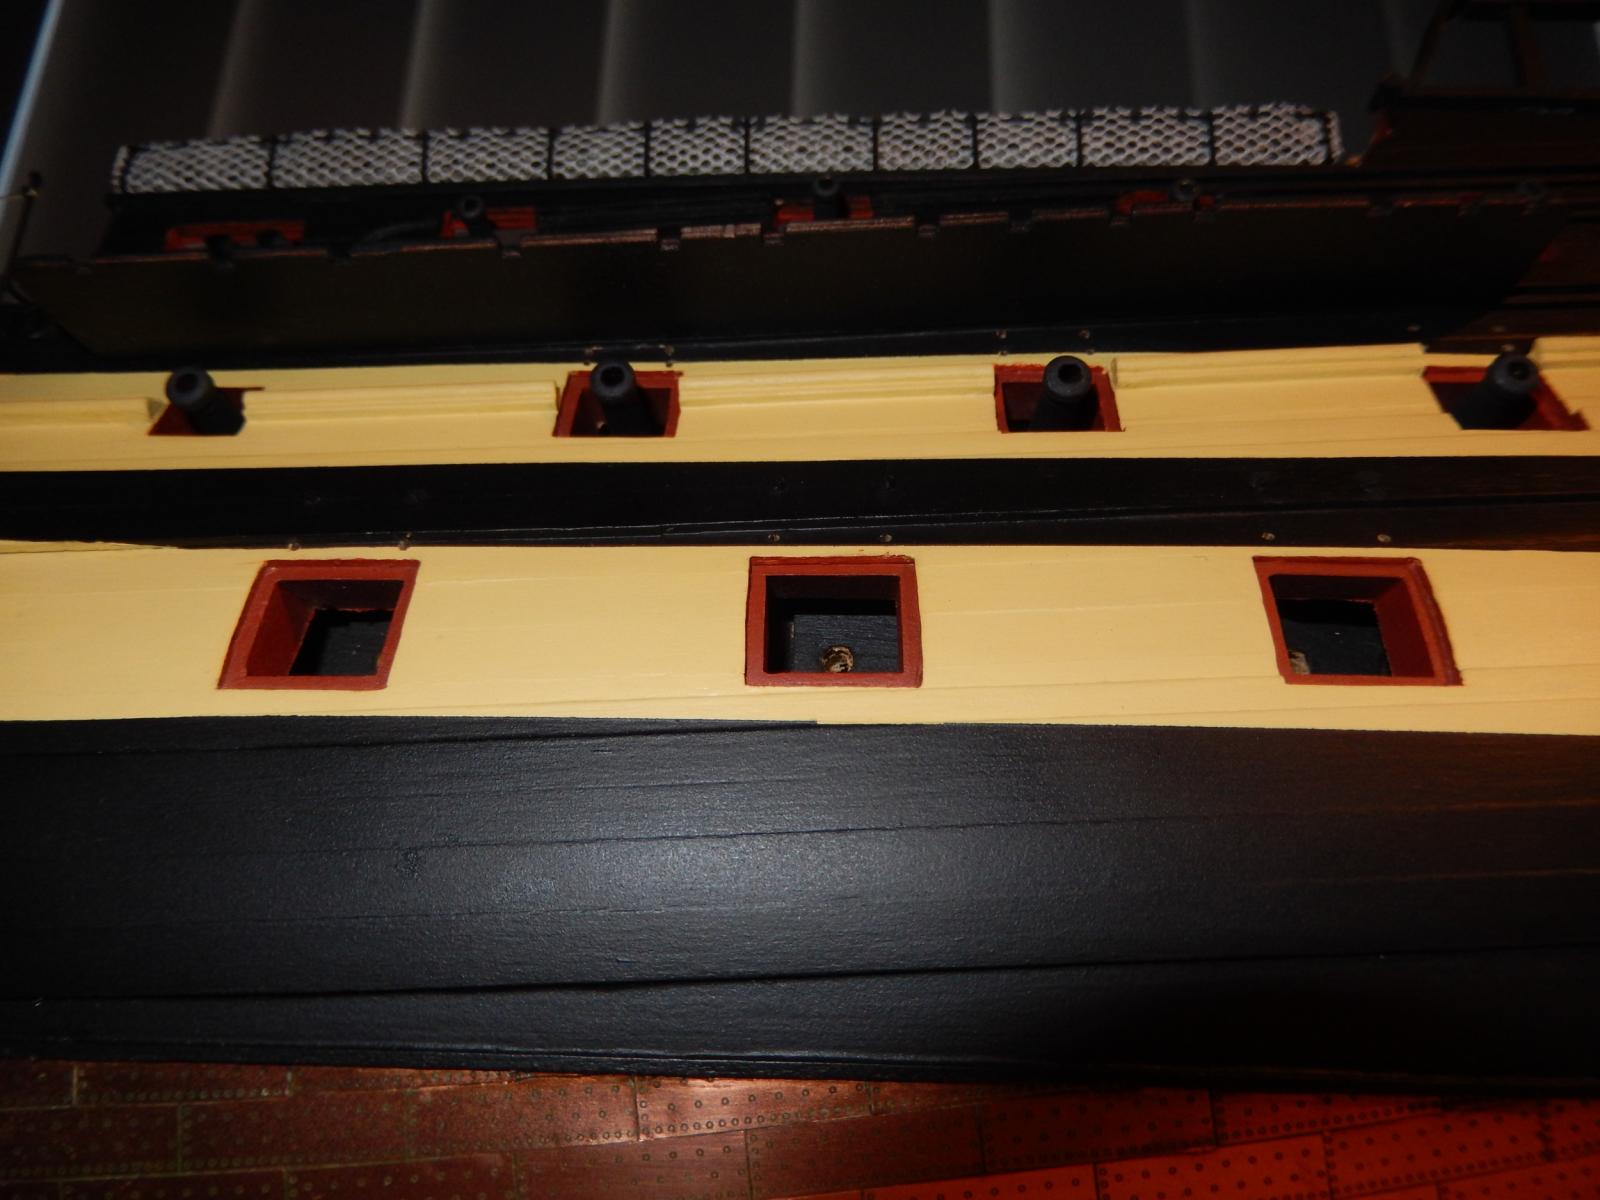
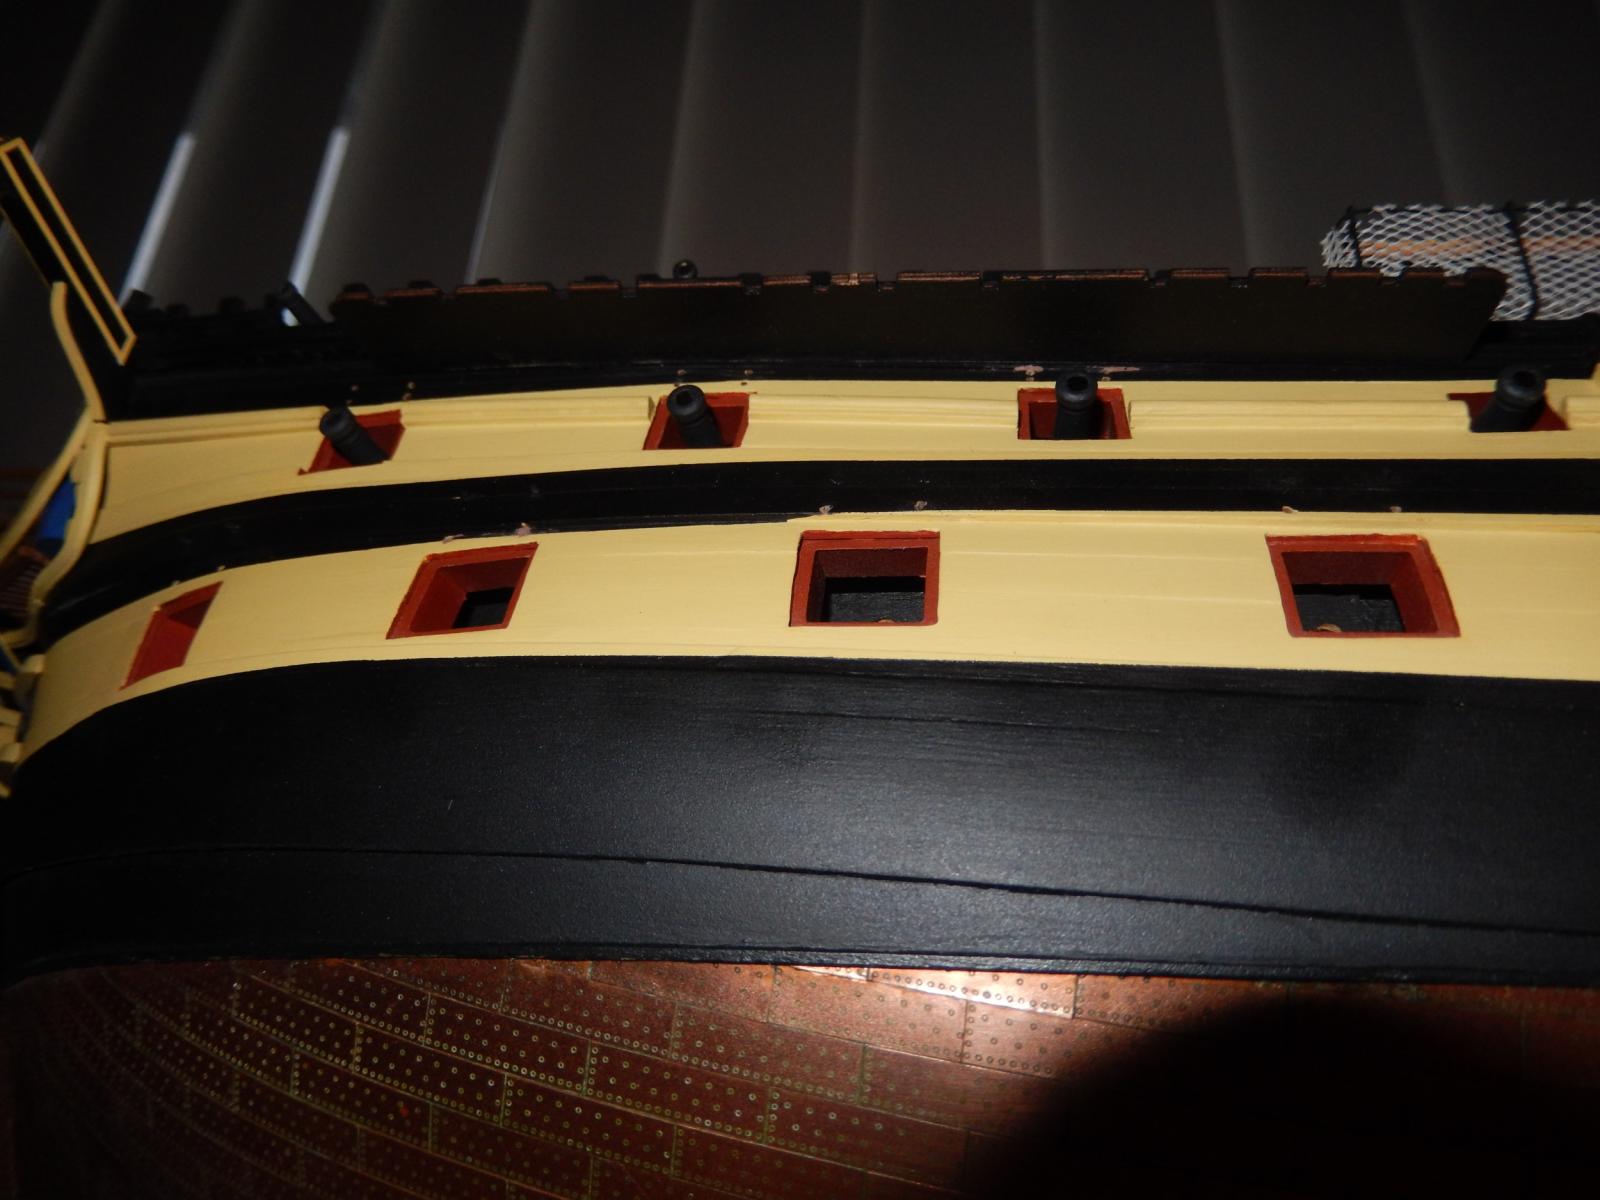
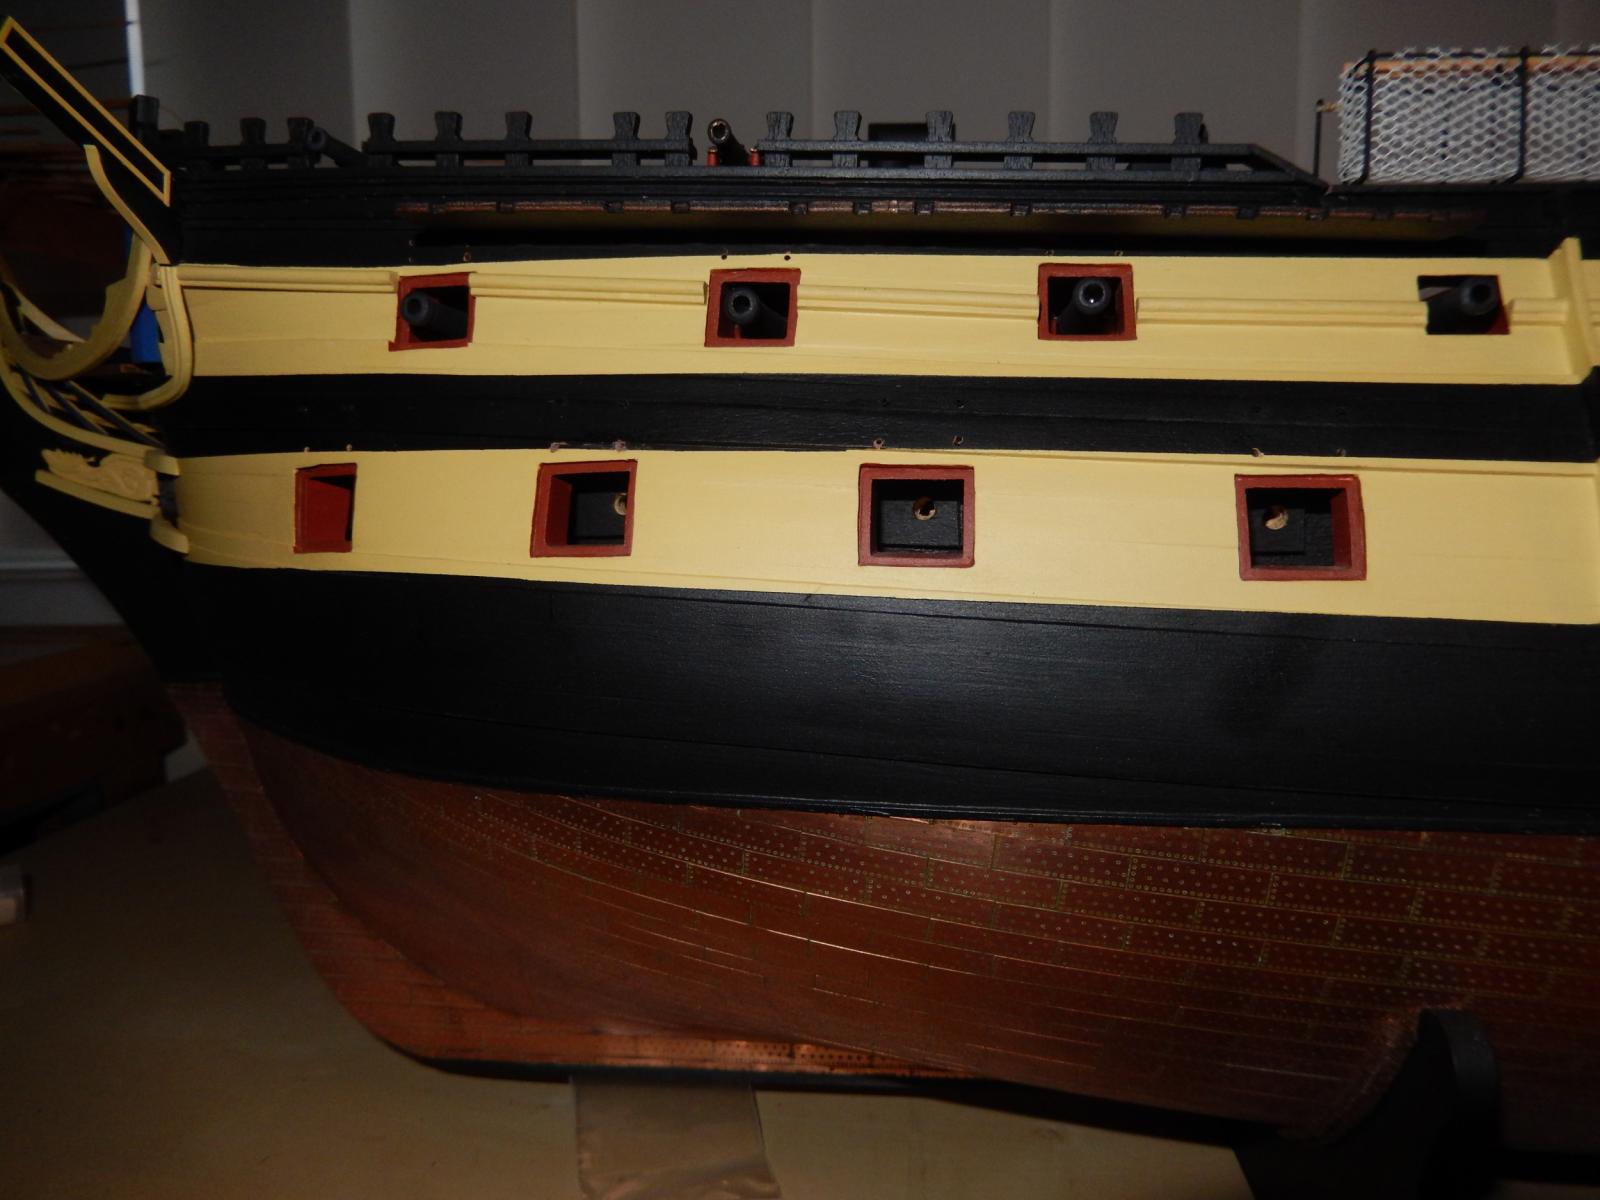
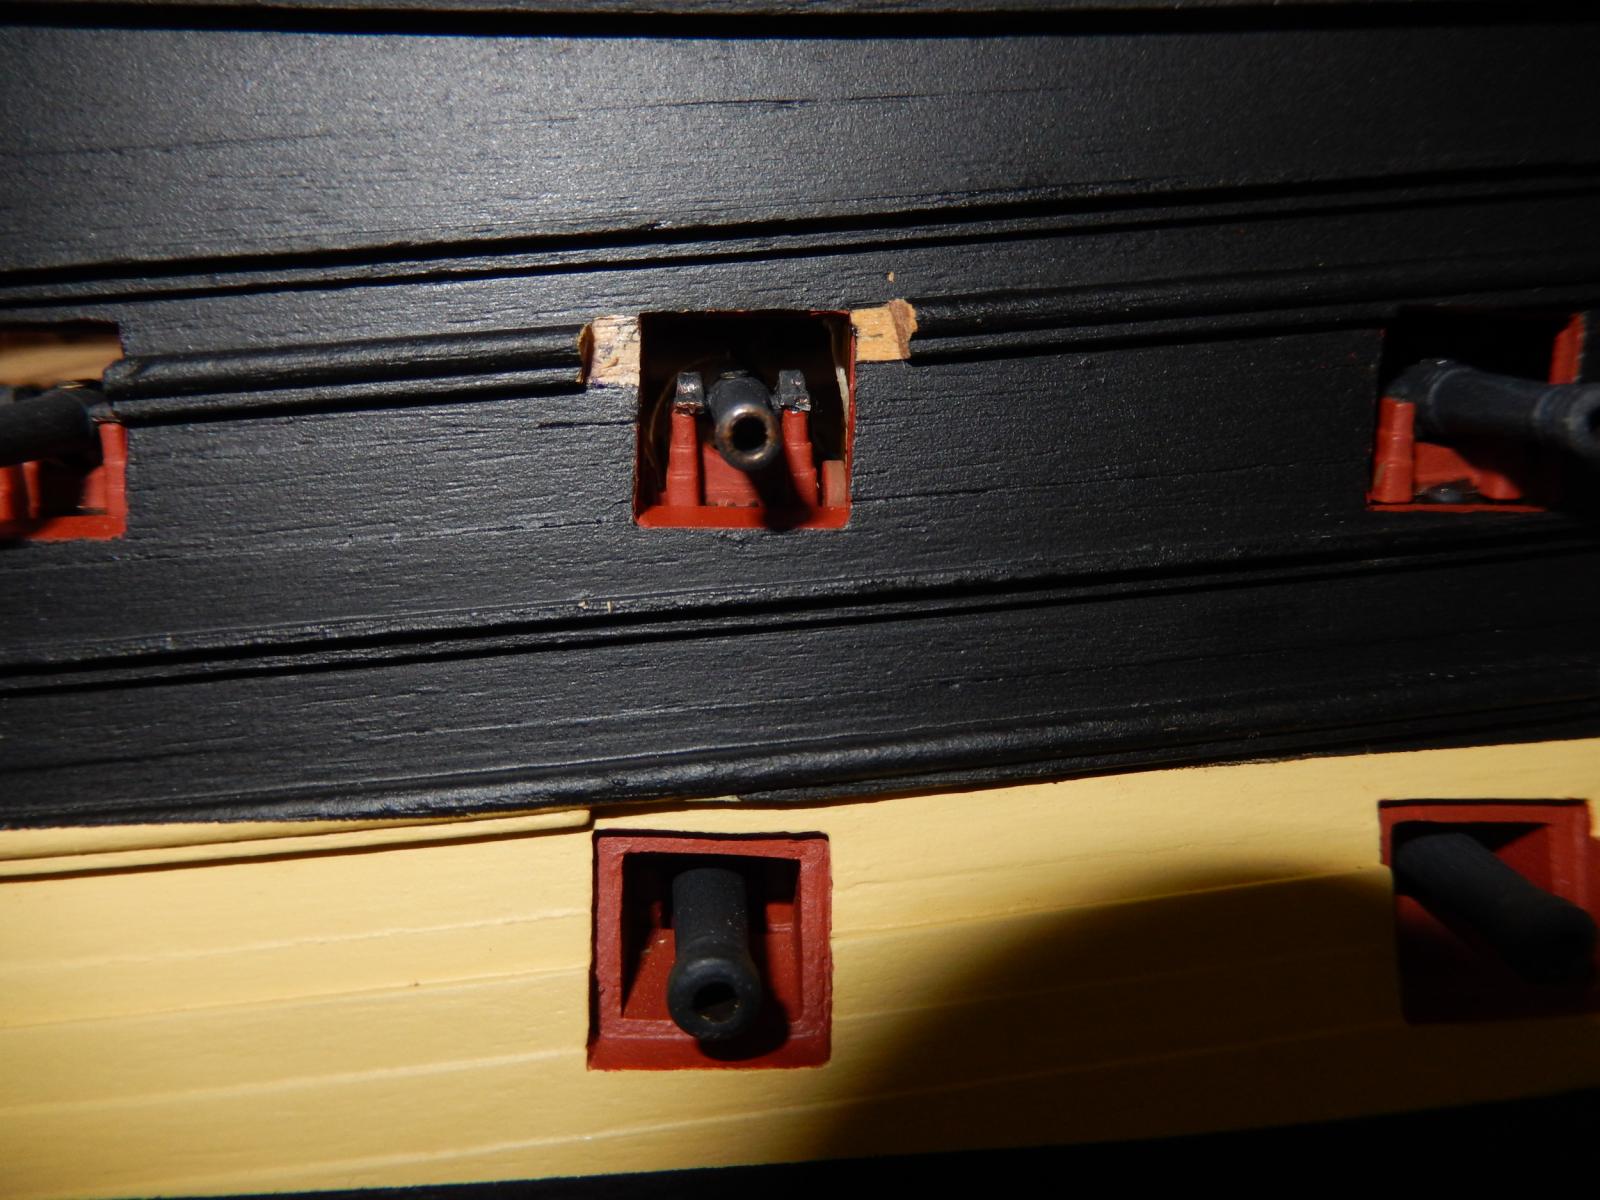
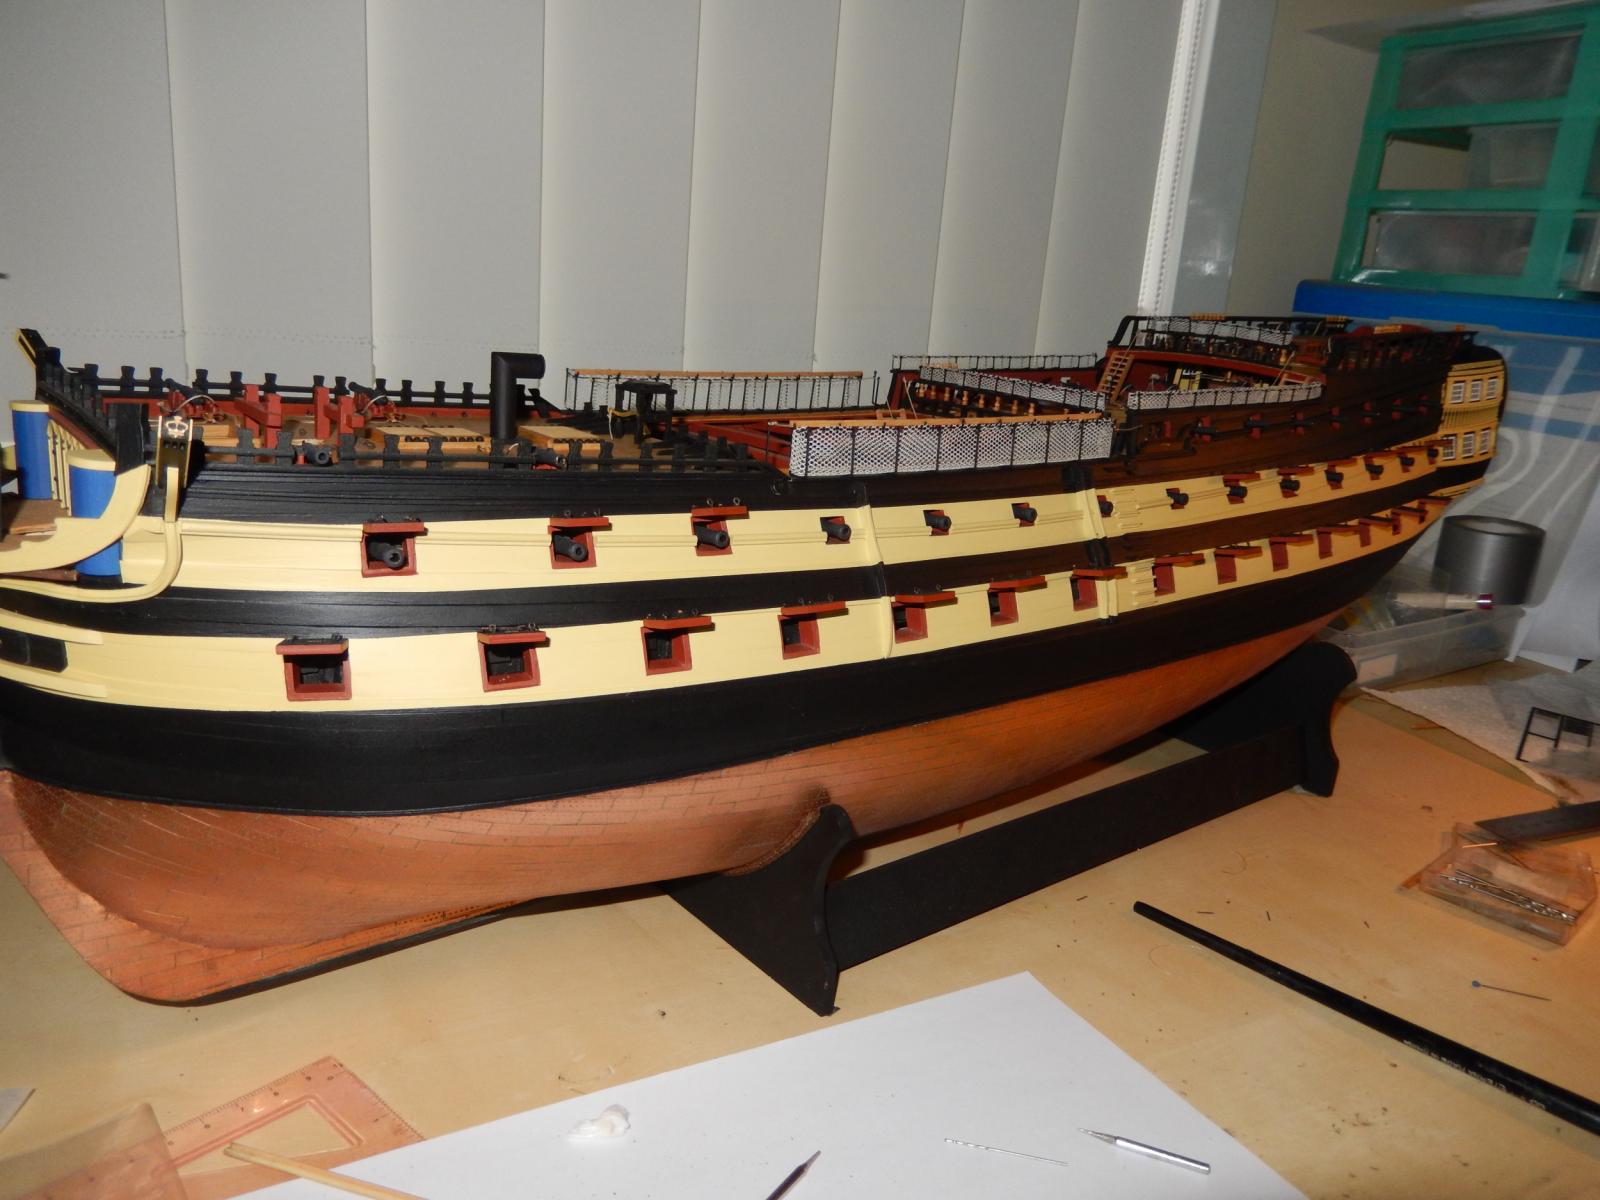
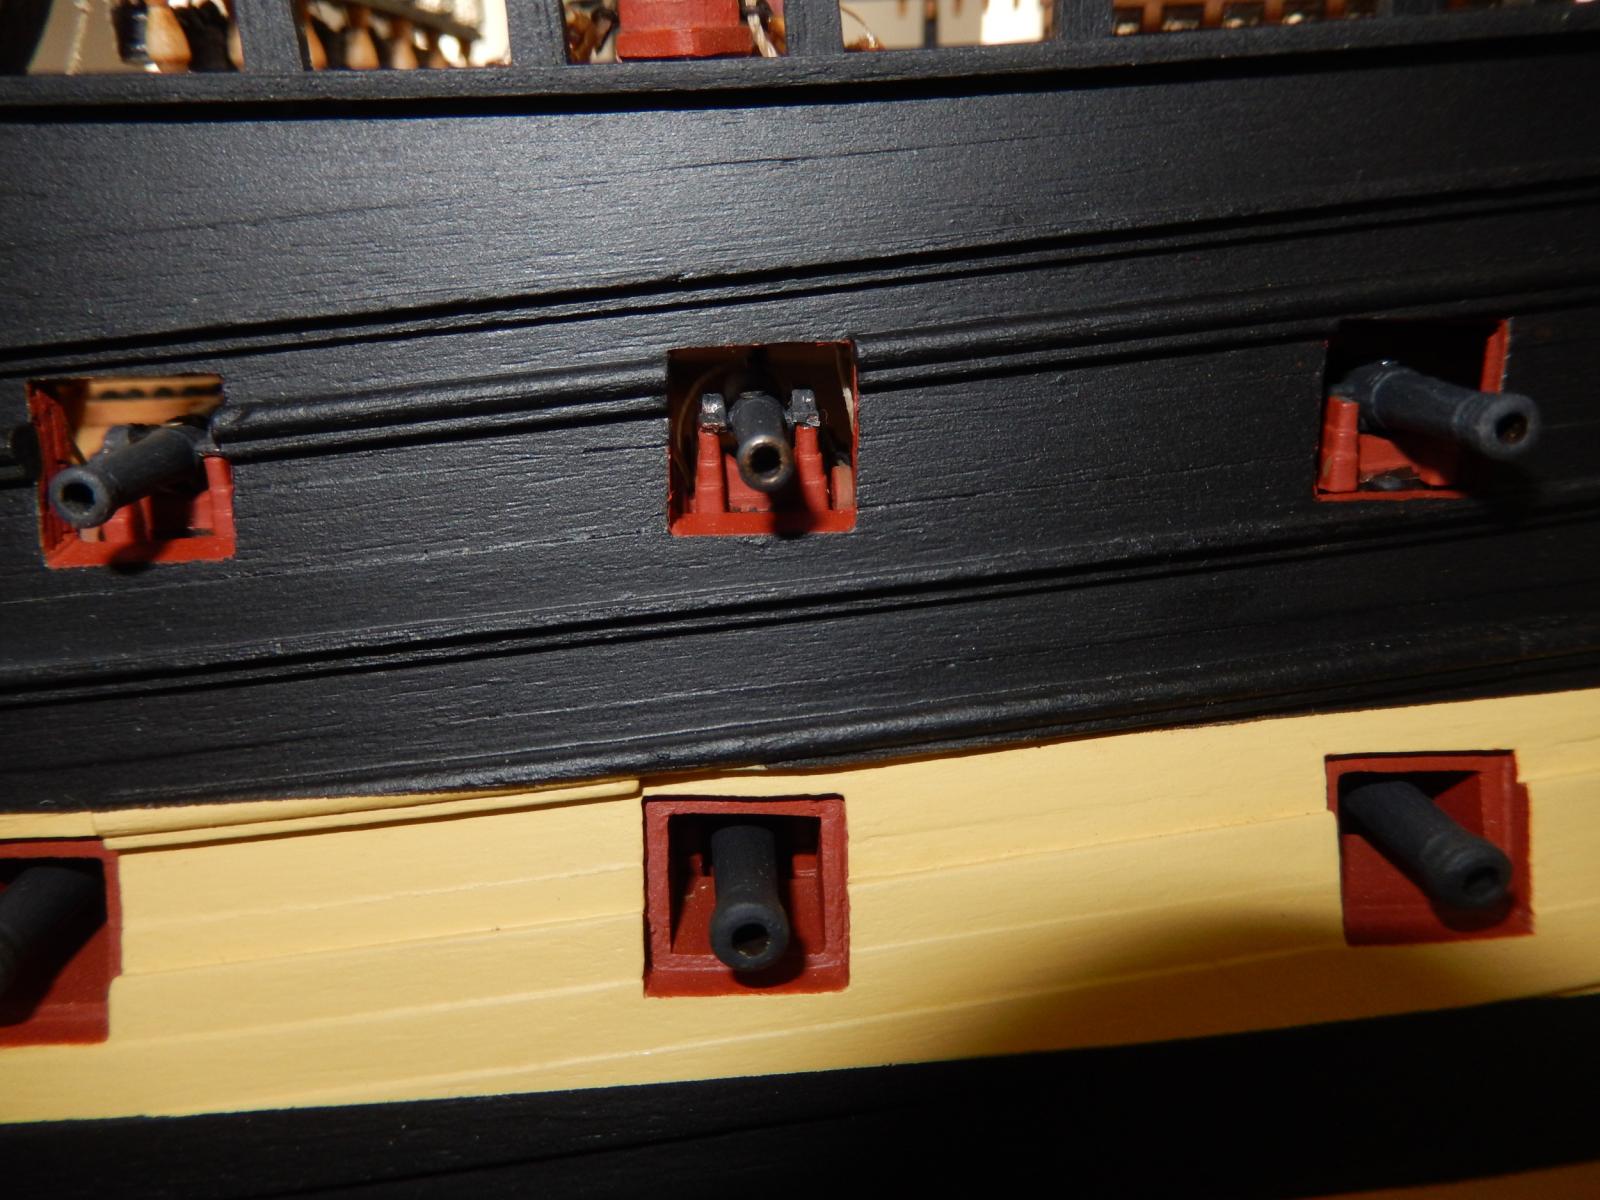
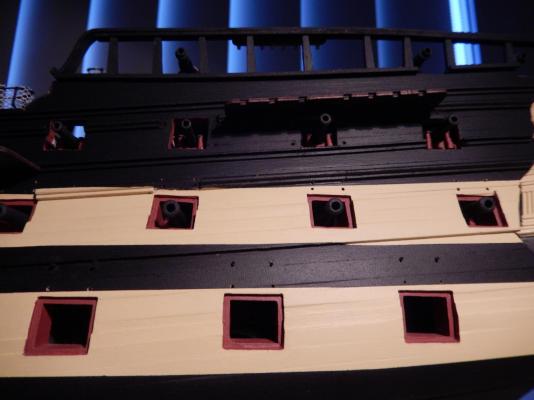
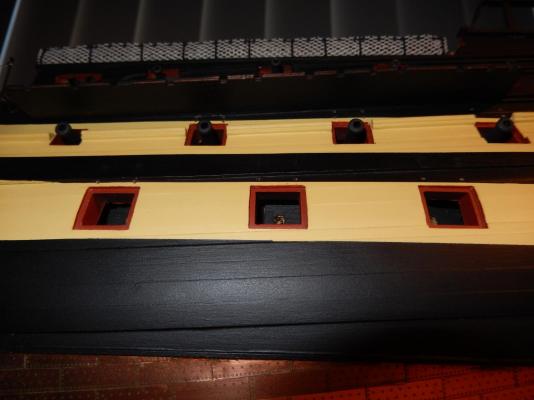
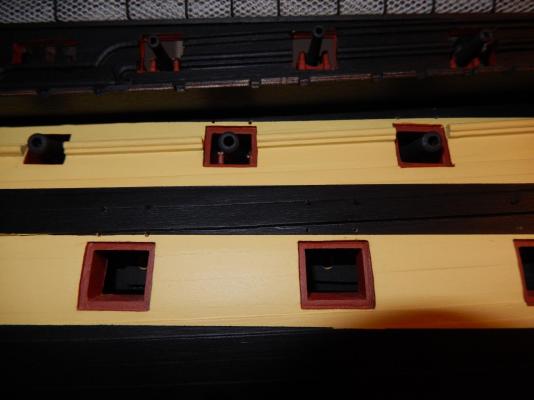
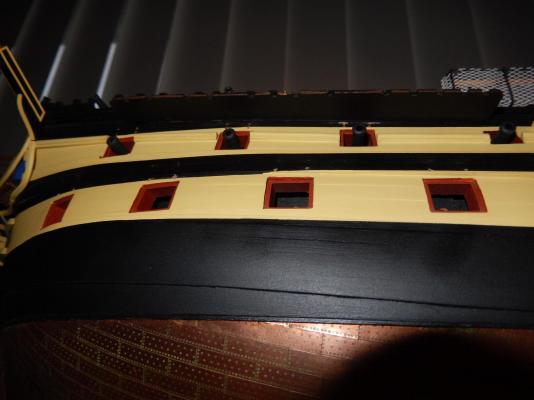
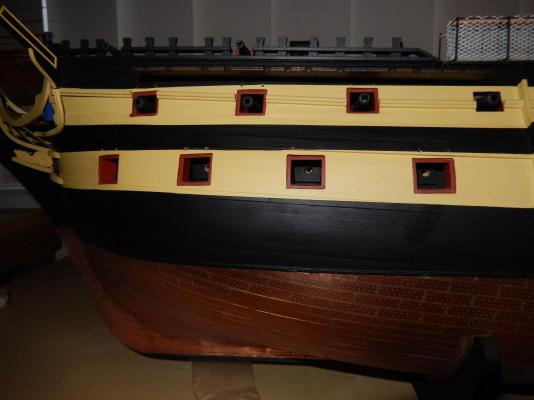
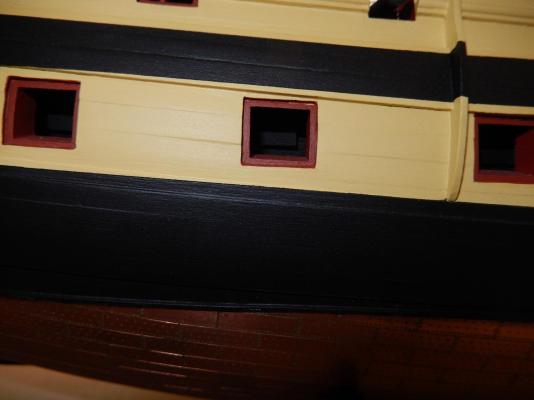
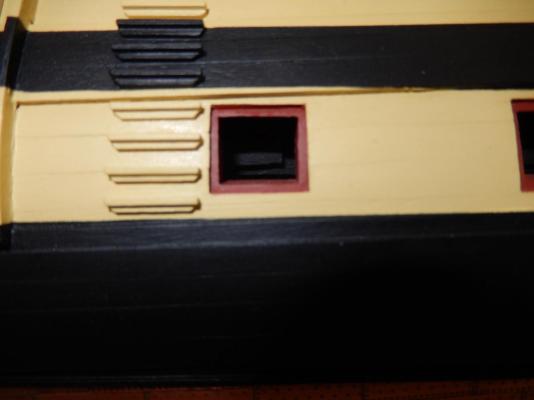
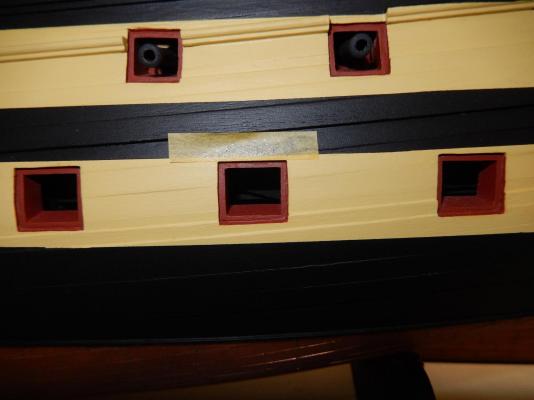
Now that the carronades are finally finished, the gun lid problem looms. I have been putting it off as long as possible. I have not only to drill holes in the paintwork, but do a bit of woodwork on the hull. The latter is because I didn't have the foresight to think about how the lids would eventually have to be fitted over a two or three problem gun ports. There, wooden molding either prevents the doors being fitted ( the first photo) or the wales partially impede their fitting (second and third photos). I would STRONGLY recommend drilling holes, and (dry) fitting lids BEFORE painting when any mistakes may easily be rectified. This photo shows some touching up I missed.. The following two photos show the wale impeding fitting the lids. Unless I can come up with an alternative, I will have to trim a bit to the wale and then hope the touching up will not be noticeable. The yellow paint does not cover well alas (the hull needed up to five coats) I have now cut back the molding on either side of the middle gun port on the top deck without damage and, since the photo was taken, satisfactorily touched it up. I used a very sharp craft knife to gradually trim away the unwanted part of the molding, though the process was rather stressful. The other side has still to be done. I now have to decide how much above the gun ports to drill the holes necessary to attach the hinges (about 1mm?). I have tentatively made a jig to assist spacing the holes. My plan is to mark with a fine pencil through the holes onto Tamiya tape stuck above each port. I will mark each pencil mark with a pin, and then drill a pilot hole with a very fine bit. (Of course I have had cunning plans before - which have turned out to be not so cunning after the fact..) Unfortunately, the pencil marks have not shown up well in the photo. In looking at it now, I think I have the holes marked a little too high - maybe down 0.5mm or so would be better. IF all these plans are realized, at this stage I will only actually fit the lids to the ports covered by the channels. I will leave the remainder to be attached as late as possible. Lots of lids sticking out are an invitation to disaster. I wish again I had chosen closed gun ports.


-
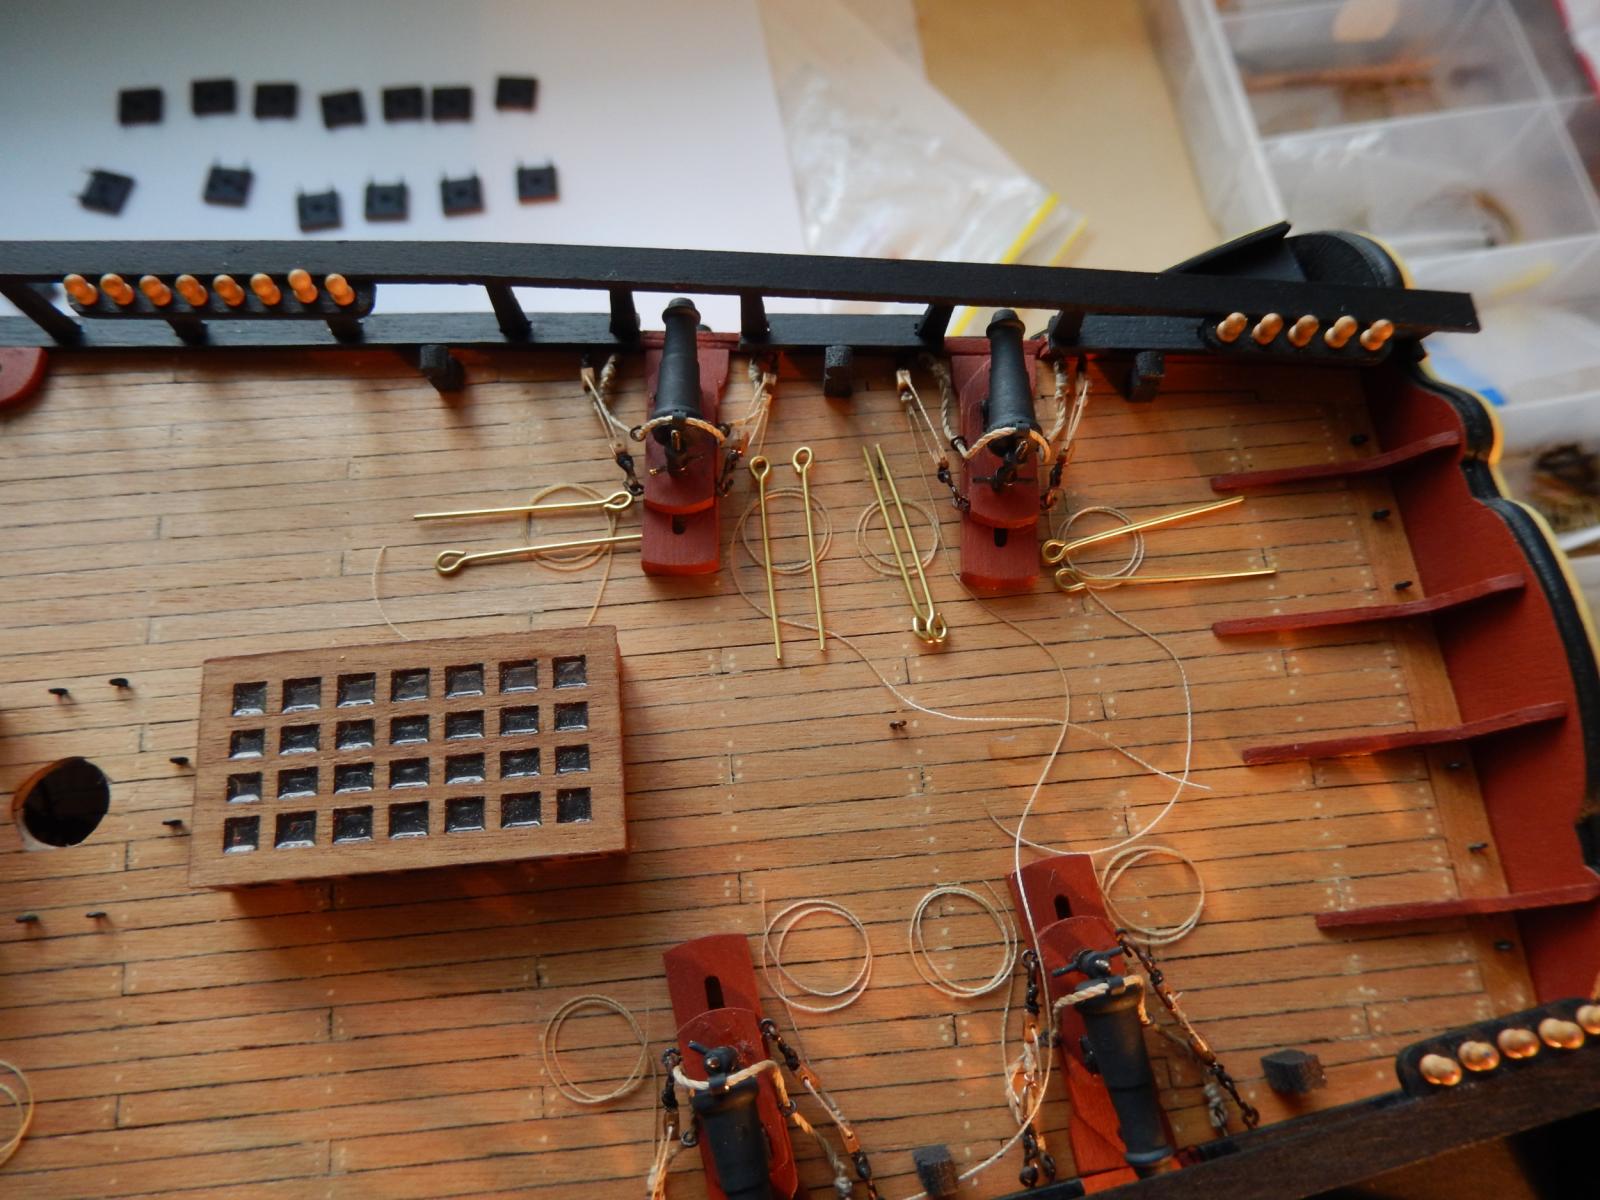
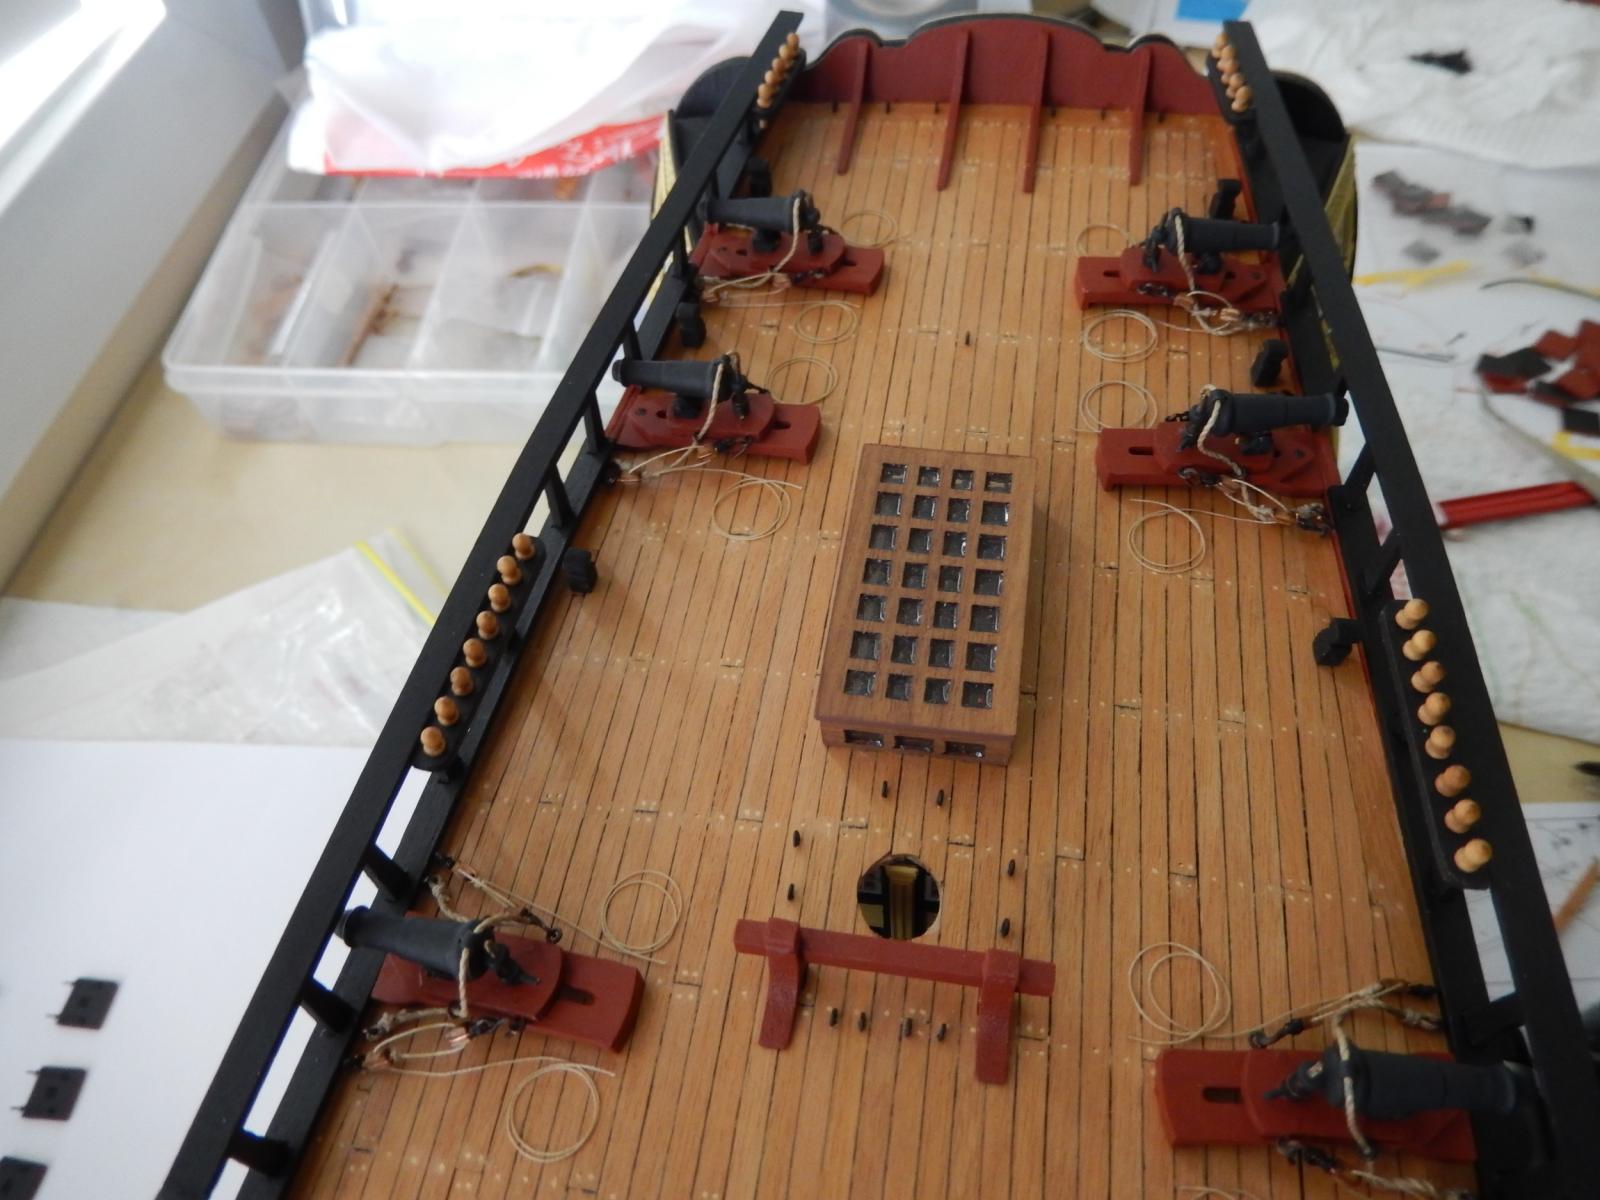
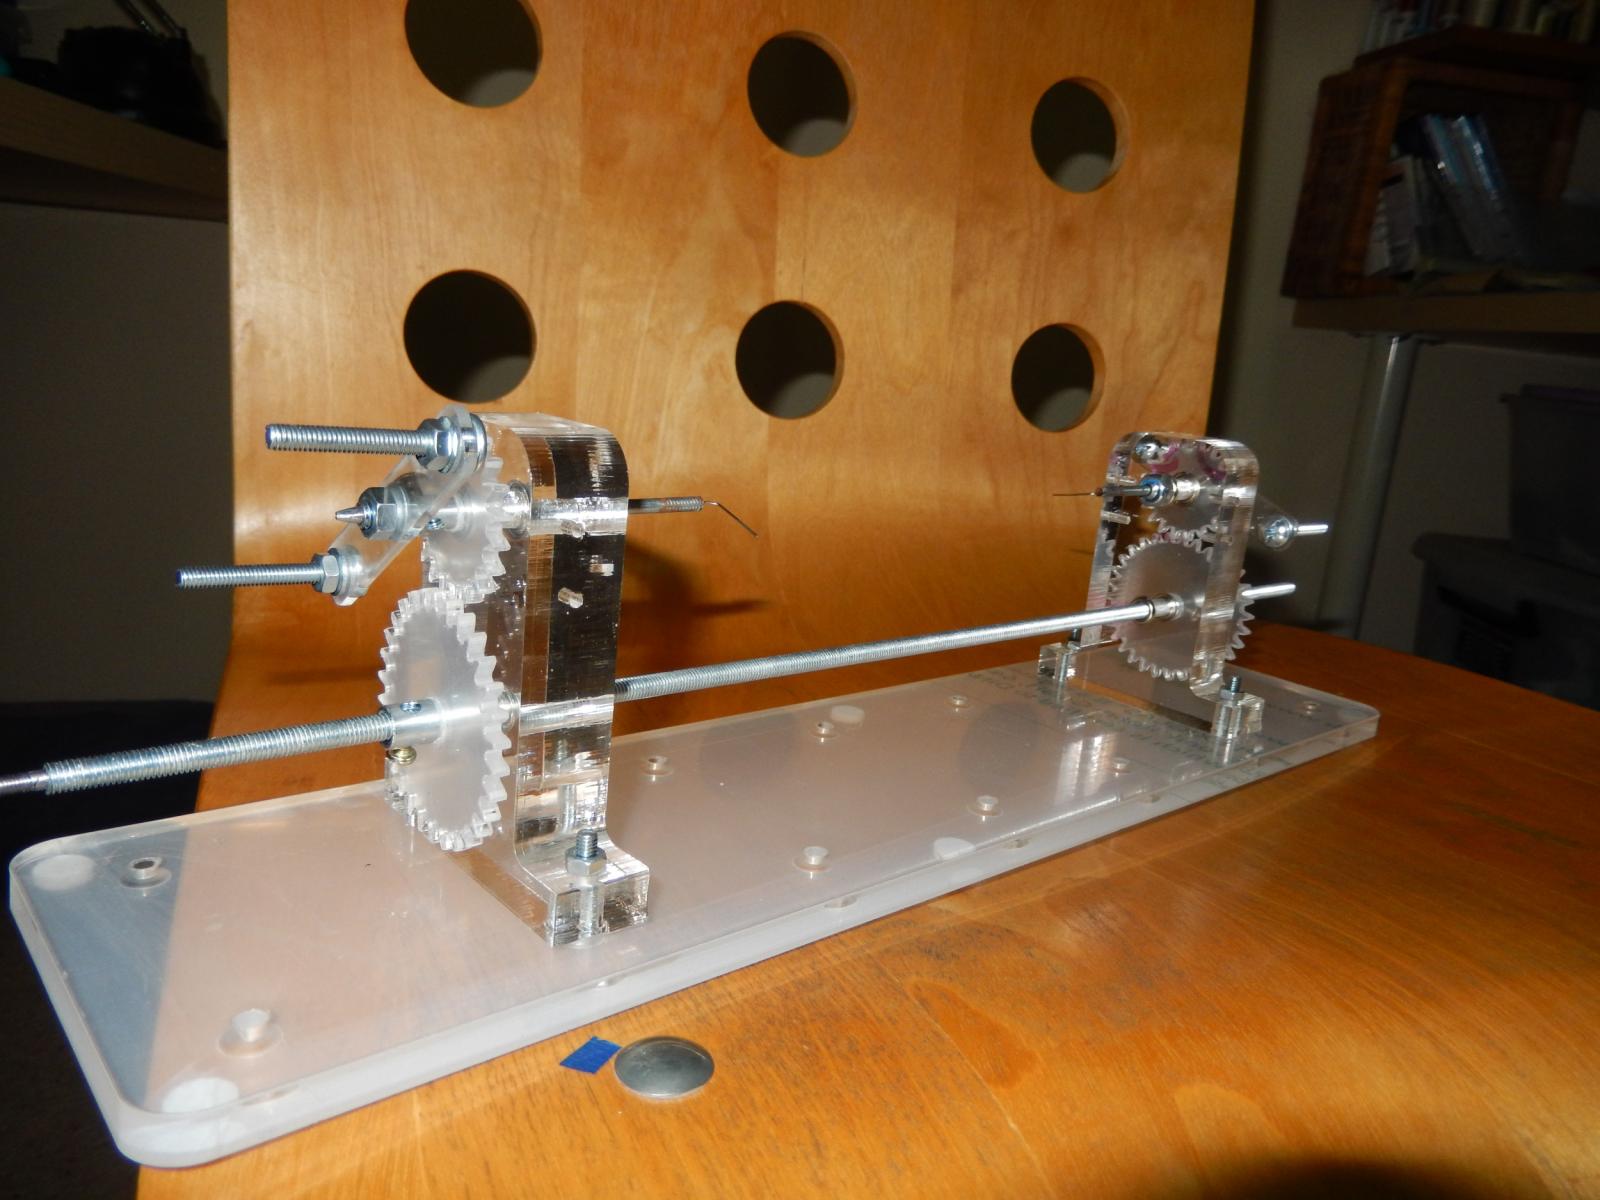
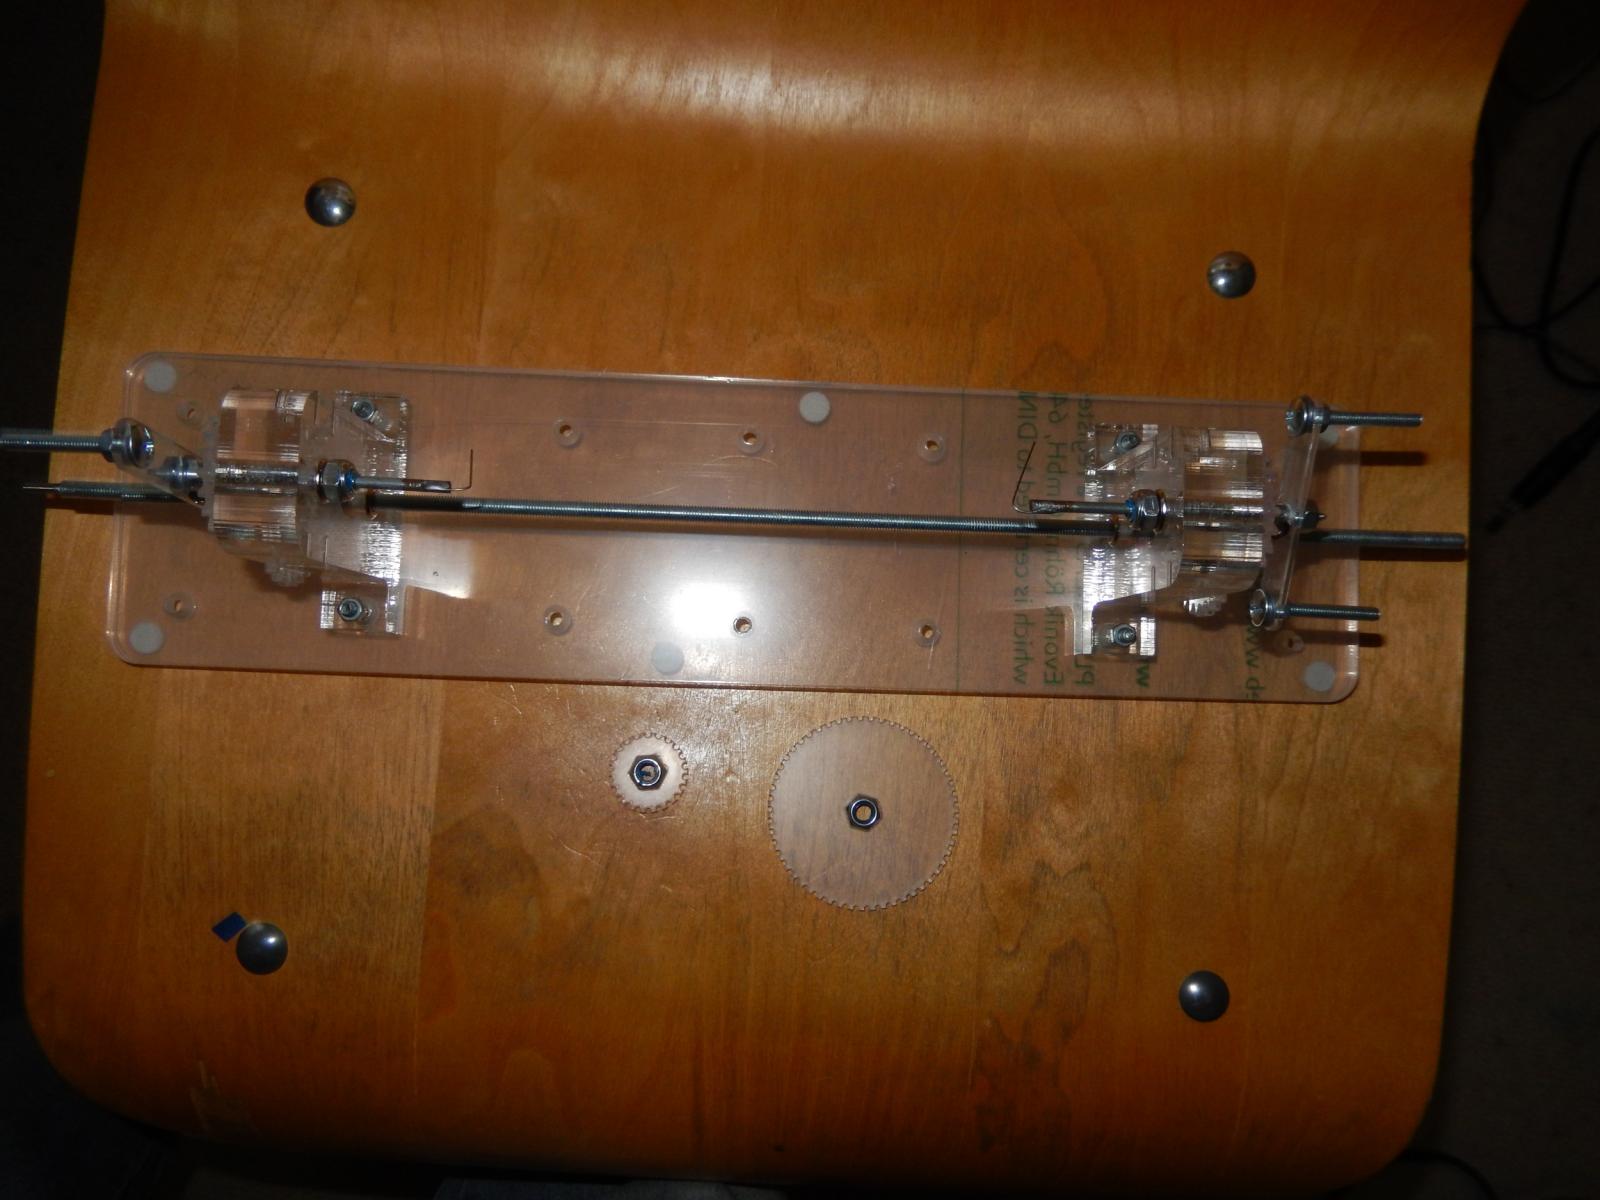
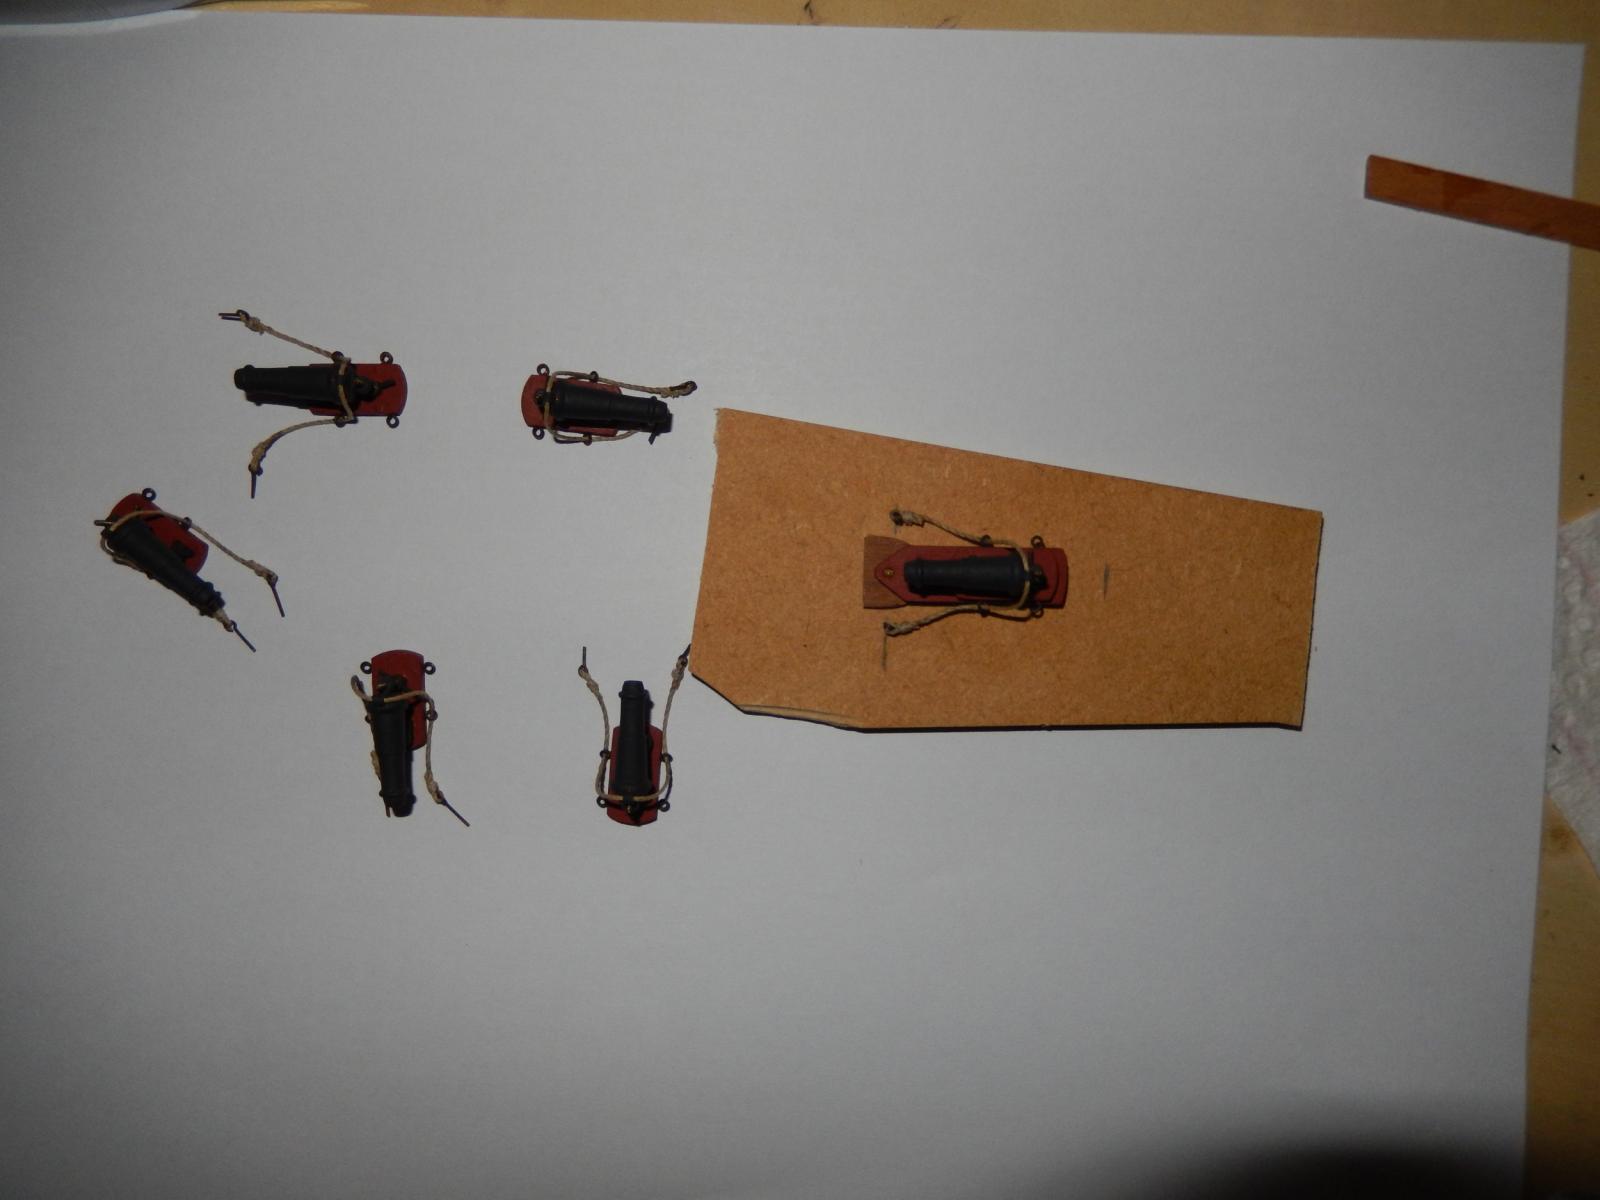
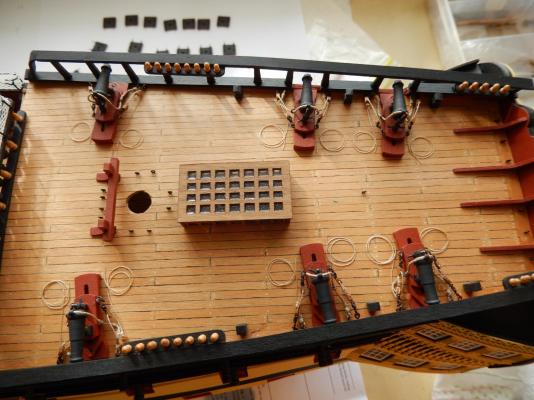
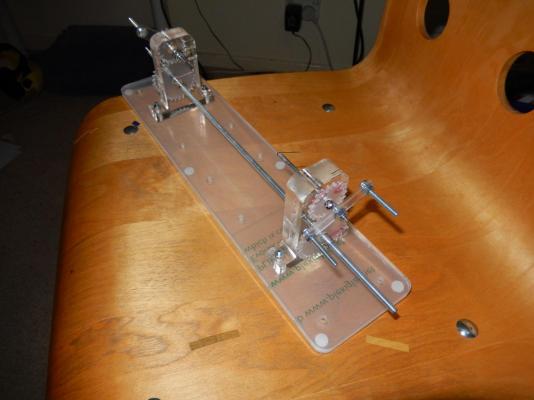
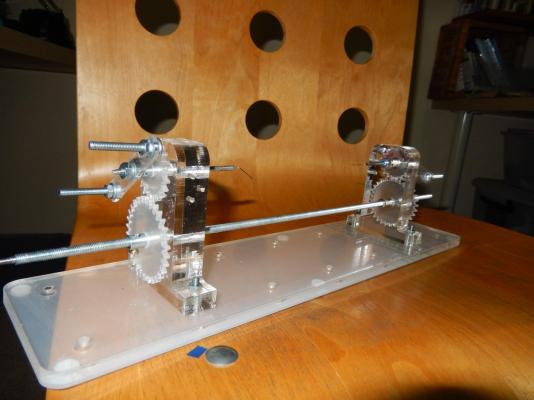
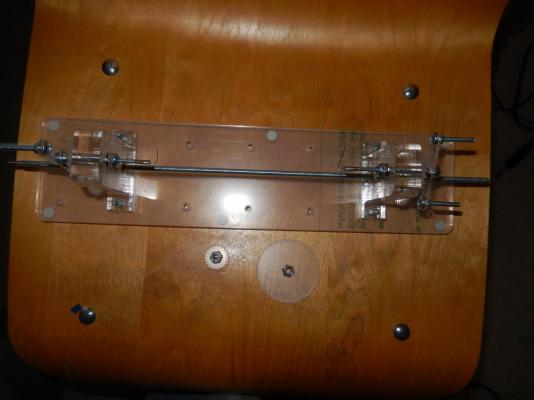
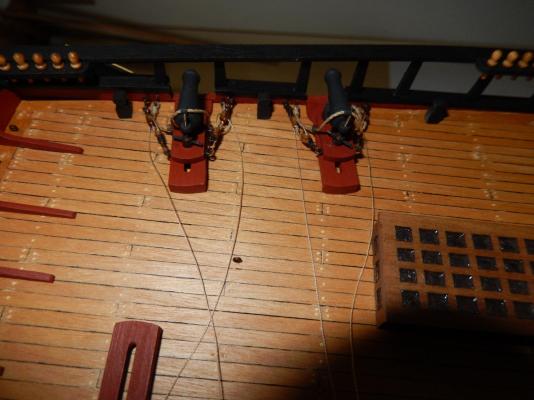
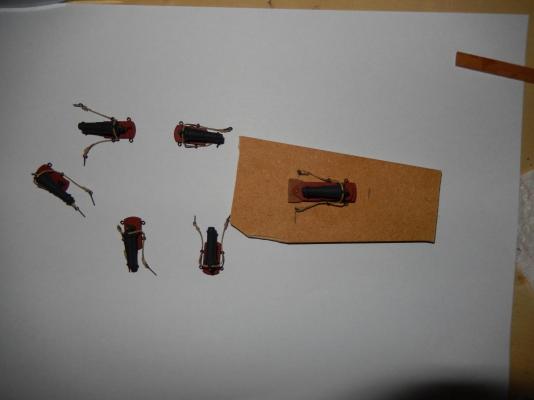
I have finally finished rigging the carronades. For the last three I used Arthur's suggestion wetting the thread with water (in fact I nearly drowned it). I first ran a very wet paint brush up and down the thread, then, with the brush, wet the deck where the thread was to be laid. I then shaped the coil in the wetted area. It worked a treat. I shaped the new coils so that they are consistent the first set which I decided to leave alone. The following photo shows some of the coils shaped, wetted and held down by a couple of eyelets. They were left overnight to dry, then dilute PVA was carefully applied to the thread and left to dry. Joy. The results: I ordered and have ordered and have just received Alexey Domanov's Serving Machine 2.0. (My wife rather unkindly asked why I need a serving machine as I already have one. ) At this stage I'm not quite sure what to do with it, but for those who may be interested here it is. It comes supplied with an instruction video and while I can see the video, the sound so far seems to be missing. The last photo shows a large and a small gear wheel, neither of which are mentioned in any of the instructions, the use of which is rather a mystery to me. I guess I will have to ask on Alexey's website. The machine appears of excellent quality and the service provided is by Alexey is first-rate.


-
Arthur: the acrylic is showing reluctance to soften (though it may be the PVA ausing the problem). I have now decided to leave the coils done, as is. Upon (mature?) reflection, they look reasonably acceptable. The thought of stuffing them up trying for perfection doesn't bear thinking about. At least I have learned a few things. Moreover, once the main rigging and all the other bits and pieces are finally done, any shortcomings in the rigging of the carronades is unlikely to draw the eye. (Nothing like a bit of ex post rationalization. )
-
Alan - please don't feel in any way 'bad'. The matt stuff does the job. I should have experimented a bit more before I started. Unfortunately the thread supplied simply refused to go anywhere I wanted it to go, and every time I tried to guide it, whatever I used as a guide stuck to the thread. I guess you live and learn. I'll try the soaking with water and matt to see what happens. Having already stuck the coils to the deck with PVA may cause problems though. Arthur - thanks for your thoughts. I have seen the superb coils on your build and wondered how you did it. My concern is to keep the coiling on both sides consistent - whatever it looks like.
-
I have finished rigging the carronades on the left side.My efforts on the rope coils turned out to to be disappointing, but at least they're probably adequate. I'm certainly not doing them again. I had mixed results from the acrylic matt. I had hoped it would make the thread behave in a respectable manner, rather than going in every direction but the one I wanted. Bad luck. It eventually stuck to the underlying paper quite well, but I had obviously applied too much. Once off the paper there was a residual which was obvious and very difficult to remove. I tried a second time, diluting the matt and using a wet paint brush to guide the thread into loops. Once that was dry I used dilute PVA glue to attach the coils to the deck. Whatever is the knack/skill required to make good coils I something I certainly lack. Here are the results of a very large part of a day - not that I'm bitter.

-
Alan - I have ordered the acrylic matt medium, so I'll see how it goes. I have seen the falls frozen over - so I should hope your nose grows.
-
Thanks very much for that Alan. I have been wondering how all of that may be done. The waxed paper trick would certainly not have occurred to me. However I don't know what Acrylic matt medium (what?) is. Would dilute PVA do the same job? If not I guess I'll find the acrylic. Just out of curiosity, where in Niagara do you come from? I lived in Ontario off and on for about 3 or 4 years (London and Kingston) - but I think I'm over Canadian winters In fact I'm over Australian winters too.
-
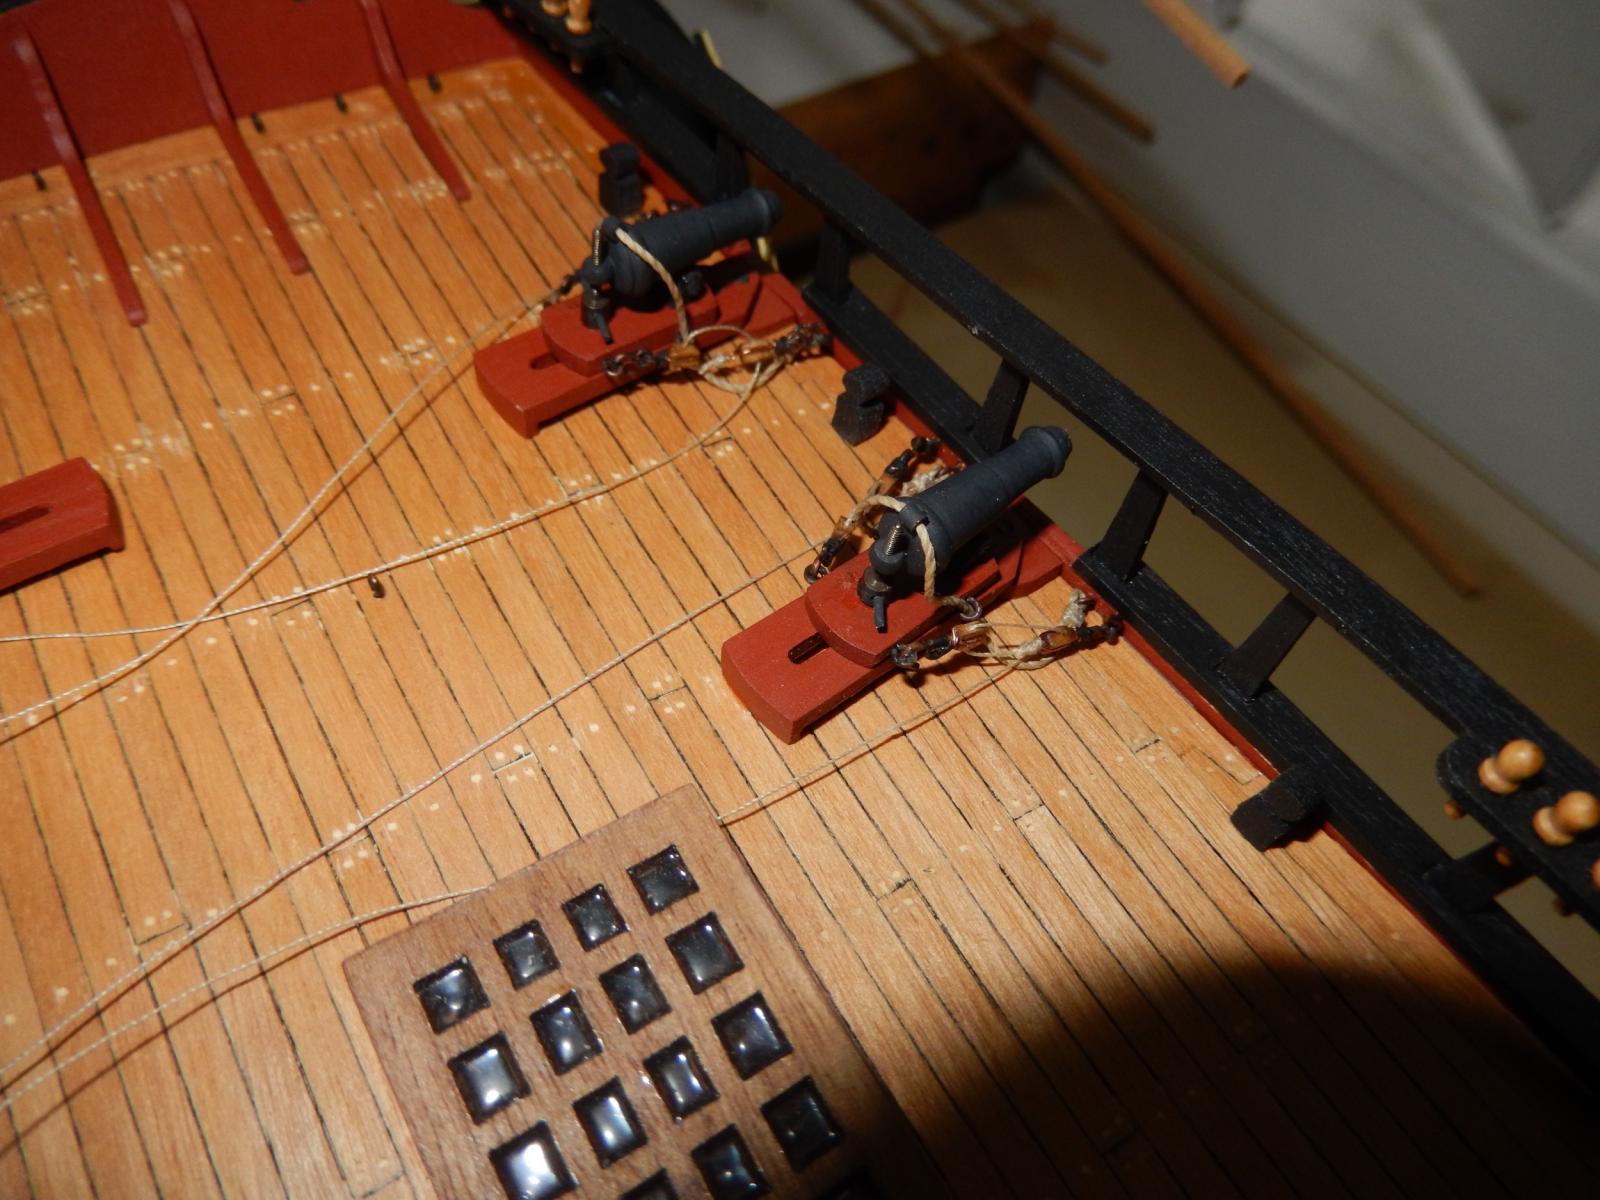
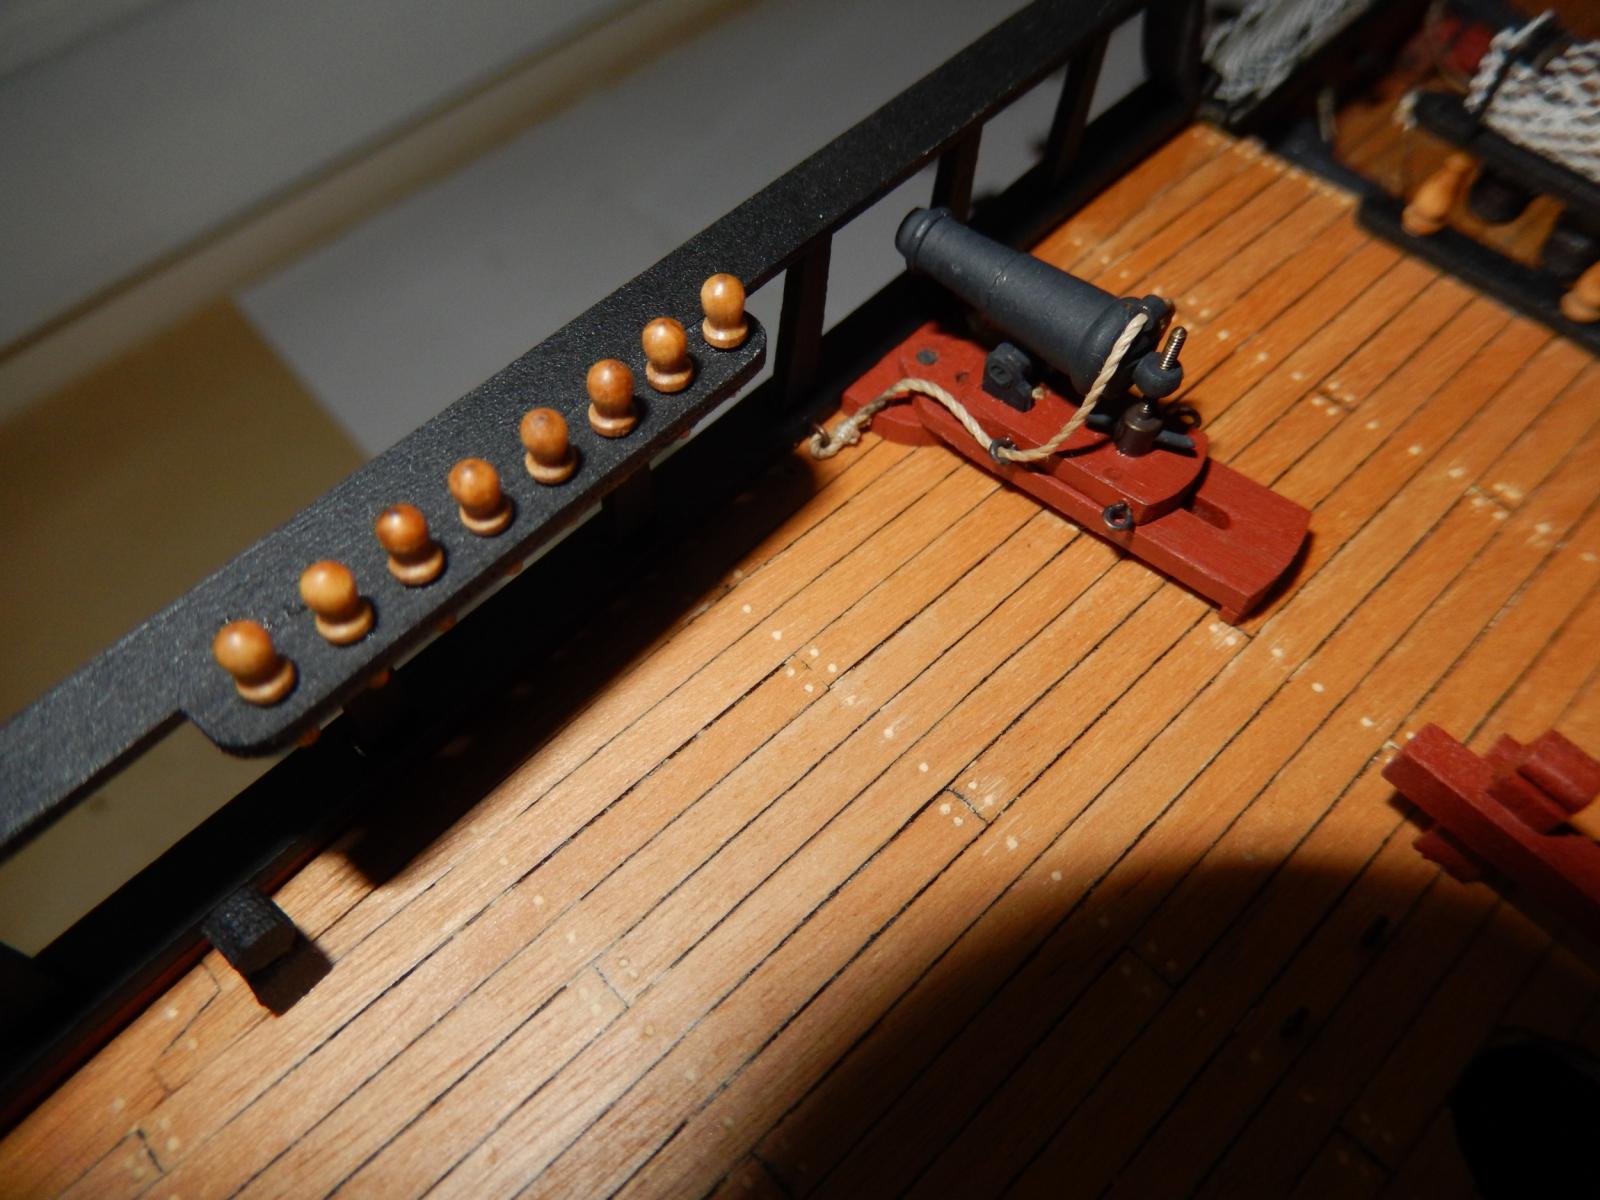
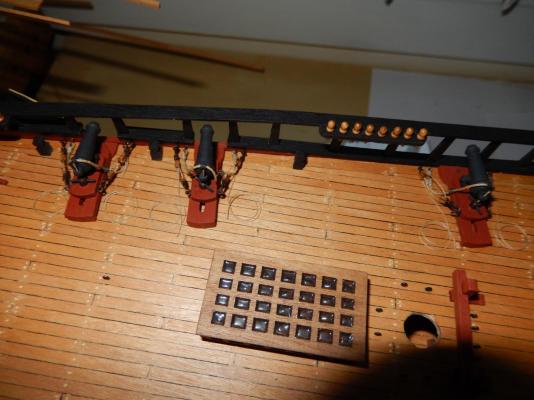
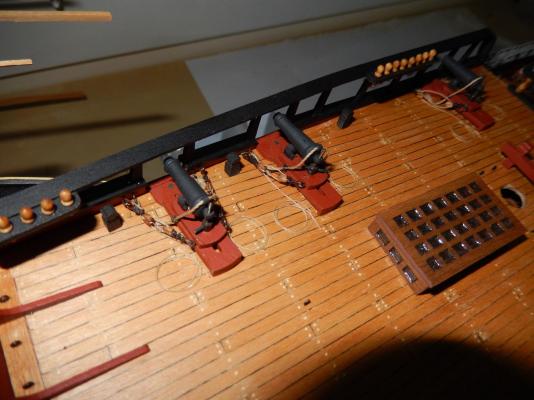
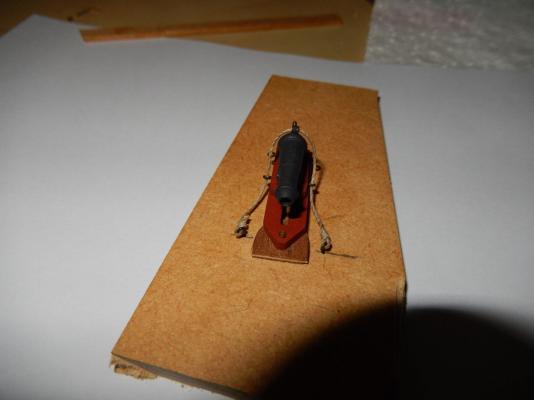
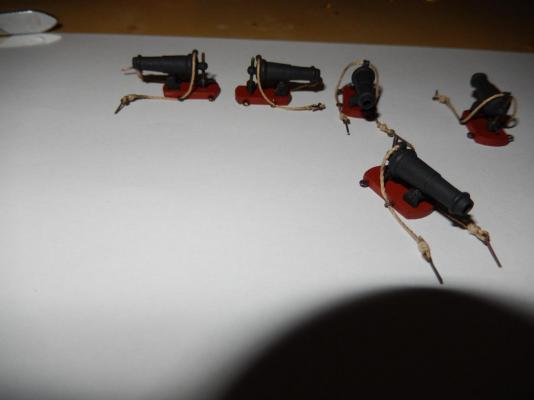
The carronade saga is continuing. This is certainly one part of the build that I have not enjoyed, though most of the problems are self-inflicted. I have rigged two carronades and the others now should be straight-forward, though I have thought that before. I regret drilling holes in the bulkwarks to receive the the eyelets for the rigging, It would have been far easier to simply put eyelets into the deck. For the forward-most carronade there is no choice but to do so. For the sake of consistency, I will do the starboard-side guns the same way as the port. The guns are rigged so that they are partially run out. If they were fully run out the rigging would not 'drape' realistically, and the two blocks on either side of each gun would have been uncomfortably close together. The ropes are not coiled and I'm not sure at this stage how to do the coiling. Suggestions are very welcome. The following photos give some idea of progress, such as it is. There is still some minor touching up to do. This is the forward-most carronade. It is dry-fitted here and only the breeching rope is fitted. The photo shows the eyelets for the rope in the deck rather than the bulwark (well there really isn't one).

-
Good grief! It all looks like a dogs breakfast. So much for elegance.
-
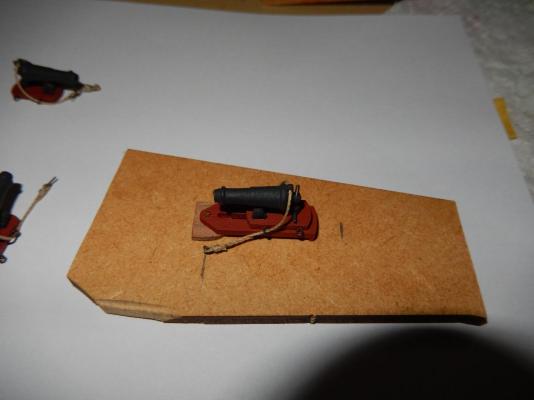
The carronades have been far more time-consuming and awkward than I anticipated. I have now completed the hardware, and now have to do the rigging. Having looked at carronade rigging all over the website, it now appears there are as many ways of rigging them as there are members. I have decided to go with the 'full' rigging shown in the instructions. While it may not indeed be 'full', it seems to be a reasonable and fairly elegant compromise. This is how I have done the breaching ropes. I have made up a jig to enable the rigging to be more or less done off the model. Among other things, it enables the ropes to be of consistent length. I will rig the blocks etc in the same way. The remaing difficulty is the get the various eyelets into the holes drilled into the bulwarks. The is very little room and for the forward-most carronades on each side, there is no bulwark to drill into. I guess I will have to attach the rigging to eyelets set into the deck near the bulwarks.

-
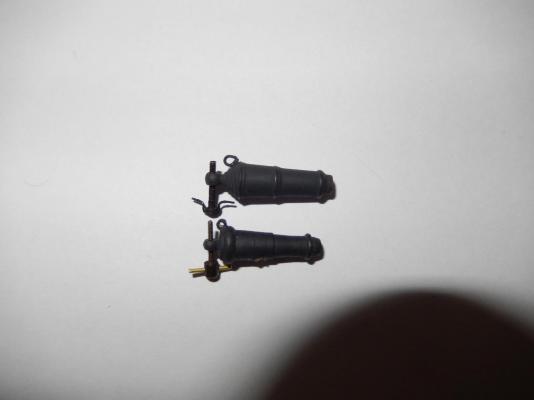
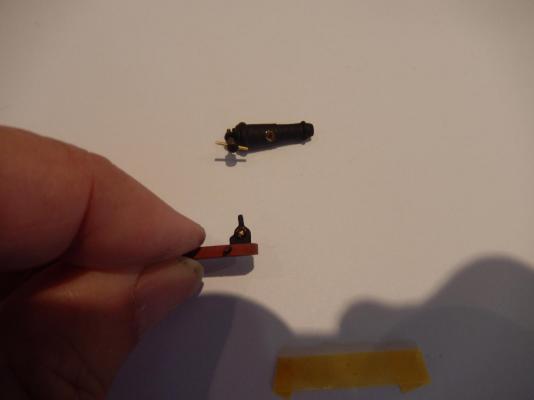
Substituting the Caldercraft carronades turned out to be not one of my best ideas. Things were going along nicely until I dry fitted one to the stern-most 'gunport' under the side railing. It didn't fit; it was too high. (The others were fine.) After much playing around, and a certain amount of muttering about plots against me, there were only two alternatives. Use the Amati all-metal carronades with their drawbacks; or use the slightly smaller Amati barrels on the Caldercraft bases with some adjustments where necessary. After more muttering, I opted for the latter, though with some trepidation. This required drilling 1mm holes in the bottom of the barrels to accommodate the Caldercraft method of mounting them. The first photo shows the relative sizes of the barrels. Here is one of the holes drilled. At this stage no touching up had been done, nor in any of the subsequent photos. The Caldercraft mounting. The composite dry fitted. For the last port on each side the bases of the carronades also had the be sanded back to further lower the carronade to give easy clearance. None of this is noticeable. In all it has turned out quite well, though a bit heart-stopping, and I think the result has been worth it. But I certainly wouldn't recommend it, and none of this would have been necessary for the other two ports.


-
Warning. In doing the upper gun port lids I have just made an unpleasant discovery. The instruction manual (p.28) specifies part 337 for the hinges. It should be 338. I have done 6 ports with the wrong ones and now have to retrieve the hinges without damaging them. I should have counted beforehand and checked the parts list!