


Meredith
-
Posts
260 -
Joined
-
Last visited
Content Type
Profiles
Forums
Gallery
Events
Posts posted by Meredith
-
-
-
For some reason I still cannot upload photos like I used to - to my own server and then just use the "insert image" and use the URL....
So it back to uploading them here...


- maso, hamilton, Landlubber Mike and 5 others
-
 8
8
-
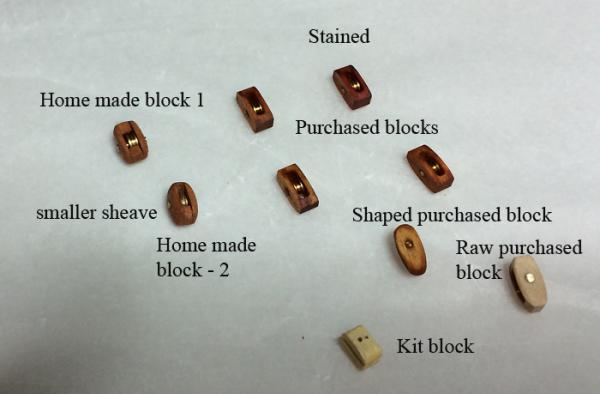
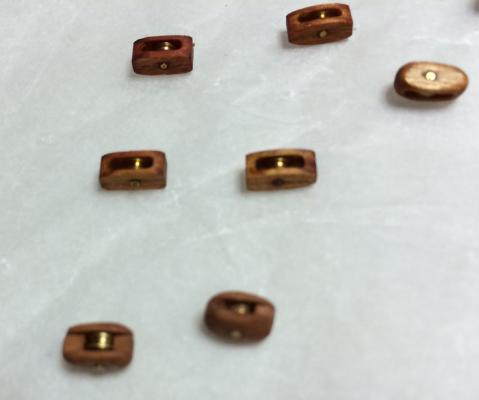
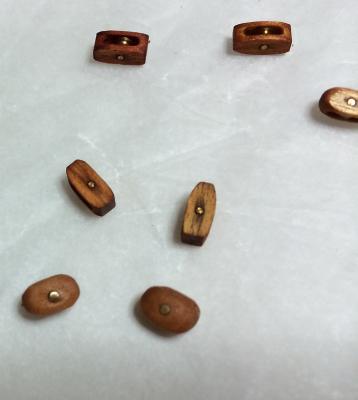
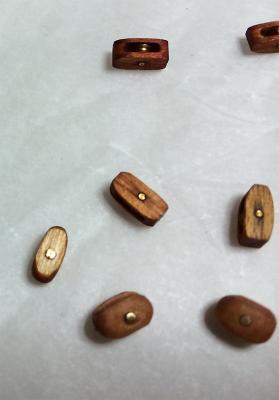
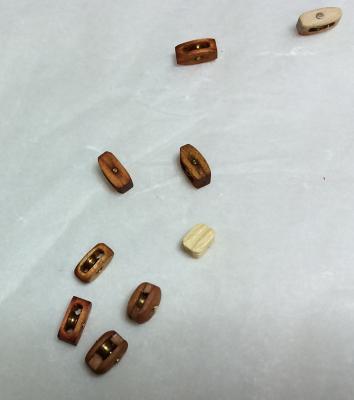
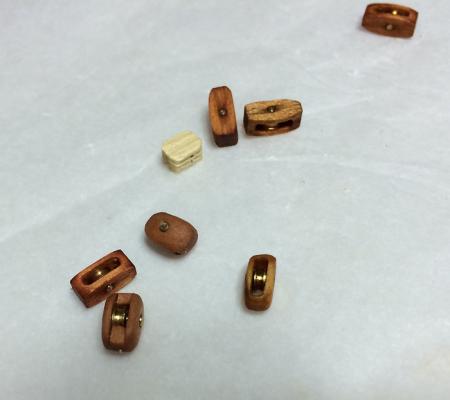
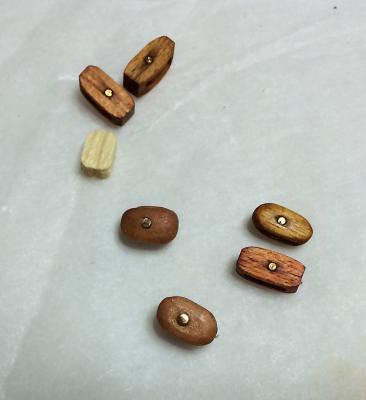
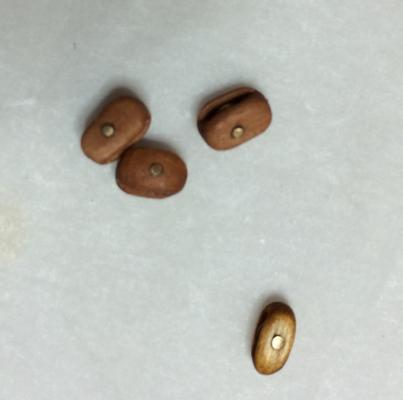
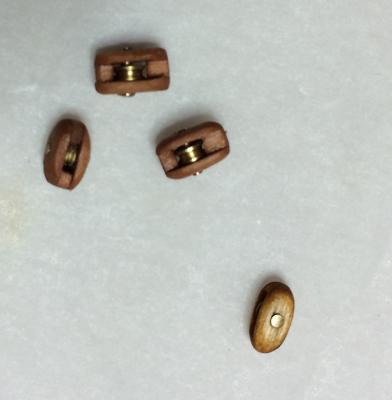
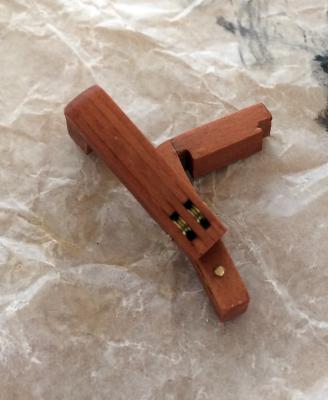
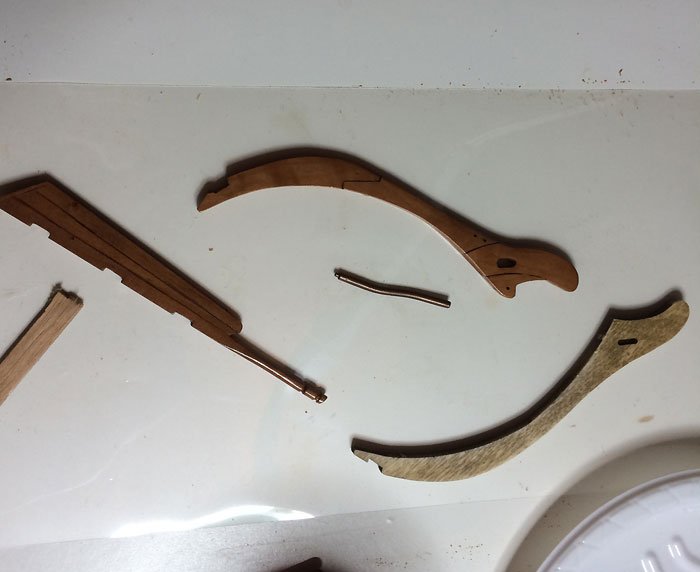
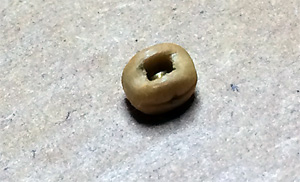
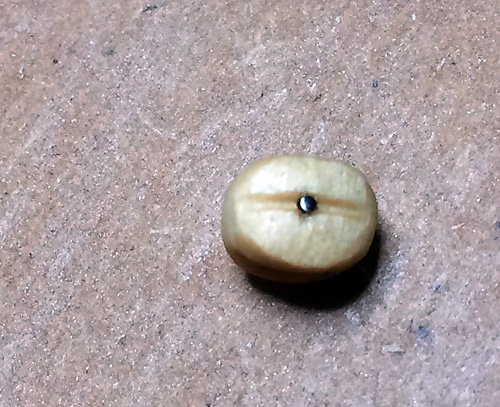
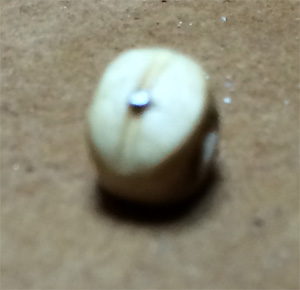
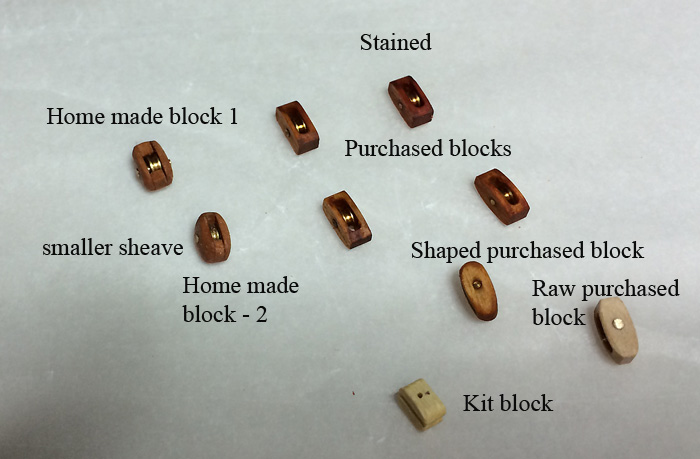
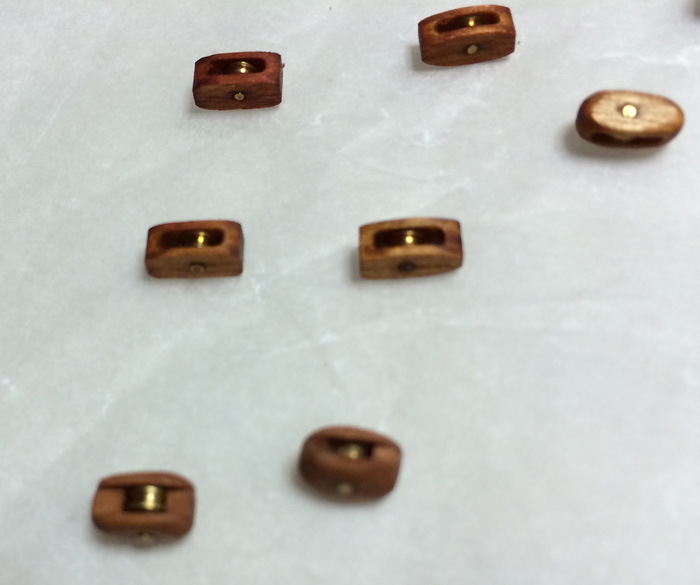
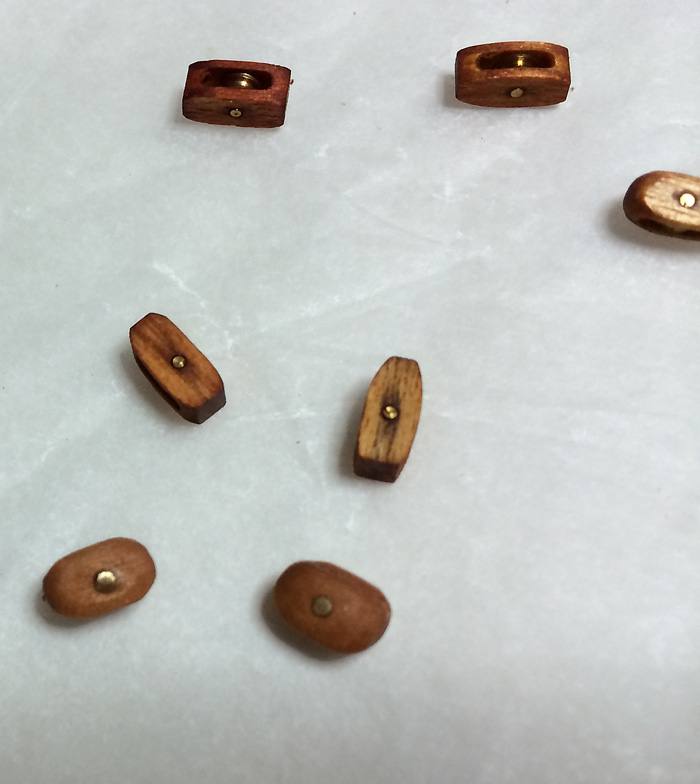
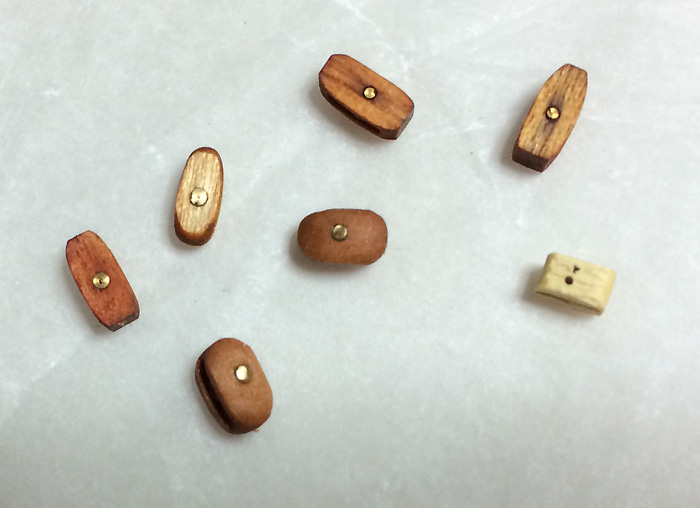
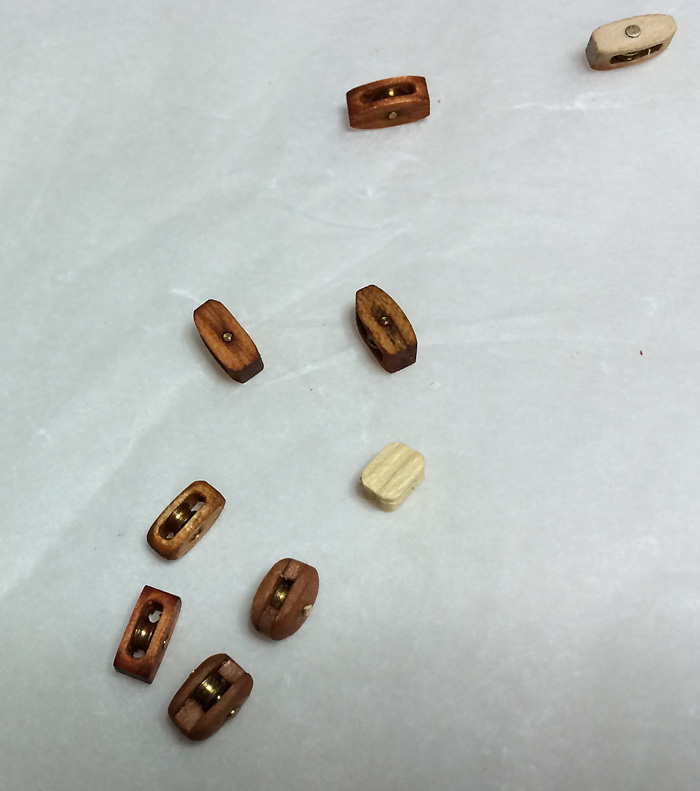
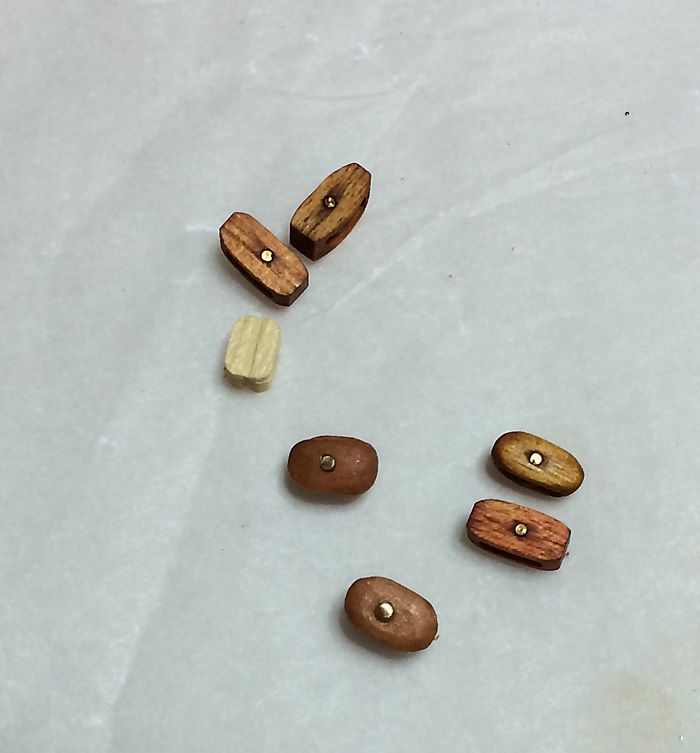
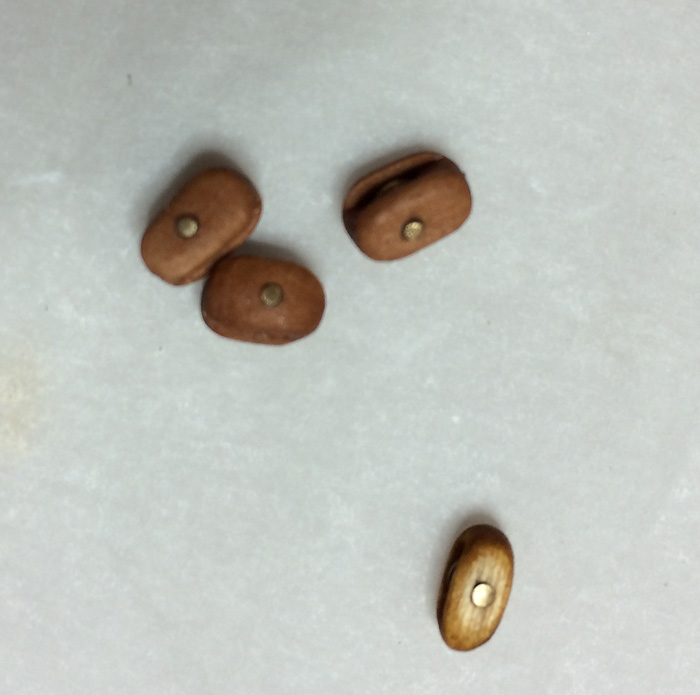
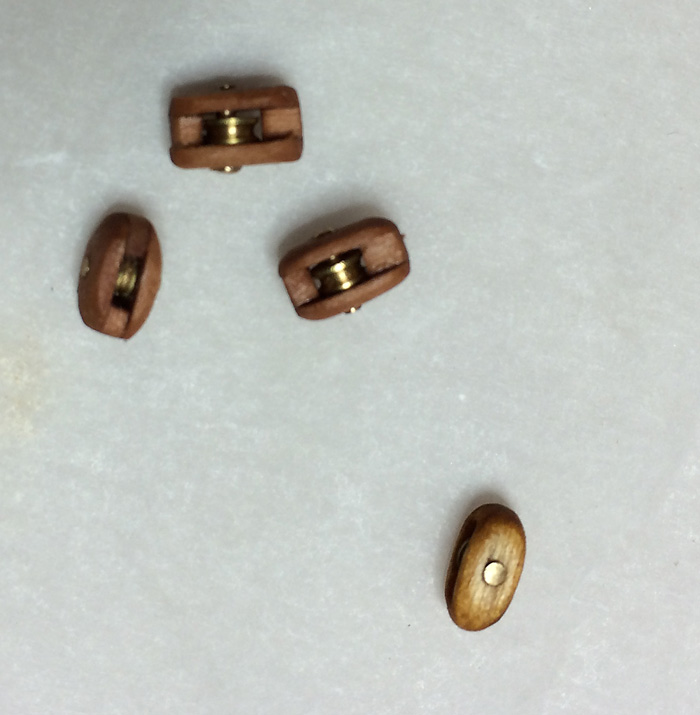
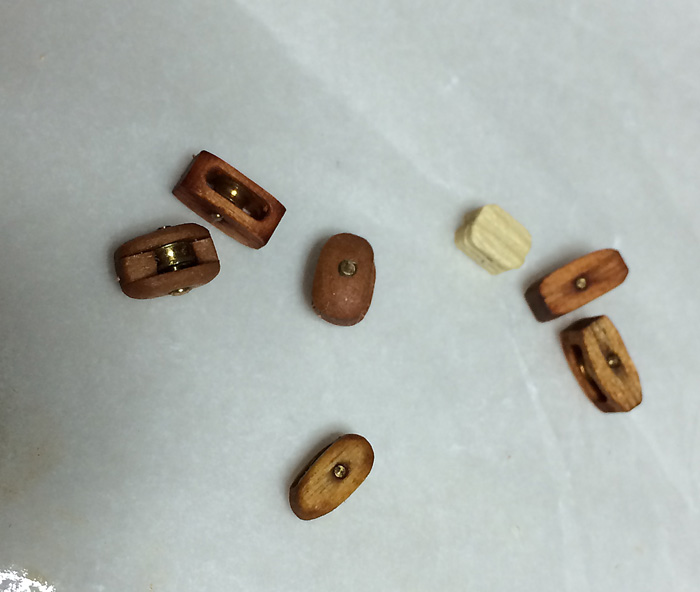
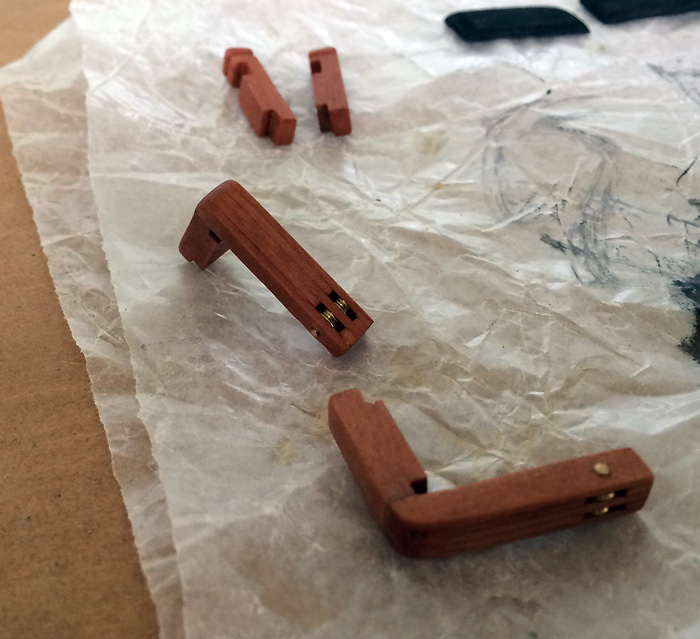
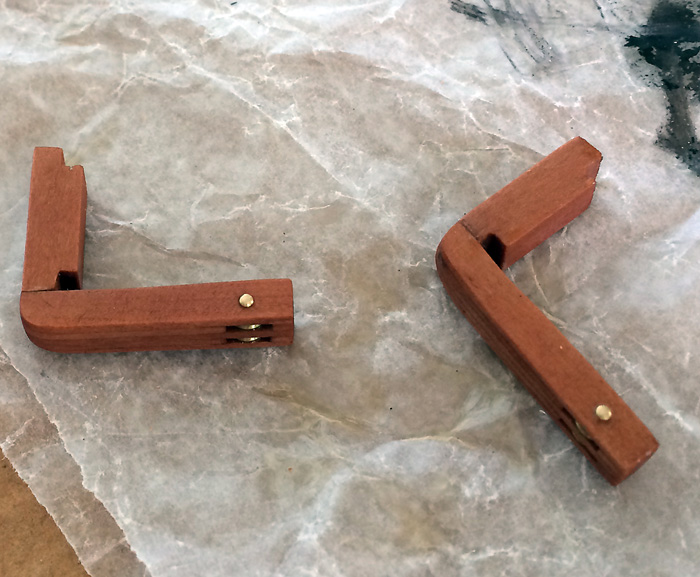
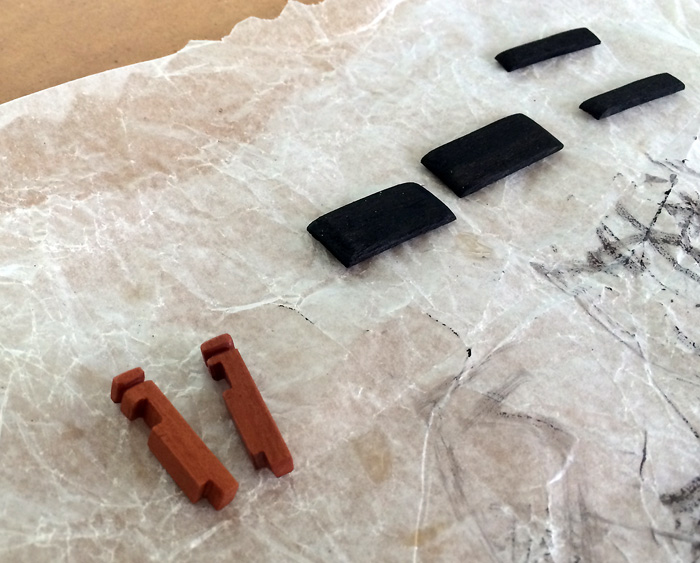
Been making some blocks. I have been meaning to get some from Chuck for ages - but if you don't order them.. they don't come! So even though I still plan on getting some Chuck blocks - I wanted some NOW....
These are 3mm blocks... the smaller sheave looks better - and of course they are blown up in size in the photos so all the bad stuff shows

I totally forgot about a few purchased blocks I had.. after making the others. Would have just been easier to shape the purchased ones.
-
Thanks.
And after using woods from Hobby Mills - I would never go back to kit wood!
I have a couple of plans for scratch builds waiting patiently
But before anything else - I have to tackle the head timbers - I keep putting it off. I keep trying to solve the problems and have a few experiments - but I just have to DO IT!!!
-
And some more photos...

- mtaylor, fnkershner, hexnut and 1 other
-
4
-
I tried making nice even little holes.. but they didn't match - so I took the short cut easy option..
Much easier to insert sheaves and get them both the same..


- fnkershner, WackoWolf and mtaylor
-
3
-
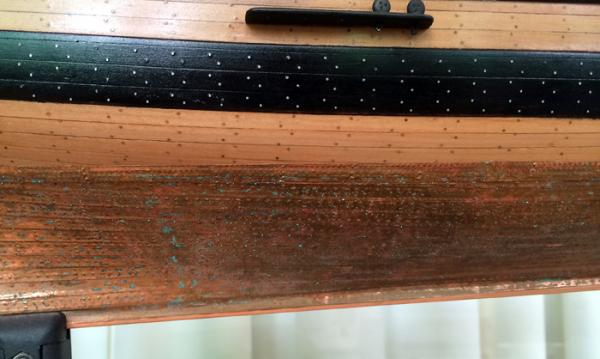
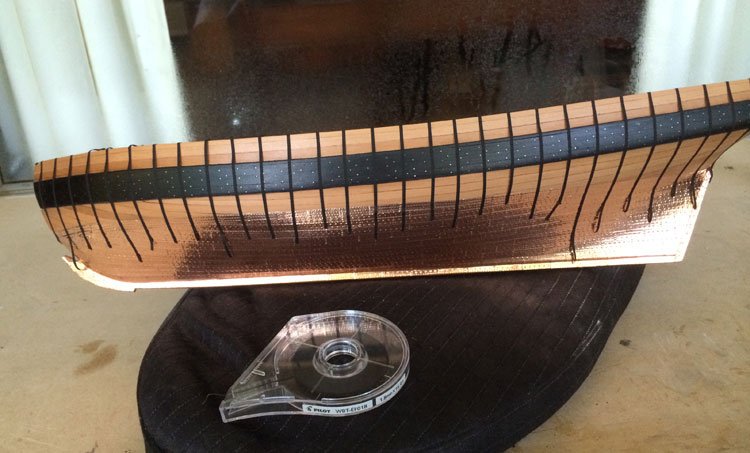
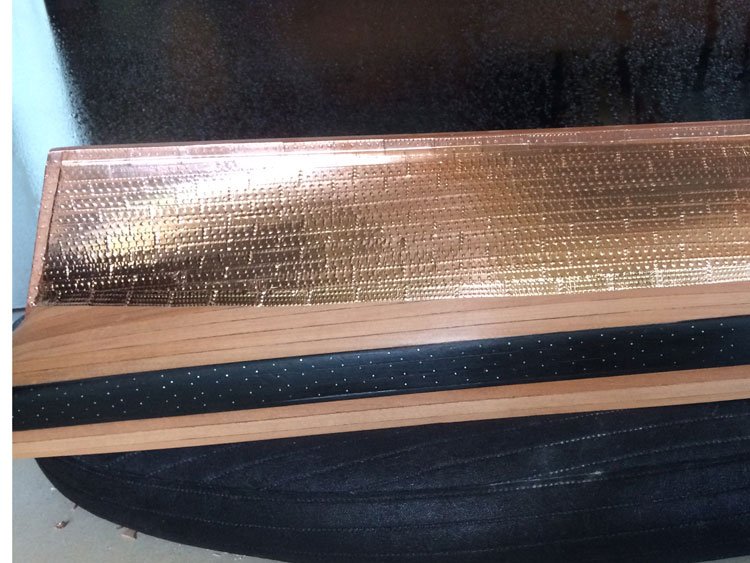
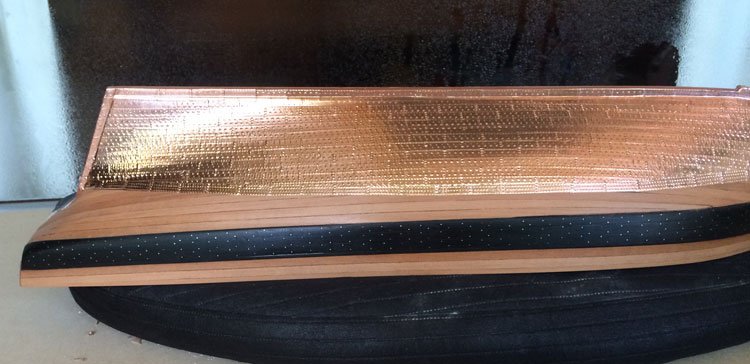
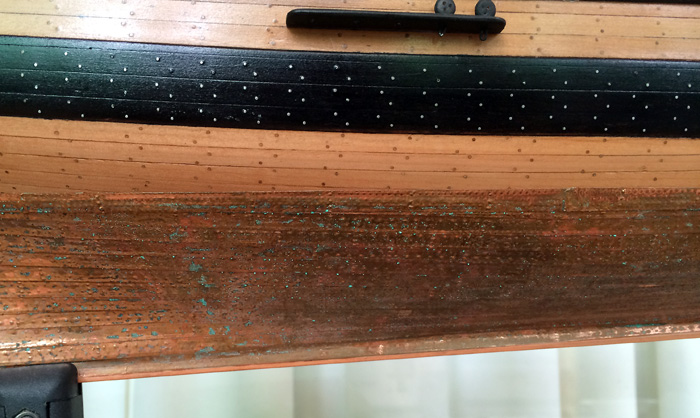
Update.....
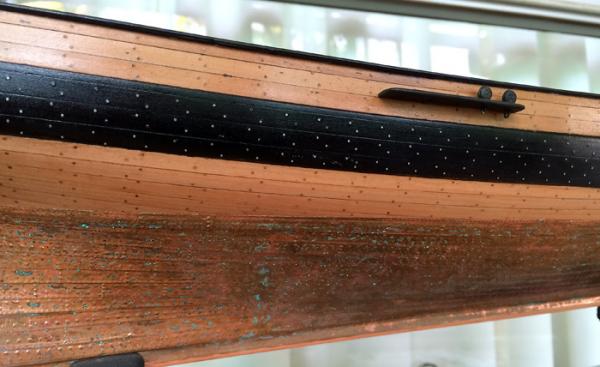
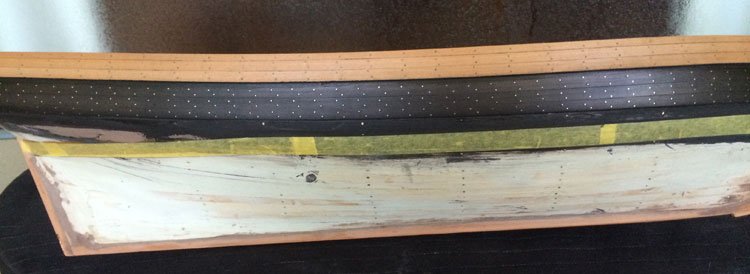
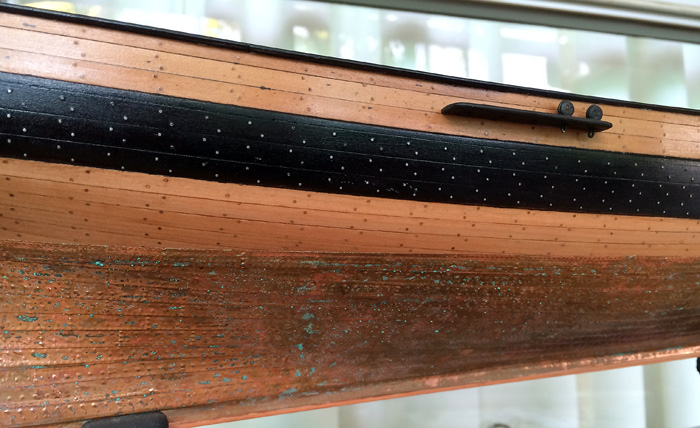
Finished the coppering. Aged it with vinegar and salt... nice lot of green
I am having trouble uploading from my own website/server - so I will have to use the site upload feature... Not real good at getting the photos in the right place and the typing along with photos.. so I will just add photos and type after !


- WackoWolf, CaptainSteve, fnkershner and 3 others
-
6
-
-
I can't even remember if I used the notched out parts. I will need to look back at my photos.
Good to see someone else joining me in this build Hamilton- you will probably catch me up. I have been very slow lately due to some personal issues. I hope to finish planking the second side tonight and then complete the coppering. Things will move a bit faster then.
I left this build on the shelf for quiet sometime due to the horrible ply. I was going to re cut it - I had some MFD. I have seen some others use it for builds. But I'm glad I waited - my Mfd is NOT good in my humid weather. I persisted and used the kit ply. It's all covered up now so I can forget how awful it was
-
Looking really nice. Love the timber colour too
-
Hi Hamilton,
I couldn't find many examples of this ship on the Internet - but I found an old one on a museum site ( can't remember where - I sacked the site on my pc but I am away from home at the minute so can't link it for you). The old one had a coppered hull - so it solved a few problems for me. Eg not having enough pear in stock to plank the entire hull. This way I didn't have to wait on ordering new wood
so for below waterline I could use the kit supplied stuff and that would be covered with copper plates.Ship is on a bit of a hold at the minute - until I get home again - and I am not quite sure when that will be.
So far it's been pretty easy and well designed. As usual - I have made a few mistakes - always a good learning experience. I had plenty of small bits of nicer timbers - so all ply that will be seen has been scrapped and replaced with some nice timbers.
I have since replaced the final row of coppering and used one continuous row - which has given a much smoother line. Hard to tell the difference between separate copper plates and a full strip - and so much easier and quicker. I mucked up a few minute bits of the coppering when I was sanding and oiling the tree nails - so decided to remove the dressing row of plates and replace the entire row instead of just the odd ones that had a little damage.
Hopefully a bit more progress soon
-
-
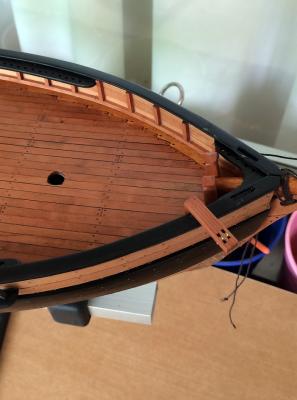
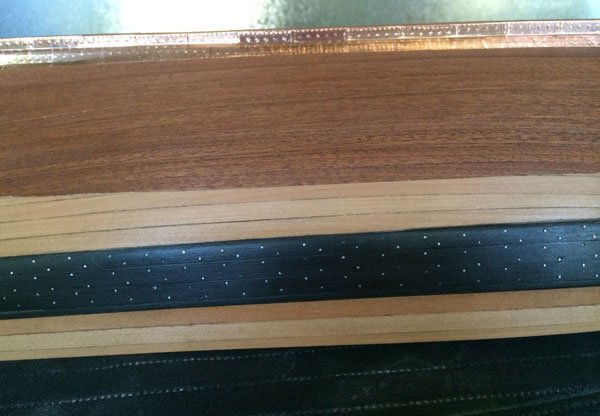
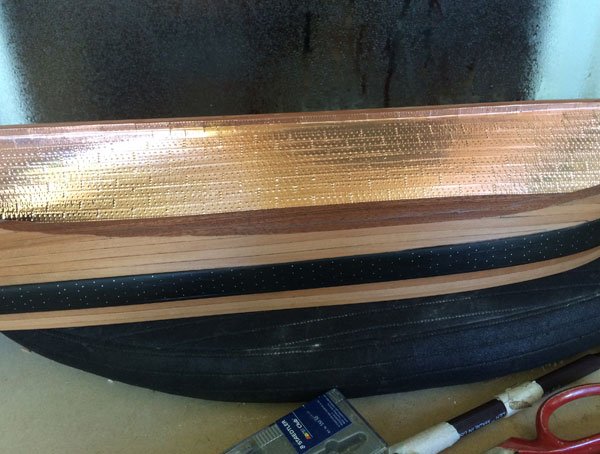
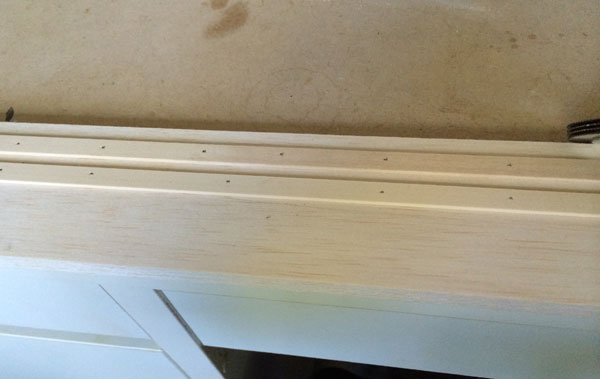
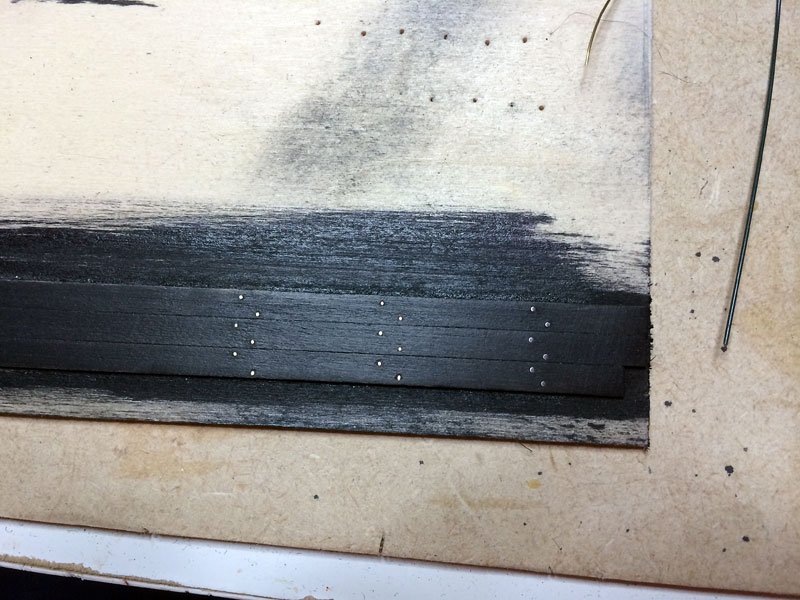
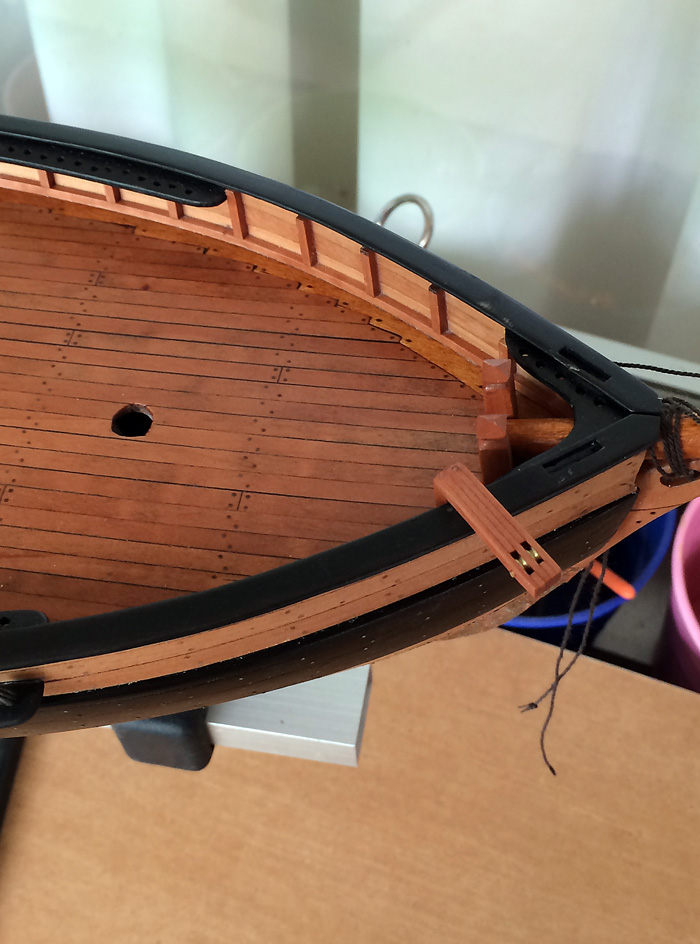
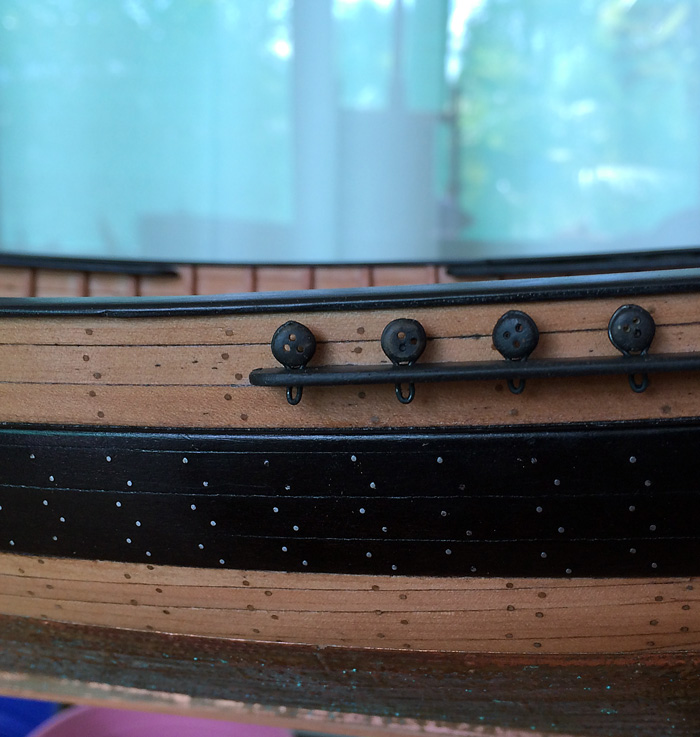
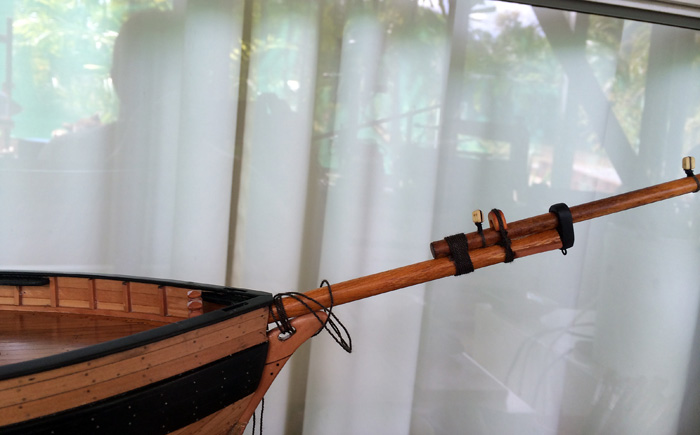
Now I will treenail the pear strips on the hull... just marking the spot as the planks above the wales will need to be carefully lined up with the strips of wood inside deck - or I will end up drilling through the whole lot - not a good look.
Below wales isn't important as it wont show inside.
-
Some pics of the progress:
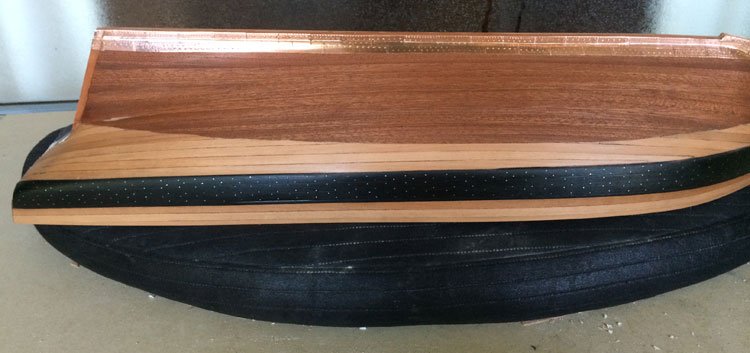
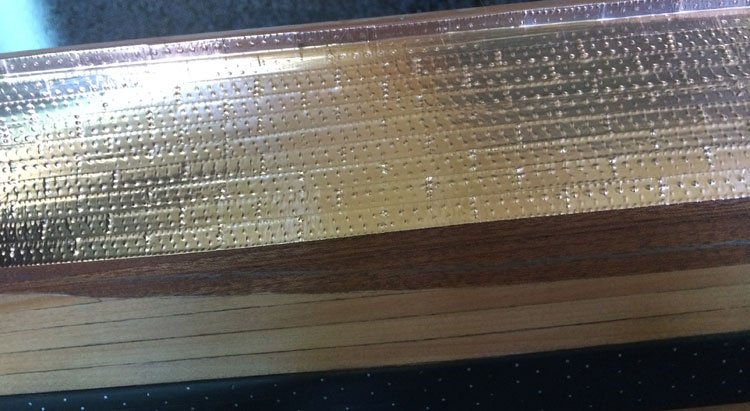
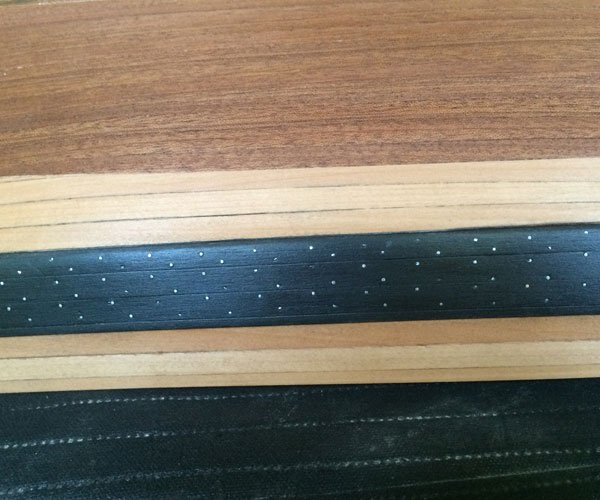
The dress plates were made with another set of Proxxon discs - no teeth removed - two outer discs teeth line up and the two centre ones are off set - no gaps.

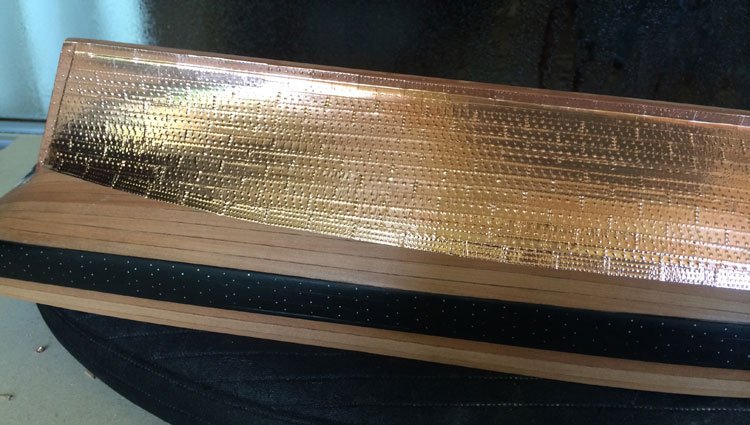
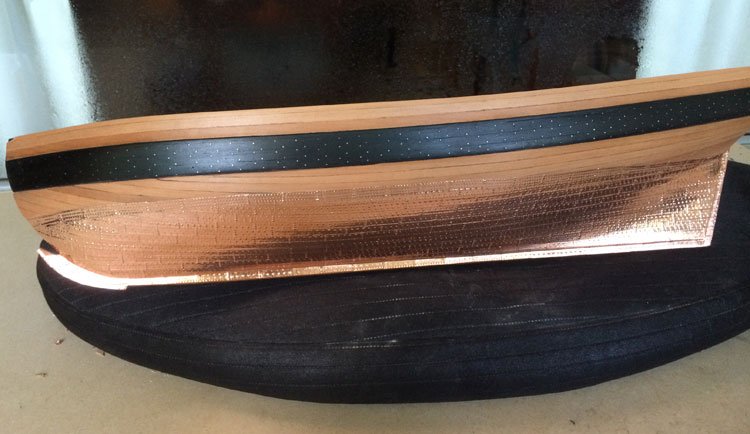
One side completed - less than an hour's work. Much quicker than the method I used on Syren.
The tools I used... The one with the little fuzzy end - I used to burnish the plates - which will soften off the look of the rivets. The photos above (and the close ups inparticular show then before burnishing - so a bit too pronounced). Burnish till you like the look of the "rivets"..
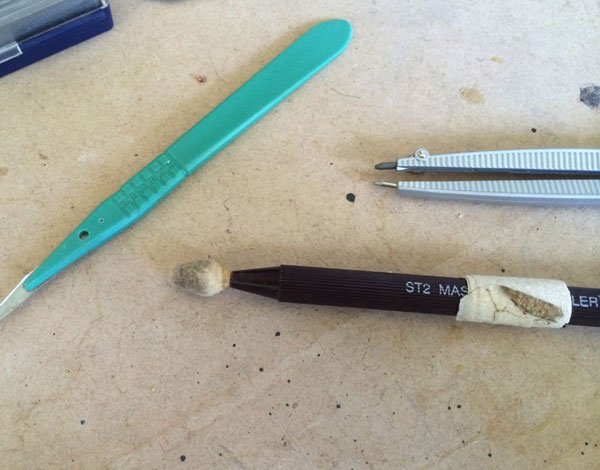
The burning tool has a very firm end - its not soft - its just covered in some sort of flock. It was a tool I used for another hobby - its not actually a burnishing tool.
- fnkershner, CaptainSteve, mtaylor and 4 others
-
7
-
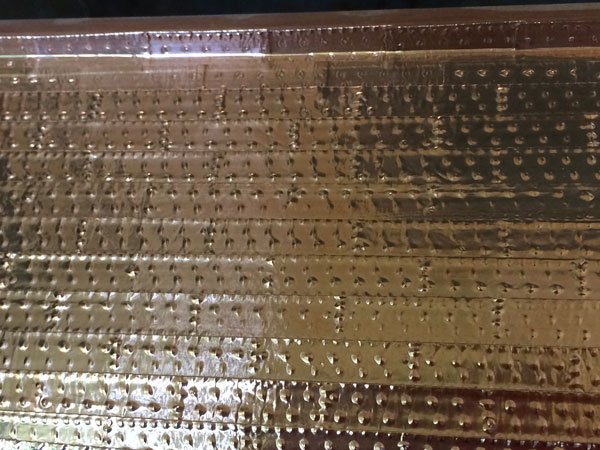
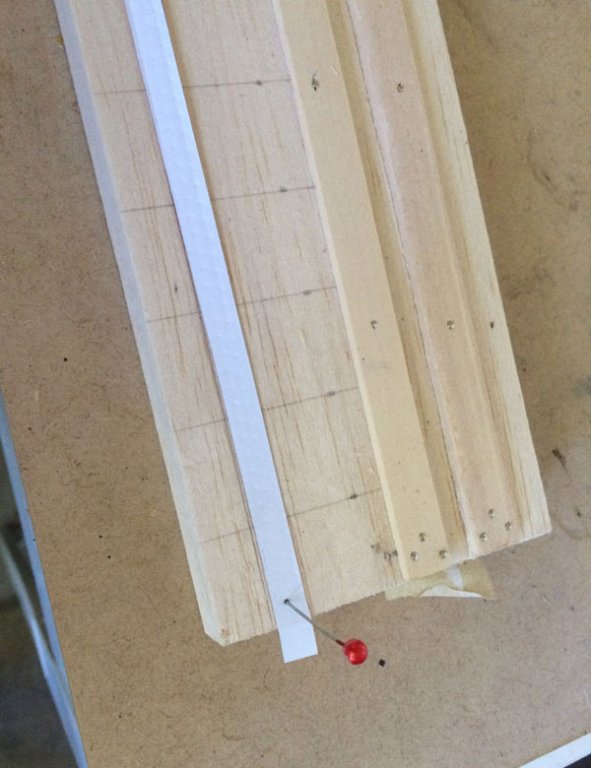
I decided to try something different than the last time I made the copper plates.
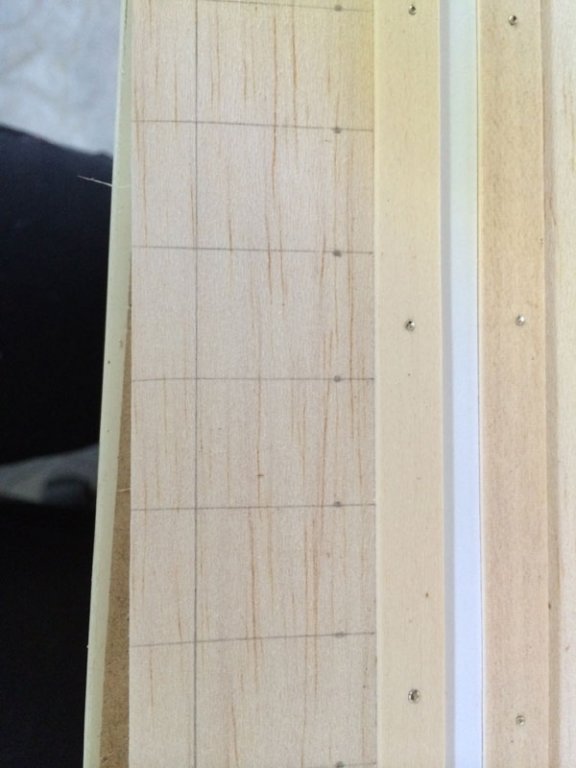
I got a metre long piece of balsa wood (needs to be soft to make the indentations). Attach some strips to the balsa wood - nice tight fit for the copper tape.
So I can make 1 metre long strips of copper plate.
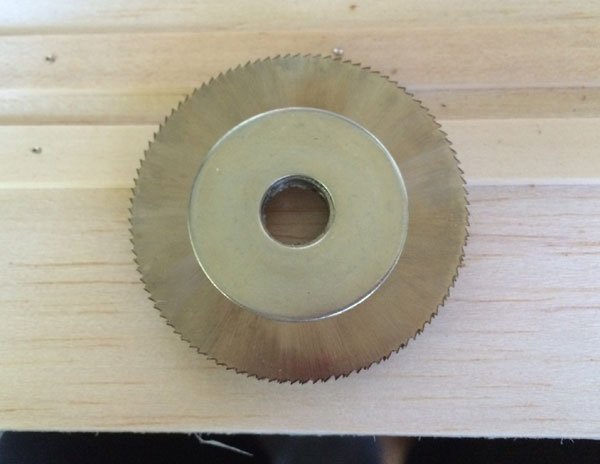
For the ponce wheel - I used Proxxon cutting discs
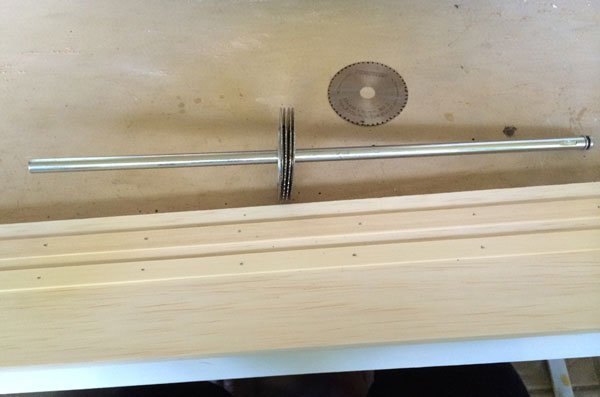
I originally had them attached to a handle - but found I get more even indentations with the rod and hands both sides and just roll towards myself
Tape laid in between the two strips (wrong side up)

I let a little bit go over each end and just masking tape it down - to stop the tape moving when I roll the wheel over
With the Proxxon discs - I quickly filed them a bit narrower - no more than a minute each disc. I filed from both sides. Then gently ran the file around the point of the teeth - just so they weren't so sharp. Don't want them cutting through the copper tape.
The two outside discs I left as they were - the two centre ones - I removed every second tooth. I marked the teeth that I wanted to grind down - so I didn't loose count and cut the wrong ones.
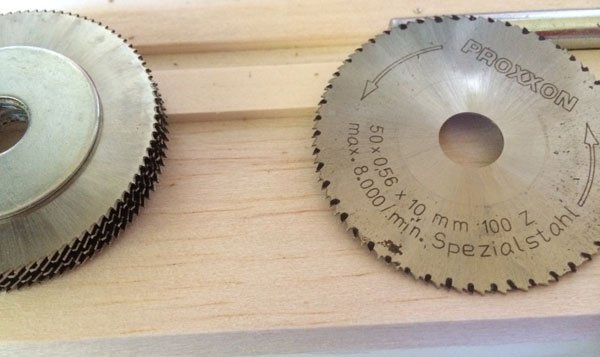
I lined the two outside discs teeth up and the two centre ones were off set.
Then I epoxied a large washer of the correct thickness between each disc - it worked out the perfect width for the tape.
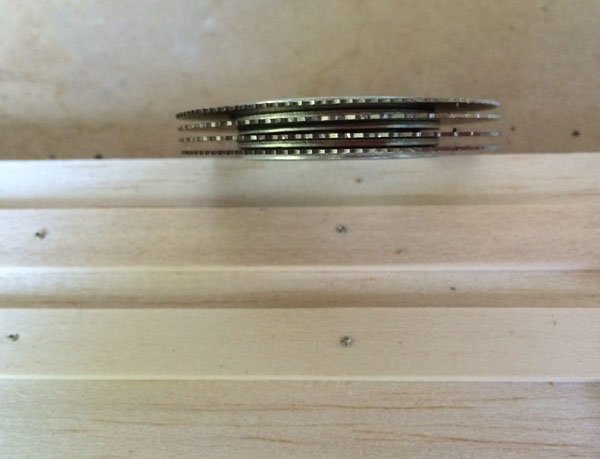
You can possibly see the line up of the teeth....
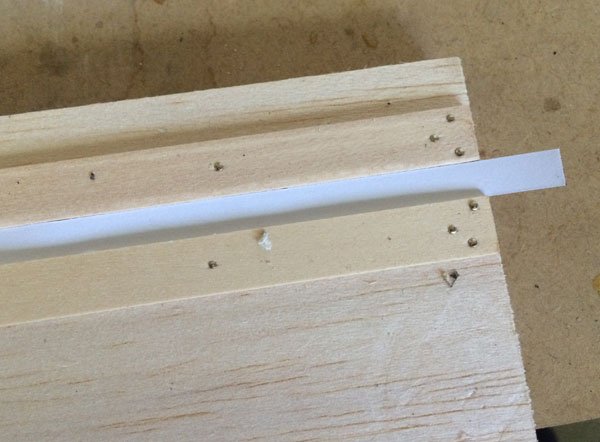
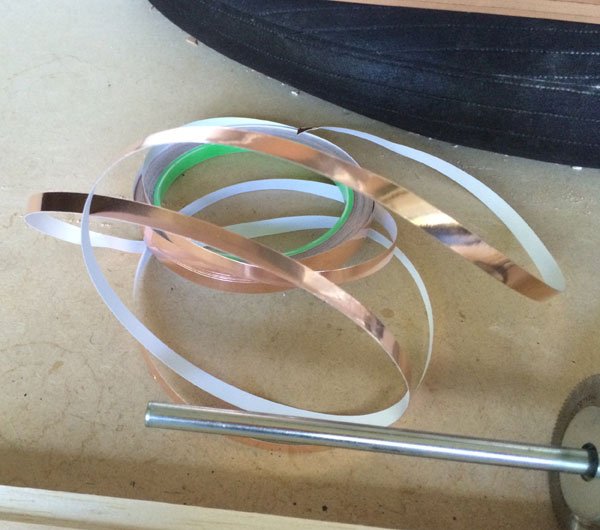
The self adhesive copper tape
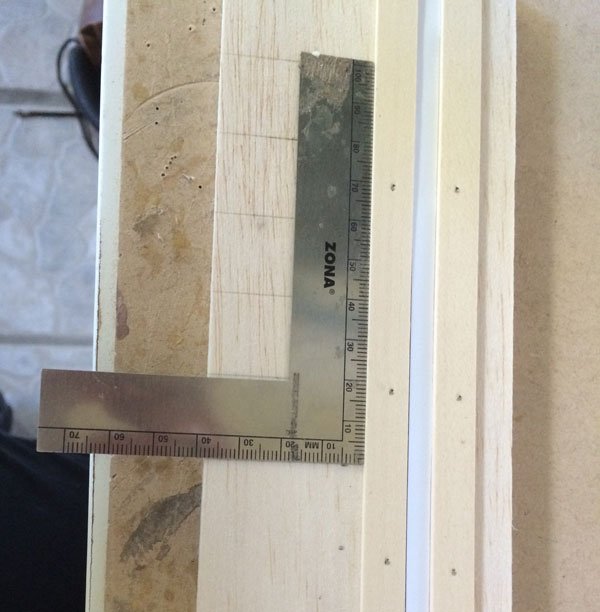
The balsa board clamped to the table

Then its just a matter of putting the disc on a rod (it was something I had for some piece of machinery - so not specifically sourced)
and then rolling it towards yourself with fairly firm pressure.
I can make enough tape for an entire ship in less than 10 minutes - probably more likely 5 minutes.
To make a leading edge with a row of rivets - I marked the spare surface of the balsa board evenly (about 18mm apart)
Pinned each piece of tape to the board fairly taut - I can place about three at a time side by side. If the board was wider - I could do a whole lot more at one time.
Then using a square I run that along the tape and at each mark I use a single Proxxon disc and just roll across the tape.
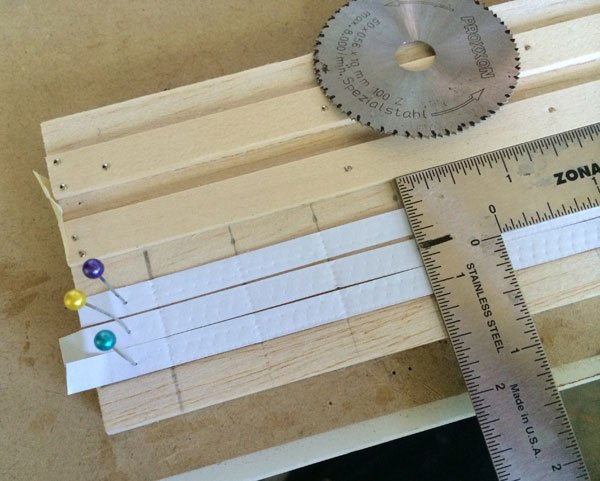
From this point you can either cut the tape (with scissors or a chopper 11 cutter).
I did the first two rows as single plates. Then remembered someone mentioning that you can use one piece of tape per row... I wasn't sure it would sit right - but with the backing off its very easy to take the contours of the hull.
So from row two onwards - each row is just one single piece of tape - with the "joints" marked with the single disc as above.
- mtaylor, avsjerome2003, fnkershner and 1 other
-
4
-
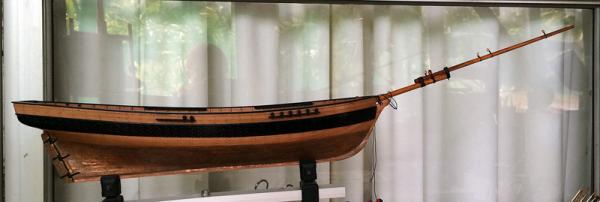
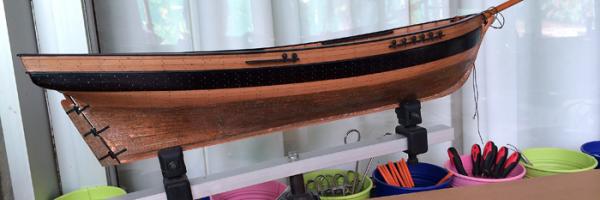
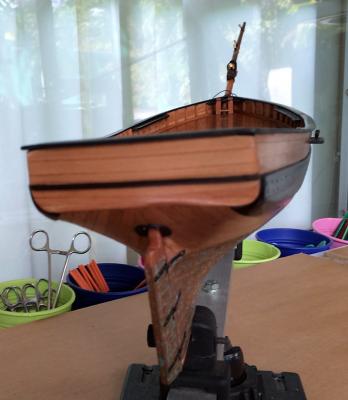
Bit of an update:
Progress on the hull so far:
I don't have enough pear strips to plank the entire hull - so as I am going to copper plate below the waterline - I have used the kit supplied wood for the planks below the waterline that will be covered up.
Might not be the "correct" way to do it - but it solves my problem
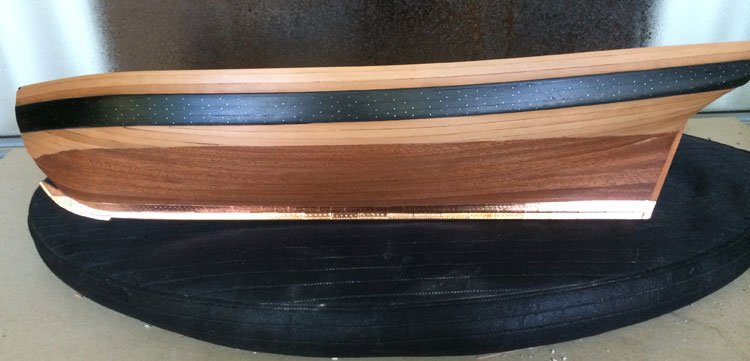
Planks are pear above the wales.. the wales are ebony stained pear (thicker stock) and below the wales to the waterline is alos pear.. below waterline is kit supplied sappelli (think that's what it was)
- coxswain, CaptainSteve, mtaylor and 4 others
-
7
-
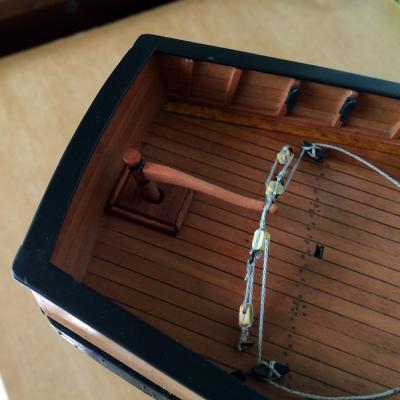
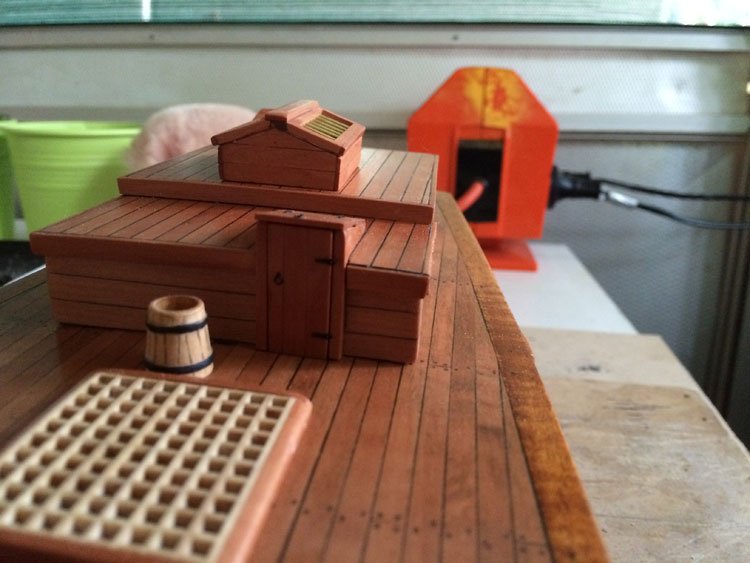
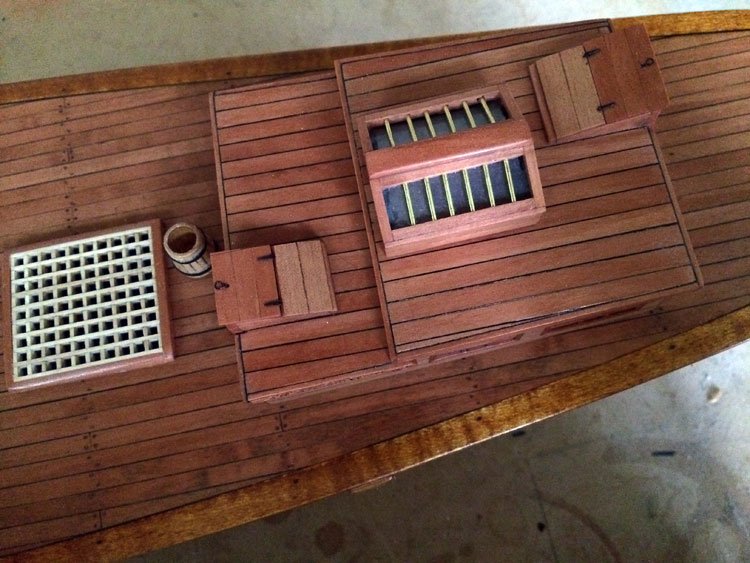
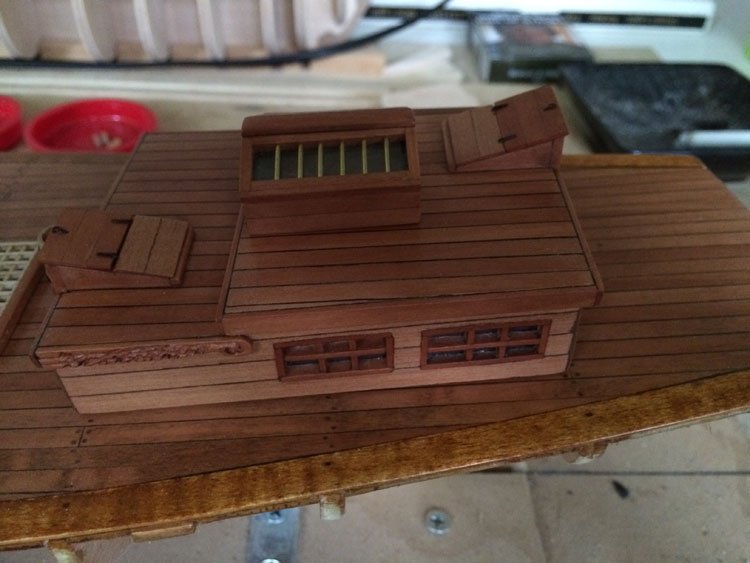
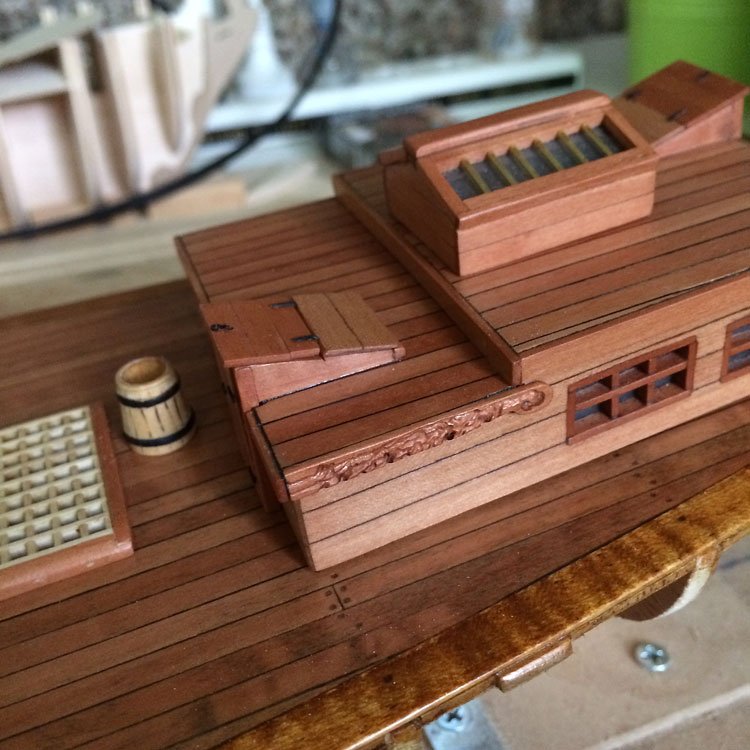
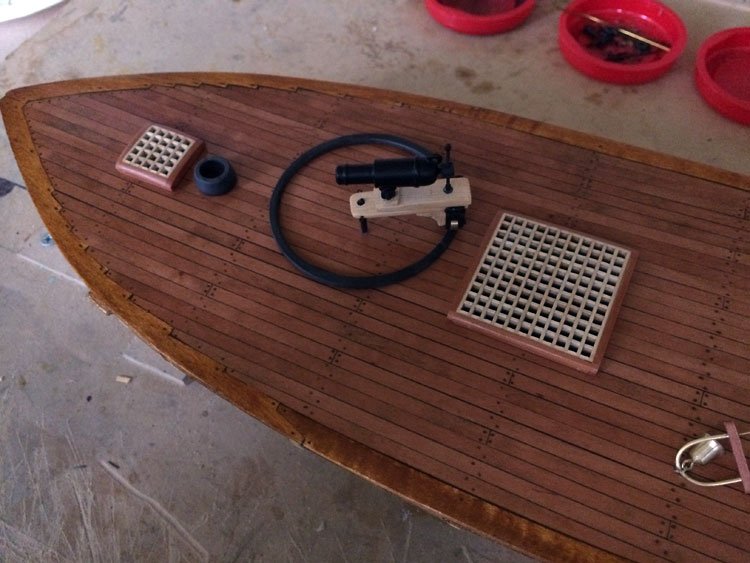
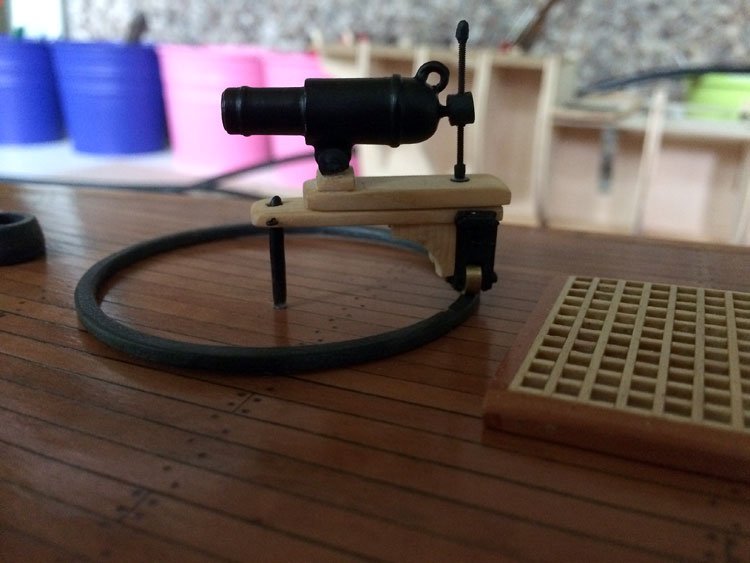
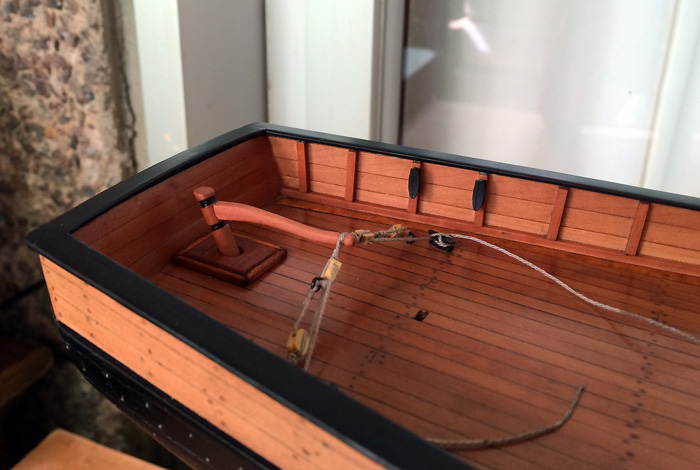
Made all the deck fittings - using mostly pear and Huon pine. The kit supplied pretty awful looking ply. Nothing is attached of course - as I haven't finished the hull planking yet. The bucket came with the kit - I have remade that - but no photos as yet.
- Aussie048, avsjerome2003, mtaylor and 7 others
-
10
-
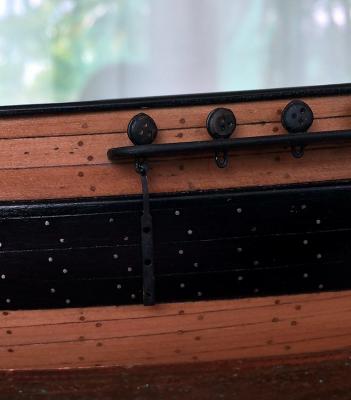
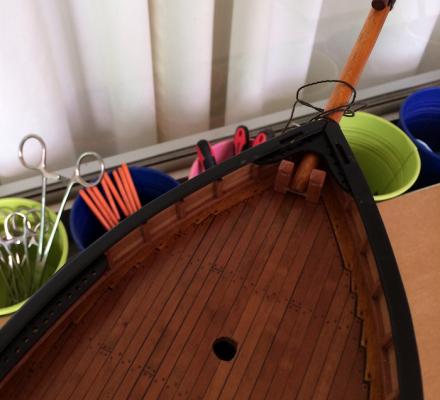
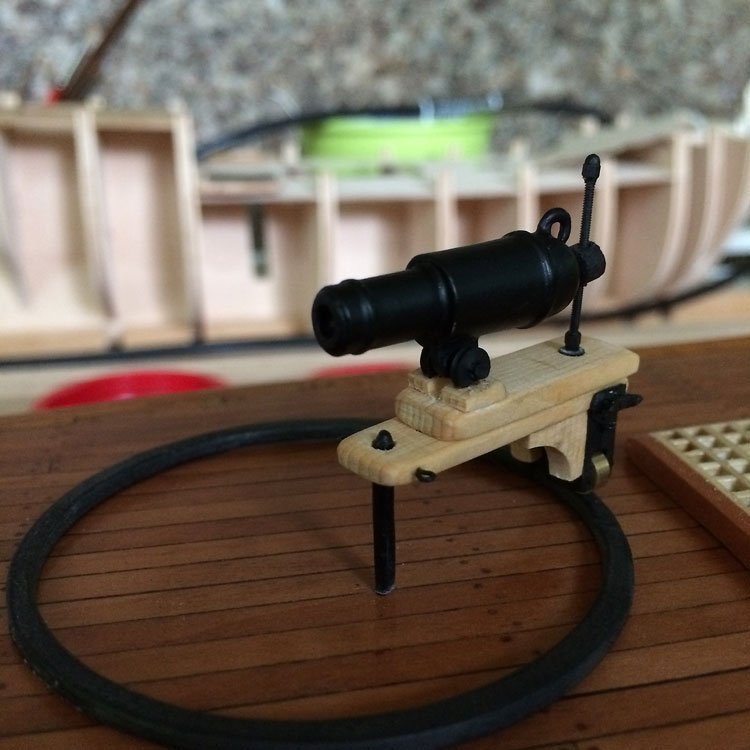
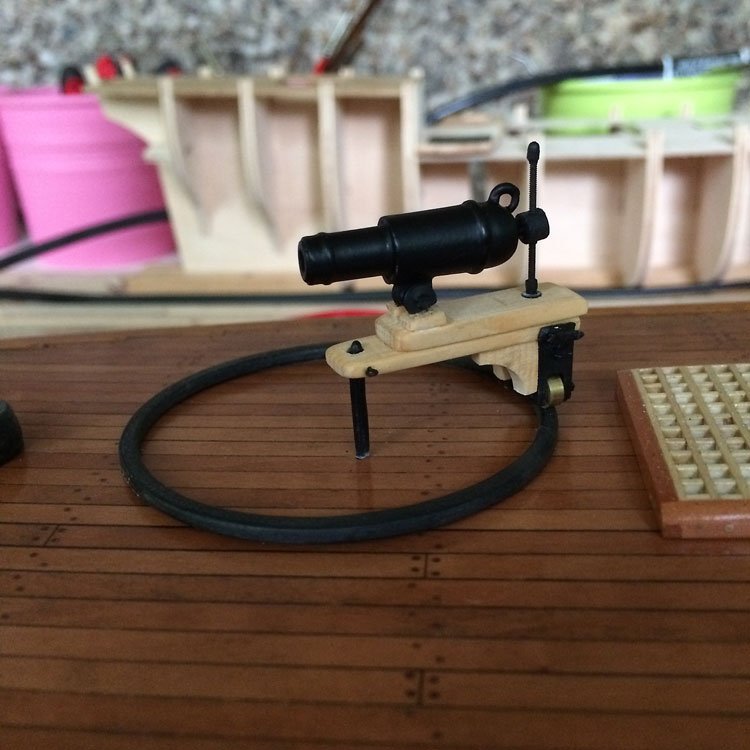
Have a few up dates
But I need some help...
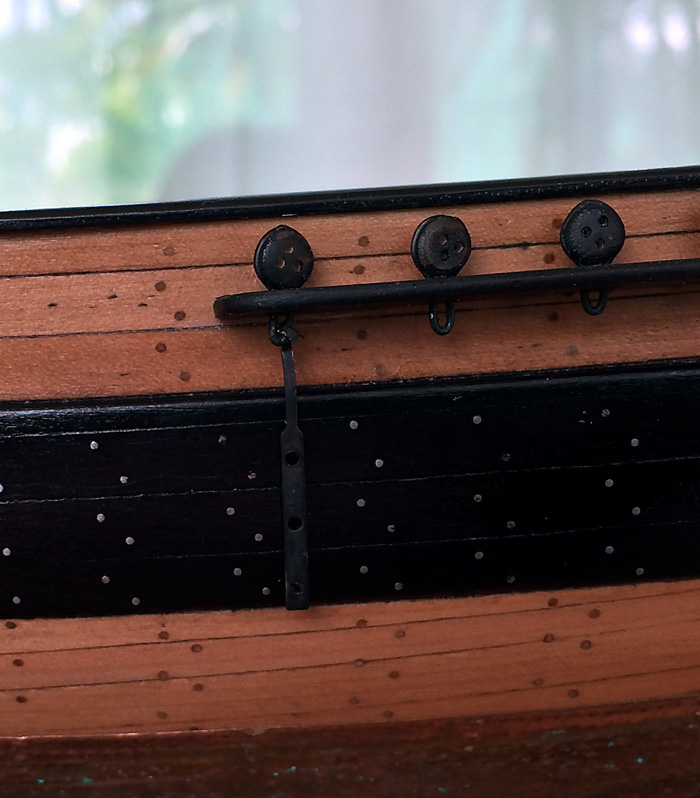
Its the Wales - do I treenail them or not...
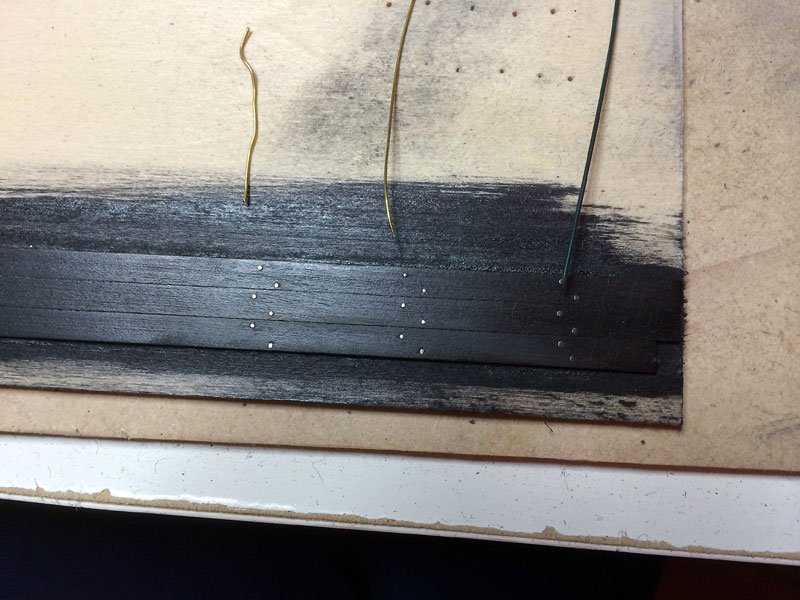
I have a sample with three different wires - from the left 0.5mm brass, middle 26 gauge brass and on the right some sort of steel wire - very dark green on outside (which you don't see when inserted) and a dull grey sort of steel colour is what shows. I am leaning towards the one on the right. Lot littler than they appear here. drill size was a 79
Photos aren't too good as they are at night under reflective light.

I also remade a fed things - the kit came with awful ply laser cut parts - other than painting them - I could see no way they could be used. Took me all day for one of them - as I didn't have any wood the right size or thickness - so I had to rip a billet down to 4mm (from 10mm thickness) with little handsaws - took ages. Then I go to the point of shaping the individual pieces- and yep - I broke my only blade in my fret saw almost instantly. So the shapes were all cut out with little Japanese saws - didn't go too badly.
They are wet with oil - no going to be this shiny when finished.
New timber is pear.
-
I only broke one piece of cherry frame - and that was when I followed the instructions. Then I did all the rest "my way". I soaked the cherry - can't remember if I used boiling water that time - but I often do. I only soak for a few minutes. Then I just ironed the cherry around the formers. I have I tiny travel iron ( steam iron ) - so it bends and dries the wood at the same time - no breakages whatsoever. And quick and easy and even if you get a bit heavy handed or rough - they still don't break. You get a really tight fit over the mold/ formers. An ordinary iron will do the same job - it can just be too big at times. My little iron is very versatile and fits in pretty small spaces/tight spots.Steve,
When I was bending the tween frames into the hull I found a technique that helped with the breakage problem. The ribs were soaked in water with a bit of amonia for 5 or 6 hours. When bending I would put the bottem end against the keel then slowely start bending very close to the keel and work my way up very slowley stopping for a few seconds every few mm or so. Once I felt the wood relax a bit I would move up the rib. If you try to force them down close to the center of the rib they will snap like the brittle little sticks they are.
Al D.
Great progress Steve. I found this boat a most enjoyable build - AND I learnt a lot
( mostly what NOT to do again) -
-
Yes I know the answers are there.. I just have to figure what to ask
I just find the plans a bit daunting.But like most things - once your take the plunge and start - it becomes much easier.I saw the NRG mentor program - It sounded very interesting.
-
Ahh - but how to use those plans is just one big mystery to me so far!!! That is more daunting to me - just where and how to start. I have read about them. I have watched DVD on it - but still it's not 100% clear. But this build s just sensational
-
Great video Vivian.
I see you have chosen another interesting subject for your new build. Very addictive this ship building eh?
Best of luck with it all - I will follow along
-
I got a copy for Christmas. I just wish there were more parts/topics covered
Looking at the Russian site build - its just beyond beautiful.
One thing I have noticed - both on the DVD and the site - he does his deck planking in one run - no joints. To me in small scale this looks so much neater.


Dos Amigos by Meredith - OcCre - 1:53
in - Kit build logs for subjects built from 1801 - 1850
Posted
Thanks Mark,
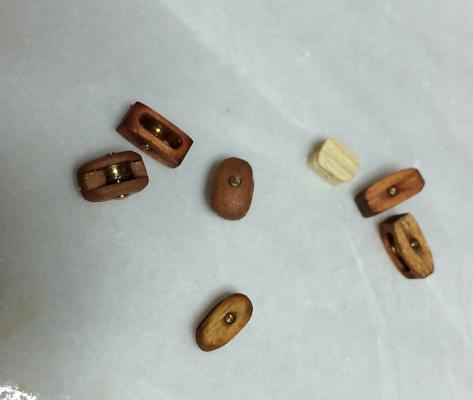
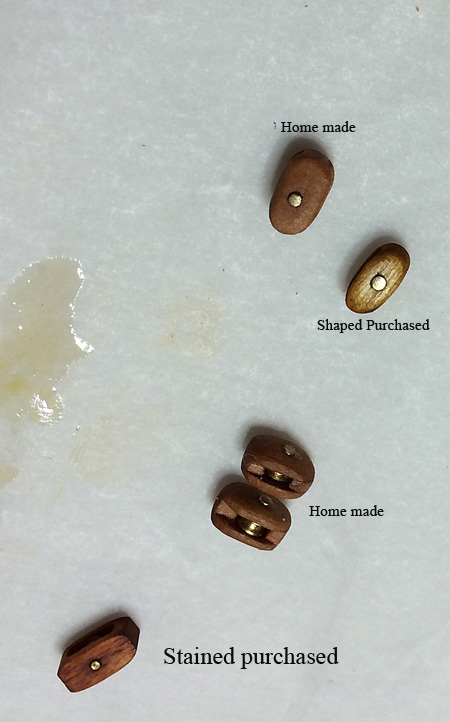
I am a bit disappointed in them so far - but I was trying to work with a few bits of wood I had to hand. (without re-sizing the wood).. I know the principle works ok.. just need to get the dimensions right - eg size of wood.. size of sheaves. its was pretty late when I was playing around with it - so it was just an experiment. I then went to look for some photos/pictures of the real thing.. boy can they vary in shape/style/size. So I really need to pick one style and copy it. Most had flat sides (faces) - and I rounded mine too much. And sheaves aren't right size for the blocks - but that's easy fixed. It was all just a bit of improvisation. Now bigger sizes would be very easy.. I might have to up the scale I am working in and do nothing smaller than say 1/48 !!!!
I had almost decided last night I will just order some Chuck blocks.. but being impatient I was trying to get something I could use NOW - not wait for international postage. If I had ordered them when I first thought about it - they would have been here months ago - just waiting for me to get to the stage I needed them. procrastination does not always pay!