-
Posts
408 -
Joined
-
Last visited
Content Type
Profiles
Forums
Gallery
Events
Everything posted by alross2
-
A little history on this kit - When Jeff and Suzi Marger owned BlueJacket, Suzi wanted a kit that a kid could build without any tools other than sandpaper. I came up with this basic design of a typical skiff you might find on a lake here in Maine. It's not exactly to scale, but close and kids had fun building it.
- 24 replies
-
- Bluejacket Shipcrafters
- Finished
-
(and 1 more)
Tagged with:
-
OK, bottom color on this AM. After peeling away all of the masking tape, I found some underbleed on the deck, but that's easily removed. The next activity will be adding the photo-etched coal scuttles and bases for the deck furniture. The waterline masking was a little tricky, as it is 1/16" below the top of the armor belt. I taped off the hull along the top of the armor belt with 1/4" striping tape, then used 1/16" striping tape below that. Regular painters' masking tape was applied from the 1/16" tape up. The first layer of color was from rattlecan of red primer, followed by an airbrushing of flat red.
-
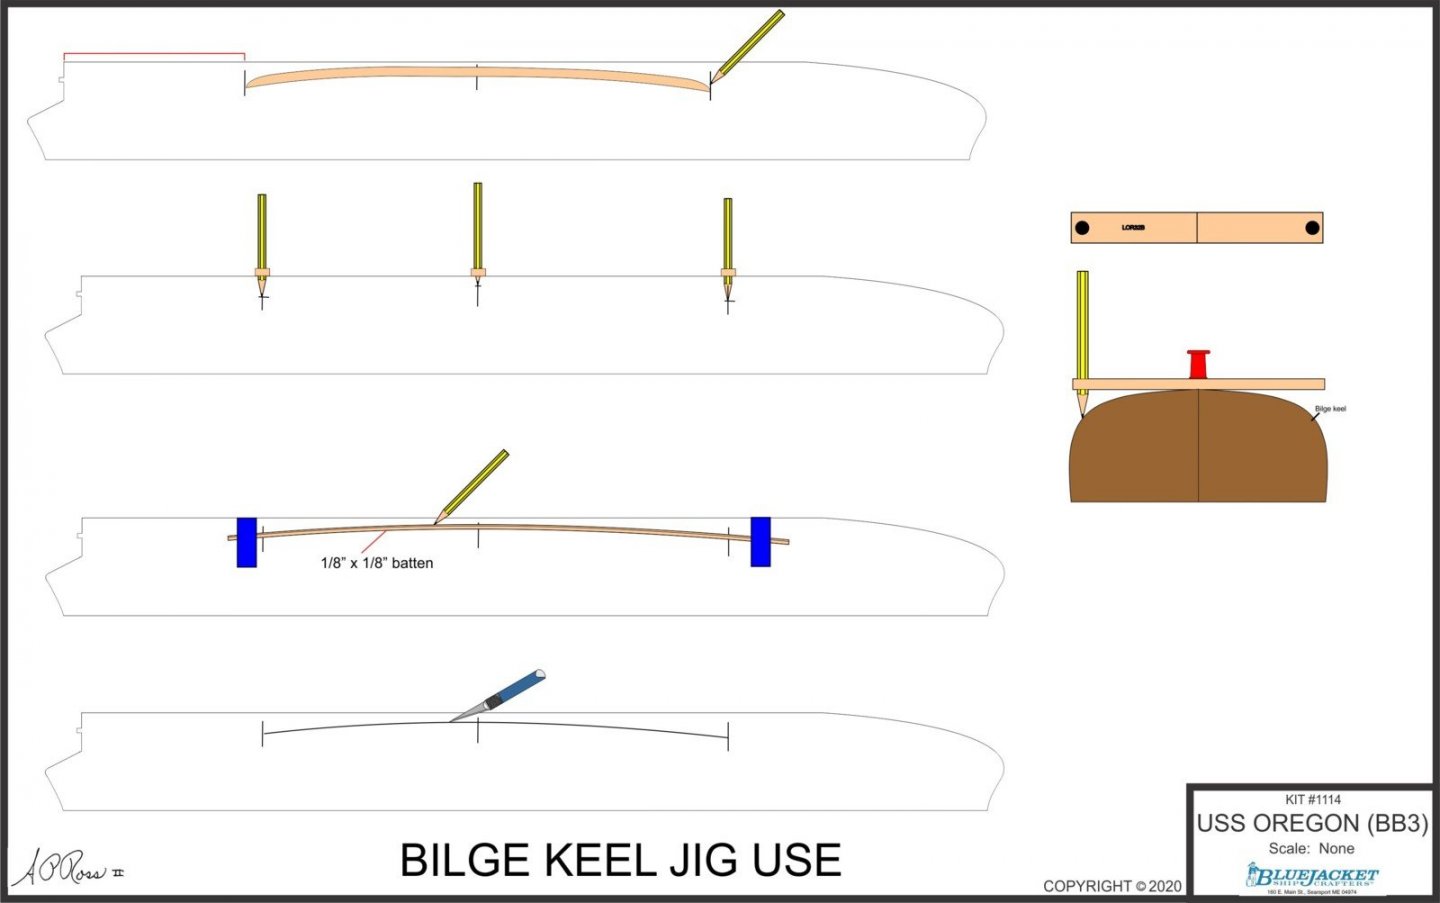
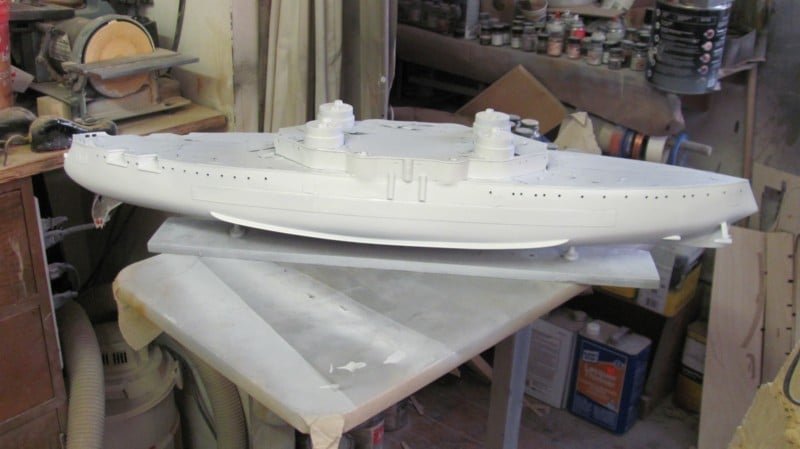
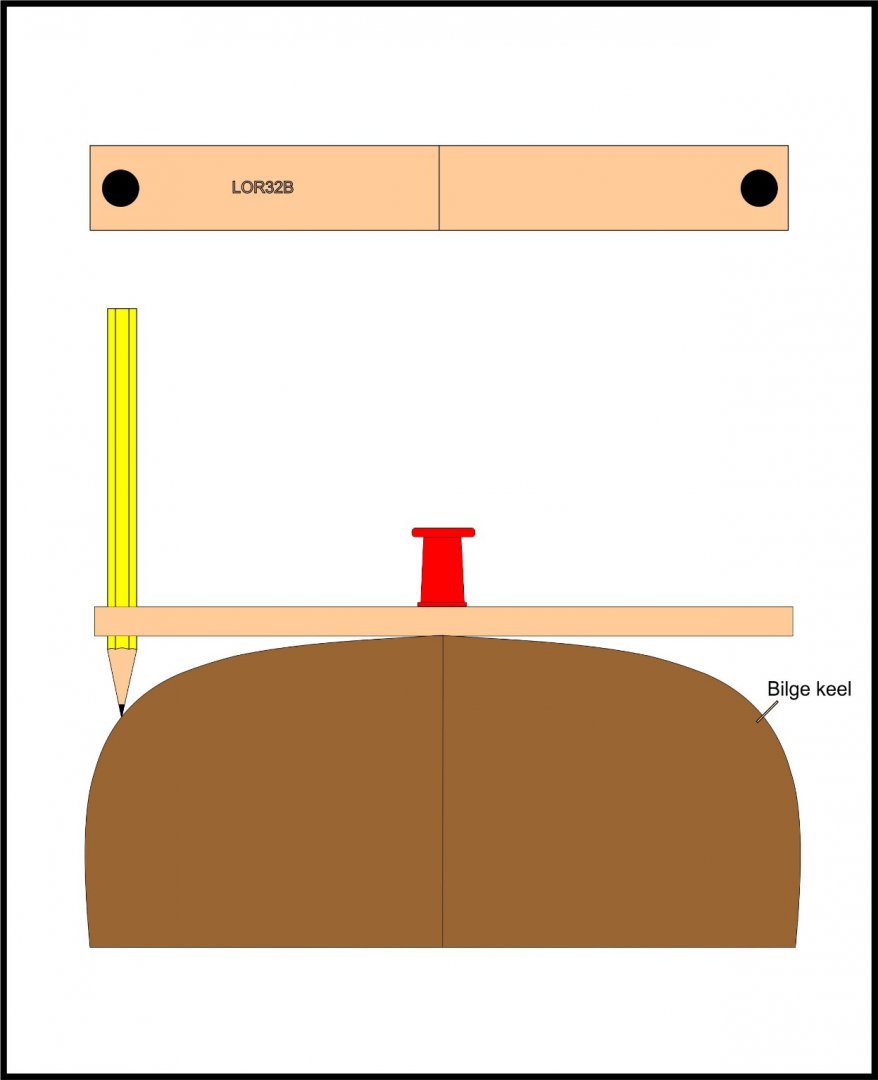
I'm working on the OREGON instructions today and decided the text on setting the bilge keels needed an enhanced illustration to accompany the jig illustration. The dimension from the rudder post to the aft end of the bilge keel will be filled in when I get back to the model in my shop and measure it.
-
You go, Mark! If I get a call from someone having a problem with one of the kits I developed, first thing I ask them is whether they read the instructions. If not, I tell them to back and read them, then call me. Because there is so much laser and photo-etch, there is a specific sequence to be followed that isn't necessarily intuitive. I used to develop training materials and procedures for the nuclear power industry and taught technical writing at a college.
-
Let's be honest; not everyone reads and follows instructions. While this isn't a good idea in kits with lots of premade parts, it happens. So, one of the challenges in kit design is to tailor your illustrations for this potential situation. While thinking about the text for this process, I realized that the initial illustration (while just fine if you read the instructions) might be better if it mimicked the text more closely. Thus, the second illustration.
-
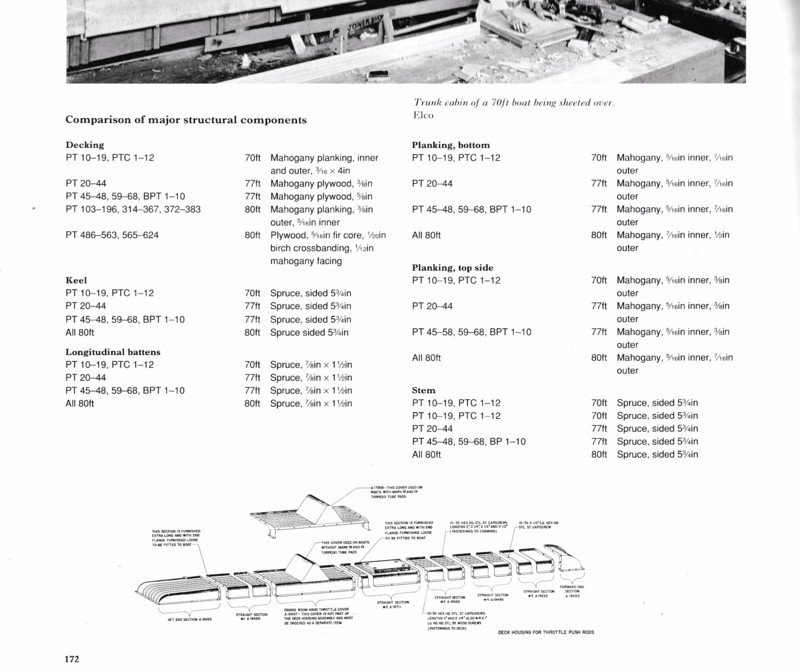
This information is from John Lambert and my ALLIED COASTAL FORCES OF WWII, Volume 2, and was taken directly from ELCO drawings, of which I have hundreds. PT103-196, 314-367, 372-383 had planked decks. PT486-563, 565 on had plywood decks.
-
I have the following Anatomy of the Ship books for sale. All are the original Conway Maritime Press LTD. hardbounds except QUEEN MARY, which is USNIP. I've had them for about 30 years, but they've only been looked through a few times. The bindings still make that "like new" cracking sound. Prices include shipping by Media Mail. Payment through PayPal only, plz. The 20-gun ship BLANDFORD – Goodwin, 1988 (ISBN 0-85177-469-5) SOLD The 100-gun ship VICTORY – McKay, 1987 (ISBN 0-85177-444-X) SOLD The 74-gun ship BELLONA – Lavery, 1985 (ISBN 0-85177-368-0 SOLD The Bomb Vessel GRANADO 1742 – Goodwin, 1989 (ISBN 0-87021-178-1) SOLD The Frigate DIANA – White, 1987 (ISBN 0-85177-356-7) SOLD The Cunard Liner QUEEN MARY – Watton, 1989 (ISBN 0-87021-599-2) $75
-
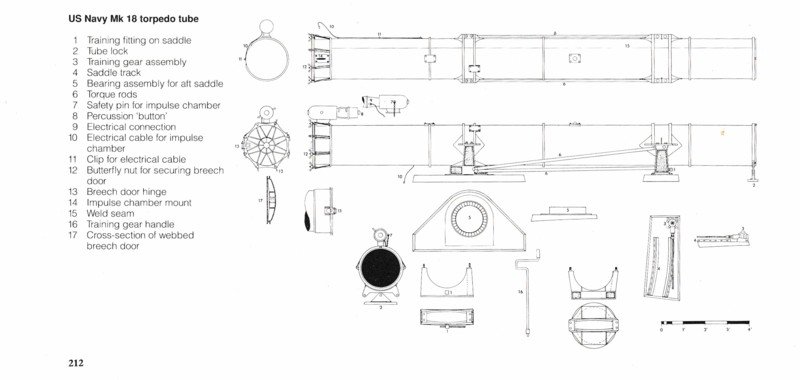
Hopefully, the front torpedo tube slides are not glued on. They're backwards. What's supposed to be the training gearbox is supposed to be inboard.
-
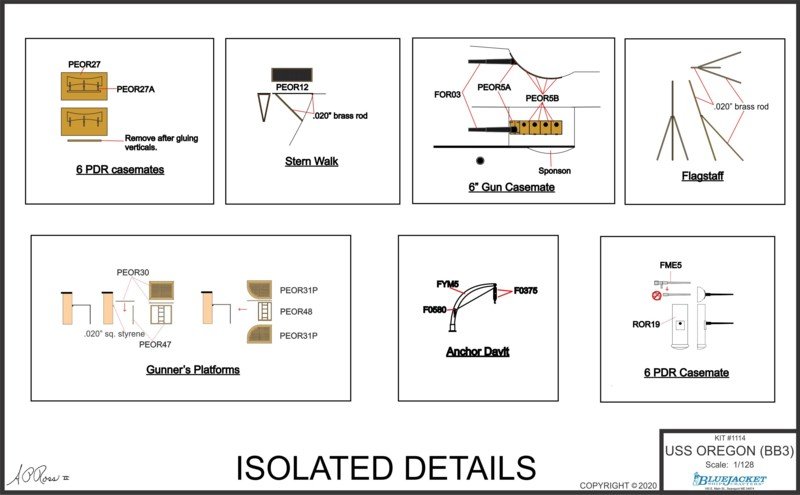
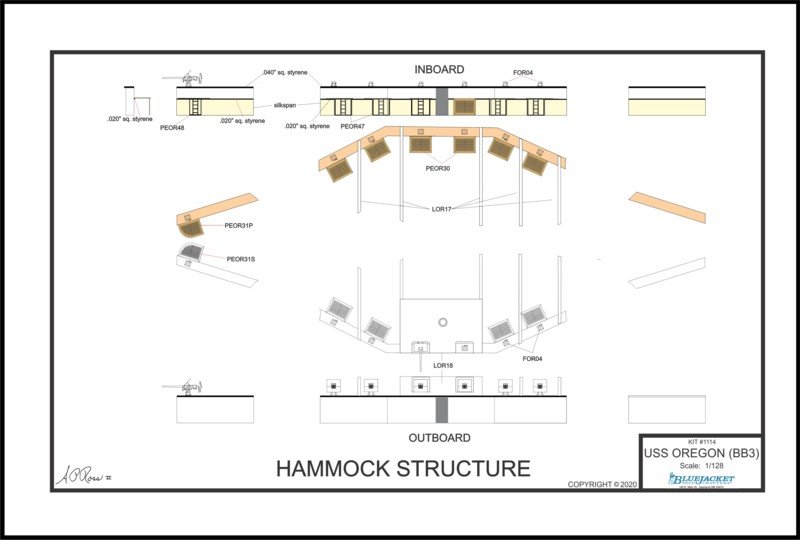
This one required some rework, but should be OK now. It shows the layout of the hammock storage structure. The gunner's grates are only 3/8" x 1/2", but are photo-etched and have the holes completely through. When not in use, they folded down. The pale yellow on the lower section represents silkspan which is used to simulate the canvas curtain over the hammock storage.
-
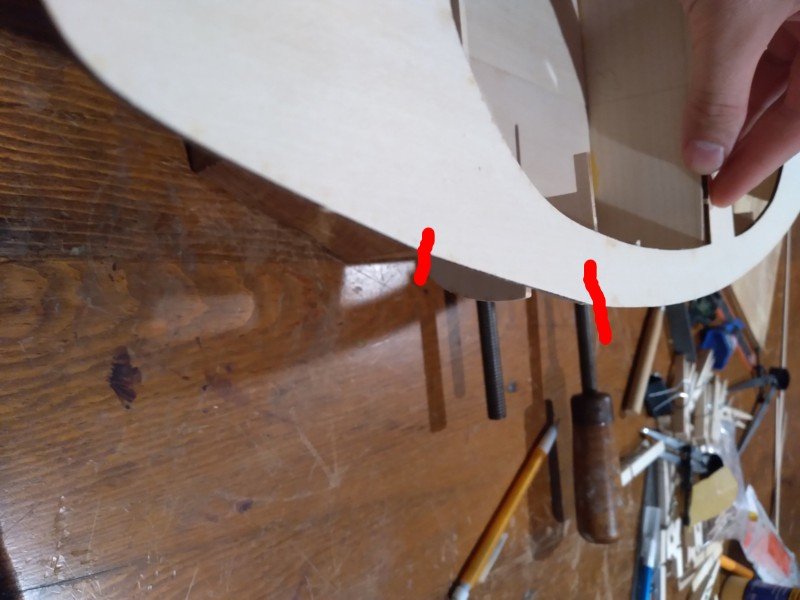
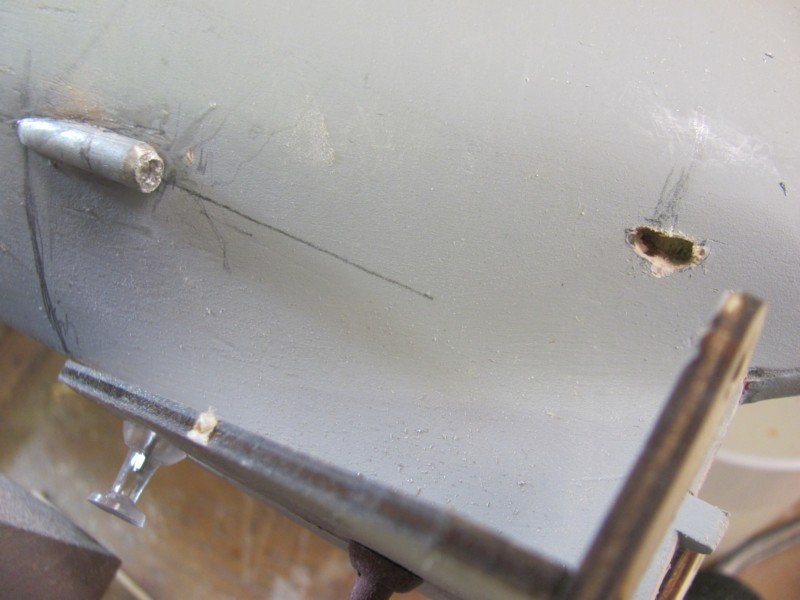
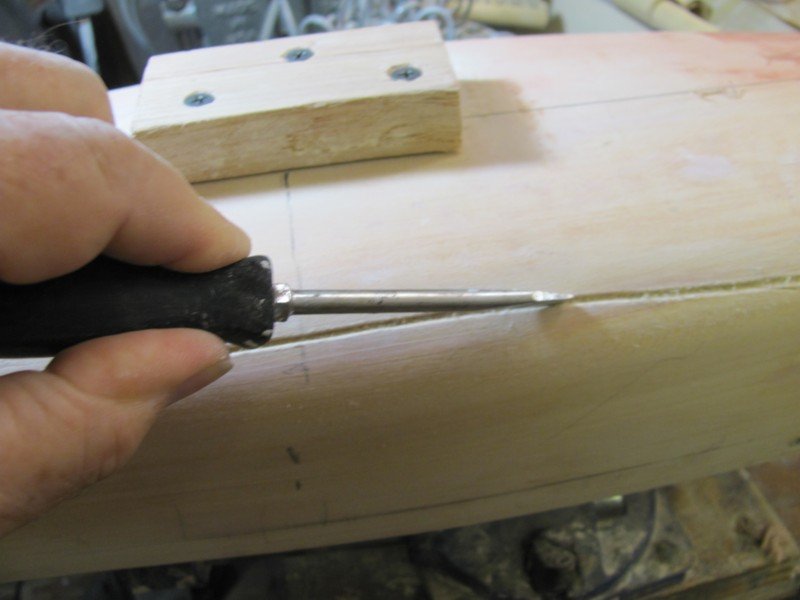
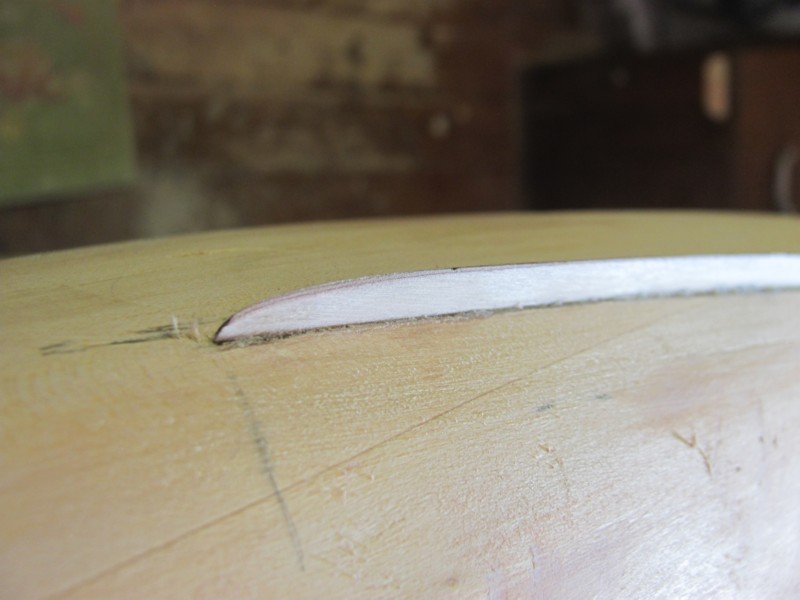
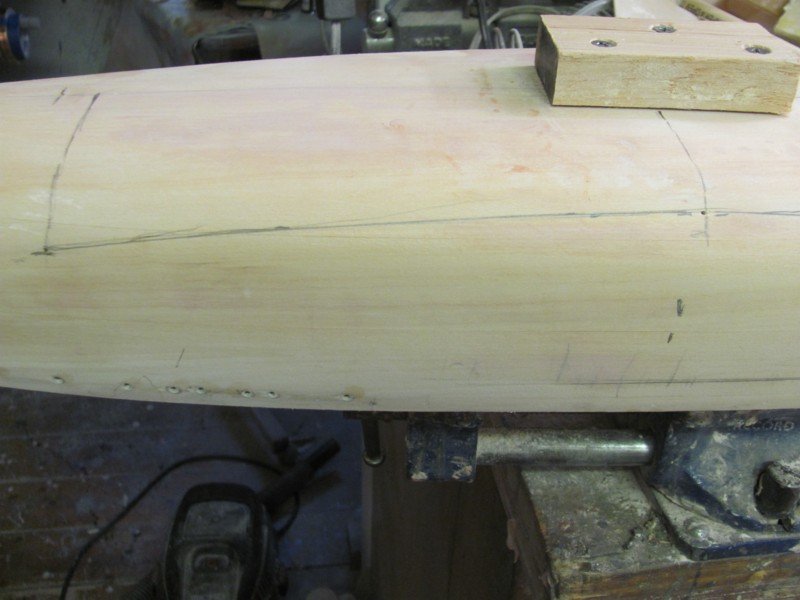
I always cut a slot for the bilge keels as it is sturdier than just gluing them to the surface of the hull. After using the marking jig and using the batten to form a fair curve, I cut along the curve at about a 45 degree angle with a hobby knife, then use a slot head screwdriver to widen and deepen the knife cut to 1/16" or so. If you take you take your time and don't force it, the screwdriver works well. Once the slot is incised, you can dry fit the bilge keel in place to ensure fairness, adjust the slot if necessary, then glue the bilge keel in place. A bit of filler will take care of any resultant gaps.
-
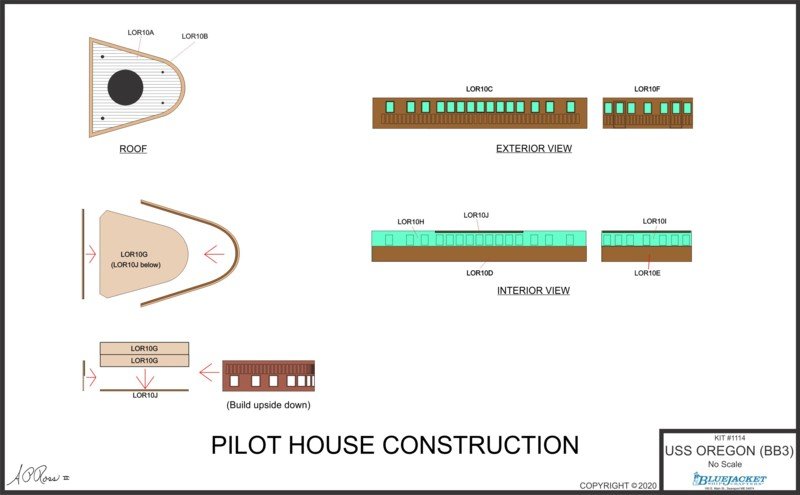
The pilot house itself is not a complex assembly and is built upside down over a form. The angled cuts at the back of the form are to prevent the sides from sticking to it when they are glued together. The sides are .015" laser board, which bends well. The bluish green items are clear styrene strips which will be inserted after the pilot house is assembled and painted.
-
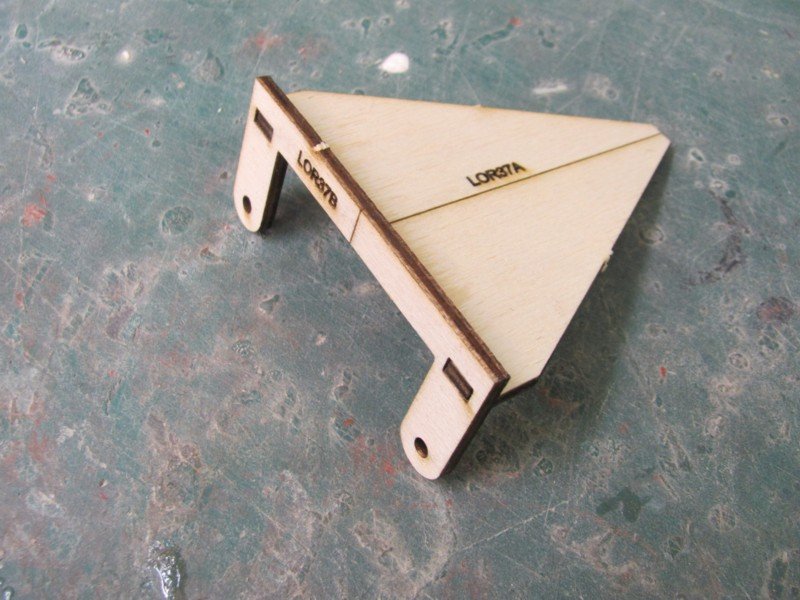
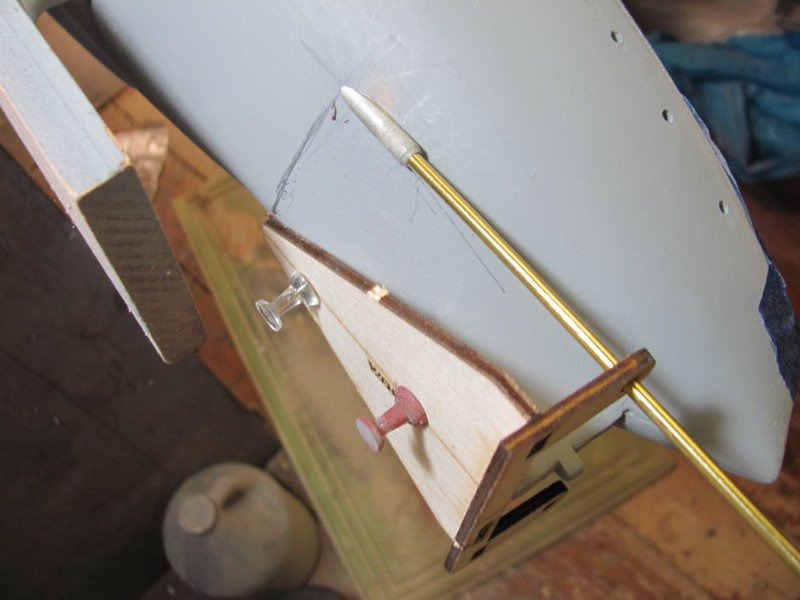
I do like jigs. This is a simple one I created this morning, but it will be a time saver. It is for locating the bilge keels on the hull. When viewed from below, bilge keels run parallel to the keel. Because of the shape of the hull, when viewed from the side, they usually form an arc and this is sometimes difficult to achieve correctly. To use this jig, you place the line on its center on the centerline of the hull, drop a pencil through the holes and mark the position of the bilge keels along the hull at each end and the center of the bilge keel location. You then use a batten and pencil to connect the dots and it will give you a fair curve.
About us
Modelshipworld - Advancing Ship Modeling through Research
SSL Secured
Your security is important for us so this Website is SSL-Secured
NRG Mailing Address
Nautical Research Guild
237 South Lincoln Street
Westmont IL, 60559-1917
Model Ship World ® and the MSW logo are Registered Trademarks, and belong to the Nautical Research Guild (United States Patent and Trademark Office: No. 6,929,264 & No. 6,929,274, registered Dec. 20, 2022)
Helpful Links
About the NRG
If you enjoy building ship models that are historically accurate as well as beautiful, then The Nautical Research Guild (NRG) is just right for you.
The Guild is a non-profit educational organization whose mission is to “Advance Ship Modeling Through Research”. We provide support to our members in their efforts to raise the quality of their model ships.
The Nautical Research Guild has published our world-renowned quarterly magazine, The Nautical Research Journal, since 1955. The pages of the Journal are full of articles by accomplished ship modelers who show you how they create those exquisite details on their models, and by maritime historians who show you the correct details to build. The Journal is available in both print and digital editions. Go to the NRG web site (www.thenrg.org) to download a complimentary digital copy of the Journal. The NRG also publishes plan sets, books and compilations of back issues of the Journal and the former Ships in Scale and Model Ship Builder magazines.


