HOLIDAY DONATION DRIVE - SUPPORT MSW - DO YOUR PART TO KEEP THIS GREAT FORUM GOING! (Only 20 donations so far - C'mon guys!)
×

woodrat
-
Posts
835 -
Joined
-
Last visited
Content Type
Profiles
Forums
Gallery
Events
Everything posted by woodrat
-
 Tadeusz43 has pointed out that I used his photo of the Nao Victoria without attribution and I apologise for that unreservedly. The offending photo has been deleted. Sorry Tadeusz. Dick
 -
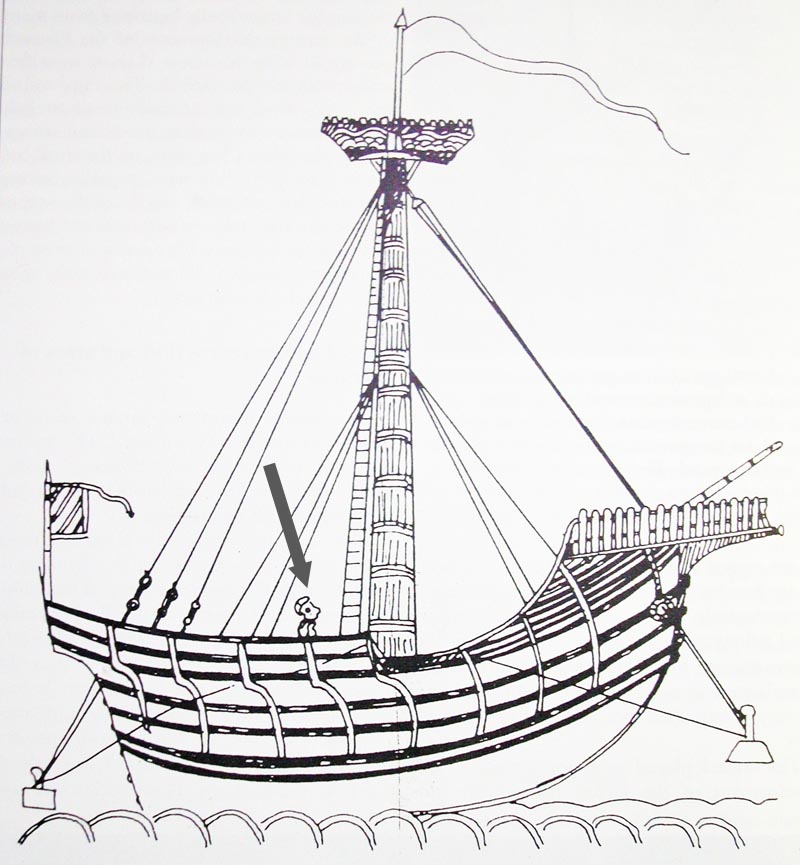
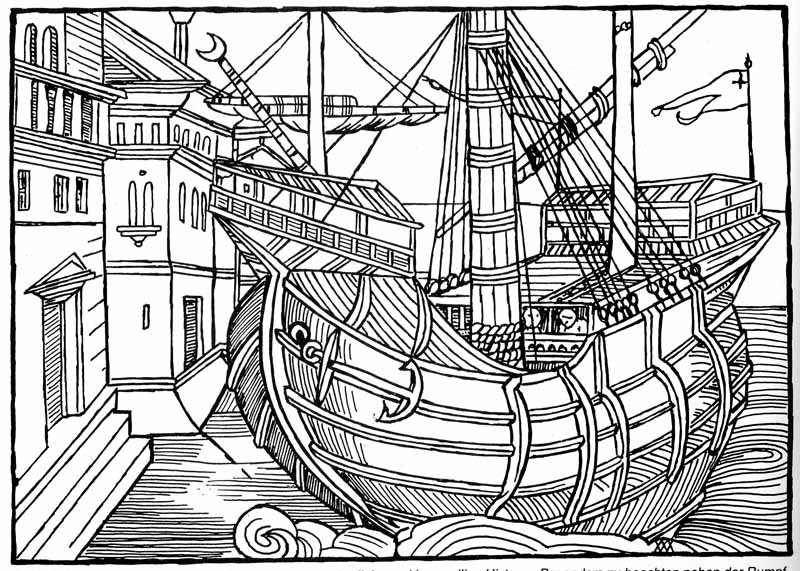
Thanks, Steven. I agree that the 15th century mastmakers had the skill to fabricate multipiece masts but do not think that the wedges would extend to the centre. The illustration from the Tavola Strozzi shows a square section just below the maintop about which the forestay is secured and which is above the shrouds. This indicates to me that there is a large central spar with either a square or octagonal cross-section to which the external spars are secured by wooldings. Dick
-
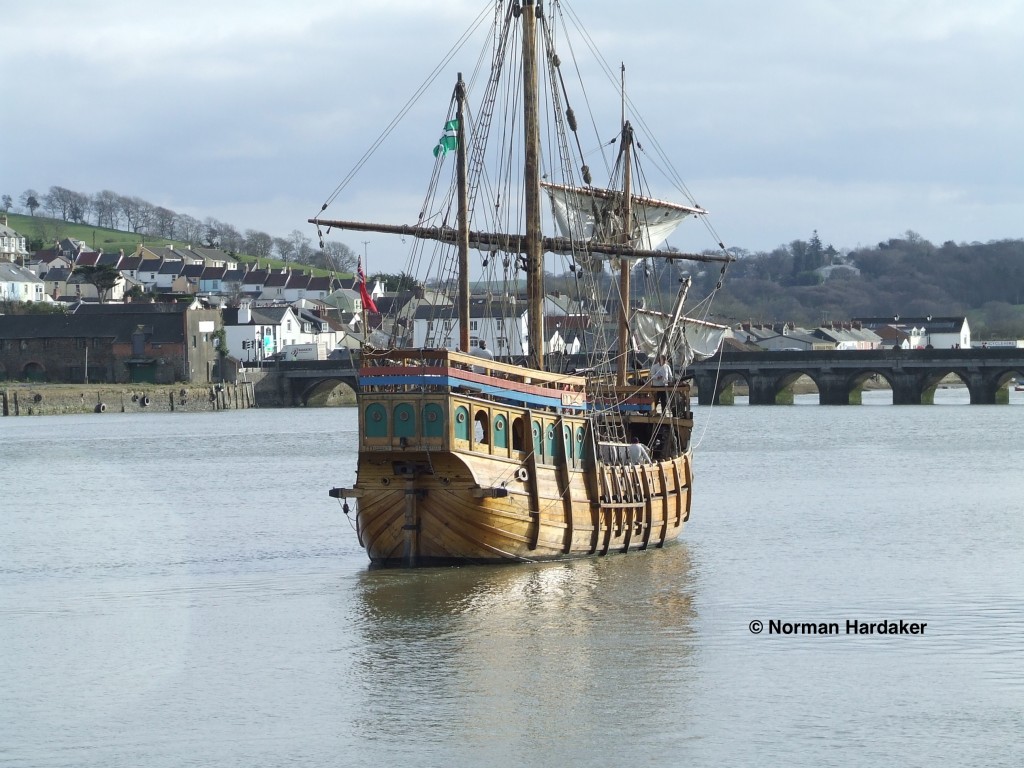
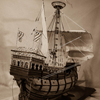
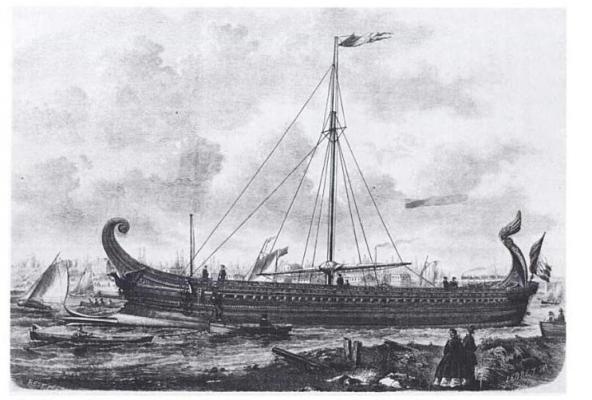
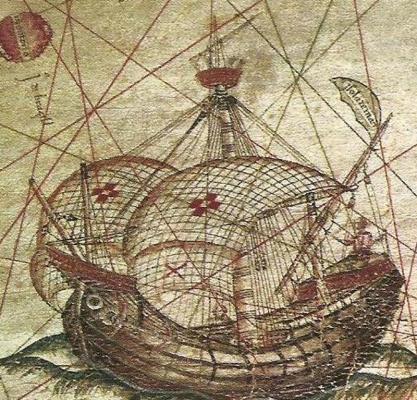
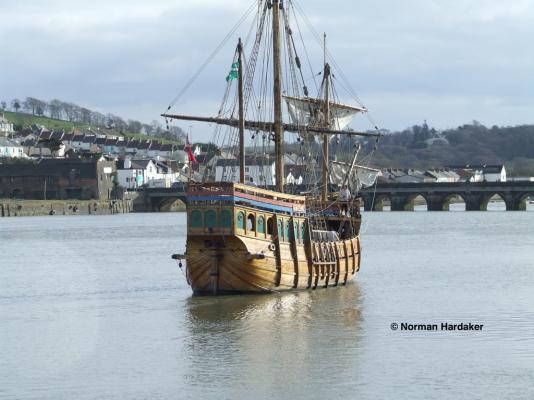
Thanks, Carl. The square transom of the nao Victoria reconstruction dates it to early sixteenth century about 80 years after my ship. It does show well the type of vessel used by the portuguese and spanish in the great age of exploration. Look how small it is! Cheers. Dick
-
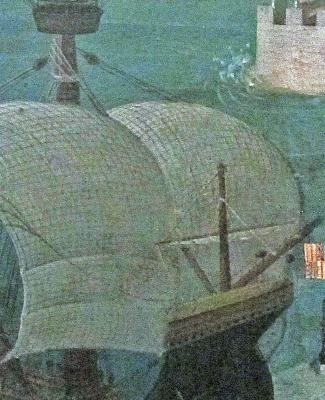
Thanks, Steven. Great pictures which demonstrate what a great marine artist Carpaccio was. The detail is extraordinary. These pics confirm my belief that the forecastle was much narrower than many models depict and that the lapstrake planking below the forecastle has a distinct tumblehome which I have tried to depict in my model. as I have not done much the last few months as I have been shifting my workshop which, as you know, takes up most of the time available for modelling. I am trying to work out a way to construct the mainmast which was made up with many spars shaped and lashed together over a central mainspar. I could just turn it in one piece, I suppose. How is the dromon cross section going? Dick

-
Thanks Jud and Crackers. I would still love to know more. This would be a great Ph.D thesis for some aspiring nautical archaeologist Dick
-
On reflection and having reviewed my books, I think that there is no evidence for routine or common usage of bells in mediaeval ships. Most large ships had trumpeters as seen in contemporary illustrations. Zorzi da Modone whose illustration I am using for my model was also called Trombetta (trumpeter). Presumably, the ships trumpeter could be used for signalling much as would a bell. Dick
-
These references may be of use: Pryor, J Mariner's Mirror 219: 70.3 fig.13 Also reproduced in Lillian Ray Martin also Landstrom, Bjorn 1961: the Ship: an illustrated history figs. 215-18 Dick
-
I am constructing a scratch-built venetian carrack of 1445 http://modelshipworld.com/index.php/topic/4915-venetian-carrack-or-nave-tonda-by-woodrat/ and I can find no evidence that ships bells were in use in this period. My feeling is that they were. Certainly the Grace dieu had a bell. Does anyone have any proof that mediaeval ships had bells? Cheers Dick
-
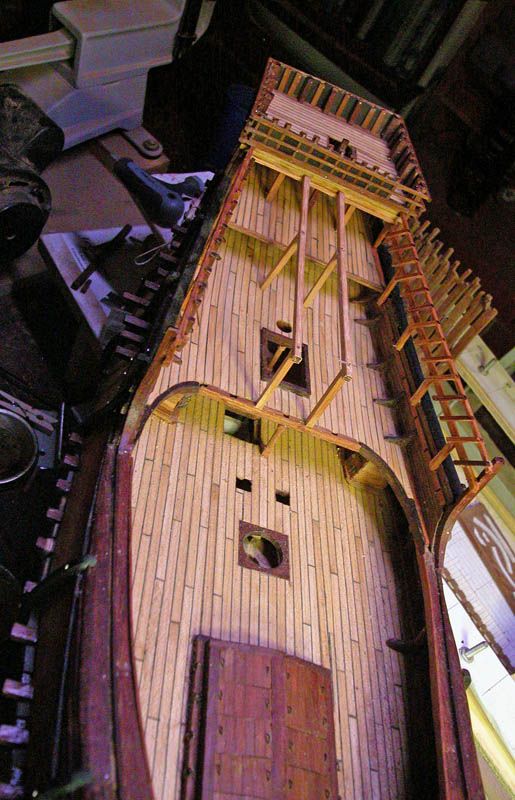
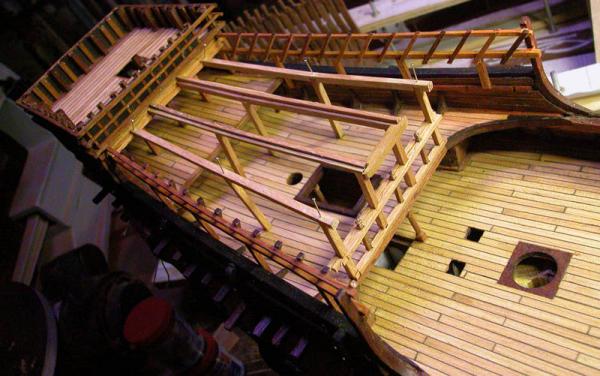
Thanks Cap'n Steve and George. A lot of the deck machinery and quarterdeck/ poop accommodation is just educated guessing based on the limited contemporary illustrations available. There are no plans available as ship design was kept secret. Unfortunately the little archaeological evidence there is consists mainly of hull remnants usually only up to turn of bilge. I have a little more work on ladders, doors and poop/forecastle accommodation before I can start on the masting and rigging which will be fun,I think. Dick
-
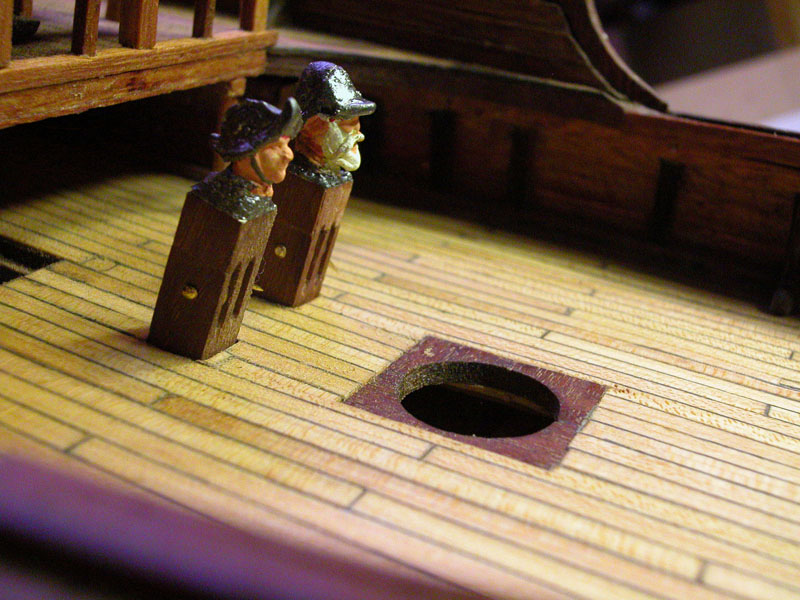
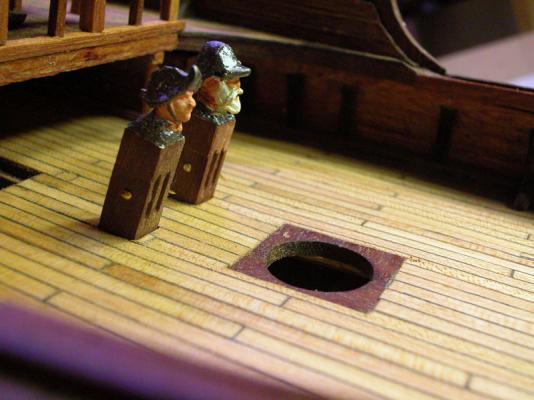
Sorry Nenad. I just had to change the knights to more practical models. I think this looks more workmanlike if not so artistic Dick

- 632 replies
-
- 16
-

-
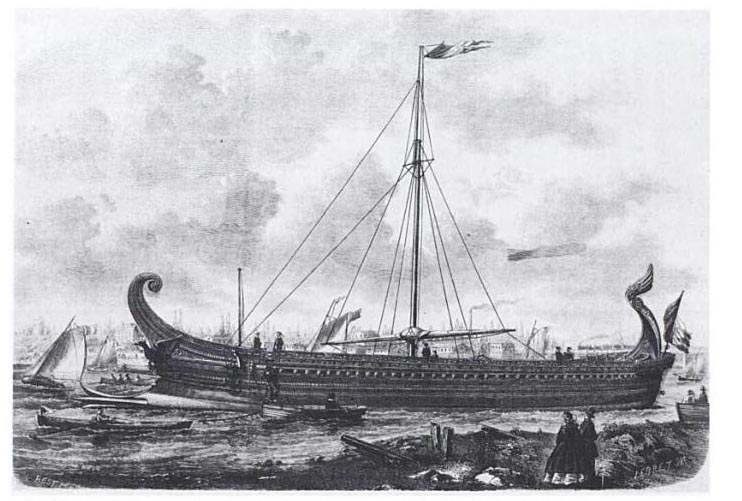
This may be of assistance The trireme shown in trippwj's post is the reconstruction of 1861 suggested by Auguste Jal on the orders of Napoleon III. It was designed by Dupuy de Lome. It was an epic failure by all accounts. Dick

-
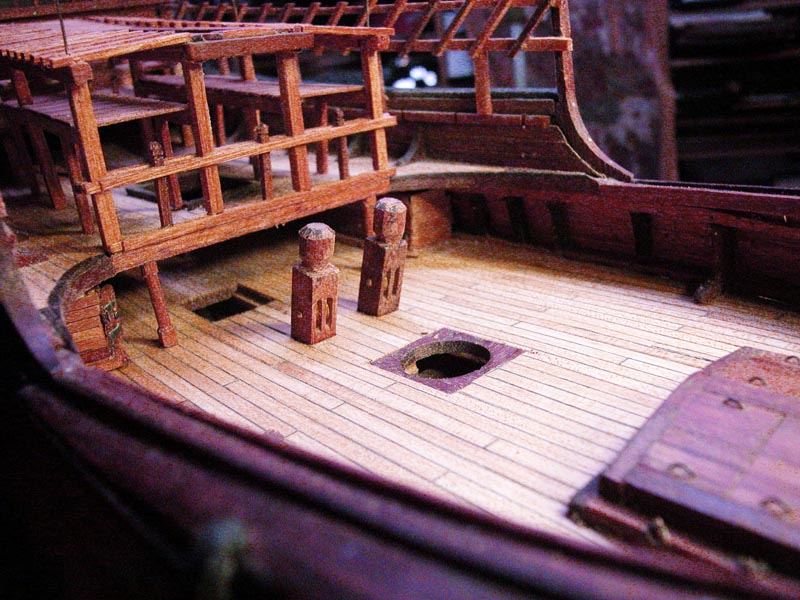
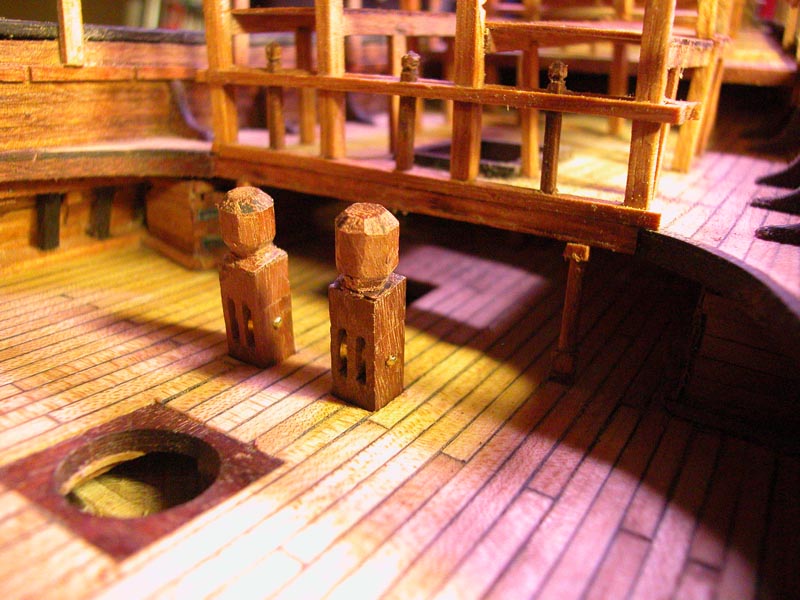
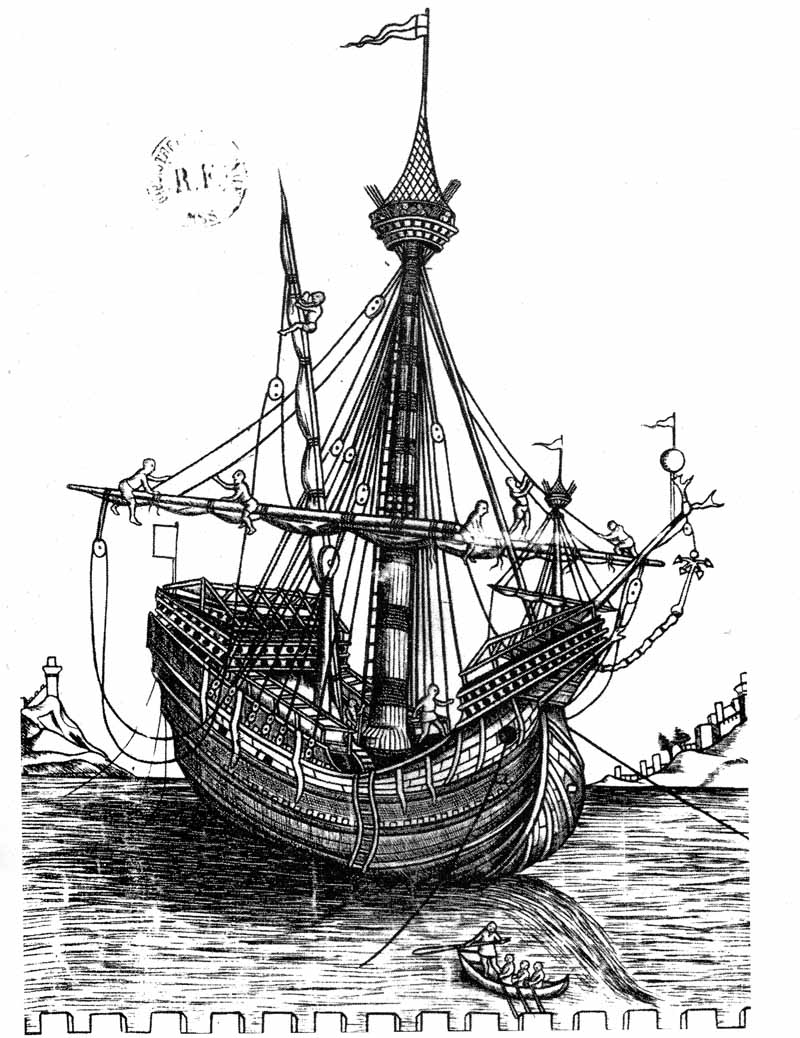
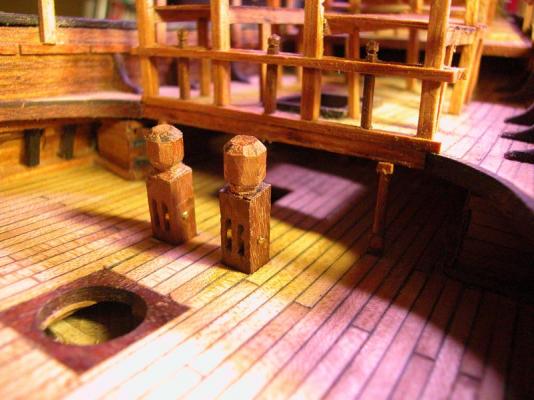
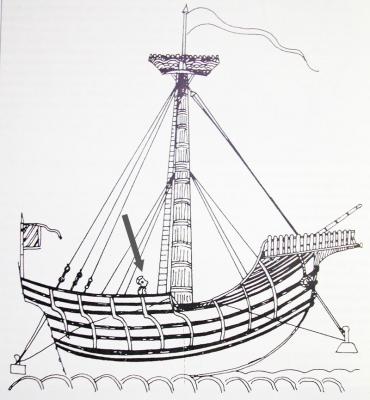
I have decided to have two knights to raise the yard which would have been heavy and will make a capstan to assist. Here is an illustration from the Trombetta manuscript showing, I believe, a knight in situ. Other people have suggested that this is a person but this is clearly not the case Cheers Dick
- 632 replies
-
- 13
-
-
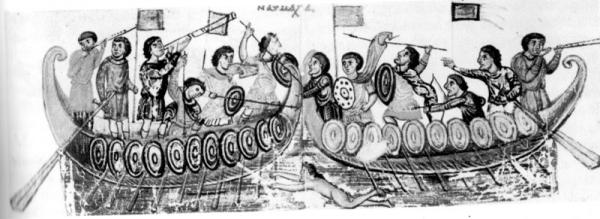
Nice quality drawings, which CAD package do you use? I use Penanink ver 1.1 although I am trying to upgrade to later versions. The lower ports would rquire some modification to the frames (presumably the toptimbers), to allow excursion of the lower bank of oars. As you are not including this in your model it is probably academic but may be needed in your cross-section mockup. I agree with you that if both banks of oars are manned by one rower per oar, there does not seem to be a need for the oarbenches to be angled and that orientation at right angles to the keel should be OK. Dick
-
What about the lateral stability provided by oars? This would be lost if all oars are stowed inboard. Would this not increase the risk of capsize? Also, during an action, at least the lower bank of oars would need to be manned in case the dromon had to manoeuvre or in case the upper deck is overrun and the upper bank taken over by the enemy as I believe happened at least once. In that case the lower bank prevented the dromon from being rowed off by the enemy. Dick
-
A couple of thoughts. Why would you want to bring the oars inboard during a battle? This would produce lateral instability and a chance of capsize. Bringing the oars onboard would also hinder movement along the deck. Would there be a mechanism to lock the oars outboard to maintain lateral stability and free the rowers to fight. Some illustrations of fighting dromons seem to indicate the vessels going prow to prow and fighting from their castles and siphons. Perhaps boarding occurred over bow or poop. Also would clashing of oars be prevented by increasing the amount of flare of the upper part of the bulwarks slightly as well as having the upper oars longer with different shaped blades because of the lower angle of entry to the water? Cheers Dick
-
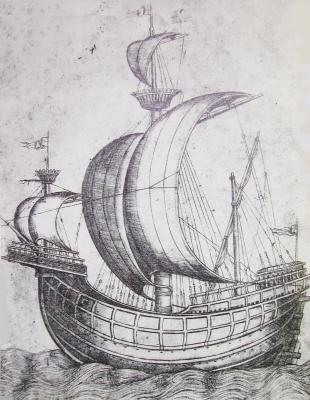
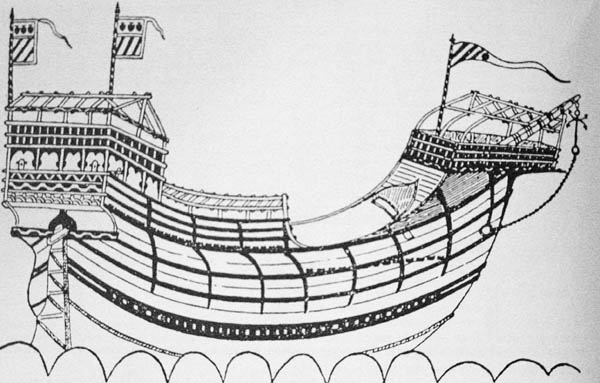
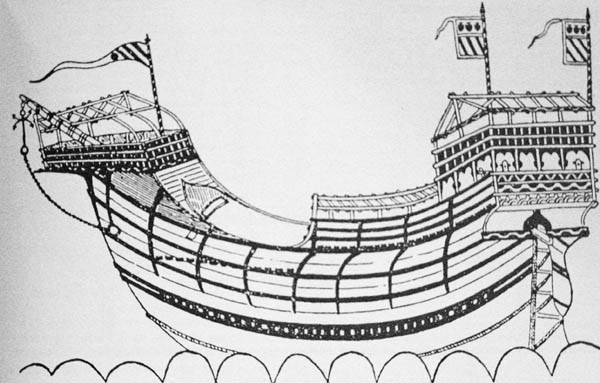
Thanks, Jan for the feedback. I do like this sort of constructive criticism. I cant claim to have got it right but it seems to me the people who built the Trombetta nave , a very large ship for its time, were less concerned by its speed through the water than with strengthening the hull so it didnt fall apart. There was a great variability in these "futtock riders" and they often go almost to the midpoint of the hull. I did make an attempt to taper them at their lower end. Maybe not enough, who knows? This is the original illustration of the Trombetta nave which I have followed. even the modern reconstruction of the Matthew shows these rather bulky futtock riders extending to the waterline ( or below it were the ship to heel at all many of the contemporary illustrations seem to have been made either of a ship model or of a ship out of water. They seem to show much more of the hull than would be seen in a ship in the water. If this ship was really afloat it would be sitting much lower and the external bracing thingies would be partly below water! Cheers Dick

- 632 replies
-
- 14
-
-
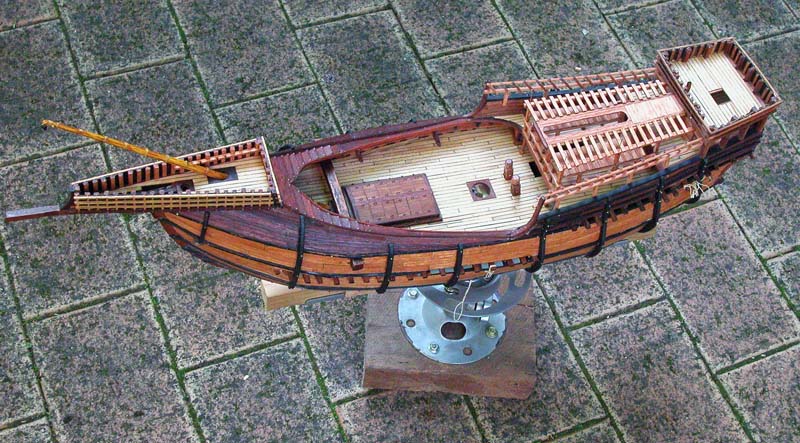
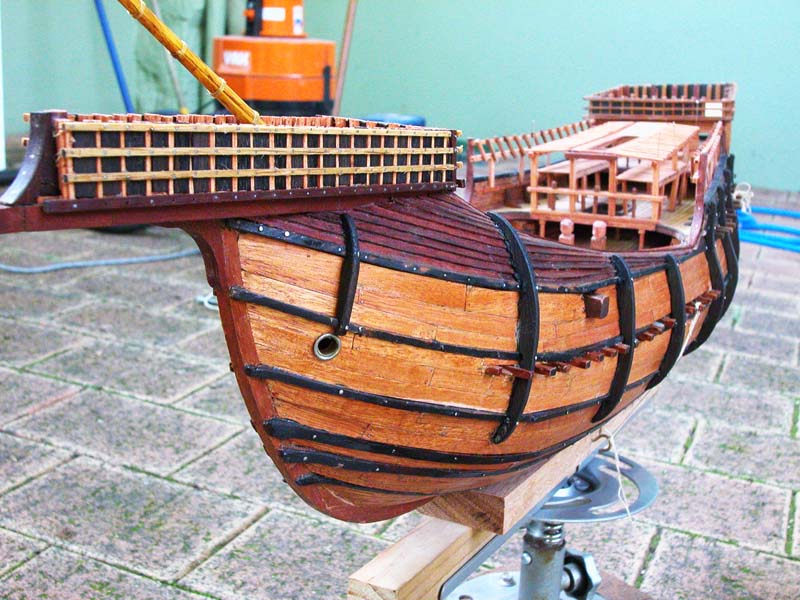
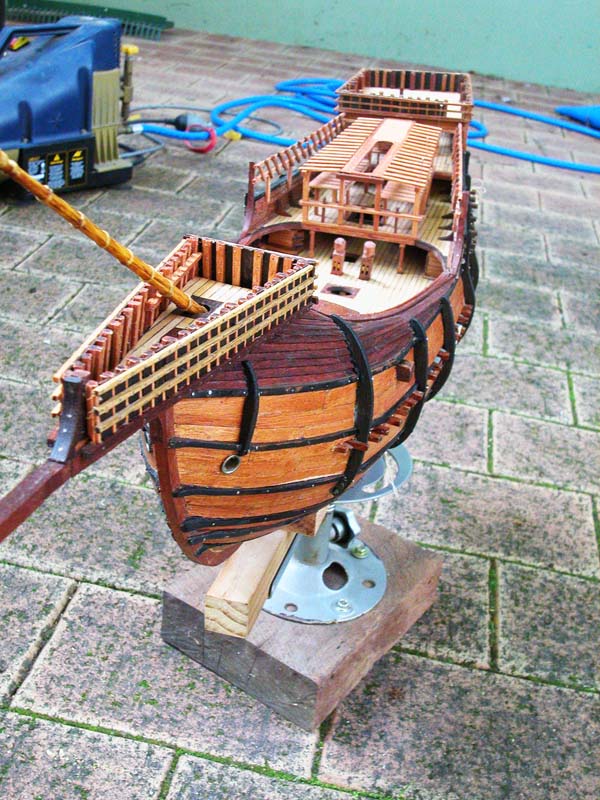
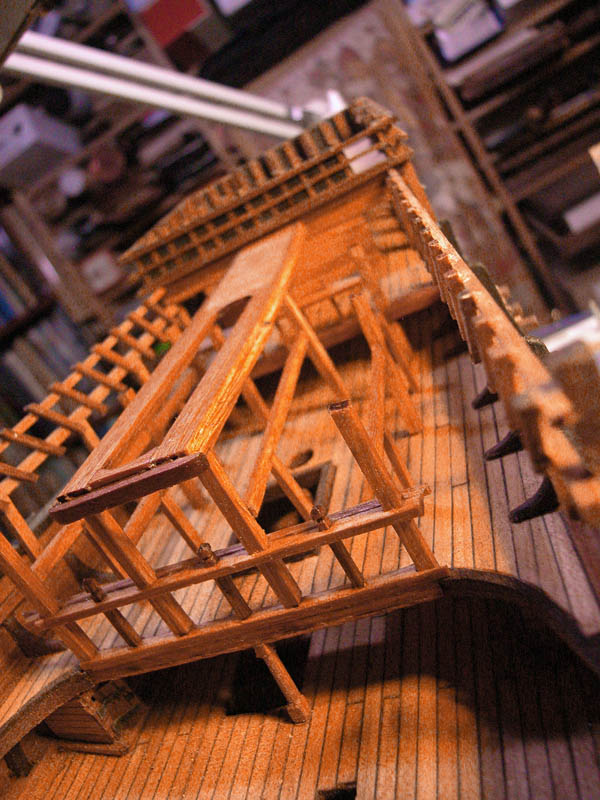
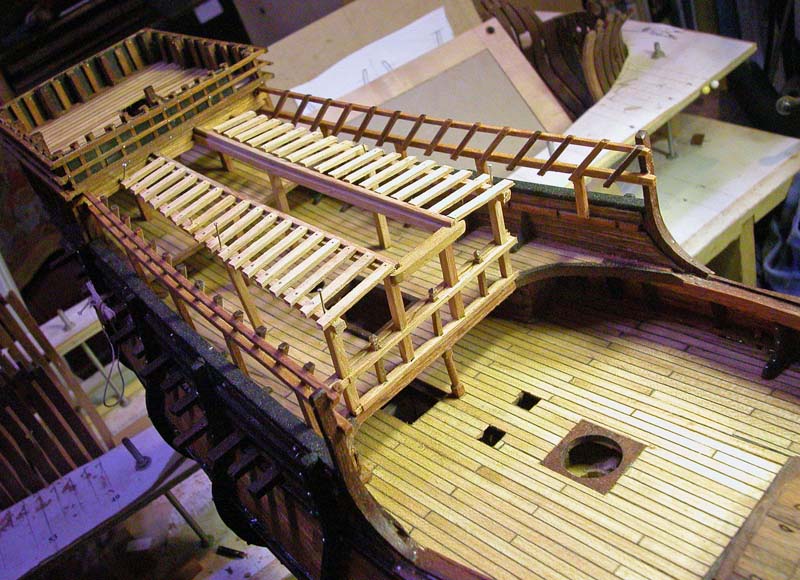
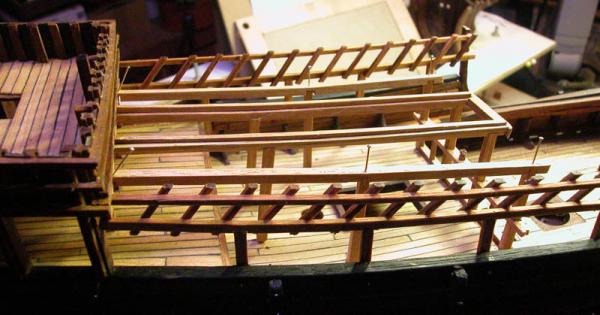
Thank you Jan, Carl,Kees, George and Steven. Hovering cats are amazing, yes but not as romantic as the creaking old argosies of the middle ages. Romance aside, however, life would have been smelly, wet and uncomfortable for all on board! In regard to the wooden framing, in the venetian and other italian shipyards, the upper works and accommodation were built by house carpenters brought in by the shipyards. Hence the methods used would have been less nautical and more domestic. At sea, the wooden framing would have coverings of tarpaulin and other suchlike removable shelter. Particularly on the sterncastle this would have been necessary to reduce windage on the very tall structures. Dick
-
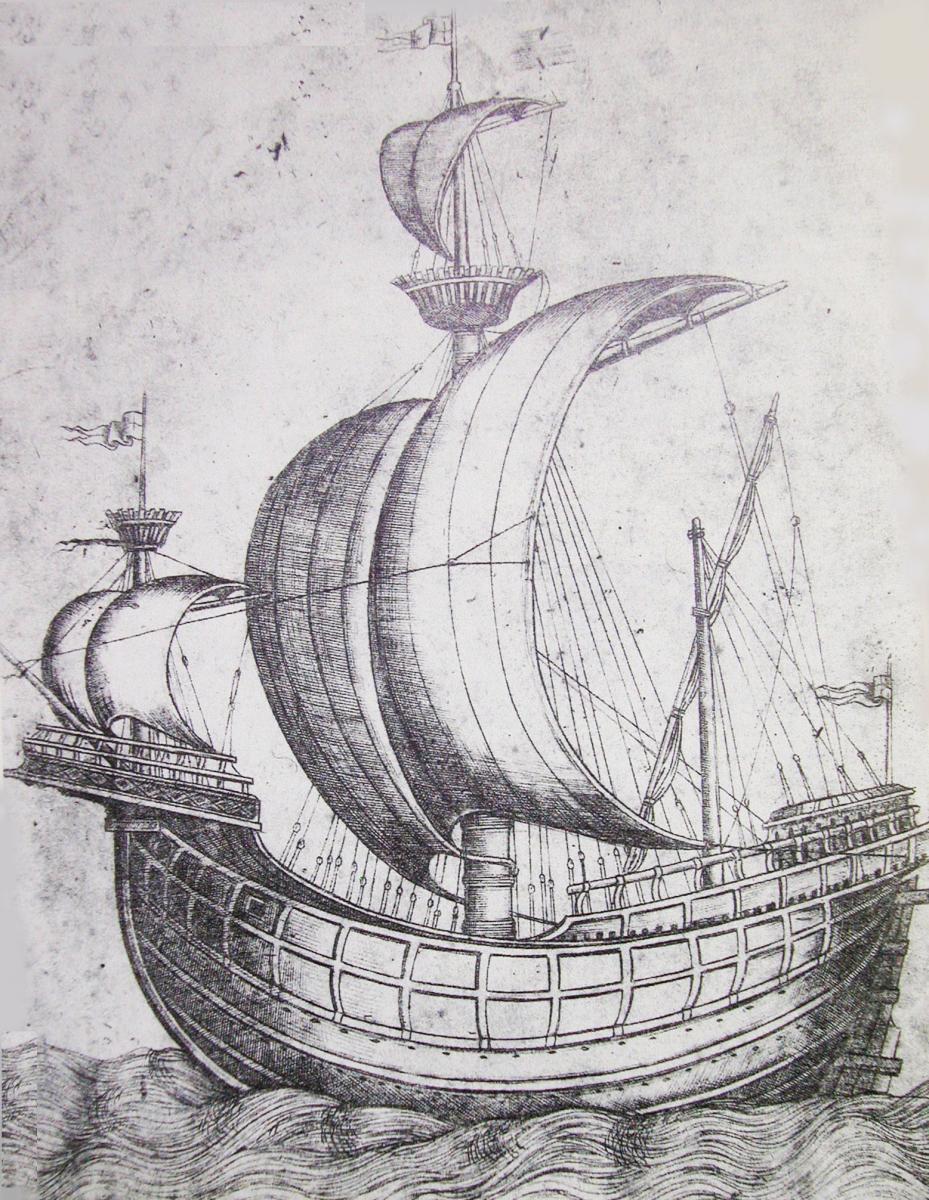
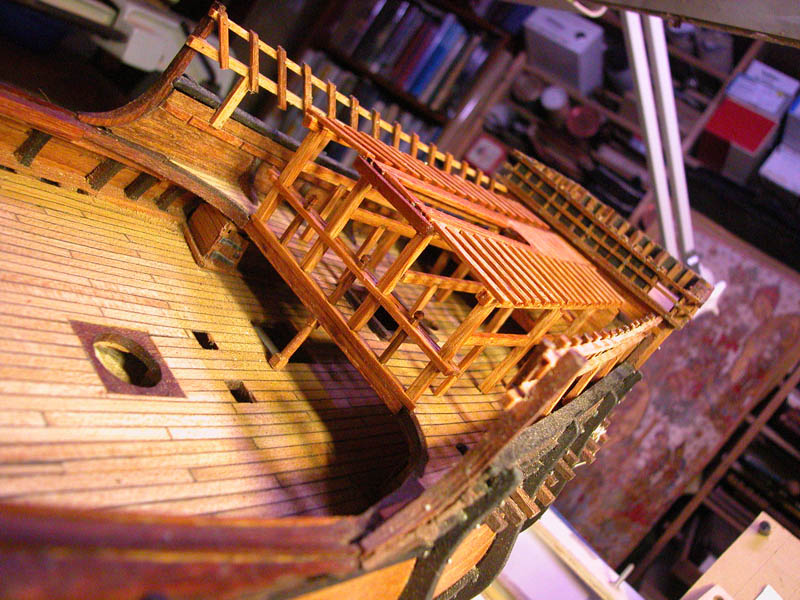
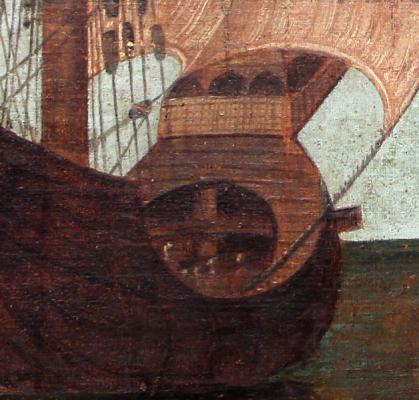
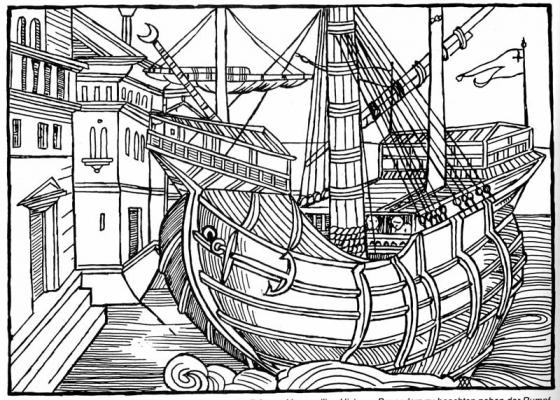
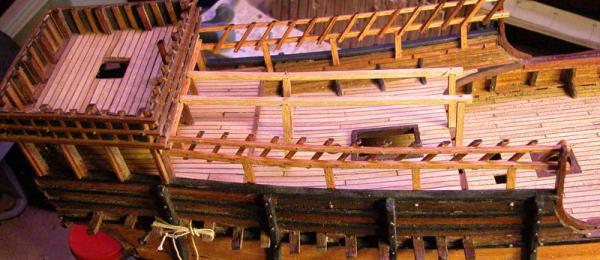
Thanks, Geoge. Here are some contemporary illustrations of carracks which show what I based my quarterdeck accommodation on. Note the space in front of the mizzen mast to allow for rigging to be handled. Dick


- 632 replies
-
- 12
-
-
Excellent, Steven. I look forward to following this. I am very jealous that you had access to such eminent specialists in the field. Dick
-
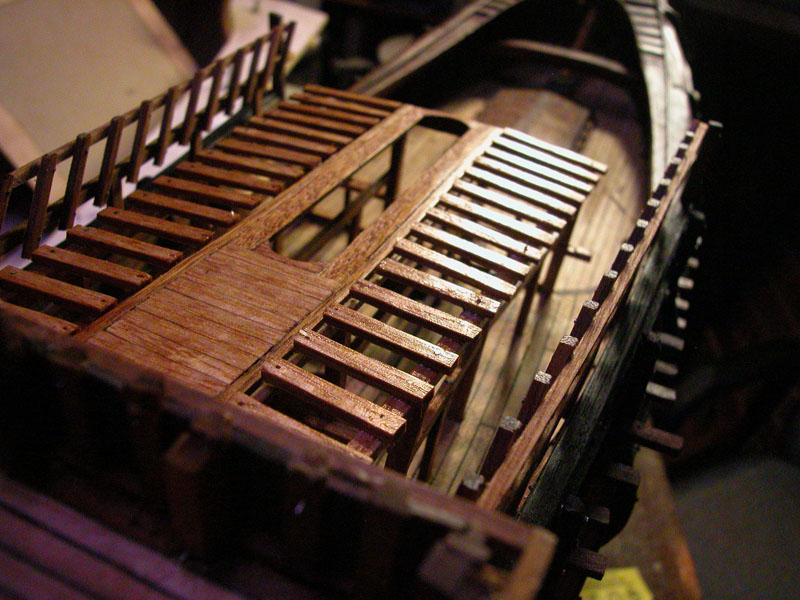
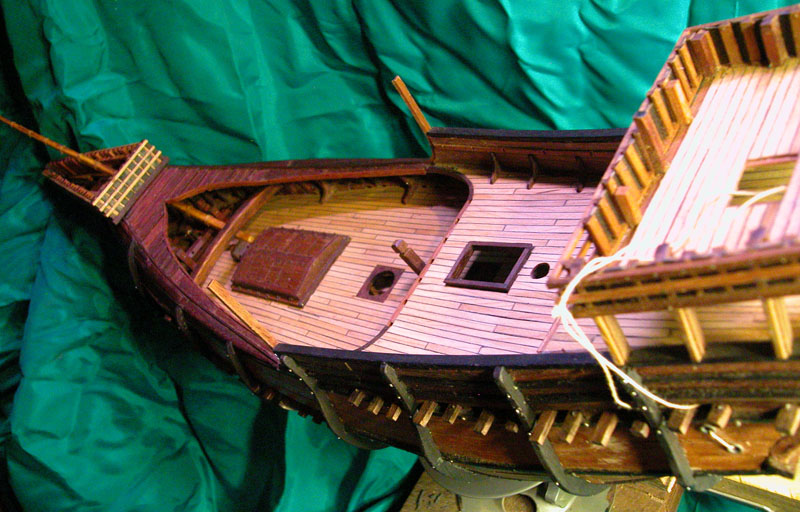
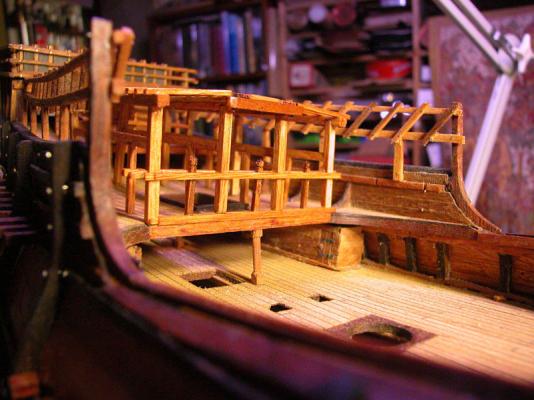
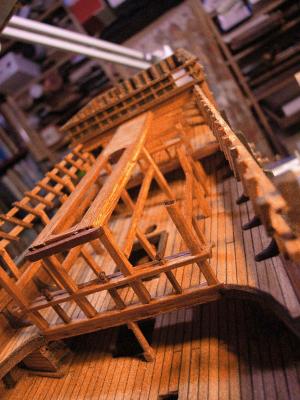
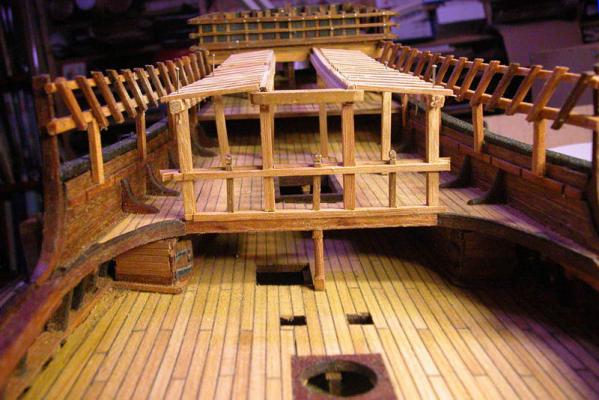
Showing the building of the halfdeck accommodation. Note that I have left space at the side for the mainmast standing rigging which will be internal to the bulwarks. Cheers, Dick


- 632 replies
-
- 14
-
-
I think you should, Steven, if only for the sake of your sanity. The research and planning of the dromon would be of interest to many at MSW. Dick
-
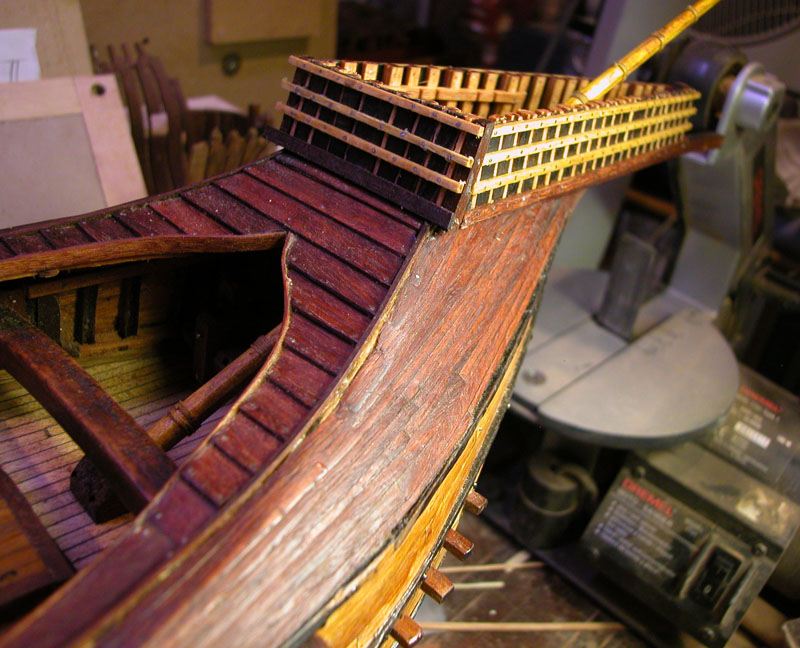
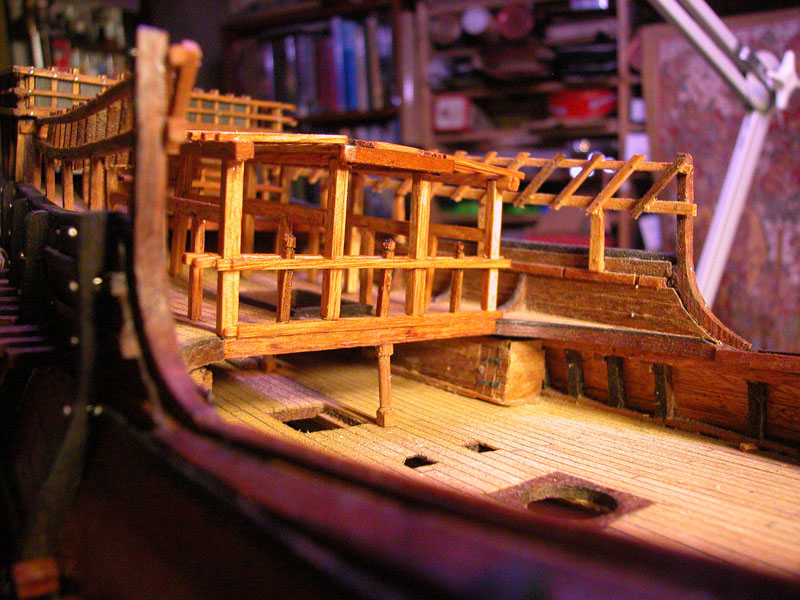
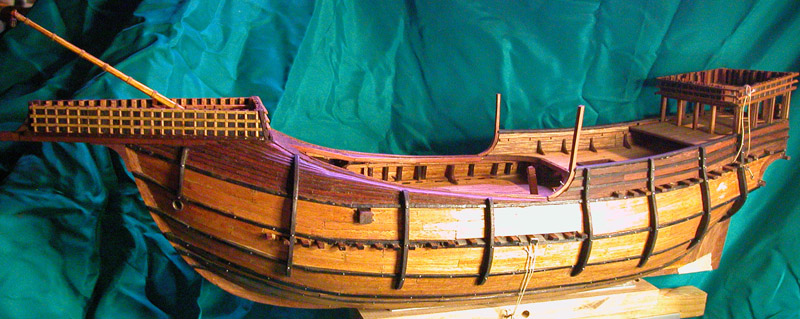
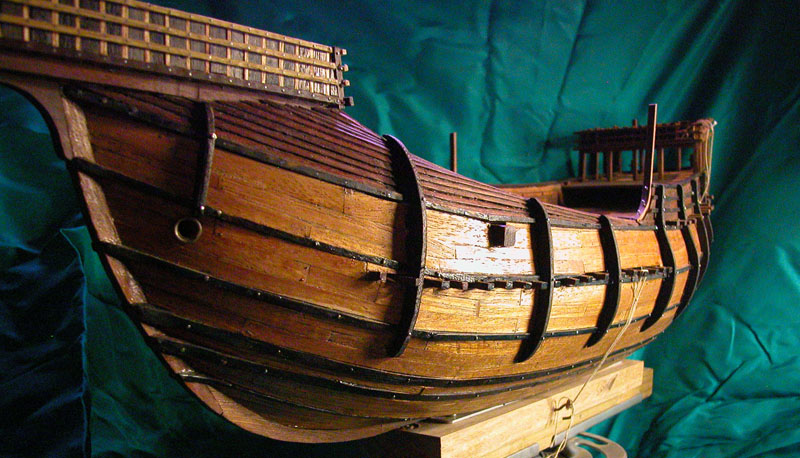
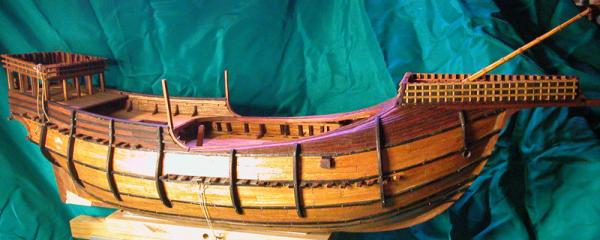
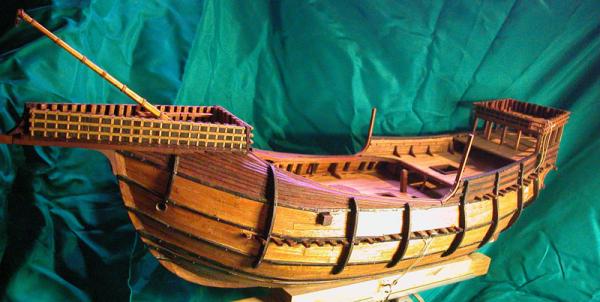
I have added the external support frames or futtock riders. These were used to add rigidity to these relatively lightly built hulls and were a characteristic feature of these vessels. They were, however, very variable in their application, size, position and number. This vessel has these supports along its full length. Looks like a carrack now, I think. Dick


- 632 replies
-
- 16
-