HOLIDAY DONATION DRIVE - SUPPORT MSW - DO YOUR PART TO KEEP THIS GREAT FORUM GOING! (Only 72 donations so far out of 49,000 members - Can we at least get 100? C'mon guys!)
×

woodrat
-
Posts
835 -
Joined
-
Last visited
Content Type
Profiles
Forums
Gallery
Events
Everything posted by woodrat
-
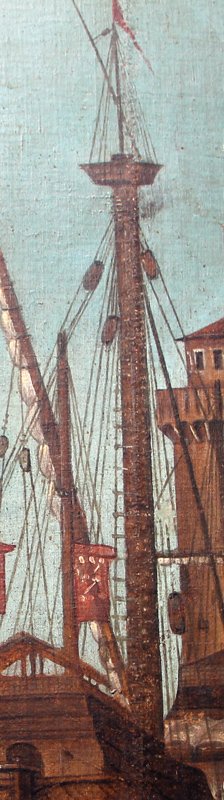
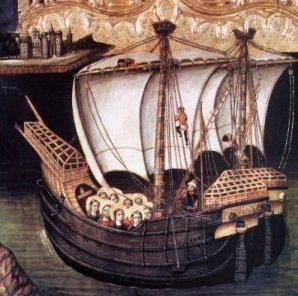
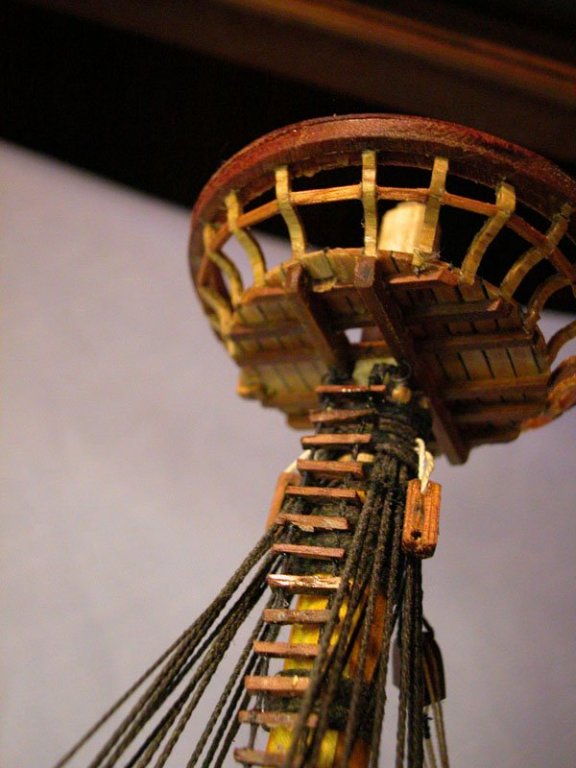
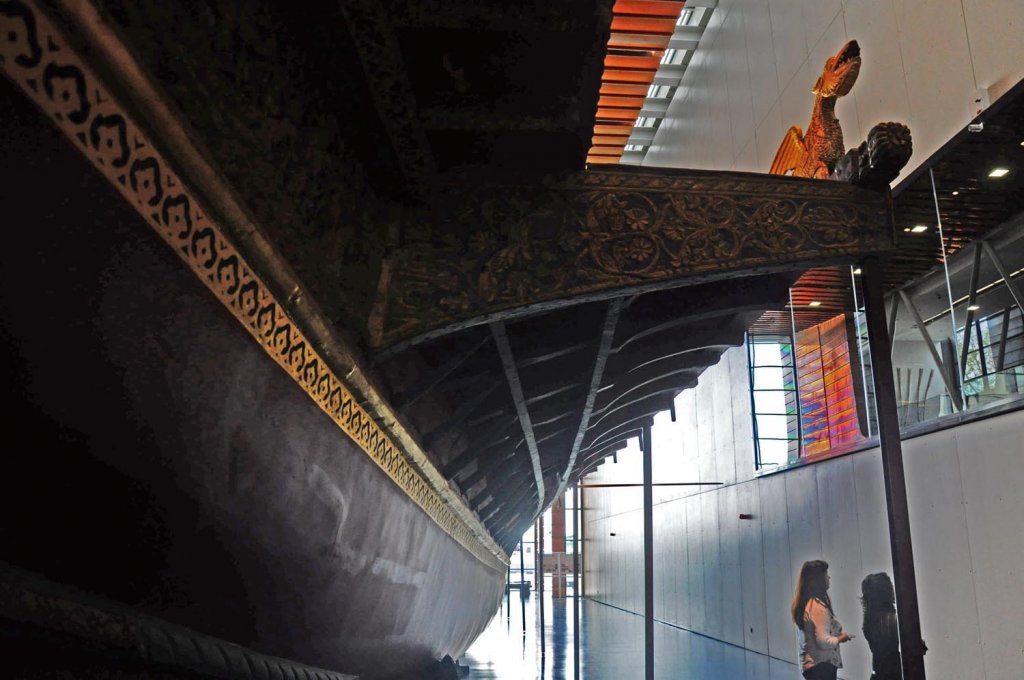
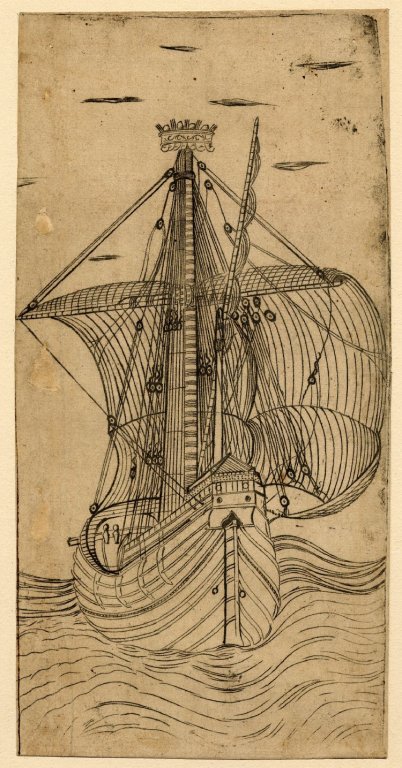
 All the good contemporary illustrations, especially Carpaccio, agree that the ladder was fixed to the maintop and to the deck (presumably by eyebolts, Druxey). So, it must be concluded there was no other tethering At least one illustration shows both Jacob's Ladder AND ratlines (or at least it looks like he's climbing ratlines, though you can't see them) Note the matelot perched on the mainyard. Confusing, isn't it? Dick

-
I agree, Carl. But the parrels have to run freely up and down the mast. If the ladder is attached to the mast they could not do this.
-
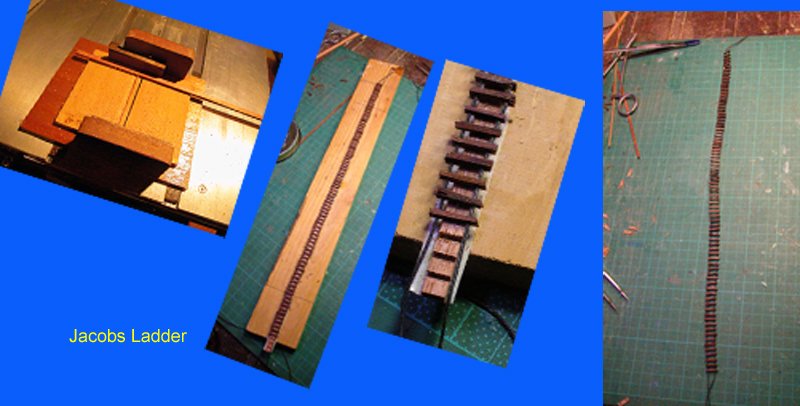
This is the making of the Jacob's Ladder. I can understand why it became replaced by ratlines. They must have been a horror to climb on a pitching, rolling ship with the ladder twisting and slapping back and forth. question: were the ladders secured to the mast to make them more safe? Dick
- 632 replies
-
- 10
-

-
Thanks Jesse and Druxey. I have some deck level work to do first and also the Jacob's ladder before I can hoist the sail. Dick
-
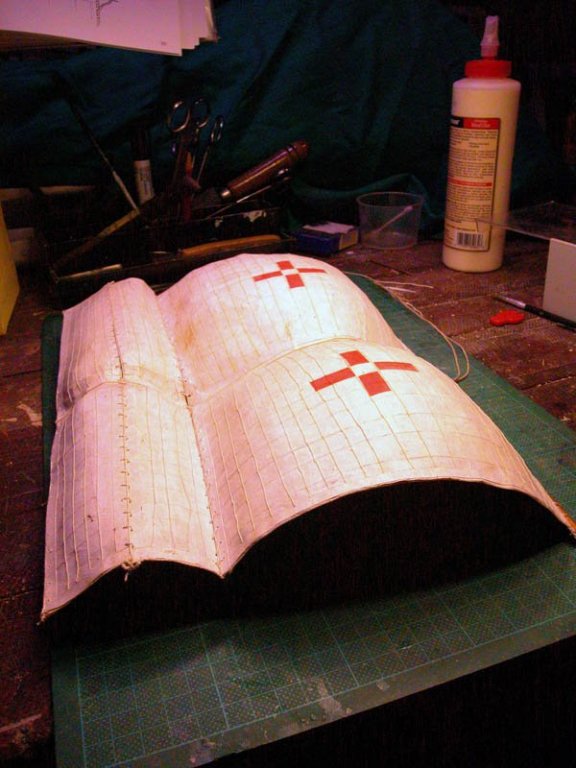
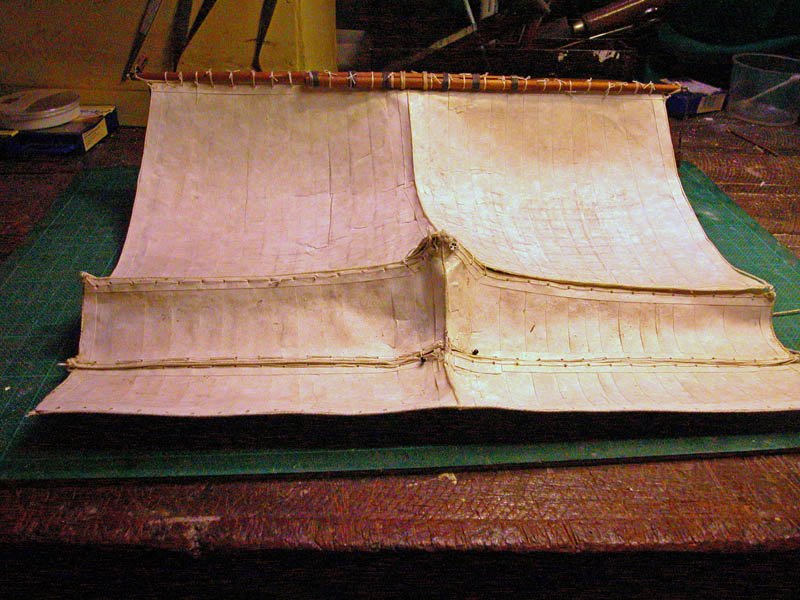
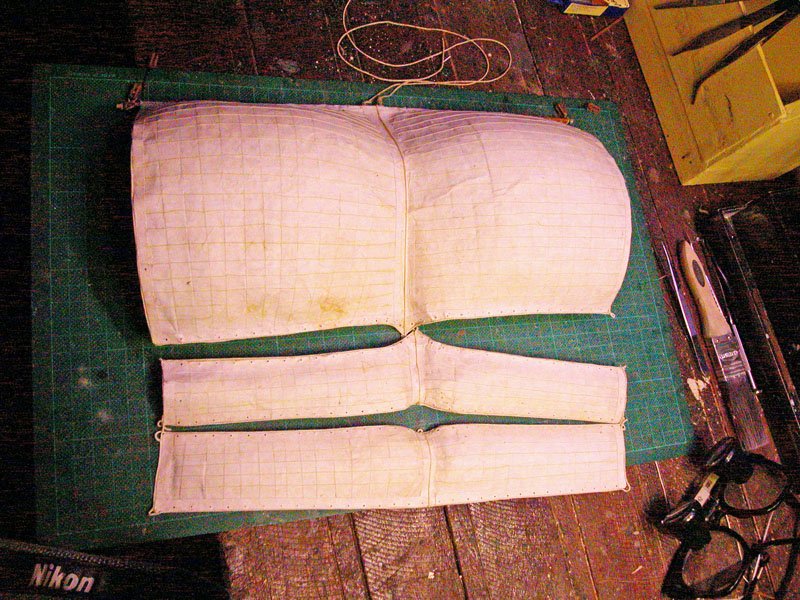
The bonnets were used to increase the area of the sail in this era They are unlaced from the mainsail as required. Reefing points are not seen in illustrations from this time although they are definitely seen in earlier mediaeval ships, particularly those from northern climes.The bonnets are now laced to the mainsail. I have applied a simple cross as in the Benincasa carrack shown previously. These need not be elaborate and, indeed, need not be depicted at all. Dick
- 632 replies
-
- 12
-
-
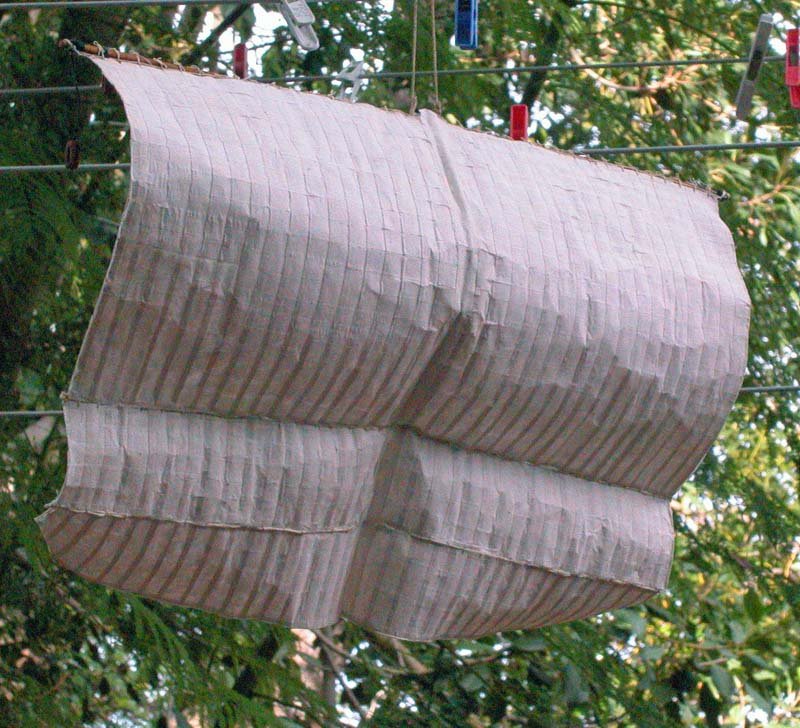
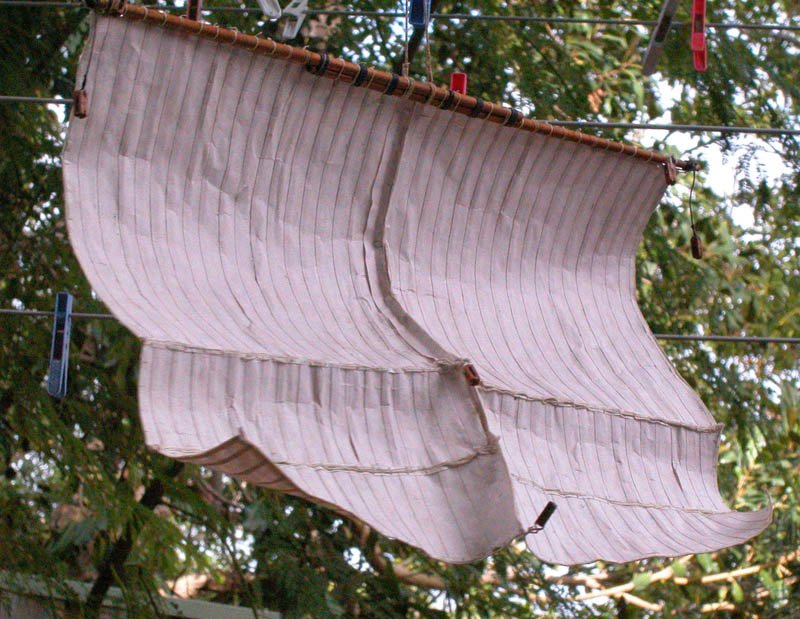
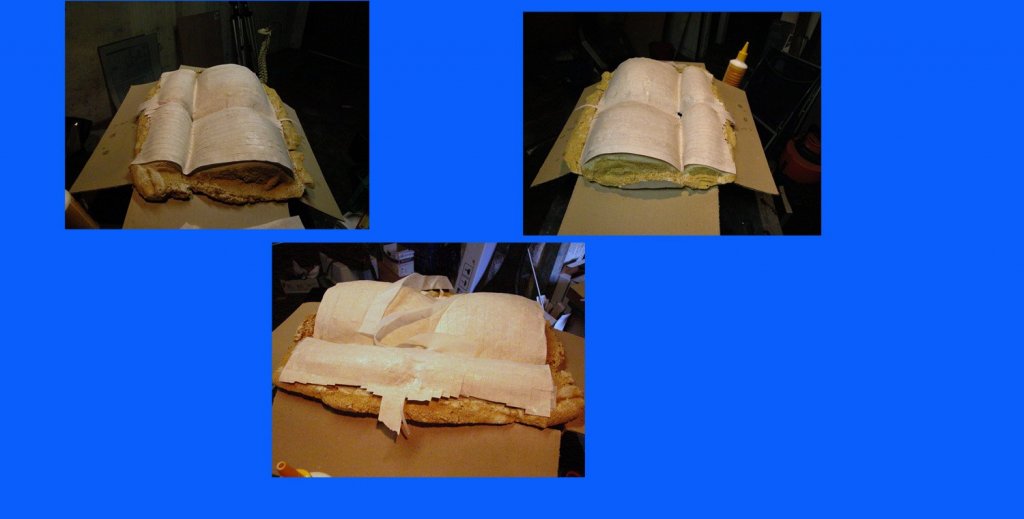
I would not be so presumptuous. Compared to other methods on this site my sail is a little primitive. But the shape is close to what the contemporary illustrations show. It is basically papier-mache using strips of calligraphy paper over the plaster-of-Paris mold shown earlier. White glue is the stiffener. Bolt-ropes are glued on. Dick
-
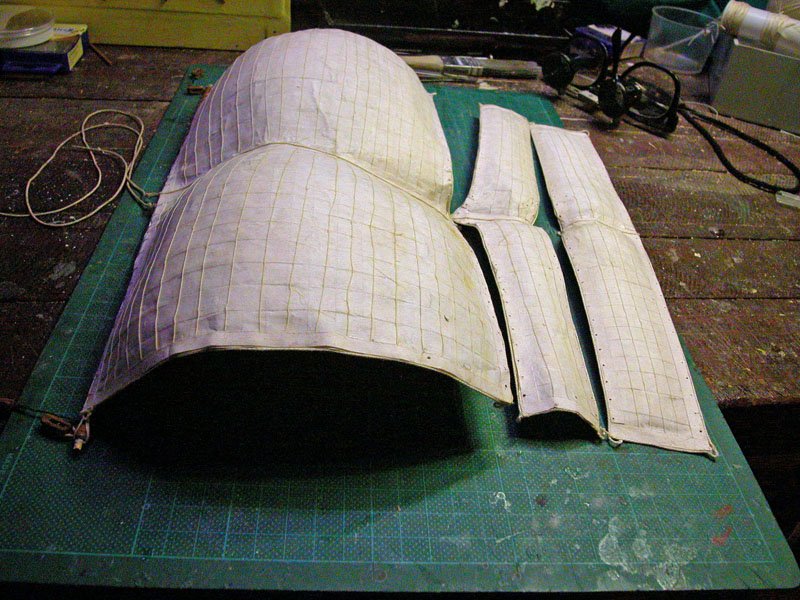
I have done the best I could on the mainsail. It is an approximation of the possible appearance of sail in that era. It only remains to hoist it.
- 632 replies
-
- 11
-
-
Don't be too concerned. I f you look at preserved galleys in the Istanbul Naval Museum, there are some imperfections in the run of planking. Models should never be "perfect" but they should be interesting and yours surely is. Dick
-
You are most kind, Steven and I would also like to thank everyone for the 'likes'. I can almost see the light at the end of the tunnel. Dick
-
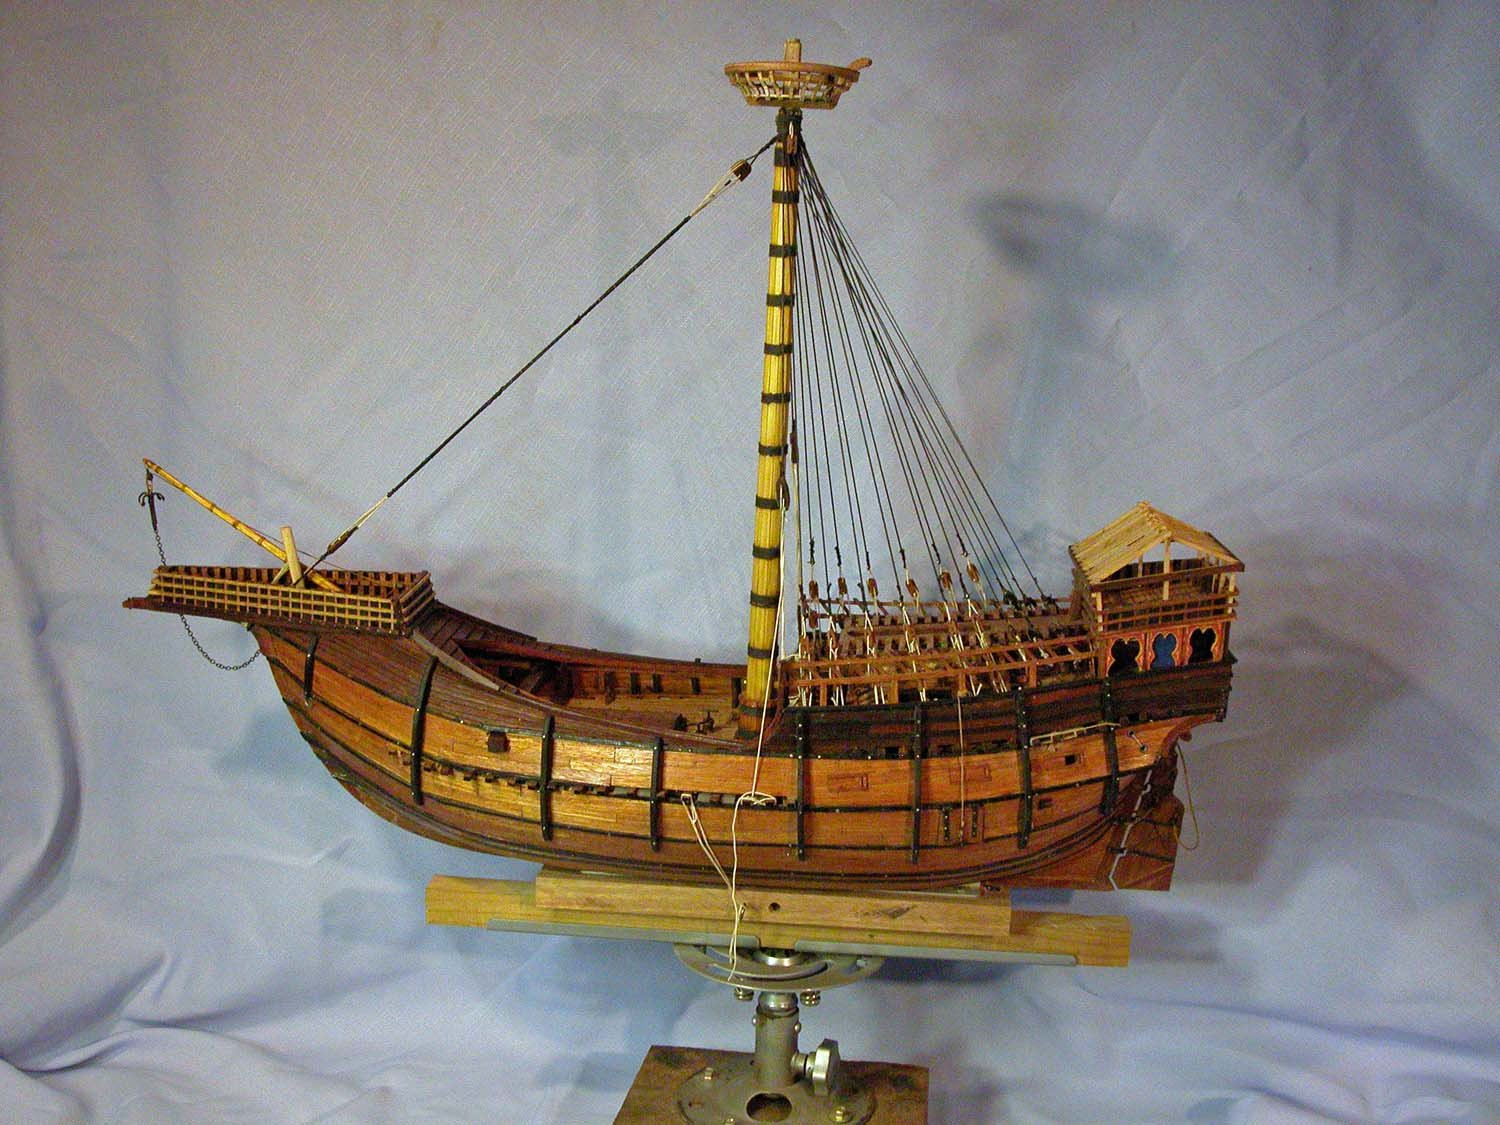
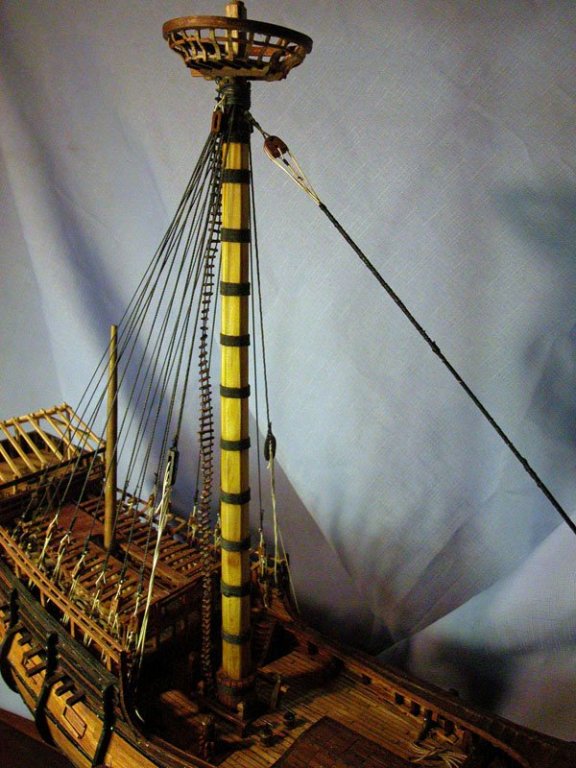
He fitted with inches to spare. Crows nest were very large fighting platforms in those days Dick
- 632 replies
-
- 10
-
-
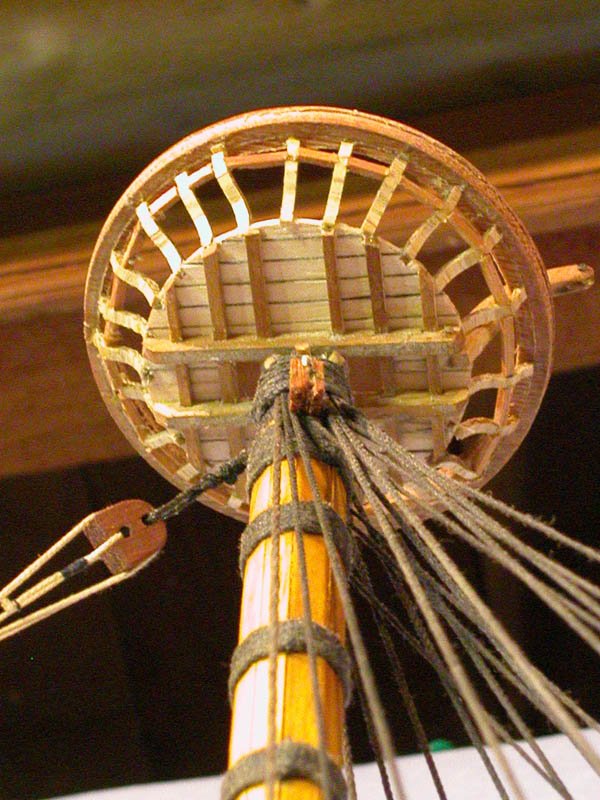
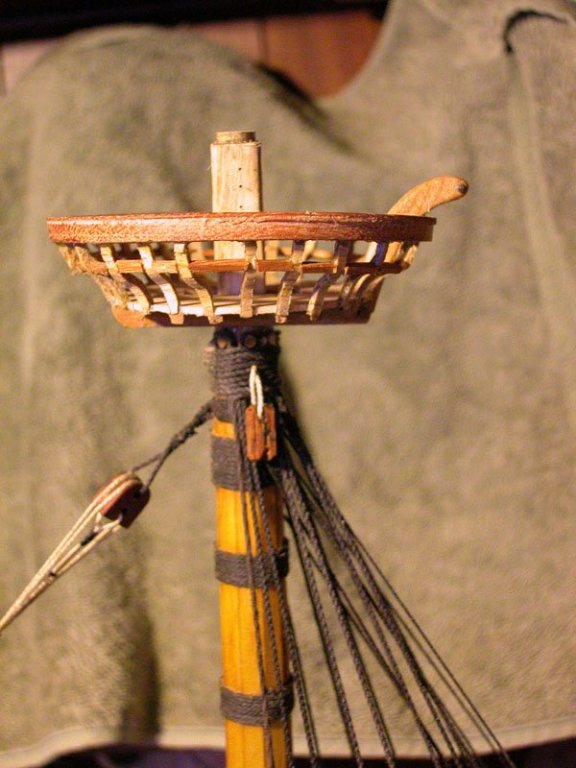
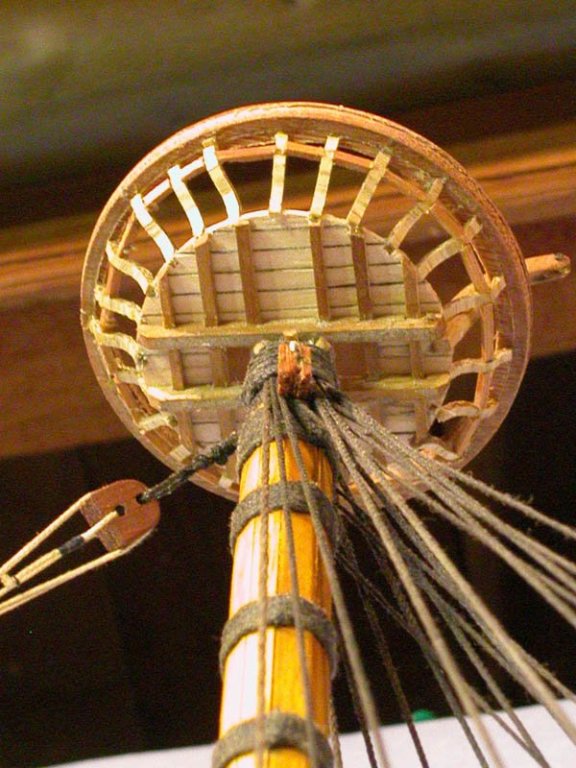
The crane on the maintop is wrong. It should be projecting laterally not aft so that it will access the waist not the quarterdeck. Will fix as it will bug me! Dick
-
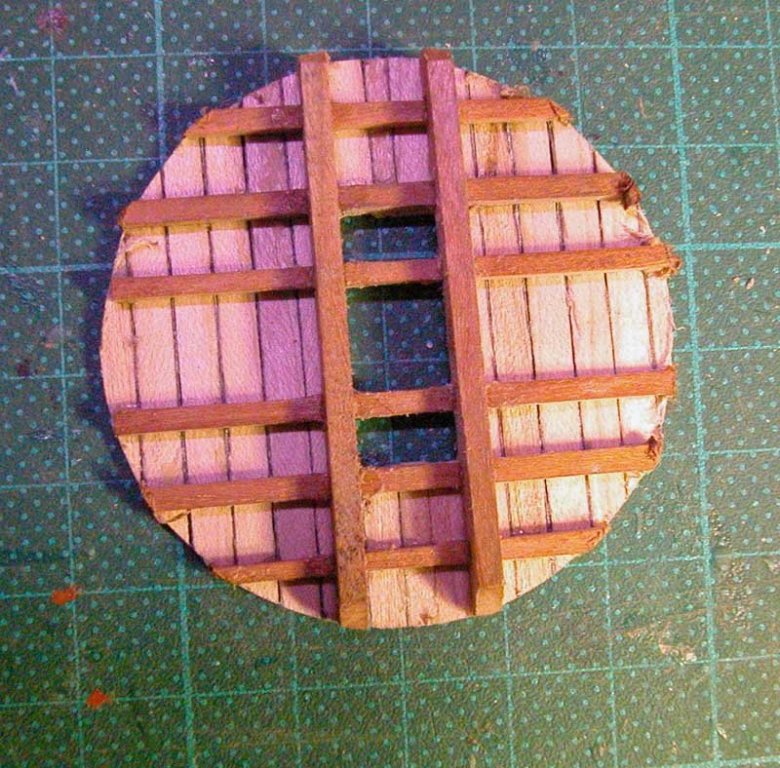
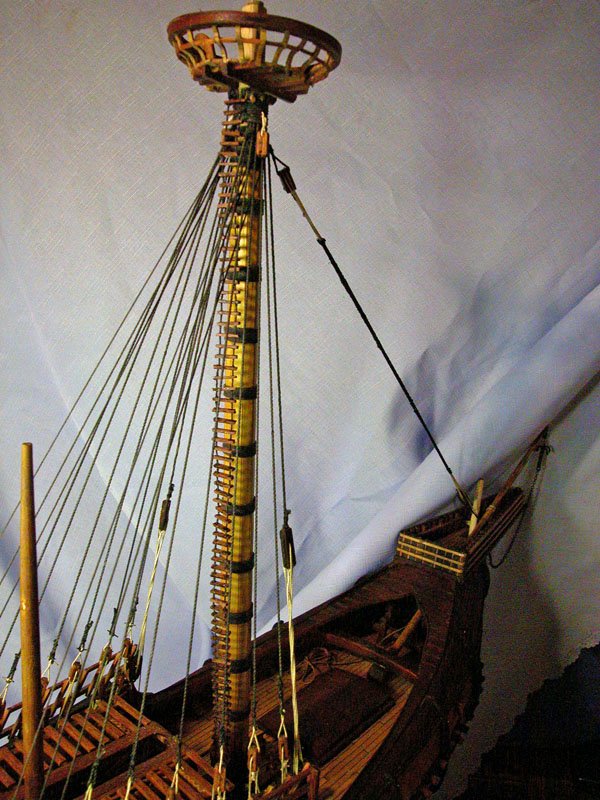
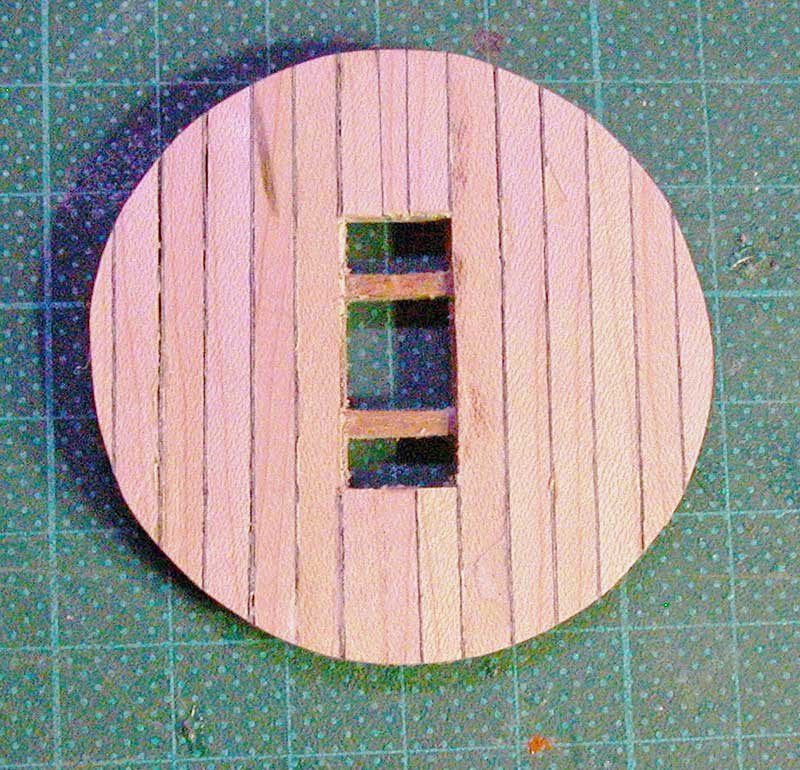
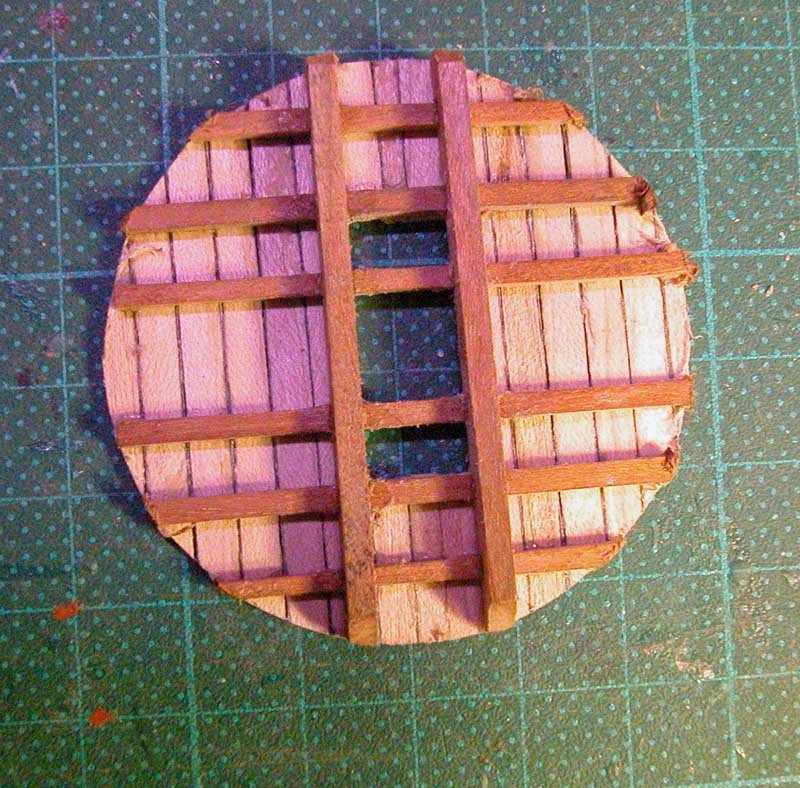
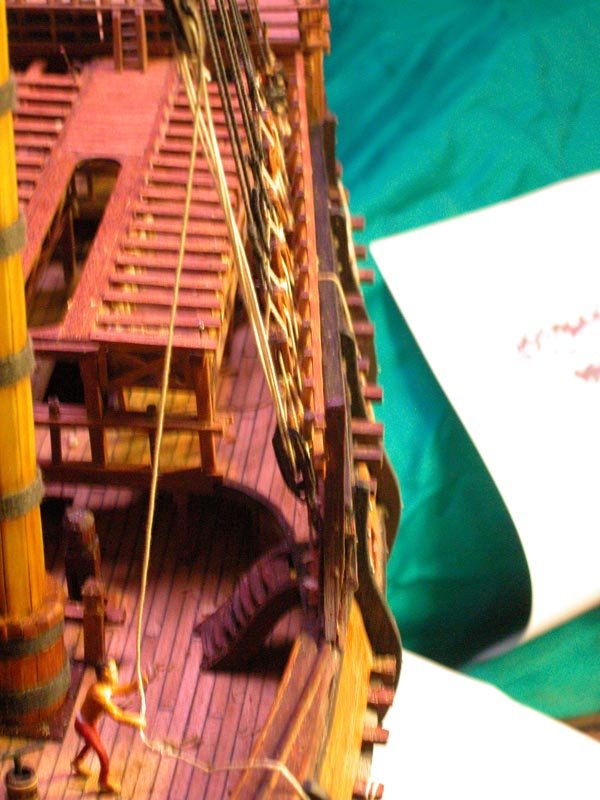
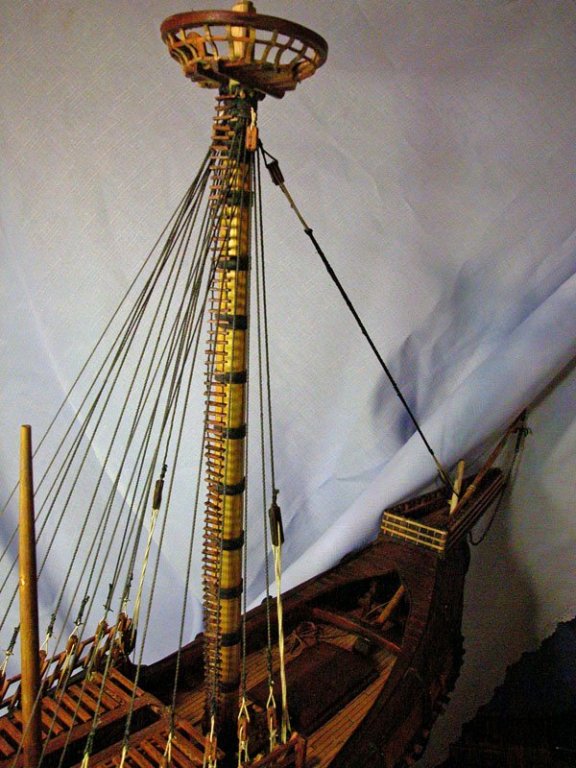
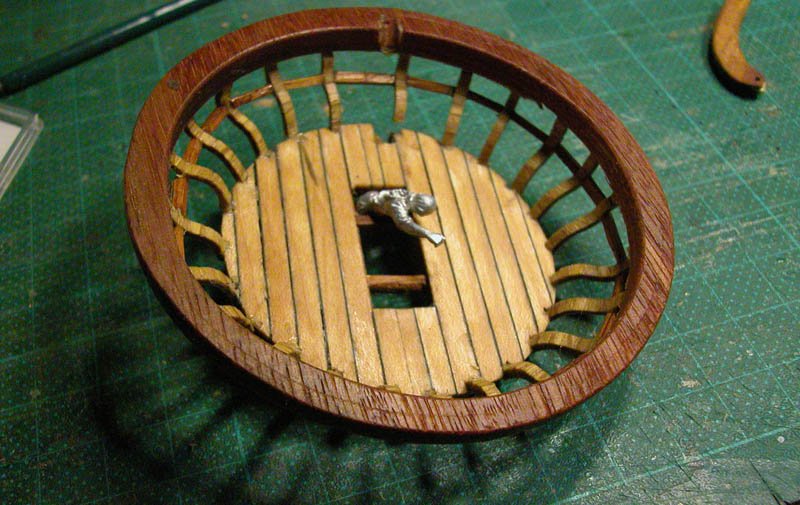
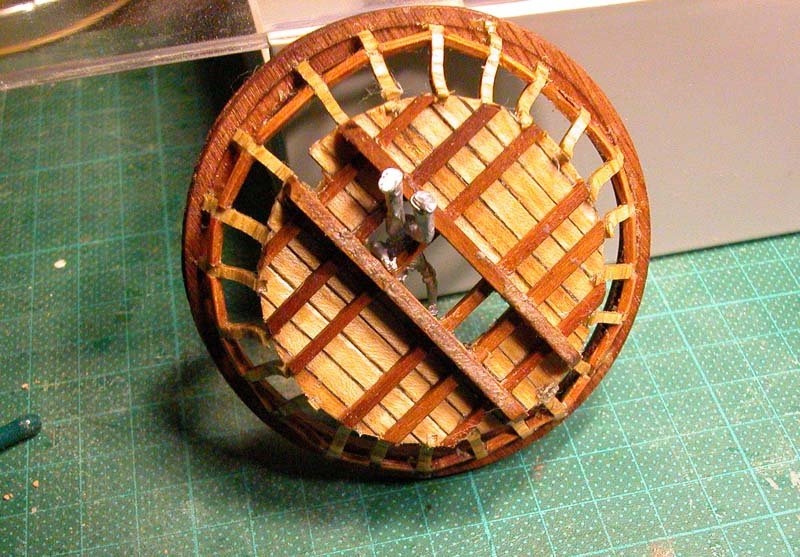
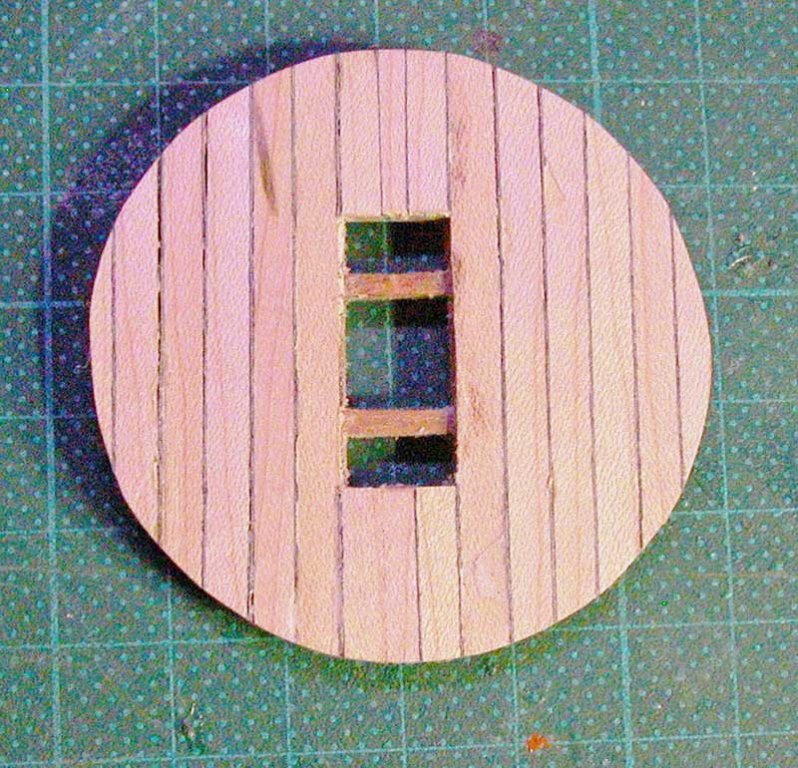
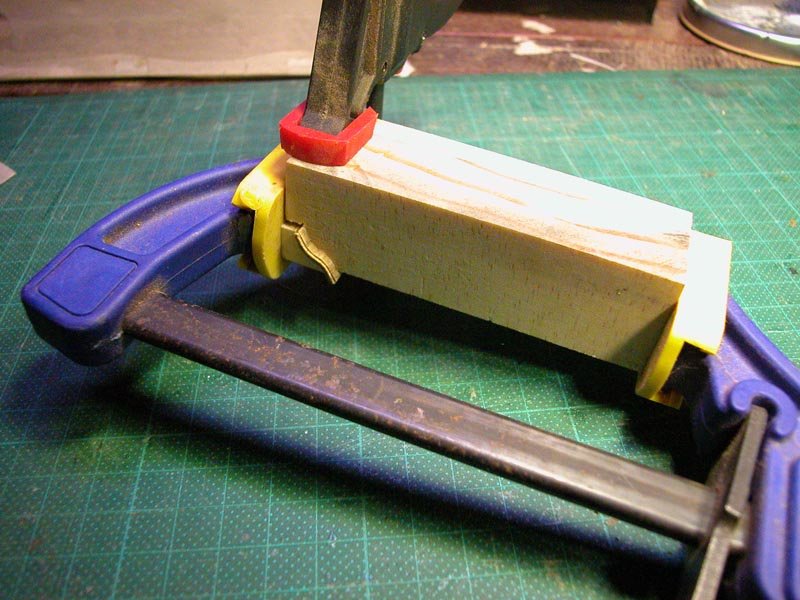
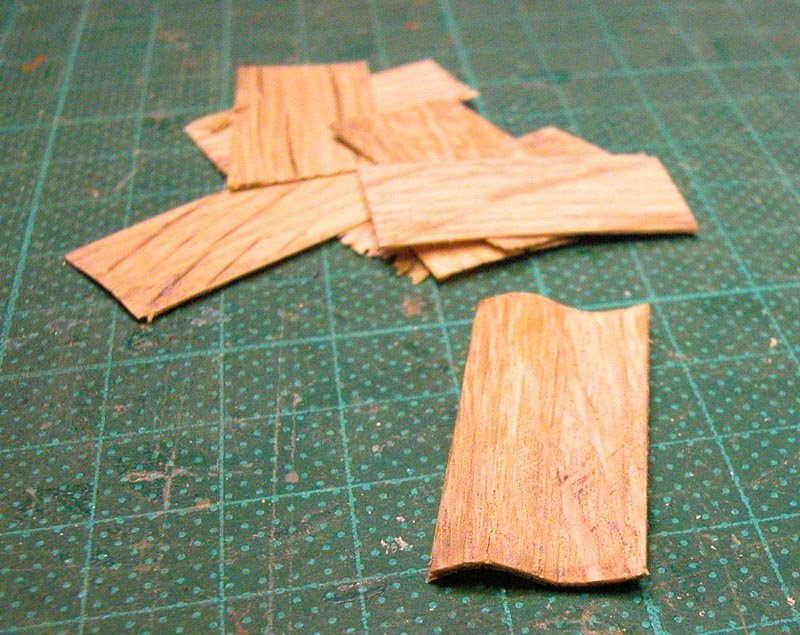
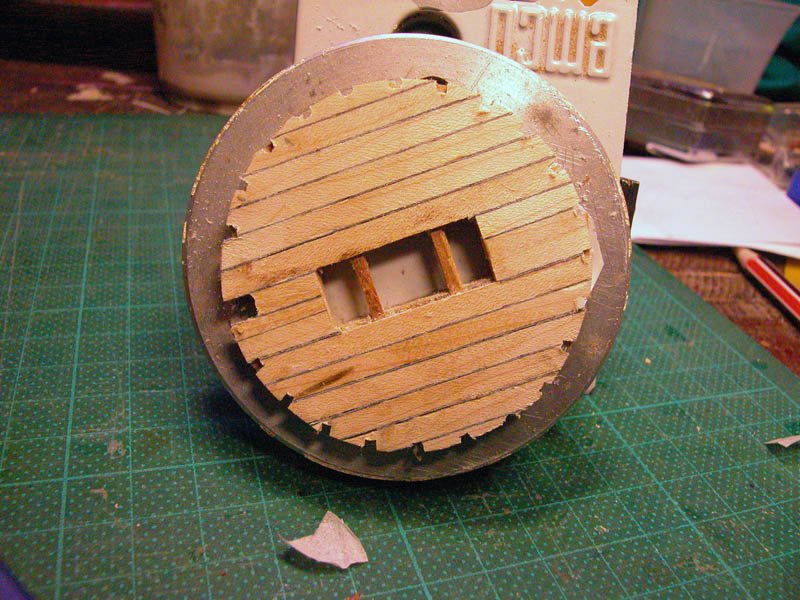
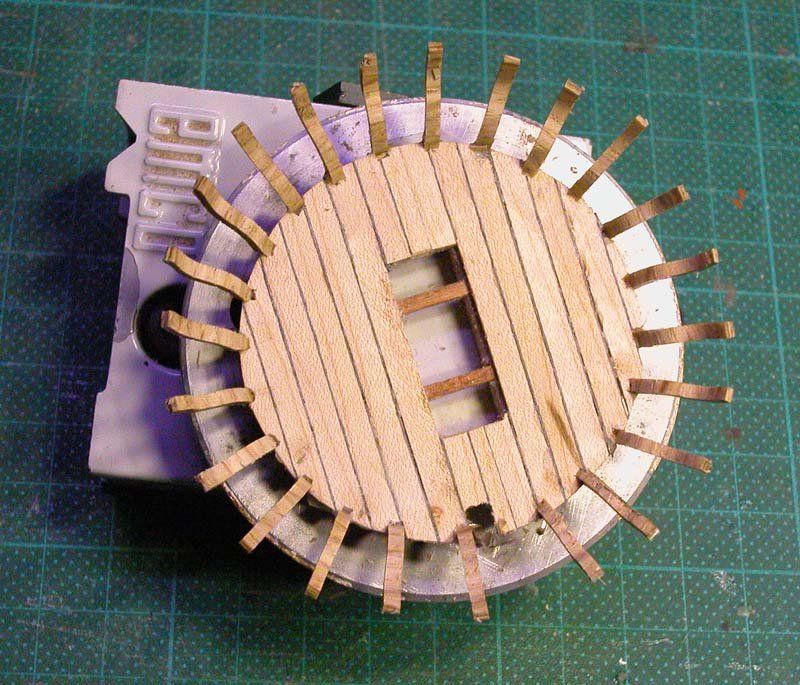
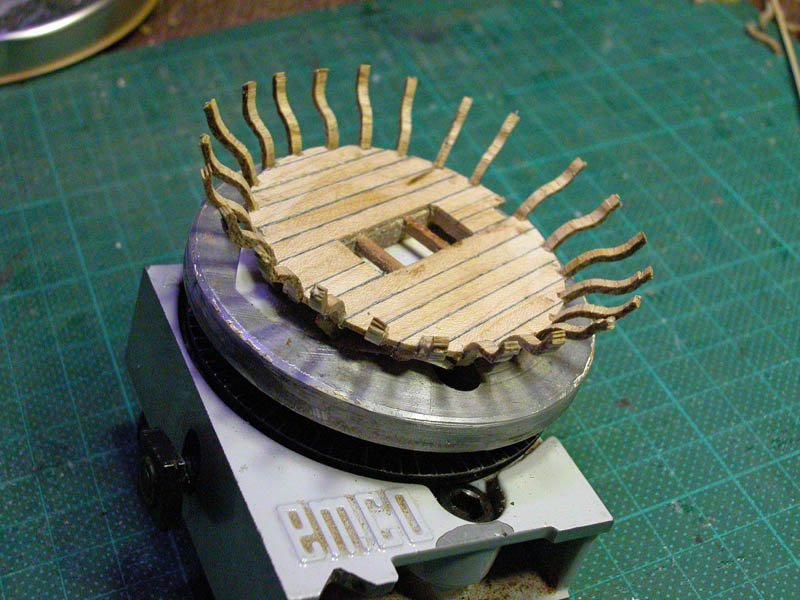
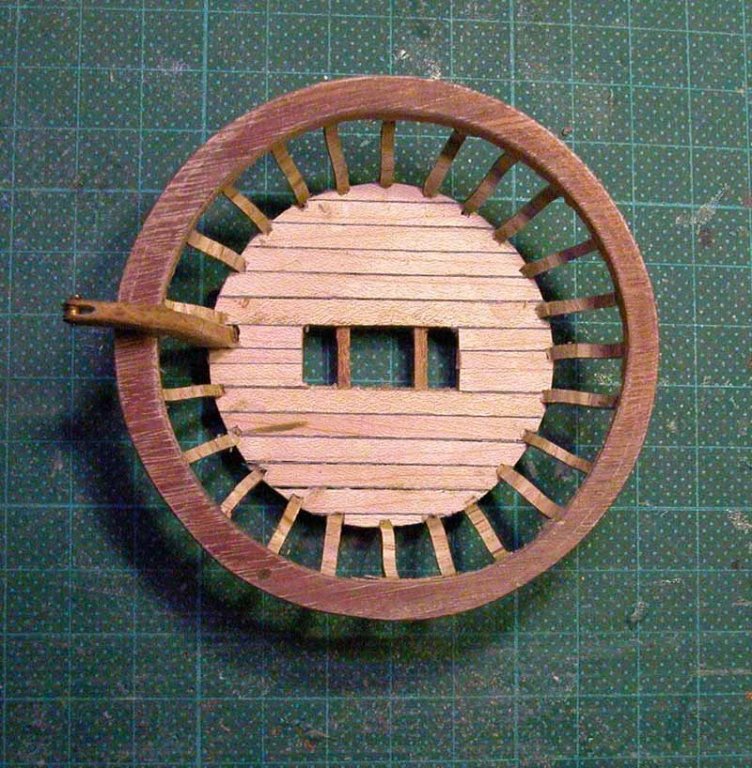
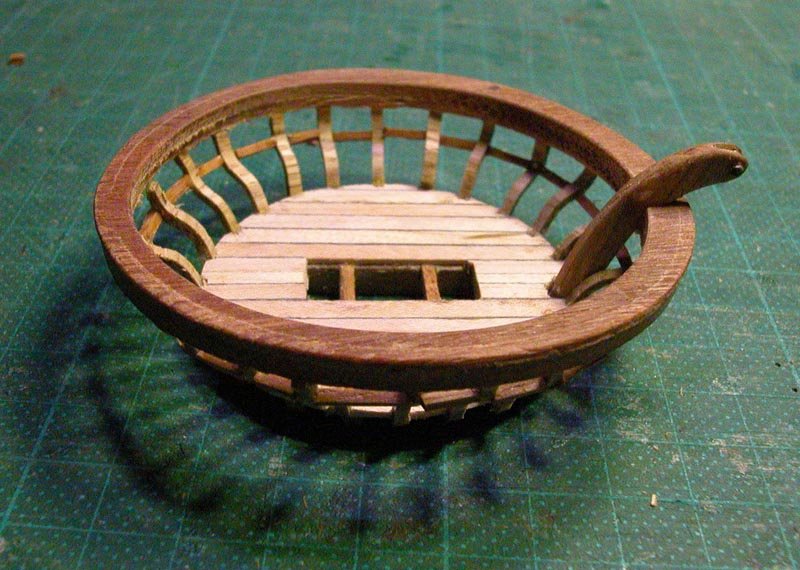
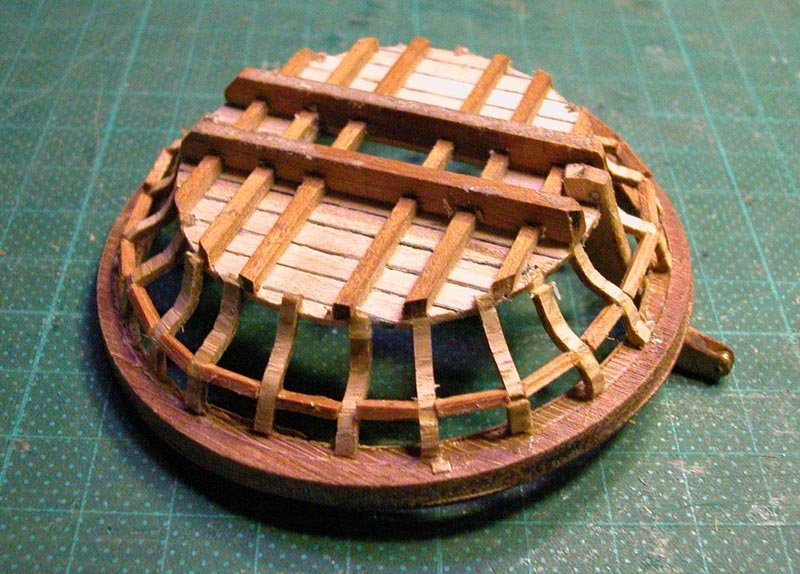
The following is the construction of the maintop (or crow's nest if you like) The construction of the base. Note the access aft for the jacob's ladder to allow ingress to the top and the entry of the halliards. for ward of the mast will be the exit of the halliards. The side frames for the top are made by laminating thin strips of wood and sawing them to thickness required the position of the frames is located using my Emco dividing attachment (Unimat 3) The circular rail for the top is turned on the lathe. Note the crane arching over the rail. This is for lifting objects such as ammunition etc from the deck to the maintop. It has a pulley. The frames are strengthened by bracing timbers Temporary positioning of the maintop on the mast Almost ready for the mainsail and yard. Still have work to do at deck level. Dick


- 632 replies
-
- 16
-
-
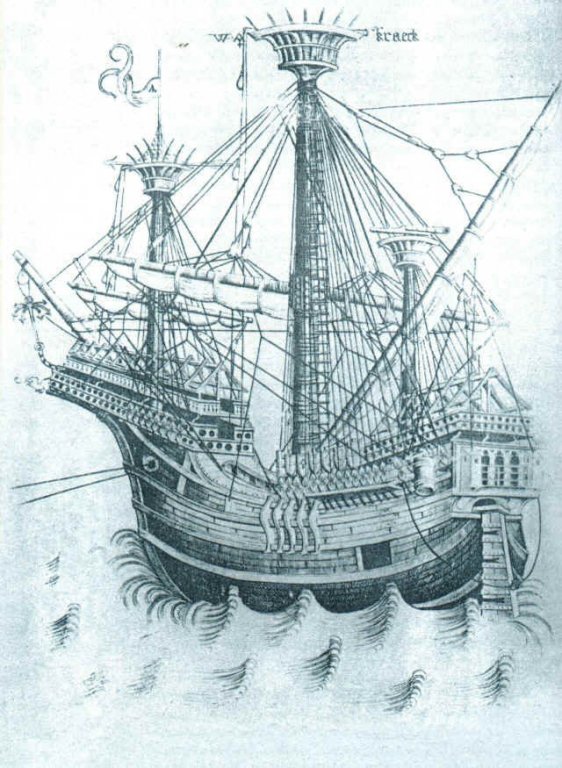
OK Götz. Have fun with your build. This is a classic picture of a carrack ( Kraeck?) from the northern european region which is a good resource . Cheers. Dick Is kraweel a corruption of caravel?
-
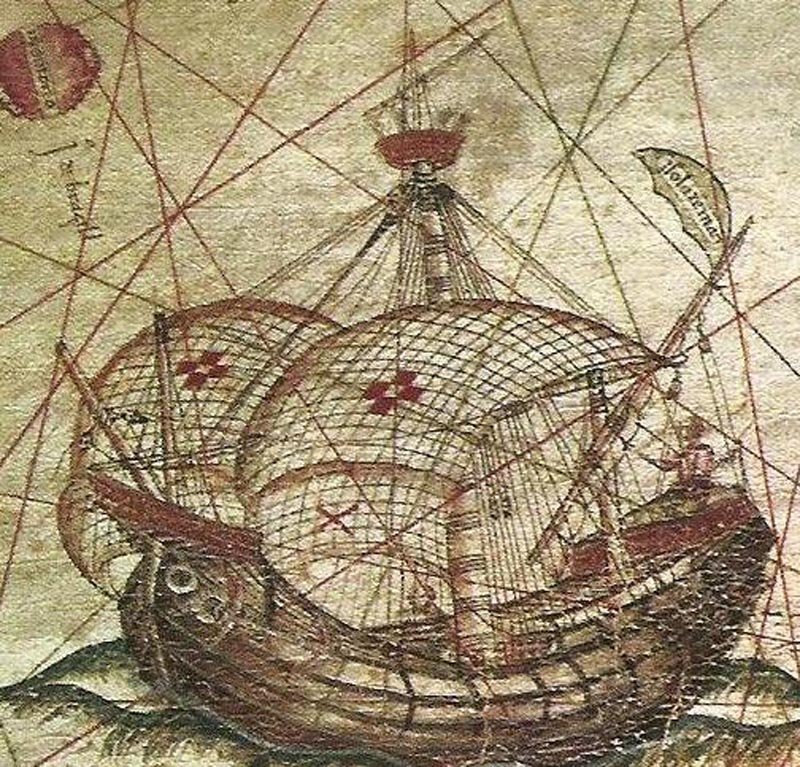
Goetz, most of the vessels of this period have a rope ladder on the aft side of the "crows nest". The ladder entered beneath the crows nest. Remember that the halliards to hoist the mainyard also enter below the crows nest go over pulley(s) then exit down the front to attach to the yard. There were many designs for these structures. No set patterns. Ratlines did exist in some ships but at this period I doubt they were used to access the the crows nest even if they were fitted. I am in the process of building the same structure for my carrack https://modelshipworld.com/index.php?/topic/4915-venetian-carrack-or-nave-rotonda-164-by-woodrat/& I will post the details soon. Cheers Dick (Woodrat)
-
I could do with a good stiffener, right now Seriously though, Dan your results on the Queen Anne's Revenge are superb. I wont be able to match that. What I hope to produce is something like the true shape of a carrack mainsail cracking on in a following wind
-
Thanks Dan. That would work for a simple billowing sail and that is not the problem. In this carrack sail, there is a reverse curve in the centre where the centre of the sail is being pulled back by a lanyard so the sail does not rub on the mainstay. Also, the carrack mainsail in contemporary illustrations does not hang off the yard. It billows upwards and forwards. This is why I am having difficulty. But I think I have it licked. even the excellent R C Anderson model does not attempt this. If I can reproduce this it will be a very gratifying effect. Cheers Dick
-
thanks Druxey and Carl. The problem is making the construct stiff enough to maintain its shape against gravity. Experiments continue. Dick
-
Druxey, I don't know what brand of medium you use but the one I bought did not hold its strength when rewet. I can keep trying and pick the best looking sail.
-
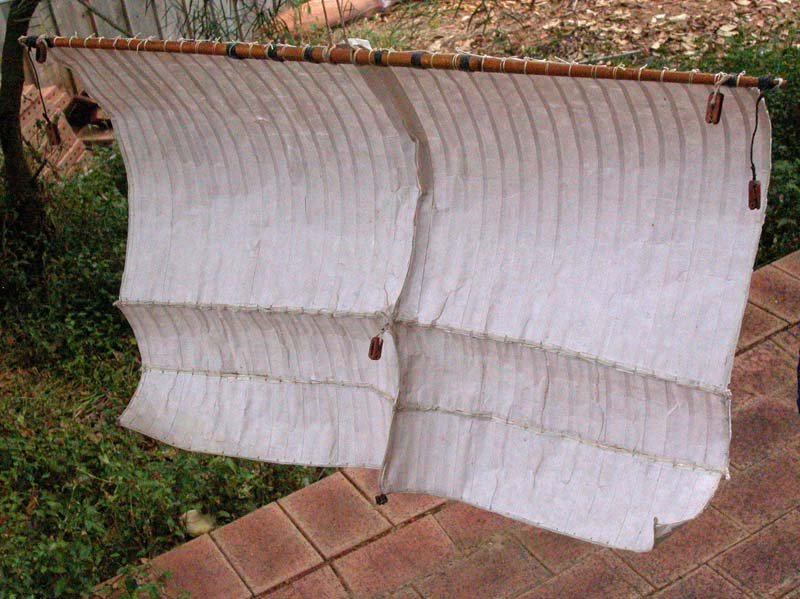
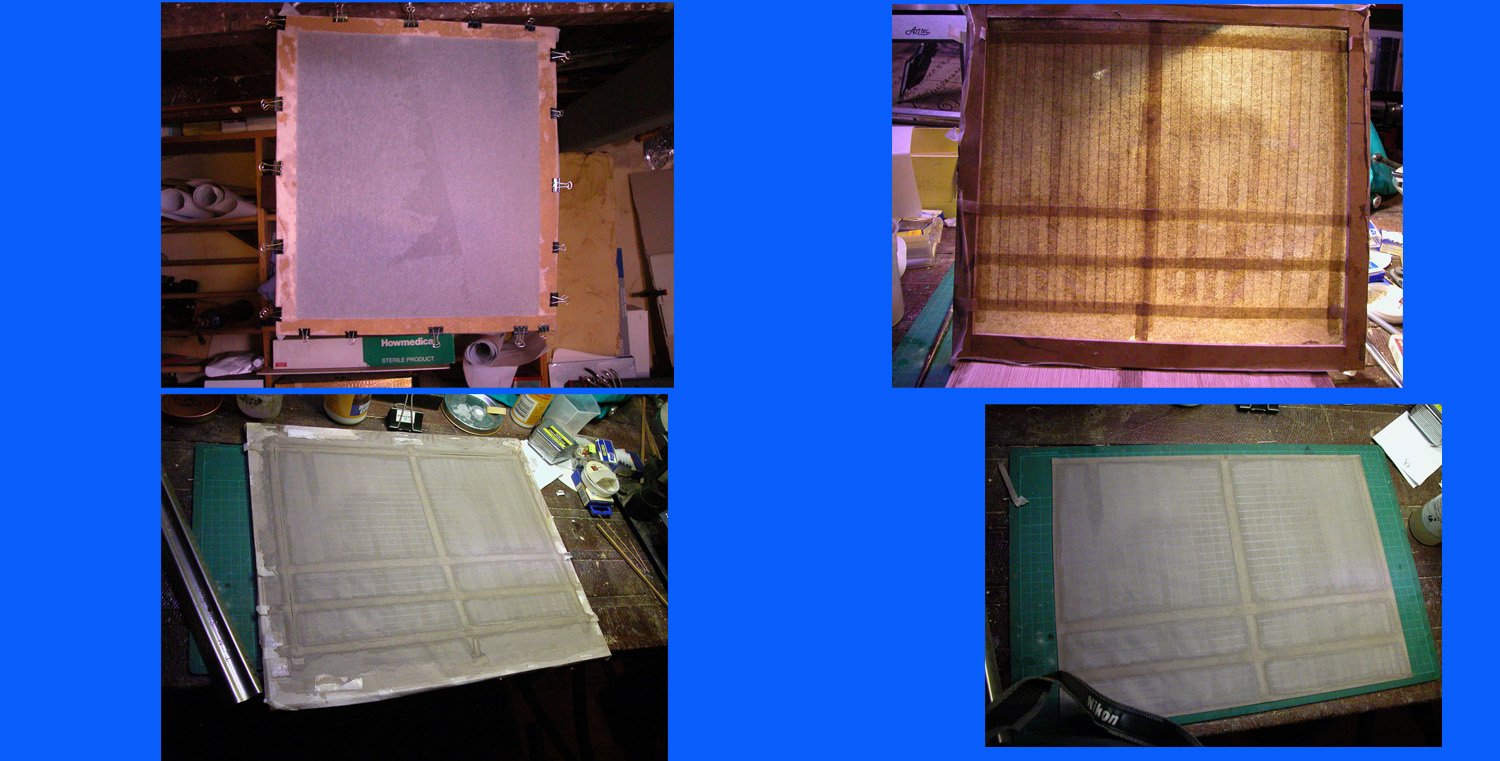
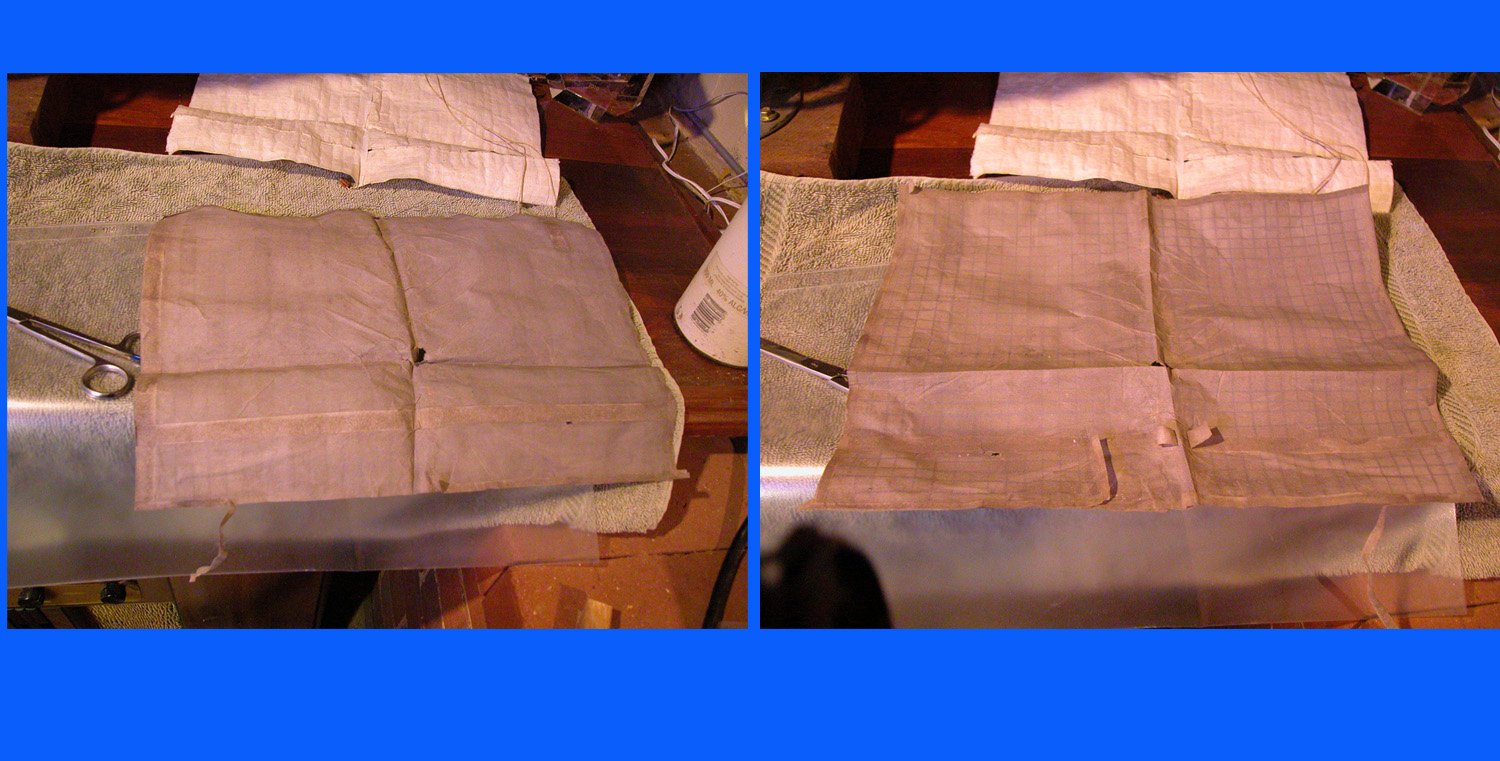
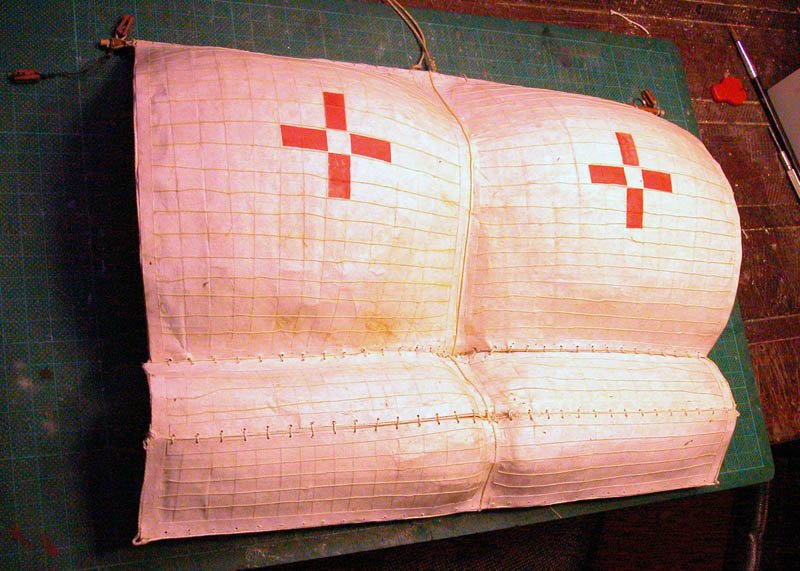
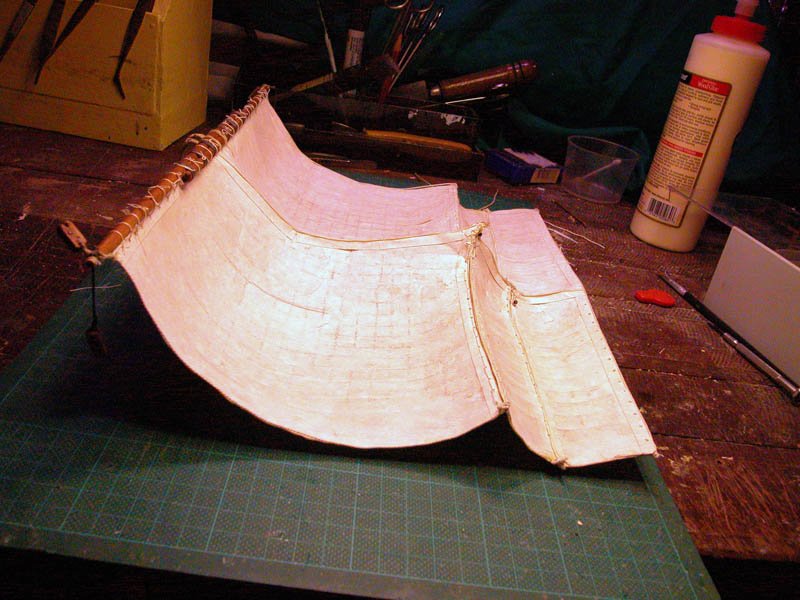
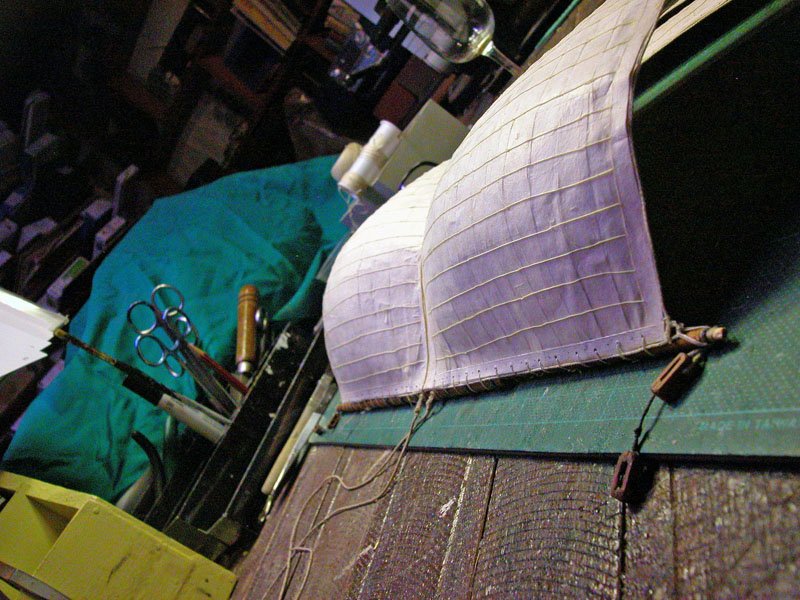
The second cunning plan was not quite as cunning as a cunning plan could be. Silkspan was wet and stretched on a frame the painted with dilute acrylic. Taken off the frame molded and set with medium. the silkspan did not have enough strength when removed from the mold to hold the complex shape. But..... nil desperandum. The third cunning plan has gone a bit better so far I used vertical strips of calligraphy paper over the mold with white glue. Then horizontal strips of silkspan over that. Dry and detach from mold Seems to be holding its shape. Ready for reinforcements and boltropes. Dick
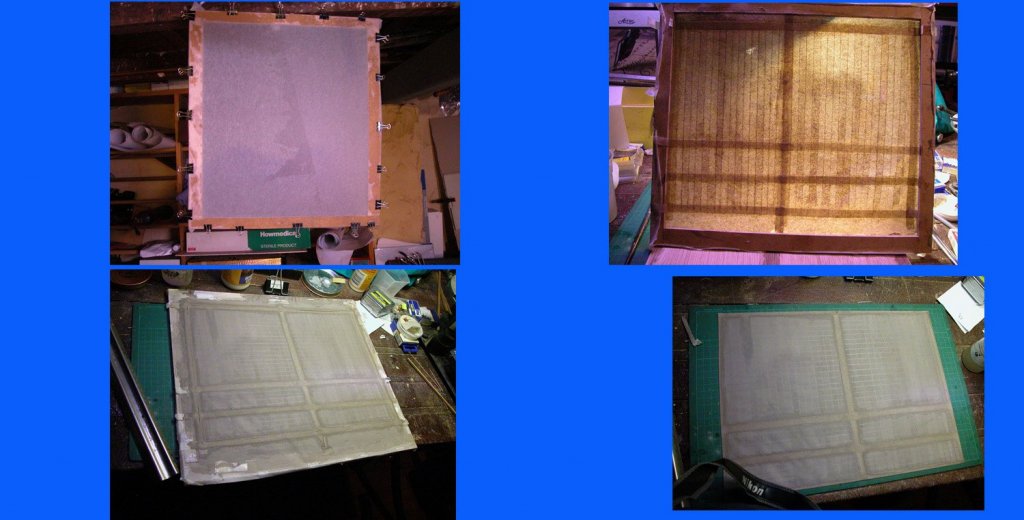

-
My cunning plan is so cunning even a cunning person wouldn't think of it. It's so great... Yes Druxey, I will varnish it and coat with mold release.
-
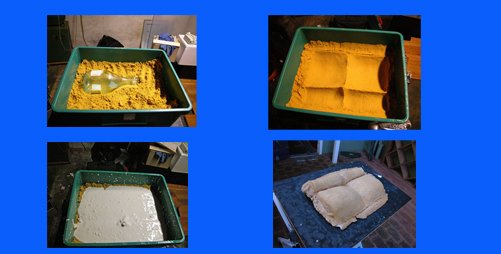
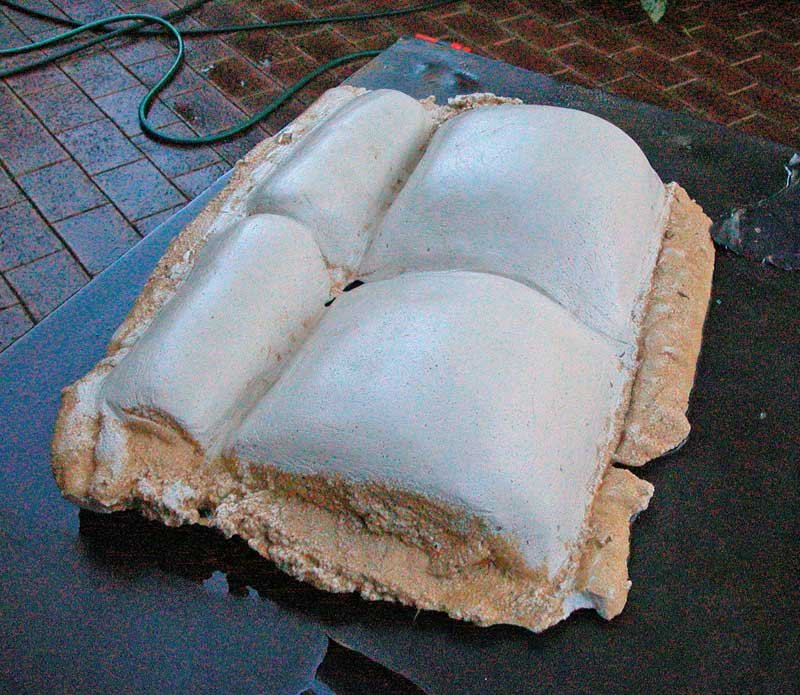
As a first step in my cunning plan I have made a mold from plaster of Paris, cunningly using a Frascati bottle as a shaper. The rough mold is shaped with files and sandpaper Cheers Dick

-
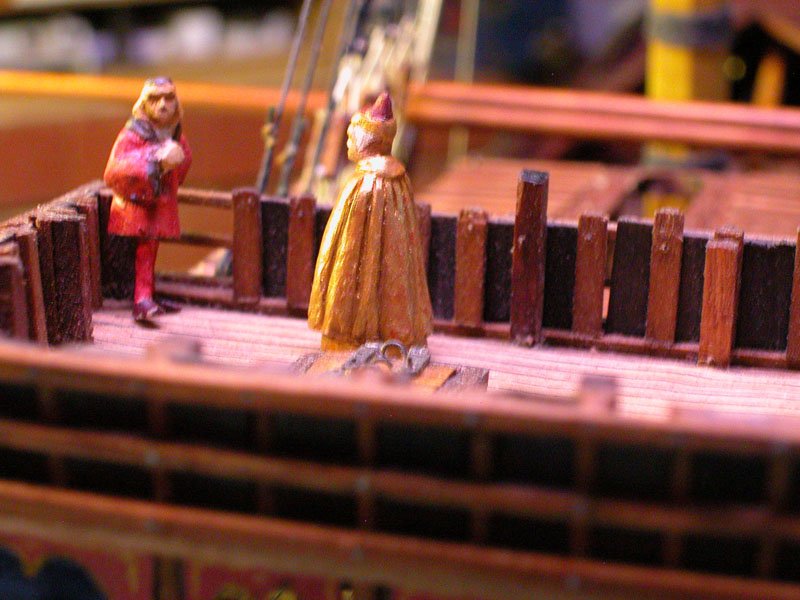
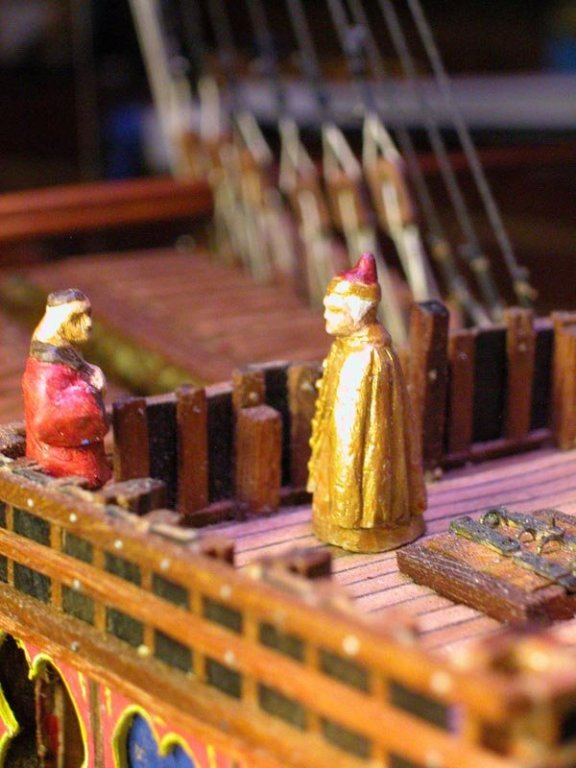
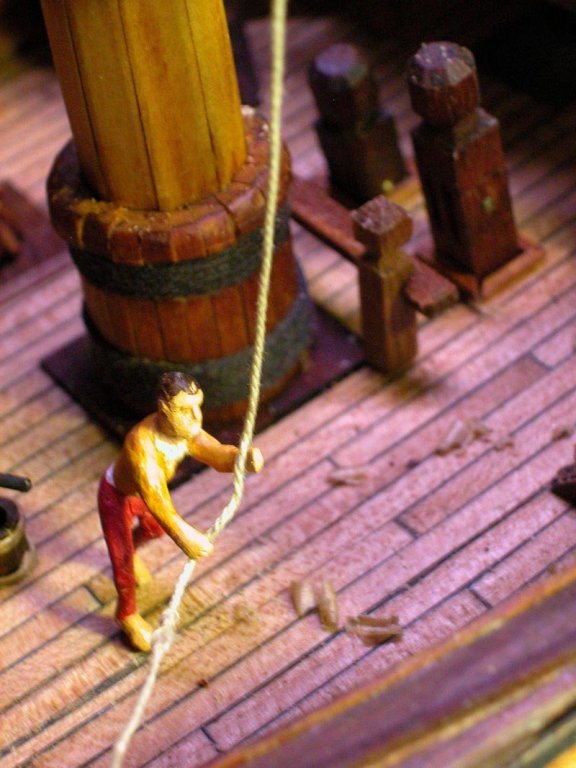
I have a cunning plan which cannot fail............ Druxey, I will try your technique and report back. I knew this was going to be a sticking point. Attached here are some scale figures carved by Louie da Fly, thanks Steven. He has kindly donated them to the build. The first figures are of the Doge Cristoforo Moro, the owner of the ship who is clearly deeply displeased with a somewhat hapless courtier, perhaps his private secretary. below, a tar hauls on a rope. Dick

- 632 replies
-
- 10
-
-
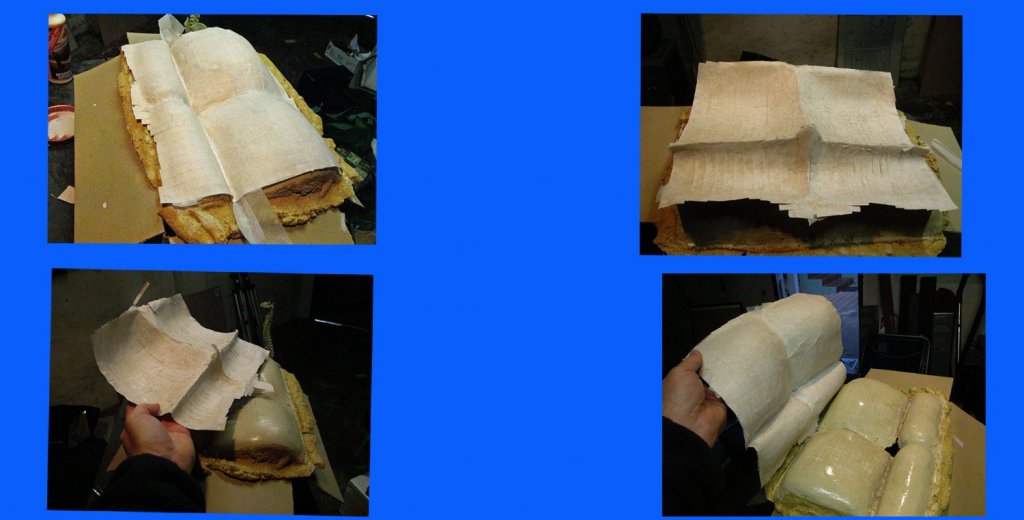
You are much too polite, Druxey. What you mean to say is: do the homework again! I had considered that method but I have given up on papier mache. Maybe a plaster or clay mold would be easier. Nonetheless I will hang the yard and see what this version looks like on the ship
-
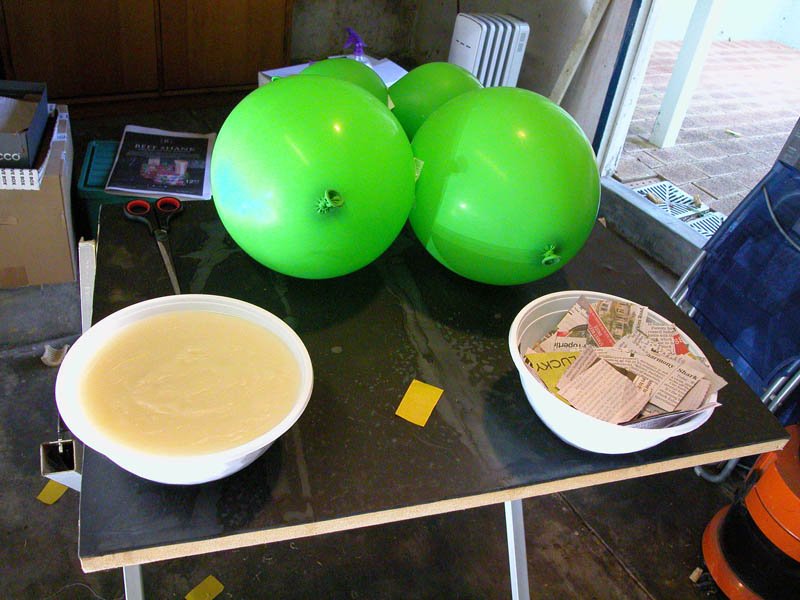
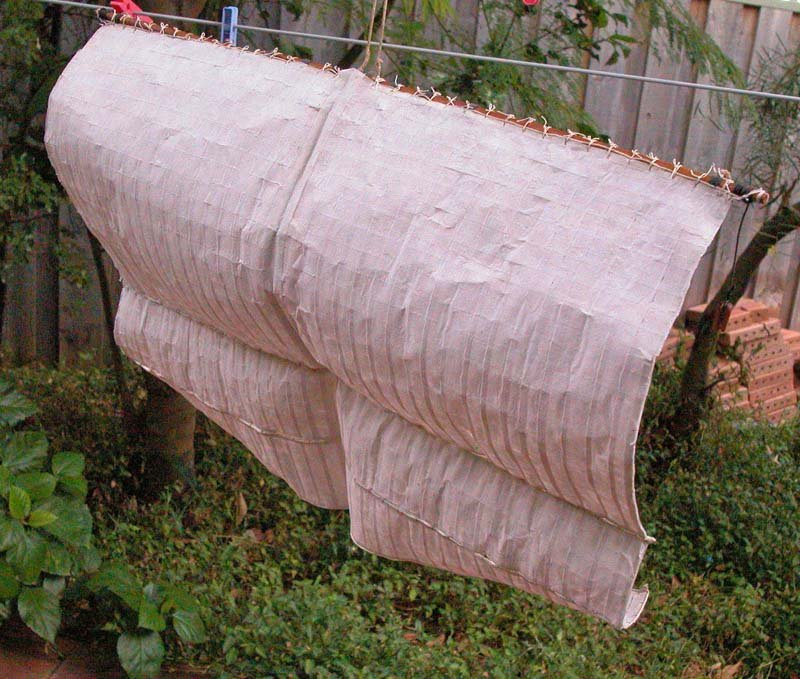
After laughable escapades with papier mache and somewhat obscene balloon constructions, the dog ate my mold, really, honest! So.. I decided to repair and resurrect my first attempt. This was paper strips. After repair, I added Silkspan strips glued transversely to the front of the sail while molding with a Frascati bottle (emptied first). The resulting mainsail is not perfecto but it gives a reasonable impression of a 15th century mainsail. prior to attaching to mainmast, I must finish the maintop. This is the base of it. Cheerio, Dick