HOLIDAY DONATION DRIVE - SUPPORT MSW - DO YOUR PART TO KEEP THIS GREAT FORUM GOING! (Only 13 donations so far - C'mon guys!)
×

woodrat
-
Posts
835 -
Joined
-
Last visited
Content Type
Profiles
Forums
Gallery
Events
Everything posted by woodrat
-
 Steven, I use loupes for all fine work. There are very good magnifying headsets on the market which are not expensive. Better than eyestrain I say. Dick
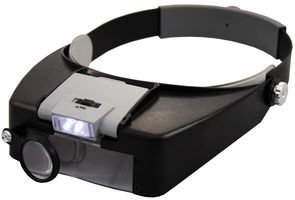
-
I could do this with my Byrnes saw if you let me know dimensions and wood type. Dick
-
Steven, great progress and looking fine. I would be careful about extrapolating colours from a mediaeval manuscript to the model. The monk was probably using whatever colours were in the scriptorium. I take your point that it does suggest colours were used. However, most hulls were probably paid with tallow and hair to above the waterline so colouring would be used sparingly above this level. Sailors have always liked their ships pretty. Dick
-
Thanks Carl. That sounds like a form of papier mache which could work. Thats sort of what I had in mind but I need to experiment a bit with materials and molds. Wish me luck. Cheers Dick
-
Yes, thanks Druxey. A mold is required as you say. I have to experiment a little. As you can see, the central part of the mainsail and bonnet is pulled back toward the mast by a type of lanyard to prevent the sail rubbing on the mainstay. This produces a complex curve unlike those seen on ships of later centuries
-
Oh Dear! That didn't work . I should have known that paper would not support a curve in two planes at once. Back to plan B I think. If plan B fails the sail furls. I thought the vikings were using woollen sailcloth which would explain the need for quilting. Dick
-
It is actually number 100 thread glued to the paper. If you look at some illustrations e.g. the cross hatching is only on the front and not visible on the back. This suggests to me some form of small calibre rope has been sown to the front of the sail. Are there any other possibilities? I may put a simple cross on the mainsail but will not do more Cheers Dick
-
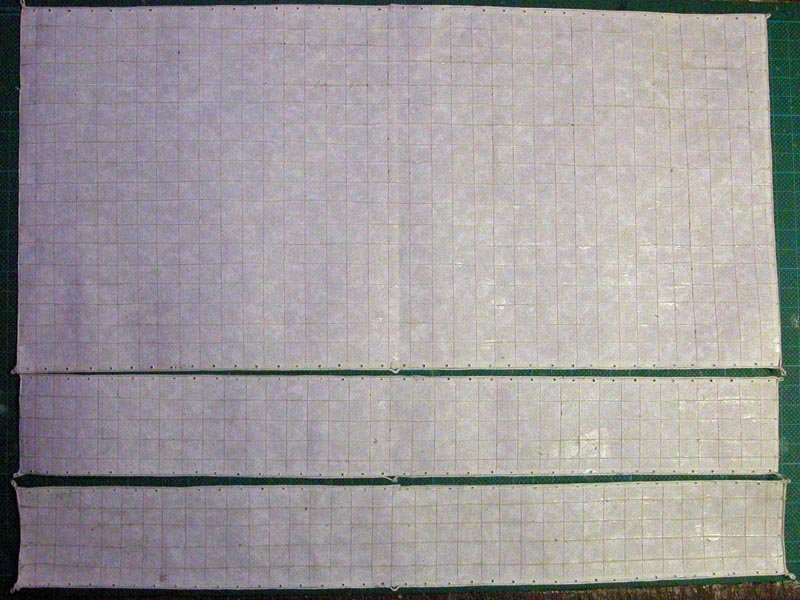
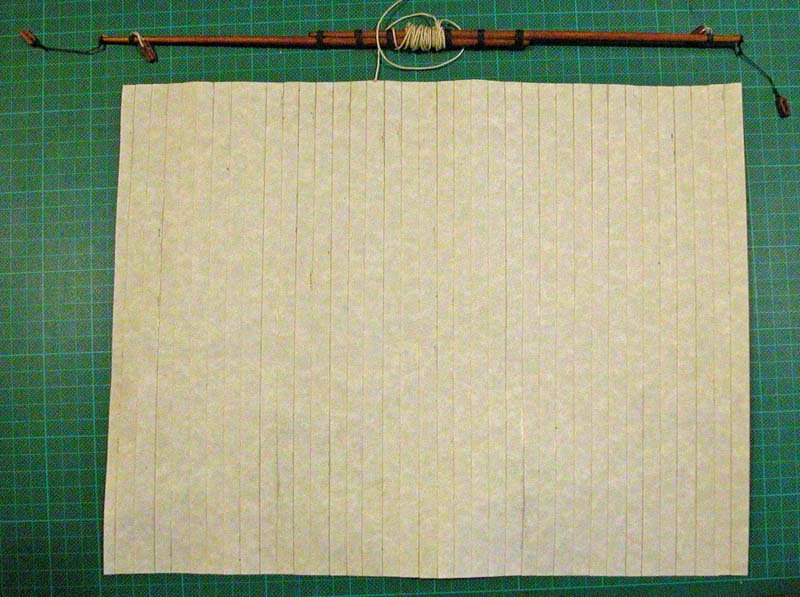
Here be the mainsail and two bonnets ready to be connected. Many illustrations show the cross stitching
- 632 replies
-
- 11
-

-
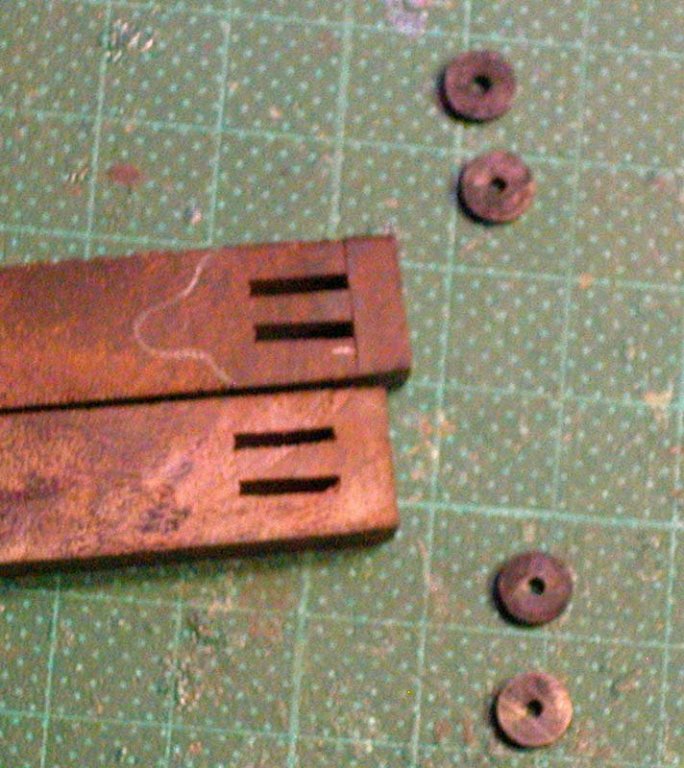
I regret to say, Steven, that I bought the sheaves, although I did blacken them myself. The paper I am trying is acid free calligraphy paper which is a bit like vellum. It is an experiment and may end in tears (pun!) This shows the paper strips glued with acid-free clear glue. I will do a mainsail with 2 bonnets. One of my other hobbies is bookbinding so this feels OK to me. Dick
- 632 replies
-
- 12
-
-
Thanks Druxey and Jesse. Here are the halliard block being temporarily installed to get the halliard length right. The blocks are made of jarrah, a West Australian hardwood. I have made the mainsail using paper and hopefully will install soon. Dick


- 632 replies
-
- 15
-
-
Thanks Druxey. I did wax the halliards but I might try your singeing. I used a different line which is inferior. I will redo it.
-
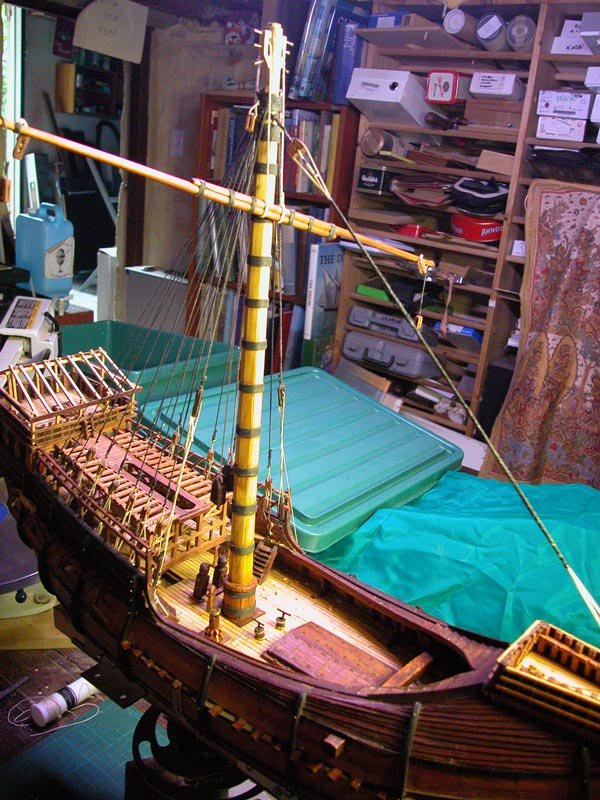
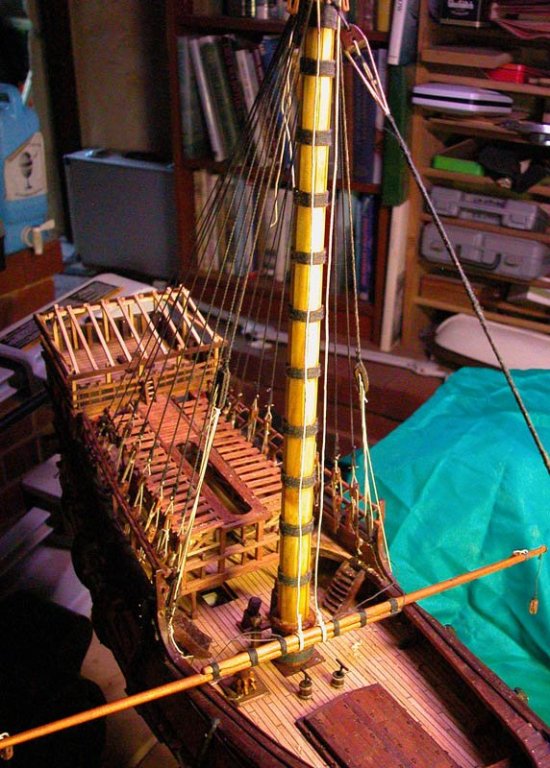
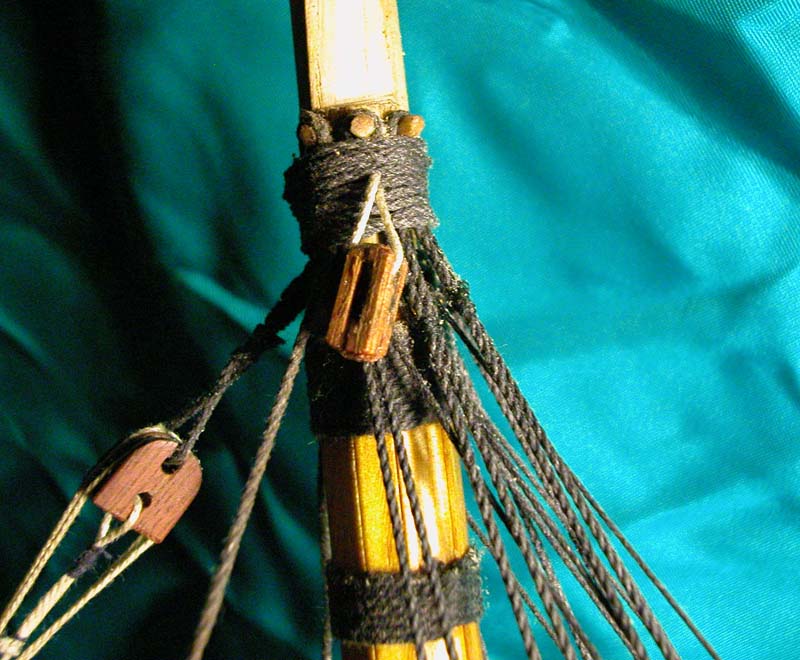
The mainyard is temporarily attached to the mainmast by ties and halliards. Note that the halliards pass through large blocks on either side of the top of the mainmast


- 632 replies
-
- 14
-
-
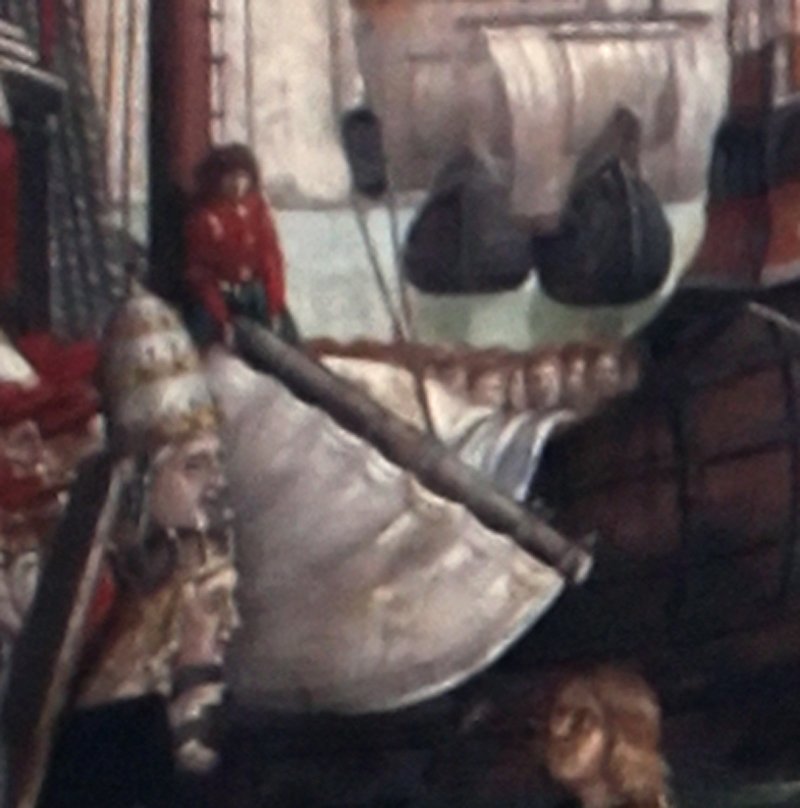
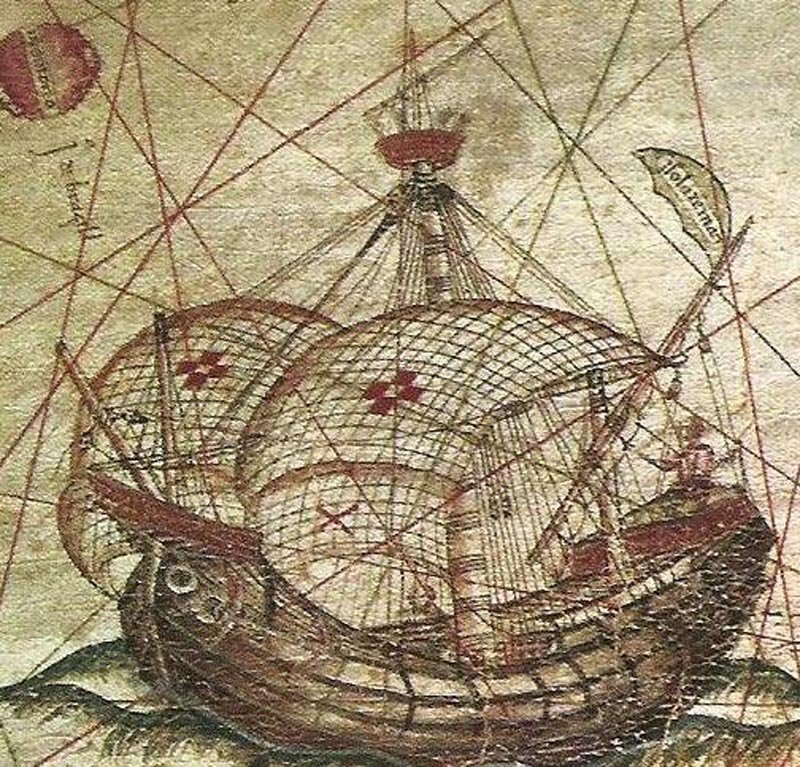
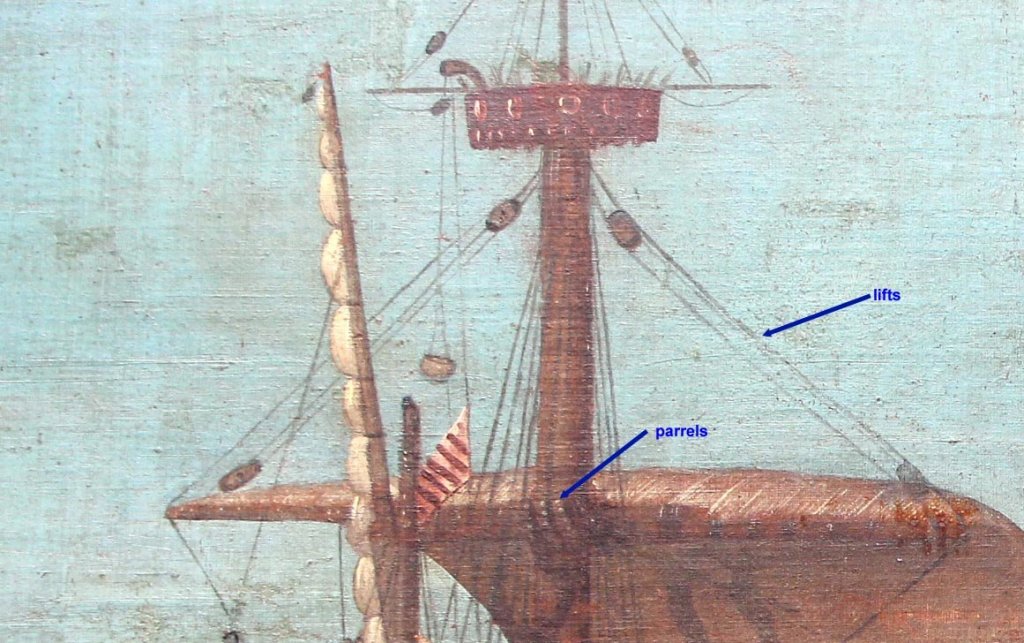
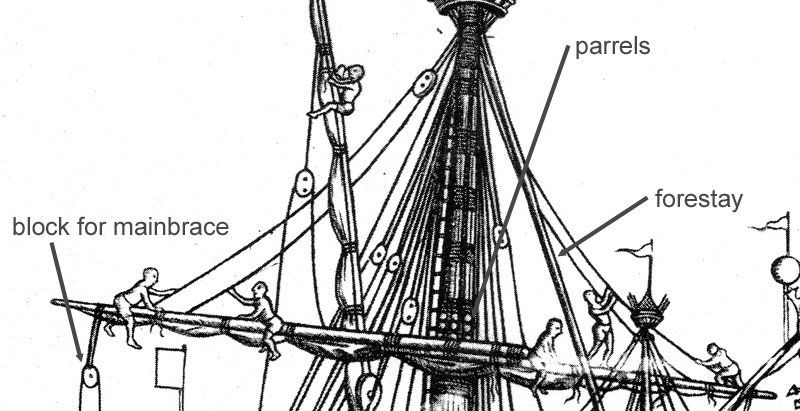
Yes, four rows of parrels. However, the problem is how to attach them in such a way as the parrels can be loosened and tightened as required for adjustment of the position of the yard on the mast. Many of the contemporary illustrations show the yard positioned at varying distances from the top. This may have been a way to adjust for varying wind strengths and directions (?) Dick This is one of the best illustrations of running rigging to the mainsail
-
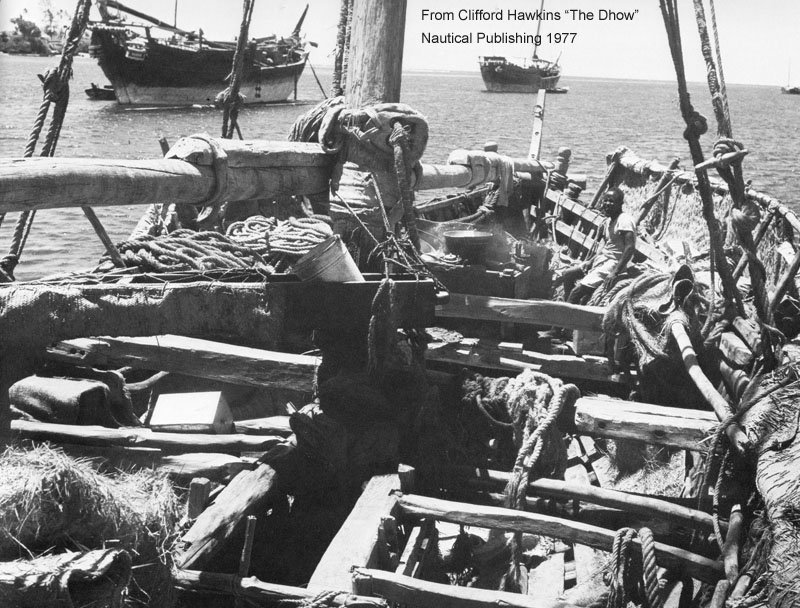
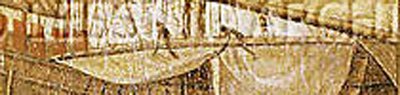
Yes. It survived well into last century as this photo of a dhow from 1972 attests. This the mainyard ready to be swayed up
- 632 replies
-
- 11
-
-
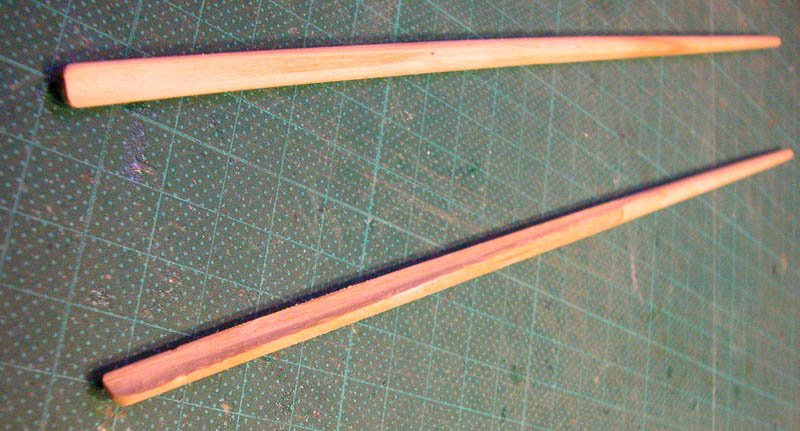
Flat surfaces would be subject to shear forces and would need reinforcement with trenails , bolts or nails, all of which would weaken the wood and lead to splitting. the concave /convex joint reinforced with rope is strong and not rigid. Moreover iron hoops are difficult to make and apply and rope is readily available and cheap. Dick
-
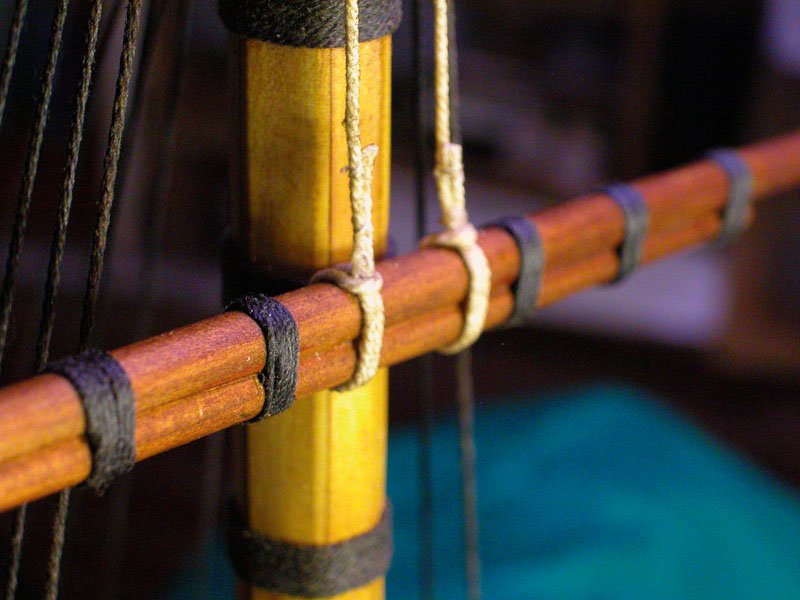
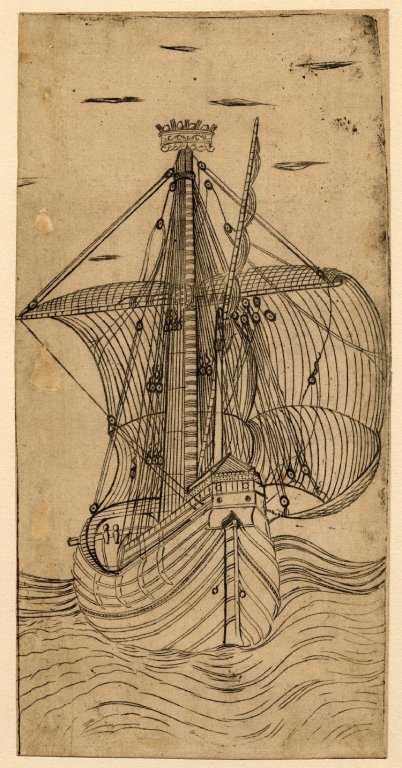
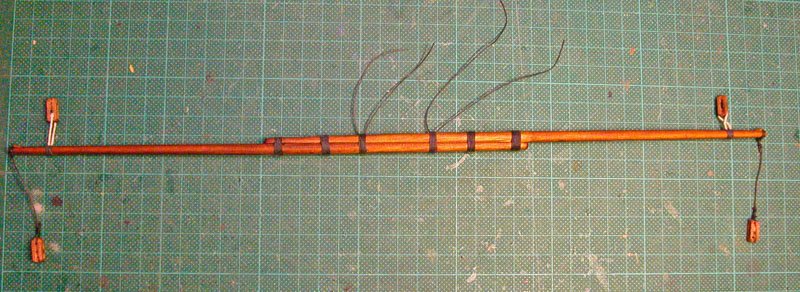
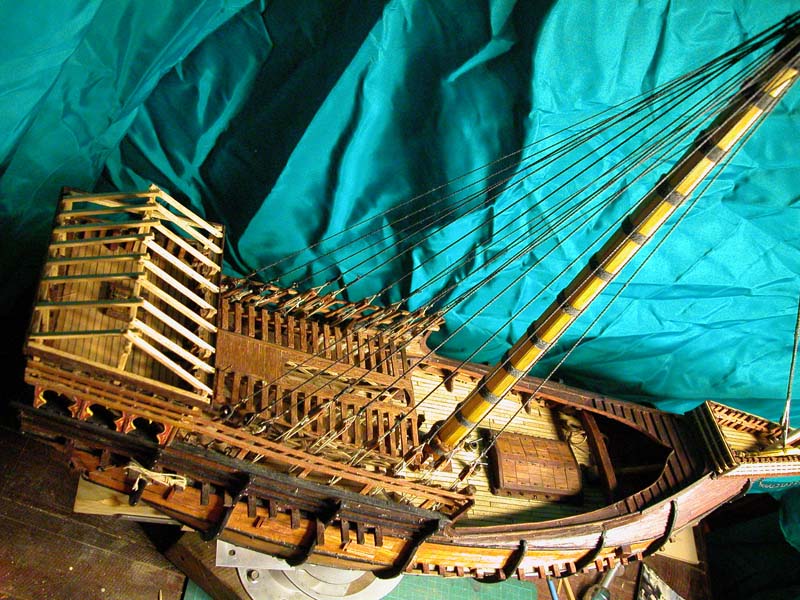
The next step is the mainyard. In mediterranean vessels the mainyard was made of 2 spars bound together. The combined length is approximately the length of the keel and the two spard overlap by 50%. It is an error to apply 17th or 18th century preconceptions to these yards. They are very different and a lot longer than many Santa Maria models depict. Once again the paintings of Carpaccio come up as the best source. But even Carpaccio leaves things out, in this case the forestay. The mainyard is held to the mast by parrels. The bigger the vessel, the more rows of parrels. In my case there will be four rows of parrels. note that one spar has a concave cross section and the other convex


- 632 replies
-
- 10
-
-
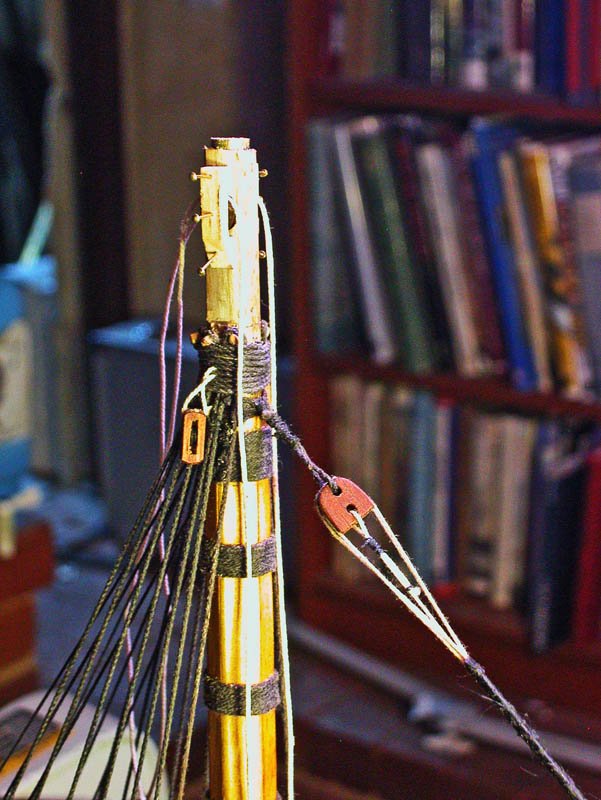
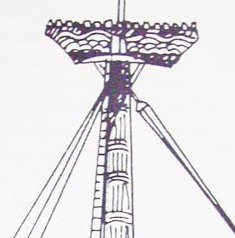
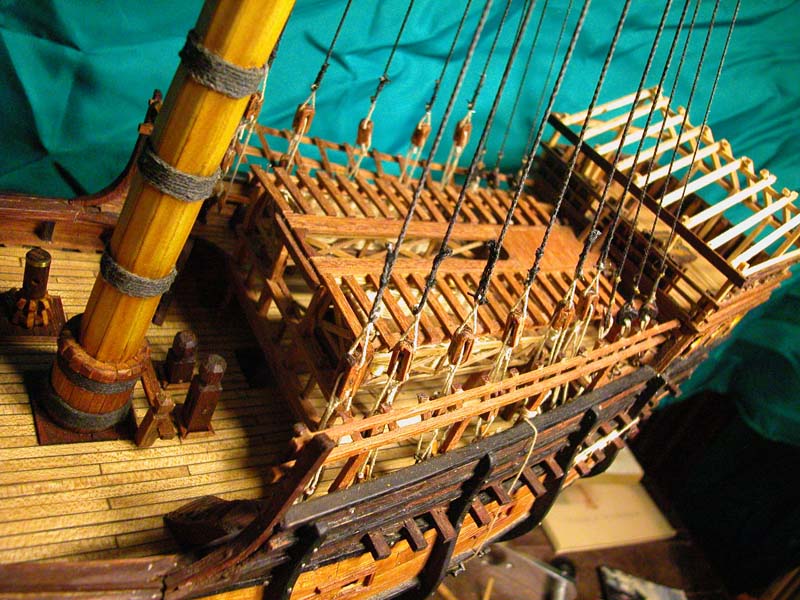
this shows a closeup of the attachment of the shrouds to the mast by looping over pegs inserted in the mast. This may seem odd in that the usual arrangement we are used to is looping the shroud through crosstrees and AROUND the mast. I chose this method because the Trombetta drawing of the mast being set up shows the fighting top already in place BEFORE the shrouds were rigged. This method is also seen in some models close to this period. Dick
- 632 replies
-
- 11
-
-
Thanks Druxey. Those carracks depicted without ratlines showed a wide spread of shrouds fore and aft. In addition the use of tackles and pendants would allow easy adjustment of shroud tension at the price of less strength. Dick
-
Thanks Jesse and Moonbug. The Mataro nao has been a major resource for this build. Anyone building a late mediaeval carrack such as Santa Maria should have a close look at it. Xavier Pastors Anatomy of the Ship volume on the Ships of Columbus uses the Mataro nao for its reconstruction. Dick
-
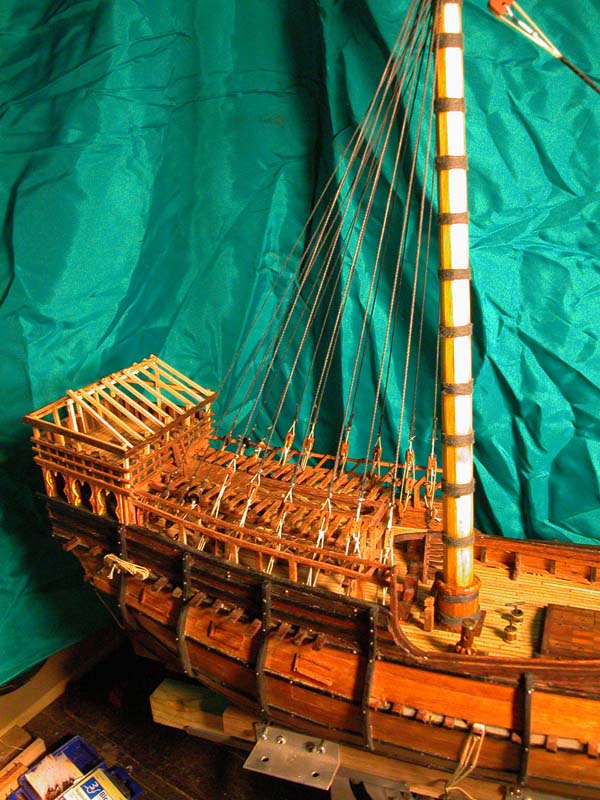
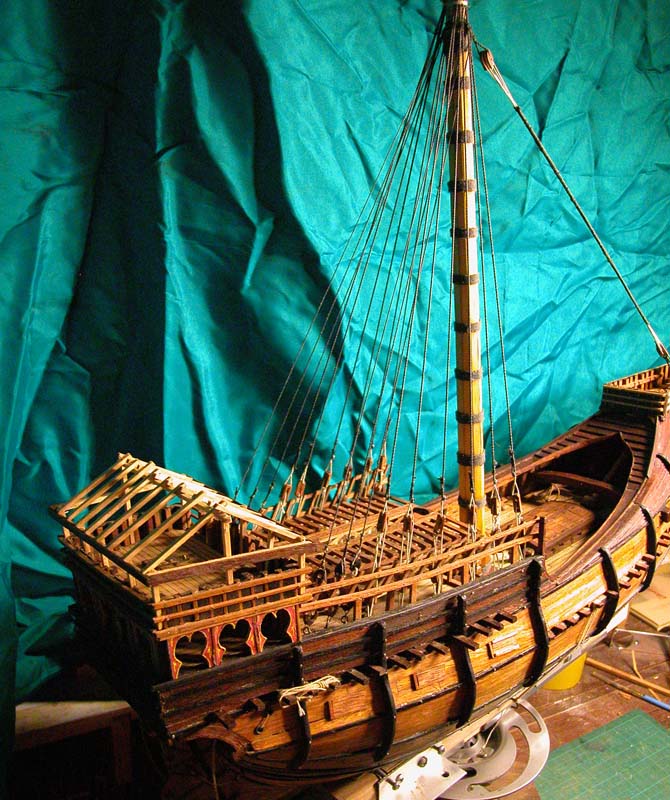
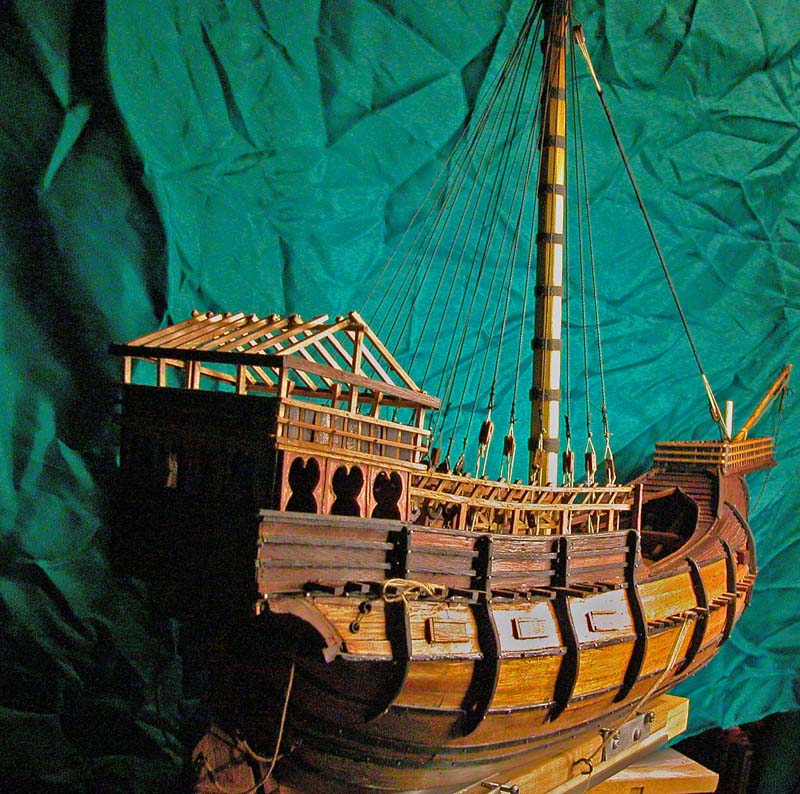
I do apologize for my tardiness in updating this log. I have been in the process of restructuring my professional committments and, consequently, have neglected the more enjoyable of my pursuits. I have, however, finally worked out the likely method that was used to laterally stabilize the mainmast. The shrouds are passed inboard, not as in later vessels outboard to chainplates. The pendants from the mainmasts ( more later) are secured by tackles. This is more in keeping with the iconography of the period in mediterranean vessels. It may well have been different in the northern european vessels as illustrated by the drawings by the flemish master WA, which show chainplates. Certainly it would have been vastly simpler for me to secure the pendants outboard but, in shipmodelling, it is sometimes better to aim for accuracy rather than facility. Nonetheless, I offer this as a solution which is consistent with the scanty evidence. Dick
- 632 replies
-
- 19
-
-
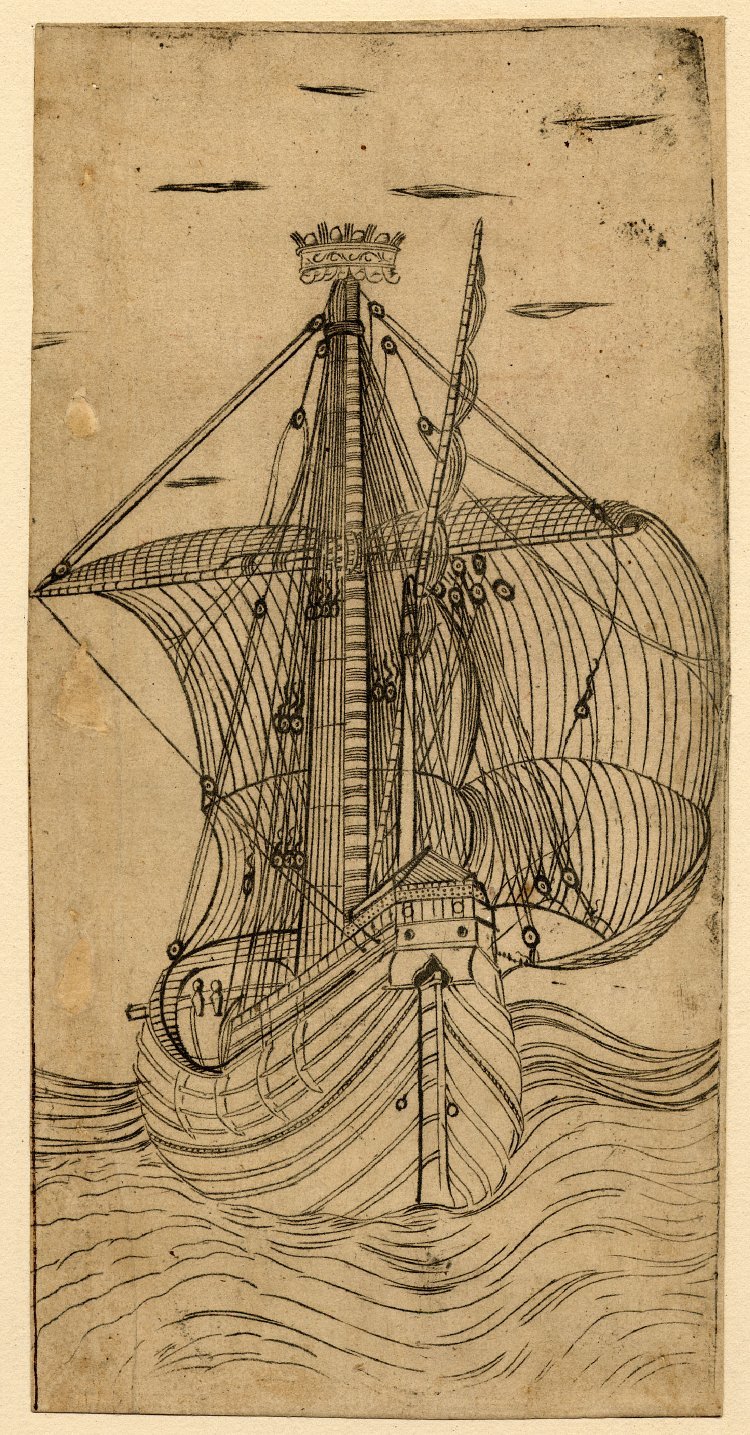
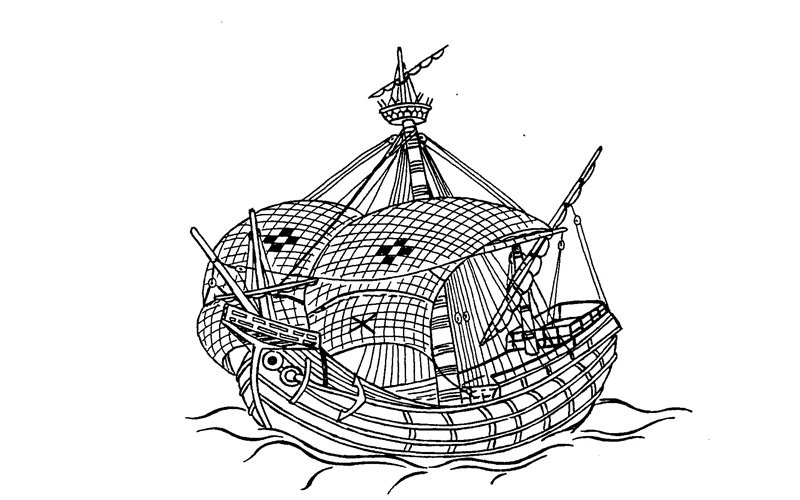
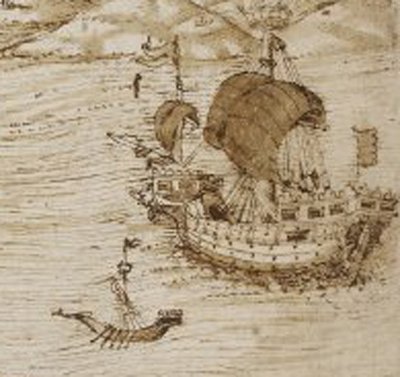
Thanks, Cristiano. One of the images in the book led me to this ship from Fra Mauro's Mappamundi of about 1459. It shows a venetian merchantman similar to the Trombetta navi. Note the single mast. I wonder if my nave only had one mast Steven note the lack of sheer Merry Xmas Dick

-
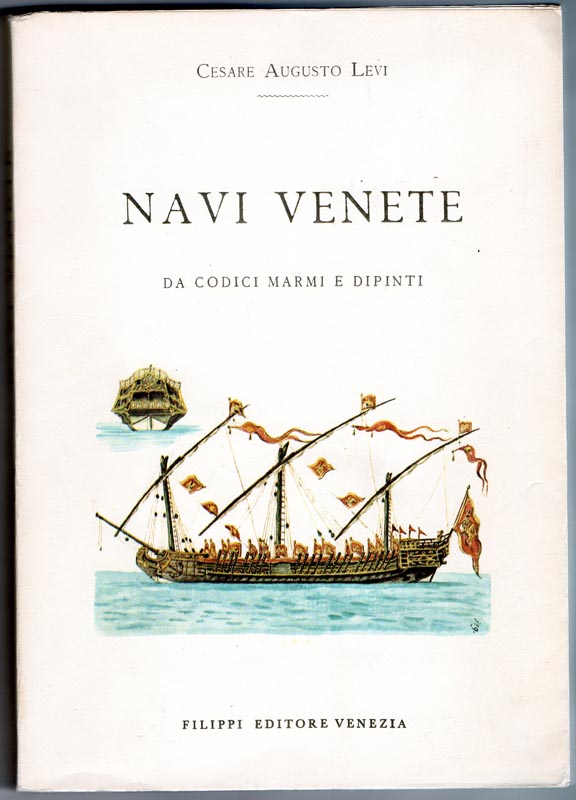
Cristiano I have now obtained the book by Cesare Augusto Levi. It has quite a number of images of venetian shipping of various centuries. Many are redrawn for the book and there are several images of navi that I have not seen before with interesting rigging details. Thanks for the recommendation. Buon natale Dick
-
Thanks, chaps. I lean to Carl's interpretation which would allow quick belaying of a line. The stand I use, Steven, is a monitor stand I found in a pawn shop. Indeed, it allows positioning of the ship to facilitate access. Very useful. How is sheer expressed, as a percentage or a ratio? Dick
-
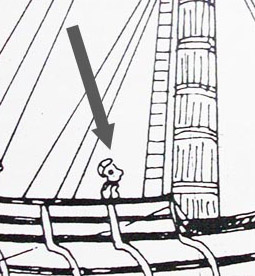
This figure abaft the mainmast is puzzling. It was thought by some to be a person but it is now thought to be a knighthead for the halyard. What is the dot in the middle of the knight? Dick