HOLIDAY DONATION DRIVE - SUPPORT MSW - DO YOUR PART TO KEEP THIS GREAT FORUM GOING! (Only 20 donations so far - C'mon guys!)
×

woodrat
-
Posts
835 -
Joined
-
Last visited
Content Type
Profiles
Forums
Gallery
Events
Everything posted by woodrat
-
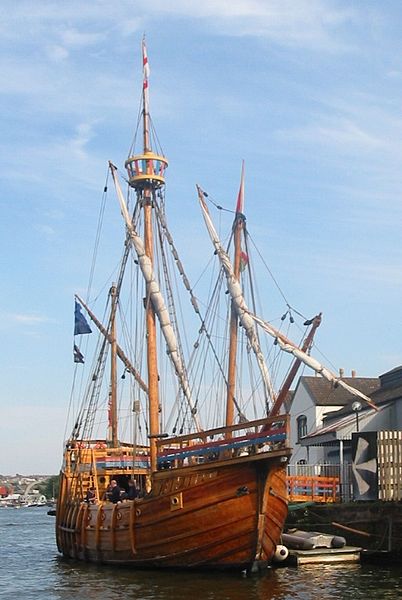
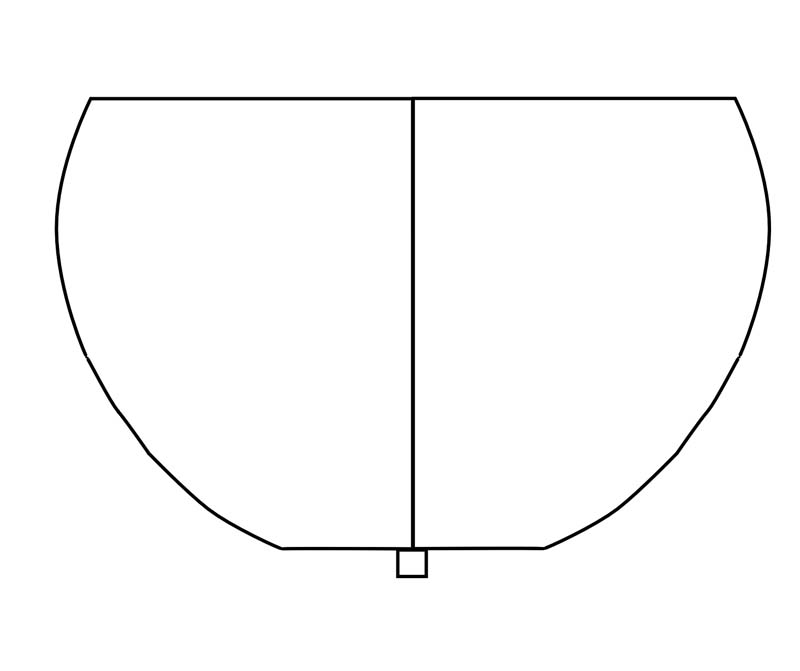
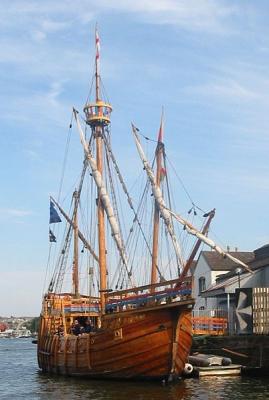
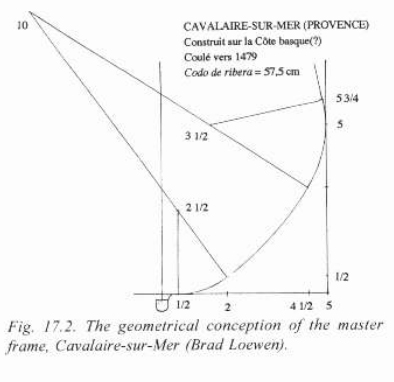
 How could I mind, George. welcome aboard. Steven, lovely pictures of the Matthew, a beautiful reconstruction (not a replica!) but what in heaven's name is that eighteenth century topsail doing above the mainyard! :Oh well, needs must! Not much tumblehome either. Interesting. Note the chafing gear on the mainstay which is secured to the stem-knee through the forecastle deck. The cavalaire-sur-mer wreck Note the resemblance of this masterframe to my Trombetta masterframe (details below) Dick
-
Thank you Tadeusz. I saw her when I visited Lubeck some years ago. Your pictures show well the U-shaped cross section. Dick
-
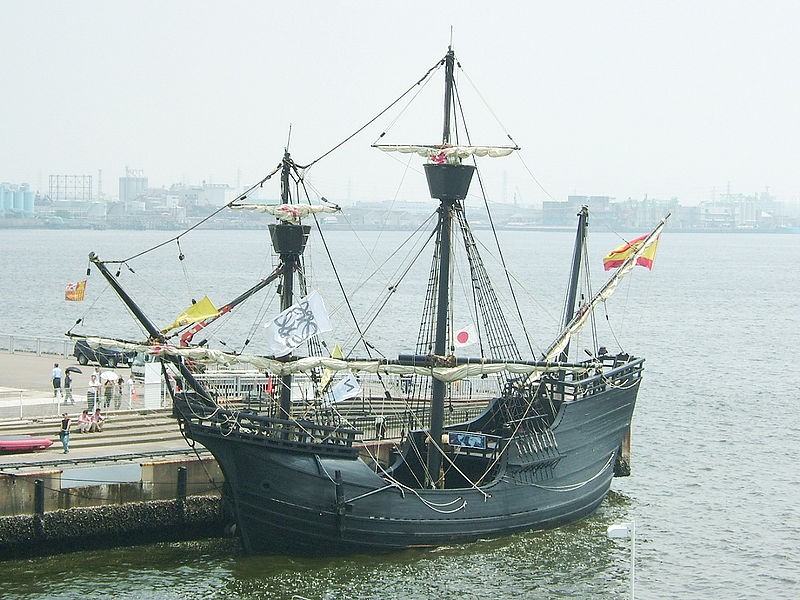
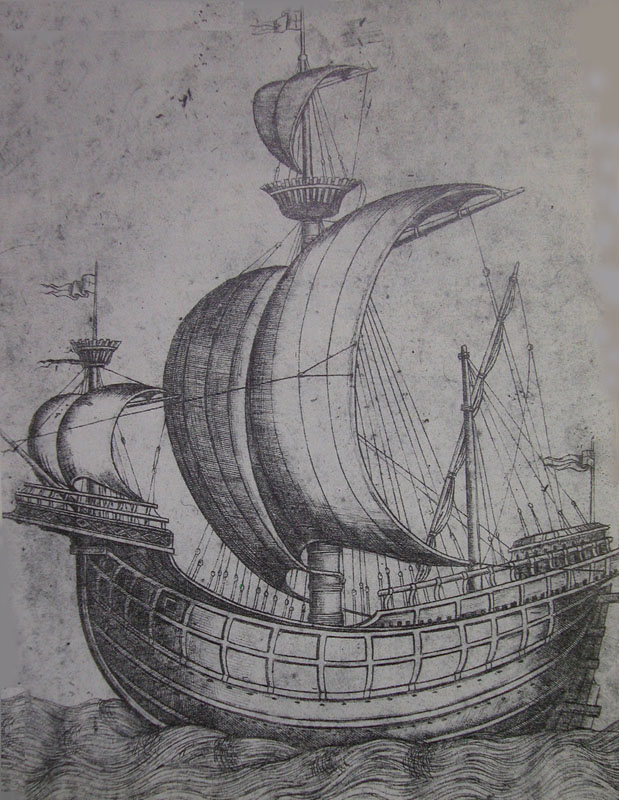
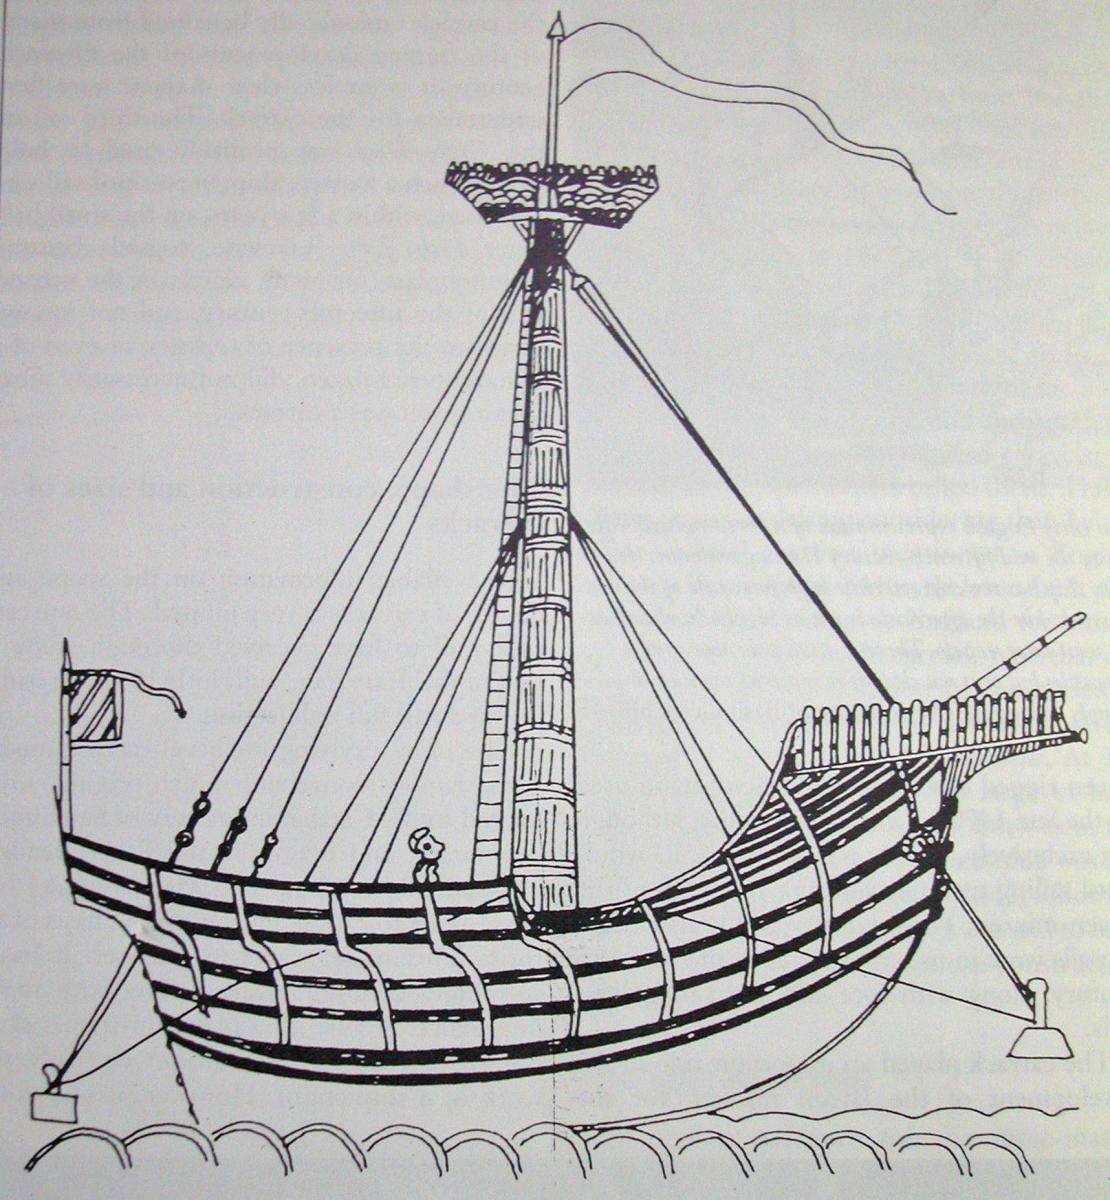
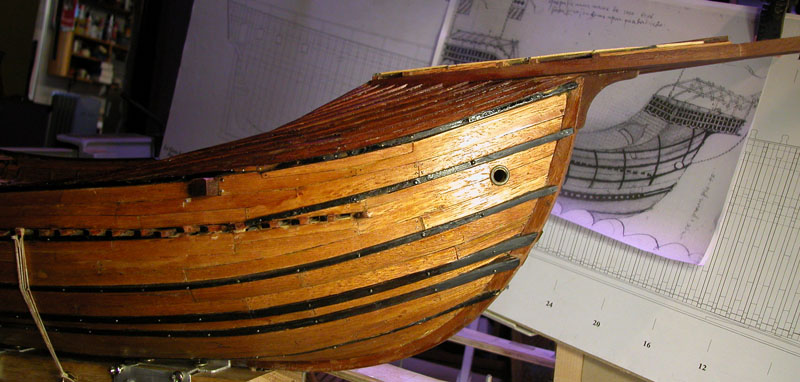
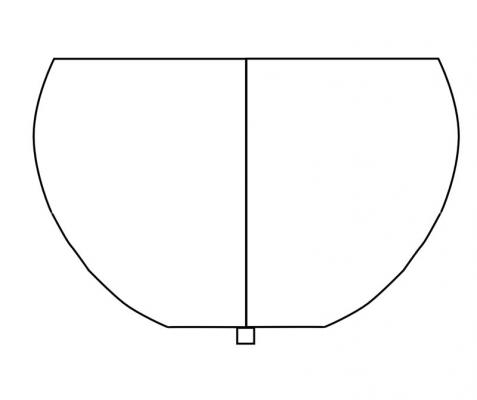
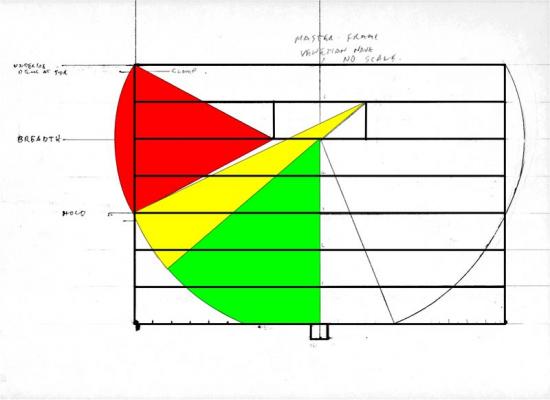
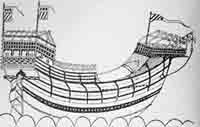
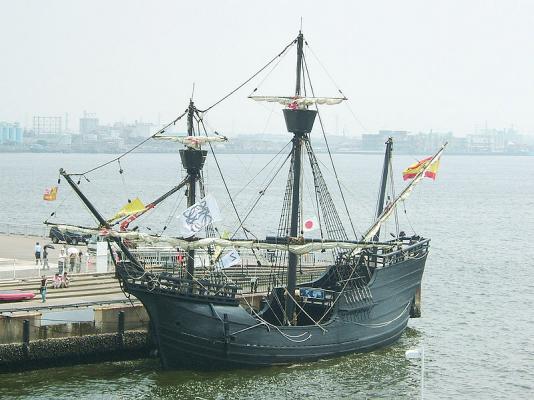
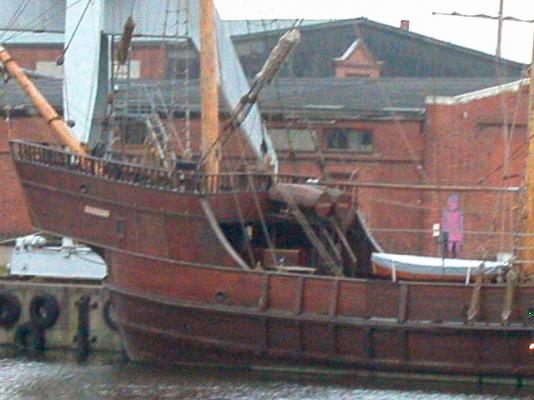
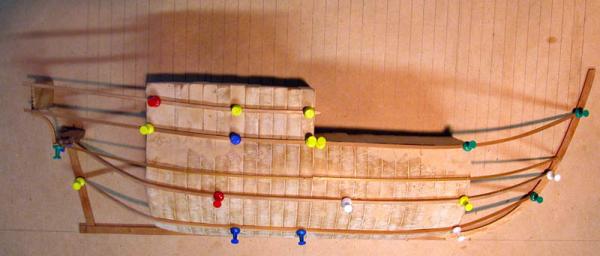
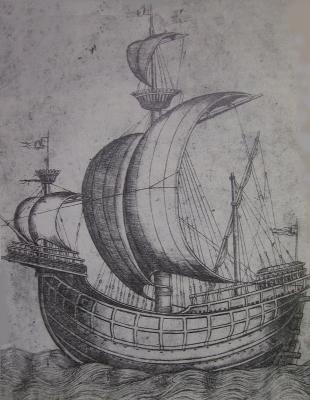
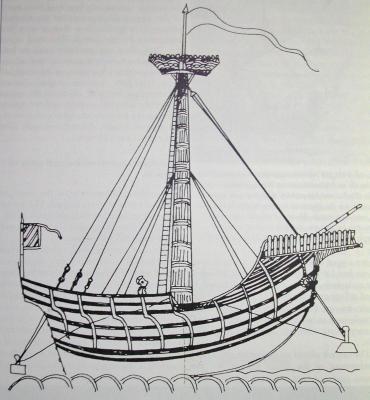
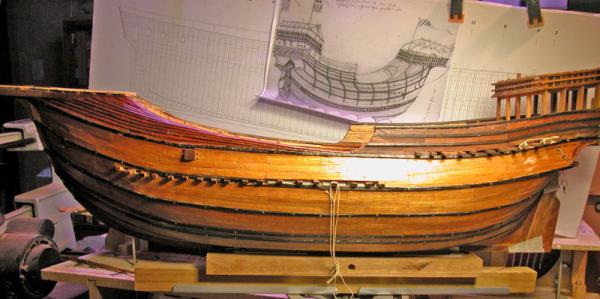
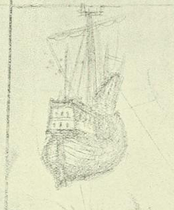
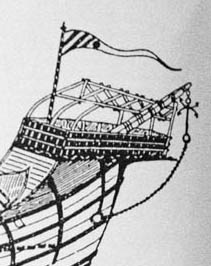
Thanks Nenad M and Steven. Steven, I have given a lot of thought to this and I am sure that there was a large range of hull forms in use throughout the Mediterranean, not to mention northern Europe during the fifteenth century. I am sure the regional differences were large. As you say, iconographic information is of limited reliability with some exceptions, such as Carpaccio, and we need archaeological hard evidence. However, that said, I should point out that my reconstruction is of a particular ship and should not be regarded as a generic carrack. The Trombetta illustration, to my eye, indicated a finer entry into the water than many other illustrations show: One of the reasons for this may be the shape of the master frame which I developed based on almost contemporary evidence: This is in complete contrast to the U-shaped frames favoured by some of the northern european reconstructors of carracks e.g. this "replica" of the Nao Victoria which looks remarkably tubby: and this carrack from Lubeck: Using the technique of ribbands based on master frame and tail frames which I used to simulate the method of the mediterranean shipwrights of the time: I came up inevitably with somewhat finer lines. I do not claim my reconstruction is anything more than an amateurs essay at a somewhat hazy subject and I insist that all errors are mine and I treasure them. I agree that some iconography suggests that at least some venetian navi were finer in their lines and I attach a few examples: Note the variation in the hull shapes Another carrack from the Trombetta manuscript Whether experts agree or not, in the end I like the shape of my hull and probably that is all that counts as it has to sit on my mantelpiece Dick

-
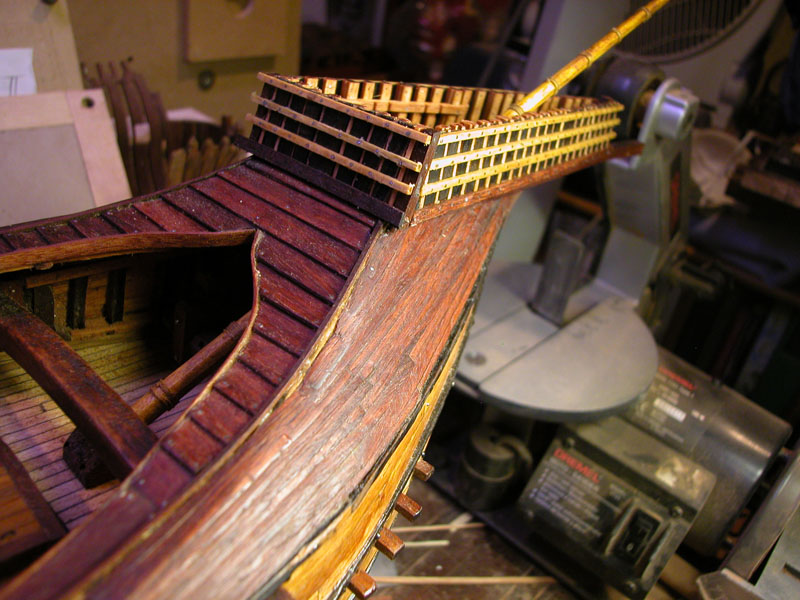
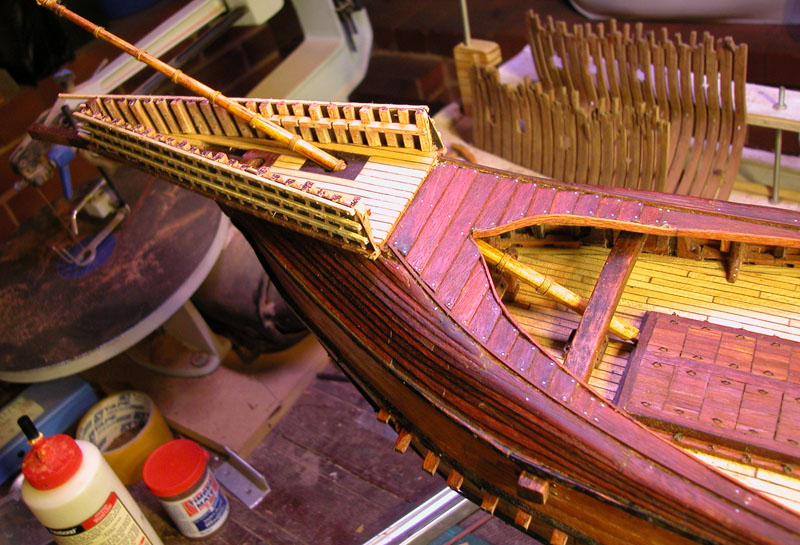
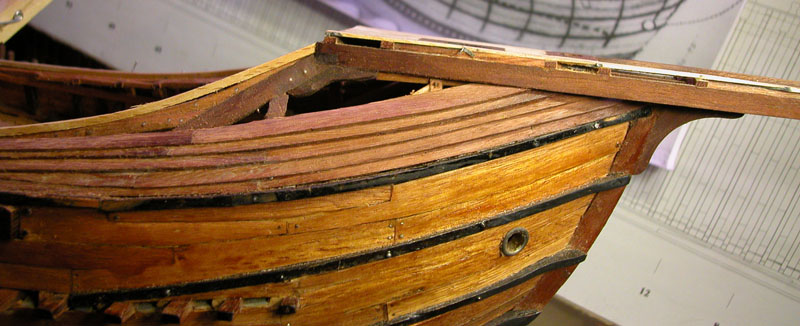
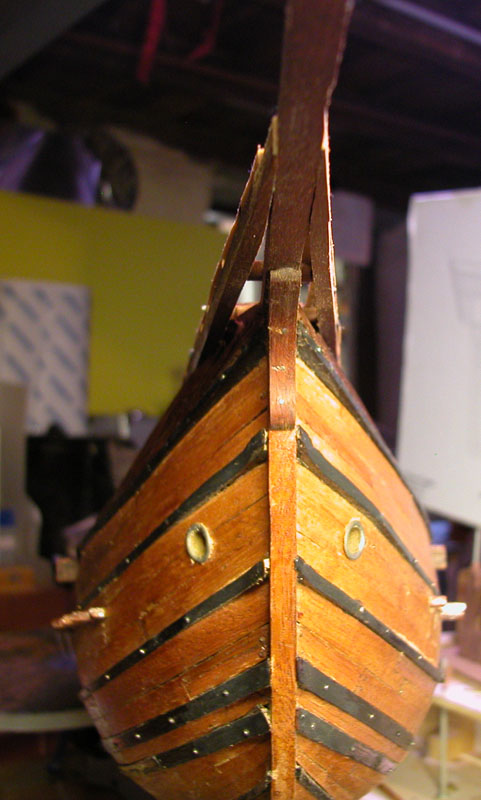
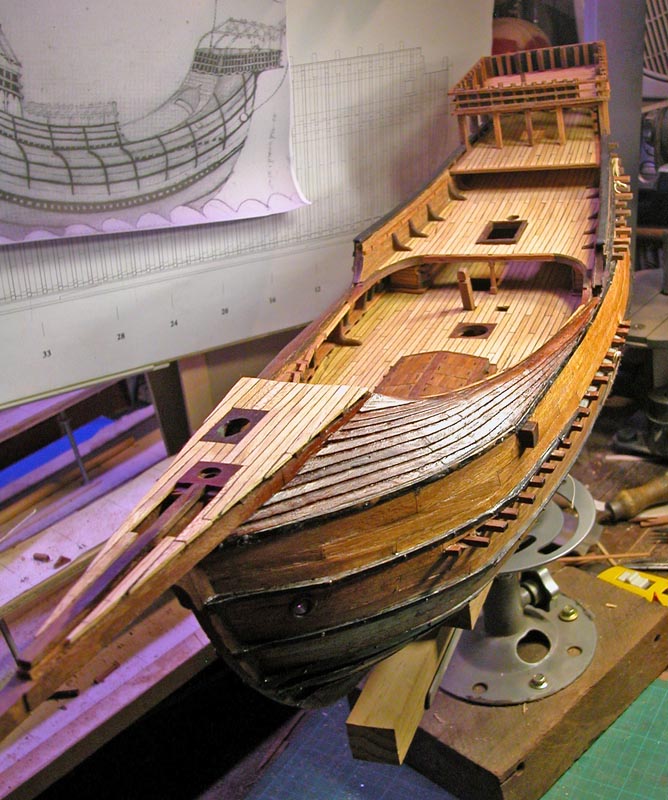
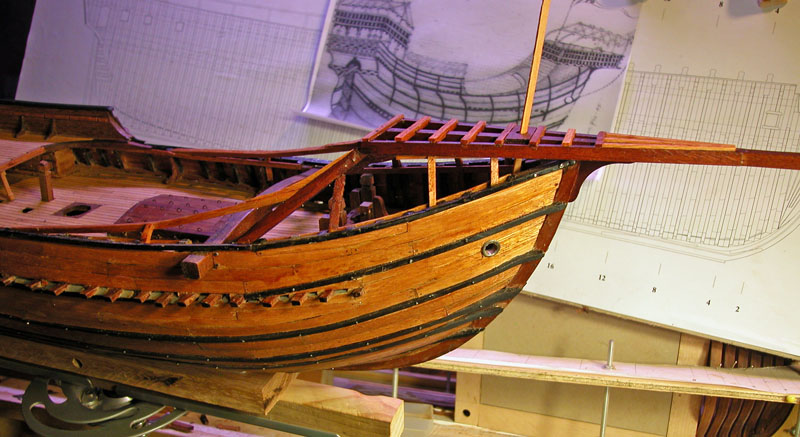
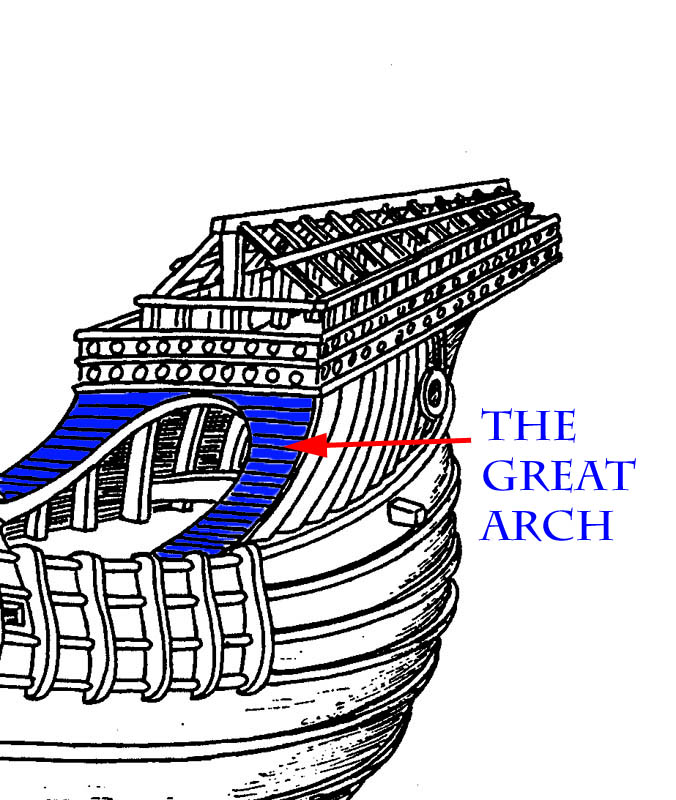
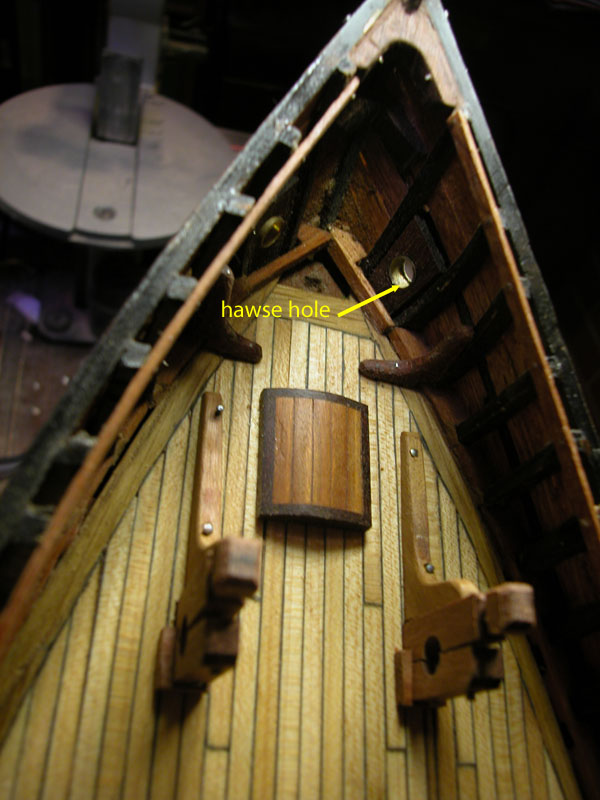
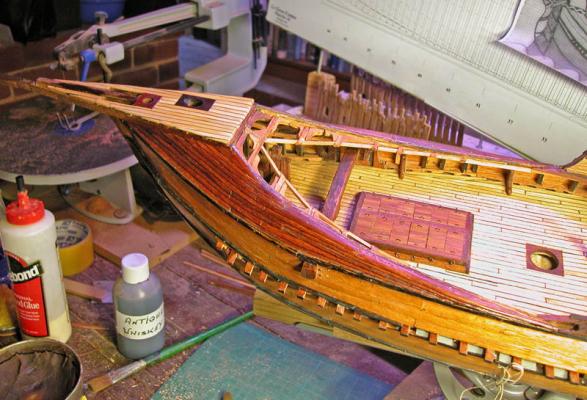
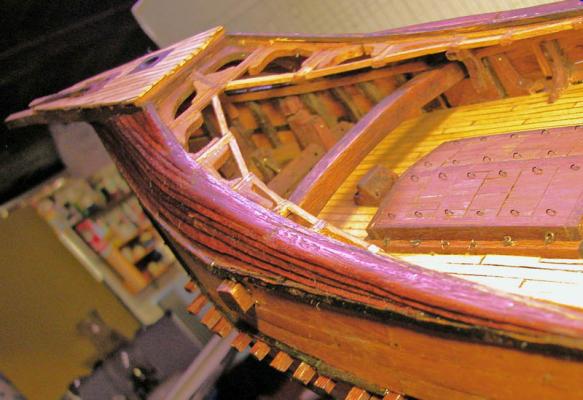
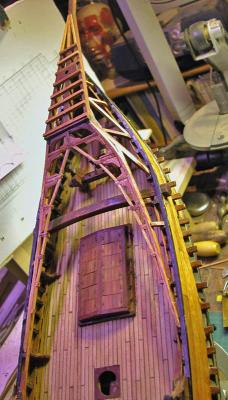
Thank you Cap'n BoB, John and steven. These pics show the clinker planking of the "great arch". These are the planks that the sailors would run along to gain access to the forecastle deck and the foremast. There seems to be not much protection to the sailors. Perhaps a 'lifeline' was rigged in rough weather to prevent losses overside! Dick


- 632 replies
-
- 13
-

-
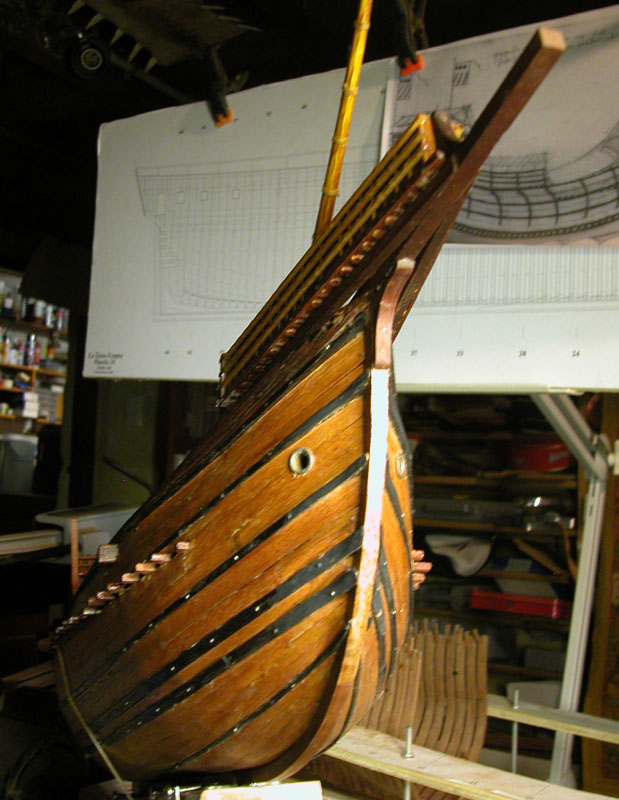
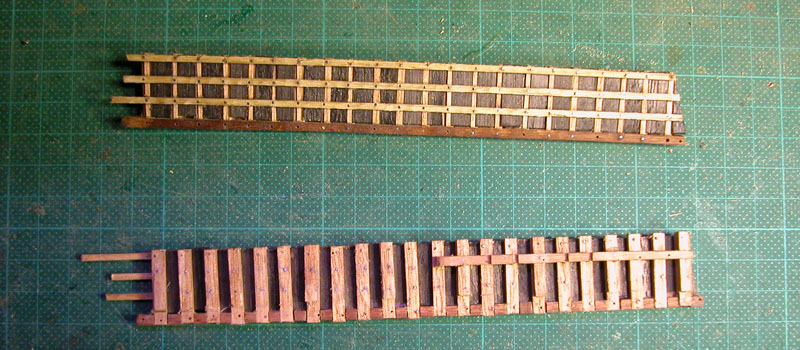
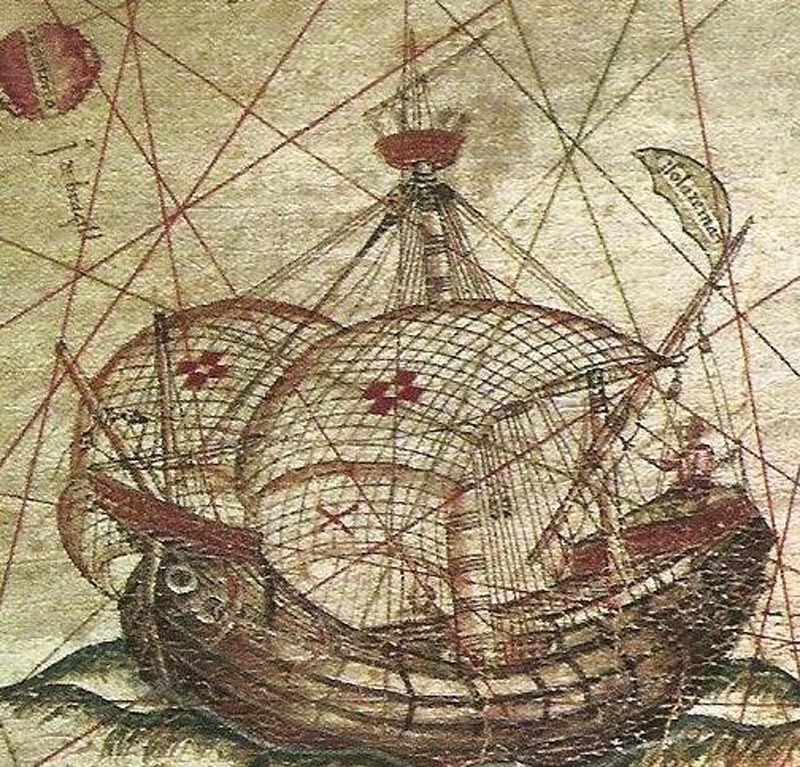
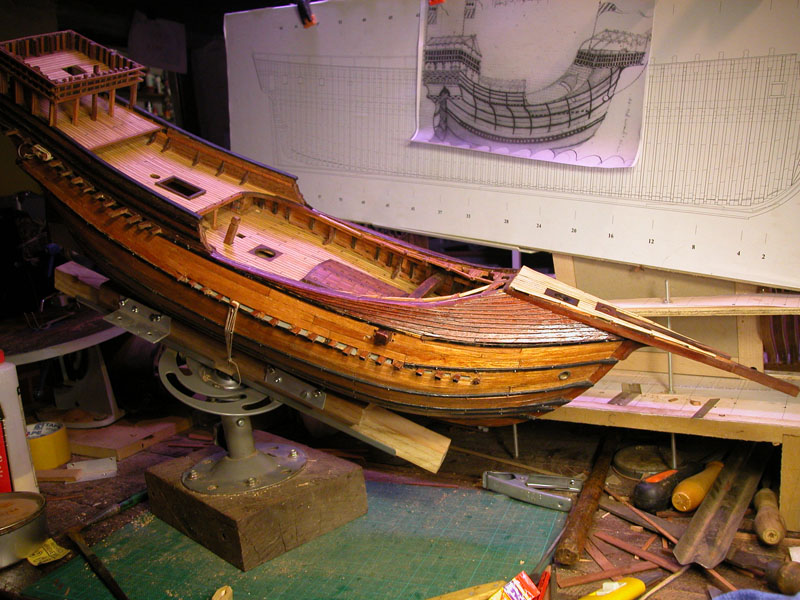
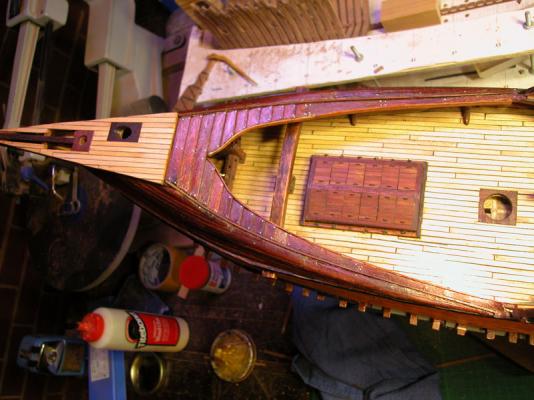
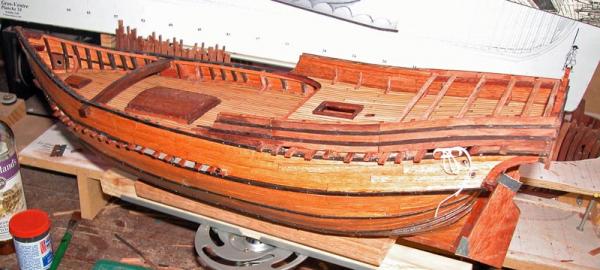
Thanks JesseLee and Steven. I have now completed the clinker planking under the forecastle and a beast of a job it was. I am moderately happy with the result. I used as a guide the excellent miniature from the Benincasa map (1482) which represents a very close approximation to the Trombetta nave:


- 632 replies
-
- 12
-
-
Thank you Felelo, most kind. But there are still a few things I wish I could go back and redo. Second-guessing long dead shipwrights is an interesting process. The rigging promises to be a real challenge, Dick
-
Yes, Steven, the narrowness worried me. Anything wider in this very large ship may have been unwieldy or even unstable, hence the tumblehome. The drawing seems to show a tumblehome here. Dick The forestay ropes are seen well in the Tavola Strozzi, are presumably lashed together in their mid portion and separated at either end

-
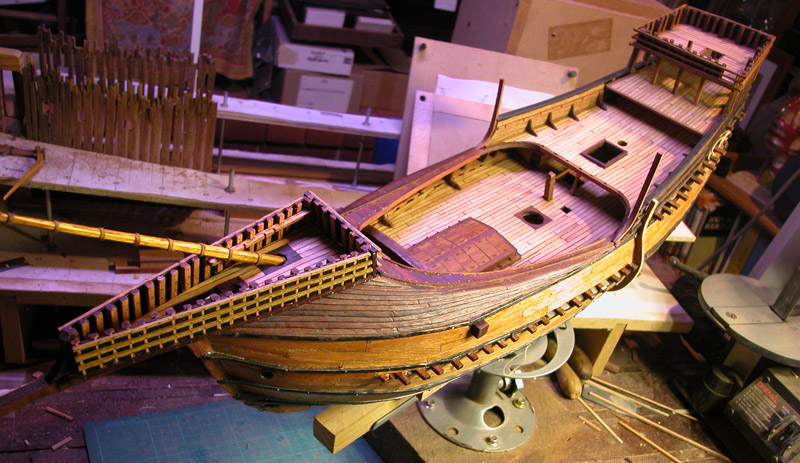
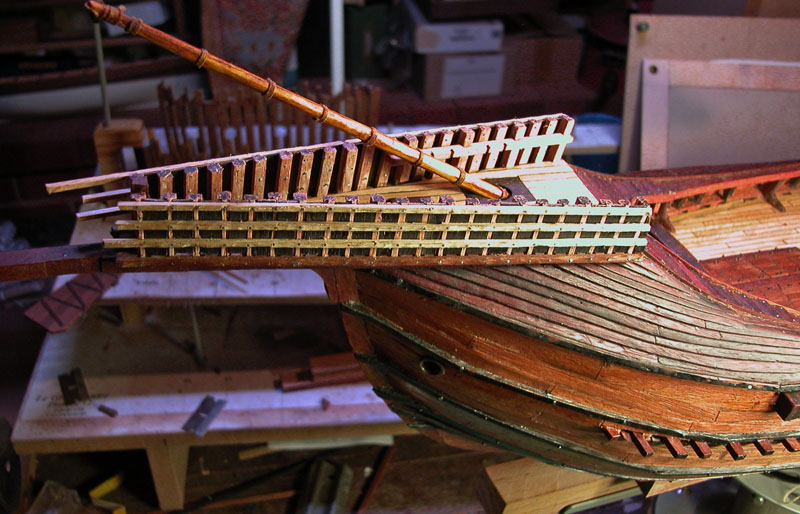
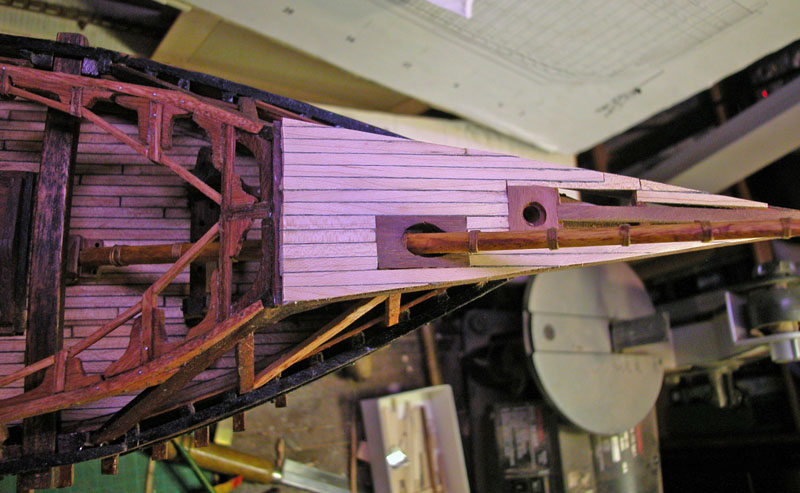
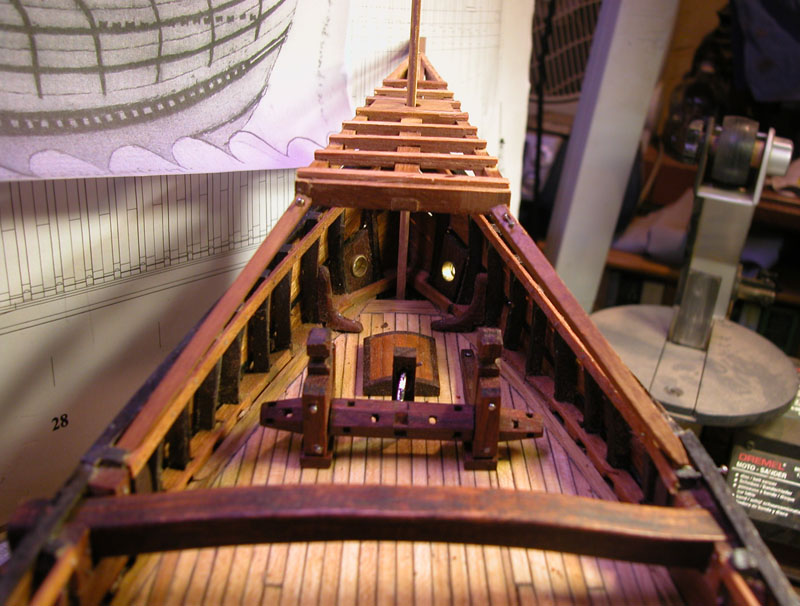
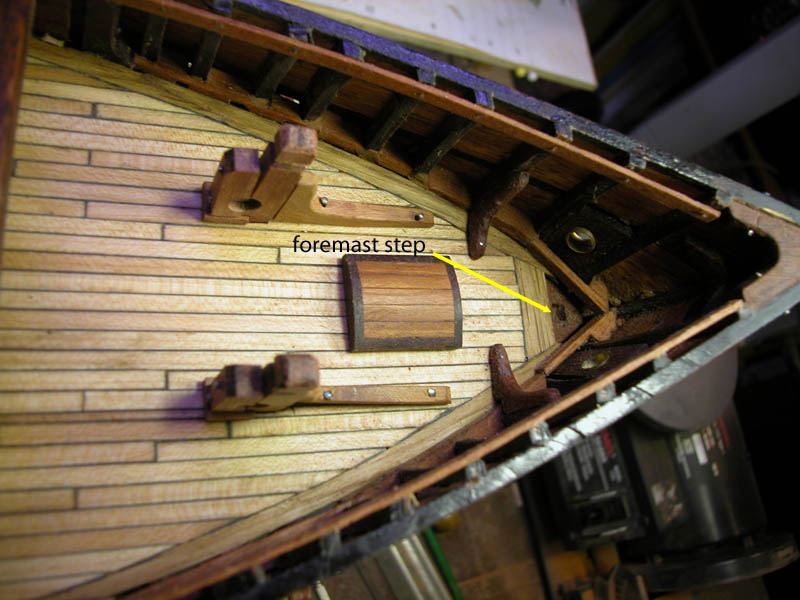
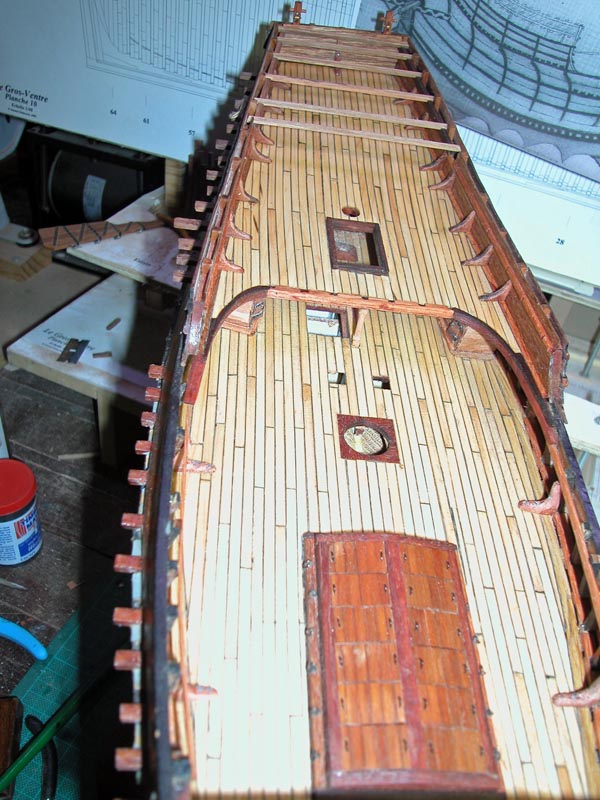
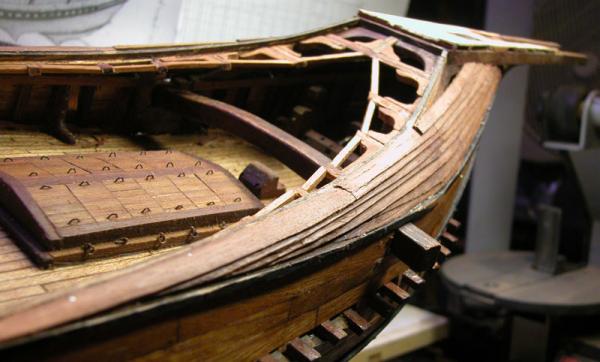
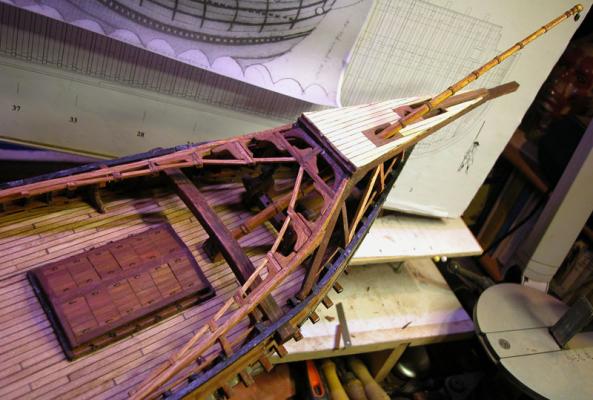
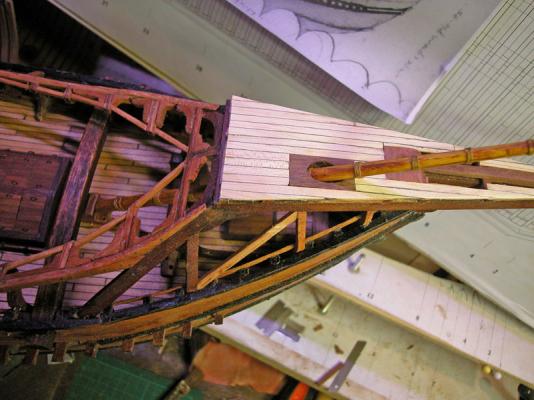
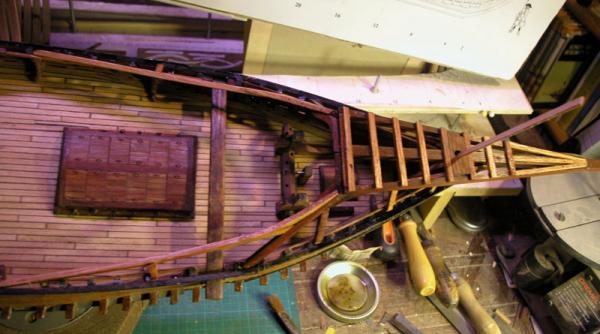
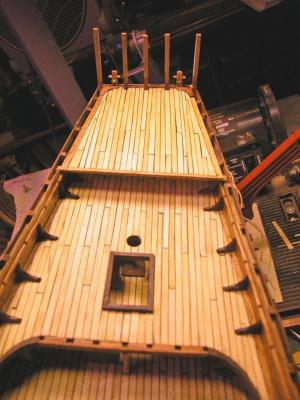
The castle planked showing foremast and bowsprit partners. The gaps in the planking allow passage of the mainstay ropes which pass around the knee of the stem

-
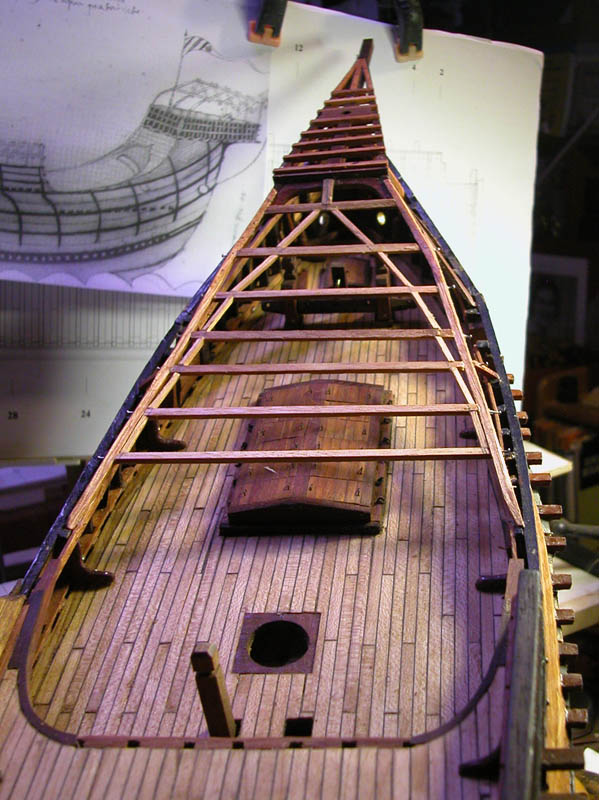
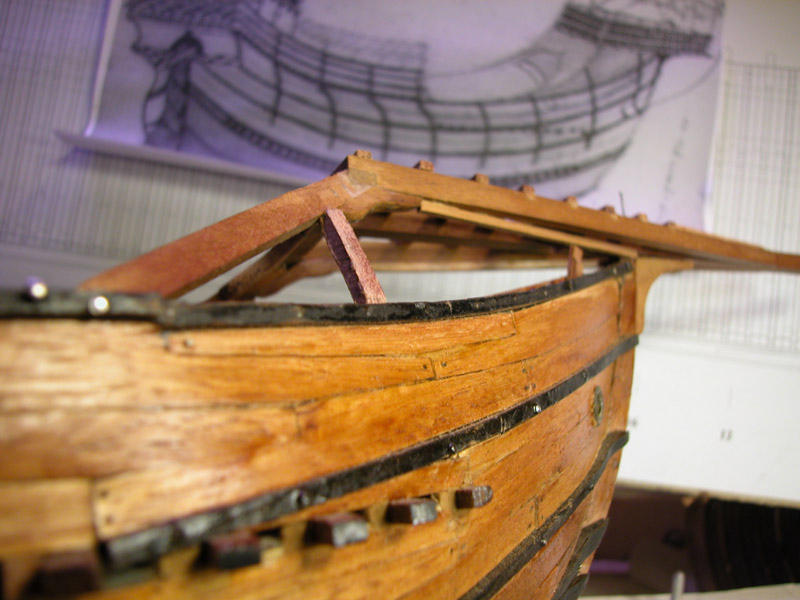
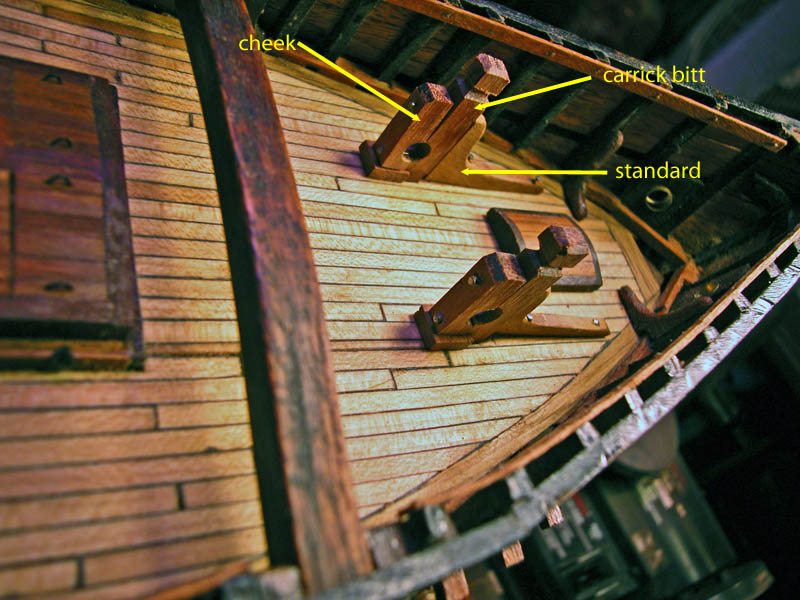
Further strengthening of the great arch and castle was required with vertical and horizontal knees and cross-bracing. I think it is strong enough now. Dick

- 632 replies
-
- 10
-
-
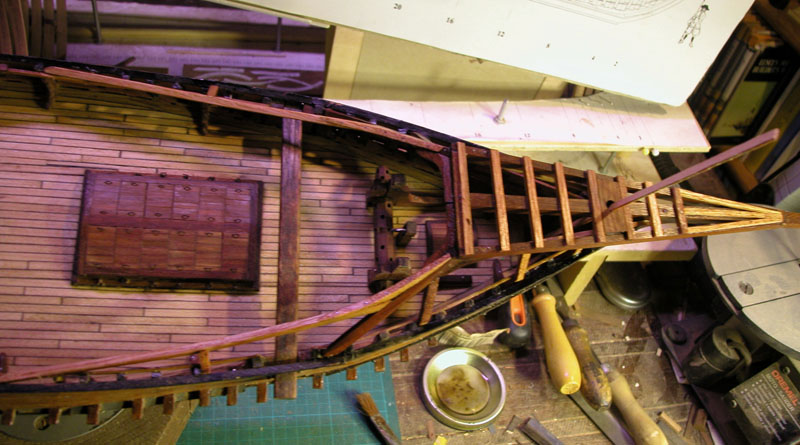
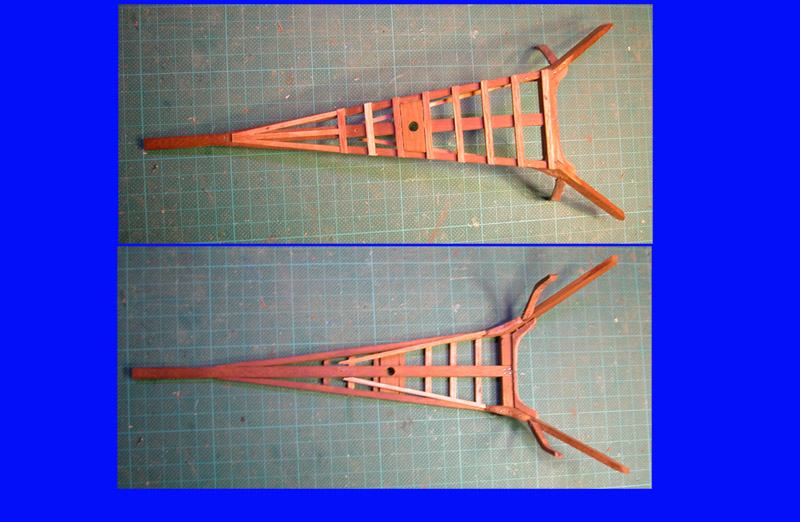
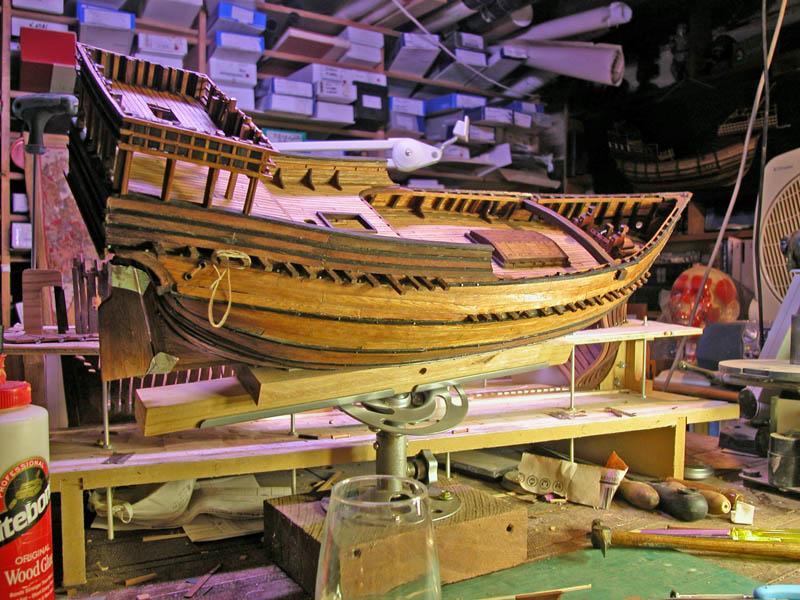
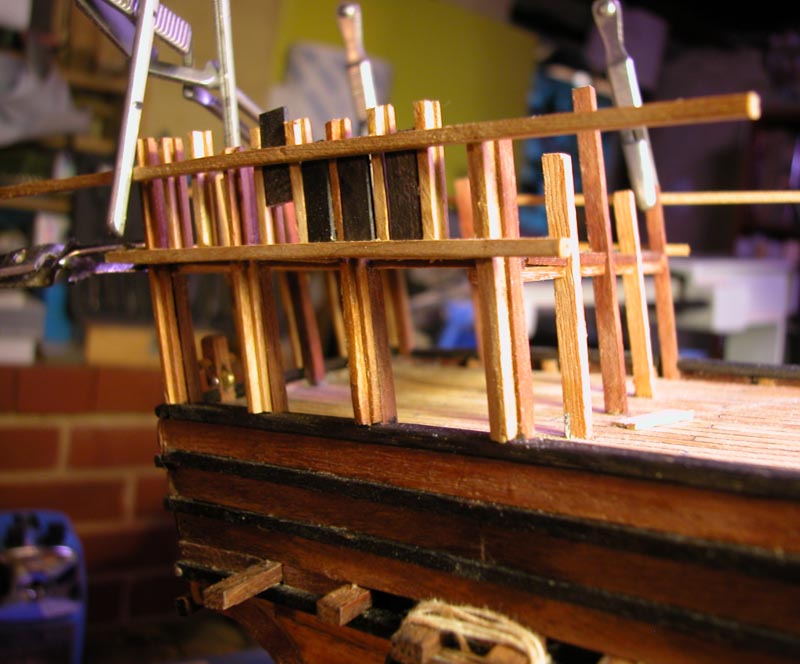
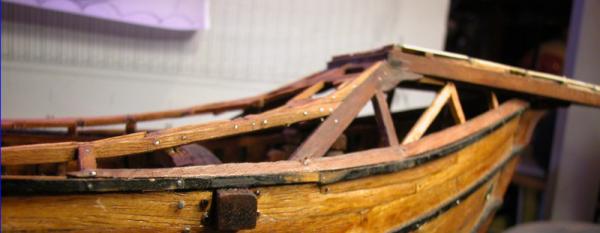
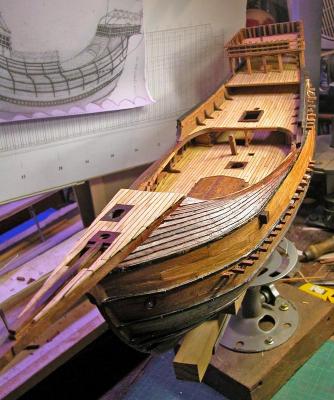
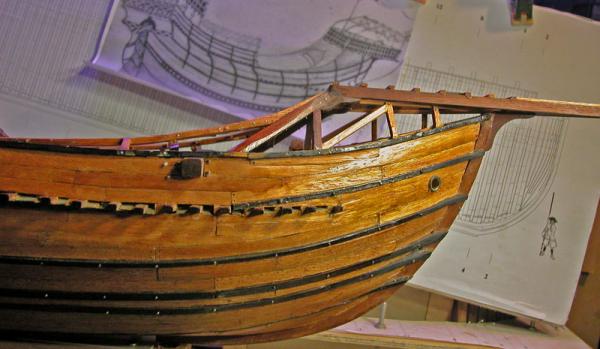
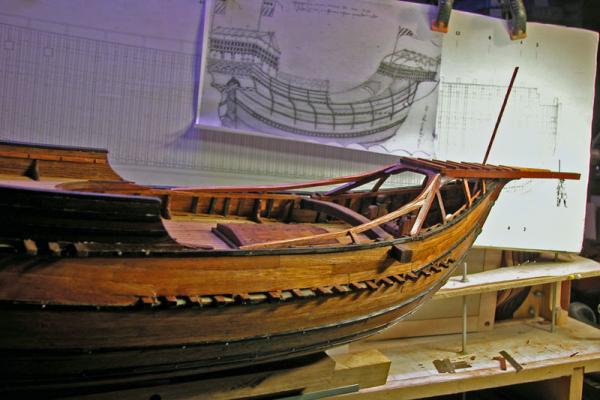
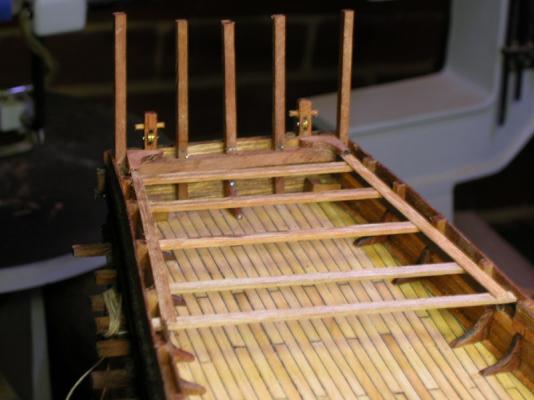
Forecastle framing complete. Now to do the clinker planking below the castle. I will need further framing to support the "Great Arch" Dick


-
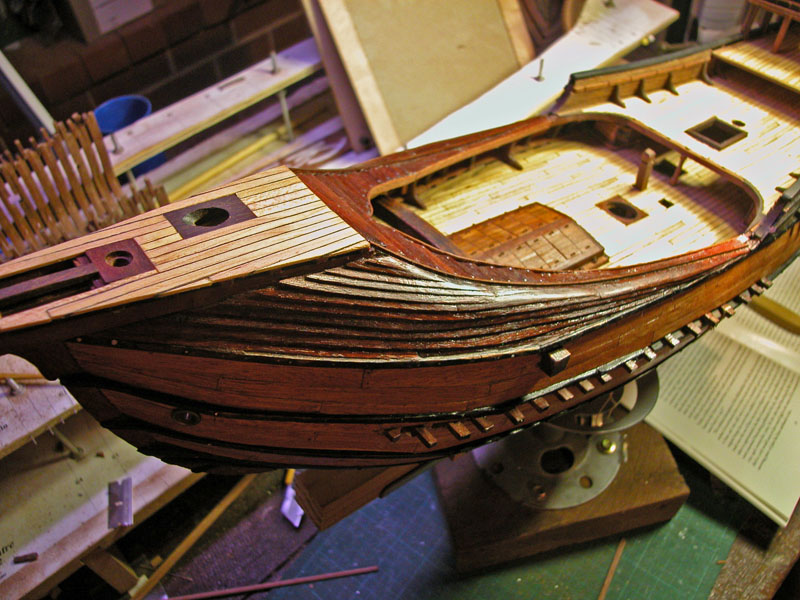
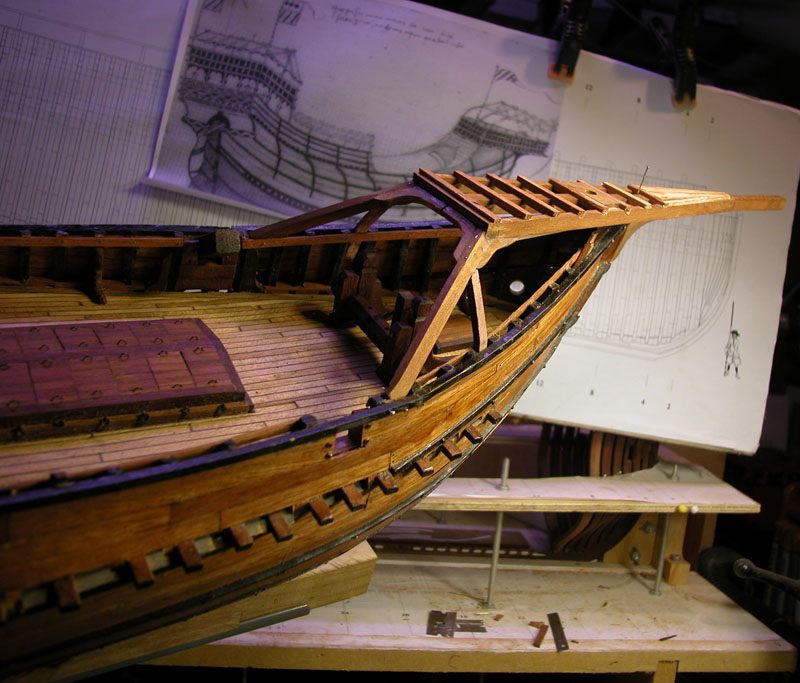
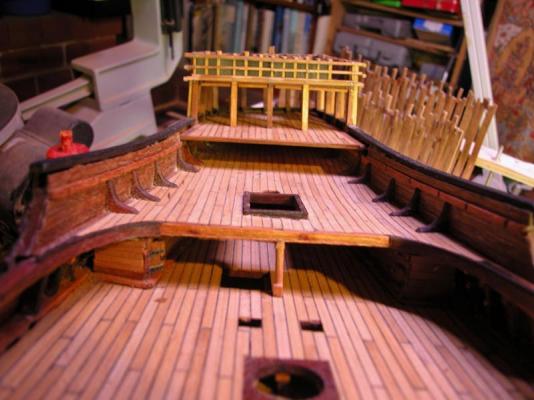
Thank you Vivian, Nenad and Steven and Happy New Year. Here are more progress pics of the forecastle. The forecastle may seem narrow but I have followed the original drawing faithfully. This allows a lot of tumblehome for the clinker planking below the forecastle, improves water shedding and looks better. I am sure there was a lot of variation among shipwrights as to forecastle design. Dick


- 632 replies
-
- 11
-
-
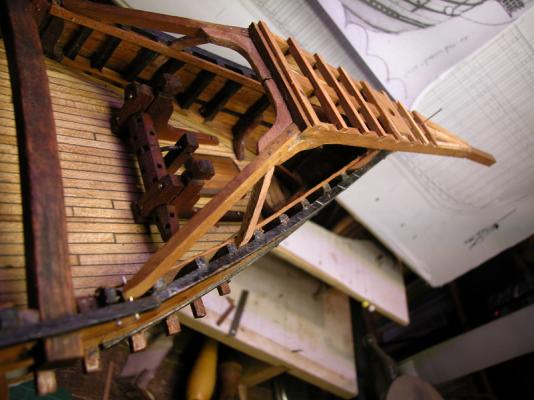
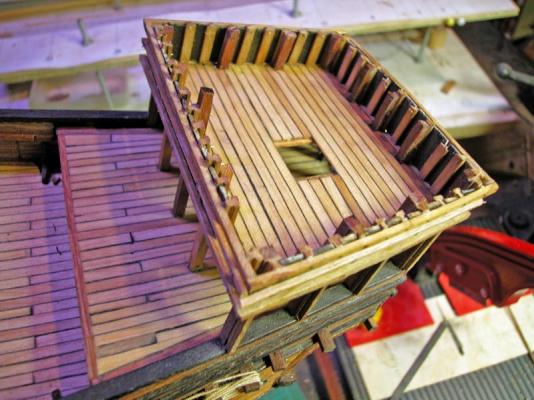
Due to some shed time over the xmas break, I have been able to make a good start on the forecastle. This is the forecastle base.

- 632 replies
-
- 10
-
-
Thanks, Christiano. I had heard of this project but have not yet ordered the book as it is quite expensive. Maybe I will get an electronic copy. The wreck is possibly a century later than the Trombetta nave but many details would have remained similar. Dick
-
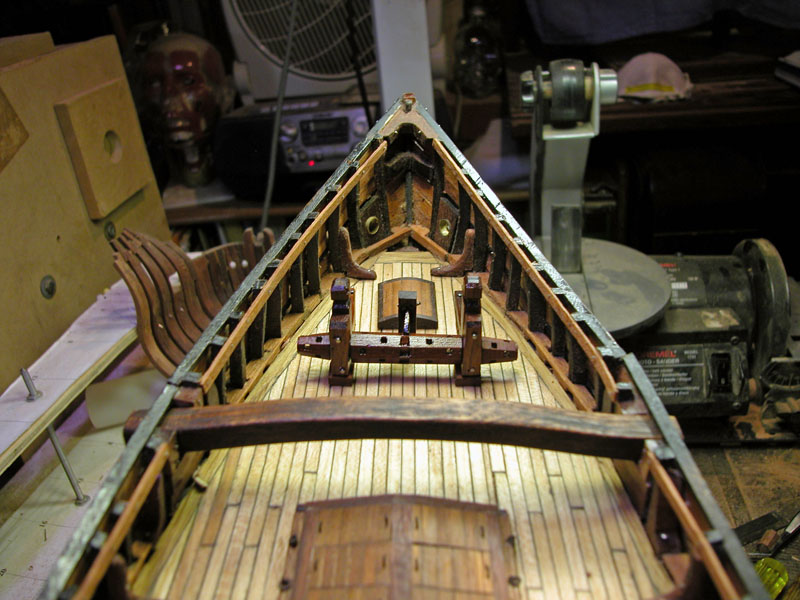
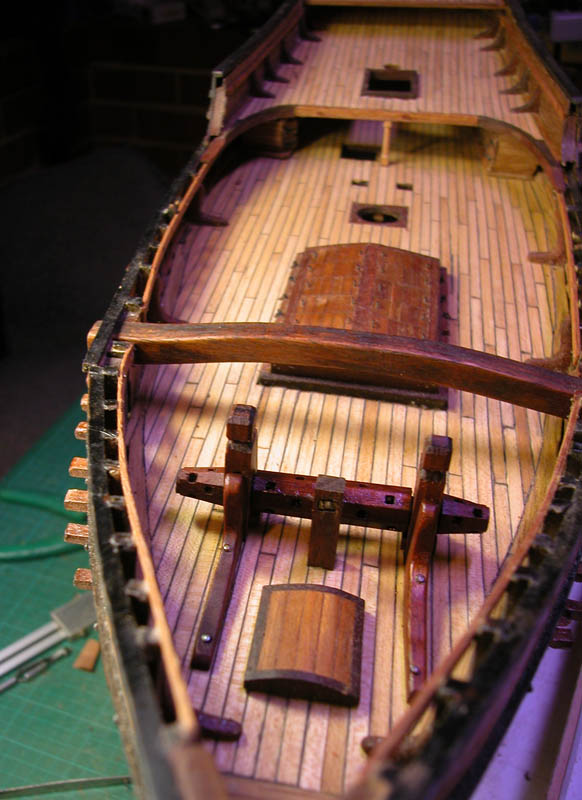
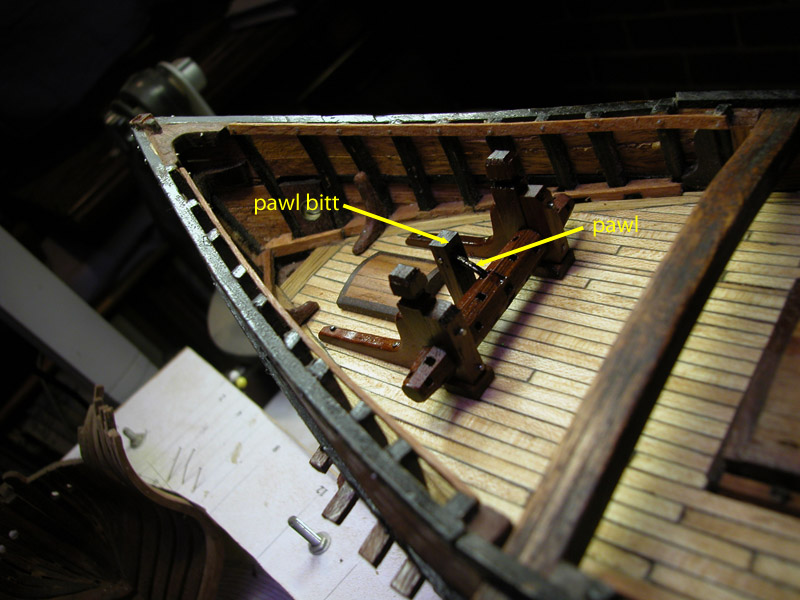
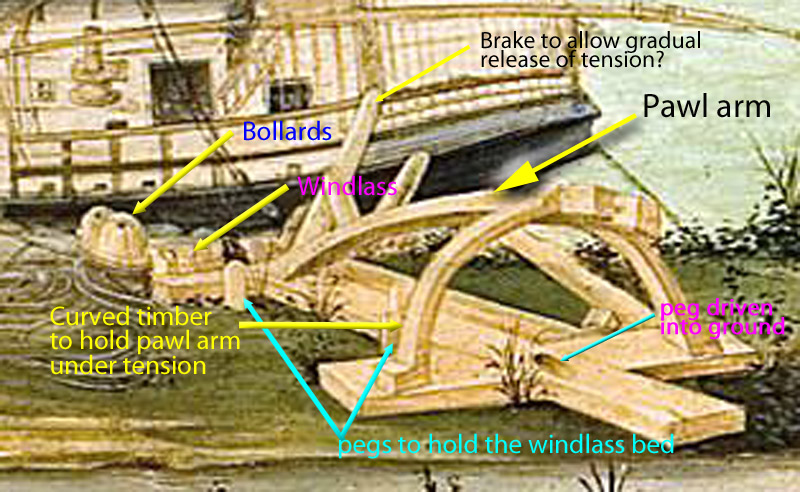
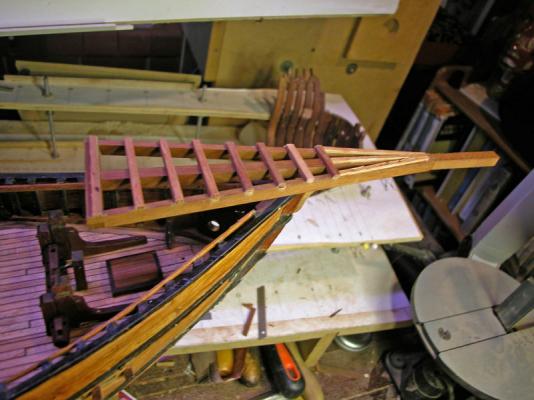
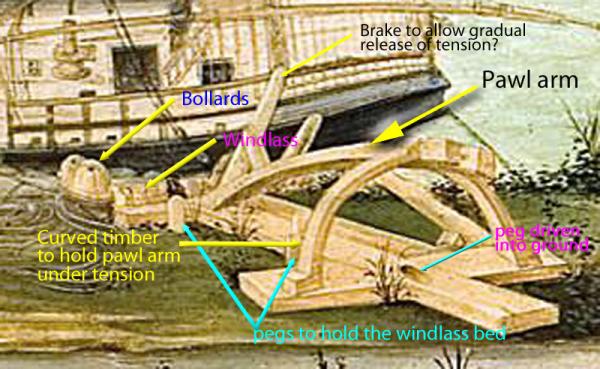
This is my interpretation of the fifteenth century Botticelli windlass after due pondering. The windlass would be used to tilt the ship by hauling on the mainmast so as to allow cleaning of the hull and replacement of sacrificial planking. The windlass would have to be able to be moved from place to place and to be held with pegs to the ground. The pawl mechanism would have to be VERY reliable and the cables in good repair. Sudden loss of the tension on the mainmast would be catastrophic! Dick
-
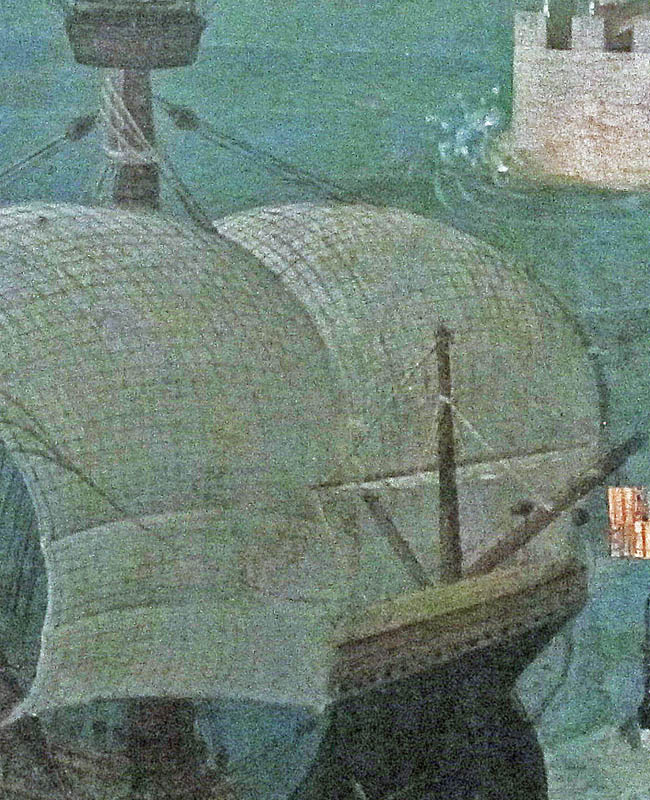
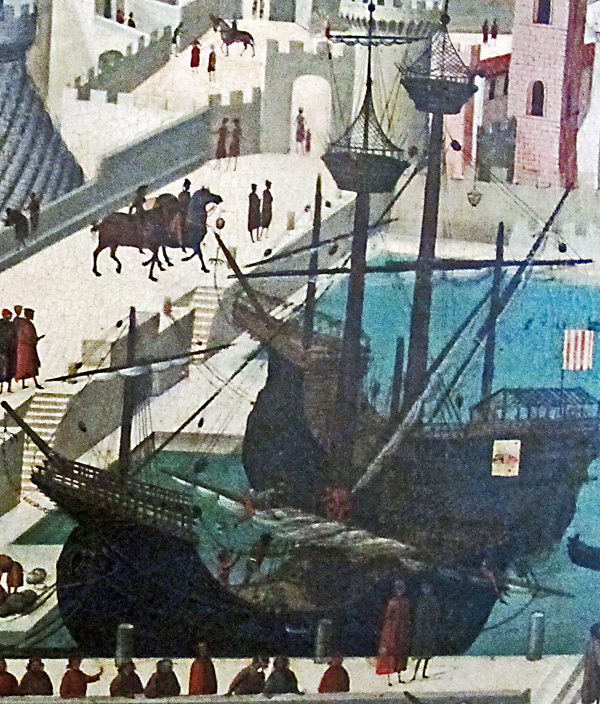
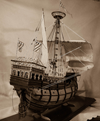
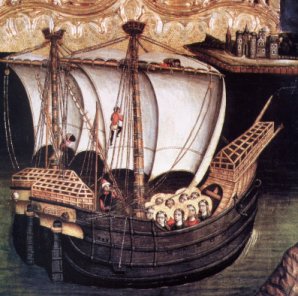
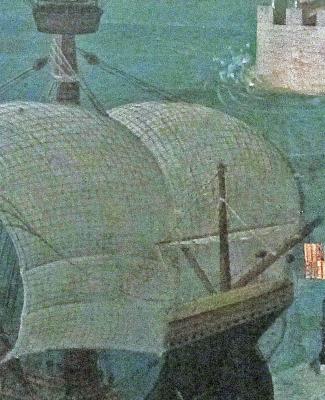
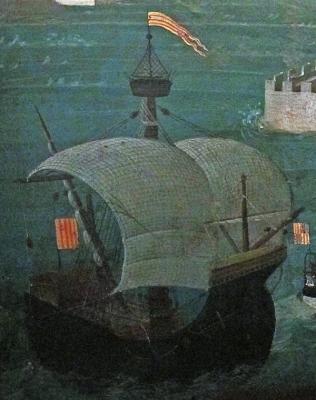
A lovely little picture with a wealth of detail, Steven. Note how the mainyard has been lowered to allow the mainsail to belly out in a fashion never seen in the eighteenth century. They liked their sails "full-bosomed", as it were, in the fifteenth century! As seen below Here is a further pic from same showing an interesting bustle in the waist where the mainsail is undergoing a "harbour-furl" with the yard fully lowered. Look how long the yard is! Merry Xmas from the Woodrat

-
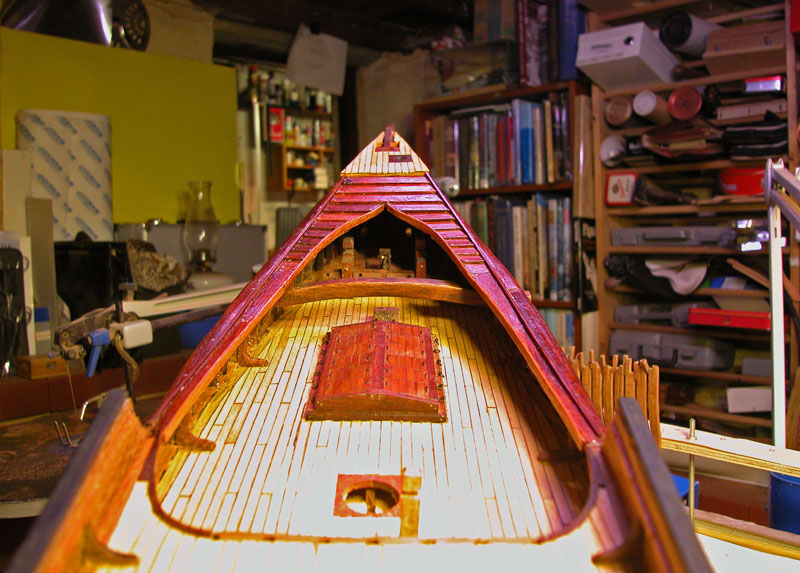
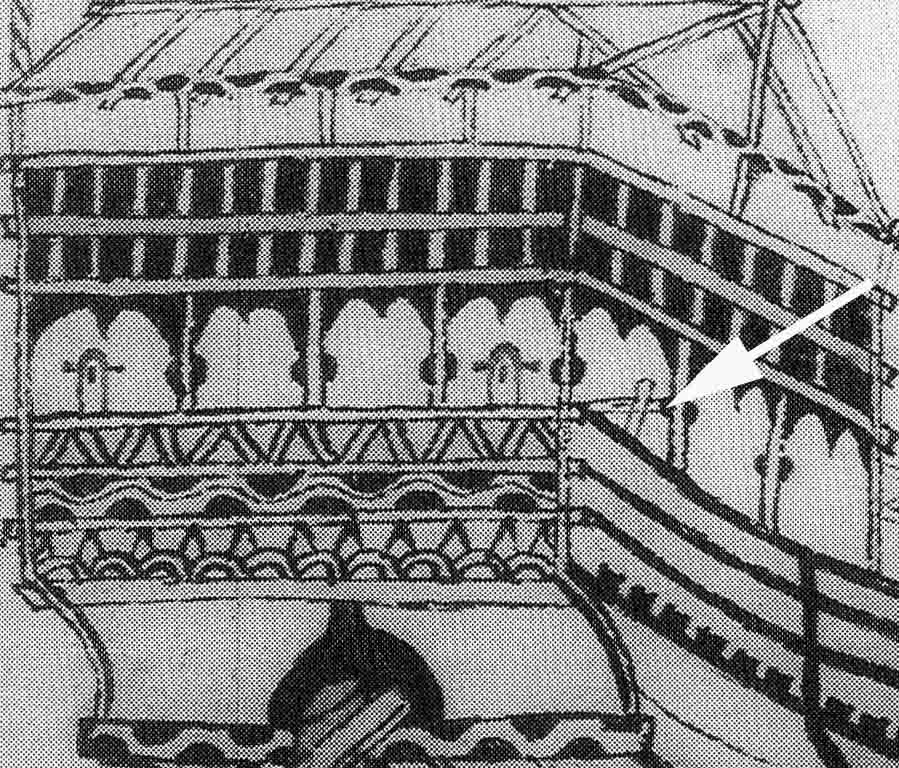
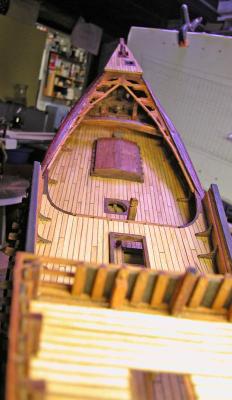
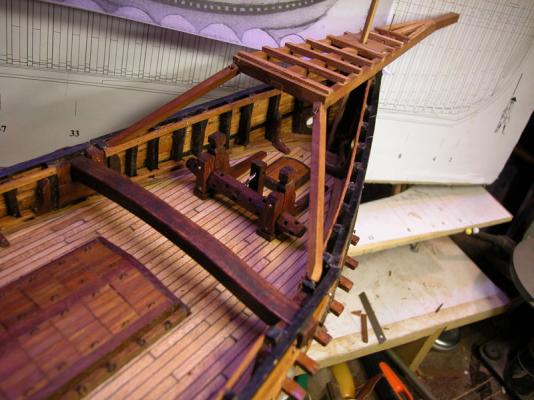
Thanks, Joe from Vegas. Steven, the thing in the foreground is, I believe, a windlass which has been used to pull the ship onto its side for careening via a cable to the mainmast. Please see below for my suggestions as to the function of its parts. Access to the forecastle is by walking up the clinker planks of the great arch. The poop is accessed by ladders. Note the tranverse orientation of the planking in the poop deck which I have also done in the model. Note also the apparently offset deck capstan. This is one of the few illustrations showing deck detail. Dick
-
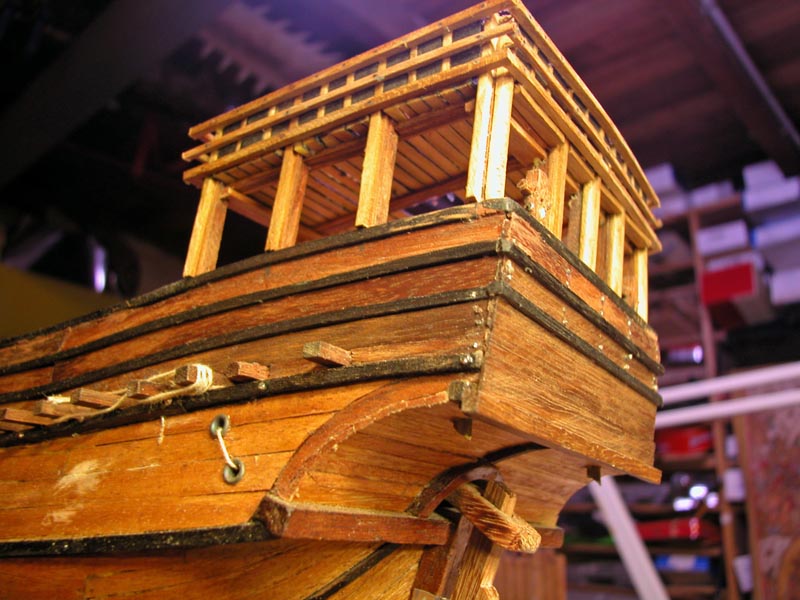
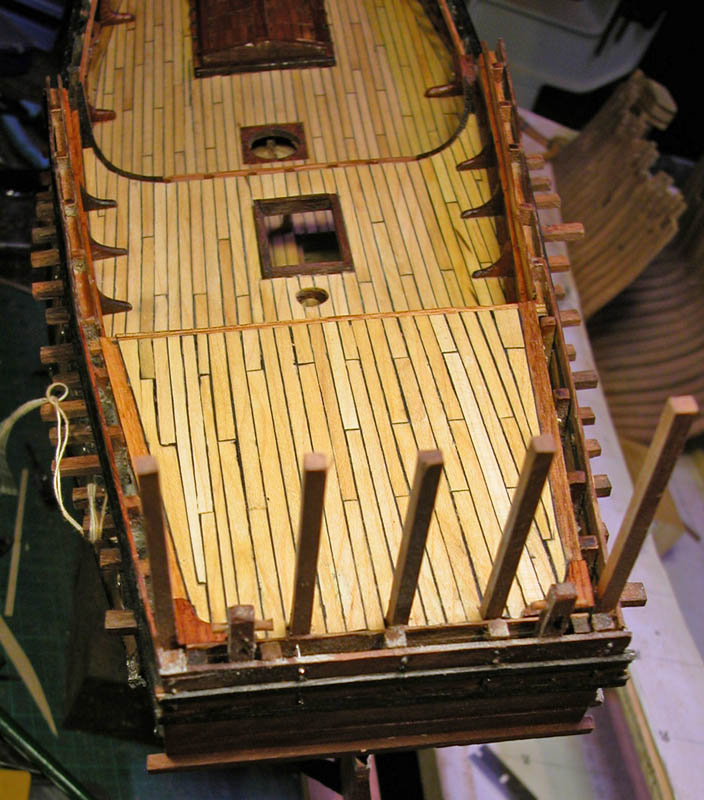
The following pics show tghe substantial completion of the sterncastle. I believe the sides of the castle would have contained removable blinds. These would have been removed to reduce windage and would have provided protection for archers if attacked Dick


- 632 replies
-
- 11
-
-
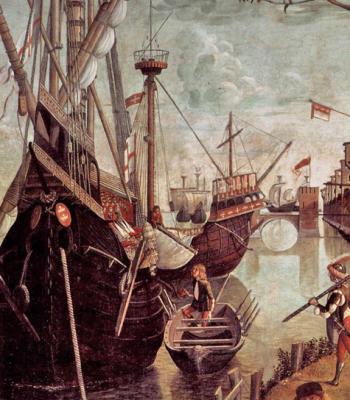
Yes, this detail from the arrival of St. Ursula at Cologne by Carpaccio clearly shows a steering oar AND a transom. I think that is a sheepskin over the stempost.

-
I have puzzled over what this structure (arrowed) could represent. I now think it is a crane for lifting objects such as buckets to the sterncastle. Dick

-
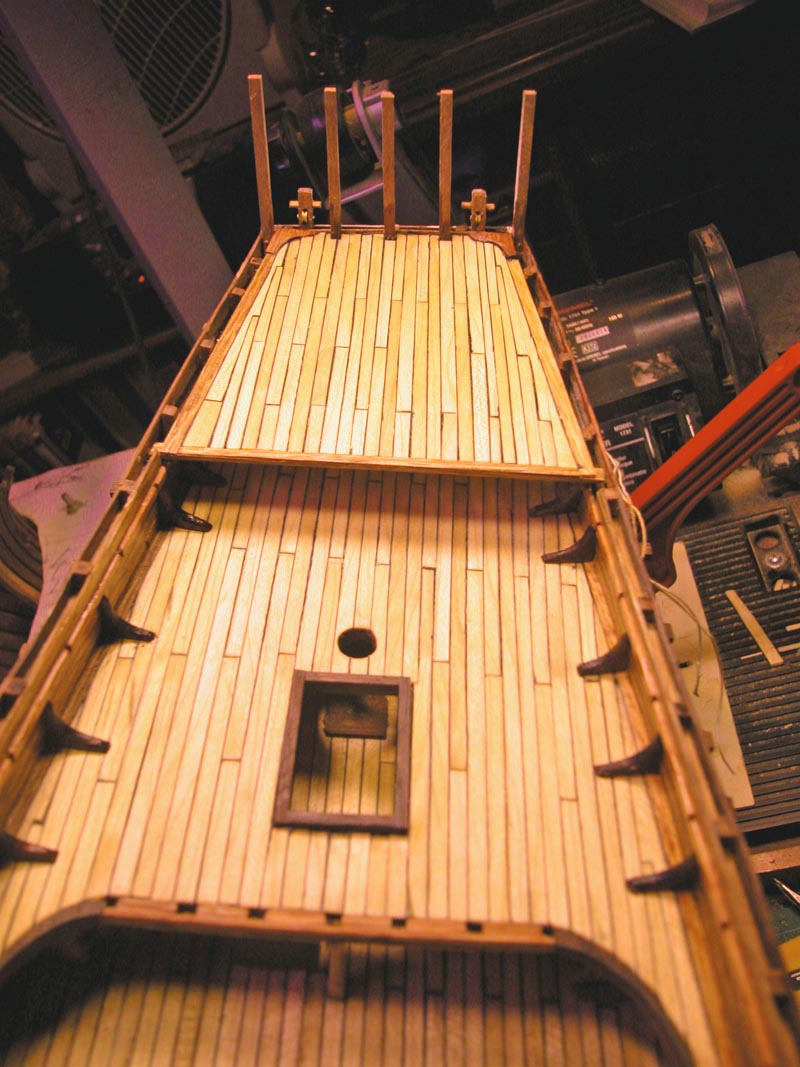
The gentlemans seats of ease in the poop!! The poop decking completed The supports for the sterncastle are started Dick


- 632 replies
-
- 12
-
-
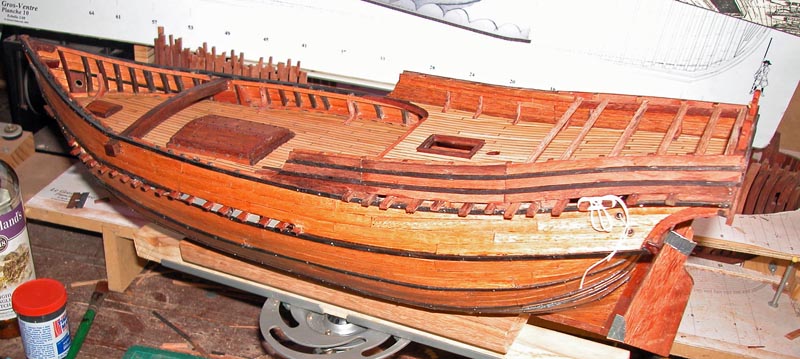
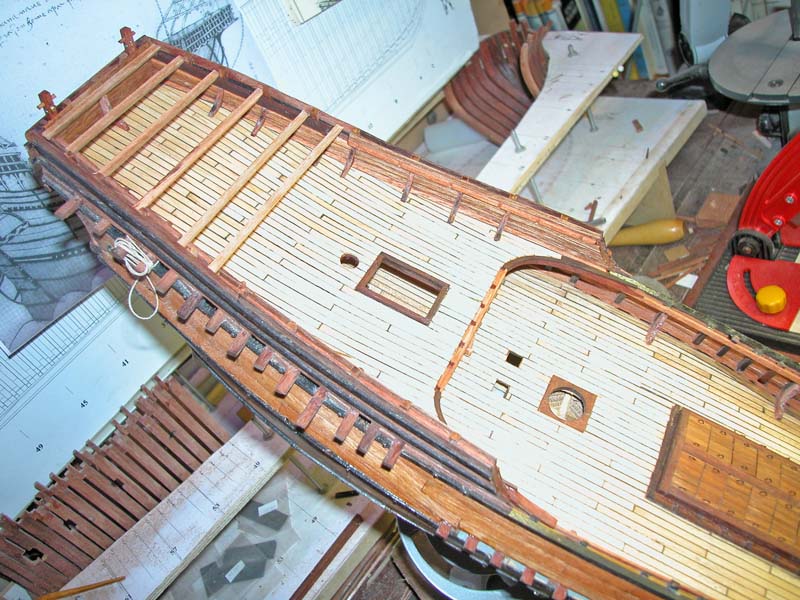
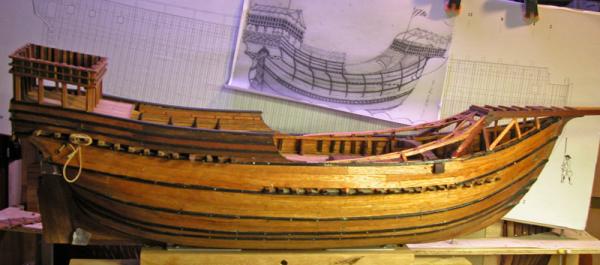
Thanks, Steven. Here are some pics showing the halfdeck and waist with deck knees Which are seen on the Villefranche Nave and the Mary Rose. A start is made on the poop deck. Dick


- 632 replies
-
- 11
-