Candice
-
Posts
16 -
Joined
-
Last visited
1 Follower

Recent Profile Visitors
806 profile views


-
 GrandpaPhil reacted to a post in a topic:
HMAV Bounty by Candice - Caldercraft - Scale 1:64
GrandpaPhil reacted to a post in a topic:
HMAV Bounty by Candice - Caldercraft - Scale 1:64
-
Beef Wellington reacted to a post in a topic:
HMAV Bounty by Candice - Caldercraft - Scale 1:64
-
AJohnson reacted to a post in a topic:
HMAV Bounty by Candice - Caldercraft - Scale 1:64
-
ccoyle reacted to a post in a topic:
HMAV Bounty by Candice - Caldercraft - Scale 1:64
-
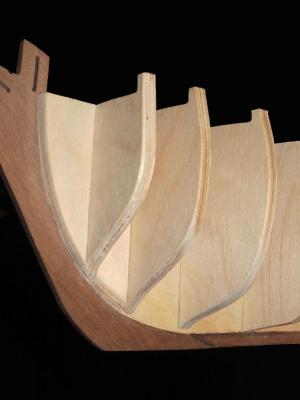
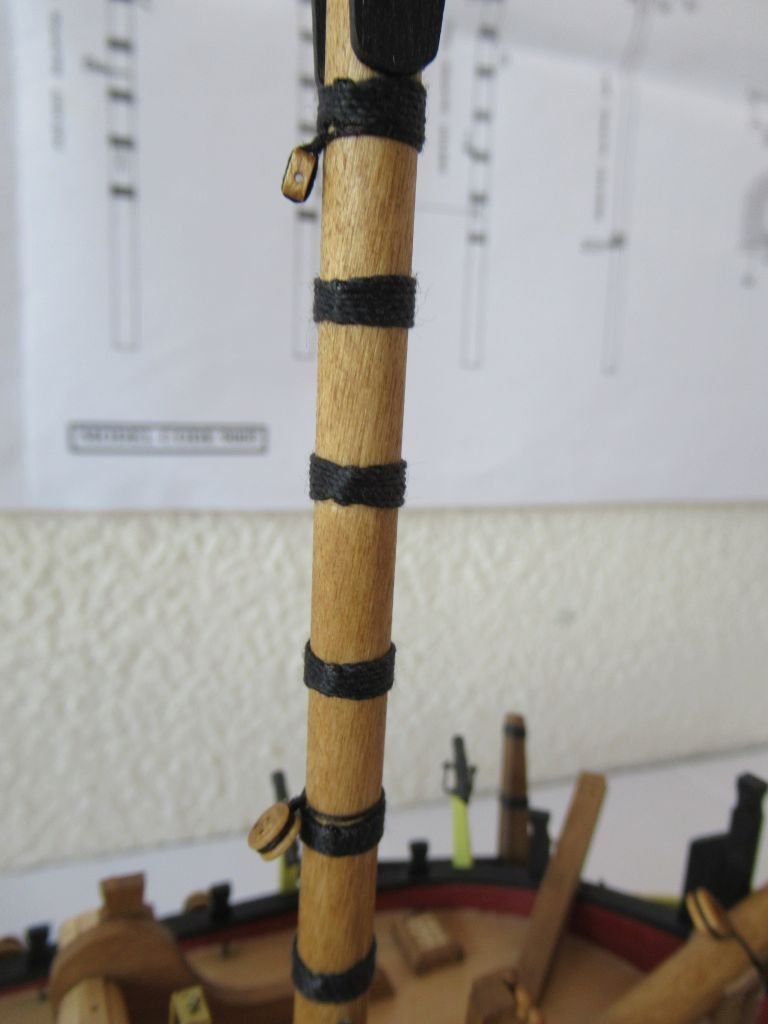
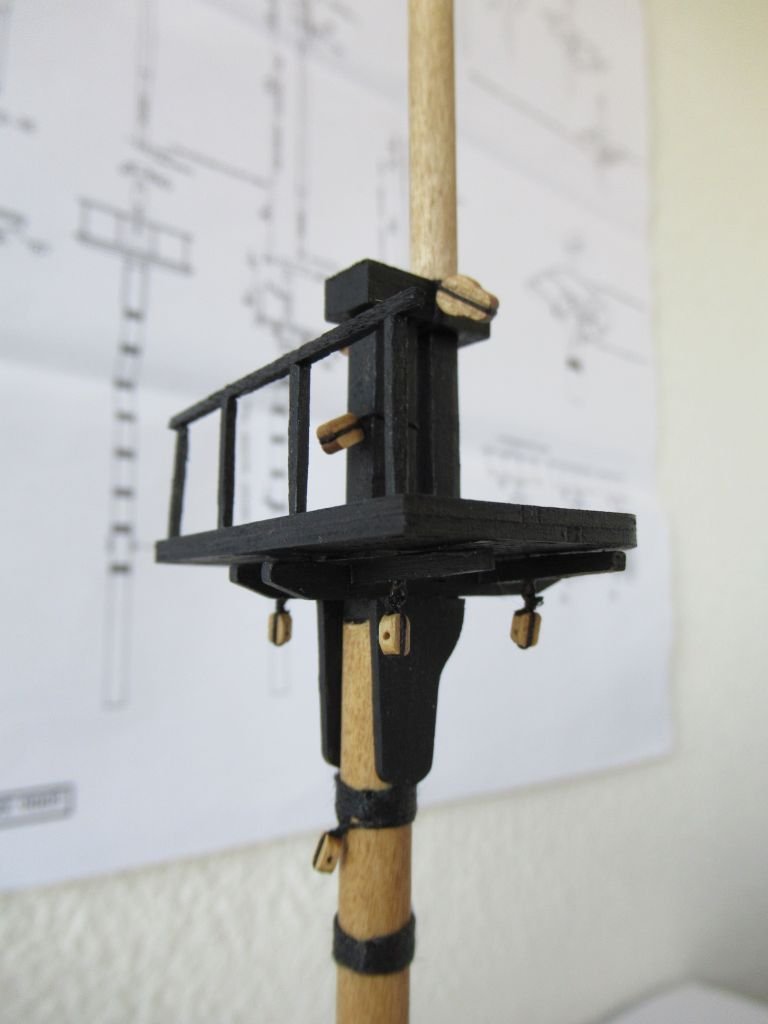
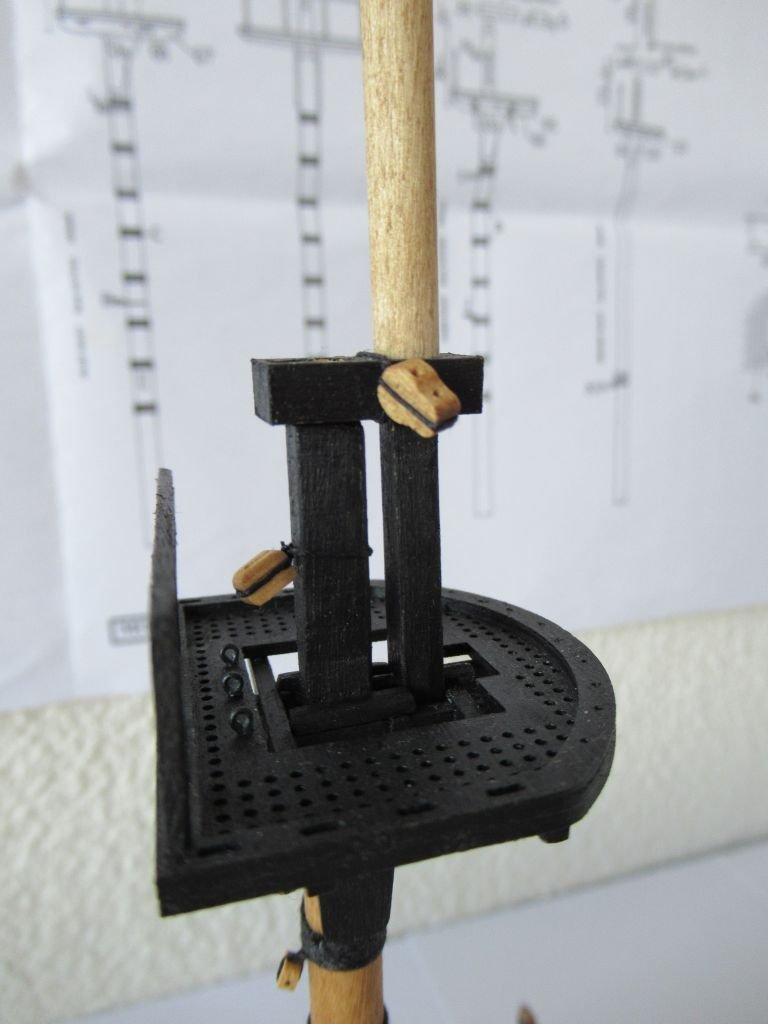
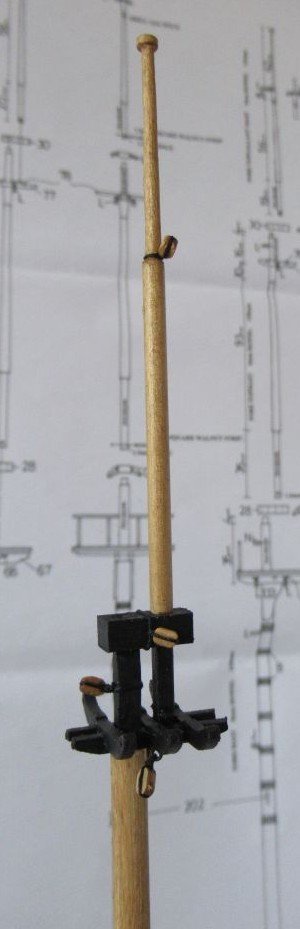
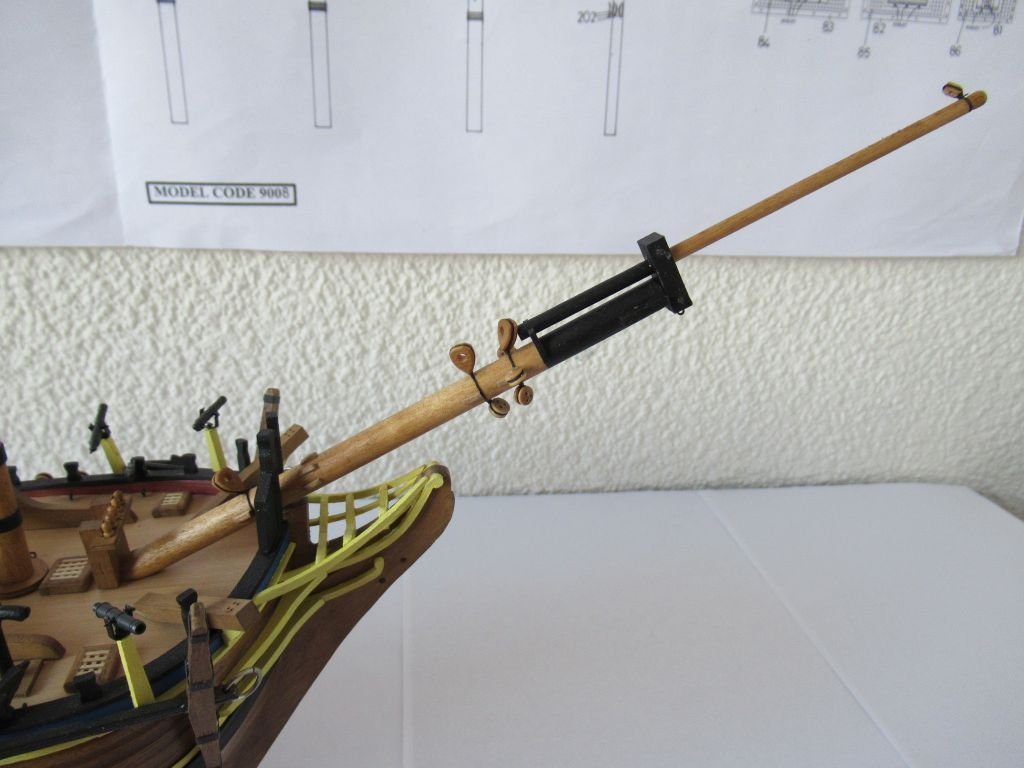
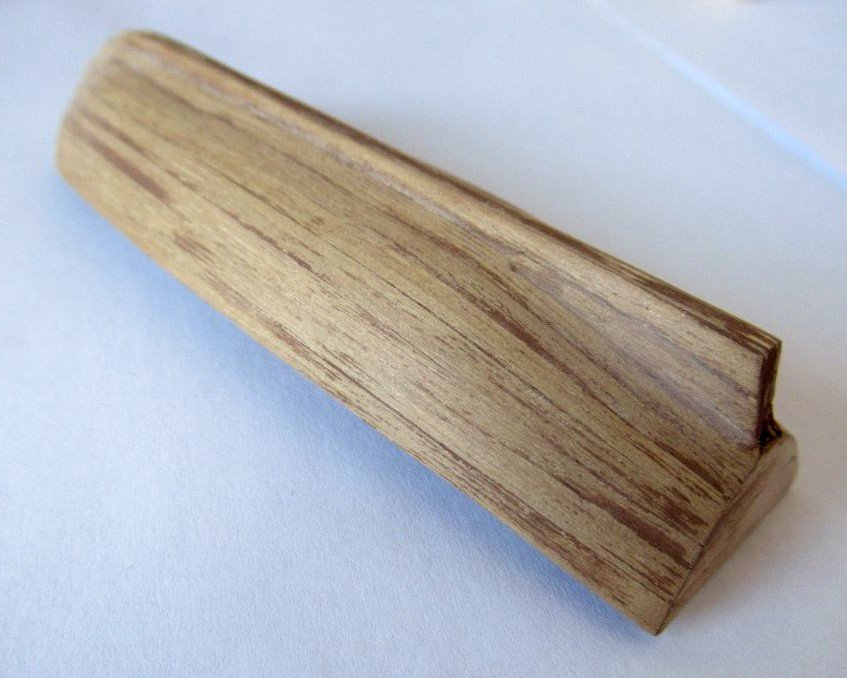
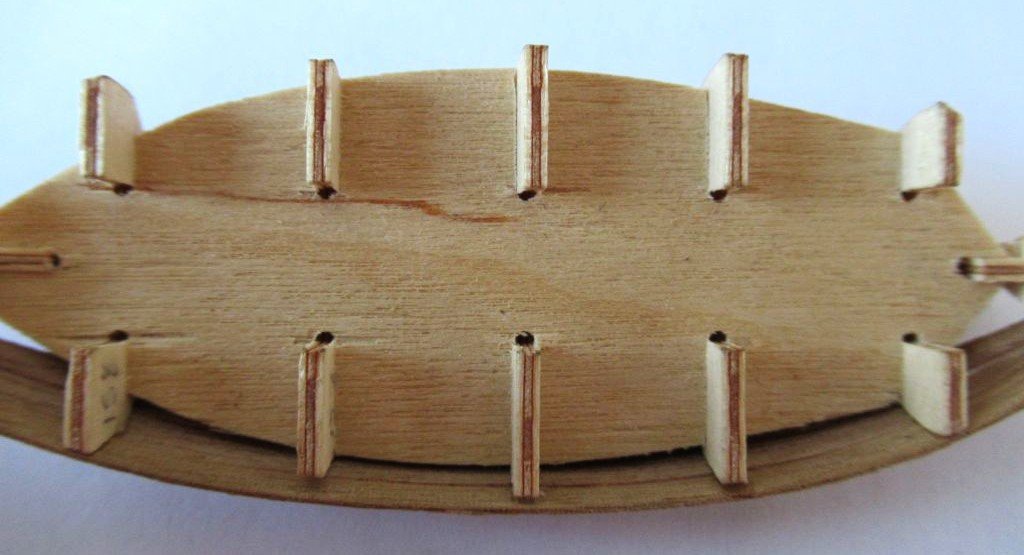
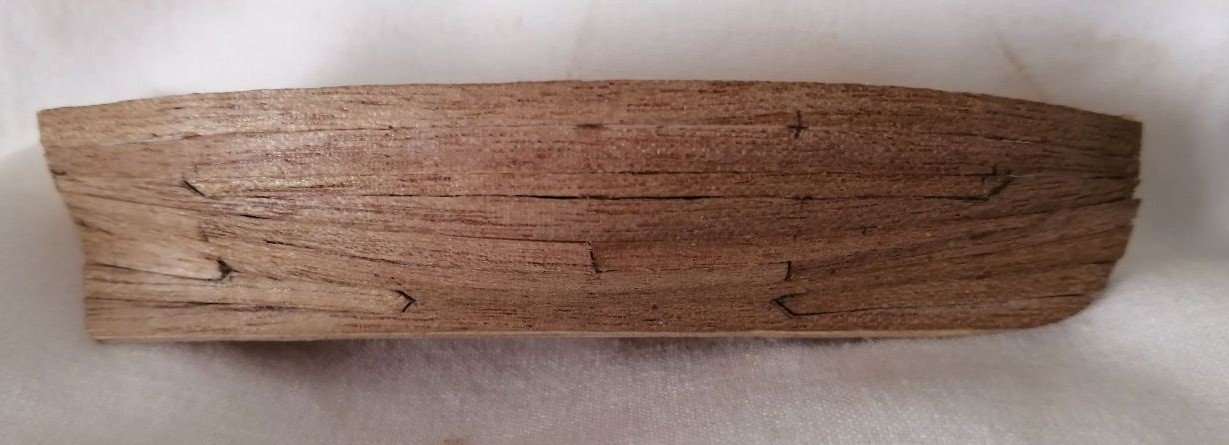
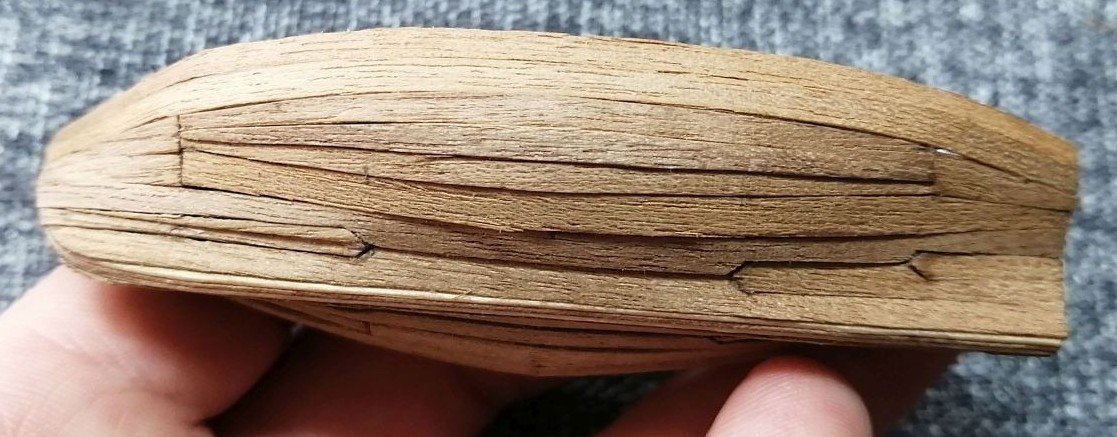
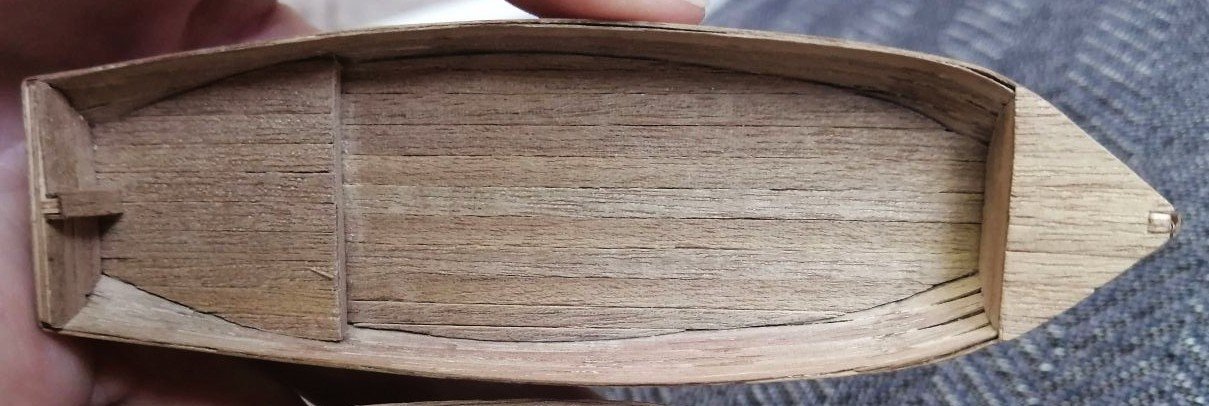
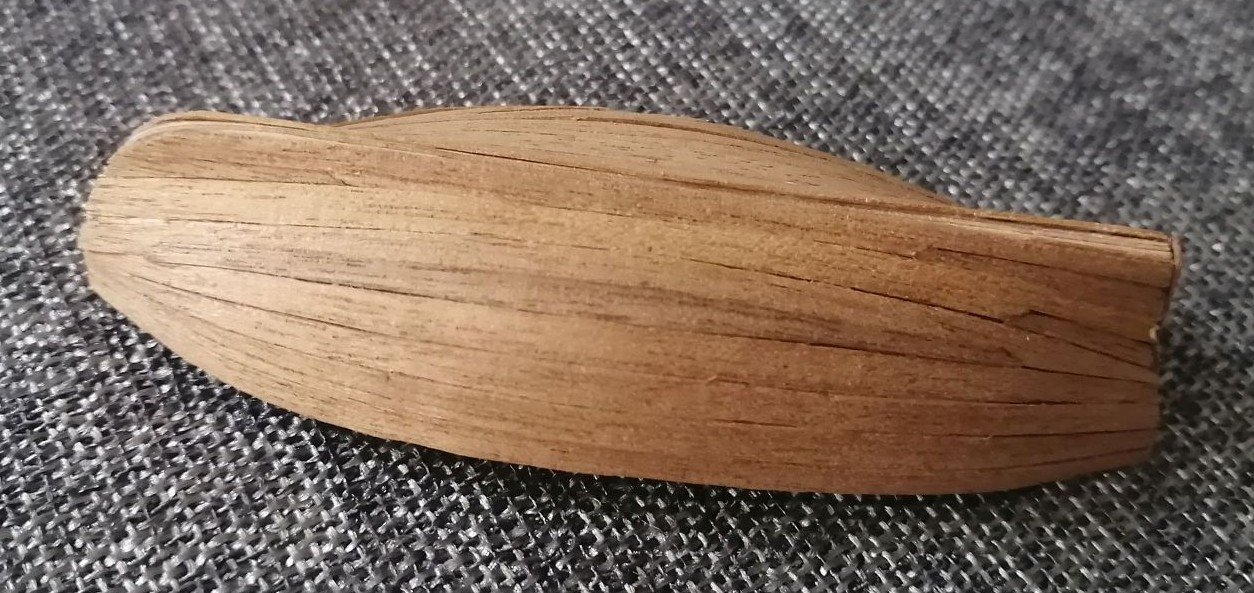
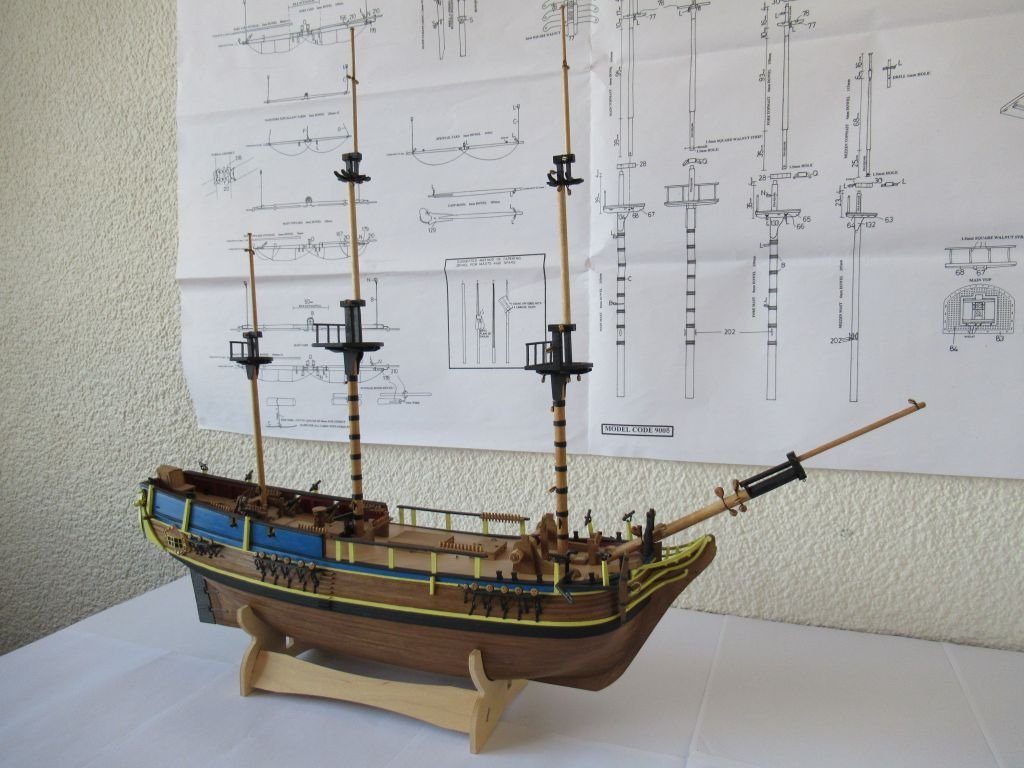
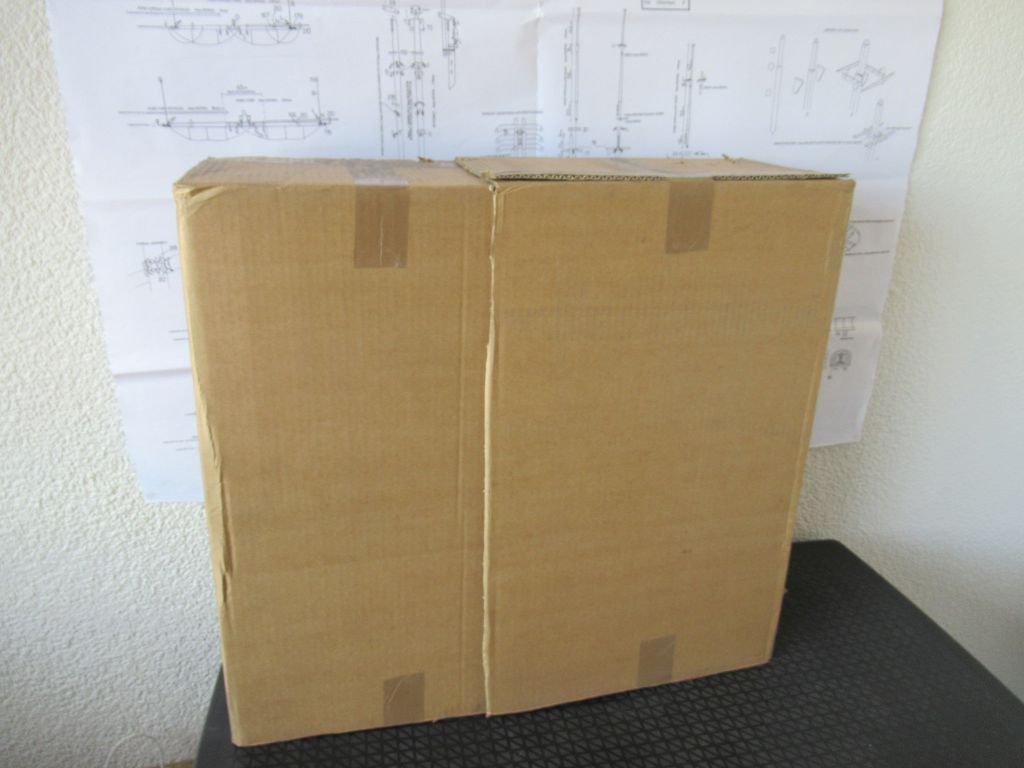
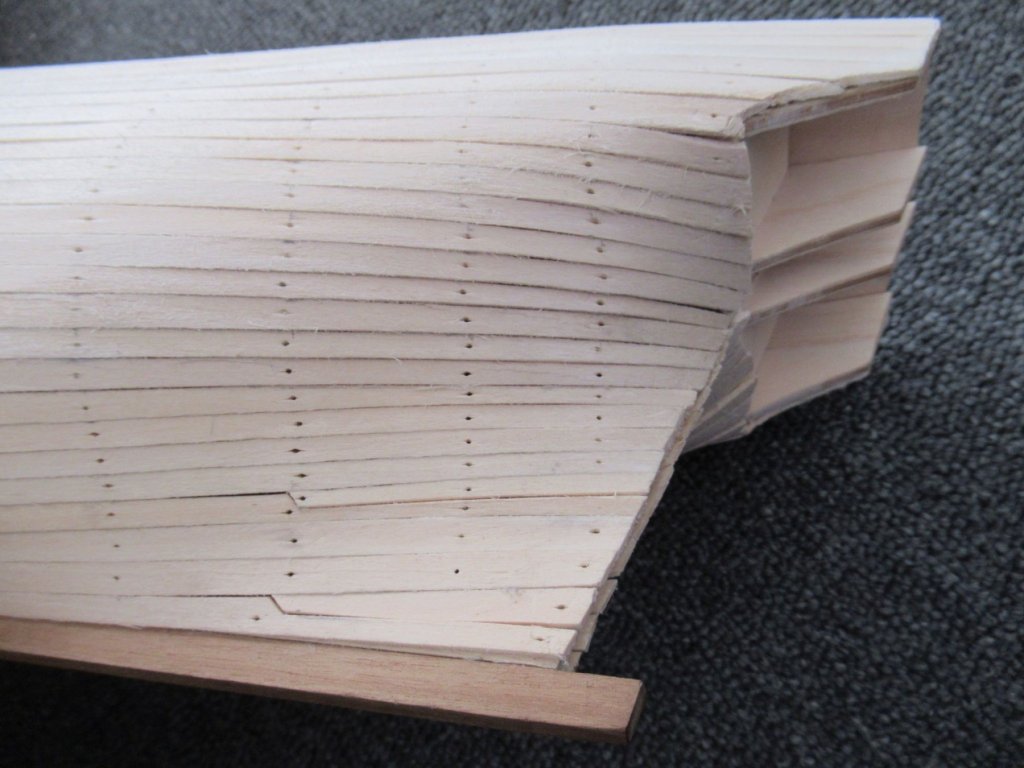
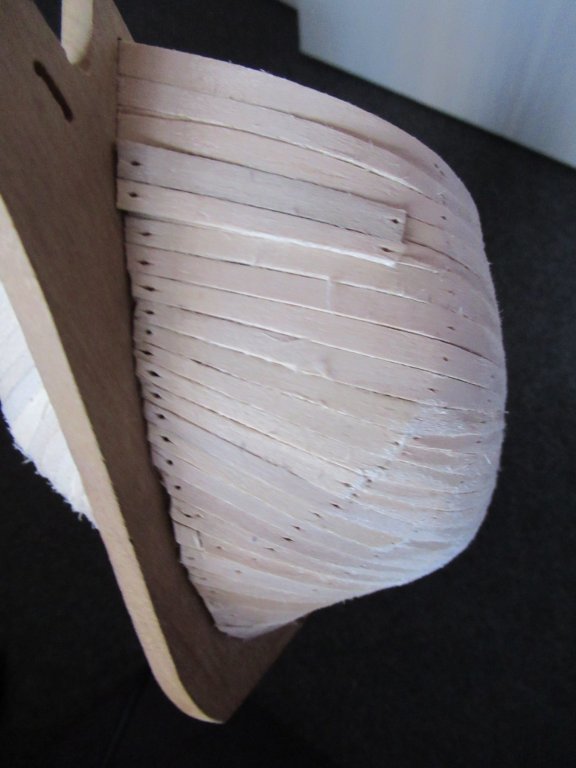
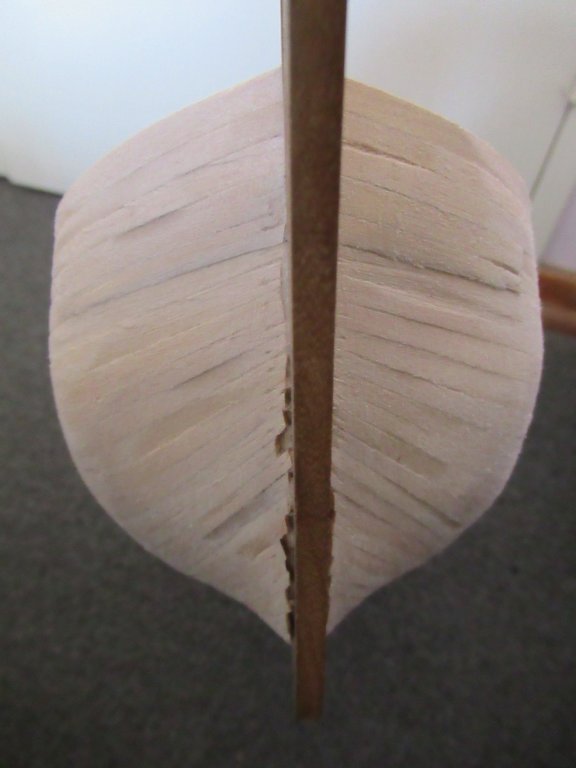
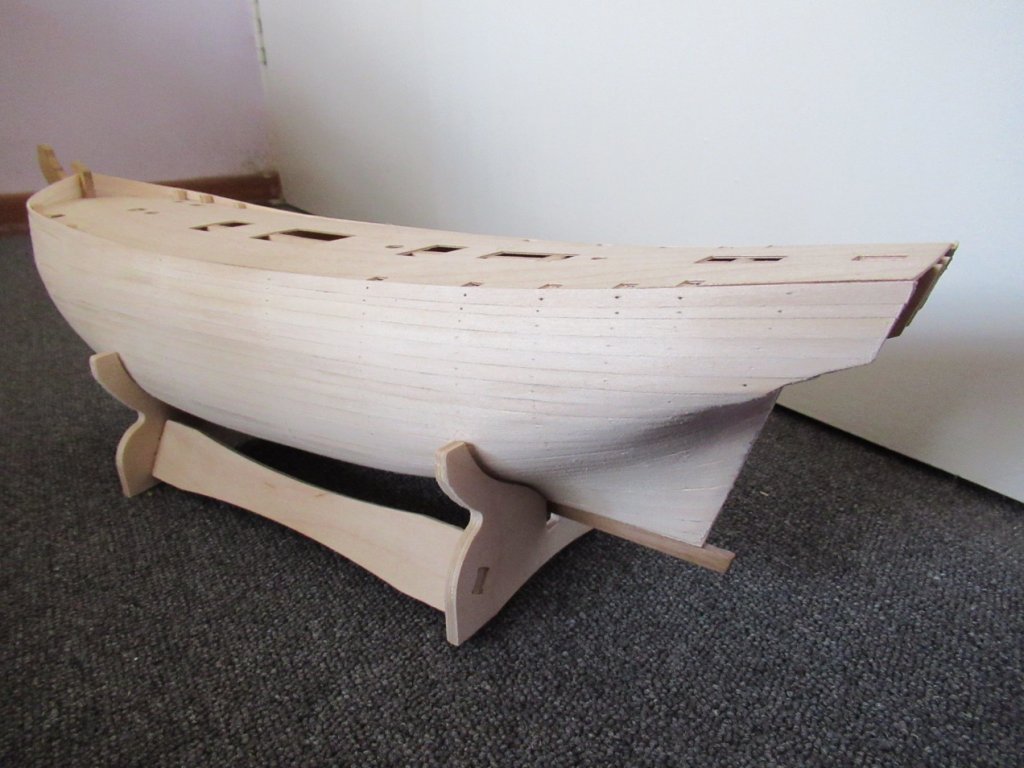
 Finally another progress update! The going is slow but progress is being made:D First up, some sprucing up of the cannons. I added the eyelets that rope the cannons to the bulwarks as well as small strips of the copper plating from the hull to hold the cannons to the carriages. The dimples of the copper plating give it a nice studded look. Next I tackled the masts. I only had a grinder and a few files to use with a vise-grip, so tapering and making different sections square and round again presented a rather interesting challenge. Through a technical error that Huawei can't explain to me, I lost all my cellphone photos so sadly I have no progress shots of this step. I also added all the blocks and railings and such. I also had progress photos of tying the woolding but have lost those too:'( I then did the bowsprit but opted not to bevel the bowsprit cap as I felt the risk-benefit ratio wasn't good enough and the problems then encounter with the angle of the holes in the cap also didn't seem worth it. I ran into some trouble fitting the mizzen mast into the deck as I had not glued the binnacle and ships wheel on with sufficient space to account for the angle/slope of the mizzen. I also had to do lots of filing of the deck and keel holes as they did not align nicely to allow the masts passage. The finished look of the masts: My dust-preventing dishtowel now no longer suffices so I cut up two boxes to give my hard work some much needed protection: Between doing the masts I have also been tacking the ship's boats. It was difficult to get back into planking again after a few year's gap, and on such a minute scale! I was very glad to have a layer to practice on that could be covered over with the second planking! The bigger boat didn't go too badly. I lost the progress photos but here is the hull sanded and wood-filler-ed: The little guy gave me endless trouble! First off the bulkheads, although carefully numbered before cutting out, seemed to be in the wrong order such that a plank lying across them missed the bulkheads either side of the middle bulkhead as shown by the gaps in the photo below: I also struggled a lot with the curvature. I first tried planking top down as the instructions recommended but had to cut a plank in the middle to make the curvature which I wasn't happy with: Side two I tried planking from the bottom up but ran into different problems and still wasn't entirely satisfied with the result: For the second planking I opted to instead start in the middle: This seemed to work much better and I was finally happy with my work! I still need to fit the keel plank on this one before sanding and wood-filler-ing. Lastly, I have begun with planking the inside of the bigger boat after removing the bulkhead tabs: That's all for now! Hopefully it won't be almost a year again before the next update!
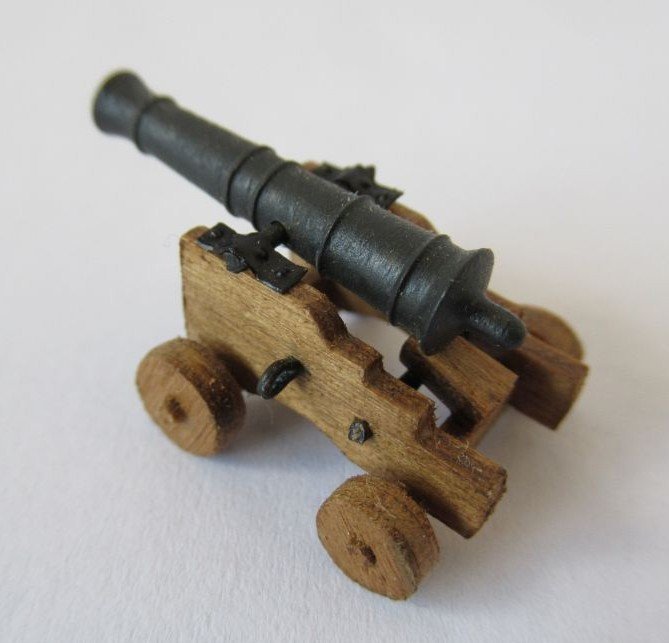

-
GrandpaPhil reacted to a post in a topic:
HMAV Bounty by Candice - Caldercraft - Scale 1:64
-
Thanks! I thoroughly enjoyed looking through your log! As a first time and severely part time builder I have so much still to learn about the ins and outs of ship building from the logs of others. I like the way you tied your blocks and will give it a try for the multitude of mast blocks that I am fast approaching. Though we may be at the same place currently, I only get to build for decent blocks of time a few weeks a year while on leave so you'll son be overtaking me!
-
AJohnson reacted to a post in a topic:
HMAV Bounty by Candice - Caldercraft - Scale 1:64
-
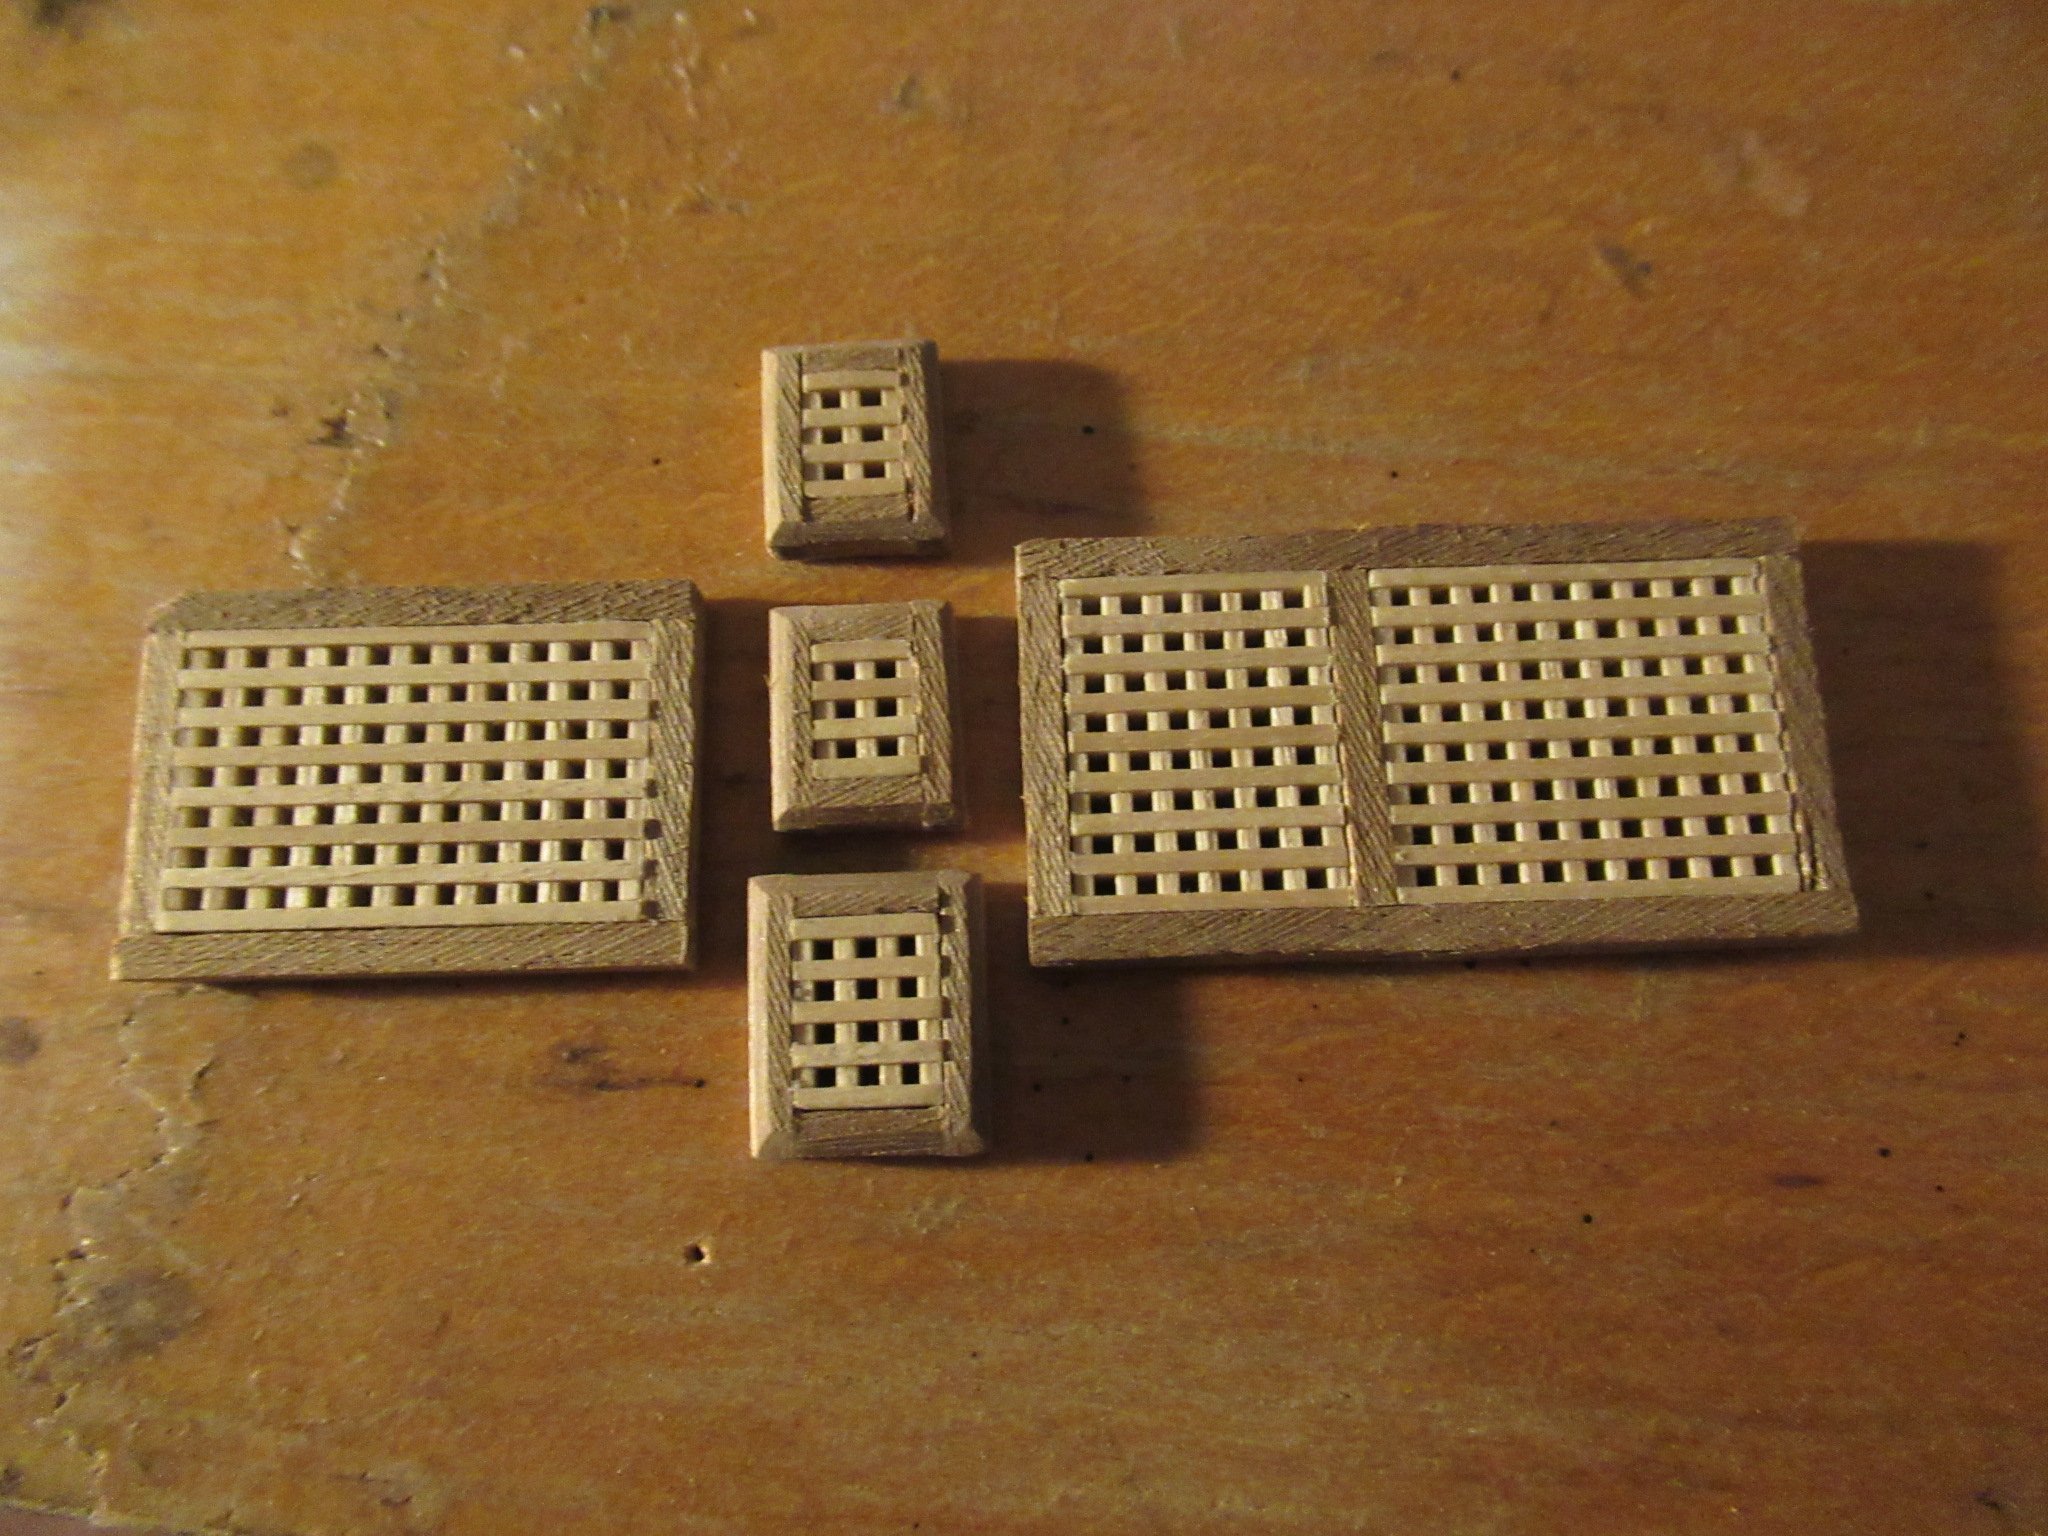
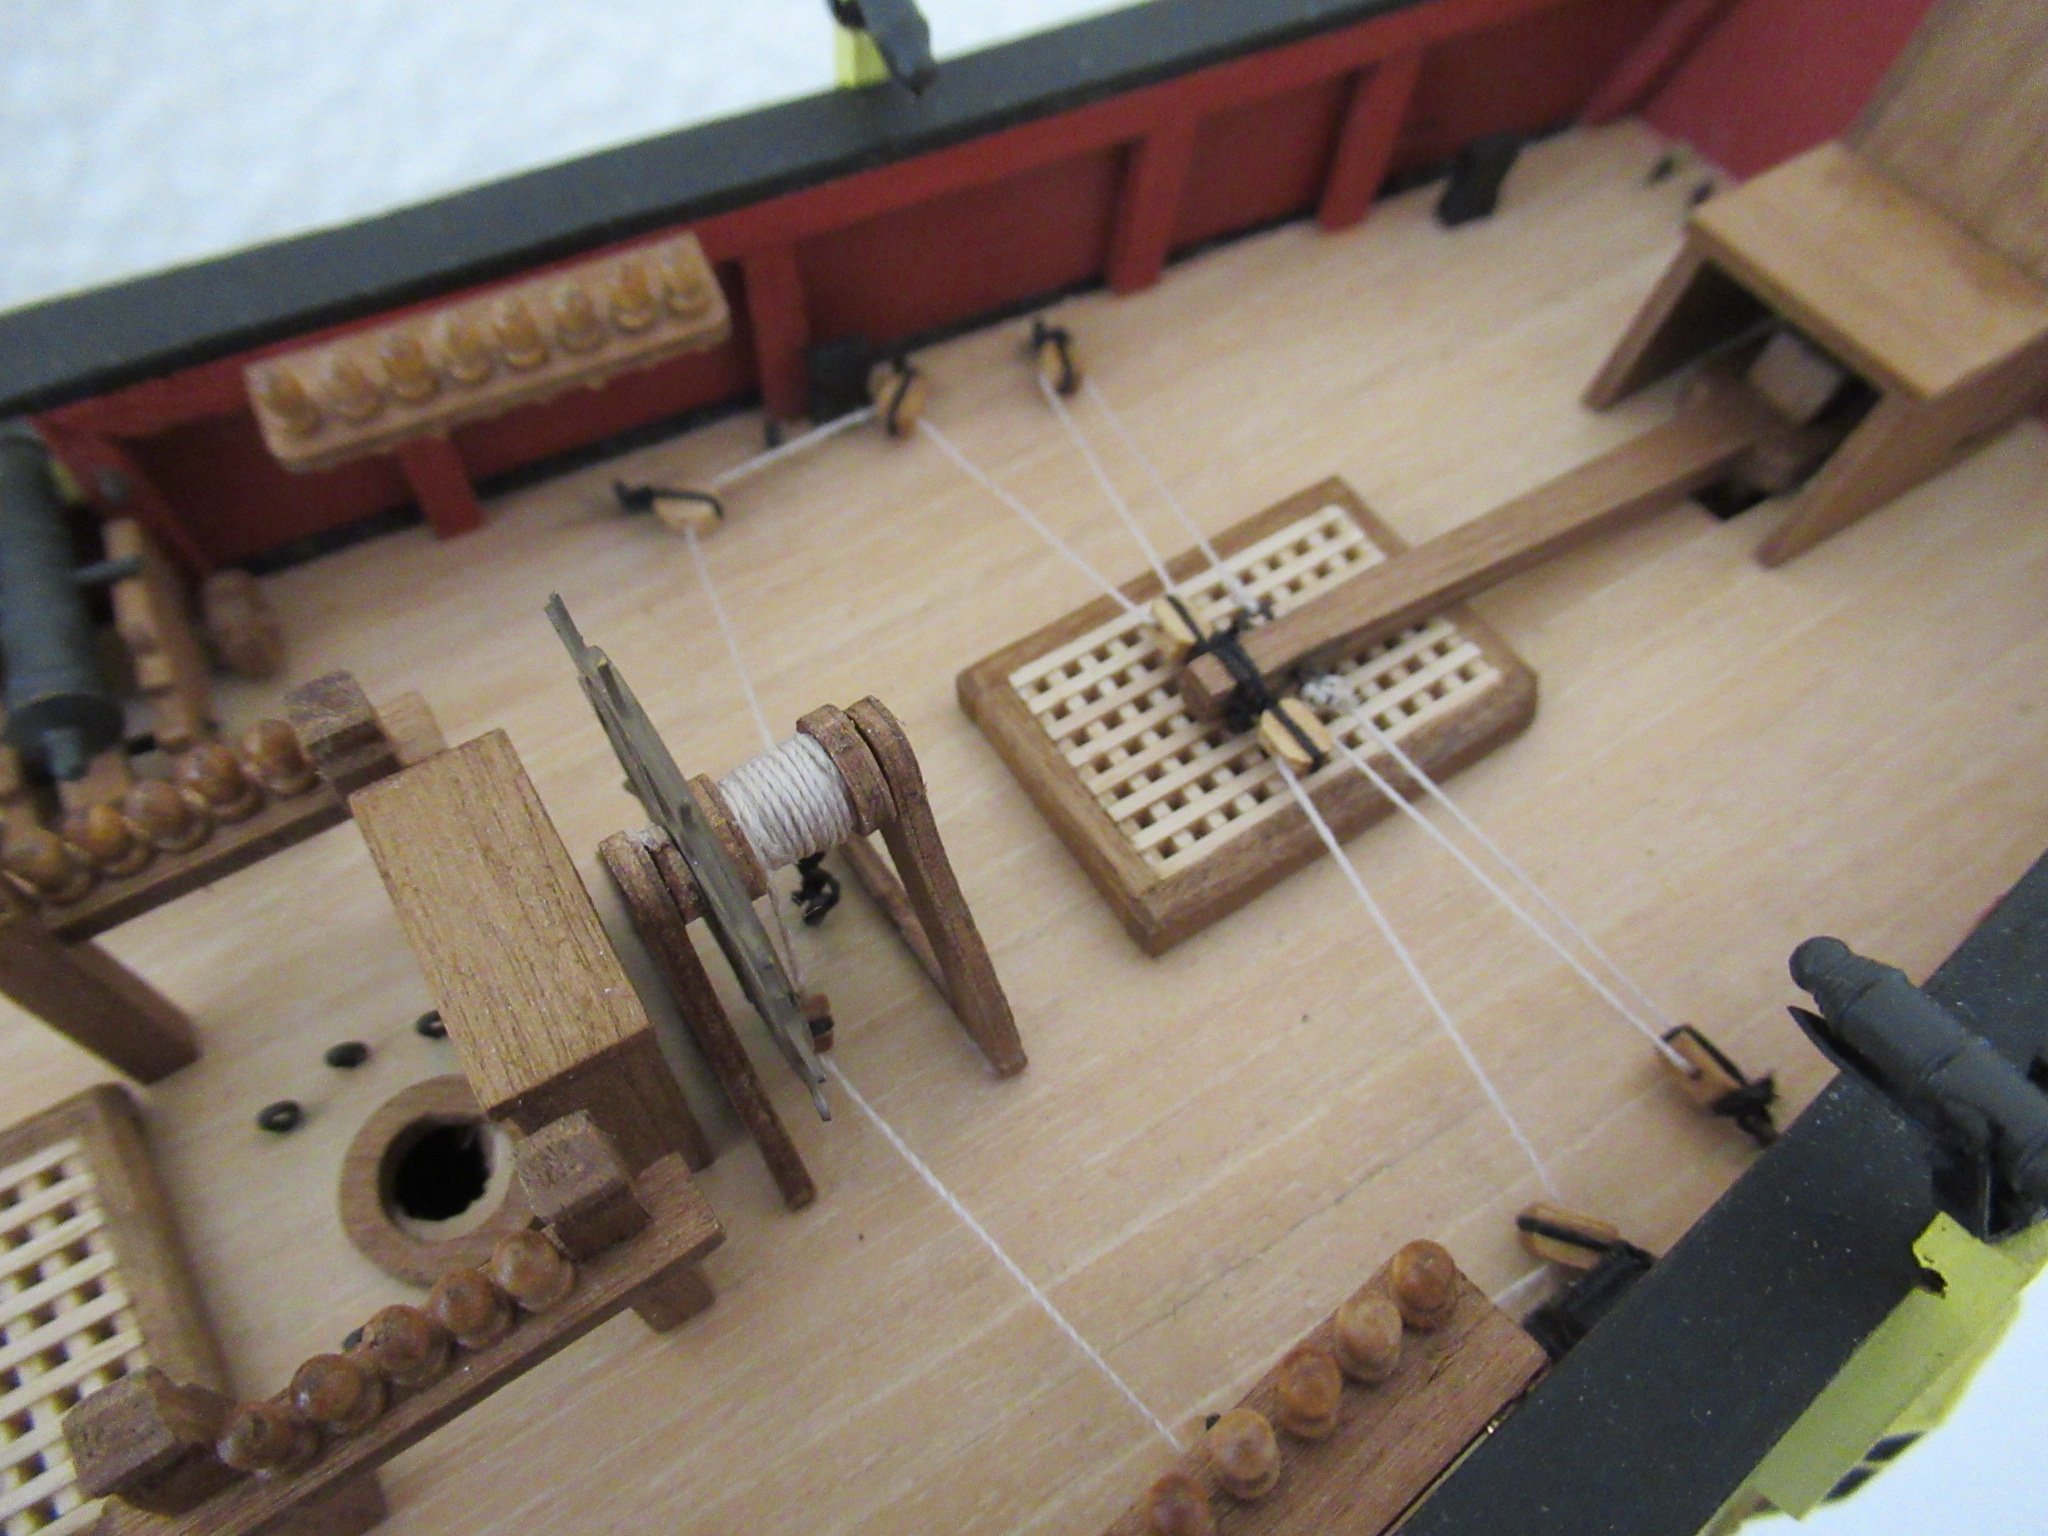
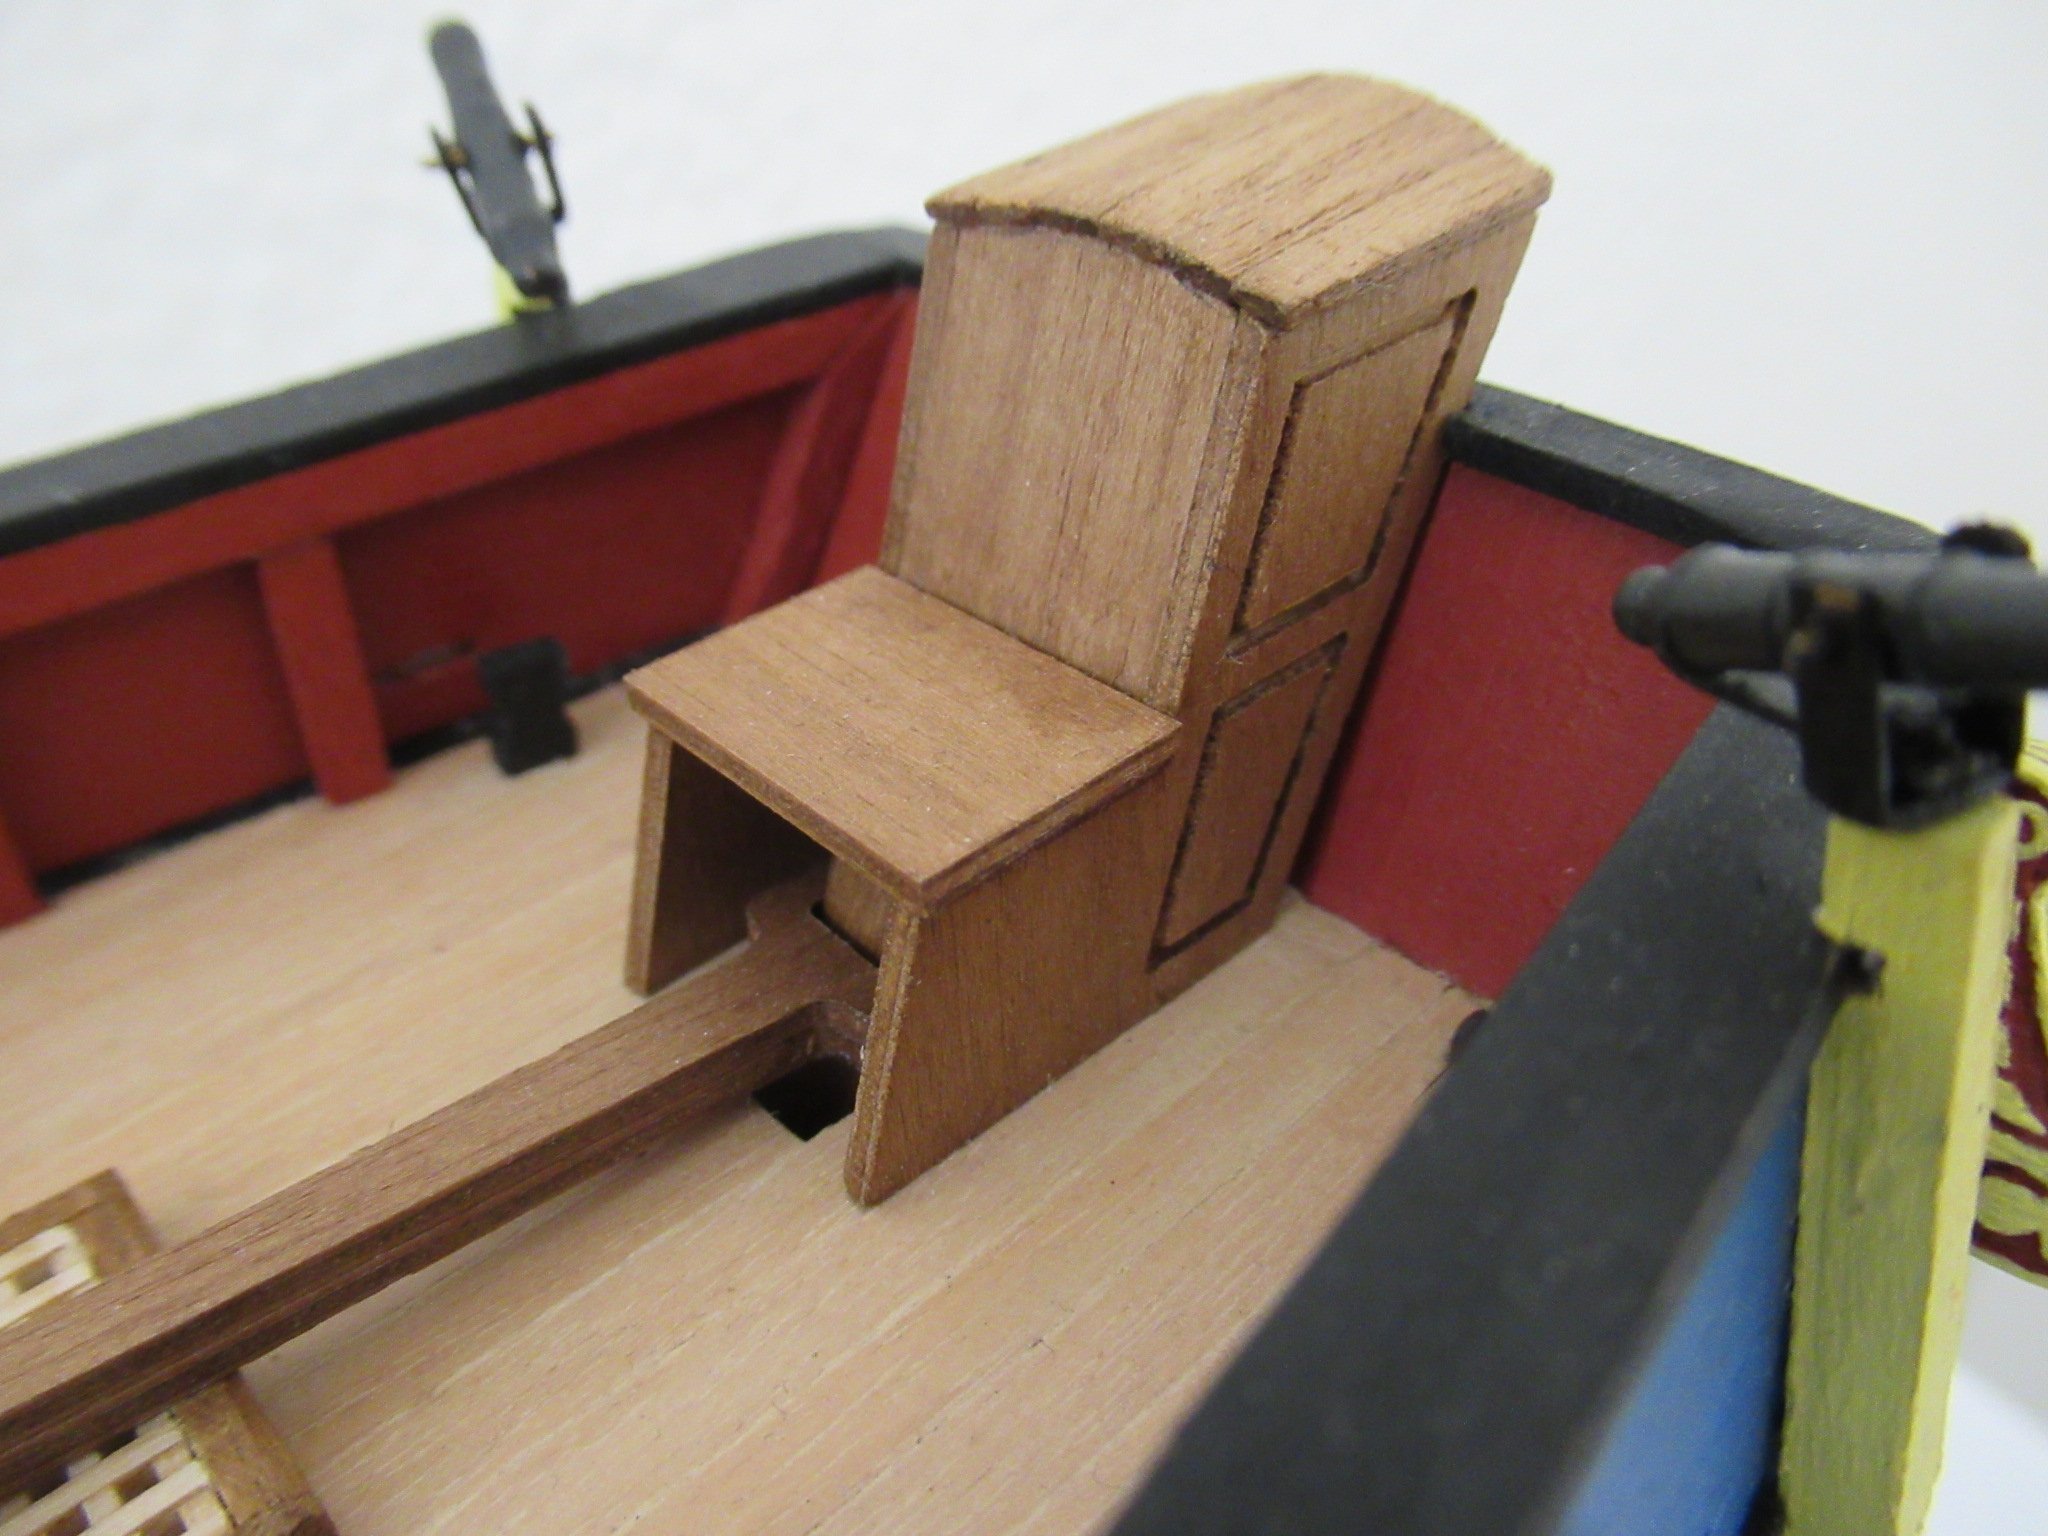
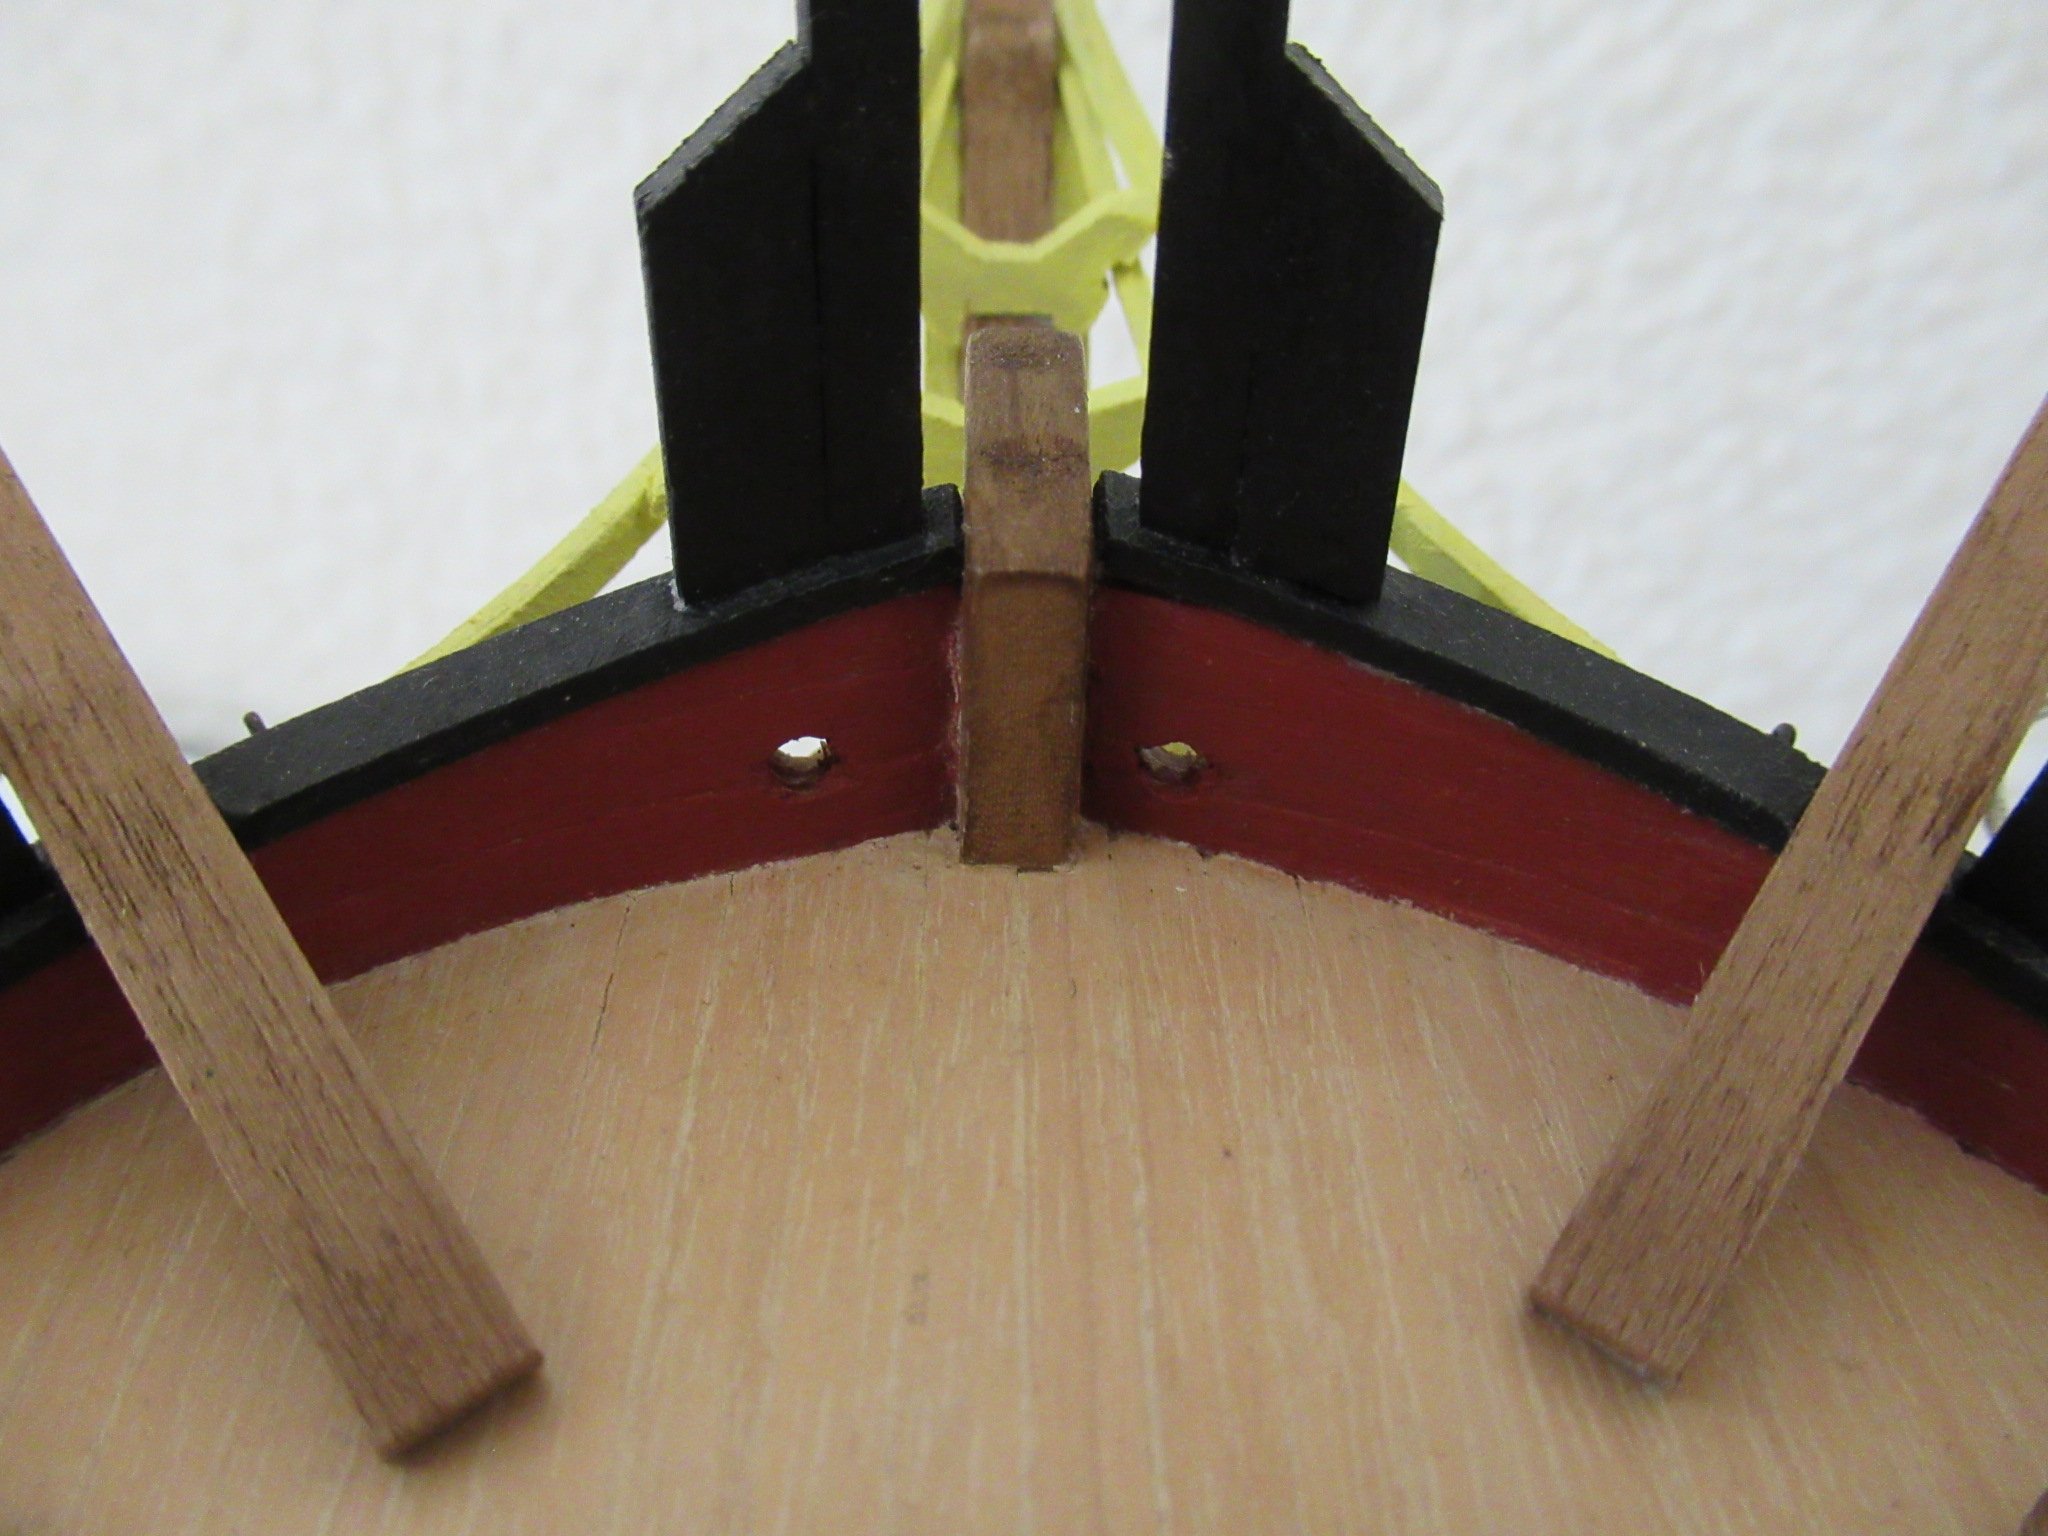
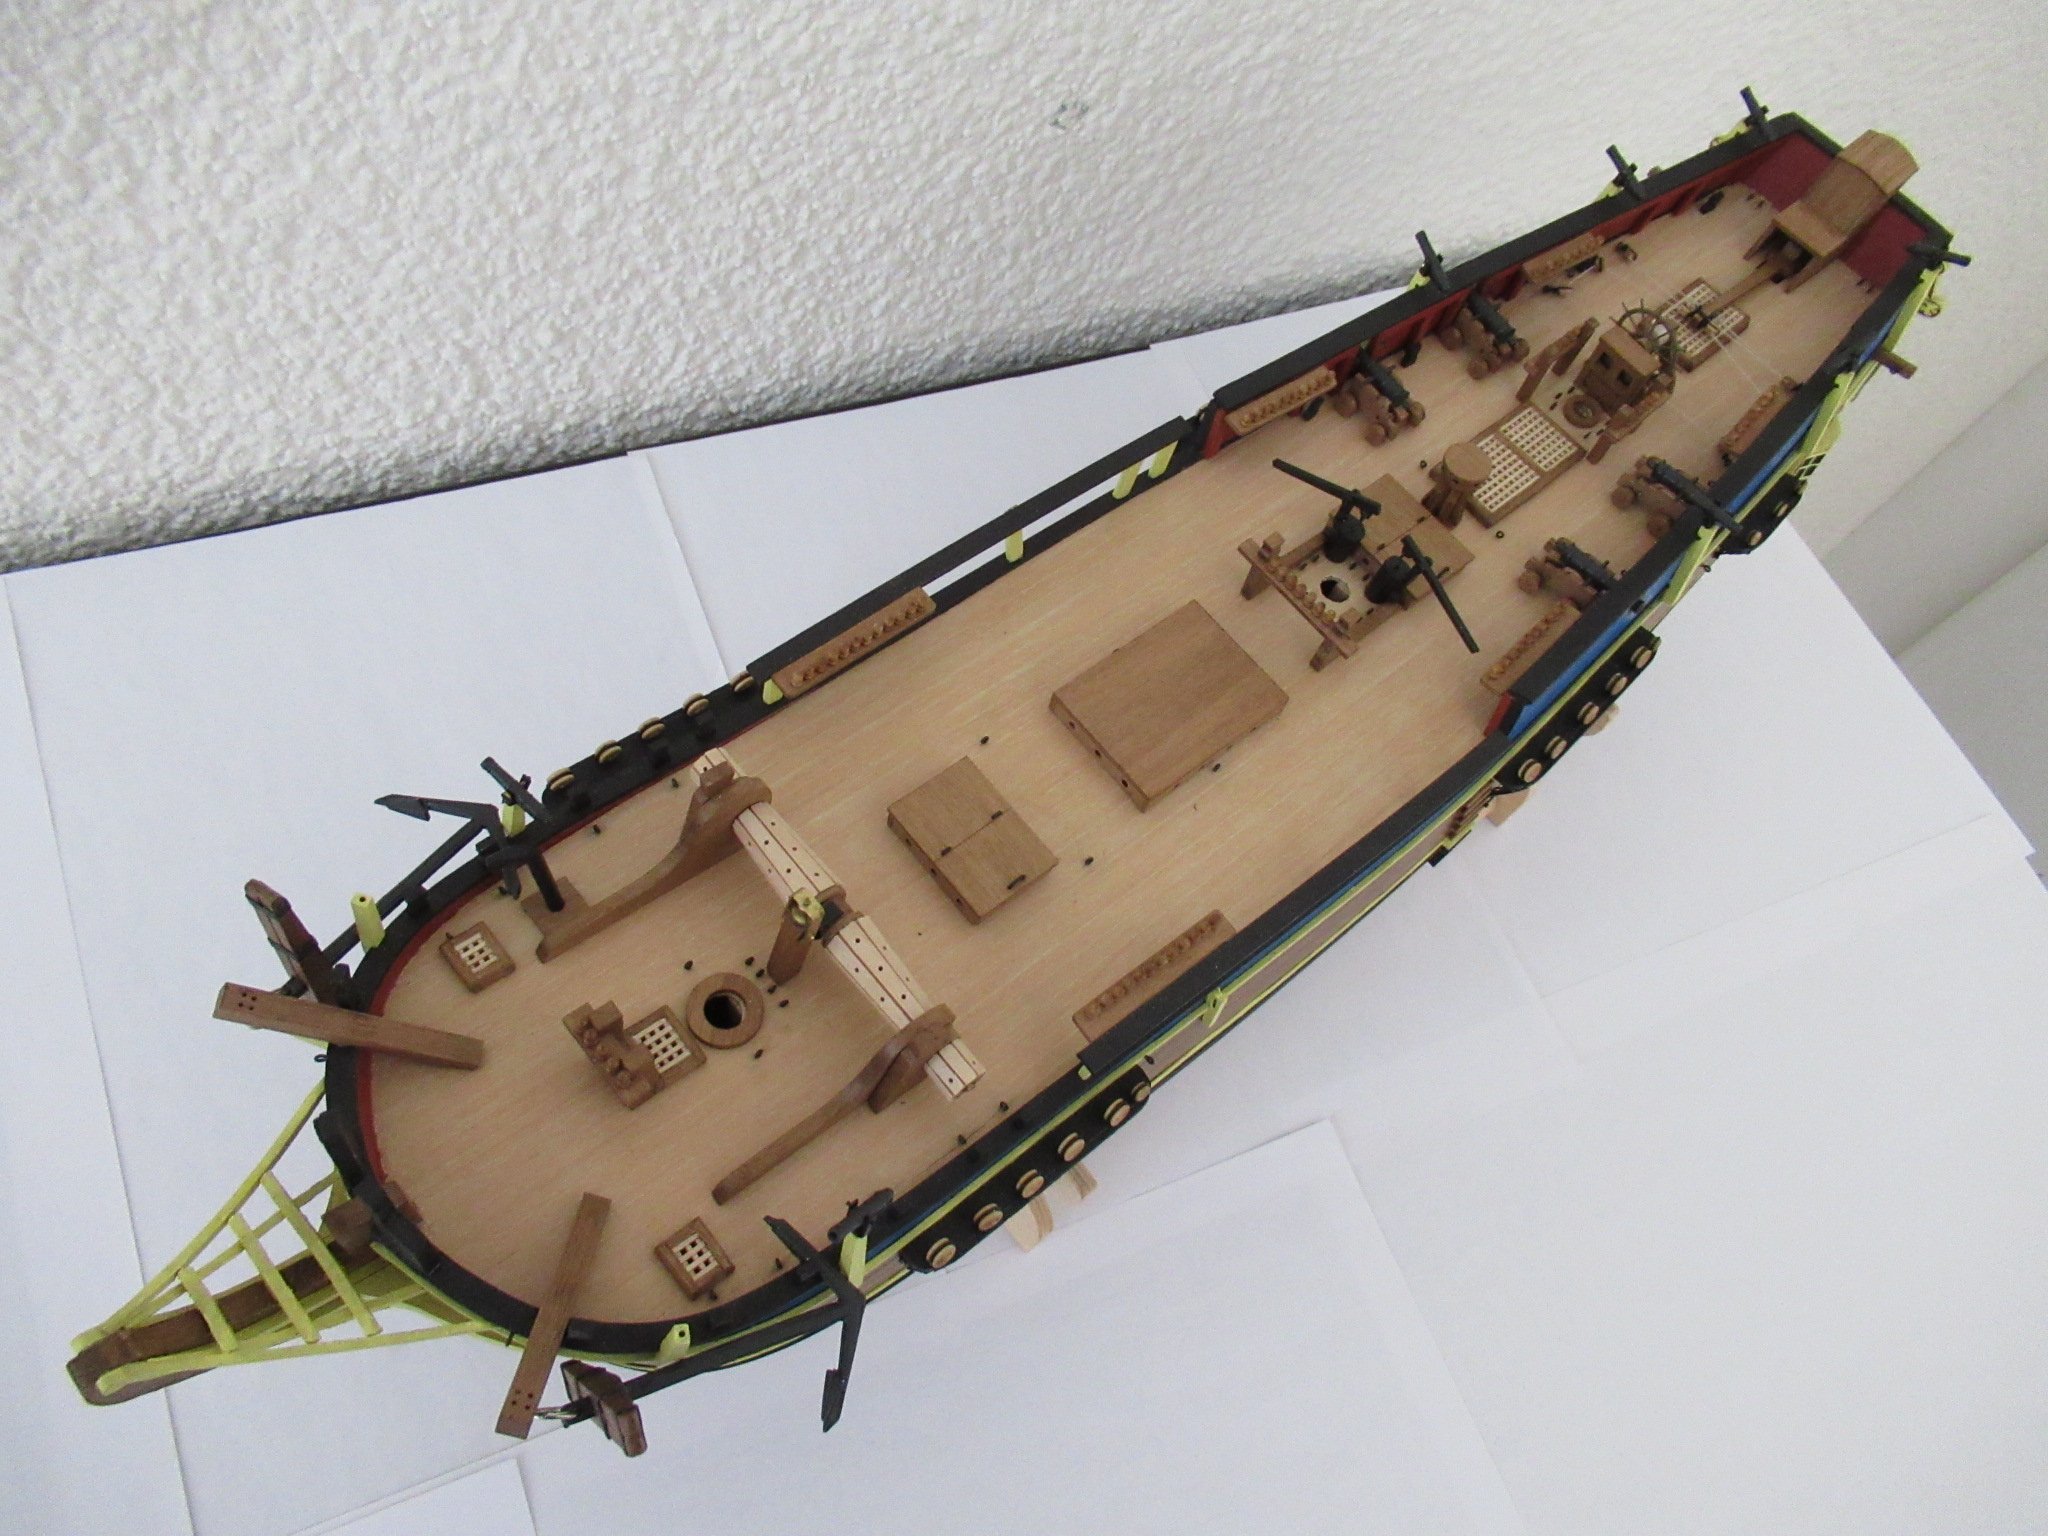
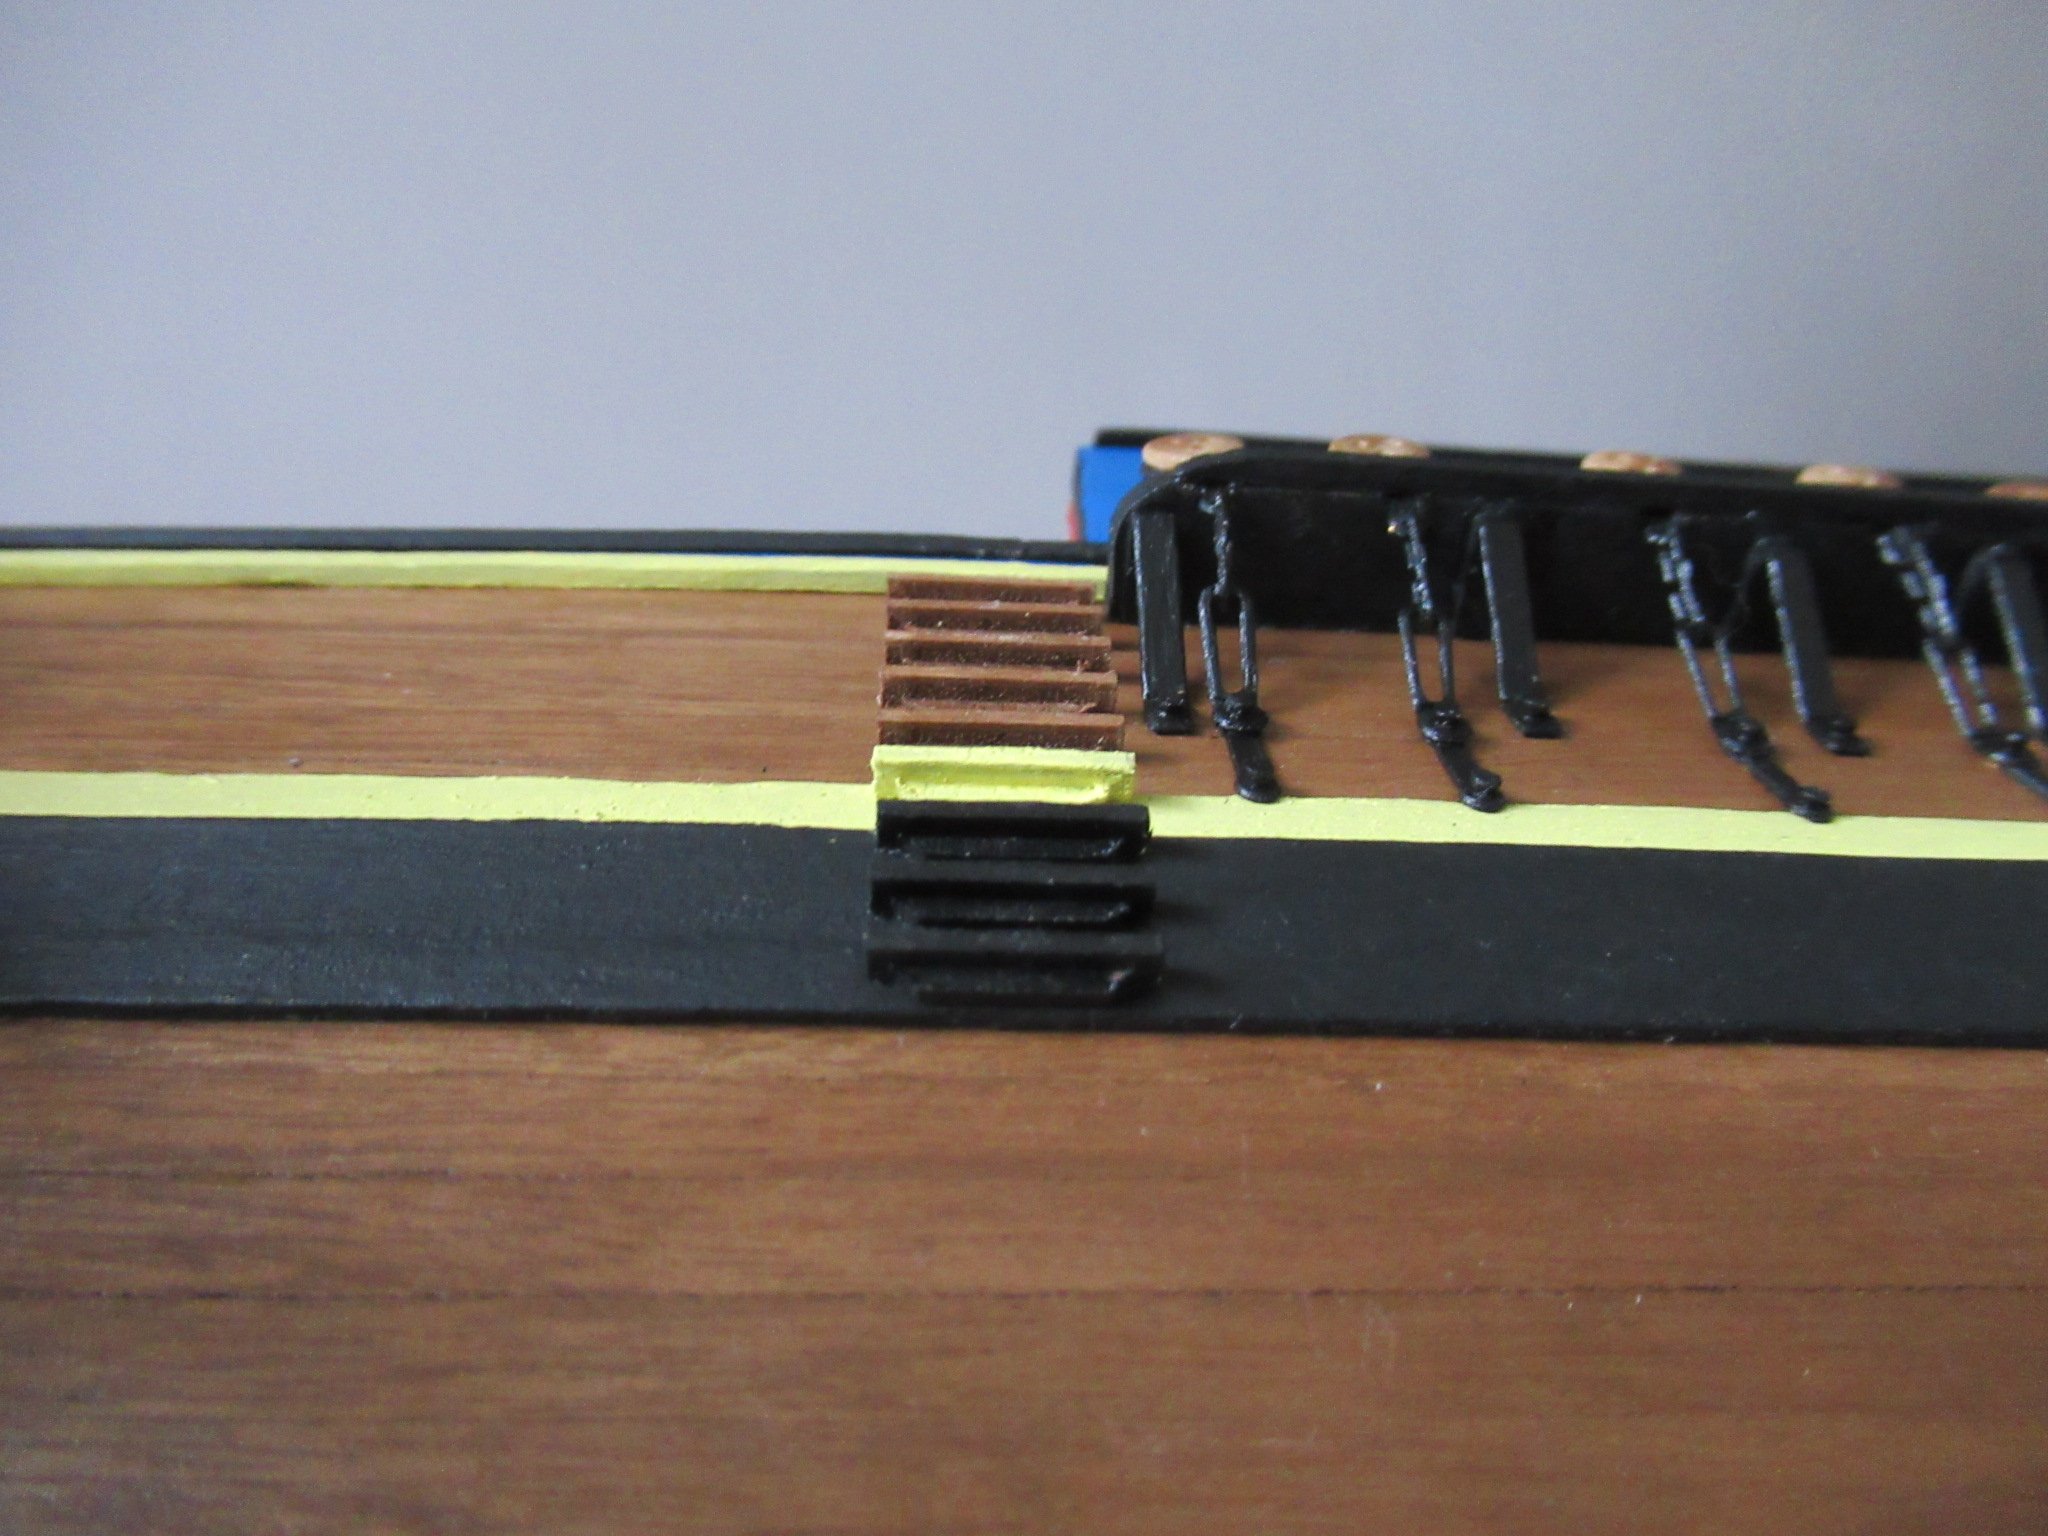
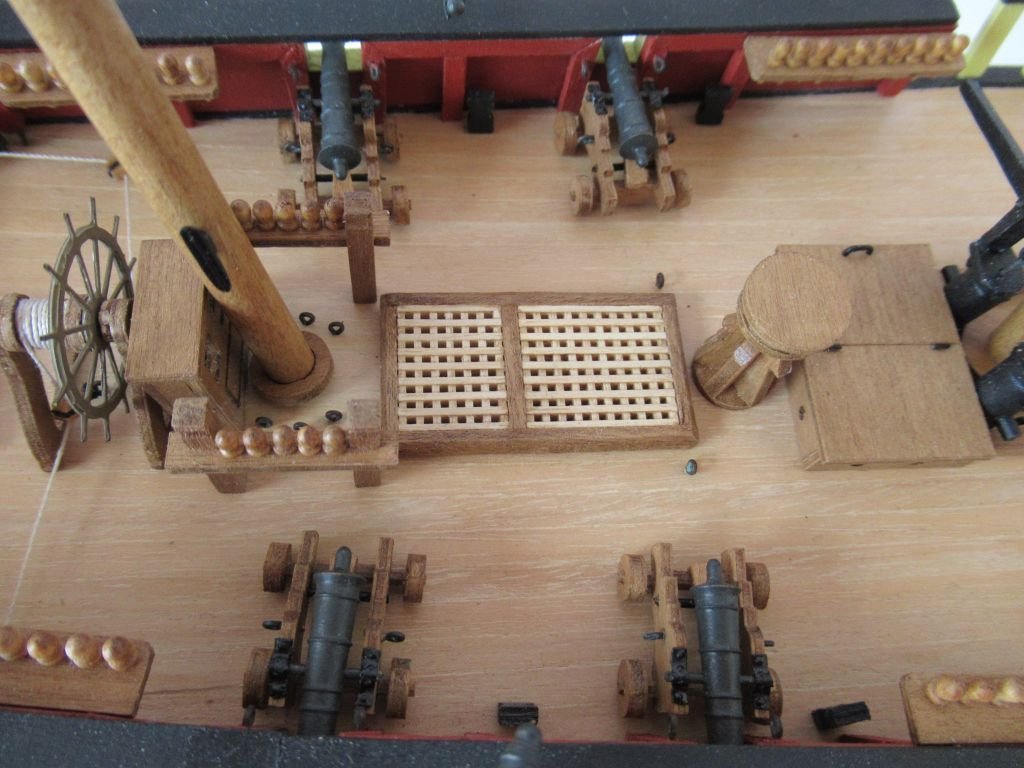
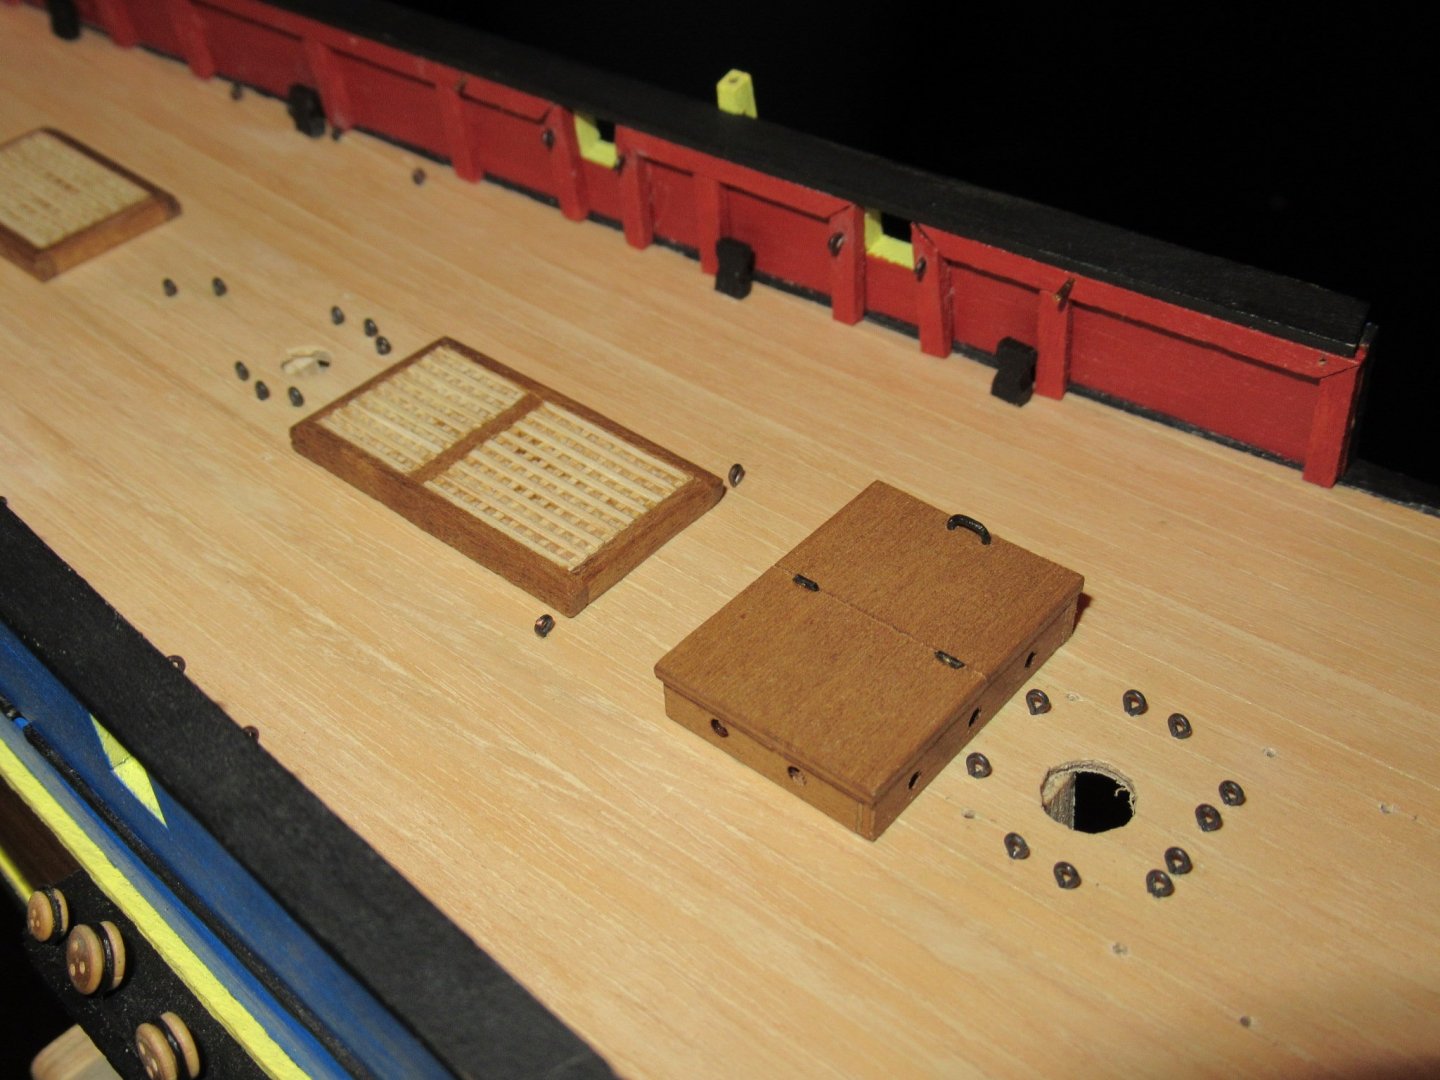
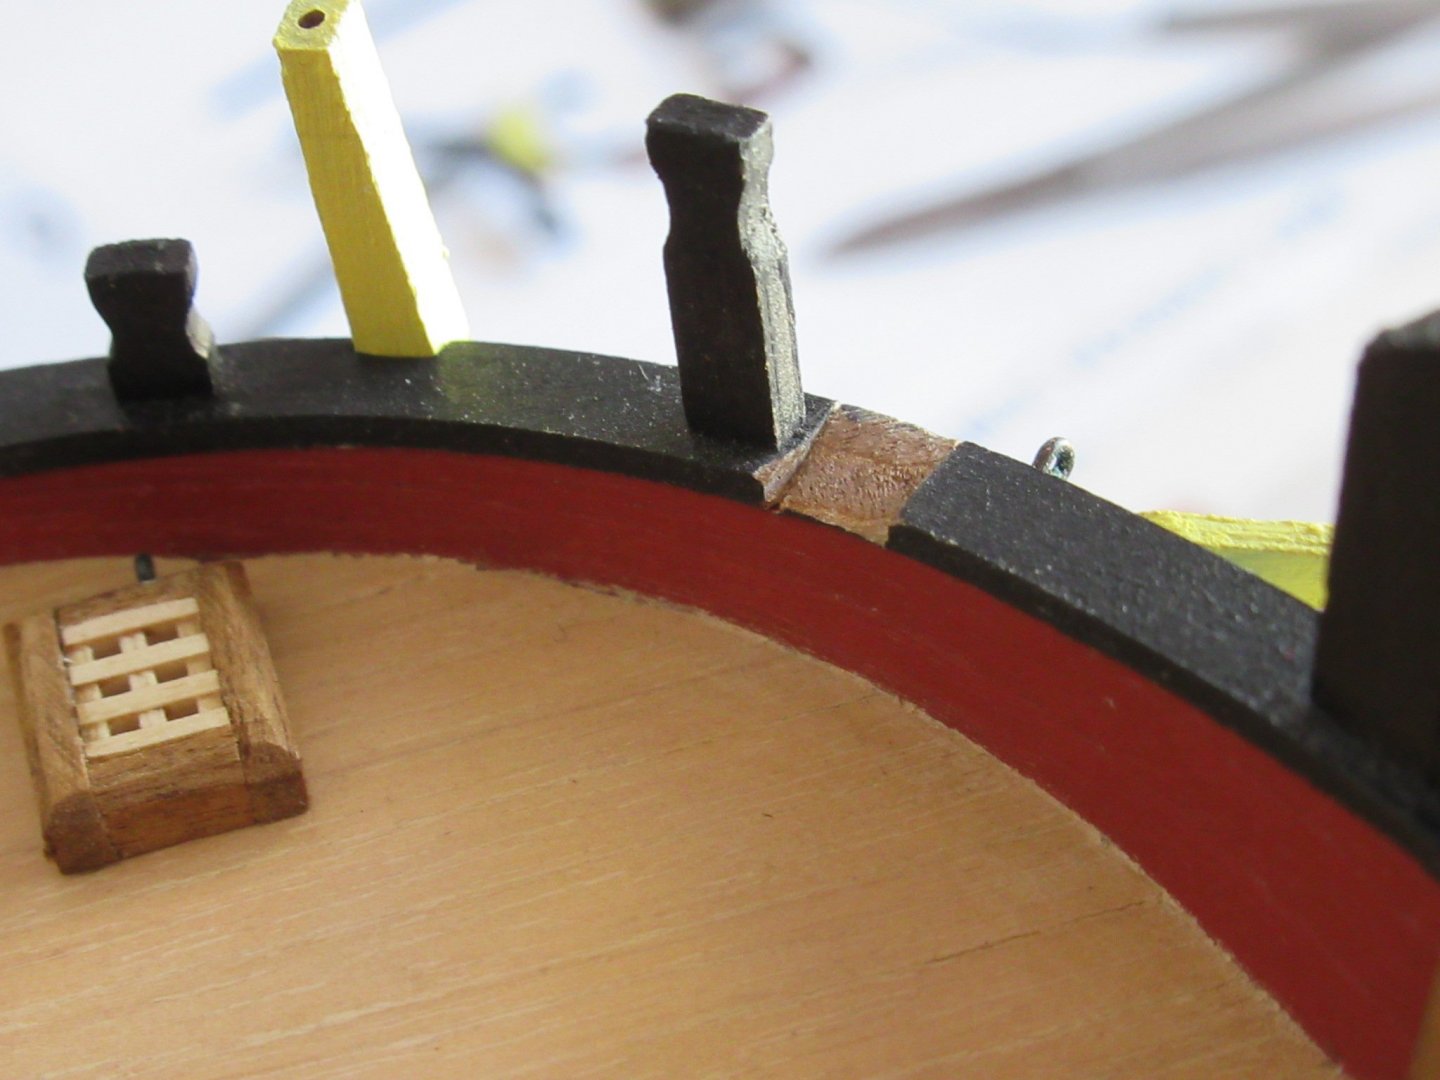
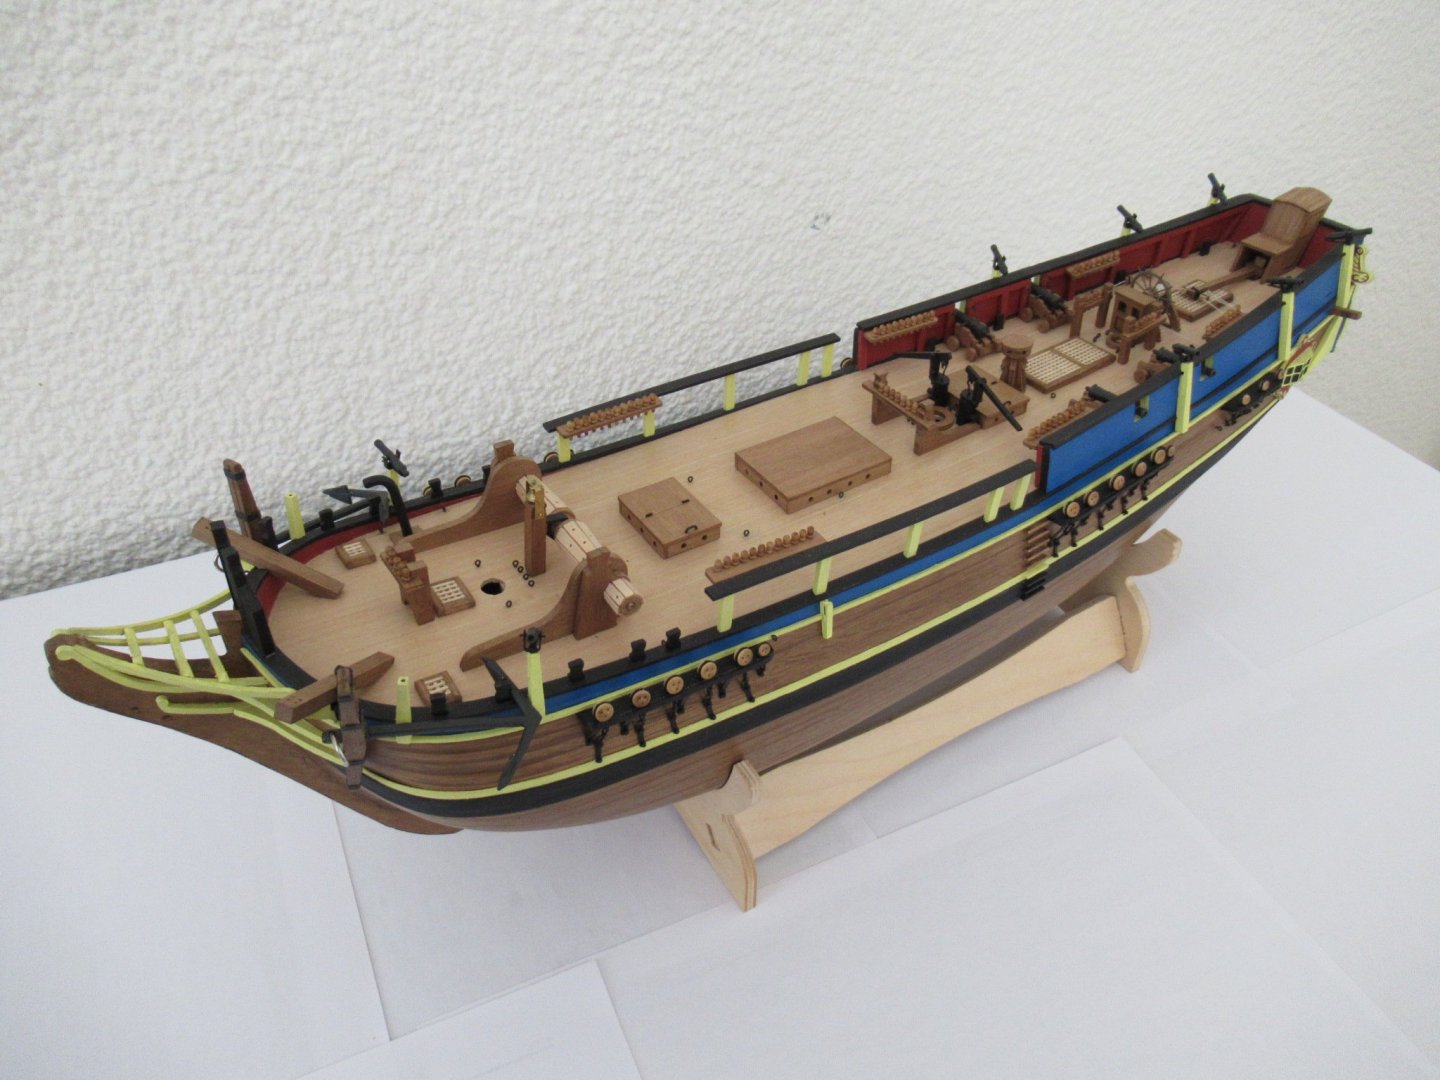
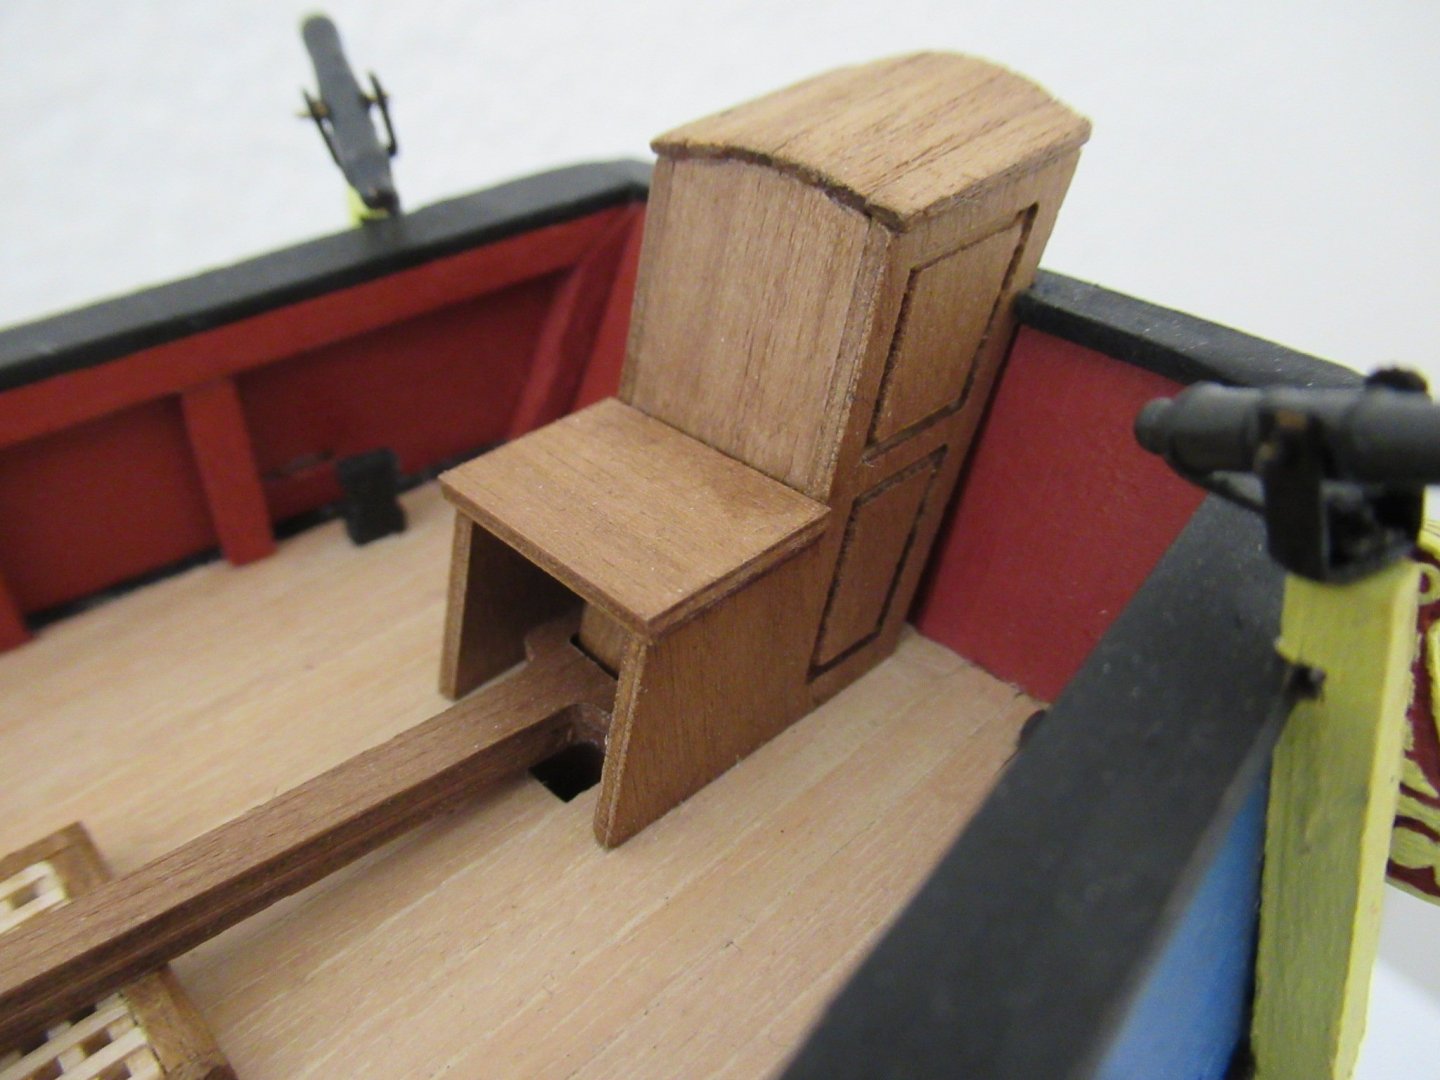
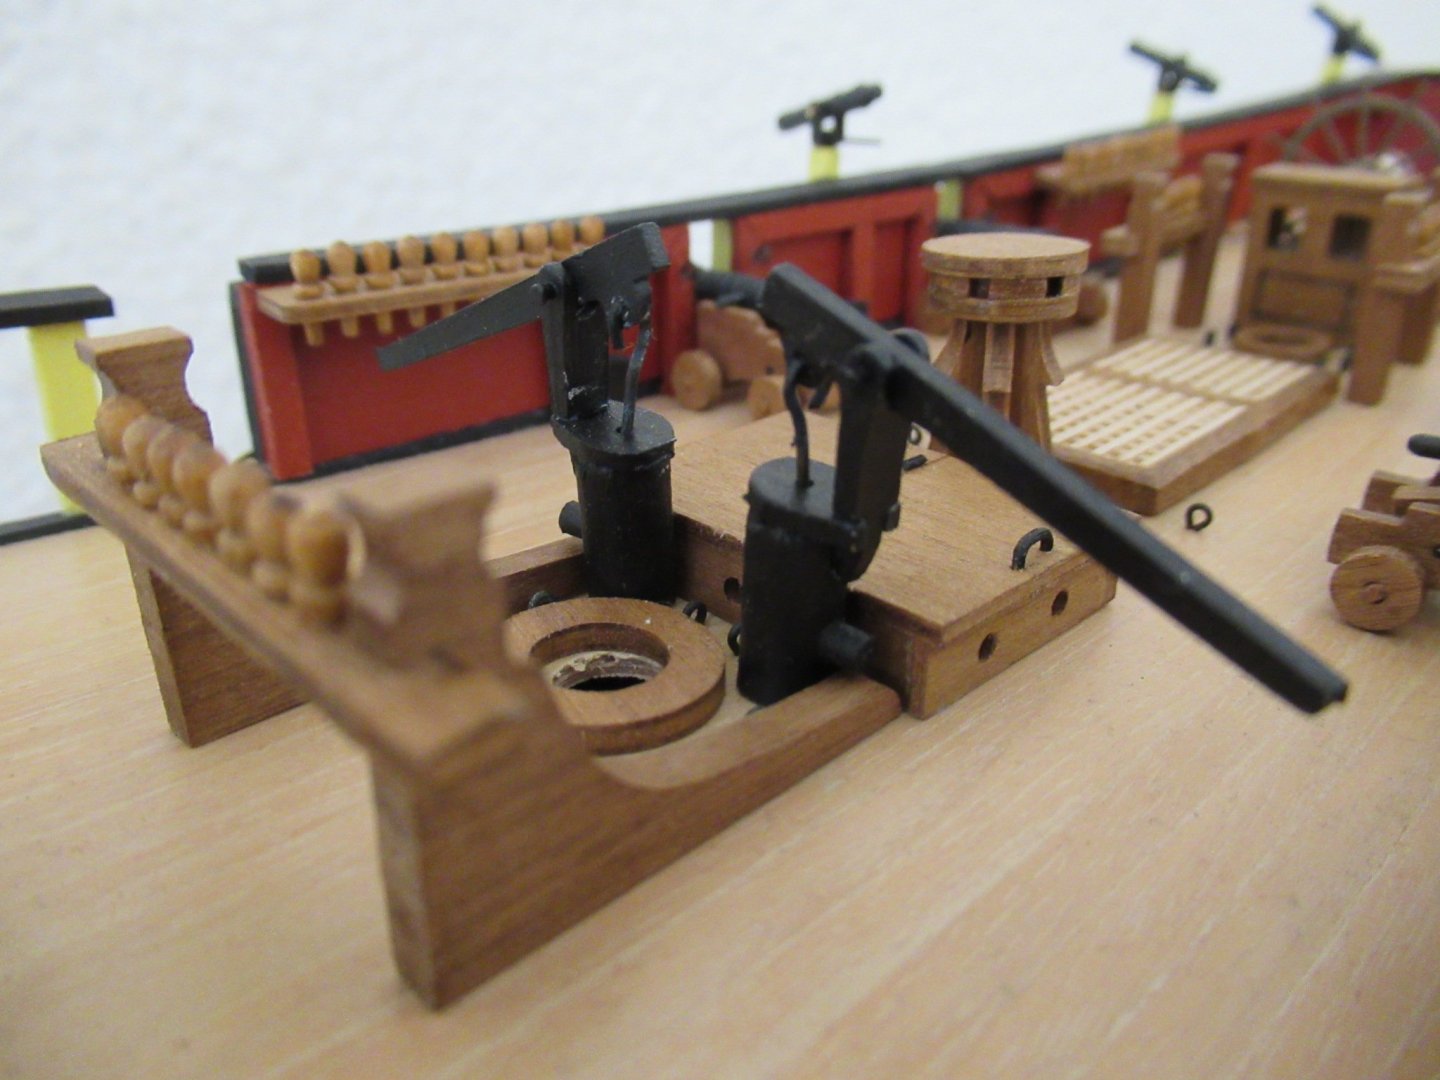
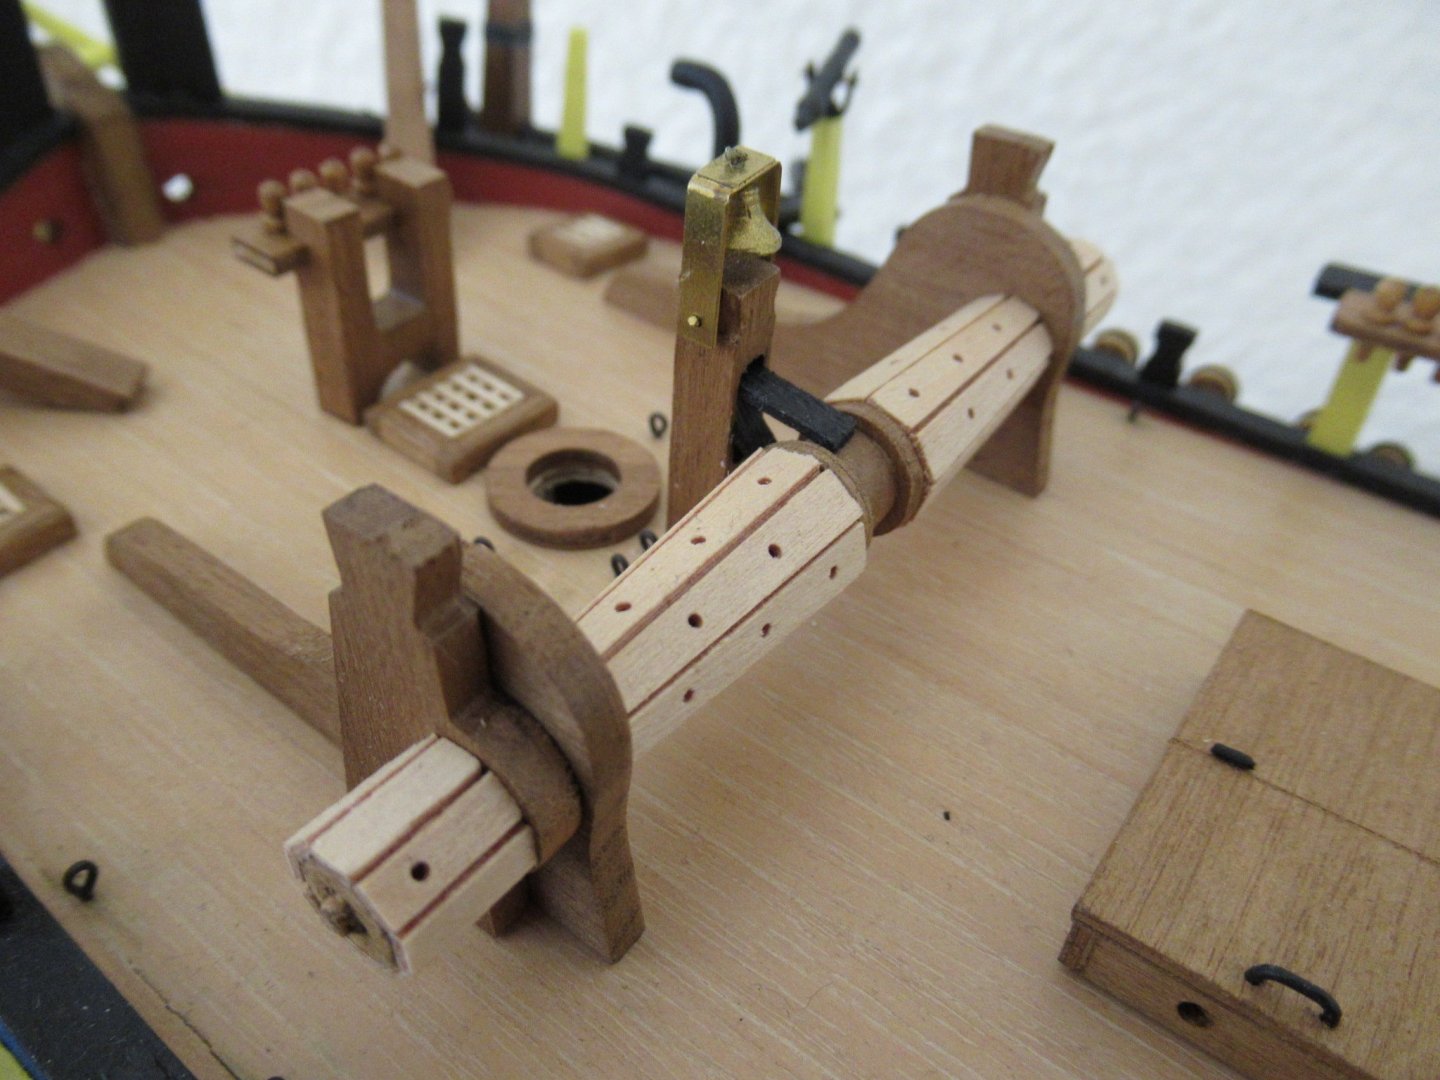
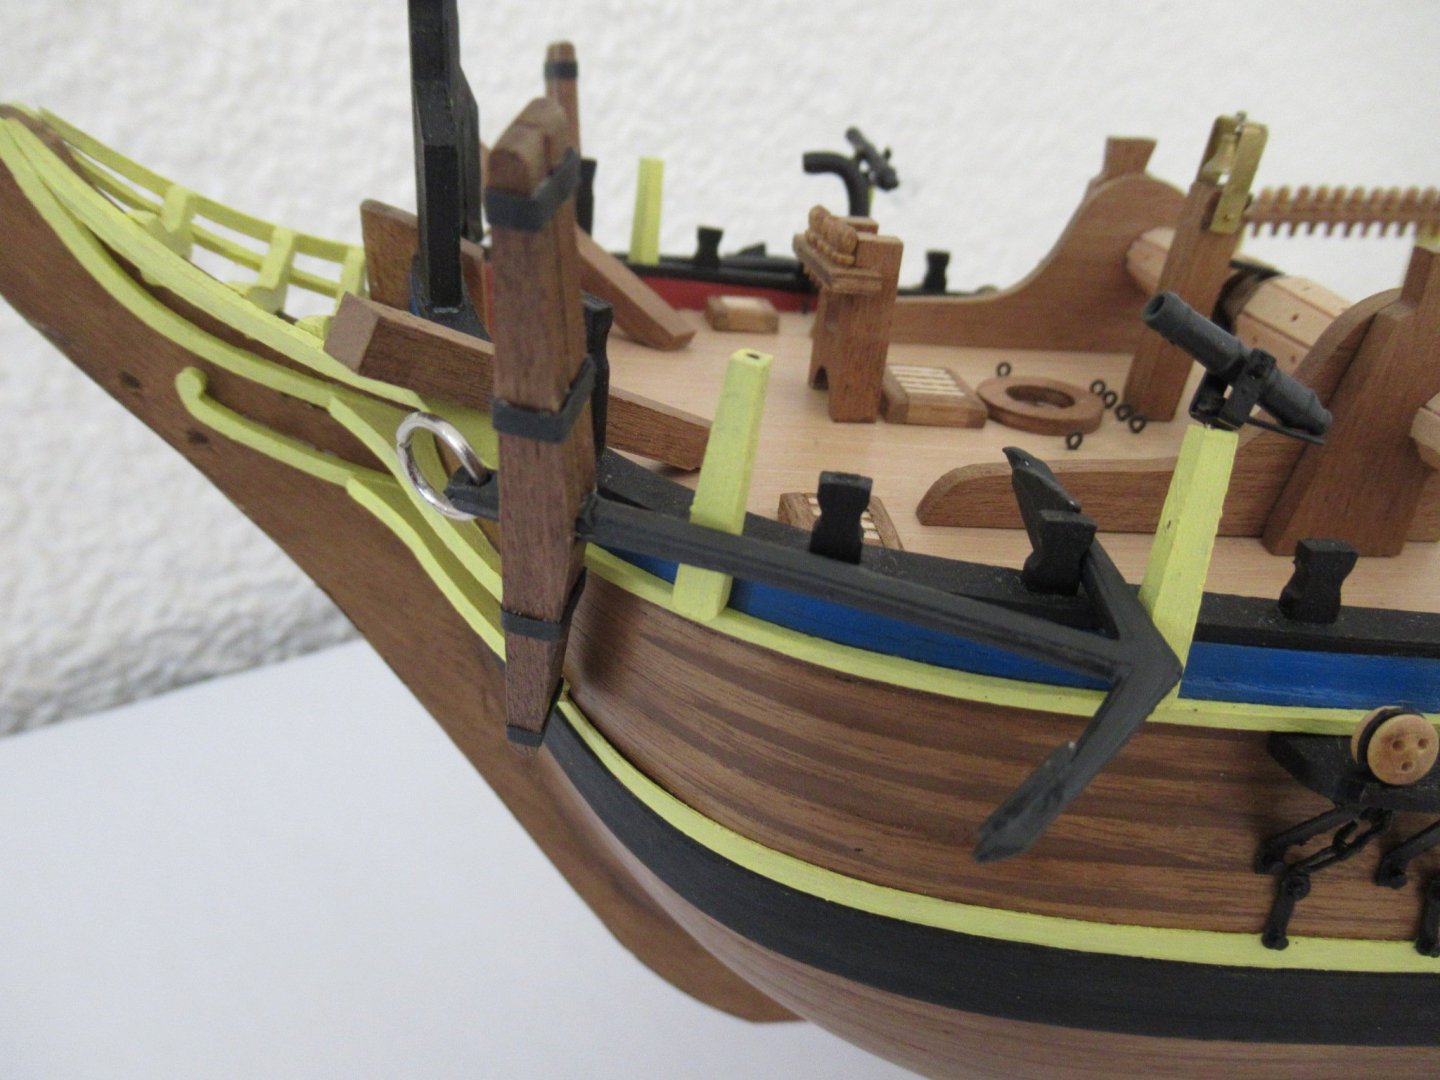
More progress to report! This is definitely a long term project! Next up were the deck fittings, starting with the hatch gratings. Slotting all the comb shaped pieces into each other and brushing them with watered down PVA was great fun! I chose to bevel the edges for added effect as I had seen others do. In the picture below you can see the difference between the small gratings that are already beveled and the large ones that I had yet to do. I started varnishing the whole grating in the imbuia that I had used for the hull but was dissatisfied with how dark it made grating; I quite liked the contrast. I sanded that one down and instead used clear varnish on the inside and imbuia only on the walnut. In the next photo you can see the varnished hatch gratings and constructed deck hatches, as well as the next challenge that I faced. Before putting the final touches to the other deck fittings and pin/gluing them in place I had to find a way to insert the NUMEROUS eyelets into position around the deck and hull. After trying various drill and hand chuck options I finally settled on using a pair of plyers to push in a nail, as nothing else allowed me to get into the cramped corners that required eyelets. The holes for pinning the deck fitting I used a drill for as these were more central and accessible. I thankfully managed to track down some patina to blacken the copper eyelets, no small feat in a hard lockdown! I also learnt from this amazing community that I could blacken the eyelets after they were already in place which made things a lot easier as the black does rub off with handling. An earbud was too big and absorbent, so I ended up using a cut down version of a small sponge make-up applicator which worked really well. It took going over them a few times but the final look was very satisfying. For the rest of the deck fittings here is a zoomed out view first for orientation: For the catheads I cut a recess in the capping rail to act as a ramp, allowing for their 45ish degree slant. The cathead support brackets also needed adjusting in order to fit around the capping rail. Below is before and after adjustment. The long side fits along the cathead, the short side against the bow. . Oddly enough the catheads came with no holes through the top end or instructions for attaching the anchors to them. I really liked what DanPage did with his, however, so I predrilled holes to create pulleys for the anchors at a later point. That is their purpose after all. Below is a photo with the anchor just resting on the timberheads for now. The anchor gave me a little trouble due to some poor plan reading on my behalf. I first glued the anchor stock in the same plane as the bottom of the anchor but realised when I tried to put them on the ship that that couldn't be right and had to pry/cut them apart again. The plans also showed a ring on the top of the anchor but the kit included no such thing. I therefore bought some at a haberdashery and will still get around to covering them in black thread later. I chose to paint the anchor gun metal grey instead of black to contrast a little with the capping rail and timberheads. You can also see a nice close up of the swivel gun assembly in the previous and next photos. They ended up being a lot more wobbly in their construction than I would have liked but I am unsure as to whose fault that is, mine or the kit. I actually ended up losing one of the housings in transit between two building locations, so you will see the two bow swivel guns are missing. A friend with a 3D printer has taken the second with the promise of modeling me another one. I also chose to paint the gun barrels gun metal grey like the anchor and the housings black like the instructions. Following the feedback that I received with regards to the missing stern capping rail I fashioned my own rail out of the left over 1.5mm walnut sheet. It took a lot of fiddling, sanding and wood filler to get it all to line up, particularly due to the inward slant of the aft capping rails, but I was satisfied with the end result. Despite cutting a slot in my new stern capping rail, the fitting of the flag locker still proved to be a challenge as I had to chose between aligning it with the deck or with the stern fascia, it would not align with both. I chose the deck so you can see a slight widening gap between the back of the flag locker and the stern fascia The construction of the deck cannons went smoothly. I chose to paint them gun metal grey as well. The paint of all the metal objects may need some touching up in the end due to all the handling. I also still need to attach the cannons to their carriages and tie the thread that anchors them to the bulwark eyelets. I did find it a bit strange that they rest so heavily on the gun ports thought. I tried taking out the small block of wood at the back of the carriage that the barrel rests on, but it made the cannons themselves look strange, even if it did give a more aesthetic look from the outside of the ship. The windlass was great fun to build with all its little panels. I chose once again to use imbuia varnish on the walnut parts and clear varnish on the ply to maintain the contrast. The three little brass pawls were far too small to fit into the recess in the post and positioning three strips of equal length around the windlass seemed very impractical. I therefore made two new ones out of wood that were wide enough to fit the recess. As they get painted black their original material seemed less important. There was no indication as to how to attach the bell to the bracket so I chose to drill a hole through it for a piece of thread. The theory was that the slightly recessed knot at the bottom of the bell would look like the clapper and the thread would allow the bell to swing a bit independently of the bracket giving a more realistic look than a fixed wire. The one snag was that the casting of the bell got too hot while drilling and melted onto the drill bit! It was a bit hard to get it off! The rest turned out as envisioned however. I painted the bell gold and decided to leave the brass bracket as is to match. The pump assembly was a bit of a figuring out mission. The plans were poorly labeled; some lines had no labels, some labels were incorrect and some things weren't labeled at all. I cut the wrong sized dowel to begin with but eventually figured it all out. I got my first taste of working with blocks, thread and eyelets in the construction of the ship's wheel mechanism. I'm a veterinary surgeon so it felt surprisingly natural to tie reinforced surgeon's knots in small corners with some spare surgical instruments that I had lying around. Getting the mechanism to actually turn the rudder was another story! In my efforts I ended up loosening the tiller arm from the position that I'd glued it and suddenly everything worked! Turns out I had glued it at too much of an angle so that it was under too much tension. The last piece of update for now is the harrowing experience of drilling the 3mm holes in the bow for the anchor hawse ropes. In order to have them level with the deck I drilled from the outside in as the drill would not fit flush with the deck to enable drilling from the deck side. In hindsight I should rather have gotten the positioning more even and dealt with a downward sloped to the holes. In order to fit between the cheeks and headrail frames the drill bit had to be quite long. This made for less accuracy and visibility during drilling was poor, which, combined with my general lack of skill, sadly resulted in rather asymmetric holes. But, as with all these small mishaps, it will hopefully only be noticeable in the final product if it were to be specifically pointed out. In driving home that point, here is a zoomed out last picture of my progress thus far: The lanterns I will leave til last as they complicate transportation. The ships boats are currently in the process of being planked. Otherwise it's onto the bowsprit and masts!


-
mtaylor reacted to a post in a topic:
Lock Down Trouble: Blackening Copper and Brass with Essential Items
-
Thanks so much for all the feedback! @Bob Cleek that is invaluable advice! I would have assumed that the wood would have been affected. Fortunately I have since managed to find an essential worker college who had some patina lying around at home! So that was a big life saver but I still took your advice and have been applying it after putting the eyelets into the deck and it's working really well! @DavidG that's super cool! Thankfully I don't have to resort to such measures after all, but I appreciate the feedback and will definitely stash that piece of info at the back of my mind in case it comes in handy later😃. Out of interest lockdown in SA is still forging almost full force ahead😢. Unfortunately this isn't Texas so guns are FAR from essential services! And Jewelry and art supply traders will only be back in a few MONTHS time at the rate our government is going. We're finally allowed to order cellphones and computers online again but still no "non essential" deliveries allowed so no chance of shipping in anything. Hardware stores have finally opened again but are only allowed to sell goods essential for professional tradesman like Plumbers and Electricians to perform emergency repairs, so still no joy there either. So I'm hoping I don't come across anything else that requires non essential items in order to continue! Thanks for all the help!
-
I am new to ship building and have just discovered the concept of blackening my copper and brass pieces (instead of using primer and black paint and still ending up with flakes coming off with handling). I have one big problem, however, I am currently a part of the strictest Covid lockdown in the world and can't buy anything other than essentials which, unfortunately, does not include anything sold at a hardware or jewelry store or bought online. From the reading that I've done, it seems that anything short of liver of sulphur gives too variable, brownish, green and/or short lived results (boiled eggs, sulfur ointment under heat, combo of salt, ammonia and vinegar). I want it to be properly black and to stay that way. Is there any chance anyone knows of anything that would be available as an essential item(s) that would do the job? I know I'm grasping at straws here but lockdown still has 16 days to go at the very least, maybe longer...
-
GrandpaPhil reacted to a post in a topic:
HMAV Bounty by Candice - Caldercraft - Scale 1:64
-
Henke reacted to a post in a topic:
HMAV Bounty by Candice - Caldercraft - Scale 1:64
-
chris watton reacted to a post in a topic:
HMAV Bounty by Candice - Caldercraft - Scale 1:64
-
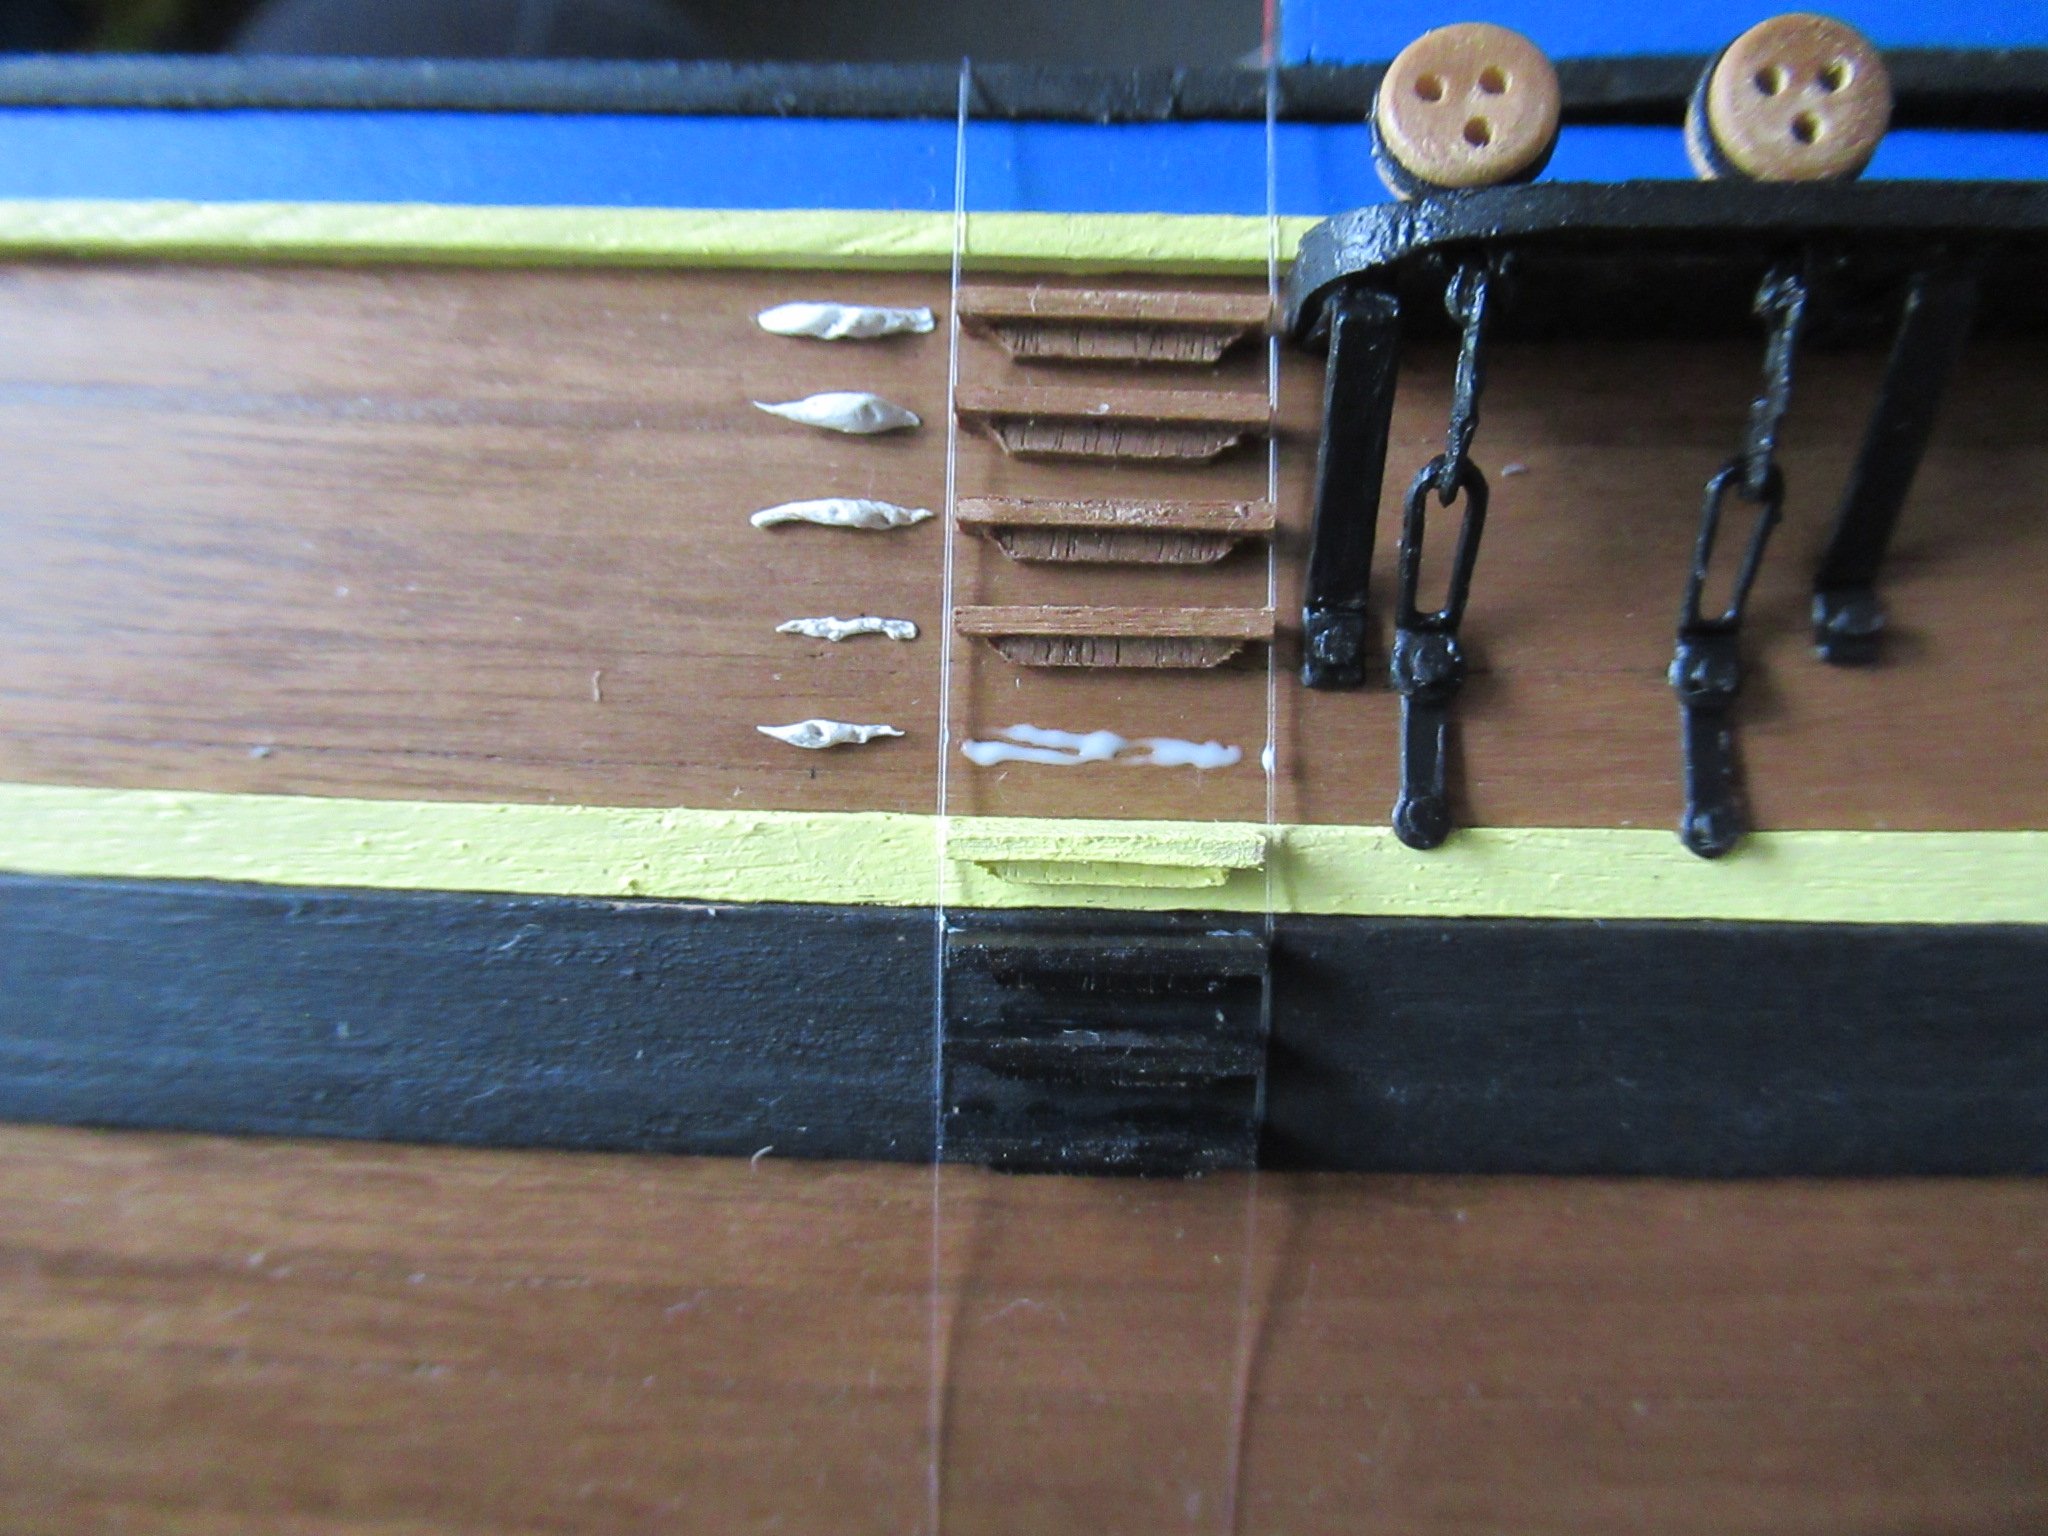
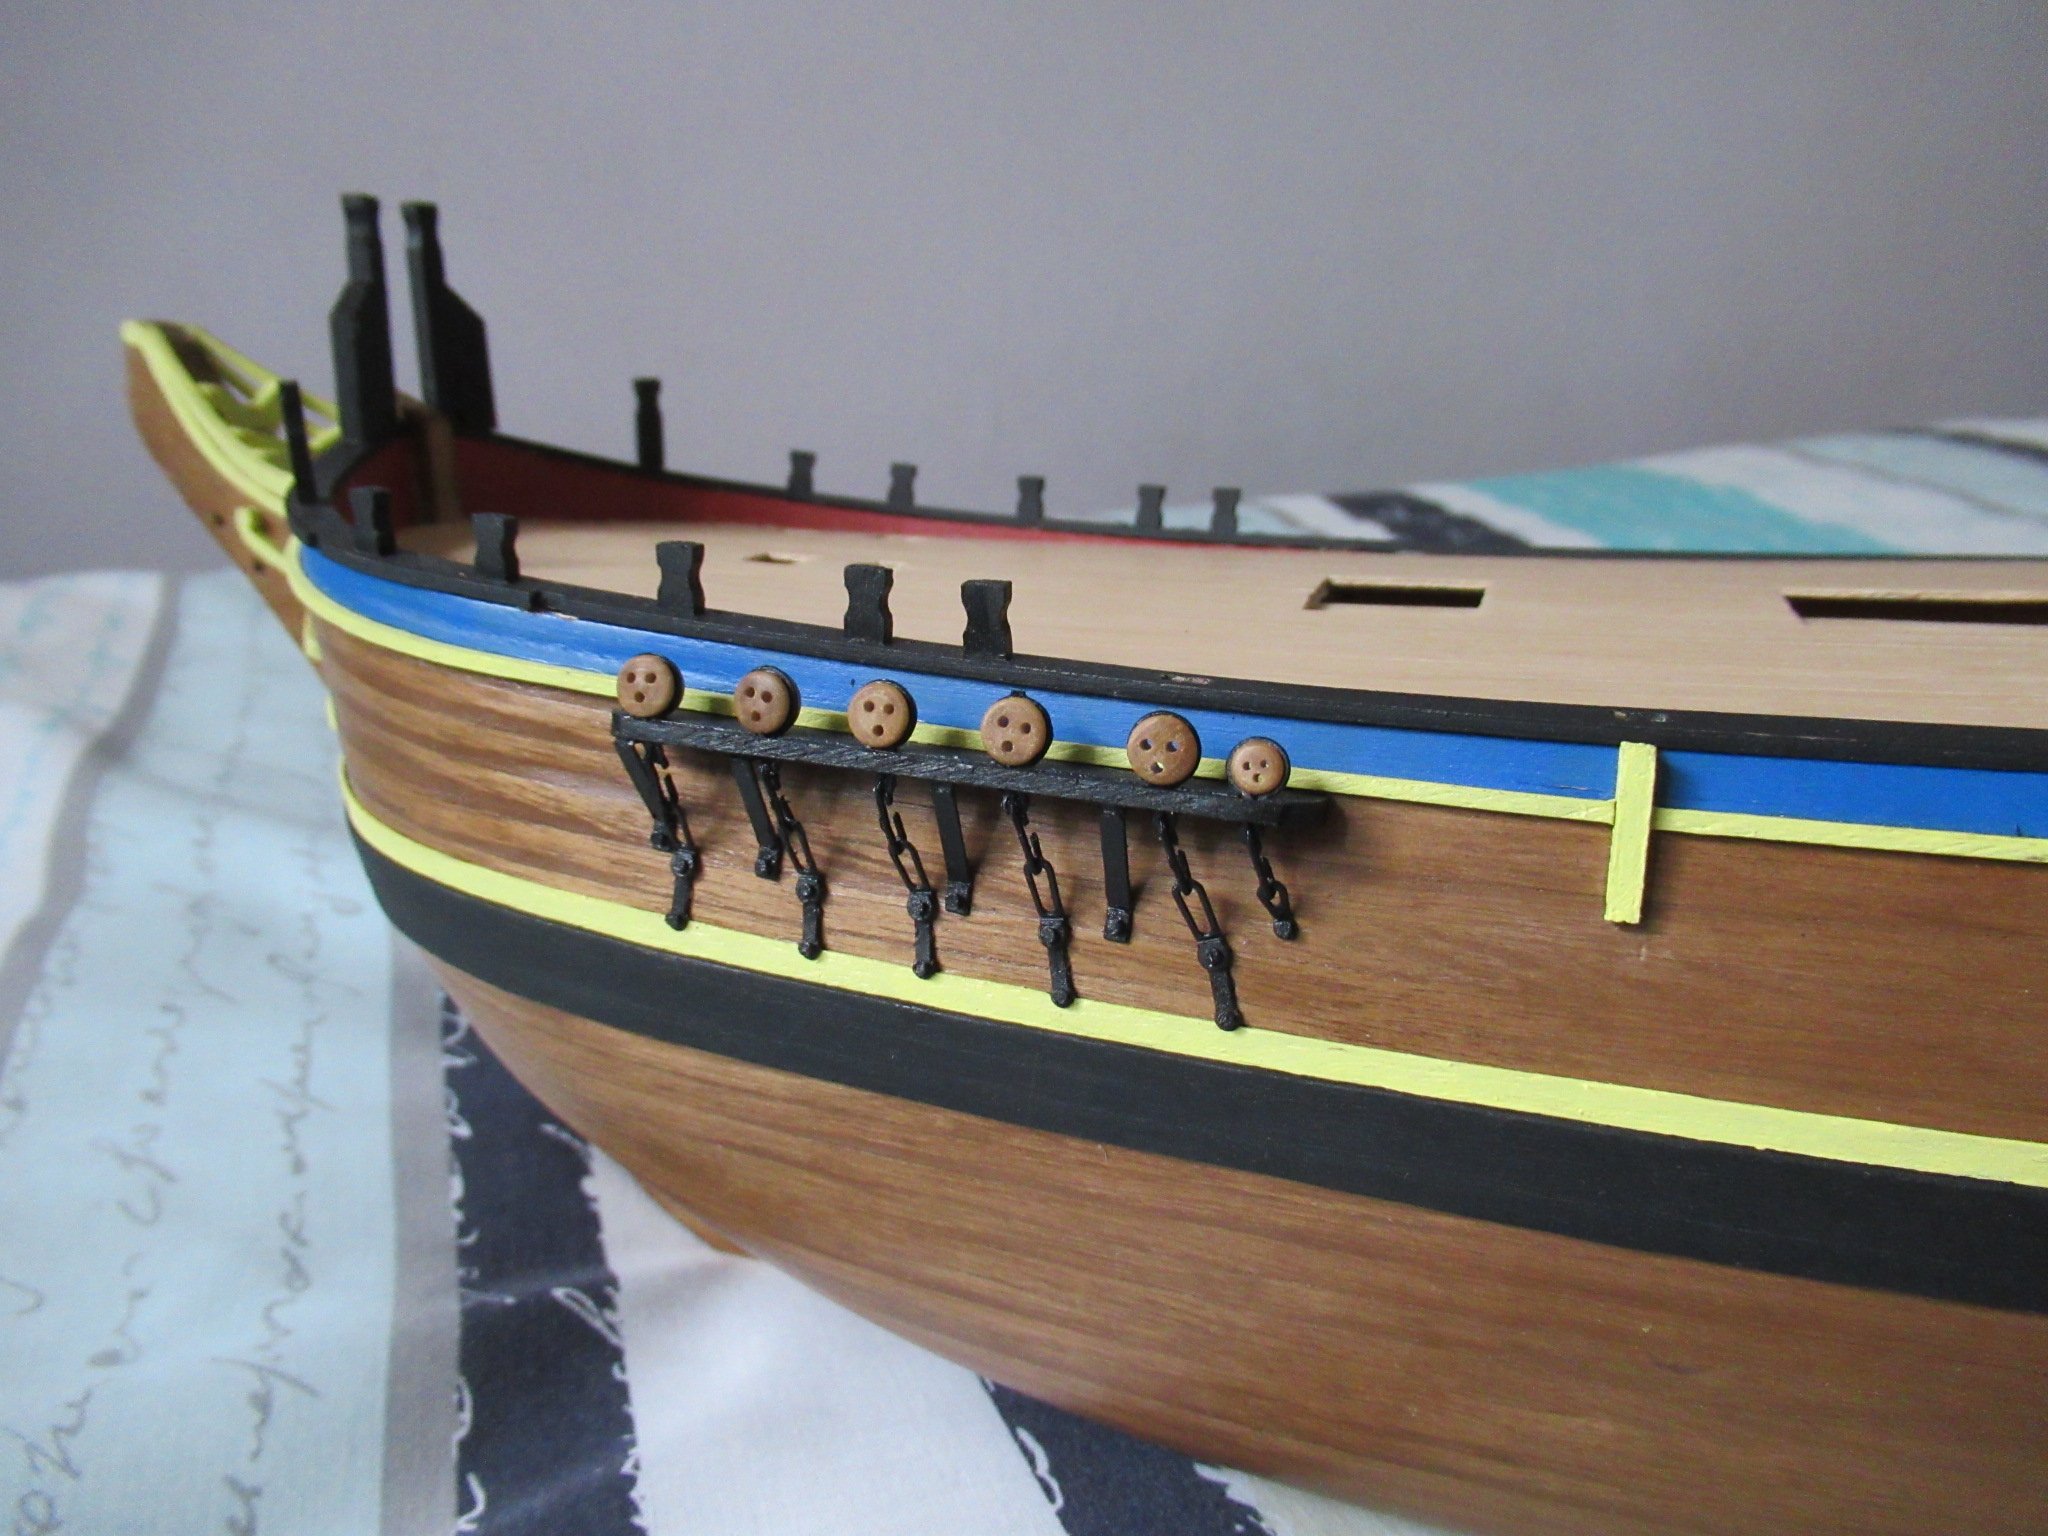
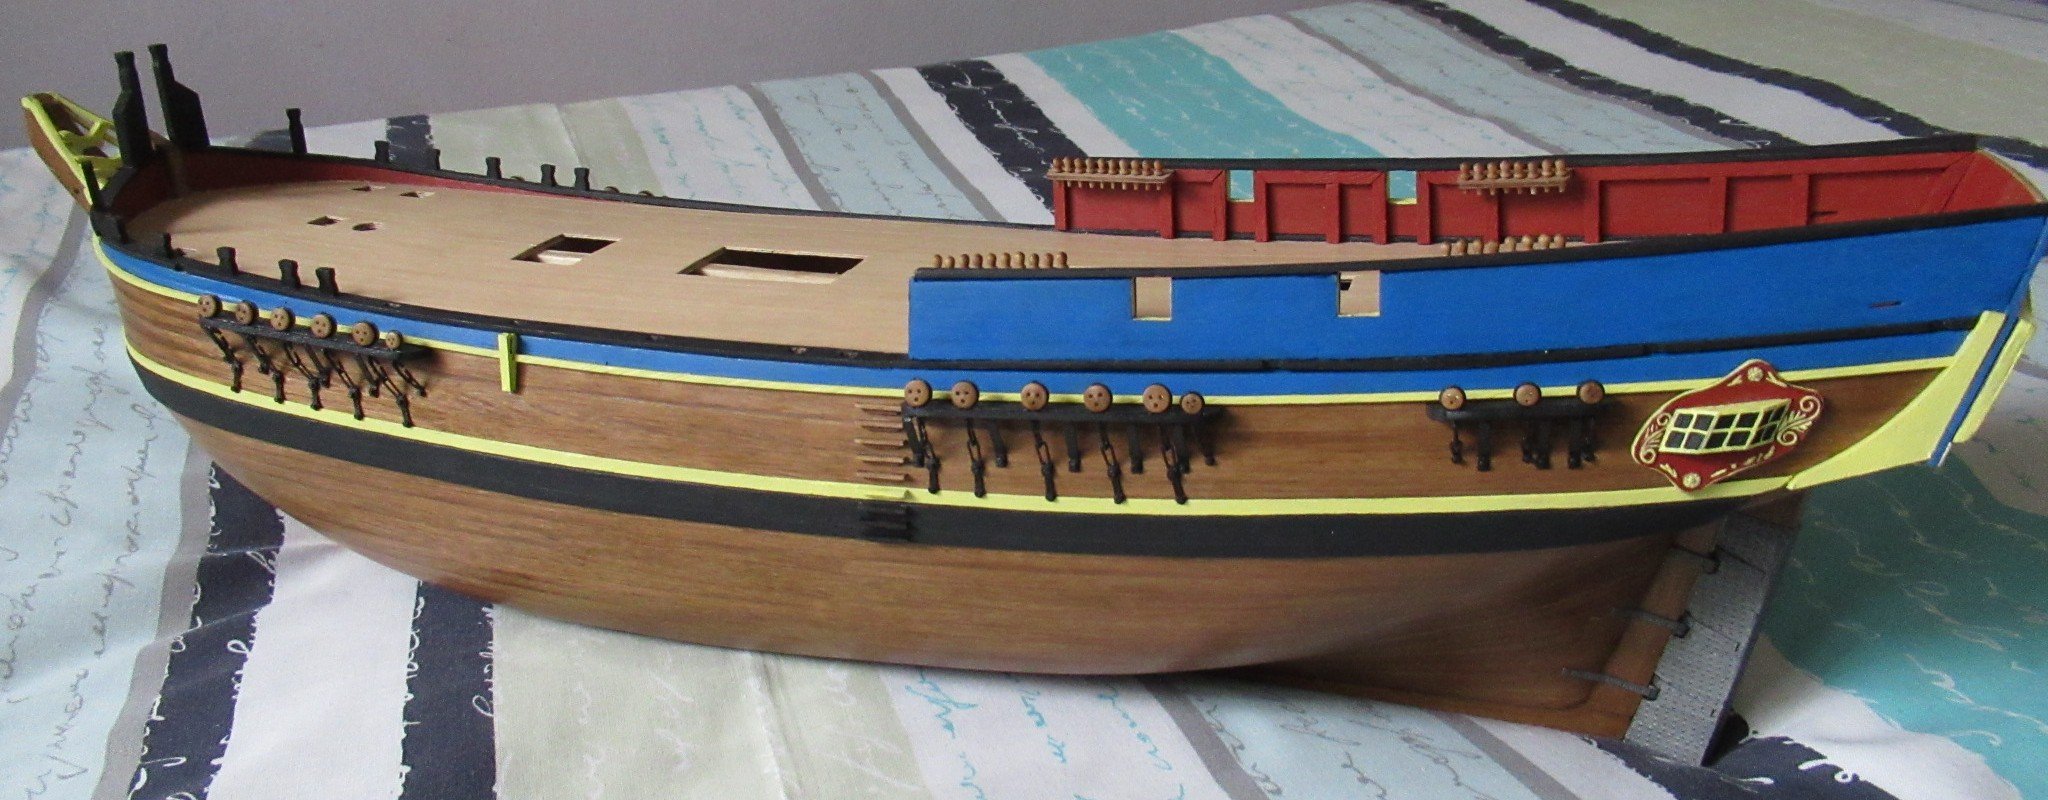
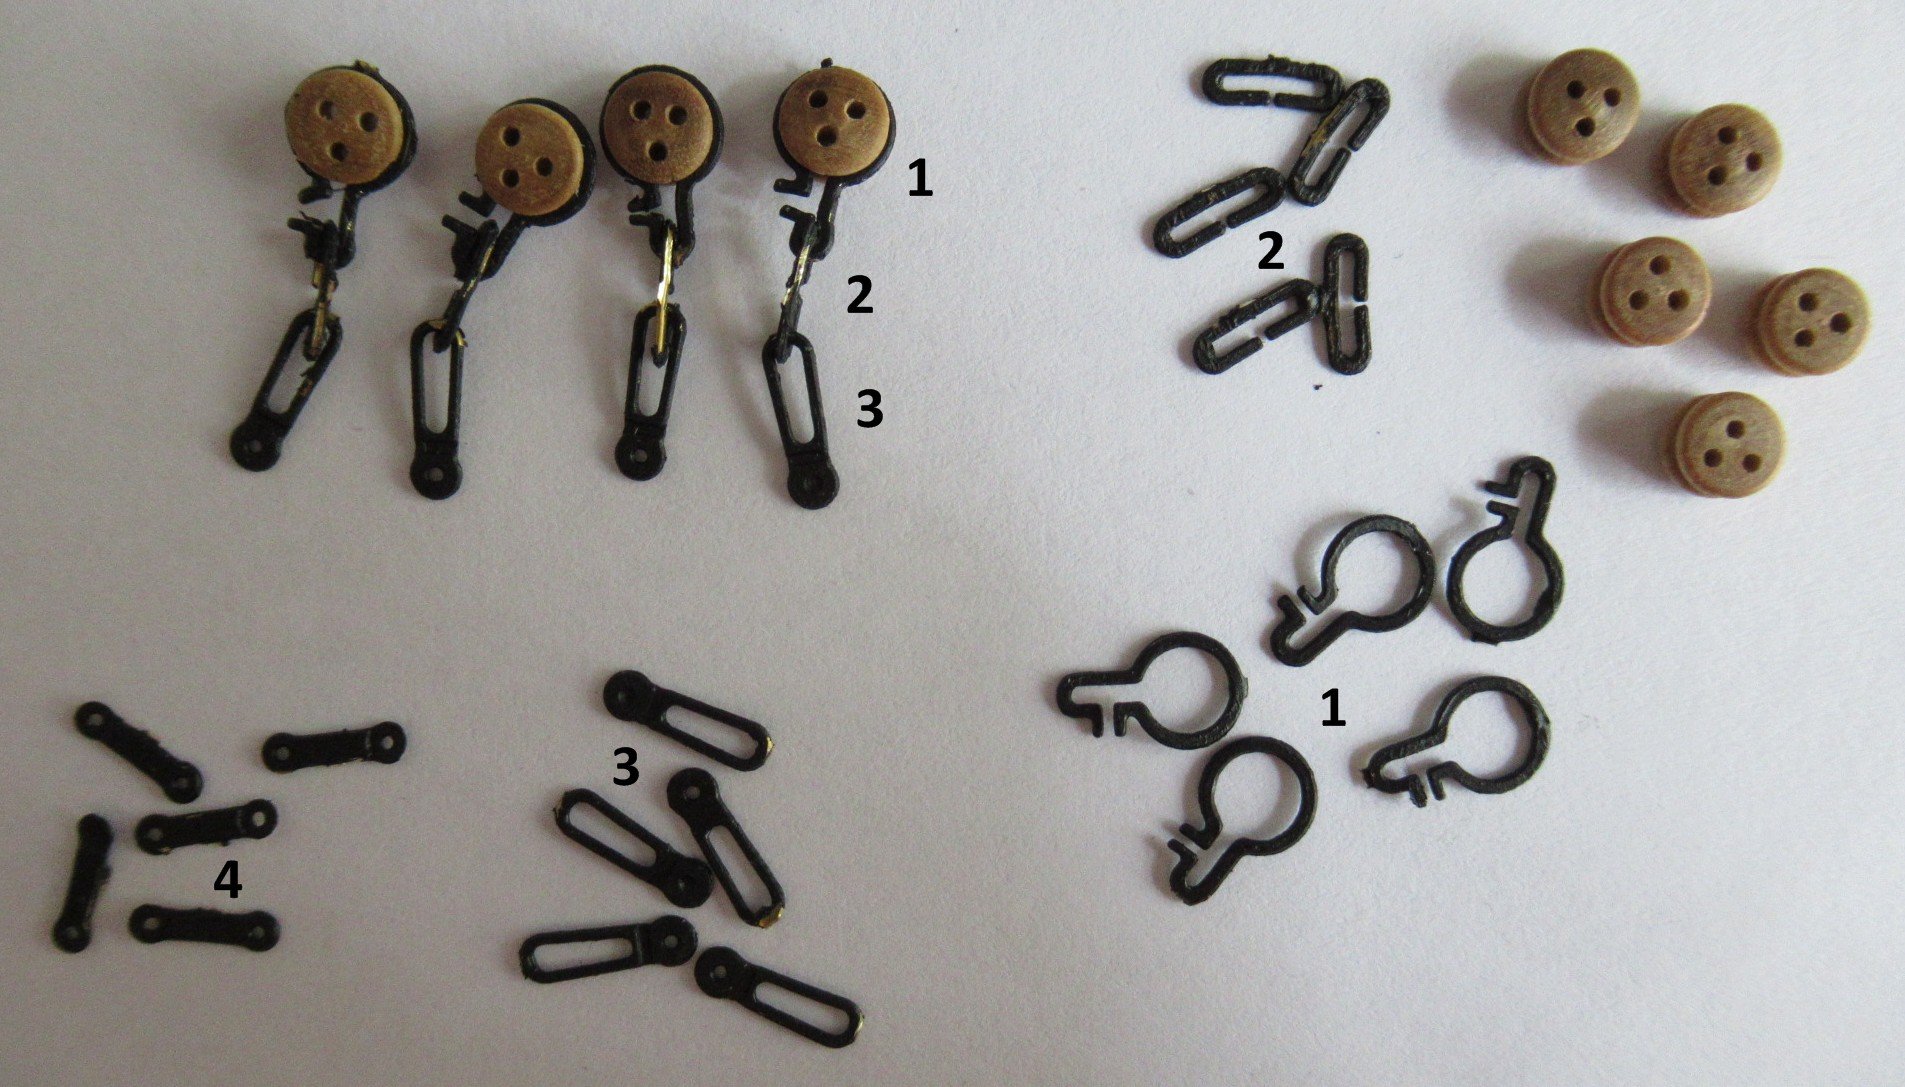
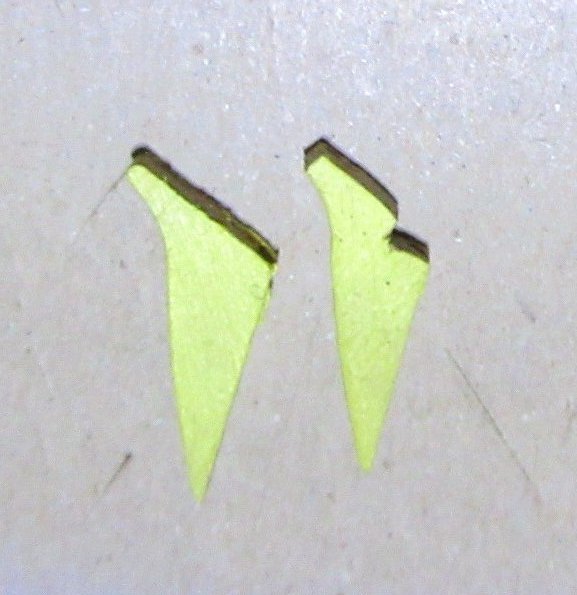
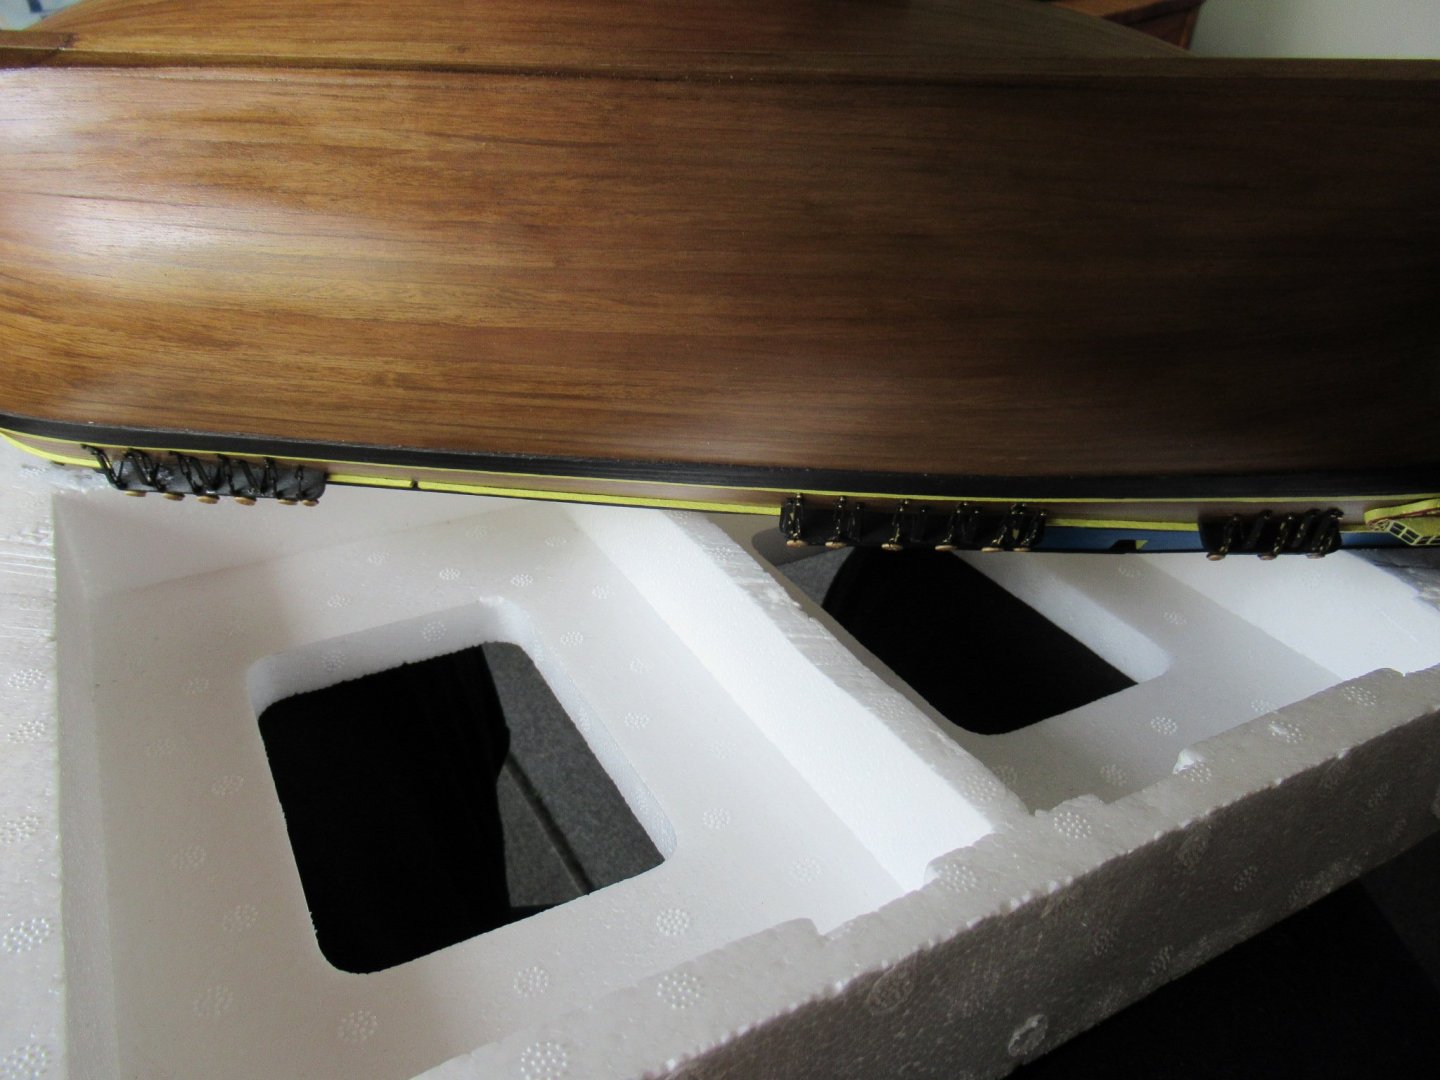
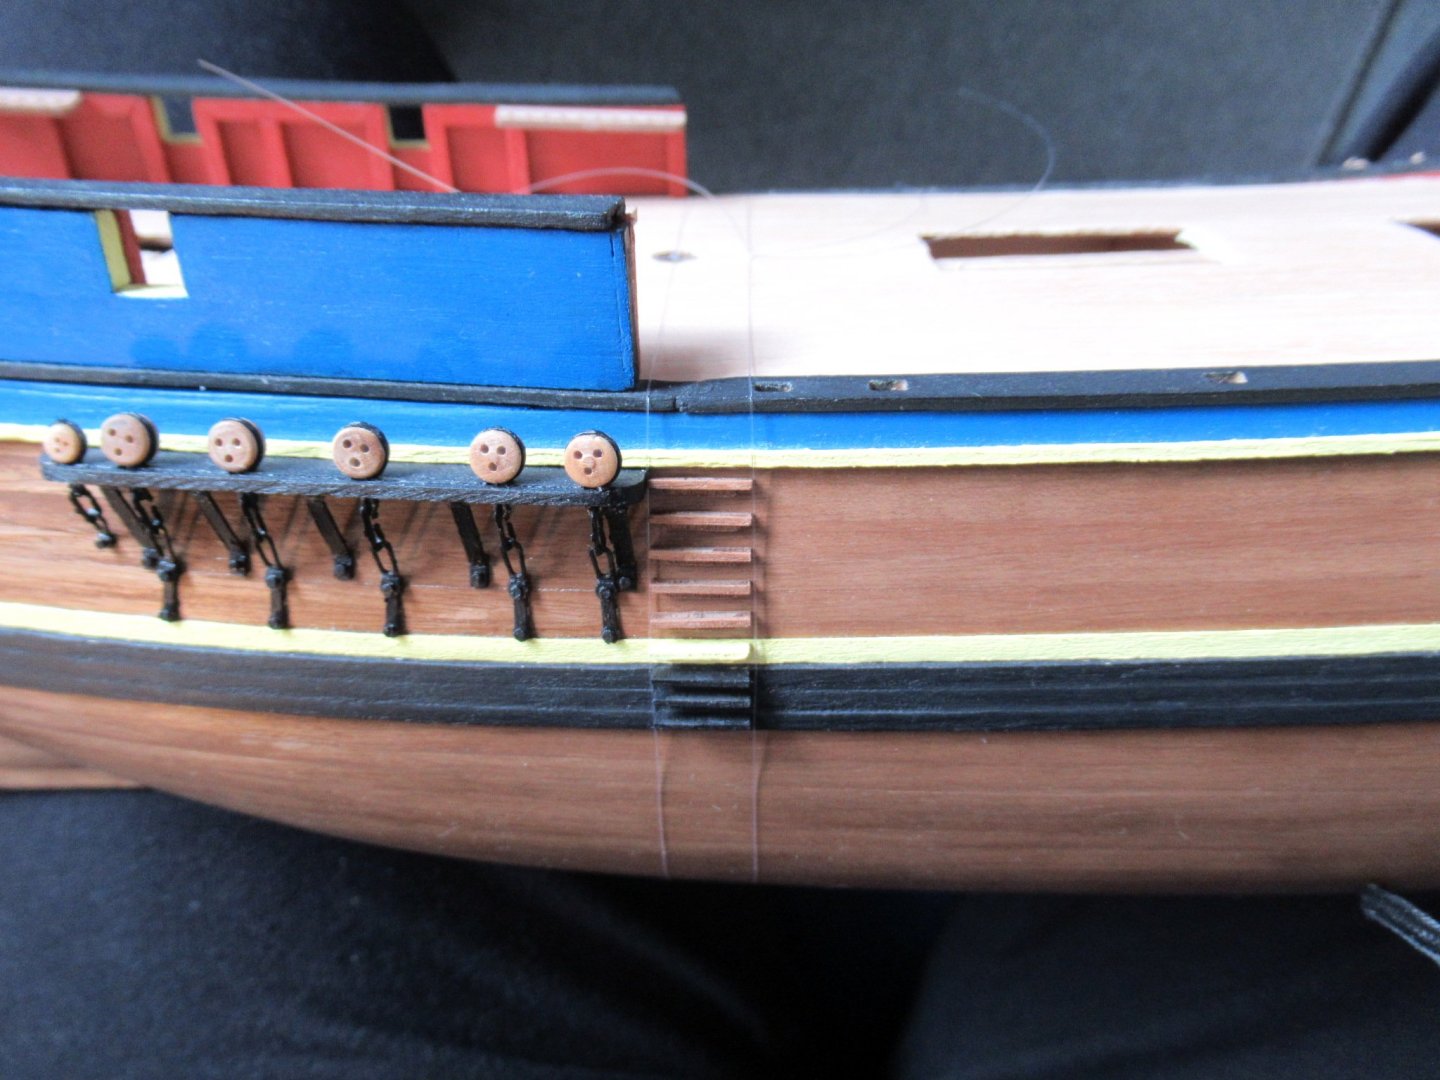
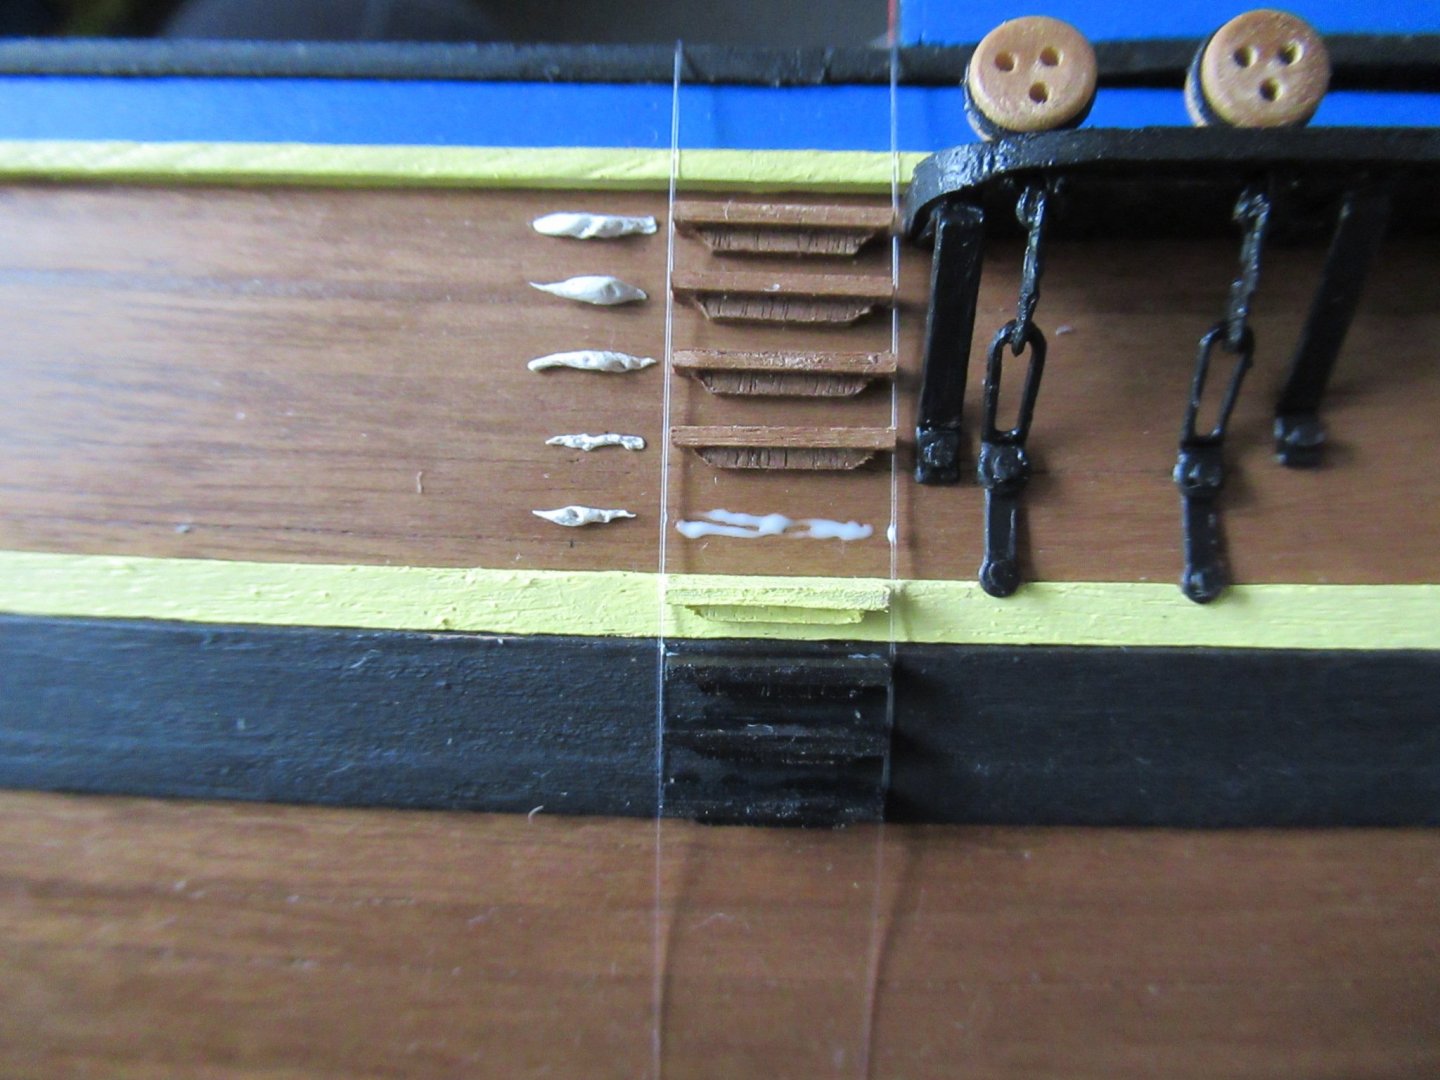
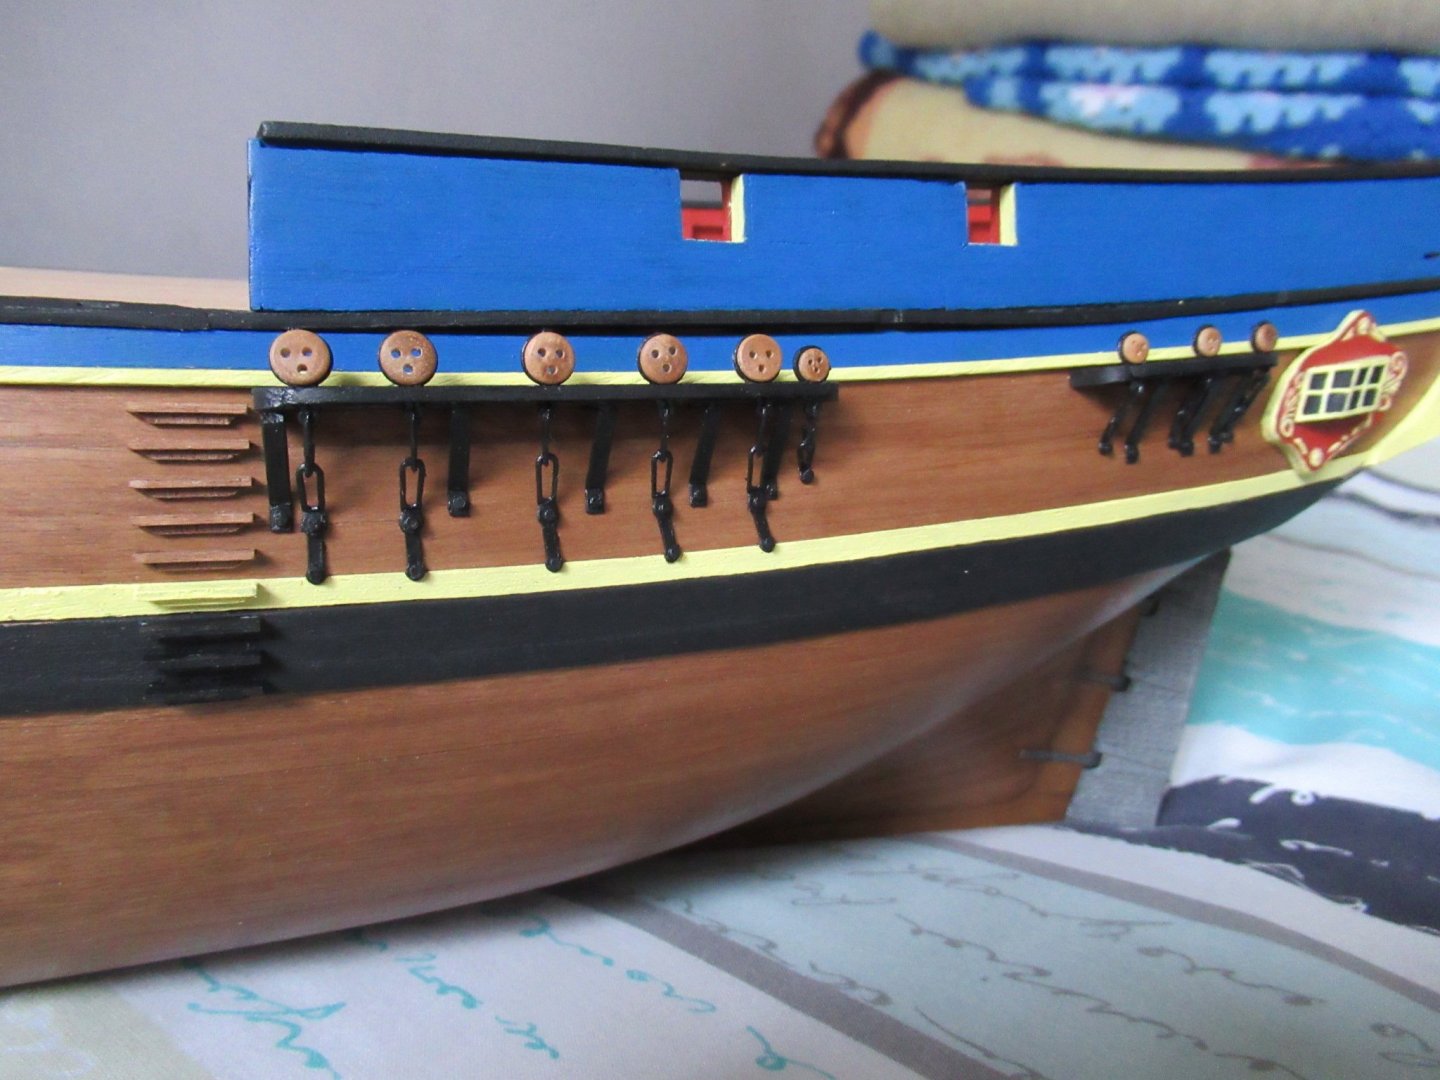
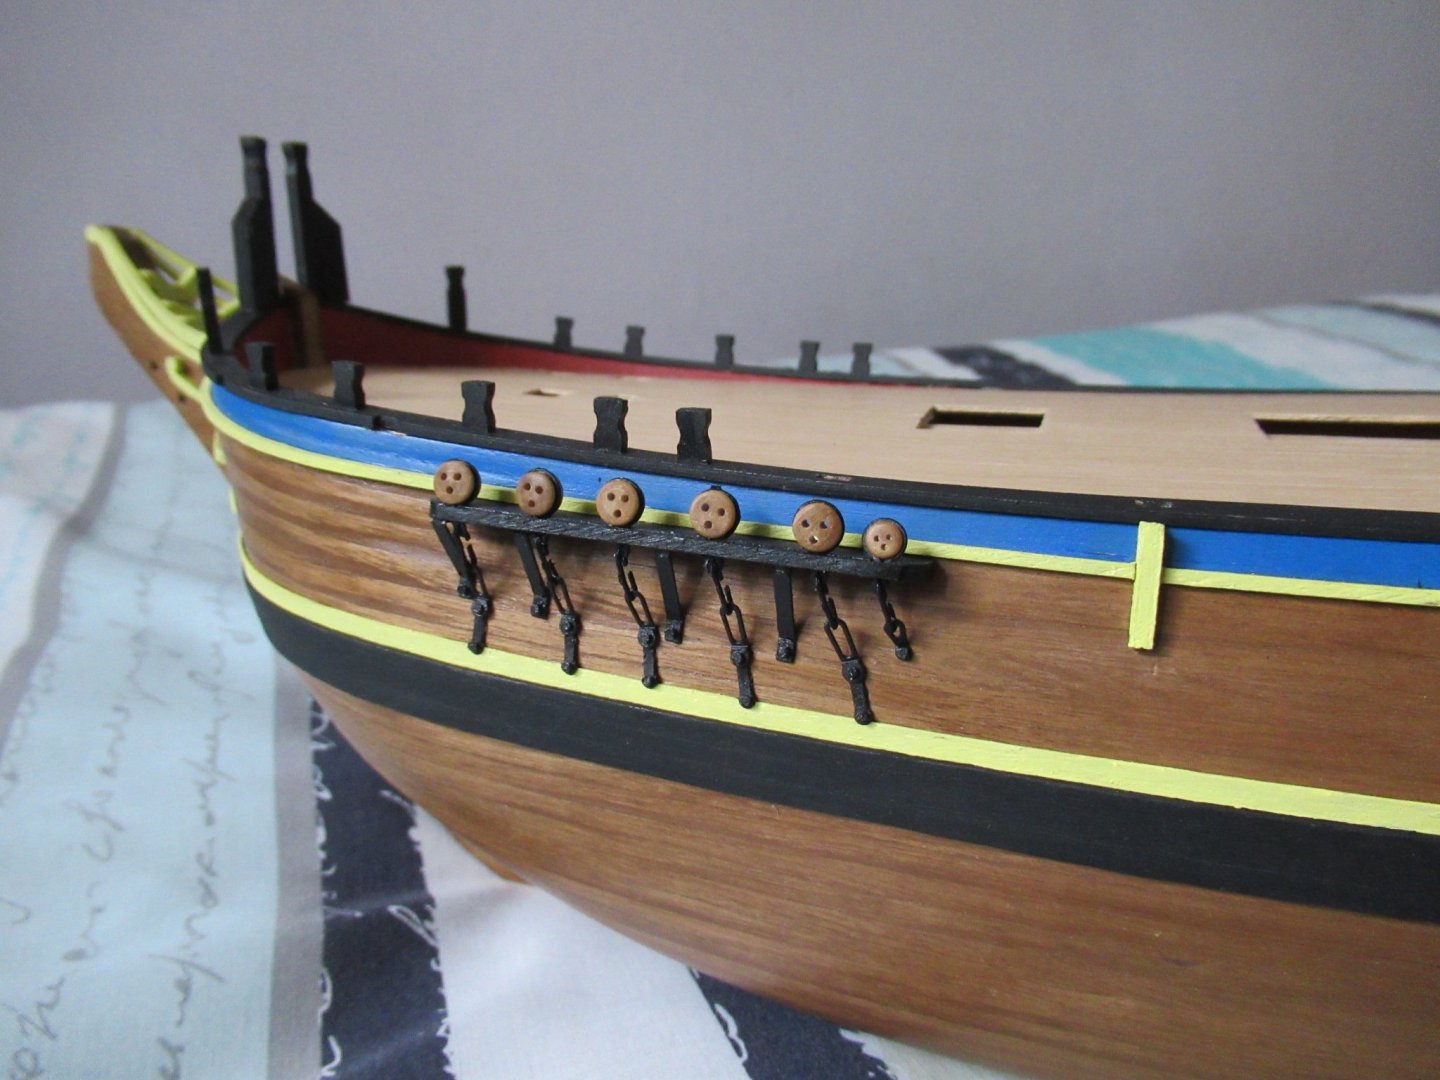
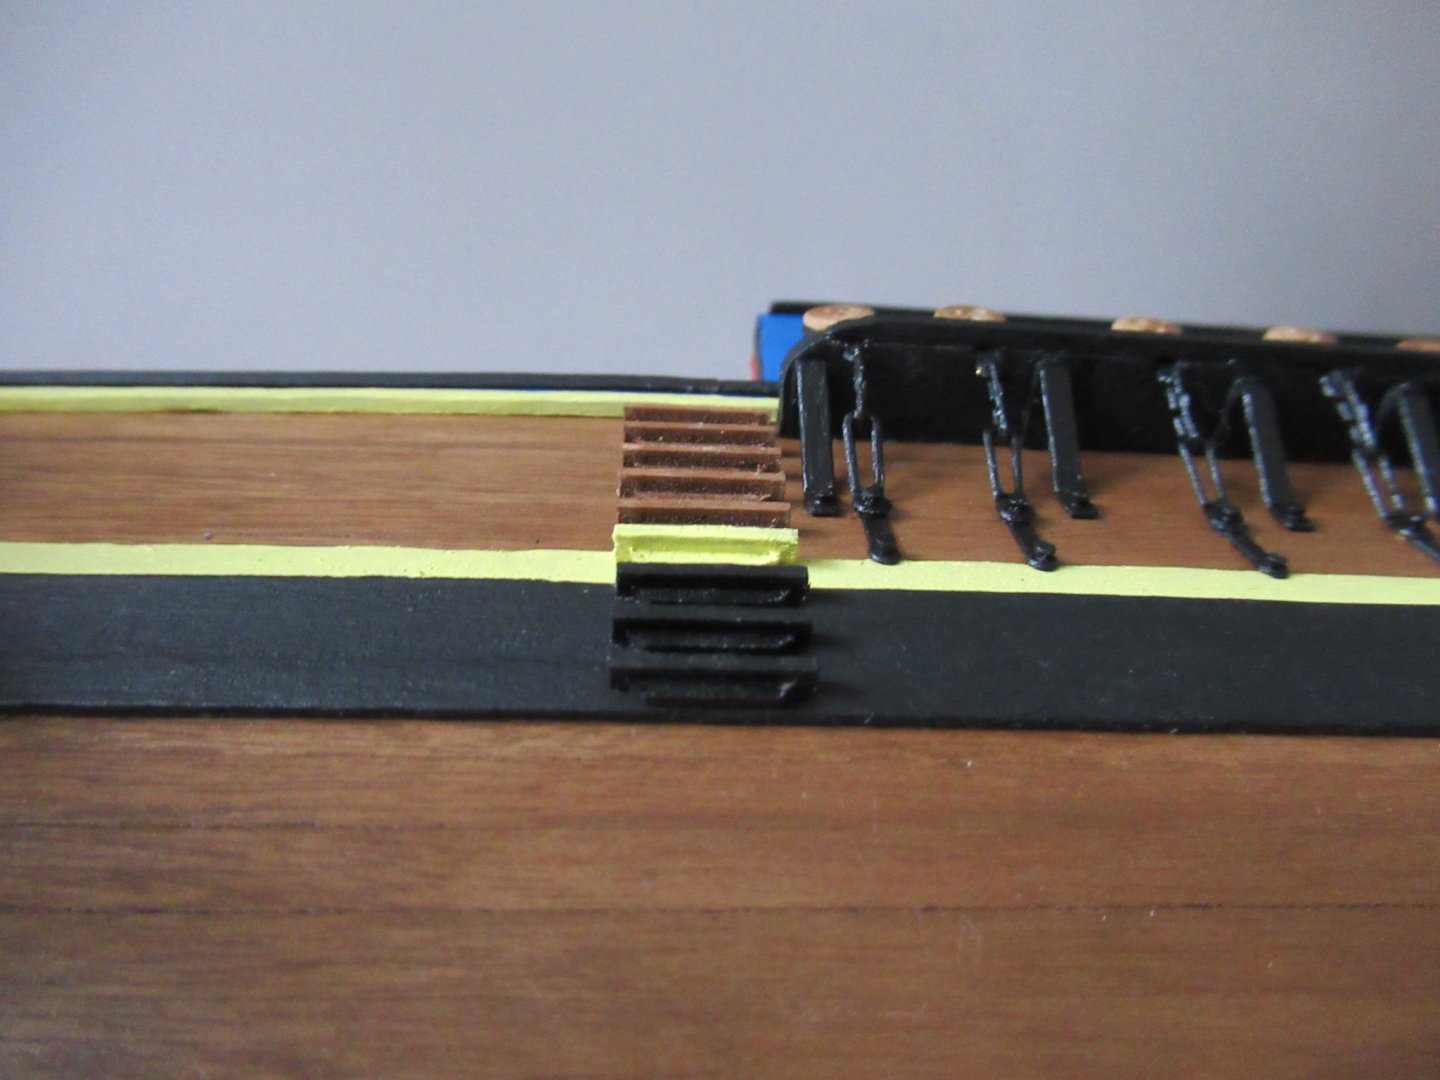
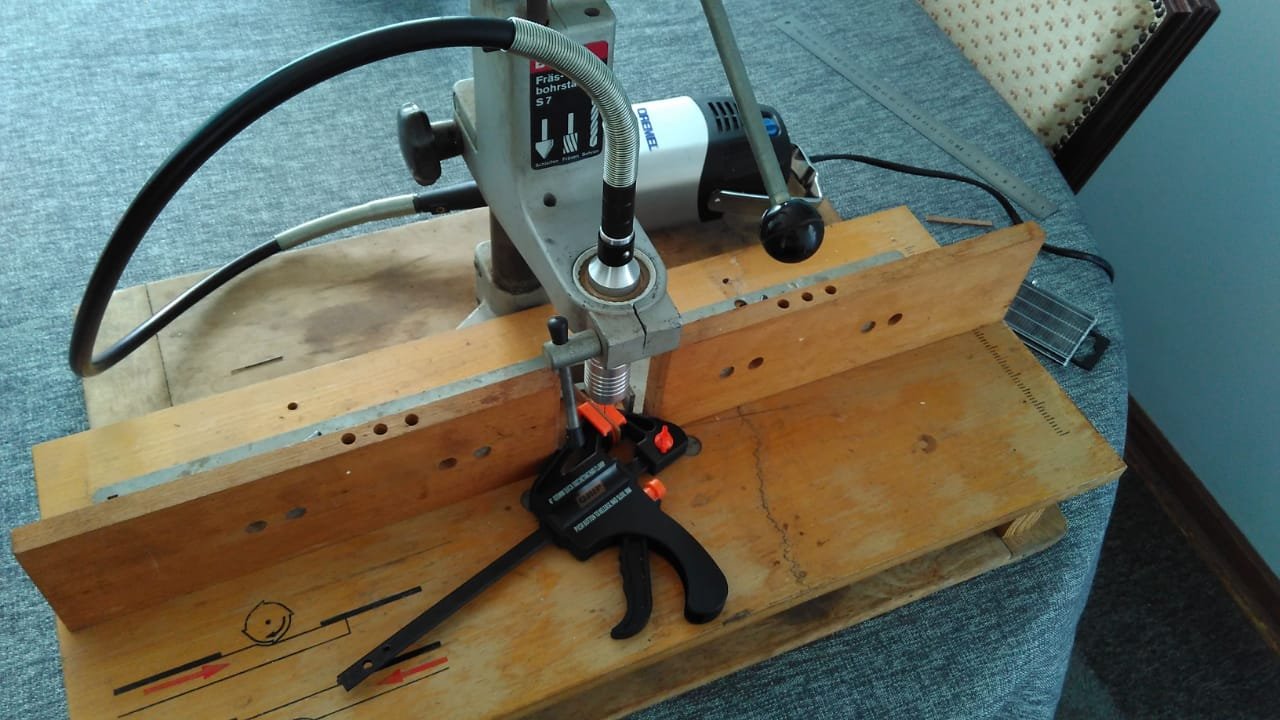
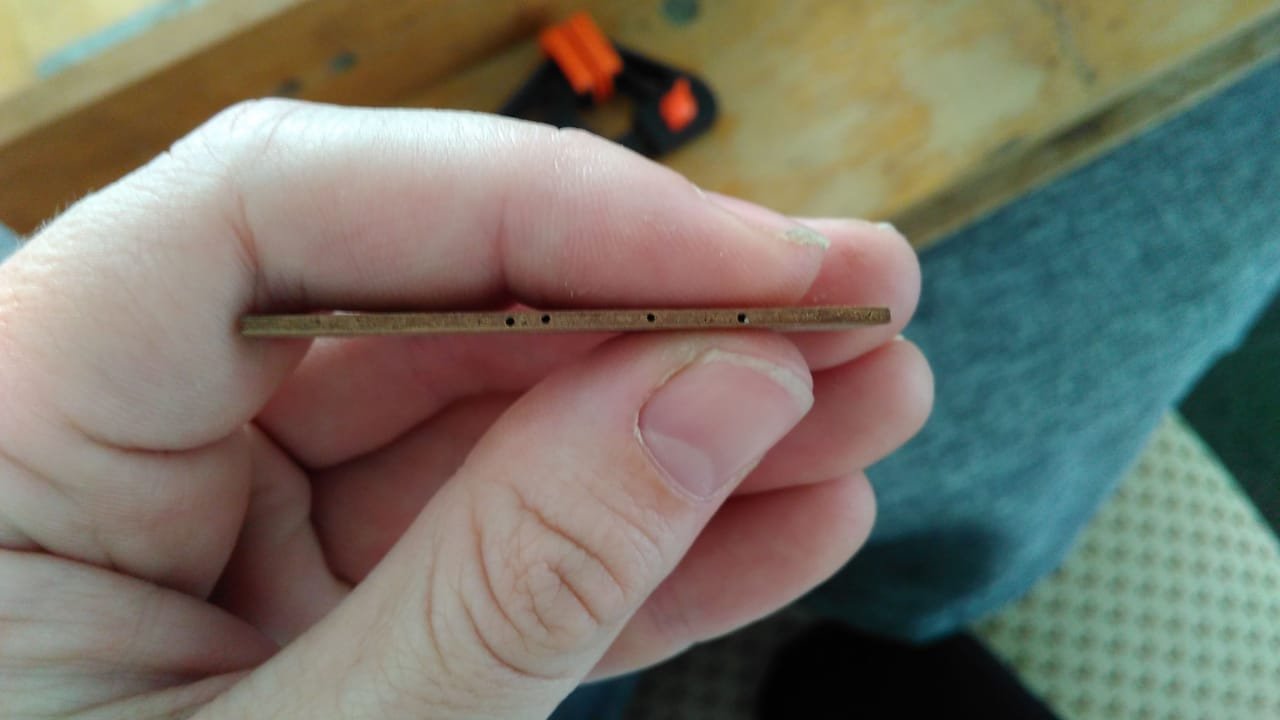
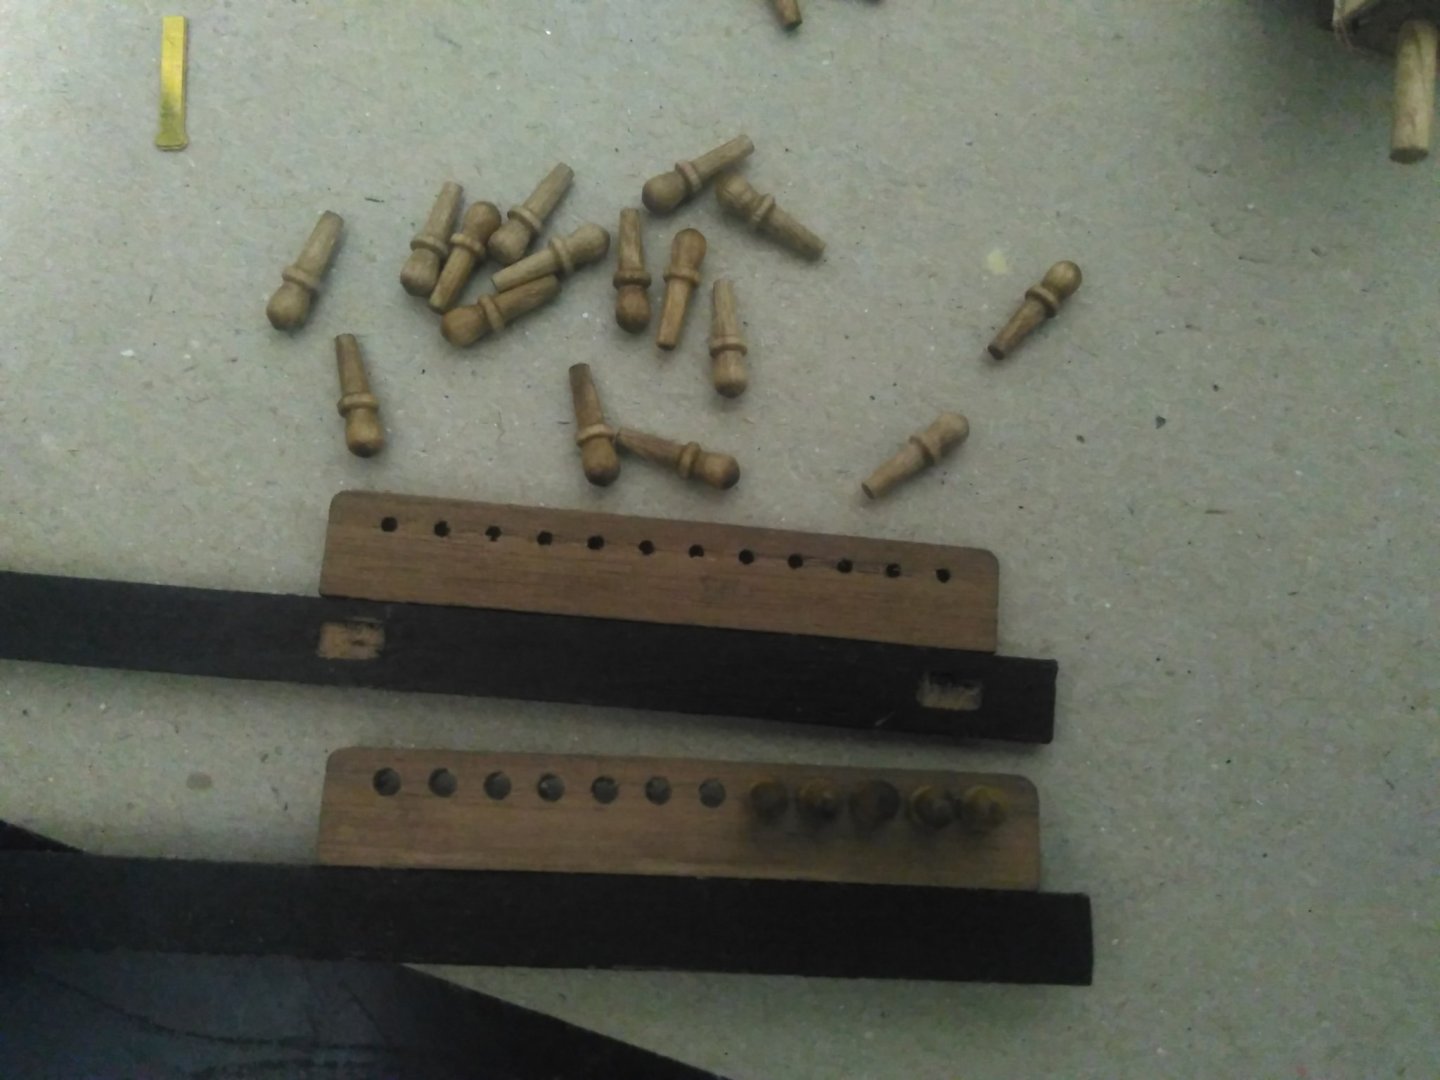
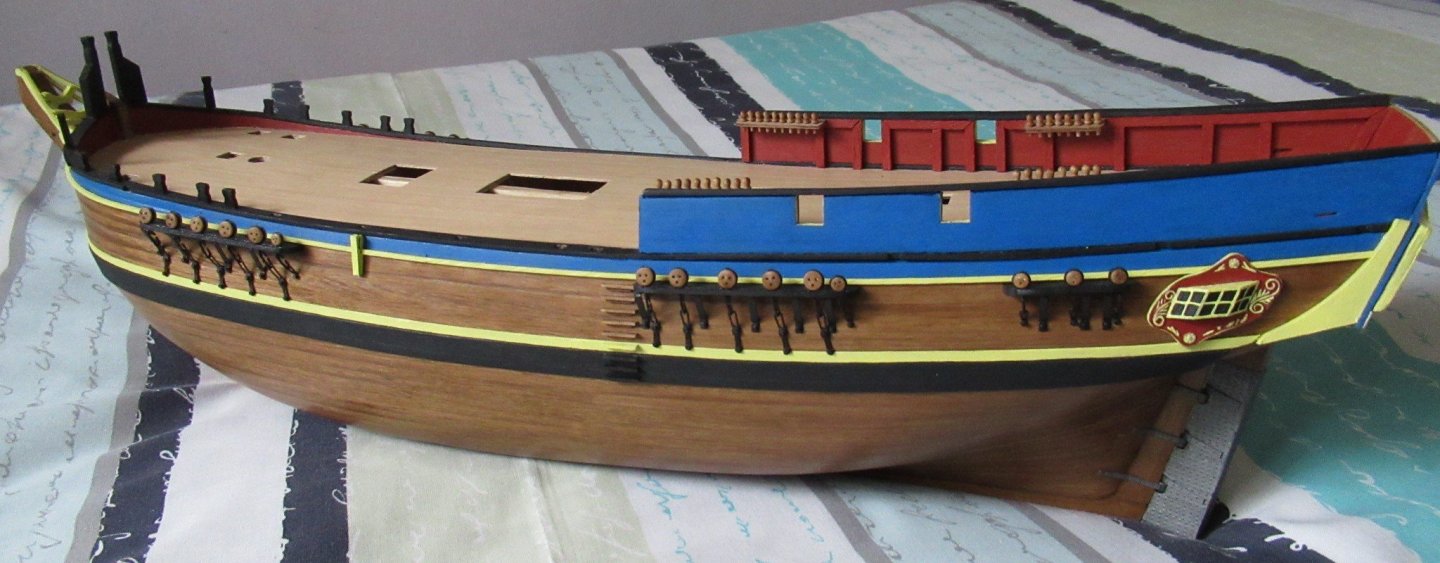
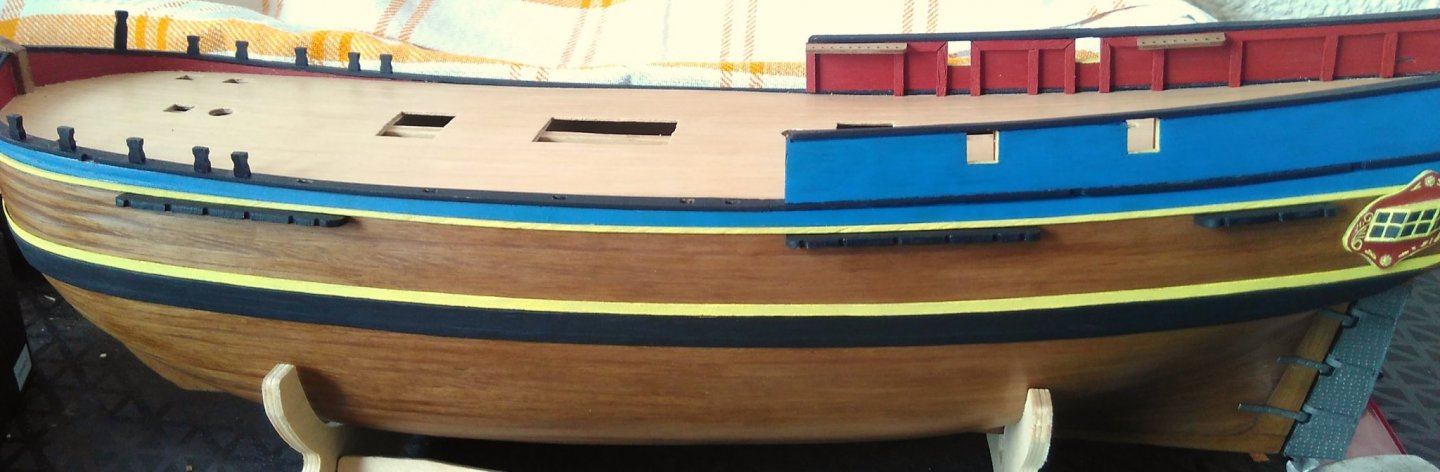
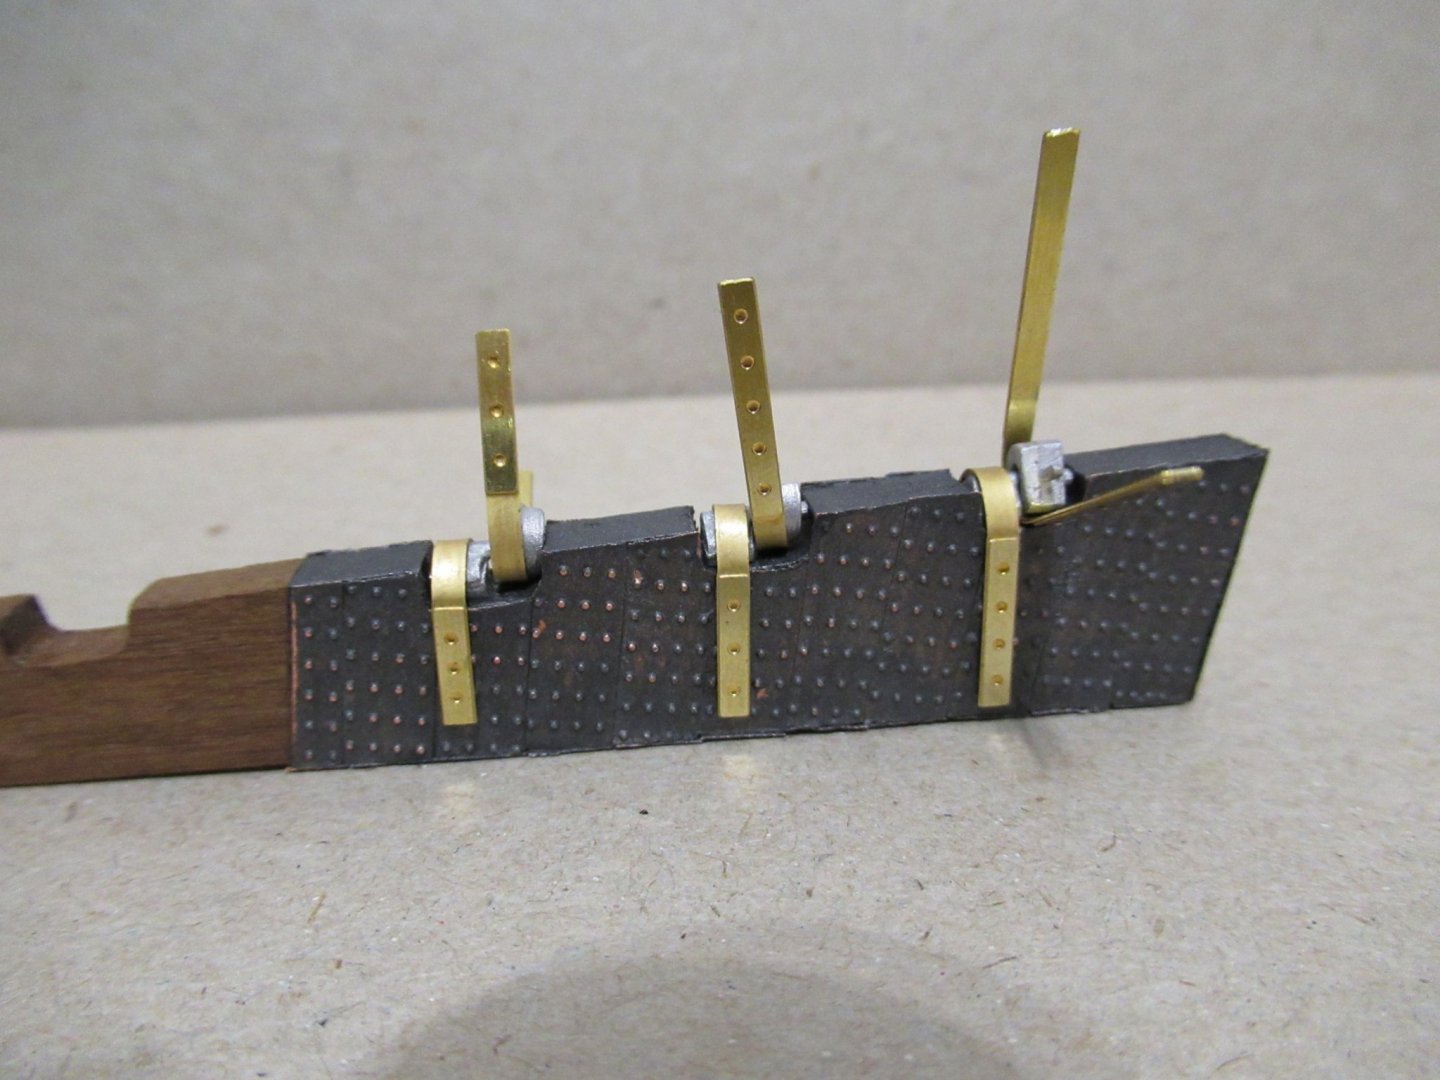
Another progress report at long last! Things have been slowly inching forward (at the snail's pace of about 30min every second night) for the last few months, but are now finally all coming together quite beautifully, courtesy of one of the strictest Corona lock downs anywhere in the world! I had built many of the deck fittings separately but will add them in here as they become a proper part of the ship. My currently completed progress began with figuring out how to drill 0.7mm holes in 1.5mm thick pin rails in order to "pin and glue" them onto place to hold the rigging. I discovered that hardware stores only stock down to a 1mm drill bit, and the only hobby shop for hundreds of kilometers had nothing smaller in stock either, and said the same of their supplier. Thankfully I eventually found that a creative college of my mom had a set of smaller drill bits that he had special ordered from China that he was willing to lend me. I was still concerned about drilling straight with such a narrow margin for error. Much asking around and figuring out later, I borrowed a Dremel from work and my dad adapted it to fit into his drill press. This was the final contraption: I cut a piece of scrap 1.5mm wood off the edge of the laser cut sheet and practiced a few times to get the hang of it: I then got my adrenaline fix drilling into the irreplaceable pin rails, cappings and channels, as well as drilling the corresponding channel holes in the hull. Scary stuff! It didn't go too badly though! I drilled right through one channel late one night, but no worries there as it later got a piece of walnut over it anyway. I also drilled one pin rail hole a bit too shallow so the wire makes a small bump on its top surface (only I'll notice). The holes in the already painfully glued down bulwarks proved to be an extra challenge as the distance between the bulwarks was too narrow for even a hand-held Dremel to make a perpendicular hole. I had previously figured out with the rudder that the brass pins were also 0.7mm. I therefore carefully used a pair of pliers to push a brass pin into the bulwarks to make the necessary holes, accepting a small degree of wood-splitting due to a lack of rotary action. I then cut small sections of wire to push into the two corresponding holes of all the pieces to hold them together. Below is an example of the pin rails attached to the mid-deck cappings (excuse the low light cellphone quality). I was very excited to see what the super cool belaying pins in their minute detail would look like in their rail. Aaaaand came upon some more drilling work that needed to be done! The holes in all the rails were 1mm diameter (top rail in the photo) but the belaying pins were 1.5mm thick. So I had to unpinned all the rails and drilled all the holes bigger (bottom rail in the photo). Next came the channel support brackets and putting together the chainplate assemblies. All of this came in a brass sheet so I decided that it would be easier to paint all the hundreds of little bits black first and then cut them out and use them. More important lessons were in store for me! I didn't know that paint, even enamel model paint, doesn't stick very well when painted straight onto brass. I gave all the pieces three coats then broke out the first ones and ended up with tiny black bits everywhere except on the brass! Back to the drawing board. After cleaning off all the flaking enamel I found some metal primer and used that instead, covered by two layers of black paint. It still did come off a bit in places but was far more manageable than Plan A. But I am now very tired of painting... The chainplate assemblies were made up of three interlinking brass pieces, the final of which was nailed together with a fourth brass piece into the hull in two places: The chainplate assemblies have to follow the (now imaginary) angles of their respective shrouds and backstays. The plan provided the angles but only of one side of the hull. I am a bit left-to-right challenged so found the best solution was to take a photo of the plan and invert the image, then copy the angles off my now left side of the hull. In pinning down the support brackets and chainplate assemblies I found it easiest to use a pair of pliers once again to push the pins into the hull. It was a lot of very finicky work and caused very sore fingertips and worn down nails, but the resulting detail was quite attractive! This is before the covering piece of walnut over the slots and the final coat of paint (I had also painted and glued all the timberheads into place along the deck railing, later photos will show them better): I worked with the hull lying on its side on my lap but the amount of force needed to push the pins into the hull caused one of the channels on the opposite side to come off. It was fortunately very easy to fix and alerted me to the potential problem of having a completed side down while pushing hard on the side that was under construction. I therefore altered my set up to include a piece of polystyrene that had holes to accommodate all my hard work on the other side. I checked every few moves that everything stayed in position while completing the other side. Here I am lifting up the hull to show where the channels will be when the hull is sideways and under pressure (you can see the pressure lines in the polystyrene walls): Each channel got a length of 1.5mm square walnut to cover the chainplate slots. This was sanded down on either side to be flush with the channels and everything was given another coat of primer and black paint (see photos below). I then went back and did the side ladders. I varnished the first five that were to go straight onto the hull. Although not in the plans, I liked DanPage's idea of painting the ones on the whale strips the colour of the corresponding strip. I had also taken heed of the struggles Matrim faced in getting the ladders to line up and decided to use two pieces of very thin gut tied around the circumference of the hull to provide a more reliable reference point for alignment: I arranged the ladders first, then glued the coloured ones down as they had the least option for variation, and used their spacing to dictate the brown ladder placement. The top brown ladder is therefore a bit further down than on the plans but I preferred that to more uneven spacing option. When they were arranged to my satisfaction I used tiny rolled bits of prestic to mark their positions and took one out at a time, added a line of wood glue and then stuck the ladder back down with a pair of tweezers. The alignment turned out quite well: Finally let's take a step back from all the close-up work and see how it all came together! You can see the timberheads in the bow railing slots, as well as the added yellow chesstree breaking the yellow upper side rail.


-
Candice reacted to a post in a topic:
Bounty by Matrim - FINISHED - Caldercraft - 1:64
-
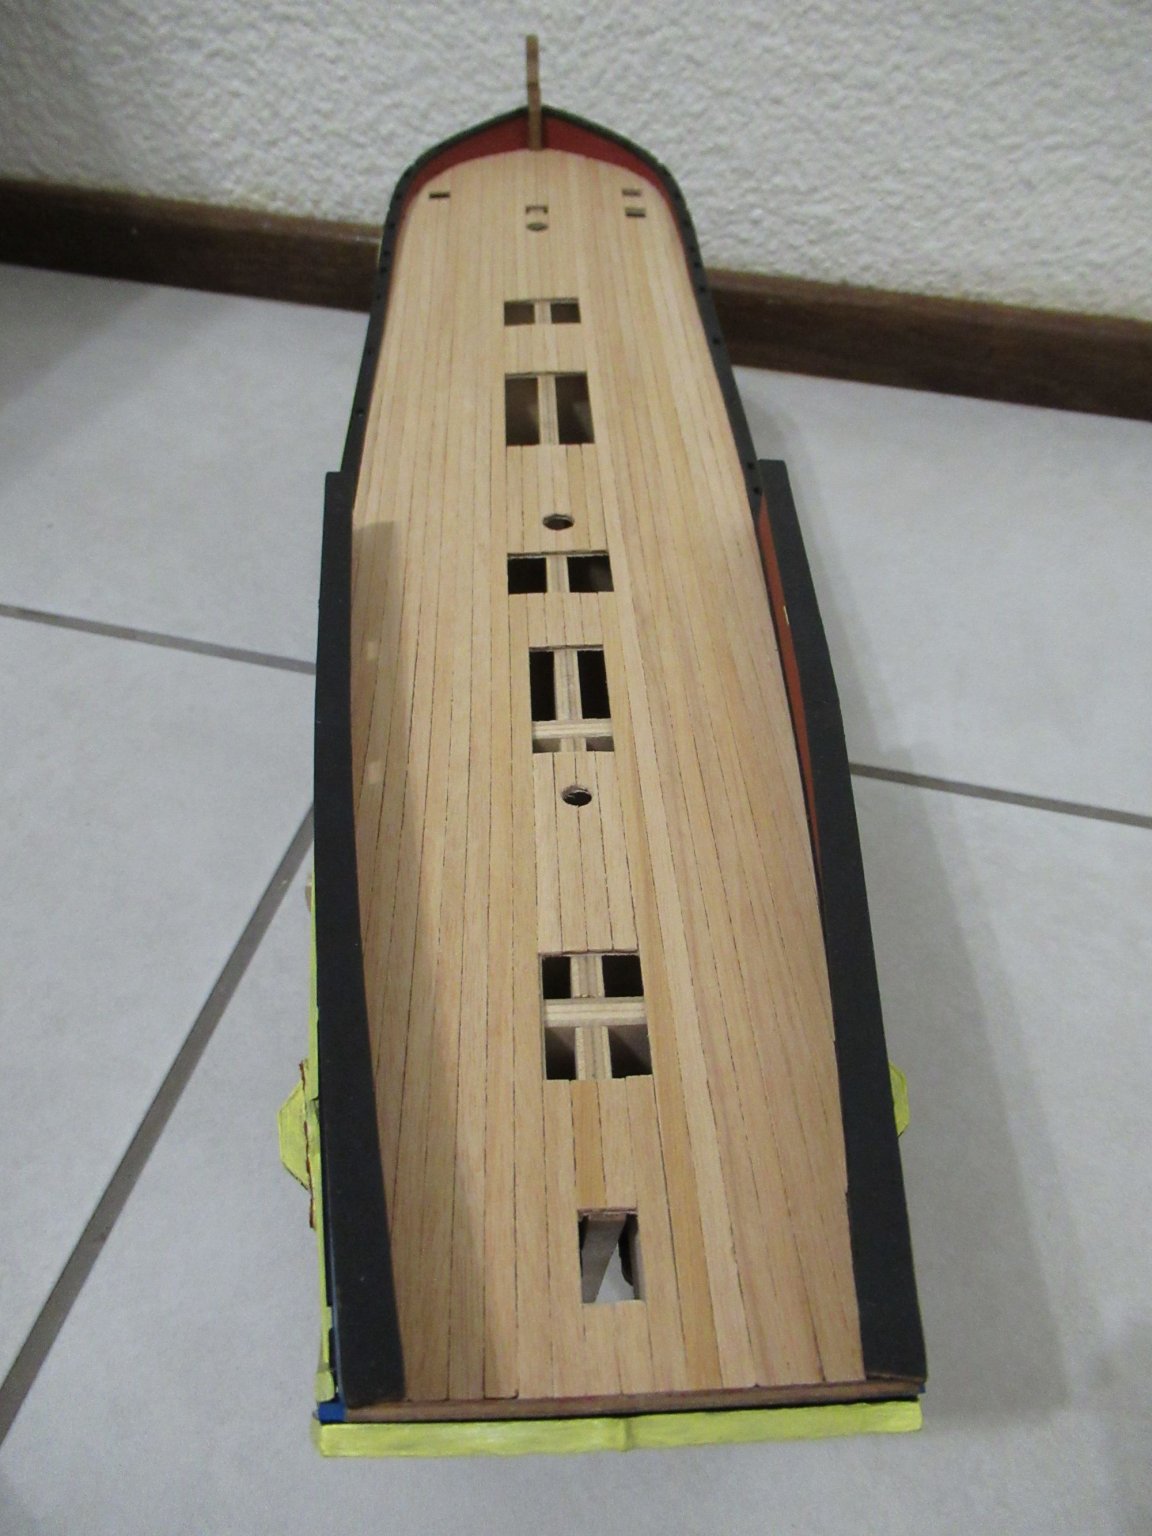
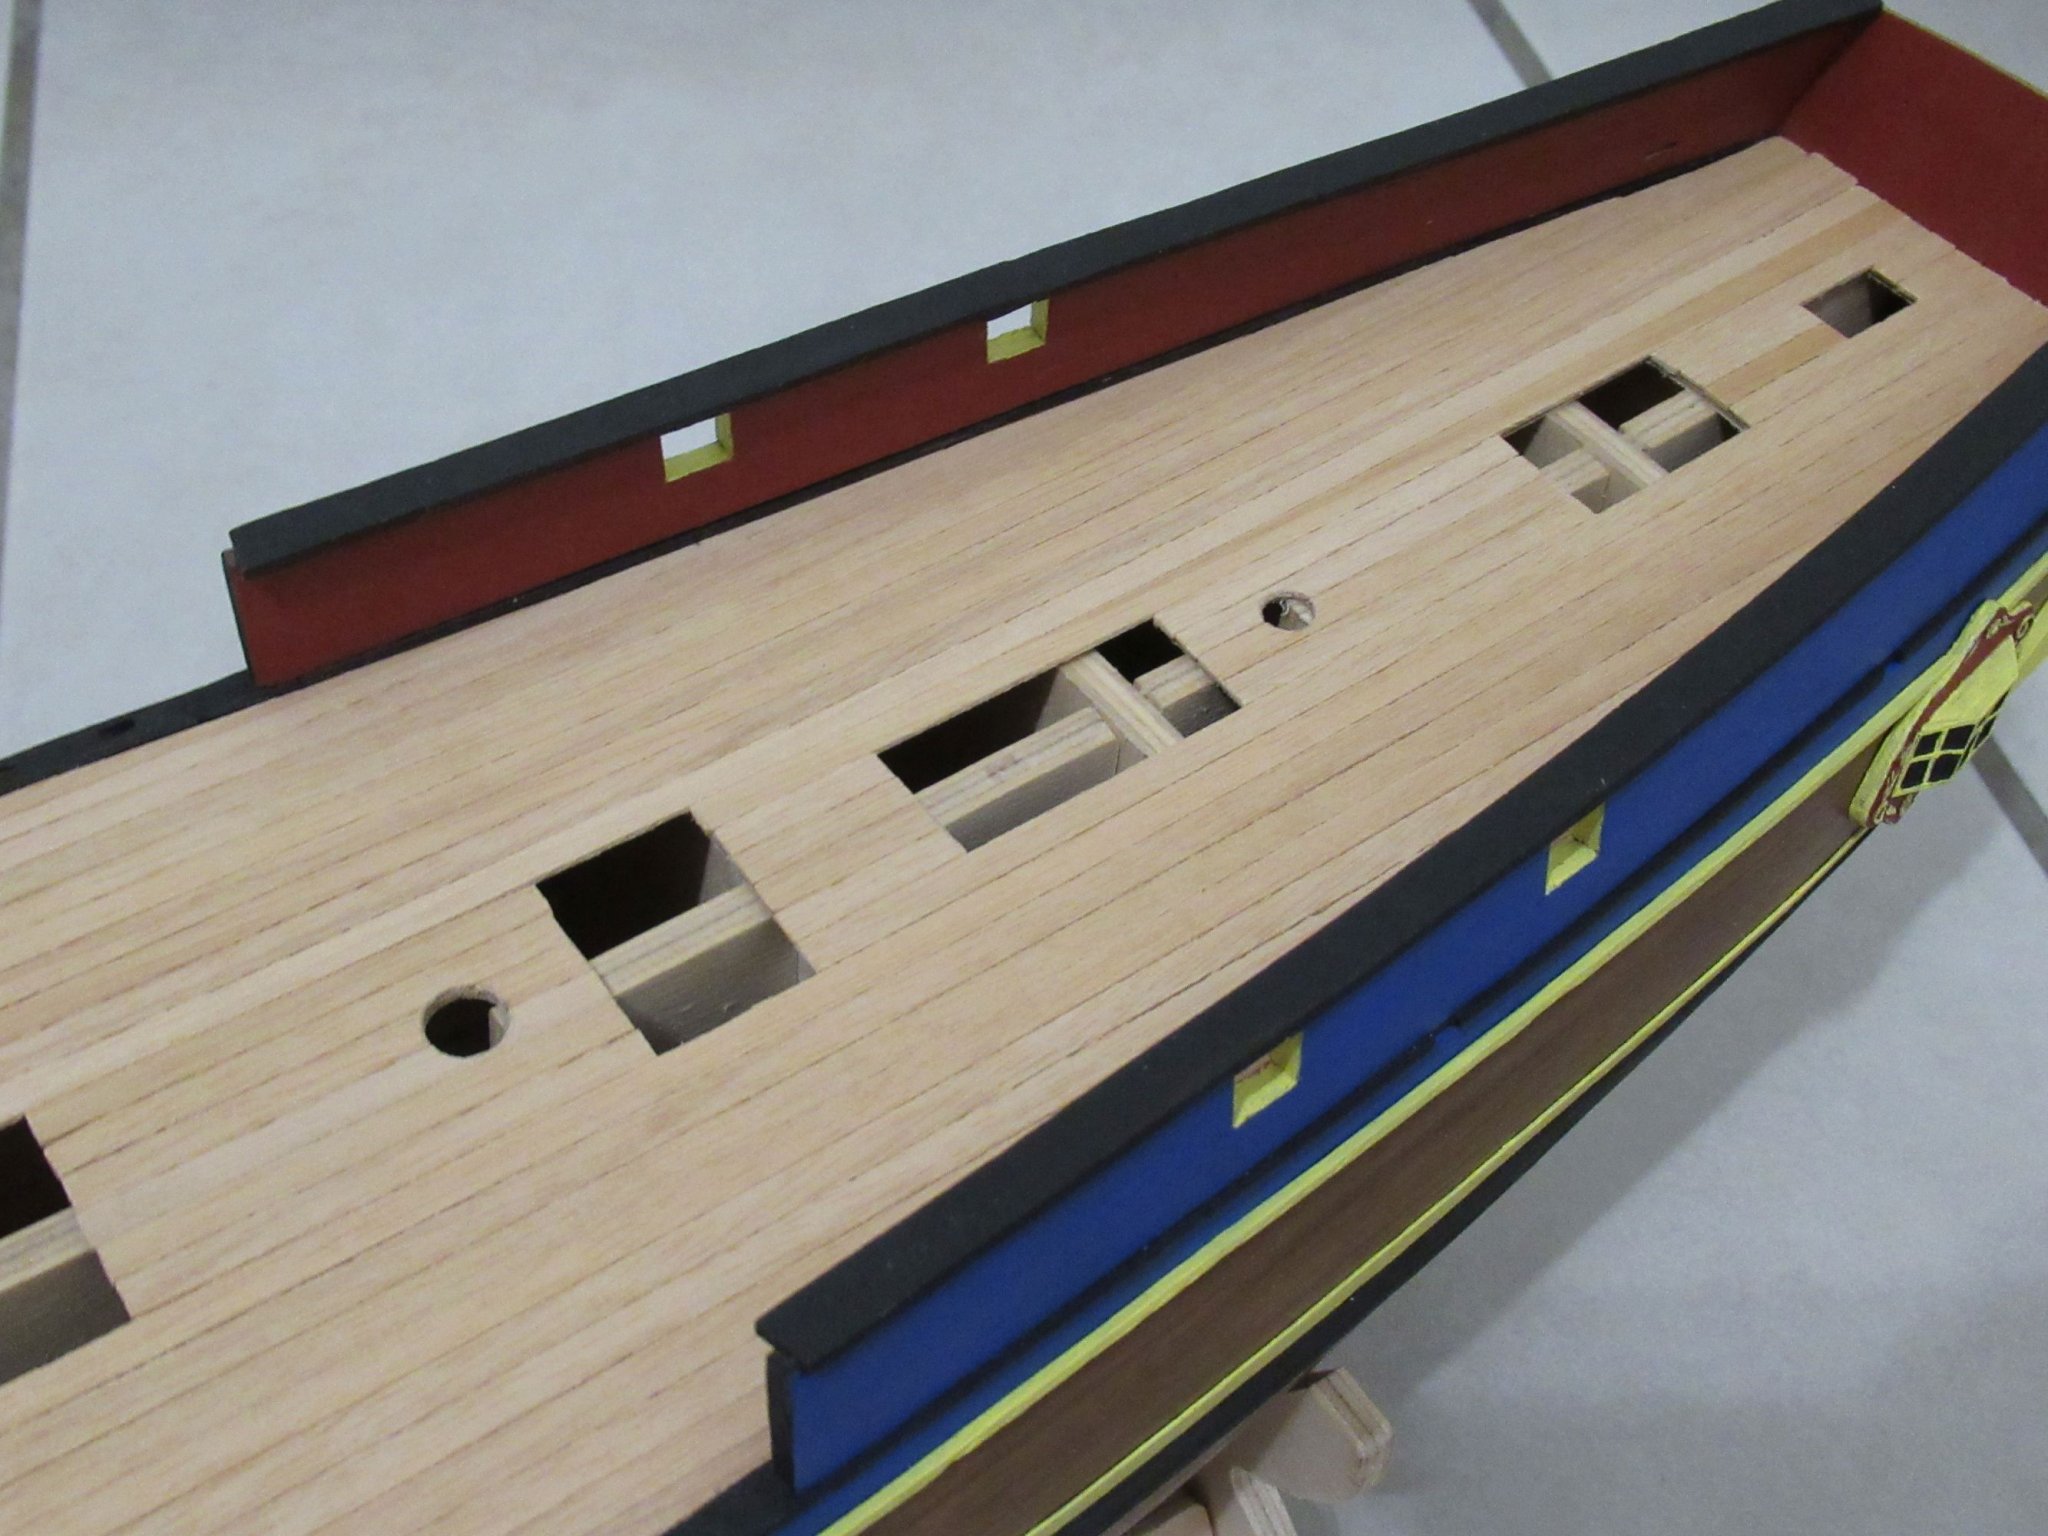
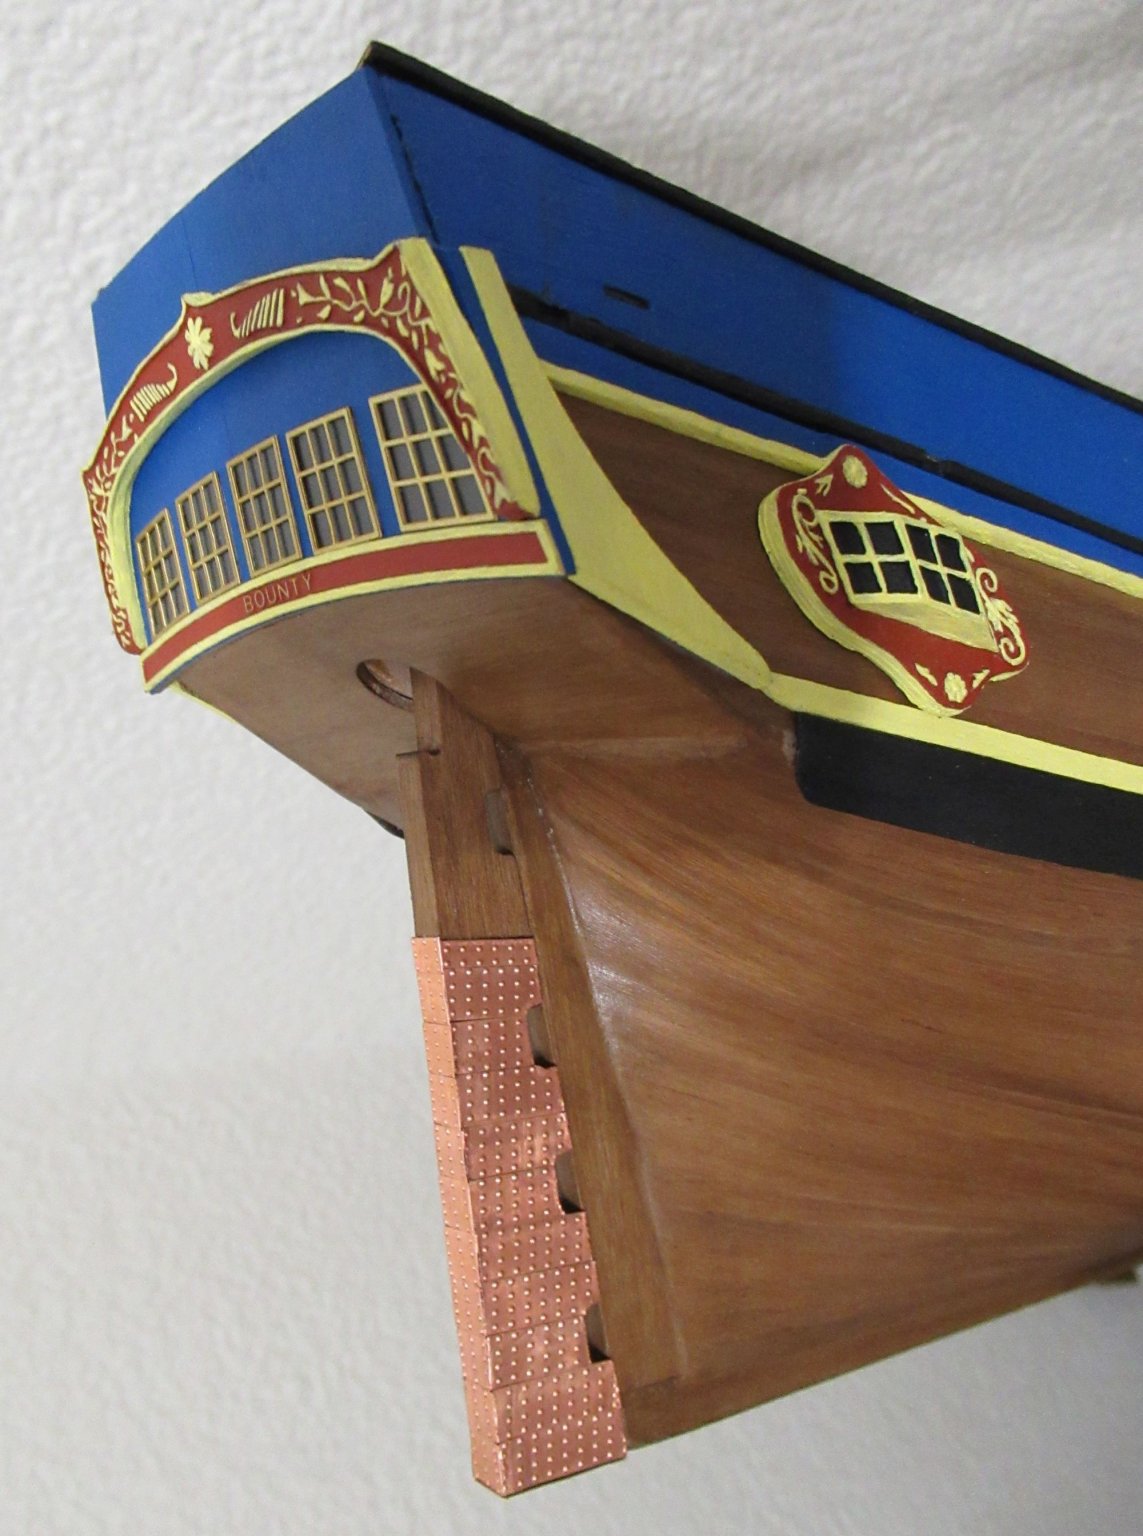
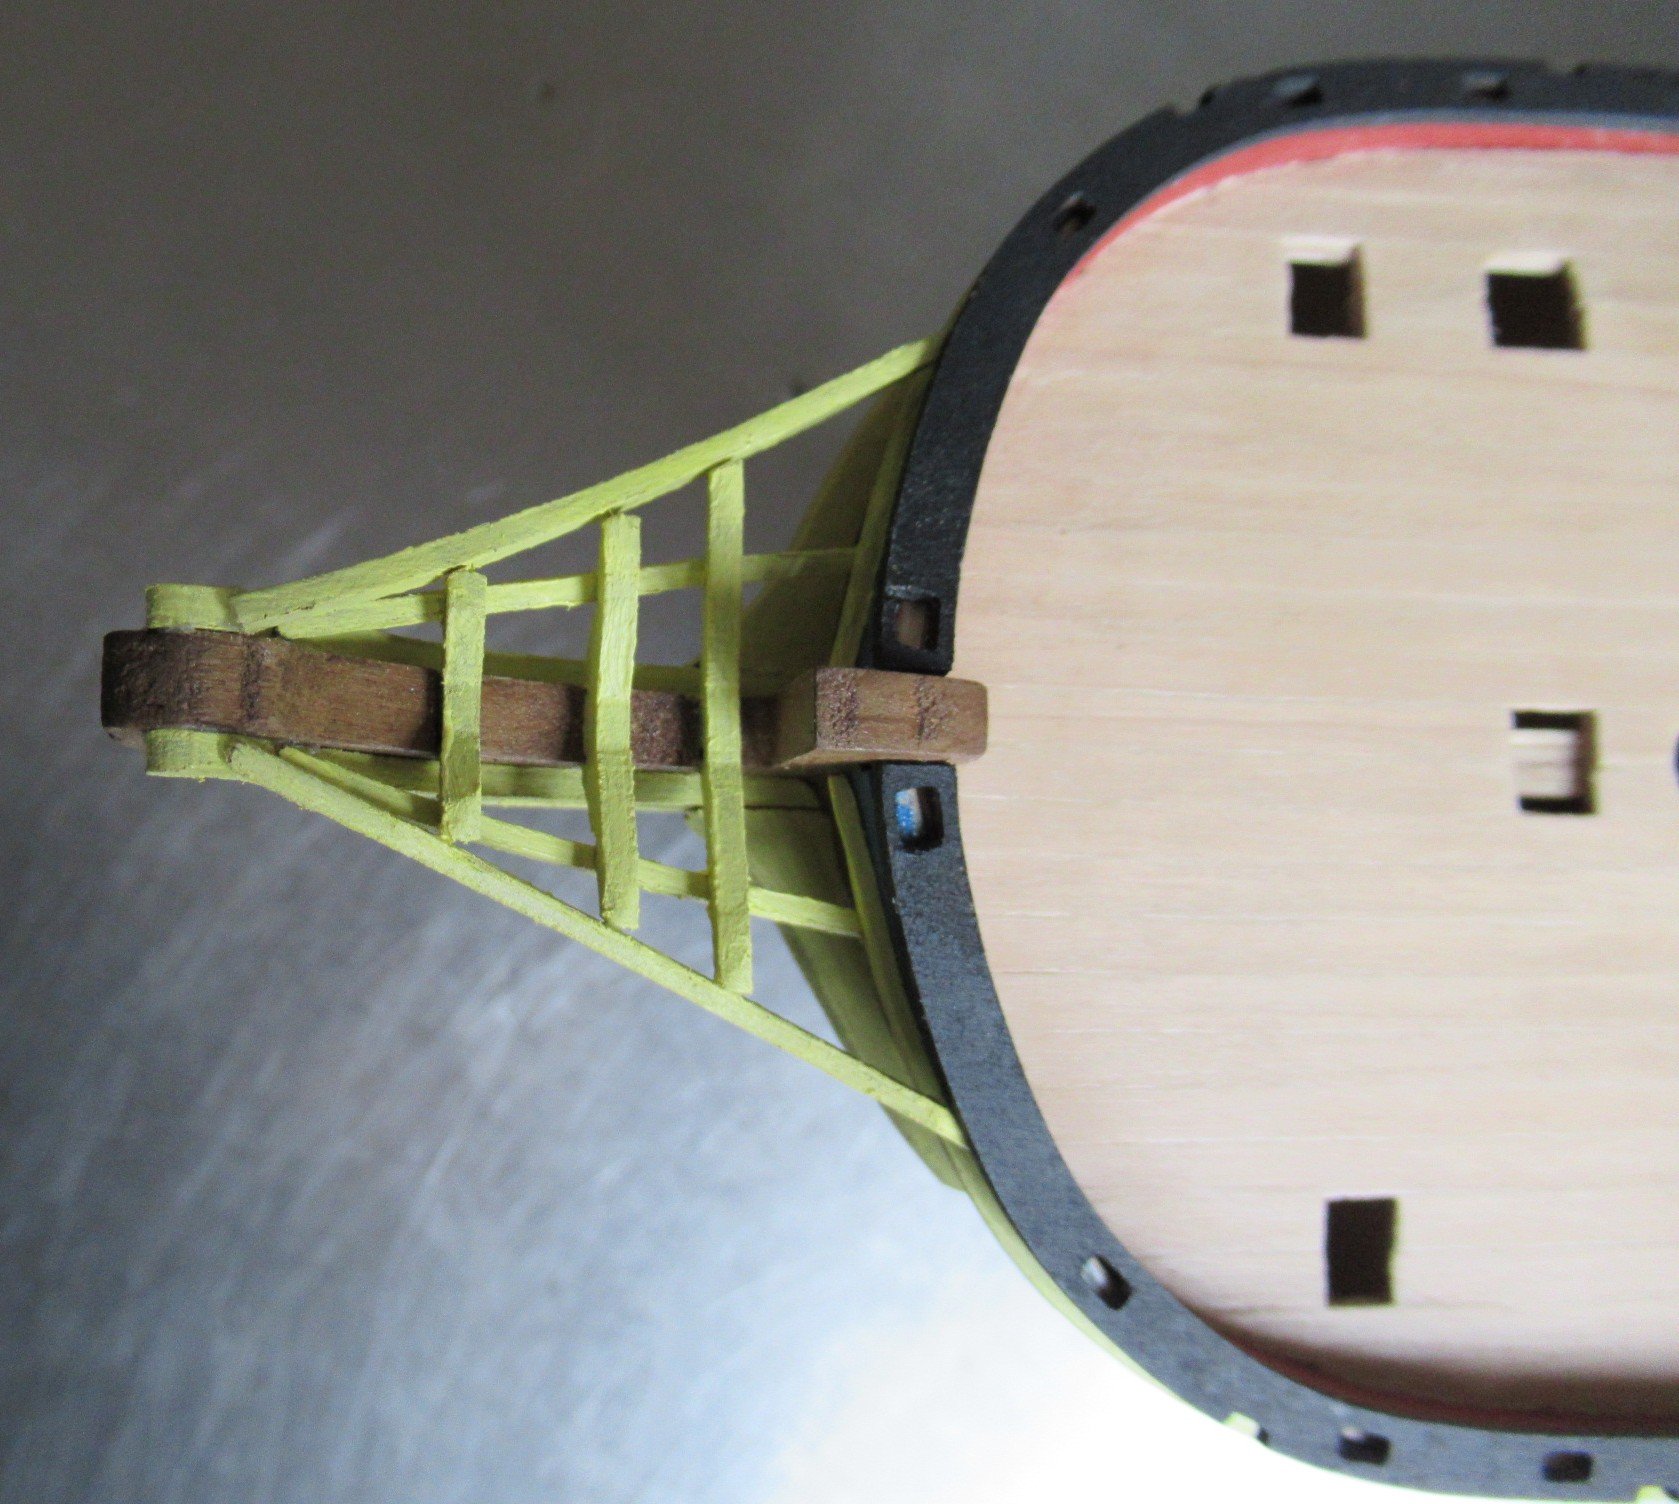
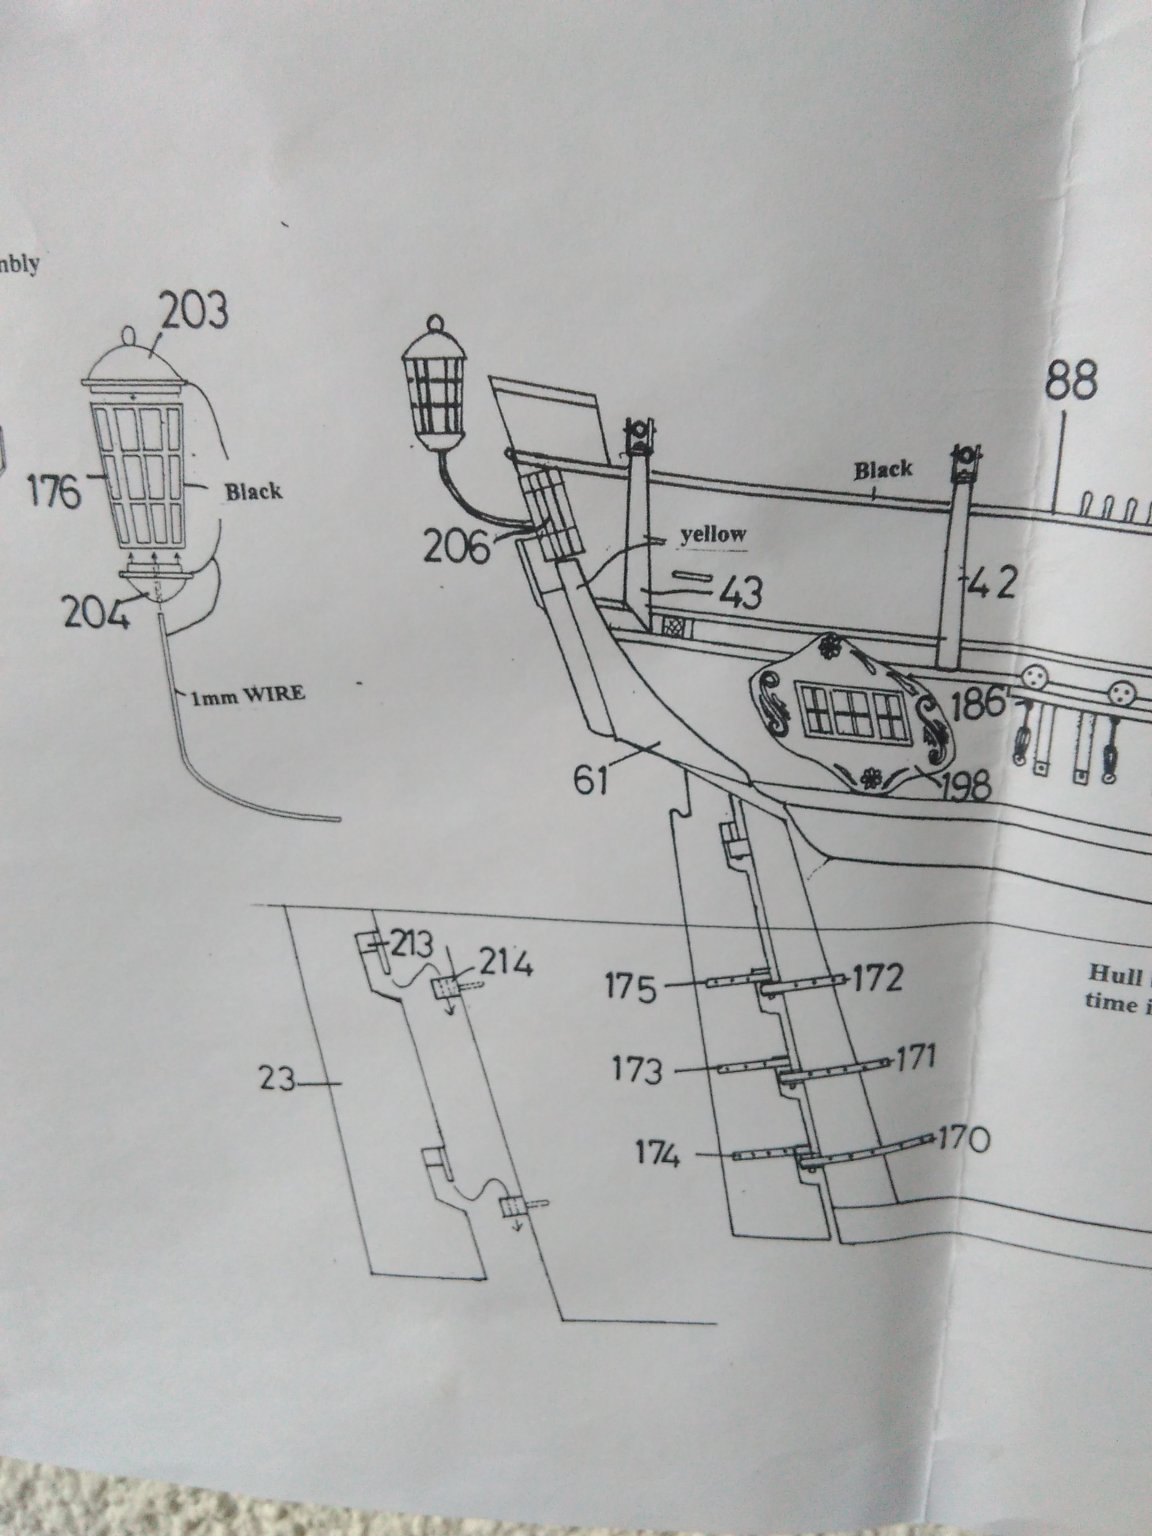
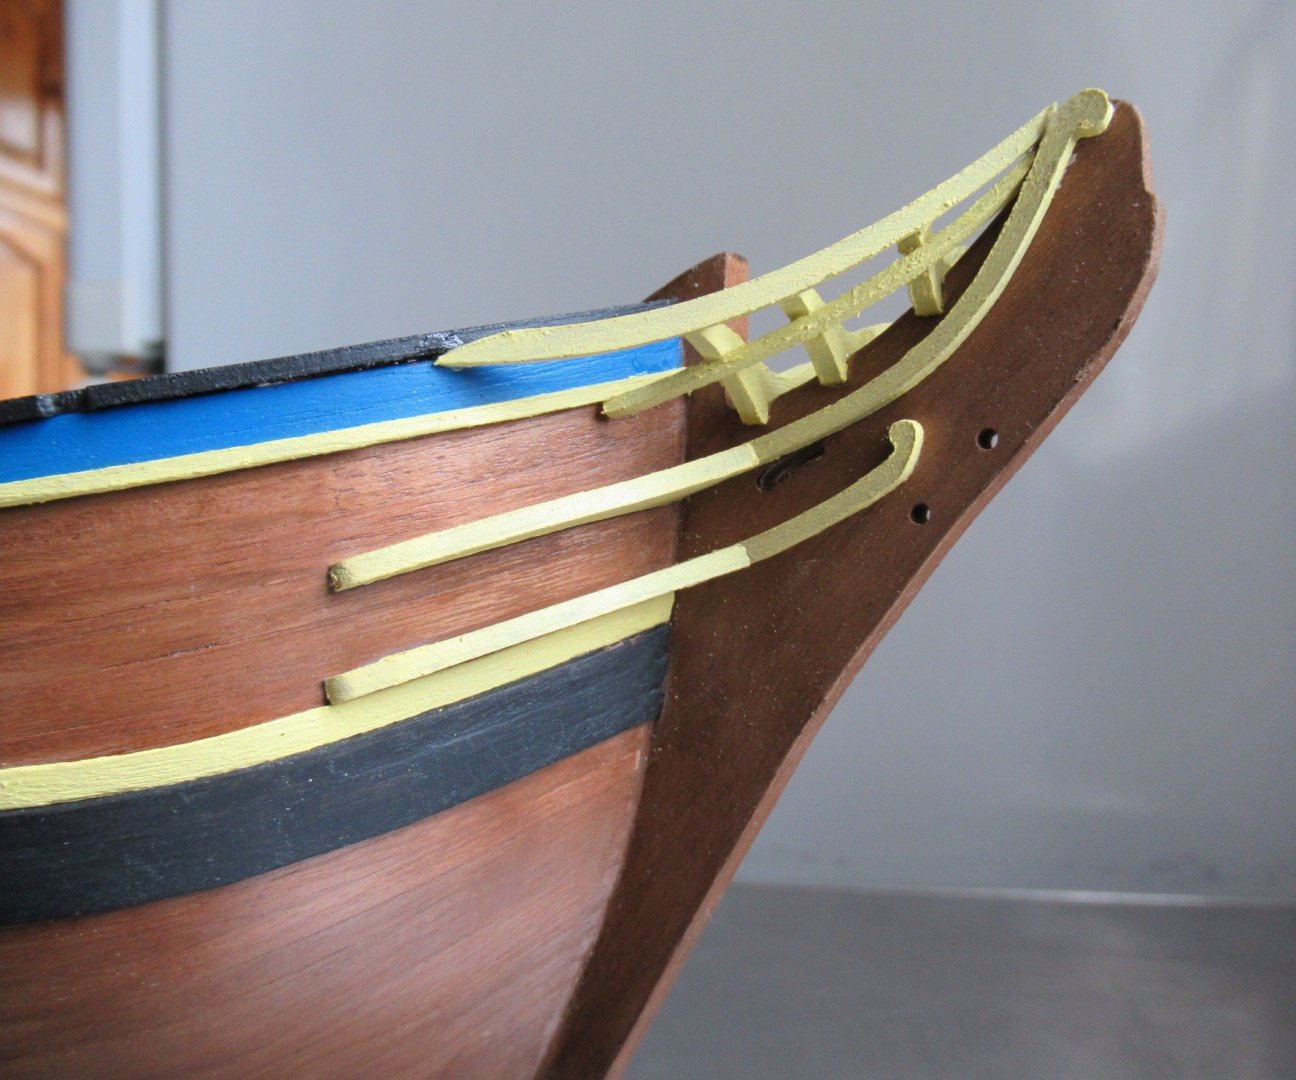
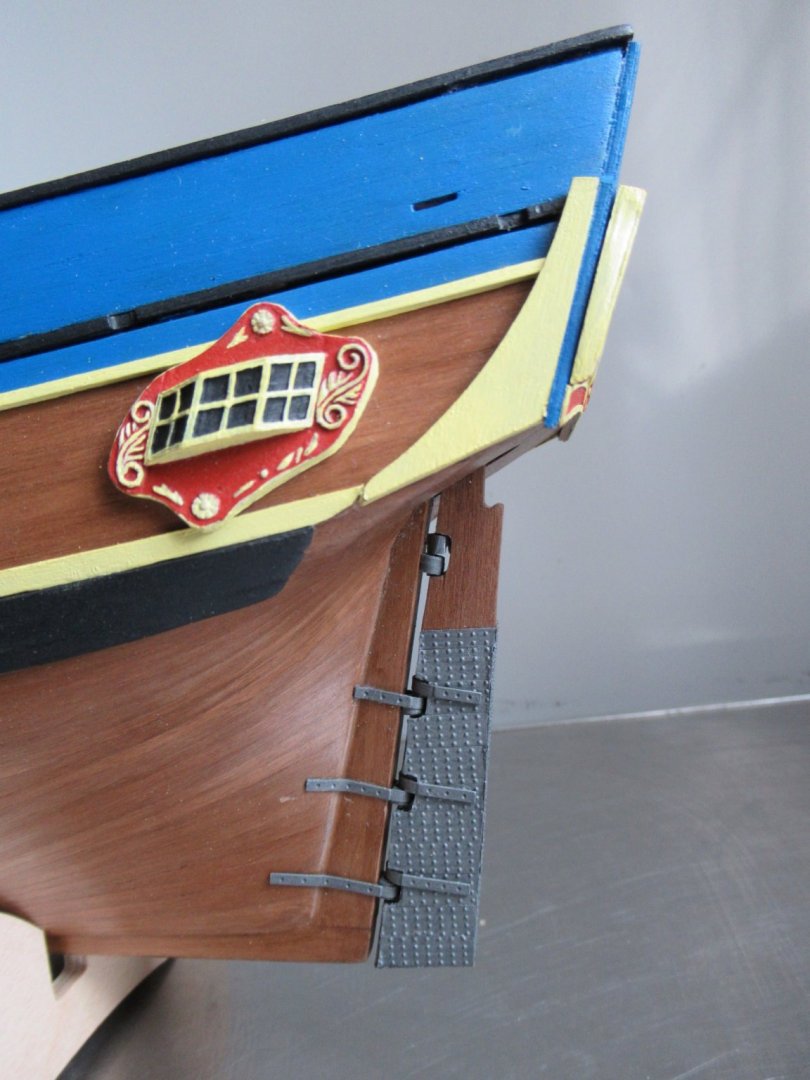
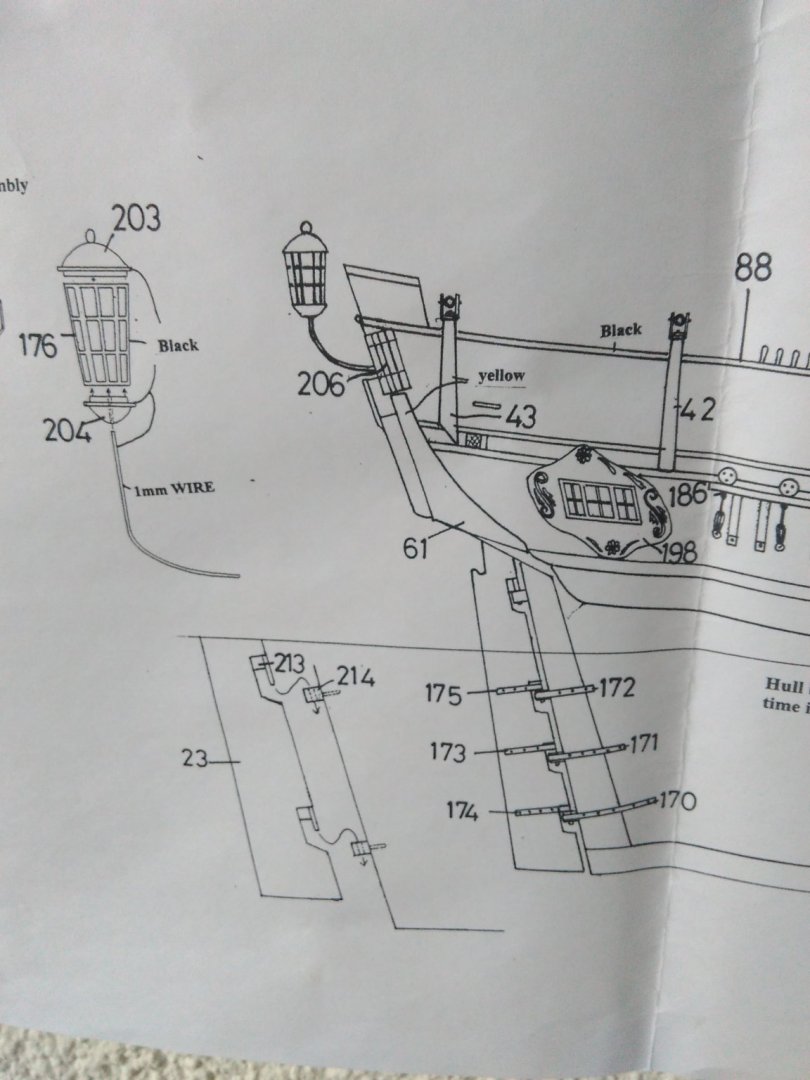
Finally another update!! Work, life and other projects have been getting in the way of late, but a short holiday in the middle of nowhere allowed me to carve out some quality time at long last to get back to ship building. First up in the progress report is planking the deck. As per the instructions I started in the middle and worked my way outwards, cutting the tanganyika planks to fit around the deck openings. I enjoyed cutting and sanding the planks to follow the curvature of the bow The sides closer to the stern were an even more interesting challenge as the planks tapered off. I was pretty chuffed with the end result I then sanded the deck down and was mildly frustrated to find that it too needed woodfiller, and of course of a different colour to the hull. So back to the hardware store. Oak seemed to be the colour of choice this time. It was a messy process as always but the deck looked far better for it. This was then followed by two layers of clear varnish. A closer up for full effect Next I cut, painting and placed the 2x3mm walnut strips on the inside of the bulwarks. I had neglected to do this previously as I was worried about the complications of having to plank the deck around them. Though in hindsight I suppose one could have cut them short enough that the planks slotted easily underneath them. With having opted to not copper the hull I had to then decide what to do with the rudder. Leaving it as bare wood didn't feel like an option. I tried painting it black to the waterline but that disappeared too much I then coppered it anyway but that was way too stark I finally settled on painting it gun metal grey, an enamel model paint that I had lying around (picture coming soon). The next challenge was the construction. The indents for the rudder hinges weren't nearly as long as indicated in the plan sheet. If I constructed them separately as shown, I then wouldn't have been unable to slot the hinges (213) onto the brackets (214 ) afterwards. So this is what I then resorted to It was a very finicky process to then make holes in the rudder post and slot the four rudder brackets into them simultaneously. The top rudder hinge came unstuck in the process (it didn't come with brass straps to better secure it). Gluing it back in while everything was constructed didn't work out as well as the first time so the gap between the rudder and the hull sadly widens slightly at the top. I was however very satisfied with my final colour choice. The bow rails were next, in all their intricate glory. Lots of sanding and fiddling later, all the little bits finally lined up well enough to look presentable. The outermost topmost rail gave the most trouble. It wanted to sit a lot higher on the hull than the black capping allowed. I ended up sanding down it's termination point quite severely to get everything to line up. It looks a little better from a normal distance than it does in this extreme close up! My bow hull curvature issues of earlier also came back to bite me again as I really struggled to get the bow cheeks to lie flat against the hull. I eventually settled for a small gap, though it isn't visible head-on as in this photo. That's all for now. I'm currently getting stuck into the deck fittings as all the other sticky-outy bits that actually come next will make transporting my ship home rather difficult.


-
Candice reacted to a post in a topic:
HMAV Bounty by Candice - Caldercraft - Scale 1:64
-
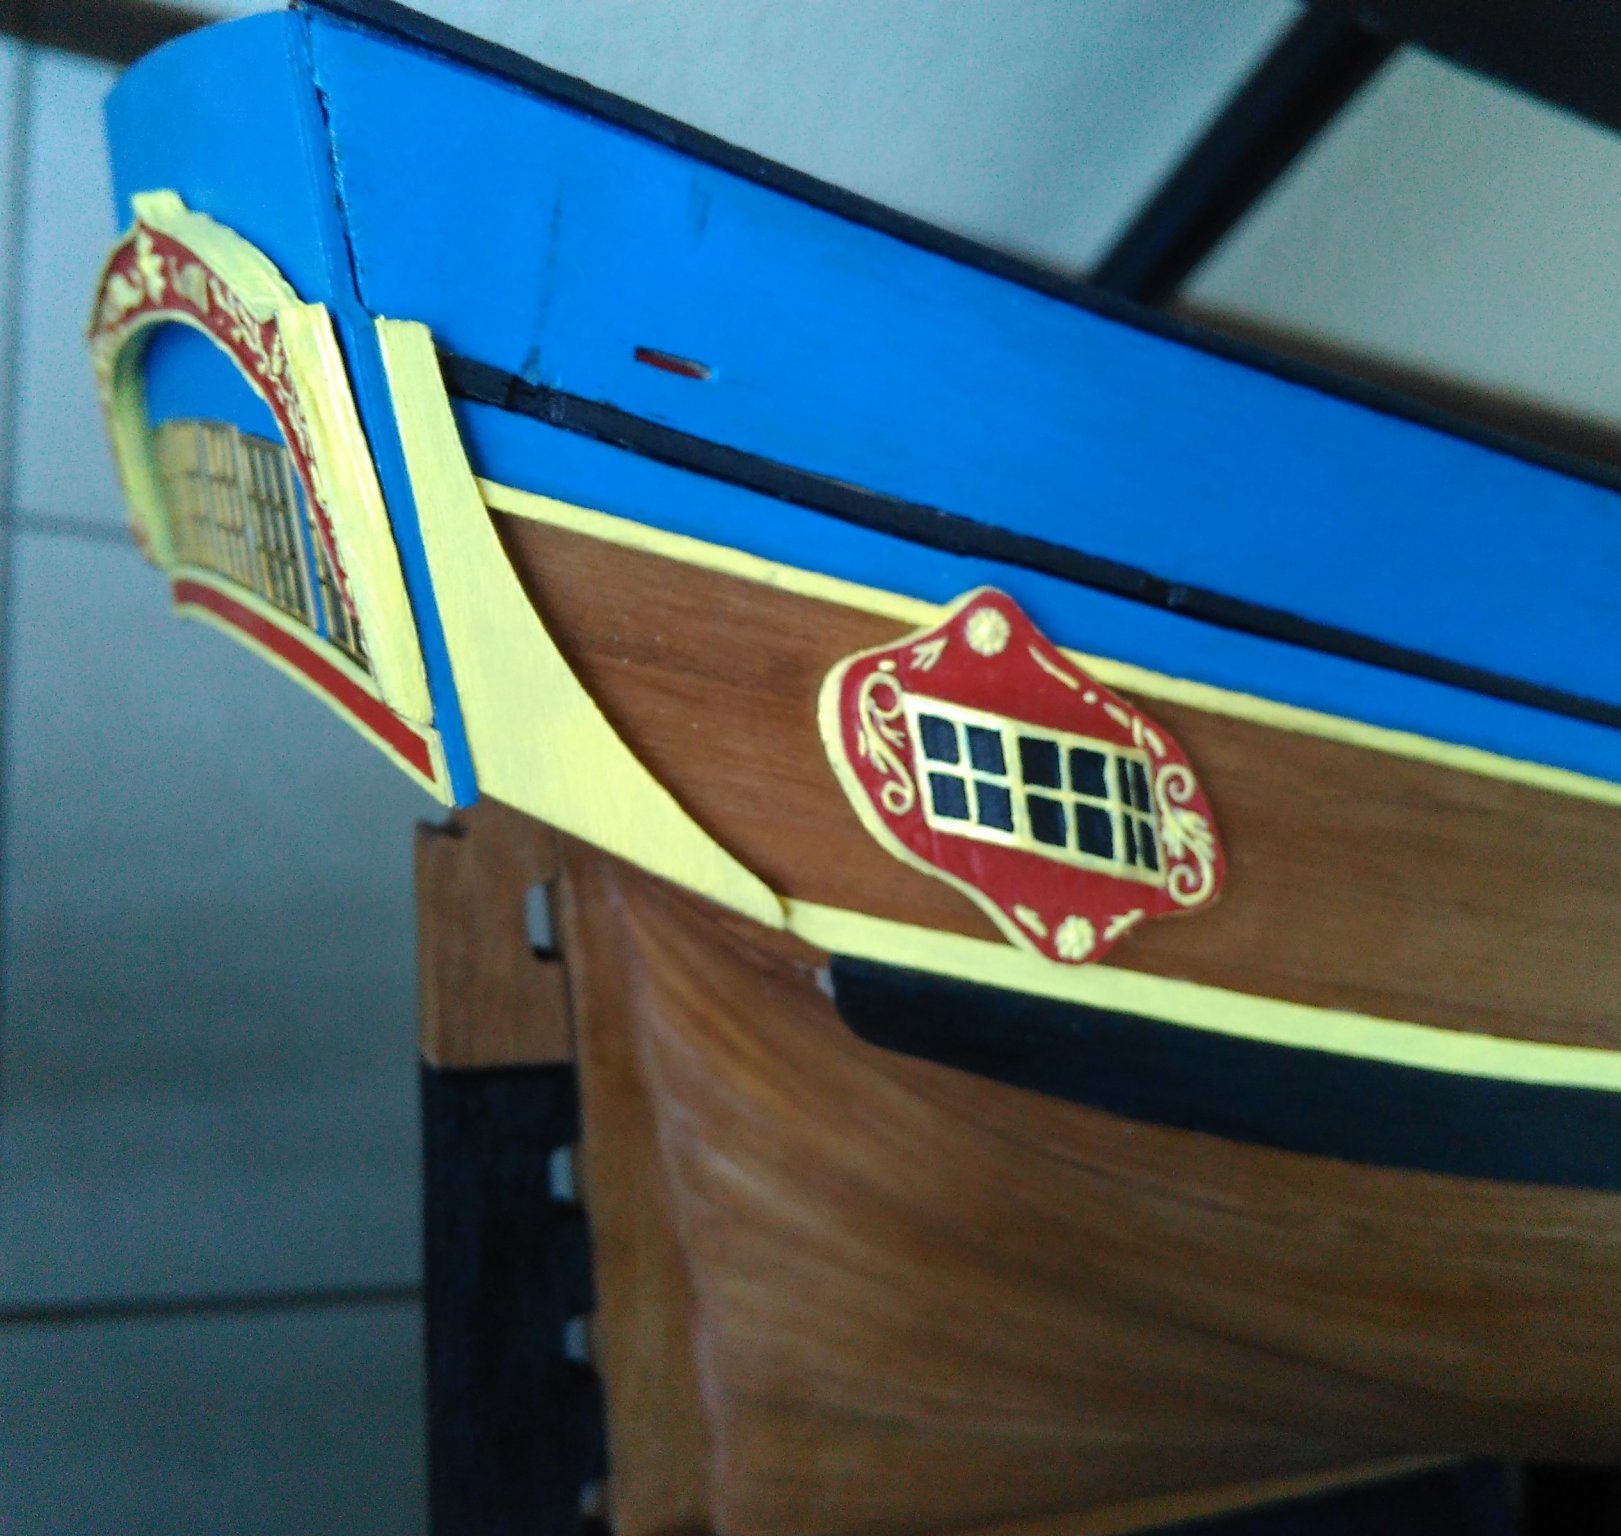
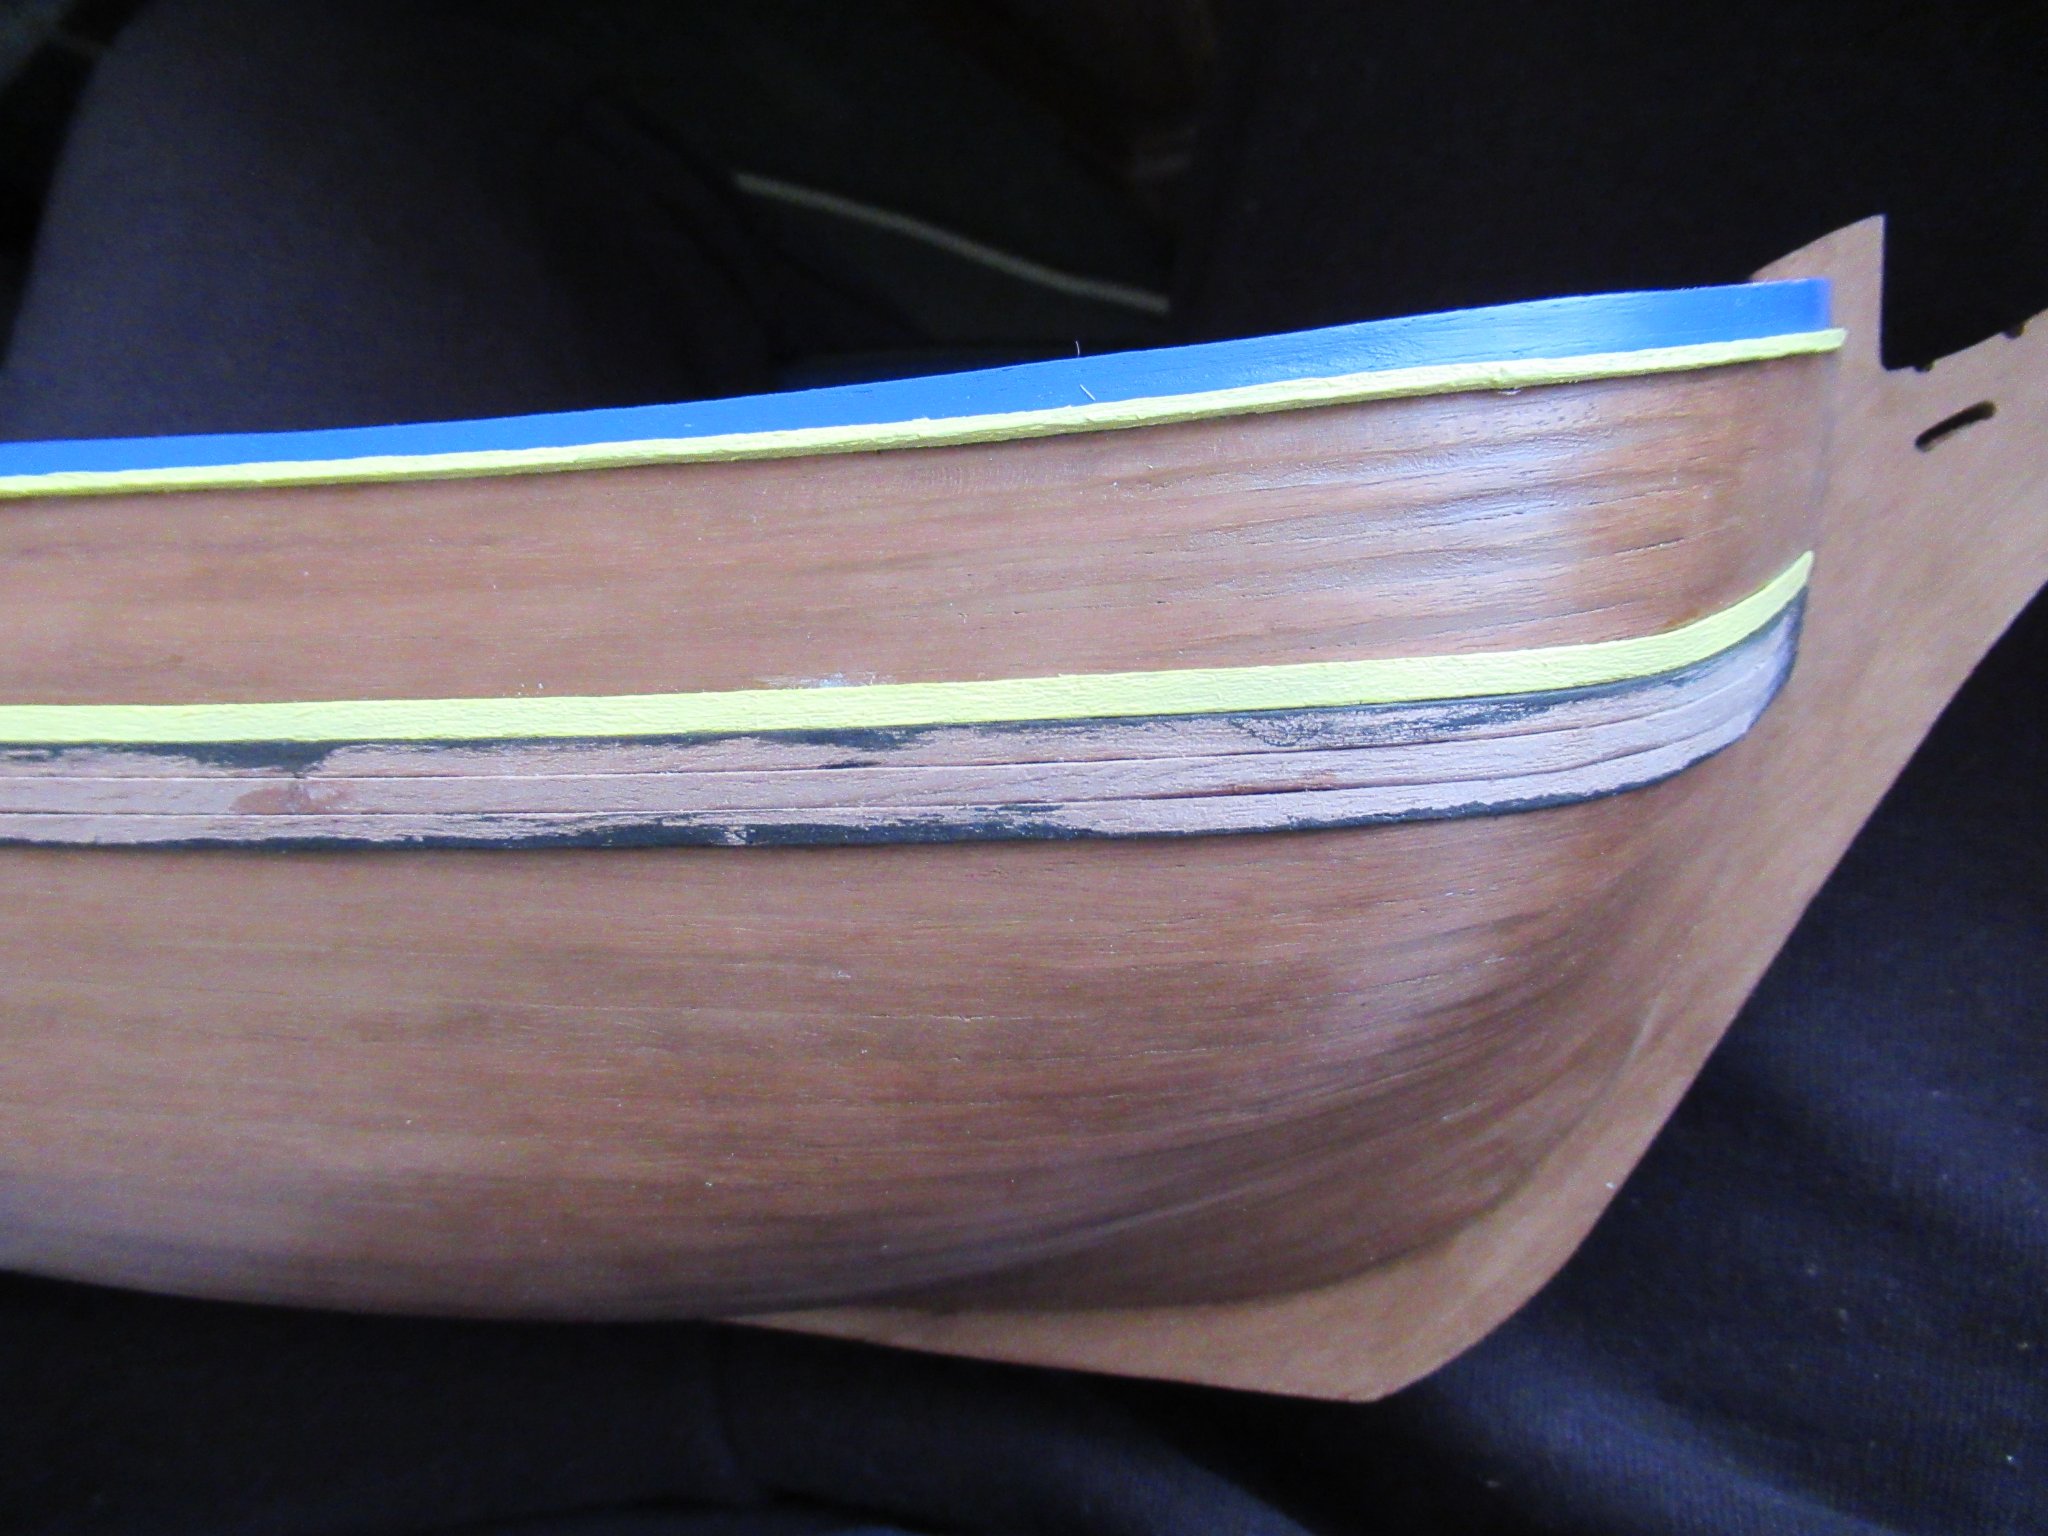
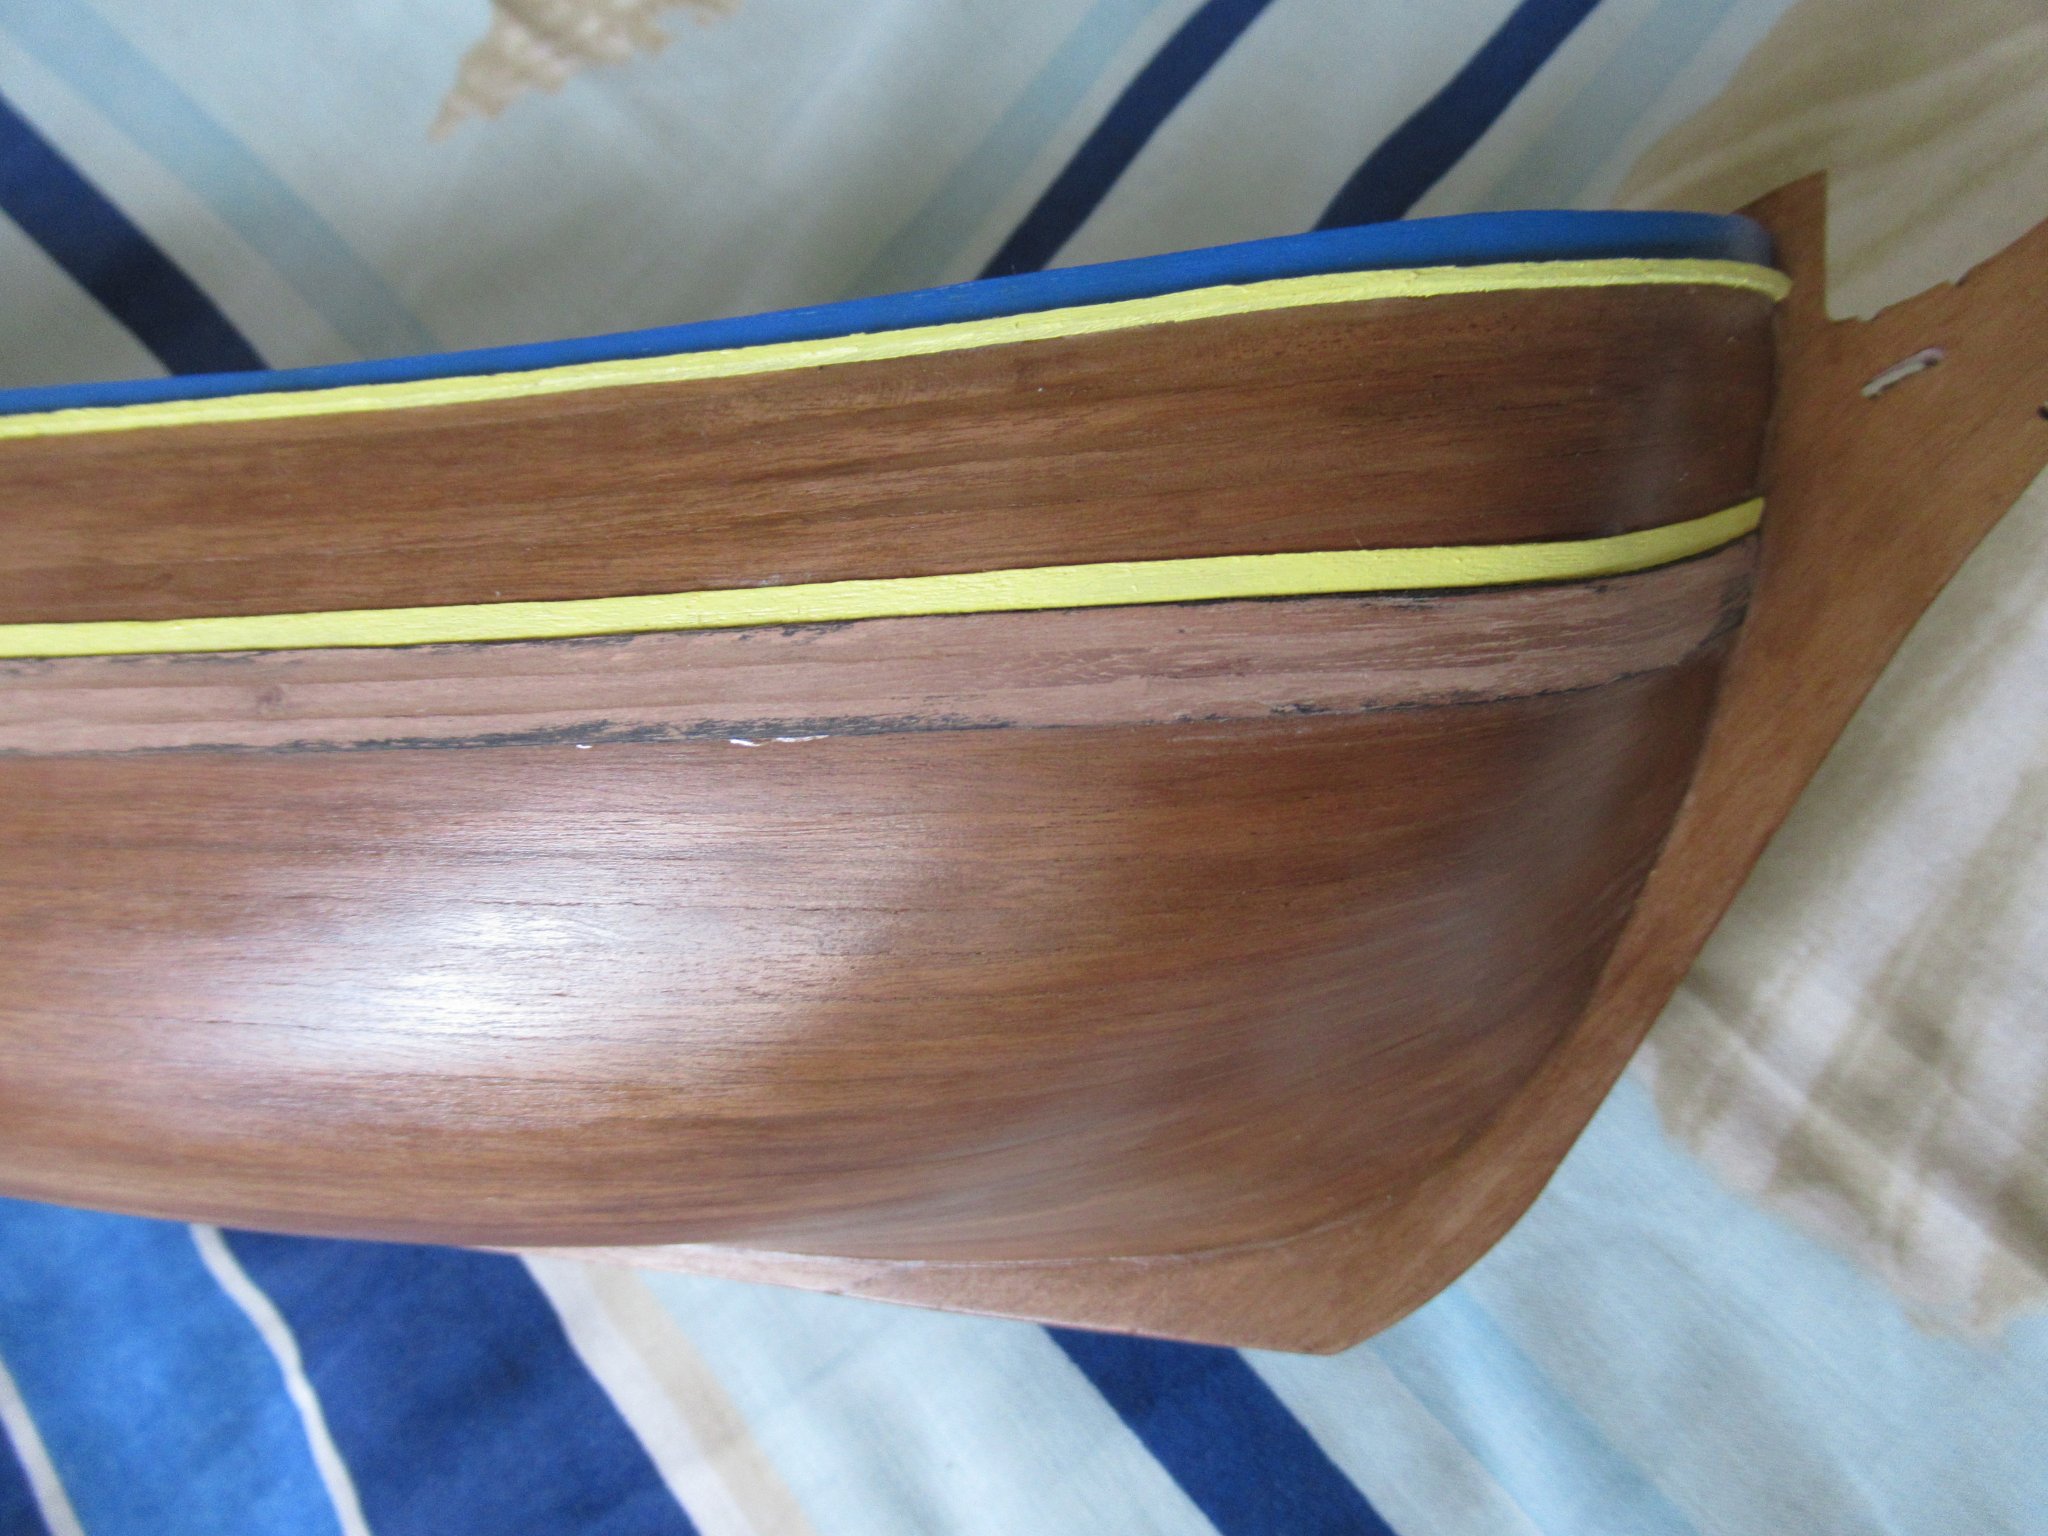
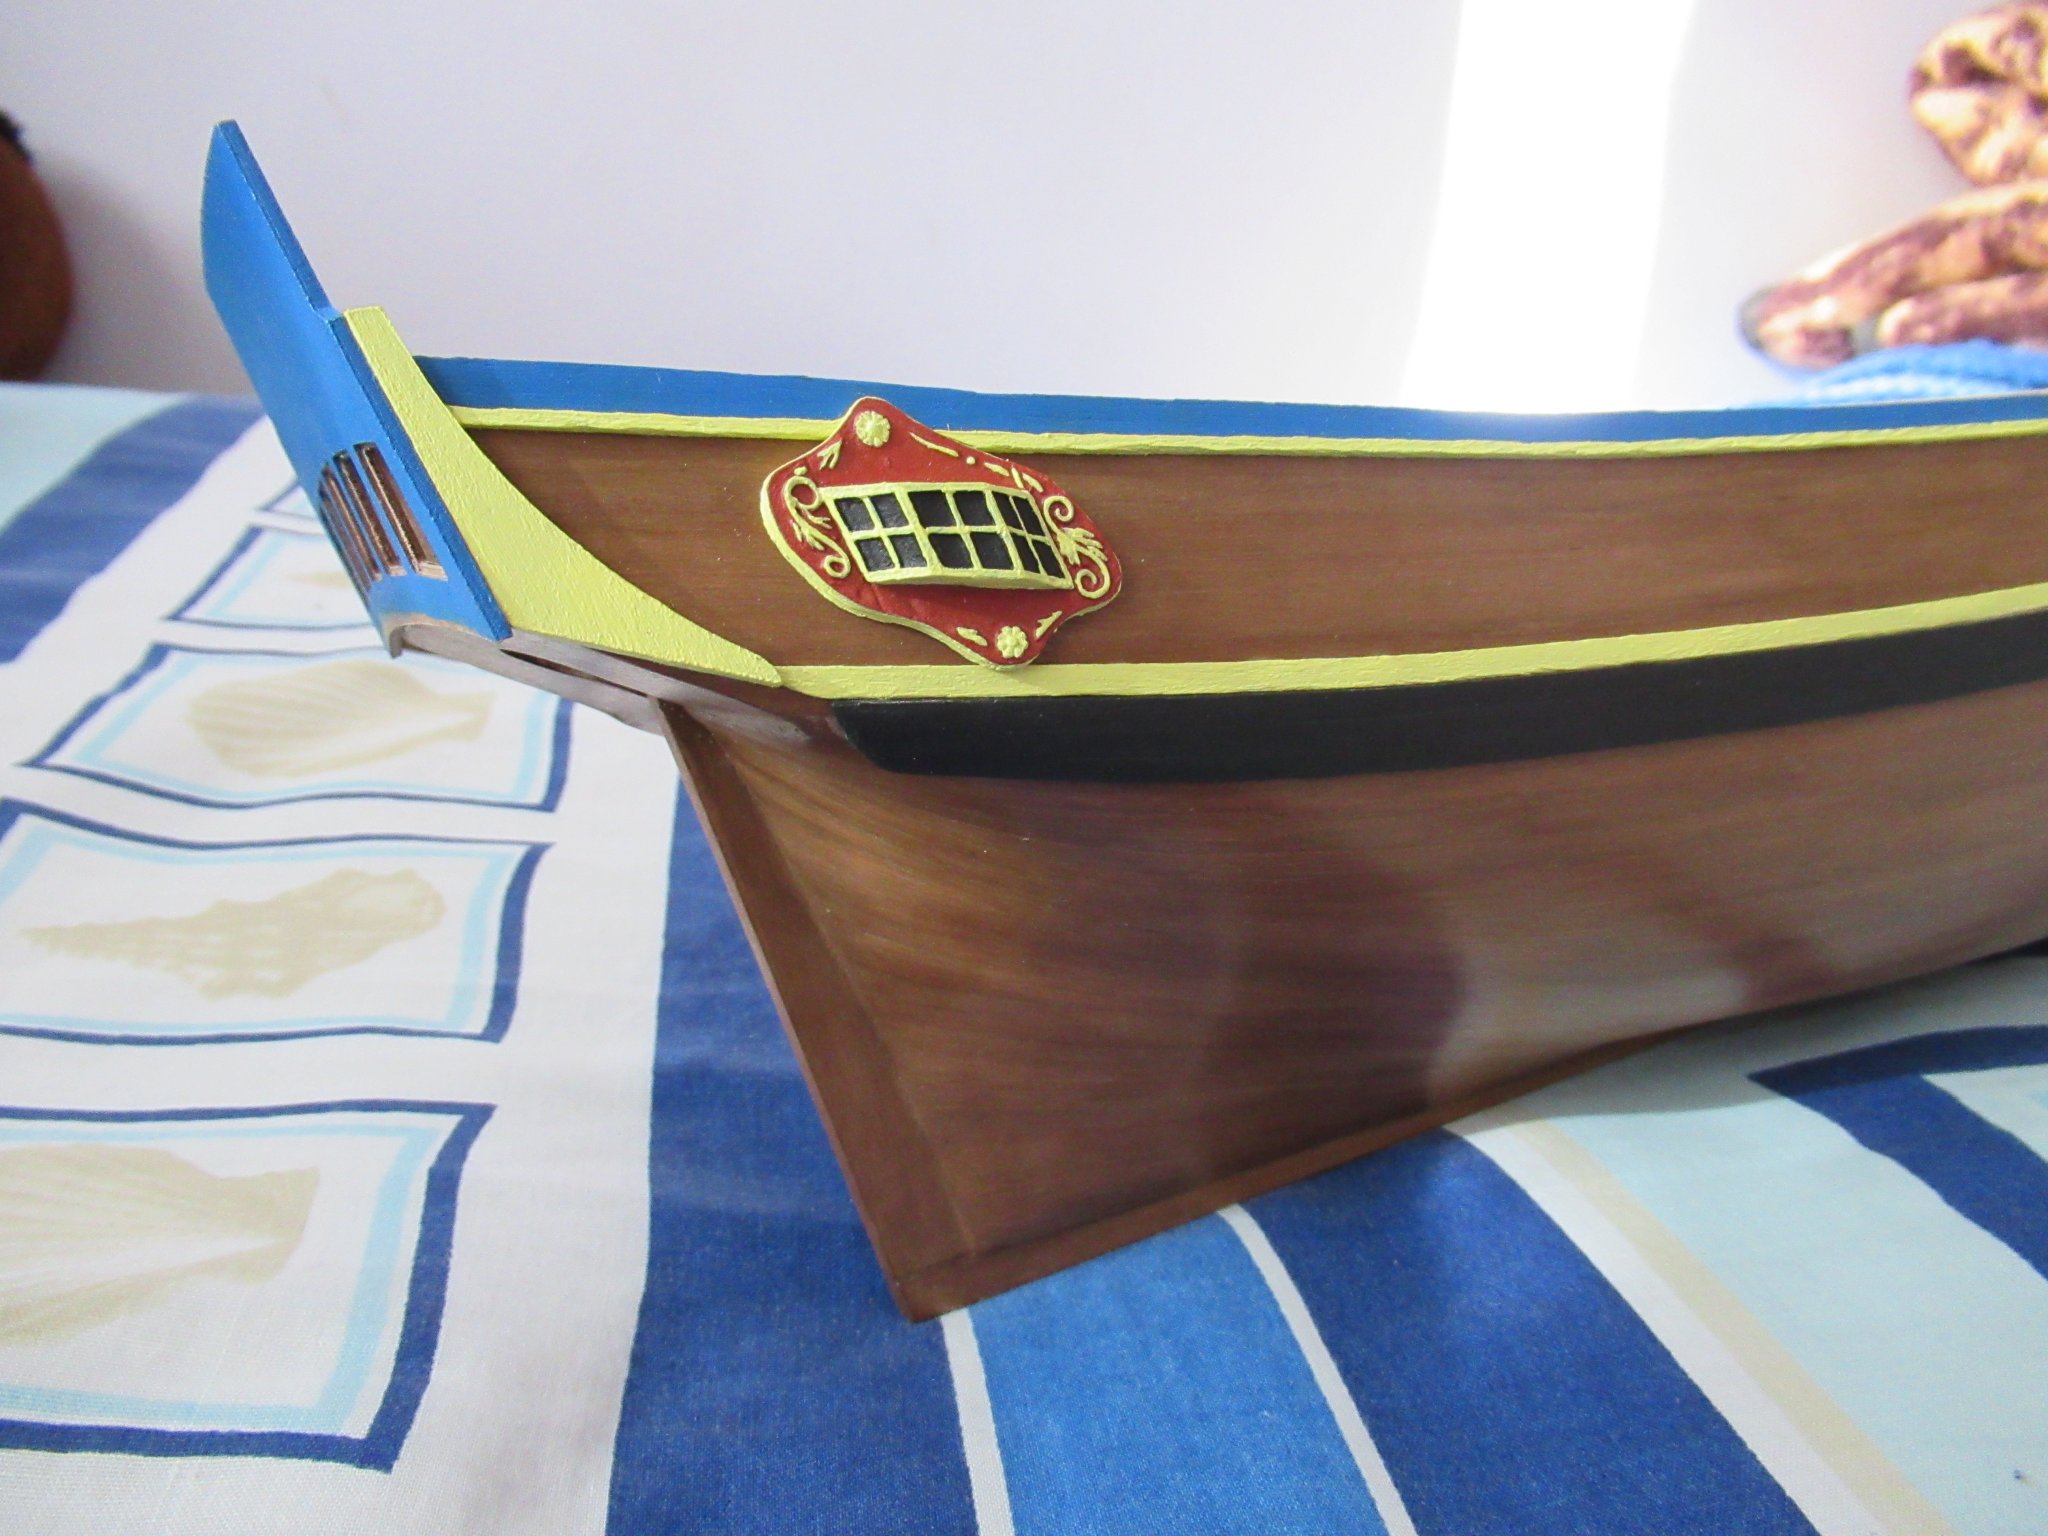
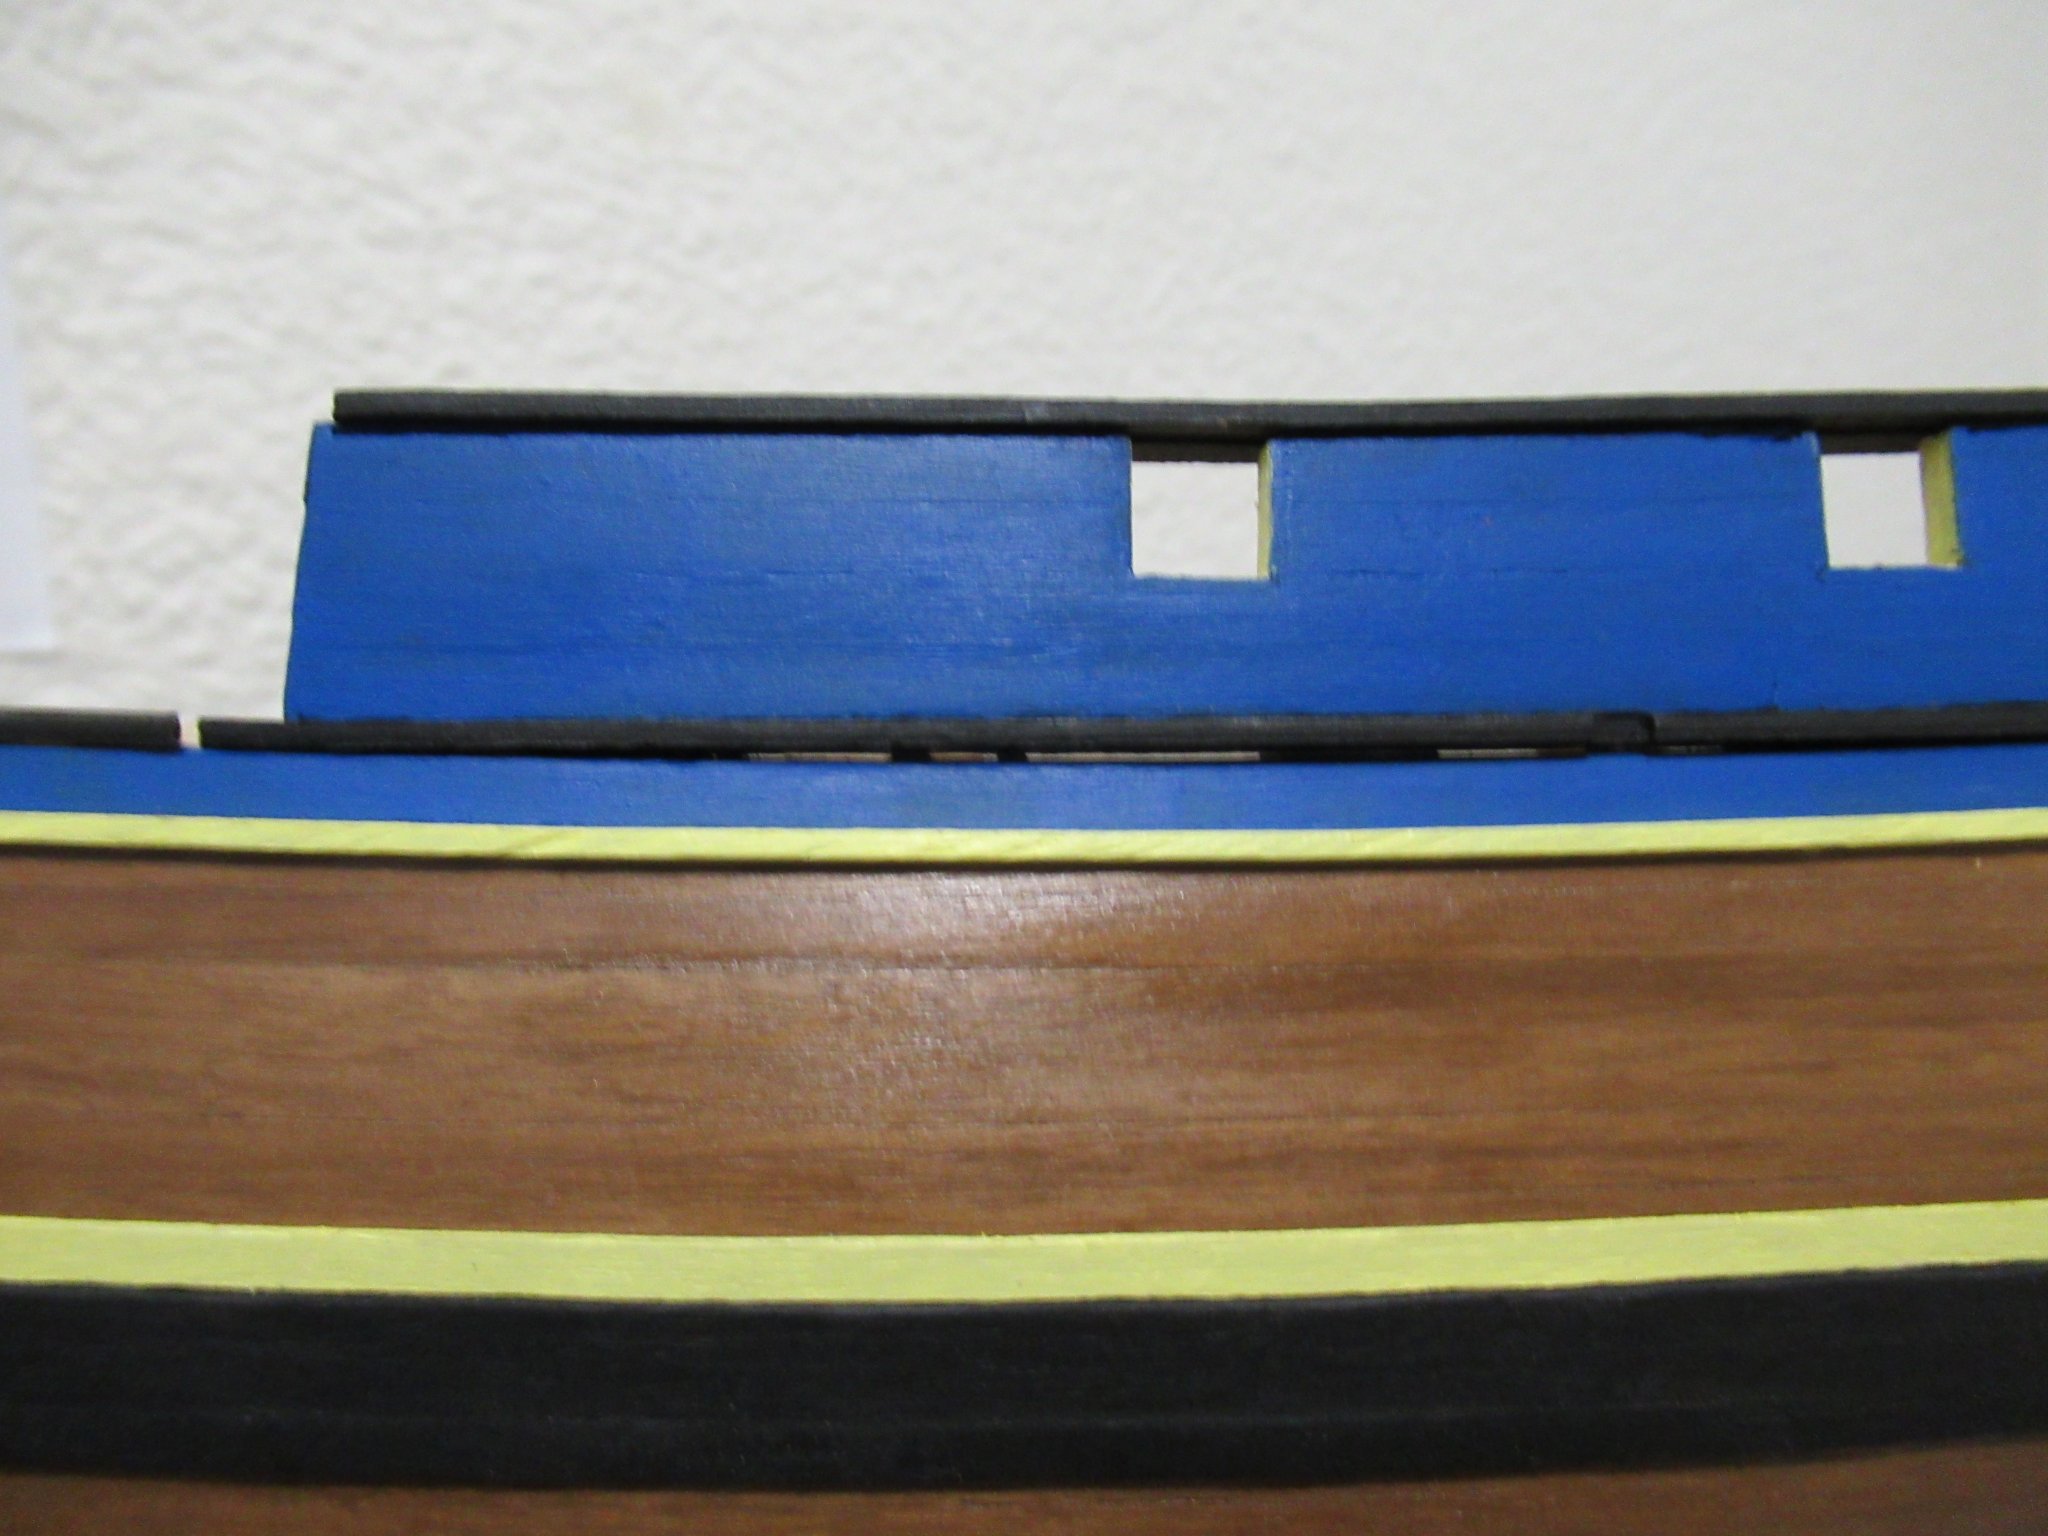
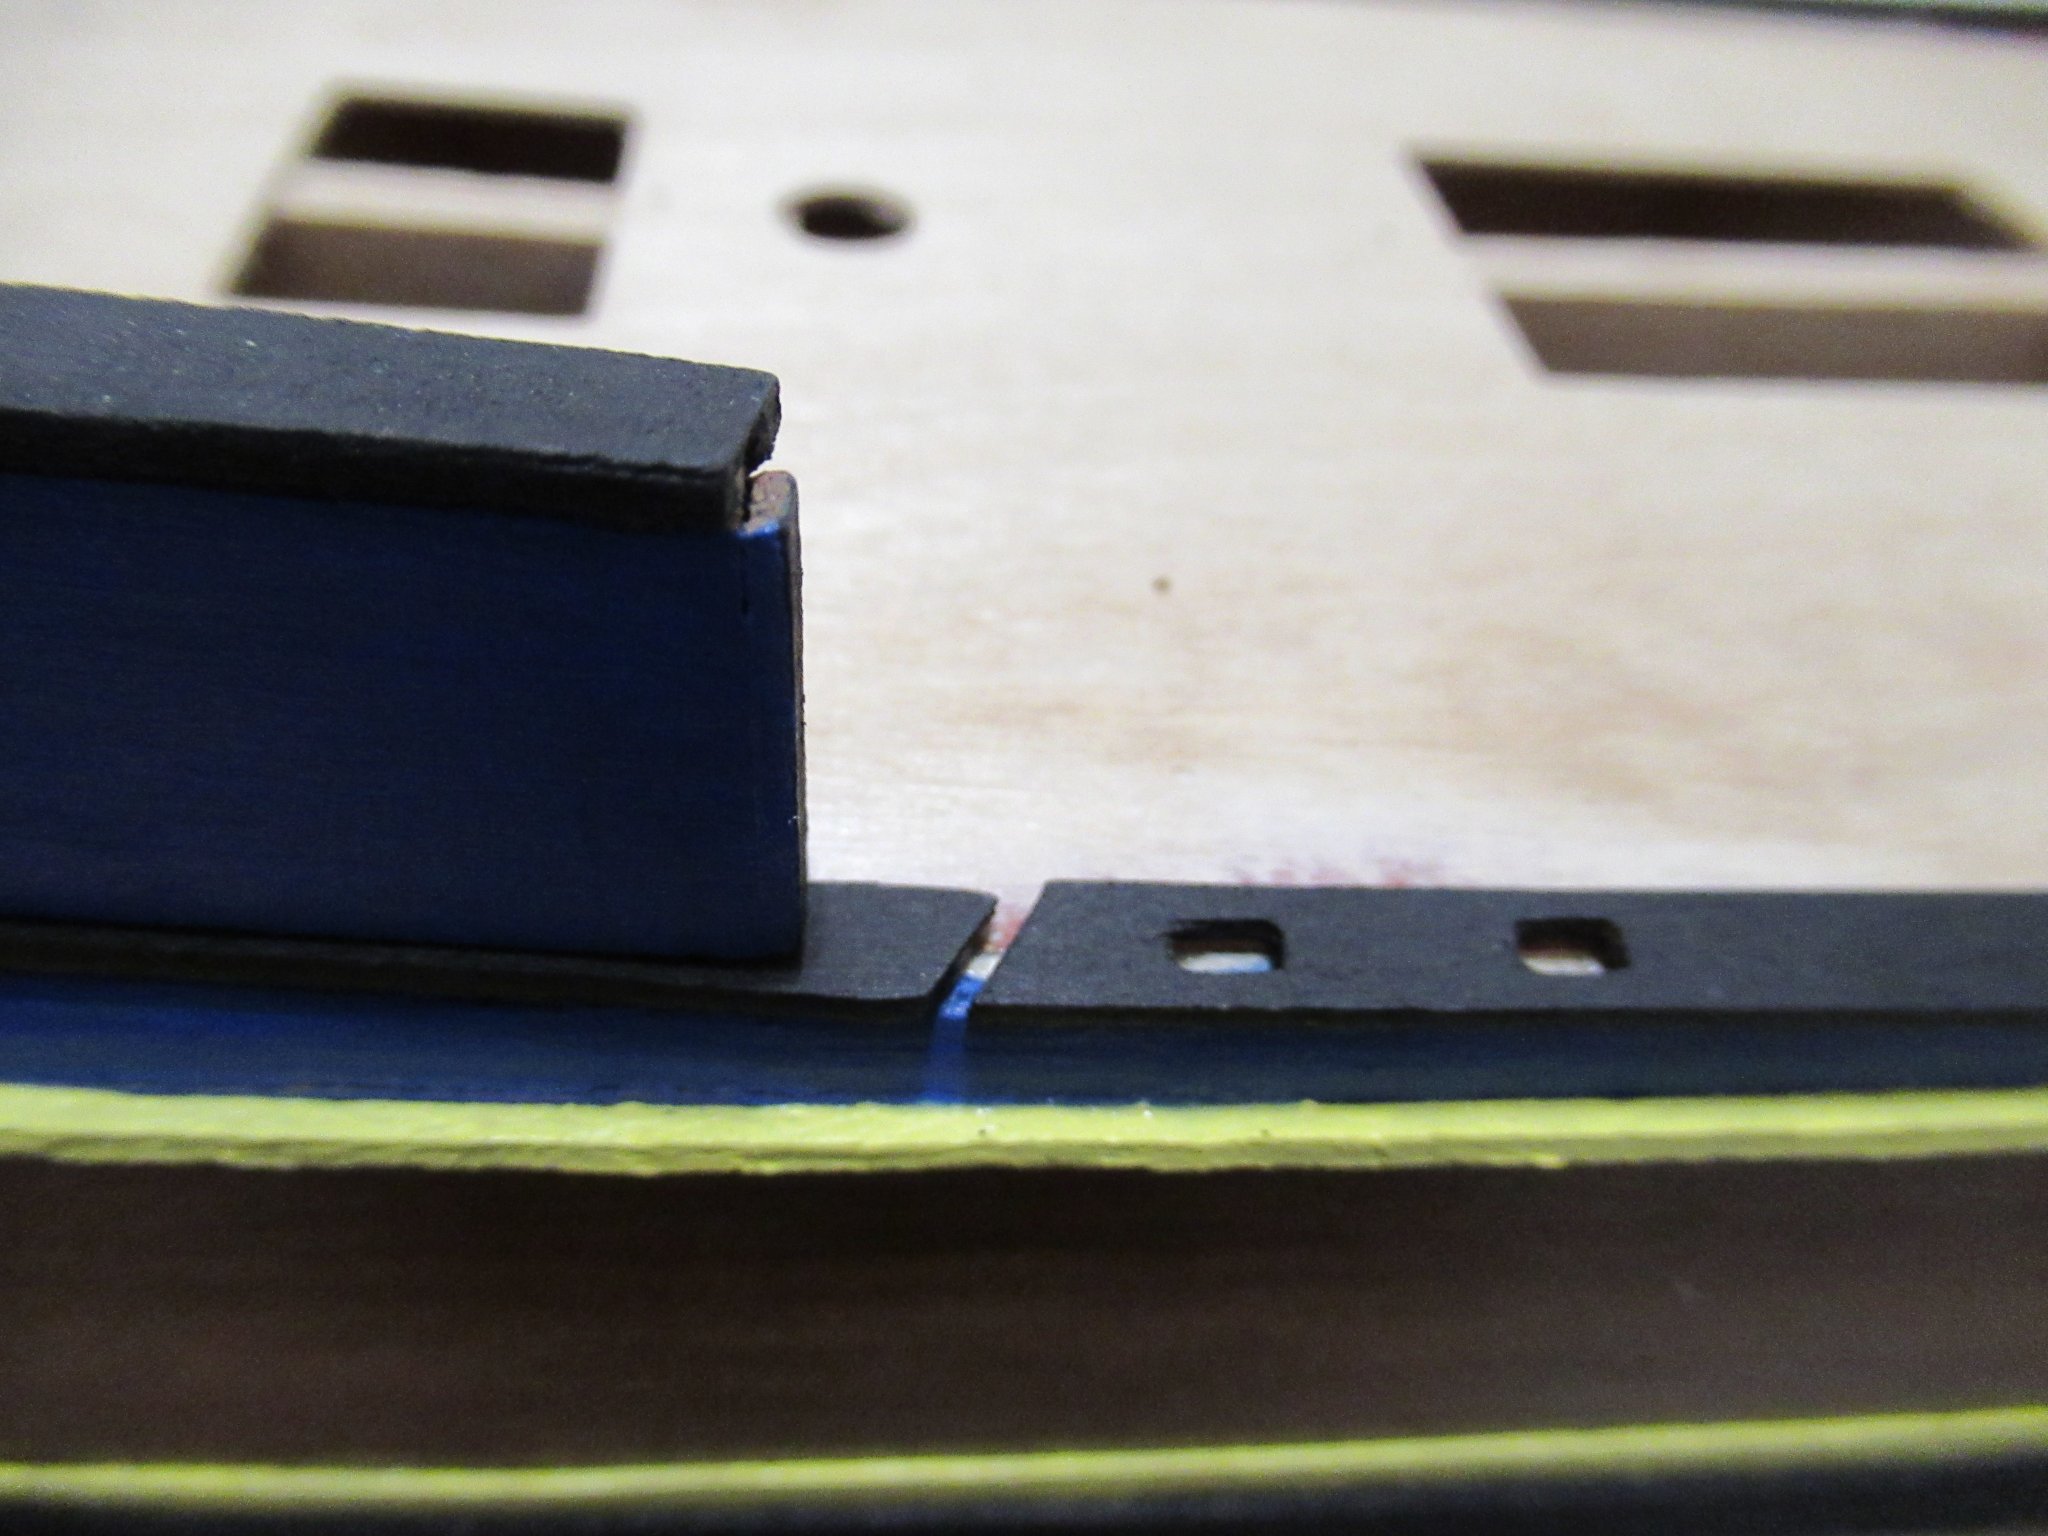
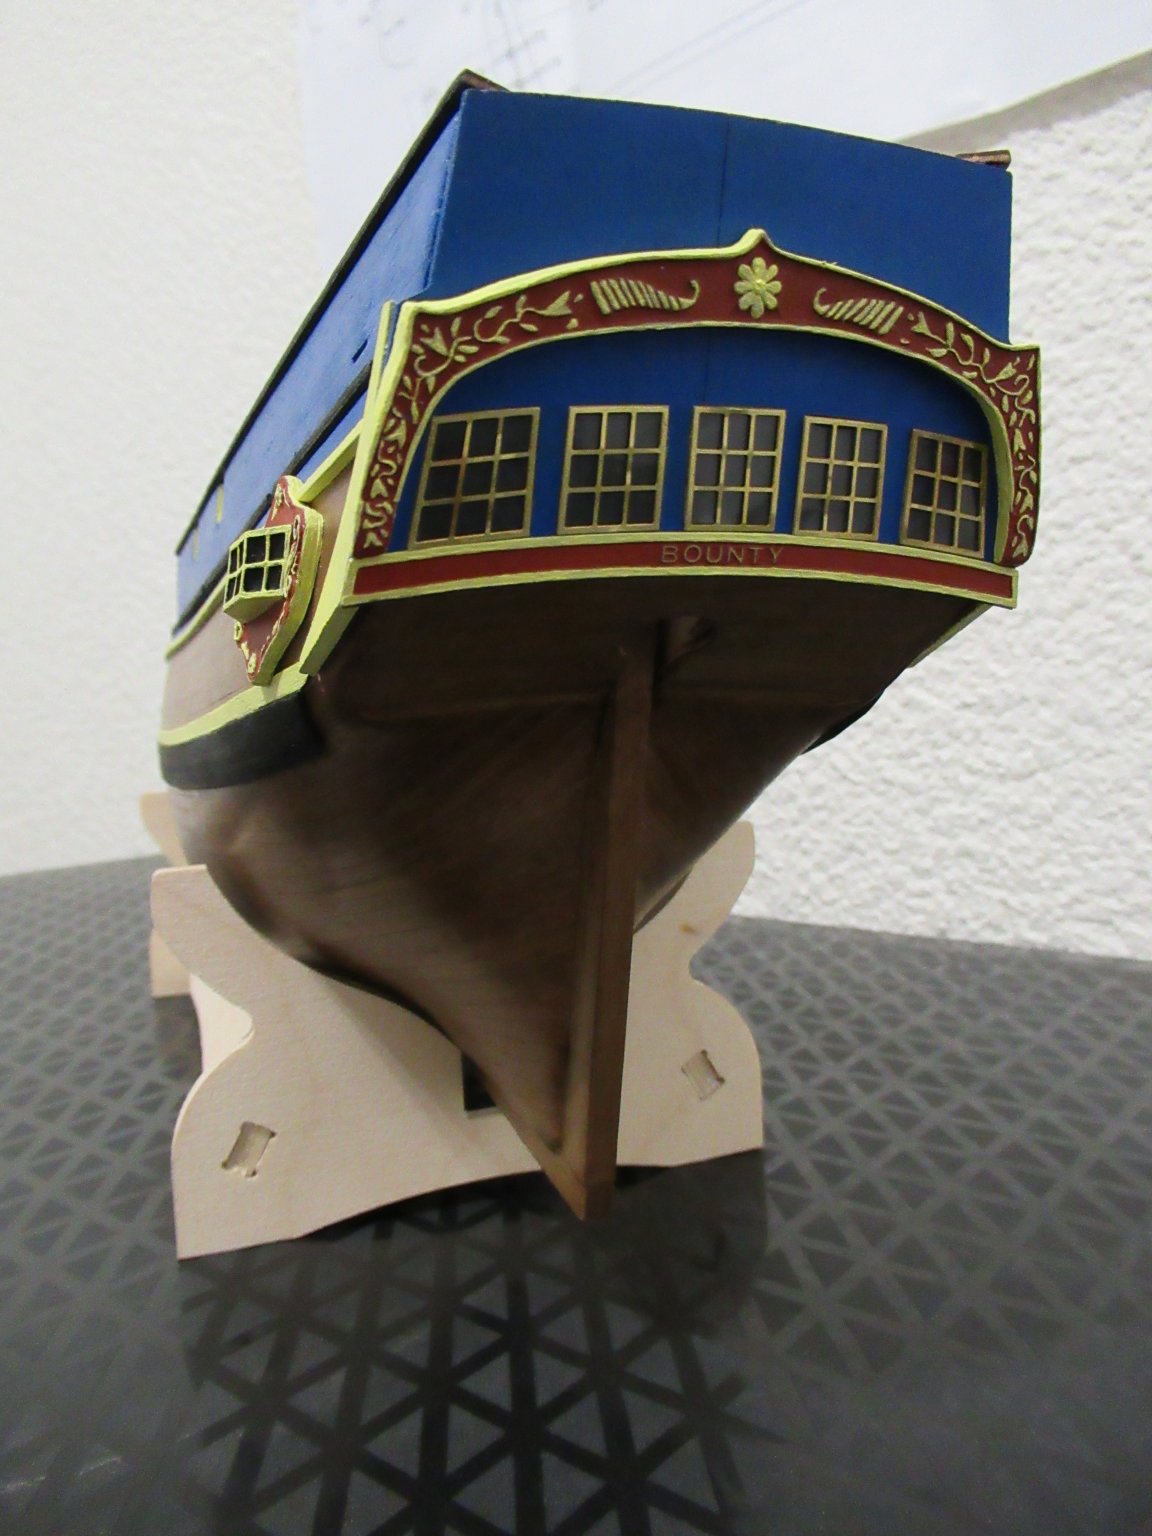
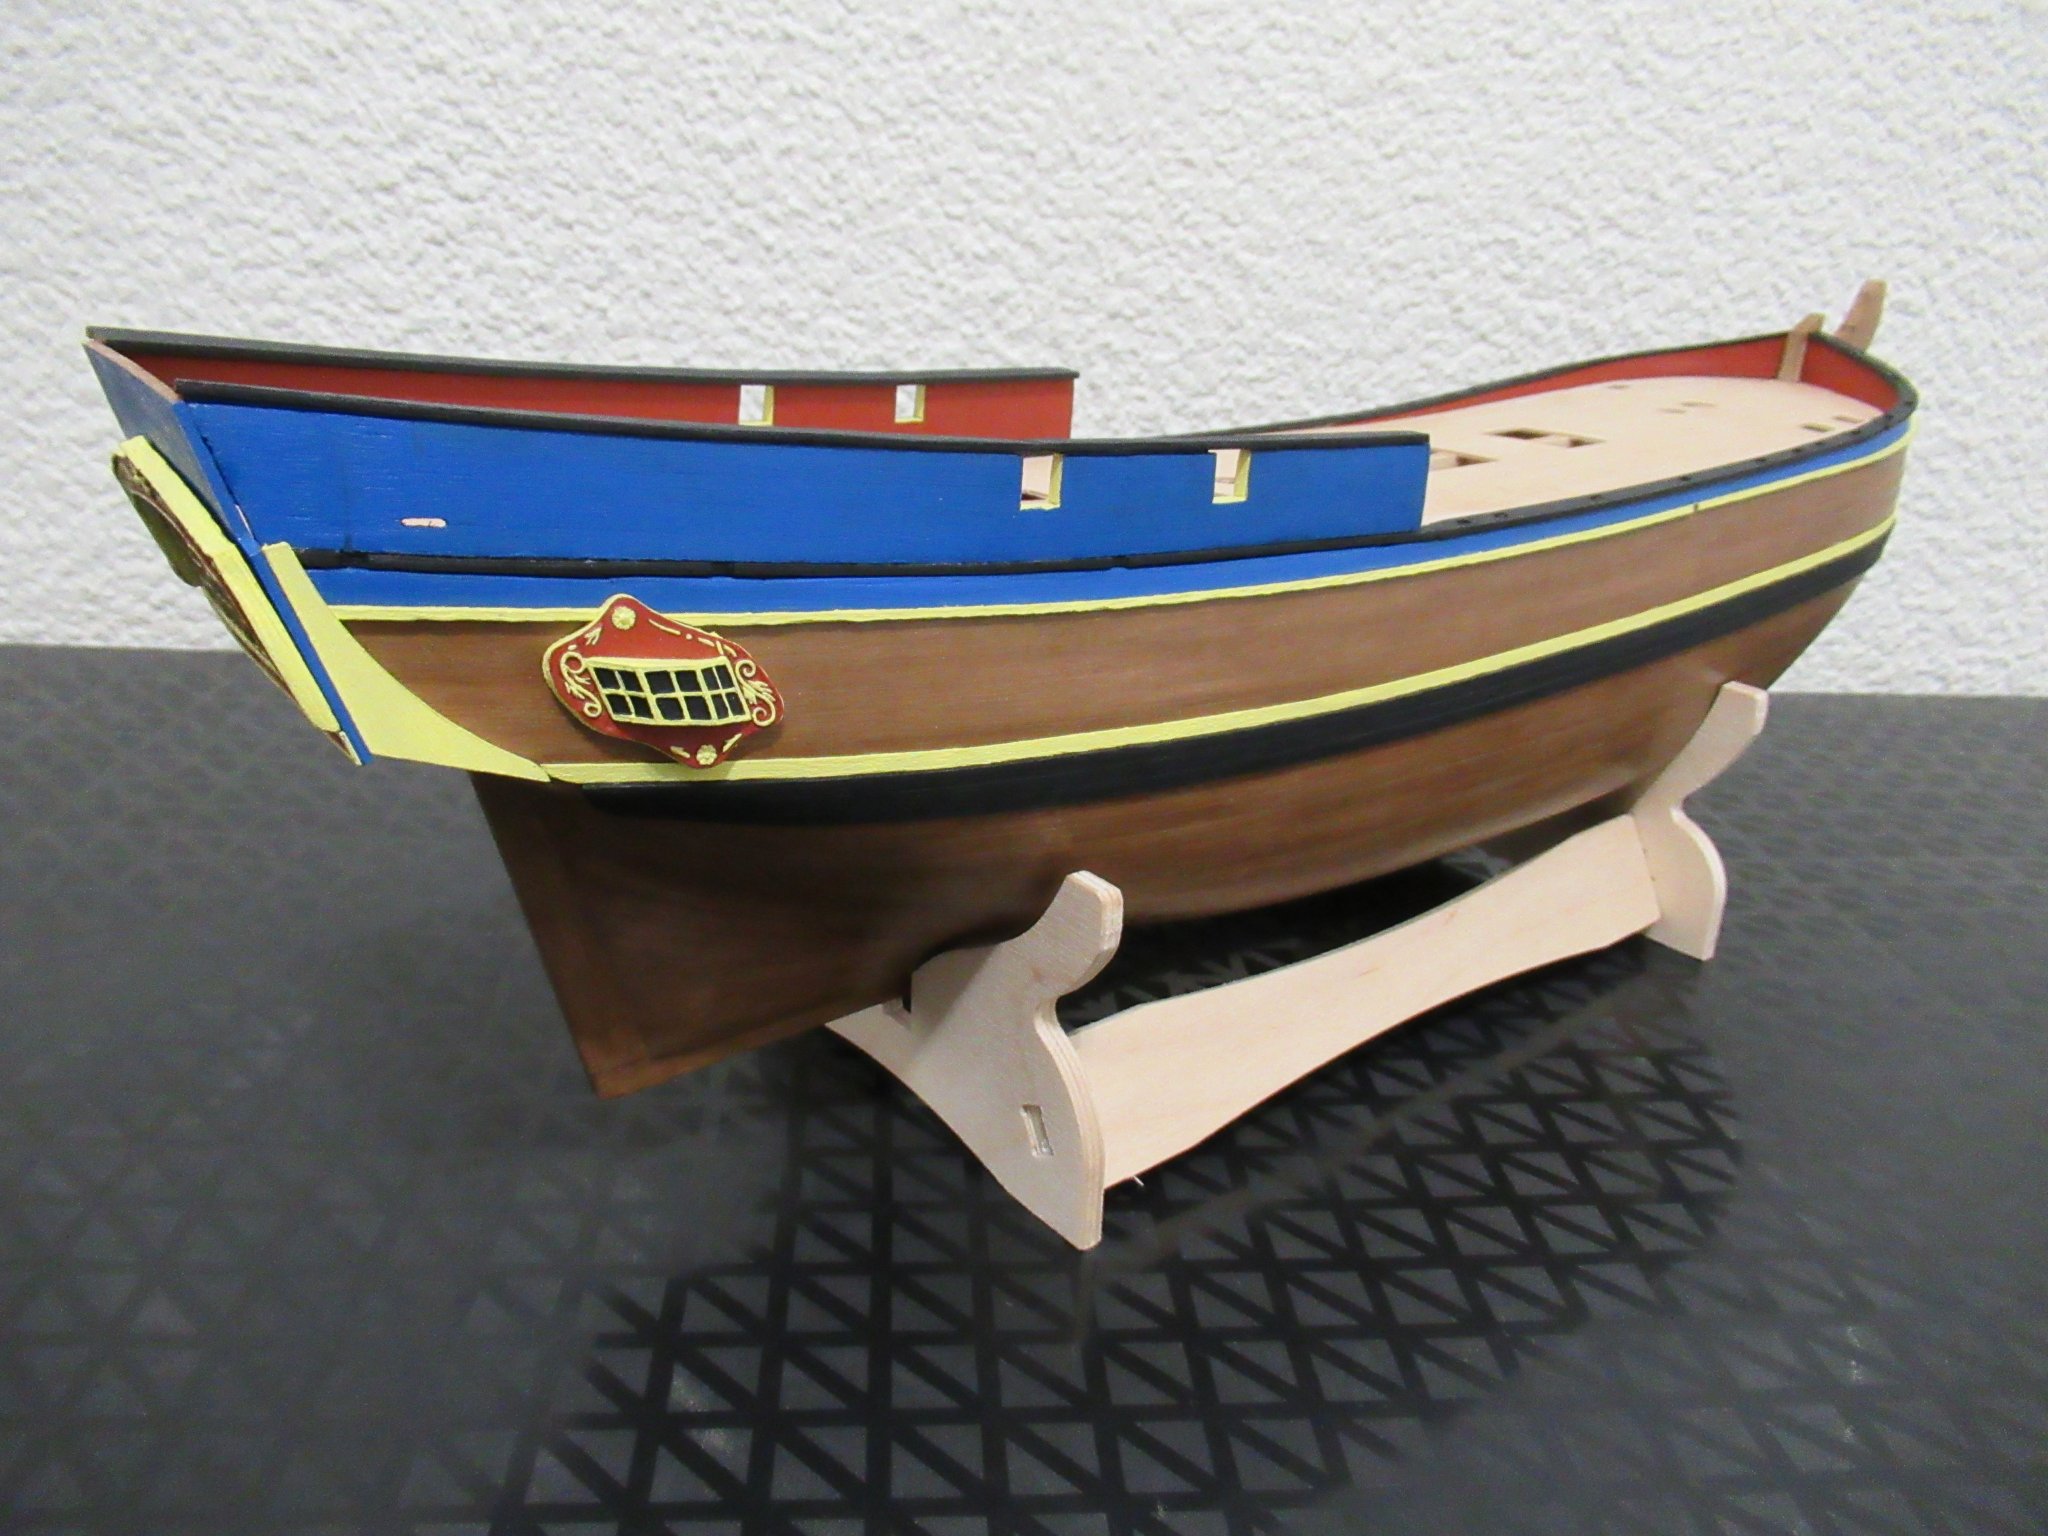
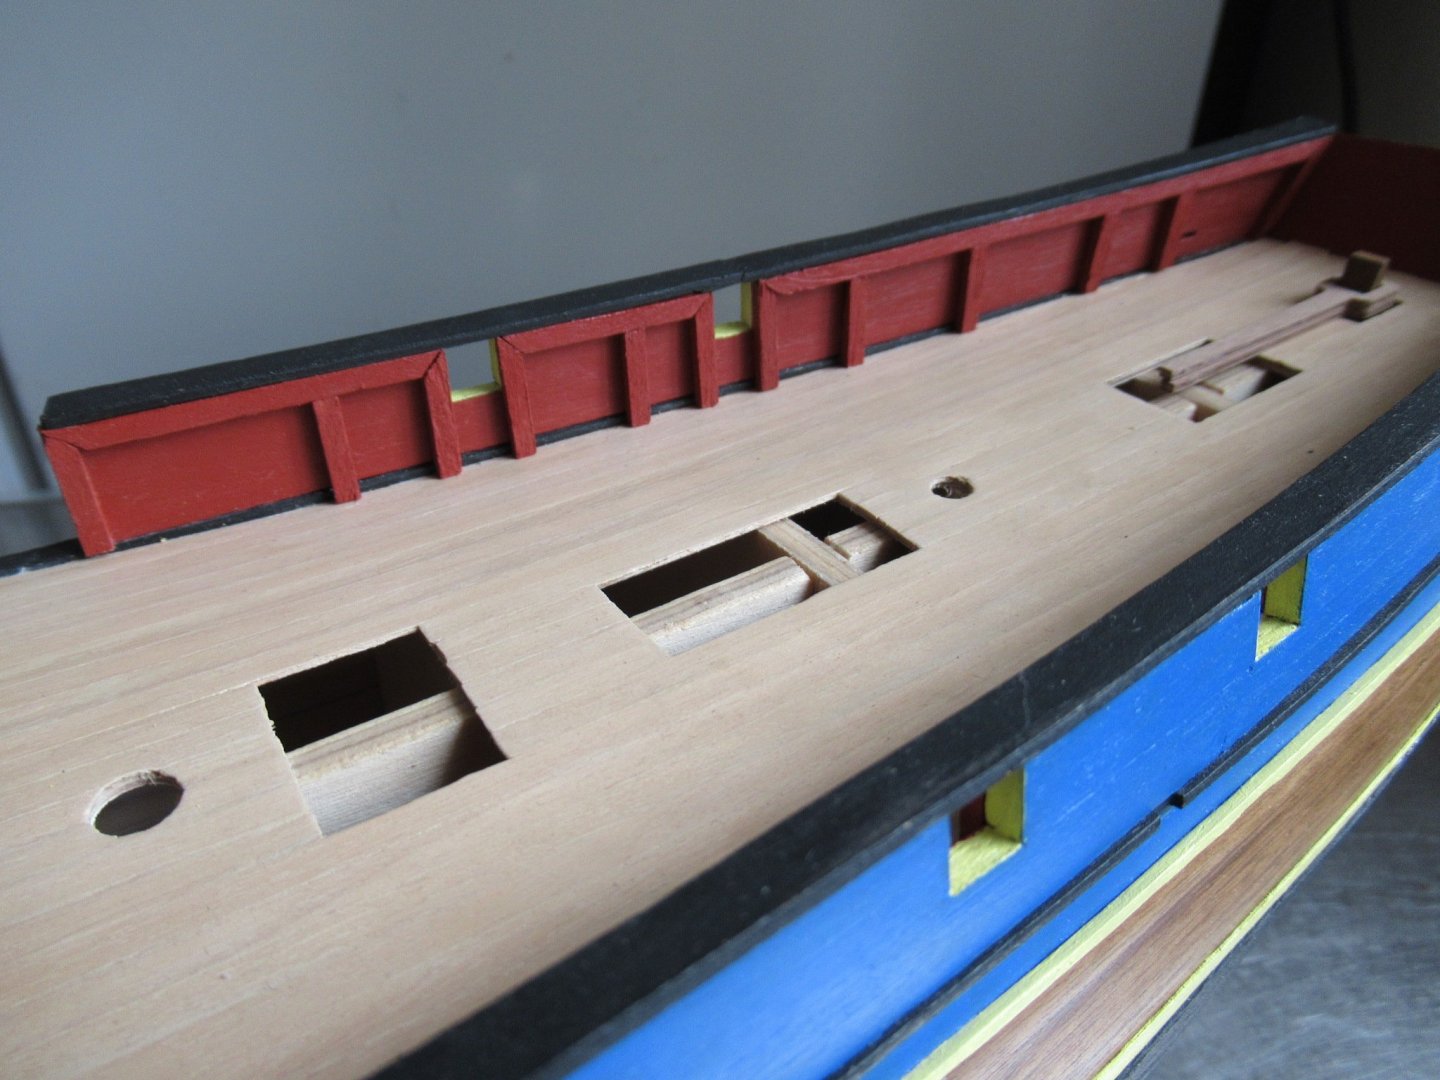
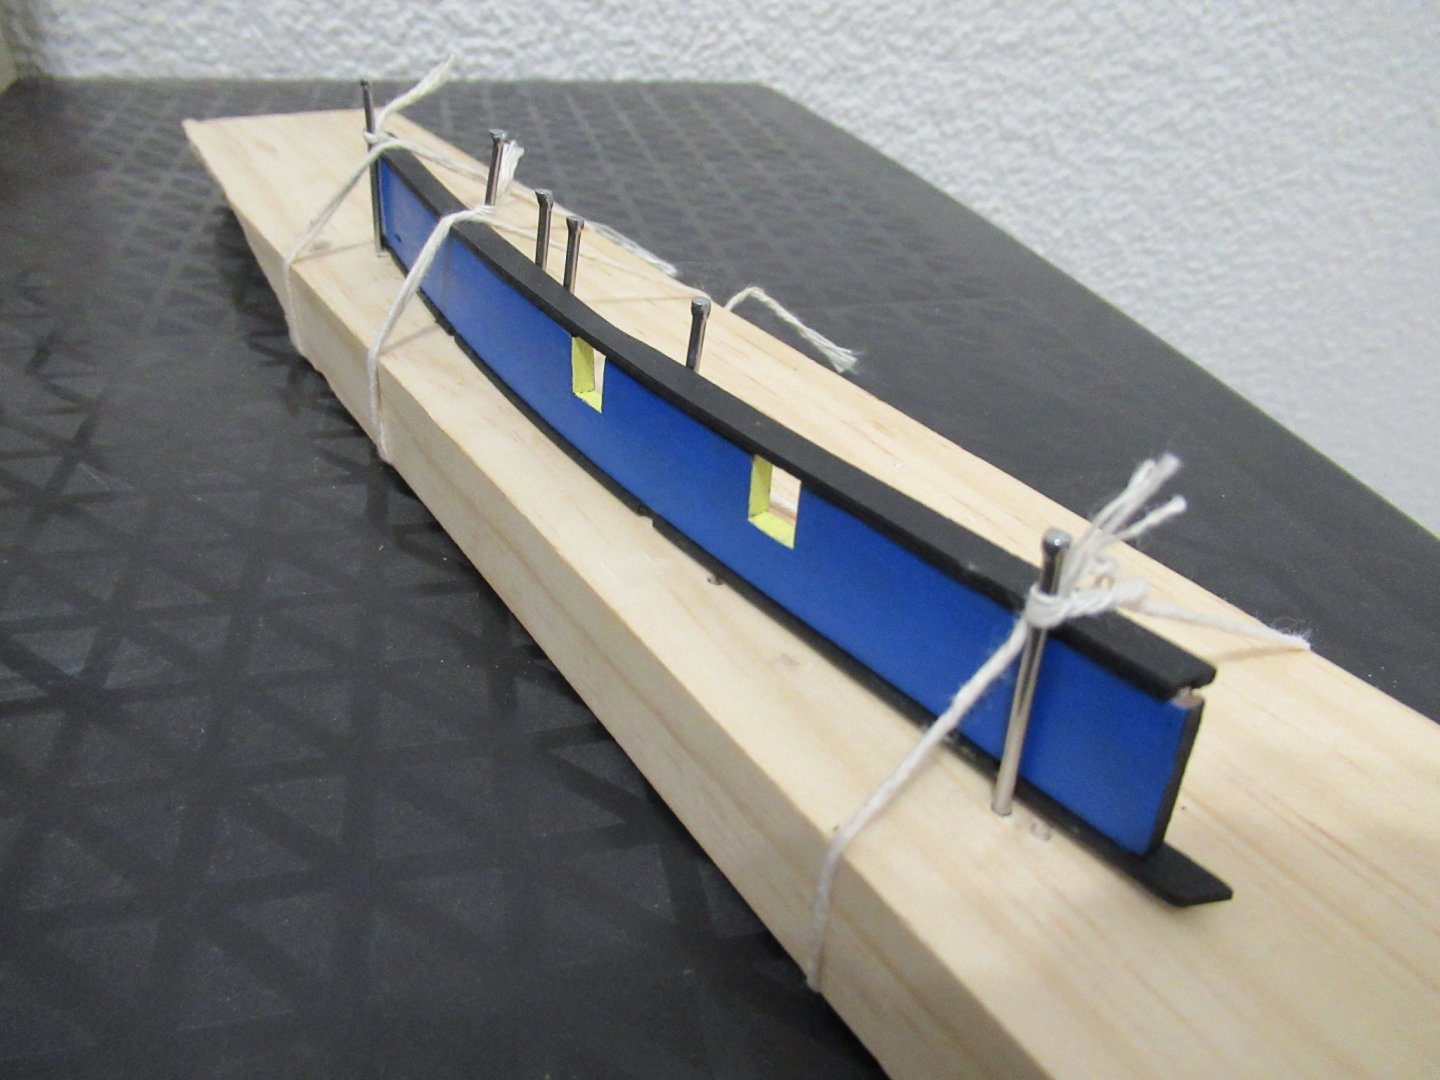
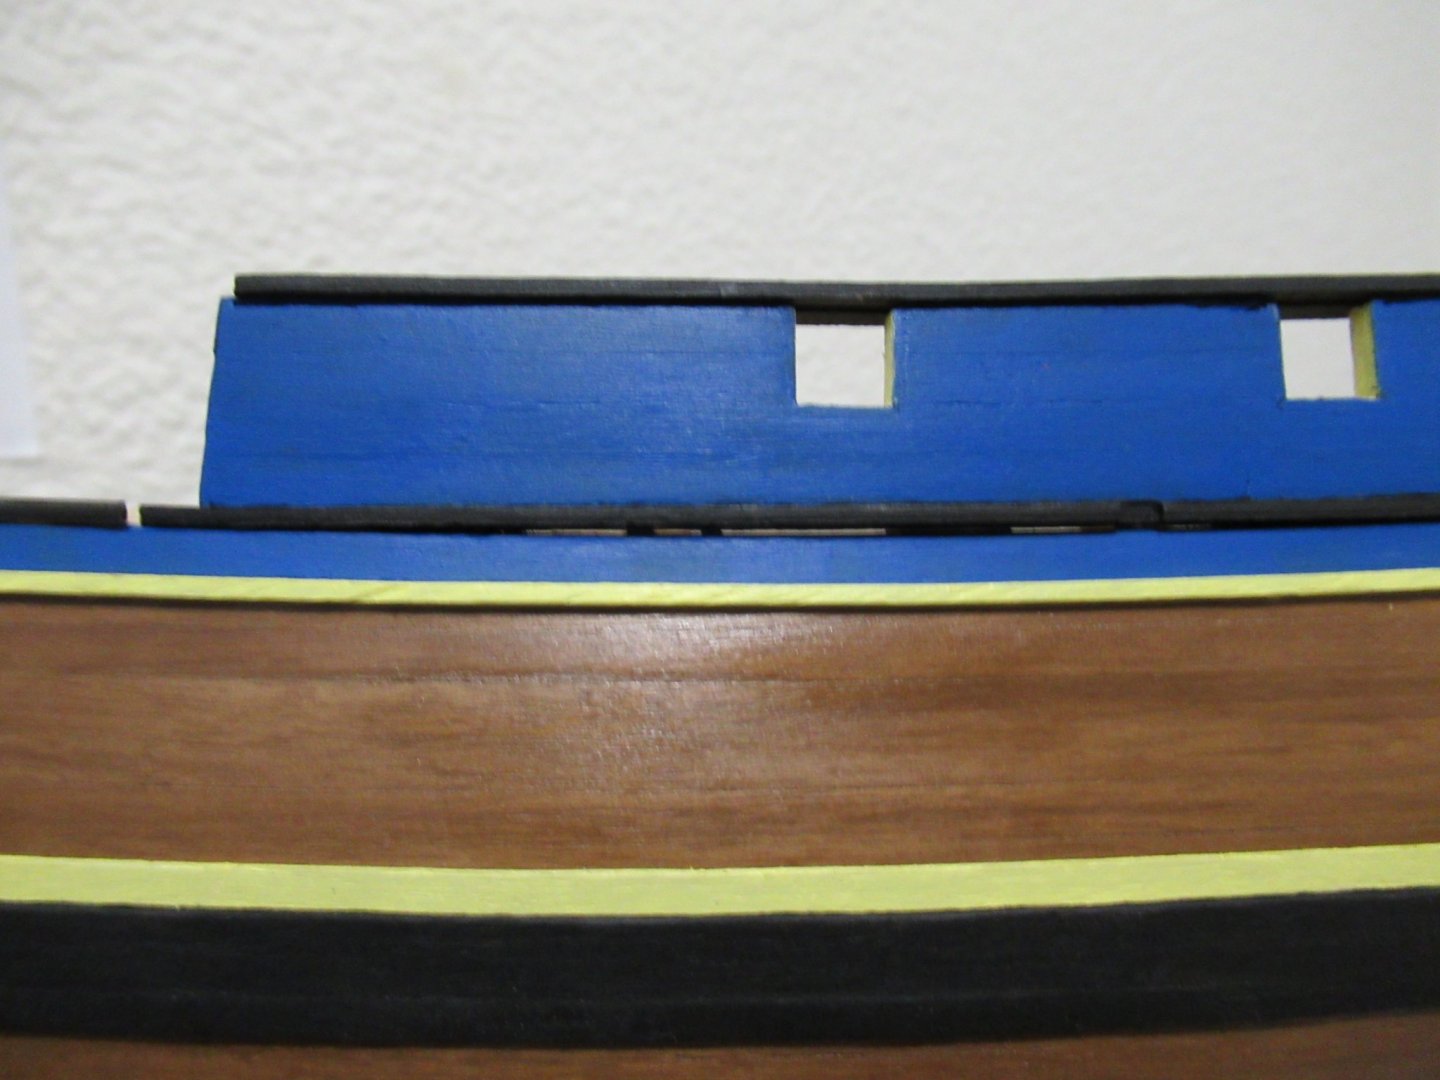
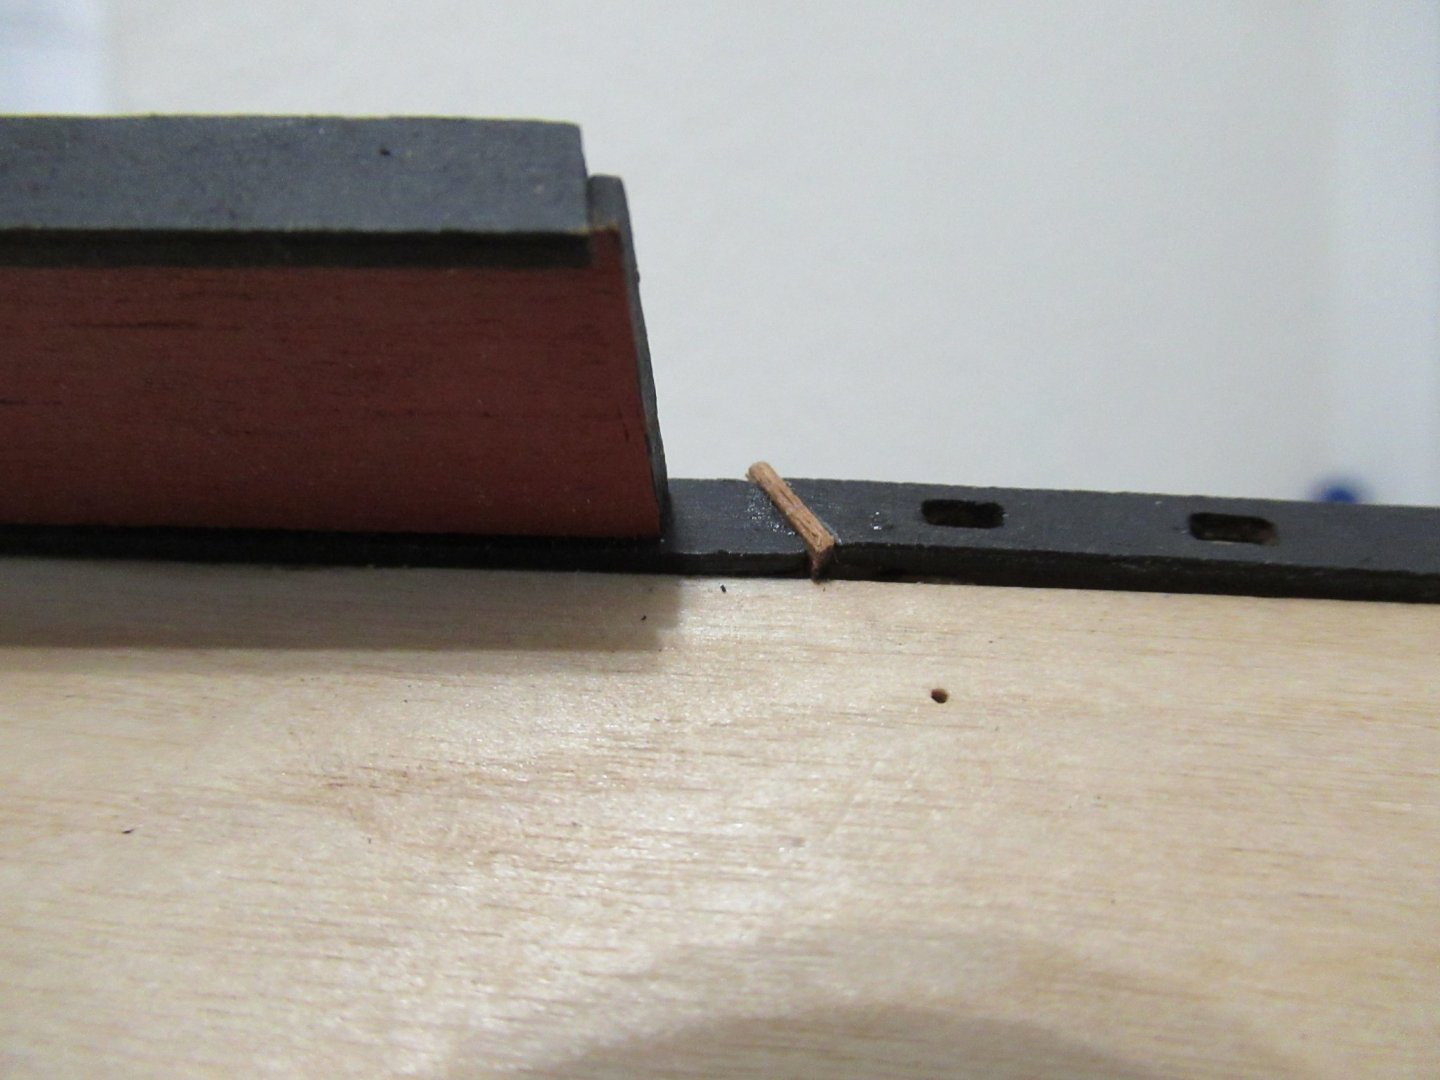
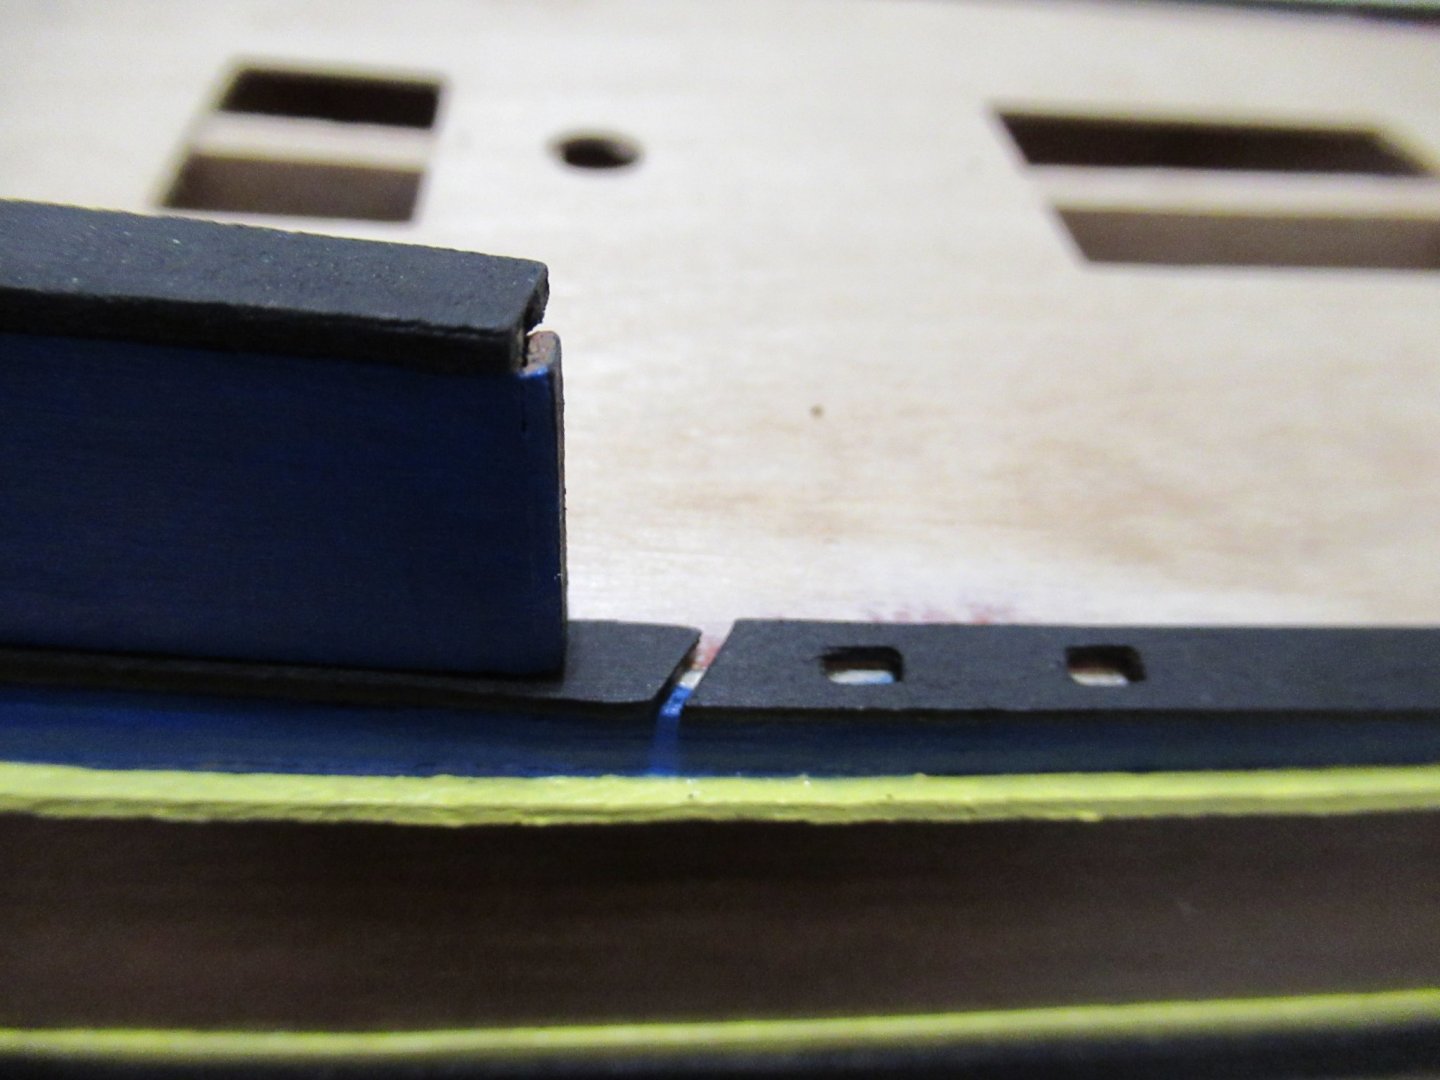
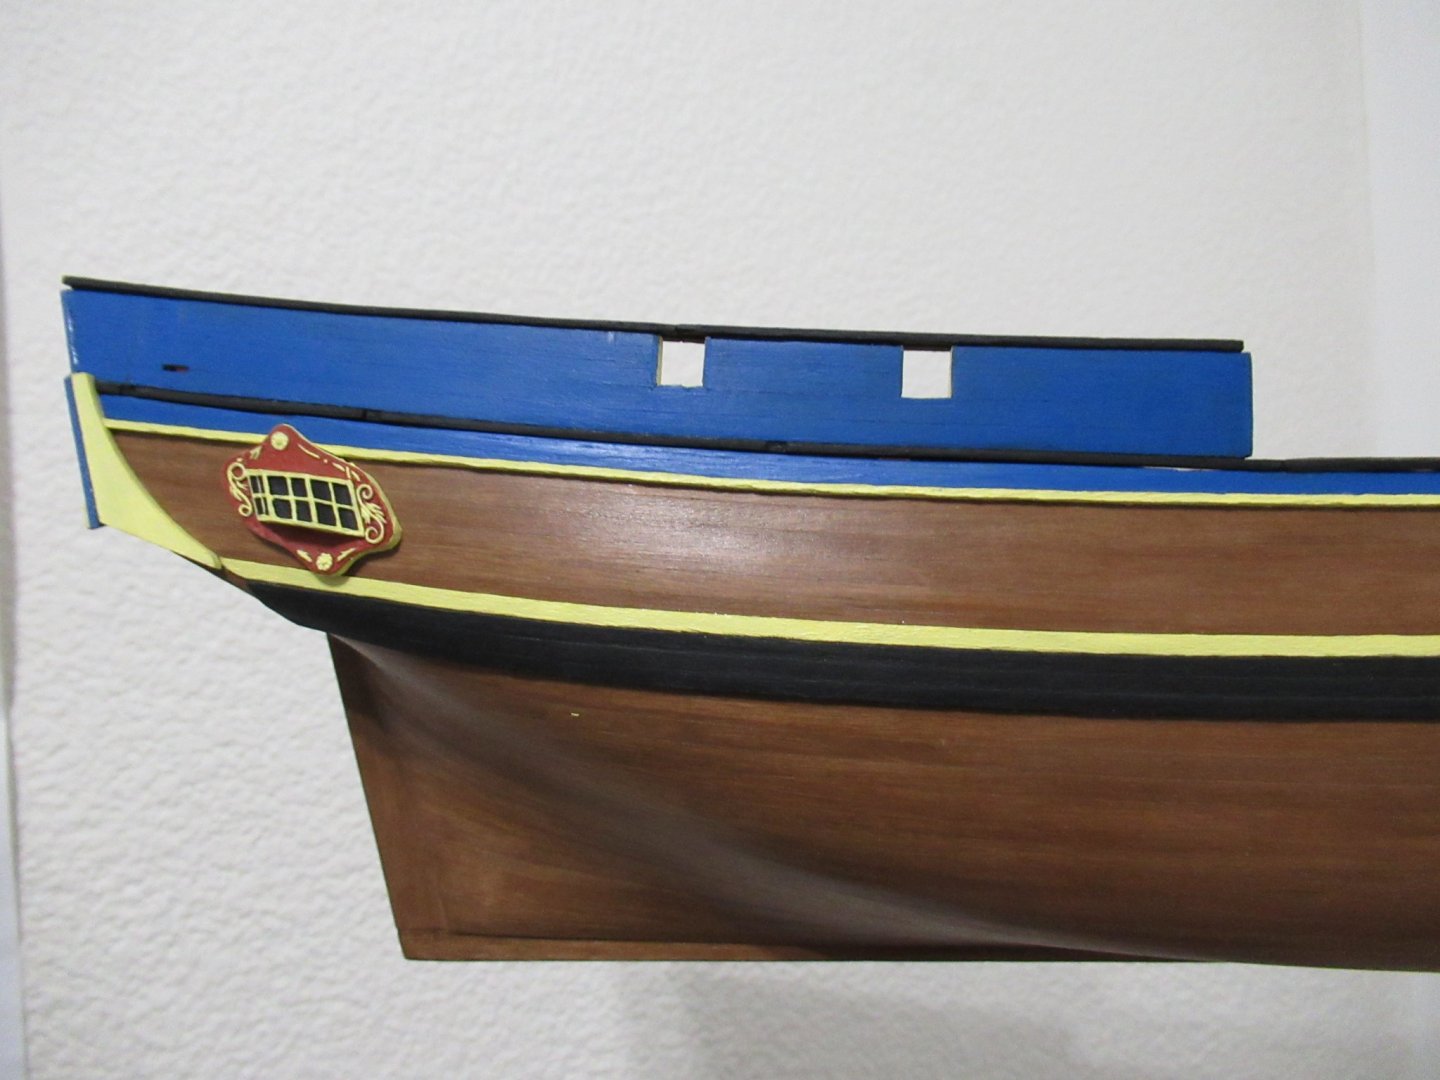
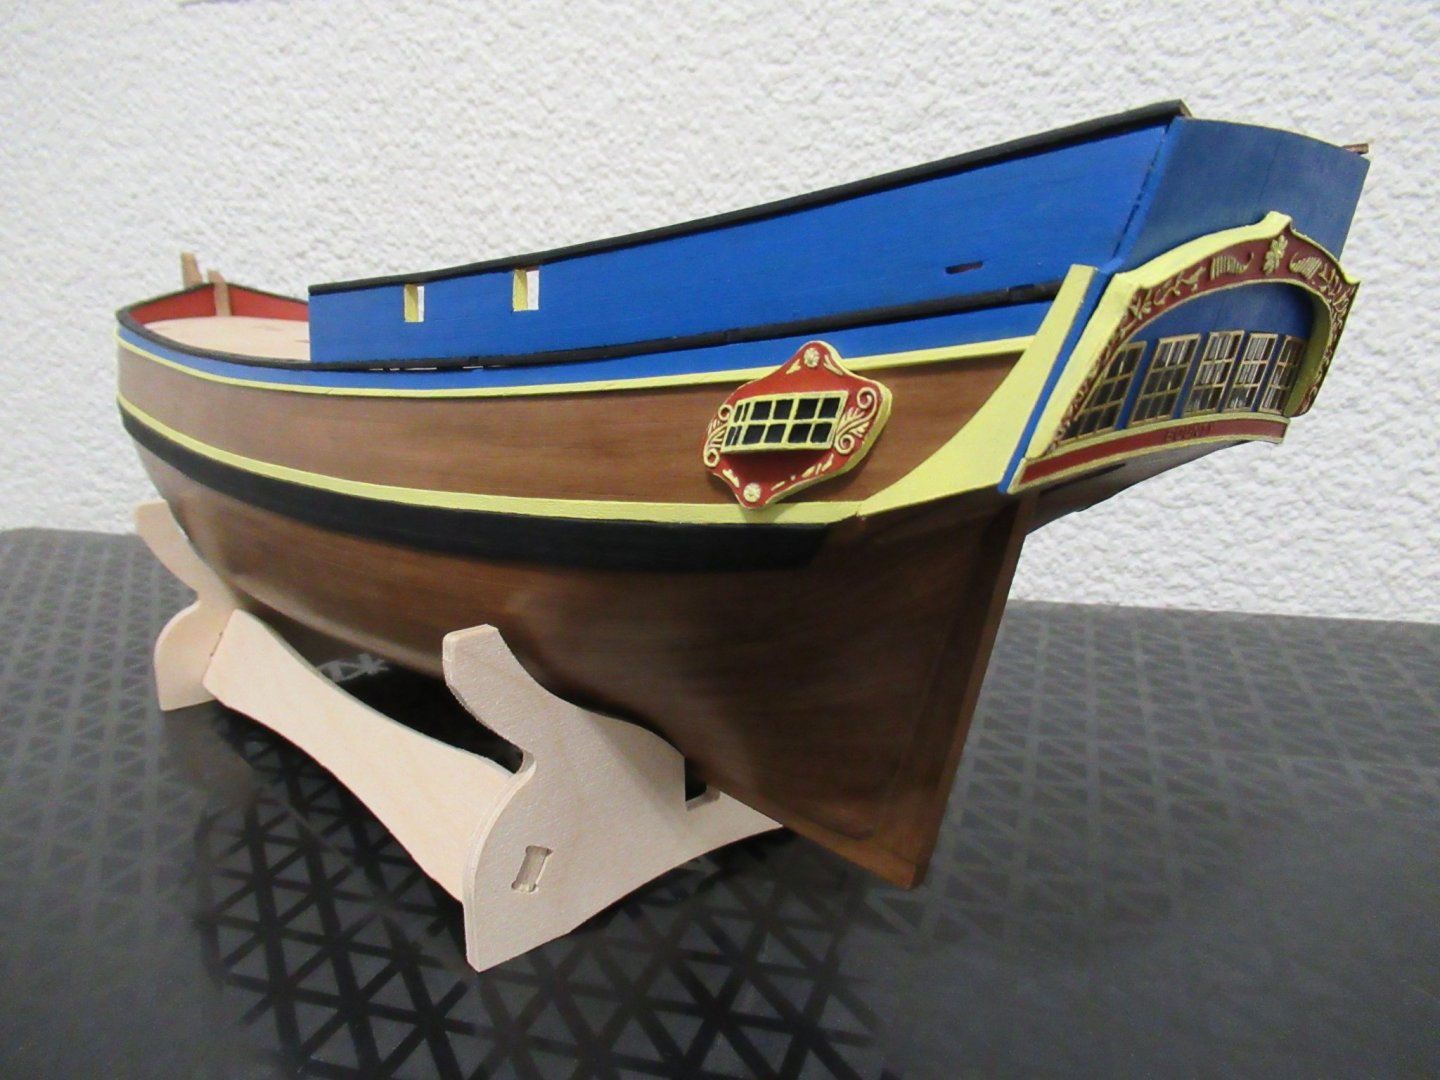
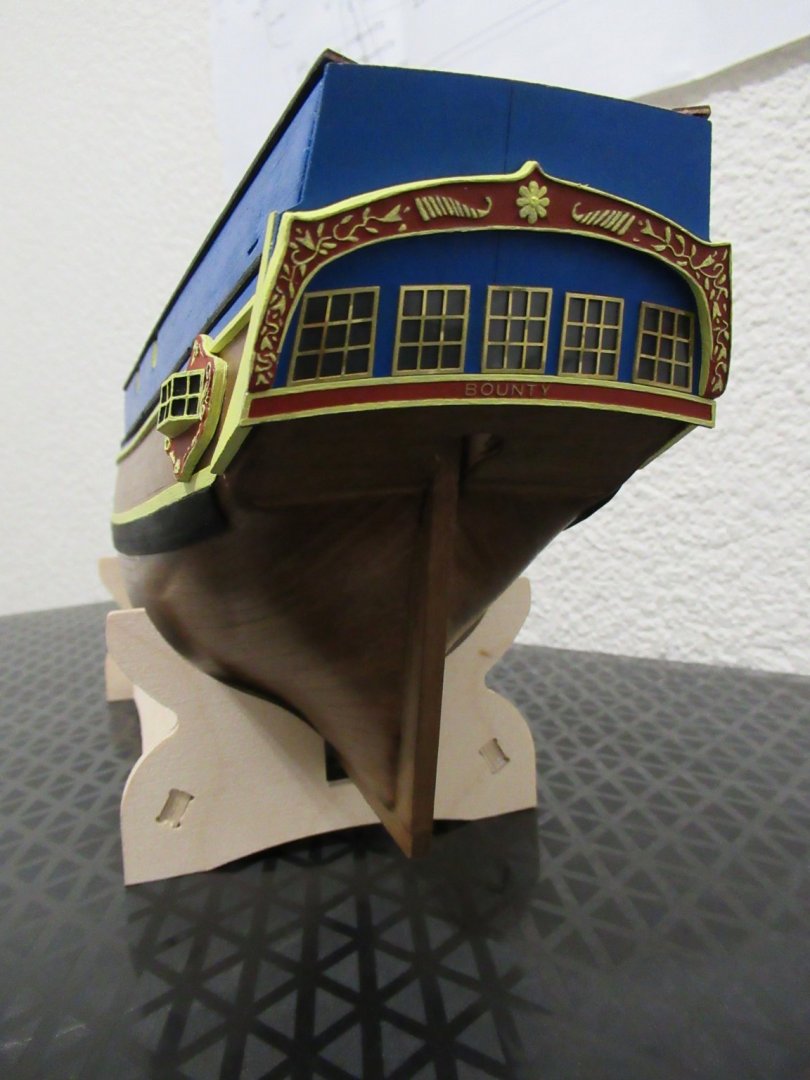
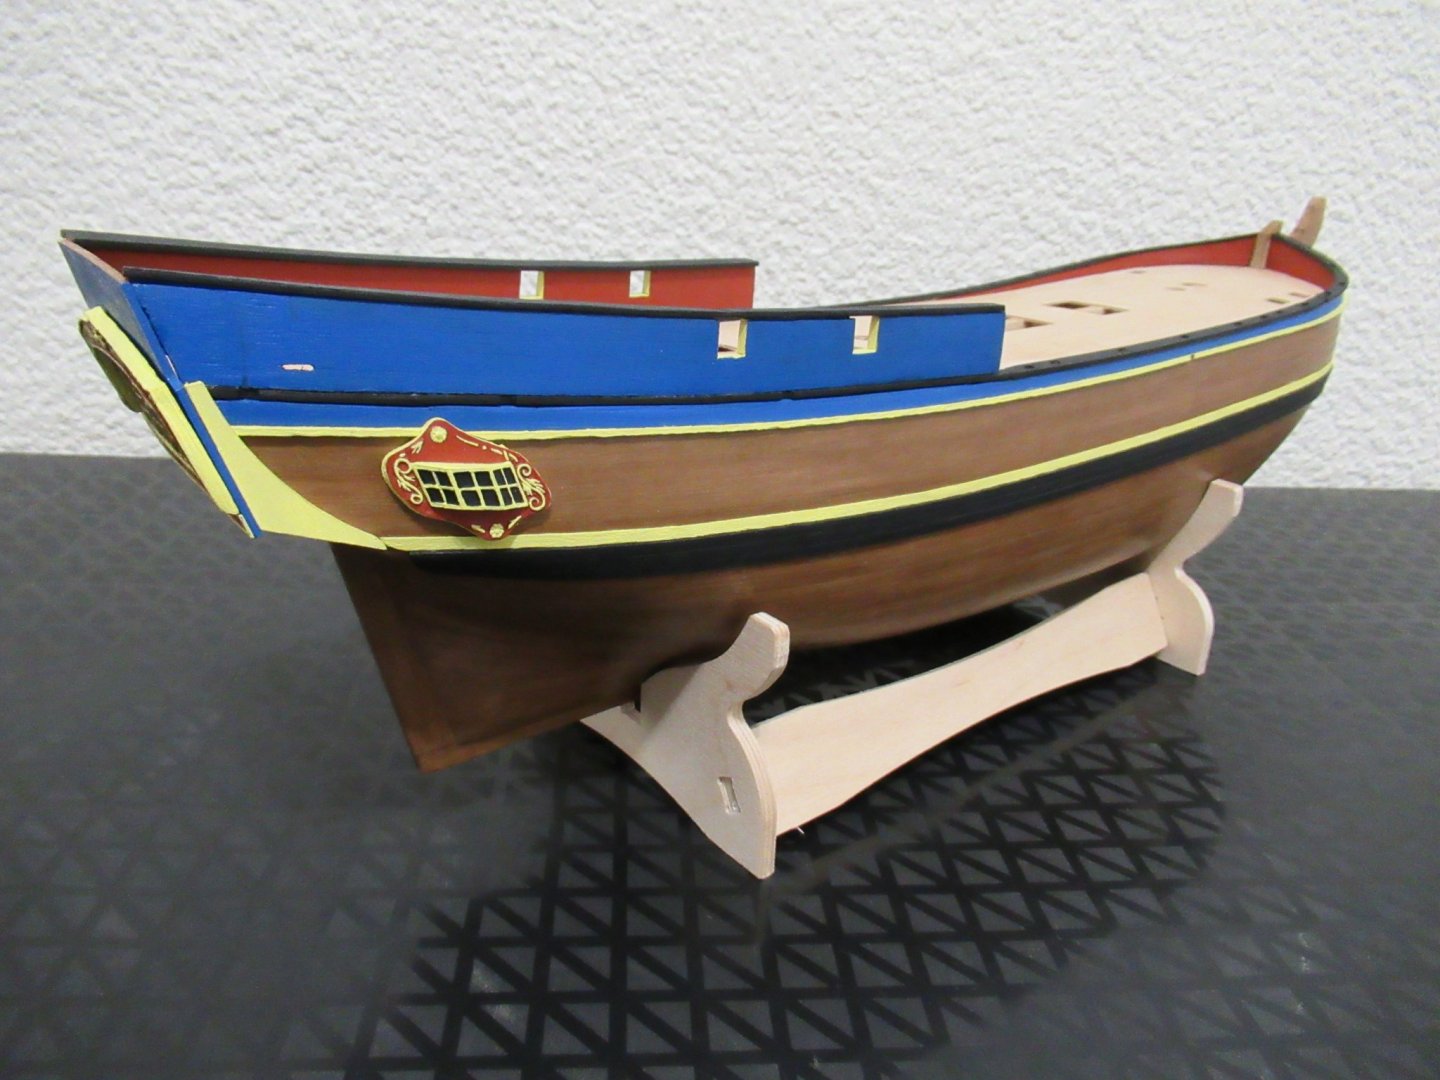
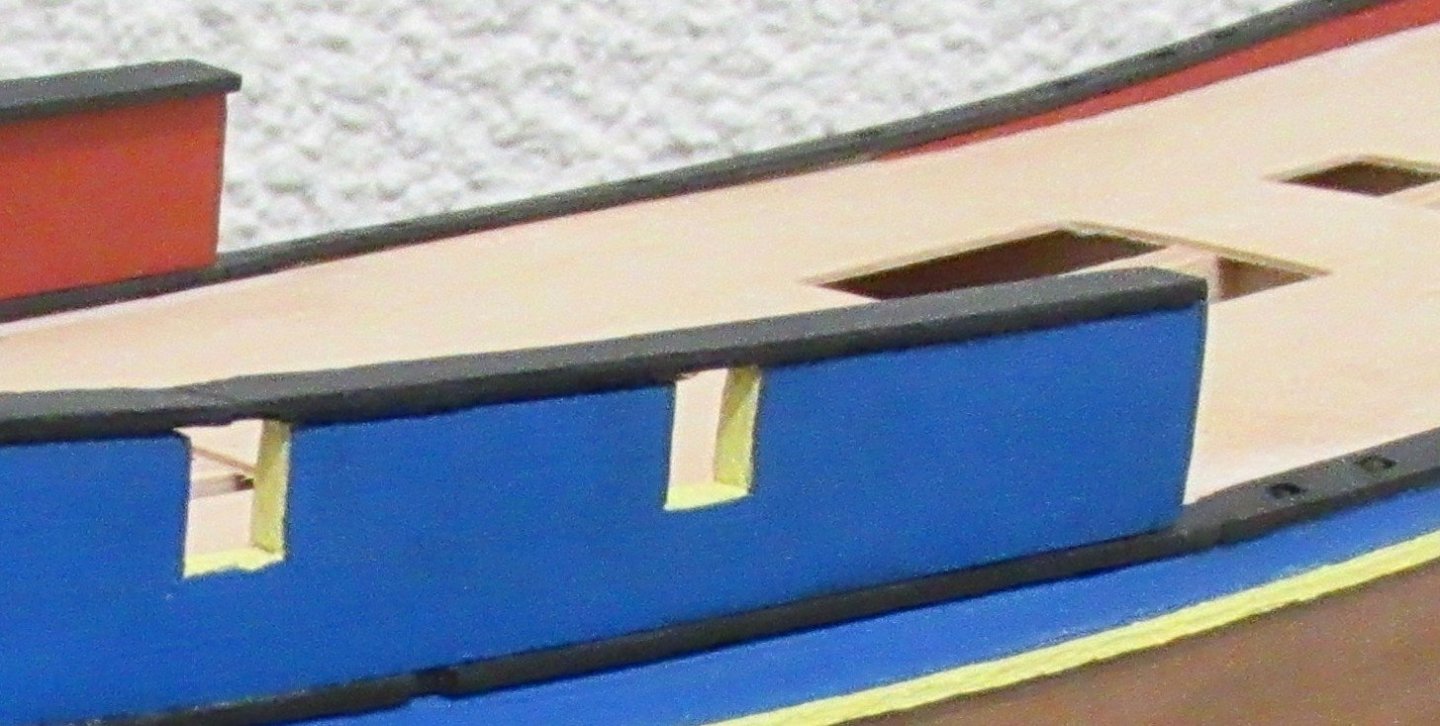
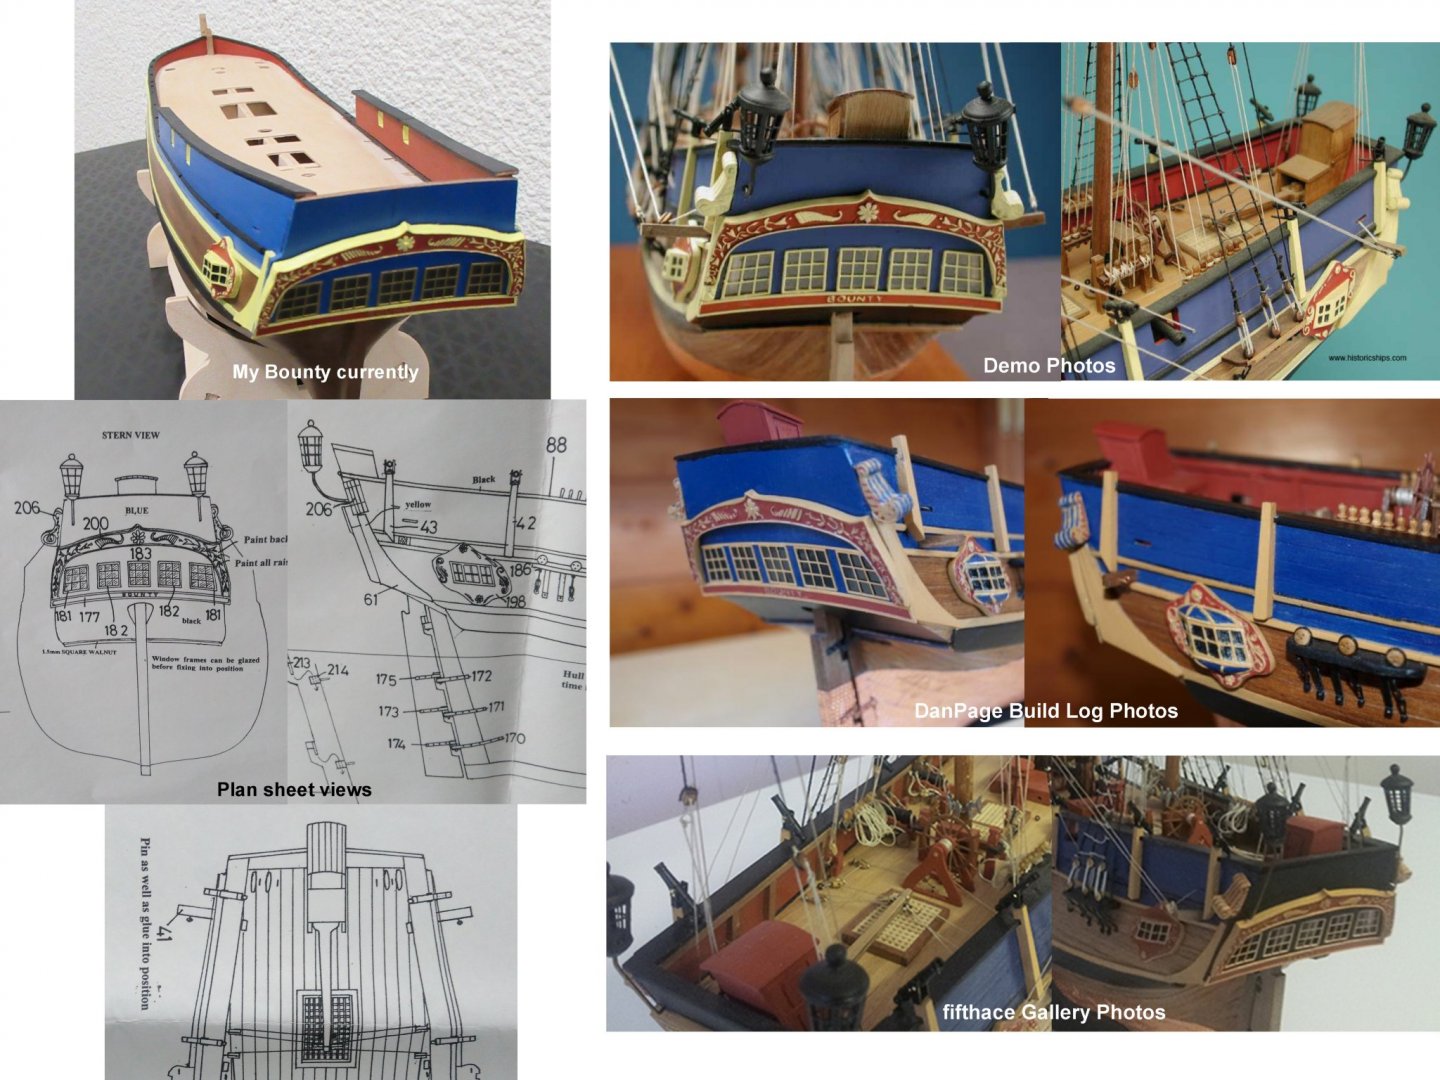
More progress at last! The next step required an education in acrylic paints. I learnt that craft paint is basically cheap acrylic but does come in a much wider range of colours if you find the right brand. I also learnt the hard way that the colour on the outside of the acrylic tube is NOT necessarily the colour on the inside. I wanted a rusty red and more of a light yellow than the orange mustard that apparently fits the "yellow ochre" category. This took quite a lot of shopping around but in the end I was quite satisfied with my choice. Correctly placing the whale and other painted planks on the hull provided an interesting challenge. I first glued the yellow L shaped side pieces on at the stern and went more with the alignment of all the pieces than the exact measurements on the plan sheets. For this reason I started with the yellow plank above the whale before planking the whale itself. The yellow strips I painted completely before hand, but wanting to sand and woodfiller the three whale planks, I opted to just paint the edges black before sticking them on. I then used my new-found woodfiller expertise to perfect the gaps before painting everything black. It did work out much easier to only have to paint the main surface and just touch up the edges where needed. I also painted and glued the side badges/windows on so that I could fit the 1.5mm square yellow strip around them instead of having to cut a hole for them later. Next was the bulwark patterns and this is where my problems really started!! Thinking I knew better I decided to assemble and plank them before gluing them to the hull as I figured it would be easier to paint them more accurately that way. The upper and lower cappings of the left bulwark pattern clipped on well, such that I could easily glue planks onto the bulwark and then clip off the cappings to sand, woodfiller and paint the planks. The right cappings however were rather ill-fitting, even after sanding adjustments and had a shallow groove that prevented them from staying clipped on. In my ignorance I therefore planked the right bulwark without the cappings. Once they were completed to my satisfaction and I came to the exciting part of gluing everything together, I found that the bend (both across the length AND width of the bulwarks) required by the curvature of the hull was far more than I was able to force out of my now three layered completed pieces! So wood bends with moisture, heat and pressure and seeing that everything was beautifully sealed with paint, I was left with heat and pressure. I then began a very long process of experimenting with building a jig of sorts. I don't have any power tools so don't laugh, but here is version 2.0: After positioning the bulwark between nails and using string wrapped around the jig (to prevent the nails from deviating outwards and the bulwark from sliding upwards away from the pressure), I heated the contraption with a hairdryer. Five minutes seemed to work quite nicely and made the wood hot enough that I could only just touch it. I then re-positioned the nails and tightened the string to ensure maximal bending and allowed it to cool for 30min or so. This worked quite well. Until I progressed to bending the bulwark across its width and found that the action undid my first bending's hard work. So back to the drawing board! I don't have a photo but version 3.0 resorted to bits of wood stacked up under the far corners of the bulwark and a clamp in the middle forcing the bulwark down towards the wooden base, in conjunction with the nails bending it across its length. After three evenings of struggling and figuring, the left side finally mostly came together. There are still some very small gaps, but nothing like there was before! Having been planked without the cappings, the right side provided more severe problems. I eventually managed to get the bend across its length right but the forces acting across the width were just too great and as the wood continued to cool, the CA glue was insufficient to maintain it and everything started pulling apart. I even tried gluing the bulwark down just after heating and bending in the hope that it would give the glue more time to set before the wood cooled enough to return to its old shape, but I only succeeded in intoxicating myself with the resulting CA fumes! An important lesson learnt: don't put CA glue on anything hot! This was the closest I could get it on the right side: I finally gave up on bending alone, sliced the bulwark off once again (probably the third or fourth time) and resorted to adding an extra plank to decrease the gap. I sanded a 1x4mm walnut plank down to about 0.7mm and then laid it down flat on the edge of the deck. I then sanded it, filled the gaps with woodfiller and painted it blue. Using jig 3.0 I bent the bulwark pattern one last time. The end result still has a few small gaps, as on the left, but is far more acceptable: Bulwark patterns finally glued on, I then secured the rest of the lower cappings. Unfortunately these didn't quite meet the lower cappings of the bulwark patterns for some reason: So more fixing was in order. I cut and glued in a small section of 1x4mm walnut plank. Sanded it down and painted it black. I forgot to take a close up, but the result was passable. You can also see in the photo below the unfortunate result of my multiple bending attempts on my intact right bulwark pattern. The capping above the aft gun port broke. I repaired it as best I could but sadly it will never quite be the same again 😢 I'm still toying with the idea of trying to fill the remaining gaps between the deck and the bulwark patterns with woodfiller, but my concern is that, working in such a small, difficult place I may only make it worse due to decreased accuracy of sanding and repainting. You can't totally see the gaps if you aren't looking at the hull on eye level: But they're still definitely there... Any thoughts? In other news I also planked the insides of the gun ports, although the instructions didn't call for it, as it really seemed necessary. I beveled the planks at the corners for a snugger fit and decided to paint the insides yellow as I found the red shining through to the outside a little stark. My last bit of progress was the stern fascia. Here I opted to leave the windows brass (instead of painting them yellow as in the instructions) as well as scratching off all paint on the Bounty wording on the name strip. The lighting here wasn't the best but I like the resulting look: One big area of confusion for me currently is what seems to be a complete lack of a capping for the stern fascia. All the photos of completed models that I have found have a black stern capping that is flush with the upper cappings of the bulwark patterns. I have read my instruction book cover to cover and examined all the plan sheet views but can find no hint of it! I even looked through all the pieces still remaining and can't find anything that looks like it will work. It definitely needs one and I suppose I can fashion one, but I just wanted to check before I do that I'm not missing something...


-
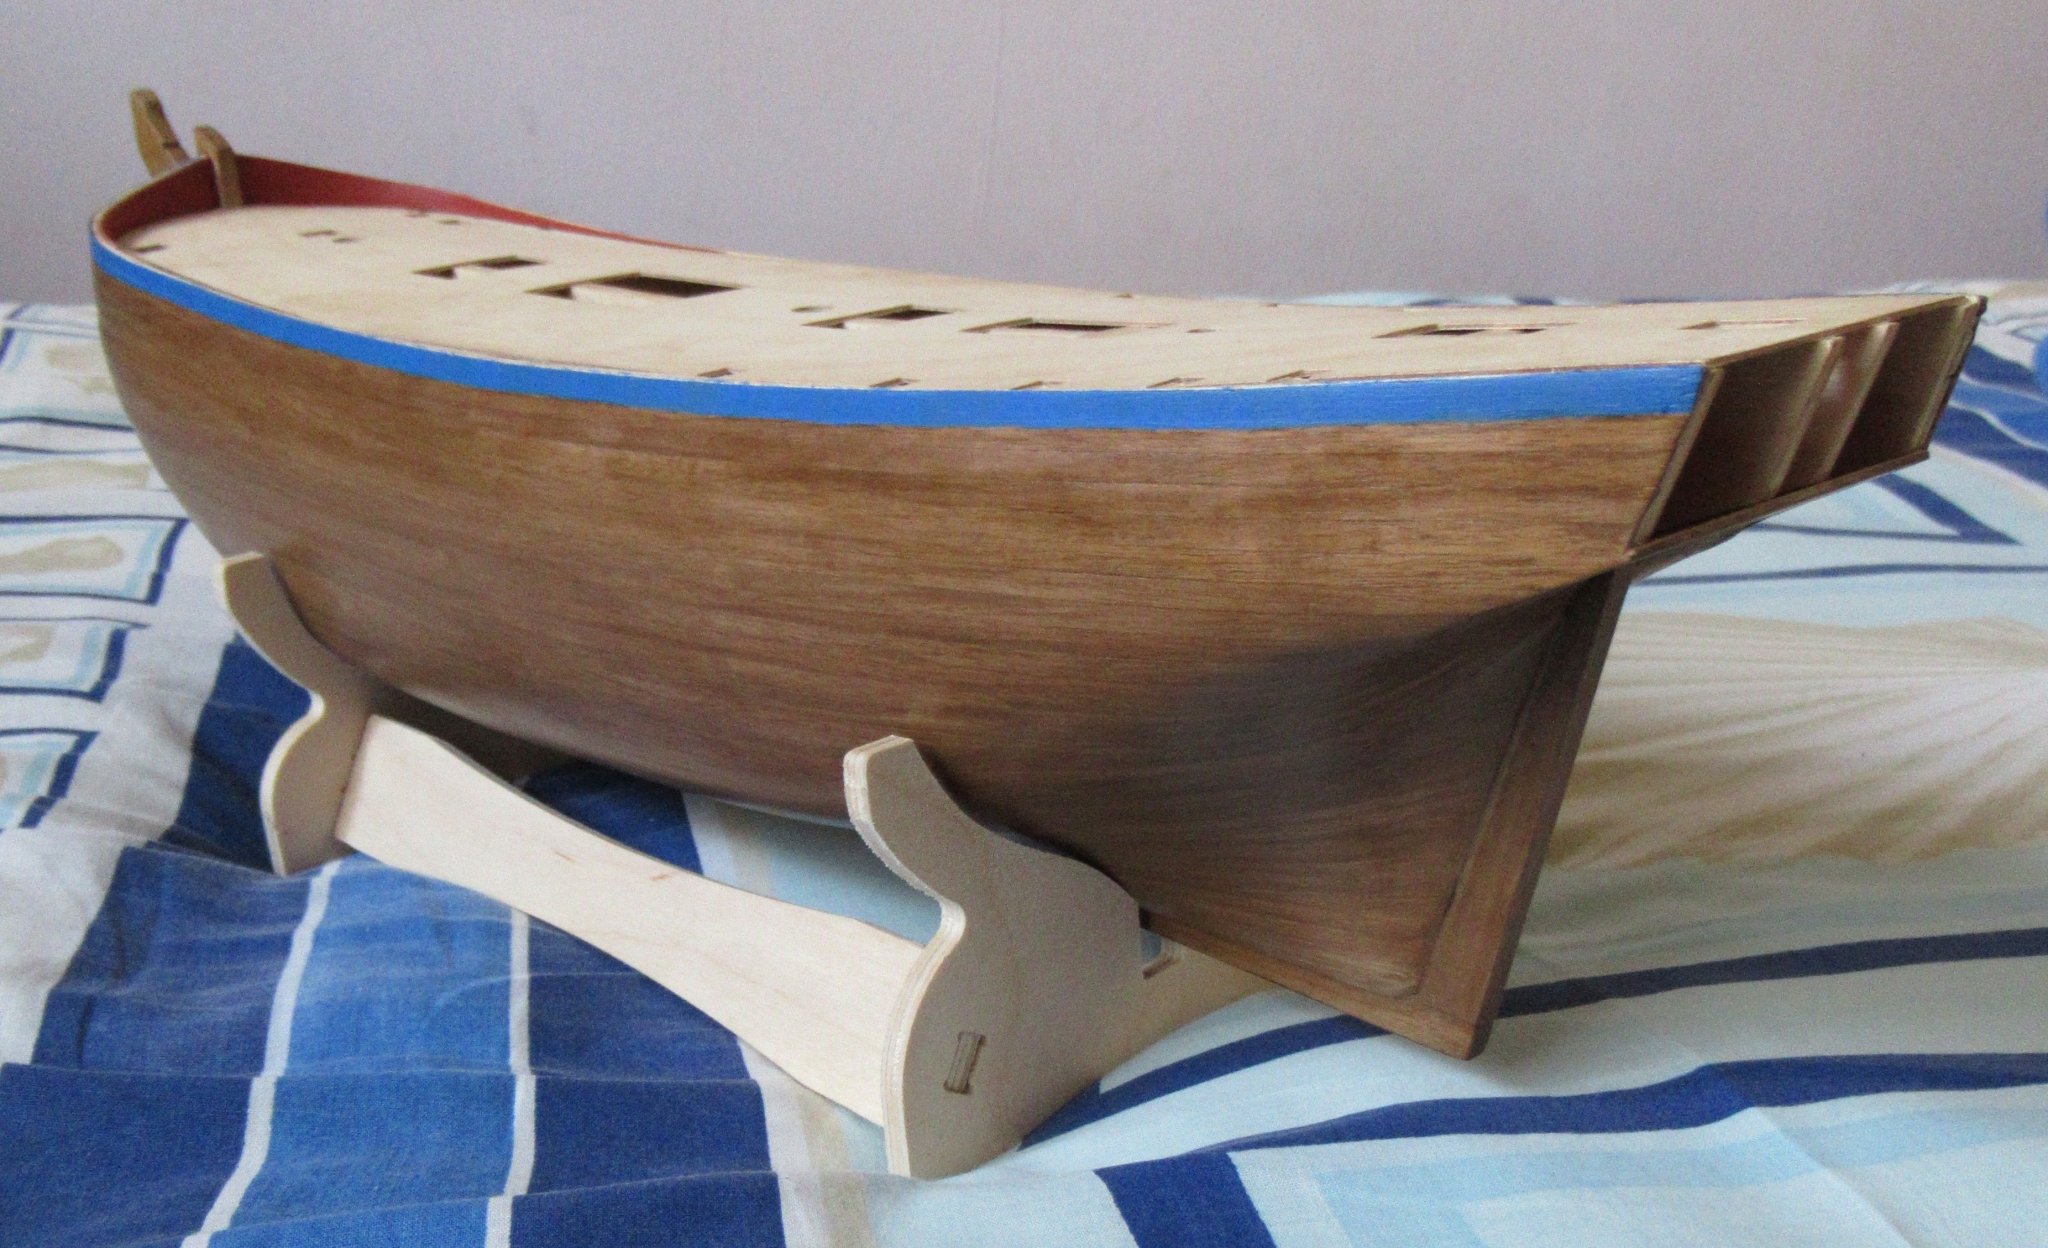
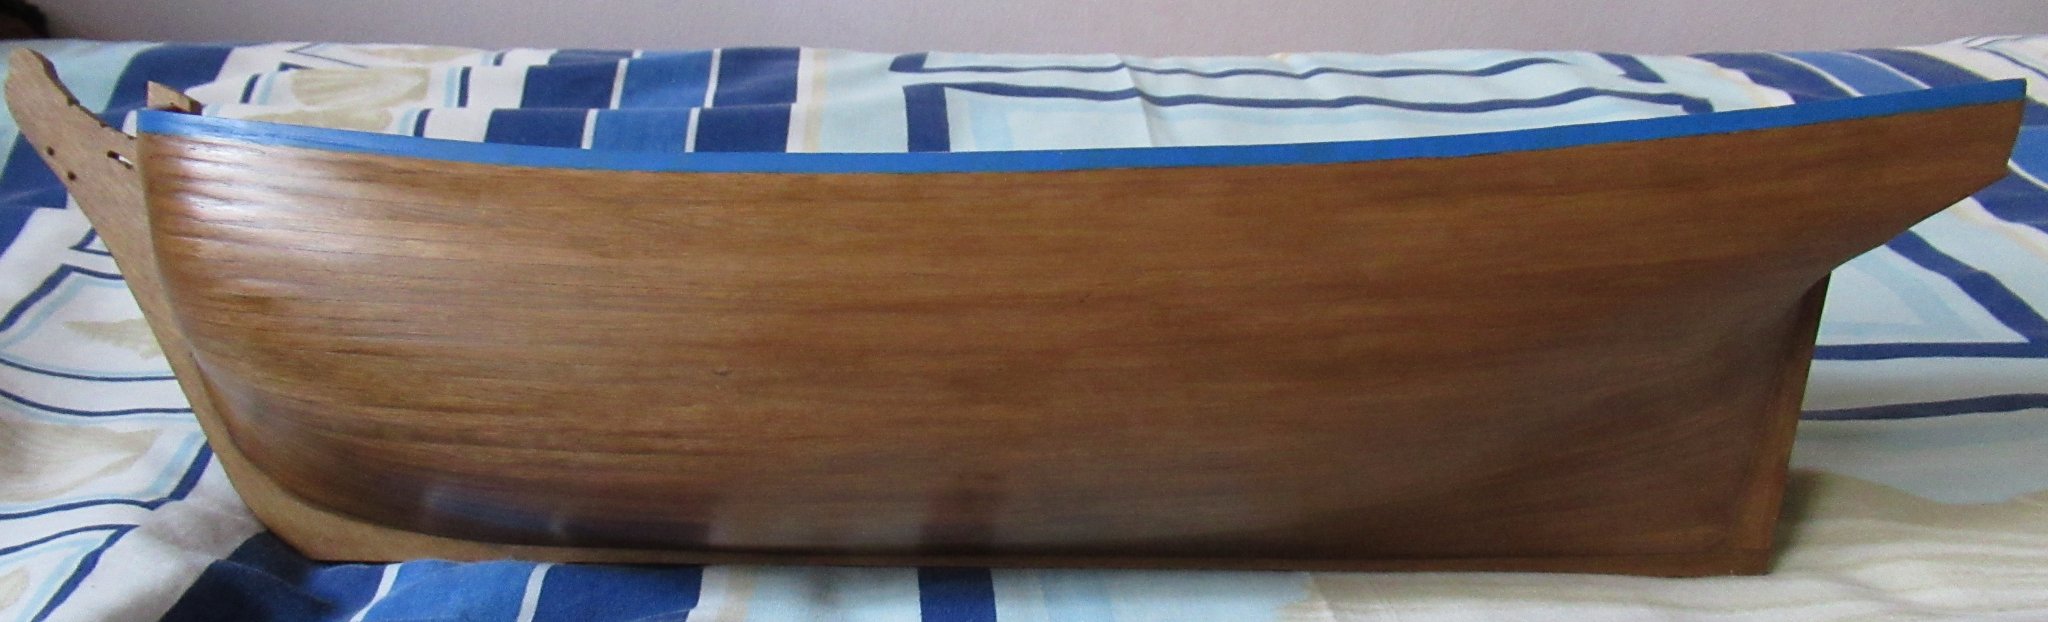
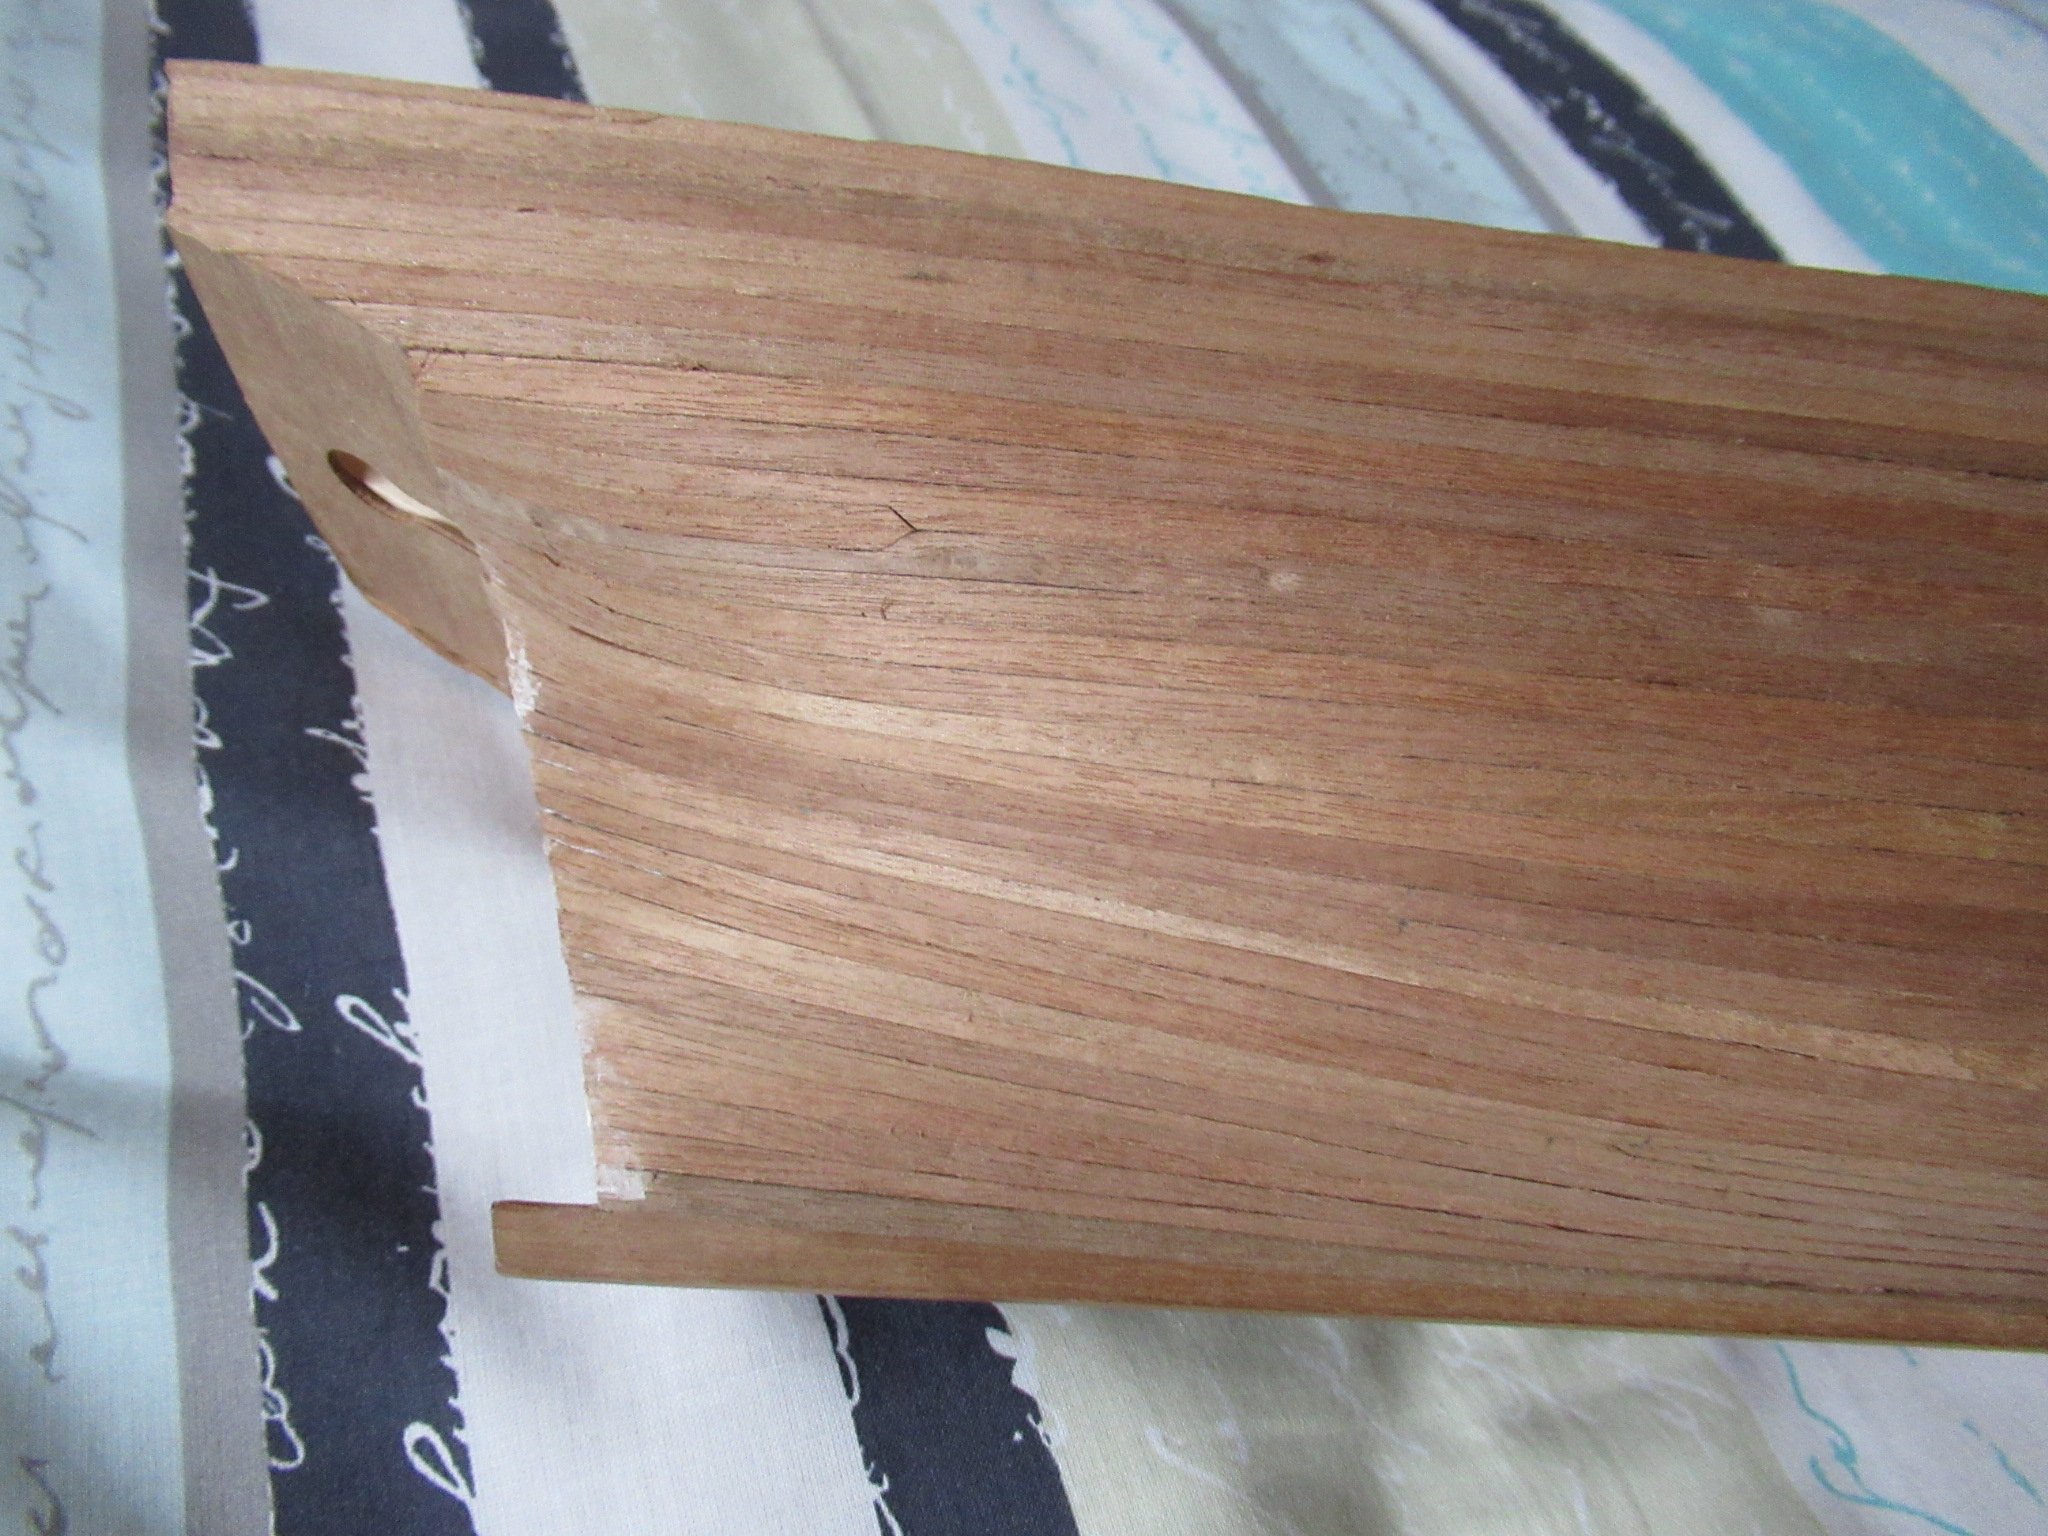
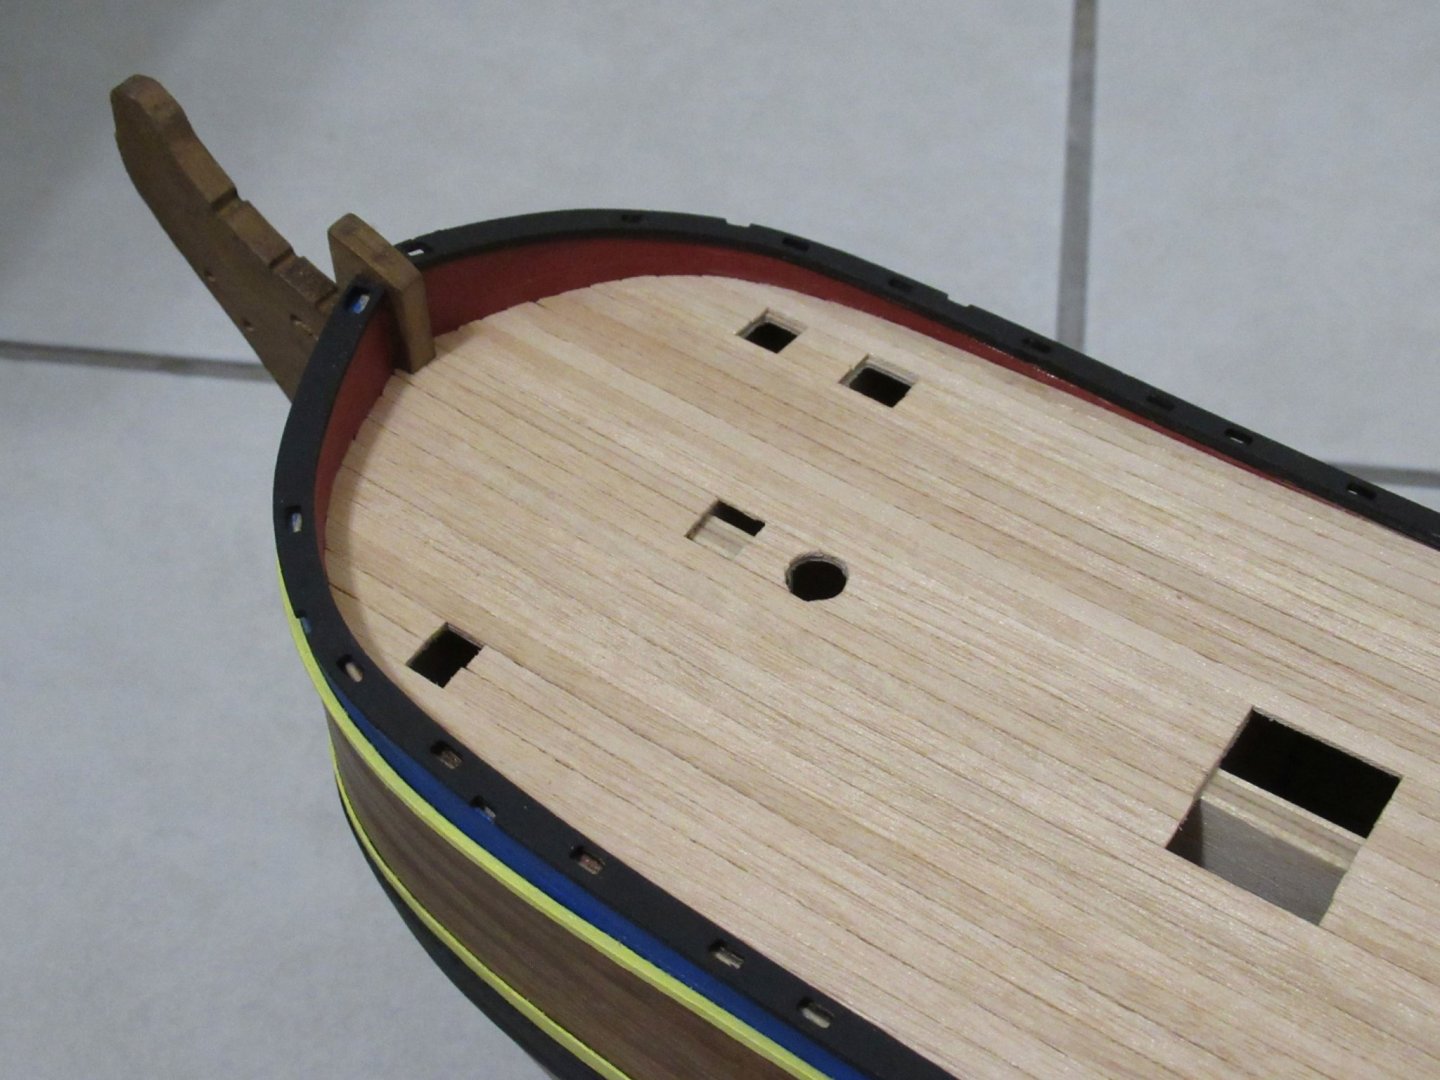
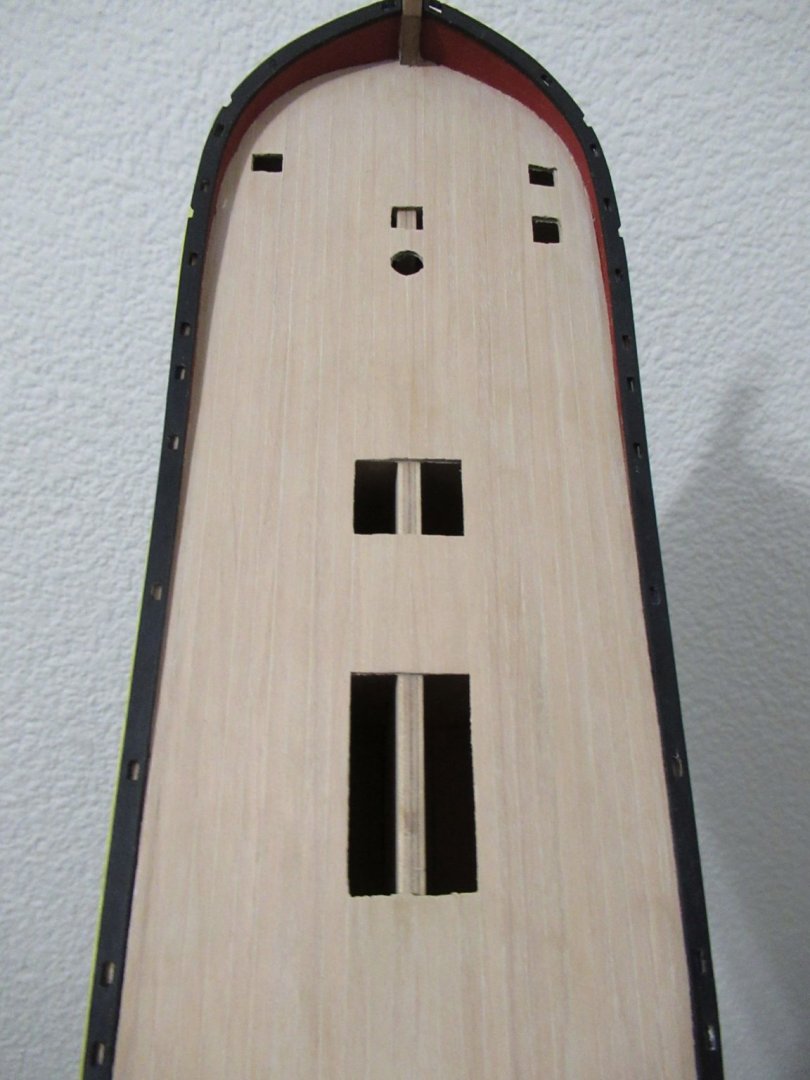
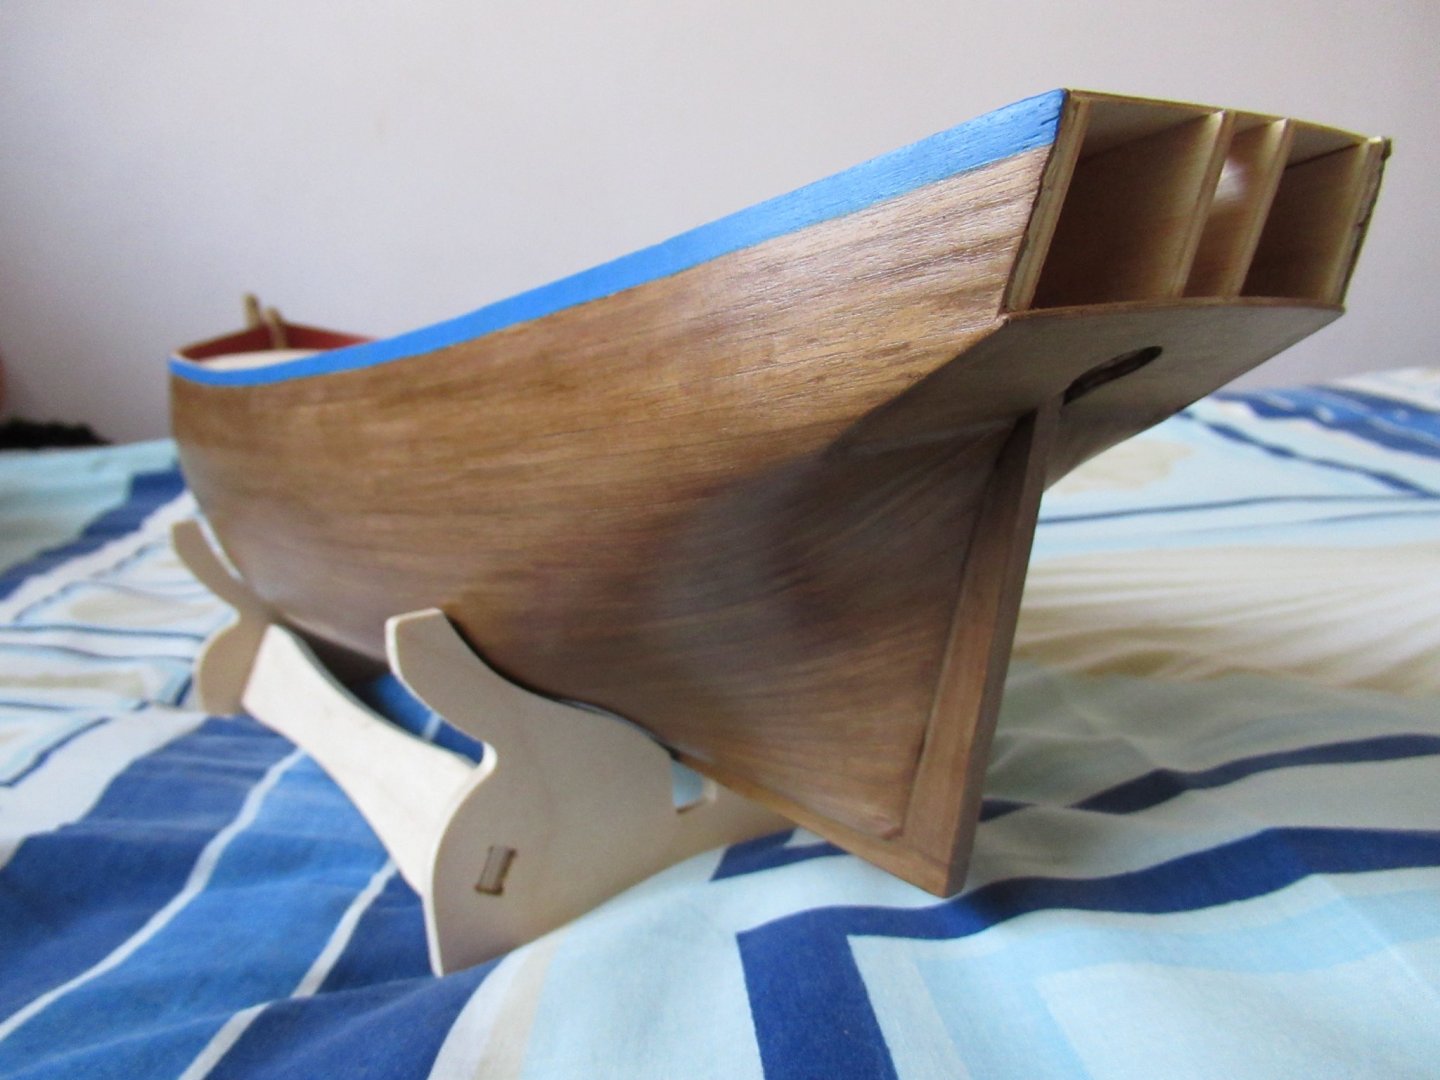
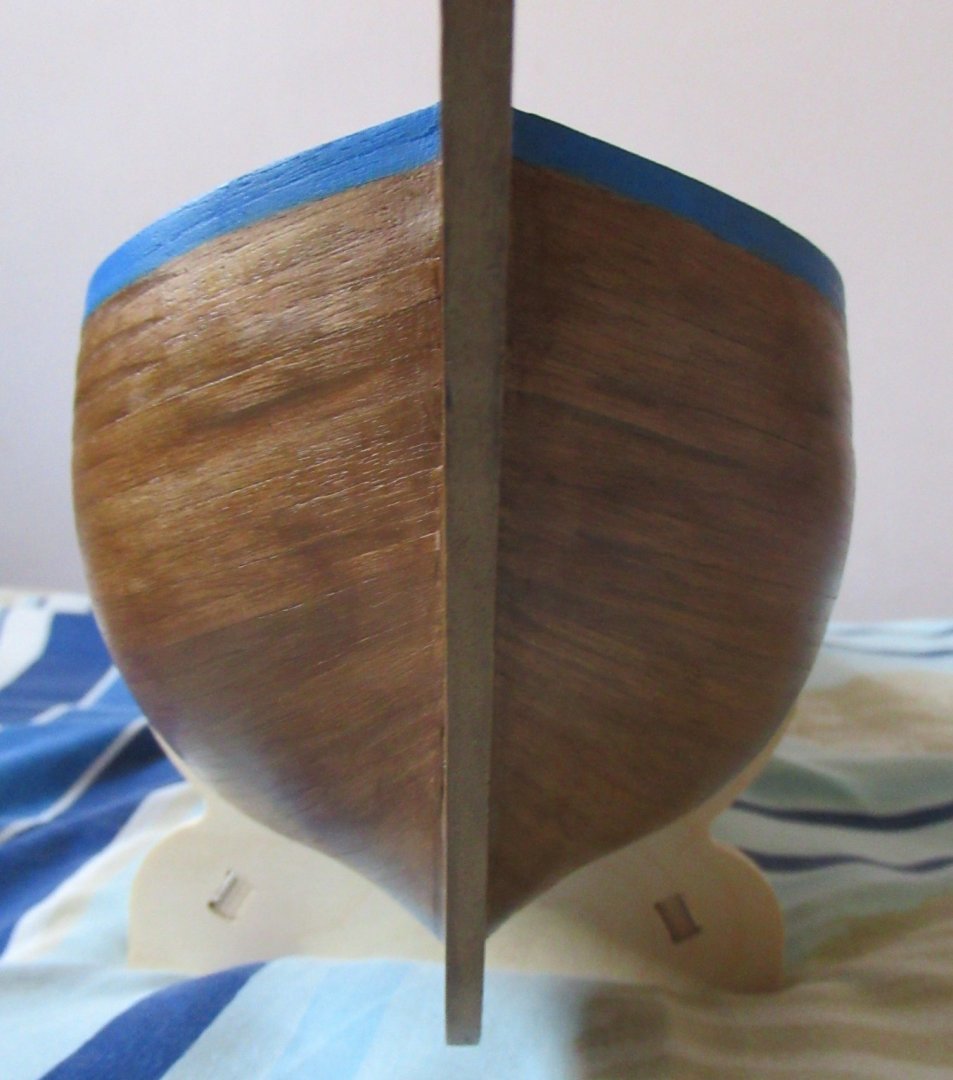
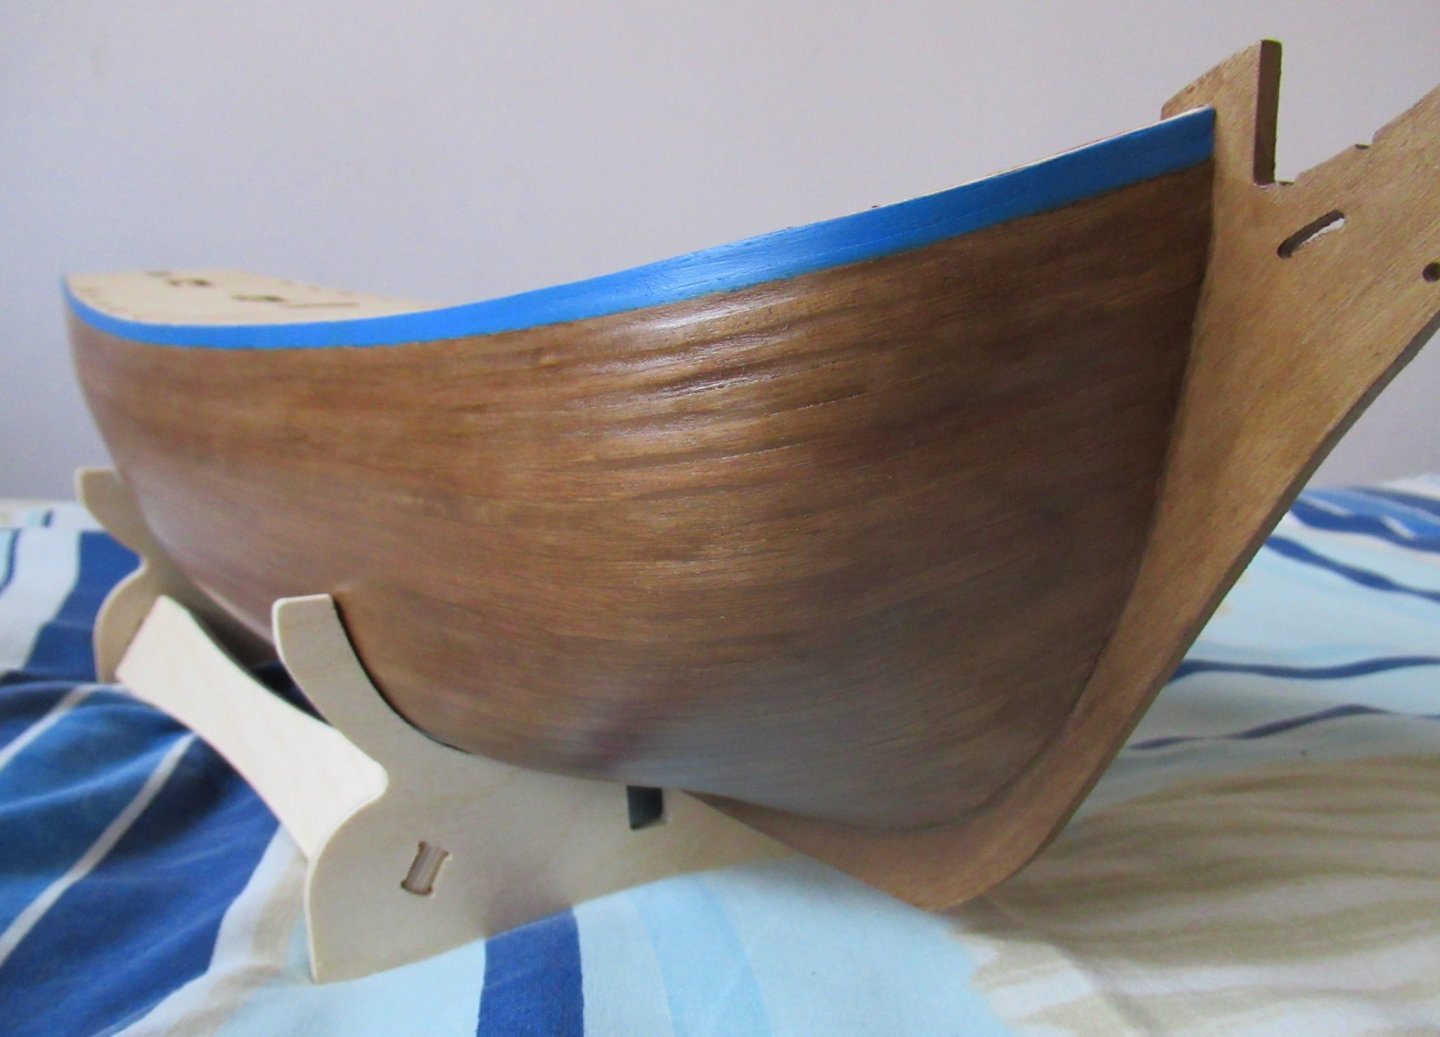
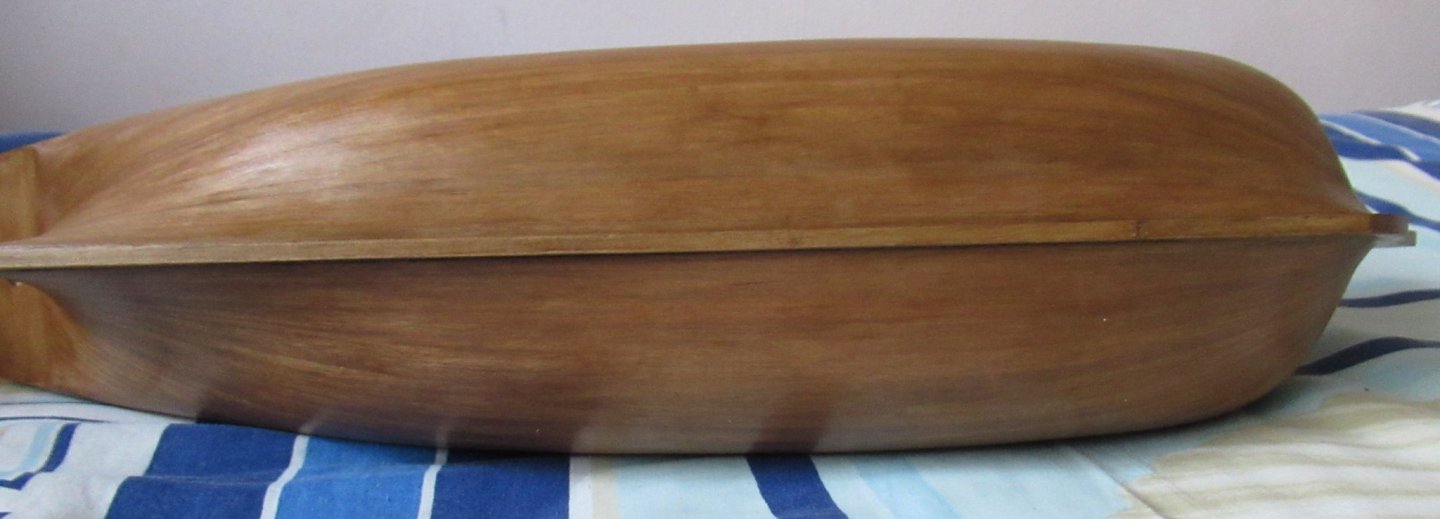
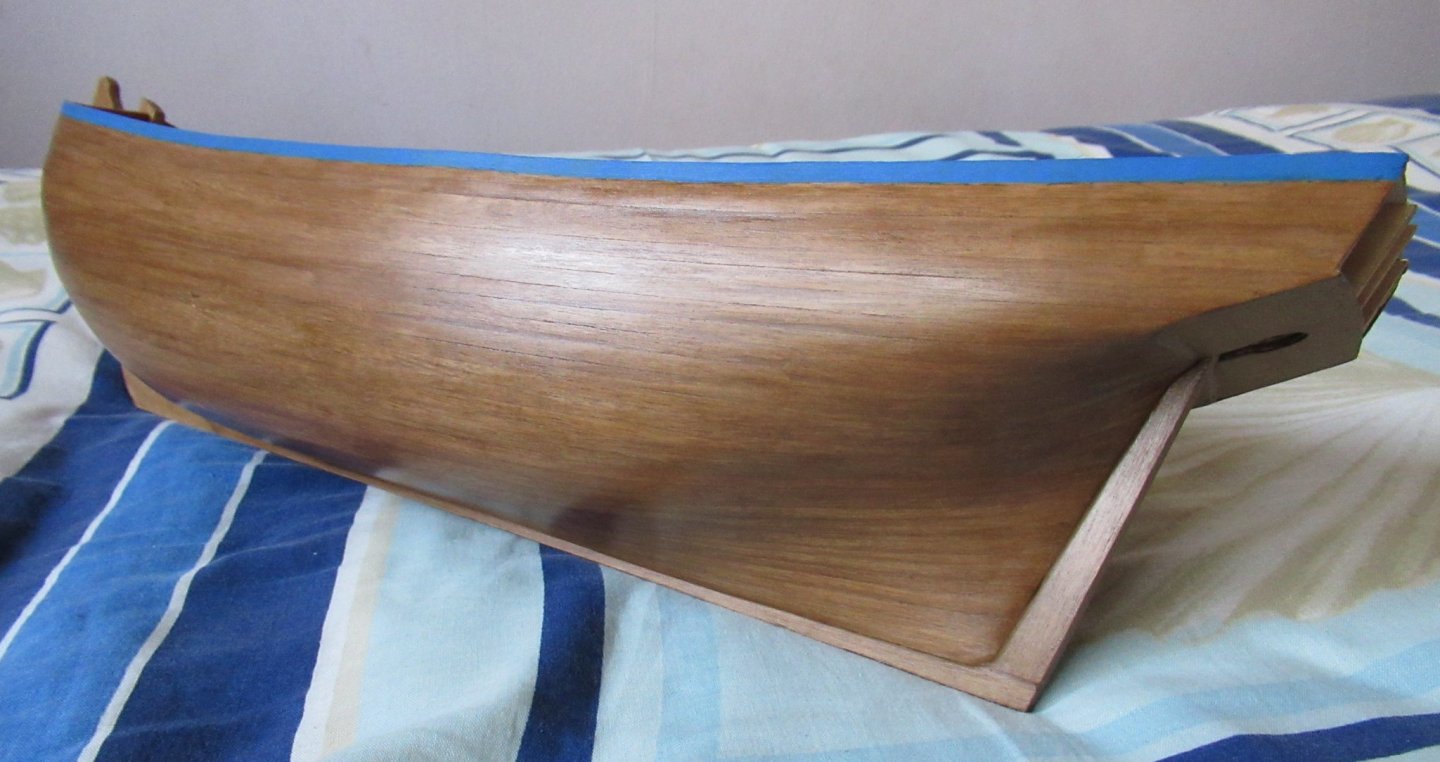
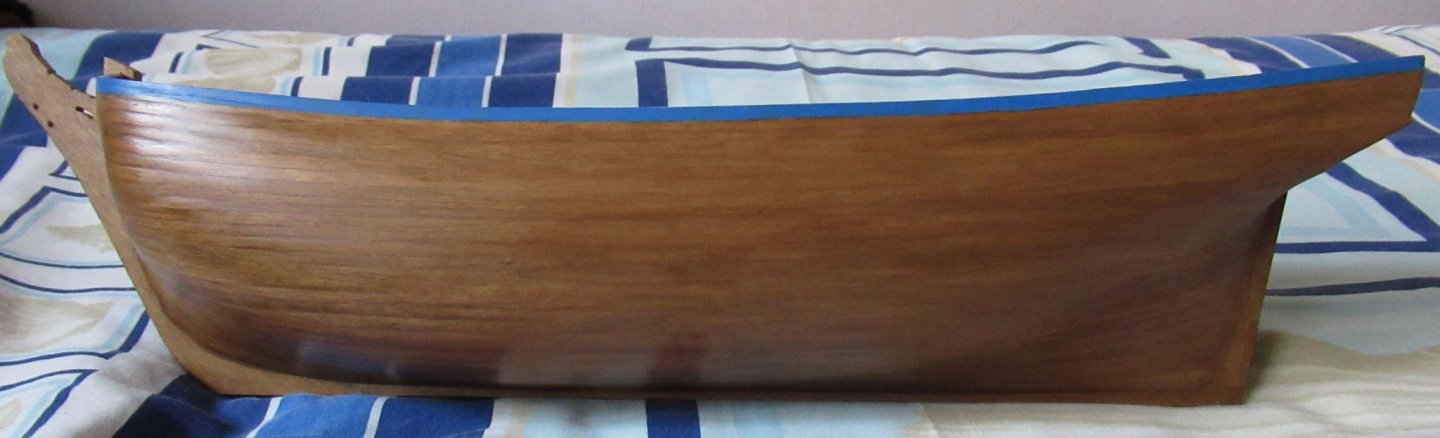
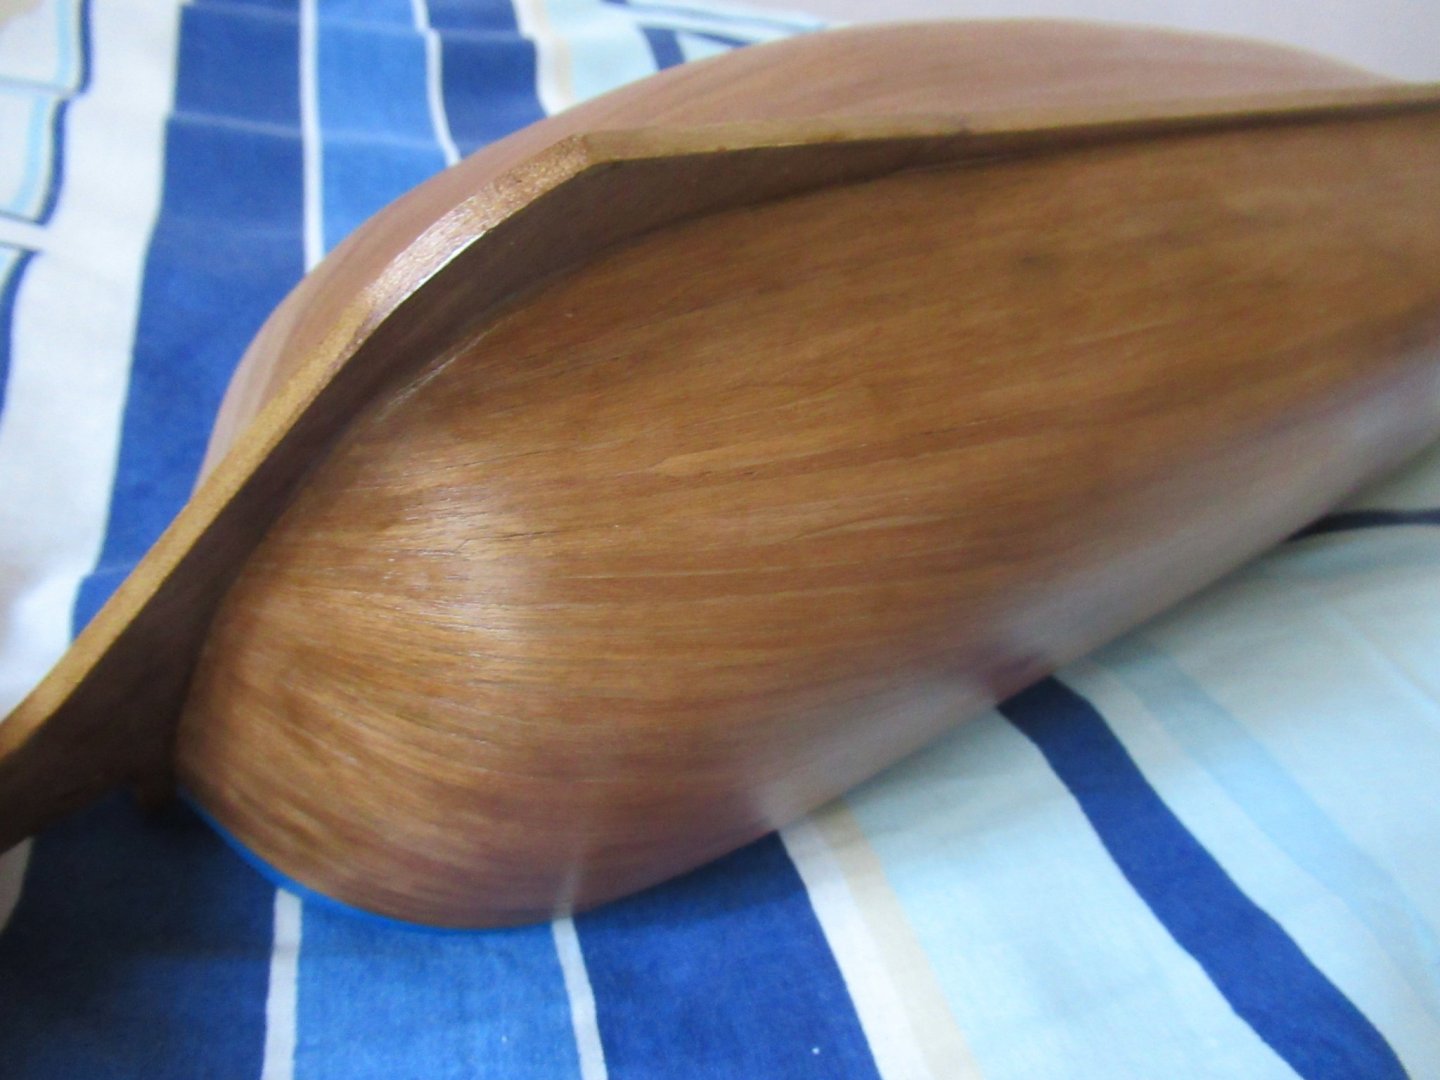
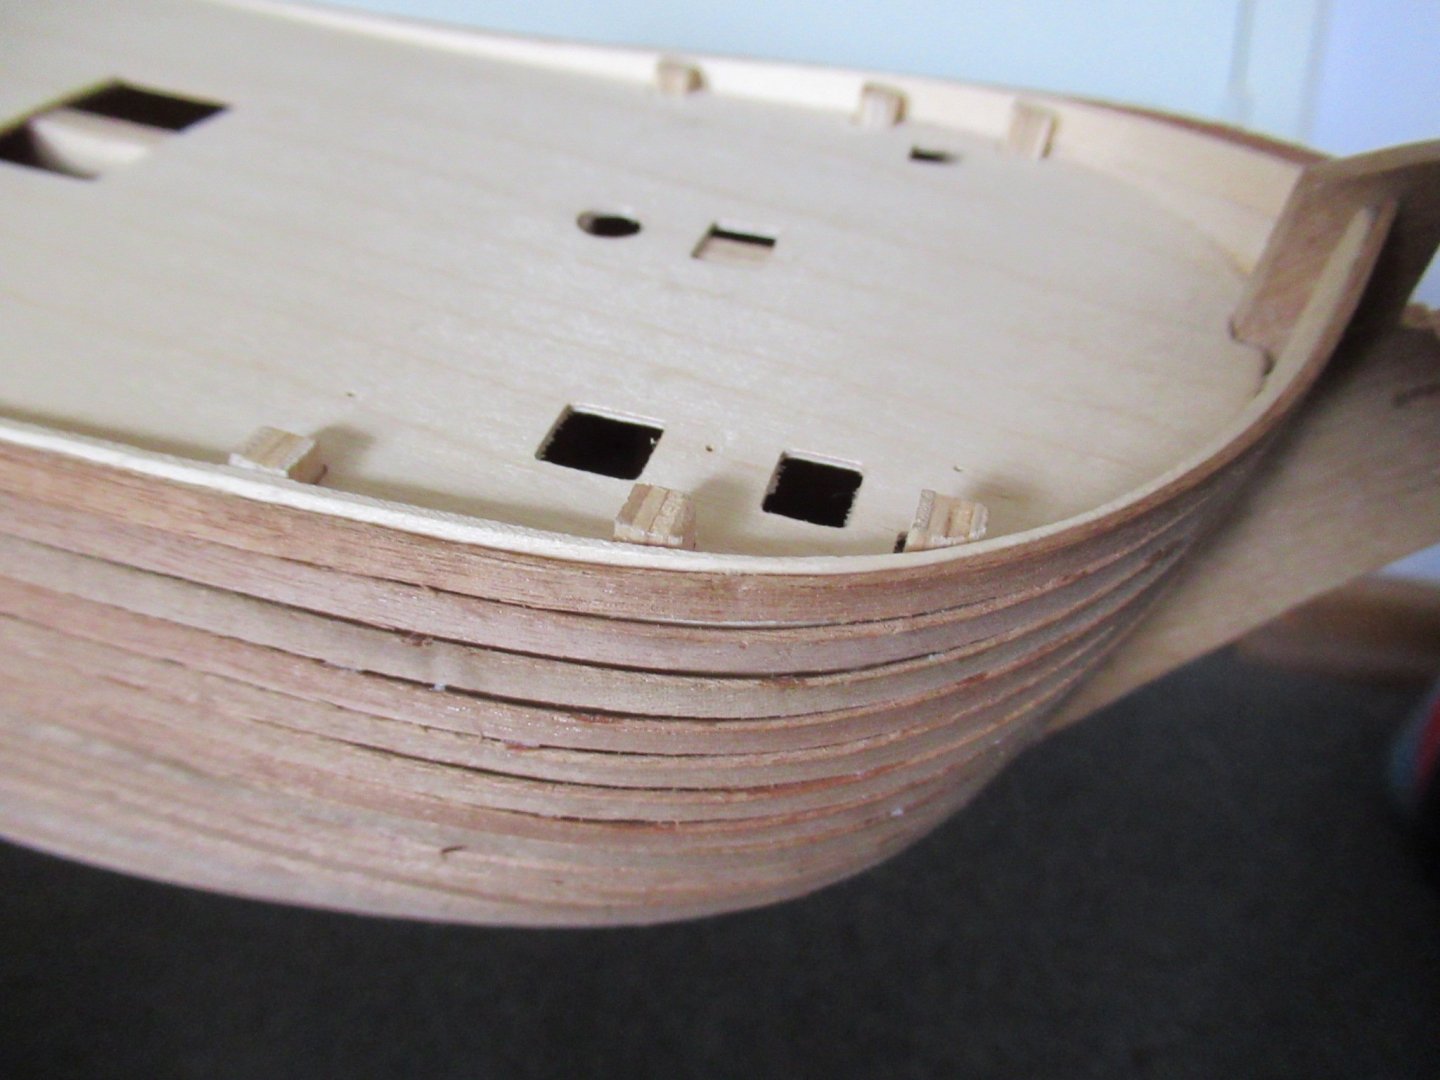
Thanks once again for all the encouragement and advice! The info on sawdust is fascinating!! I had no idea it could be so toxic! I managed to get the bulkheads off with large wire cutters followed by a chisel and finally sandpaper. I could then plank the inside of the bow and scour the stationary shops and artistic friends in my immediate vicinity for a more of a brown red to paint it, as a bright red felt too flashy. My wood filler query was not so easily resolved. I was reluctant to use the sawdust method at it had dried a lot darker than the surrounding walnut when used between my ill-fitting false keel pieces (ref. my second post). As it turns out, there is no walnut coloured wood filler in South Africa so I went with the closest match, Imbuia. My experience was a rather long and patience-cultivating endeavour. It took multiple layers to fill in my tiny defected (sanding really shows up all one's shortfalls in planking). To my frustration I learnt that being water-based meant that all it took to undo a few layers of work was one layer that was a bit too watery. I also learnt that wood filler can be undone by over-sanding or sanding with too coarse sand paper, or leaving the hull in a hot car... I became a master wood-filler-applicator by the end of the number of times that my mistakes made me redo the whole process! Please don't crucify me, but I decided not to copper-plate the hull (historically accurate or not) as the wood finish is just too beautiful to cover over! I therefore first painted the blue just below the deck (I figured getting varnish on the blue was less critical than blue on the varnish) and varnished everything else. Picking the right varnish was also challenging with the hardware store having way too many options, all unrelated to my needs. I eventually settled on WSP 27 Imbuia colour (whatever that means) with an outdoor seude finish (as the indoor only came in gloss). I was very uncertain in my choice but am super chuffed with the final result! Much to my sorrow, I didn't get a chance to seal in my wood filler effort with varnish for a few days after completing it for the hundredth time. The delay, together with holding the hull to paint the blue line, seemed to once again undo some of wood filler. I only noticed once I was into the thick of varnishing however, and therefore opted to leave it. Now if the light catches it a that right (or should I say wrong) angle you can see the imperfections outlining some of the planks, as in the photo below. These are not critical, however, and will probably only ever serve to annoy my own inner perfectionist;P I came to greatly regret my decision to not use tapering and stealers above the bow whale line so as to allow the planks to lie flatter across their width. Wood filler masks minute defects but really seemed to struggle with the clinkering that resulted in this area. The end product is passable but I would definitely do it differently next time! My original concern was that the stealers would be too noticeable, but after sanding, wood filler and varnish, it's no longer easy to even pick them out. I will definitely take the planks more seriously next time they try to express their indignation at my chosen angle! Despite the shade difference between planks you can see below how well the bow drop planks blended in: From this point on I have found the instructions to be rather unhelpful in terms of order. I have therefore been doing bits and pieces everywhere to try reach my short term goal of putting the main whale planking in place (the next section in the instructions). In looking at stern fascia pictures I see I was supposed to add a 1.5mm square strip where the planks meet the stern counter. This is nowhere in the written instructions, only a later picture. By the time I saw it, that ship had unfortunately already sailed, but I don't think it looks too bad without it. I also opted to varnish the stern counter instead of painting it black. Below you can see that the stern post thankfully fitted well enough (in terms of being flush with the second planking) despite my earlier ignorance in not cutting enough of a rabbet into the false keel. One last view for good measure;)


-
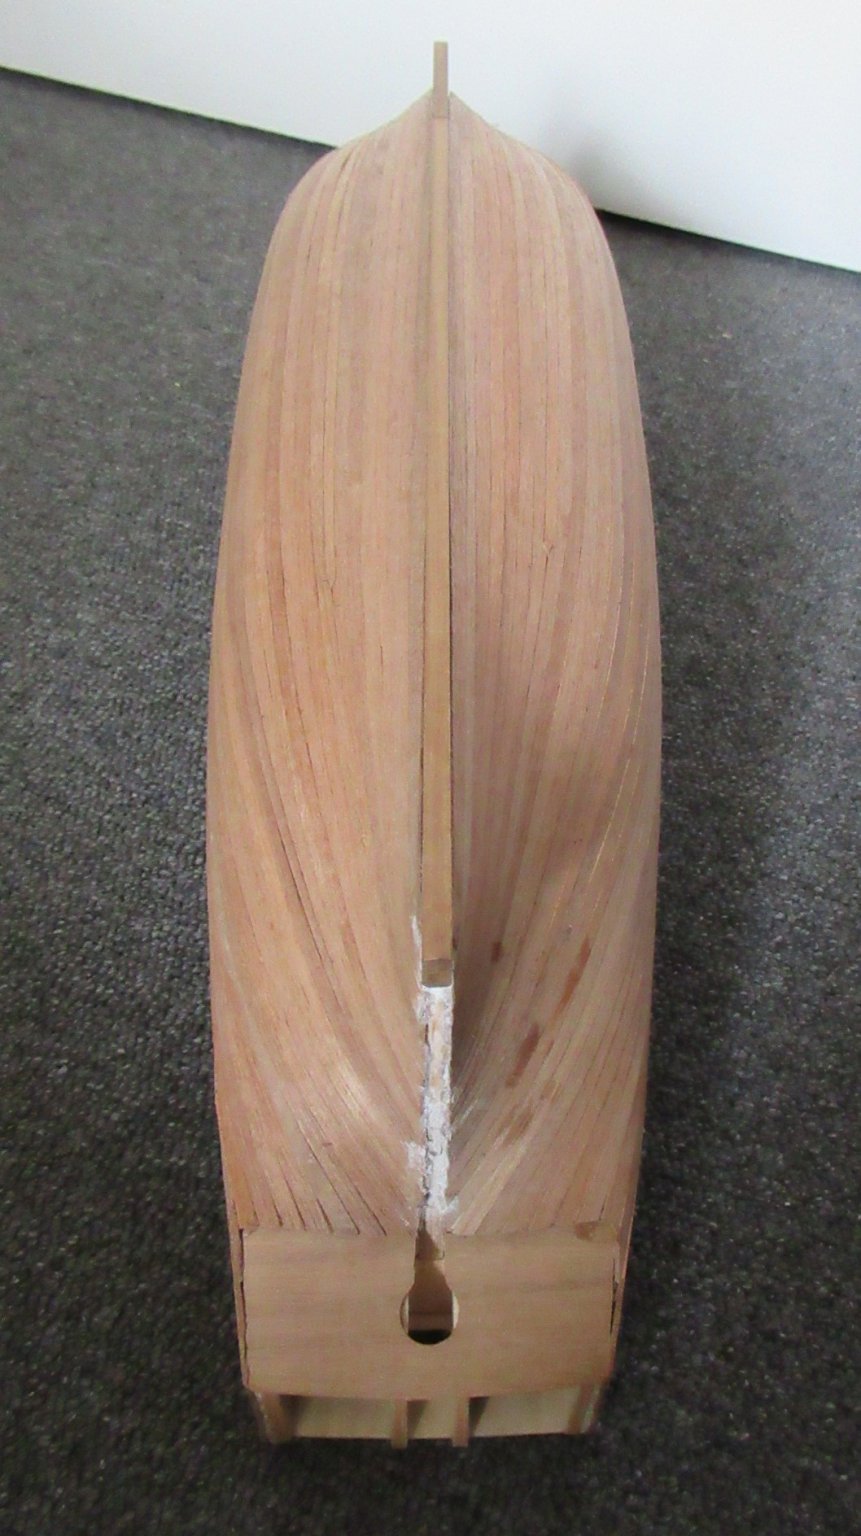
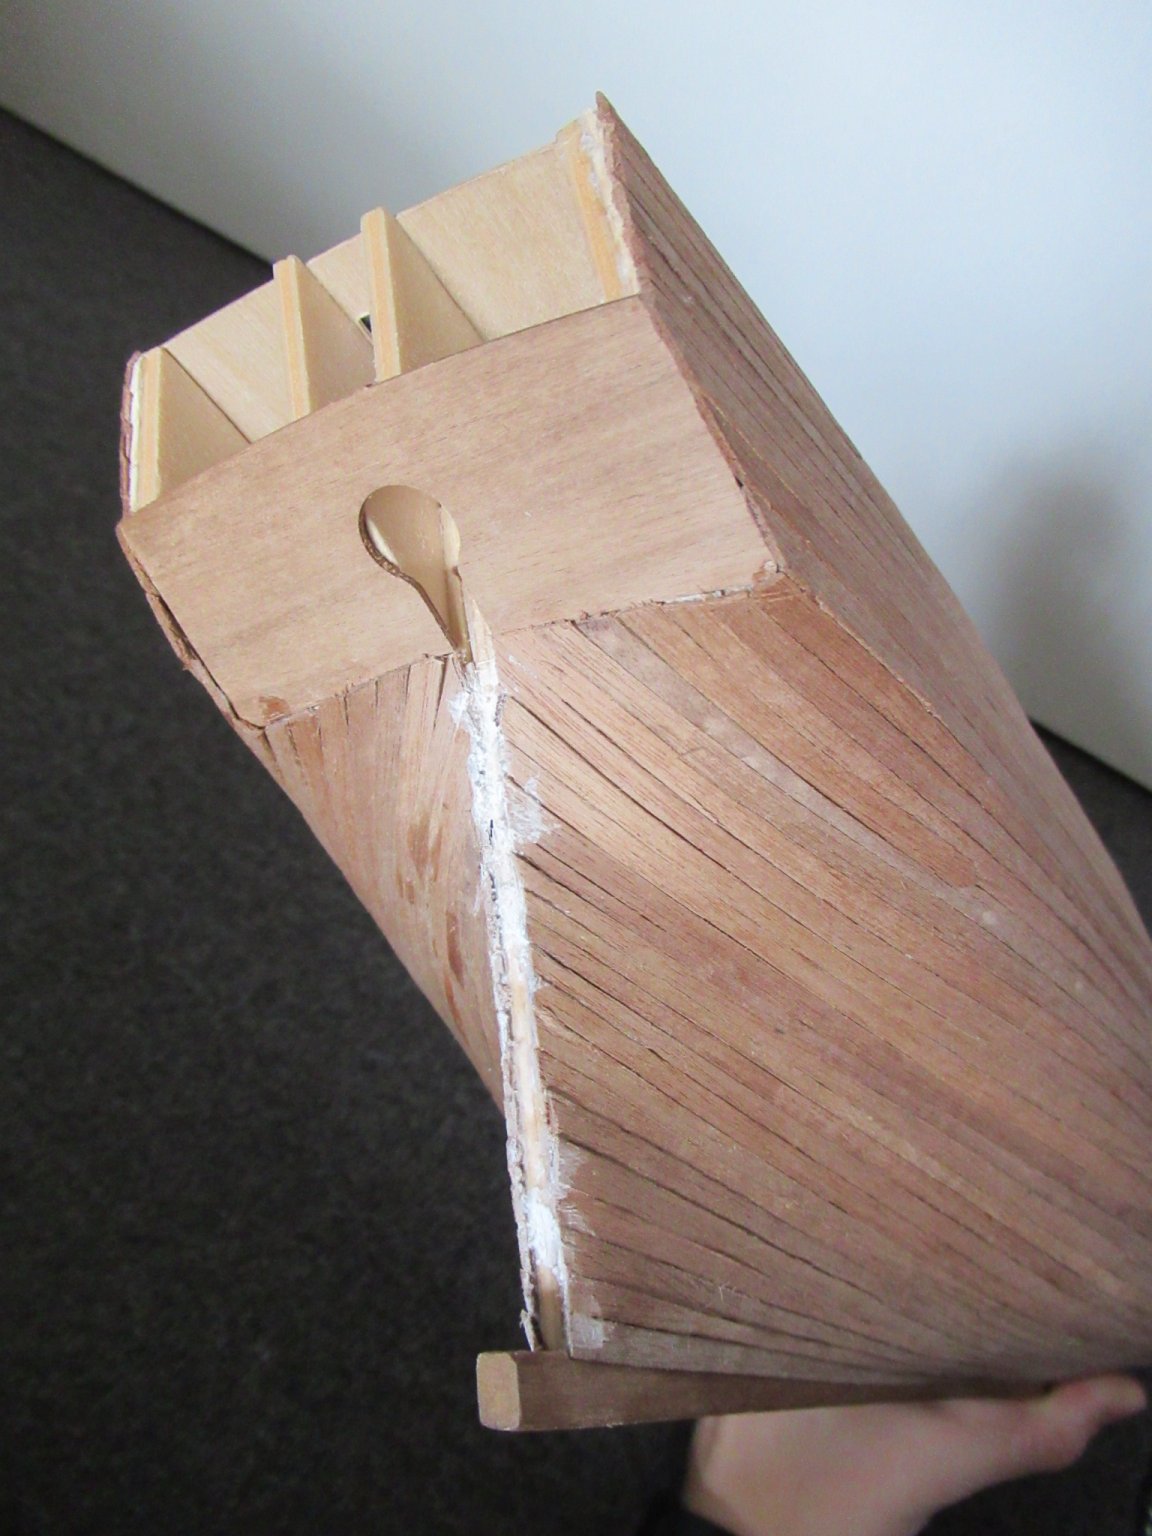
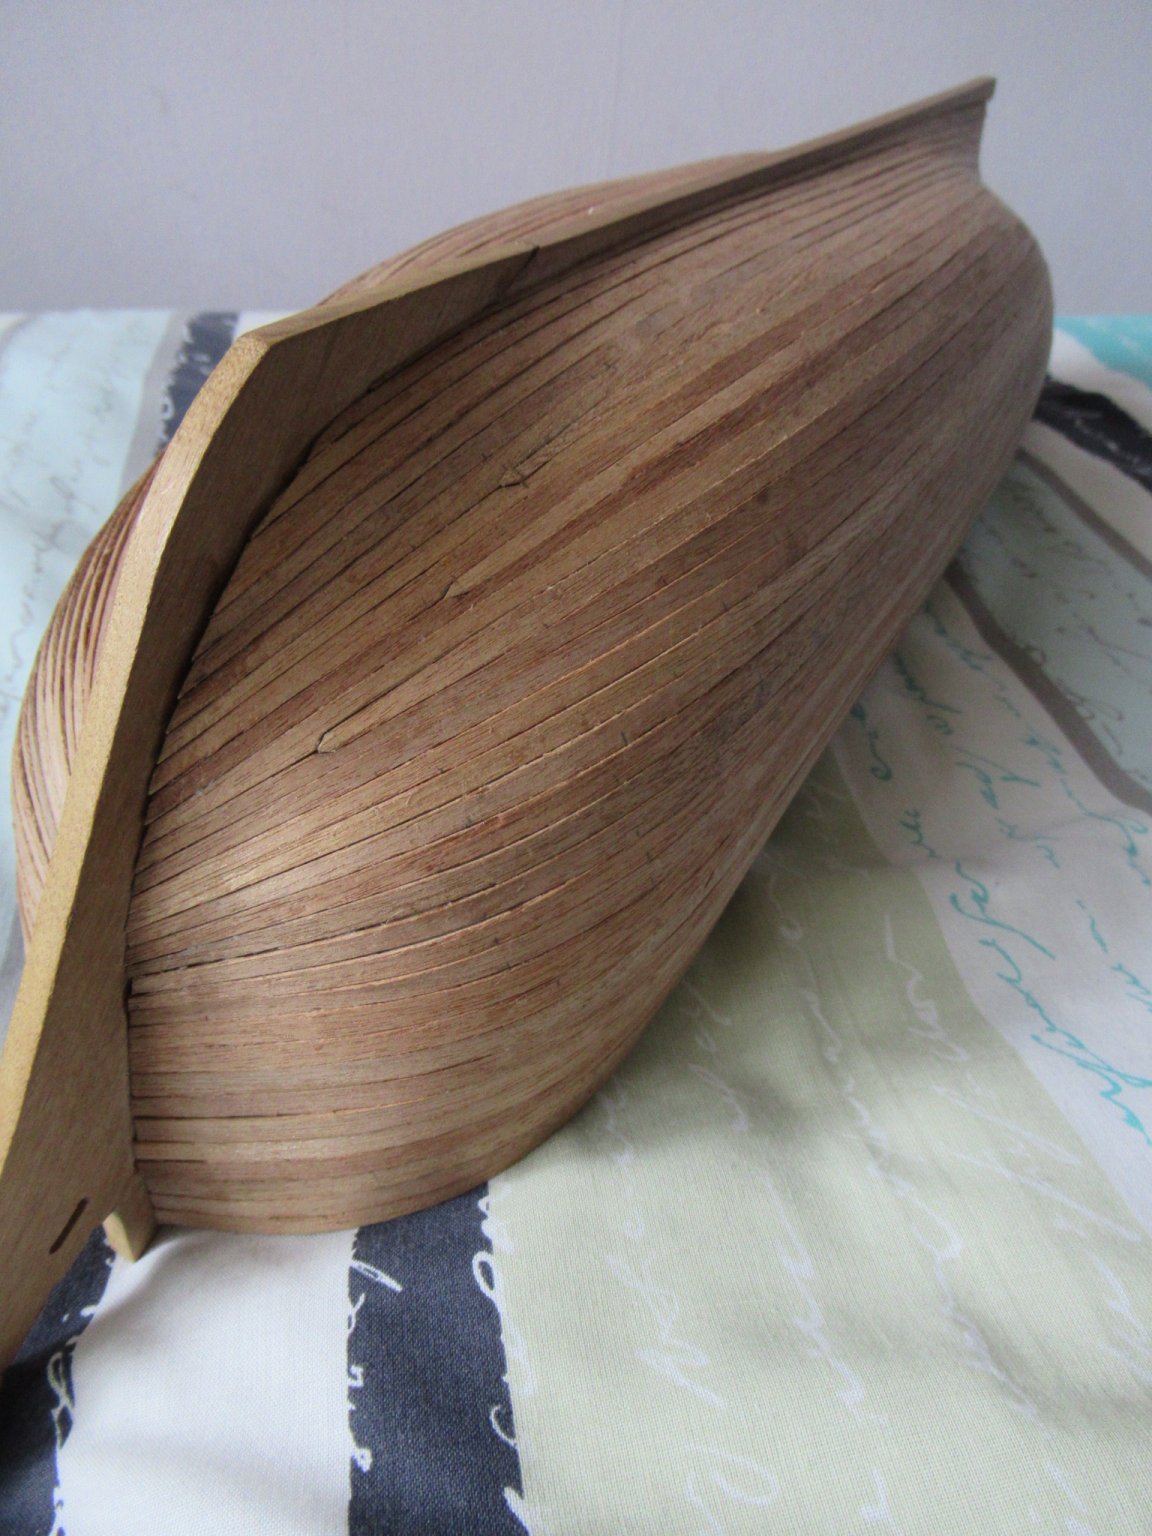
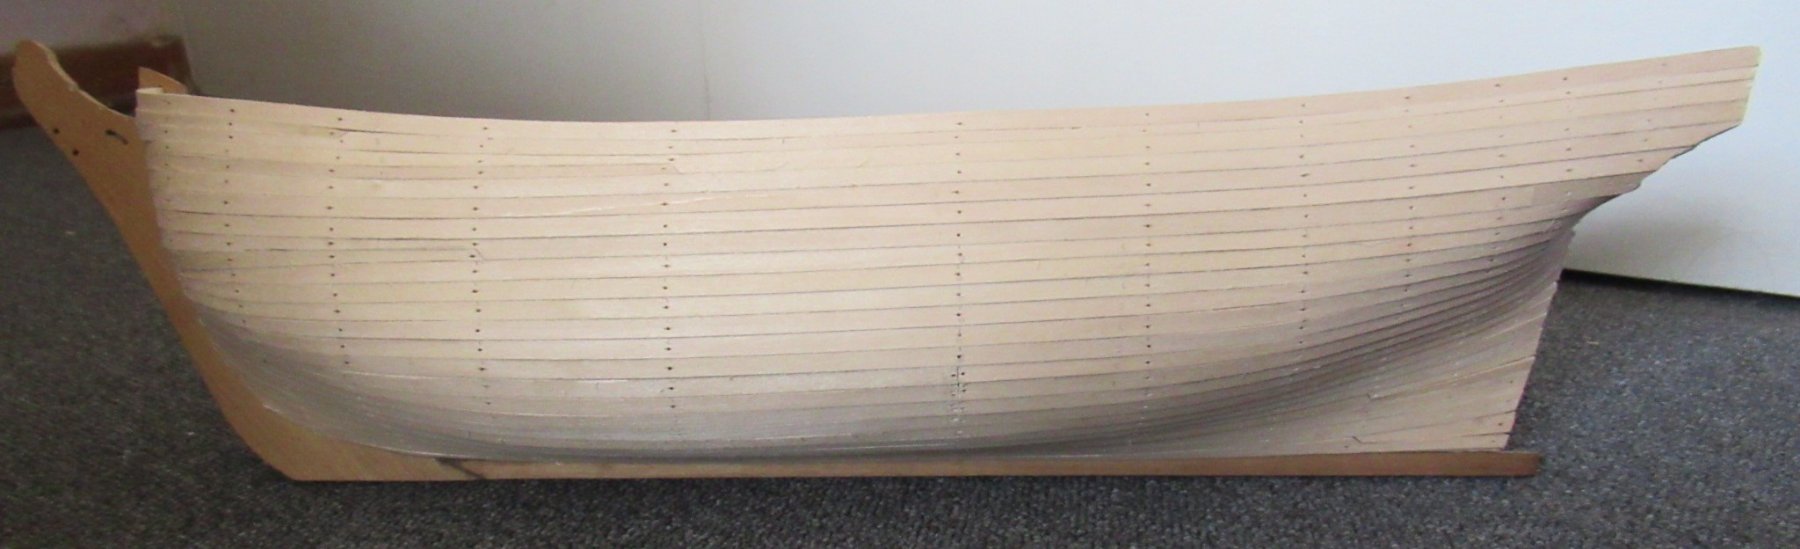
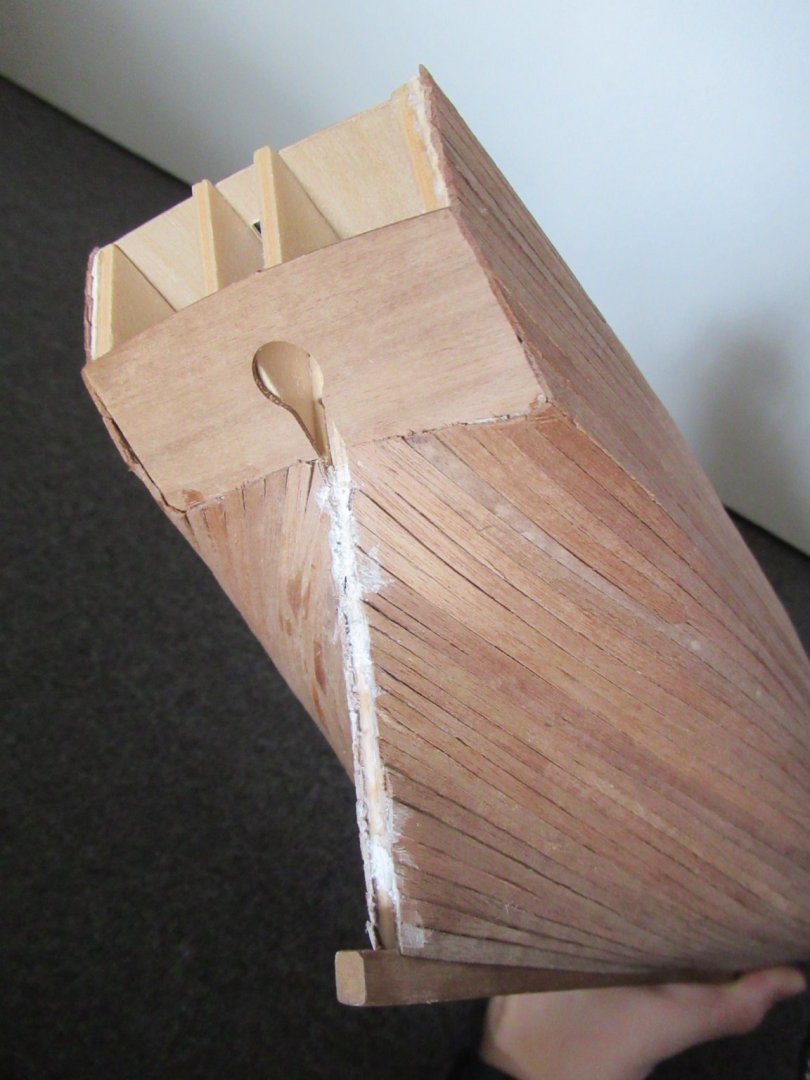
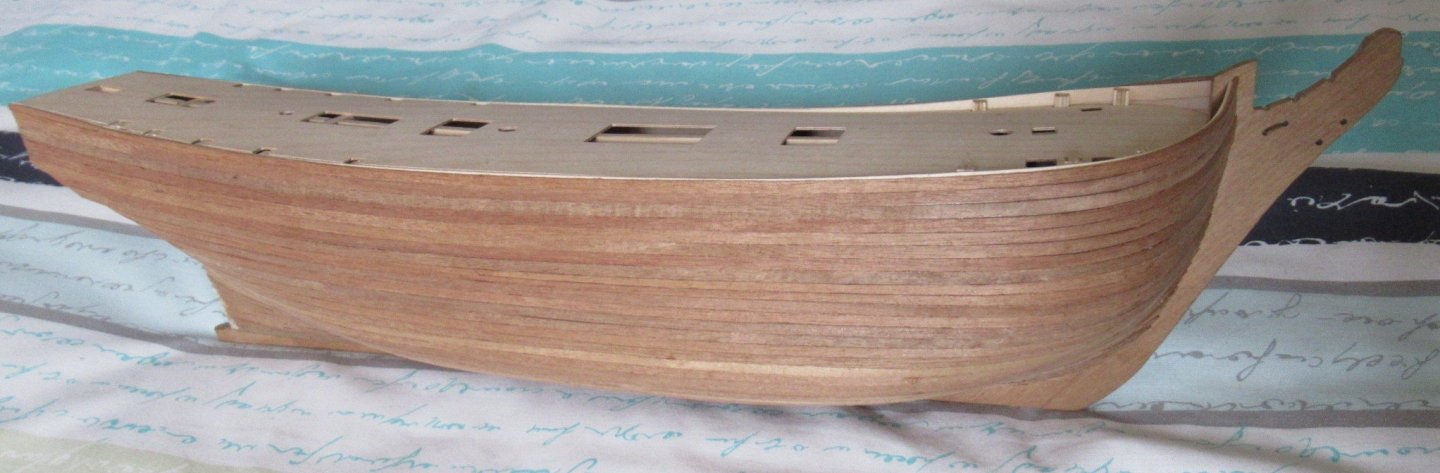
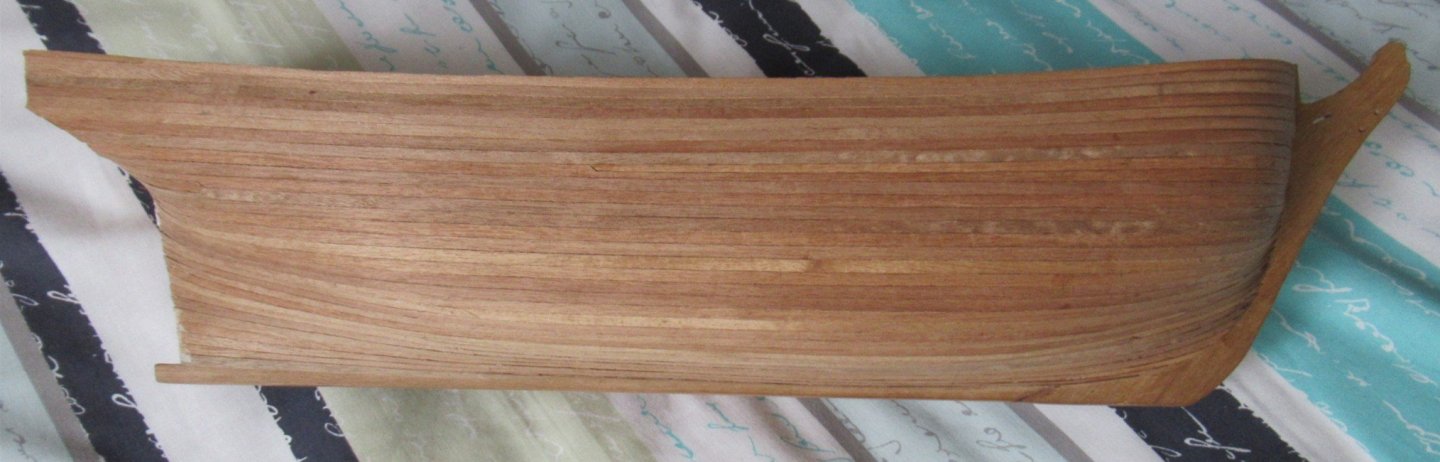
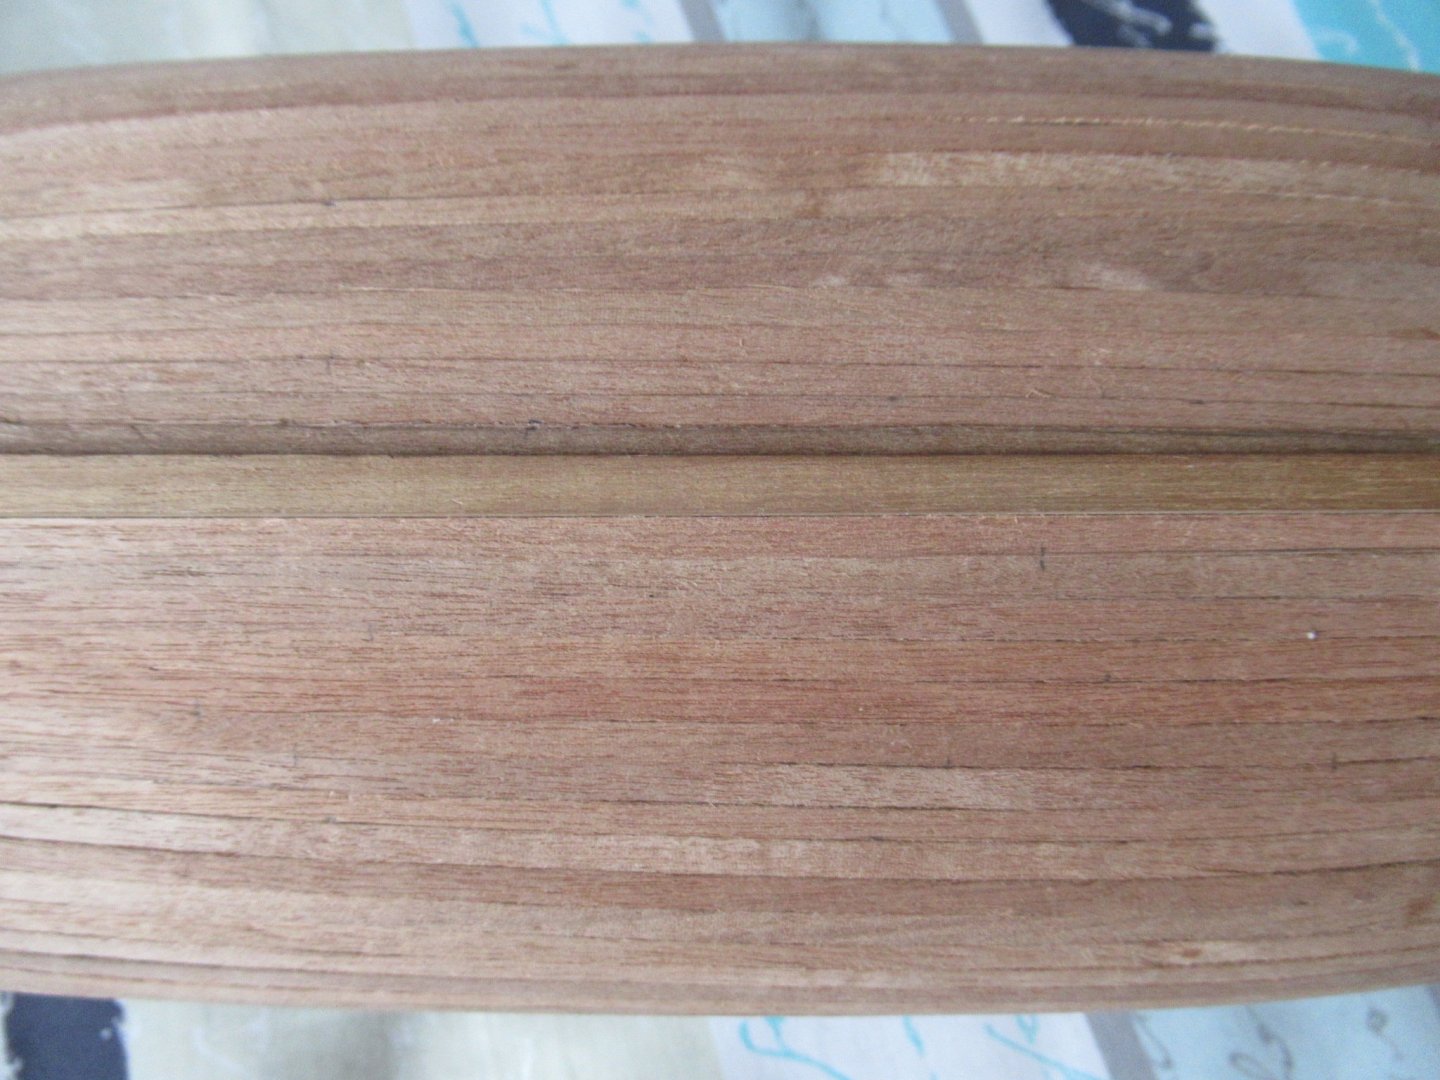
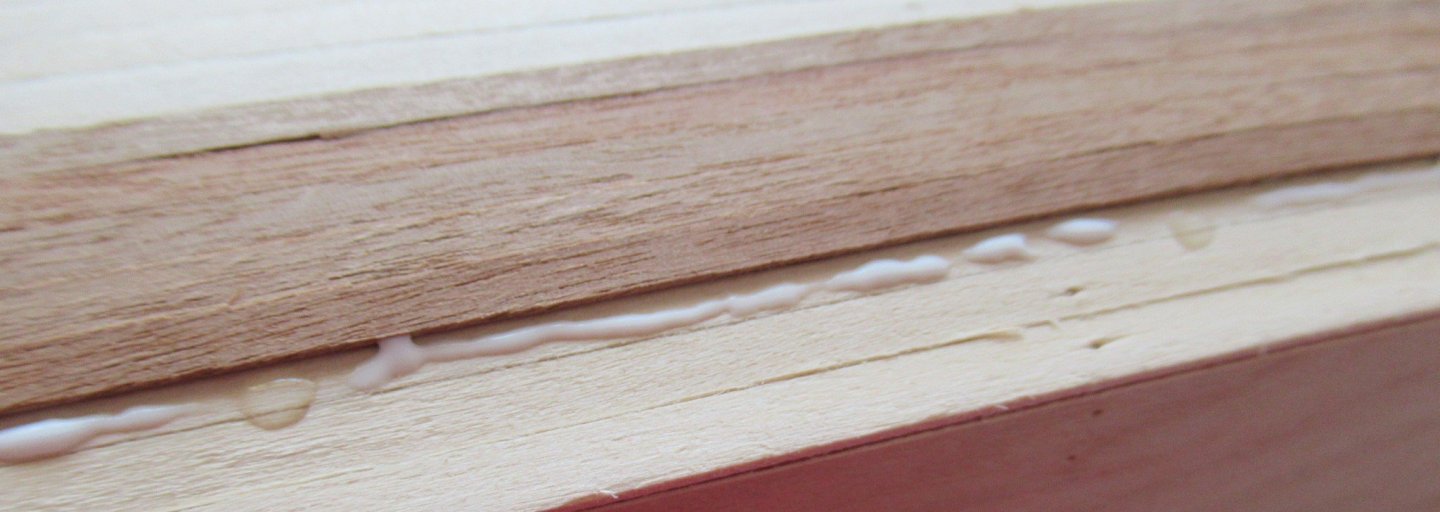
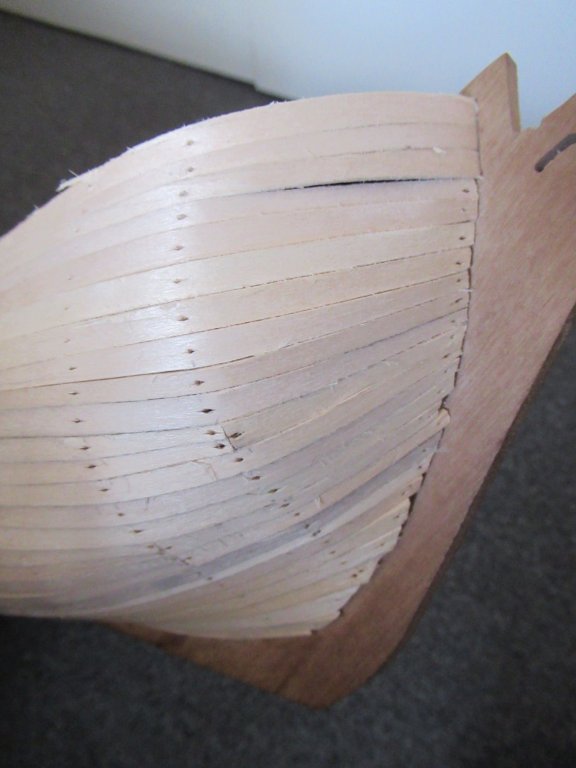
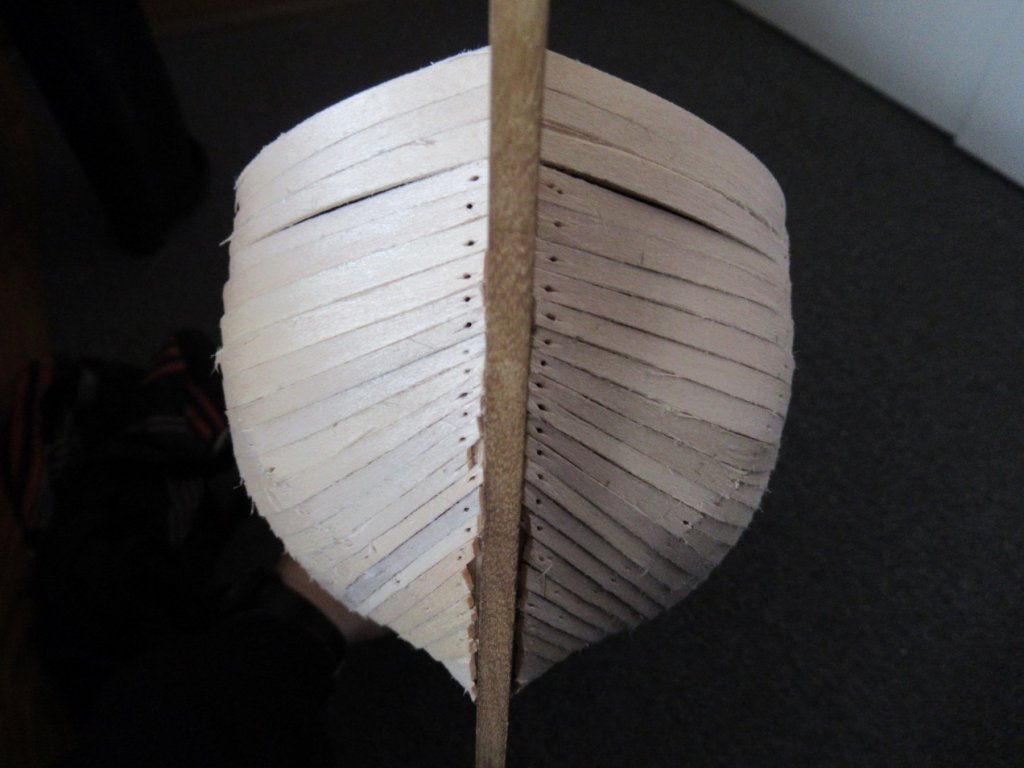
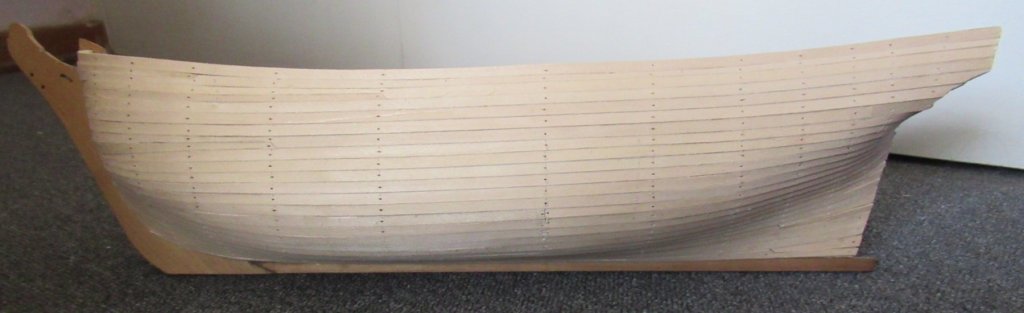
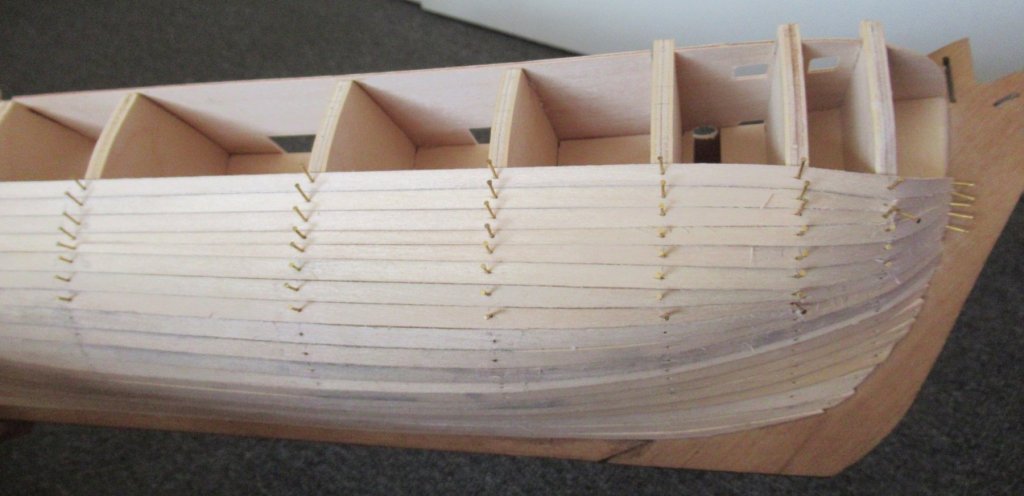
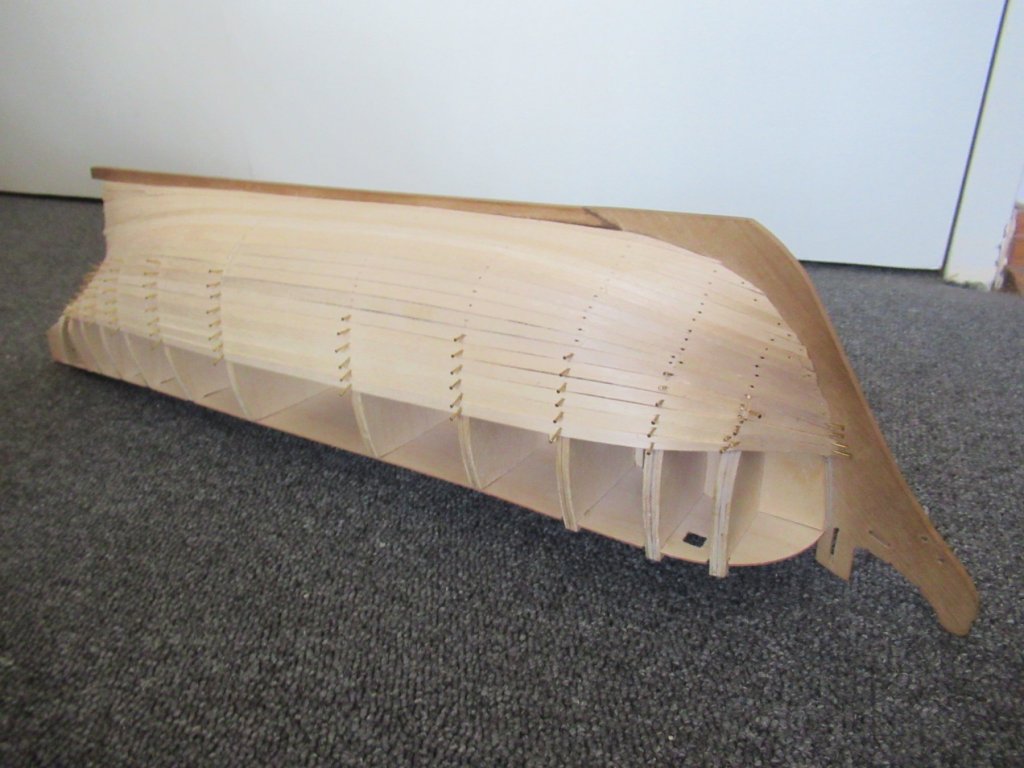
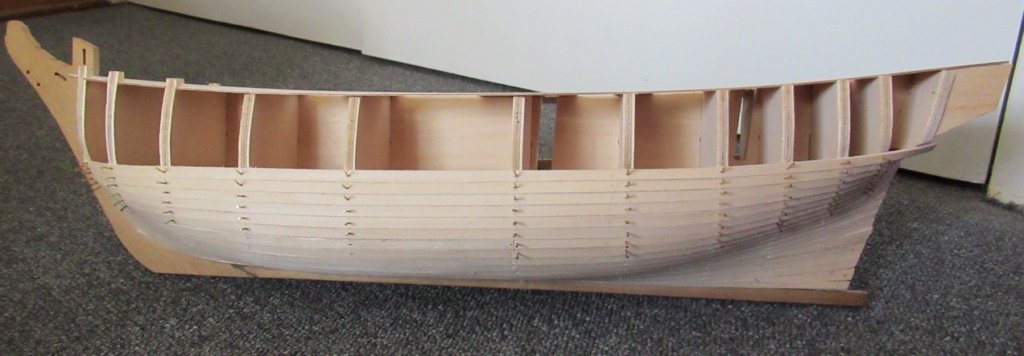
Second planking complete! My knee injury is allowing me to work half days, so ship progress has been significantly slower of late. As a whole, the second planking went A LOT better than the first, but I still felt like I'd need to plank the same hull a third and maybe a fourth time before I'd have it mastered to my satisfaction! I definitely think I gained a lot from going keel-up first time and whale-down the second time. Problems seem to arise as planks stack up so it was helpful to have my first planking, which was more correct towards the keel, to aim for as I progressed down. I also got better at recognizing problems when they could still be fixed. The method of breaking the hull into bands and measuring at each bulkhead was definitely a good way to break down an otherwise insurmountable task of learning the flow of planking. Having grasped the concept, however, I barely used my excel sheets on the second planking, going more with feel and the lay of the planks. I enjoyed learning the differences in working with the walnut wood as opposed to the lime. I found the walnut strips expanded a lot less when wet and dried a lot faster, which made it easier to not leave gaps when gluing planks down, but challenging to get them cut while they were still wet. The walnut was a lot less malleable and required a lot more coaxing to bend to my will. There even seemed to be variety across the different shades of planks with the more grey-brown planks being more brittle and harder to bend and cut without the knife following the grain. I also discovered that I have a nut allergy... to walnut... wood;P! If there wasn't a decent breeze blowing across where I was sanding, even the slightest amount of sawdust made my nose run! A problem that I never experienced with the lime. As I beveled both inside edges of every plank for a snugger fit this meant I spent a lot of time outdoors chasing the breeze! Not being able to pin the planks down (to avoid "unsightly pinholes" as the instructions put it) also created an interesting challenge, both is shaping and cutting, and in gluing without gaps. Although I made general decisions in bands of 5 to 7 planks, I found it easier to cut and glue no more than 3 planks at a time, as I had to hold the previous loose planks in place to measure the next one. For securing the planks I used a combination of wood glue (painted on in lines with a tooth pick) and CA glue (in dots at intervals between the wood glue): This seemed to work pretty well where the planks weren't under too much pressure. I took to putting CA glue directly on the the plank at bow-most end (the first centimeter or so), sticking this first, then sticking the length of the plank that runs flat to glue on the hull, then putting CA glue on the last stretch of plank as it curved around the stern under a little more pressure. I started with the planks above the whale and really struggled! There should have been exactly seven planks between the whale and the deck but they just didn't want to lie flat around the bow! I ended up with a degree of clinkering that I was highly unimpressed by. The only way to avoid it seemed to be to taper down the first planks and then add in stealers closer to the deck. I decided that that would be even more unsightly and just accepted the defects. The seventh plank also ended up being higher and lower than the last lime plank in different places. Sanding should fix most of it but I had to add a stealer at the stern (best seen in photo six). Strange how the best made measurements can still go awry! I added in a long stealer immediately after the whale plank to ensure that I didn't have the same bow problem the whole way down! I based the size of my correctional stealer on the natural lay of the next plank. Although the two stealers seemed to be about the same size, as I approached the keel I found that the right side needed almost a full plank more than the left, despite no other planks having been tapered across the middle bulkheads by that stage. You will therefore see that the planks on the left next to the keel had to be a lot narrower across their width than those on the right. Coming around the bulge I also found the need to add in a stealer that dropped off on both ends to correct the deviation of the planks upwards across the middle bulkheads. The stern ends of theses stealers are easy to pick up in the next photo, but you have to look very closely to see the drop-off at the bow as well. I committed wholeheartedly to my potentially cheat move of tapering planks across bulkheads 9-10 and then widening them again as they reach the stern. I don't know how legit it is but the end result was a complete lack of the need for any stealers down the stern post! Though a full stealer was obviously still needed for the massive width of plank terminating on the bottom of bulkhead 12. Following the correctional stealer below the whale, the bow planking gave me little trouble. Being bluff bowed it still required the customary dropped planks but I found it far easier the second round being able to drop them exactly where I wanted to instead of having to aim for termination on a bulkhead. I did struggle a bit with the final bow termination of the planks as my first planking wasn't the most precise in this area and could maybe have done with a bit more sanding. The planks did clinkering a bit more over the first bulkhead about two thirds of the way down the bow, but the gaps are smaller and only visible in certain directions. You can see a small stripe of white demarcating one such instance to the left on the photo below. The two sides also didn't always completely match with the levels that the planks terminated at, but close enough! By the end I was finding that sanding down excess plank was giving me a closer fit than cutting as I could sand it in a bevel, leaving the slightest lip to cover over any gaps. Another reason that a third planking would have looked even better;P! Here's a close up to prove it! My final challenge was getting the stern post planks to stick down properly at their stern-most extent. CA glue was the perfect solution for the lime planks but the walnut refused to cooperate. The only thing stronger than CA glue that I know of is contact adhesive (or snot-glue as we used to call it as kids) but I deemed that far too messy to even try. Then I remembered my ship's instructions warning about how fast CA glue dries when the planks are wet. Wet planks are also obviously more cooperative in the bending department. I therefore dripped water onto the stern planks until they were soaked through and used lots of CA glue. They stuck! But an odd, hopefully sand-off-able side effect of using CA glue on wet planks is that everything turns white! All in all, I'm quite happy with the final product of my second planking! Next, to begin with sanding it down! Two questions going forward: 1. Any advice on wood fillers? I'm sure I'll be in need of a bit of something to fill the small gaps once I've sanded down my clinkered planks. I take it I have to try mix different colour wood fillers to get the closest match. I could perhaps cut very thin slivers of wood to press into the cracks. I would imagine that it would give the closest colour match but I'm not sure it's worth the extreme amount of effort if wood filler will look just as good. I even found some general wood recommendations of using wax crayons, as apparently it's easier to match the colours. Any thoughts on this? Would that work for model ships too? I can't imagine paint, stain or varnish sticking very well to it! 2. My instructions say: "Using a pair of flat nosed pliers, very carefully twist and pull off the exposed bulwark tabs on bulkheads 1-3 above deck level". You can see these solid 5x5mm chunks of wood in the third photo. I cannot imagine them carefully twisting off! Am I missing anything or would it be better to carefully saw them off with a craft knife?


-
Thanks so much for the advice!! Jason, I really like your idea of the rabett at the bow! If I build another ship, I'll definitely consider using it, or trying to figure out filler blocks. I imagine that they would do similarly, Henrik, but I felt that was too far beyond my non-existent wood-working ability to try this time. I did do some bearding on the false keel, but found out after my first planking that I didn't do nearly enough! I've therefore sanded down the planks at the stern as well to try make up for it. This is after sanding down one side of the stern planks to show the contrast. Thank you for the confirmation about fixing the dip; I went ahead with the lime plank fillers. The result wasn't too bad On the right side they worked really well! On the left I didn't make them quite long enough so they end a little suddenly with a slight dip, but the walnut planks should have a good enough surface to curve over the remaining defect. To answer your question, Henrik, my instructions said to go deck down but I was warned that I could run into lots of problems doing it that way with the curvature of the Bounty's hull. I therefore chose to ignore the instructions;P. I'd have to try again the other way around to know for sure which way was better though. Below are more before-sanding close-ups to give a better idea of what I did at the stern. The left ended up being different to the right as I was salvaging planks that I'd cut months ago in ignorance. (I ended up with only a single full plank to spare so was happy I had!) On the right side, the planks that terminated underneath bulkhead 12 were full width the whole way with a stealer to make up the difference. The planks terminating on the upper false keel tapered quite a lot by the 11th bulkhead; I even had to drop a plank. I then did something that may constitute cheating between the 11th bulkhead to the false keel: I cut the planks to widen again:0. I don't know how legit that is but it seemed to work pretty well! On the left side, all bar one of the planks terminating on the false keel in that problem strip were tapered all the way (one I widened again after bulkhead 11). Then all the planks ending under bulkhead 12 tapered a little over 9,10 and 11, then widened out to 12. I didn't end up dropping a plank or needing a stealer this side. Weird, I know, but it worked and still looks sufficiently symmetrical;P! Back to the present! I have finished sanding the hull. It's a process that really makes you acutely aware of all your planking imperfections! Next up, second planking!


-
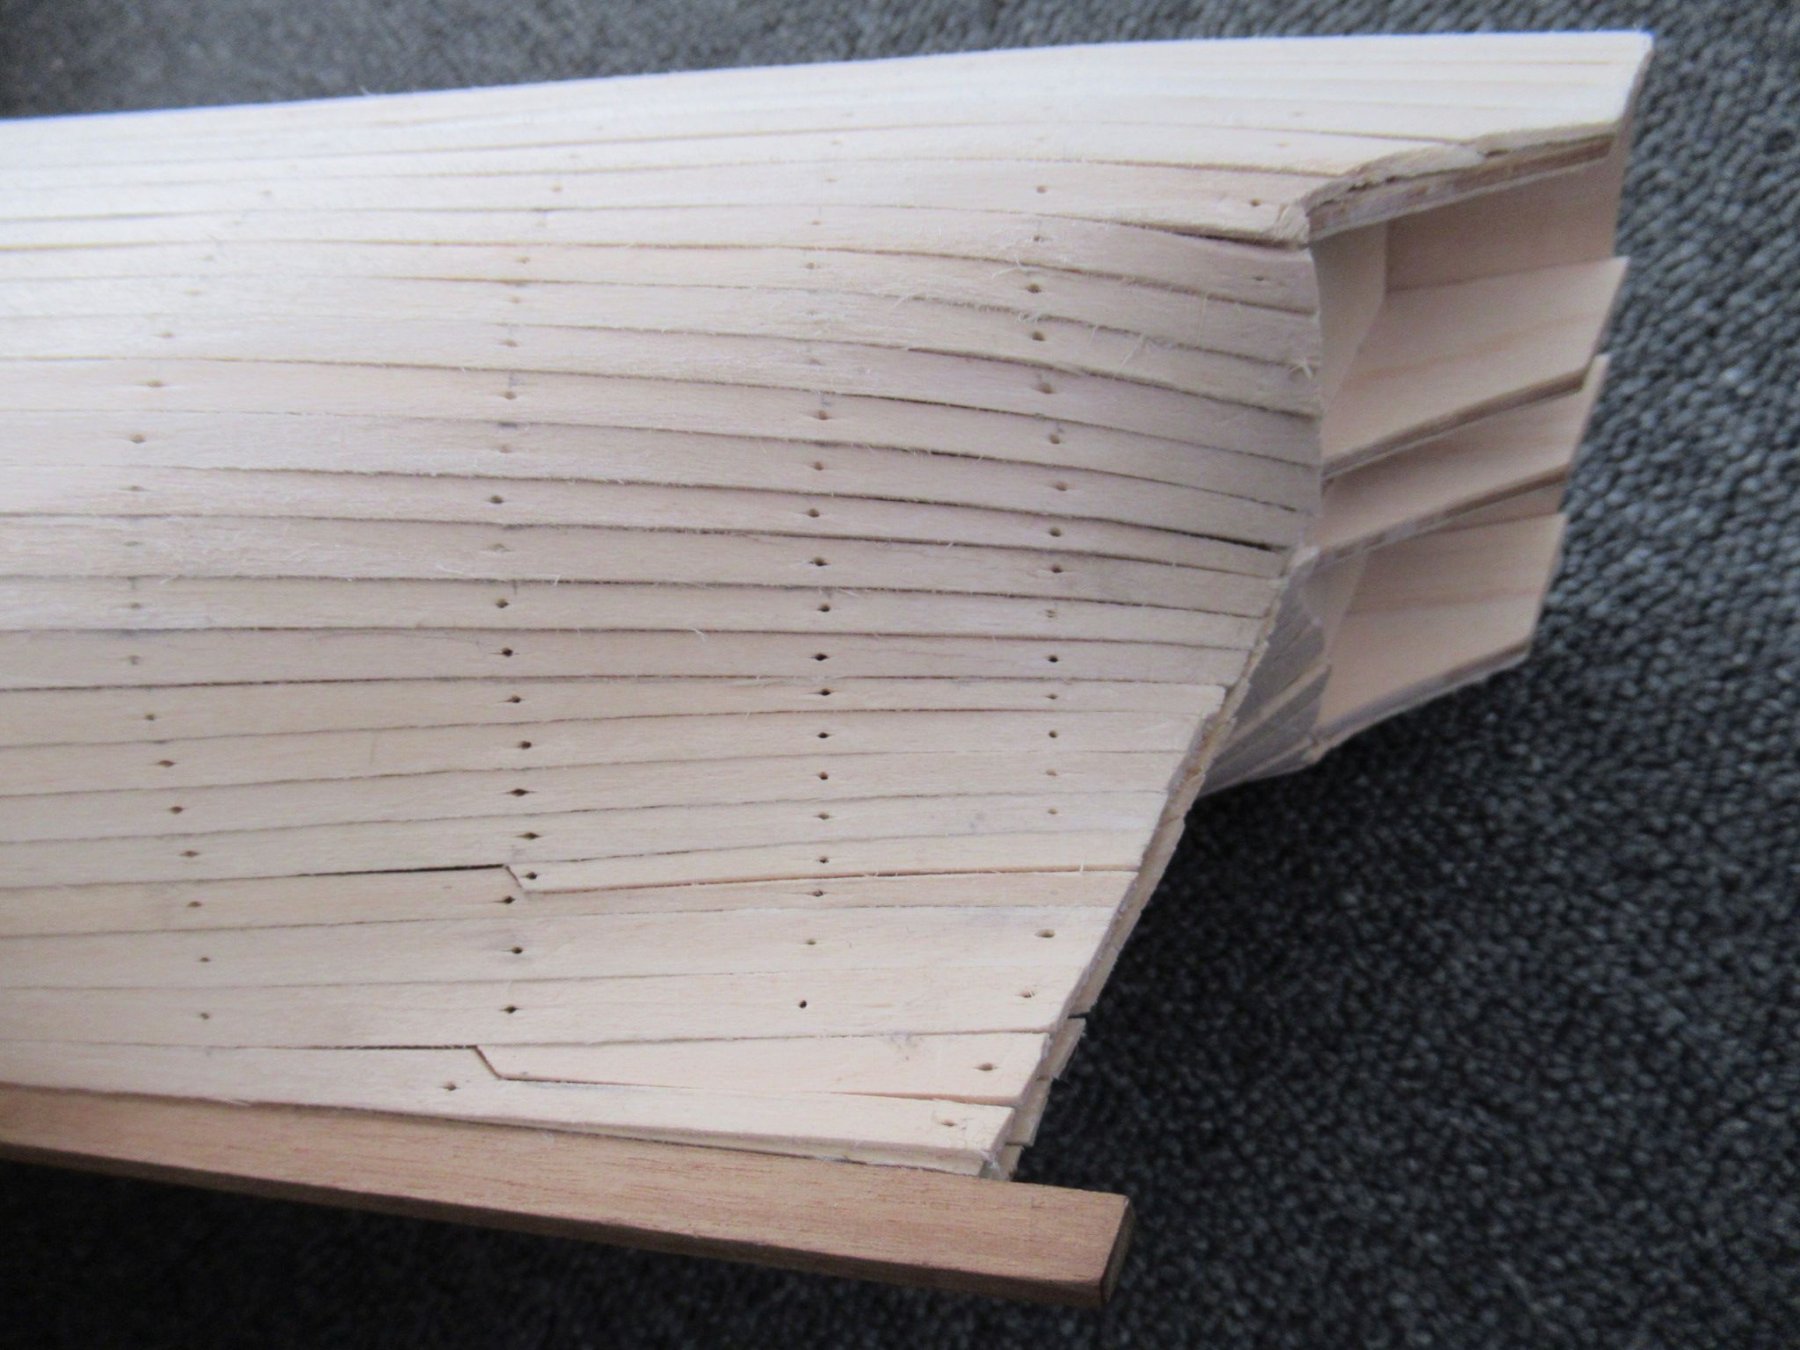
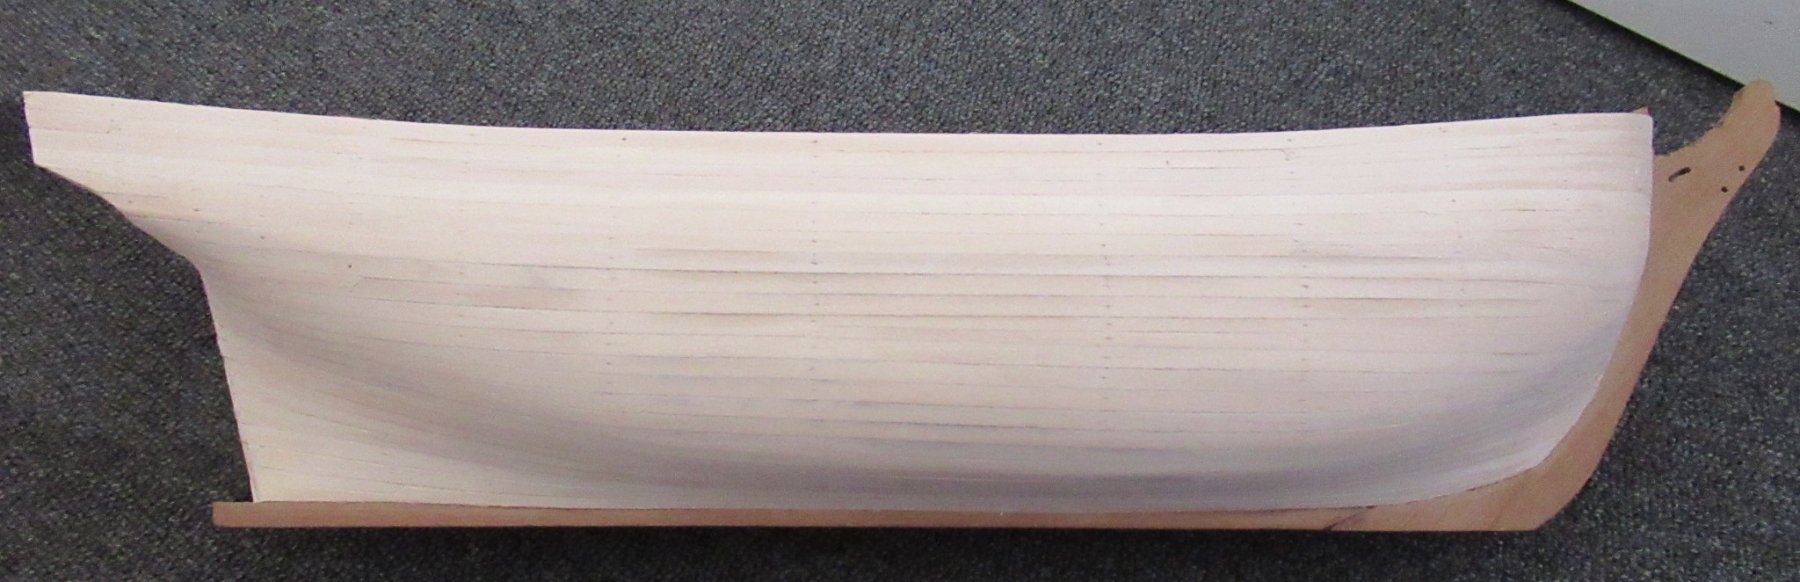
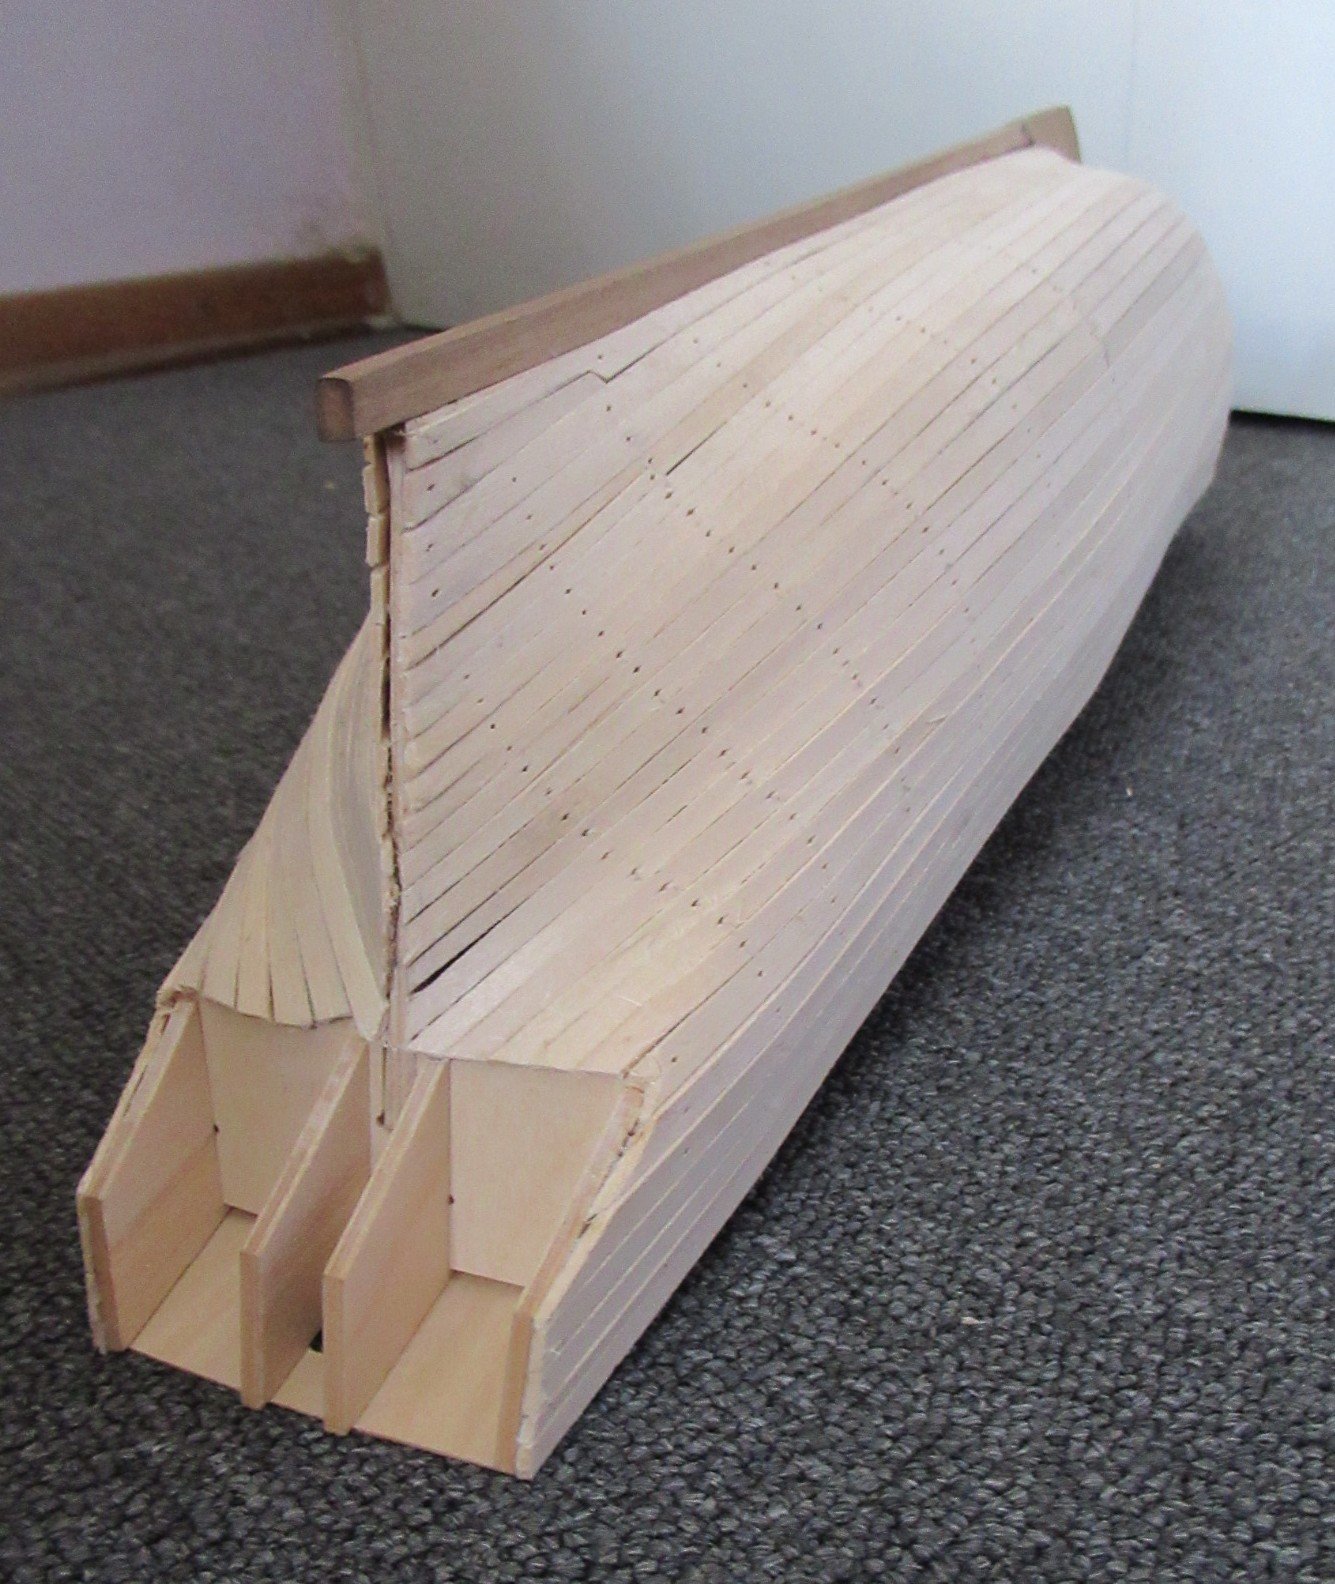
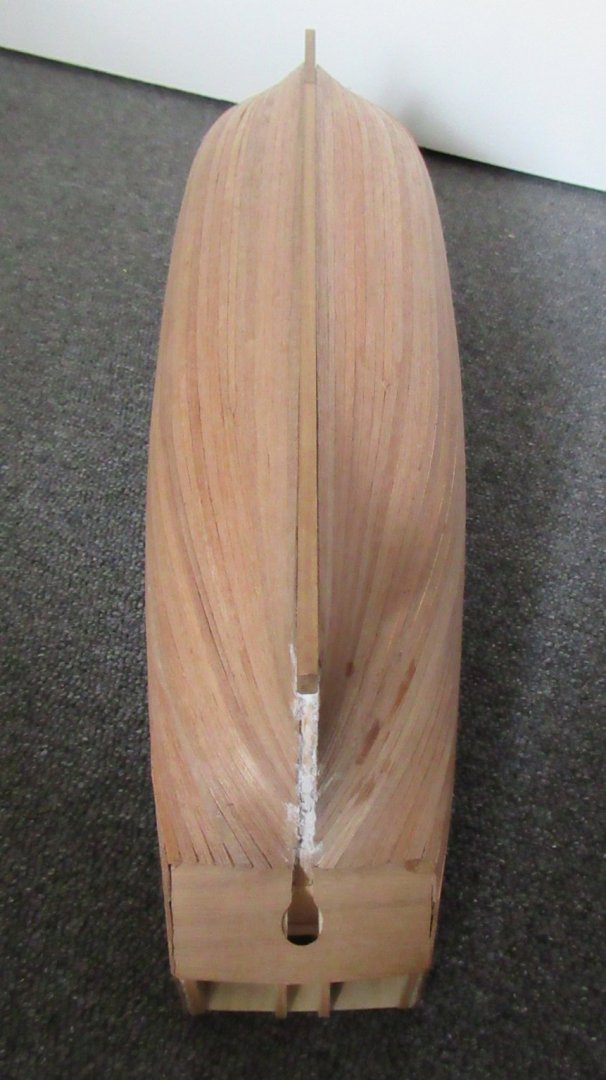
Thanks for the encouragement!! The first planking is now finally complete! It was a very large time investment but I'm mostly happy with the way it turned out! I did make a few mistakes that made my life rather interesting. I aimed for the deck on the bow instead of the top of the slot above the deck. I therefore got very worried about the way my planks were creeping higher and higher on the keel. I dropped a few planks but then ended up with a dip in the planking across the first bulkhead and had to resort to some rather interesting stealers to correct the deficit. Some regress photos to illustrate my point. First of the dip on the left: Then of the stealer I used for the same dip on the right, seen four planks down. It worked in the end, but I'm sure I'll manage to do a better job on the second planking! I also then ended up with a lip between the planks at deck level and the two just below. If I'd planked deck down I might have been able to correct this but planking keel up I saw the problem too late. The drop is a full planks' thickness so I'm considering gluing a short stretch of spare plank on top of the fourth and fifth planks from the first bulkhead to the keel and sanding it down at the edges to complete the curvature of the bow. Any thoughts or recommendations?? The stern was a bit more successful, with Dan's advice about the CA glue solving my problem of getting planks to stick. I've now begun the sanding process and will then getting cracking on the second planking! Any advice on ways to improve on my first attempt?


-
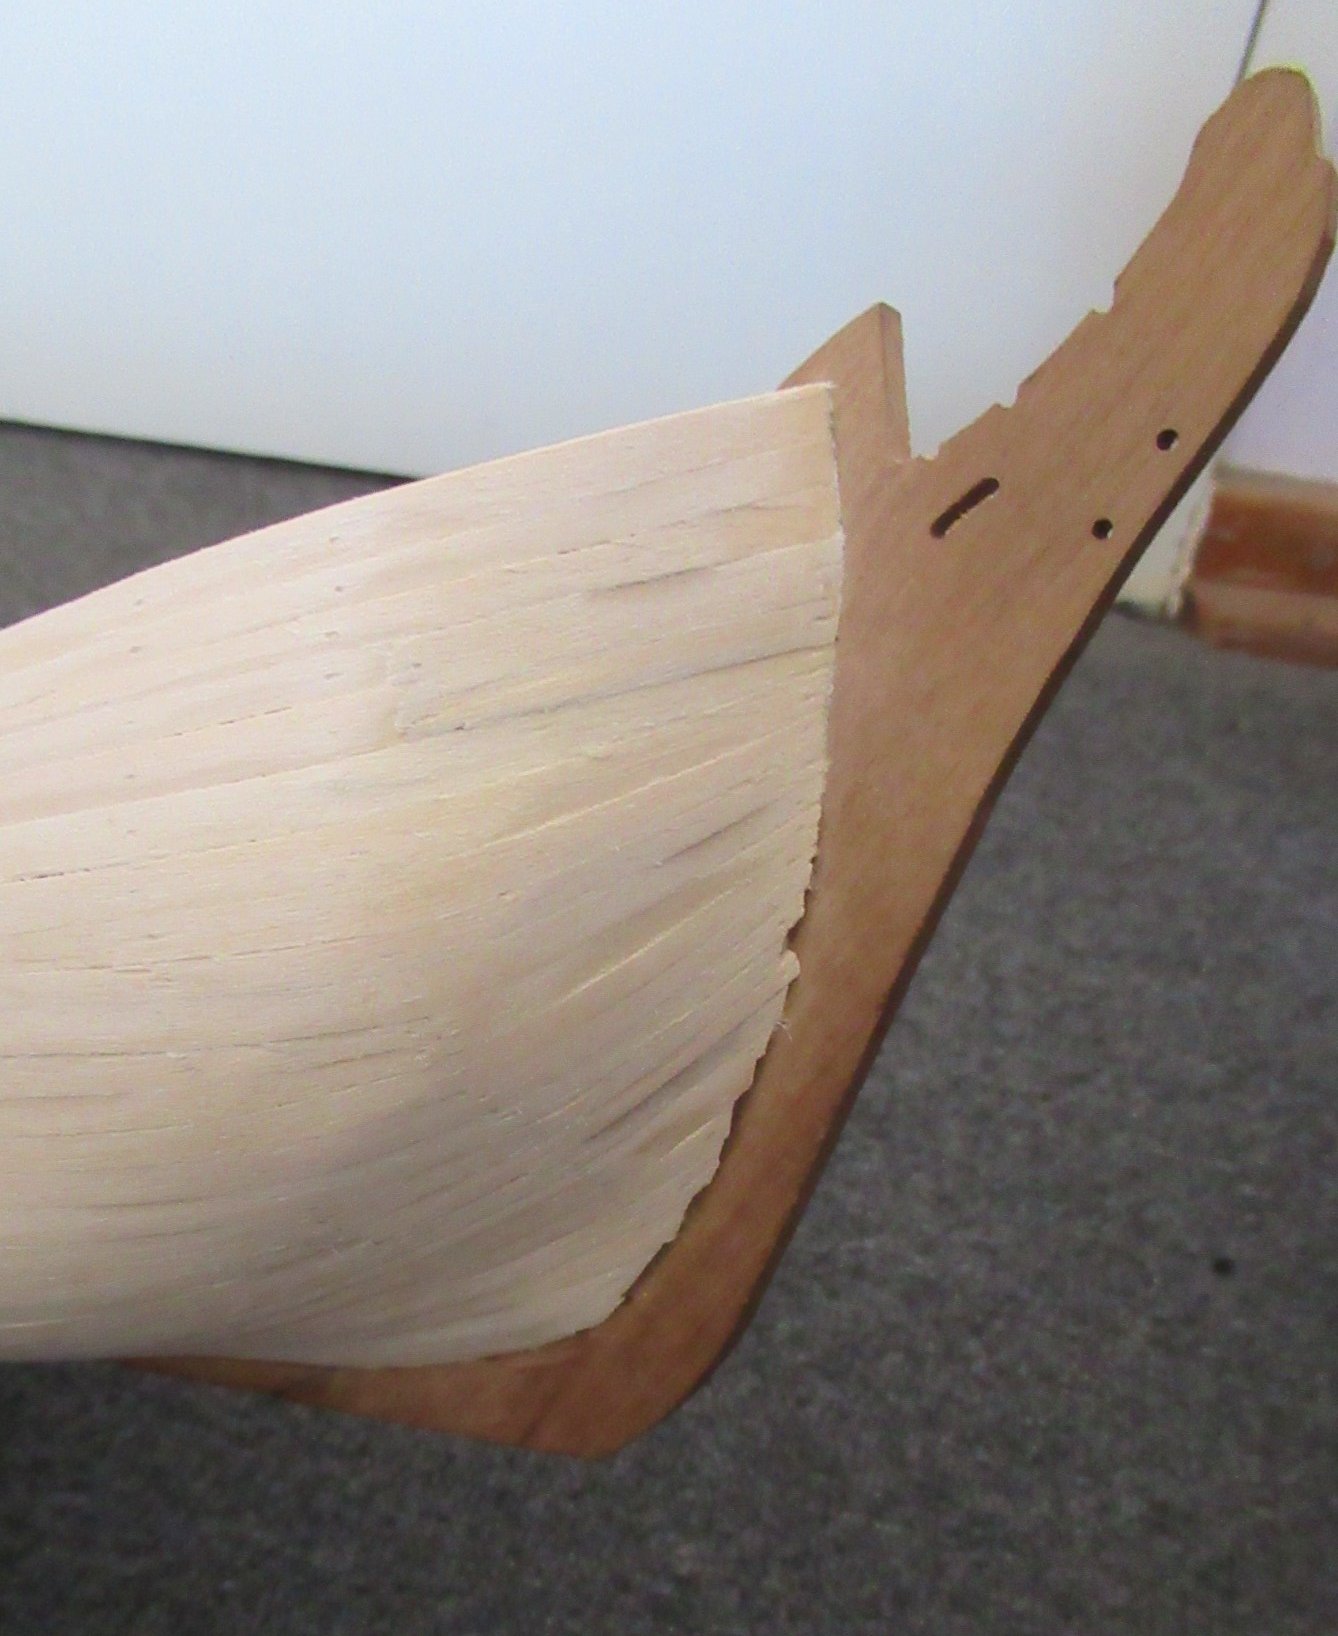
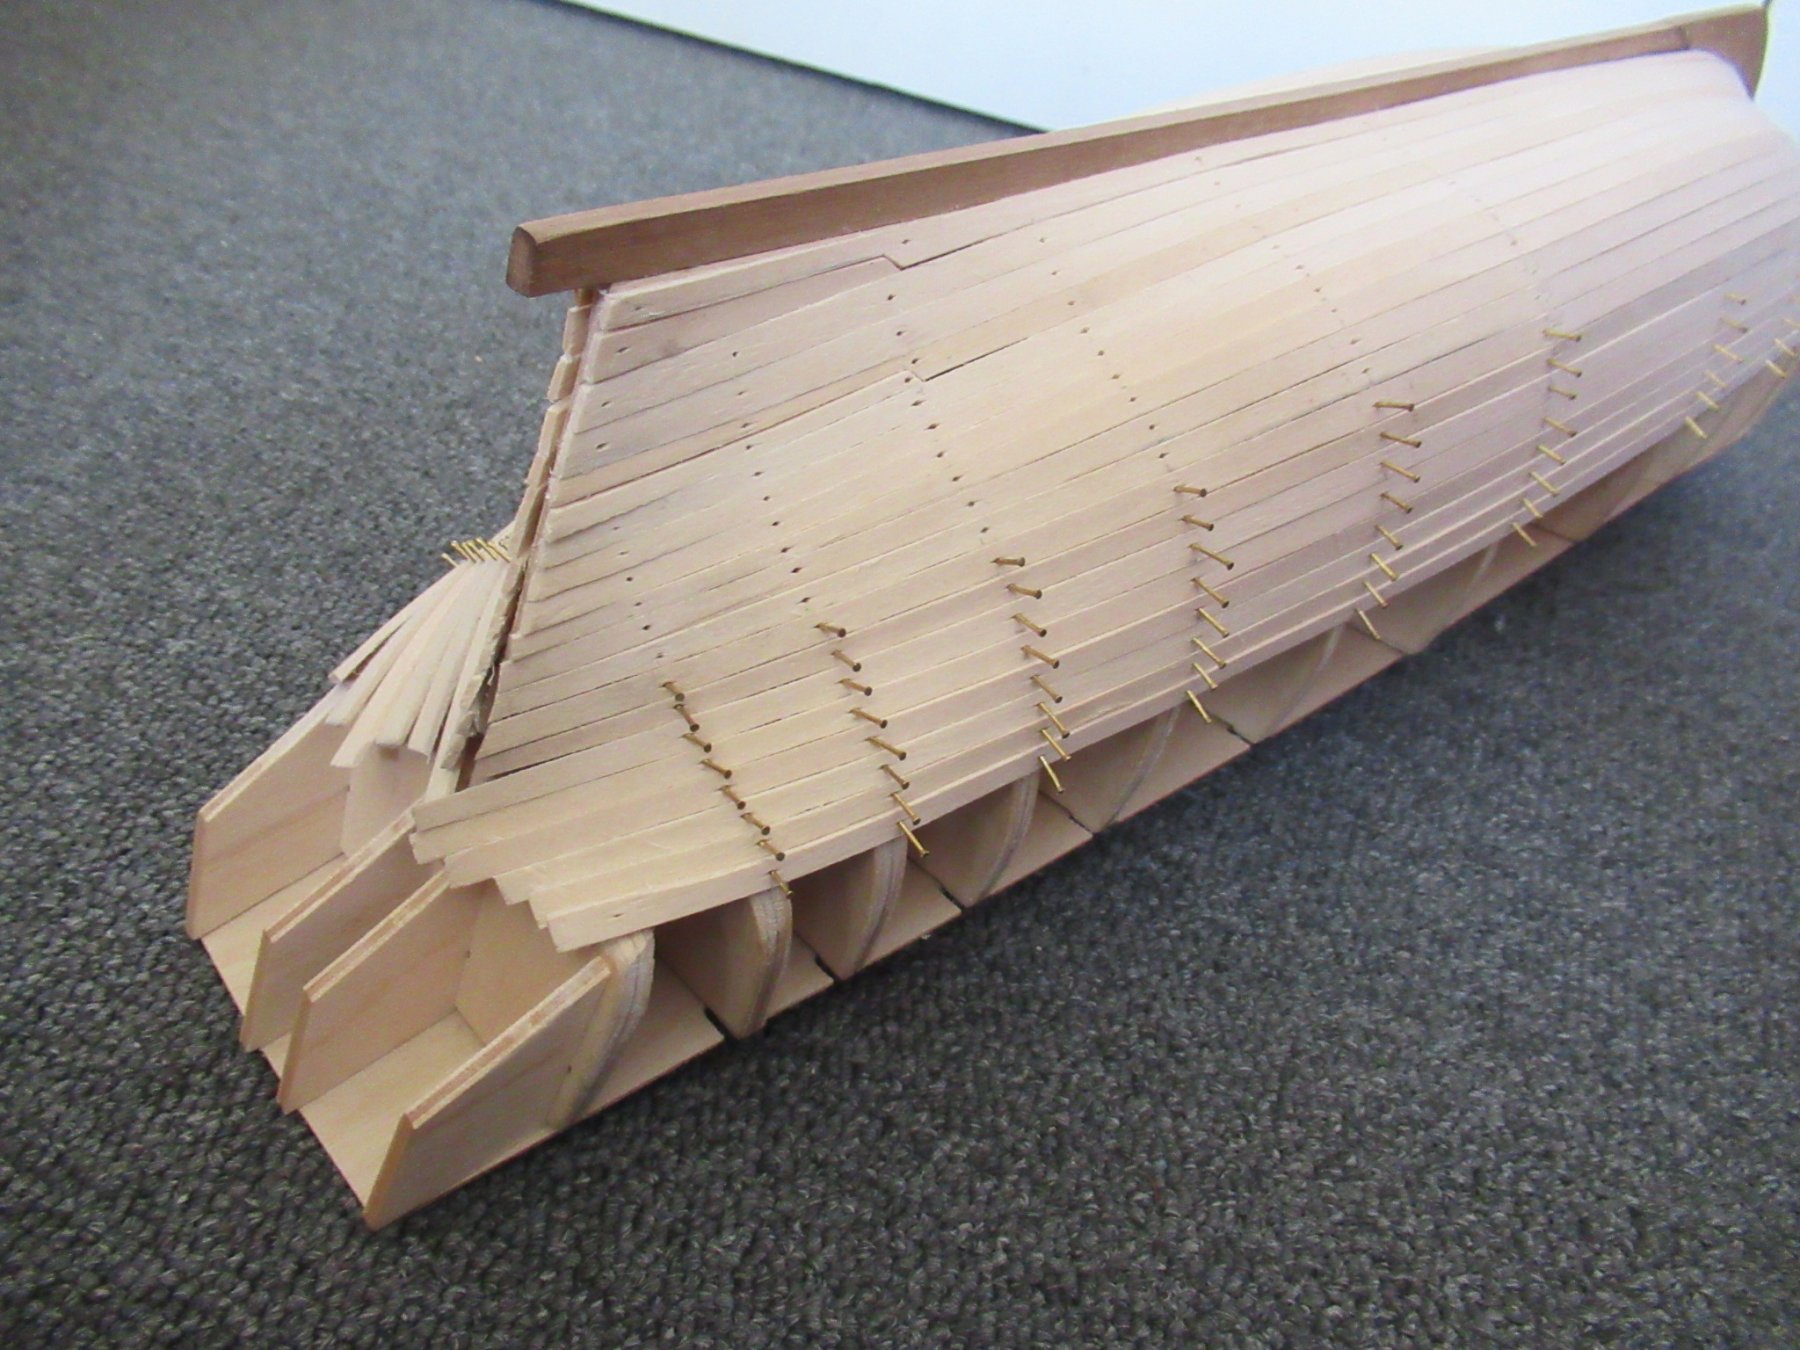
This week has been a great exercise in patience for me, both in terms of my knee's recovery and in terms of the next section of planking! Fortunately I at least have something to show for the latter ;P. I'm learning to accept that planking often requires a "two steps forward, one step back" approach in order to achieve the best fit, particularly as a beginner. I've found that my initial measurements were definitely "more guidelines that actual rules" and need constant readjusting. I'm learning to be more flexible and recognize problems earlier so that they can be fixed before they escalate. The next ten planks took me days of solid work to get right but I'm loving the resulting hull curvature that is starting to take shape! Any advice on easy DIY ways to hold the stern planks in place while they dry, apart from physically holding them while watching TV or something ;P? My peg method lasted a sum total of 5 planks!

-
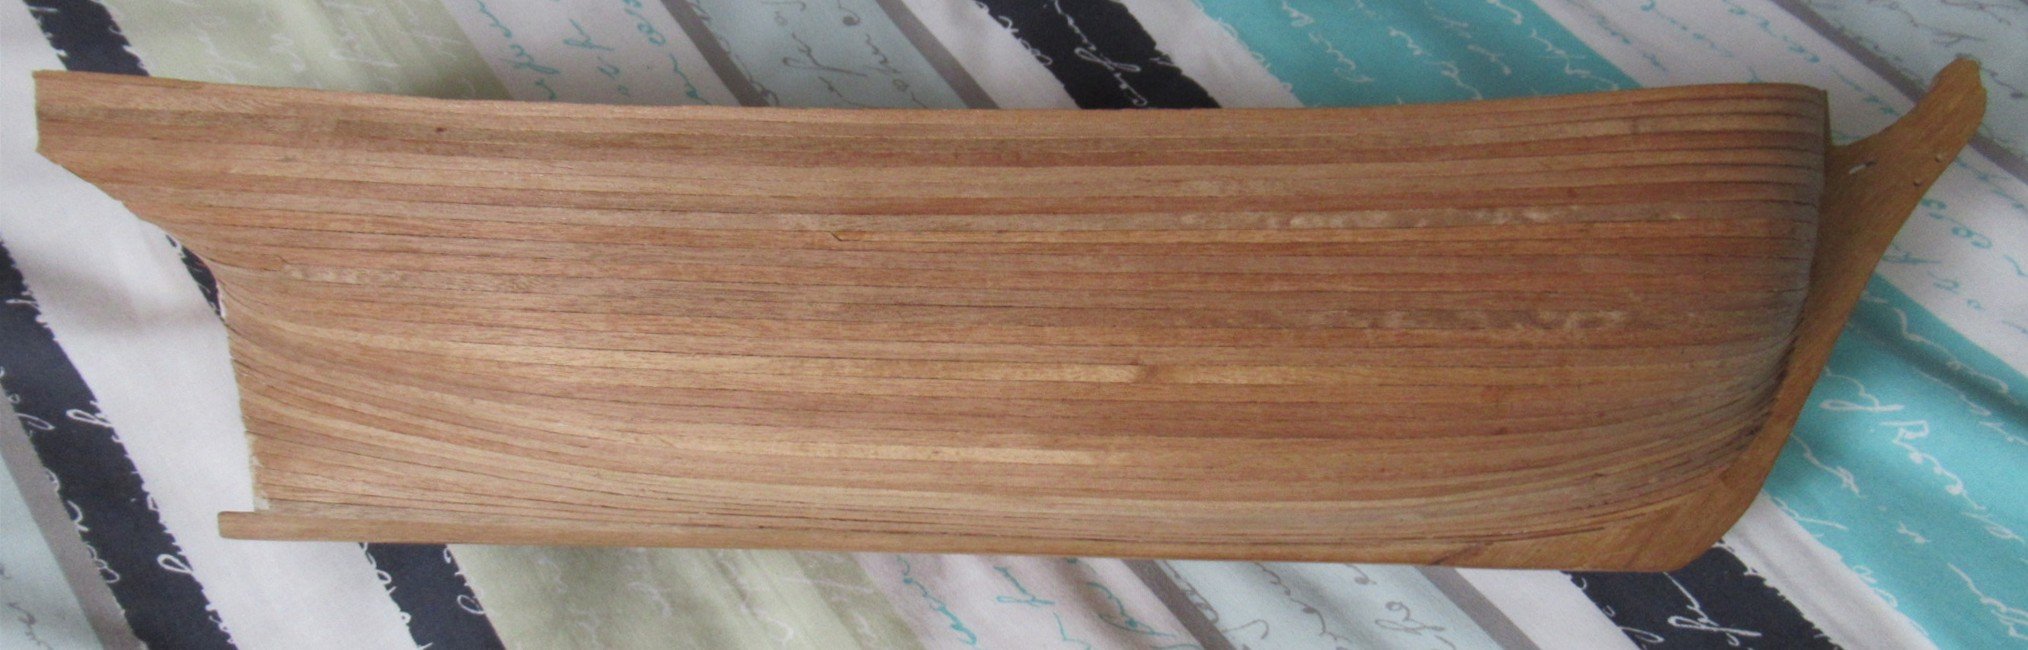
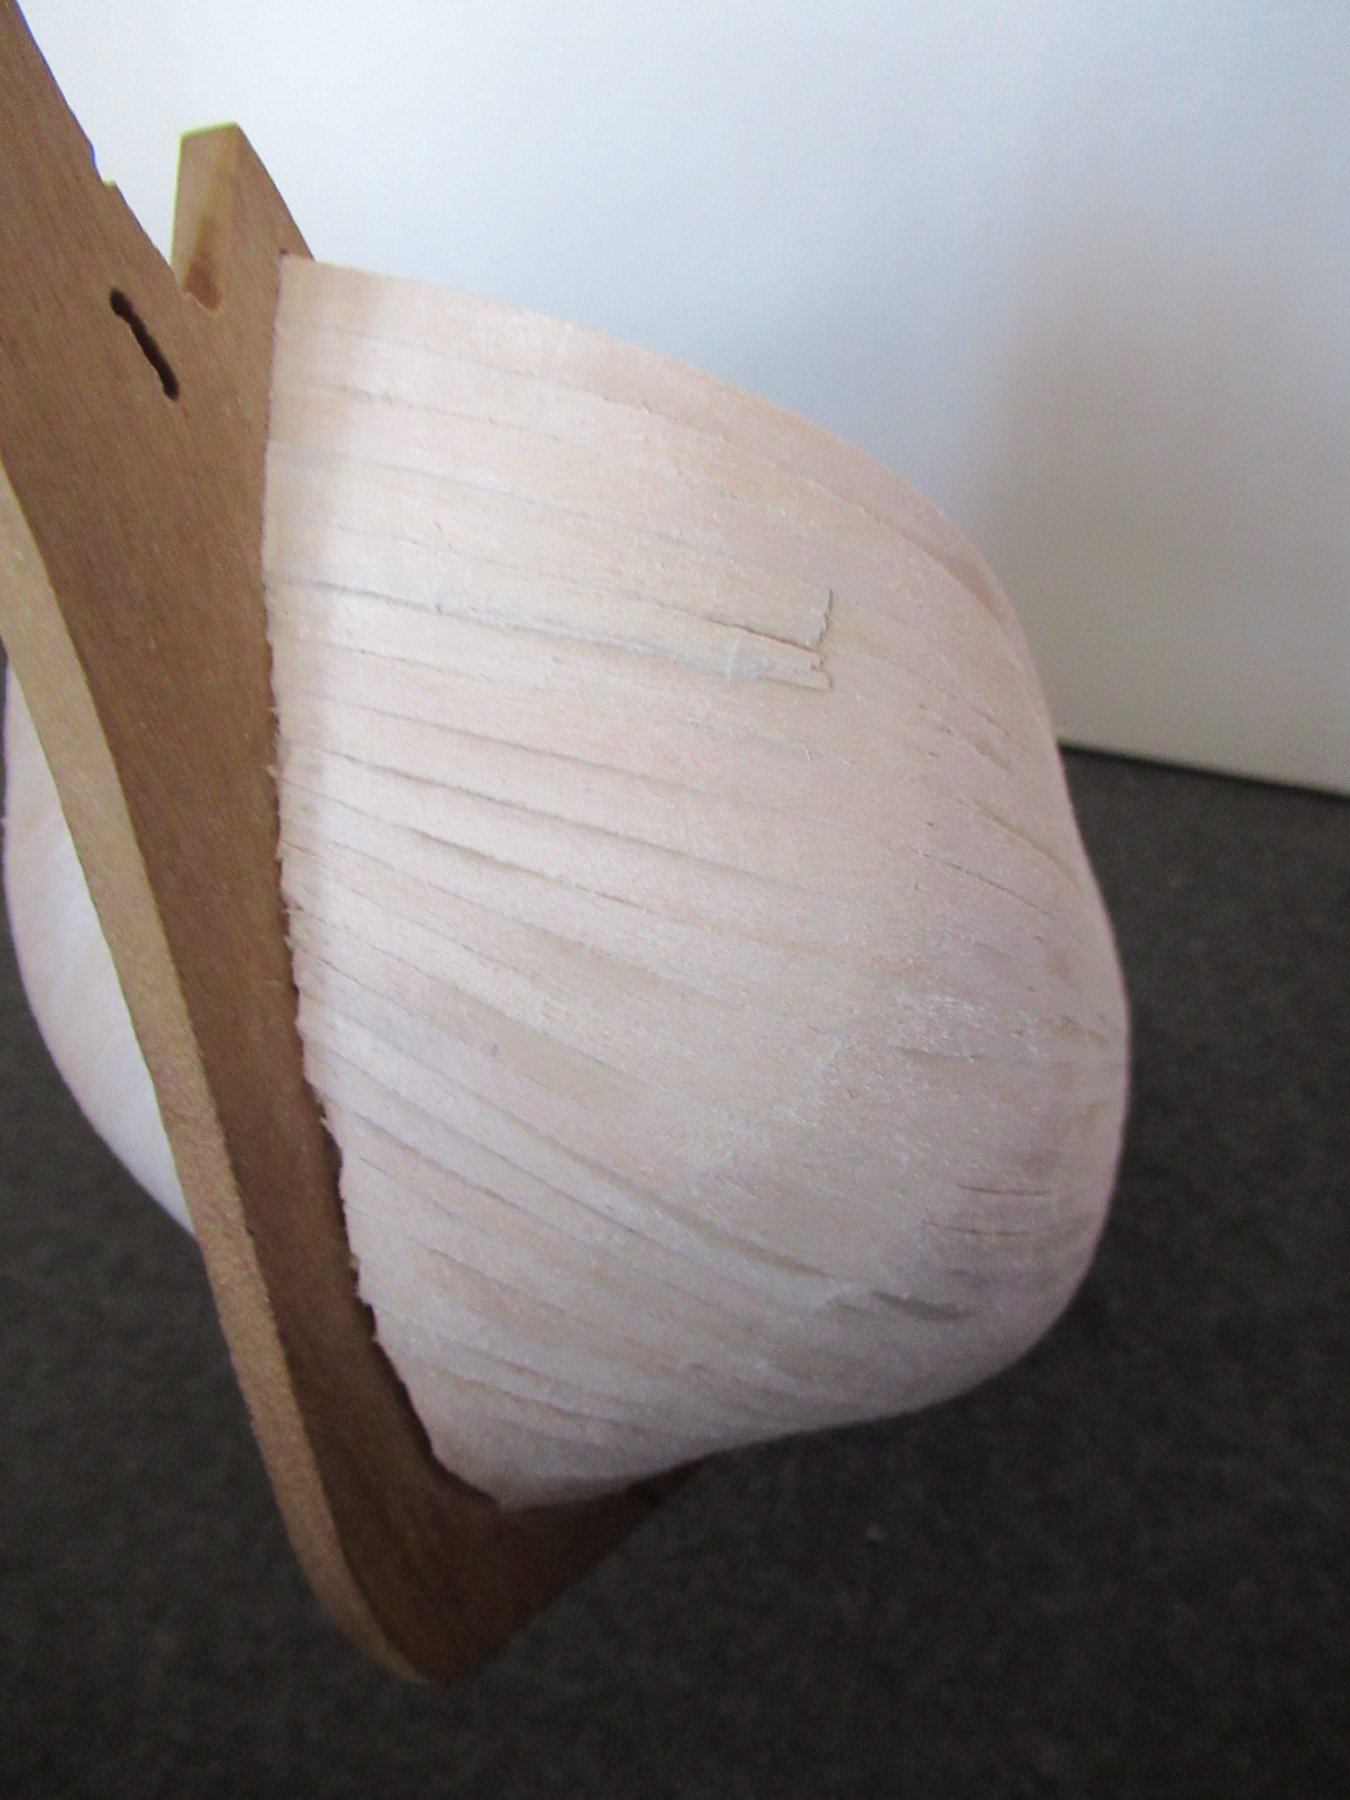
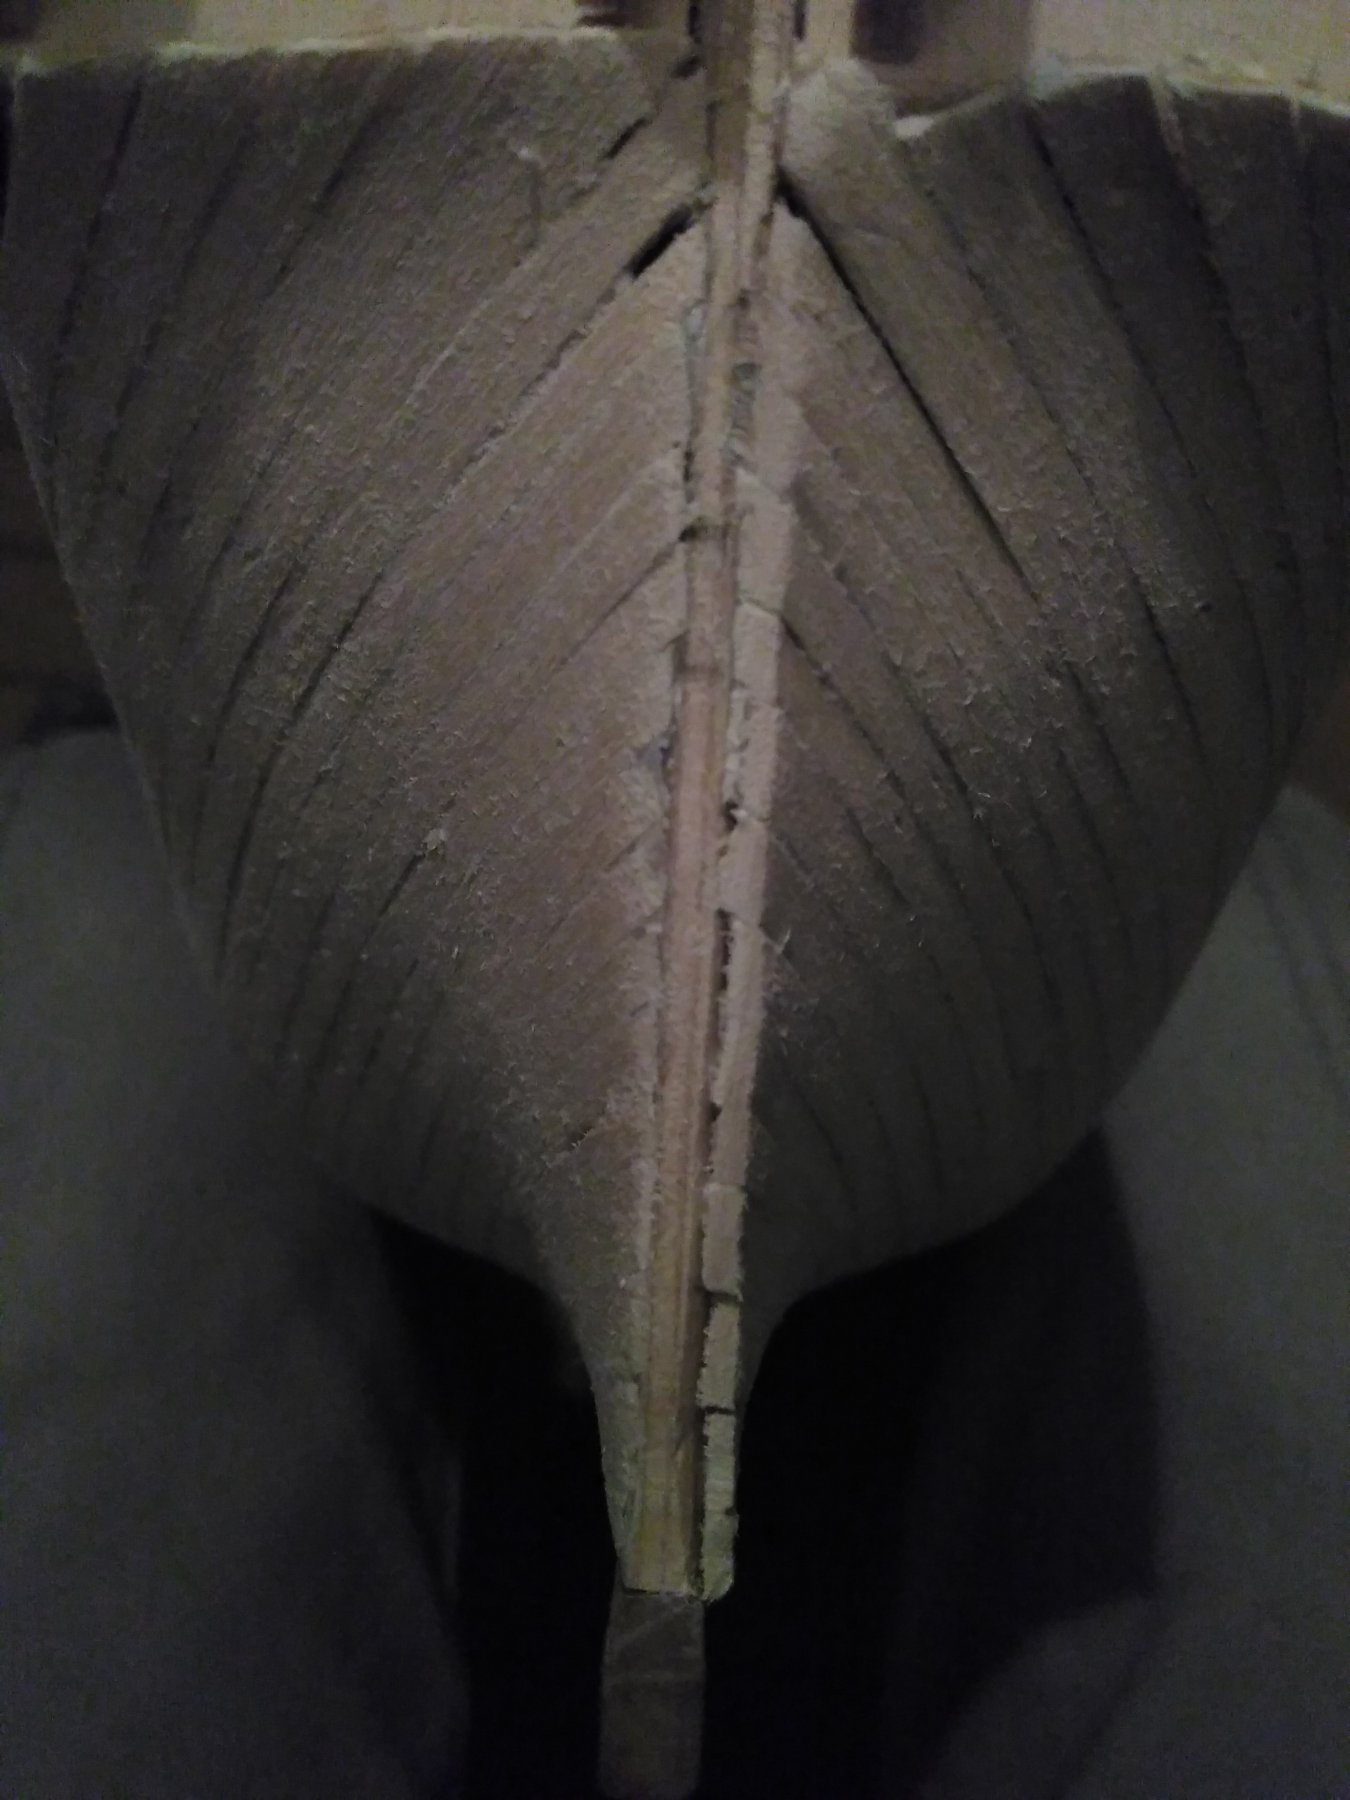
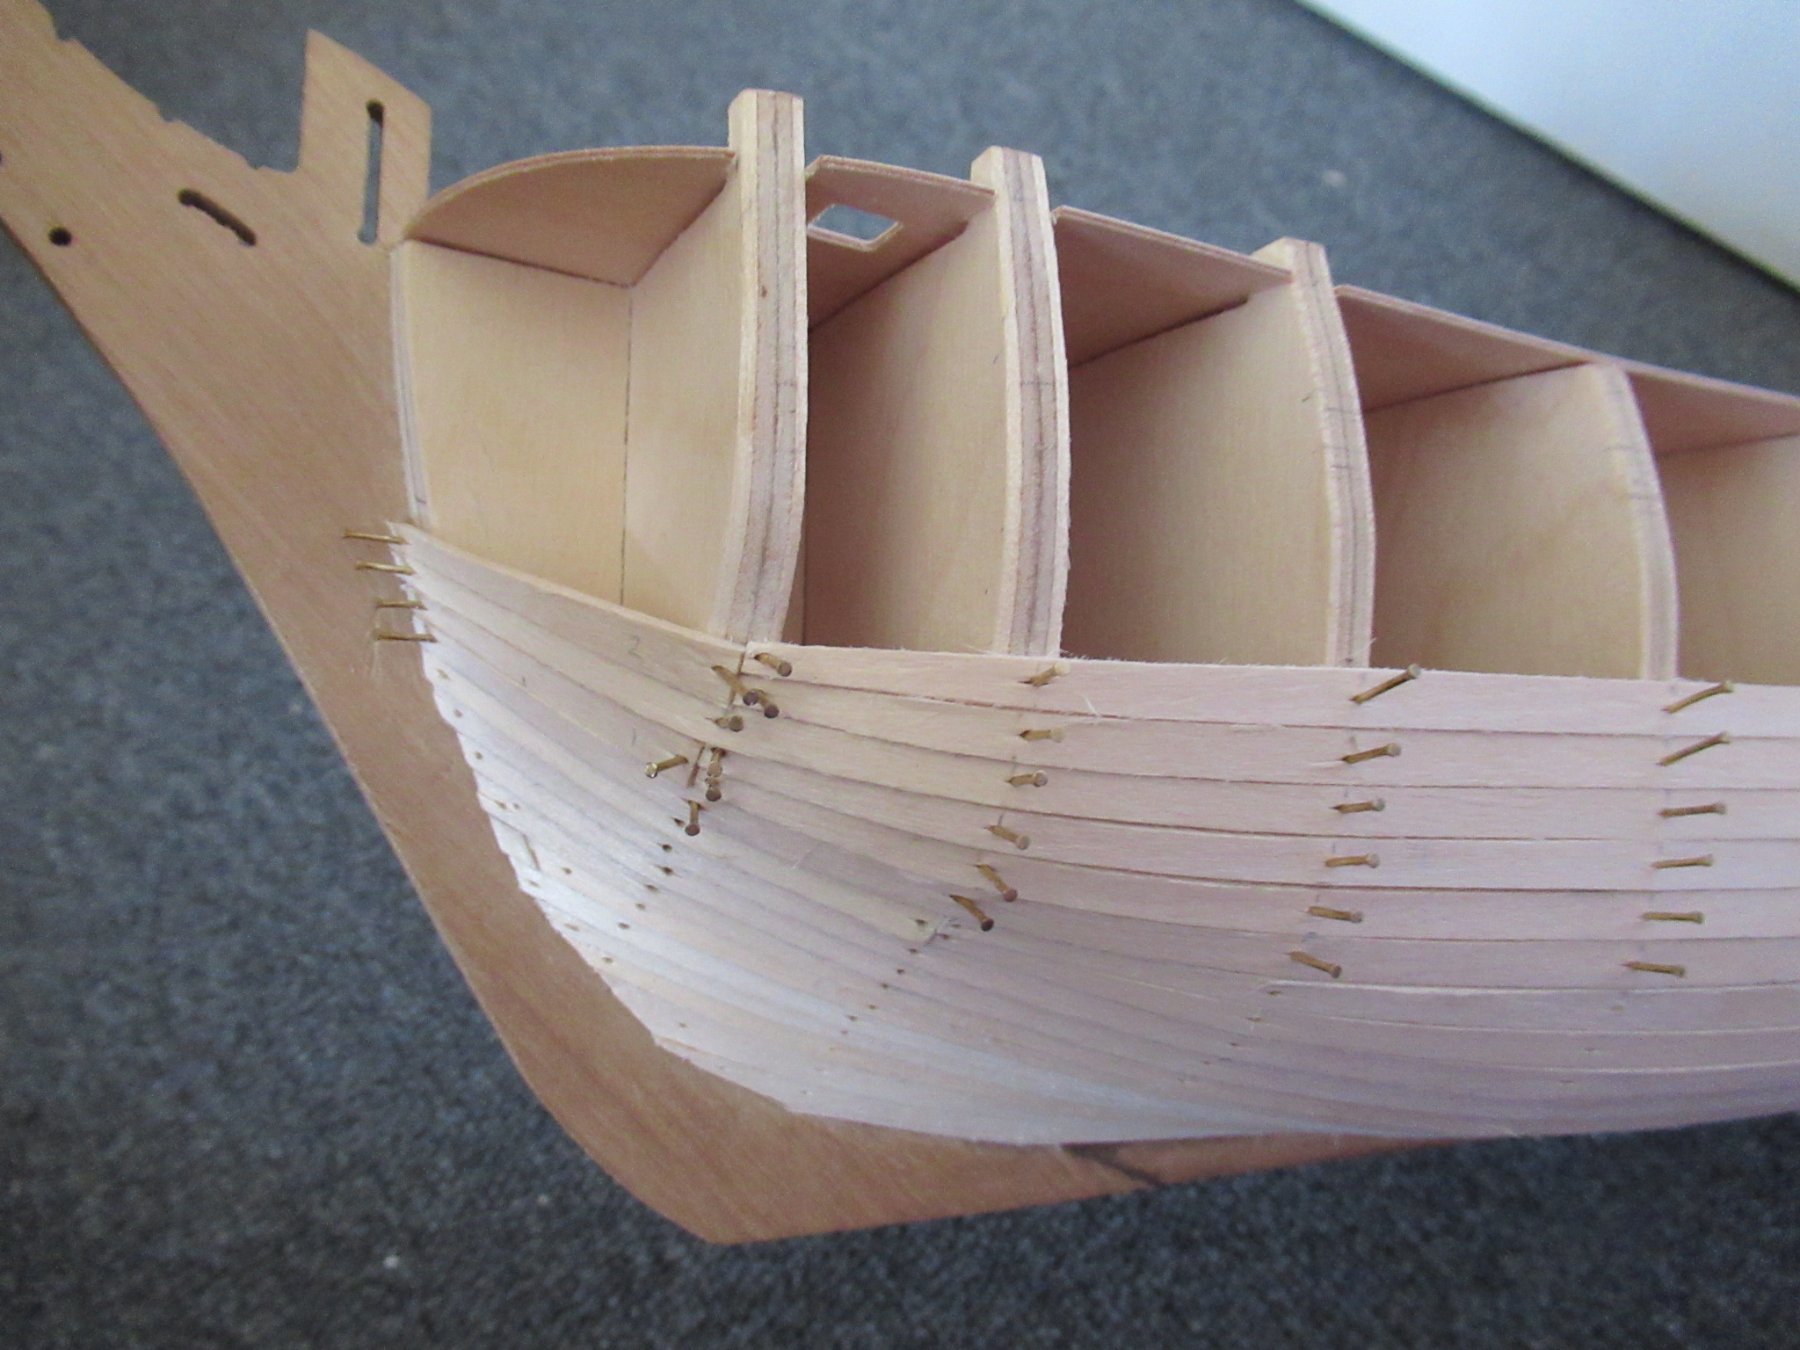
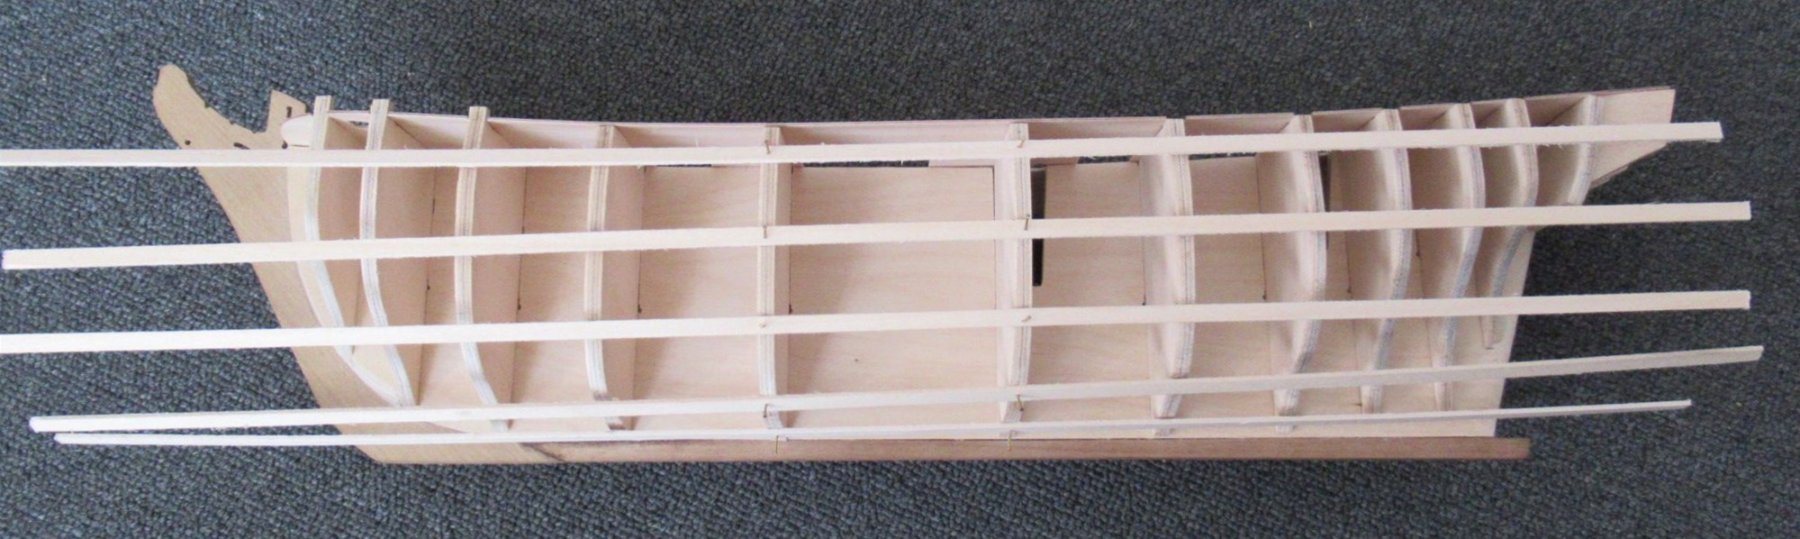
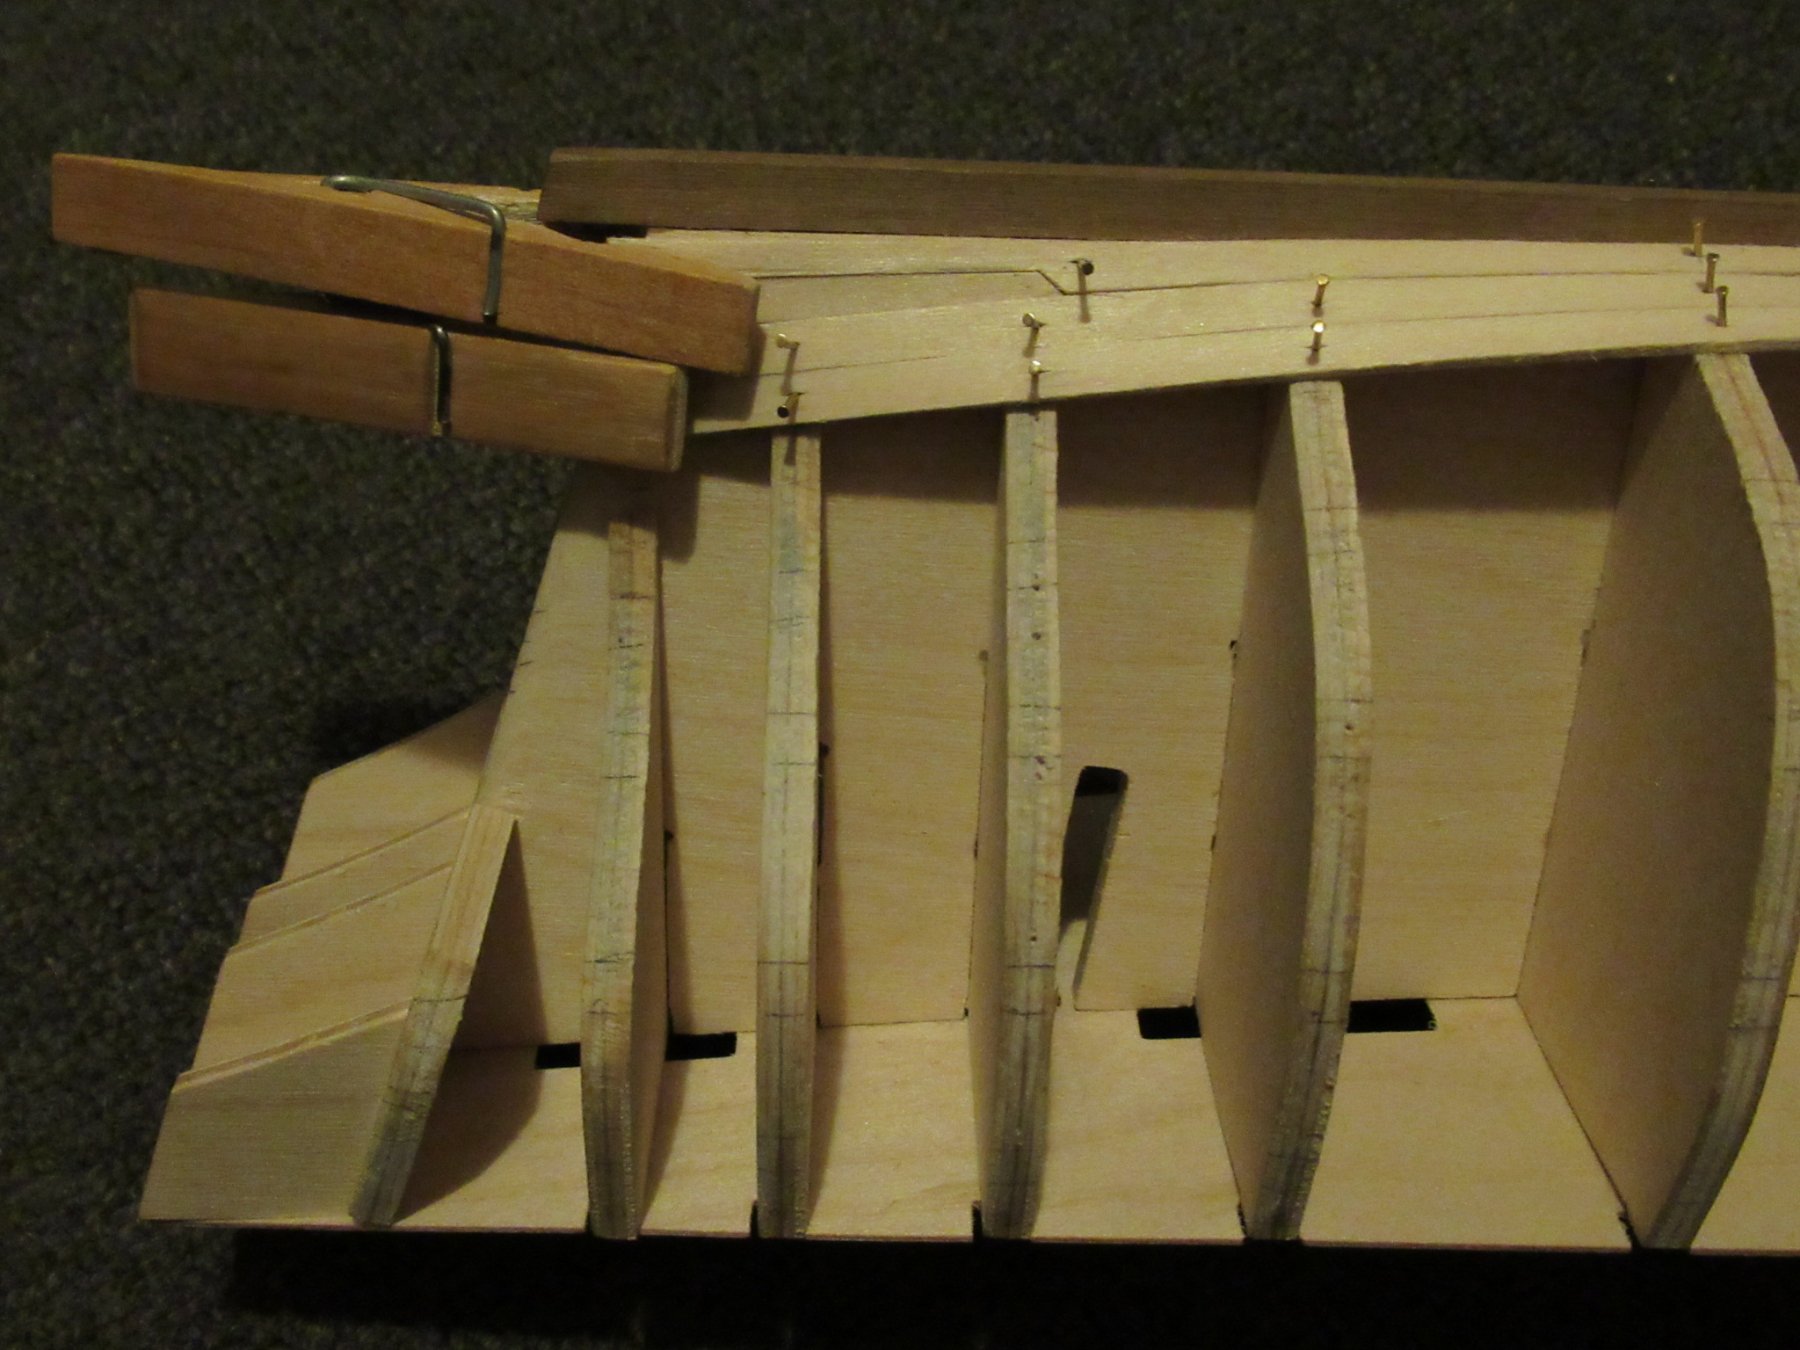
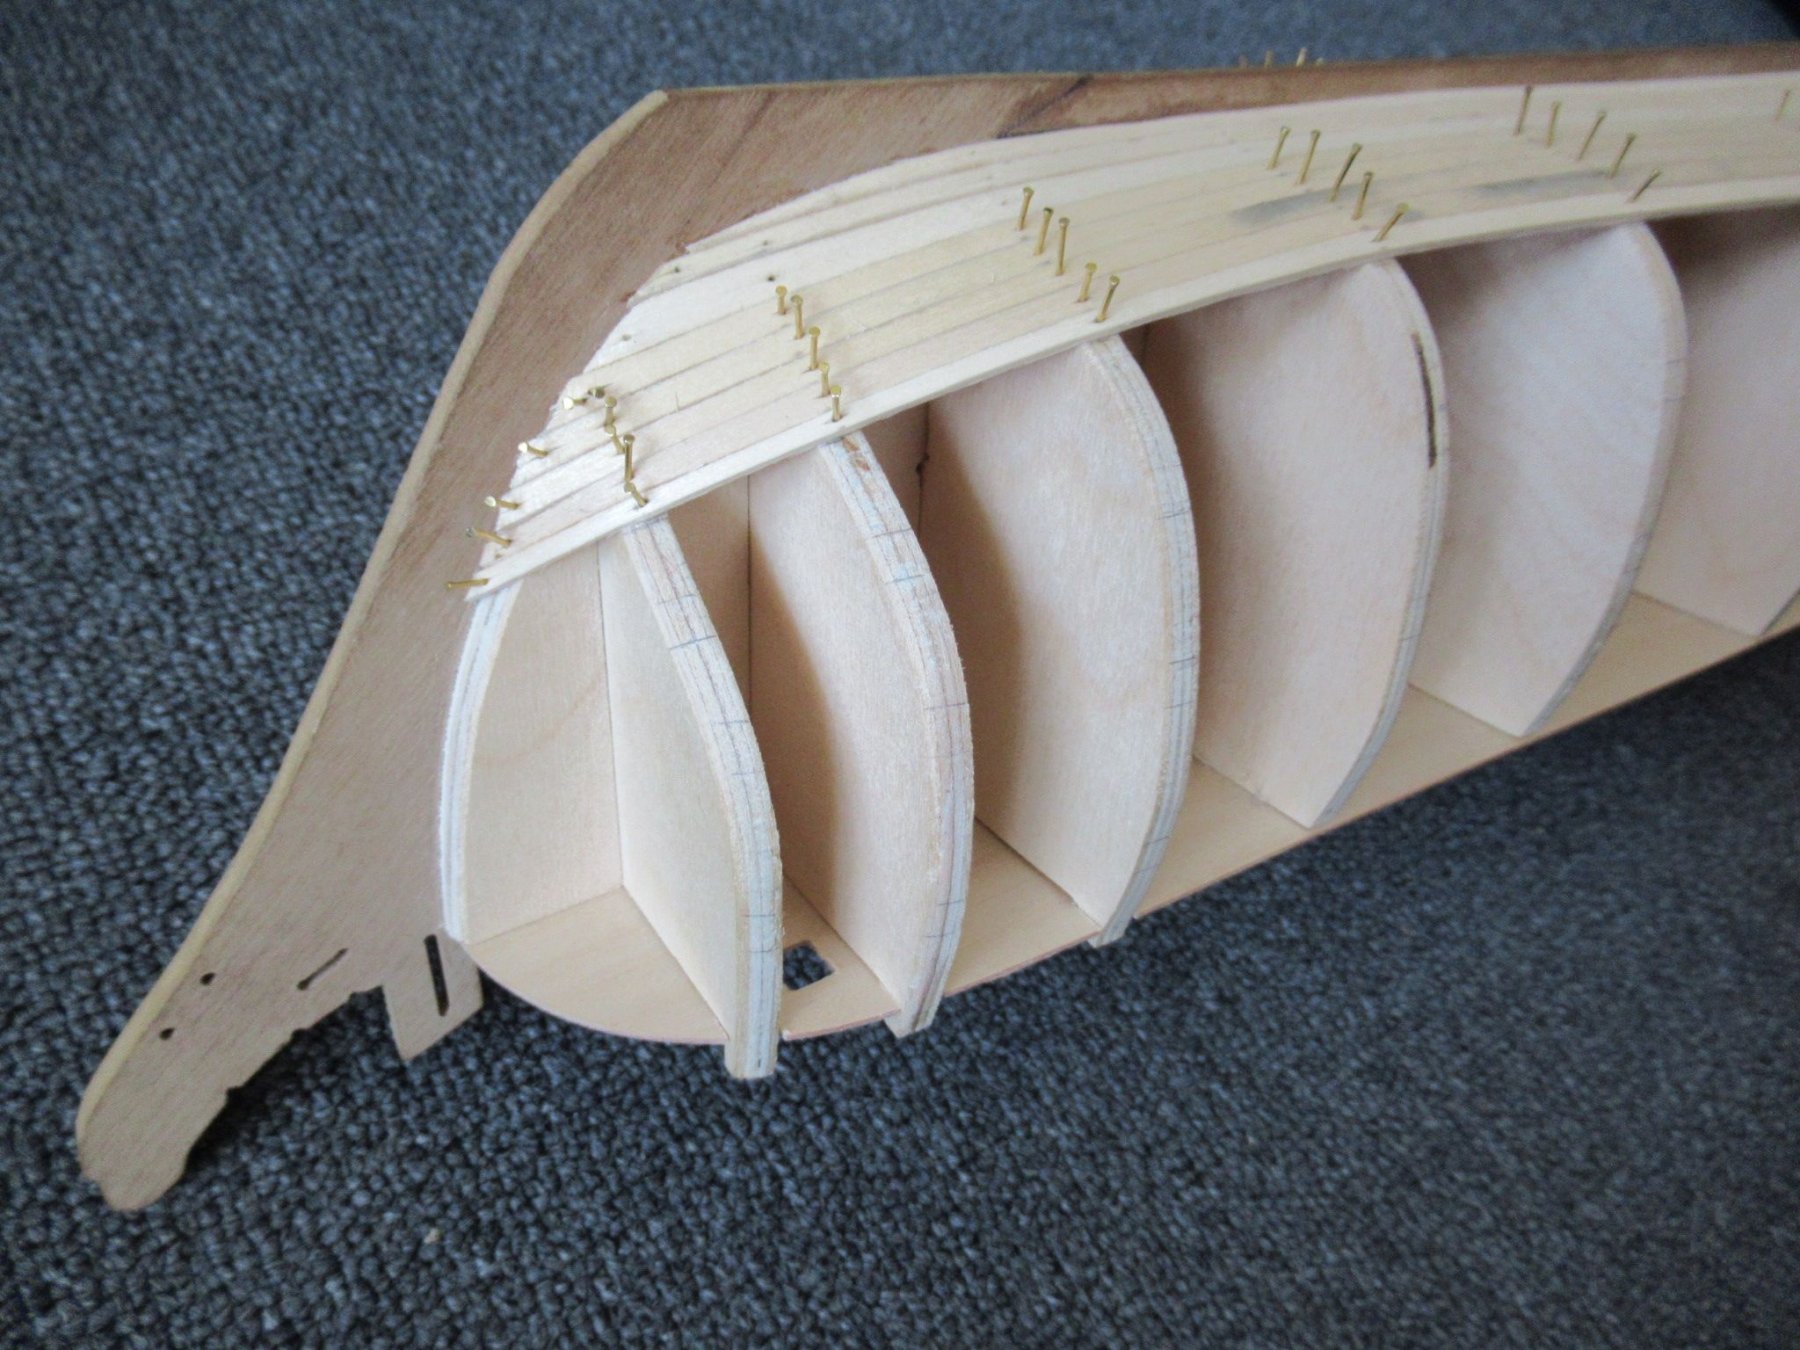
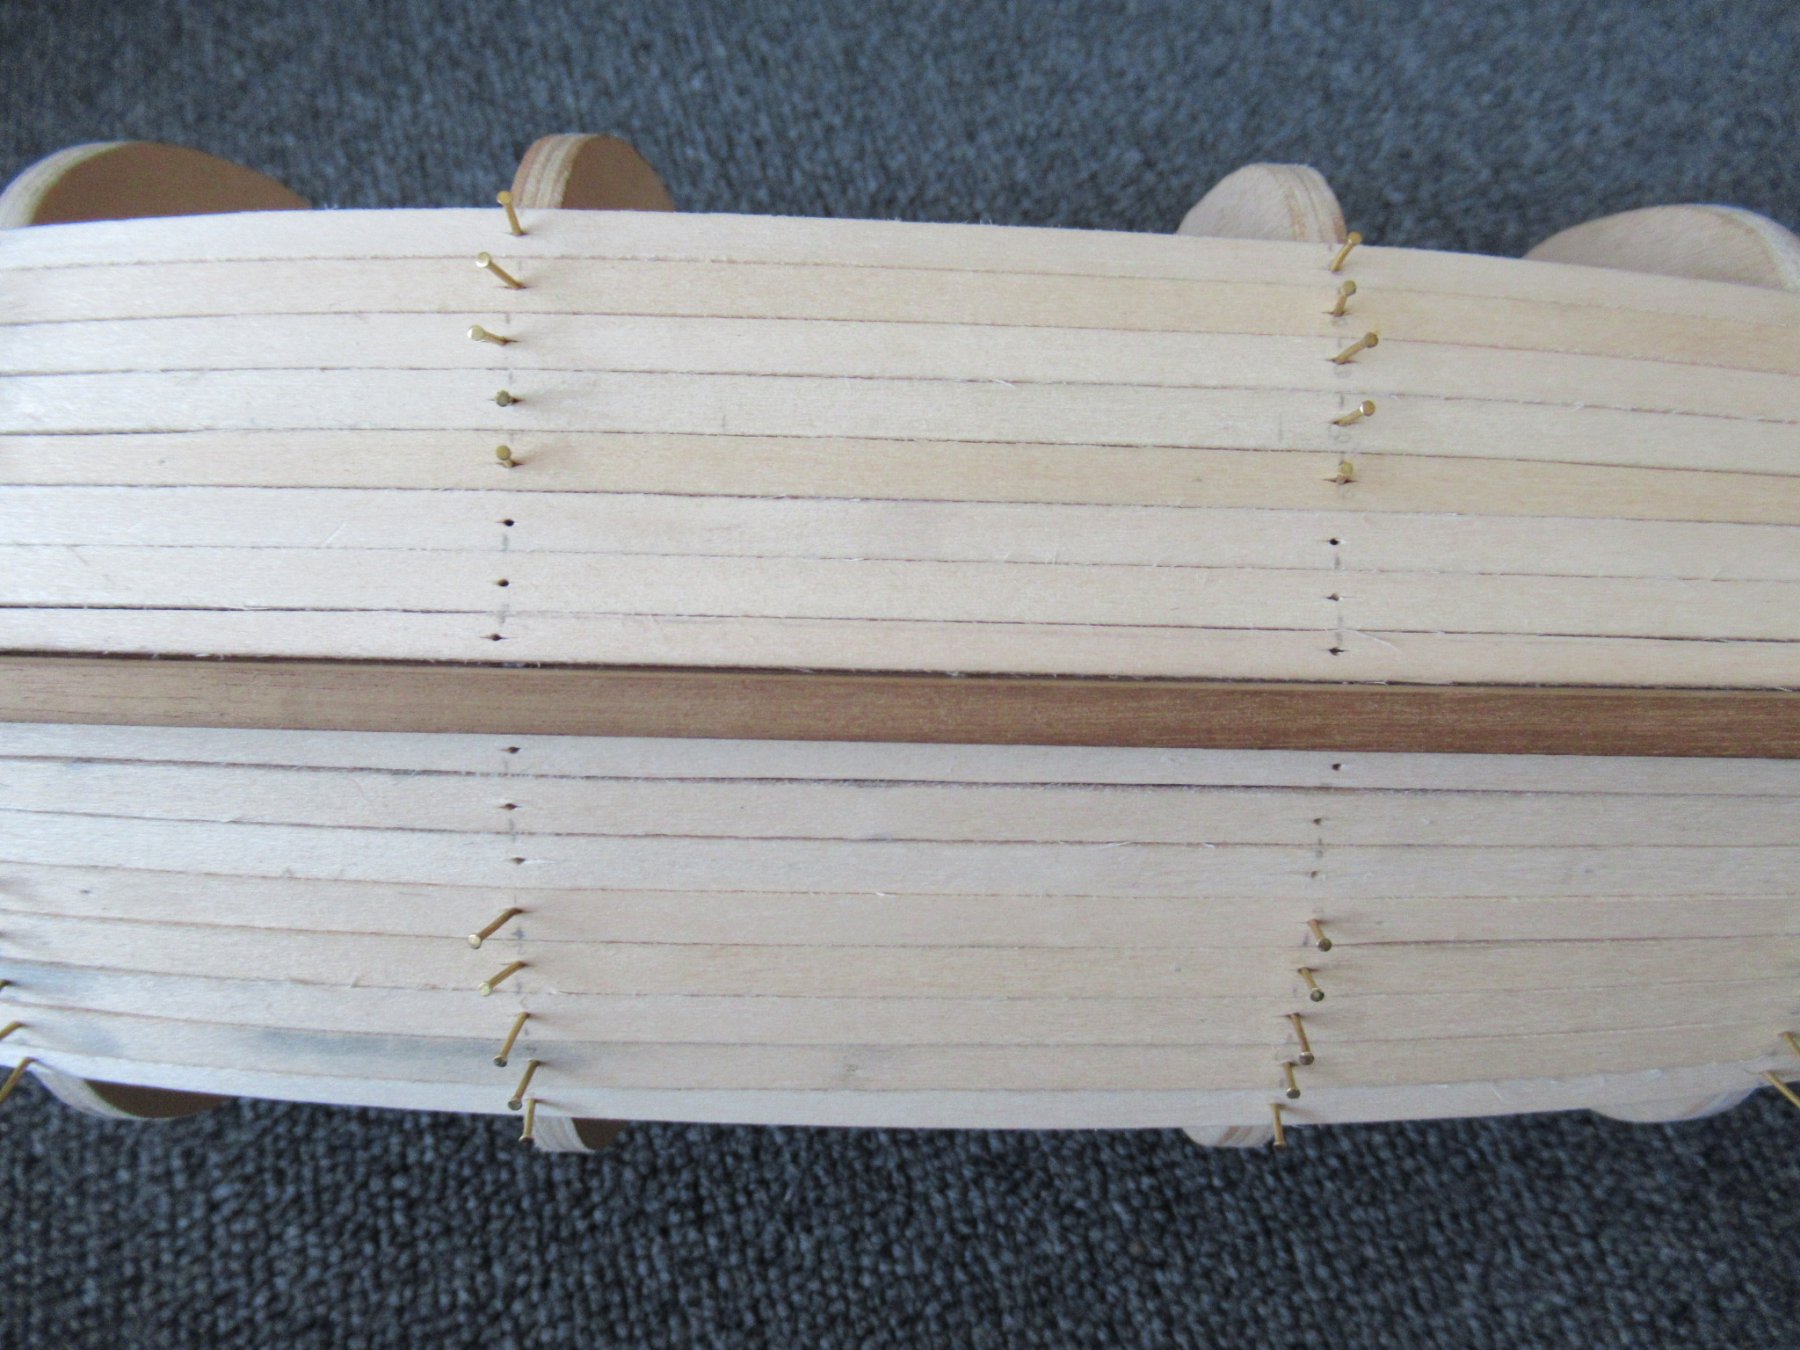
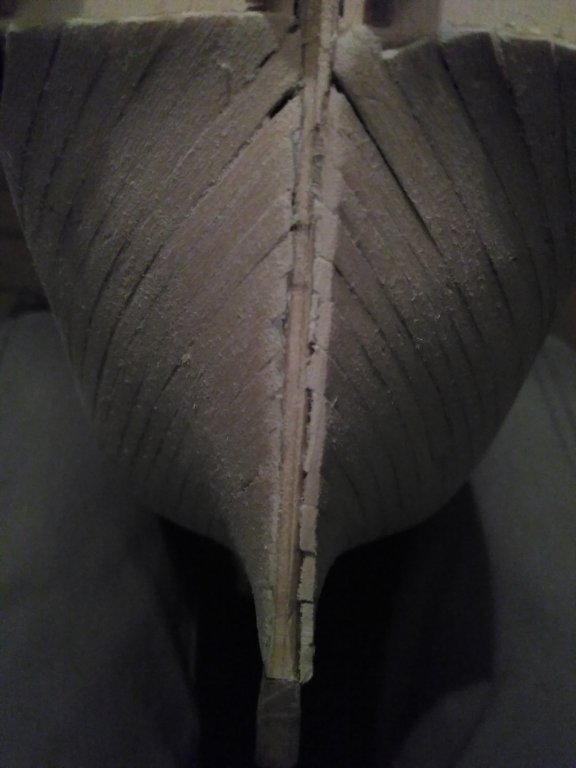
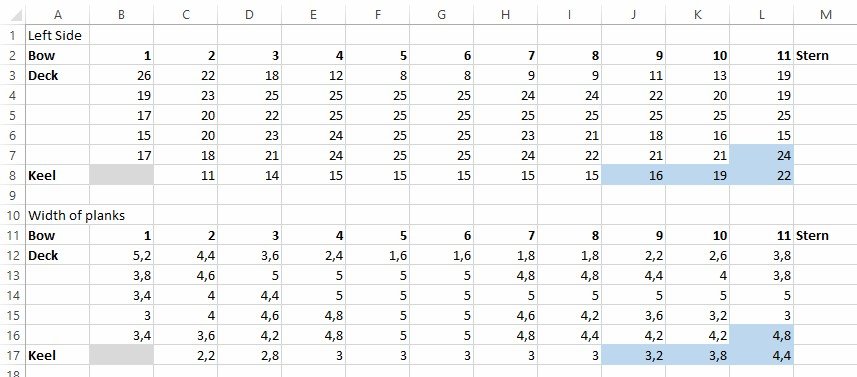
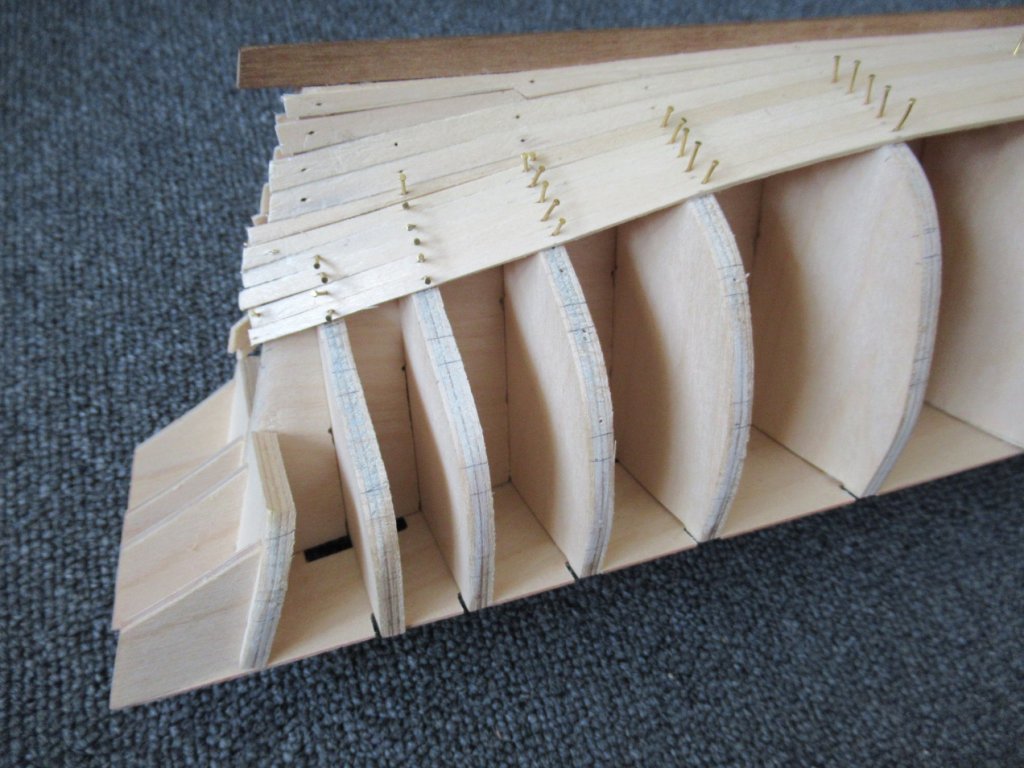
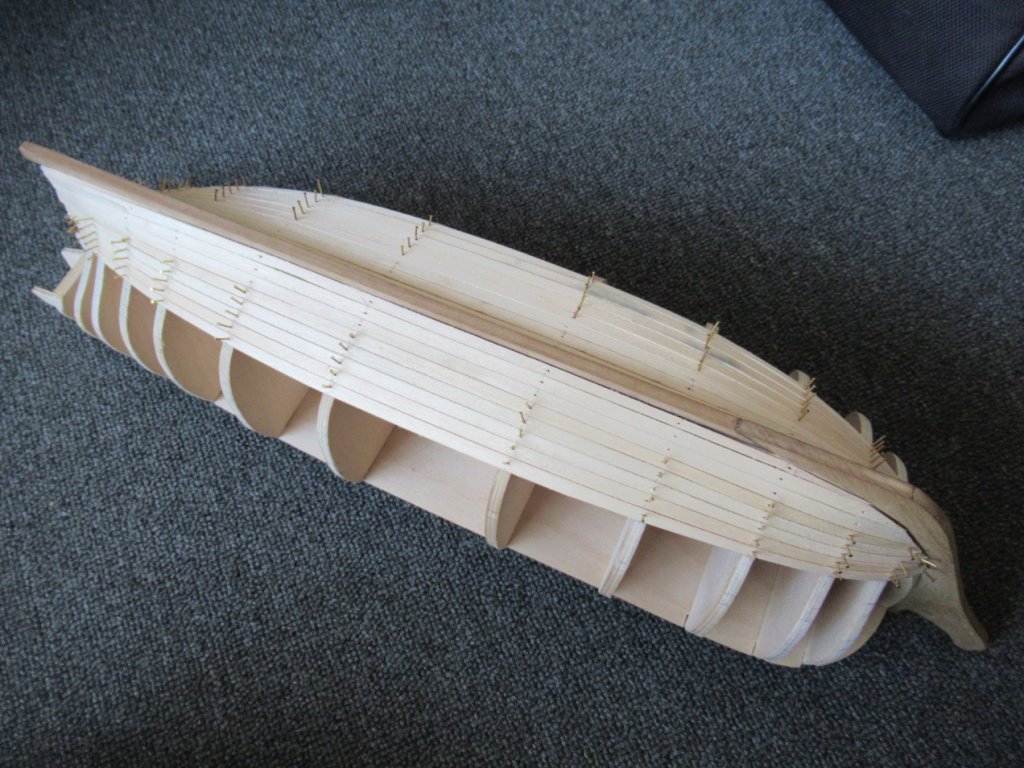
Thanks to a knee injury, surgery and subsequent recovery, I am finally making a comeback on my Bounty! Wrapping my mind around planking was a MASSIVE learning curve and a large factor in my near 6 year absence. Over that time I read and re-read the recommended planking manual and made several attempts at marking, measuring and even cutting a few planks. But without a solid block of time to figure it out, my efforts proved rather fruitless and the learning curve just too steep. Grounded from work and physical activity of any sort, the last few weeks have provided the ideal opportunity to overcome previous limitations. Planking continues to be a humbling experience but after a long time investment (and redoing all my measurements three times), I'm finally making enough progress to post again! I opted to go against the instructions of my model in favour of the method described in the beginner planking manual as I was concerned that my lack of experience wouldn't allow for me to overcome the challenges arising from planking from the deck down and just dealing with problems as they appear. The "full buttocks" nature of the Bounty made this method really difficult, and I found myself reconsidering how seriously to take the "don't bend the plank laterally" instruction; the math of my measurements just didn't seem to work. In the end I opted for a bit of a compromise and accepted some clinkering. Below is the temporary planking battens, only nailed to bulkheads 5 and 6 to allow for different curvatures to be experimented with. I used an excel sheet to record my measurements and make subsequent calculations. The Bounty also required me to try mastering stealers in the very first segment, as the kit doesn't come with a wider garboard plank. I found it near impossible to get a nail into keel to hold the furthest extent of the bottom stern planks and resorted to clothing pegs to hold them in place while drying. I learnt just how essential a metal ruler is, at the cost of a plank or two, as well as the vital importance of proper hull fairing (one of the reasons I had to start my measuring from scratch again). I soaked the planks for ease of cutting and bending (with the help of a steam iron) and subsequently learnt how much they shrink when drying. I took to gluing the planks down after they dried to minimize those resulting gaps and discovered how much harder it is to drive a nail into a dry plank compared to a wet one, leading me to now put in all the nails before letting the plank dry. I'm now two bands in and going steady. The third promises to be the most difficult due to the way the hull curves, but being the first planking, it doesn't have to be perfect, just a good learning experience so that I can do the second planking better!


-
Thanks a lot for all the help and advice; I greatly appreciate it!! I have read a lot of the articles that are up and have found them invaluble. They are the only reason I sound vaguely like I know what I'm talking about;). I hadn't put two and two together with the copper plating covering the hull, so thanks Edward, that really helps. I filled the crack with sawdust and glue and sanded it straight so it now looks a bit better and the copper plates should go over it nicely. Thanks Brian for the tip about varnishing first when filling in gaps later. It's obviously not serious with this gap as I'll be covering it, but the glue did leave the surrounding wood a bit darker, as you predicted. On Slog's advice I did double and tripple check that bulkhead 6 is actually bulkhead 6. I was also a bit suprised that the fit was that far off on a Caldercraft model, but apparently it happens coz that bulkhead is definitely in the right place. Thanks for the advice about checking that both sides line up, I'm not sure that I would have thought of that on my own. I sanded it down, and now it all fits:). Yes I had already glued the sternpost in place. My instructions said nothing about sanding down the stern and directed me to glue the sternpost on right away. It does make sense, however, and I see on Dan's Bounty log that he did it as well, so thanks so much Jason for pointing that out! I managed to unstick my sternpost with the blade of a craft knife, so it wasn't too late to do as you suggested:). My next challenge is bevelling the bulkheads and plank termination patterns. I've started one side of the bow already. So far it seems to be going well, but this step is promising to keep me busy for a while:)