
DavidG
-
Posts
202 -
Joined
-
Last visited
Content Type
Profiles
Forums
Gallery
Events
Posts posted by DavidG
-
-
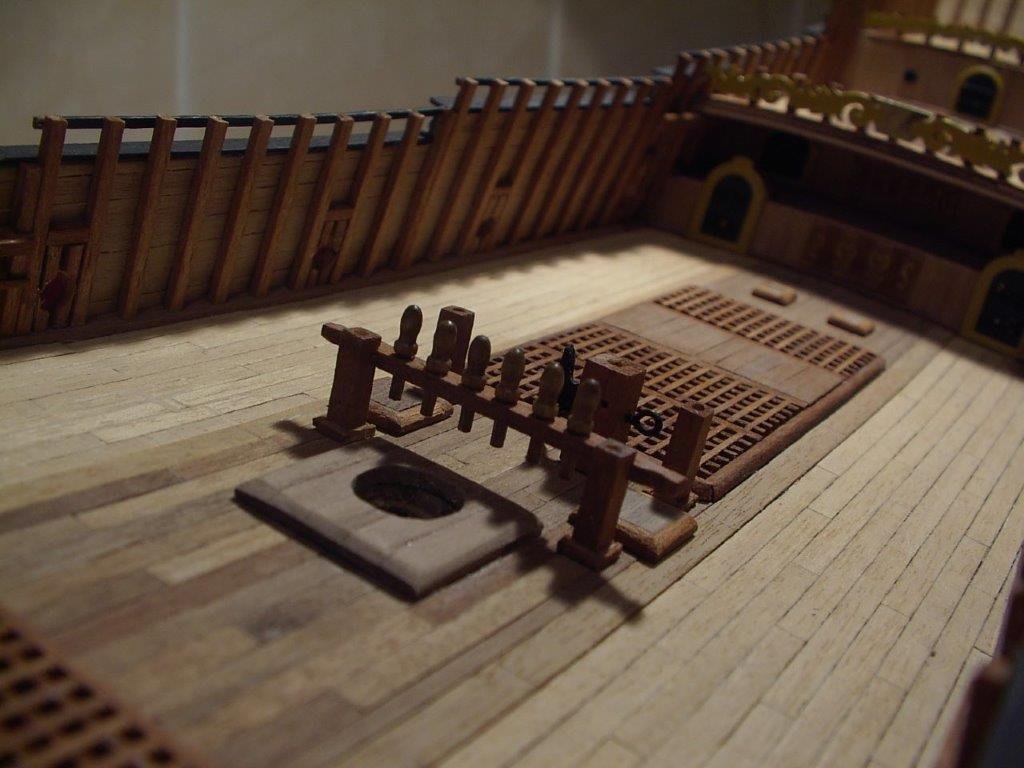
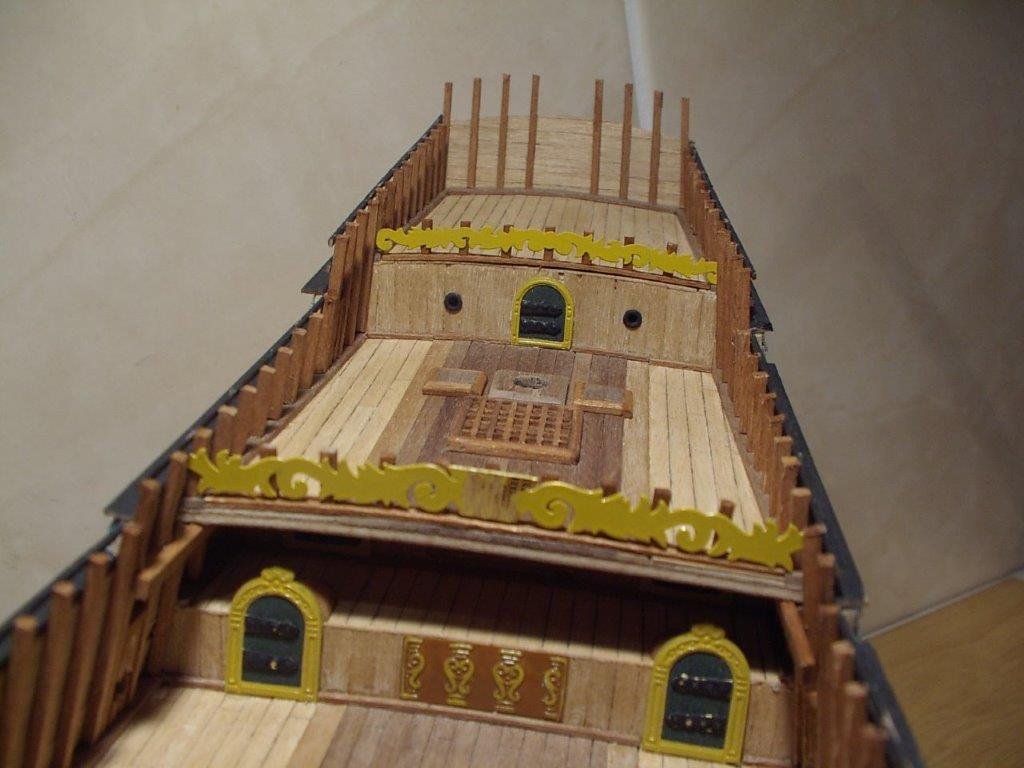
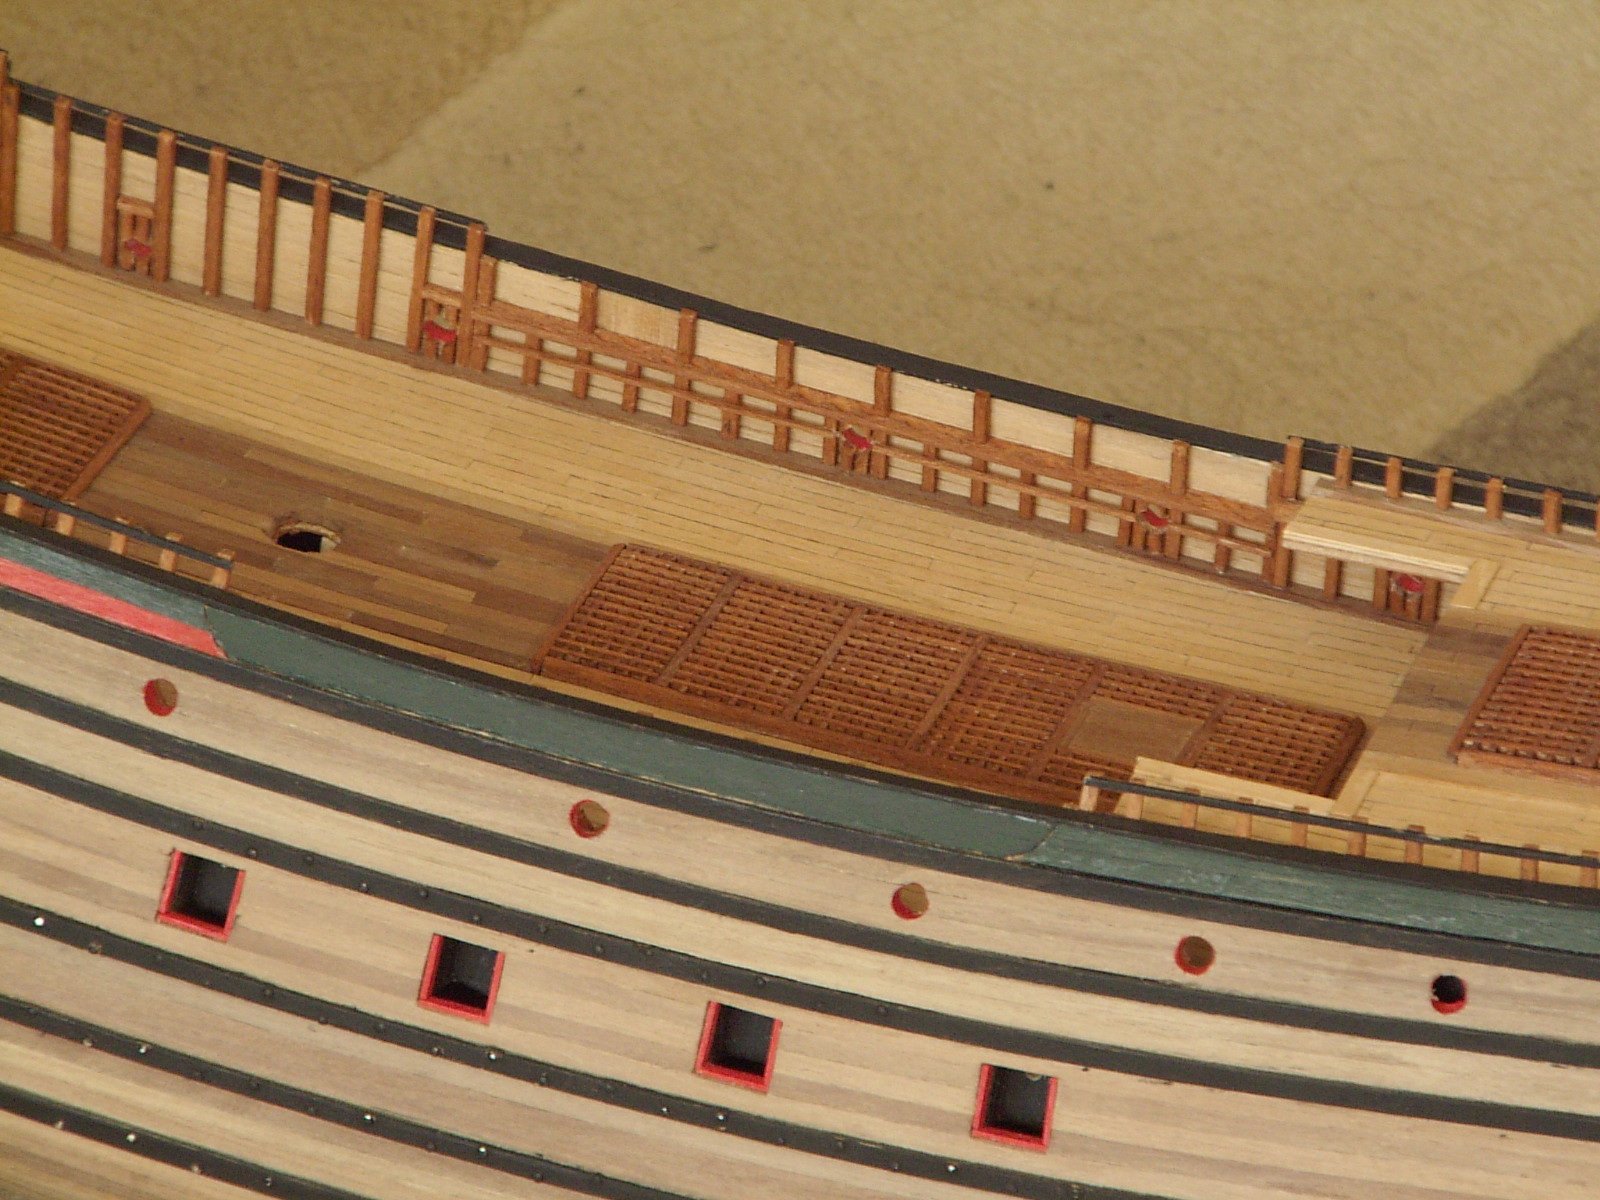
the next step is fitting out the deck with various hatches, gratings and decorations. If I was to do it now, should have replaced the gratings to smaller ones. but that time there wasn't such a supply of aftermarket parts. It is one area of the model I'm the least satisfied now.
In this stage the first step is also taken on the road of endless painting of parts.
-
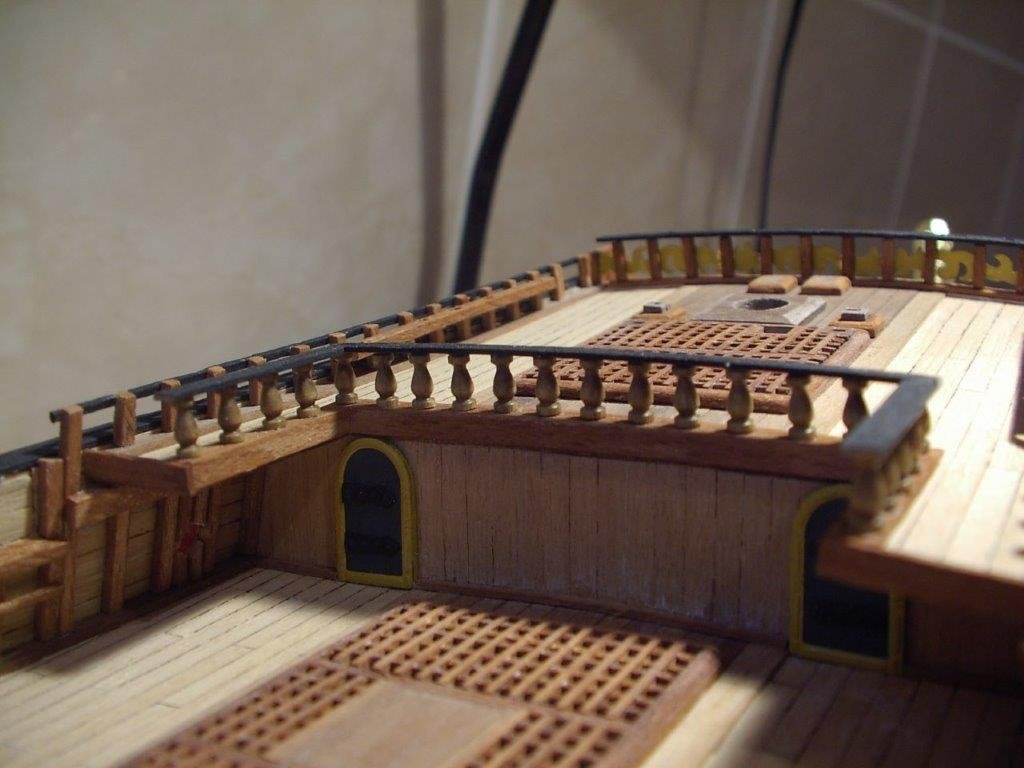
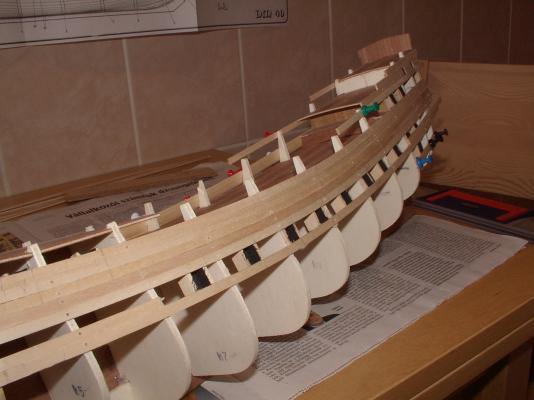
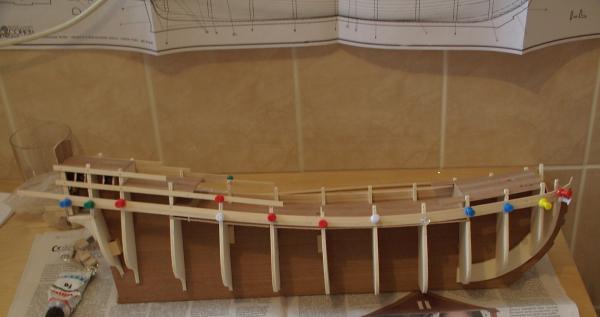
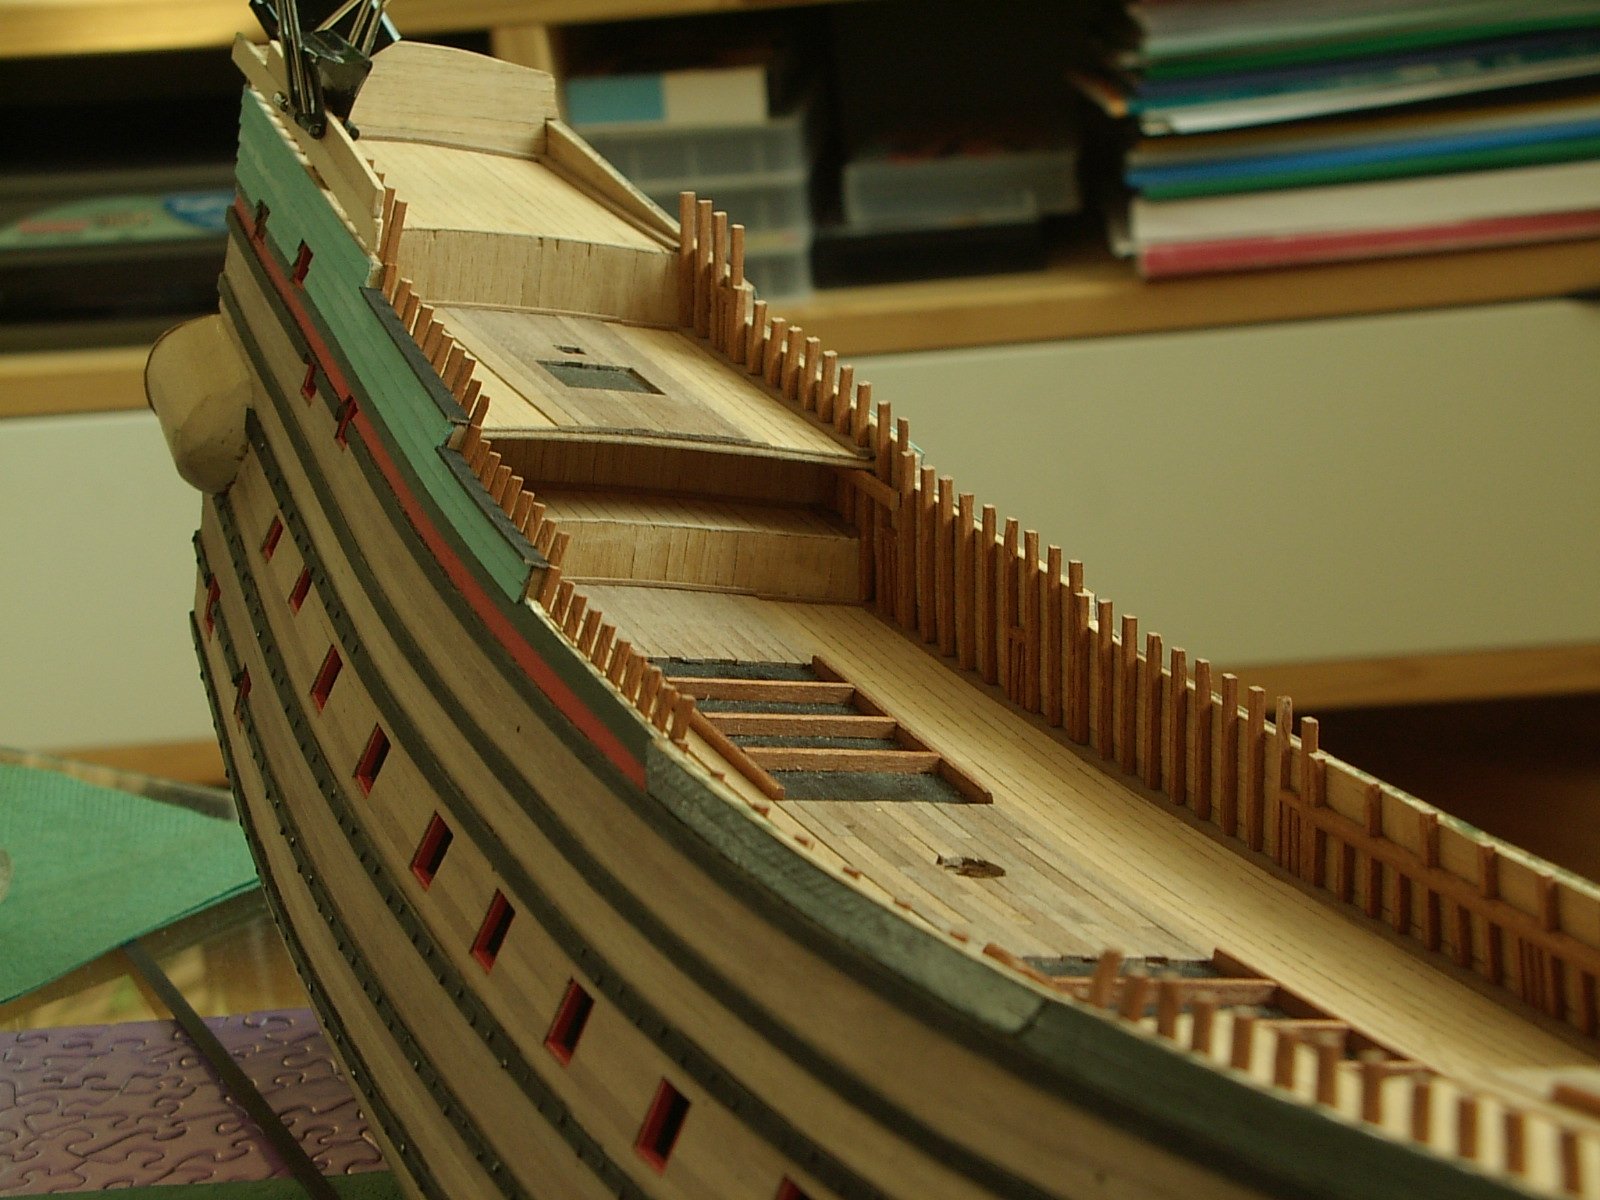
after the inner bulwarks planked, the posts glued in place. there are a several hundred of them..
this is the point when the kit switches to beech strips, not a favorable move. in such a small section (2x2 mm and like) they don't hold the edge at all, and it makes cutting them nicely very difficult.

- Eddie, coxswain and FrankWouts
-
 3
3
-
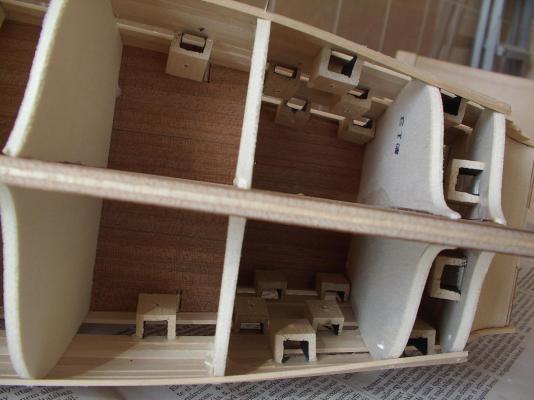
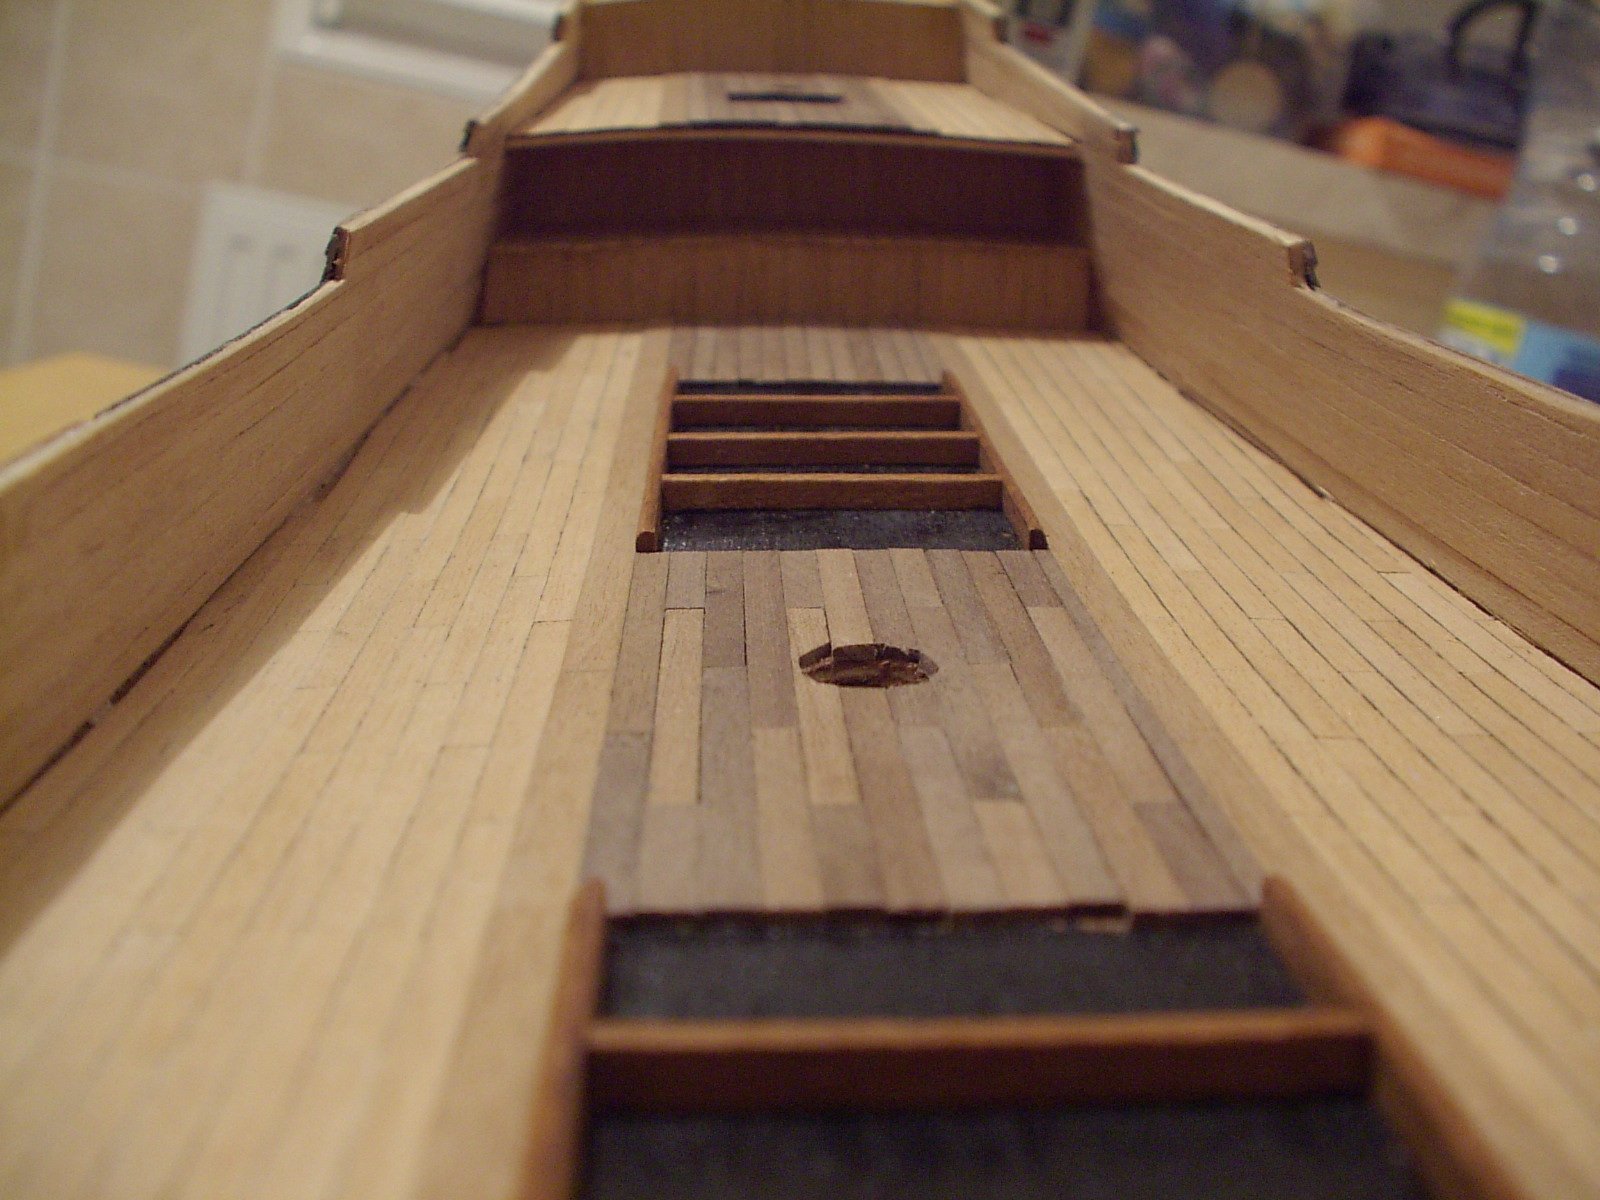
deck planking is straightforward. the middle section is reinforced by thicker walnut planks - don't know how authentic it is, but looks fine.
there are no actual openings below the gratings, the black paint covers the ply deck.

- coxswain, FrankWouts and Eddie
-
3
-
after a year into the build, the planking is done as the work on the deck starts

- coxswain, Eddie and FrankWouts
-
3
-
an area with clinker planking, painted as the kit instructions suggests.
- Eddie, FrankWouts and coxswain
-
3
-
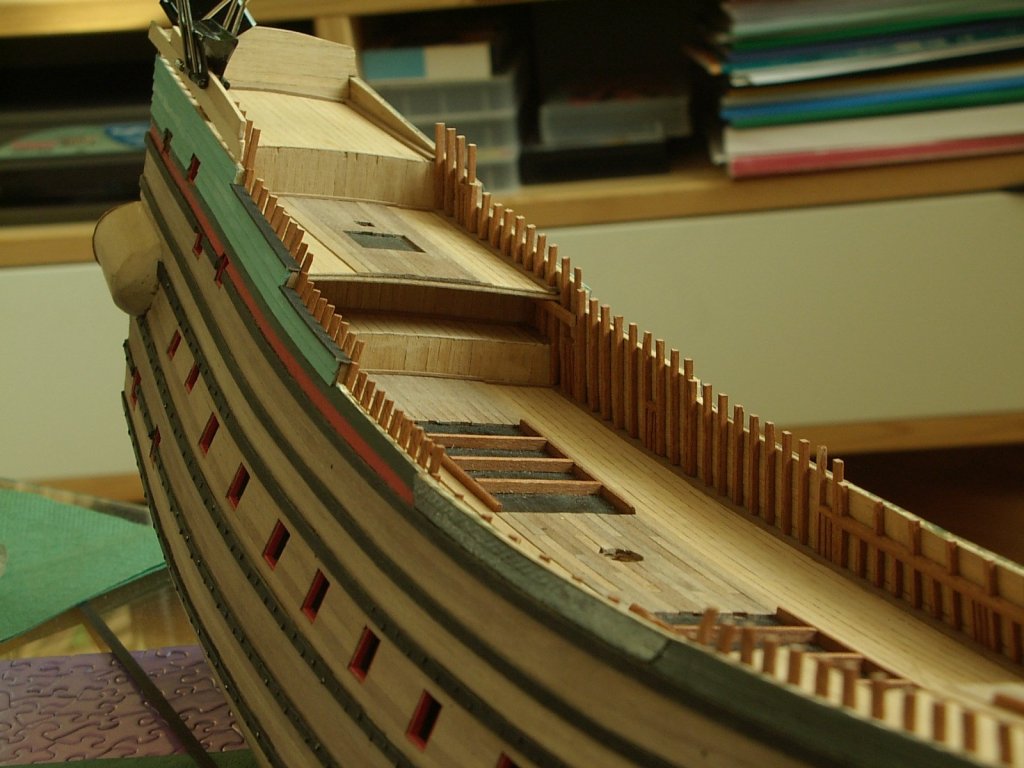
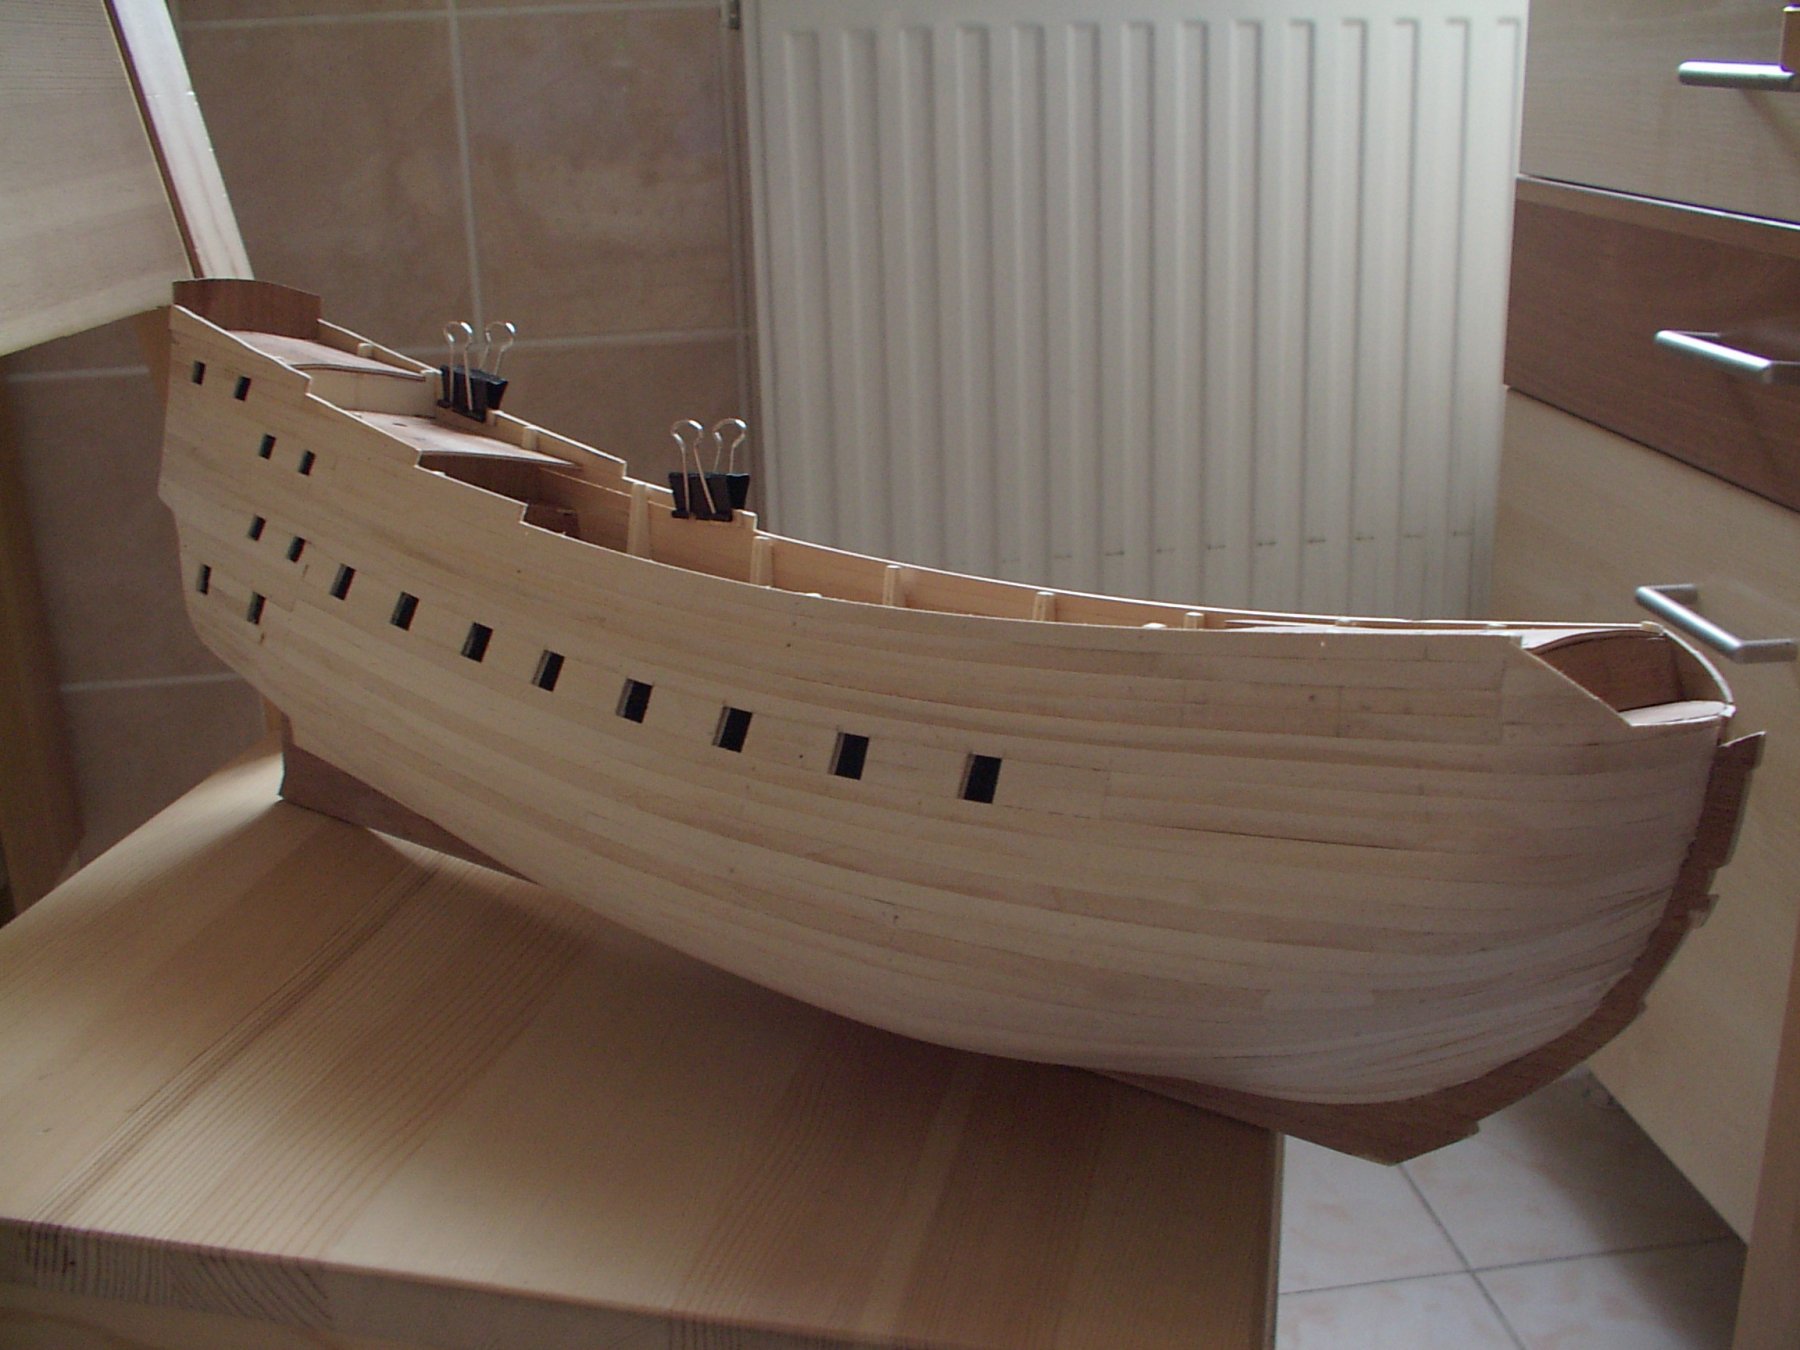
I prepainted the edges of the wales.
there are quite severe bends at the bow, but the wood took them pretty well.
- Eddie, coxswain and FrankWouts
-
3
-
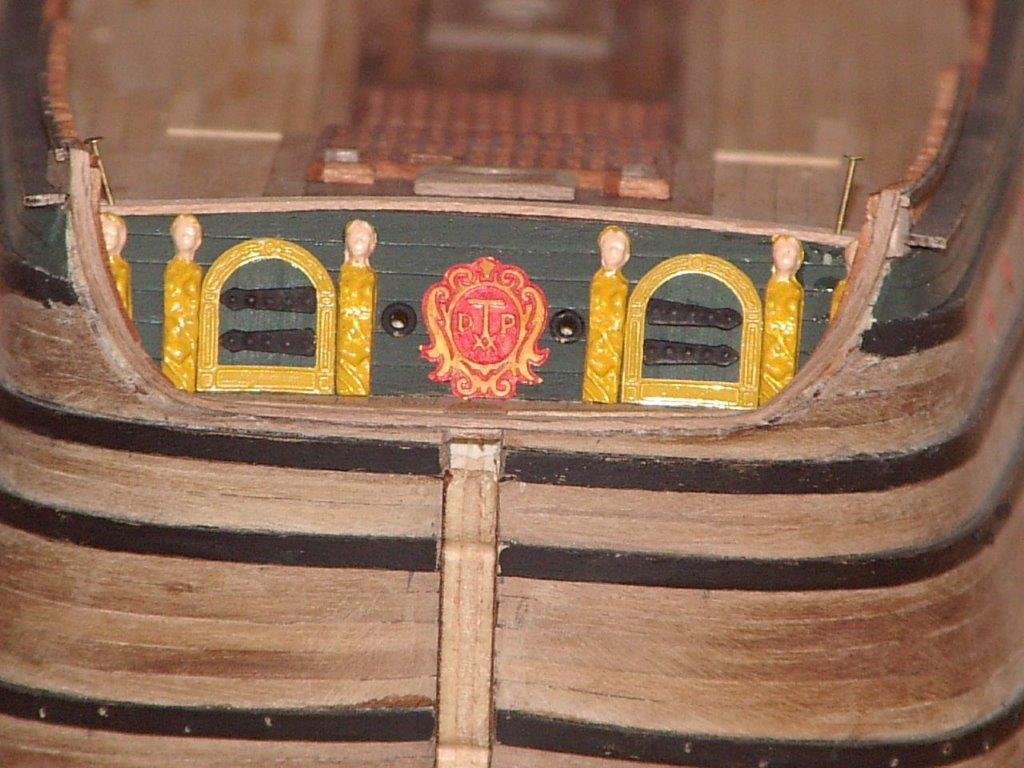
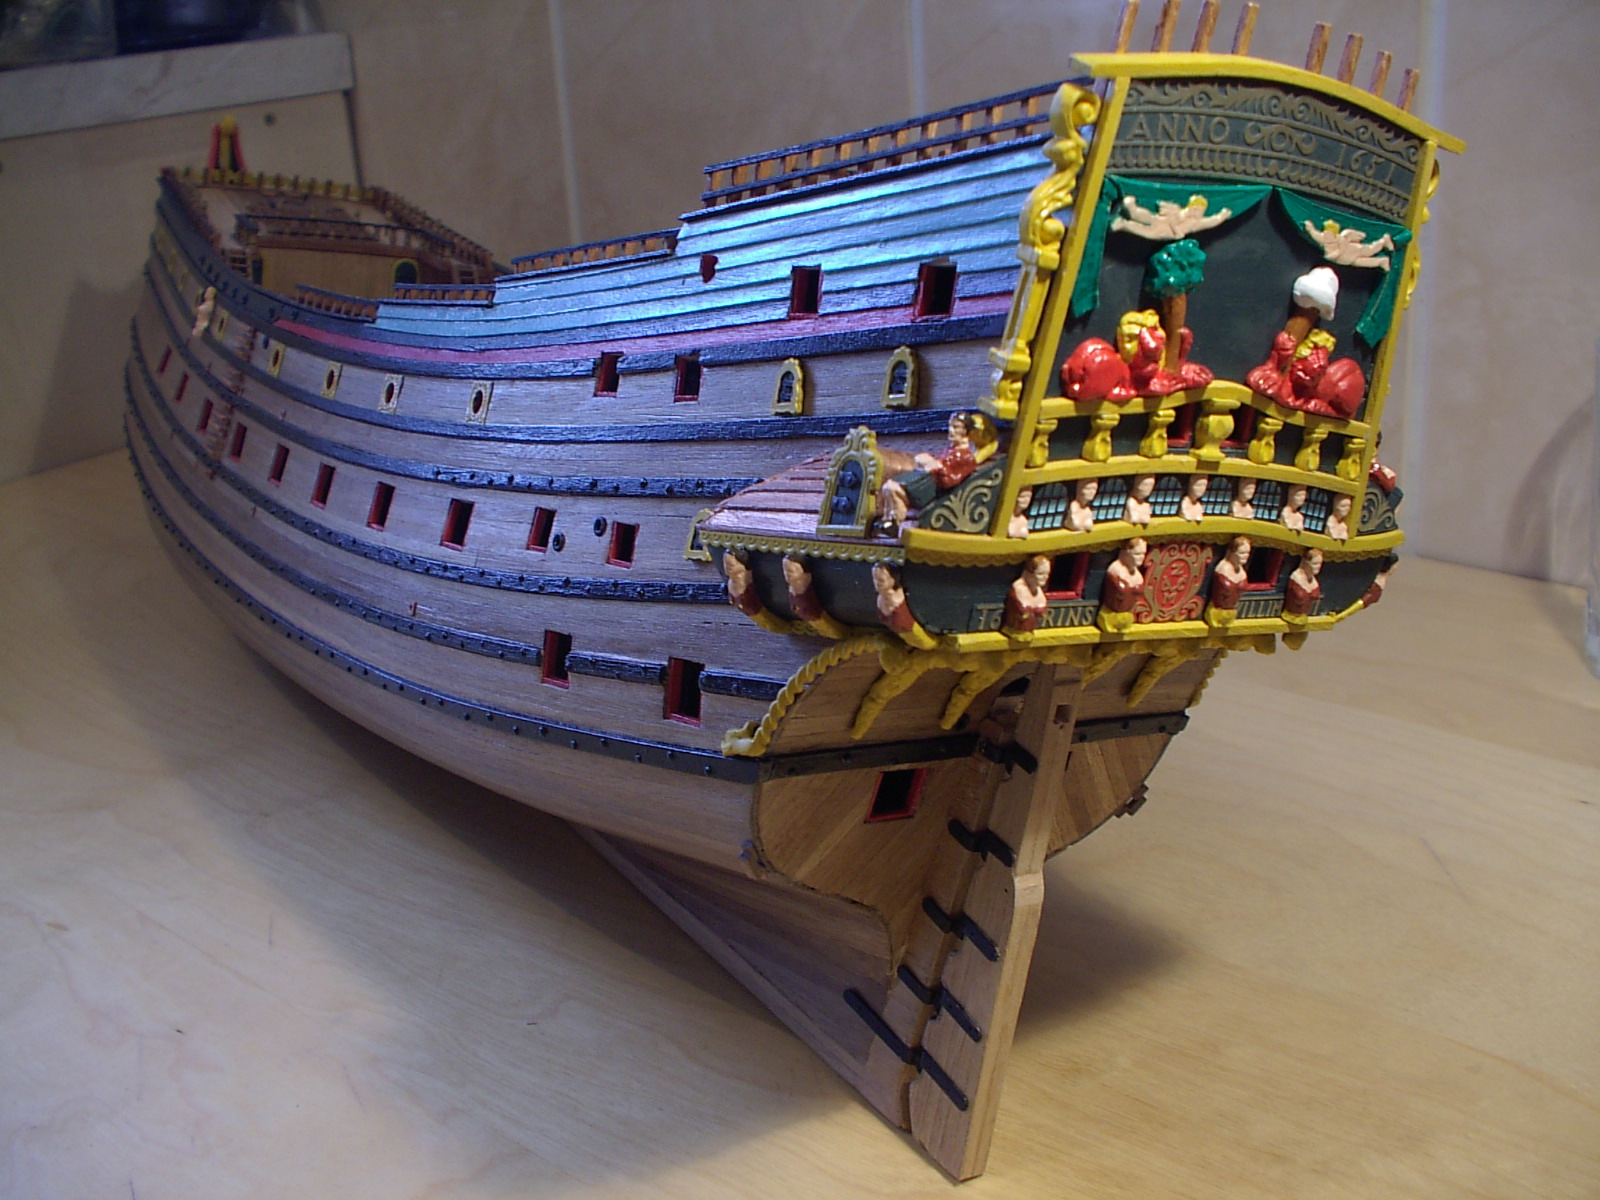
the quarter galleries are carved from a block. they are preshaped in section, but the forward profile must be carved in. a pretty difficult task, especially I used a very basic toolset. If it is inevitable to have some blood in the model... this one has mine. Seriously, do not carve hardwood, held in your hand, with a knife in the other hand. Lesson learned.
The blocks finally glued in place. As they will be planked and heavily decorated, there is still opportunity to adjust the shape.

- Eddie and FrankWouts
-
2
-
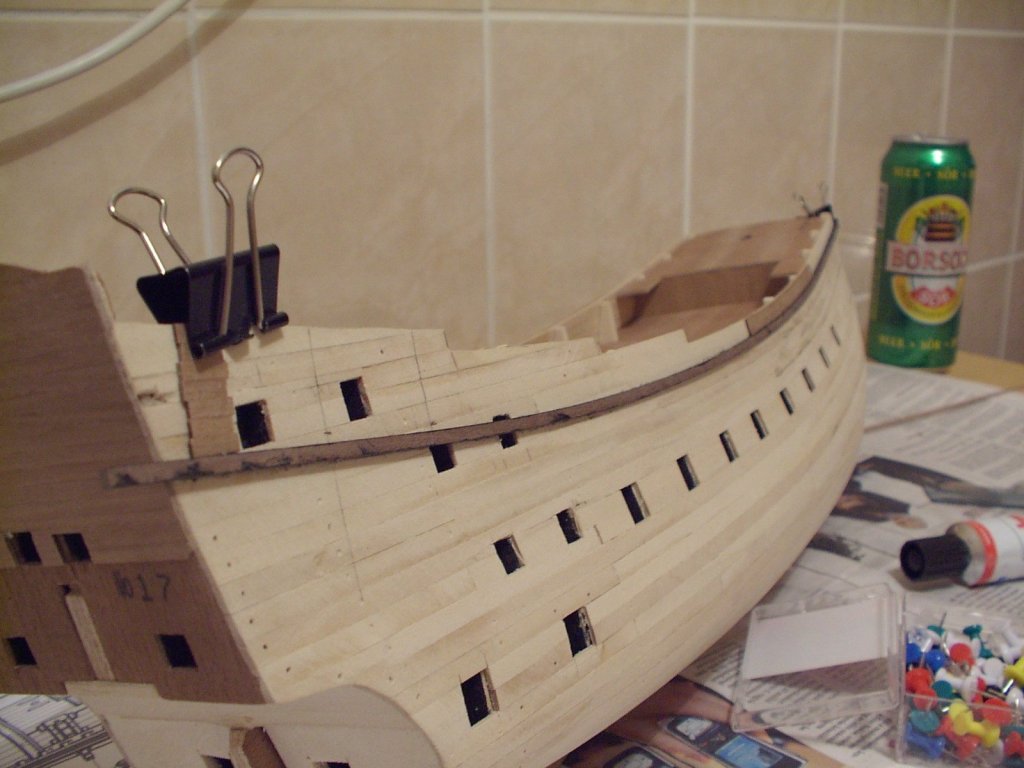
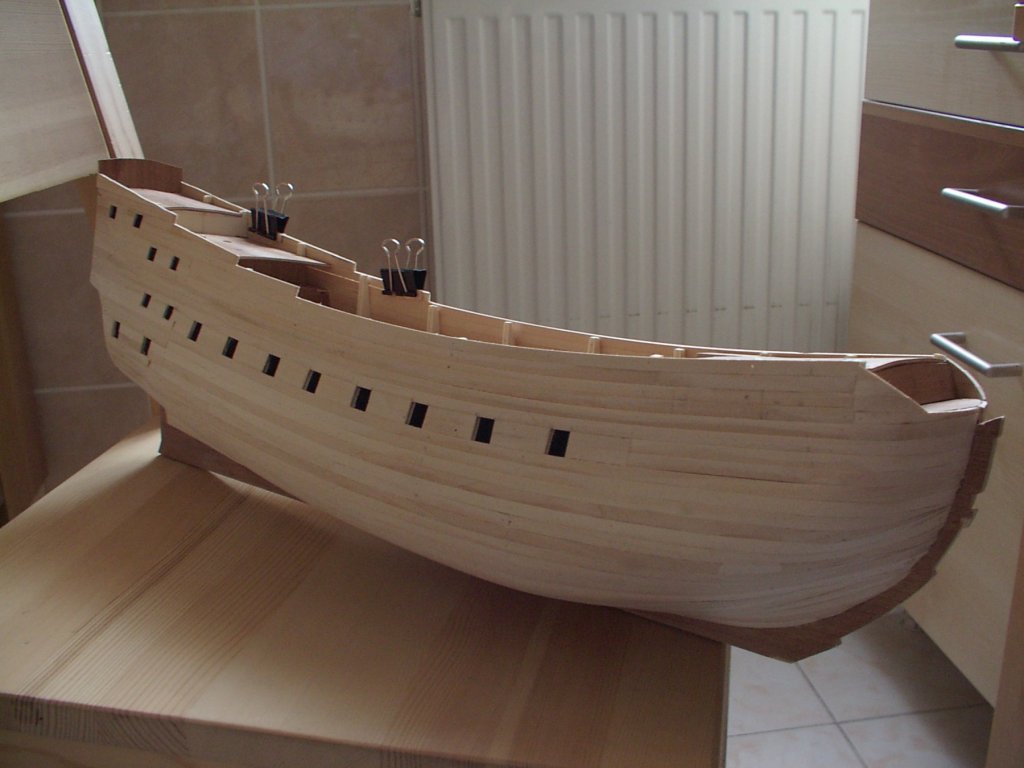
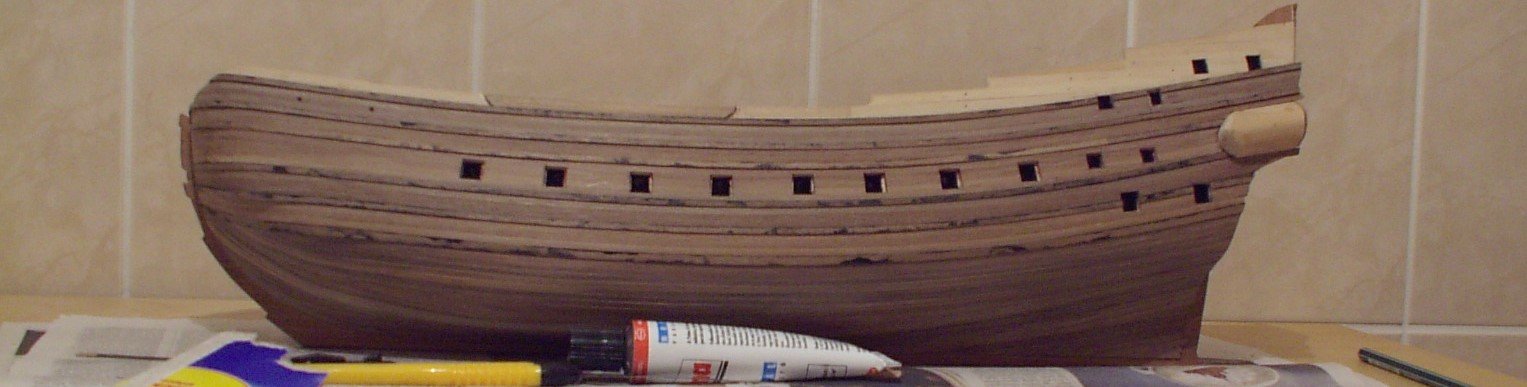
start of the second planking with the highest wale. as for the first layer, the wood was well cut, straight, and uniform in width. not uniform in color, so some sorting was needed, but now after ten years I see the planks of different color blend together nicely. The dark strips became lighter over time. A spacer, made up from the required number of planks helped to position the wale strip near the stern.
- FrankWouts and Eddie
-
2
-
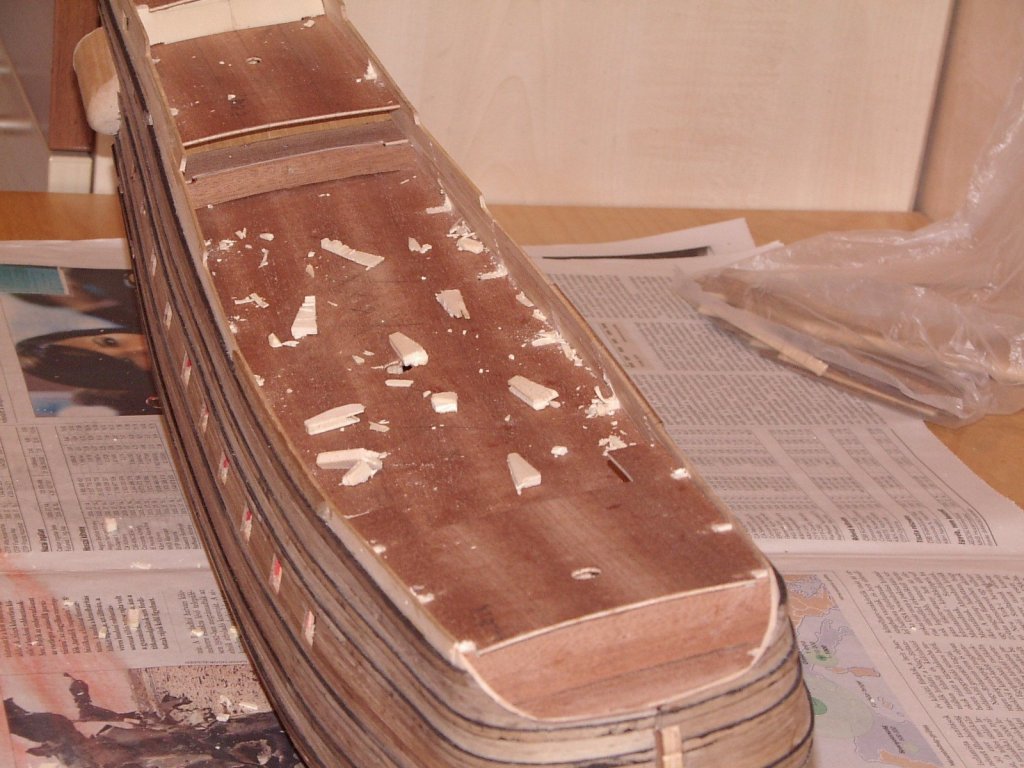
thank you for the comments.
can't believe a year passed since the last update.. log writing goes as slow as building..
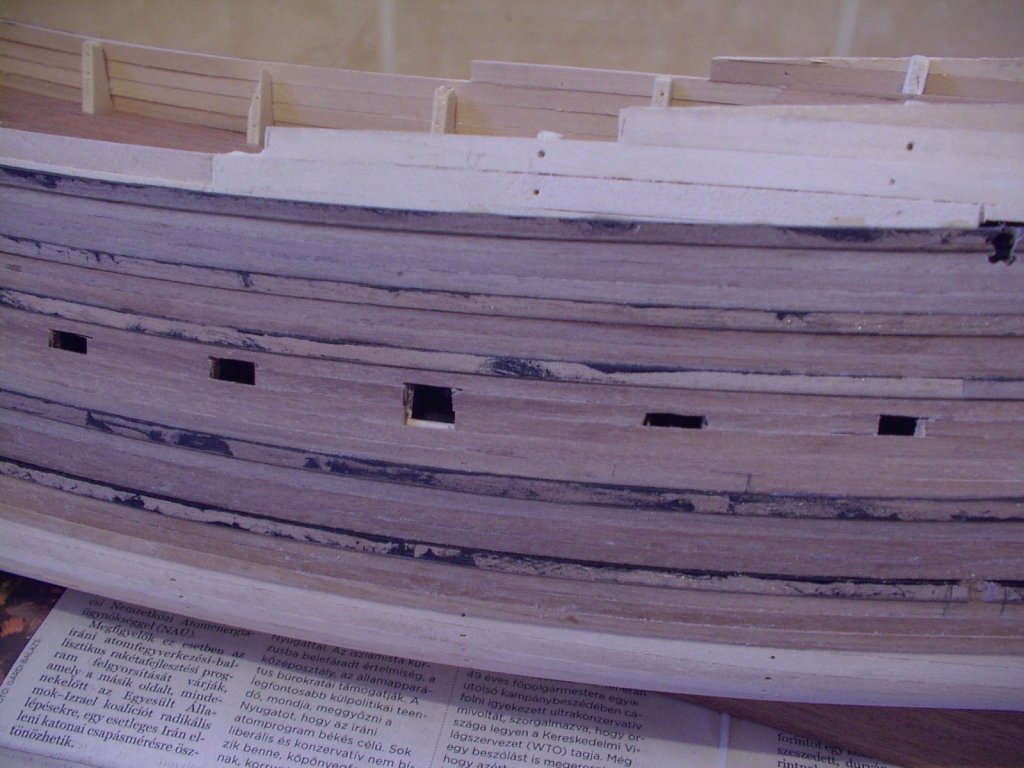
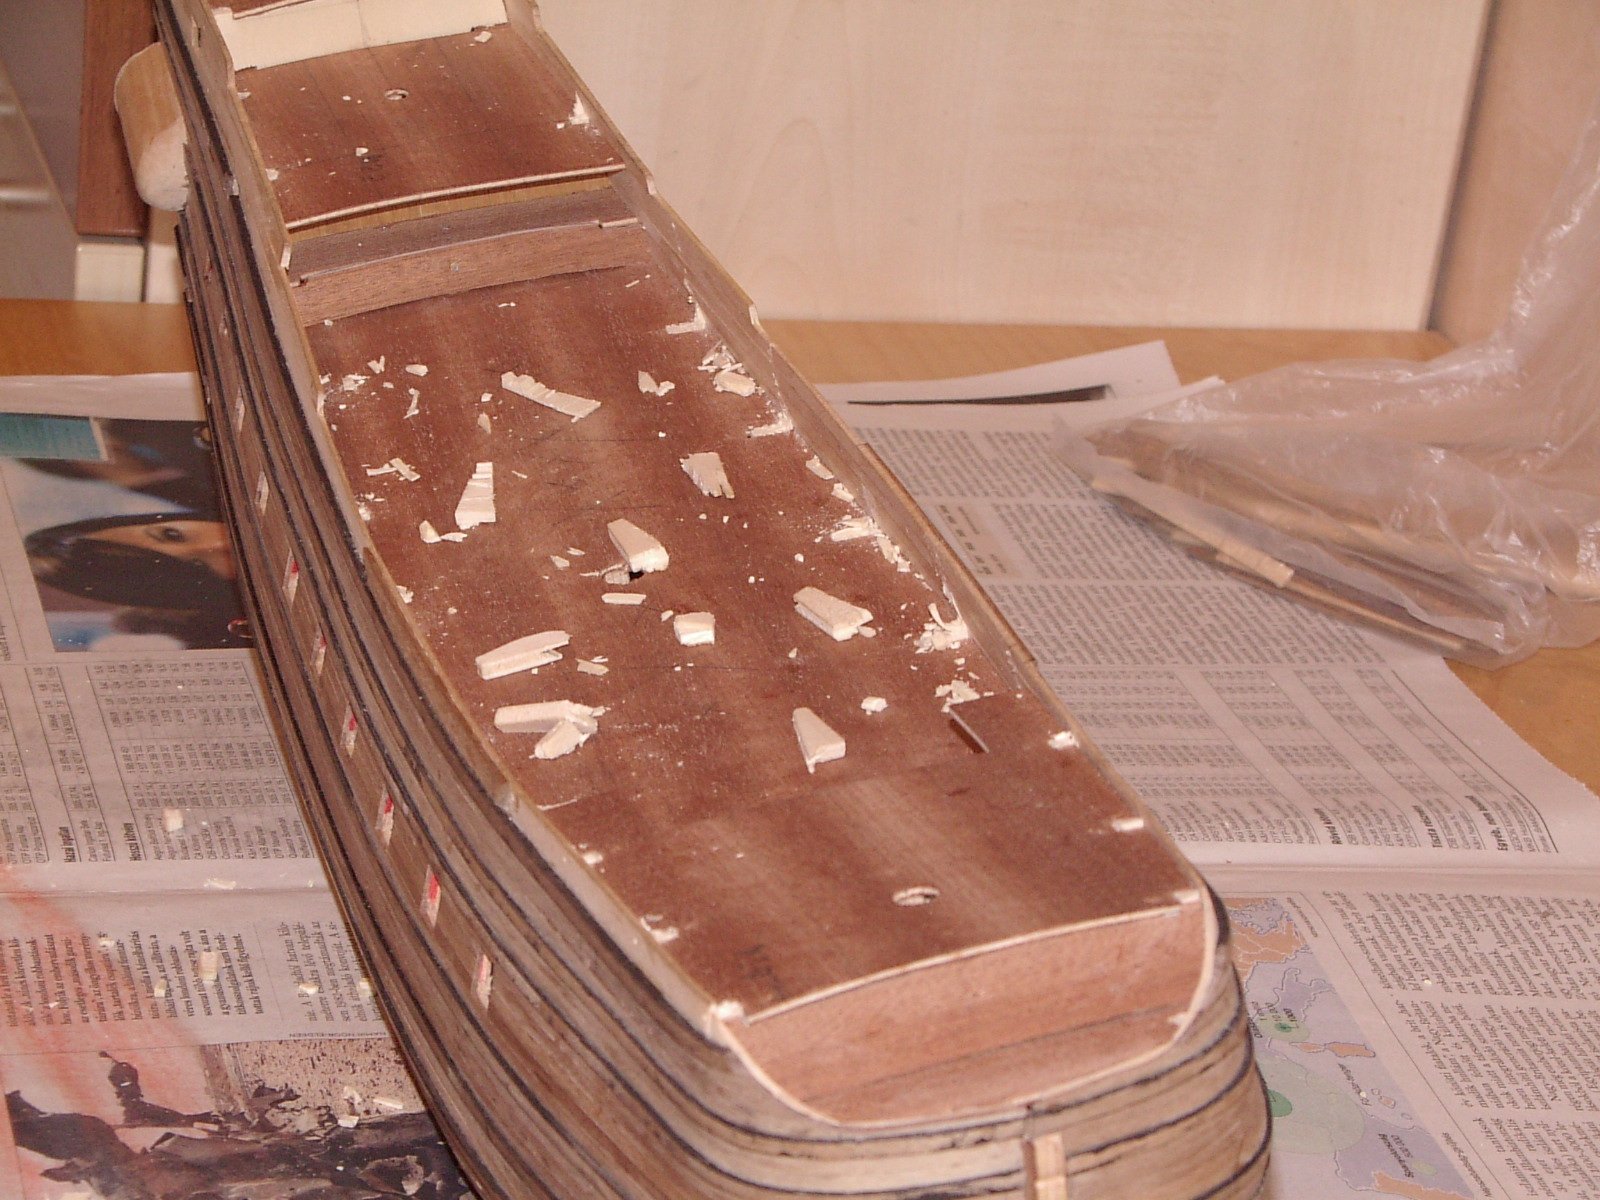
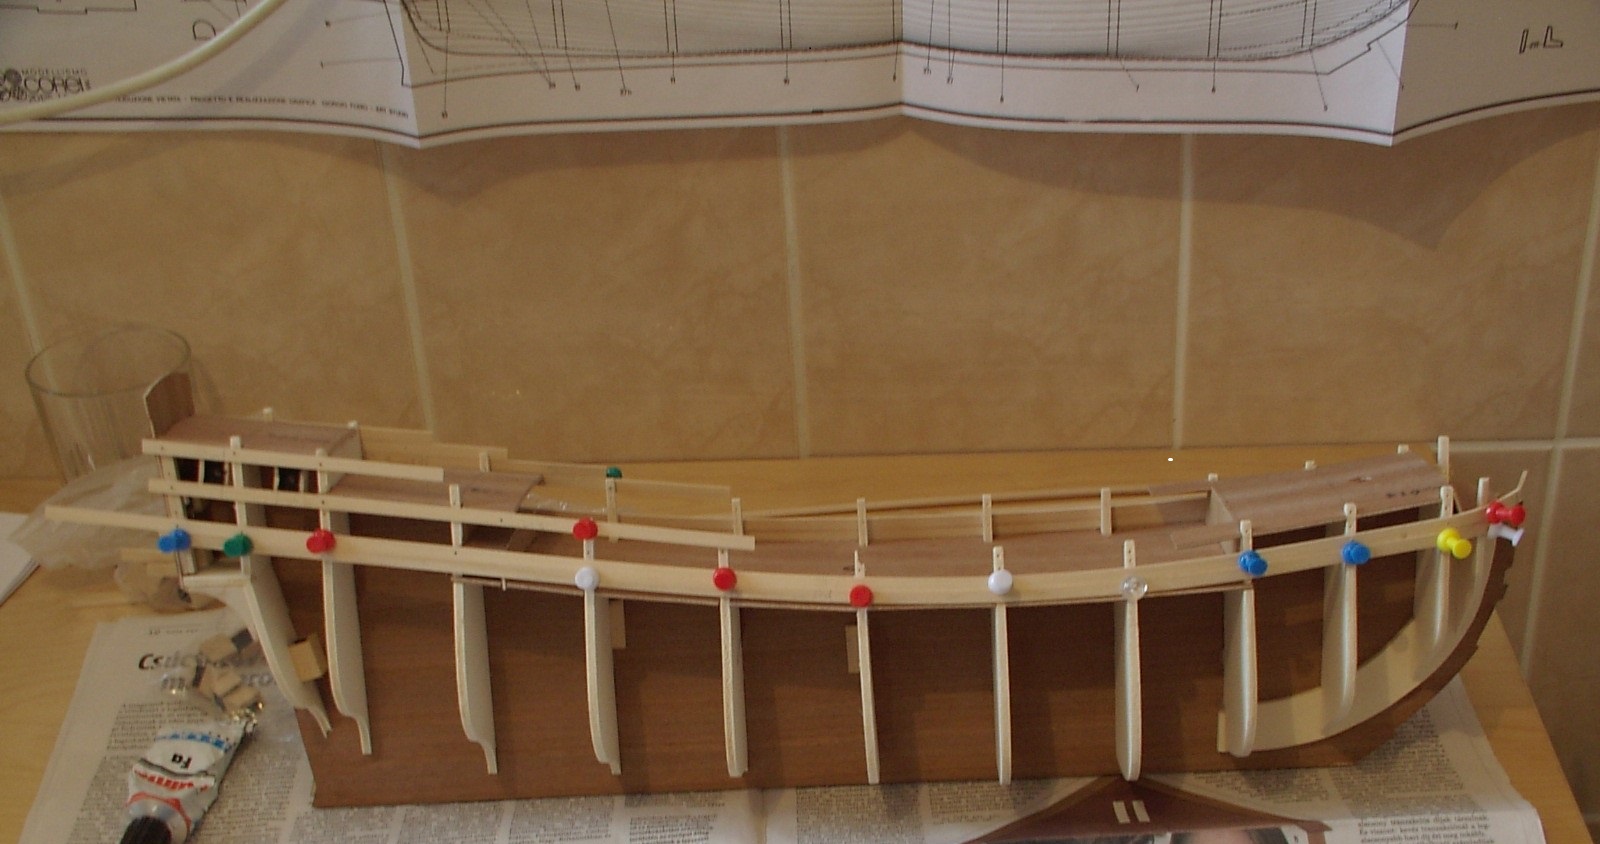
here is a picture of the first planking, actually my first properly planked hull. I was satisfied with it, but most importantly the whole planking was trouble free. I wasn't sure in the beginning, but it gave me the hope that I will be able to build the ship to a reasonable standard.
I still like the idea to have the flow of gunports defined by the planking strips above and below.
- FrankWouts, Eddie and coxswain
-
3
-
Cornwall model boats sells corel accesories
http://www.cornwallmodelboats.co.uk/acatalog/corel-decoration.html
give it a try,
David
-
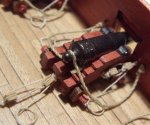
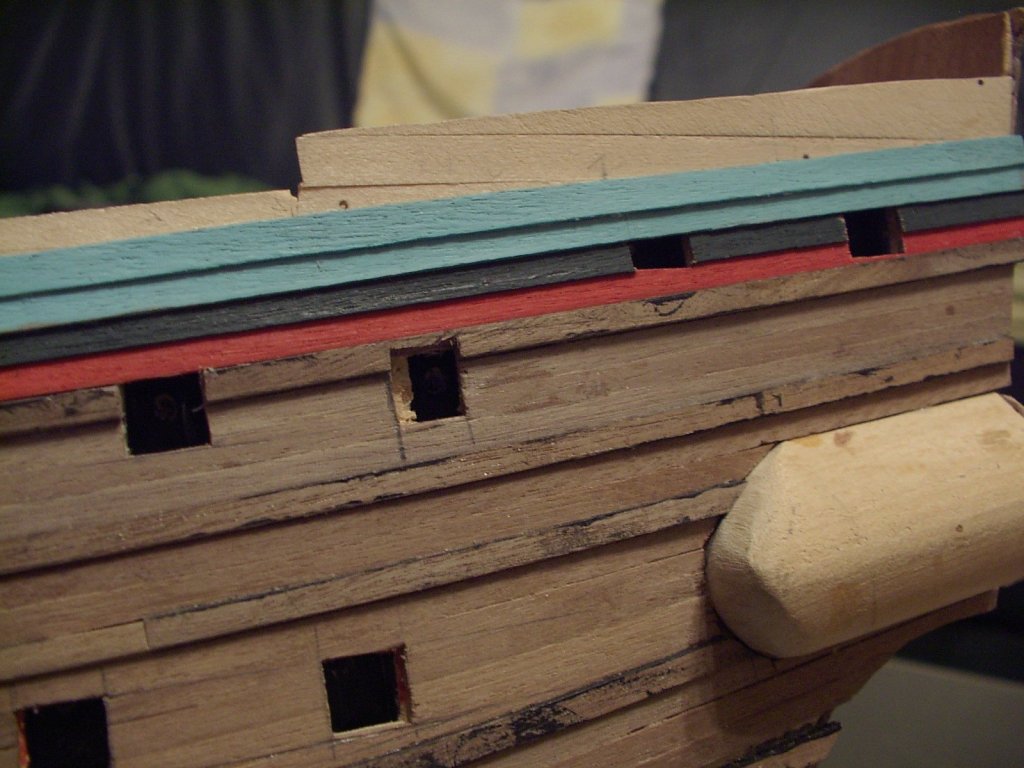
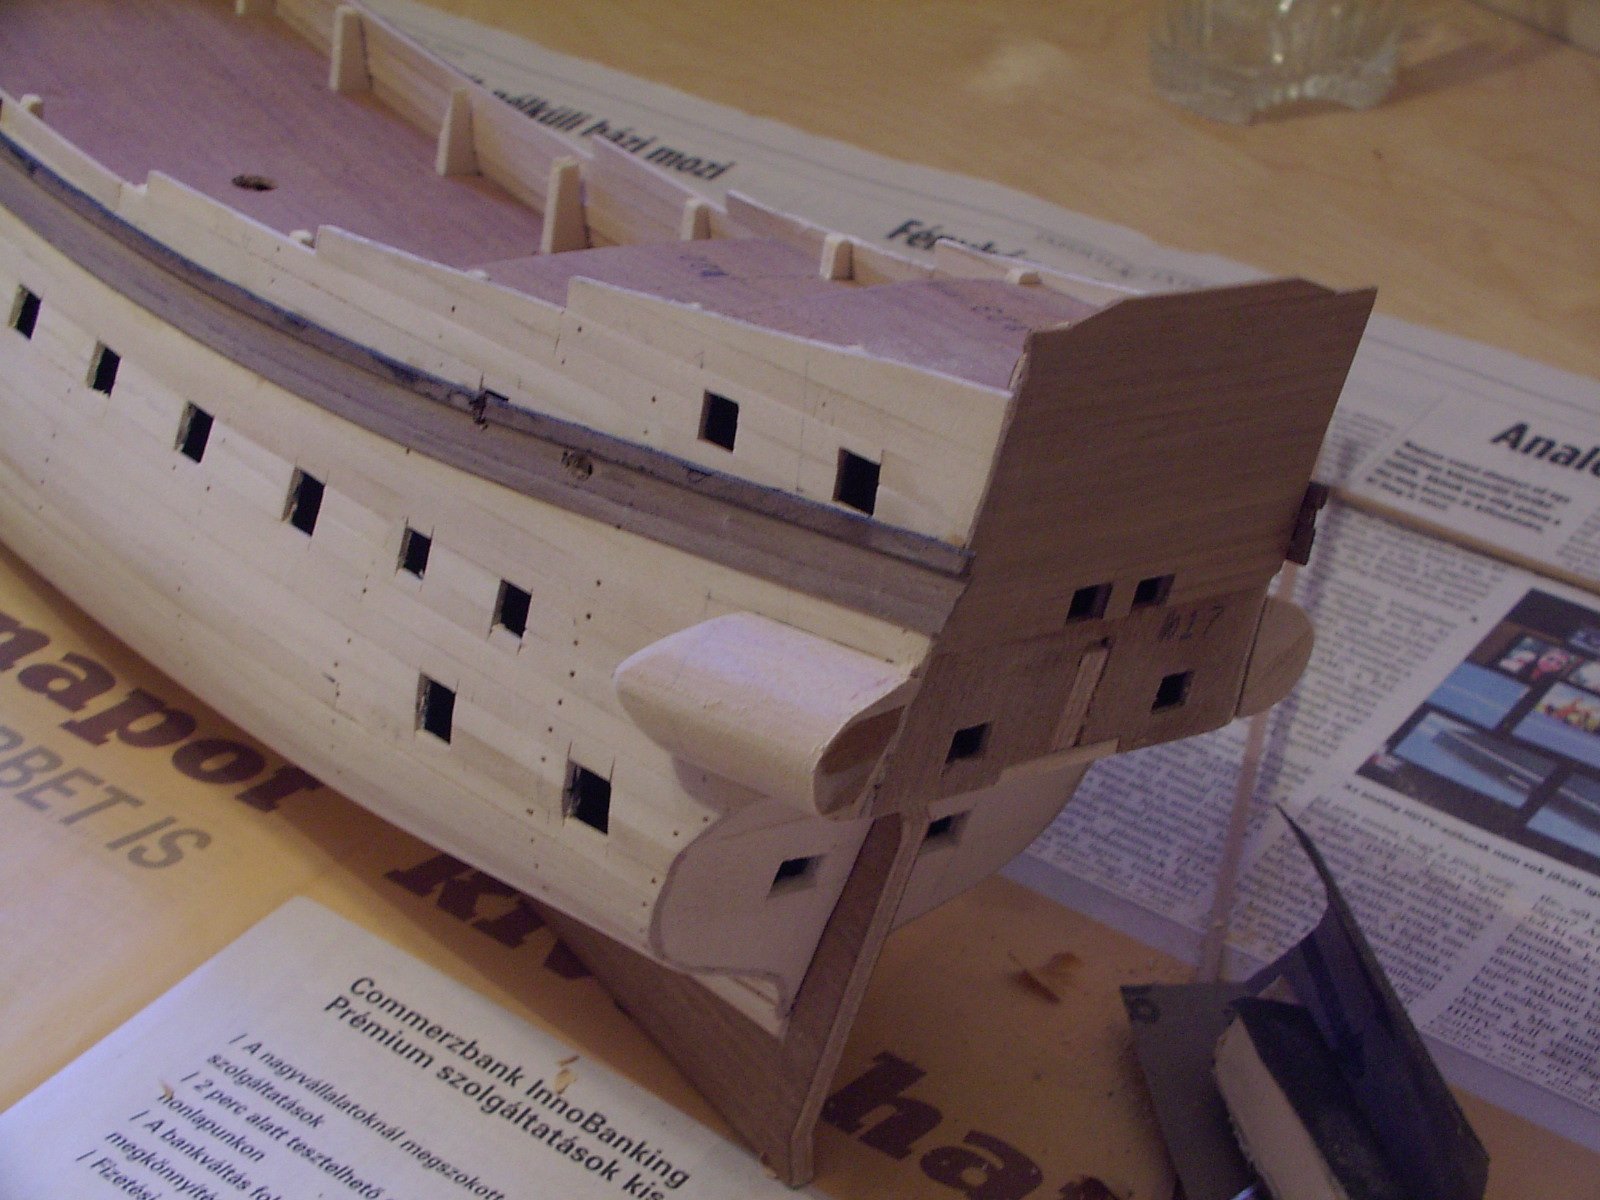
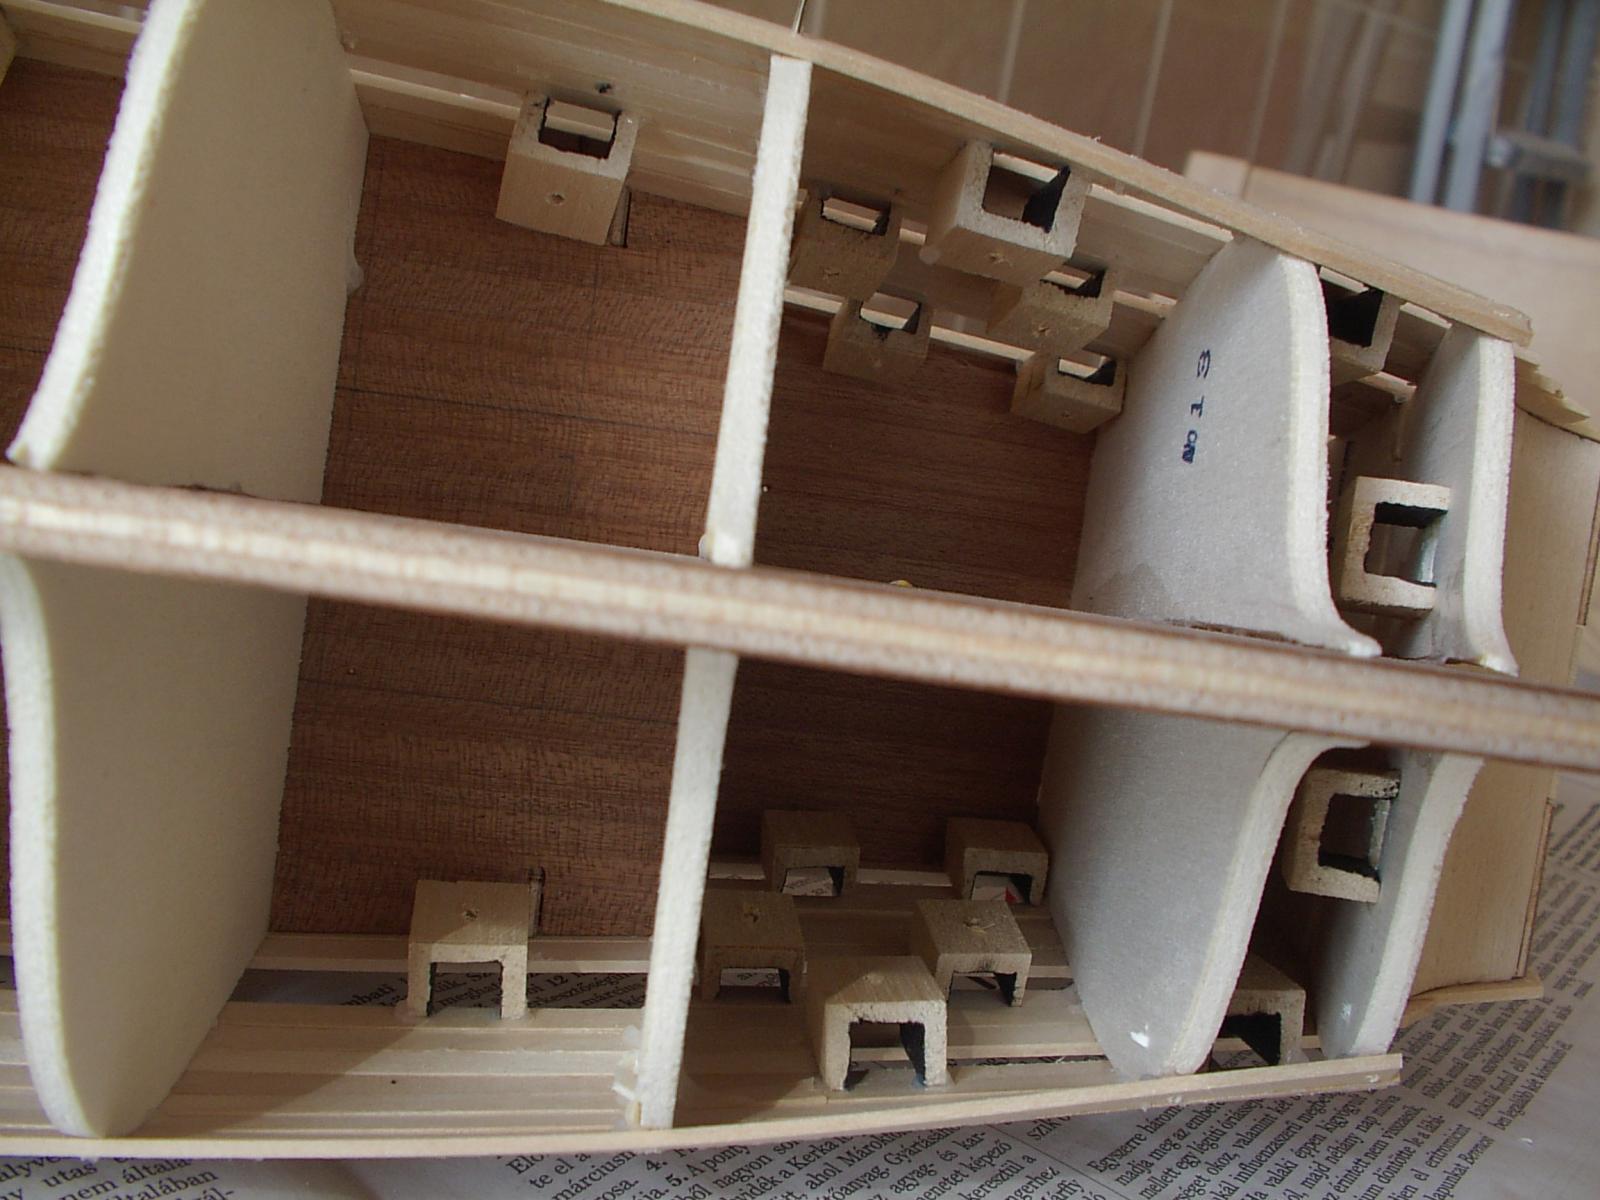
The kit uses a unique system for making the dummy gunports. The height of the gunport is two strips width, so the top and bottom planks fit with exactly two strips width apart. Then a U shaped strip cut to size is glued from the back, which will hold the half barrel.It is strongly advised to have them pre-drilled before glued in place. The space between the vertical edges of the holder pieces then filled with short lenghts of planking, forming the gunports. The joint of the gun holder pieces must be very strong.. I lost some of them inside the hull at the very end of the build and had to find a workaround to mount the guns.
- WackoWolf, Piet, Landlubber Mike and 5 others
-
8
-
thank you for the views and likes.
A few words on the kit. This one is from a period before laser cutting, and certainly was a high quality offering of that time. But modern kits are certainly more precise. The quality of the planking material is very good, like other walnut strips included. The kit uses an extensive amount of beech strips for various items – while the strips are well cut and consistent, for small sizes it’s just too brittle and difficult to work with. There was a few missing items in my box, but got immediate response for my emails and received everything is short time.
What I particularly liked, is a well structured list of all parts at the end of the manual, they show the part number, which material they are made of, and complied in the recommended sequence of building. It worked for me very well, gave a structure to the whole process, and allow planning for upcoming steps in time (ie painting parts for future steps).
The ship is built on a plywood central piece, with no separate sternpost. A ply stem piece is attached later in the build. The accuracy of the precut bulkheads was not perfect, some adjustments were nedded by removing/ adding wood. The lime strips was very easy to work with, though.
- FrankWouts, coxswain, WackoWolf and 3 others
-
6
-
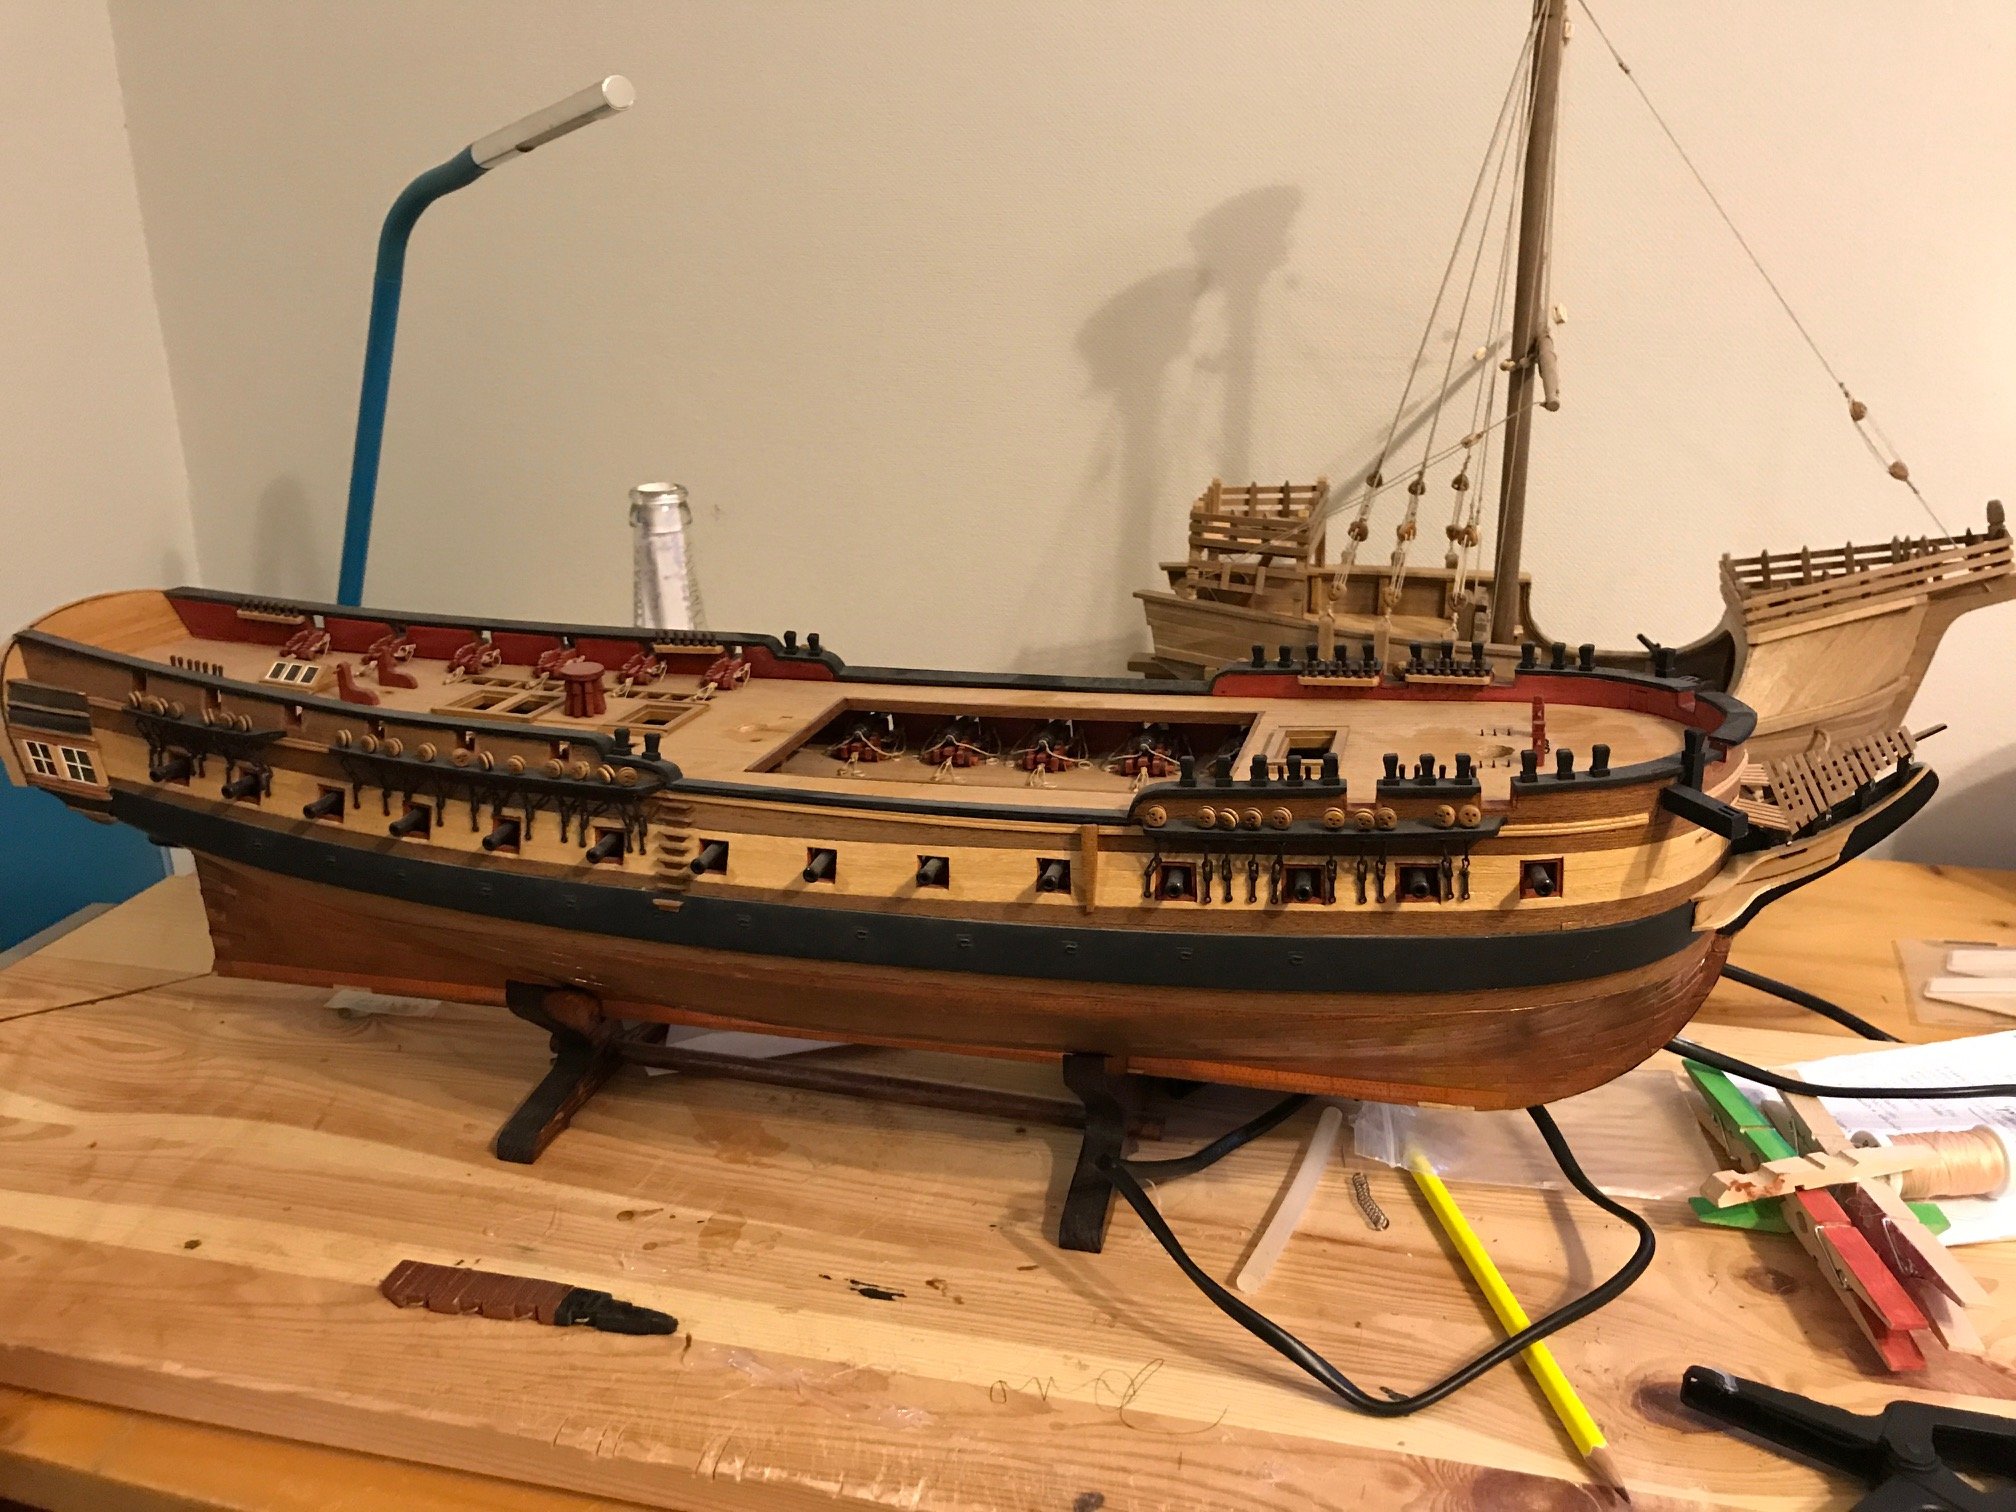
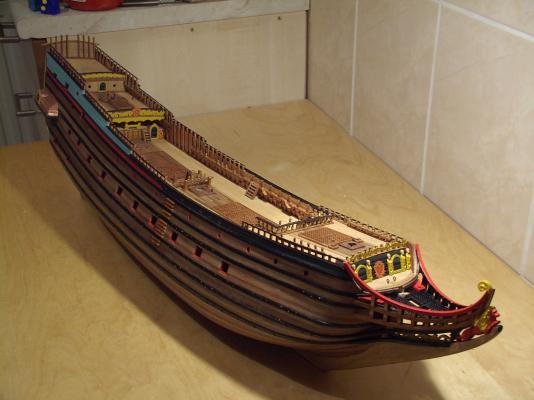
Hello All,
I built this model 10 years ago. From my teens (now I'm 40) I have been a modeler, building plastic kits of all kinds, but always wanted to build a wooden ship. I gave a try to a solid hull, pretty simple Santa Maria (shaping the hull with a rasp from a square block..), then, when I could afford, a Billings Mayflower (which was not up to publishing standards).The Corel kit was a major step up, the first ship I taken seriously, and this became the period of my modeling, I enjoyed the most. I found the old DDM site, read a lot, purchased books and discovered something new with each part I made. This will never come back, and this model still reminds me to these exciting times.
Things have changed a lot since. Having two kids now, in addition to heavily increased workload, I mostly exercise model building by watching other people's work. Recently I read a post about majority of MSW members are not participating. Feeling guilty in this regard here comes my log of the Prins Willem.
I built the kit mostly out of the box, and despite it's shortcomings on the historical accuracy, had a lot of fun. I will try to continuously update the log as time allows.
David


- coxswain, marktiedens, costeo and 10 others
-
13


Prins Willem by DavidG - Corel - Scale 1:100
in - Kit build logs for subjects built from 1501 - 1750
Posted
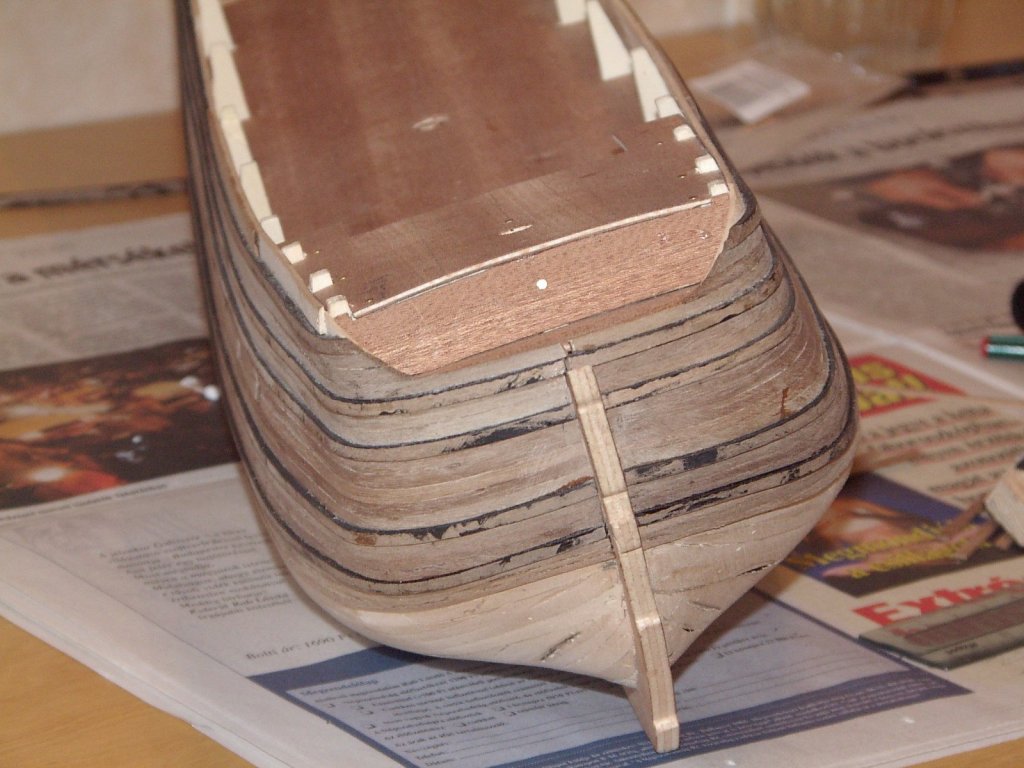
time to construct the scary head part.
the first step is to attach these timbers to the bow. The triangular gap is supposed to be filled with a solid wooden piece, but after a long string of failures to fit them, I decided to live without it.