DavidG
-
Posts
202 -
Joined
-
Last visited
Content Type
Profiles
Forums
Gallery
Events
Posts posted by DavidG
-
-
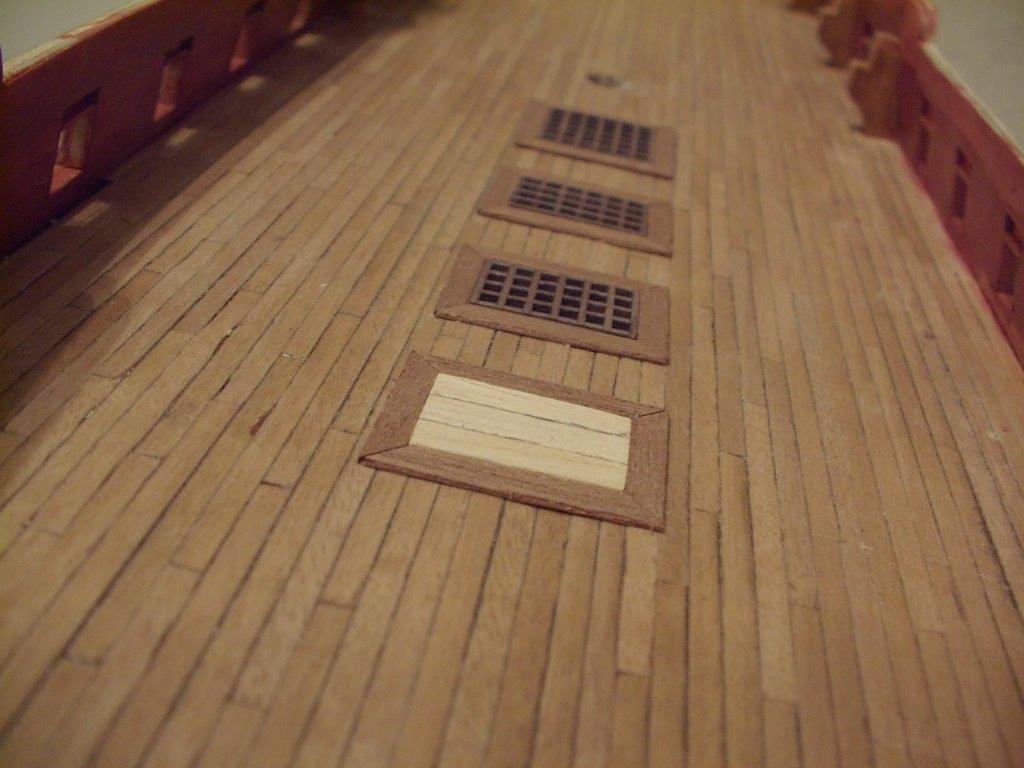
finally, some deck fixtures were made, following the kit instruction.
I didn't know that time, but these were almost the last features built by the kit, and what follows is a long process of experimenting with all its failures and successes.
- Old Collingwood, Saburo and J11
-
 3
3
-
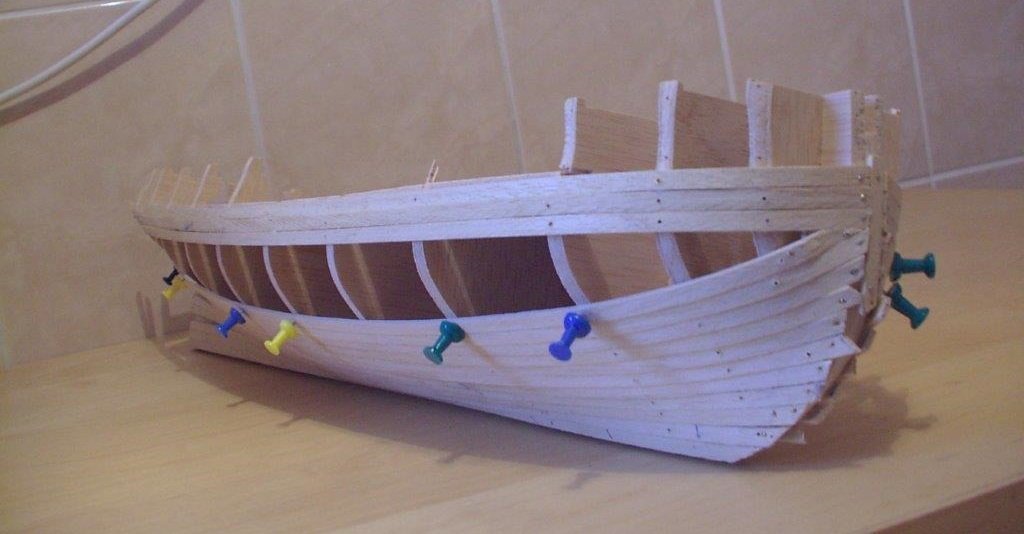
Having the hull shape and the gunports ready, the second planking can start.
I never had such an easy planking job like this. The hull shape is very friendly. In addition, the strips are so thin, like paper, it's really about just gluing them side by side. There is large grain, the reddish color makes it typical kit look - but at least easy to work with.

- J11, Old Collingwood, GrandpaPhil and 2 others
-
5
-
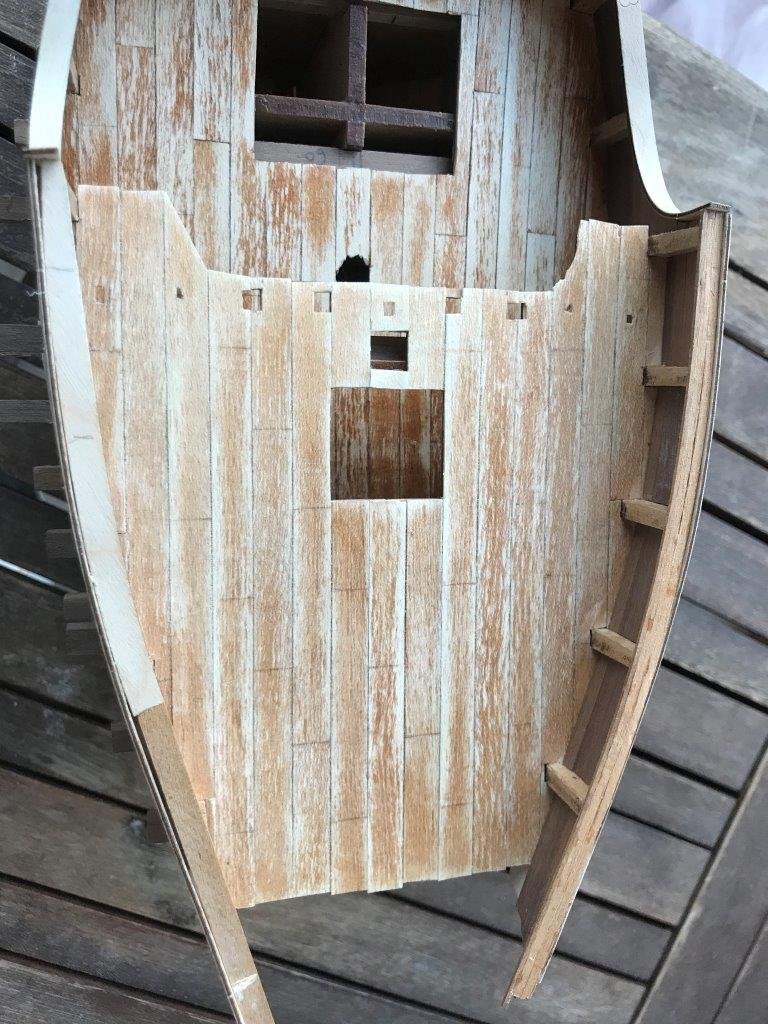
and here are some recessed ports, with future lids. Inspired by the painted models, I used the second planking material to show a light stripe over the gunports, and planked dark above and below. This is the final cover - it's a pity, there is so much visible grain.
the wales are also built up using first planking strip. At the end the wales come out smooth but I recall an endless loop of filling/ sanding/ painting to reach the final stage.
- Saburo, Sea Hoss, GrandpaPhil and 2 others
-
5
-
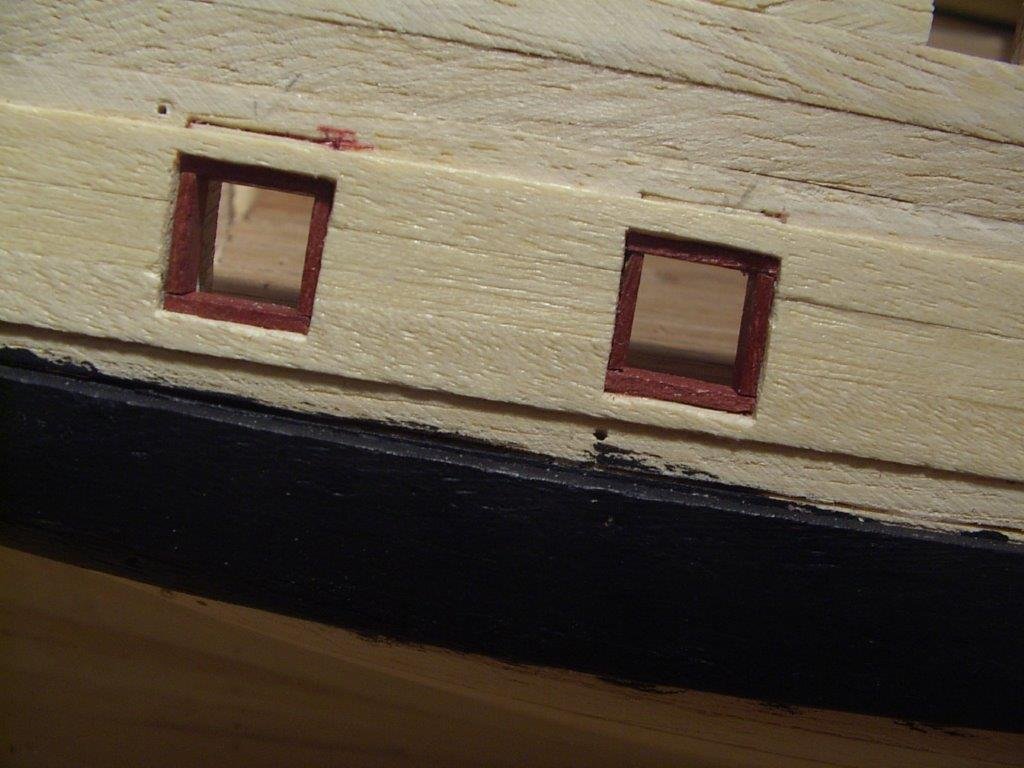
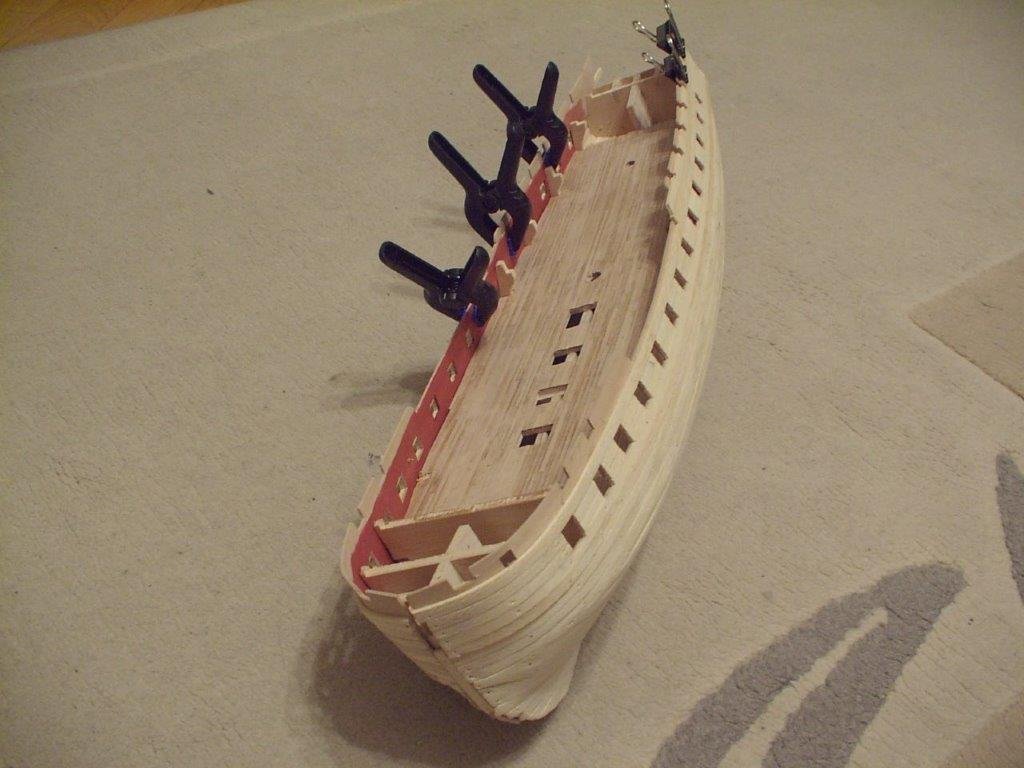
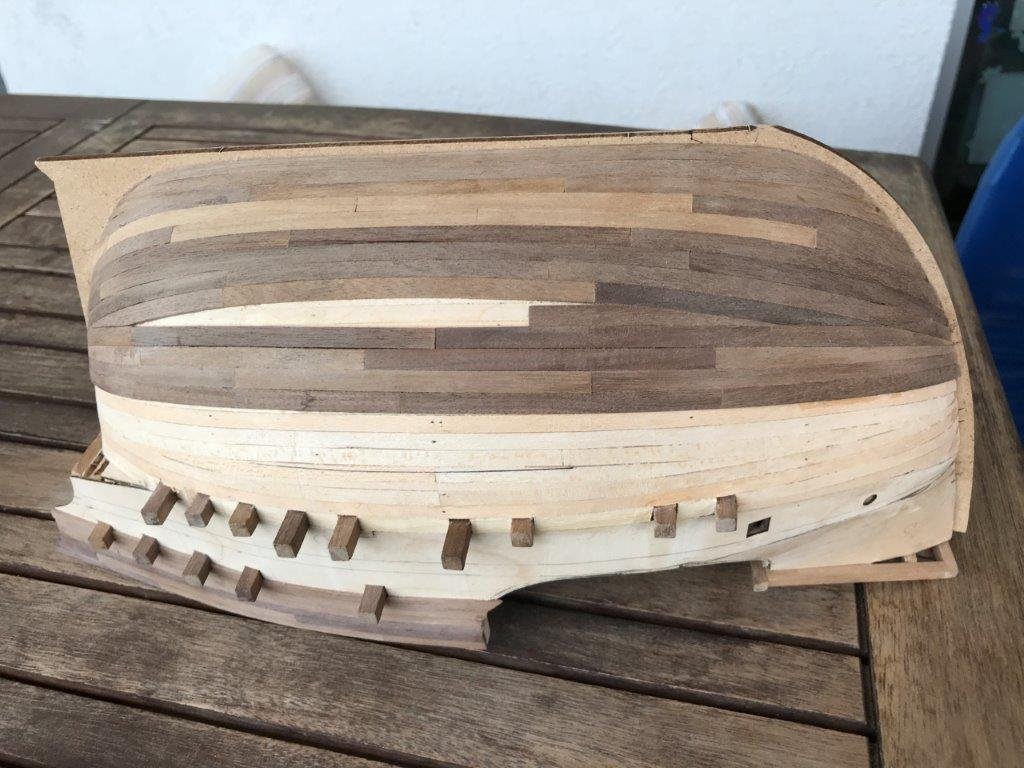
the bottom of the ports are cut, and filler pieces inserted to the upper edges.
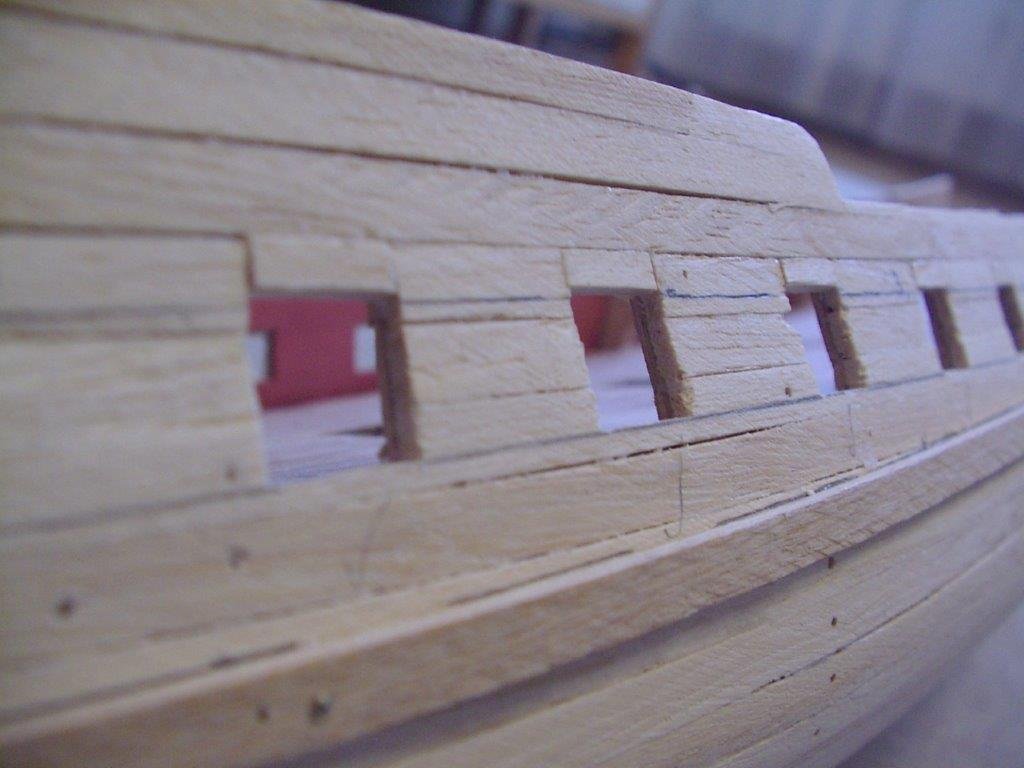
finally the gunports can be framed. the example below is a port without lid. I had some spare strips for this, but soon I had to order more material.
The wales are buing built up. The upper wale strip (first planking) was installed originally as temporary one for the gunport positioning, but it is the right size and the bending qualities were better than the thick walnut (?) one, and choose to use it for the wales.
-
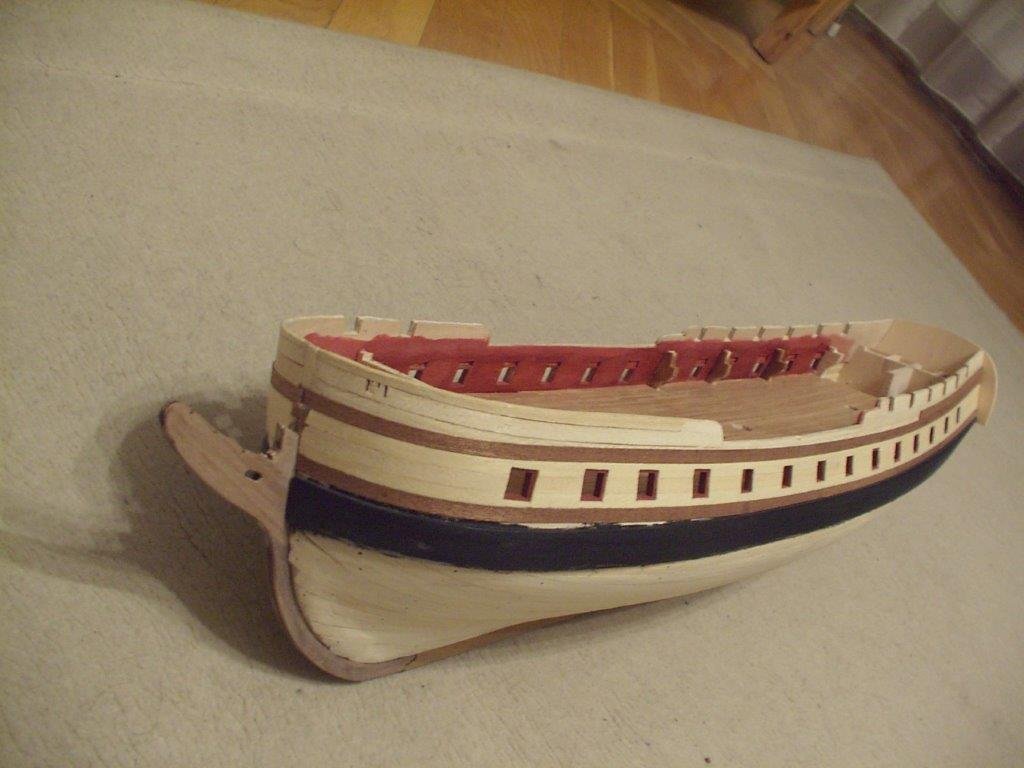
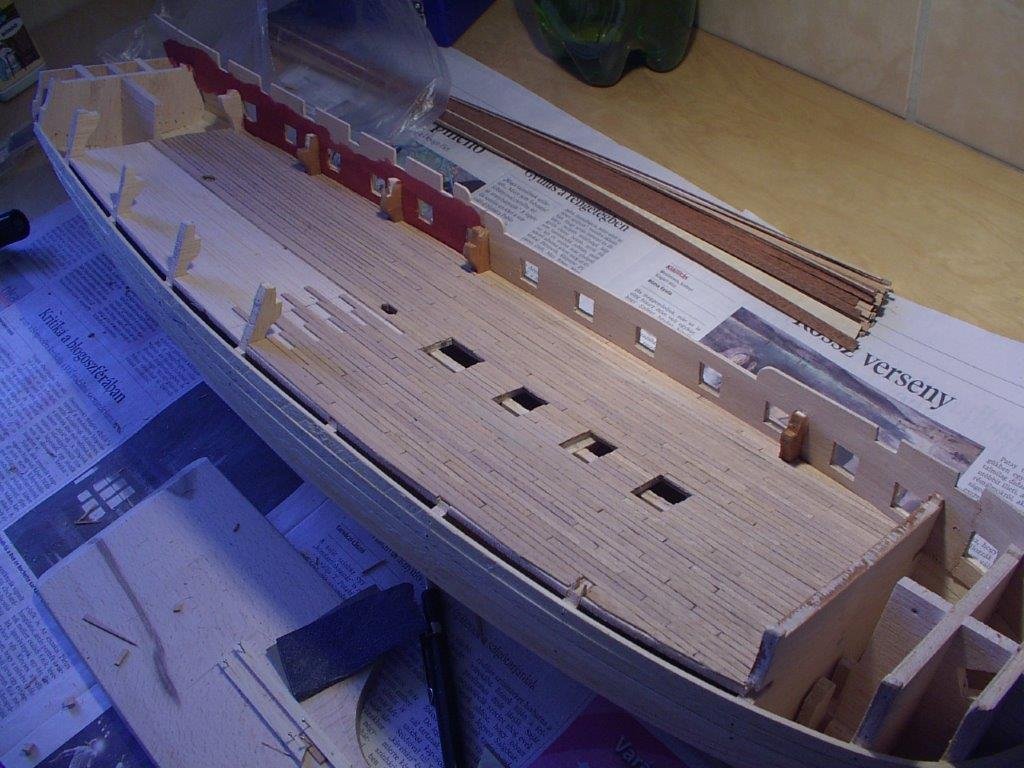
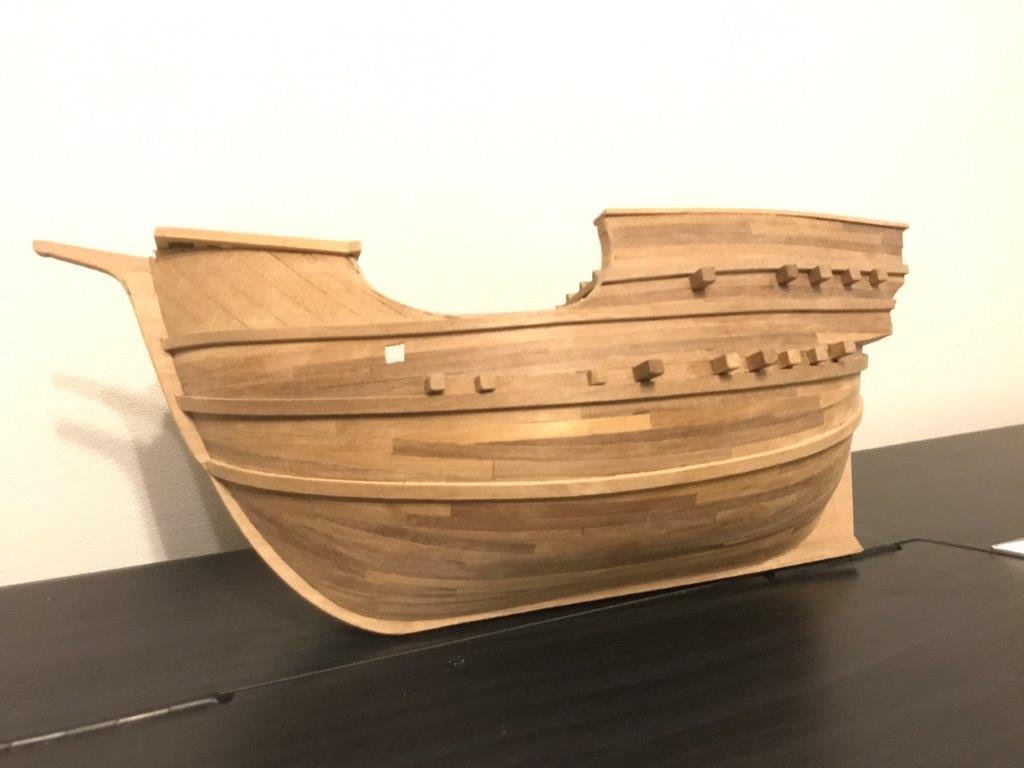
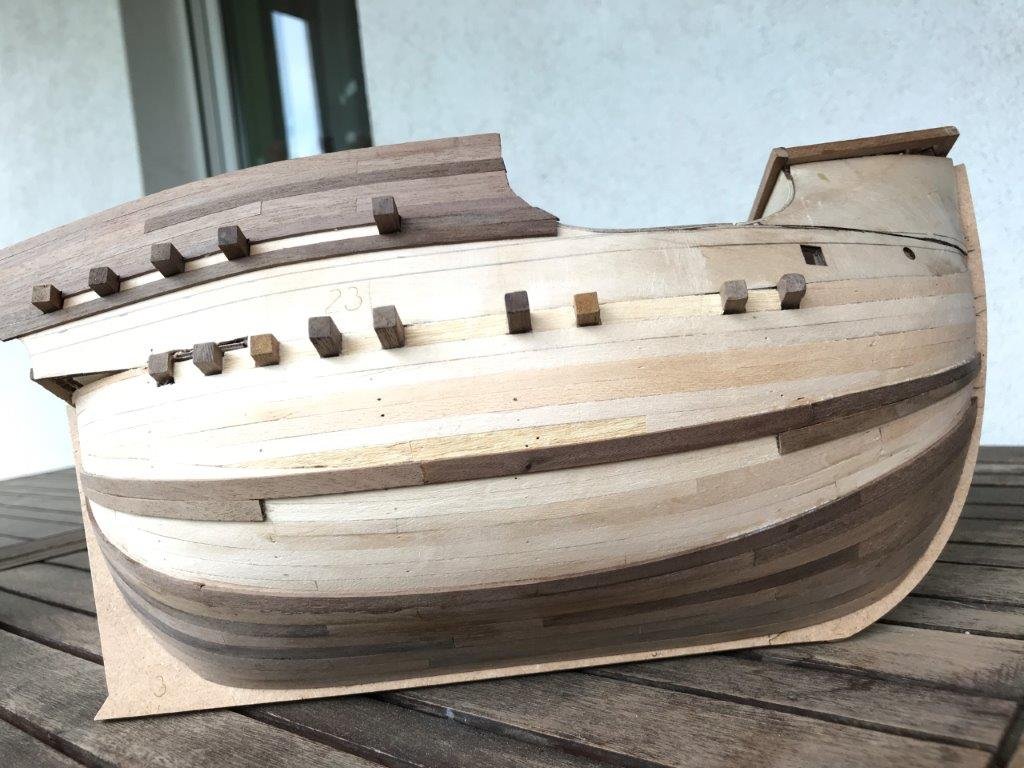
finally both bulwarks installed and the gundeck planked. The red color is an ordinary water based €1 wood stain from the hardware store, but worked very well for this model. I wish I still had a jar of it, unfortunately now out of production.
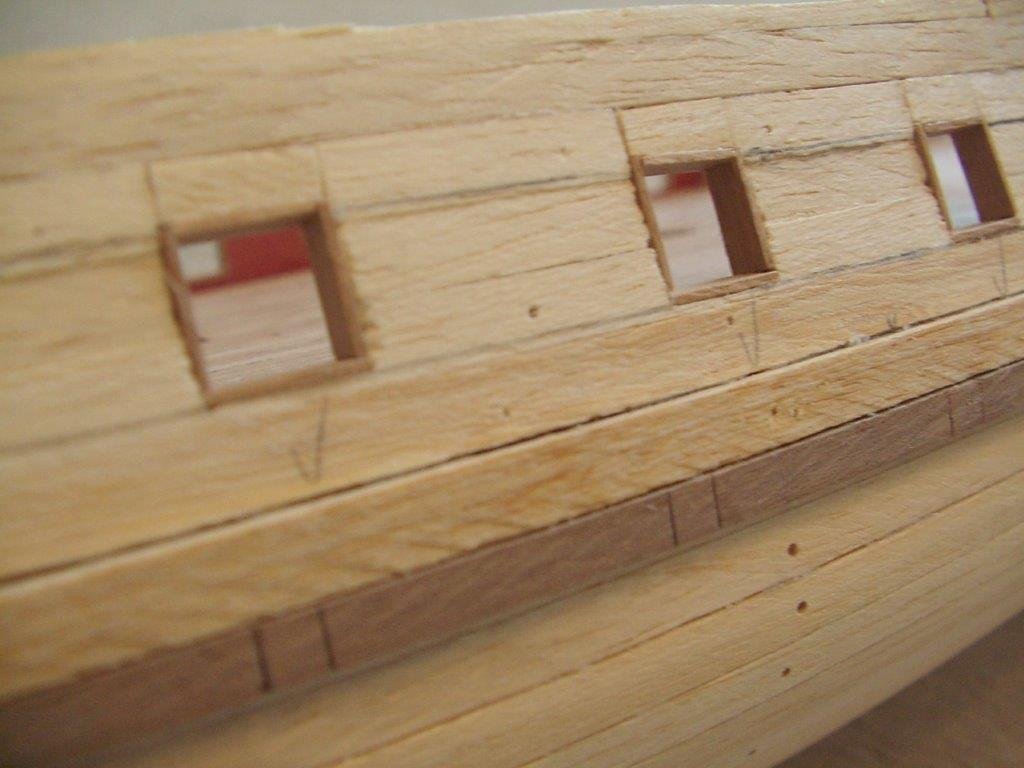
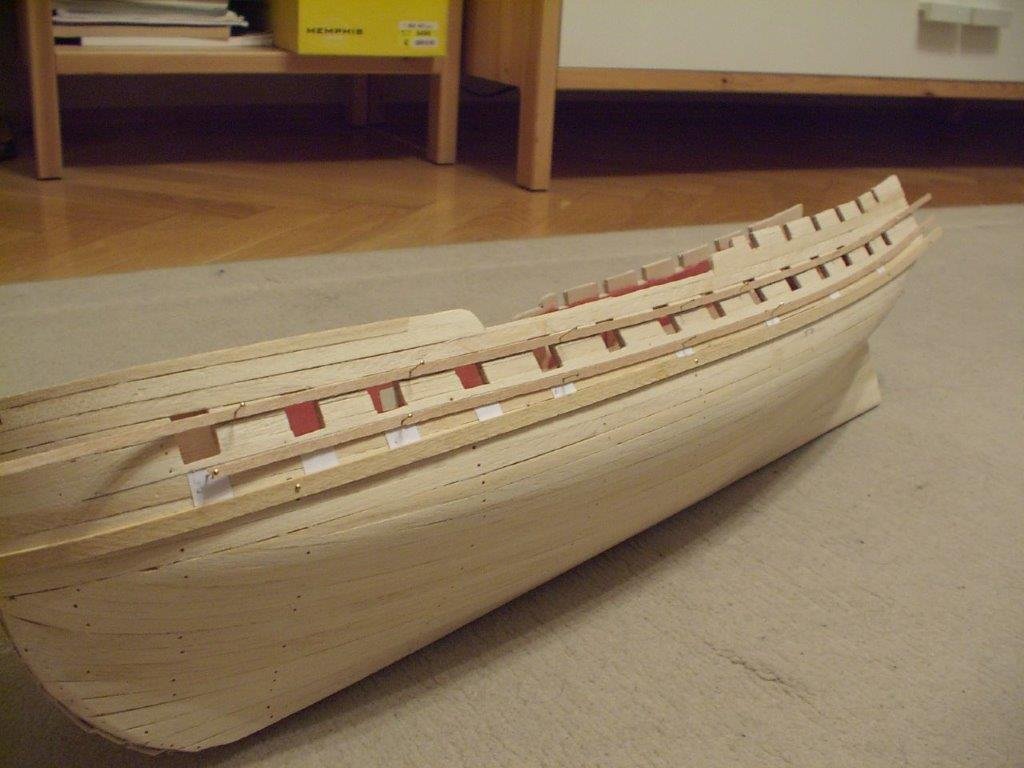
further investigation revealed the first mistake (many more will follow...). The kit originally designed with dummy gun barrels on the gundeck (except for the middle four), and their height under the closed areas are relatively unimportant. Not so with my planned carriages - now all of the ports are too high. The white paper templates mark the correct height from upper edge of the wale, the thin planks are the correct lower and upper edges. Let's correct all the 28 of them.
- J11, GrandpaPhil, Old Collingwood and 1 other
-
4
-
the first bulwark piece in place. again, the fit of the precut part was very good. it will be covered with first planking later.
besides not using the metal gunports, I also decided, I will build the gundeck with actual guns. I planked the whole gundeck, even it will not be visible.
the deck planking material was pretty poor, unevenly cut and very brittle. A good scraping helped a bit.

- Old Collingwood, GrandpaPhil, J11 and 3 others
-
6
-
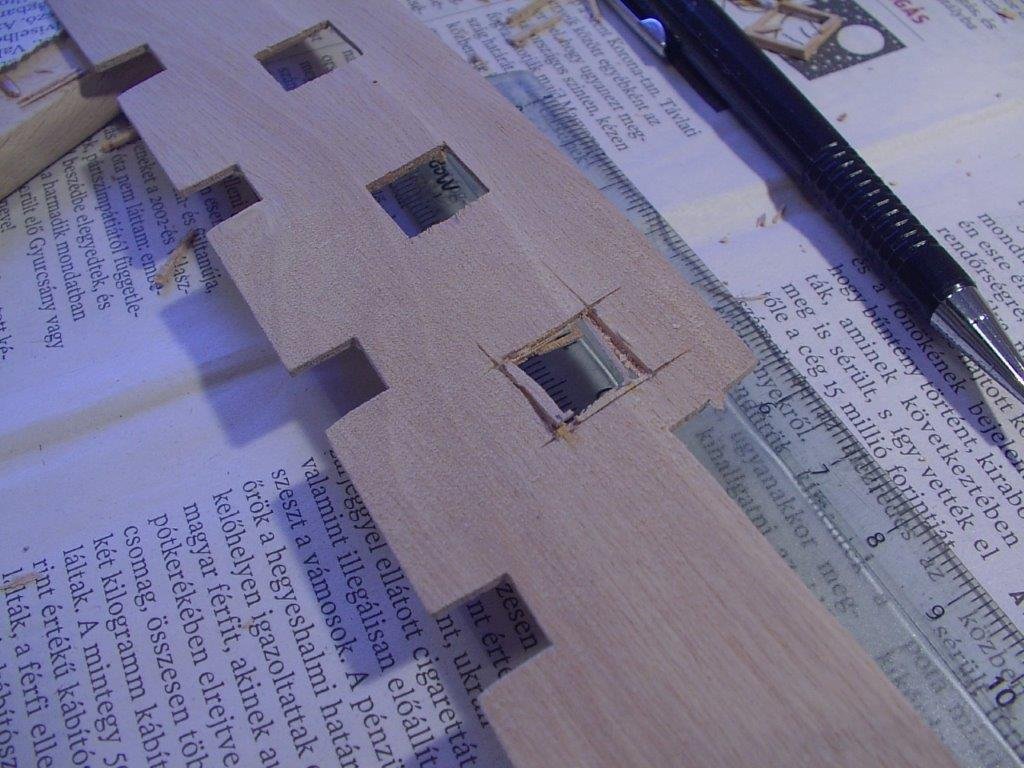
the kit provided cast metal gunports, which I decided against in favor of wooden lining. for this reason, I had to enlarge the gunport openings.
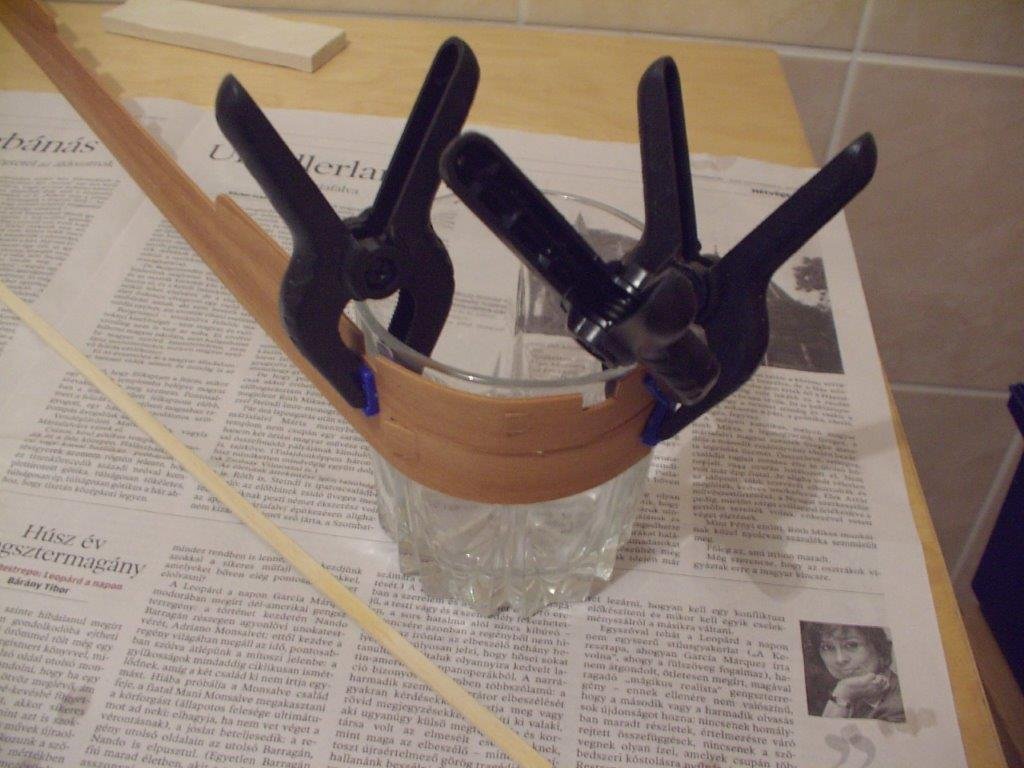
and here is my sophisticated bending device, I still use different sizes of glasses and pots for bending. the soaked template stays on the former overnight.
- Saburo, GrandpaPhil, J11 and 2 others
-
5
-
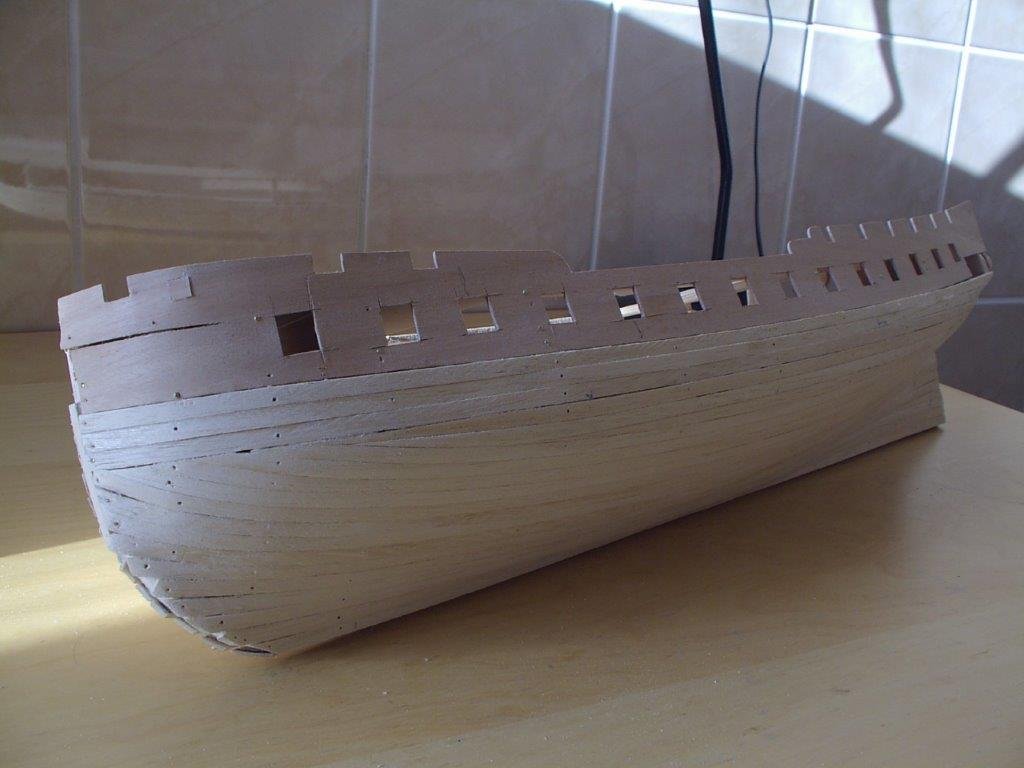
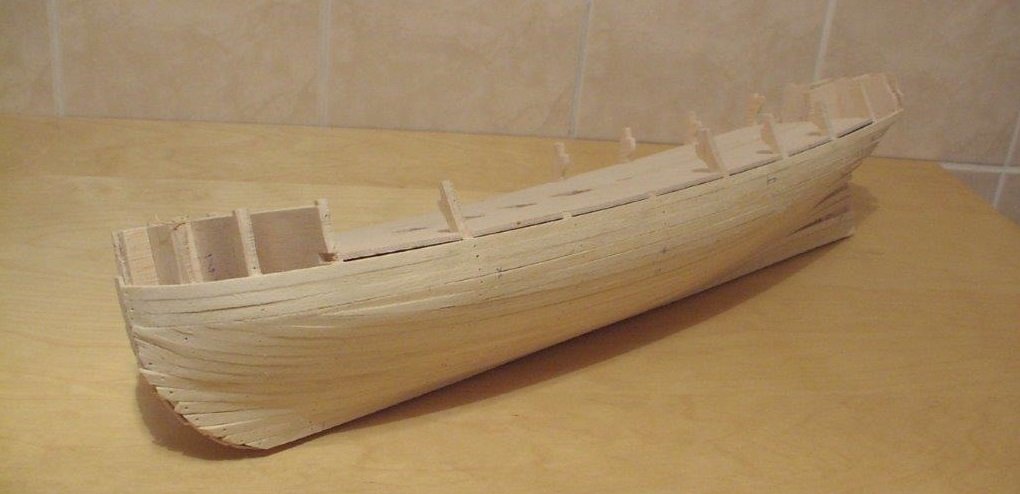
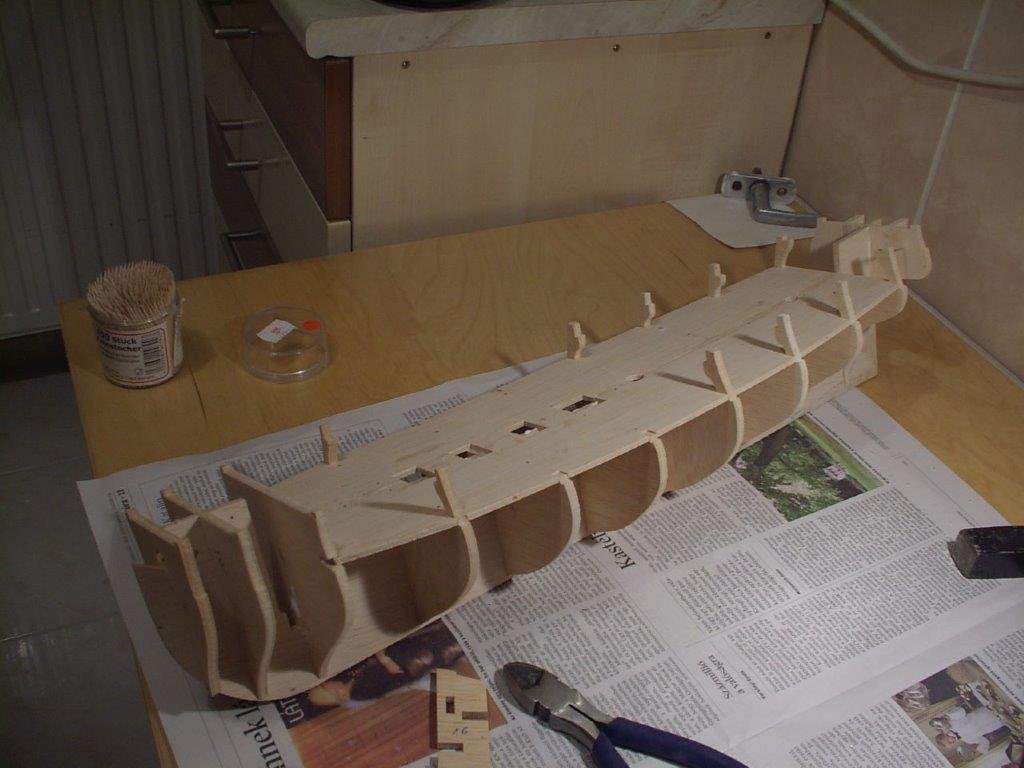
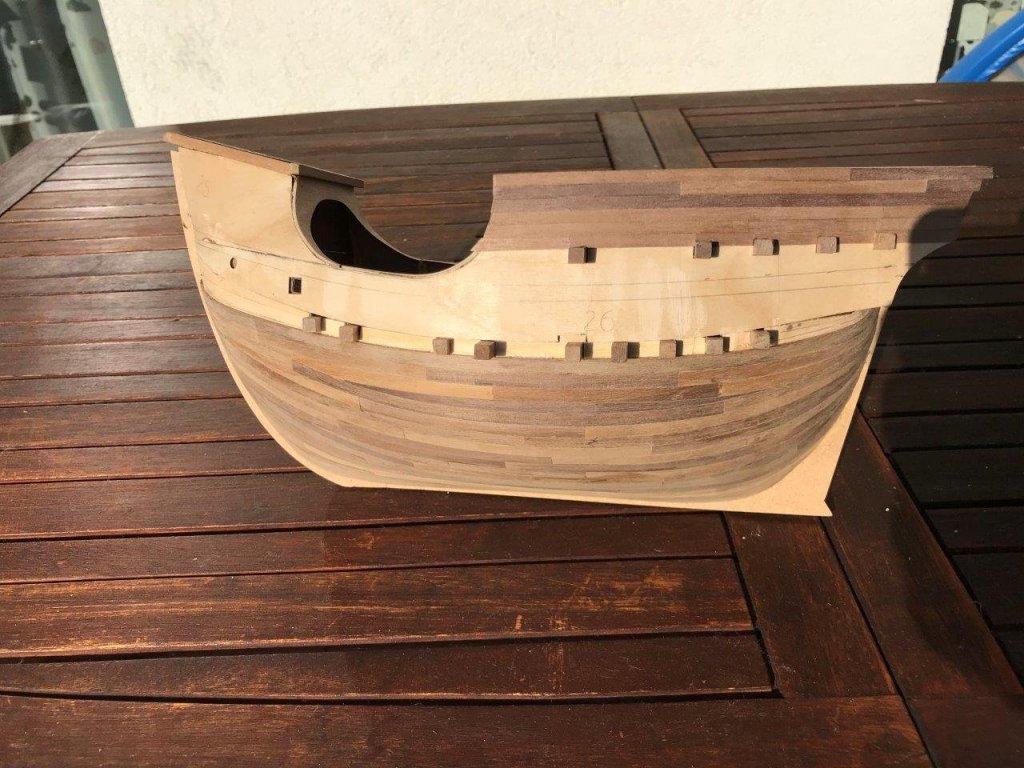
the basic hull takes shape quickly. the fit of the precut parts was perfect. the hull shape is not difficult either, so no issues with the first planking.
the frames are made of a very light and soft plywood, having a balsa core - parts can be chipped off by fingernails.
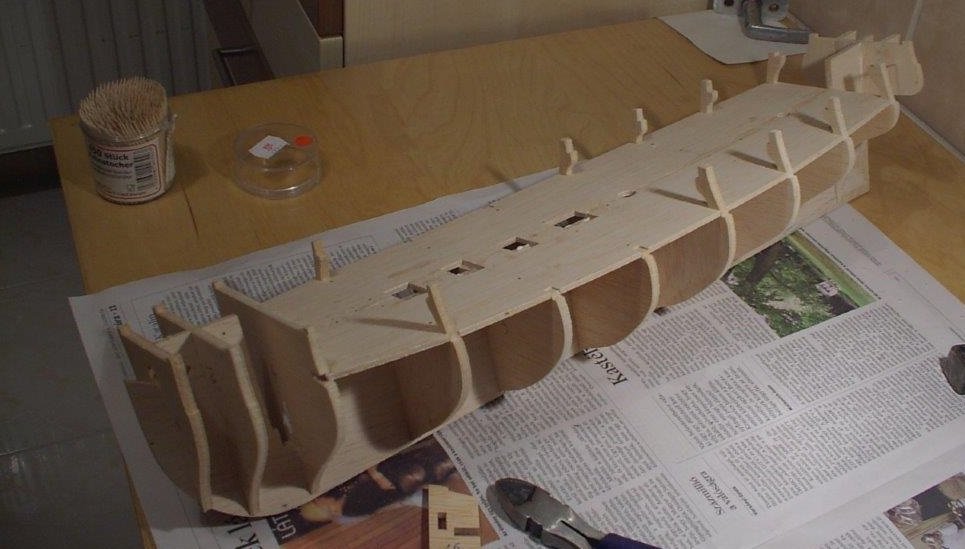
the first planking is 2 mm, rather rough basswood, but bends easily and provides a lot of room for future sanding. a precut prow piece will be added later, a vertical strip acts as a placeholder during planking.
the bulwarks will be built up by a gunport strip, so the planking doesn't take too long.
 df
df
- GrandpaPhil, J11 and Old Collingwood
-
3
-
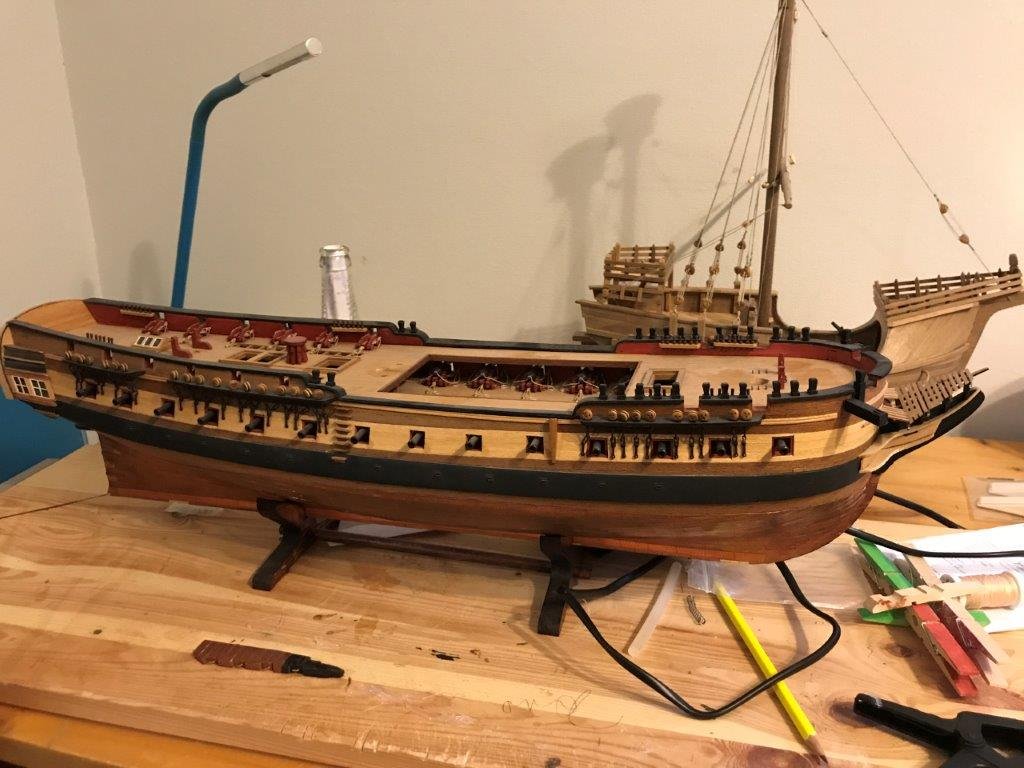
after finishing my small Coca model recently, I decided to move on with my Occre Diana, I started 10 years ago.
This was the period where I discovered forums, ship modeling books, I purchased the recently released Vanguard kit (still unstarted) and prepared myself to build a better quality model than my previous efforts, which may exceed kit offerings. I shortly learnt, the Occre kit provides ample room for customizing. This is not an expensive kit by any means, and we got what we expect - a well designed hull shape, average (or less) quality materials and loads of generic fittings. I started the build out of the box, but changed concept already in the early stages. My usual sequence was to build a step by the kit, then deconstruct what I have done and replace to an improved version. Then go to the next stage and repeat. But how an improved feature should be made? I found it pretty difficult to answer - the provided plans are more assembly instructions, and I had no specifics about the actual ship (well, proper research was not in my plans anyway), so I used the resources I had. I drew a lot of inspiration from the design of the Vanguard kit, the Anatomy of Ship Diana book (which is a different, British ship) and pictures from the forums I liked. The result therefore not a specific ship, but (in the best case..) a generic frigate.
Anyway, I try to resurrect this project and finish it to a reasonable standard. The plan is to add the missing parts to the hull, make the masts and rig the ship.
In the 10 years passed, I saw a lot of wonderful models built here, and I have questions, wheter a feature I liked by the time is acceptable for now. There are several parts to change, but still not decided if I want to contuine the build/destroy loop. If I want to finish this in a reasonable time, some compromises most probably had to be made.
This is the actual status, on my working desk - the first task is to dust it off. I will post the sequence, how I got this far.
- Saburo, tarbrush, Old Collingwood and 5 others
-
8
-
Hi Steven, thank you for the nice words.
-
...and the ultimate question at last, what to build next.?
I have a couple of options.. An unstarted Vanguard kit, from the first production batch. While it's the ultimate project, and finally I have the space to build it, still not sure to take a 5+ years commitment. Probably I could build the Coca over the same time needed to frame the gunports on the 74.
Other option is to finish my half built Occre Diana, which is so heavily modified, I can not call it Diana any more. I have the hull almost ready, however have some details which now I don't like and needs change. Then to mast and rig the ship, a year long project to say.
Or start another quick build.. there are some nice little kits out there..
-
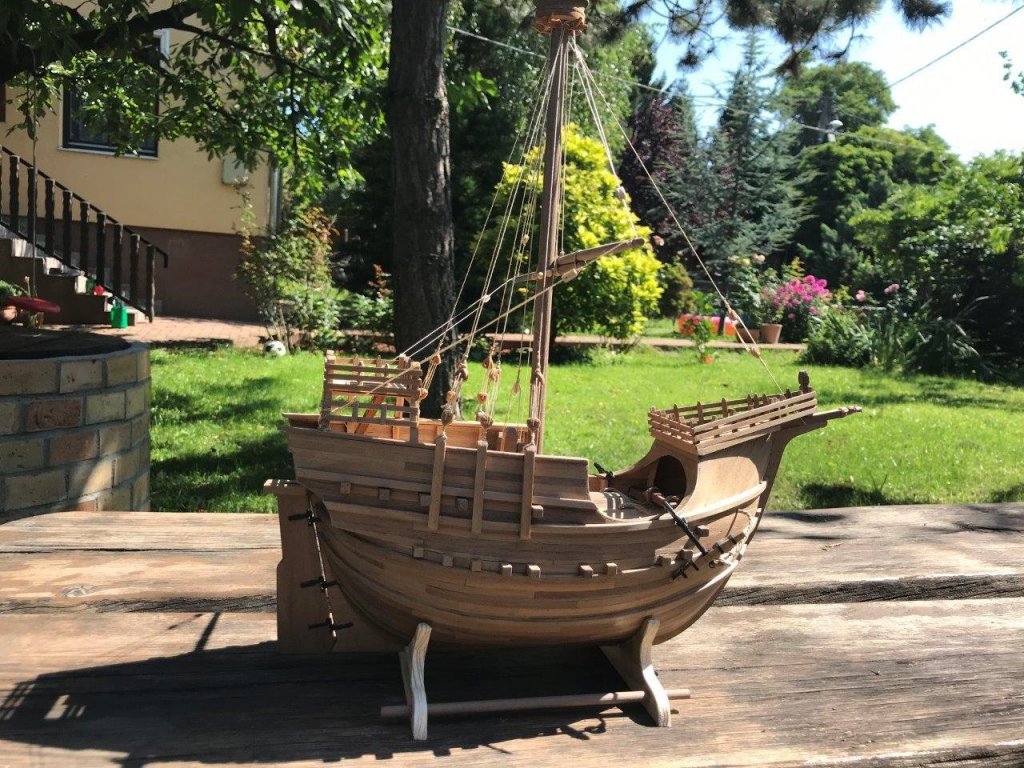
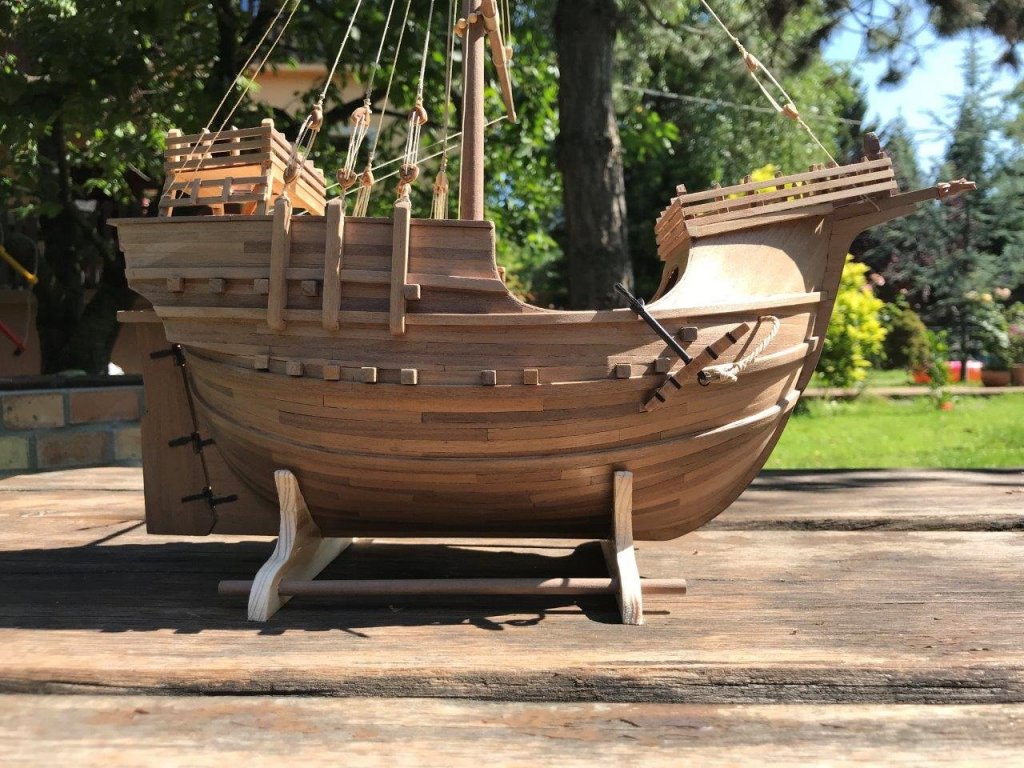
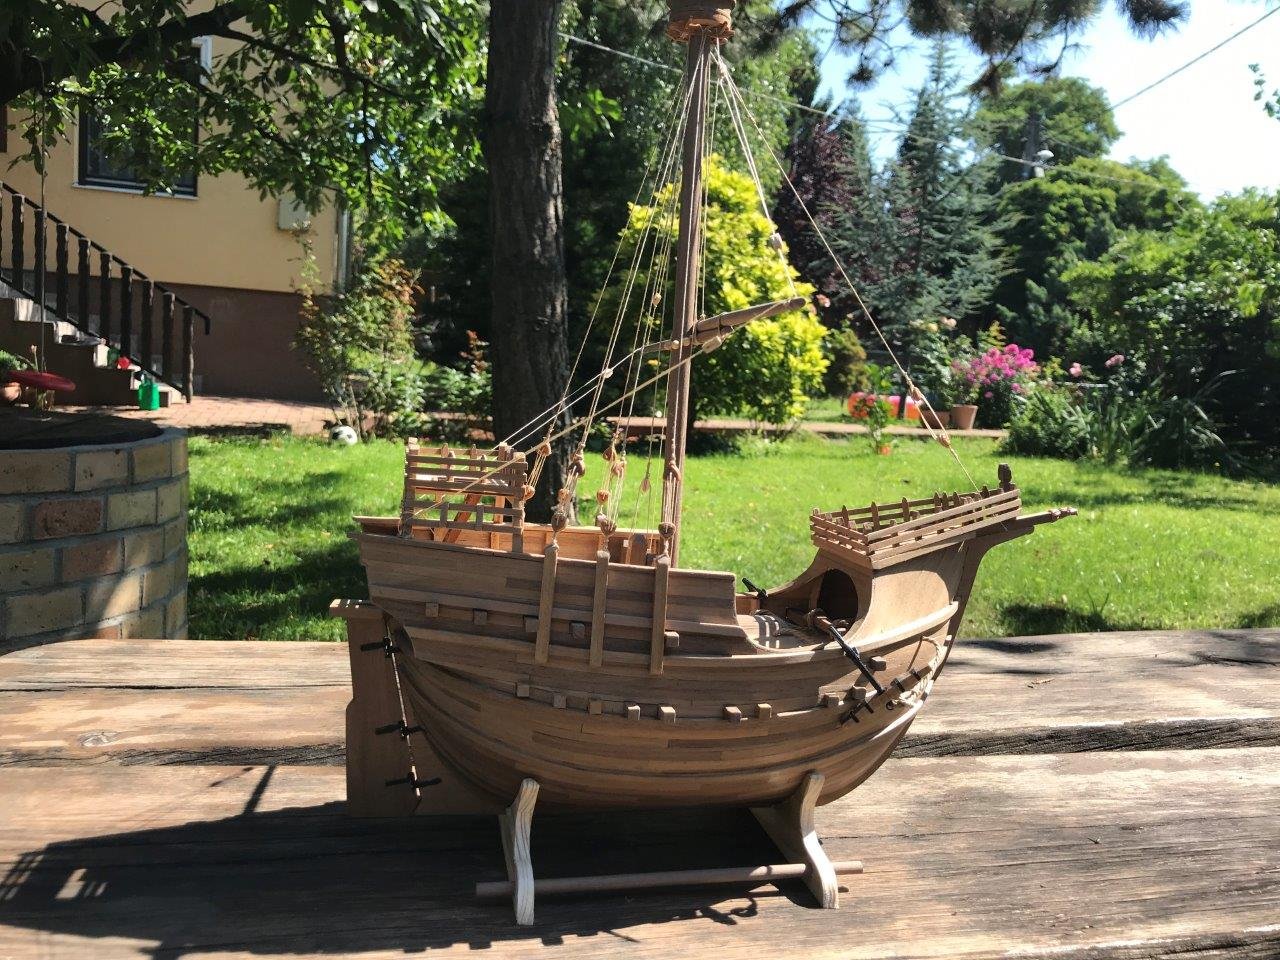
I had some spare evenings recently and finished the model.
So, a quick summary of my overall thoughts.
A nice little ship, not too difficult to build. Not having a lot of time, I wanted to build something which shows reasonable progress in even a couple of hours work, and this kit definitely met this demand. The model itself is quite simple, not too much of anything, but sufficiently maintains interest. For most of the time it is an excercise in planking. Plank the bulwark, plank two hull, plank the deck - most of the build is done. The only watch out is the hull shape - while the whole construction is really suitable to beginners, the severe bends are challenging at times.
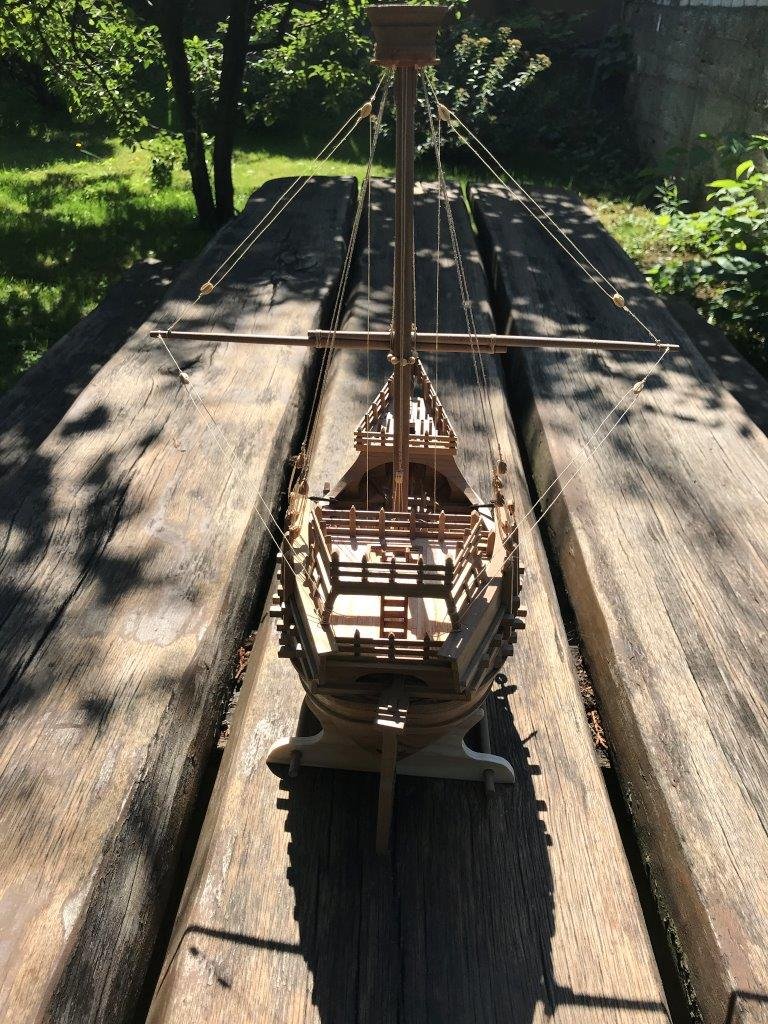
The kit supplies ramin dowels for the mast and spars, they are fine, but I changed them to walnut to maintain a uniform colour. Apart of it, I built everything out of the box. Here goes some pictures of the finished model:


- BLACK VIKING, Henke, nikbud and 7 others
-
10
-
-
Hi, I'm almost sure, the half built ship is a Corel kit of the Wappen von Hamburg.
-
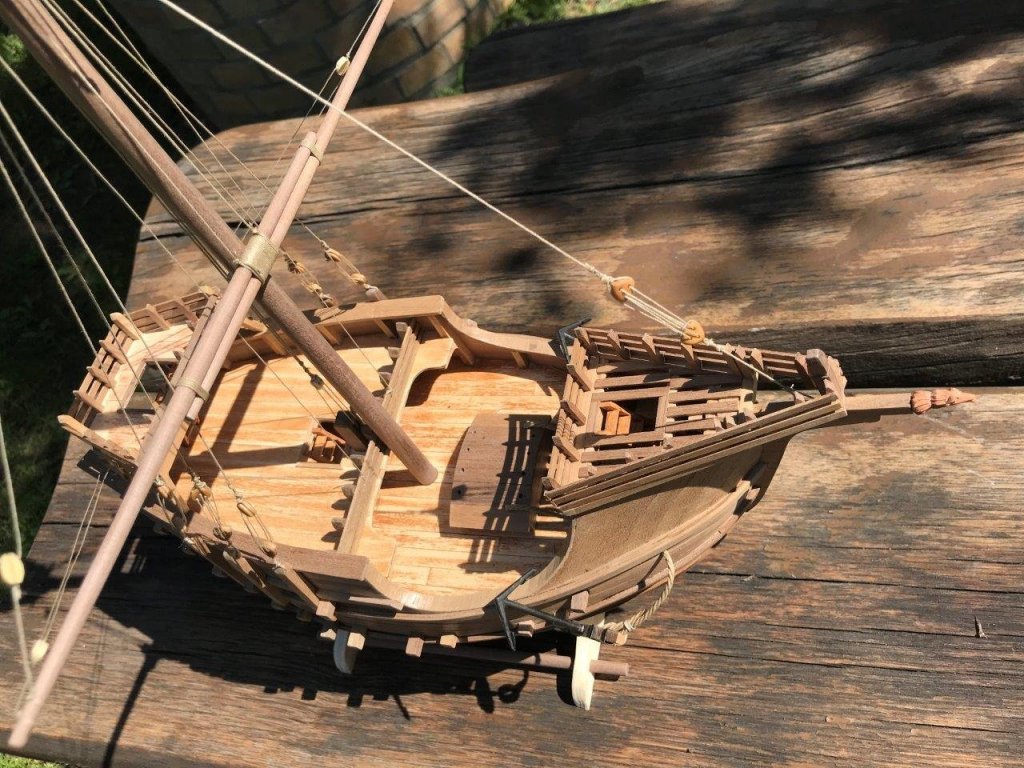
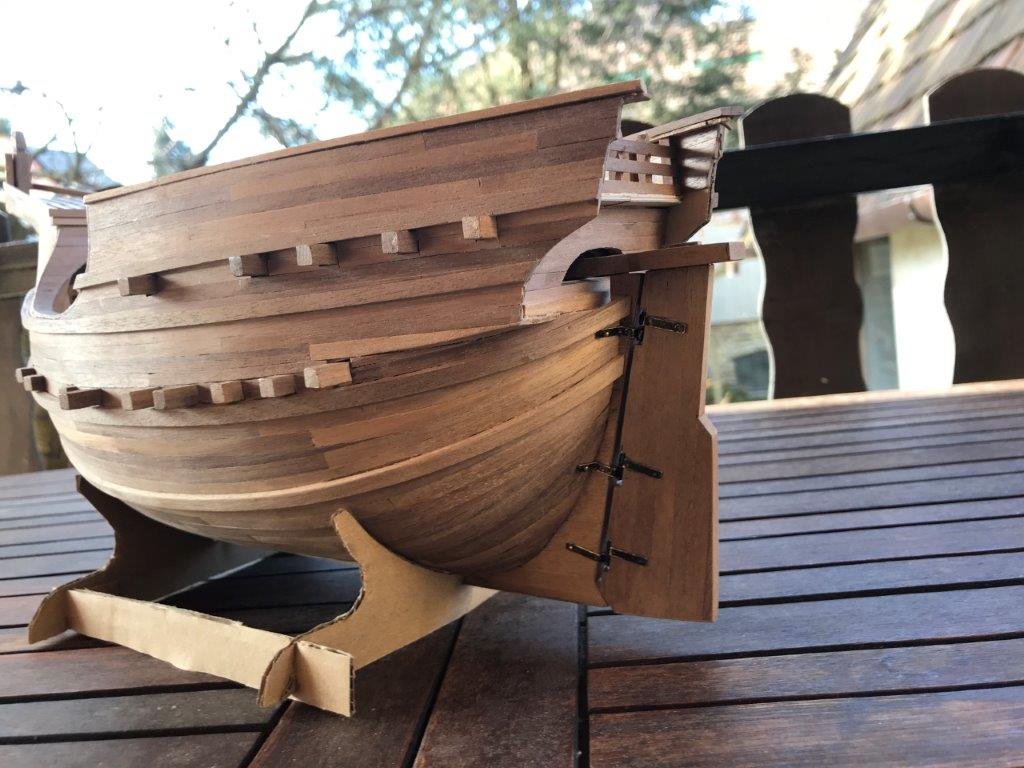
had some time last week to work on the model. first, attached the rudder.
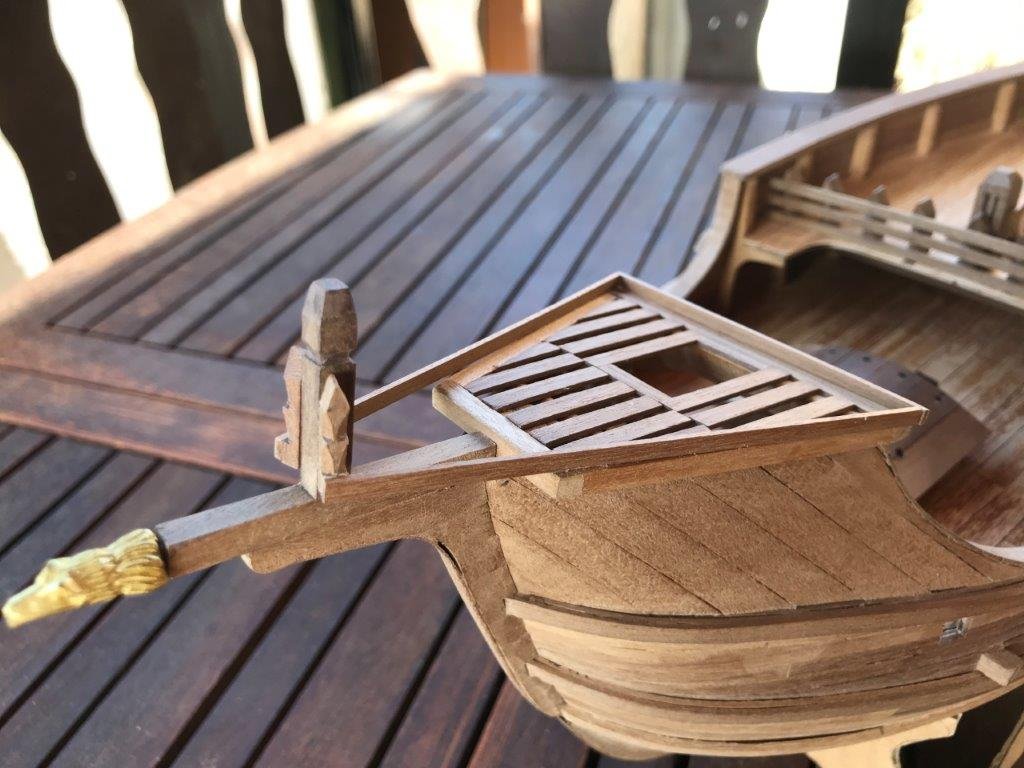
then built the deck superstructure. there is some detail carved to the posts, but they become almost invisible after the rails are attached.
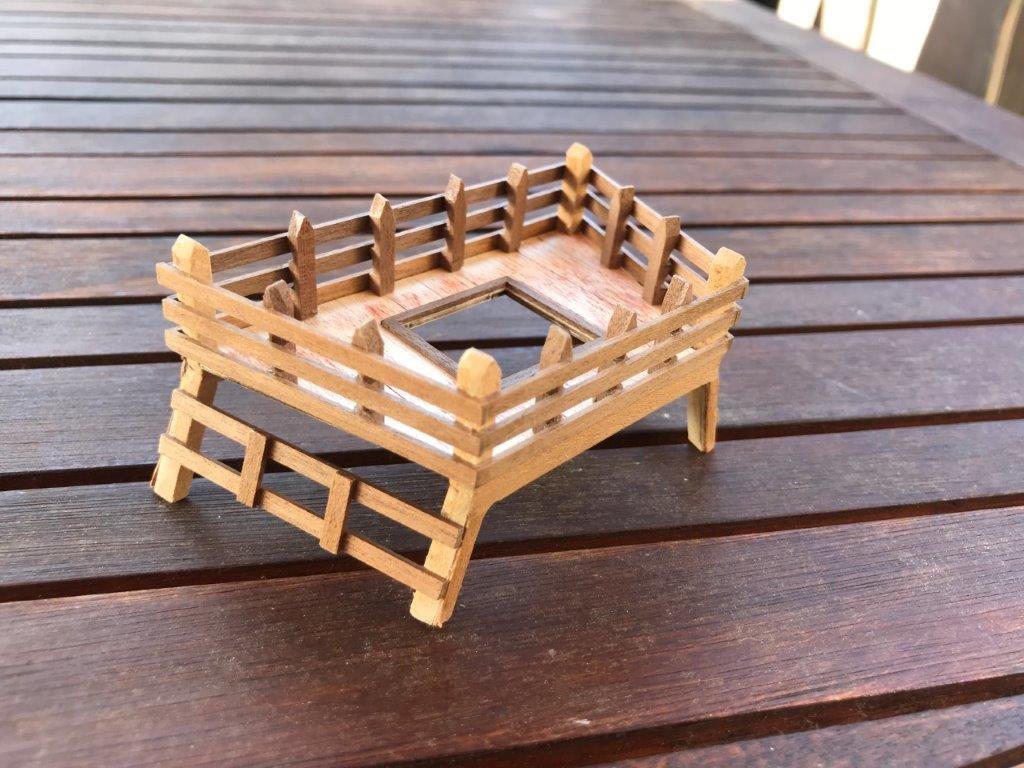
currently assembling the forward rail structure. I lay down the bottom rail first, glue it to the deck to provide some gluing area for the posts.
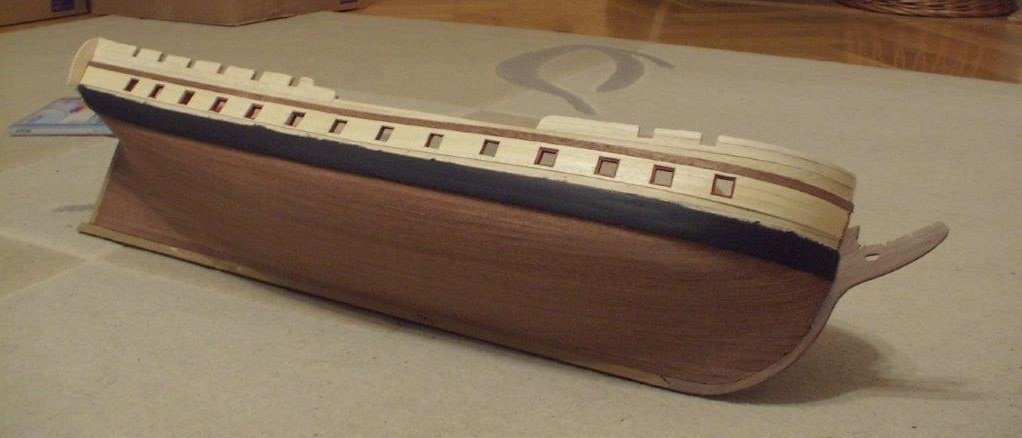
finally an overall picture of the hull as it's current state
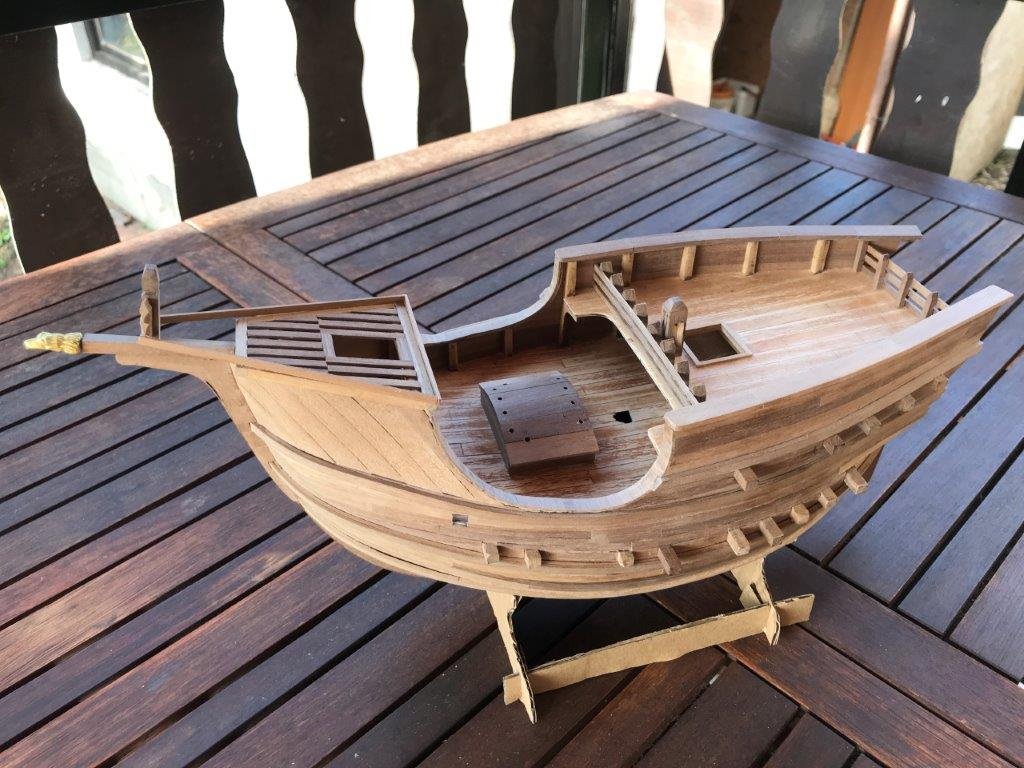 actually there is not much work left on the hull. But will have to spend some time with smoothing out the details, fill the cracks and sand the edges smooth before applying the finish. I also have to make a new stand instead of the temporary cardboard one, as I lost the original in a recent house move.
- chris watton, GrandpaPhil, tarbrush and 2 others
-
5
-
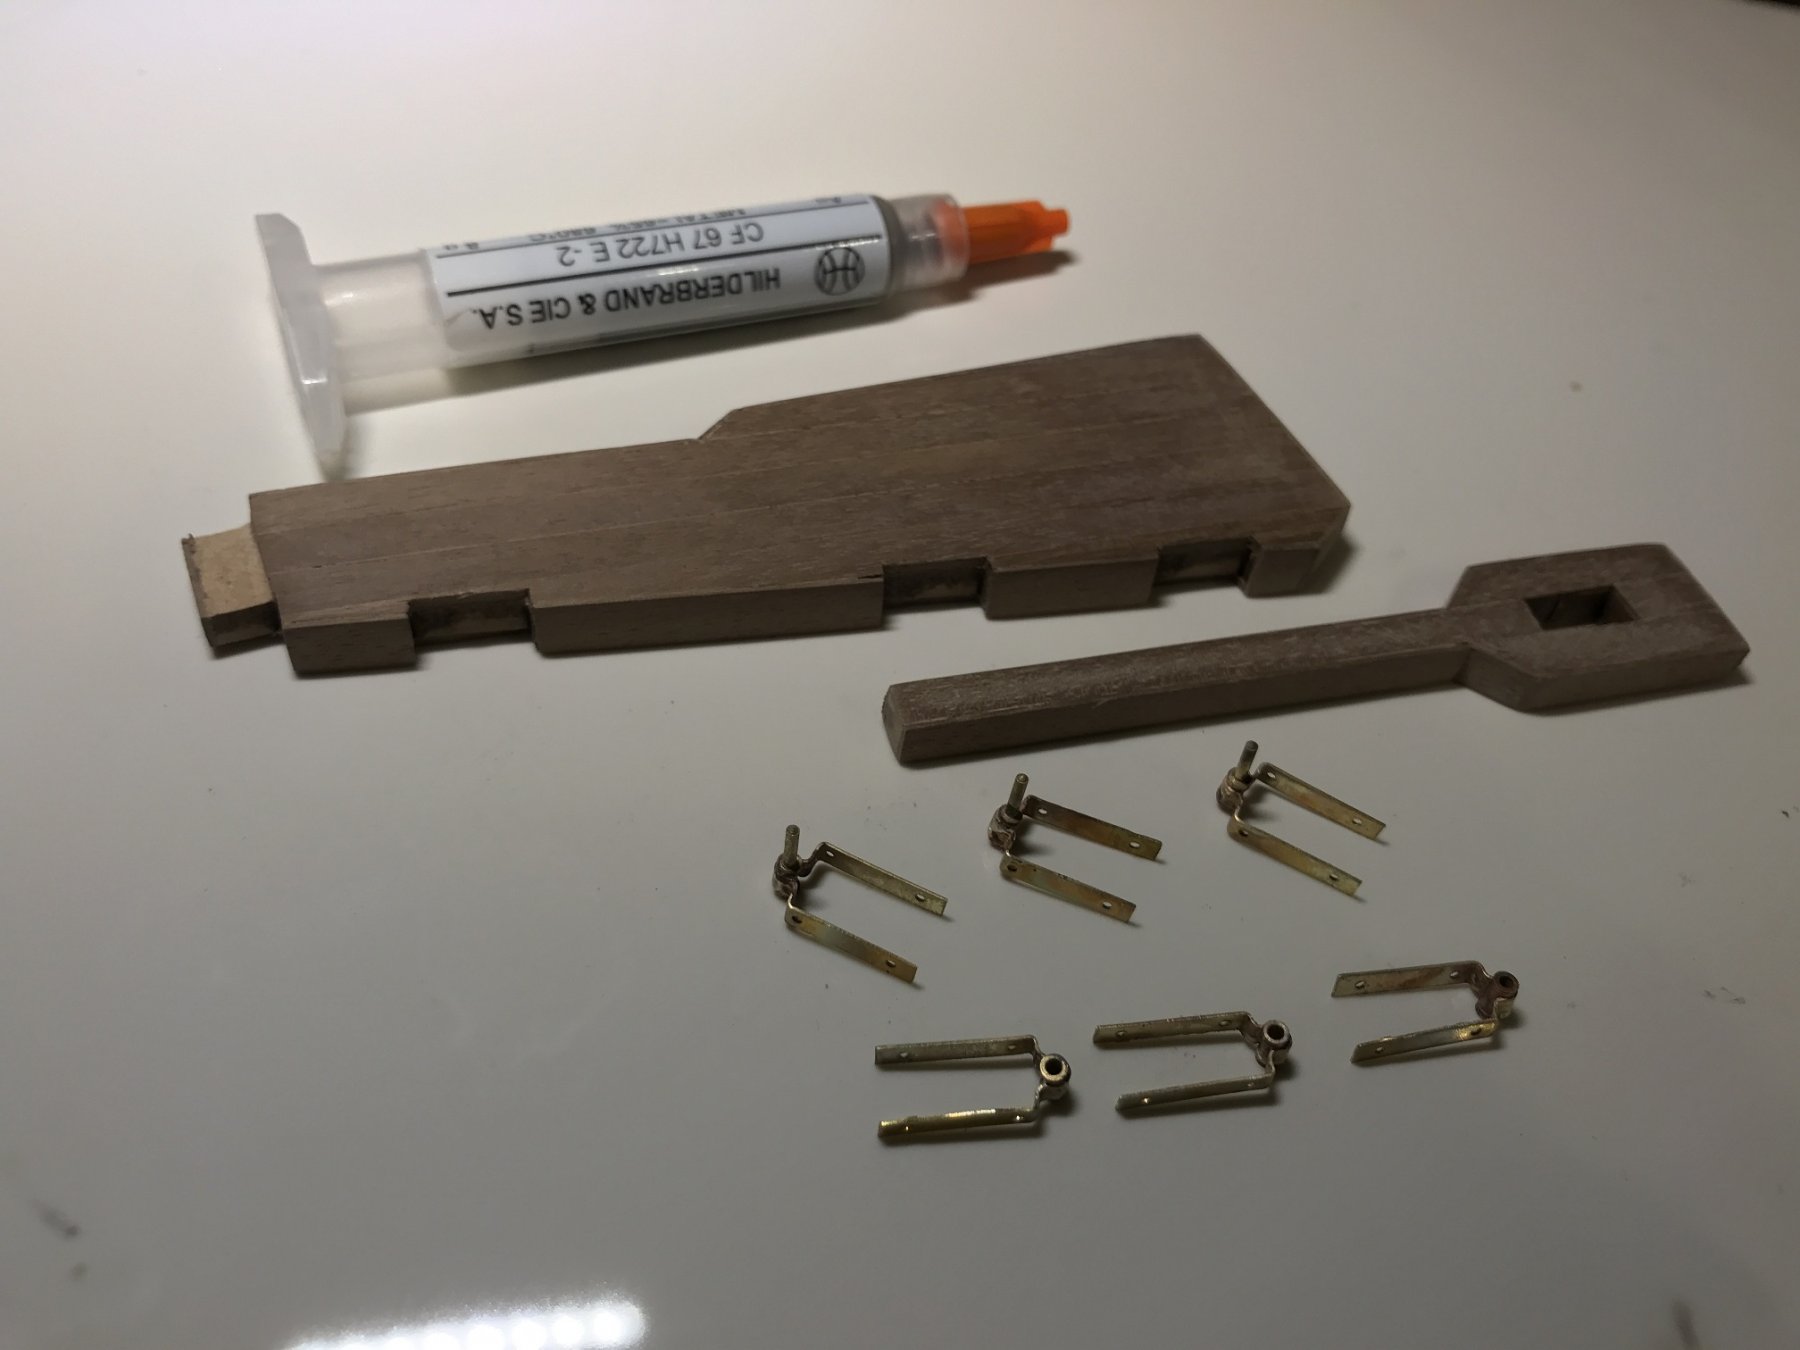
the parts for the rudder are made. the giant rudder is a planked mdf precut piece. The pintles and gudgeons are soldered. I still have to varnish the hull first, at least around the sternpost, than I can fit it to the ship. In the background, the silver soldering paste I used. It sticks to the surface and makes the task easily managable.

-
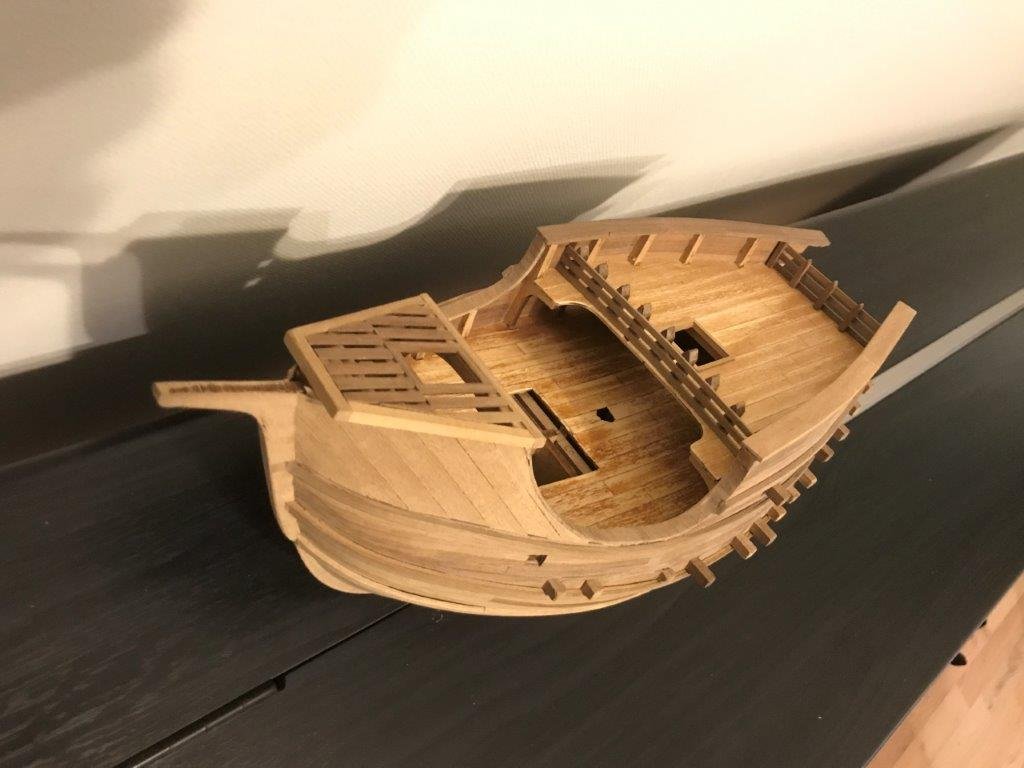
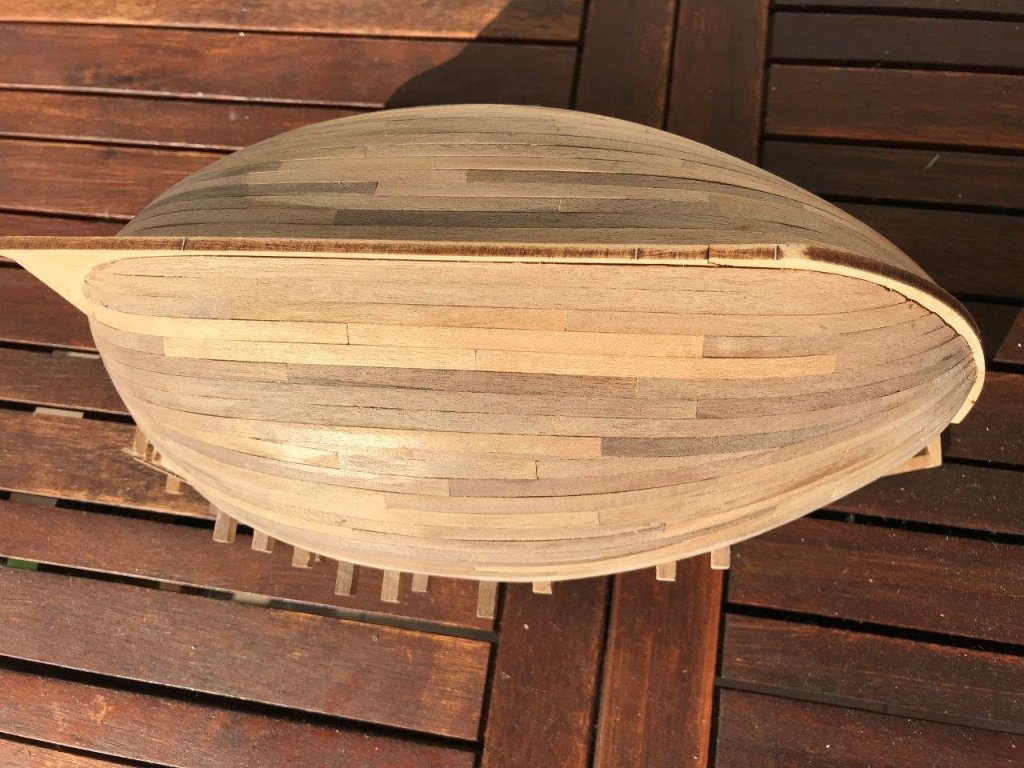
a long overdue update to log.. works slowed down a bit last year behind buying and extensively renovating a house, but the model is not abandoned. I finished the planking last summer, and I was able to do some small-scale work, like carving stanchions and other bits. Now I have a dedicated space to work, still not a full workshop but a craft desk in my working room, so works can catch up and I think I can finish the model before summer.
a couple of (not so good) pictures of the current status, with the planking is done (if I ever choose to plank a ball, I feel prepared..)
the rudder assembly next, shold be done for the end of the week.
-
This is a great build.
i found a similar article about colours here http://www.009.cd2.com/members/how_to/colour.htm
-
Hi Jasseji, it has a gundeck, however not full length, the bow area is closed and the deck does not extend there. The model is also designed with dummy guns on the gundeck - this is very simple to convert, just leave the dummy strip and add guns like I did. For the foremost gunport, which is between bulkhead 2 and 3, I added a small platform to hold the gun. Hope it helps.
-
not a major update, just a status on planking. slow, but continuous progress in the last month. the most challenging part is over, the end is visible. probably needs another month to finish.
- yvesvidal, Vivian Galad, tarbrush and 1 other
-
4
-
here is the progress I made in April on the second planking. The second belt is almost done on one side, and started on the other one.
despite the small size of the hull, planking goes very slow (as usual). This is my first try on scale planking, but the severe bends on both ends would make it too difficult to shape the plank precisely anyway. Each plank segment needs to be pre-bent. This slows down the process considerably, I can do 1-2 planks per day.
The 1x5 mm planks provided have a lot of room for later sanding, but they are a bit too massive for this size of the hull. My planks are clamped to a former overnight, than use PVA with spots of CA to hold the plank in place.
The above picture shows my process, I place the tapered, bent planks to either sides of the row, than fill in the middle with full width segments. The second planking of this middle belt seems to be the most demanding part of the build, I hope to finish on this weekend, and than move on to the upper parts.
-
On 3/10/2018 at 7:58 AM, Snow said:
Hi mate could you tell me what the color is beside the gumports is it a sand colour i cant work it out thsnks
Hi Snow, the kit calls to use the dark 2nd planking strips around the gunports, but I choose the insert some rows of the kit supplied light one. Not for authenticity, I just liked the look. I framed the gunports with standard 1x3 mm walnut strips (leftover from other kit) and stained them red. The result is some kind of dark reddish brown. I may try to take a pic in natural light if you are interested further.
-
thank you Sargon. Actually I worked a bit on her this year. Made a pair of replacement bow rail pieces (the kit one doesn't fit), but not glued yet. Also fitted the channels, deadeyes and chain plates. By the current plans, I'm not going to rig the model due to lack of space, but this might change as I plan to move.
The Diana needs actually the bow area built and with some short mast poles could be declared as built.
On the other hand there are some areas of the model I'm still not satisfied. I'm thinking of replacing the quarter galleries, making a new capstan, and tidying up the stern decoration which is a failed attempt of carving.
This is no change vs my history with the ship, I was constantly building/ deconstructing / rebuilding, resulting the improved areas contrasting the kit parts, and defining new targets for update. In turn, this endless loop and the lack of time made me to stop working on the model for years.
Anyway, I can set a build log, if there is interest.
-
.. which do not fit at all. I don't know why. Either a build or design flaw, I need a workaround. Nothing too complicated though, on one side I salvaged some part of the kit piece and used a planking strip to extend it. On the other side, I edge bent some 2 and 1 mm strips from my reserves (2x2mm + 1x1mm, to be precise), glued them side by side, forming the rail. This is glued into place finally.

The picture also shows the weathering of the upper deck, much lighter and more subtle than the lower one, while it doesn't really come through on the image.
The second planking is the next task on hand. I will follow a similar, 3 belts approach like I did for the first one. Already made some progress, yet to take a picture.
best,
David


Frigate Diana by DavidG - modified OcCre kit - 1:85
in - Kit build logs for subjects built from 1751 - 1800
Posted
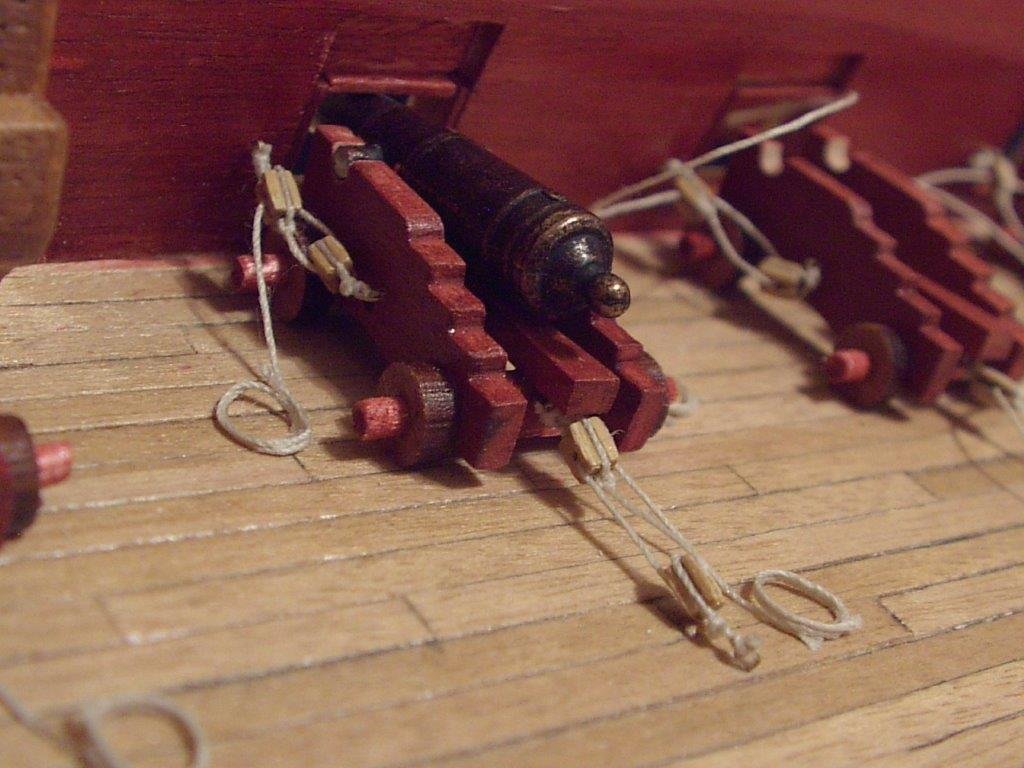
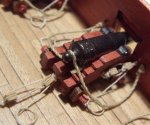
once I had the basic hull set up, started working on the guns. I planned to populate the gun deck will carriages (instead of dummies) throughout. A very fiddly job, but I was enthusiastic about it. I purchased aftermarket cannon kits (they are made of pear) and after sanding, staining assembled them.
I also changed the barrels to stock Amati items, I wanted to have them uniform, and they were just the right size.
A barrel is test fitted for checking height:
I fully rigged the visible guns. The barrel is only a temporary fit here, they will be painted black and the breeching rope added. I used 2mm blocks for this.