lambsbk
-
Posts
910 -
Joined
-
Last visited
Content Type
Profiles
Forums
Gallery
Events
Everything posted by lambsbk
-
Thanks John. Yes, I did use the Blacken-it. I guess I am about to find out how it is going to paint up. Although I have heard good reports about painting blackened brass some say there is a problem with the paint staying on over time. Hmmm...we'll see...
-
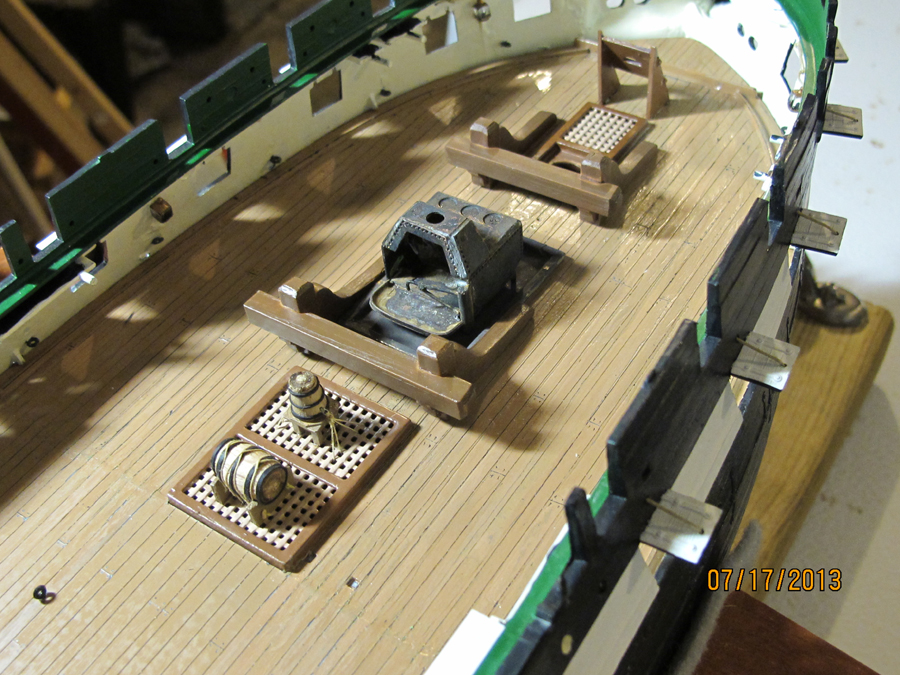
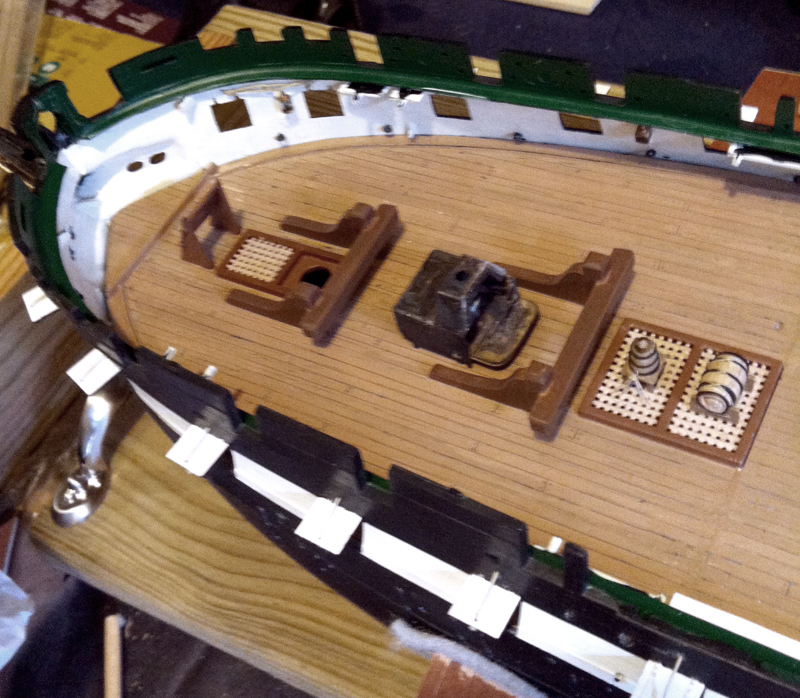
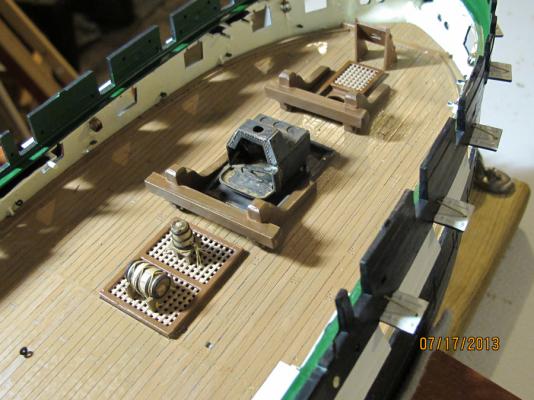
I placed the fore deck fixtures for the gun deck below for a photo op.
- 601 replies
-
- 3
-

-
- constitution
- revell
- (and 1 more)
-
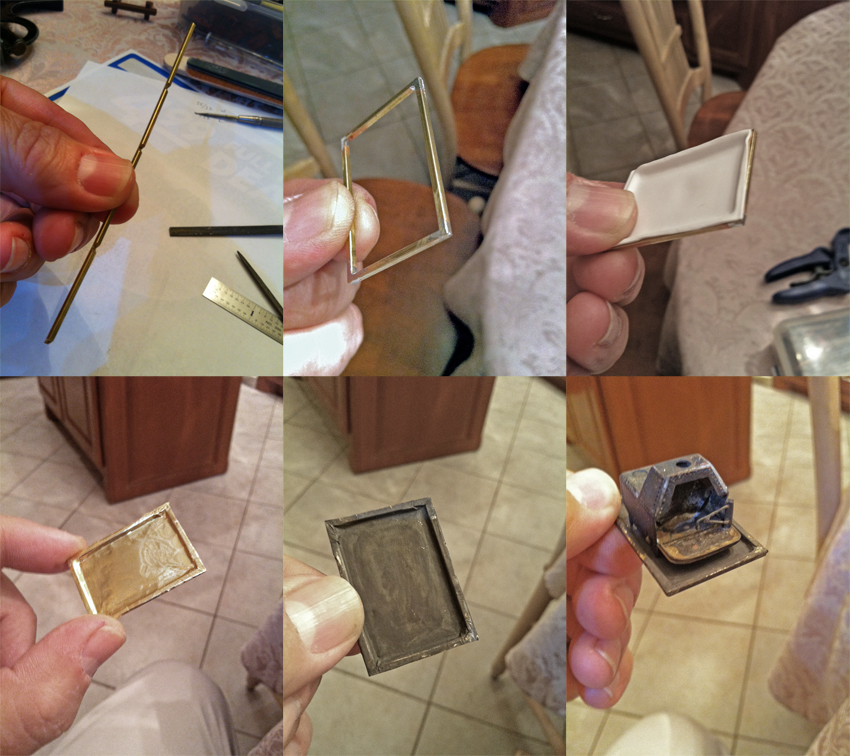
I have not had much time this week or last to work the build. I did mostly finish the camboose by completing the camboose floor (I think that would be correctly named). While in Boston I looked at that area carefully and was surprised to find no brick at all. Instead the floor consisted of a solid wood frame and metal shaped and hammered out to the inside area of the floor. This made sense to me since embers from the stove would be disastrous on the wooden deck and the metal is more easily seamed. I started with brass micro-tube stock and cut 'V' shaped notches appropriately. Then I bent it into a frame and soldered the frame. Next I tried heating and melting a plastic ember tray but that did not work. So next I shaped .001mm brass and soldered it into the frame. After cleanup I blacked the structure. The result is below. I have not painted it yet.

- 601 replies
-
- 2
-
-
- constitution
- revell
- (and 1 more)
-
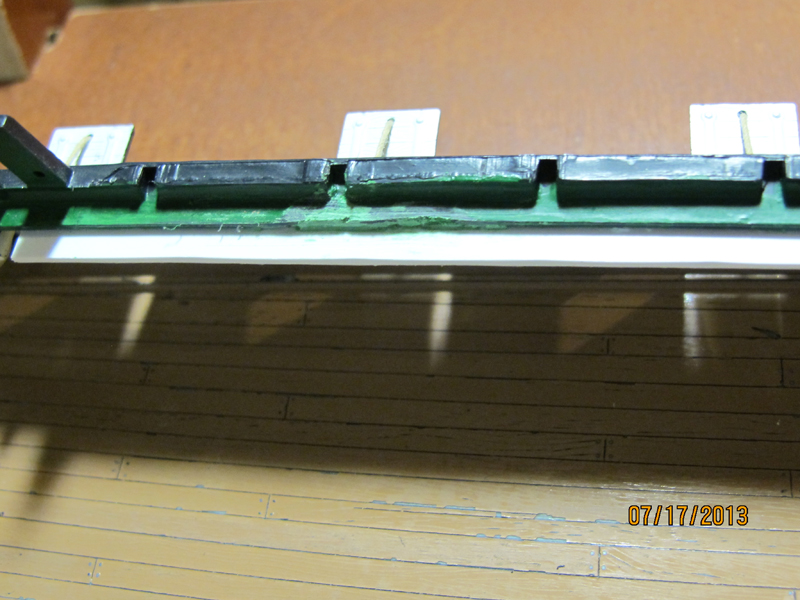
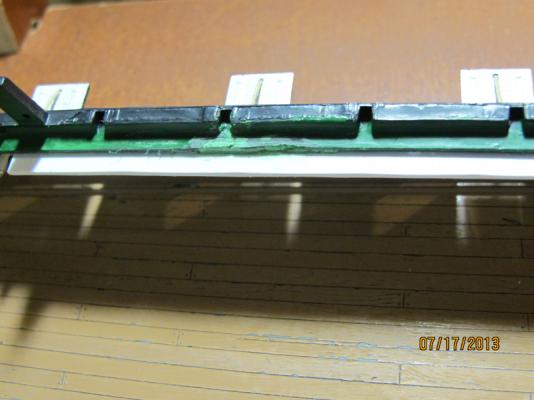
A couple of folks were wondering about the Spar deck repair. I used some green plastic putty and corrected the defect. This is a pic of the completed repair before paining. The styrene is being used for deck support and to discourage light transmission from the Gun deck through the Spar deck cracks. It will eventually line the entire under deck. Obviously some touch-up painting will be needed in a few areas.
- 601 replies
-
- 1
-
-
- constitution
- revell
- (and 1 more)
-
Very nice John.
-
Augie: Just a note on the shrink wrap - I used it for banding my barrels and noticed it likes to slip. I just touched them up with Hypocement to hold them in place. The anchor stock has a much gentler taper and maybe won't need this addition but I thought I would mention it. Dave
-
Well John I finally got home and looked at the label. I don't know how I could forget: it is called "Blacken-it." It is made by a company called A-West in Woodstock, GA. It is a dilute Seleneic acid/copper chloride/copper carbonate solution. I use shot glasses to pore in and mix the small brass pieces for blackening.
-
I will have to look at the label. I bought it at Hobby Town in Mount Pleasant, SC.
-
I love my Dremel. When I bought it I wasn't sure if I would use it much. Now I realize I could not model the way I want without it. Have a safe trip John. Dave
-
Right now I am in the middle of trying to figure out how to strop 2mm blocks. That is a new challenge for me. I am experimenting with a knotting tool. We'll see if it helps.
-
I will probably use a chemical agent to blacken them before painting. The agent is a little tricky as it produces a gas from the chemical effect and the brass has to be watched and stirred to prevent uneven exposure. Oddly, the chemical sometimes produces an 'oily' after effect that has to be re-treated. I believe the pins will be small enough to avoid some of these problems. The eye-bolts I used for the cannons were difficult to control regarding these effects due to the small central 'eye'. After blackening the pins my HOPE is for better paint adherence to the pin.
-
Mario: The finished build is SUPERB. Just a question: the build looks difficult. Would it be a project for a beginning wood build? If it can be done...where do you get the kit? Thanks. Dave
-
Looks good John. I agree, the details are making this build start to pop.
-
Oh...I think they are brass pins. I will probably blacken them before painting them.
-
Thanks John and Kim: It is lambsbk@sc.rr.com I have not even thought about the questions on technique yet for the pins. Jassiji is ahead of my build here and he drilled them out. I have a couple of spare parts so I will be experimenting before going 'live' on the build. It will probably be several log pages from now. Thanks for your thoughts and interest. No. Not rude...this forum is meant for sharing ideas, techniques, and encouragement (from what I see in it anyway). I wonder if Chuck has a mission statement or something like that which spells out the forum mandates. hmmmm.. I'll look around. I know the current forum look and general post forte. I wonder how it started. Dave
-
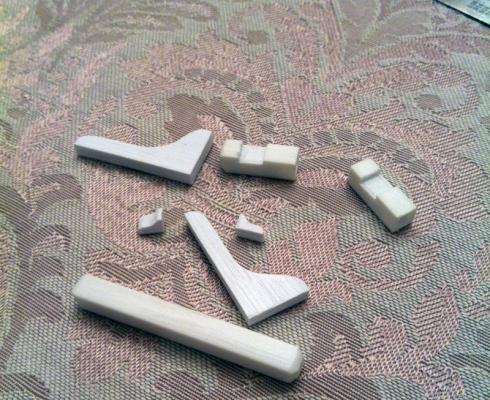
Not much time this week and next week due to a busy schedule; so I worked the fore bitt to at least accomplish something. Bitt parts after shaping: On deck...

- 601 replies
-
- 1
-
-
- constitution
- revell
- (and 1 more)
-
Nice work Evan, as always.
-
Sounds good Henry. John: You can't keep a good ship down.
-
BTW. Have you heard from Henry. He was to sail on the Connie on the fourth. I wish I could have been there for that trip.
-
Thanks John. I would not have thought about it on my own. So many good modelers have chimed in on this weakness of the build that I just had to take the plunge. I ordered 5mm pins from MS but they are backordered for now. Hopefully I will have them in hand when needed. Dave
-
Thanks. My pins are on back order but I am closer to needing them now that the gun deck is moving along. I will watch out for those smaller rails.
-
Dan: Nice effect on the weathering. It looks like just the right amount to preserve some of the copper sheen as well. I don't know about the color scheme but I understand your dilemma. What is the reference you are currently using? Dave
-
Jasseji, if I can ask, how did you drill out the fife rails to accommodate the brass belaying pins. I just ordered some and am not sure how to get the job done. Thanks. Dave
-
Kim: the save is still ongoing. I have glued styrene strips on the underside of the spar deck and I believe I will be able to use plastic putty to repair the damage. I don't think it will be very noticeable when complete.
-
Russ: I assume you mean the small nibs of thread closest to the ring bolt pointing toward the gun. I agree. I don't like how it turned out. The rest of the guns are going to have a simpler seizing knot - for looks. Since it has to carry no weight I see no reason to secure it with an 'ugly' properly tied knot. Thanks. BTW, I am enjoying watching your schooner come along. She looks great.