
boris279
-
Posts
168 -
Joined
-
Last visited
Content Type
Profiles
Forums
Gallery
Events
Everything posted by boris279
-
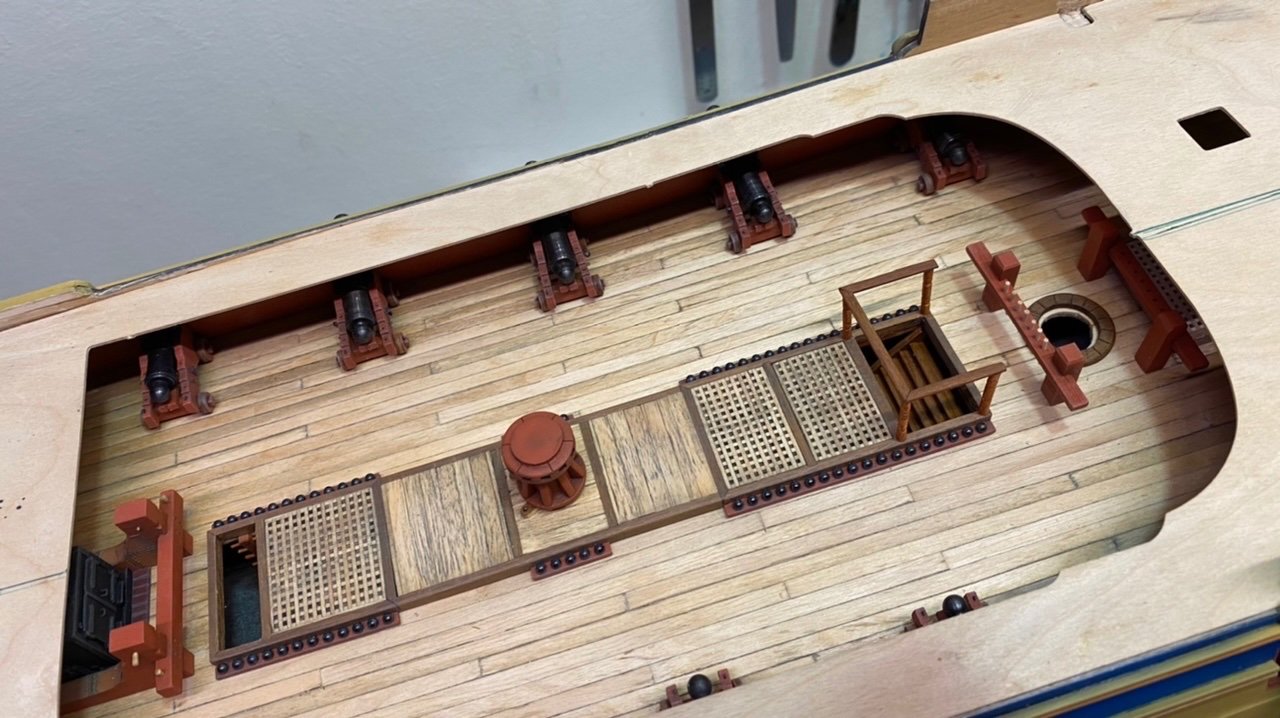
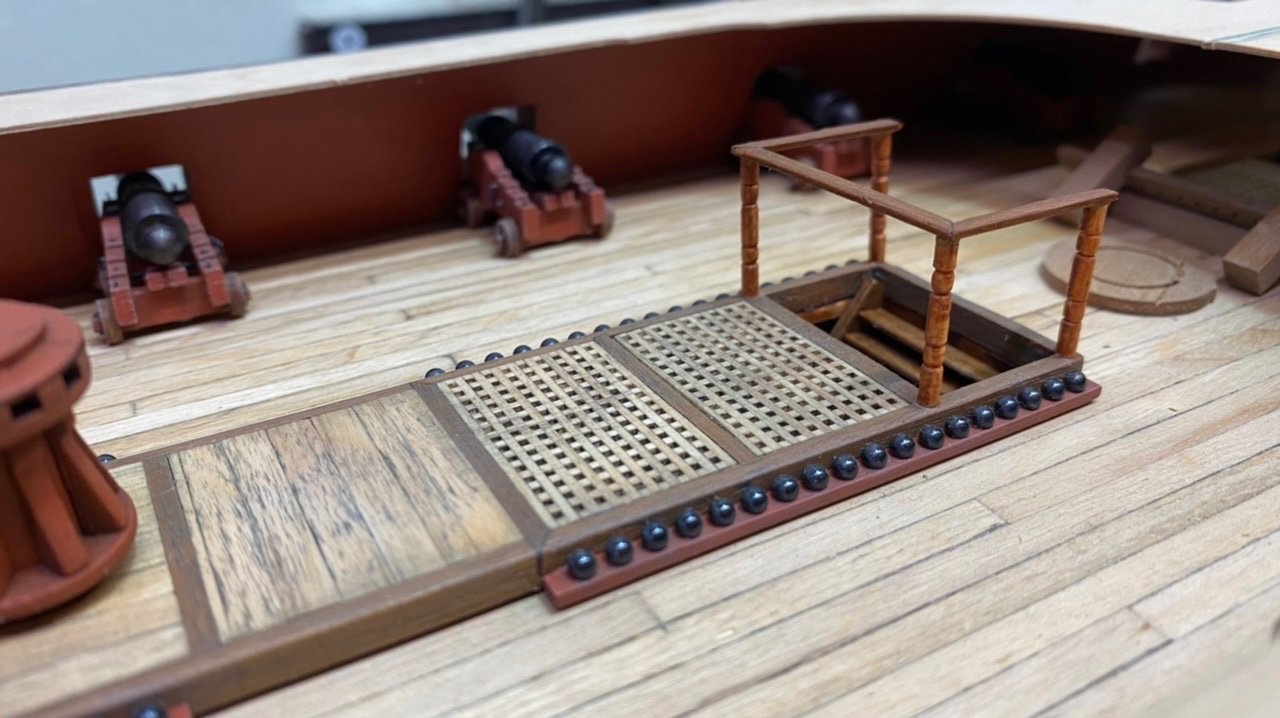
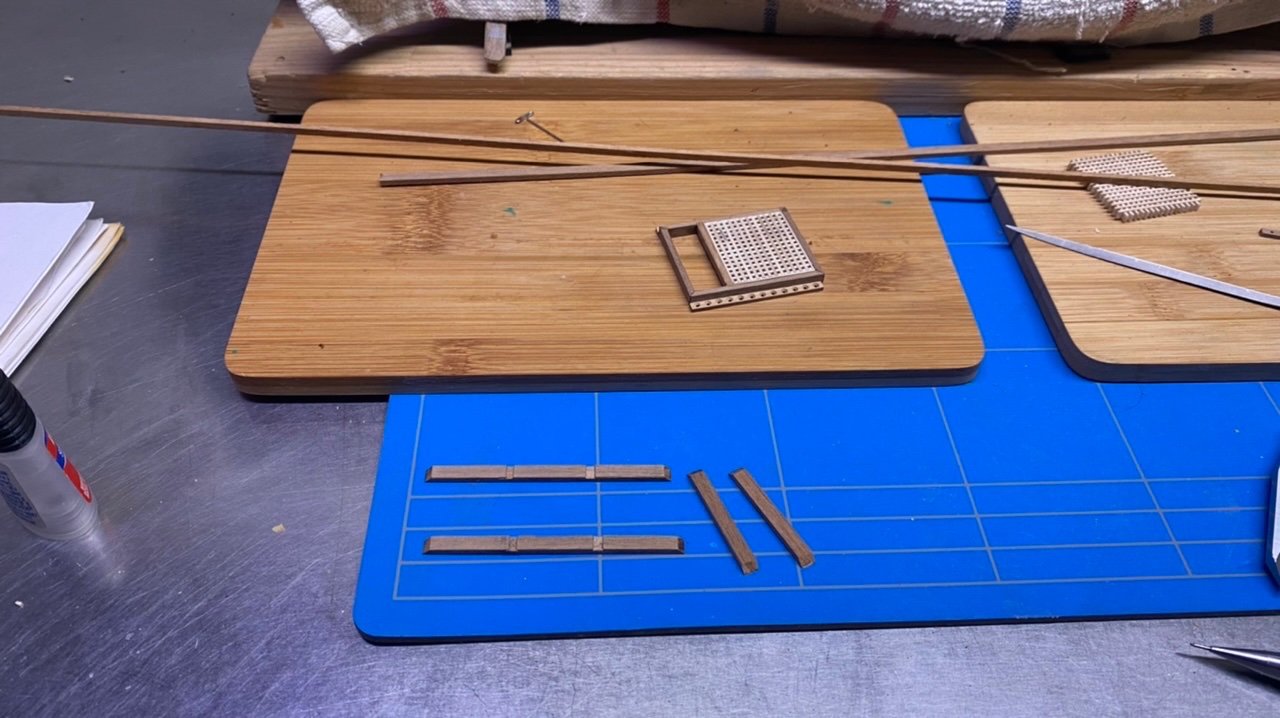
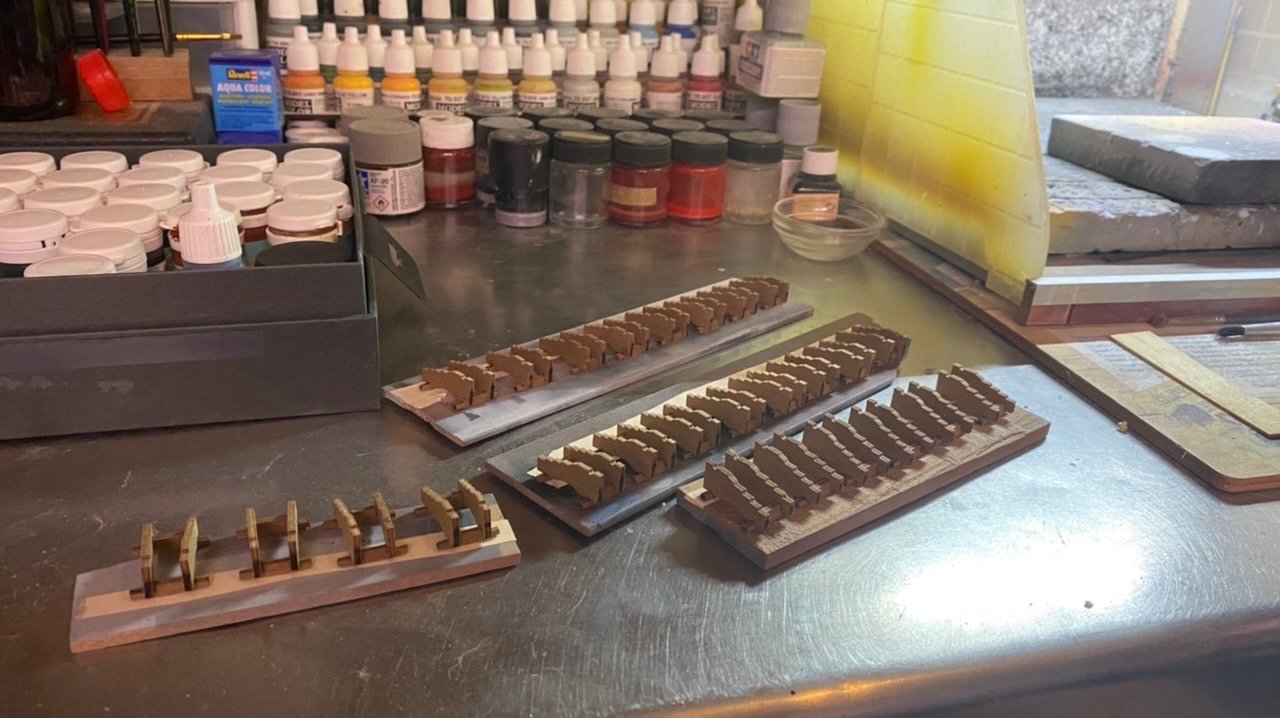
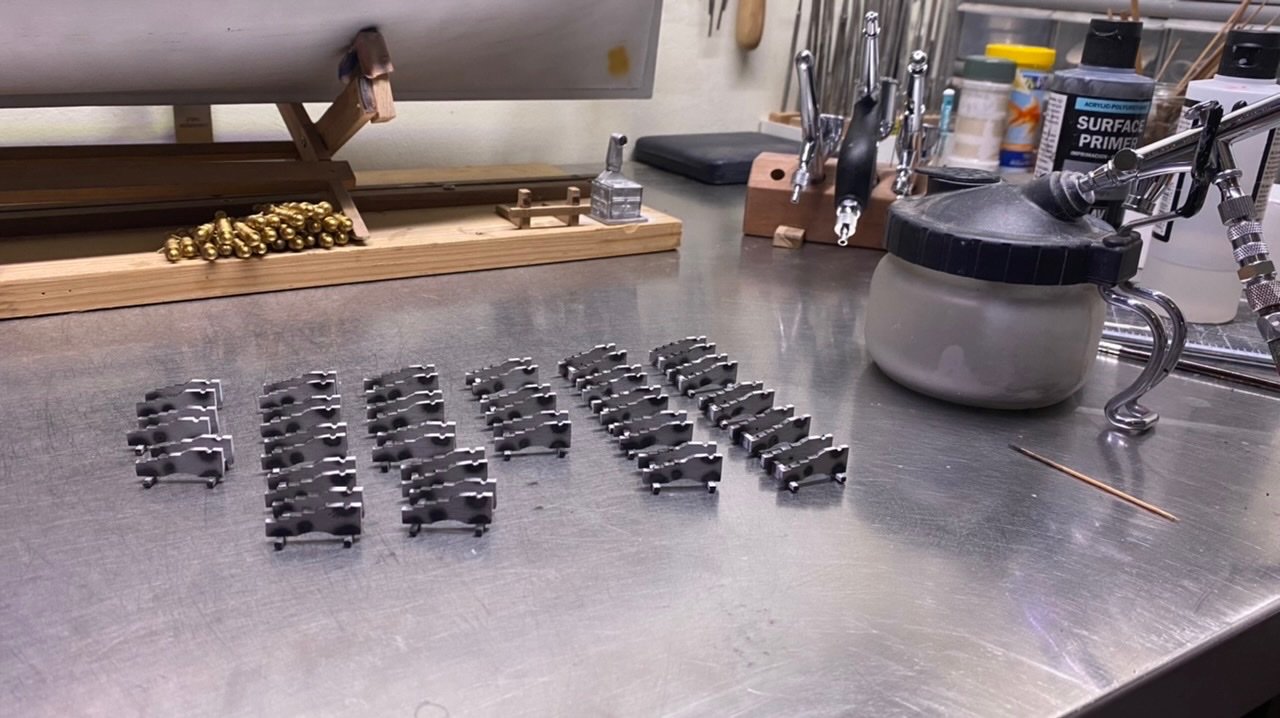
 Today I made a start with the capstan, grids, bettings and stairs. Unfortunately, in my enthusiasm I forgot to take pictures, but luckily many people have been there before me, with pictures and explanations. So herewith only pictures of the temporary end result, still needs to be done, but it gives a bit of an idea.
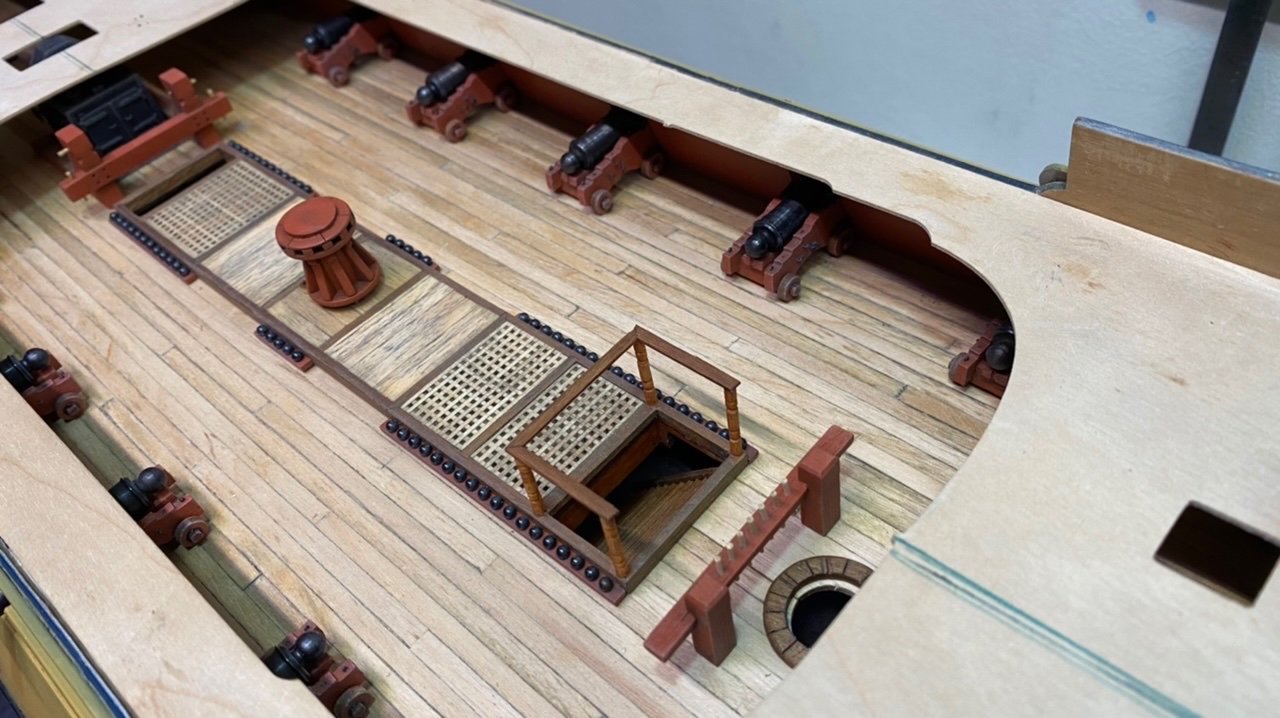
-
That is a very nice job, you did there like it a lot. !!
-
Nice work on the coppering!! to cut out the gun ports, I used a mould, that I made from plexiglass, works great and makes it much easier to cut them out. also very helpful when to place the brass trips. just my 2 cents, perhaps it is useful.
-
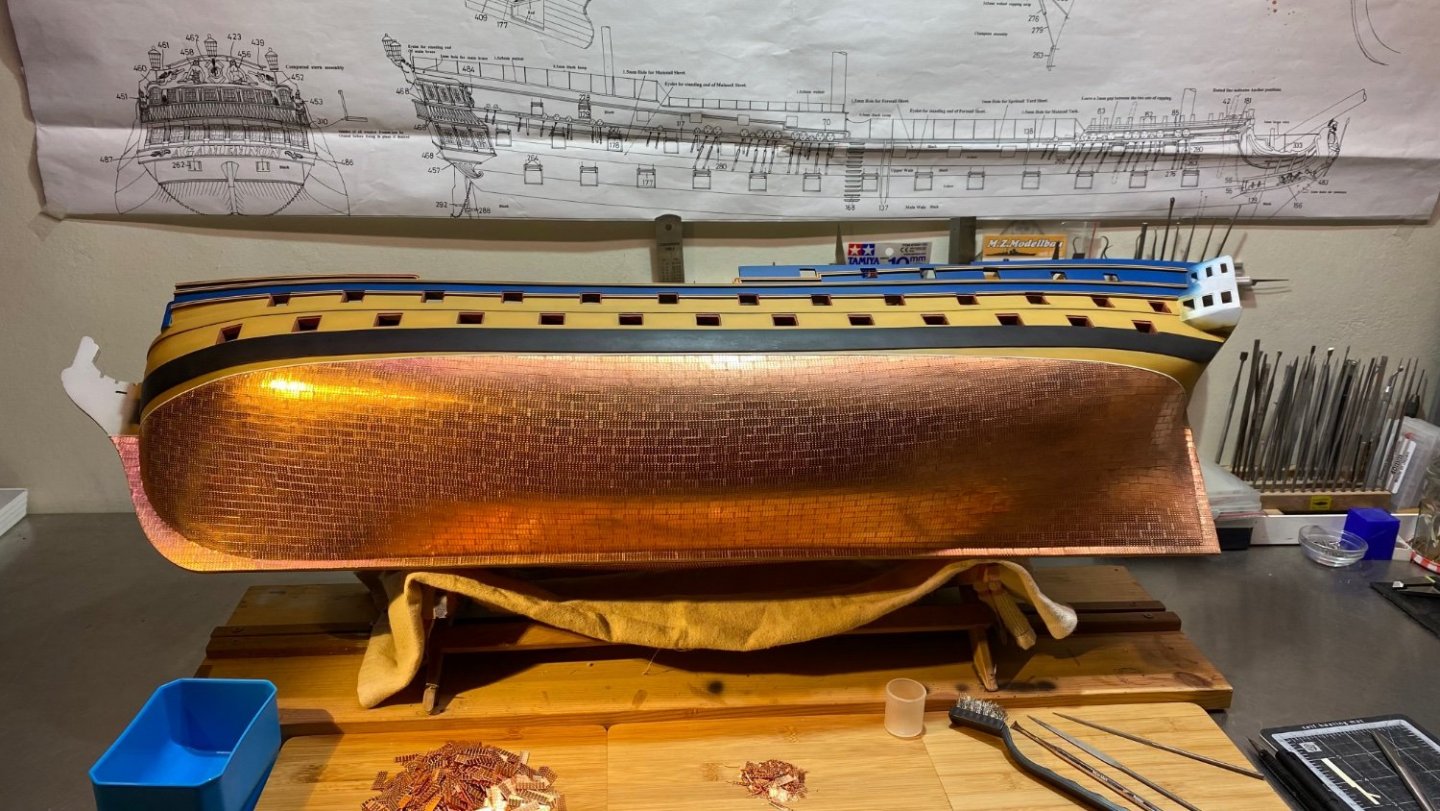
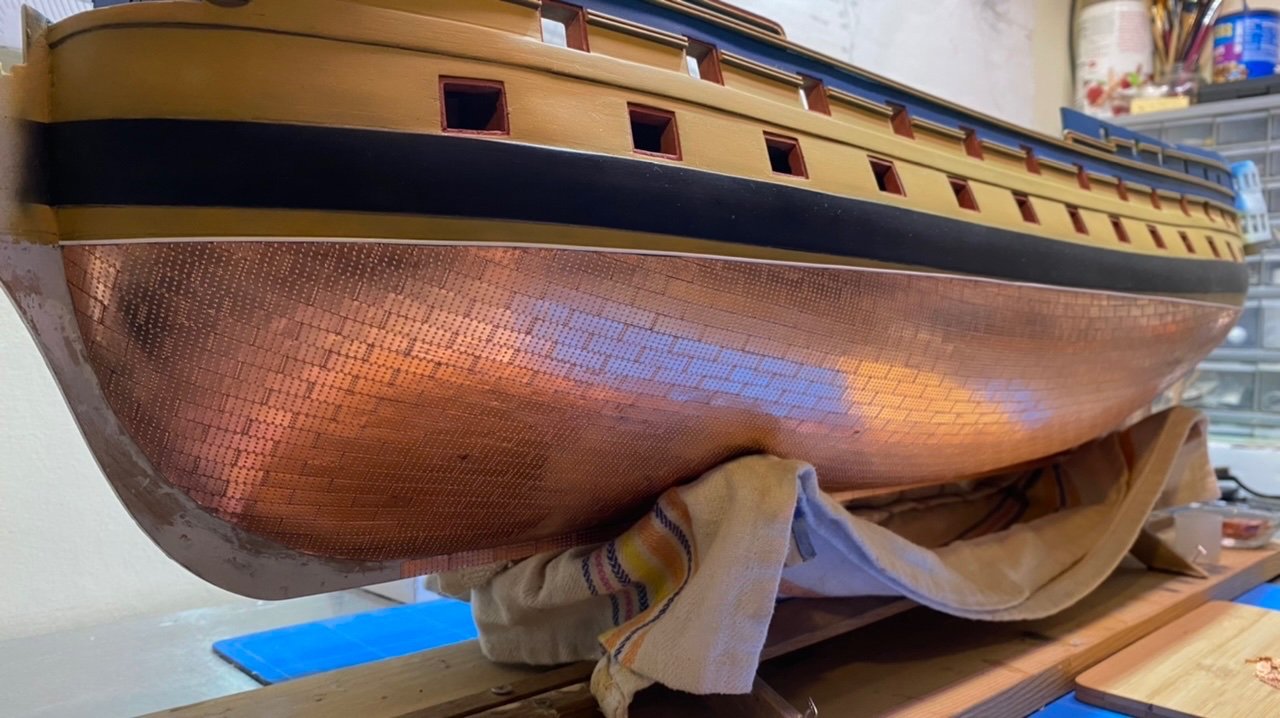
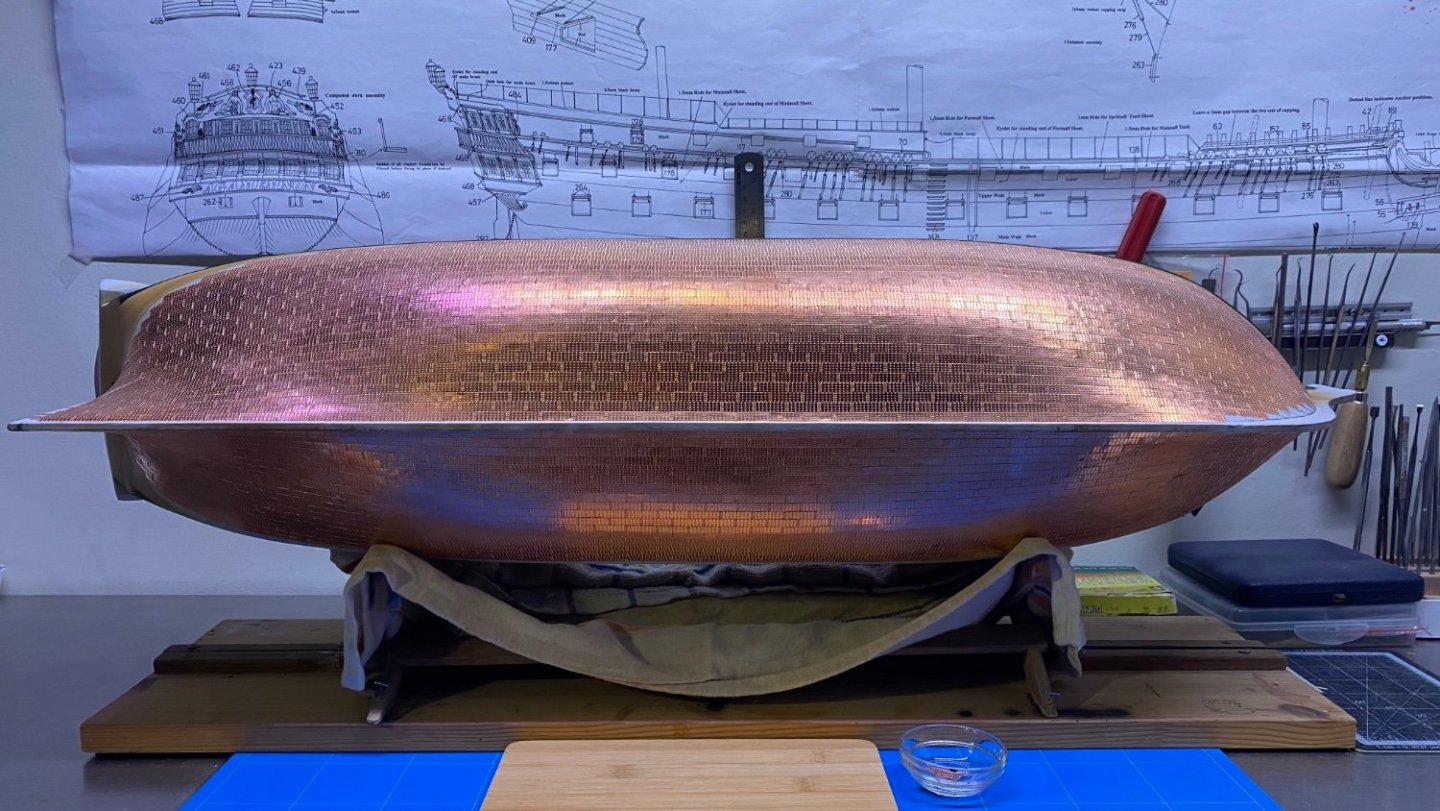
Thank you all for your reactions and for watching I have weathered the copper plates a little, as a test I kept a number of plates in a bowl of seawater for 3 weeks to see how the colour would turn out. This is my reverence to work from. I then also applied this to the rest of the underwater ship, accelerating the process with ammonia, after cleaning, I applied a number of filters of copper paint and blue/green paint, then sealed this with a layer of varnish. Then I touched up the rest of the paintwork.
-
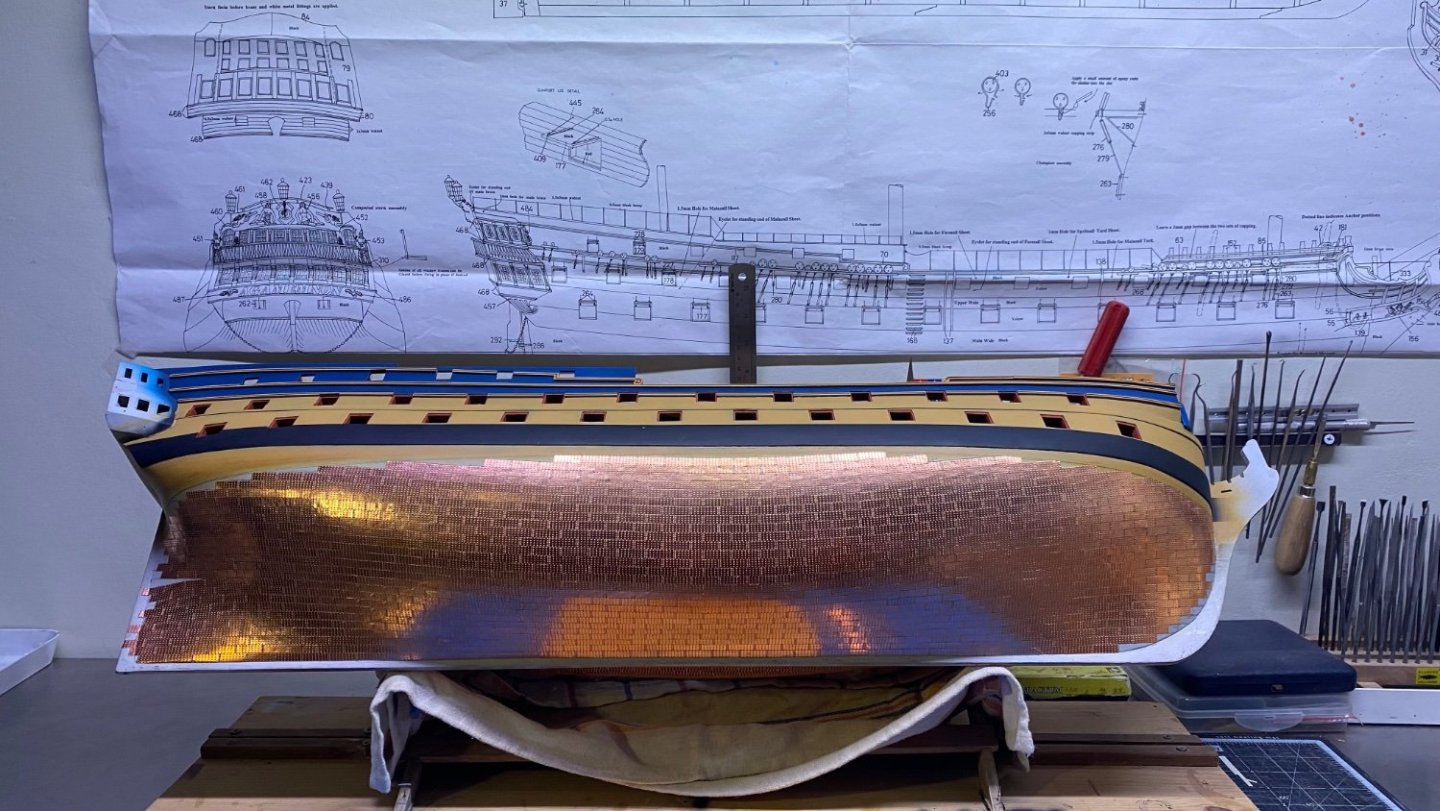
The chapter on gluing the underwater hull with copper plates is finished. Only the rudder remains. As I have never built a ship model of which the underwater ship had to be fitted with copper plates. I must say that it is not as boring and difficult as I thought it would be. I did notice that the necessary counting, calculating and measuring is important to make it a little easier for yourself. And also noticed during the gluing, that by bending the tiles a little, they are easy to place, by sliding them over the underlying row. All in all, I kept the cutting loss to a minimum, by using the cut off pieces as fitting pieces at the waterline if possible. That way I have enough left over. Now all that's left to do is colour the white trim and we can get on with the hull.


-
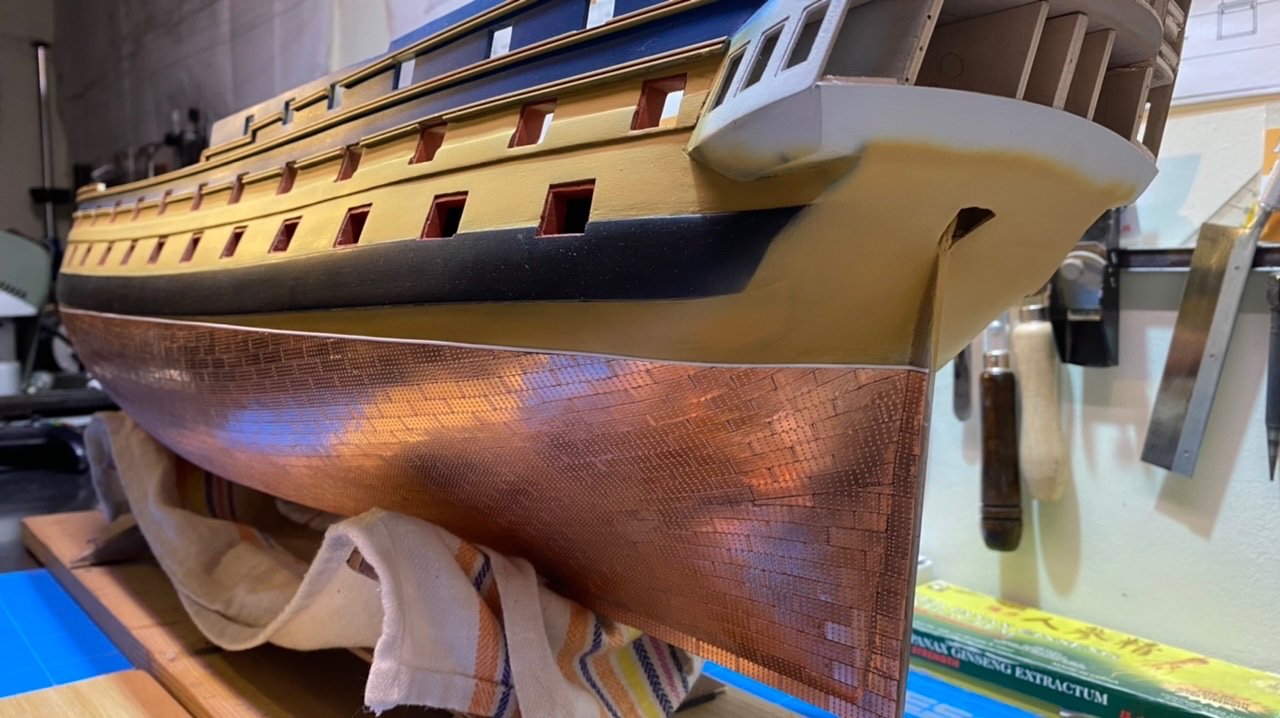
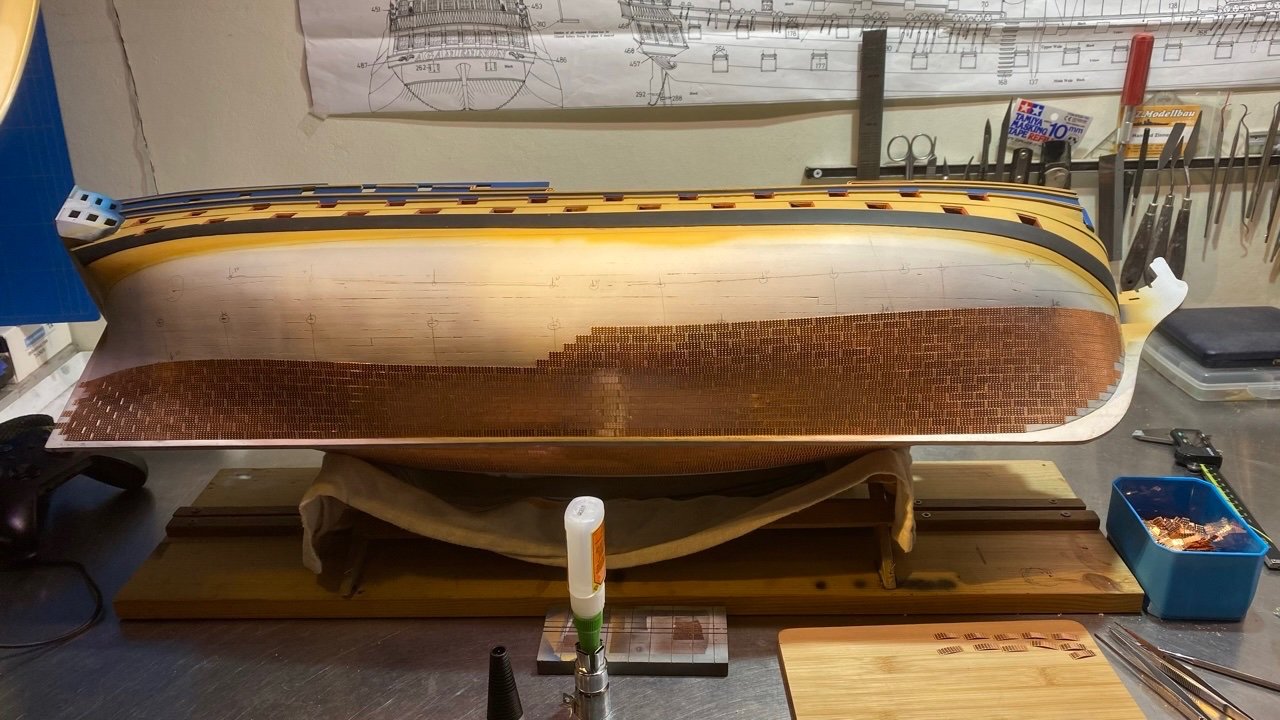
Allen, I was already convinced myself that the tiles are indeed not quite the right scale, it is indeed that I have to do with what is supplied with the kit, I have already done some tests to get a slightly more realistic image. It seems if the plates are sanded a little, then the nails are less dominant, and the whole is a little calmer in my eyes. But I am still testing.
-
Thank you all for your thumbs up and for watching. A bit further on, port side is finished except for the last part of the bow, this I will finish later to make it fit nicely with the starboard side. The strip on top will be painted later on. Only the starboard side to finish the waterline and the cover strip and finally the rudder. Below some photos
-
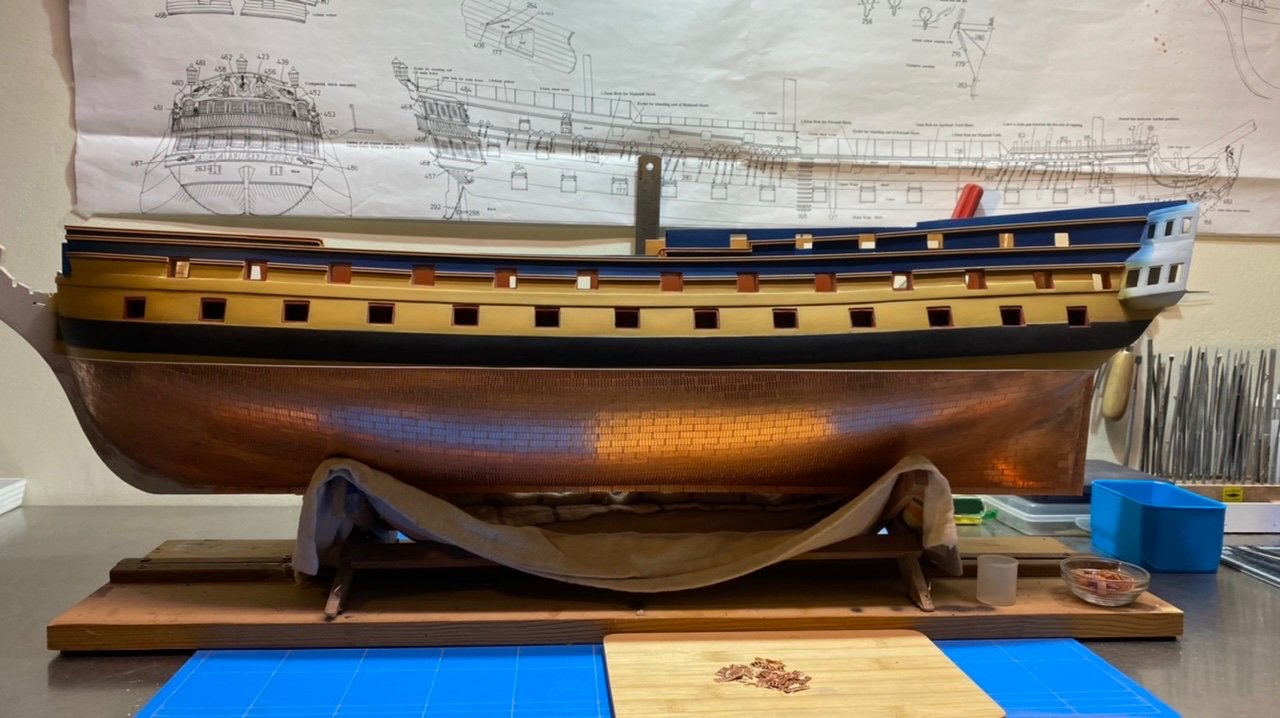
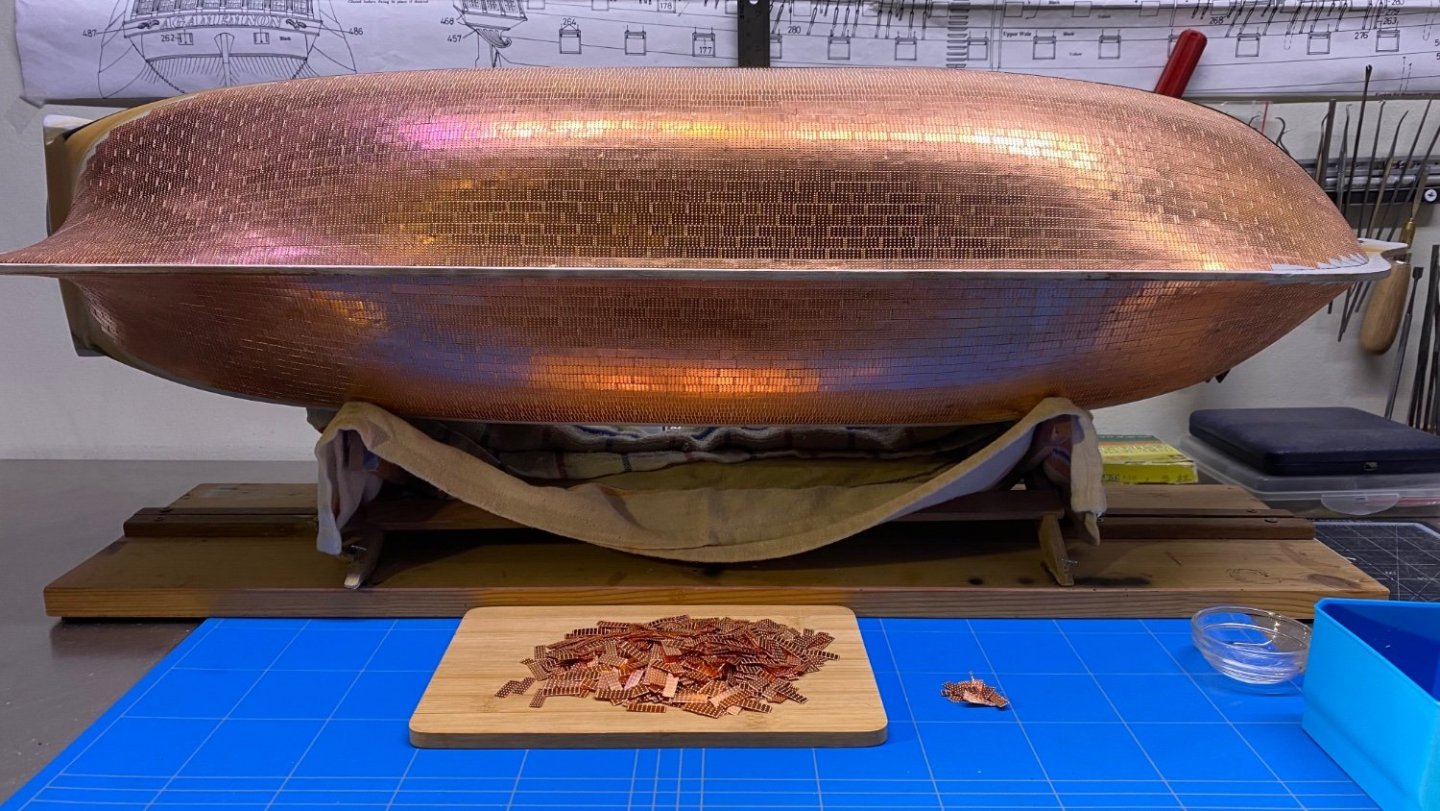
Thanks for the reactions and for watching. The big copper plate puzzle is more or less done, all that remains is to make all the small fitting pieces that connect to the waterline. All in all, counting and calculating has worked out quite well, and so far I have minimal losses (right-hand pile) and still have a fair amount of tiles left. On to the last stage, the plinth that covers the top of the waterline and the keel on both sides, and as a final piece of the puzzle the rudder.
-
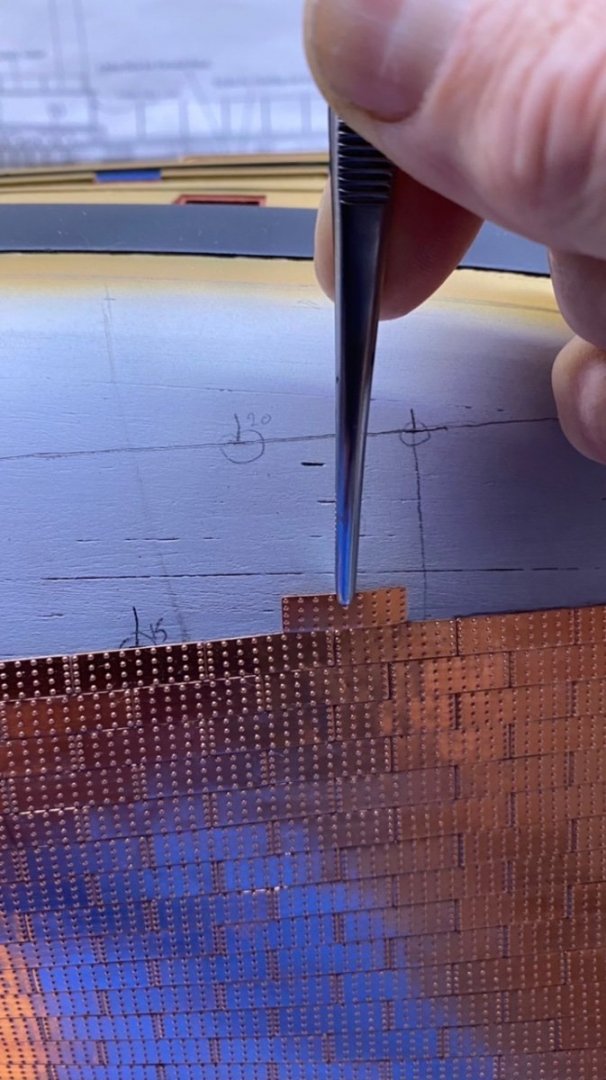
I wish everyone a happy and prosperous New Year Since the holidays are behind us, we can get on with modelling again. After a lot of searching and reading, measuring and calculating. I started with the big copperplate puzzle. In this case I started at the keel, and try to work my way up to the waterline, trying to follow the courses of the planking. Are now 10 courses placed on both sides to create a base. All with about 1000 tiles placed, there are still about 1500 pieces left.

-
Nice !! Looking forward to how you are gone copper the hull.
-
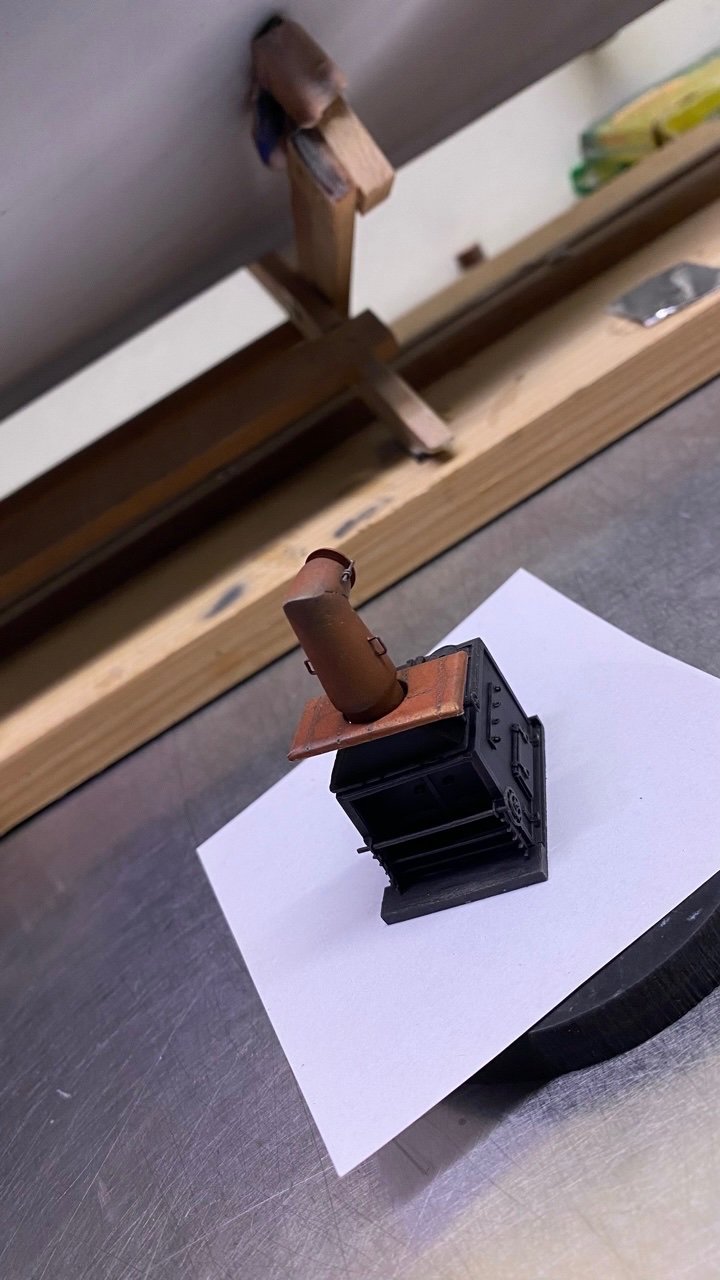
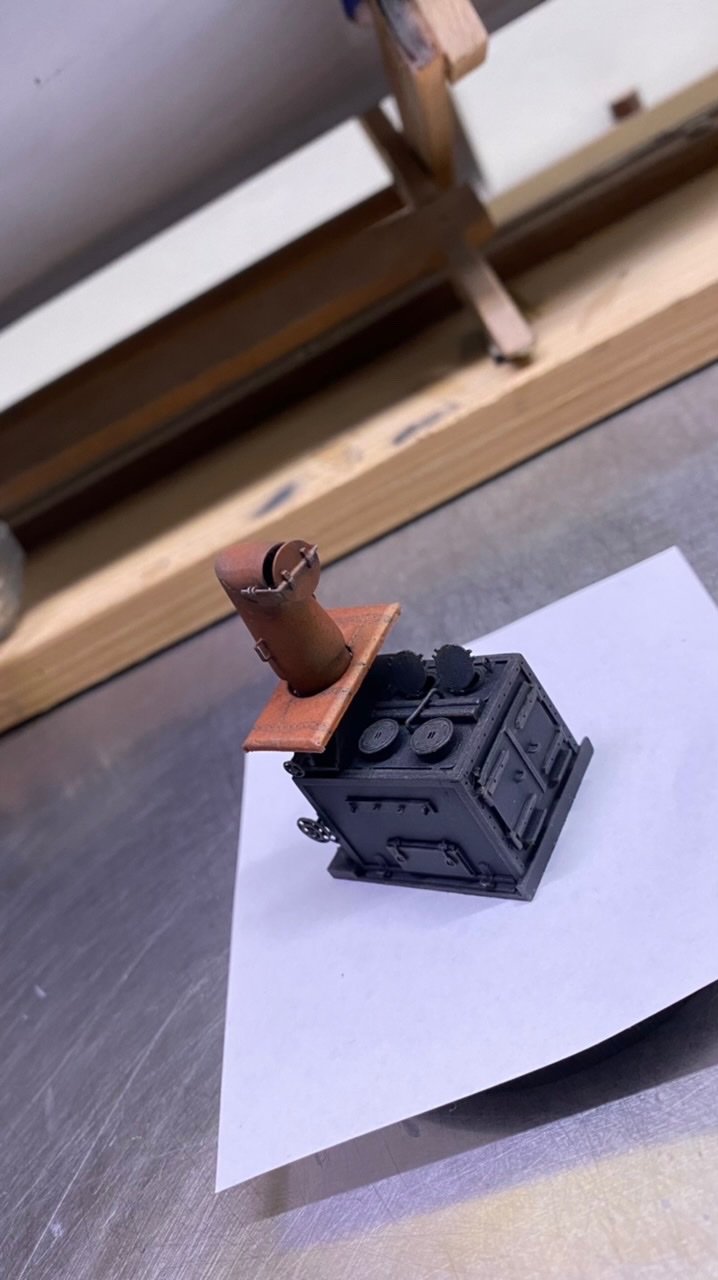
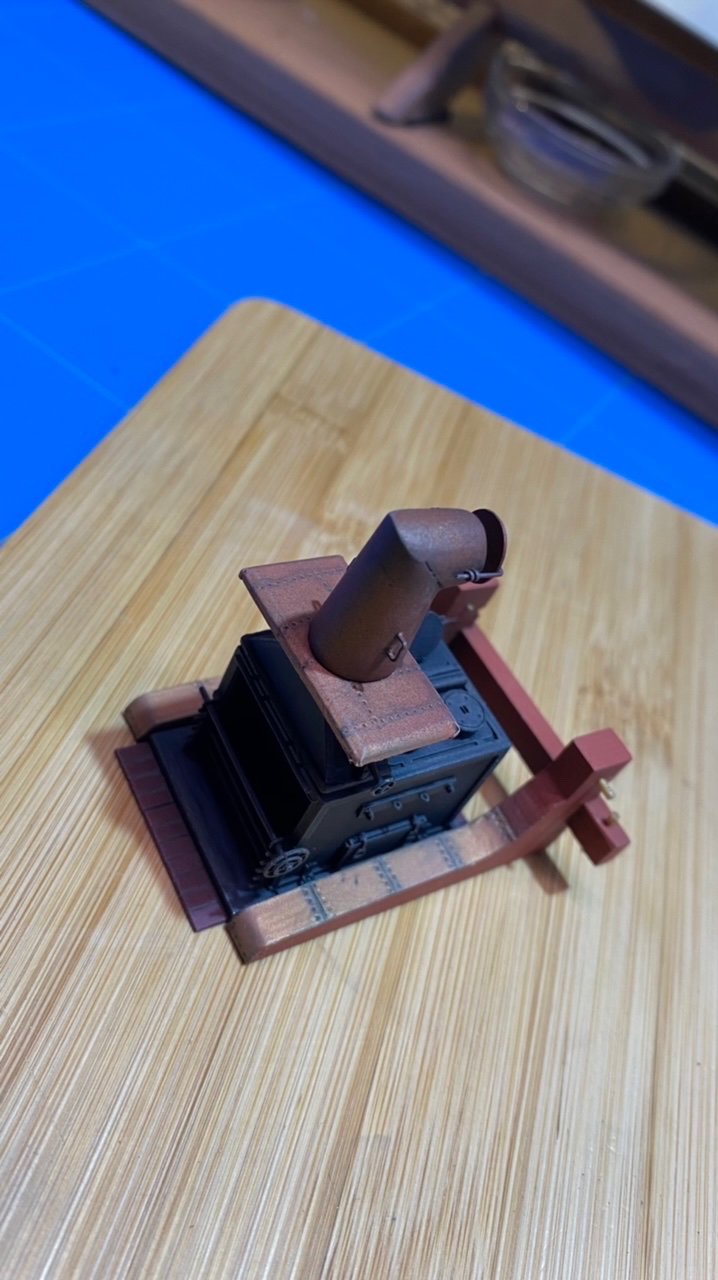
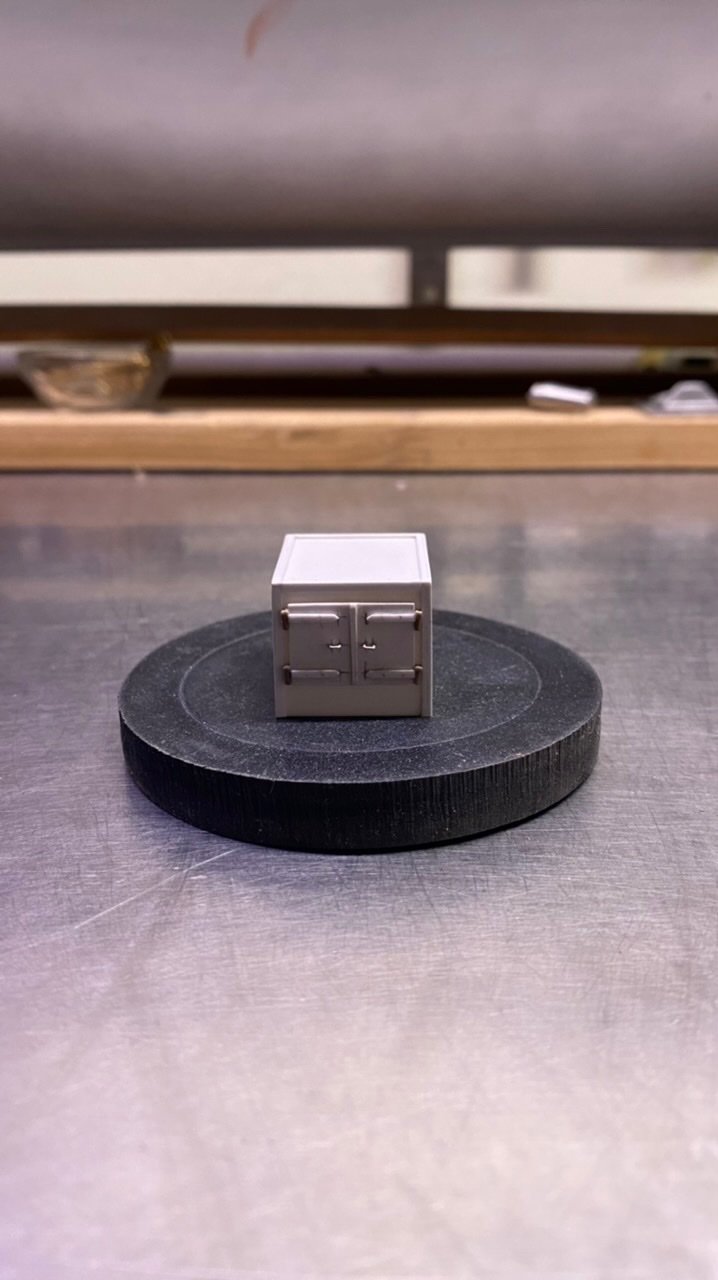
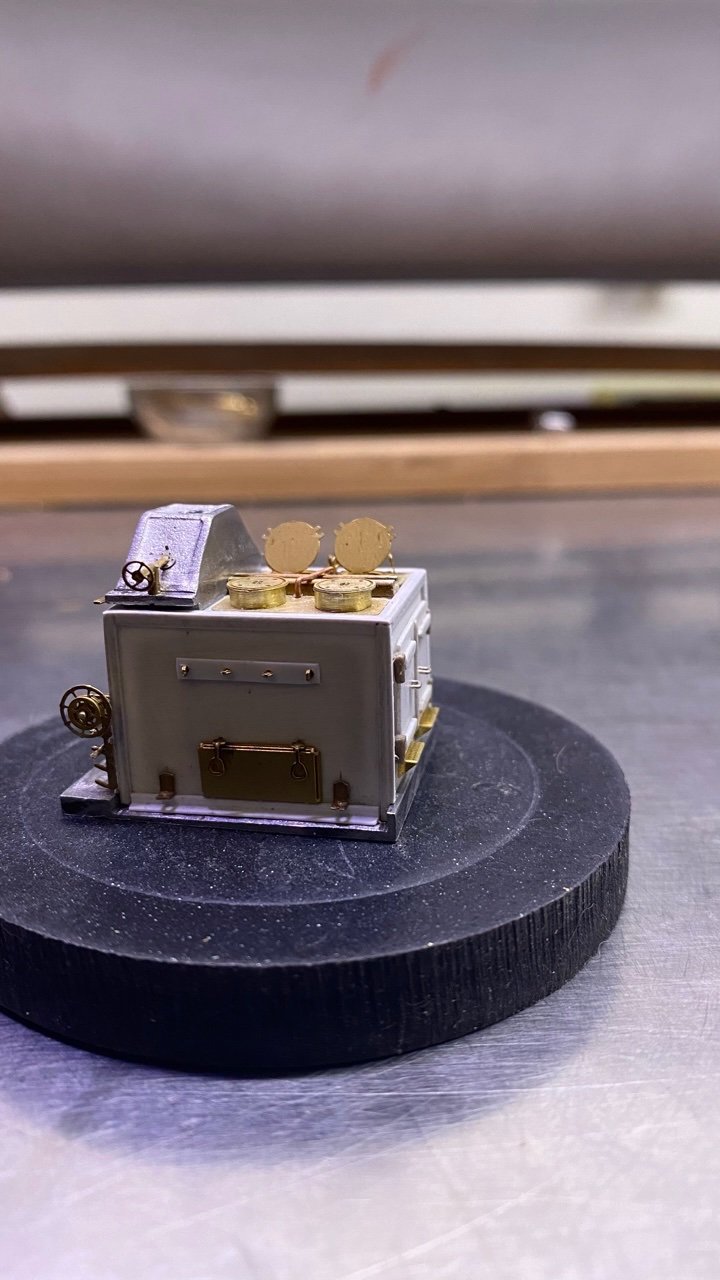
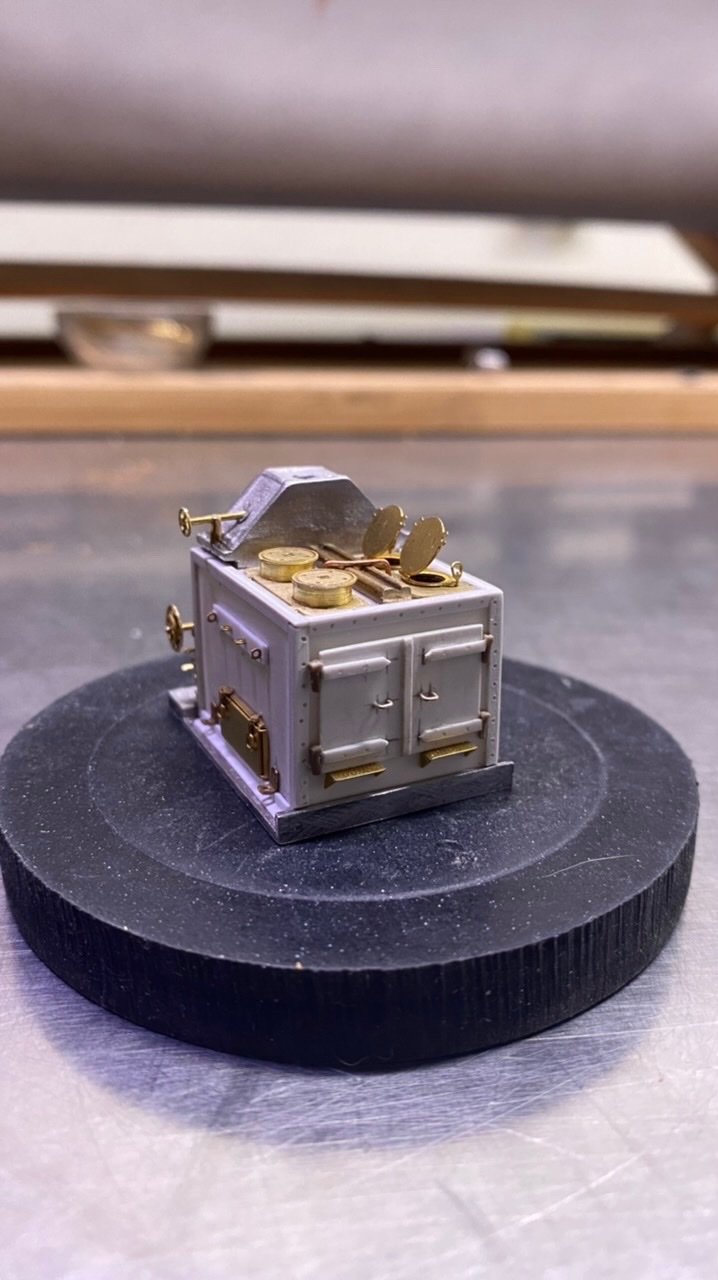
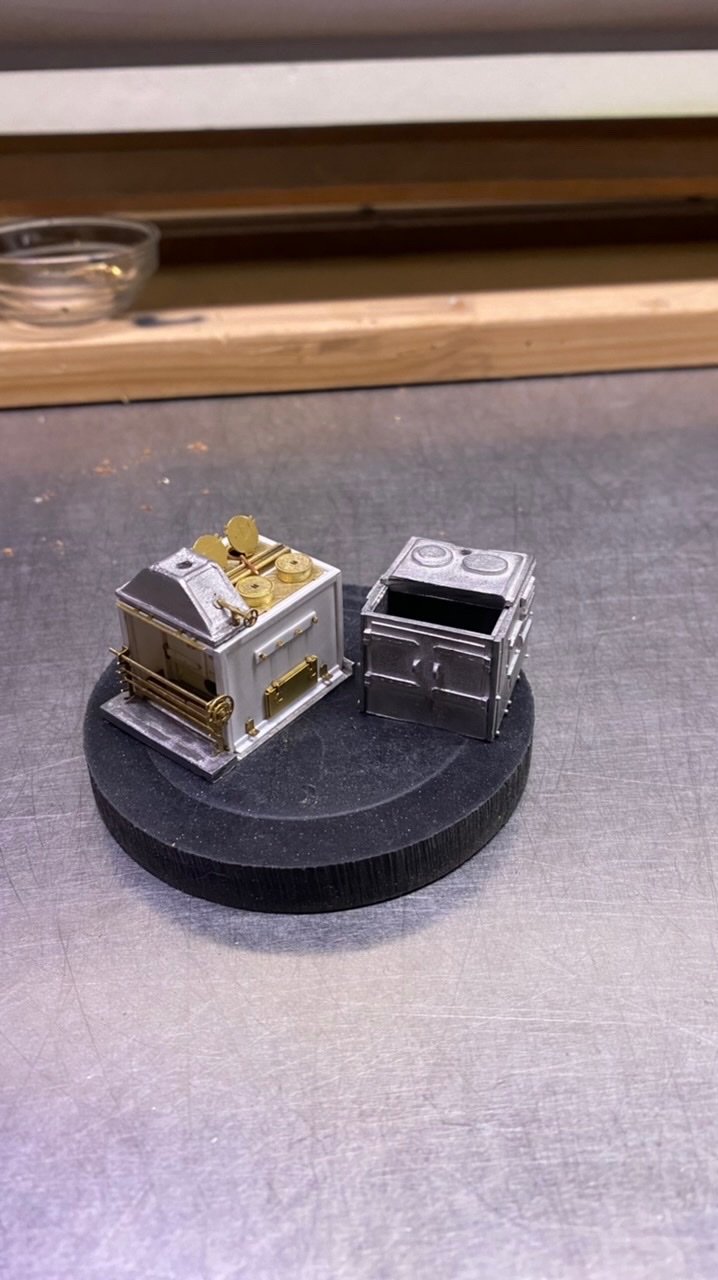
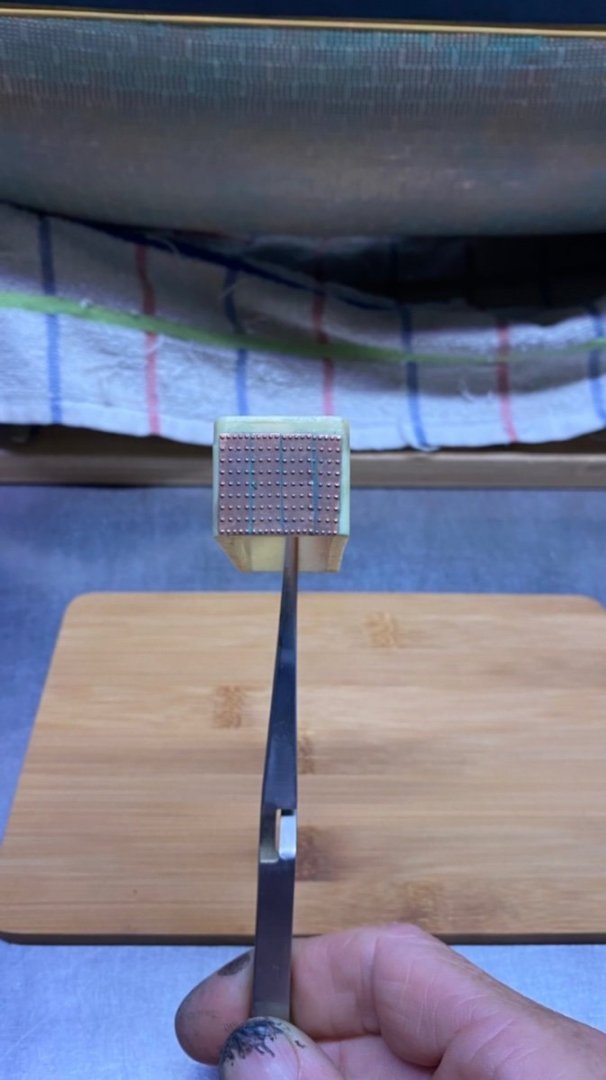
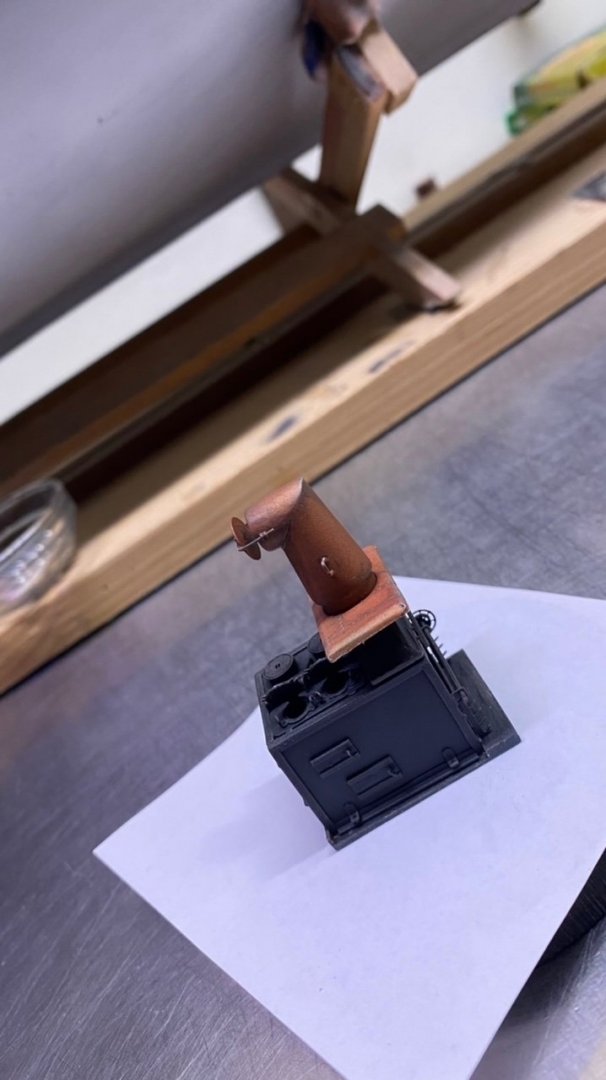
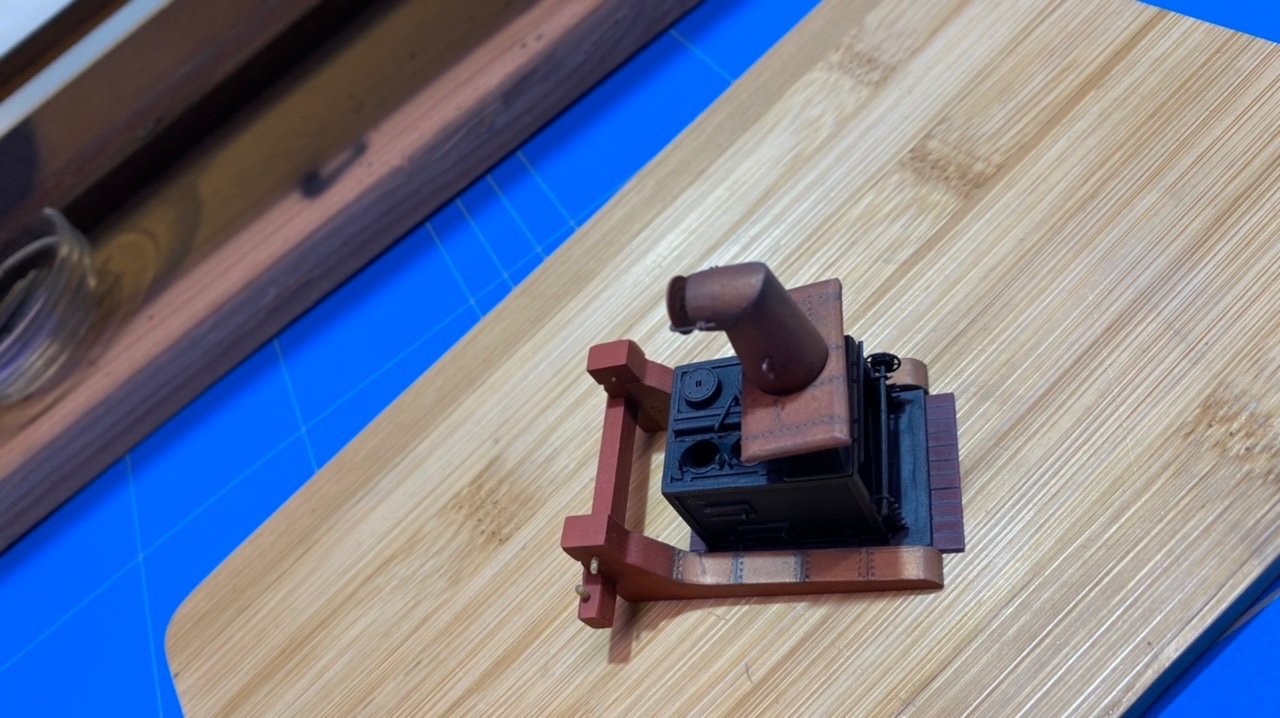
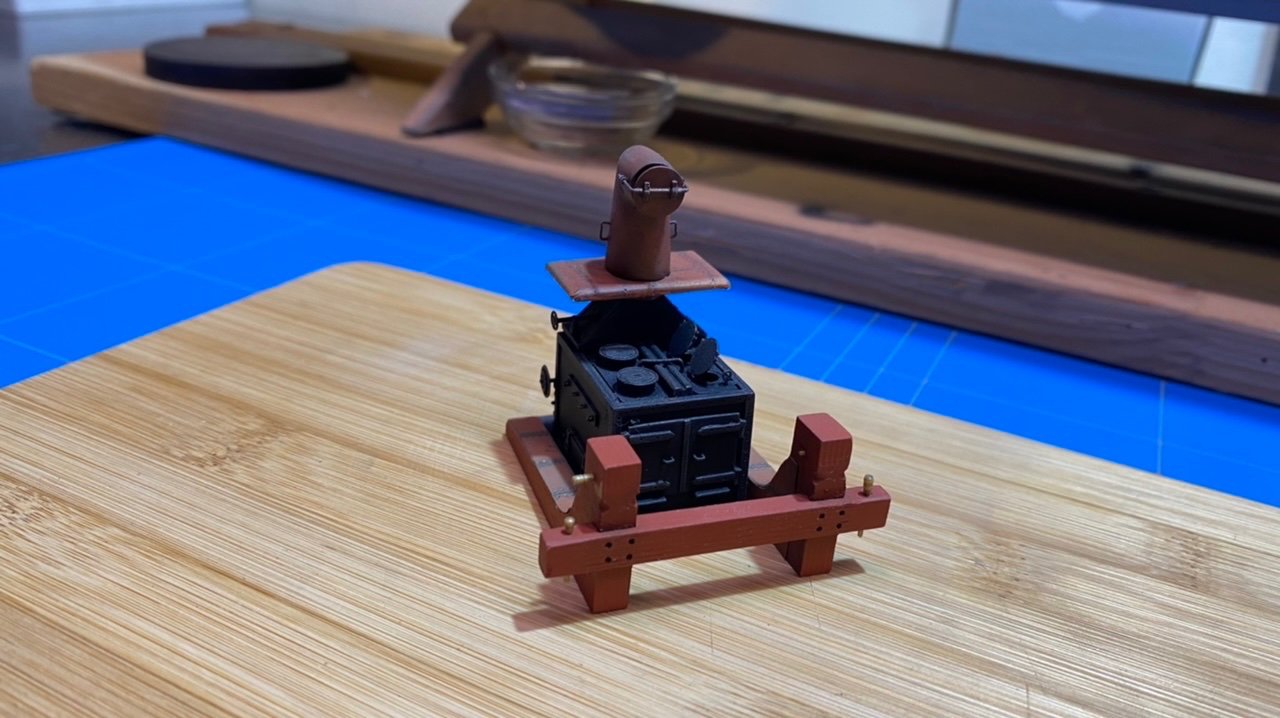
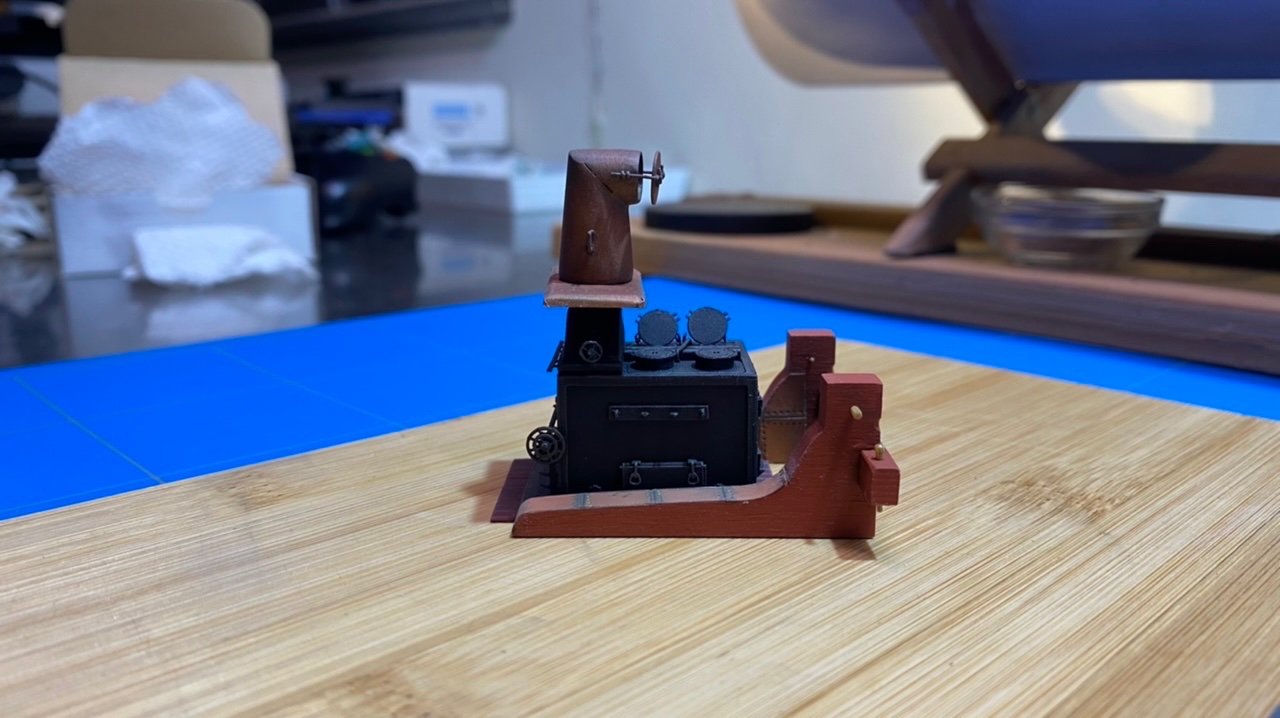
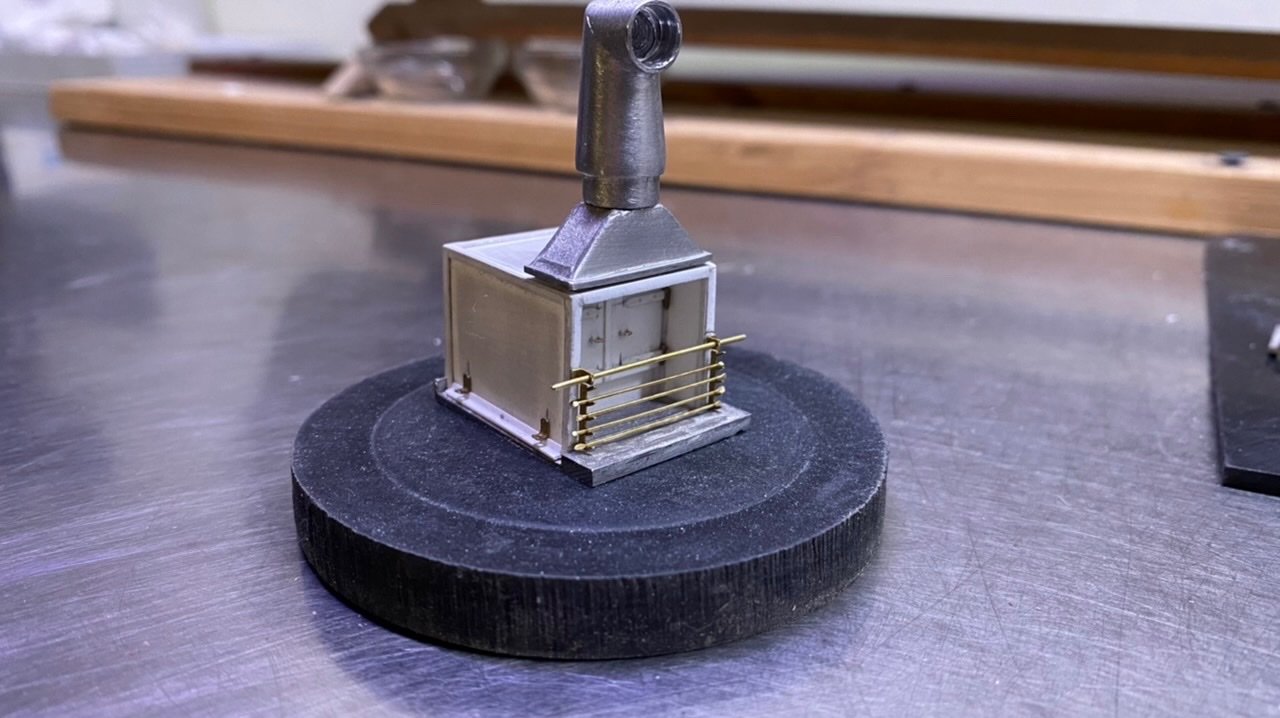
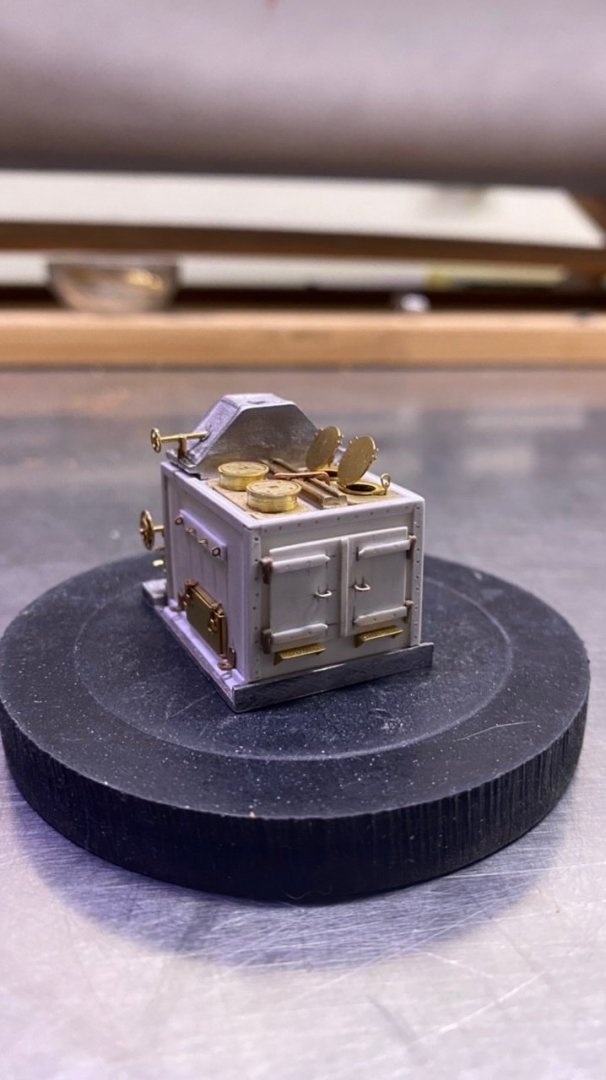
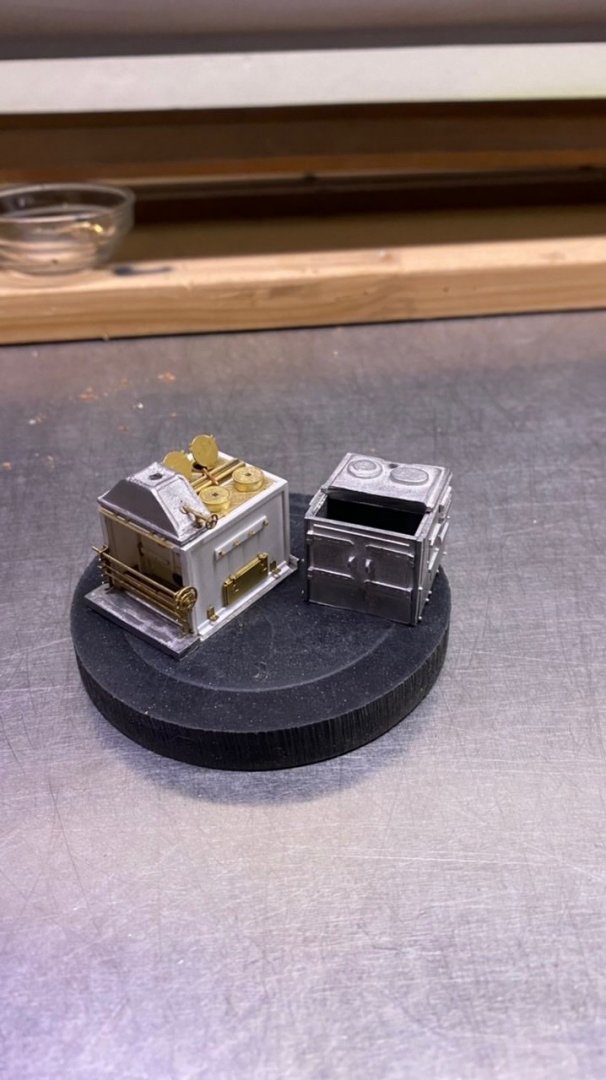
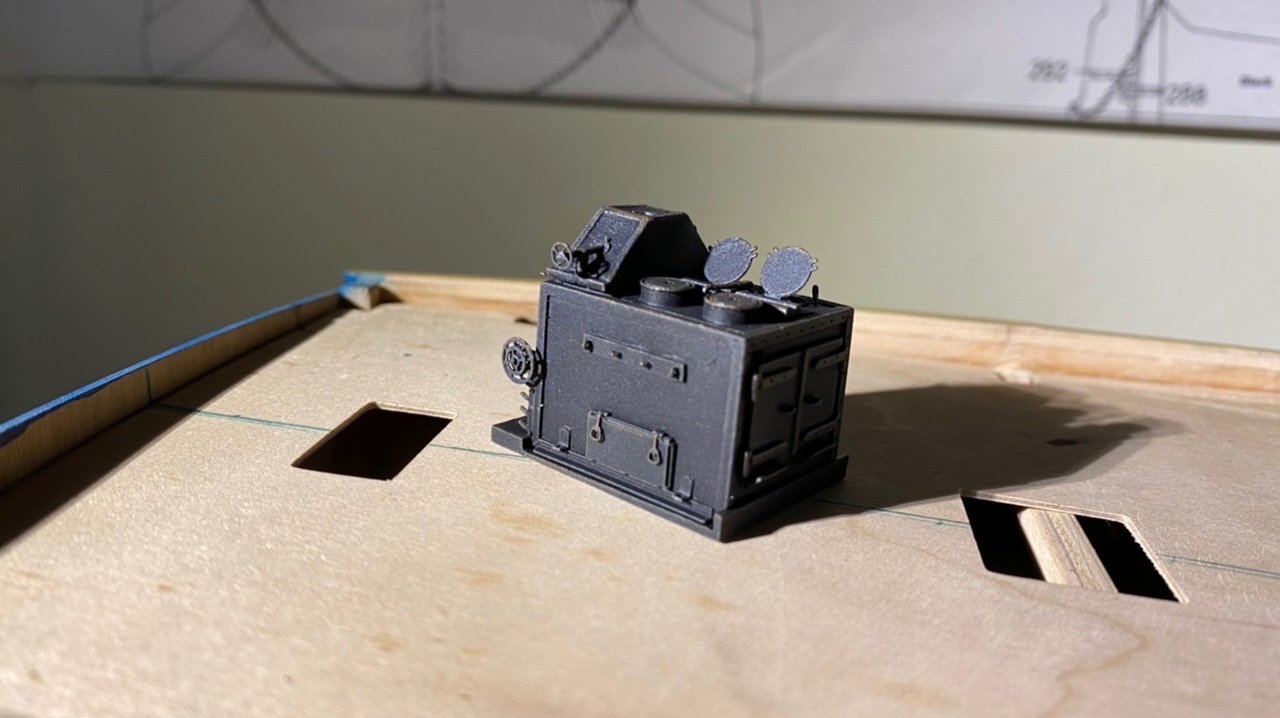
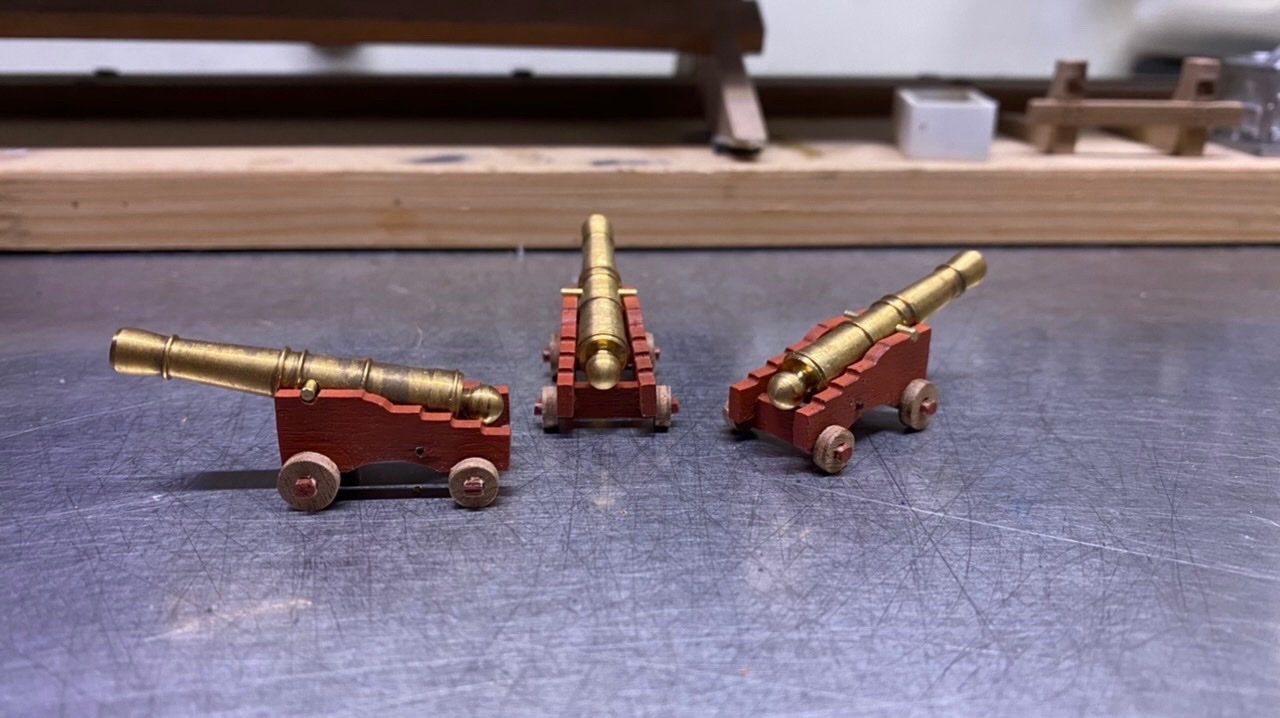
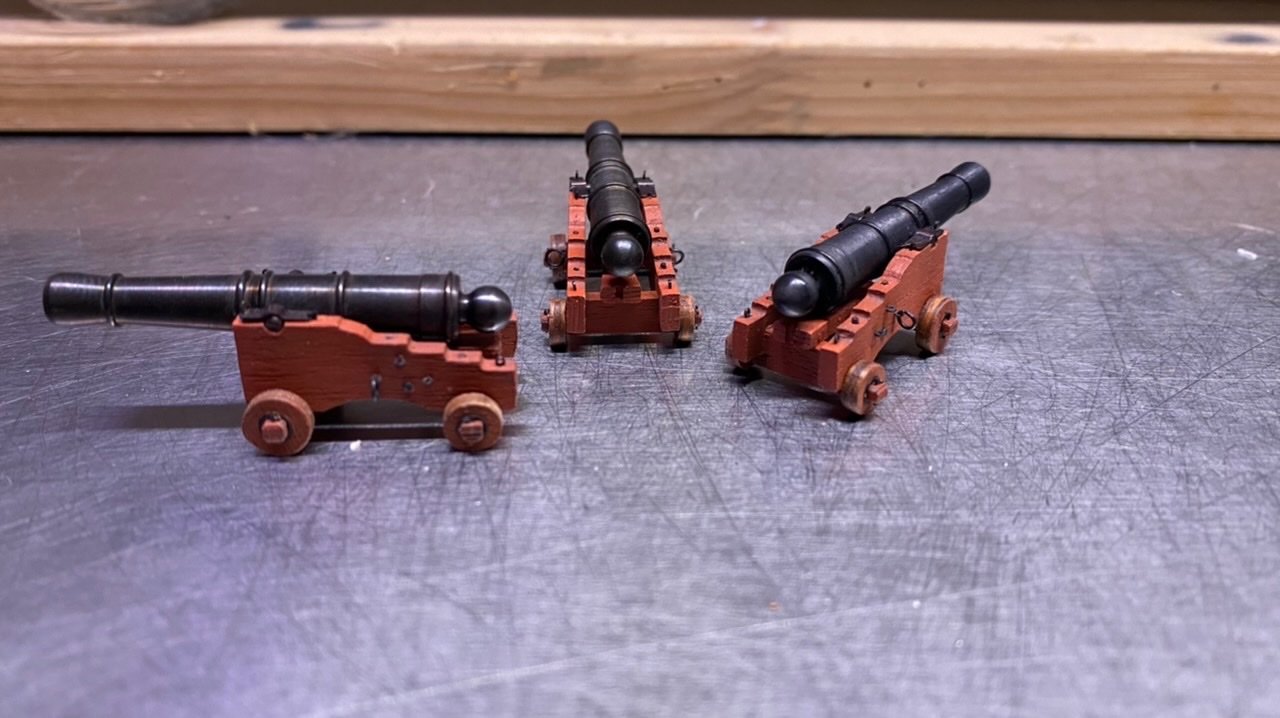
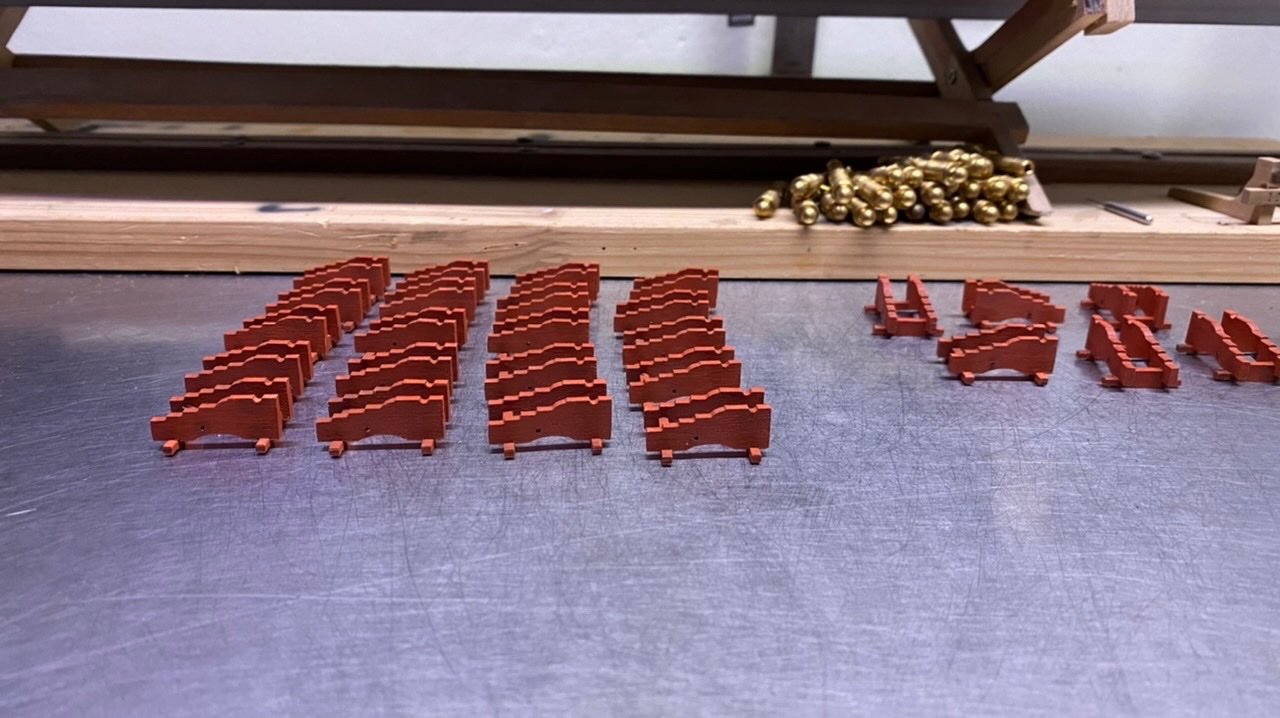
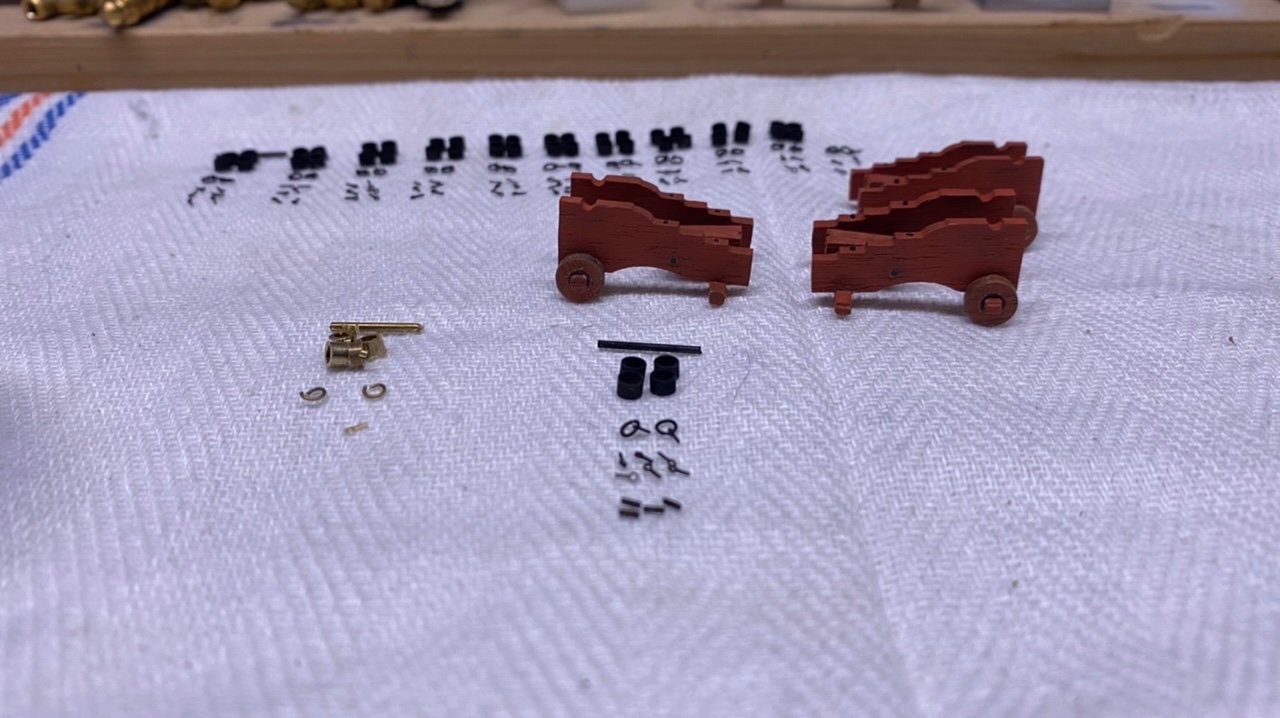
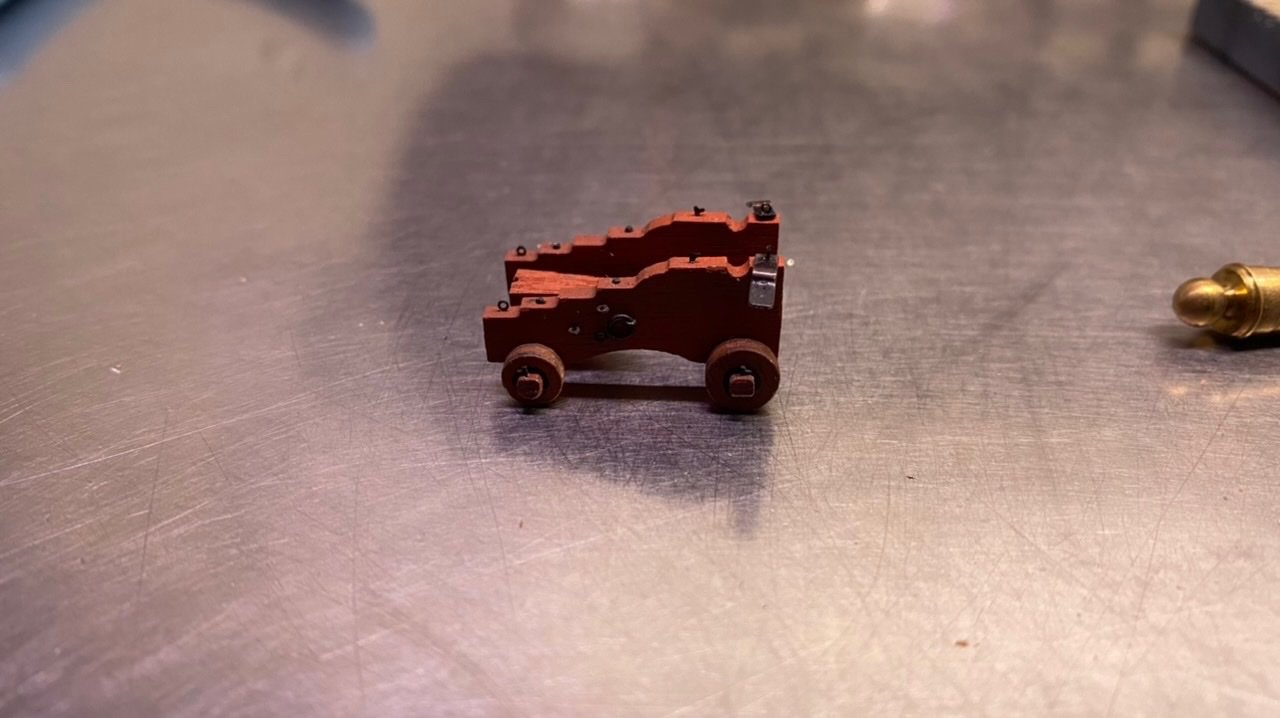
The canons Made the canons, upgraded the carriages a bit did not like theme as the came with the kit. so I made all the extra parts out of brass. The cooking device, did not like the pewter cooking device kit, so I made it by my self. The Chimney, The supplied chimney came as a solid piece of pewter, I hollowed out the top of the chimney with a dentist's router, so it looks a bit more realistic to me. Then I made a lid from a sheet of brass, from thin brass strip then made the rest of the fittings. The bottom plate was made from a piece of wood, which I covered with aluminium tape and then used a skewer to poke small points into it to imitate rivets. Then I sprayed everything in the primer, and after that I gave it the necessary colours. I also lined the betting on the inside and top with aluminium plates which I made from aluminium adhesive tape, to simulate the copper lining. I gave the bottom plate of the cooker and the betting a colour. Apart from eight nails, I think it is finished, because everything will be placed under the deck and will not be visible anymore.


-
Beautiful work, looks very realistic!!
-
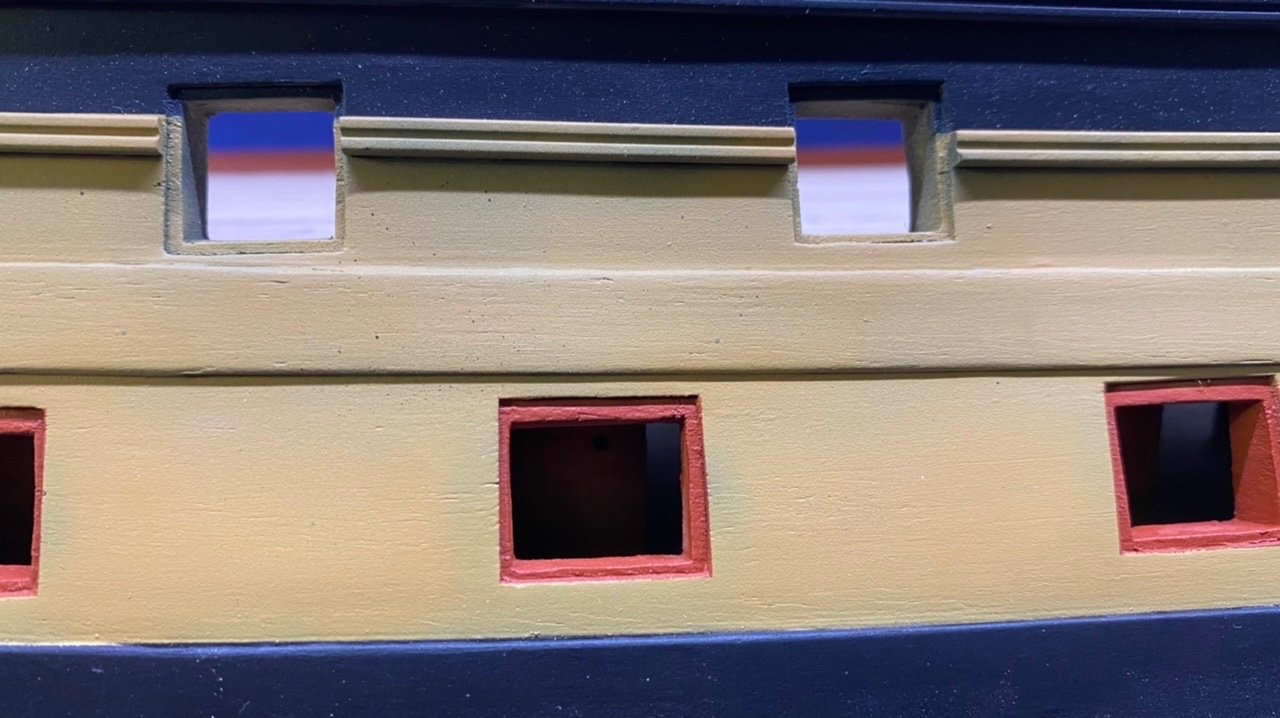
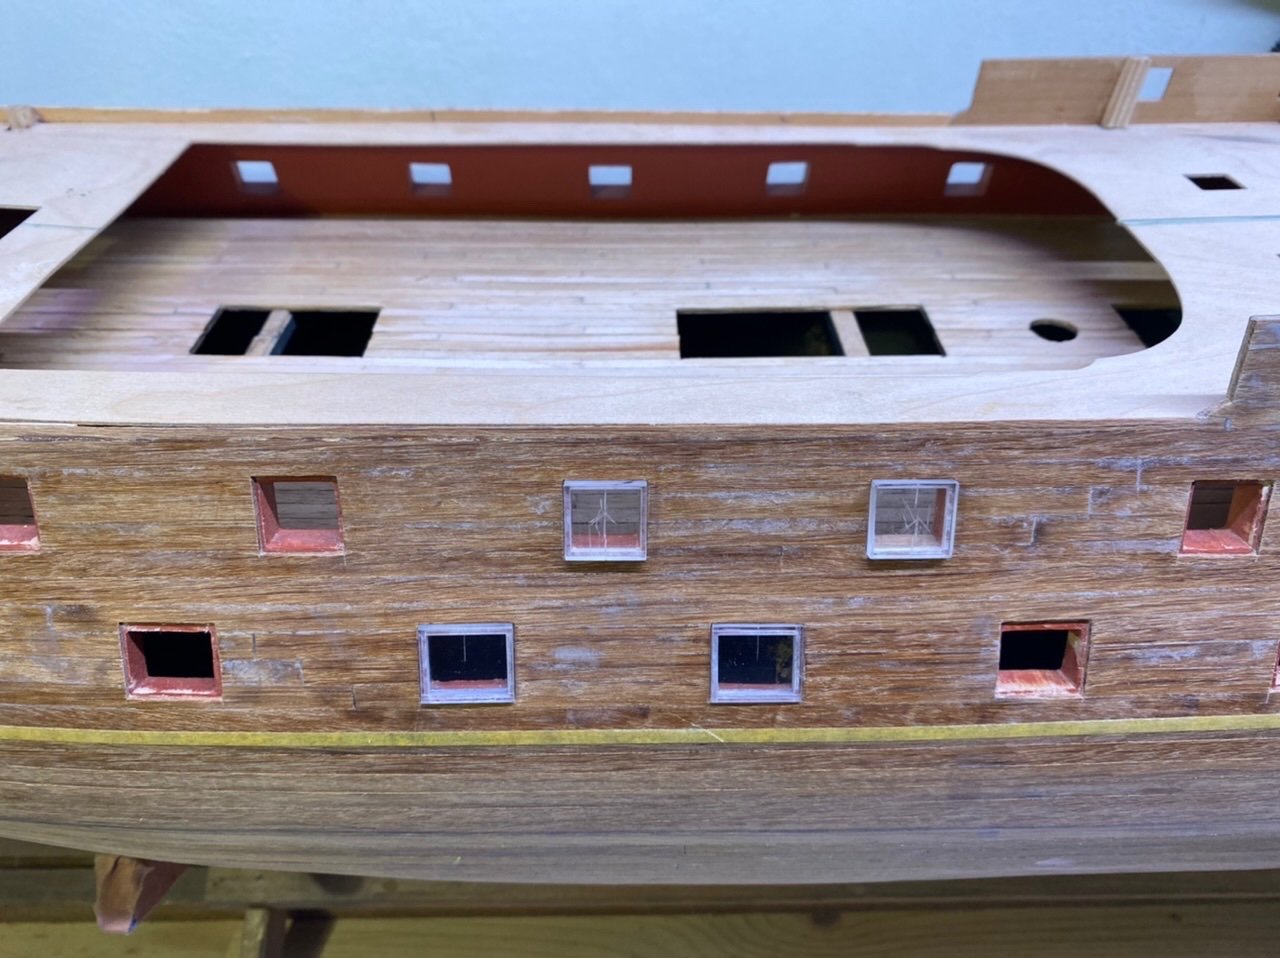
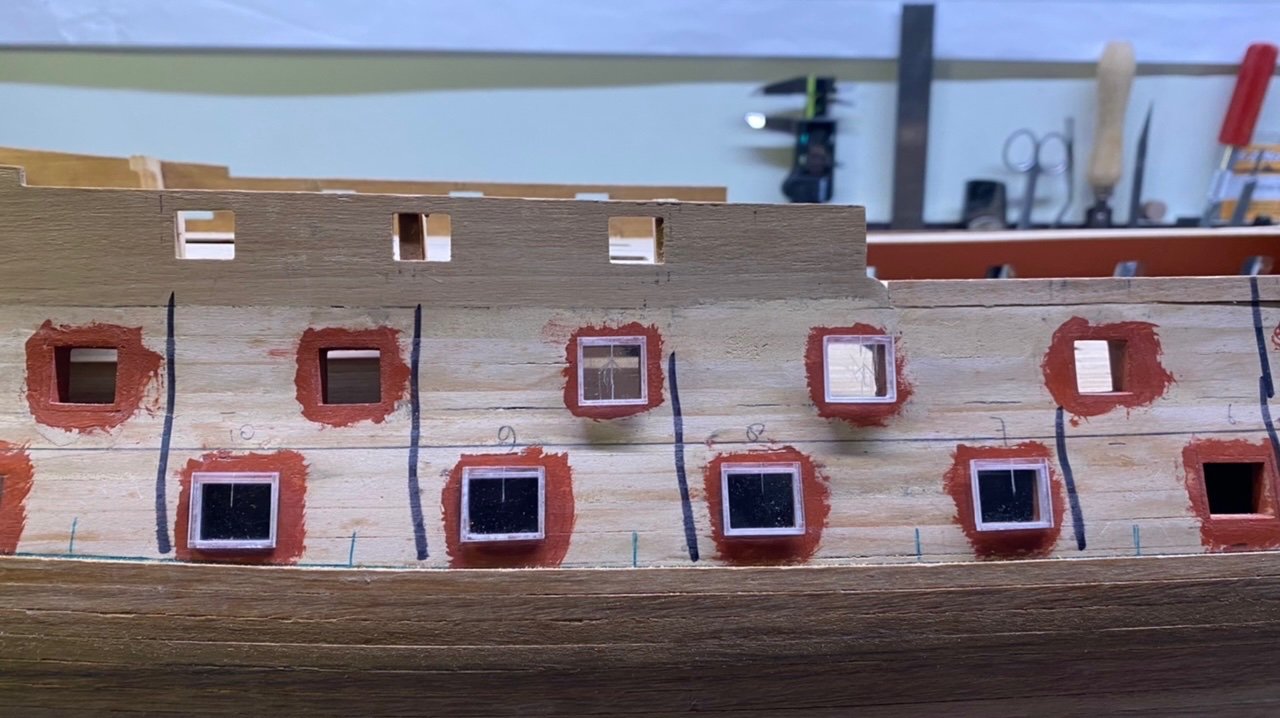
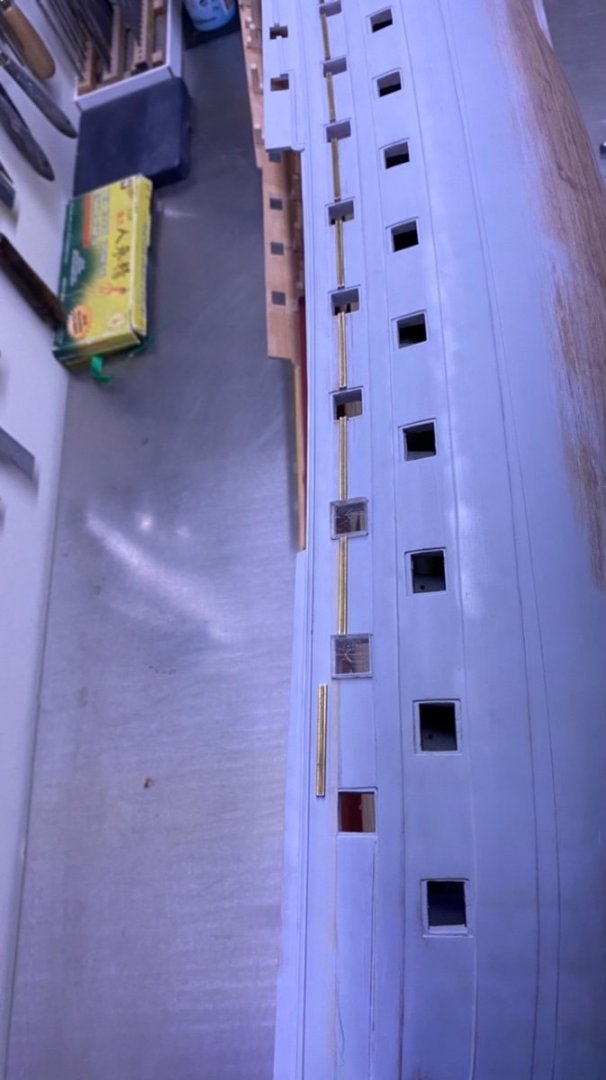
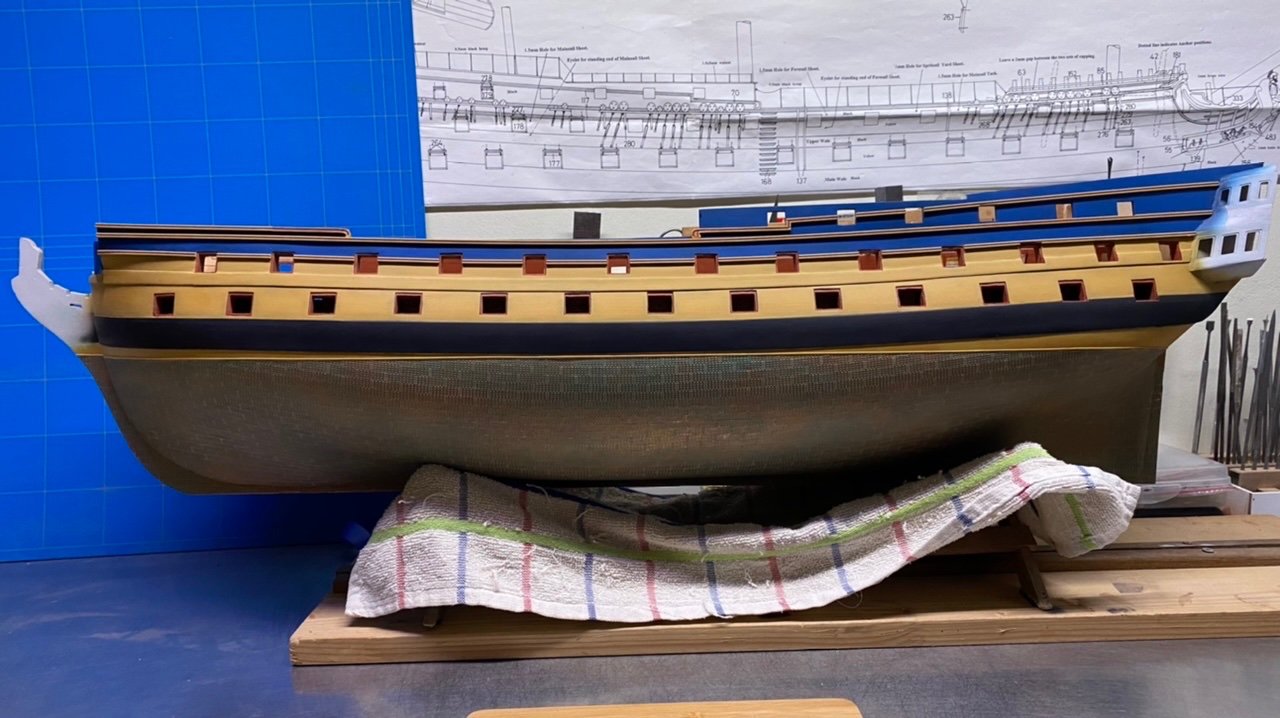
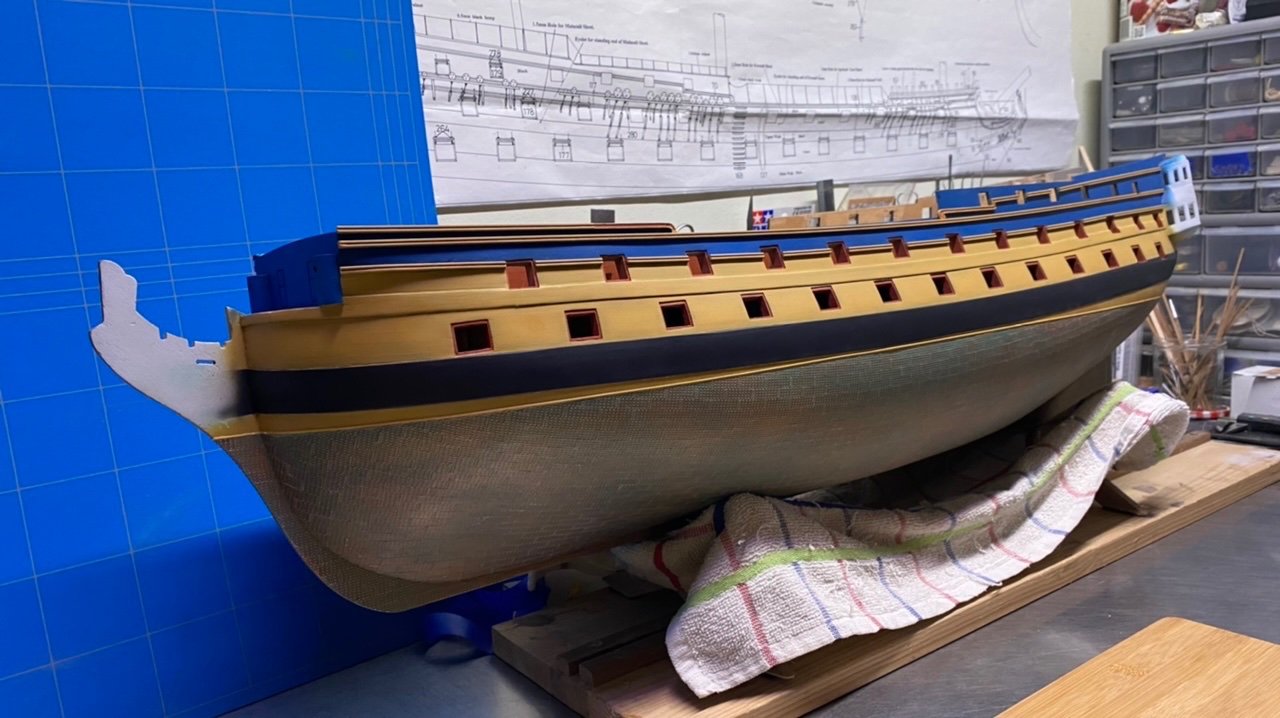
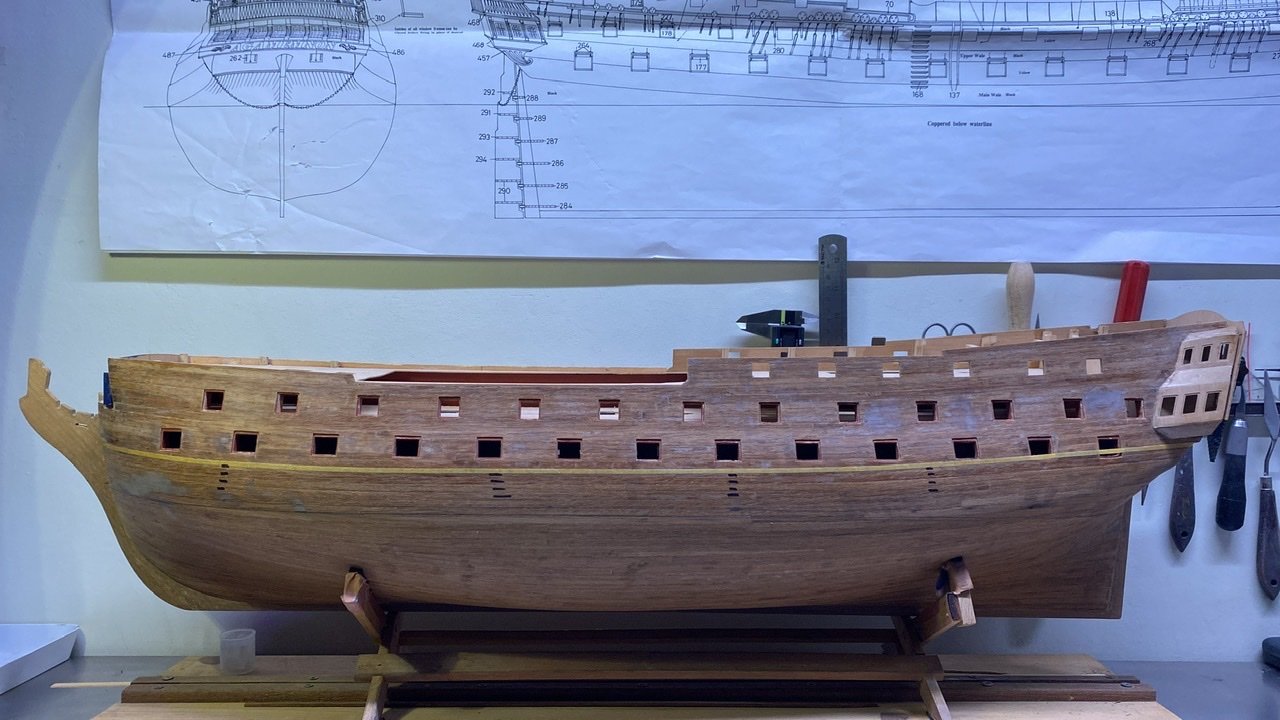
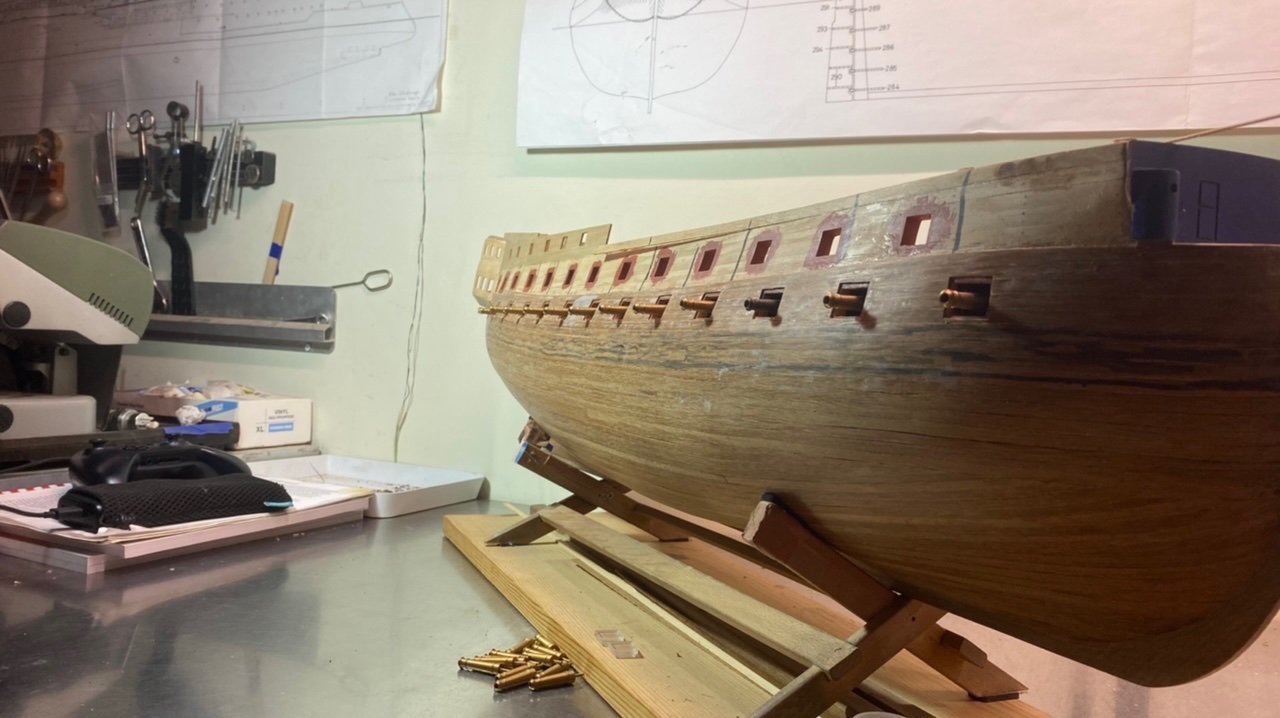
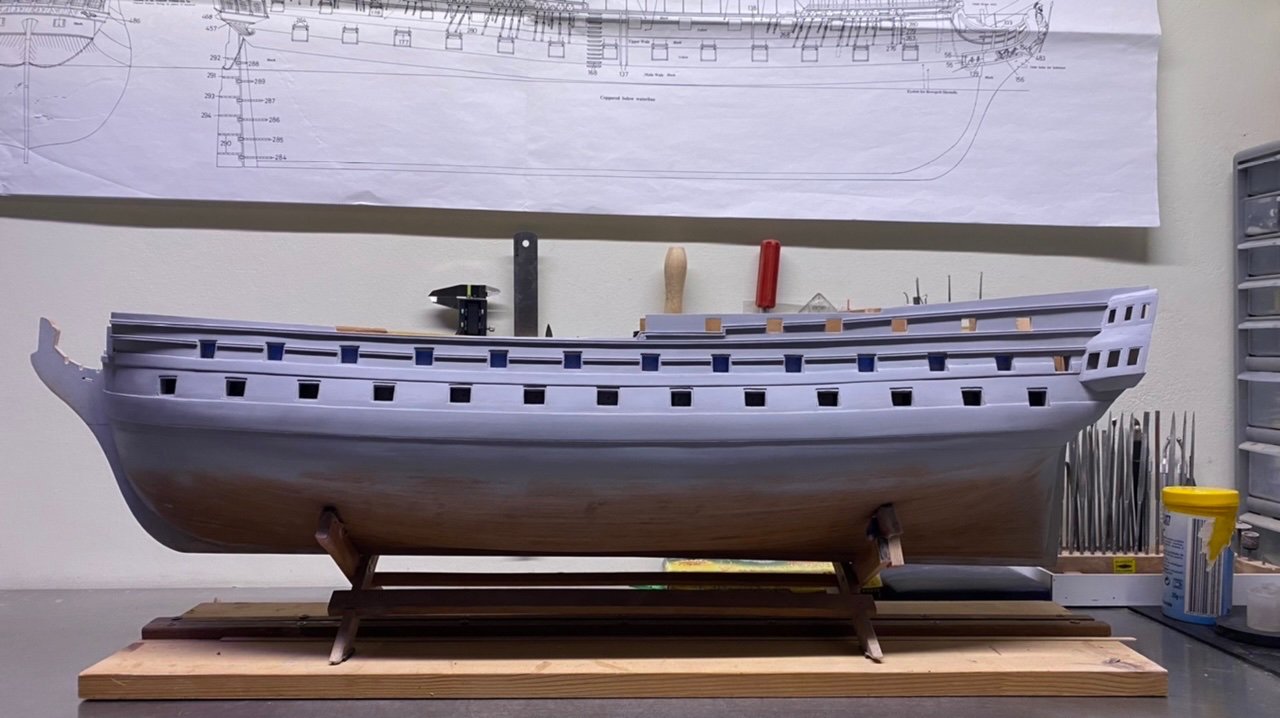
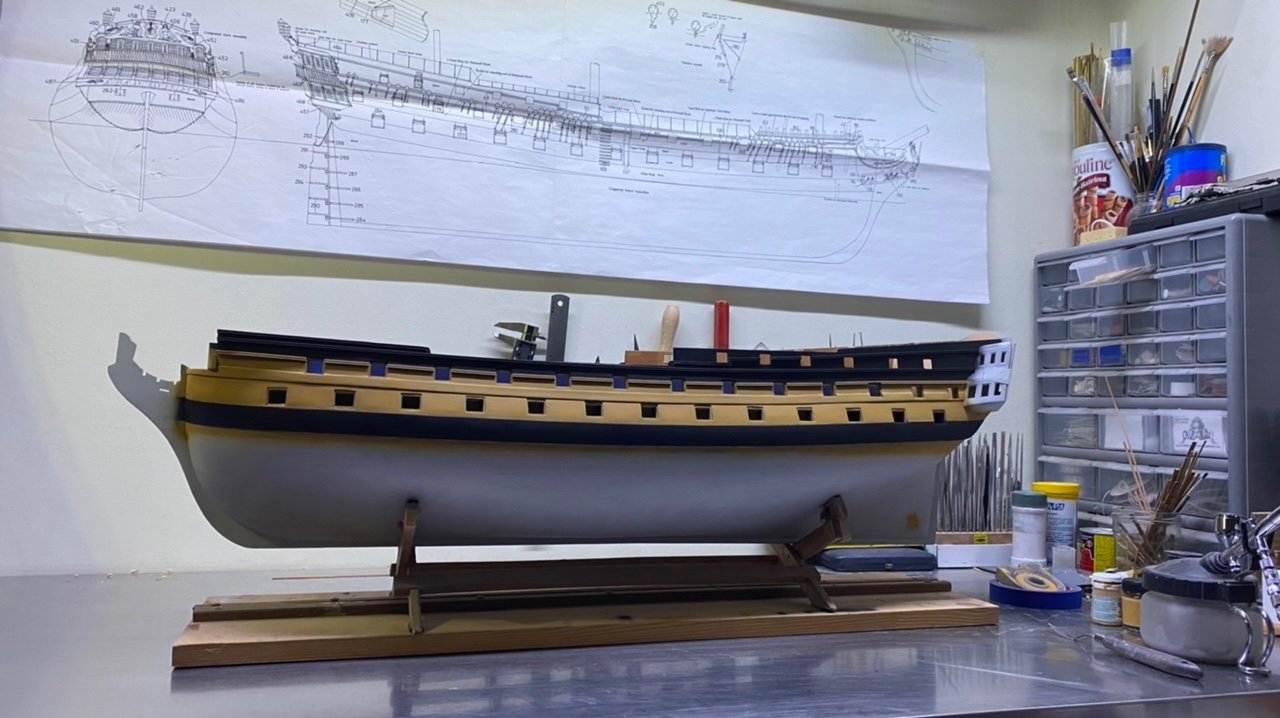
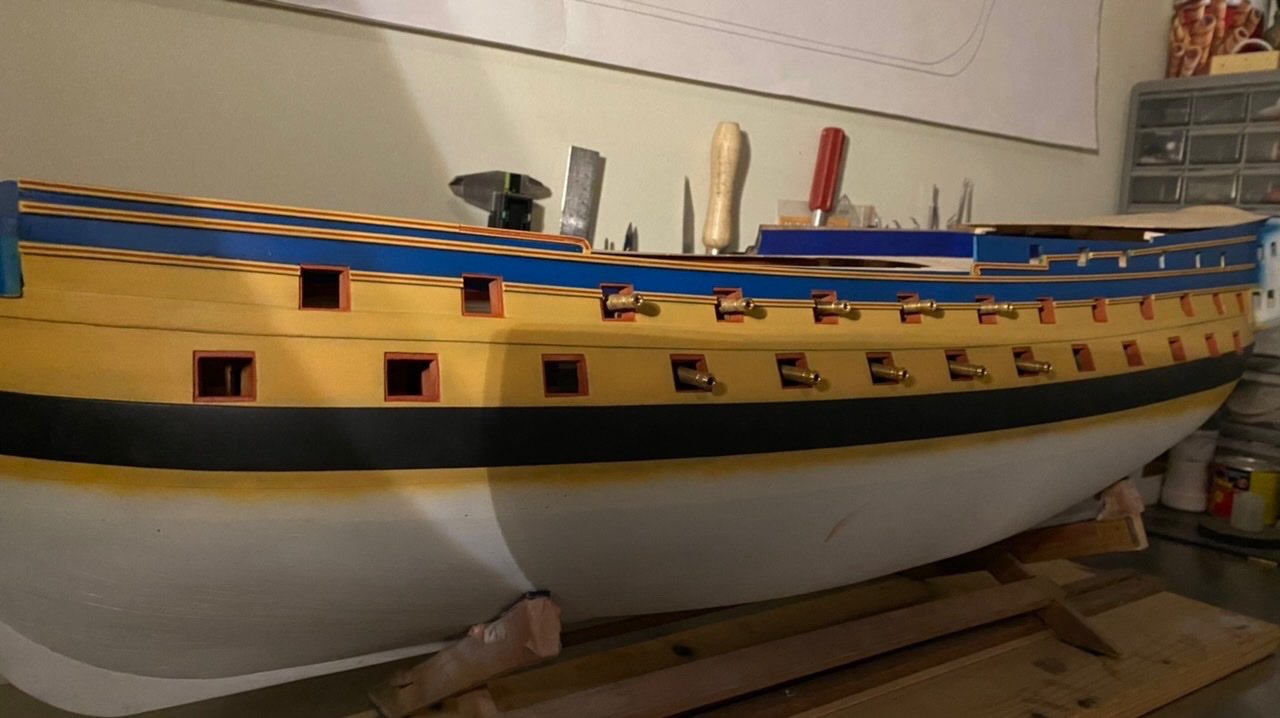
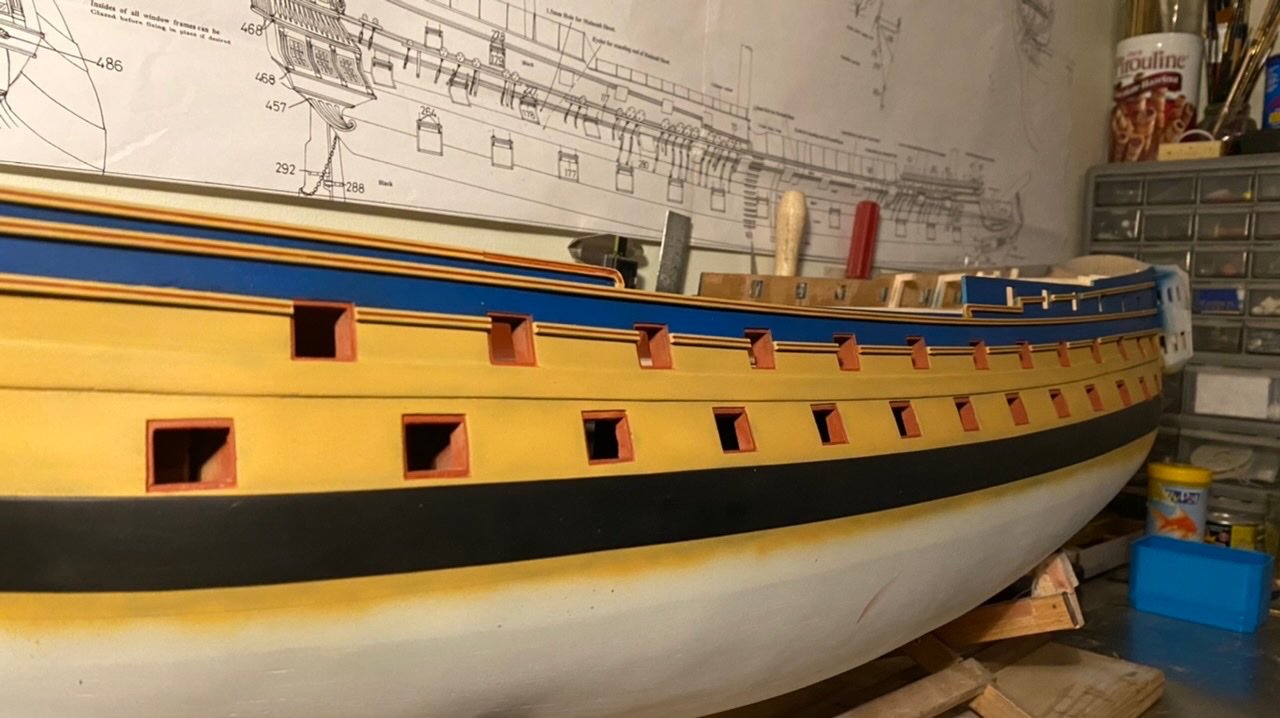
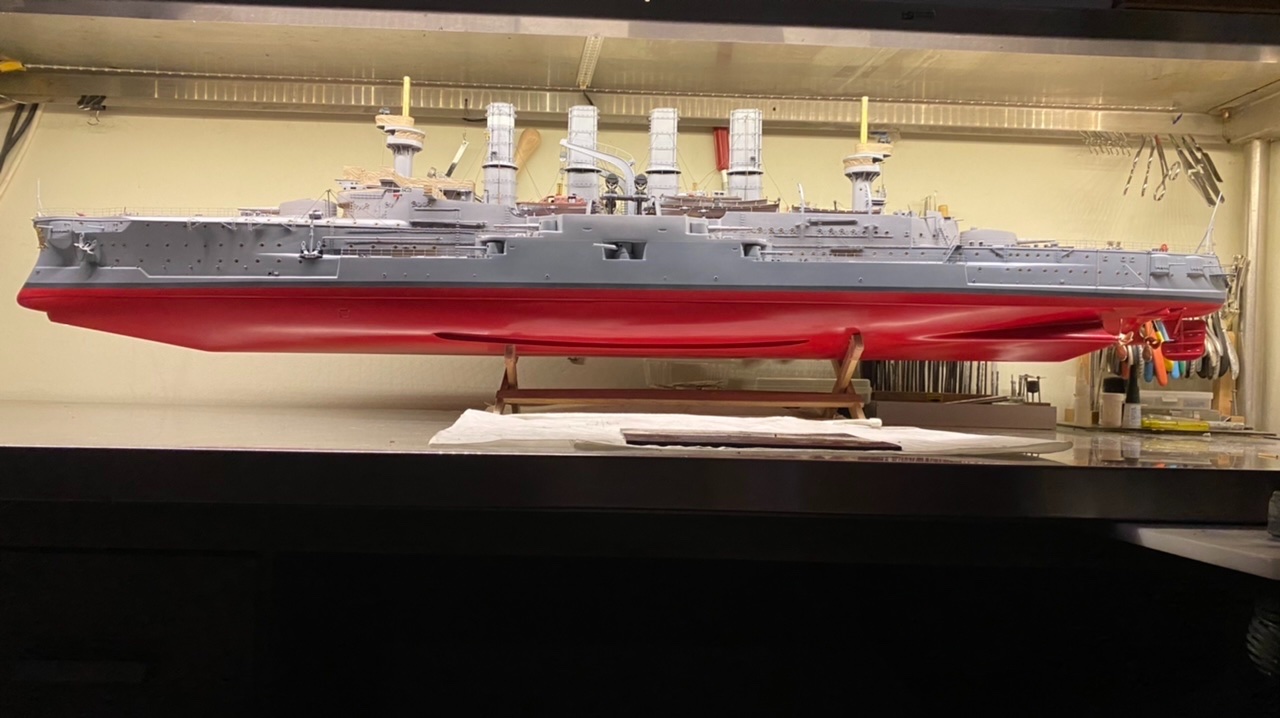
After my Scharnhorst is finished, I decided to pick up HMS Agamemnon again, this kit was given to me by my wife and daughters about 10 years ago. I started it and after the first planking was done and the gun ports were cut out, the model was damaged during the rainy season because the first planking had come loose from the rafters and some of the rafters, the plywood had started to expand with all the consequences. After I had repaired the damage somewhat, I lost the sense of purpose and put her aside. In the meantime, I built the 1/100 Sms Emden and the 1/100 Sms Scharnhorst. So I started on the Agamemnon again. In the meantime, I made the second planking, gunwales and gun ports and added colours to the hull. I deviated from the colour scheme as suggested in the building description, but chose to paint her in the colours she was painted in the beginning of her career. Below some photos Say more than words. (Sorry for the disorder of the pictures)


-
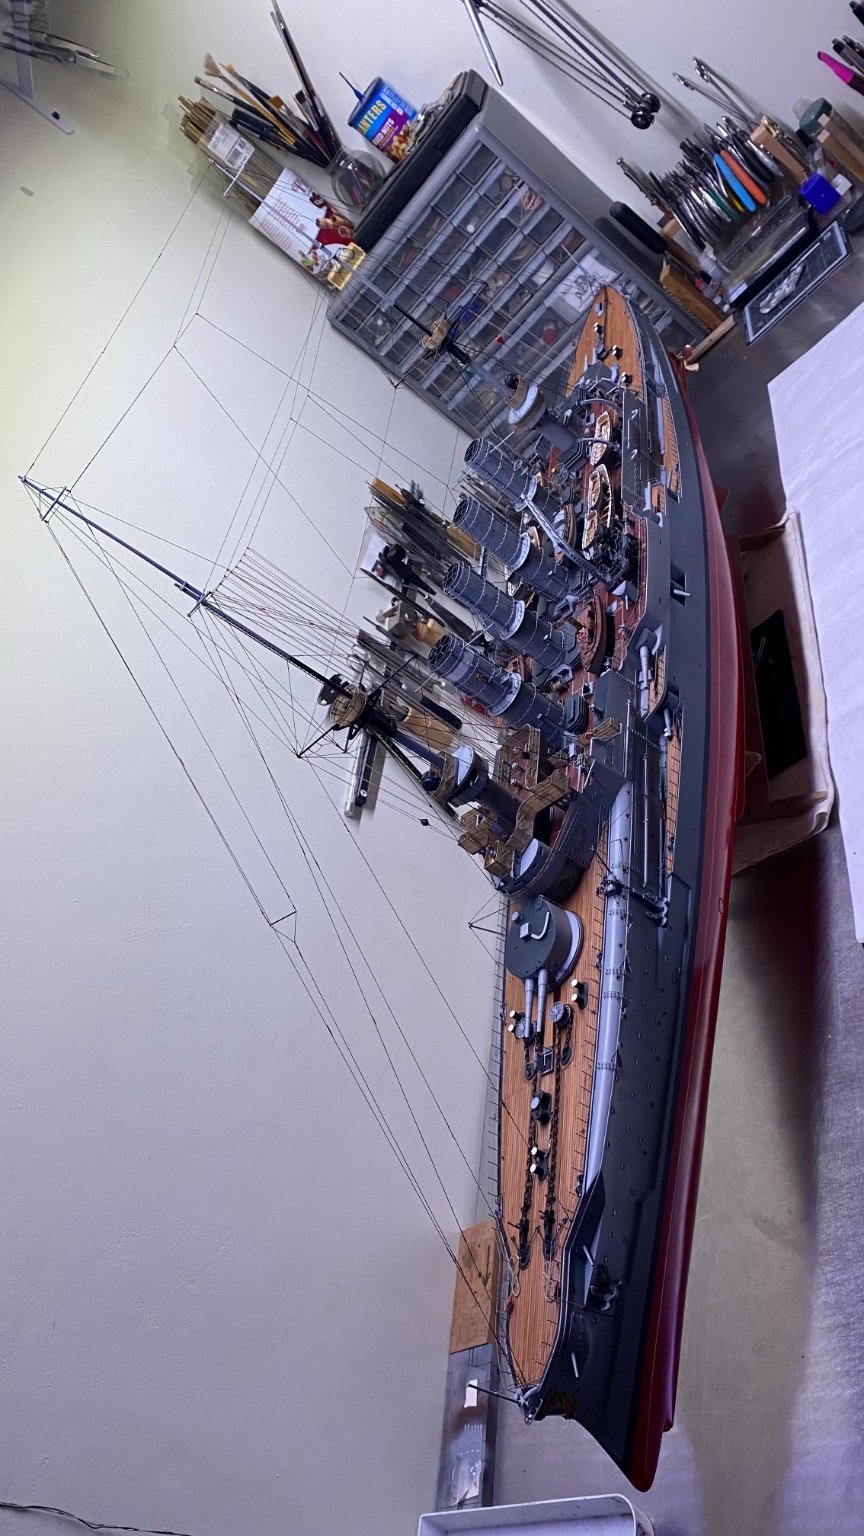
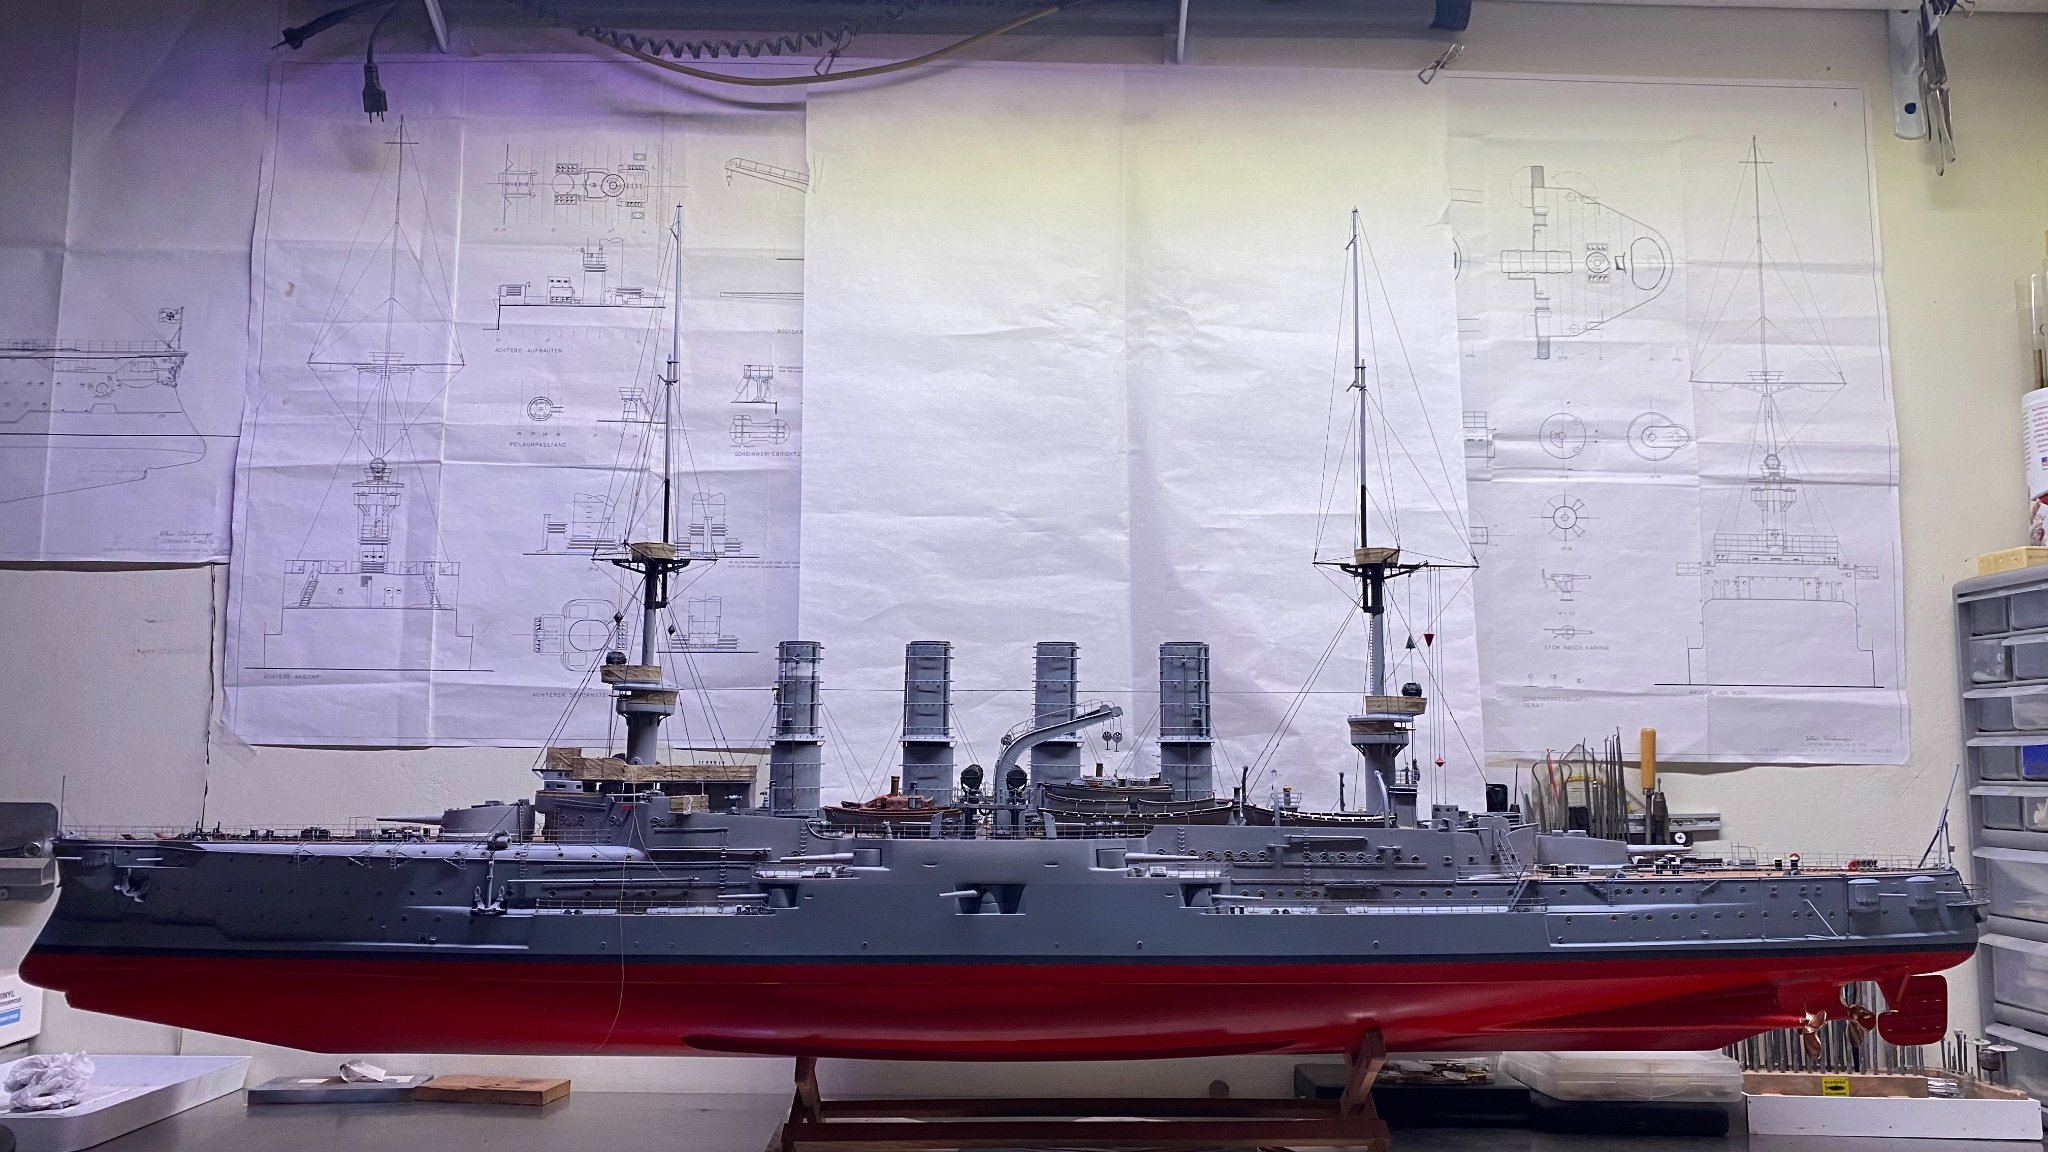
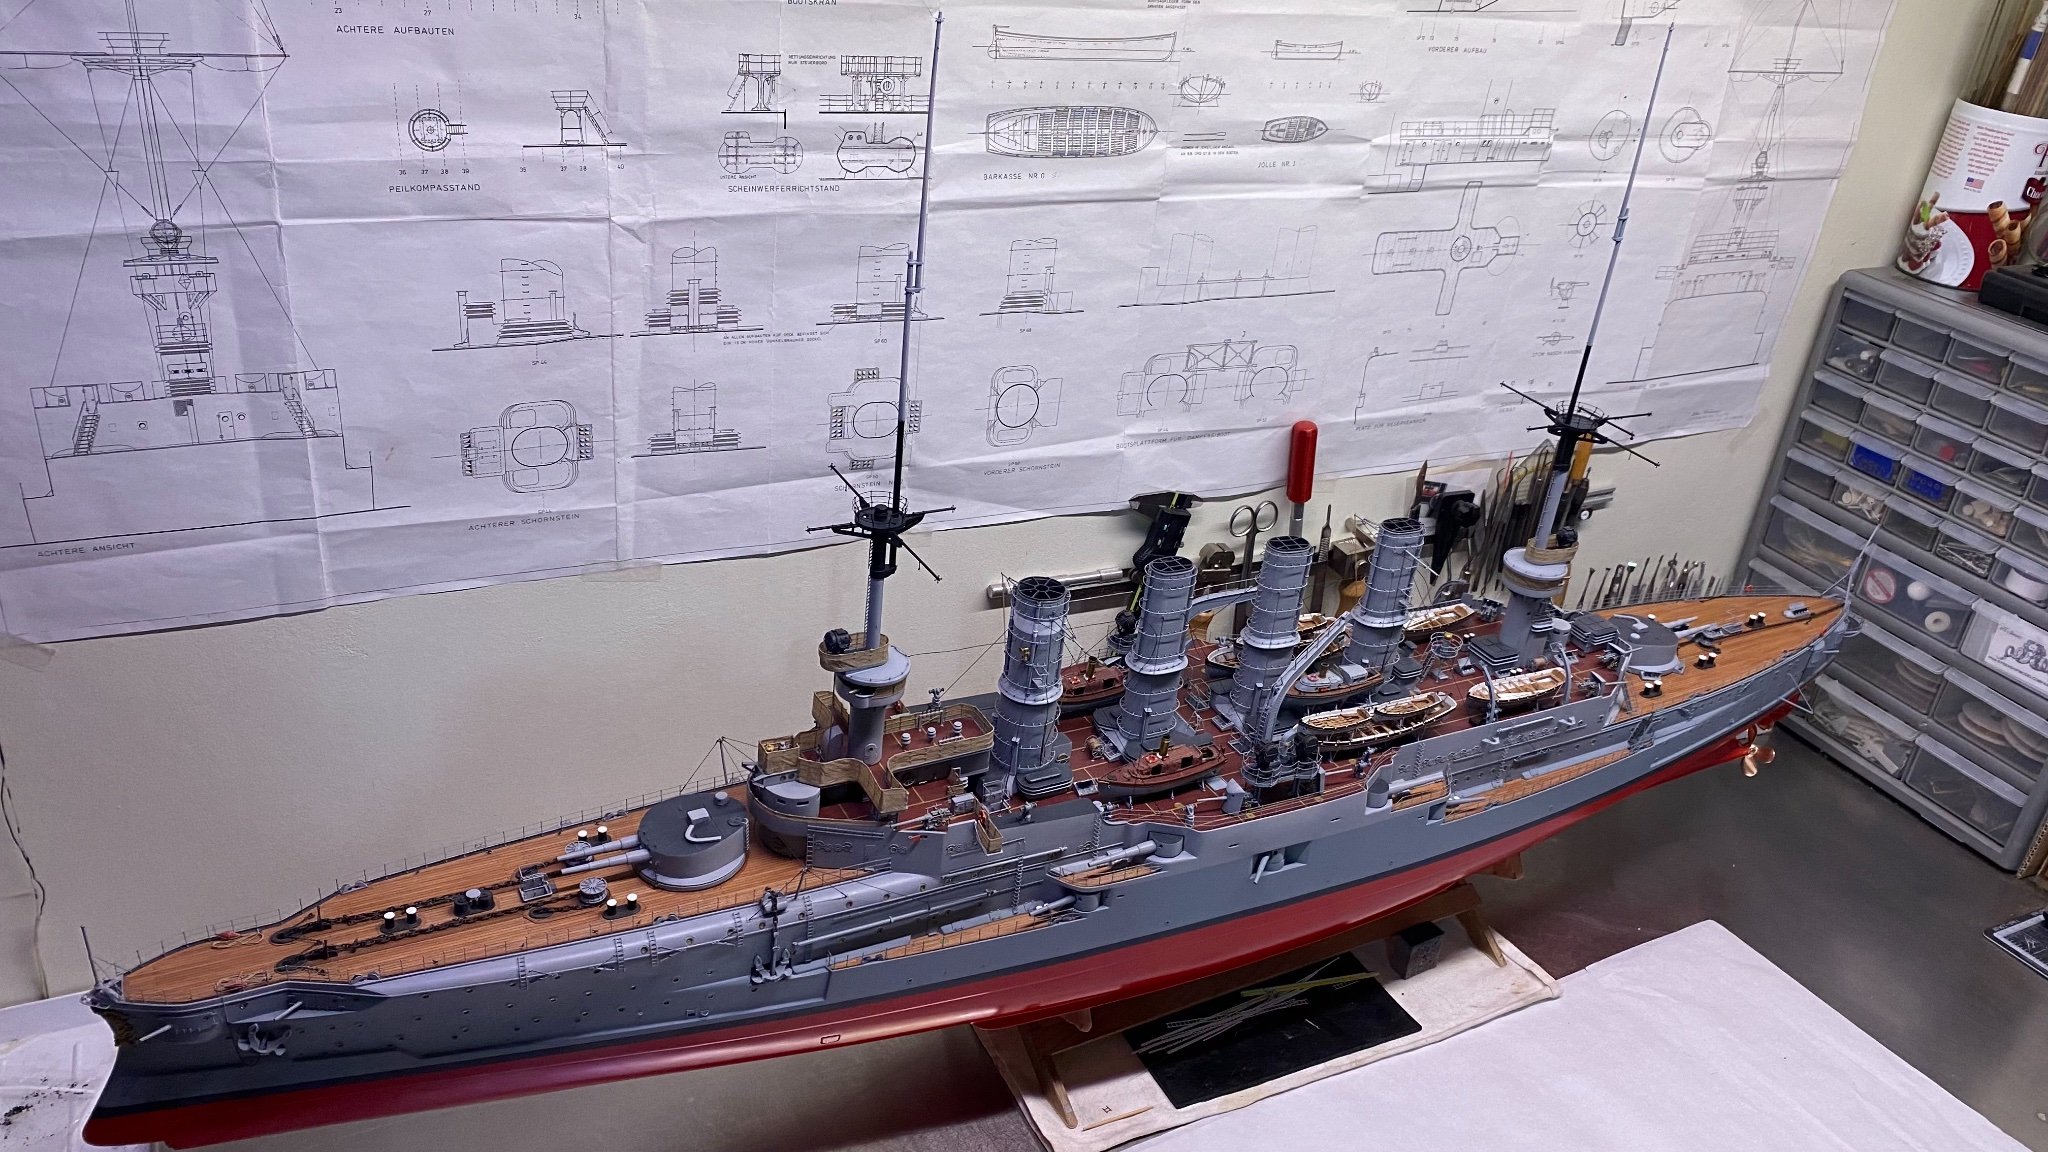
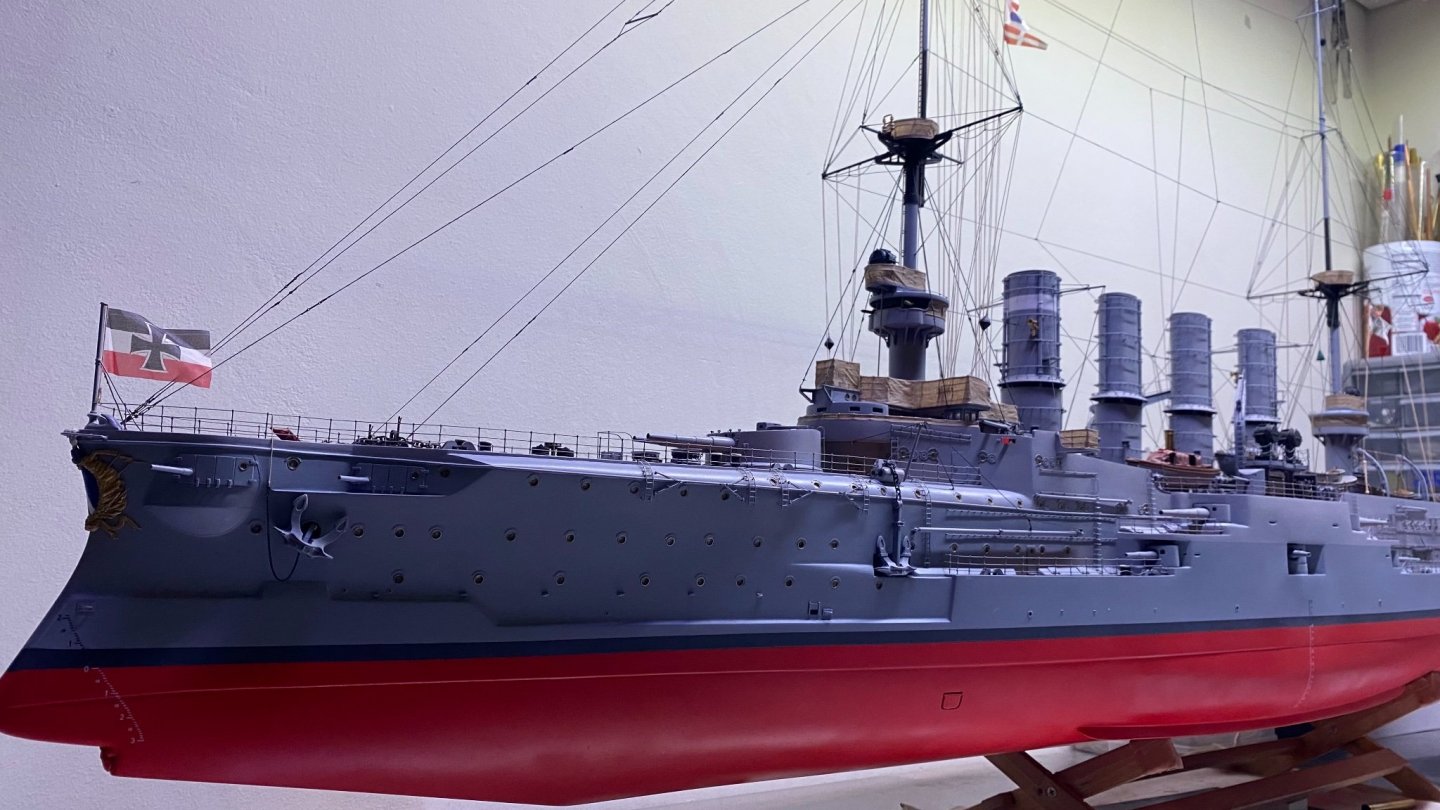
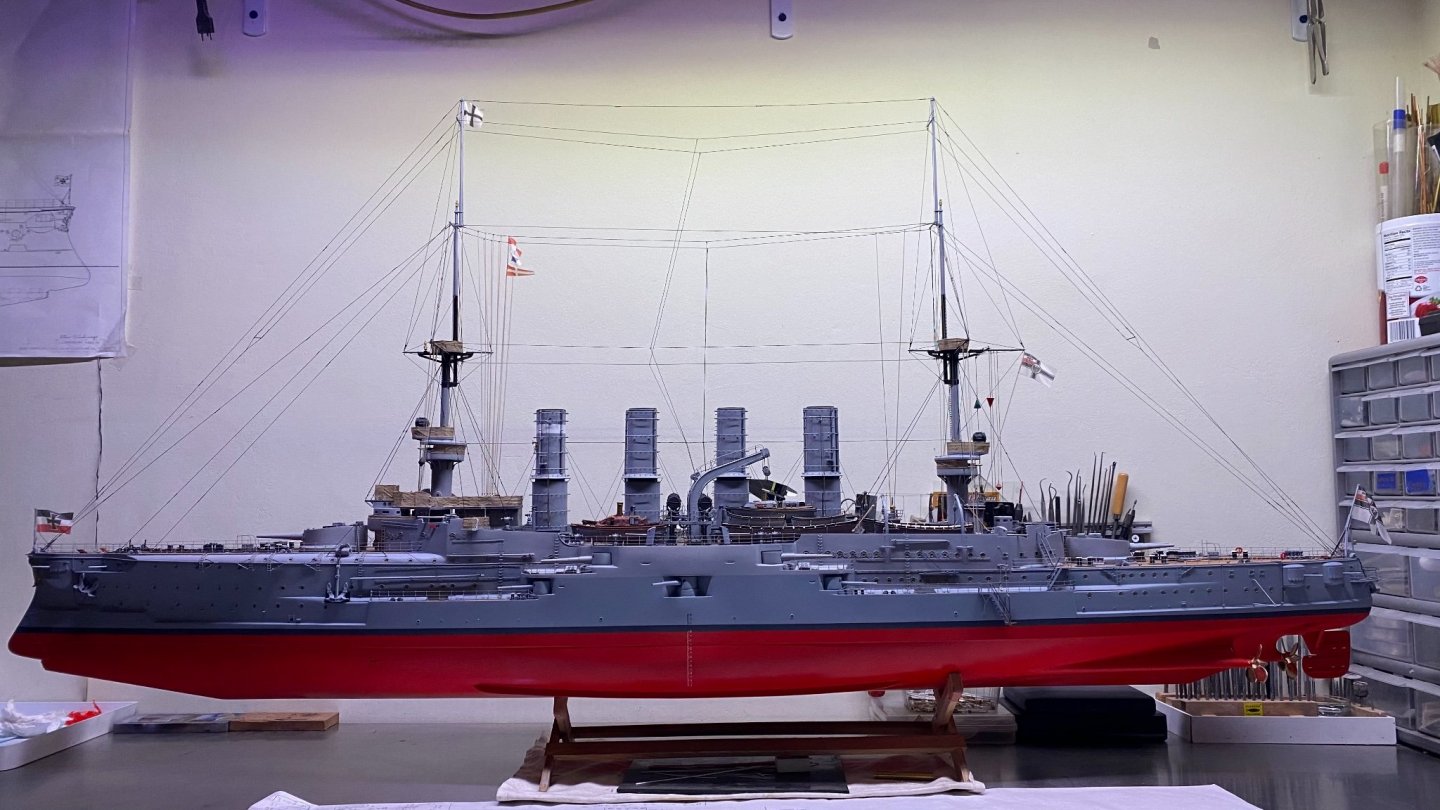
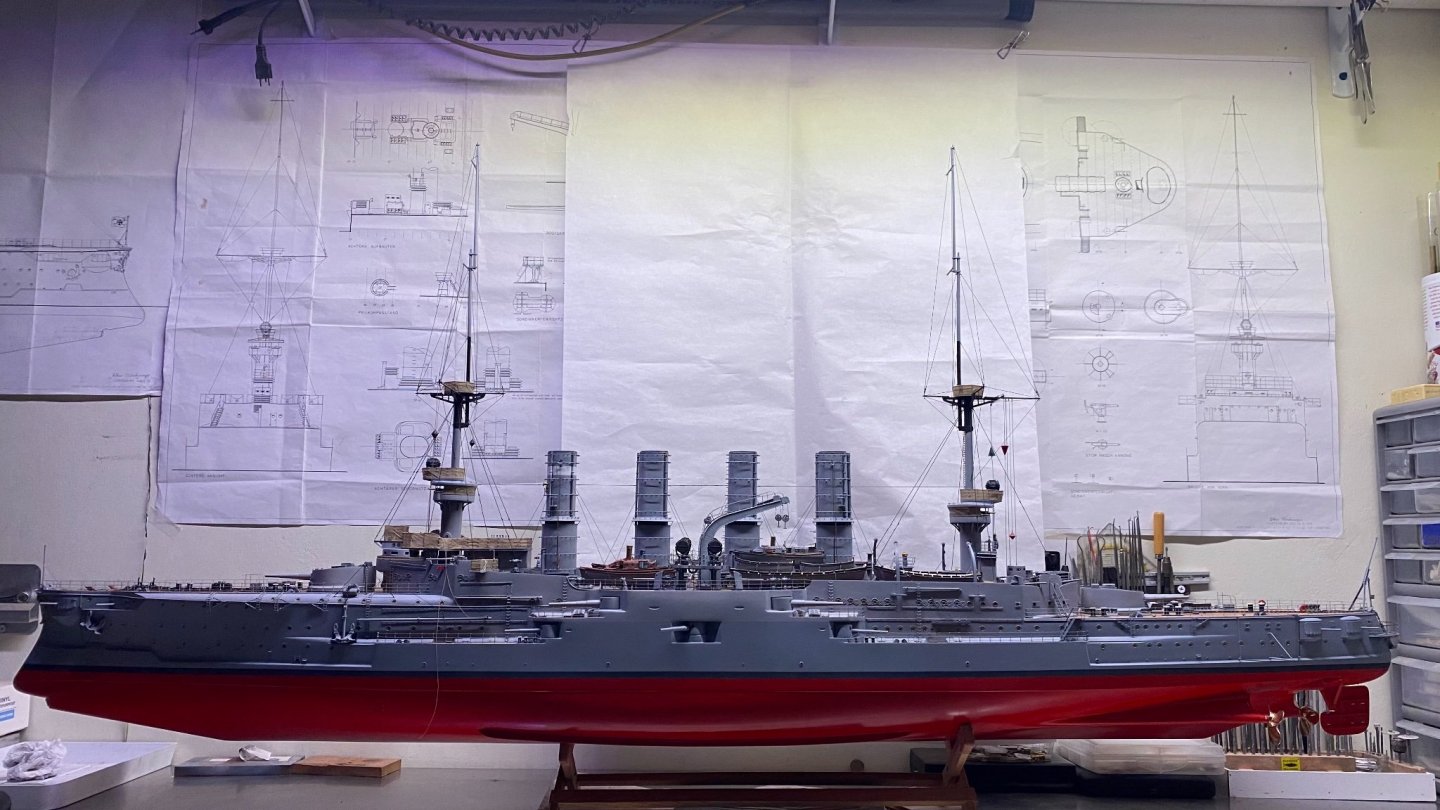
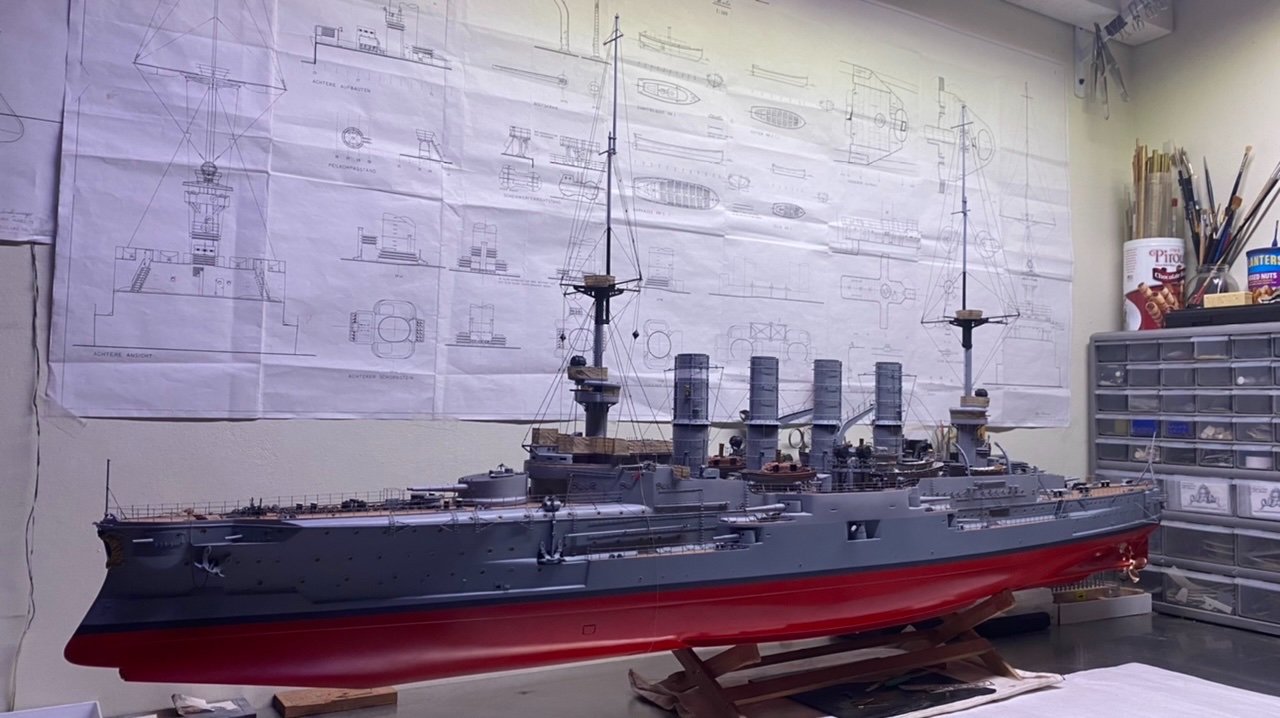
So after being hammered down by C for 3 weeks, I am back !! Thanks everyone for the thumbs up and nice words. In answer how I made the laders for the mast. ? I made them out of evergreen strips, that I place on strip with painters tape (blue) build them like a puzzle together, and then apply super glue with a micro glue application tool (kind of needle), after the glue is cured, polish it with 600 sandpaper, and spray paint them carful with a filling primer (tamiya) takes some practice, but it is quite simple to do. Finished more or less all the points that I wrote on a to do list during this build one of the last points on it was placing the flags, (done) Last point on the list, finishing the display case and stand (still open) Still working on the last part. but below a few pictures of the model.

- 202 replies
-
- 24
-

-

-

-
- battleship
- scharnhorst
- (and 2 more)
-
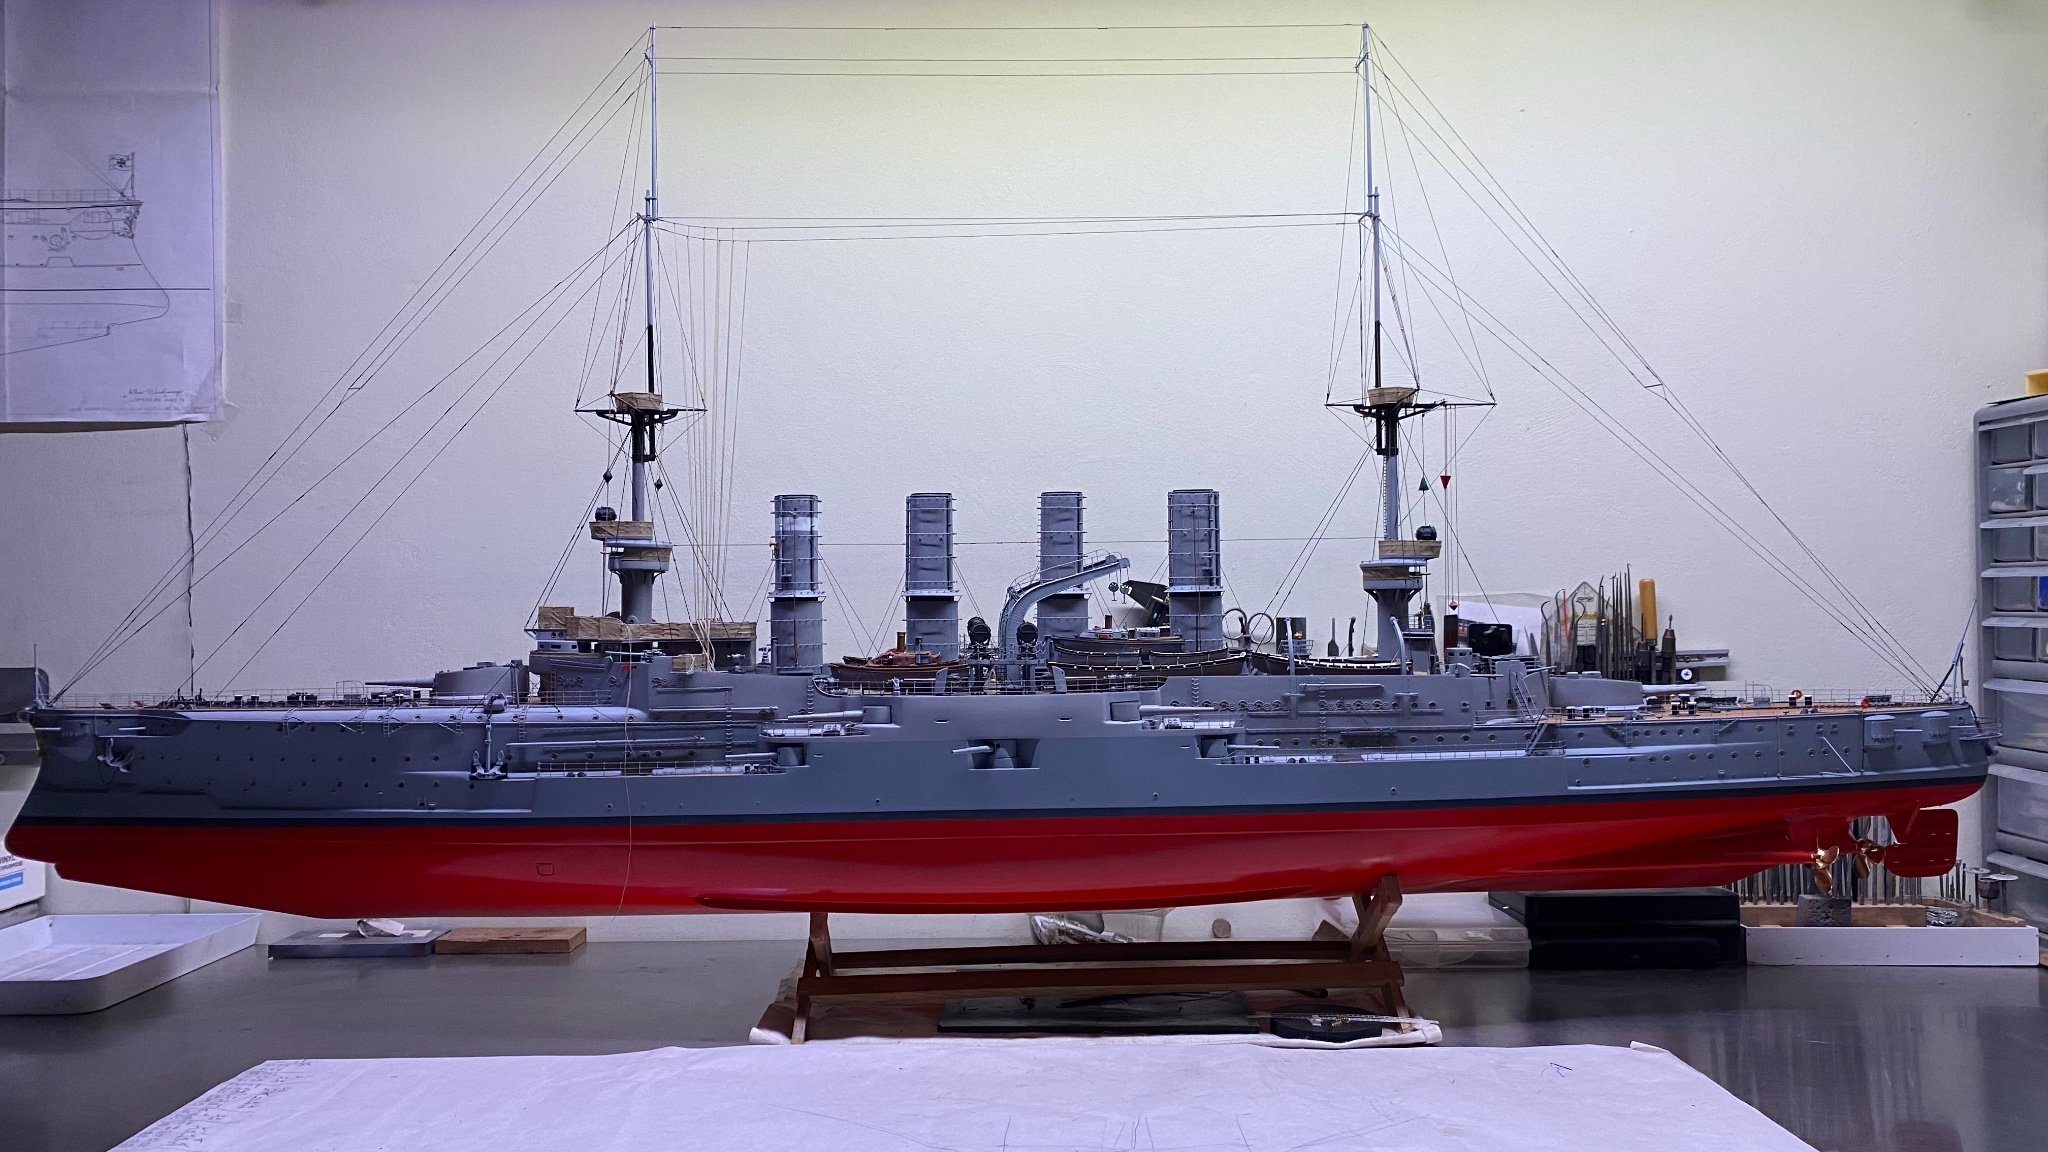
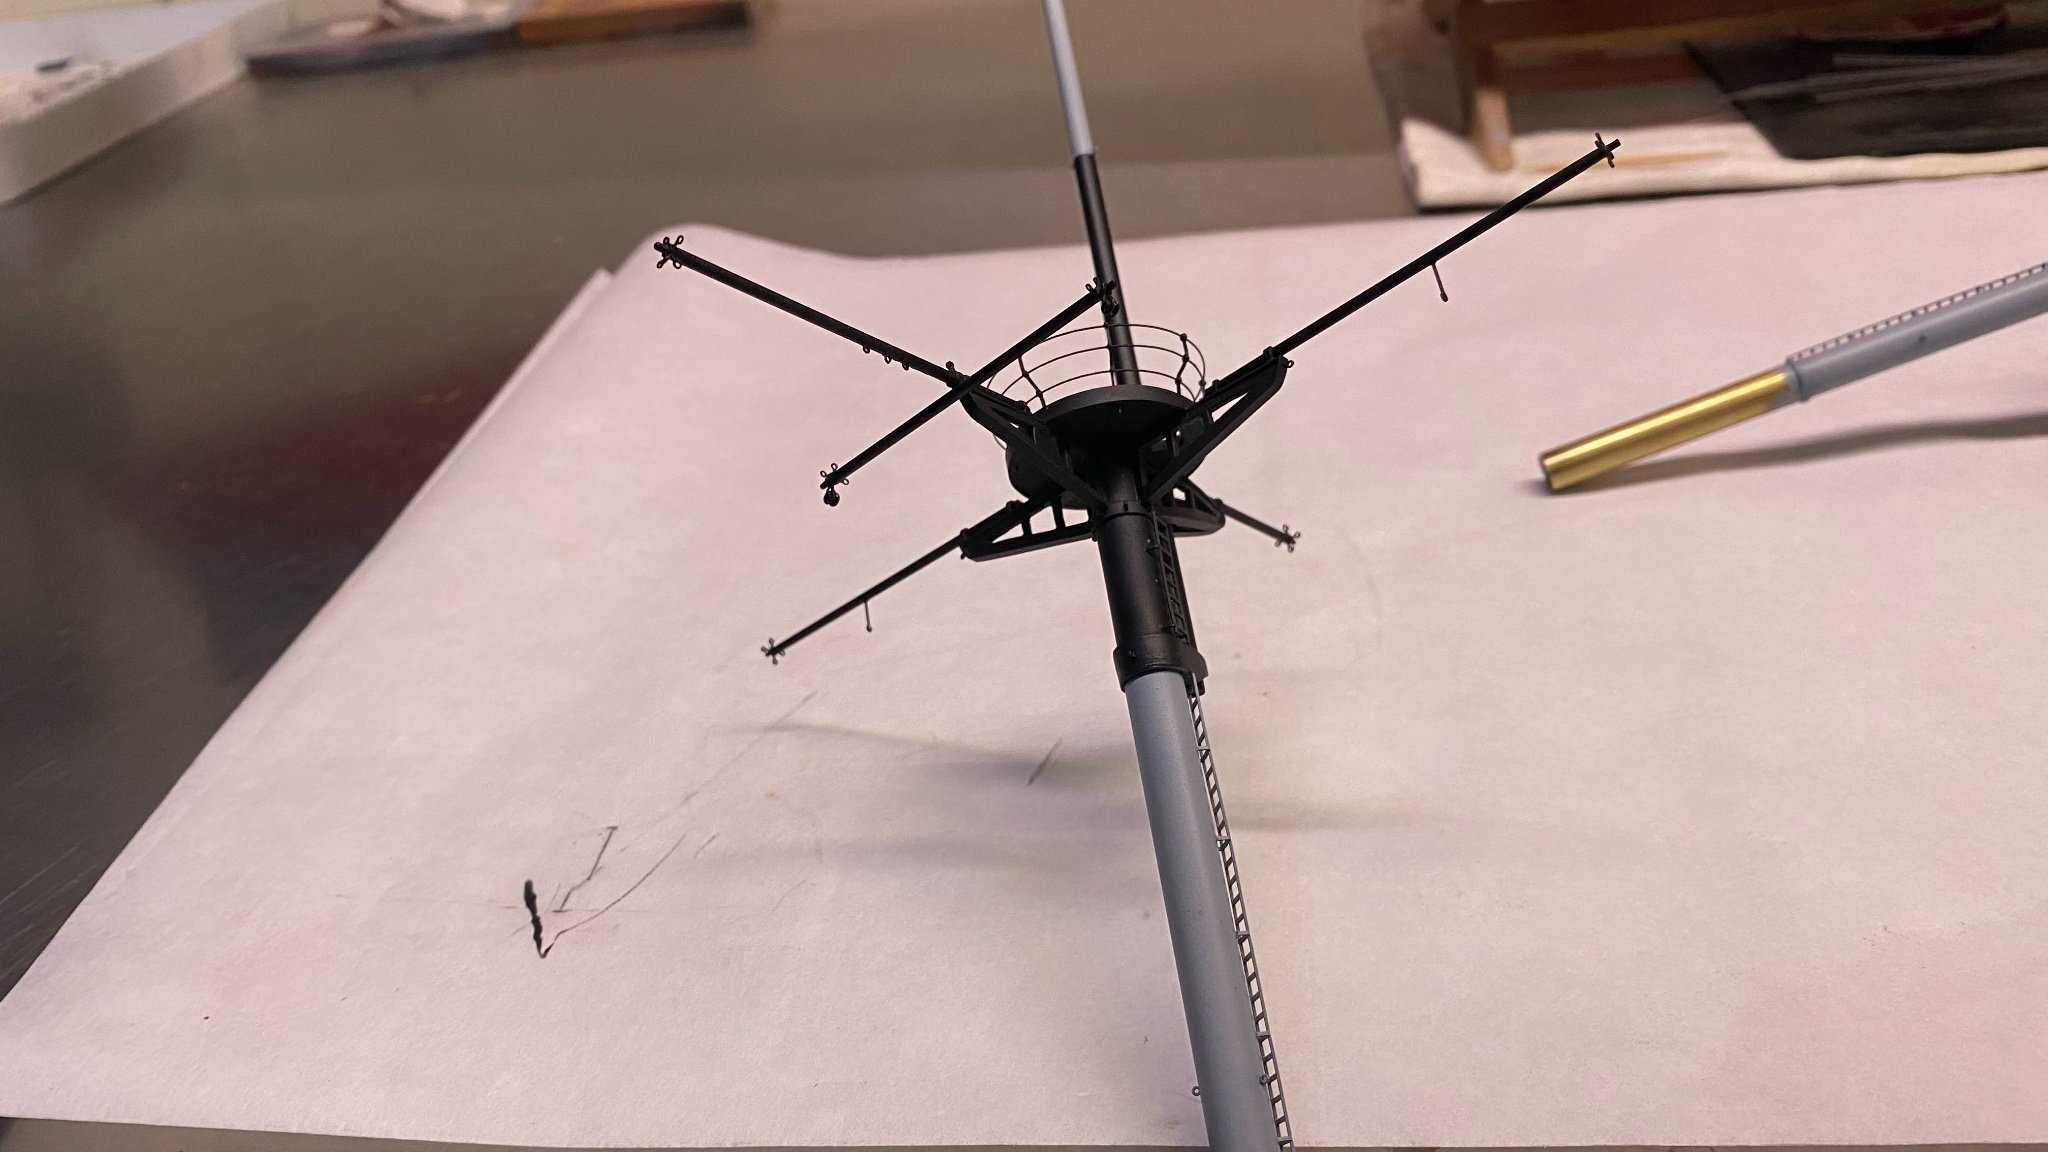
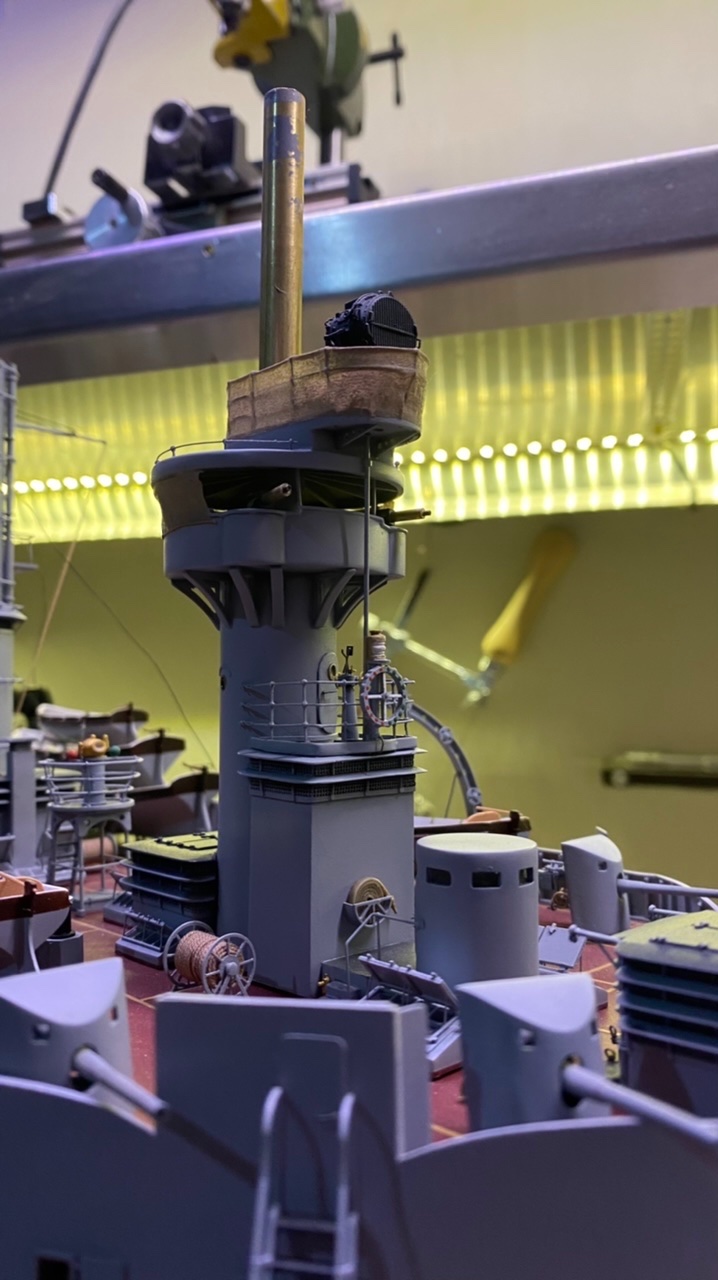
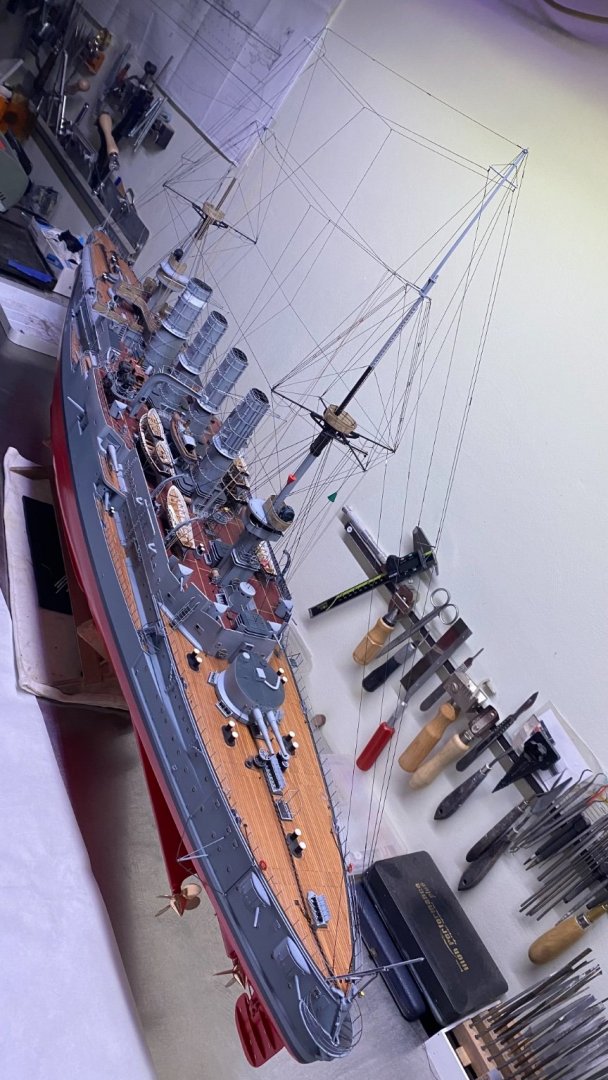
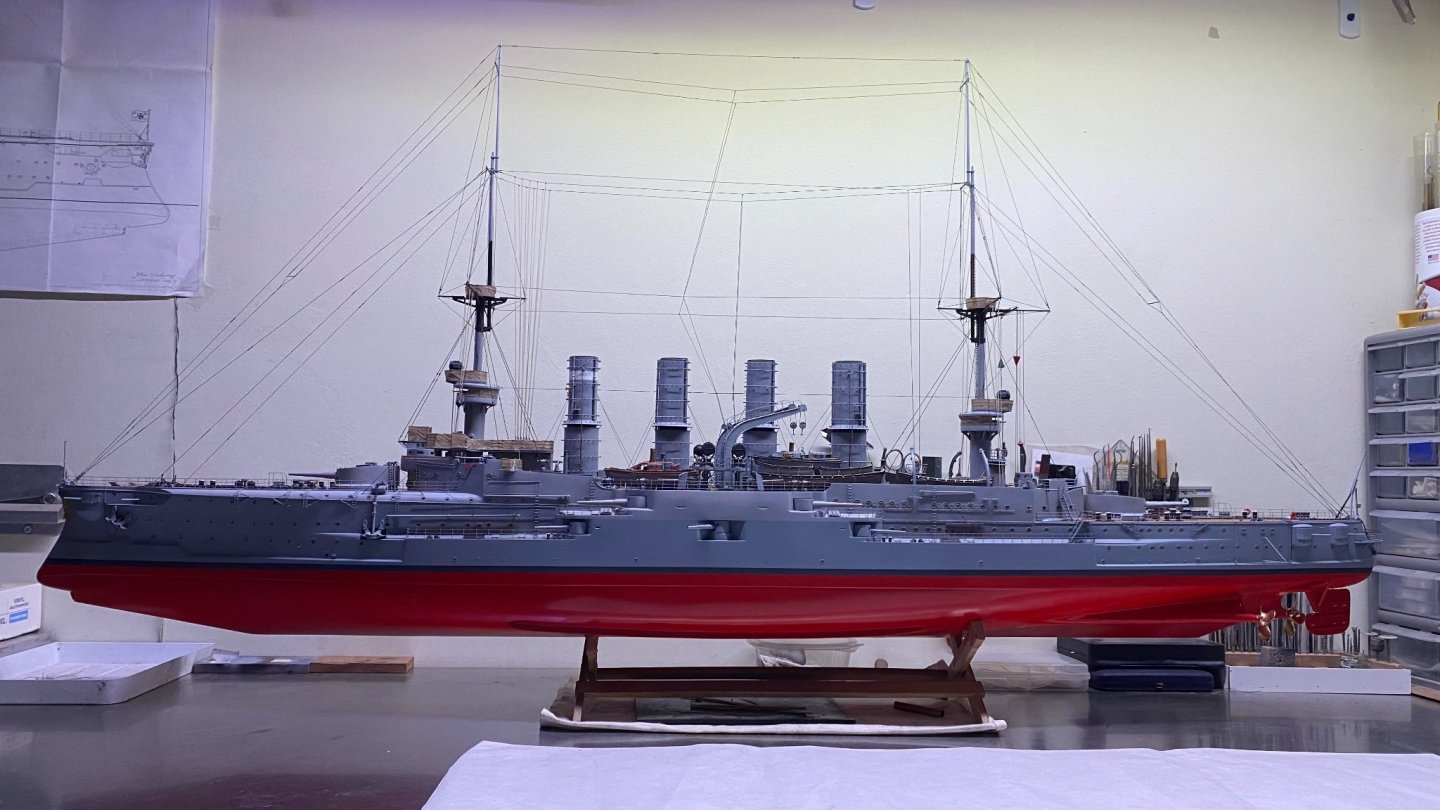
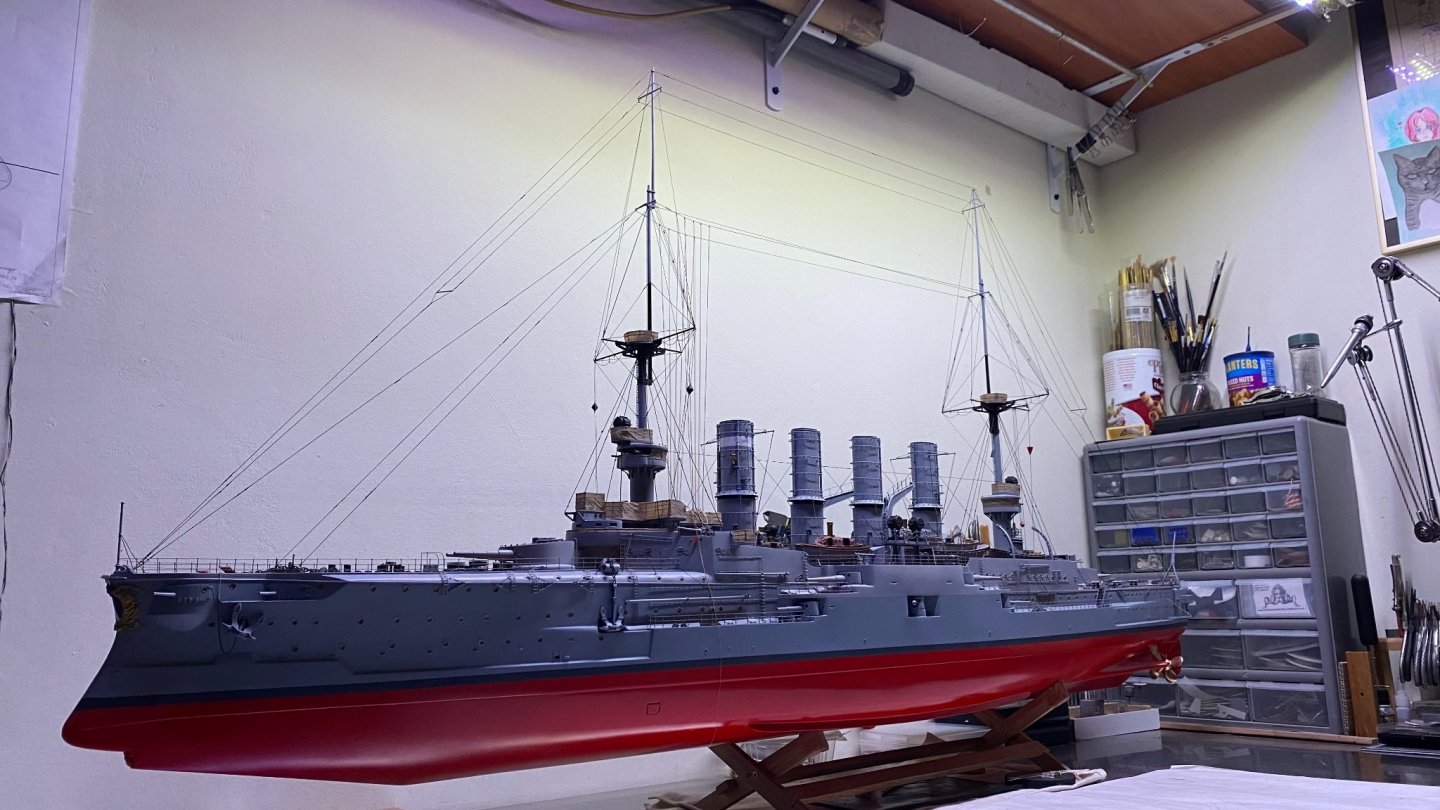
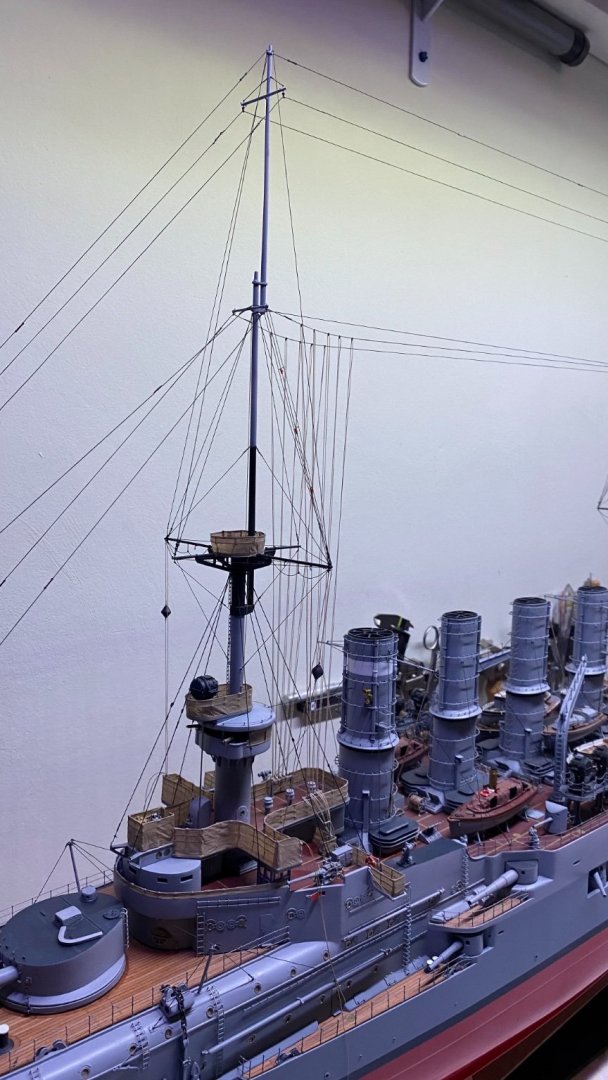
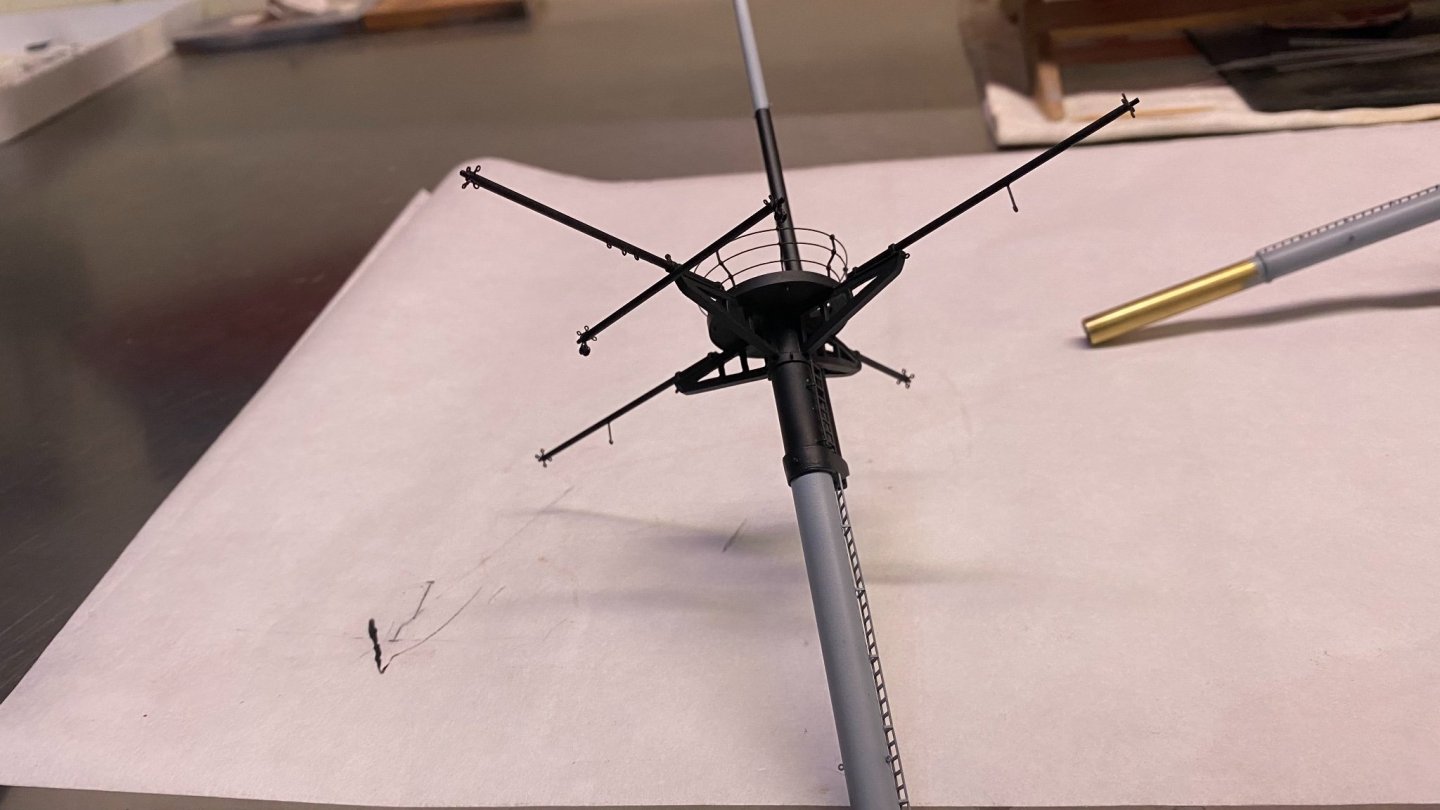
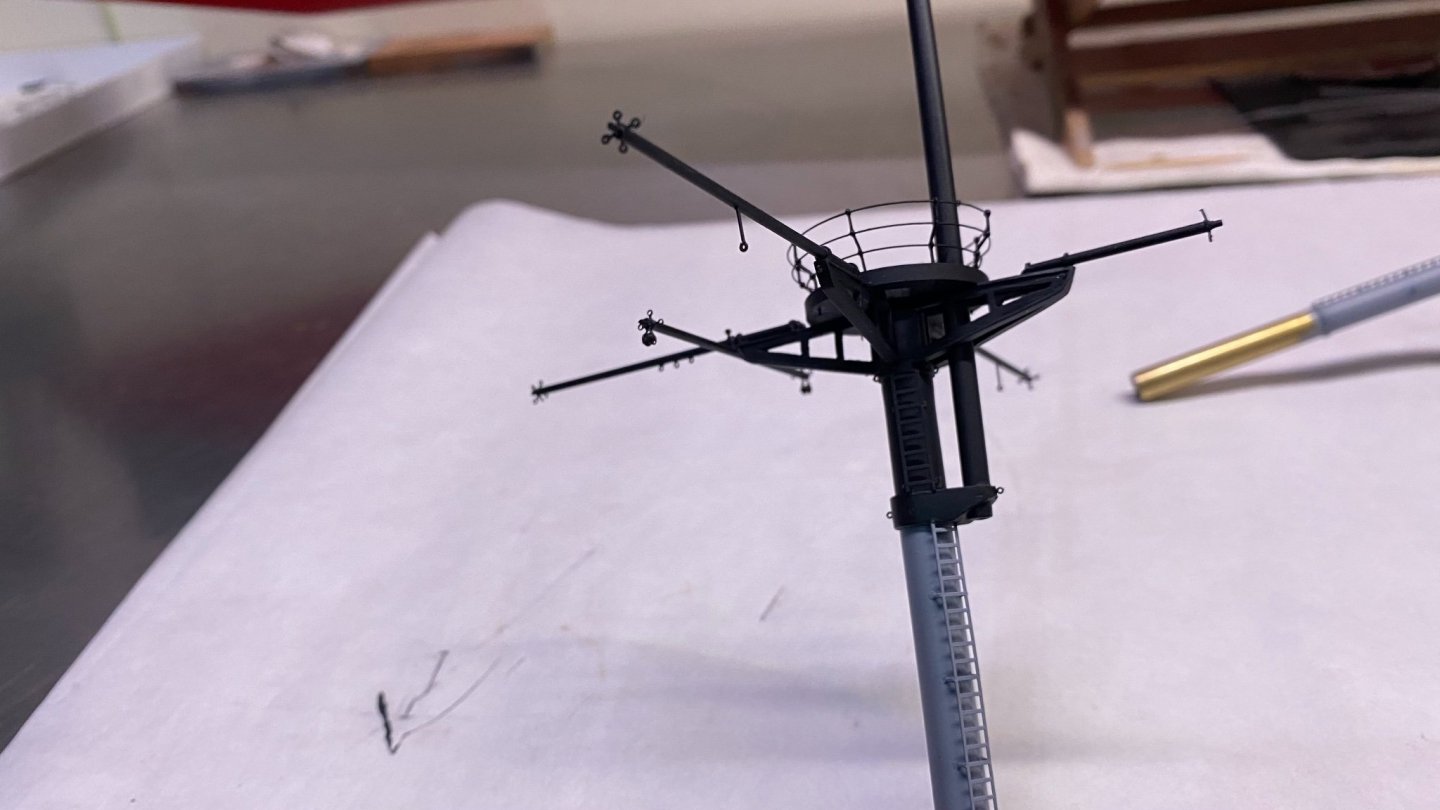
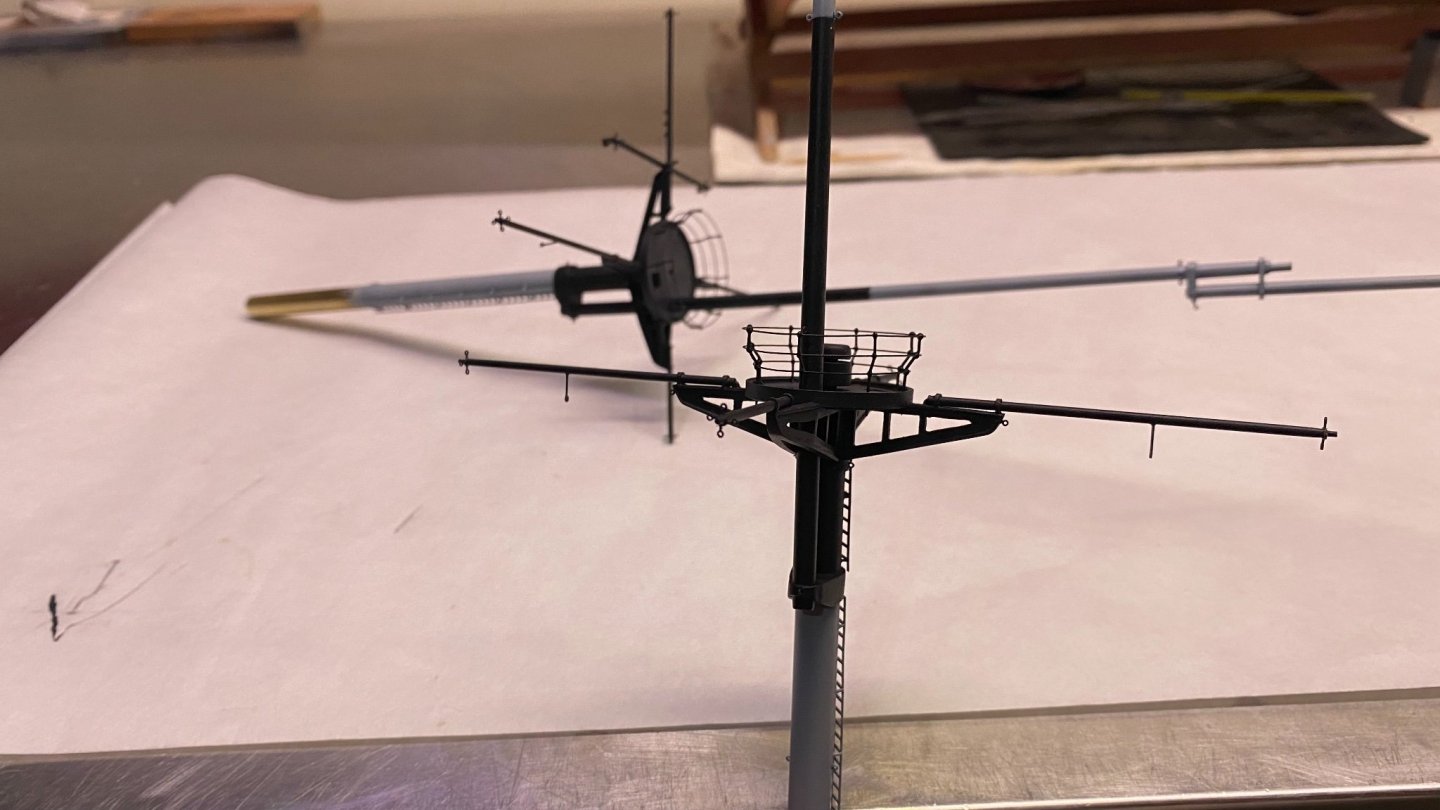
thanks everyone for responses, thumbs up and looking. Rigging and antennas are ready, after some searching, thinking and studying of various photos, I made the antennas as follows. Only the rigging for the davits of the auxiliary boats, the gangways and the necessary small details remain. And then, finally, the flags can be placed. We are almost there but not quite.
- 202 replies
-
- 24
-
-
-
-
- battleship
- scharnhorst
- (and 2 more)
-
Thanks for the thumbs up and looking and we continue a little bit below some pictures
- 202 replies
-
- 18
-
-
-
- battleship
- scharnhorst
- (and 2 more)
-
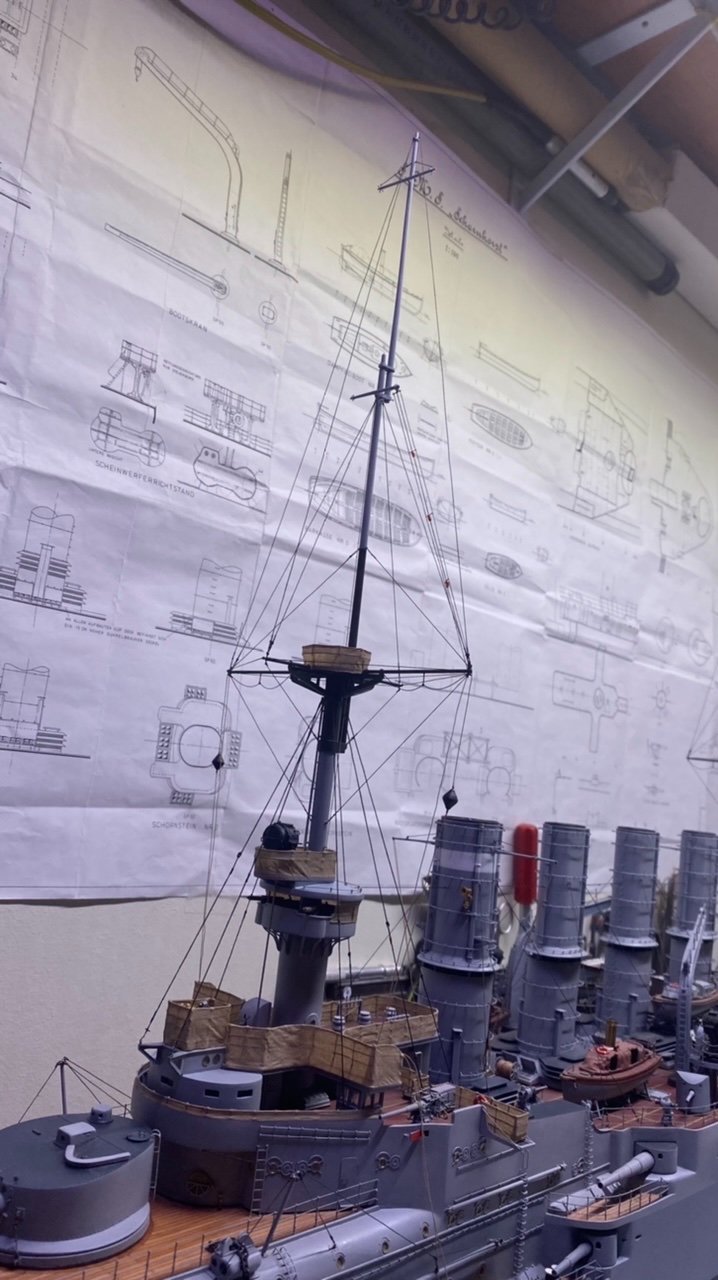
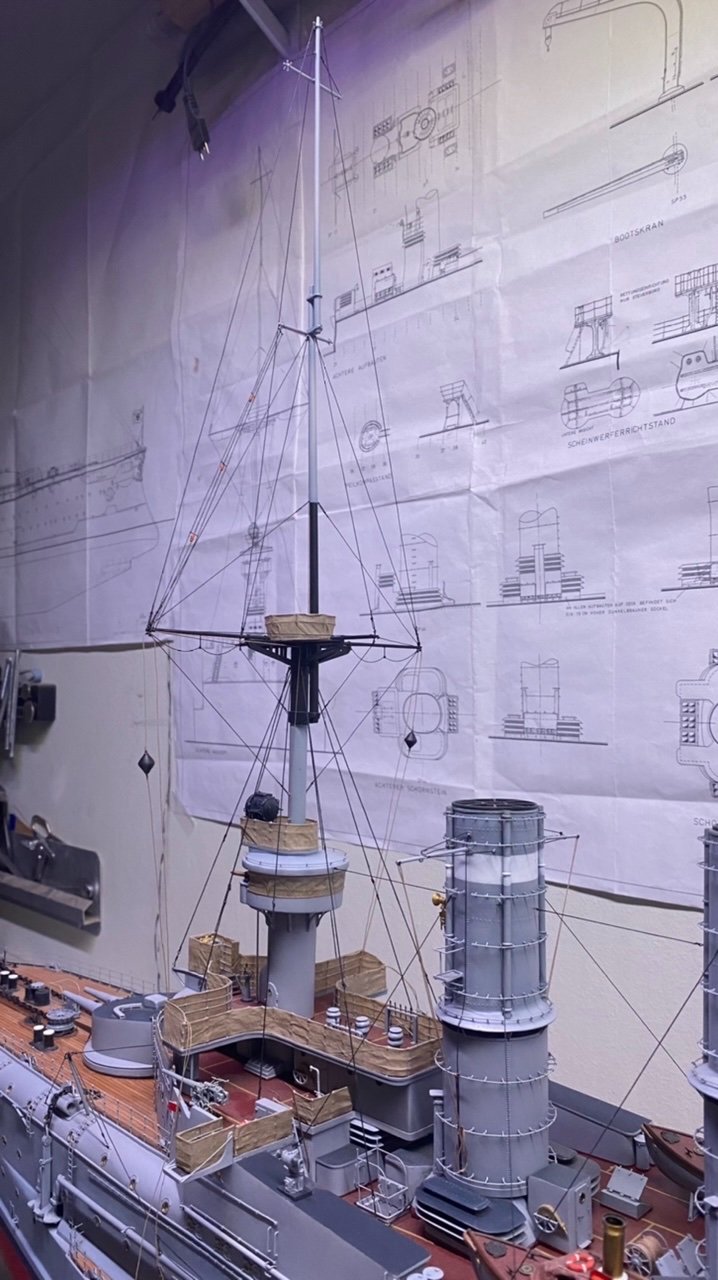
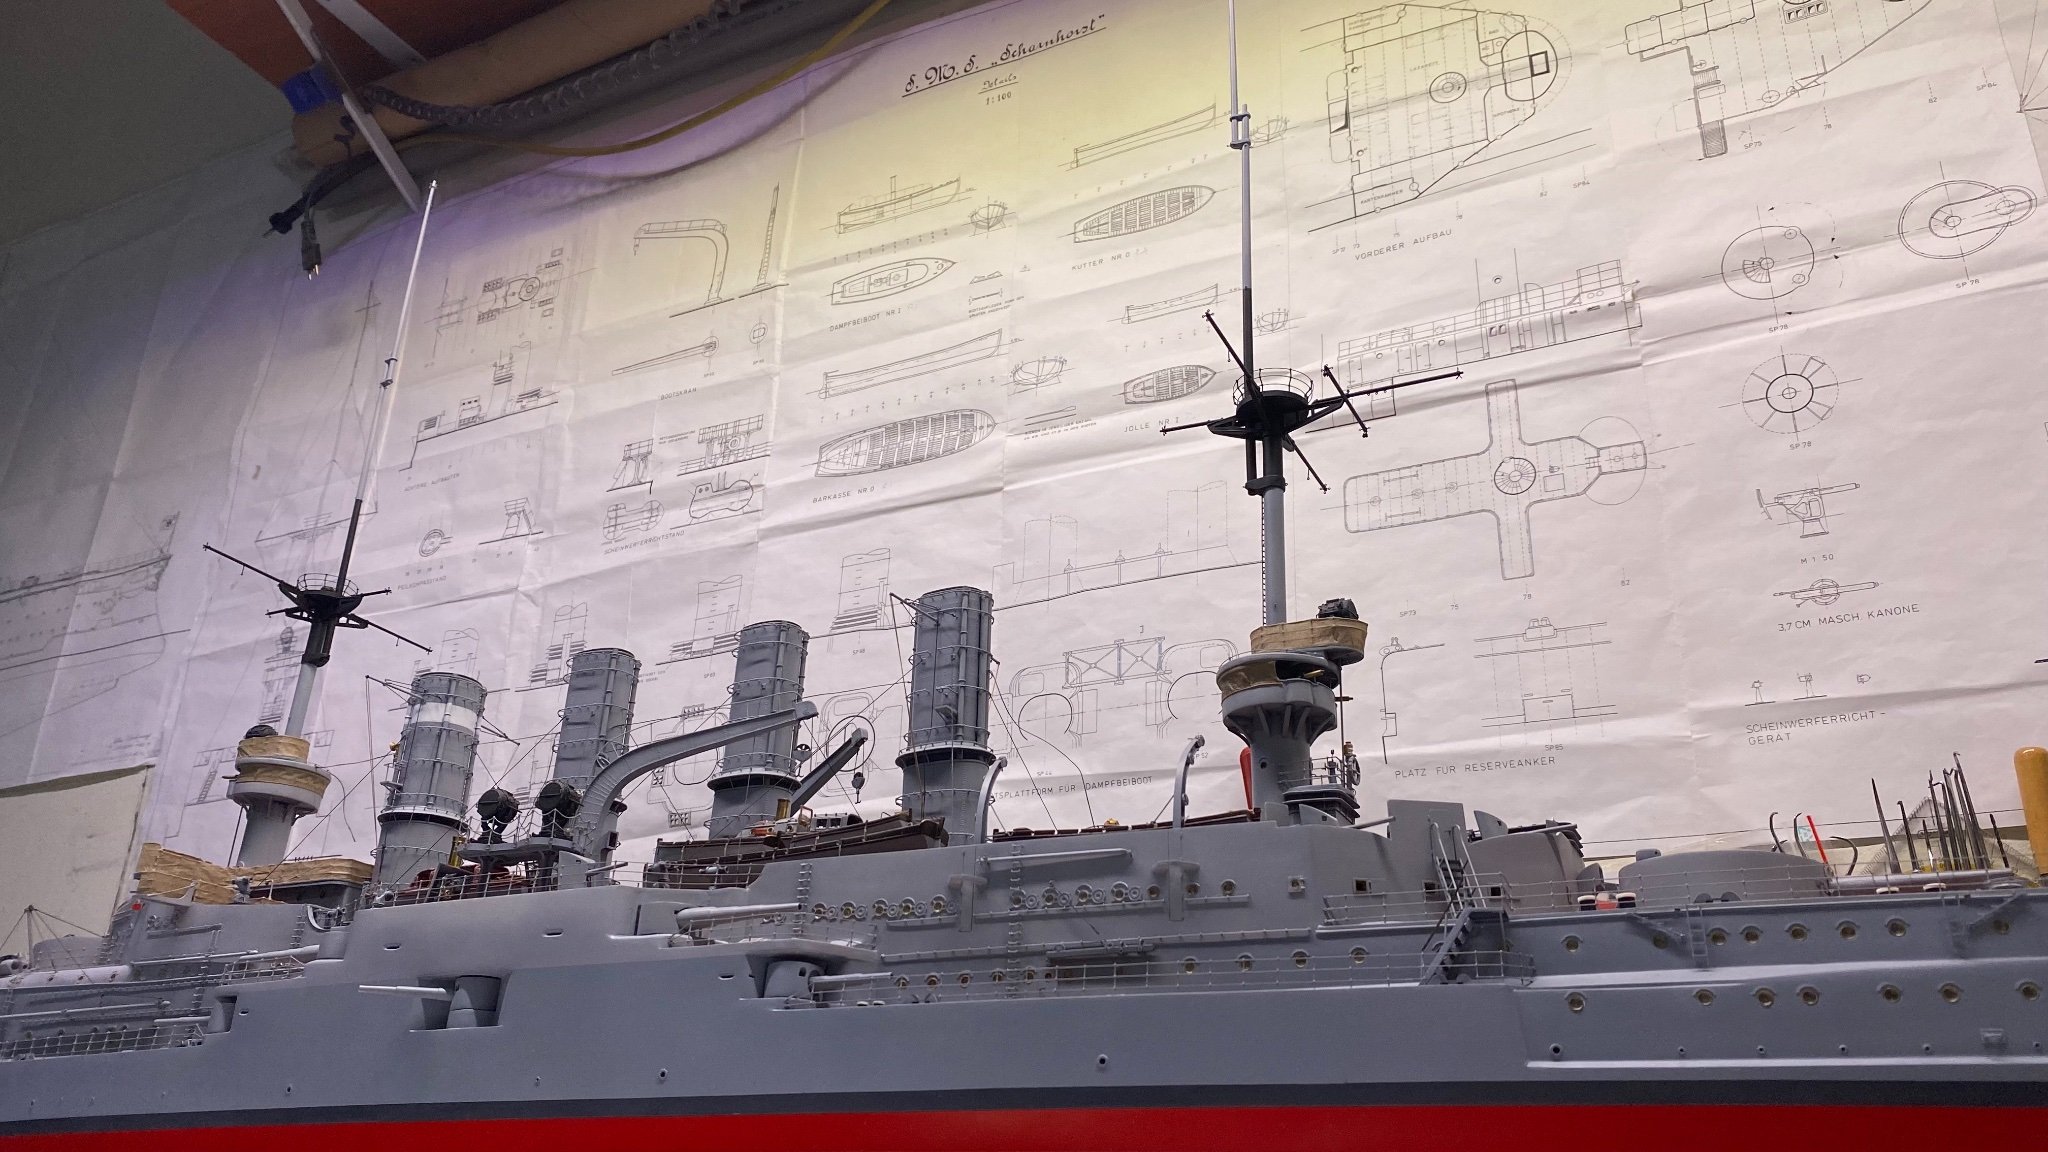
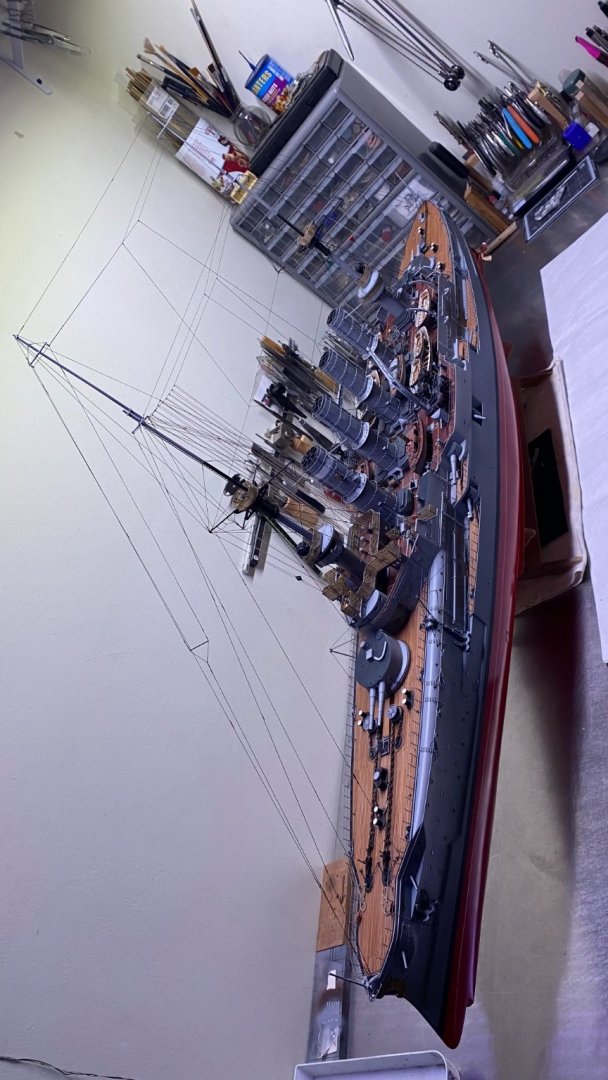
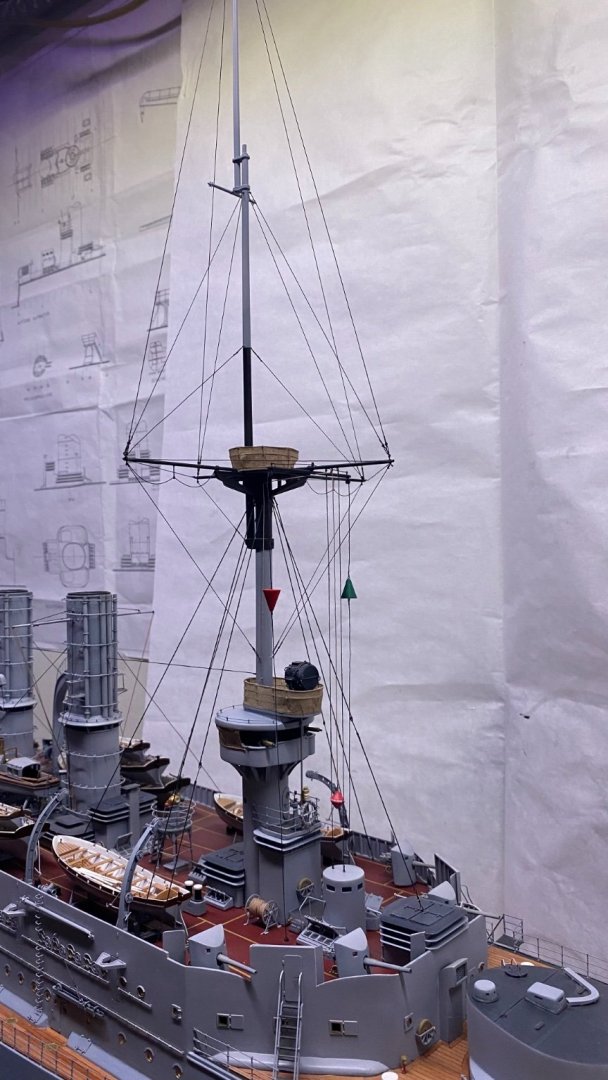
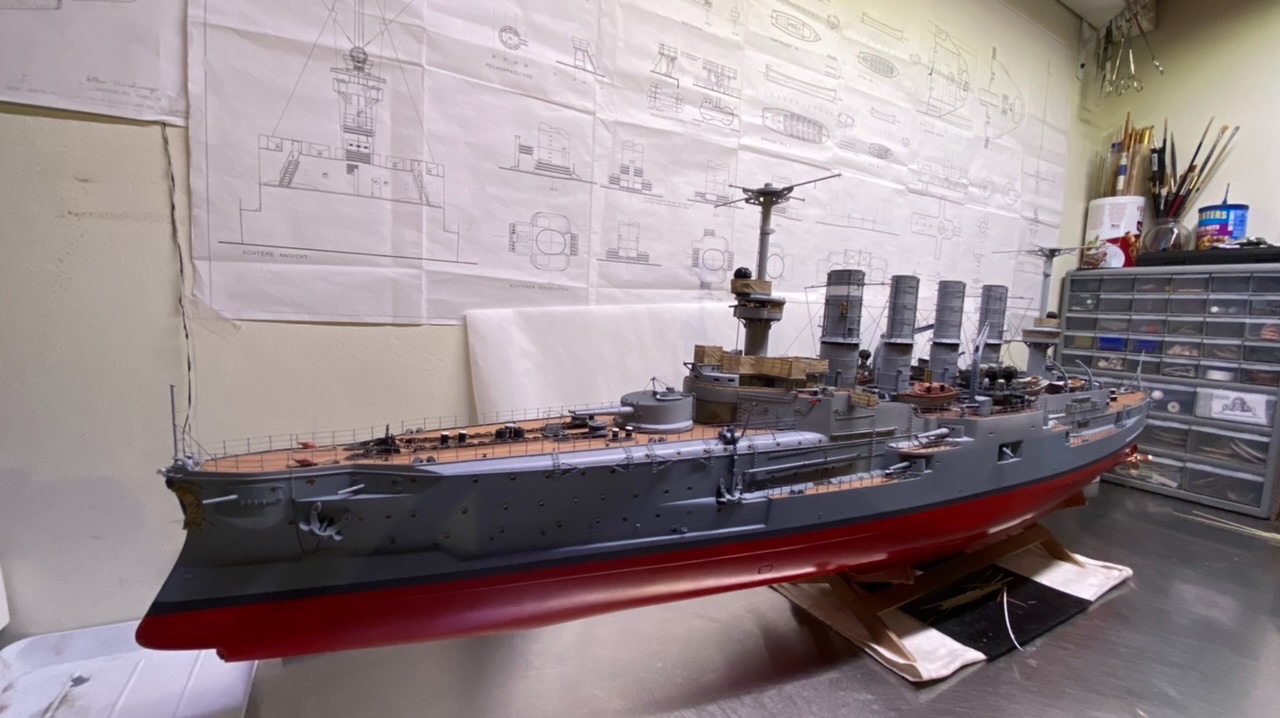
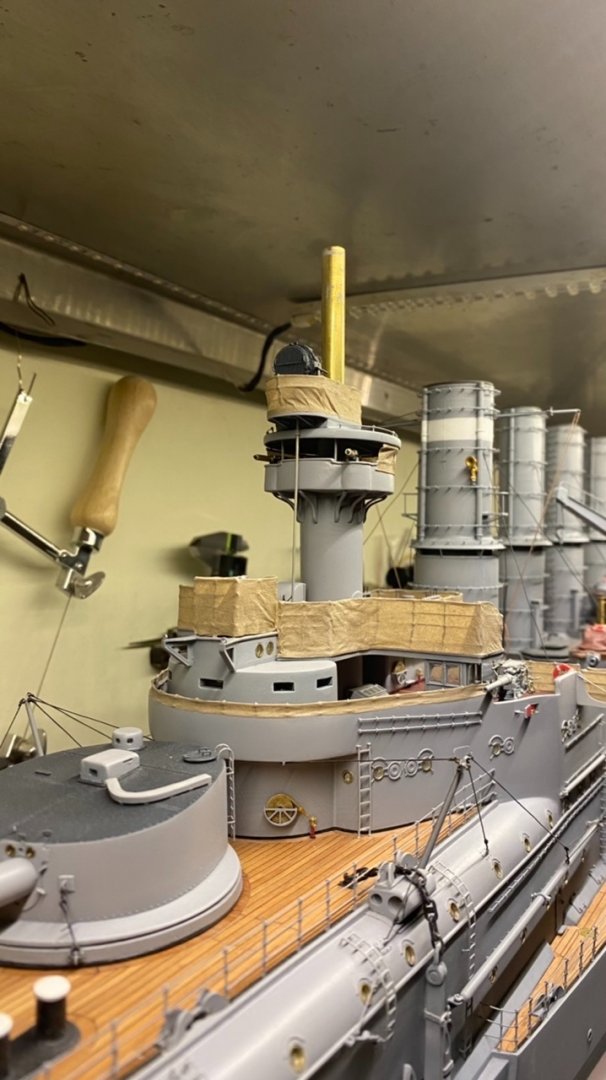
Thanks everyone for the comments , thumbs up and watching. Continued with the aft mast, made the stays and further rigging, also made the navigation buoys. Now we can start Now we can start with the antennas and the remaining navigation lights in the masts and lines for the signal flags. below some pictures.

- 202 replies
-
- 19
-
-
-
-
- battleship
- scharnhorst
- (and 2 more)
-
Sascha, nice to see your build here on this forum as said before. Beautiful work, looking forward too see further updates.
-
Using different types of line from syrenshipmodelcompany that I color with black India ink. Which gives in my opinion a nice natural effect.
- 202 replies
-
- 5
-
-
- battleship
- scharnhorst
- (and 2 more)
-
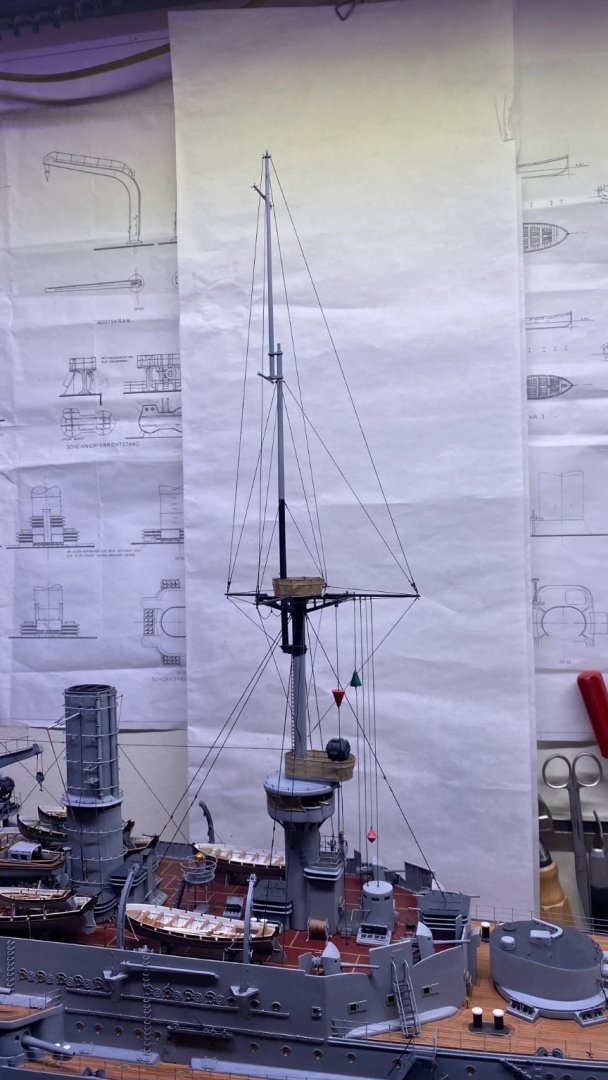
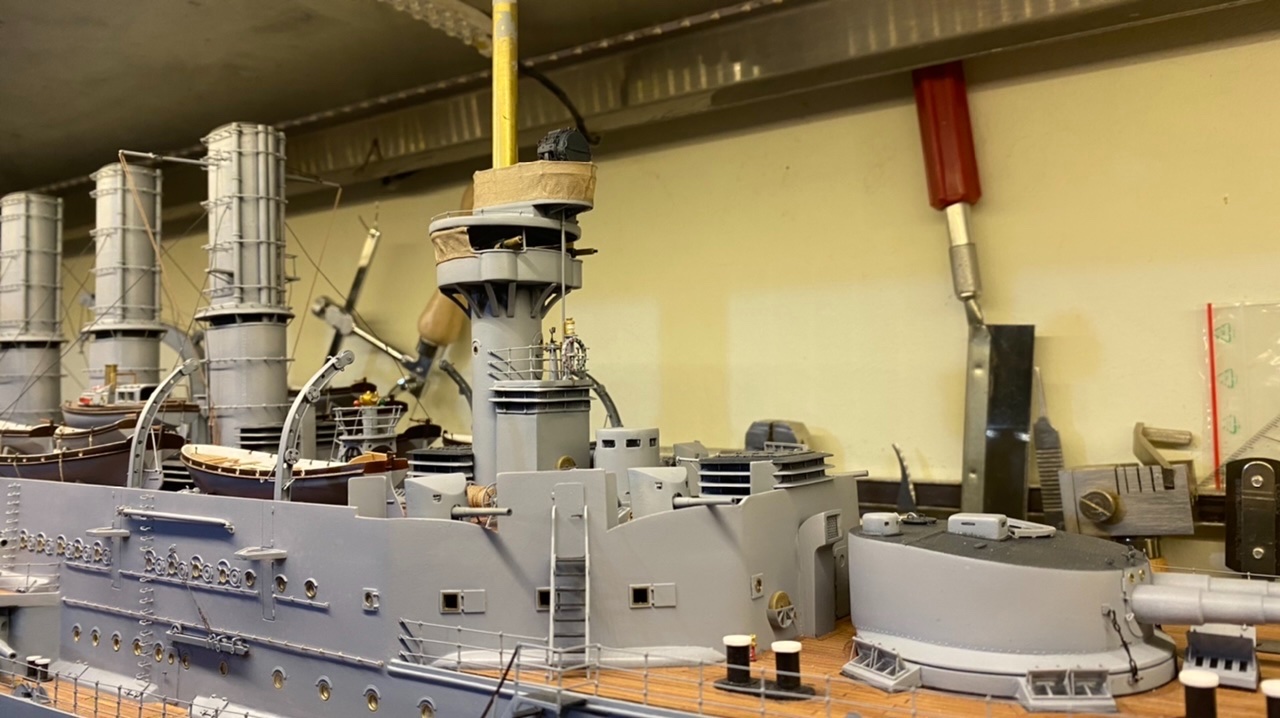
Thanks everyone for the positive comments and thumbs up. And we are going a bit further, Made a start with the foremast, this is now definitively placed, made the stays, also made a start with the navigation lights. below some pictures

- 202 replies
-
- 22
-
-
-
-
- battleship
- scharnhorst
- (and 2 more)
-
Absolutely beautiful done, she comes slowly beautiful alive.
-
Yes I know, that’s always the most exiting moment for me. but I hope to move her one more time, when she is ready, to her final place a display case that I already have, and that was specially built for it by a very skilled carpenter. below a picture of the case, when it was still in his workshop.

- 202 replies
-
- 13
-
-
- battleship
- scharnhorst
- (and 2 more)
-
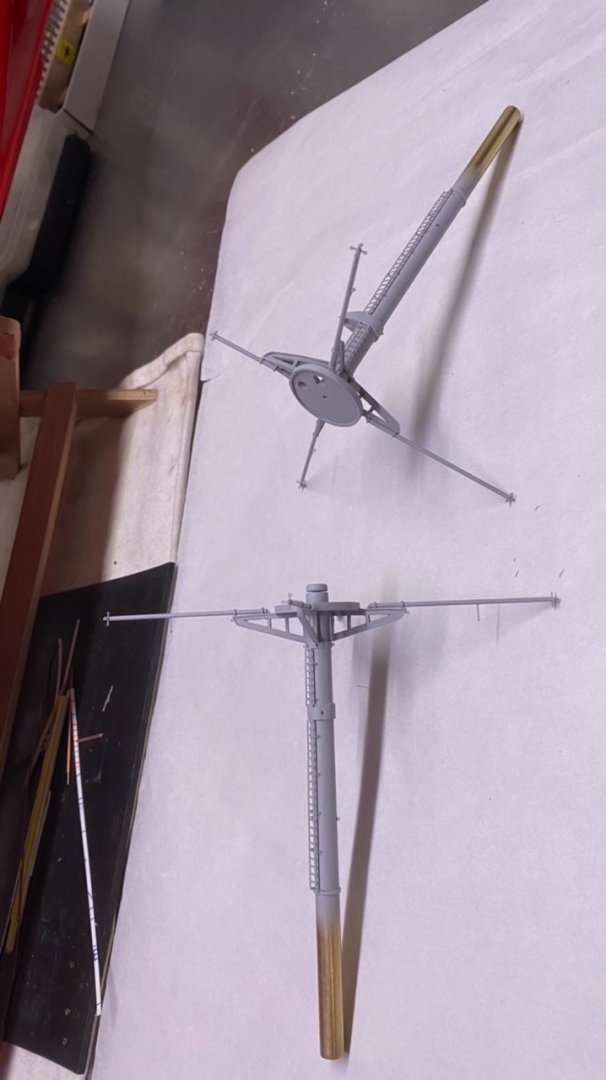
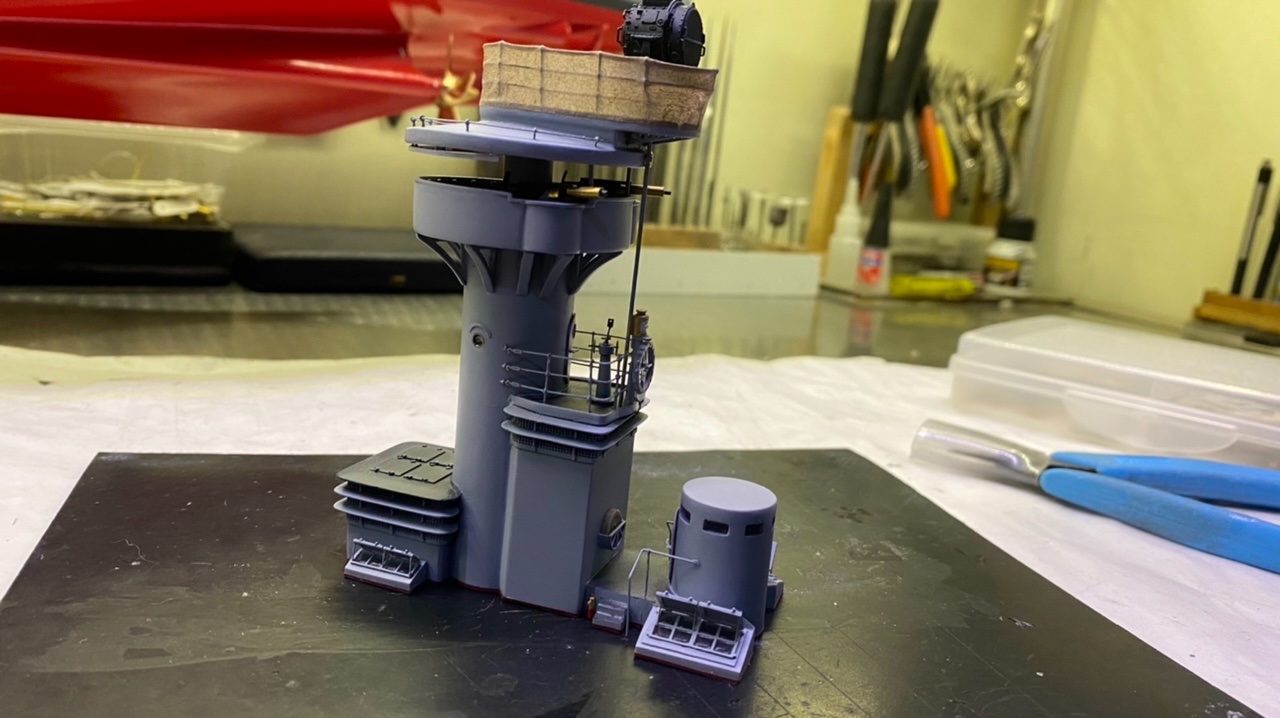
Thanks to all who watched and responded. Final stage of the masts. The masts are more or less finished, except for a few small details, than I can start with the rigging. Below some pictures


- 202 replies
-
- 18
-
-
-
- battleship
- scharnhorst
- (and 2 more)
-
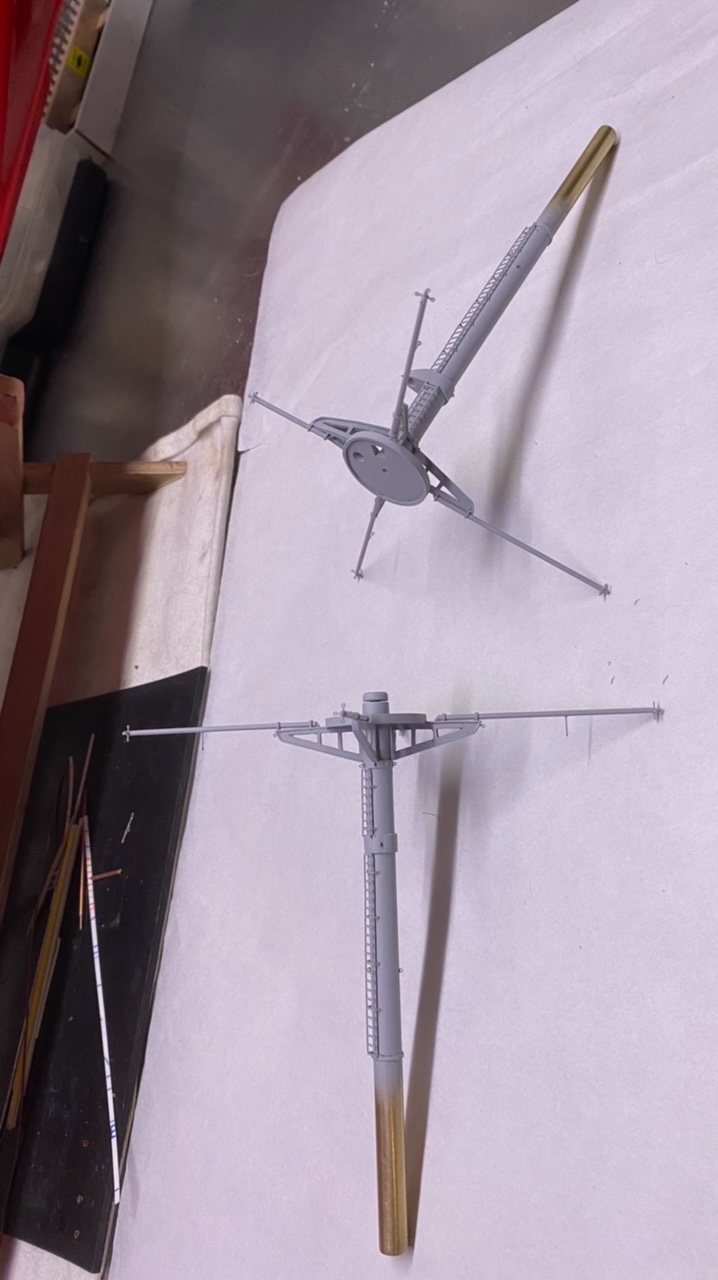
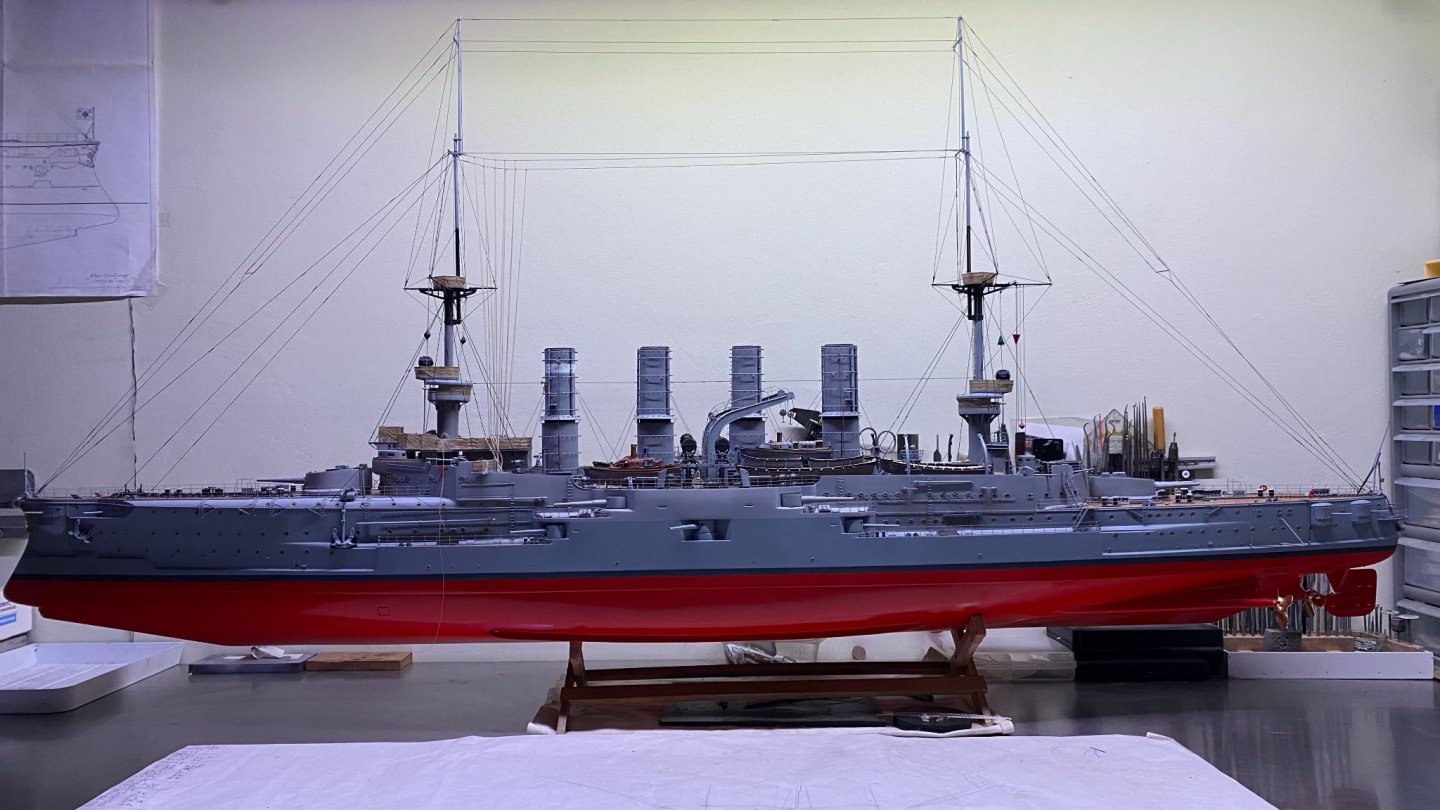
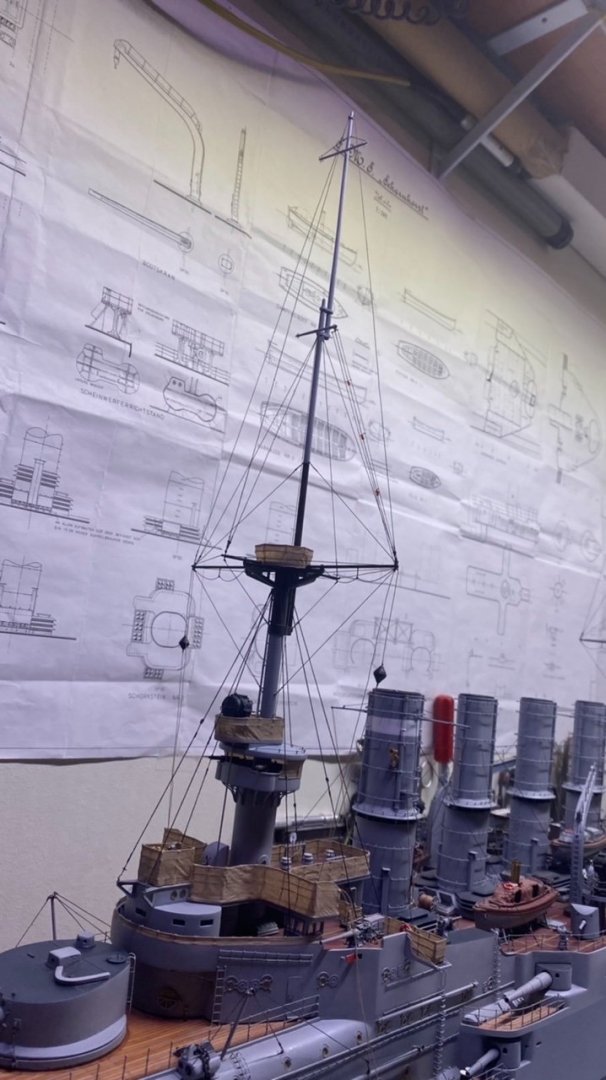
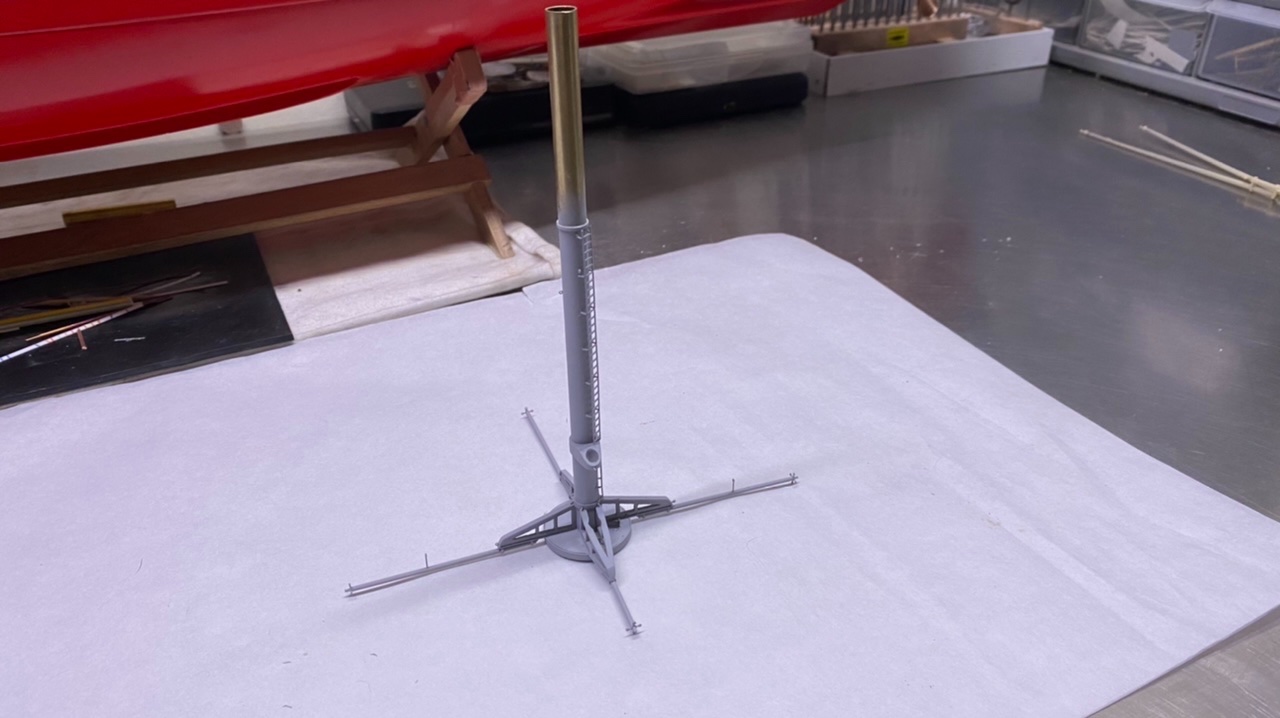
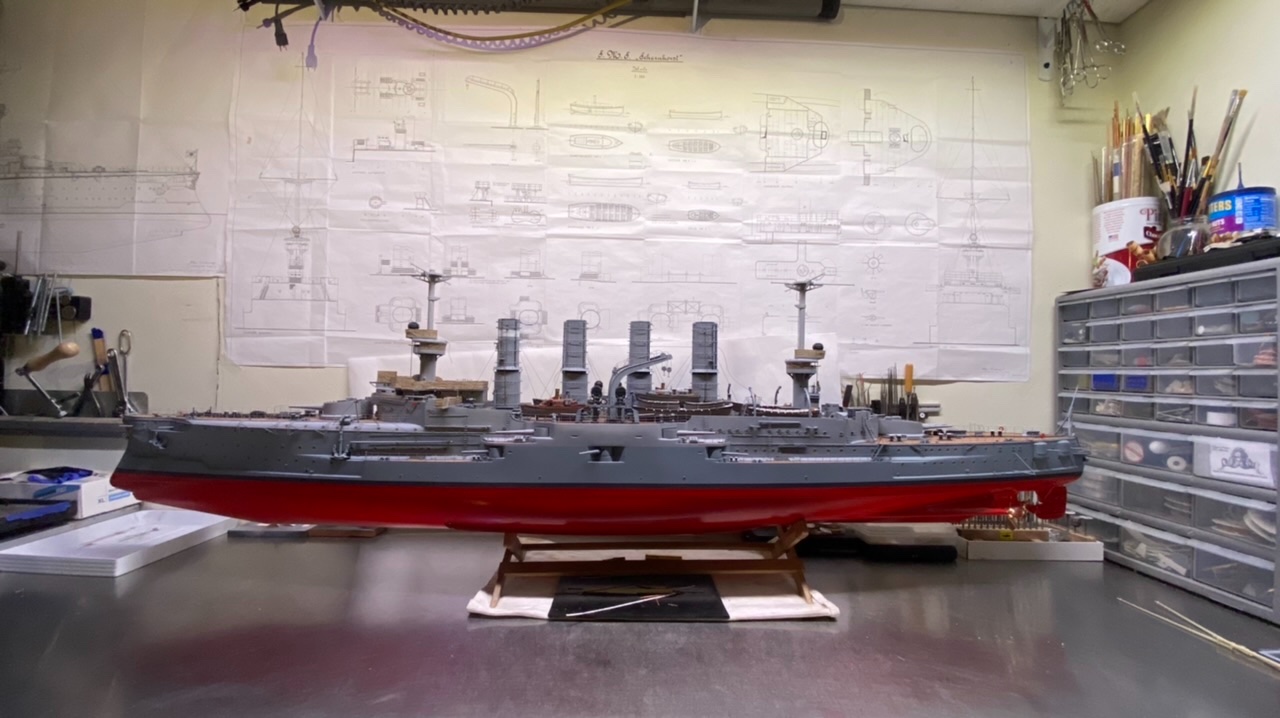
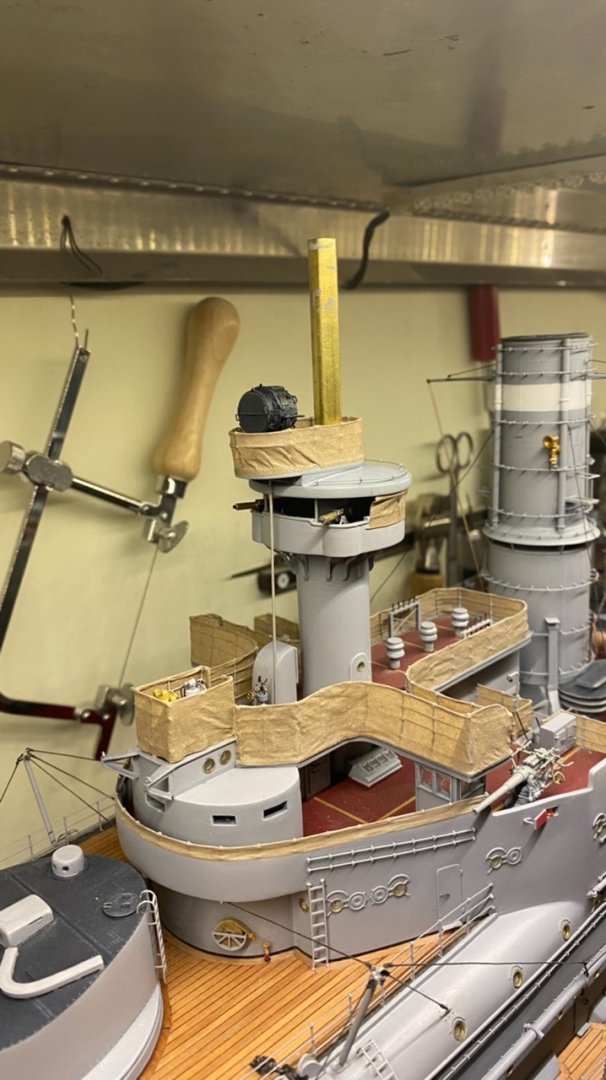
Thanks everyone for the thumbs up and nice comments. worked a little bit further on the Scharnhorst, more or less the final chapter “the mast and rigging and antennas. Made a beginning with the two lower parts of the mast and belonging platforms. Bellow a few pictures, it’s still very basic, but gives a bit of a impression.


- 202 replies
-
- 18
-
-
-
- battleship
- scharnhorst
- (and 2 more)
-
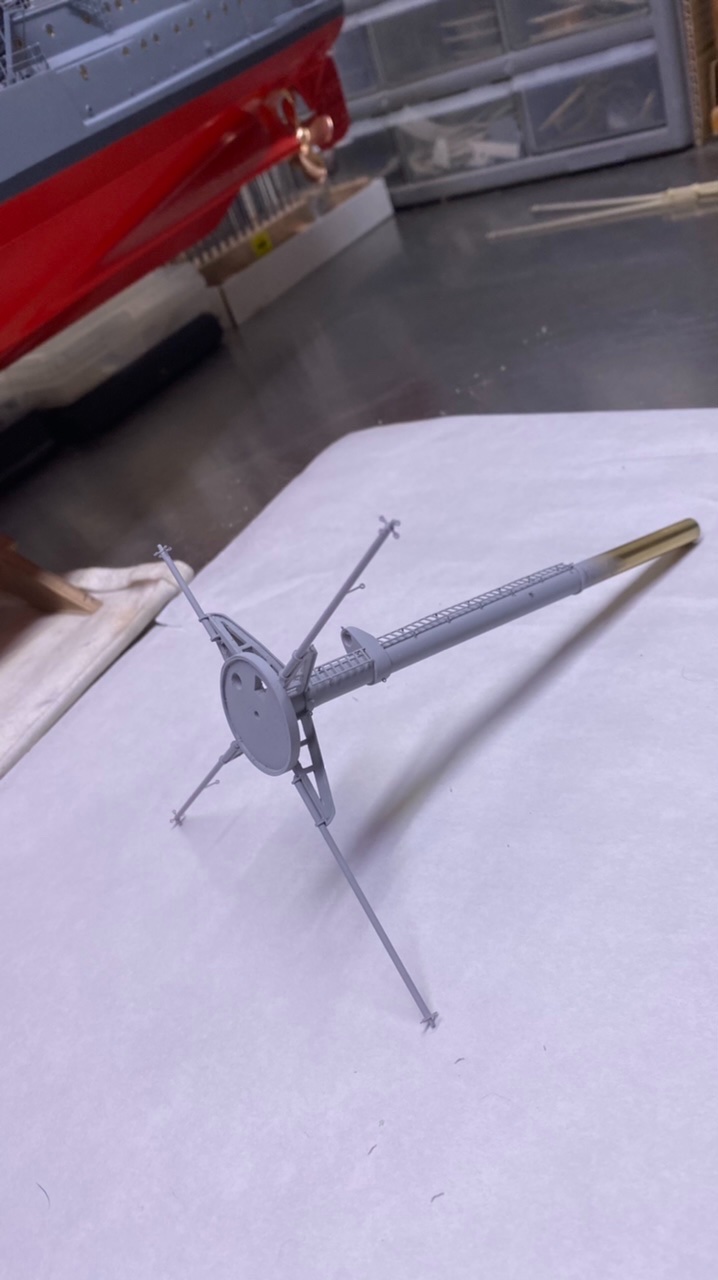
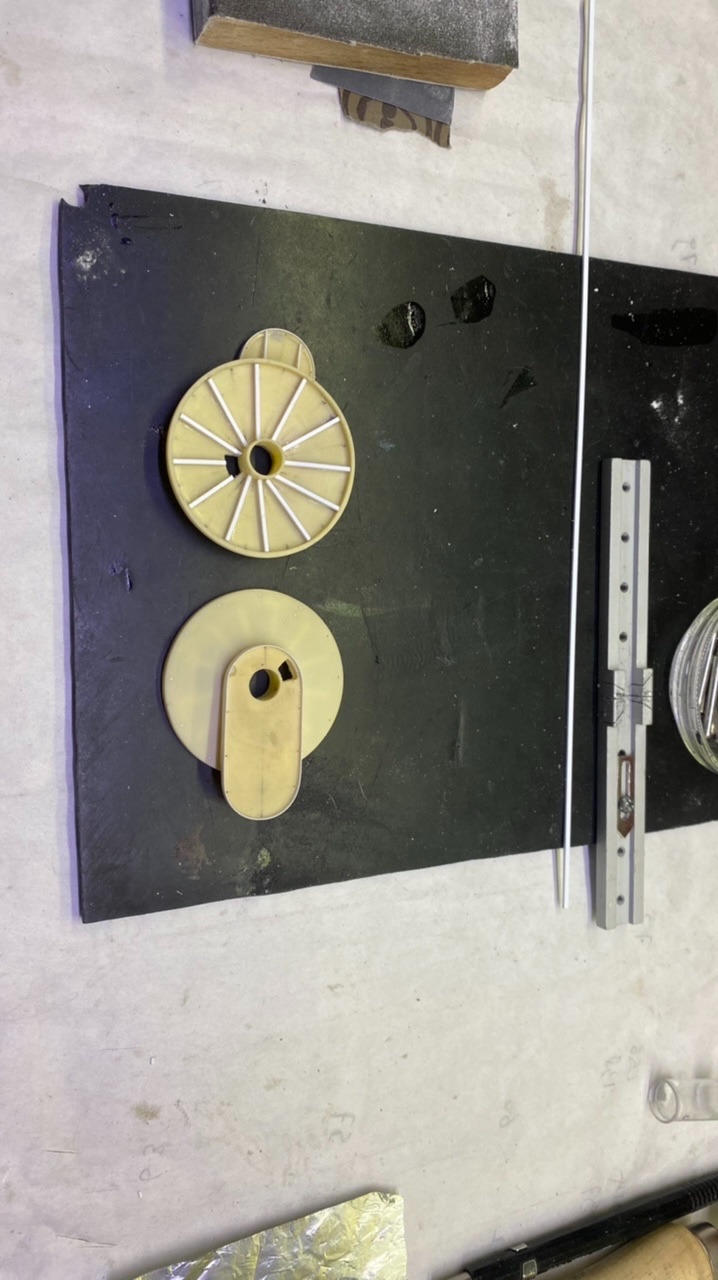
Started with the further construction of the battle mast and the platform for the floodlight, below some pictures need no further explanation.


- 202 replies
-
- 15
-
-
-
- battleship
- scharnhorst
- (and 2 more)