Captain Al
-
Posts
613 -
Joined
-
Last visited
Content Type
Profiles
Forums
Gallery
Events
Everything posted by Captain Al
-
Hey there Captain. I was looking over your planking again as I move along on mine (I'm about 40% done) and was wondering why you planked so much of the starboard side? On mine, the kit calls for only 9 walnut planks on starboard side down low, and none up top. Didn't you run out of walnut planks? Was this the reason you ran out? Don't get me wrong, it looks great. I was just considering how much wood I have and how much more planking I had to go on each side and so I looked at your's and it seems like much more than the amount of wood I have on hand.
-
No need for more photos Capt. On closer look I can see what you're talking about. Thanks for the advice on the planking.
-
Well it sure is nice to hear from you and glad you are still at it. I am very impressed with your planking. It looks fantastic. I am now into that phase of my Bounty so I know first hand now what a challenge it can be. Are you satisfied that on your open side where your planks do not end on (and get glued to) a frame, that they are sufficiently stout (thick) that there will be no play in them -- at least not enough to snap them? I've been considering where to end mine and this is my primary concern. It looks like you used a few wedge shaped planks here and there. But I don't see any drop planks or stealers. Is that true? The wedges look fine; super fine for that matter. All in all, a very nice planking job.
-
I'm not very clever but my thought would be, tight enough to be taut but not so tight as to put any real tension on them and the masts themselves. I think the idea is that they look more taut than running rigging, but since this is a model, they're not really holding up the mast. And also remember, depending on the point of sail (which direction the wind is coming from) the windward side's shrouds are tighter than the lee side. Not knowing how delicate things up top are, I would not risk putting any more tension than is needed to look good. I wonder, will the thread you use have much stretch over time?
-
I believe here in the colonies they would have used Sitka spruce. Oak is not straight enough.
-
Let me be first to congratulate you. Masterful job!! I may not be eligible though for the modification prizes as I believe I may have some insider information.
-
I'm with Mike. Football is about as exciting as sanding a hull -- so I'd rather be doing the latter. I should tell you though Capt. that I'm still plugging along and making progress (your photos are very helpful). I've been going very slowly; trying to avoid planking but the time is fast approaching. I will probably begin planking after this Holiday weekend (Independence Day for we Yanks -- sorry about that Mike, but the ole empire couldn't last forever and I think Scotland should be independent as well).
-
Interesting tale and learning experience. Thanks for sharing. I will be especially careful to keep my 8 year old grand-nephew beyond arms reach.
-
Sound advice from all. I will probably weigh the value of having something moving against any difficulty it would add to make it so. I also realize that I won't want many people handling the model when done and it might even be encased. So what would the point be? Thanks for your replies.
-
I've reached the point in my Bounty build where I will soon be putting together such things as the capstan and hanging the rudder from its post. I have had to drill a hole for the rudder post and I'm wondering if it should be large enough so that the rudder will actually move on its gudgeon and pintles. That made me wonder if any of the other moving parts are designed to and should be made to spin, rotate etc. or should they be installed and built as a "for show" only immovable part?
-
Nope, never tried that one either. I guess the real answer is that there are an awful lot of things that could be used. Its going to be a matter of narrowing them down to those I can get my hands on and then testing those out. Right now I am working on the trenailing of this main deck and finding its tough to get a perfectly straight line across the deck without a pencil line to mark it. Might try taping a straight edge across and then marking or drilling right up on the edge of it.
-
I will look for those products and give em a go. But I can't recall seeing any of them in my hobby store so on-line might be the only way. With the attendant shipping costs and time delay. But thank you, its worth a search since you are right about trying to get the looks just right after much work to get this far.
-
I appreciate your reply Nigel and will probably do a bit more experimenting before settling on a finish. Thanks for the reminder to abrade -- I always forget that and it does make a big difference.
-
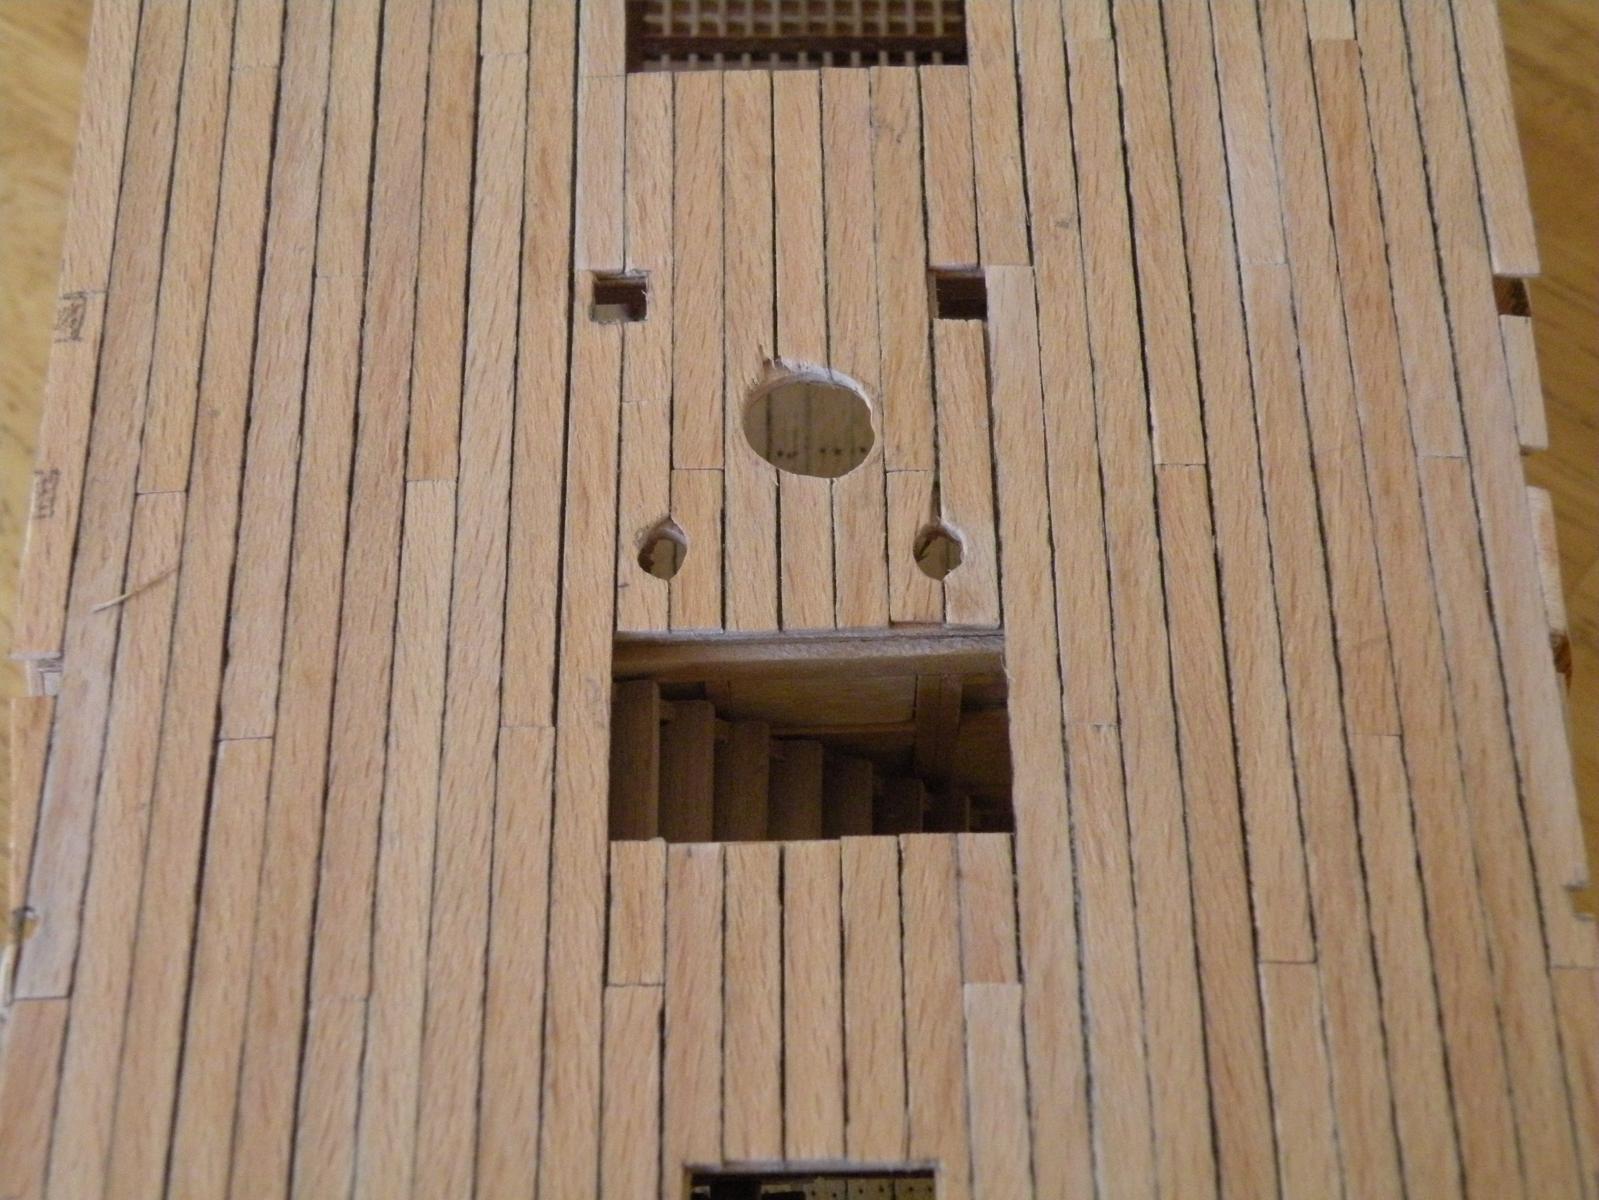
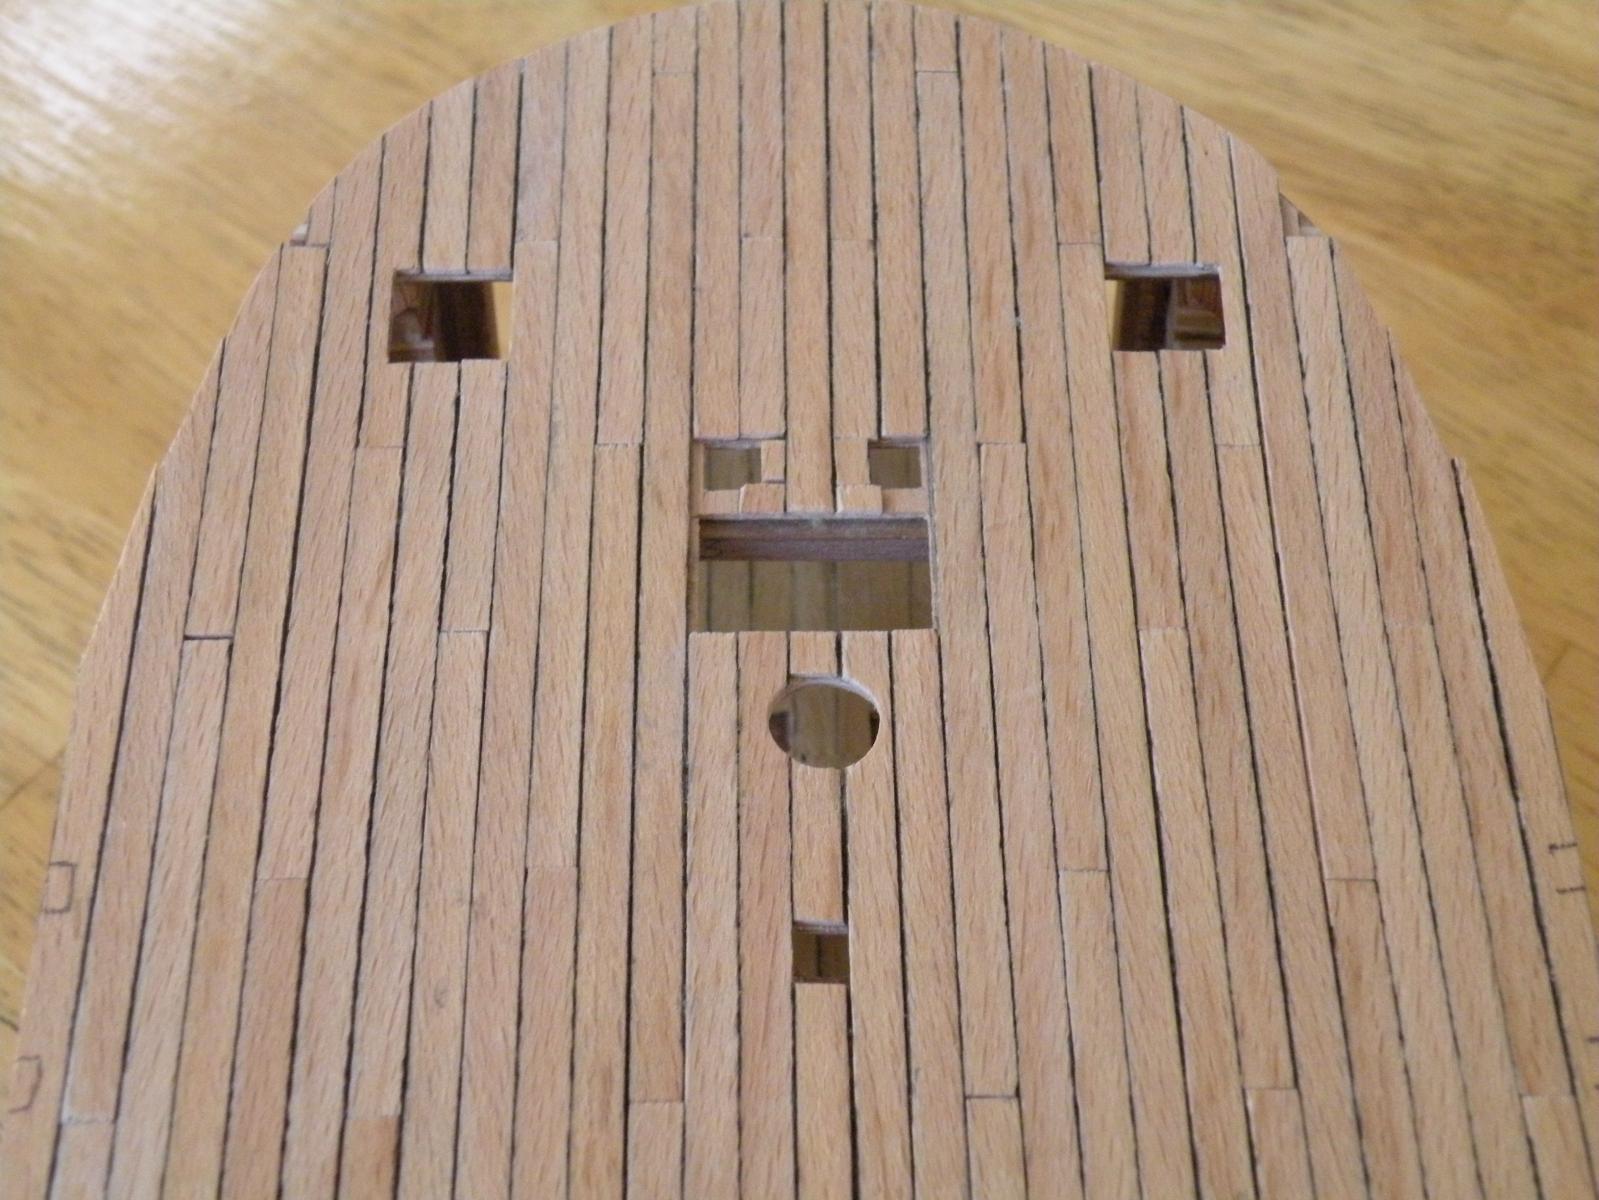
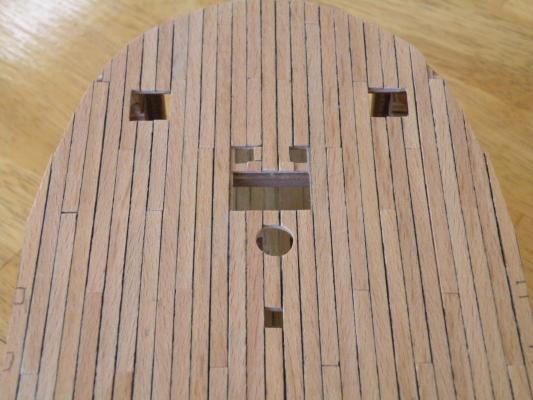
I am on the verge of sealing and finishing the main deck of my Bounty build. I have two issues to deal with. First, the color or tone. The deck is basswood and when sanded it's pretty white. I've sample tested several other wood tones and all were too dark. I did the lower decks simply by using polyurethane over the rawmin. Turned them slightly yellowish. So for the main I would like to get something with a bit more weathered appearance, but I'm OK with just the poly if it comes to that. Second, I just realized that polyurethane does not glue to very well, if at all. There were just a few things that I had to glue down to the lower decks and they stuck pretty well (very well actually). That may be cause I applied only 2 coats of the poly and rawmin is pretty porous. I don't want to encounter glue down issues on the main deck but I'd also like to do whatever finishing before I start adding fixtures etc. Would a real marine type varnish inhibit the glue from being absorbed? Any suggestions would be appreciated. Here's a picture of the deck just to show how white its gotten since being sanded.

-
Great work Mike. I am jealous. I hope mine comes out half as good. Capt Fisher, I have the same kit as you so I'm interested in your comments. I know what you are saying, but I don't see that that is much different from Mike's. Maybe he went down a plank or two lower with the "pale" basswood, but otherwise, it is what I thought our's will be. Except, I now notice the transom superstructure is pale whereas our's I believe call for mahogany or walnut.
-
I was wondering where you've been Capt Fisher. As for me, I've been plugging along slowly but surely on fairing the frames of my twisted Bounty. I've also done some filling in the bow and transom in preparation for planking. I'll put up some pictures and describe my work shortly. But I haven't been getting much response from anyone lately so I've kind of given up on my build log. I think I've read just about every relevant article and post on MSW, but I check it out daily just cause there is so much good stuff and always something new. Hope you get back to building and posting.
-
Yes it is Michael. I have been using the razor saw for awhile now and its much better though it takes a few seconds longer to set up for it.
-
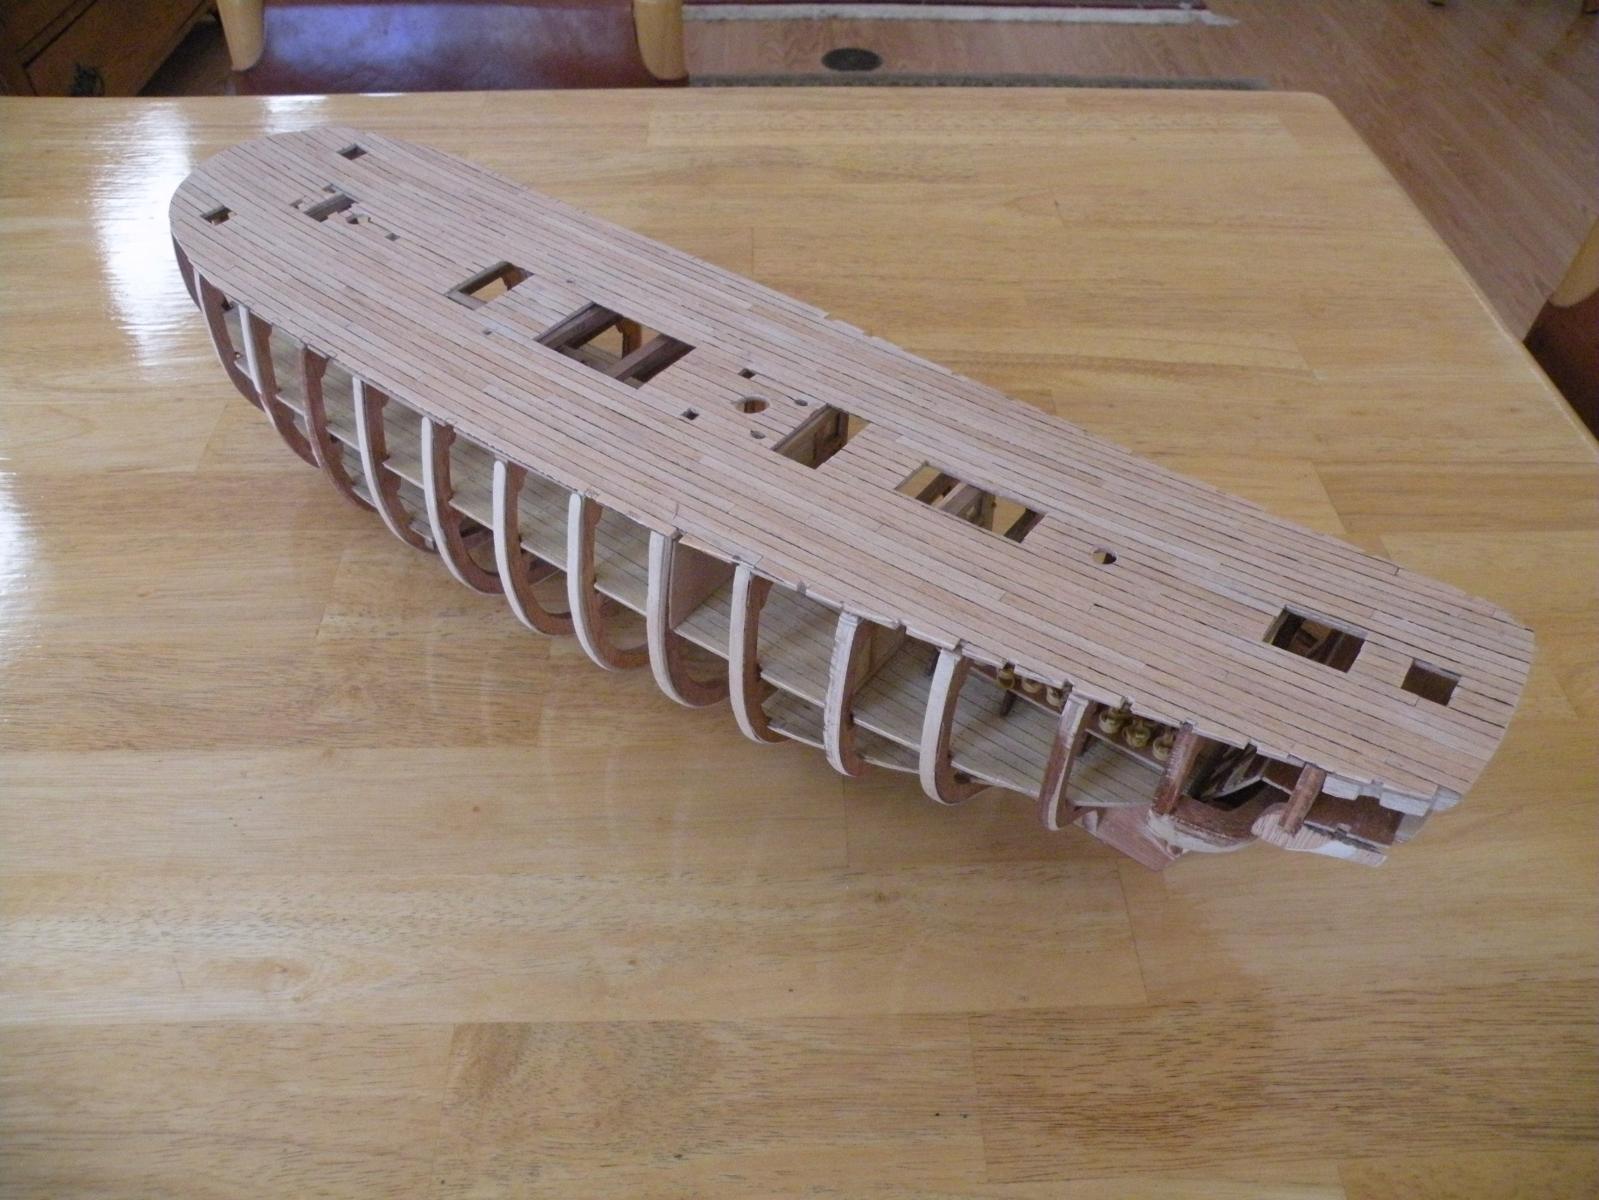
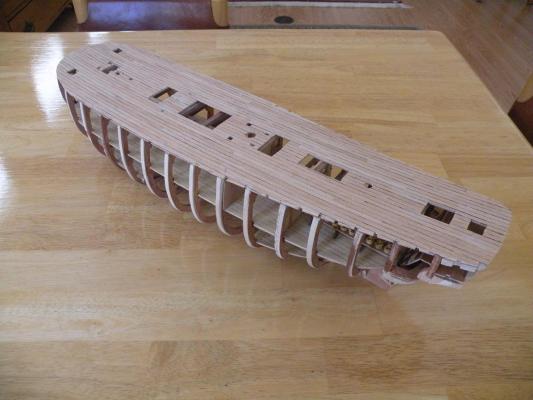
And finally, I achieved the modest success whereby I think I can proceed to line the hull respectably. First couple pictures show the warped keel which caused all of this. In the coming days I will move on to planking the deck and building out the transom. Then I'll be ready to take on the hull planking -- I think.


-
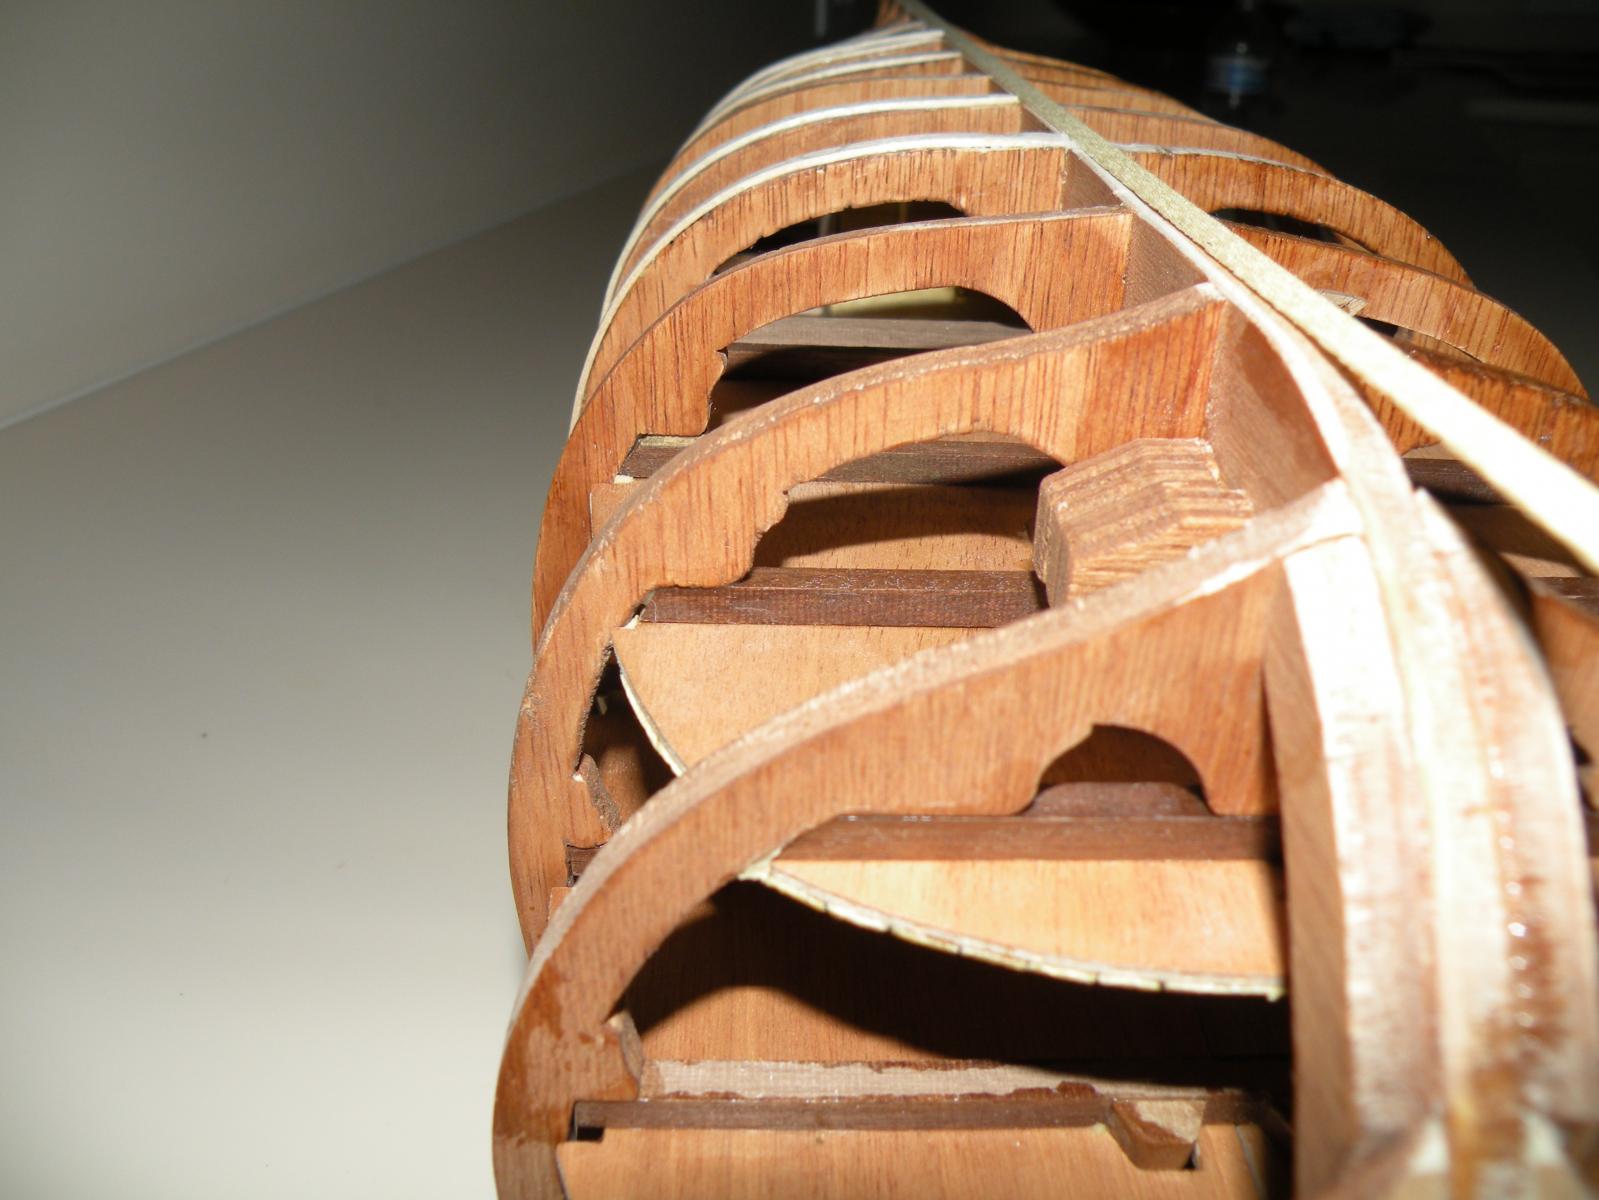
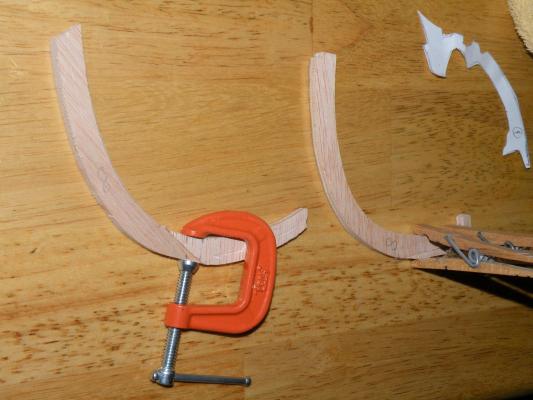
Now for a look at some of the worst offending frames and the tool I used to reduce their size. These were the easy ones. The tough job was the "indented" ones. I found that the coffee stirrers at Starbucks were the perfect size in both length and width to use as veneer. And on most of them the thickness of about 1.75 mm was just right as well. In a couple cases I had to veneer the veneer with two sticks totally over 3 mm thickness to bring the frame into the right curvature. These sticks are quite bendable after 24 hours in water. I replicated the shape of the frames for drying jigs. After a day on those they glued on quite nicely to the frames. I used only 2 frames to represent all the 15; two were enough to get the basic shapes of all with the sticks flexibility making up for any slight differences between say frame 8 and 10 or 36 and 33 (using A.L.s part numbers).


-
Its been a bit over a week since my last update. At that time I was waiting to see how well the deck glued down. Well it was superb. Not a spongy spot anywhere and solid as a rock. My next chore was supposed to be planking the deck but I decided to wait on that until I had faired most of the frames. I anticipated a lot of heavy work with a sander and just wanted to get it done before doing some nice work. No rhyme or reason, just felt like it. So I moved on to the frames. The real issue turned out to be that the keel is slightly warped. I think I noted this early on but didn't know how it would affect the build. Now I see that even the slightest warp will throw the frames way out of line. For a couple months I'd been thinking the frames themselves were badly laser cut. My apologies to A.L. Frames are probably OK, but being attached to a warped keel (whose fault was that?) made some stick out and some seem indented so to speak. So seeing as it was impossible to correct the keel at this point, my only option was to add material to the edge of some frames and sand down others. I've spent the whole week doing this with pretty good success given the severity of the problem. The pictures below will shed light on what I was up against. The silver lining was that I discovered the utility of my Skil detail sander. Its the perfect tool (I think) for radical sanding that needs to be done with a delicate hand. Forgot to note the worst of it. With the main deck on the masts would not slide down into the mast steps. They were OK with just the first two levels of deck but this last one wouldn't work. I had to take use two remedies. First I opened up the holes in the main deck a bit to give the mast some room to move into alignment. But I couldn't ream them out too much or I'd have a huge gap to fill later. So the second approach was to whittle down the base of each mast until it went into the step. Ultimately I got all three to go in and stand straight. Later on I realized I might have been able to unglue the mast steps from the underside and move them a mm or two up or down the keel. Might have saved a lot of work.


-
Boyd, are you also building a Bounty? And you are referring to a second planking, correct? I have been using your method of coating both parts for awhile now and it does work well. I'm needing to put added material onto my frames, so I am veneering them using this method. The key is to get the second part glued and placed just when the first is tacked up.
-
That's funny cause so far on my AL Bounty the one thing about the kit that I've been completely satisfied with is the amount of material provided. Of course I haven't actually done the planking of the hull, but I have counted every piece in the kit and compared it to the instructions and there seems to be plenty. If I didn't waste any and used it as instructed, I would theoretically have 5 left overs. We'll see how that turns out in reality.
-
Definitely see what you mean there. Enough to make you seasick! Just kidding you Mike. You know I'm impressed with your work.
-
If in doubt I use this: http://www.worldwidemetric.com/measurements.html