Captain Al
-
Posts
613 -
Joined
-
Last visited
Content Type
Profiles
Forums
Gallery
Events
Everything posted by Captain Al
-
Using a sheave on a double block as a becket???
Captain Al replied to Captain Al's topic in Masting, rigging and sails
Thank you all for your replies. You've all shed a lot of light on the subject and brought me to the conclusion that either I am seeing the photo incorrectly (things do get vague when there's 5 parts of line and you can't make out where they each start and stop) or its another case of A.L.'s poor examples. In many cases, this being one of them, I would rather have them not show an example than show one so poorly defined or plainly wrong. -
Has anyone ever heard of or seen a rigging where one of the sheaves of a double block is used as a becket? On my photos in my Bounty kit, it shows the tackle belayed to a sheave on a double block, then running up to a double block, back down to the remaining sheave on the double deck block, up to the second sheave above, and then finally down to be belayed to an eyebolt on the deck. I have never seen such a thing and wonder why a single block with becket is not being used on the deck. Can anyone shed light? I haven't installed these deck blocks and think I should simply use the single below and the double above.
-
Incredible work Danny. Truly inspirational. So glad to see you back at work and healthy.
-
I thought I had accidently erased the first reply before it got posted, so I repeated much of it.
-
You are very complimentary. At this point in my build I need all the encouragement I can get cause I've become somewhat frustrated. I'm at the point where reading diagrams and plans is important and I'm not all that good at it. I agree with your choice of chocks. I wish I had a lathe. Maybe I'll invest in tools instead of kits in the future and do some scratch building. I do have McKay and its been helpful in some areas, not so much in others.
-
Ha Ha, I like the one on the far right -- cause that's all I was able to accomplish. Wish I had a lathe. Did you have your power equipment before you started kit building or bought them for the project? If I ever finish my Bounty I'm going to make the decision to either invest in another kit or put the $$ towards some fancy equipment and try scratch building. It seems like a lot of the stuff I've had to do to make my kit work was kind of scratch building, so why not scratch from scratch. Only trouble is, I'm really poor at reading plans. Anyway, to be serious, I like the last one you did also. Not too fancy like you said and definitely the right color. I hear what your saying about the instructions dropping off. Ridiculous. Just when you need them the most. Here's a trick I learned today (better late than never), learn Spanish. Then you won't have to rely on some bizarre translations into English. It took me days of wondering and asking others if some blocks (#s 331 and 417s) were single or double cause they appear different in photos and drawings. In the English parts list they were both just called "blocks." I finally looked at the Spanish list and there they are called "cuadernales" as opposed to "motones"/ My espanol is good enough to surmise what "cuad" means. I already made up 10 single blocks on eyebolts before I really questioned what was the right one, so now, hopefully I can use those singles somewhere else. You and I are in the same time zone. I live in No. Cal near Sacramento. What part of So. Cal are you from?
-
Translation problem: "frames"
Captain Al replied to Captain Al's topic in Masting, rigging and sails
I'm sorry...the part I was referring to was not 331 but part 417. And the confusion comes because in a photo part 417 is clearly a double block. But in another photo parts 331 are also clearly double blocks. Since the kit supplied only one size of double blocks, I can't figure whether to use a double when 331 is indicated or when 417 is indicated. Maybe they are both double blocks but different sizes and they all got mixed into the same compartment and I can't distinguish between them? The parts list does list 417 as a "frame" but I am now convinced that is simply a mistake not a translation issue. As long as a double block is correct to use for all those blocks around the masts, then I don't really care if its a 331 or a 417. I just don't want to fix a single block down there only to find I needed doubles. In total there are 26 of these around the 3 masts. -
I'm working on attaching blocks to the decks and spars of my Bounty build and cannot figure out how to distinguish when a double block is used as opposed to a single. When comparing the plans, photos, parts list and instructions that came with this A.L. kit, it becomes even more confusing. Part of the confusion may stem from translating from Spanish to English. So here's my question: Part #331 is shown in English to be "frames," when clearly in photos and plans it is some type of block; whether double or single is still at issue. I looked up the word "frame" in a very old and very very complete Oxford dictionary and found one definition to be, "a structure constructed of parts fitted together." I wonder if it is possible that this implies that Part 331 is a double block. I am not yet good enough to follow the rigging plans to see what will run through these blocks surrounding the masts on the deck, so making sure I get it right beforehand is tricky. Assuming that a crewman would haul down on the bitter end of the line (before belaying it) and not be pulling up on the line from the deck block, it would then mean (I think) that the line would start at a becket on another double block above. Or it could start above on a deadeye. Either way, if its a double down below, it would have to be a double above and the line would start above in order to be hauled downward at the line's end. Most important for the moment though is if these blocks at the mast are double.
-
Just thought I'd add that I did painstakingly glue the edges of my planking and it is well worth it. Only problem is that it makes you need to place the plank and snug it up a little quicker lest the small amount of pva on the edges dries. I always apply pva to both surfaces to be brought together.
-
OMG -- I just tuned into your build! You mentioned my build log early on, so thanks for checking it out....but you are putting me to shame. As a first timer, with this same AL kit, I was really over my head. But you seem to have a great knack and eye for this. There aren't many suggestions I can make; just keep doing what you're doing. I think I may put aside my build and wait til you catch up so I can ask you questions in real time. I'm at the point of finishing up all the main deck features, including putting blocks around the mast holes and I'm finding it almost impossible to distinguish (from plans, instructions, parts list and photos) one type and size block from another. Wait, this isn't my build, its your's, so I'll just say it again -- great start and keep on posting.
-
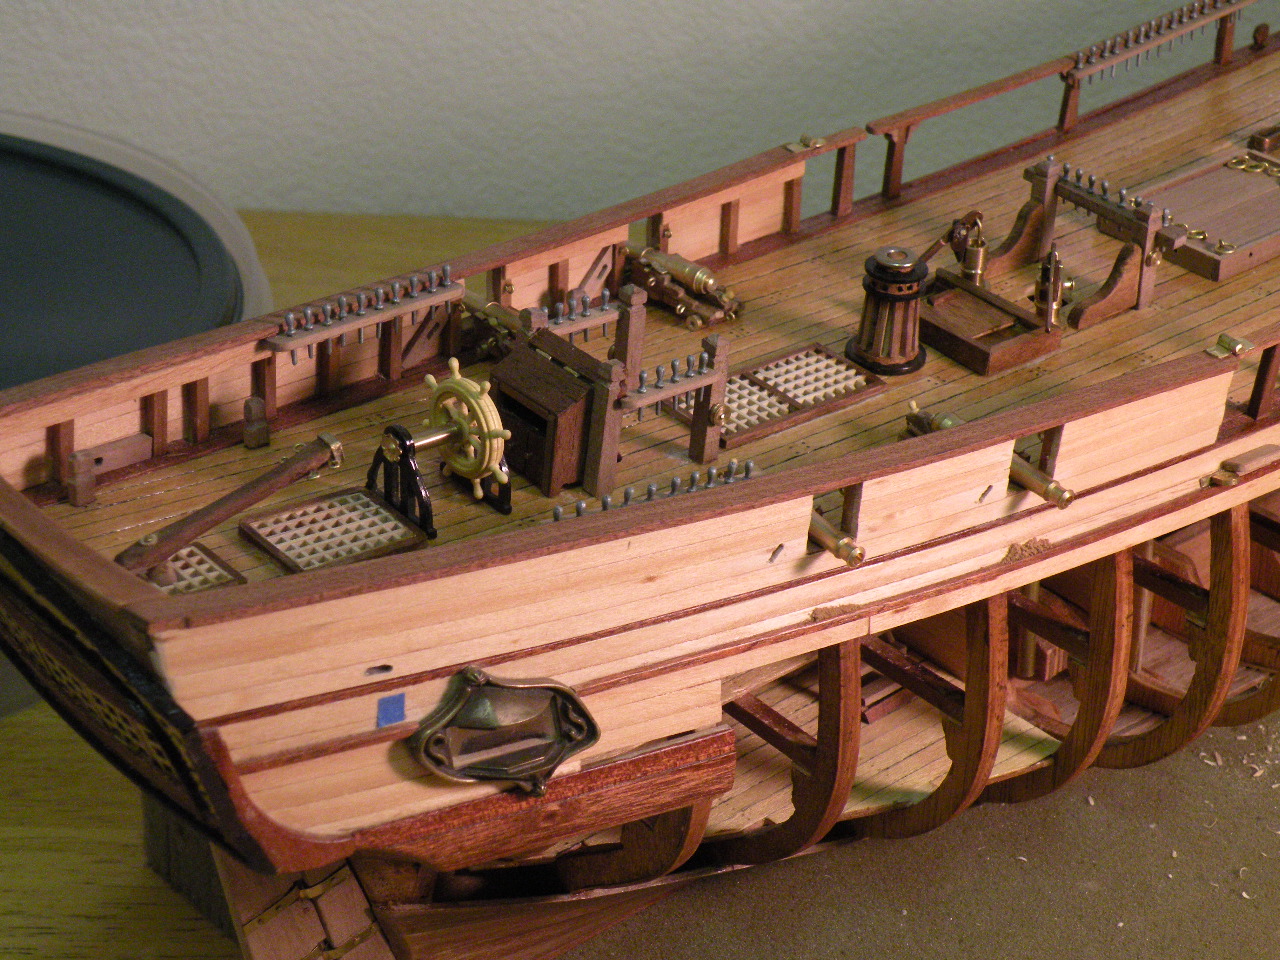
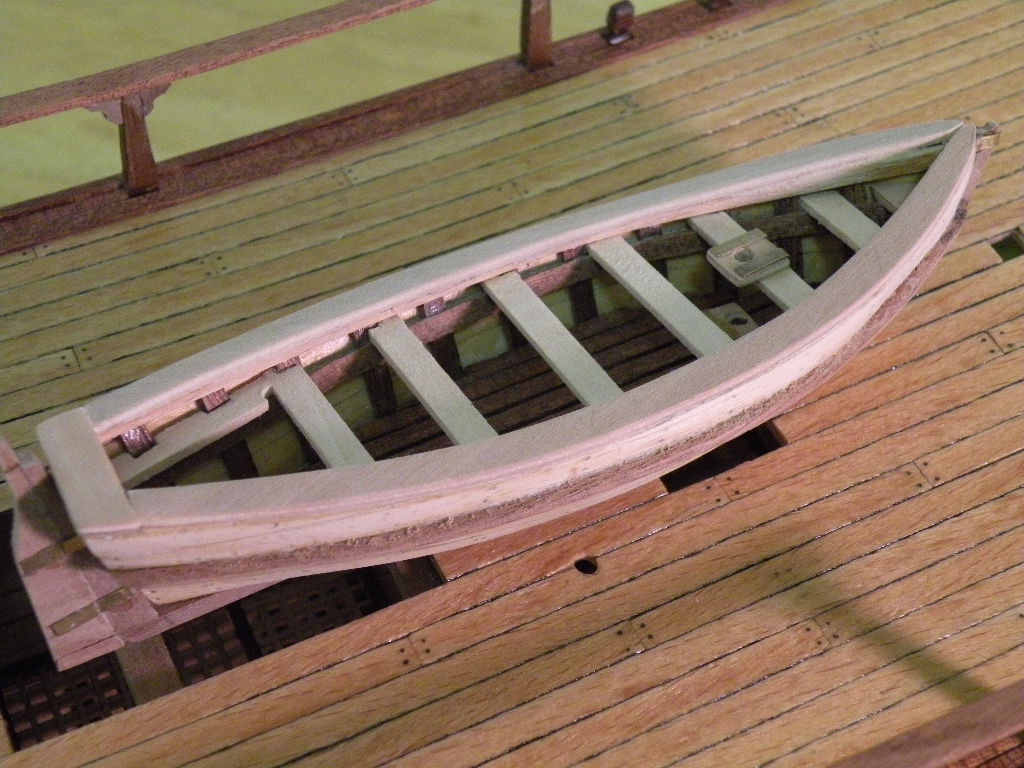
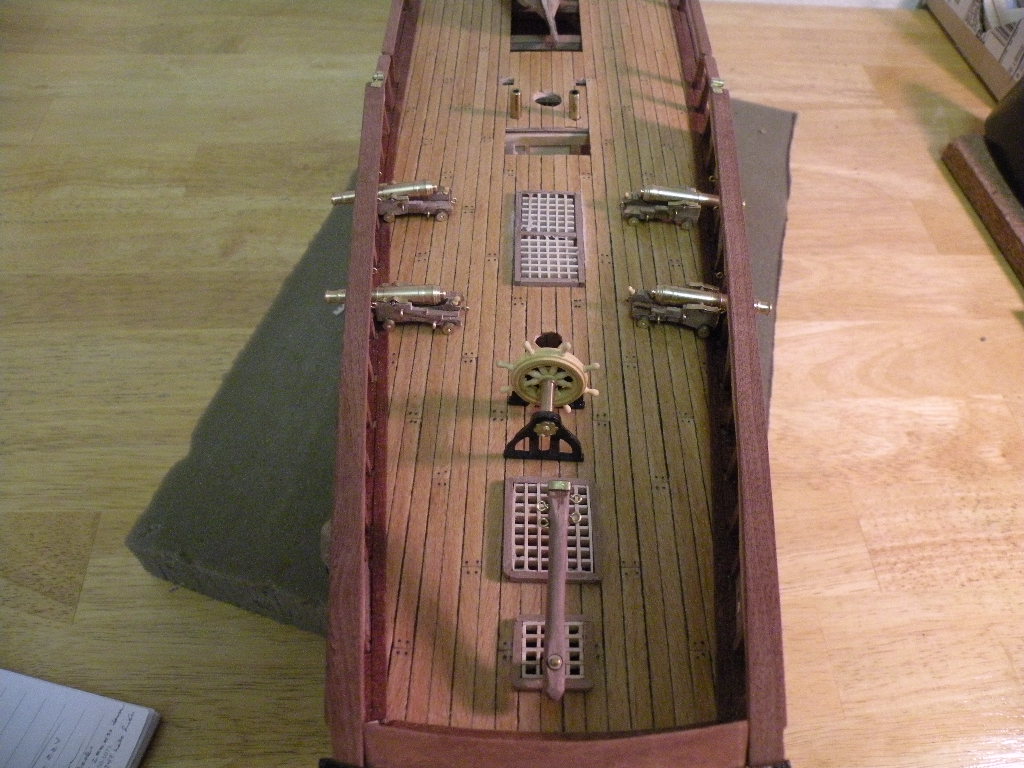
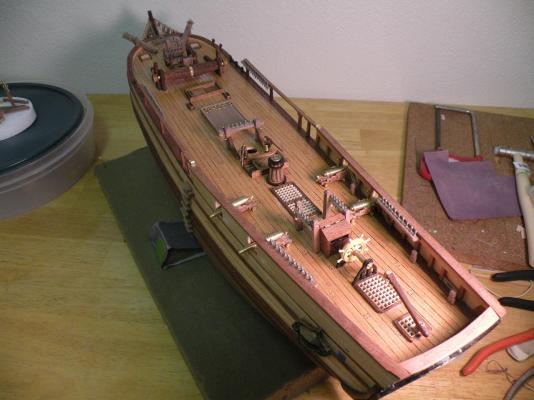
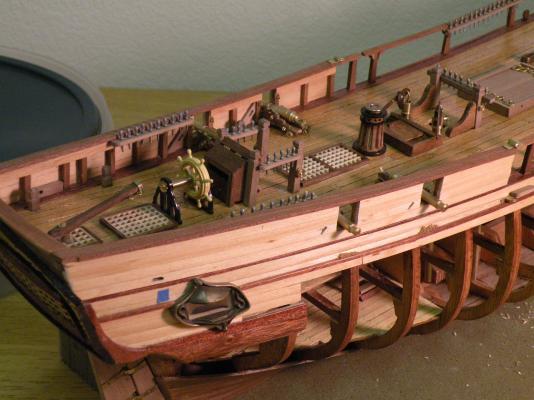
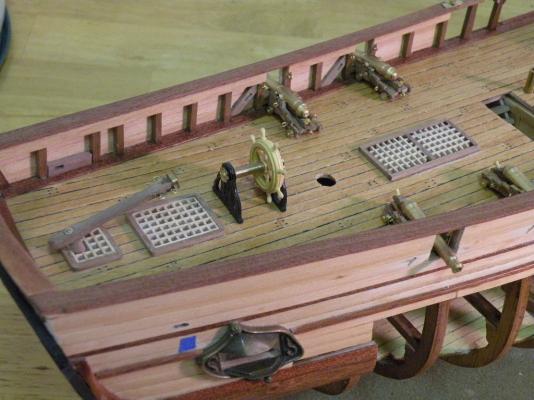
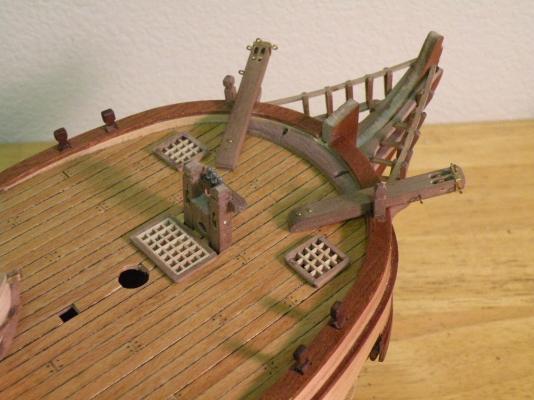
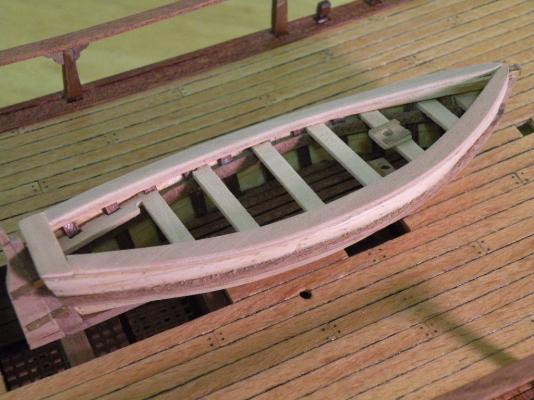
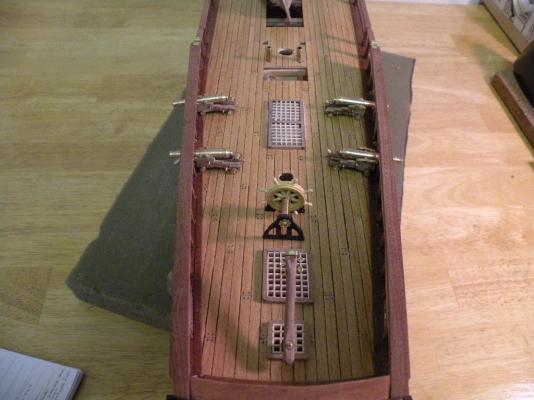
Time for a brief update. 3 attached photos showing my almost completed deck ornaments (equipment). The cannon are not yet glued in place cause I'm thinking it will be easier to rig the restraining lines and blocks when I can still hold the cannon in hand. I wonder if anyone can shed light on how these lines run. I can't find any pictures large enough to really tell the story. I hope I don't just have to guess at it.
-
Right purdy little steamer you got there mate. Someday I might just try one meself. What with you to show me the how tos it caint be all that diffeecult.
- 44 replies
-
- 1
-

-
- robert e lee
- constructo
- (and 1 more)
-
Hey Mike, things are looking great. I know how much you're enjoying it.
- 44 replies
-
- 1
-
-
- robert e lee
- constructo
- (and 1 more)
-
Well thank you all for the input. I think its better to know how such a distasteful word came into being than just slough it off and not be able to discuss it. We're all in agreement I guess that while we find the word distasteful and wouldn't use it ourselves, discussing its origins does not make the discussion itself distasteful and contemptuous.
-
Tom, thank you for that idea. It may even still work on mine. But its now in my notebook of ideas and techniques. Thanks. I also would note to Jan, that I am in total agreement.....no in depth analysis of the term is needed, and it goes without saying that it was contemptuous and in keeping with the times. My curiosity stemmed from the fact that Artesiana Latina continues to use the term. I would write to them but I've tried on various occasions on different issues and have never received a reply.
-
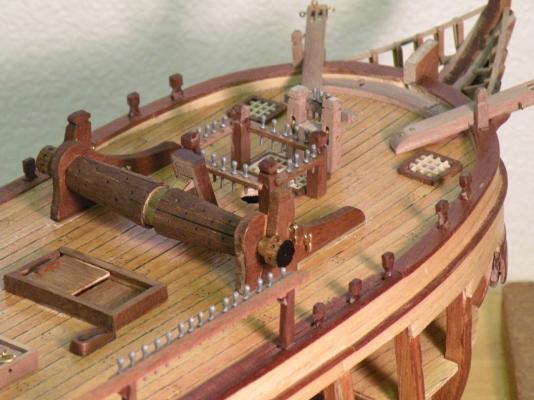
All this has been great info and very interesting from a nautical history standpoint. But has anyone yet come up with the origin of the term "niggerhead?" And for builders, has anyone a good idea as to how to put these square holes into the windlass barrel and/or a capstan?
-
This is a very interesting topic to me today because I am just finishing the build of the main capstan on my Bounty and I've had a couple questions in mind to throw out. First, in this politically correct world we live in (and in this case rightly so), how in H does the kit manufacturer get away with calling the end pieces "niggerheads" and where did that term originate from? Second question is what are the square holes in both these "niggerheads" and in the barrel of the windlass used for? I'm guessing that on a vertical windlass spokes would be inserted in order for crew to operate/turn the thing. But if this is so, why have I seen no kits, including mine (by A.L. and pretty detailed) that show the windlass or capstan with these spokes in place? I reckon the same might be how the horizontal windlass was turned, with the spokes inserted into the "niggerhead." But in that case only two crewmen could stand alongside and turn the thing. The square holes on the surface of the barrel are even more puzzling. I see in a picture above that pegs might be put in them to keep the rode isolated to a section of the barrel. Is that the purpose and is it the only purpose? Finally, how does a model builder get these tiny square holes into the piece? In my case, for the barrel holes, I resorted to drilling small round holes in the lining before gluing the liners to the barrel. I painted the barrel part black to emphasize the hole. I did the same to the "niggerheads." But I haven't figured out yet what I'll do on the smaller vertical capstan where the holes are not in the barrel but above it. I may resort to just penciling in square holes and varnishing over it. Any answers mates?
-
Thanks Mike. And your encouragement has helped a ton.
- 265 replies
-
- 2
-
-
- finished
- artesania latina
- (and 1 more)
-
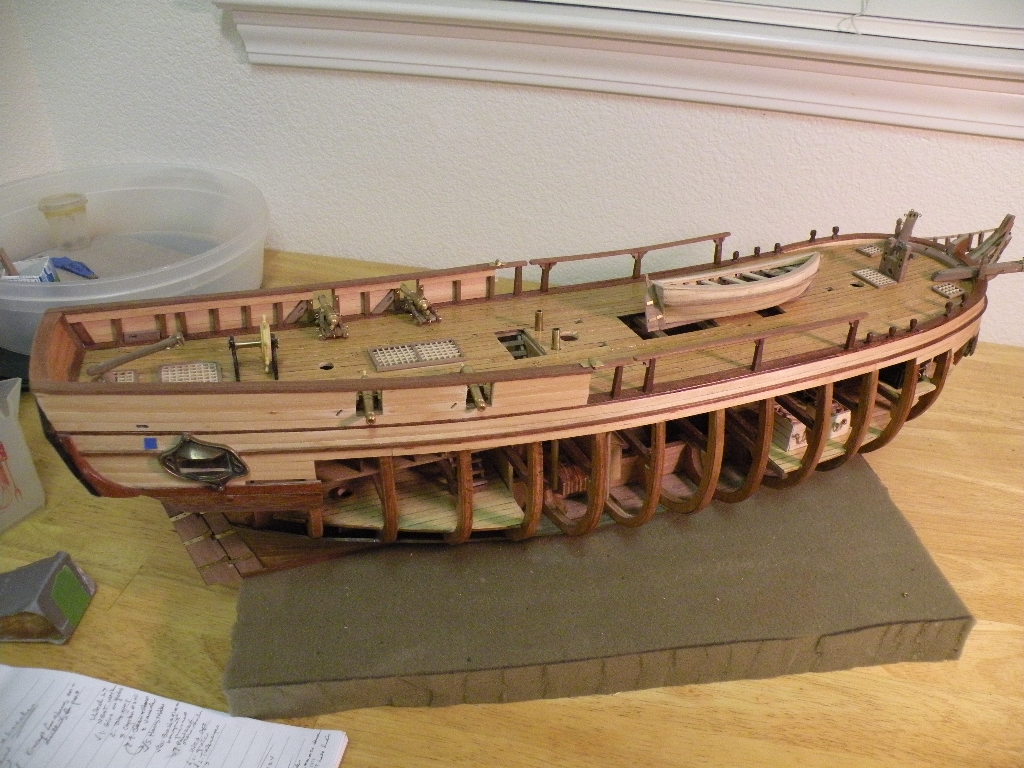
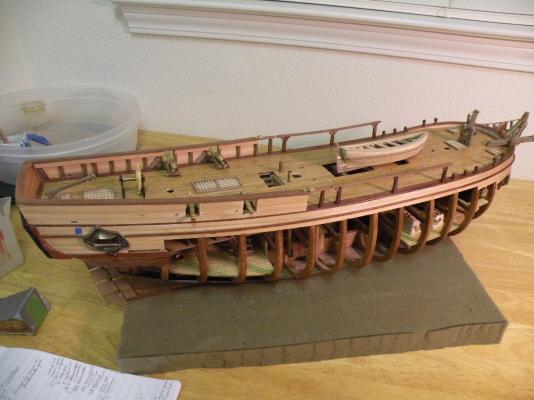
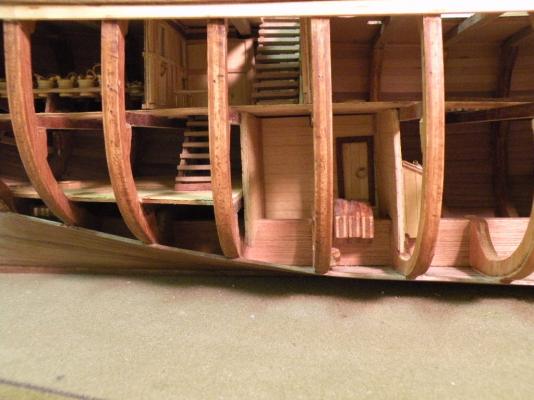
Moving right along. Some photos of where my Bounty stands after a year's work. Some of the deck ornaments above and below are not yet glued in place. I'll be completing all the deck stuff and adding a few more pieces down below before I start on building masts. So enjoy and comment away.


- 265 replies
-
- 5
-
-
- finished
- artesania latina
- (and 1 more)
-
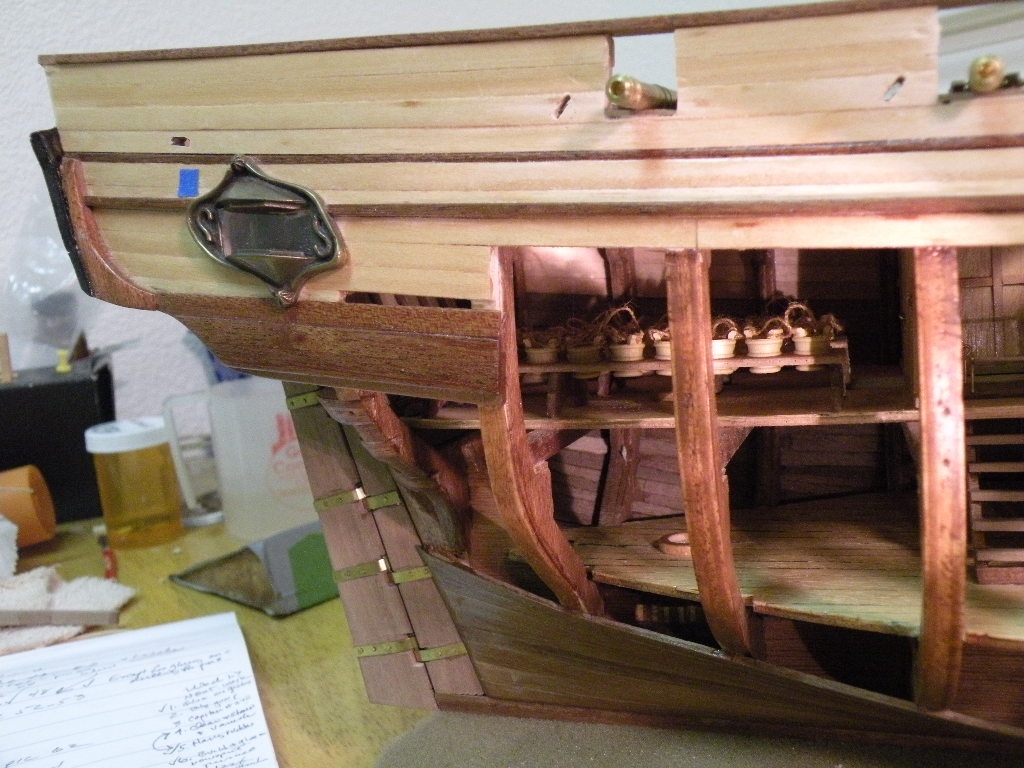
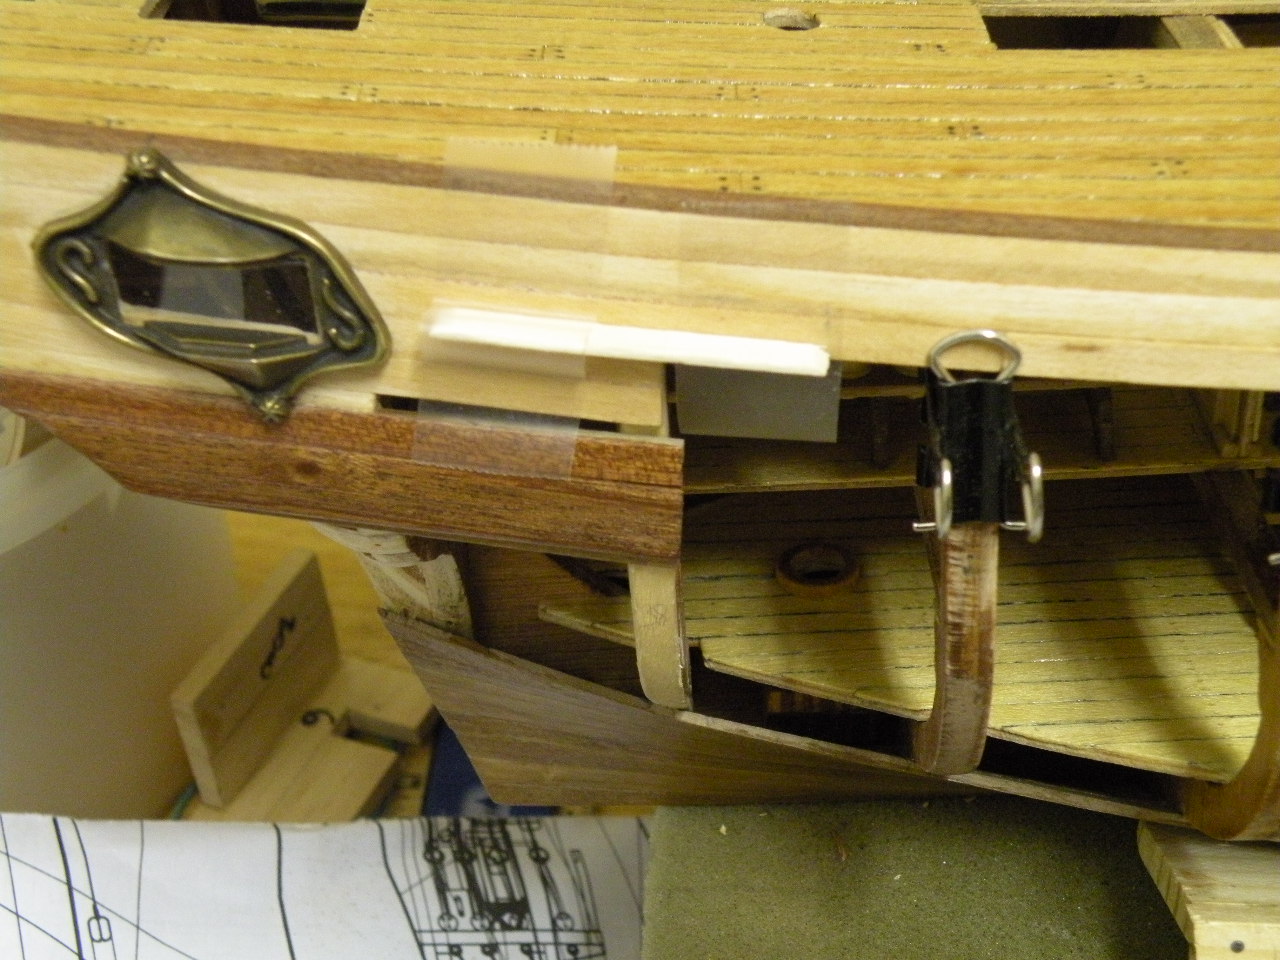
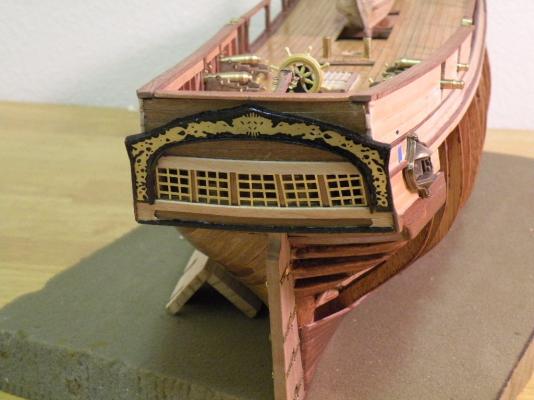
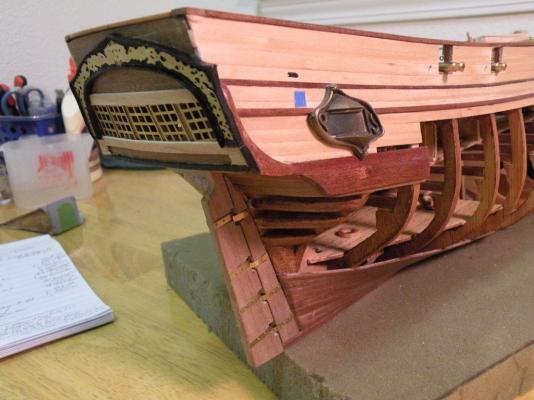
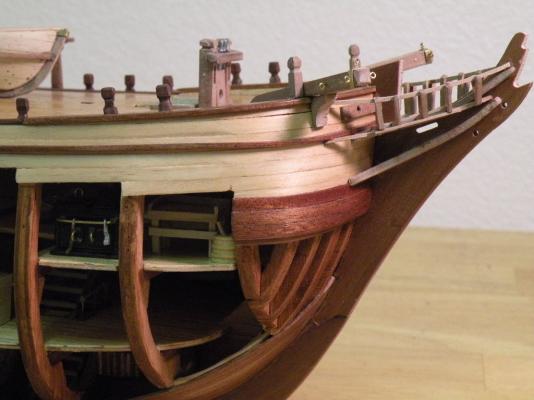
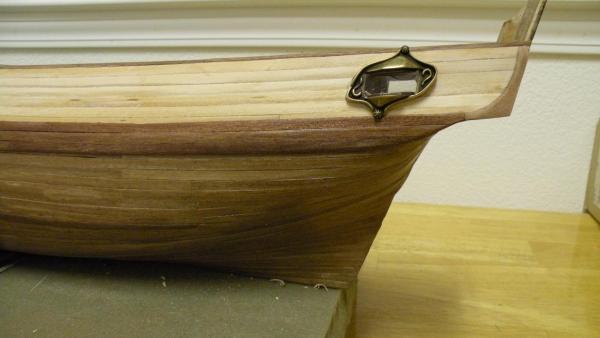
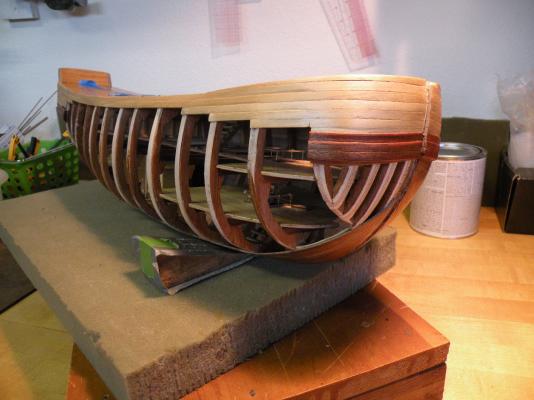
A big thank you again Danny. I'm seeing the whole thing clearly now. I'll have no problem adding these wales. Today I added the 3rd basswood plank below deck level on which the channels will sit. I might add one more plank below that. The interesting thing about the wales is that the aft portion (of the open side) is already on and, following A.L.'s picture, I cut it off at frame 38 (second to last frame aft). Now that I'm positioning the channels and seeing where the chains will attach to I can see that these wales should have extended one more frame. There is not enough wale to attach the forward most chain. So I need to extend these by 40 mm. The picture shows a mock-up of where this aft channel will go.

- 265 replies
-
- 2
-
-
- finished
- artesania latina
- (and 1 more)
-
Thanks for clarifying that for me Dan. I was pretty sure that's what you did but the only picture I saw of it wasn't a side view of the whole ship. So can I assume you added these extra wales under each of the channels? Did you make them span the full length of the hull or are they broken and span only the frames under the channels?
-
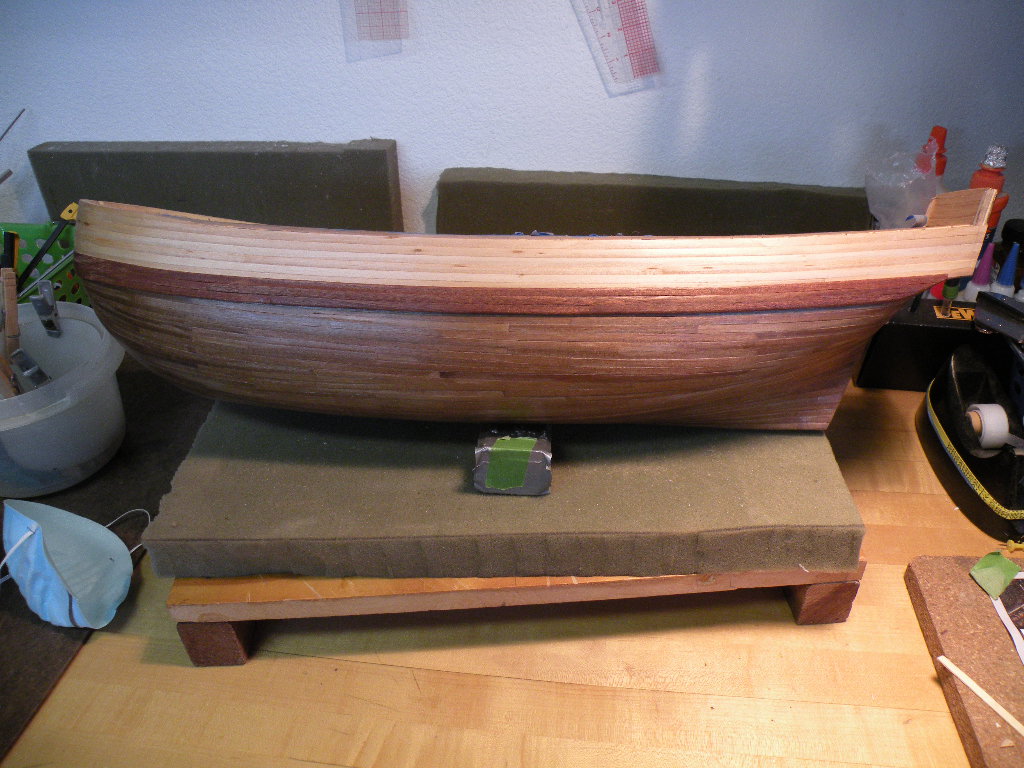
Keith, thanks for pointing that out. I must have looked at your's and Dan's pictures a hundred times over the past couple months and didn't really focus on that. My kit pictures are either wrong or deceiving cause I've had it in mind from the start that there should be 2 basswood planks coming down from deck level. Regardless, I'm at a good point today to add a plank (or two?) so that'll be my plan. Thanks again. I've noticed on Danny's build that he's added several planks down lower, to which he's attached some rigging gear. Did you do that as well? I should go look at several logs and see how different they are. I'm pretty sure Mike didn't add these but his was a different kit with slightly different planking. Thanks again. I'll post again soon.
-
The last six months have not been wasted. Just haven't had time I guess to update this log. So I will skip all the gory details of how I've managed to get to where I am today and just post some pictures. All I'll say is thanks to Mike D. for his almost daily support and advice without whom this would not be possible. Mike says I'm an anorak. In the context I have taken that as a compliment.

- 265 replies
-
- 5
-
-
- finished
- artesania latina
- (and 1 more)
-
Masterful job. I hereby promote you from lieutenant to first lieutenant even though I have no authority to do so. There is a lot more interior detail than you even told me about doing. I'm not jealous that I did not put greenery into my pots. I thought we both agreed that our Bountys would be outward bound models. Everything about the build is fantastic. Thanks for sharing it all with me for the past year.