HOLIDAY DONATION DRIVE - SUPPORT MSW - DO YOUR PART TO KEEP THIS GREAT FORUM GOING! (83 donations so far out of 49,000 members - C'mon guys!)
×


Captain Al
-
Posts
613 -
Joined
-
Last visited
Content Type
Profiles
Forums
Gallery
Events
Everything posted by Captain Al
-
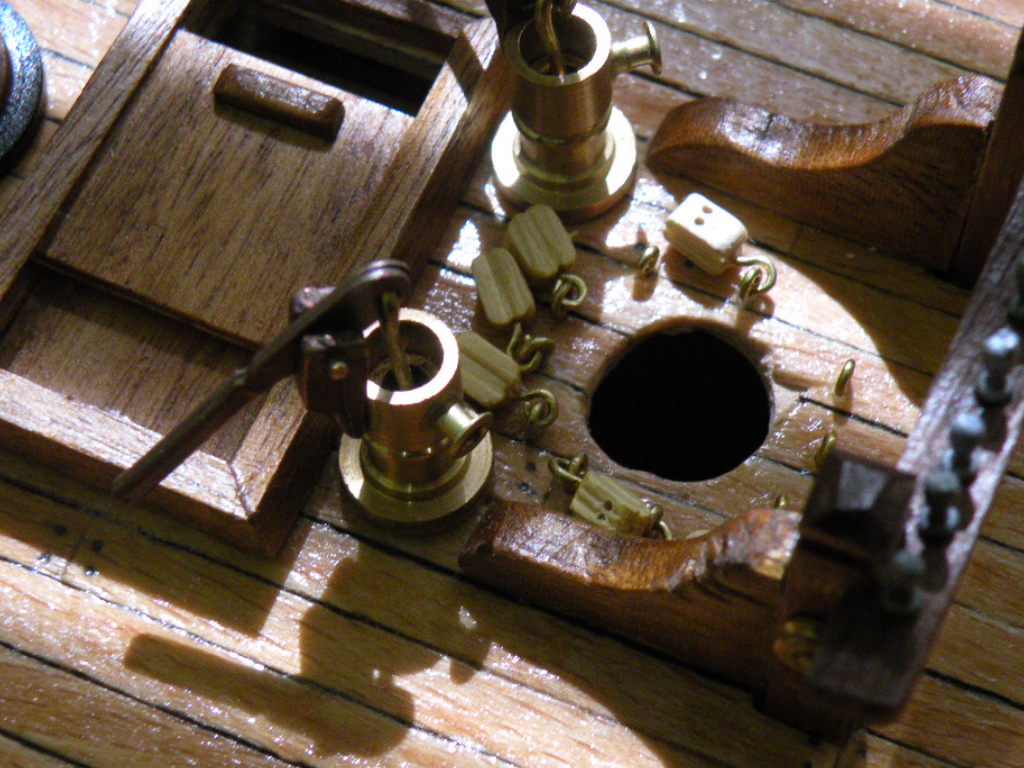
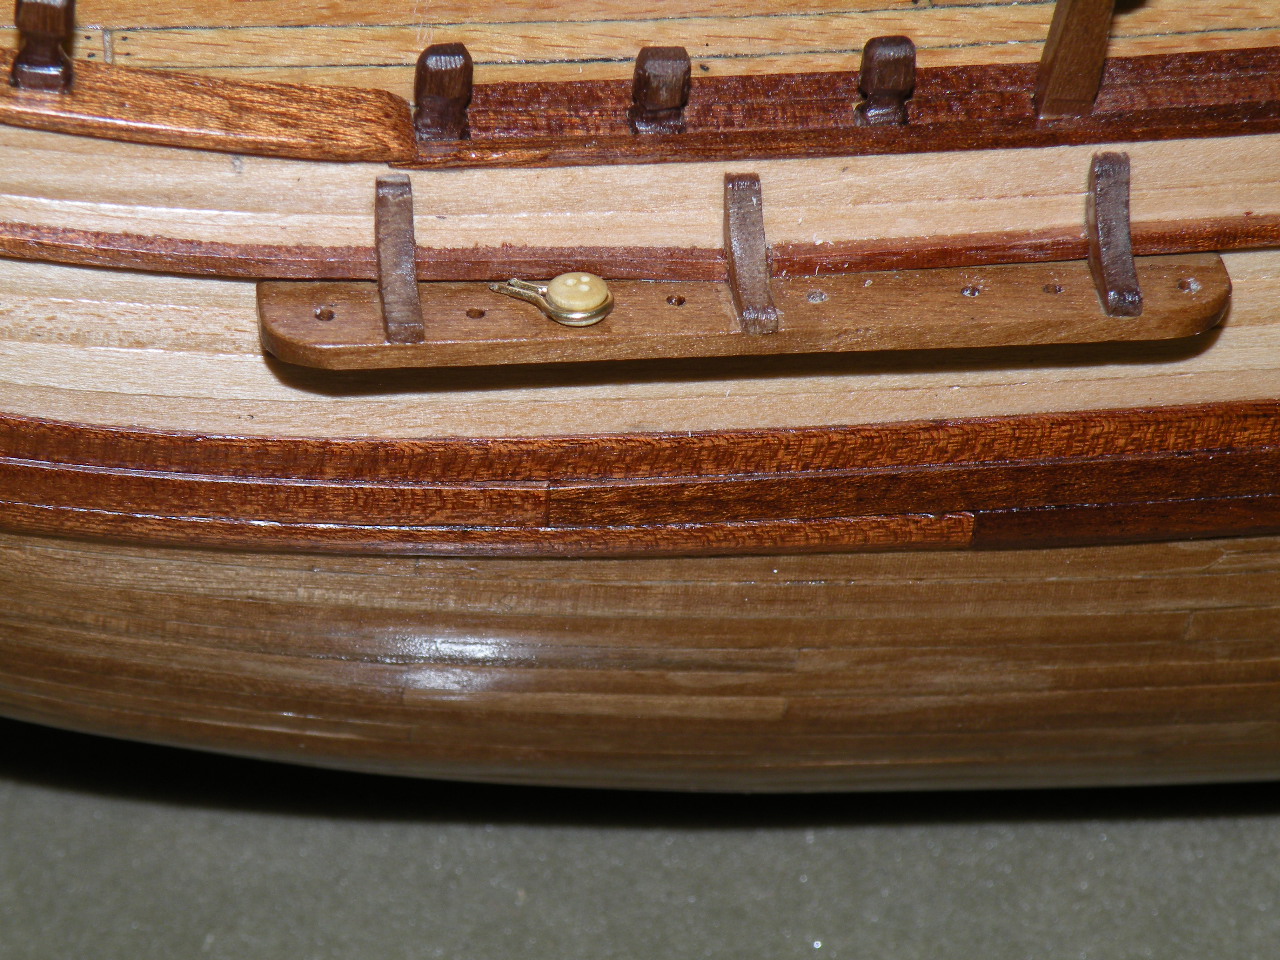
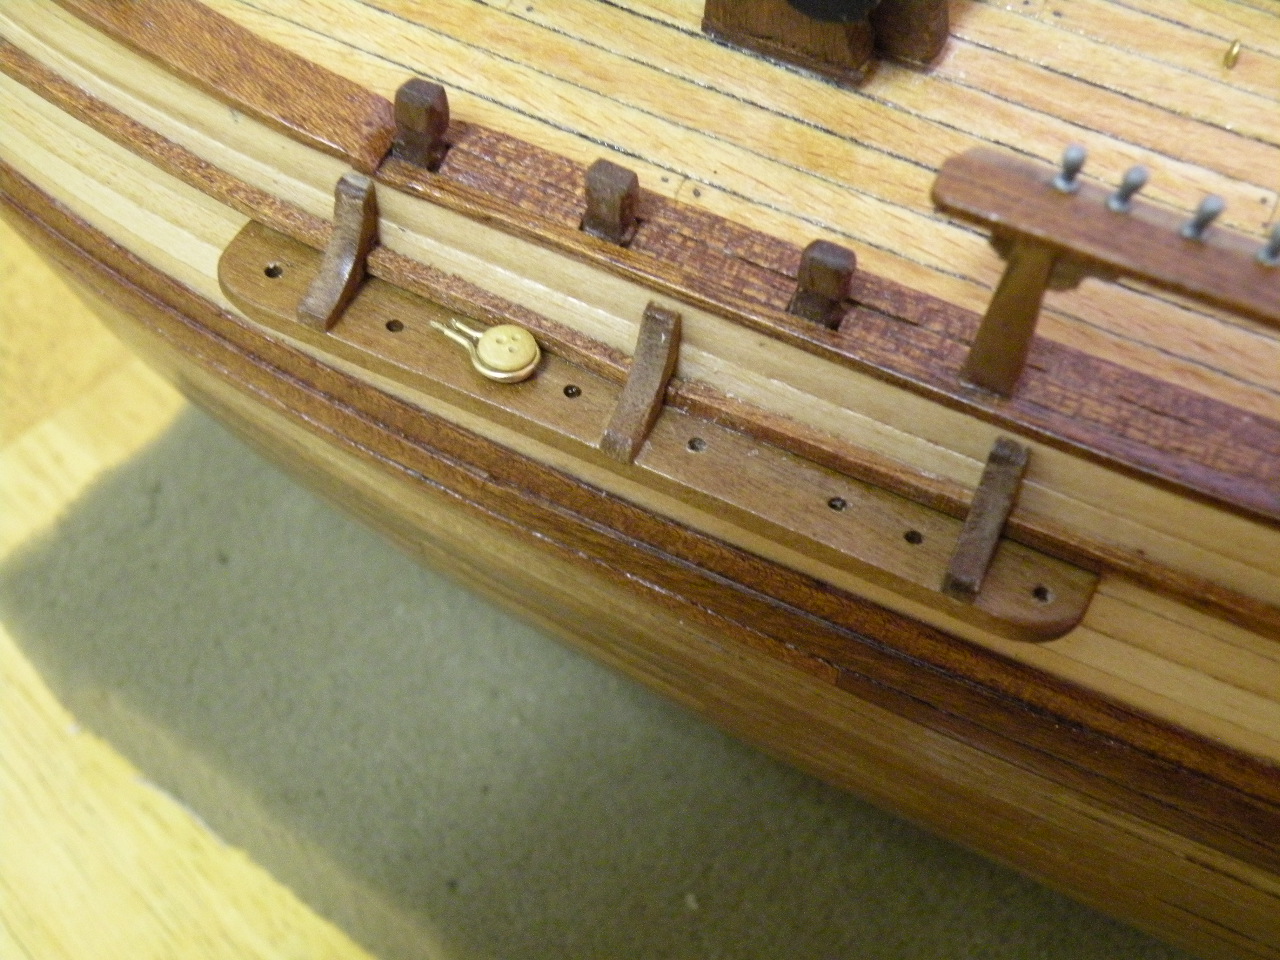
Once again I'm needing to thank you Dan. Yes of course, that does make much more sense. I mean that's how I've done so many other things -- off the ship first, then attach -- that I don't know why I've been thinking of tying these on in these tight spaces. Maybe cause I had to do that with the cannon? Maybe I didn't need to with those either. Oh well. Live and learn, right? Now, as far as threading these blocks, I didn't know there was a real tool made for the job. On the cannon blocks and tiller rigging I used my wife's thinnest sewing needle. Worked OK but sometimes it was a bit short and hard to get into the sheave hole. Sometimes even used needle nose pliers to hold the needle. Any port in a storm. I'm going to find these Birch threaders somewhere; probably on-line. This brings up some points I hope will help others -- I learned quickly that if using the eyebolts as beckets you have to make sure you don't put them through the sheave hole. Best to find this out before they're on the boat and you're trying to run some thread through them. I've tested all mine with the needle that I had intended to use to thread the blocks before I put a drop of CA on. I'm still searching for the perfect applicator to put a minute drop of CA right where the eye meets the block -- or just as often where the eye meets the deck or hull or anywhere. I've read many suggestions and purchased several cheap plastic applicators (none worked to put a really tiny drop on) and so far the best thing I've found (from a msw thread) is a medium size sewing needle with the eye cut off to make a fork. I hate to have CA get into the eye or even drip down and clog the sheave. Finished the foremast blocks today. Heck, my picture was too big to upload.
-
Of course I should have added that I take Mike's characterization as a compliment.
- 265 replies
-
- 1
-

-
- finished
- artesania latina
- (and 1 more)
-
Boyd, you might want to pick up on this bit of methodology.... the hardest part for me in putting all those double blocks around the mast was being precise with where I would drill a pilot hole. On one of them 13 holes needed to be put around the mast hole. Being an anorak (see Mike Dowlings comments if you don't know that term) I thought the holes should be exactly spaced and in the same location as the plans showed. And I knew I could not duplicate that visually and my pin vise tends to slip a little before digging into the already varnished deck. So what I did was: traced the plans onto a bit of tracing paper; making dots where the holes had to be. Then I transferred that to another little bit of heavier construction paper, poking holes into the construction paper where the dots were, and punching a larger hole in the center which would be the mast hole. Then, making sure I had the "template" oriented fore and aft correctly (cause the holes are not laid out symmetrically or evenly around the hole), I laid it over the mast hole and taped it to the deck. So then I was able to put the drill bit into the little holes I'd poked and drill down into the deck. Worked very well to get good spacing. Still it was a tricky maneuver to insert the pins and hook the block's beckets into the eyes and close them up. I chose to use brass eyebolts on the blocks rather than tie beckets with tread cause I know I couldn't tie 10 knots in that close quarters. In looking at other builds and how blocks are attached to eyes, I know that this method is not authentic and is kind of the lazy man's way, but I'm just not good enough or don't have the right tools to get those knots correct. As I build the masts and yards I hope I can do less of the brass eyes and more thread stropping of the blocks with beckets.
- 265 replies
-
- 1
-
-
- finished
- artesania latina
- (and 1 more)
-
Keith, no paint is planned. Except of course for such things as barrels and other little tidbits. I have spruced up the transom's decorations a bit with black paint. That was for no other reason but to contrast a bit with the brass filigree stuff. I do appreciate both your kind words. It gives me encouragement to keep it up. I've gotten away from describing all the pitfalls I run into and how I have worked around them. My earliest posts were like a primer on how not to build a model. Now when I run into difficulties I think its more from lack of foresight or plain inexperience. The one thing I can't reconcile myself to is that so often the plans or instructions are just wrong. I'm getting better at recognizing that and trusting in my own concepts and measurements. Having sailed my own boat for years I understand some things about how ships are put together and how things need to work, but that's a far cry from understanding an 18th century square rigger.
- 265 replies
-
- 2
-
-
- finished
- artesania latina
- (and 1 more)
-
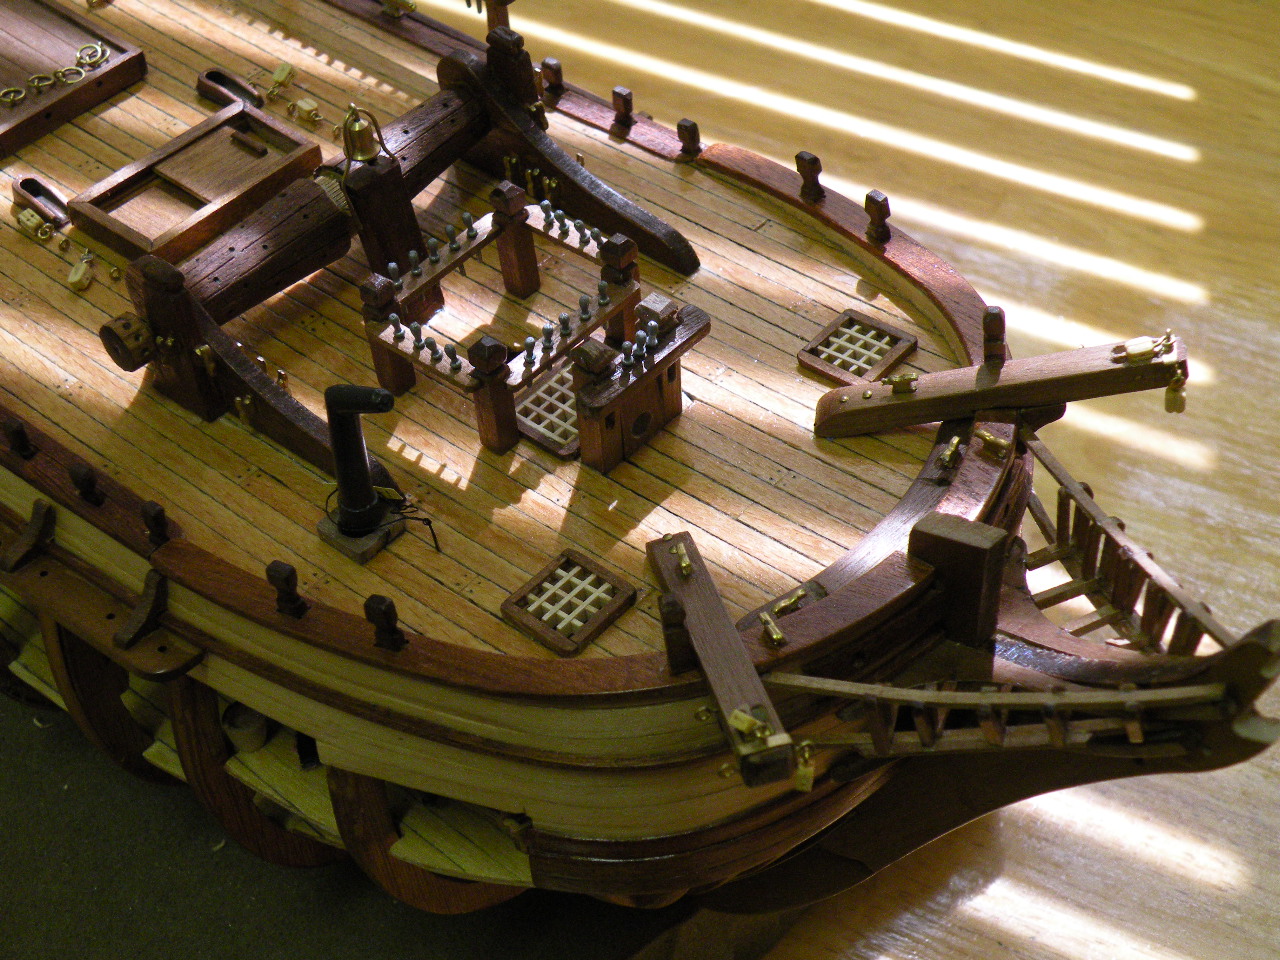
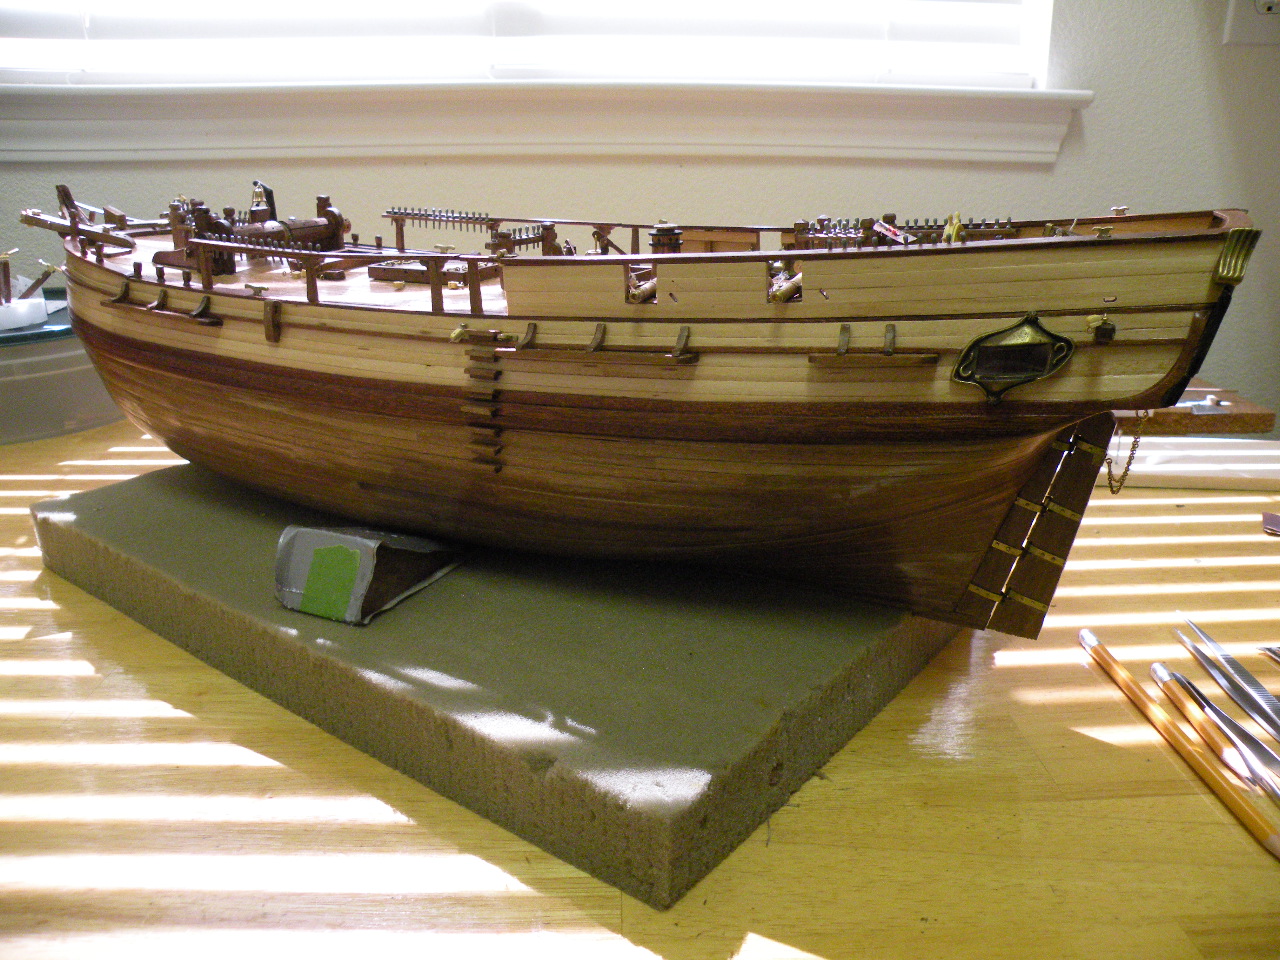
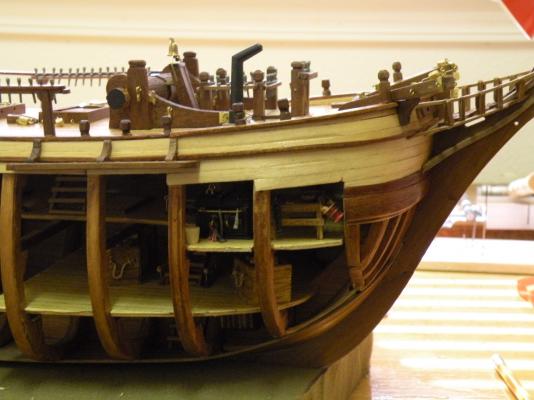
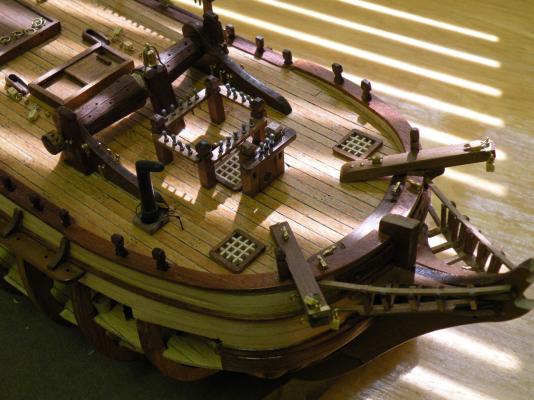
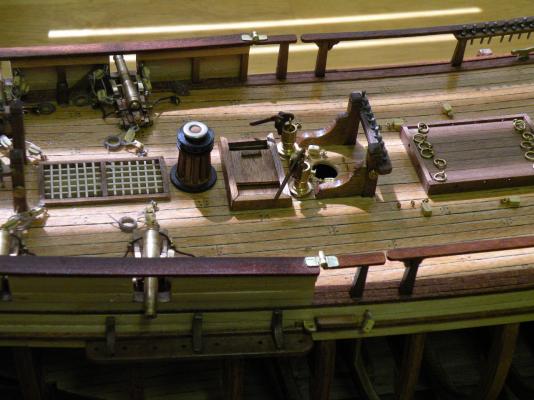
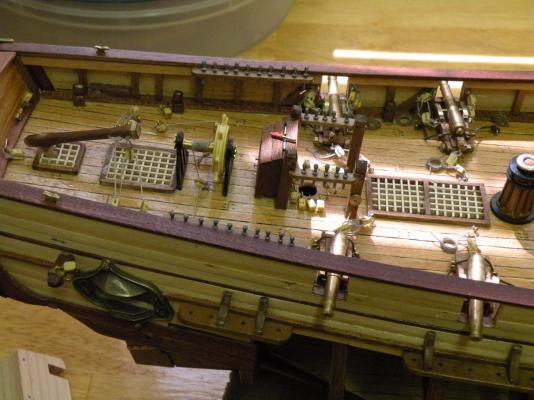
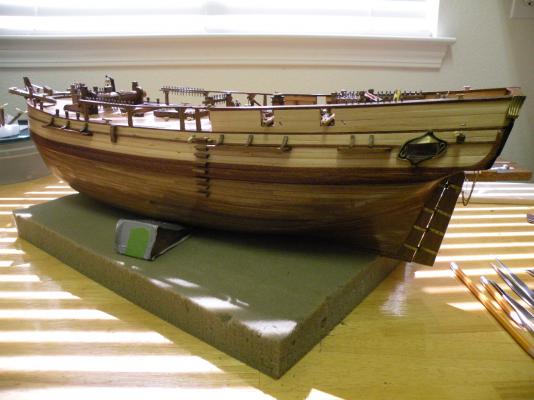
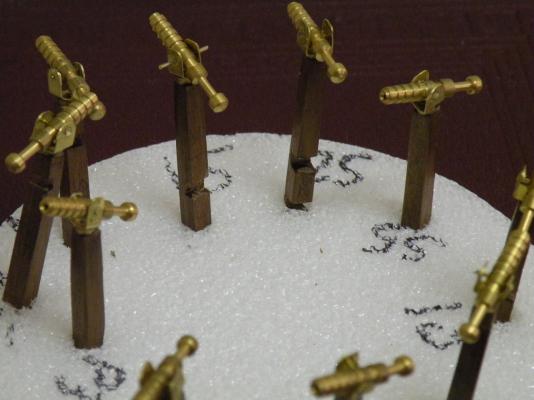
Well I don't know if you could say I'm moving forward with the rigging or just kind of planning for it. Most of my time the last 2 weeks have been in putting blocks on the deck and hull and experimenting with ways to make my chainplates and deadeyes. The pre-planning has been extremely useful. All the above suggestions and comments have given me the confidence start the process. But first I will build and mount the bowsprit, mount all the half pound guns and the anchors, and build and mount the launch. I already have built the jolly boat so I've really got a head start - ha ha ha. After that I suppose you have to build and put up the masts before any real rigging is done. Just so this log isn't too boring with questions and samples, here's a few pictures of my 90% completed deck. I only have the blocks around the foremast to do. Down below I'll stick in some ballast, hammocks, bales and whatever else comes to mind and will fit. I love the detail work you've been doing Boyd. Its inspiring.

- 265 replies
-
- 4
-
-
- finished
- artesania latina
- (and 1 more)
-
You got that right jb. Though sometimes I think by the time I finish this build I'll be nearing my time.
-
And on close inspection I see that on the upper deadeyes its just the reverse -- center hole on top.
-
Thanks for another tip Danny. I can't believe how much minute detail all this model building entails, most of it I'm sure being quite important in the end. Of course what I showed above (bad photos I admit) is a sample and I'll definitely be watching out for those holes.
- 265 replies
-
- 1
-
-
- finished
- artesania latina
- (and 1 more)
-
I think I have the process down. Now I just need to take more care in the real application. Placement of the hole in the chain needs to be better -- I should probably use a punch to start it and/or do a smaller pilot hole first. I'm using 1.2mm rod here which worked a little better than the 1.0mm wire. I couldn't flatten the end in my vise so I used a sledge hammer and an anvil. Taped the rod to the anvil first so it wouldn't twist. Three blows I think did it. Then a bit of clean up with a file.
-
Yes, that is a good way to fill holes. After a lot of discussion and thinking about alternatives, I think I've decided to enlarge the existing holes just enough to let the chain slip through. I'm following the advice Dan Vadas has given me on my Bounty build log. He shows a way to make these chains from a single strand of wire -- meaning the hole doesn't have to be enlarged very much (if at all to tell you the truth). He's flattened the end of the chain and drilled a hole in it to accept the connecting link to the chain plates. I'm not going to worry about the fact that this will position the deadeyes in the center of the channel rather than out at its outer edge. I think (and hope) it will make no difference in how the shrouds function. They'll be strong enough to hold up in a storm (when its hot here I turn my fan onto high) so the only concern I have is that they may lie against the railing. But this is what the plans show so we'll just see. Thanks for your input. Everyone has been great in their responses to this question.
-
Danny you're the best....thanks for these pictures. It looks like the deadeye holes are staggered along the channel. Mine are straight in line but I suppose this is cause these are not from Bounty, but HMS Supply. Can you remember what gauge or diameter wire you used on these? Thanks again Dan. Without your continuous help I think I'd have let my build sail into the sunset long ago -- and that would have been without sails!!
-
Great advice on positioning the chains. I will definitely hold off on that step. Now, to make sure I understand what you did let me put it in my own words -- you did not cut slots from the front of the channels into which you slipped the lower part of the strop. You had a round hole in the channel and you cut a little slot in the hole just big enough to push the eye of the strop down through it. Sort of a variation on just enlarging the hole, but more secure and less intrusive of the rest of the channel. That sounds like the perfect solution. Thanks so much Danny.
-
No need to collect more walnut dust....I have about an ounce of it from my hull sanding. I've never really gotten good results though using it as a filler. Maybe I'm using too much glue and not making the stuff thick enough.
-
Thank you all for your advice. I think I'm going to take it. Filling and filing is the least intrusive and then I'm free to 'build' the deadeyes and stropping off the ship and probably do a cleaner job of it. I'll post some pix when I get to this step. Thanks again all. MSW rules!
-
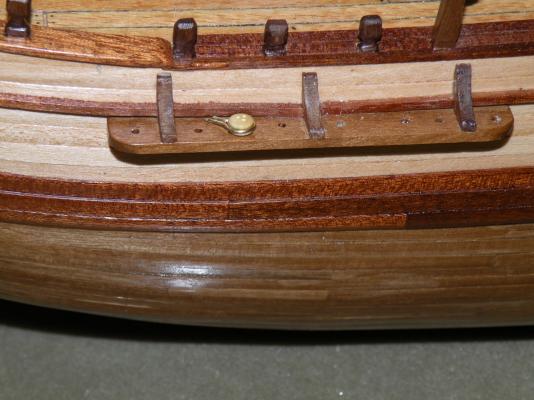
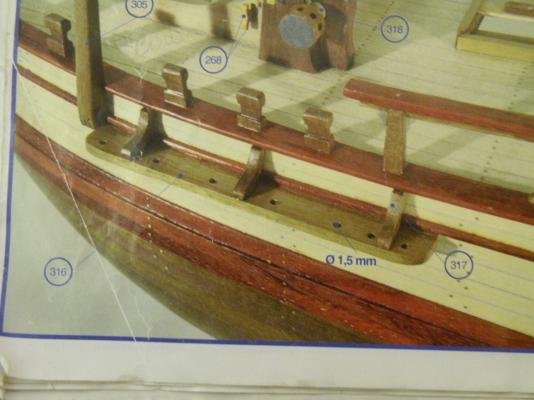
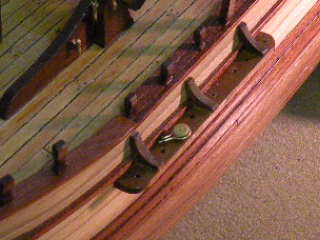
Seems like I'm only updating this log when I have a problem. At the moment I have several, but I'll focus today on just one.... how to proceed with attaching the deadeyes through the channels and onto the chains. I've posted this issue under a rigging forum and received a couple helpful replies. But I thought someone who is actually working on or has completed this AL Bounty kit could give me a tip. Here's the problem (which the pictures should illustrate). I followed the directions and put 1.5mm holes into the channels appropriately spaced. Now I'm putting the strops on the deadeyes (well, trying to) and I find that the 2 strands of stropping (kit calls for 1mm brass wire) will not fit through the 1.5 mm hole. I'm trying to reach a conclusion as to how to deal with this and the options seemingly are: (1) drill or ream out the holes, (2) cut slots back to the holes so the strops can slide back into the holes, (3) fill the holes and cut (or file) notches on the outer edge of the channels for the stropping (and then cover the notches with a strip of wood, (4) improvise something bizarre like using smaller wire for the stropping, even perhaps thread. Simplest seems like (1). That would just be a matter of how big to make the holes. Would the holes just need to accommodate the two strands of wire (ie 2 mm), or wider so I can form an eye at the end of the strop and still fit it through the holes? I can't make these holes too wide since there's so many in a row. Here's some photos to illustrate. Included one of the instruction books pix.


- 265 replies
-
- 2
-
-
- finished
- artesania latina
- (and 1 more)
-
But still..... other than being too far inboard, doesn't it still seem like it would be simplest just to drill or ream out these holes so the two strands of stropping will fit through? And yet, if I do that, I then need to close up the pair of strands and form an eye for (the chain) and this would have to be done from underneath the channel with no room for maneuvering. Its all still a dilemma. Perhaps remove the channels and start fresh?
-
Thanks for waiting. Here's the shots of my channels. I included a shot of my instruction photo from which I thought to drill the holes. It still looks like that's what they're calling for. But that's not to say its correct or the best way. Filling these holes would not be a problem My thinking now is that if I put the deadeyes through these existing holes they might be too close to the hull; not far enough outboard that the shrouds won't touch the rails.

-
I'm going to get out the digital and take a pic or two. I know what you mean now, I think. The strop wires will sit way out on the edge of the channel, not in the middle as for example where I've placed these 1.5 mm holes. Be back in a few minutes with the pictures. Thanks for your time guys.
-
Difference between a deadeye and a clump block
Captain Al replied to Captain Al's topic in Masting, rigging and sails
But in this case, the case of Artesiana Latina's misleading or ambiguous nomenclature, I have to go with JC's conclusion. They simply did a poor job of translating from Spanish to English. And it isn't the only time. -
Thank you druxy. The 'shaving' idea would work if the holes I already drilled were closer to the edge. But they're right smack in the middle of an 8mm wide channel. I think cutting into the channel, even if the cut is about 3.5mm before it gets to the hole, is the better idea. I just need to think about and plan the cuts and what tool to use -- Dremel or hand? That is the question. With those knee braces on the channels themselves are pretty solid. Cutting into them shouldn't pose a big problem. Would have been quite simple if done off the boat before mounting the channels. Now the other solution I'm thinking about is to enlarge the holes just enough to squeeze two strands of .8mm brass wire (the smallest I can use for the stropping and still look good) down through the holes and then twist the two strands into an eye (first a top twist, then a bottom twist with a nail between the strands to create the eye). Only drawback to this is the looks. I can snip off most of the bottom twists, but it will still not be smooth. I could maybe put a drop of solder on the remaining twist, or even CA gel. And a last thought solution could be to wrap the two strands of .8 wire around a ring under the channel. Whatever I do, I do thank you for your attention and suggestion. In the end the right way may also be the easiest and cleanest looking.
-
I'm beginning the research and learning process in how to build and rig the channels, deadeyes, chains and shrouds for my Bounty model. Unfortunately I think that by following the kit's instructions I have made the job a bit harder than it should be. The kit instructed me to drill 1.5mm holes in the channel prior to installing them, which I did. Now they are all (6) on the hull, supported from on top with knees. I come now to the process of installing the deadeyes and chains. Let's forget for the moment the way to strop the deadeyes, soldering techniques, and other fine points. My question centers on the fact that however I do the strop, with an eye underneath, there is no way I can put the eye down through a 1.5 mm hole in the channel. I can't move to the next part of the assembly, the chains, until I figure this one out. I read on another thread that slots are cut from the outside of the channel into the hole, and then a faceplate is put onto the outside edge of the channel. This seems logical, do-able and even quite "authentic," but I've never seen it on any model I've viewed (and I've looked at 100s) and other than a brief mention on the other thread, never seen it discussed. And certainly its not mentioned in my kit's instructions. So this begs the question, is this the best or only way to get that eye down through the channel? Or should I just enlarge the holes to maybe 2mm and trust in the link between the deadeye strop and the chain to prevent the chain from pulling upwards through the hole?
-
Galleon by tuciship
Captain Al replied to tuciship's topic in - Build logs for subjects built 1501 - 1750
Yes, I too am wondering if you are building this from scratch. Its beautiful and appears you are really enjoying the build. From the title of your build log I thought from the beginning that it was a scratch build. -
Difference between a deadeye and a clump block
Captain Al replied to Captain Al's topic in Masting, rigging and sails
GJ..., the way you put it makes 100% sense. We're it not for some ambiguity issues I would easily see why you'd advise not to use a deadeye if it called for a clump block. But consider this: A.L. has also listed regular blocks (doubles as I recall) as "frames." That one took me a few hours to sort out before I realized I was better off using the Spanish parts list. Then there's the problem that while they "call for" both deadeyes and clump blocks, clump blocks is but one of many different ways they refer to a block, be it single, double, and now, using your logic, a triple. There are no triple blocks in the kit. I think the safest thing now for me is to assume that when they say "clump blocks" they are referring simply to a block (with sheaves) and not to a deadeye. It may be that the so called "clump" is a single (as in your diagram), a double, or a triple (but that would probably not be the case or they'd really be amiss in not supplying any). I am going to have to get better at following the rigging plans to determine exactly what type of block to use and how many sheaves it should have. Going to the plans should make it clear though whether it should be a deadeye or a block. This discussion has enlightened me in several ways, so thank you all again. -
Difference between a deadeye and a clump block
Captain Al replied to Captain Al's topic in Masting, rigging and sails
Thanks for the replies. The kit is still the one I started 18 months ago -- A.L.'s Bounty. Considering all that's been said, particularly that the real difference is that the later clump blocks had sheaves while the deadeyes just have holes -- the fact that most of the blocks used on models don't actually have spinning sheaves, I think Danny is right. When I need to order some it'll be deadeyes. Thanks again everyone. -
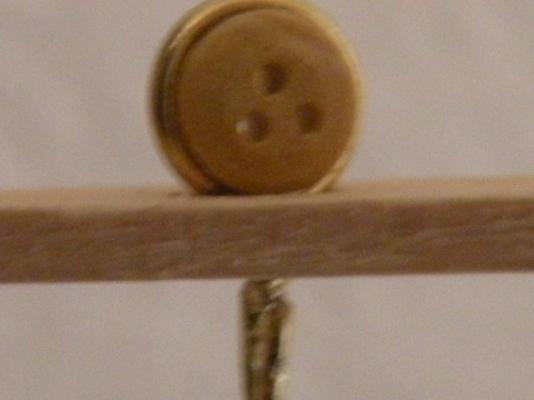
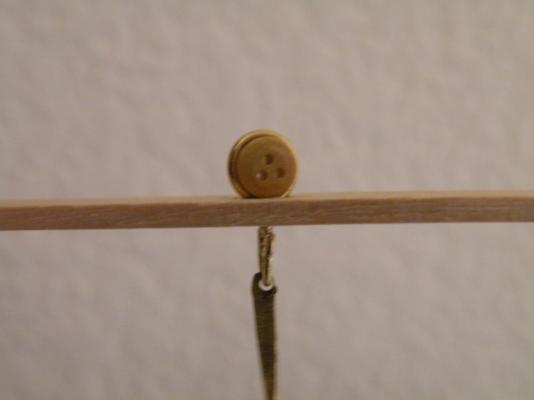
Can anyone tell me if there is a real difference between a clump block and a deadeye? Both 5mm and both 3 hole. My kit calls for both but supplies only what appear to be deadeyes. I can't really see how they are differentiated either in use or in appearance. Since they don't supply enough anyway, I'm going to have to order some and I can't find a supplier of clump blocks but I can find deadeyes. Is this really just a question of terminology changing over time?