

drtrap
-
Posts
904 -
Joined
-
Last visited
Content Type
Profiles
Forums
Gallery
Events
Posts posted by drtrap
-
-
Stergios
I would say stick with a similar length that you used for the shrouds. So at a guestimate around 1.5 - 2cm for the loop plus some extra to run a short way down the stay.
As for the ranks, I think they are redesigning the ranking system. There's a short thread about it.
Hi Jim and thanks
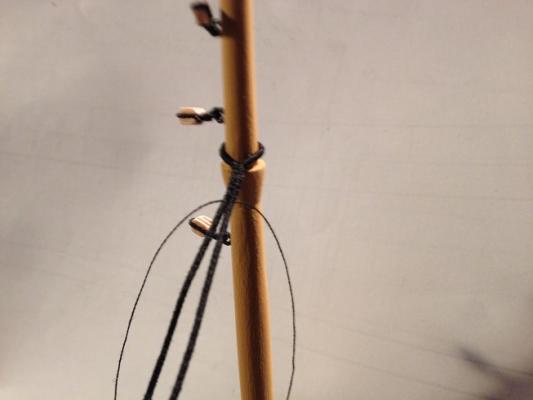
I've attached this photo, showing the starting and ending points for the serving of each loop for the lowermast.
I hope to be this way on the safe side...
Thanks
-
Stergios
Looking good from here
I have just bought a sizing machine from Alexey and will be back at my builds soon
Cheers
Geoff
Hi Geoff
I'm only three steps ahead of you, practising and serving lines...
Waiting to see your serving progress and discuss our initial procedures!
Cheers
Stergios
-
-
Hello guys !! After a long absence from my build due to workload , I finally manage to finish it.
Thank you for your support. I will post some photos to the gallery.
Dimitris
Hi Dimitris
I'm so delighted to see you back.
She's really very beautifull.
Are u ready for the next one (I suppose...
 ) ??
) ?? -
Where are my naval ranks ??

-
Looks The Business Mate.. the size difference is amazing between the two.
Eamonn
Sorry for not dropping a word in sooner, though I've been in the following quietly in the background

Echo this. The difference is ...huge!
Nice work Jason, all the best
-
-
Fine work Jim.
For the laynards, have you used white color line or the natural?
Thanks
-
-
I've left the two pairs of seizing unglued and the second line-branch untrimmed till the next placement of the shrouds to see better the relative lengths etc

I have nt used water pva to simulate better the gravity of the pendants.
I hope that water pva works fine and do not interfere with the serving of the ropes...

-
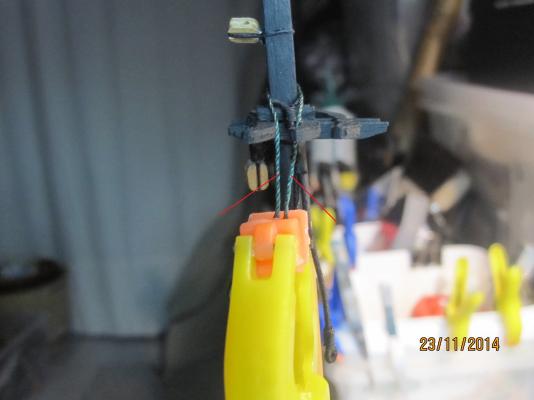
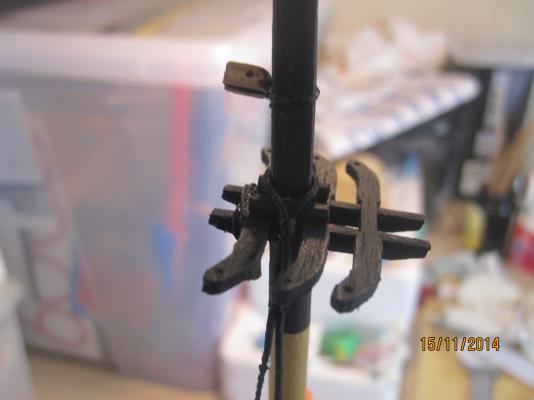
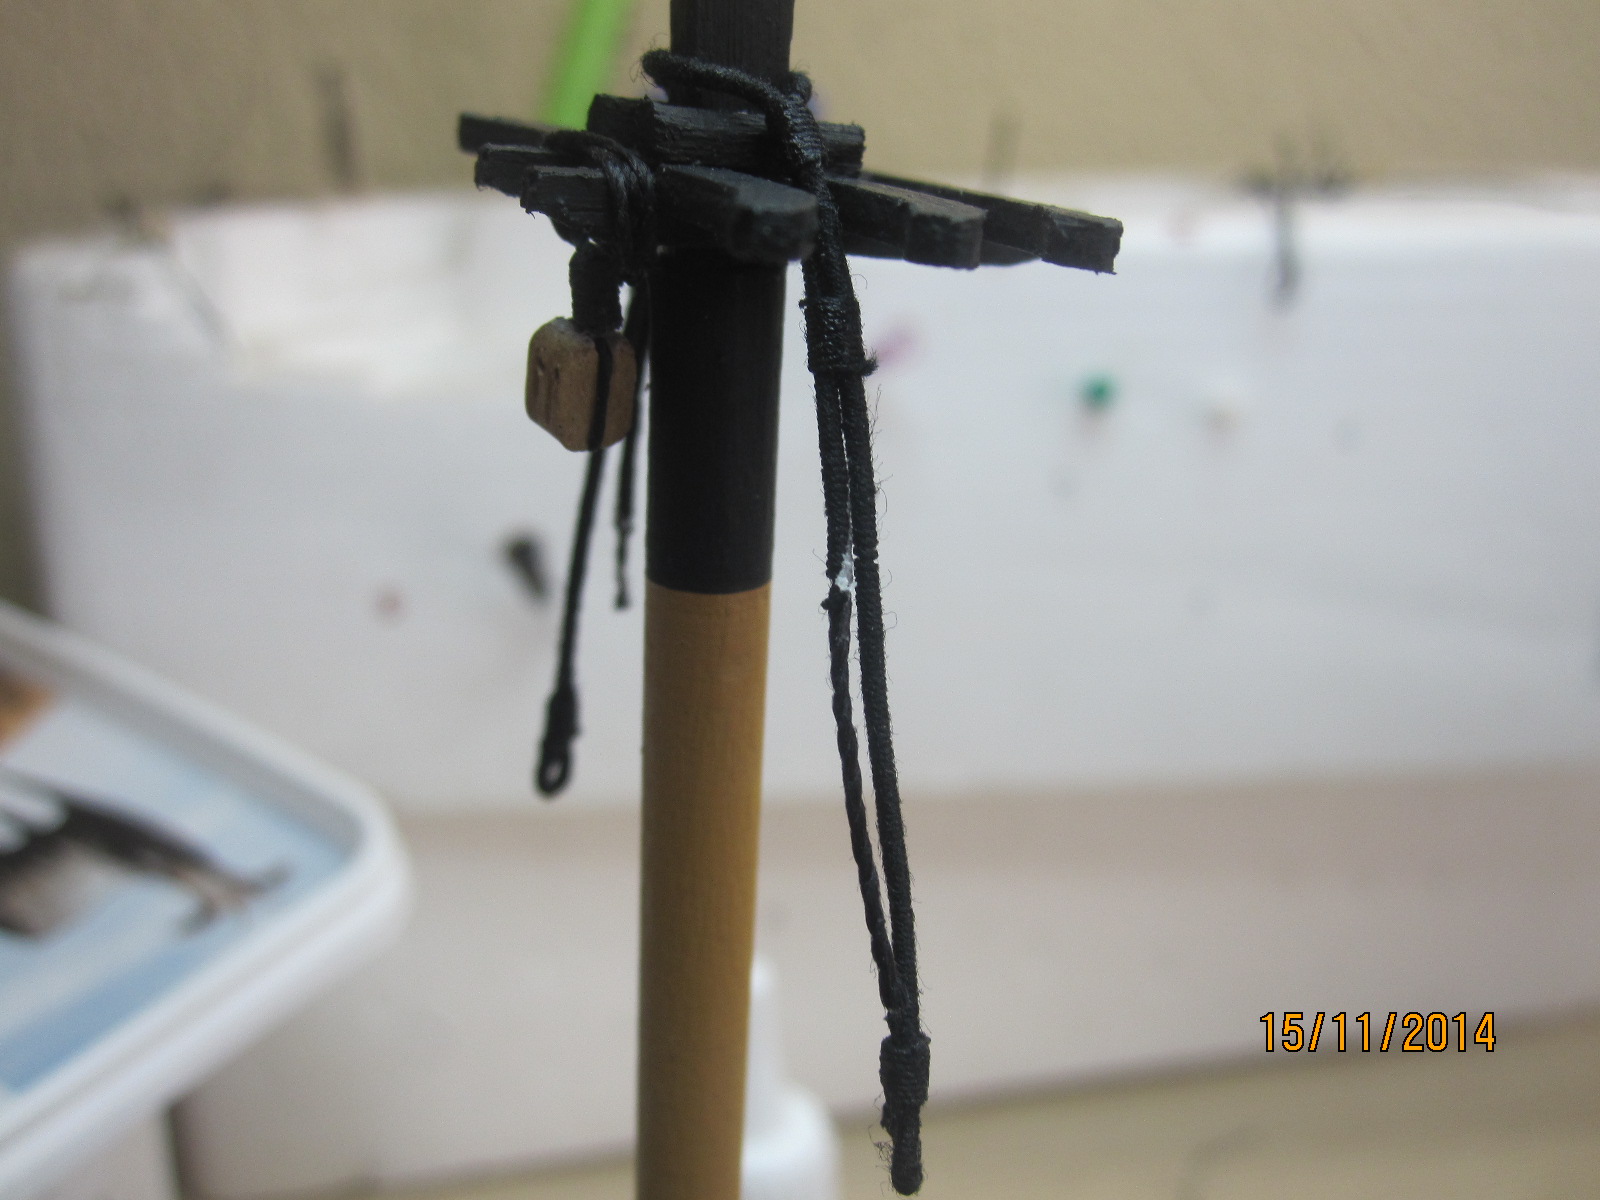
Later on I have passed the second served line through the same two proximal pairs of seizing to create a kind of loop to suspend it around the mast...
These are the two served branches side by side
...and suspanded around the lower mizzen mast
Thank you
Stergios
-
Hi everybody
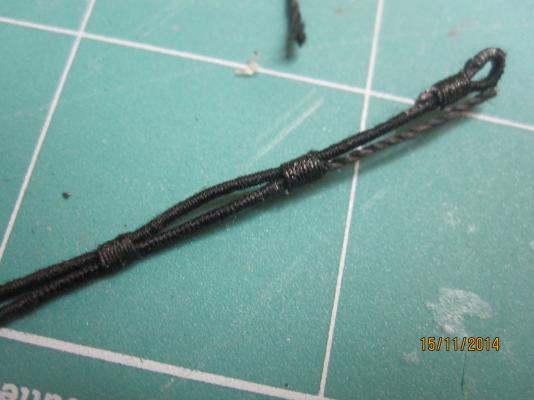
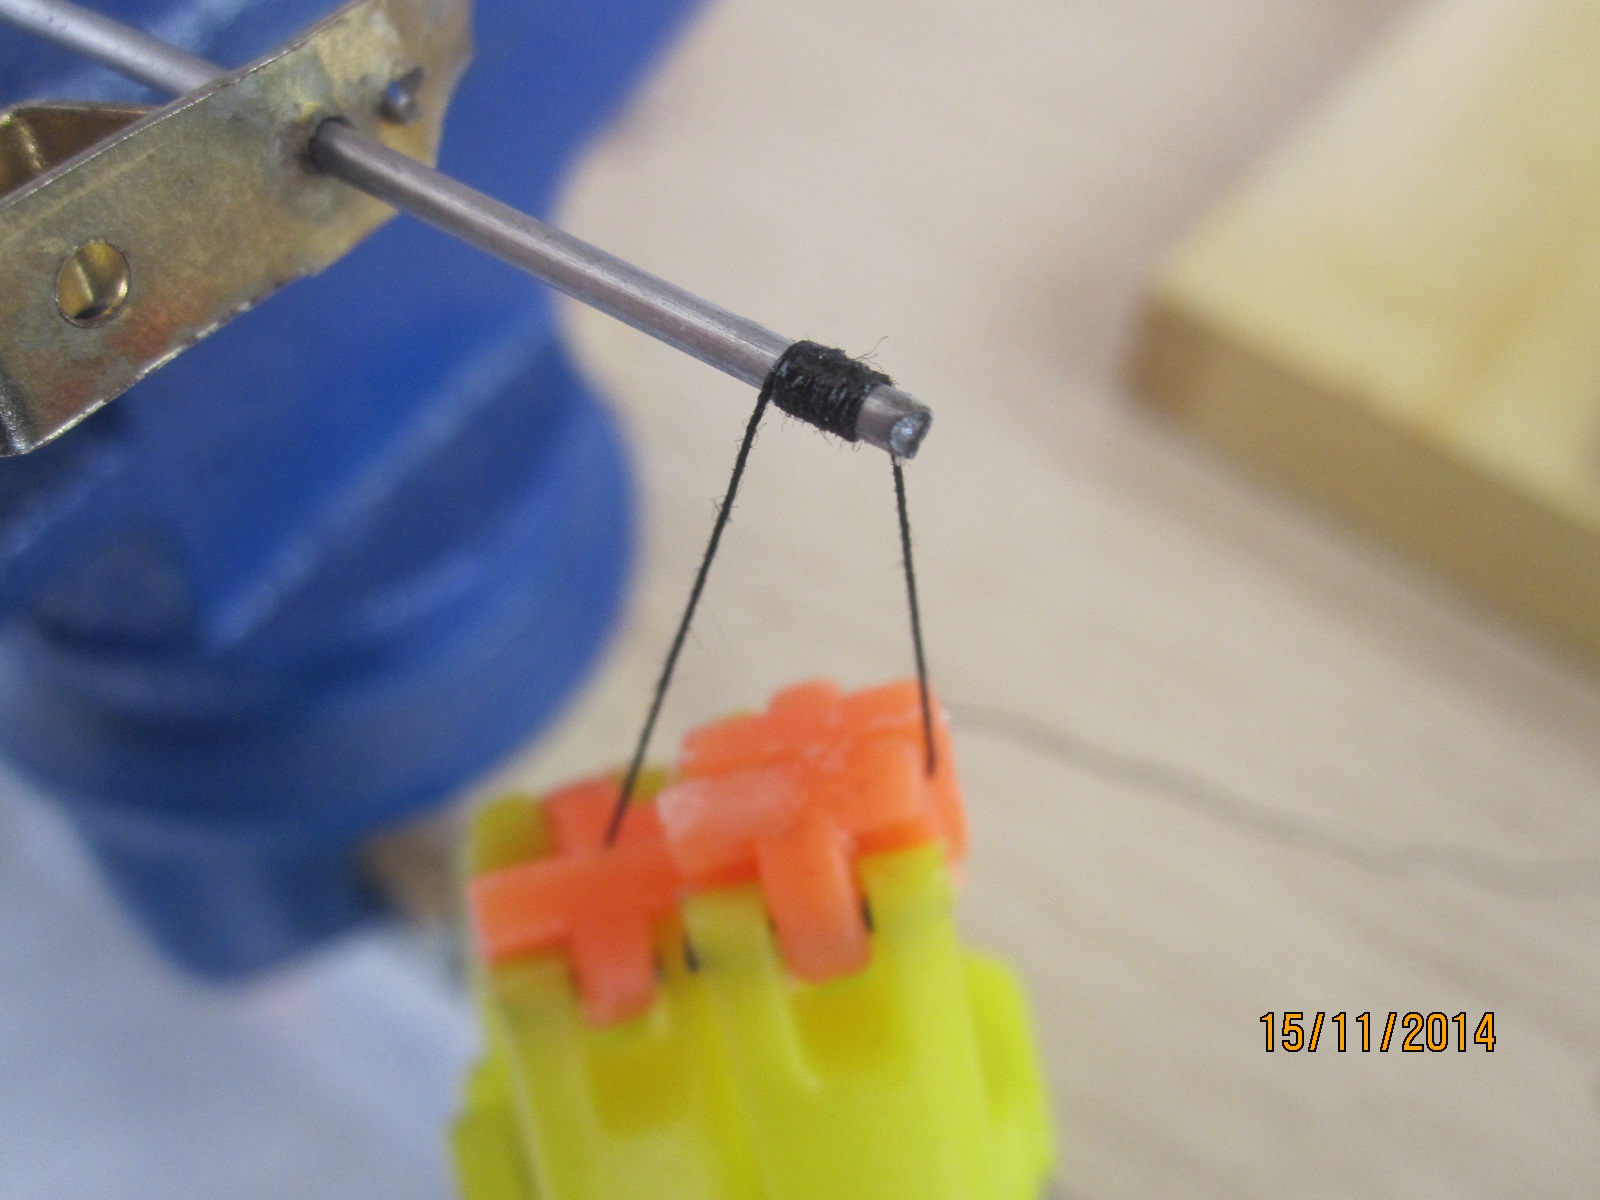
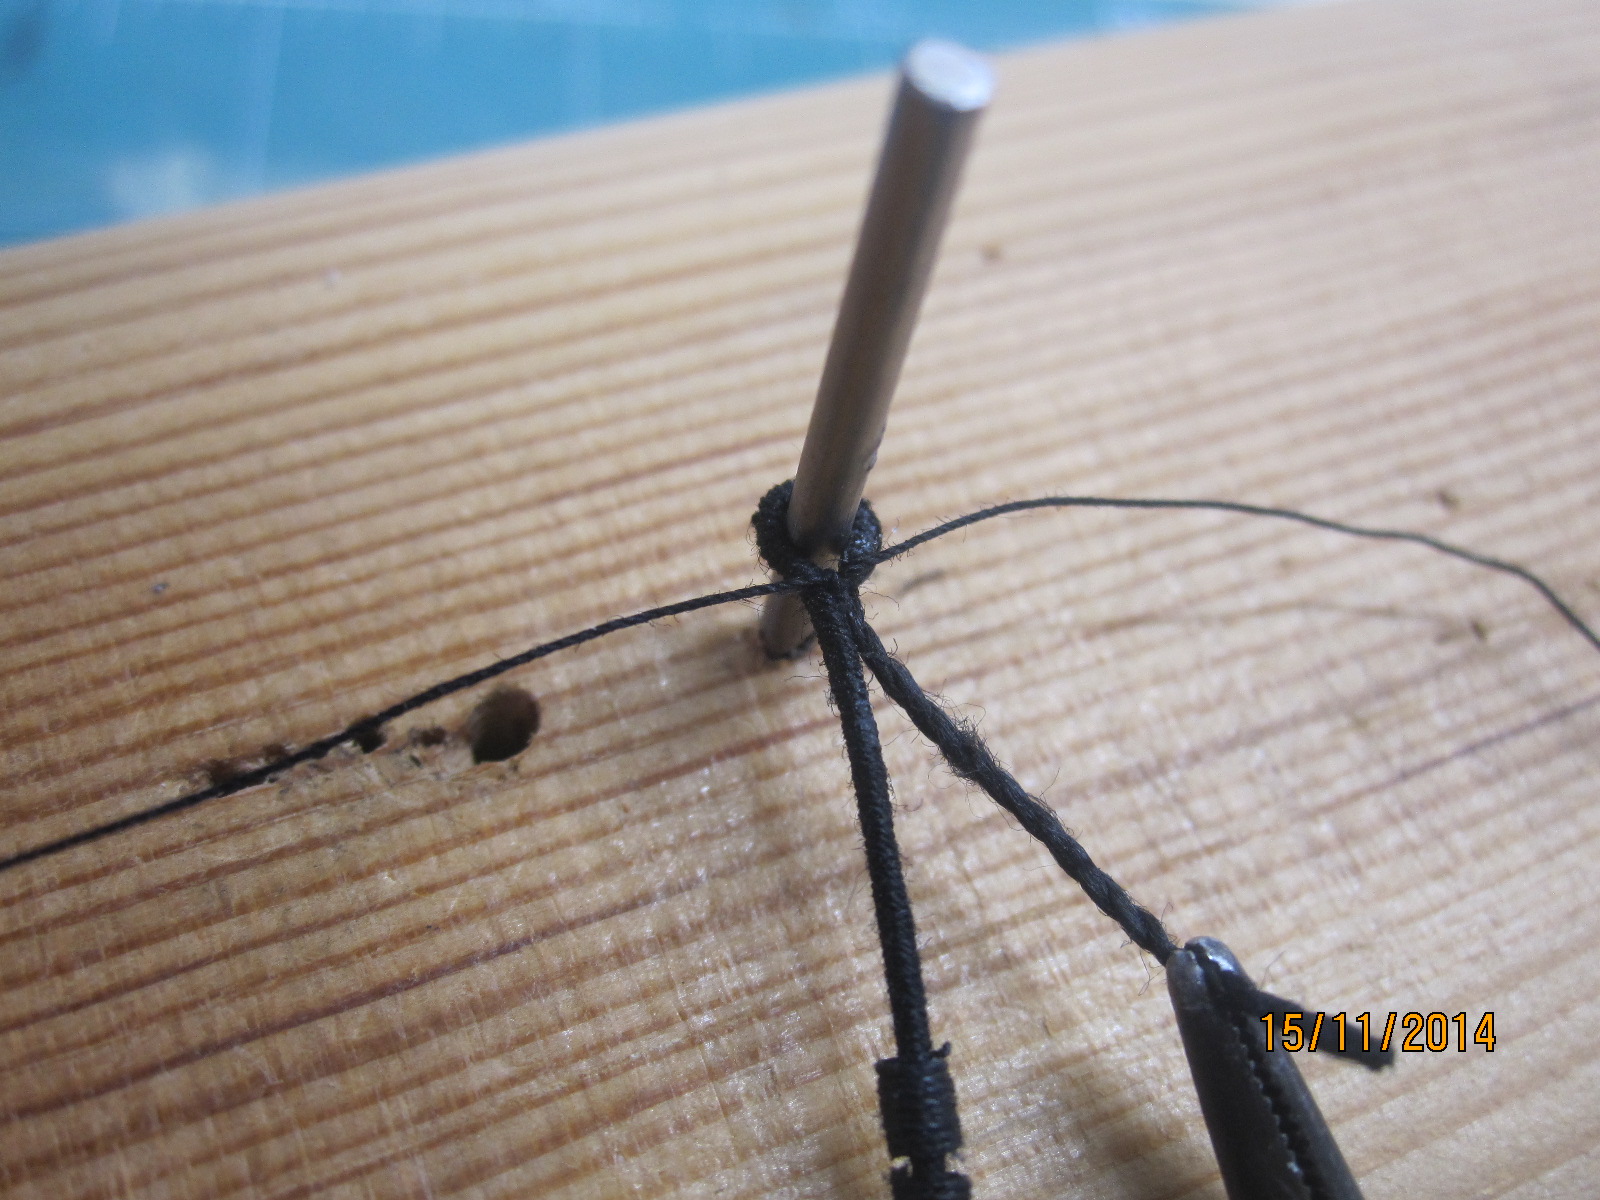
Let me present you my point of view for the mizzen burton pendants using the served (with No 40 cotton line) 0,75 rope of the kit.
I'm definitely a fun of zip seizing. Those are three pairs of seizing created around a wire/axis of 1,5 mm diameter

The line for the seizing (as a basic rule is #0,25mm)

Well I have passed those three pairs of zip seizing through the served line of 0,75 mm
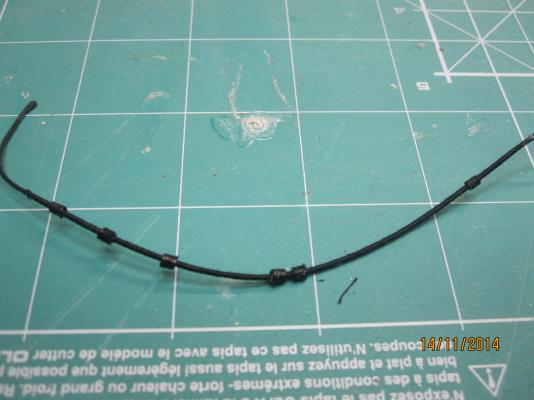
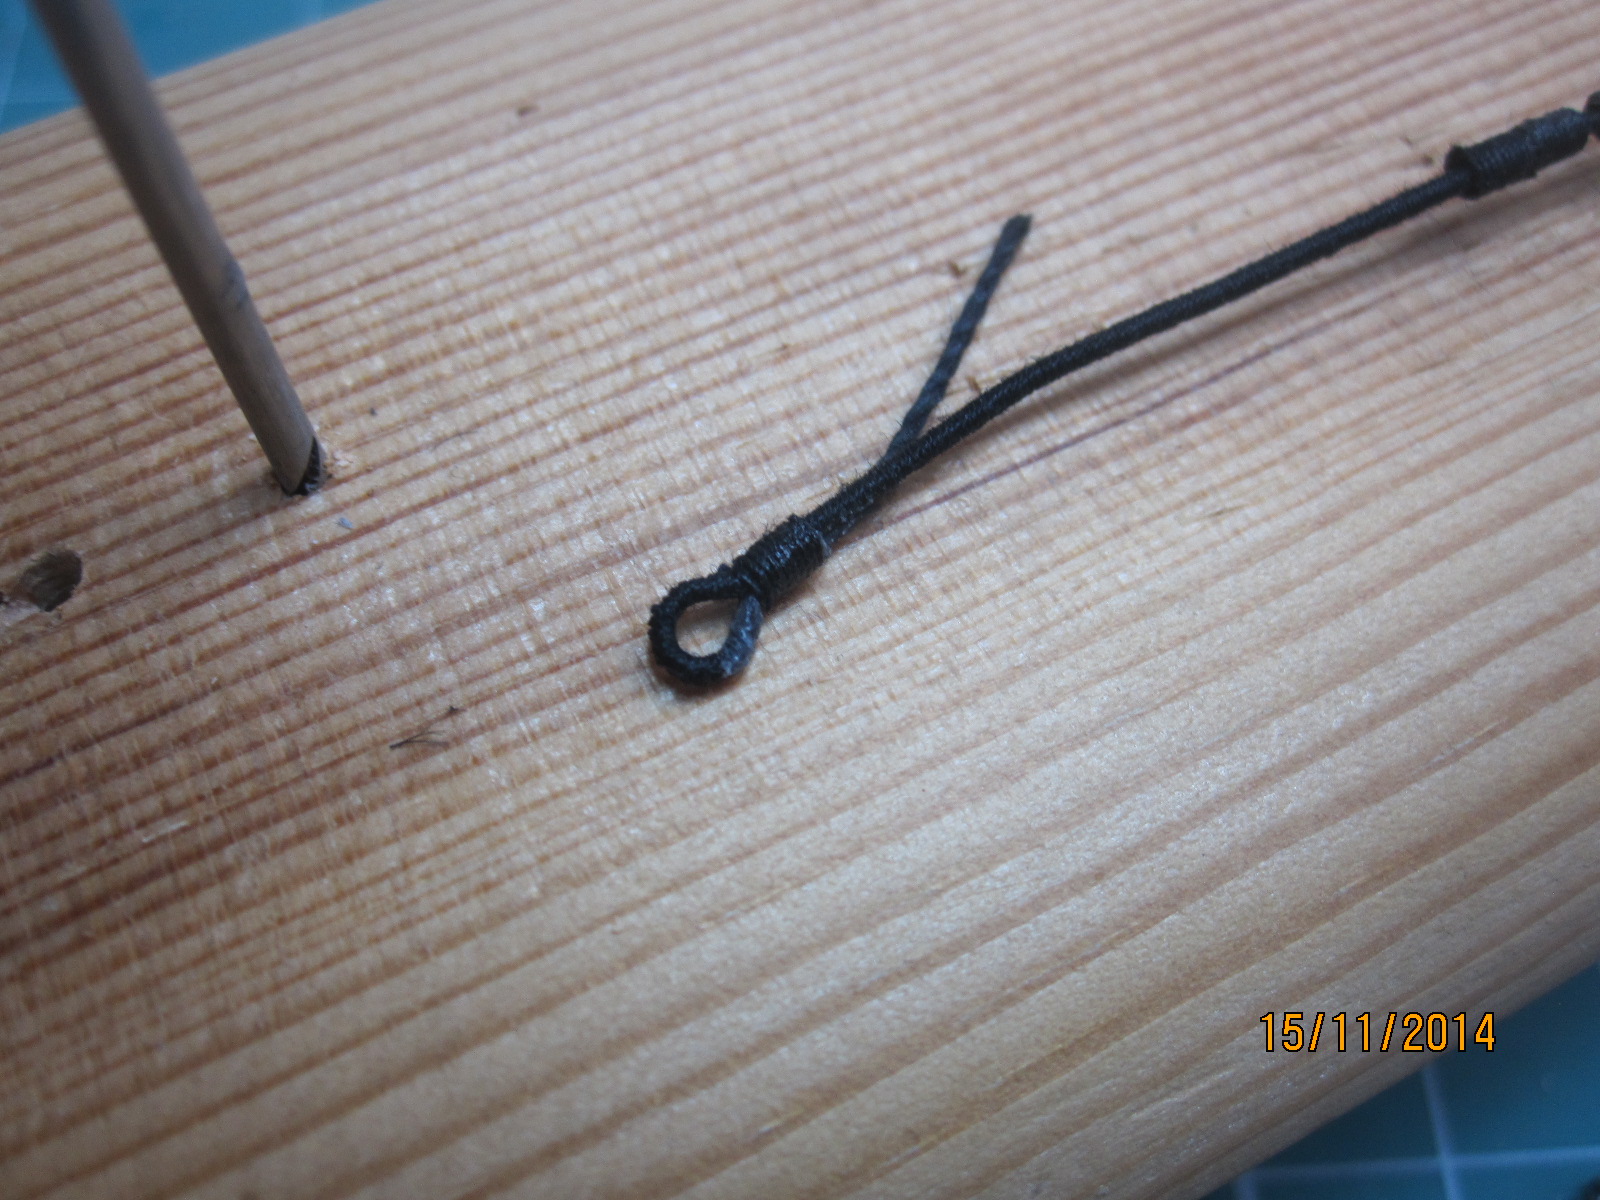
Created the main loop for the eye at each edge and secured with a double knot
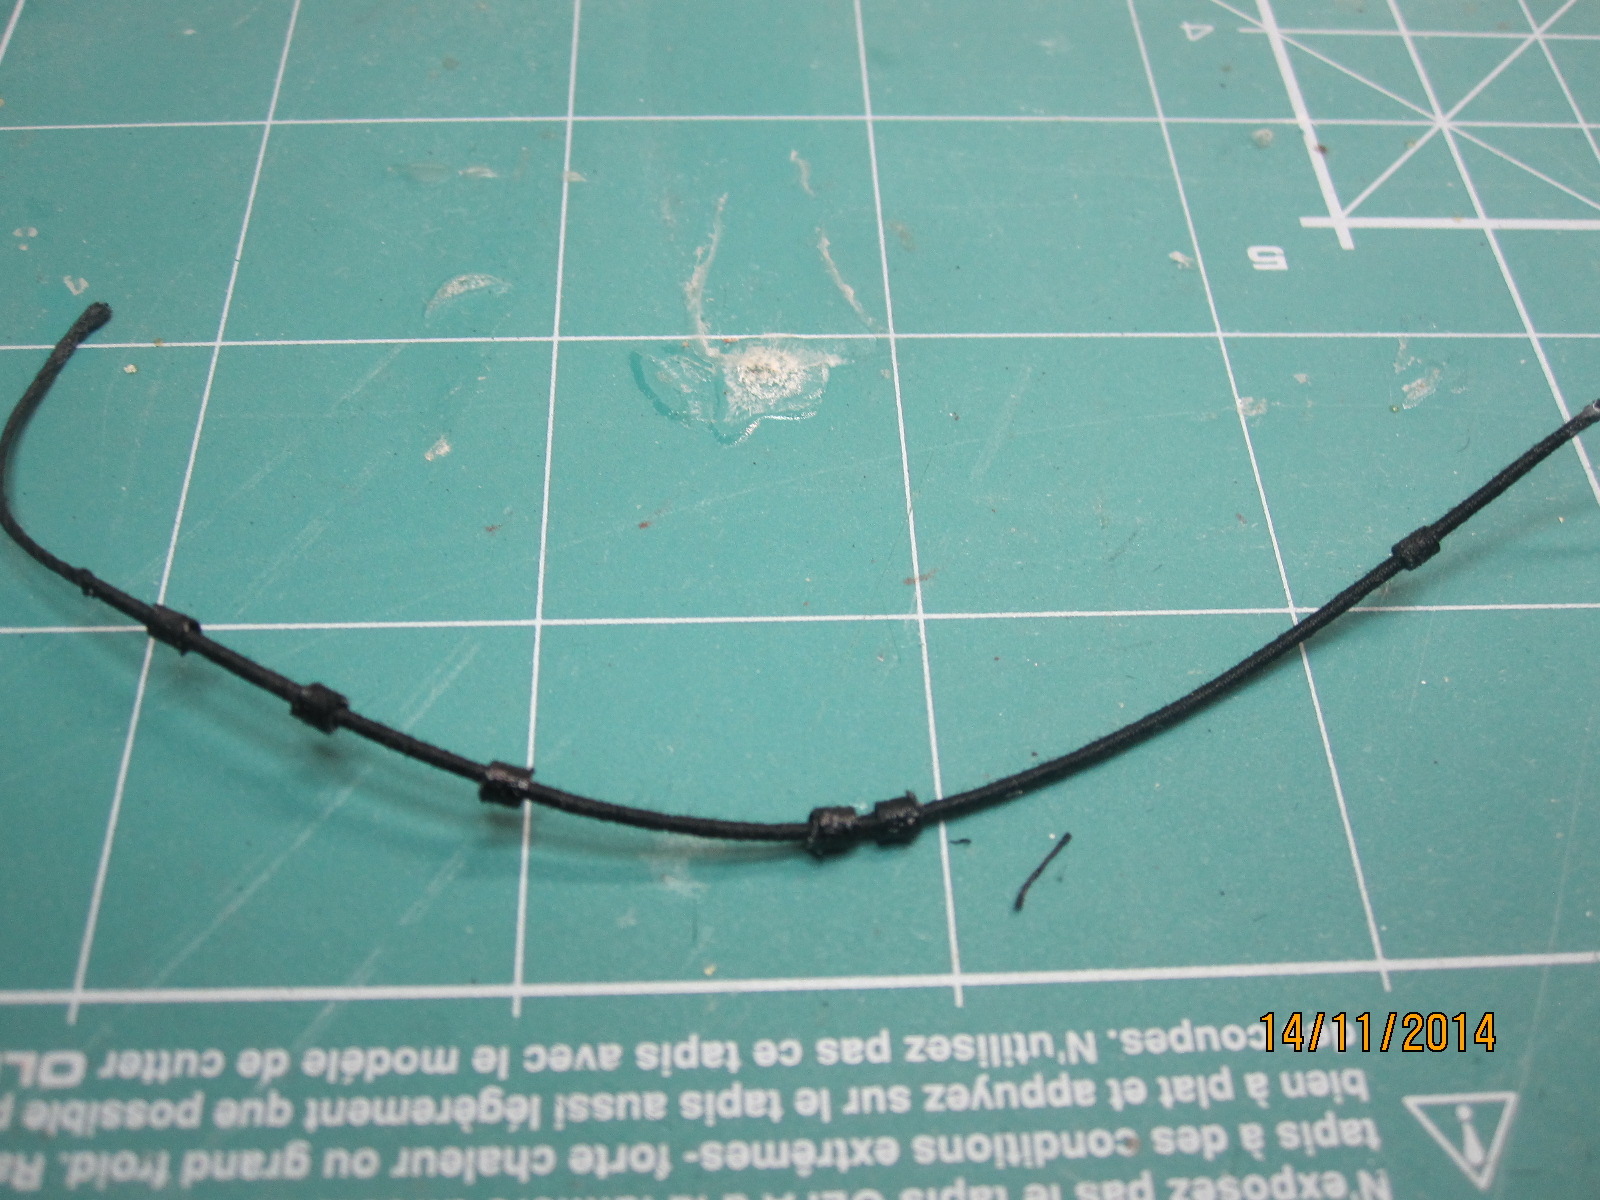
The distal pair of seizing placed then and secured (using pva on the left edge and hypo gs cement on the right to see the final resluts)

Those are the semi-final results

- GuntherMT, Aussie048 and mort stoll
-
 3
3
-
The only shrouds that I've ever seen fully served are the trailing shrouds that would be potentially rubbing against sails - so it depends on the ship design and the type of sail used whether that trailing shroud would be fully served. The ratlines don't make any difference to serving.
Copy that, Brian!
Thank you.
-
As I understand it the serving is to protect the shroud where it is passed round the mast.
We don't need to serve the entire length of the shrouds, for example the section where the ratlines are attached?
Thank you in advance again Jim.
PS: I must open and read my rigging books to not disturb, all of you
-
Jim
do you serve the entire length of the shrouds (from the top loop to the looping rope edge to the deadeyes)?
Thanksn again.
-
Jim
could we re-serve (for the desire length of the seizing) the already served two branches of the shroud to obtain a more unique seizing-appearance than that of the half-knots?
What do you think?
-
-
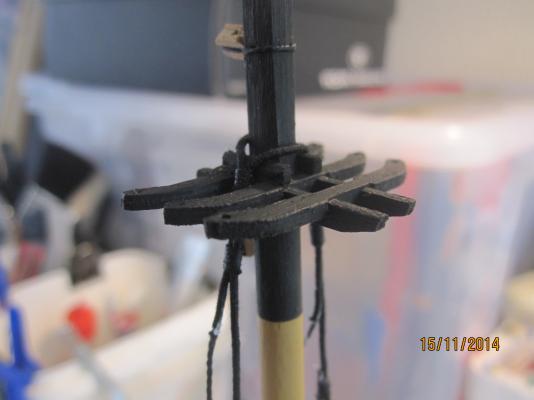
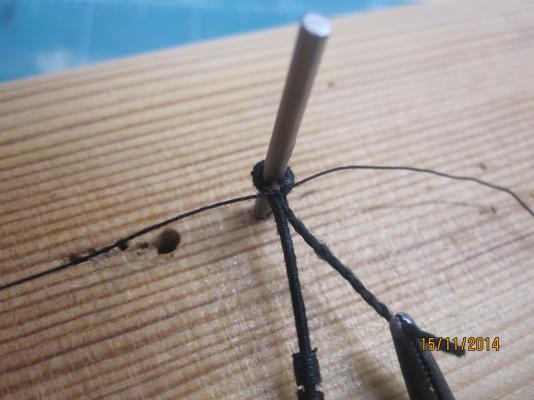
The served line can now be added to the mast by creating a loop and seizing.
First looped round the mast and used a clamp to hold in place.
Again using Gutermann, the loop can be seized by tying half knots alternatively over and under. First knot over....
Loop is more secure and add second knot under.
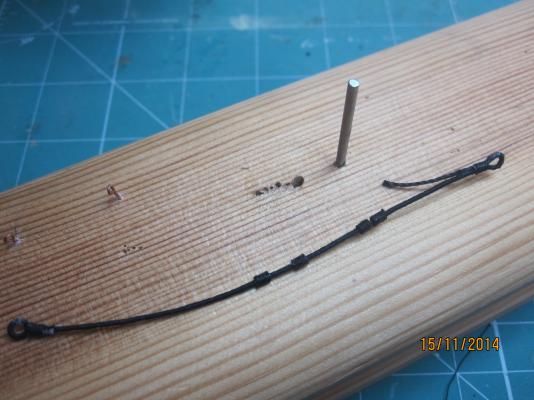
Repeat until the seizing is of a suitable length and paint with dilute PVA.
Once dry the ends can be trimmed with tweezers and scalpel.
Repeat for other shrouds required and then onto deadeyes at the bottom of the shroud.
Dear Jim
thank you so much for your pictures and comments. Those were exactly the steps of the shrouds rigging and serving, I wanted to understand better: looping and seizing around the mast.
Thanks again mate !!

-
-
Not quite the same build but I will (hopefully) be serving and seizing the shrouds on my Ballahoo main mast tonight. I will take prictures of the process and post on my build. Hope this will help you out a bit.
Thanks a lot Jim.
I'll be here to follow you!
-
You have nothing to be sorry about.
Its lovely work.
just pointing out how you could make it easier and line up ok.But its your build and if its painted the same as the tile's then that's fine.
Frank

Hi Frank
I thought you were referring to my queries about the shrouds serving...
In every case you can click on the "quote" tab for a better understanding of the post or the picture you're referring to.
Thanks again
Stergios
-
I believe the copper plates go all around the bow section, and maybe you should fold around and then continue the strait line to the stern.
If you stagger them at the front of the bow end, then you will get the correct join effect down the sides of the hull.
Hope this helps.
foxy
Sorry ??
-
I'm searching any link to understand better how the served shrouds are seized around the masts.
Can you help anyway?
Thanks
-
Hi Ray
your work is excellent!
May I ask you how do you seize the shrouds around the lower mast? Using half knots or something like that, and for how many turns?
Thank you.
Stergios


HMS Ballahoo by jim_smits - FINISHED - Caldercraft
in - Kit build logs for subjects built from 1801 - 1850
Posted
Thanks for sharing your built-steps mate!
All the best