

drtrap
-
Posts
904 -
Joined
-
Last visited
Content Type
Profiles
Forums
Gallery
Events
Posts posted by drtrap
-
-
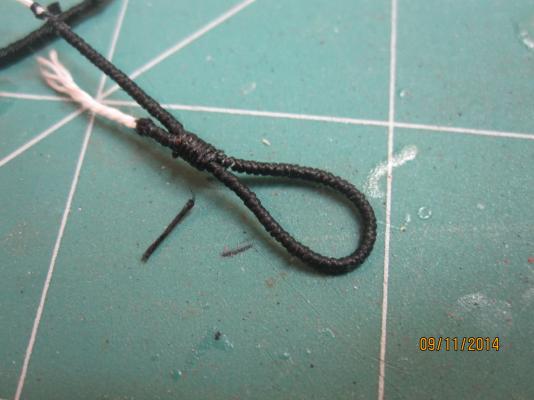
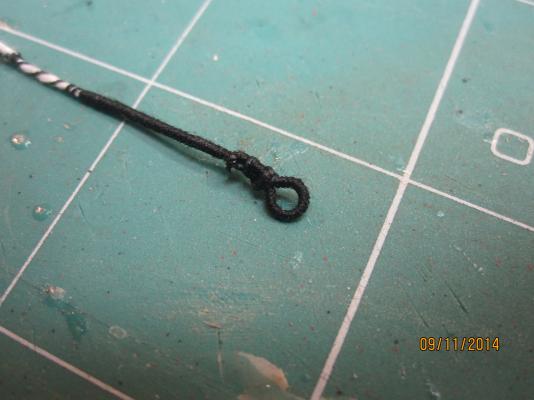
I think these would typically have been done with a splice, and thats the method that I try to use - you serve just enough line to make the loop, then create the false splice, and then serve from the neck of the loop as far as you need.
Jason, hi again.
Have you any pics to attach to enable me to understand those steps better (especially about the false splice, do you use any custom made jig to serve only the line to make the initial loop?
Sorry for disturbing again your time!

-
....... then create the false splice, and then serve from the neck of the loop as far as you need. .....
How do you stabilize and keep attached the loop on the device to continue the serving from the neck as far as you need?
-
I'd agree with Brian, you definitely want the serving line to be thinner......
Jason, you would like to say the "seizing" line instead of the "serving" line, I suppose....

-
Basically I need to improve this simple knot seizing but I'm searching the technique for a better and smooth appearance of the seizing...

-
It looks good as far as technique goes, but I think your seizing should be much smaller diameter rope - like thread sized probably, or very small rope - and it would look better. When you look at photographs of real seizings (for example Google search images for the Constitution rigging) the seizing rope is very small in diameter compared to the line being seized.
Here's a nice photo (linking to a Flickr page) - https://www.flickr.com/photos/ghrs47/14580207322/in/pool-old_ironsides
Make sure to click on the image to expand it to full size and you can then scroll around the image by moving your mouse.
If you look at that full size, it's still difficult to make out the seizings on the shrouds, but they are visible. You can also see numerous other seizings on the other rigging lines, and they can all be seen to be very small rope relative to the main line being seized.
Hi Brian and thanks for your comment and the link provided.
I've used No 10 cotton line just to help myshelf to handle better the seizing procedure and especially to see only how the served rope without damage fits to a zip seizing of 1,5mm diameter (for 1mm served ropes), independently of the size of the seizing rope.
To my knowledge, the size of the rope for seizing is always 0,25mm.
Cheers.
Stergios
-
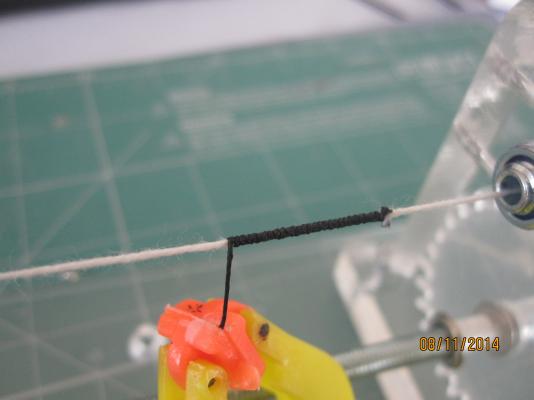
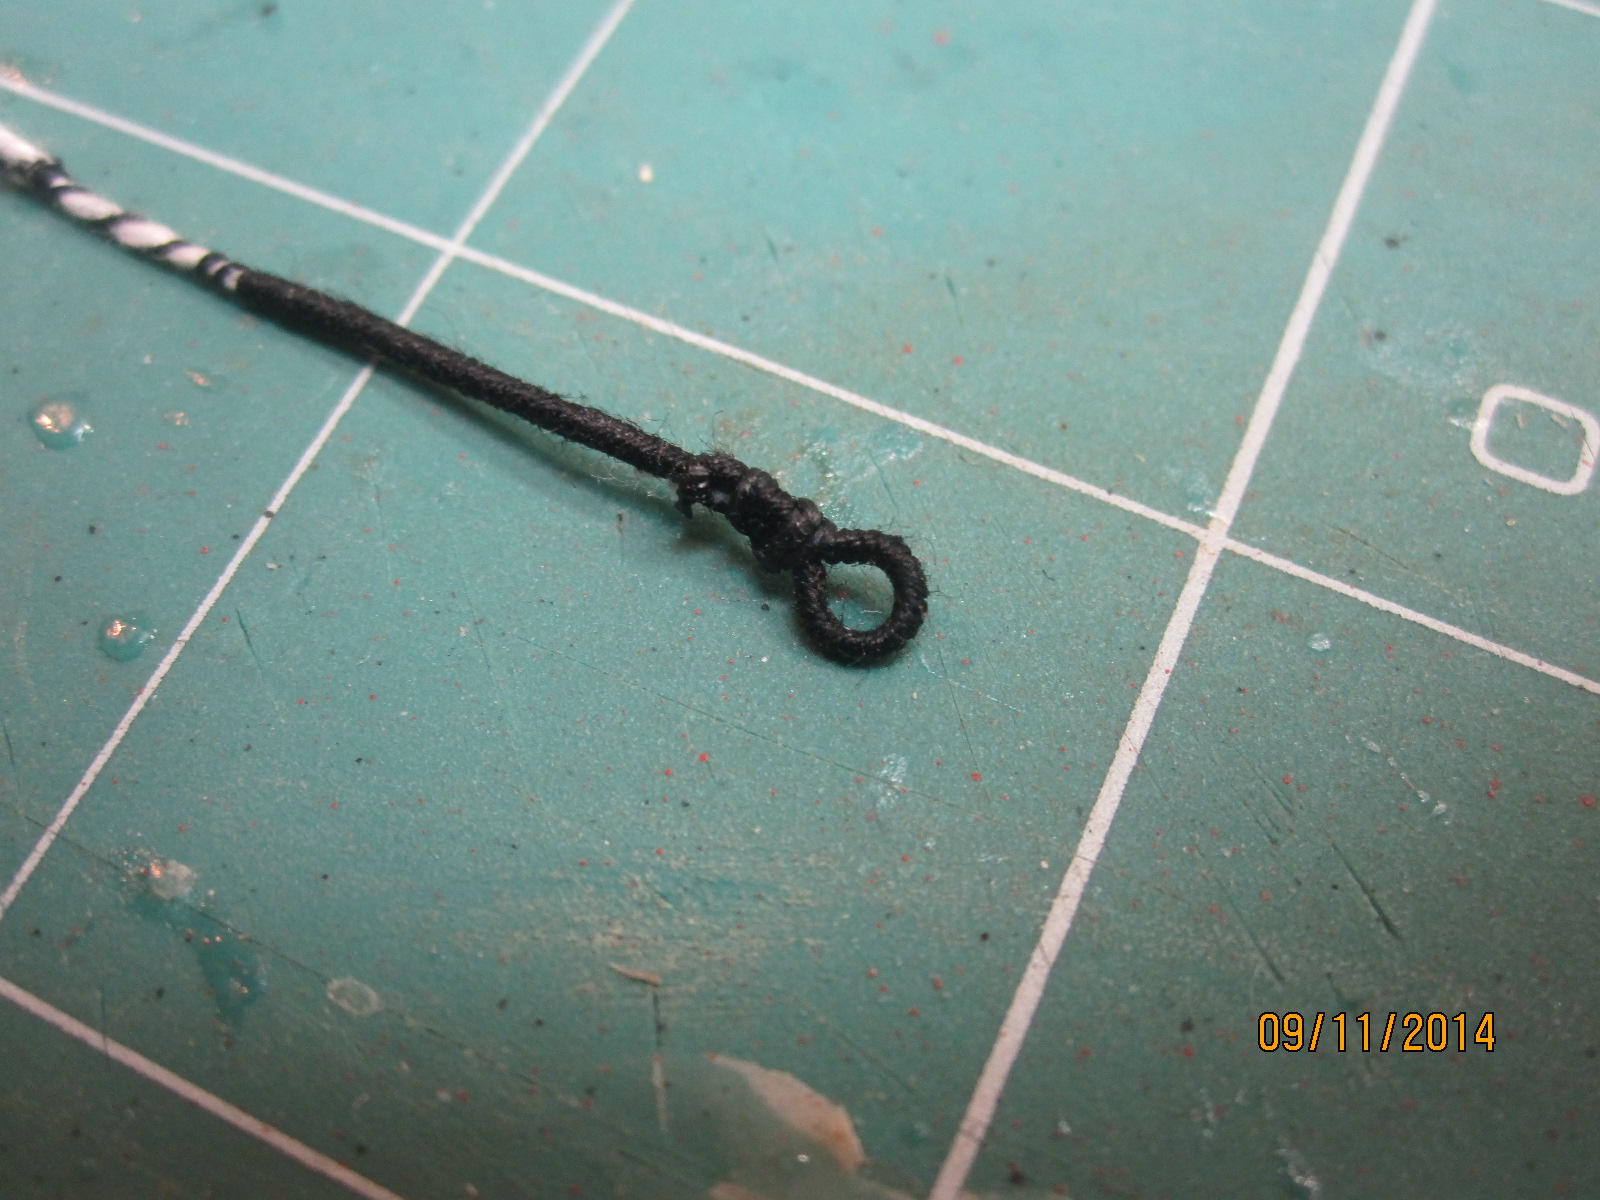
That;s a picture showing the final result of a zip seizing of 7 turns of the #10 cotton line, after the trimming of the free edge of the rope.
This seizing seems to me a little oversized and the main rope not so centralized to the seizing....
Any comments and advices, as always are appreciated mates.
Thanks.
-
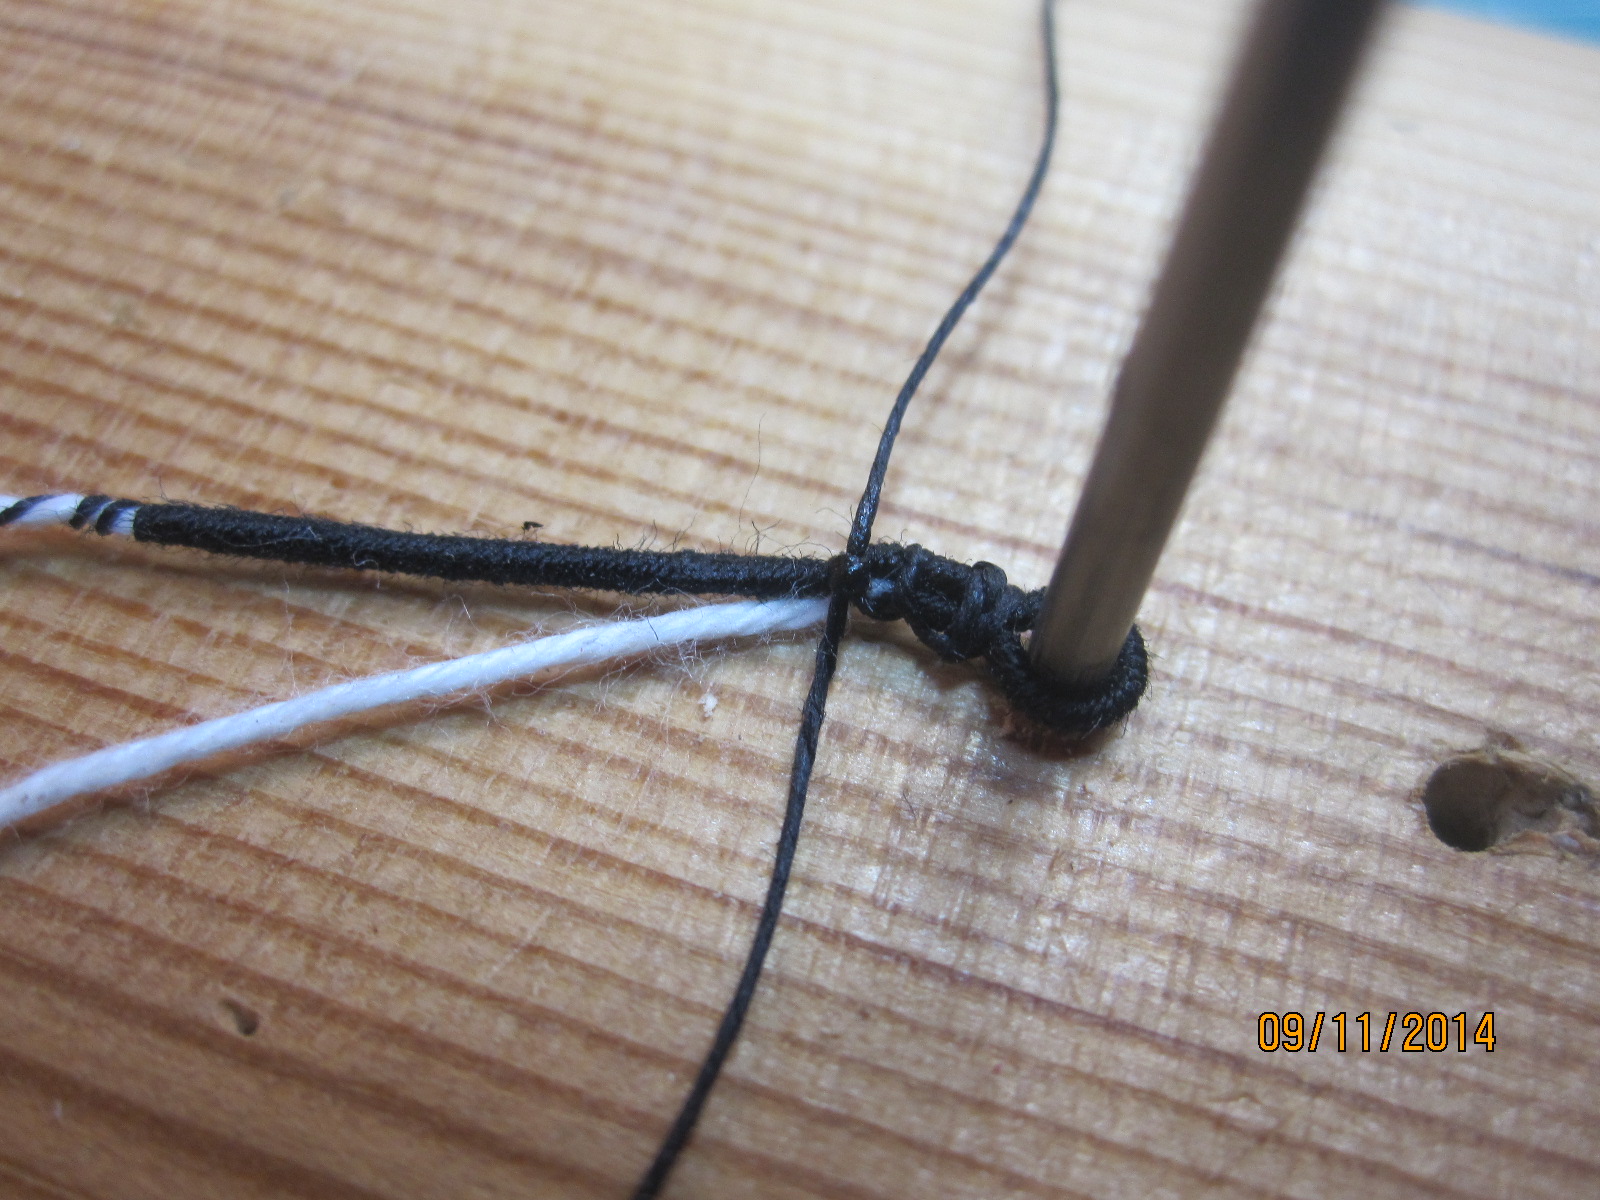
Today, I've found time for practise on seizing the served ropes. I generally like the style of the zip seizing, so my basic concern was to see whether was possible the served rope pass through the zip seizing ("hangman knot") without any damage of the serving line...
I made my 1st zip seizing turning 5 times the #10 cotton line around a 1,5 mm wire. This is the preliminary result

This is another try turning 7 times the #10 cotton line...
Alternatively I have tried this seizing with 2-3 simple knots around the served rope,

but I'm not happy with the result
-
-
I mean about that kind of seizing.
It seelms to me very risky, especially using served rope to do that zip seizing, don't you think?
-
Hello to everybody.
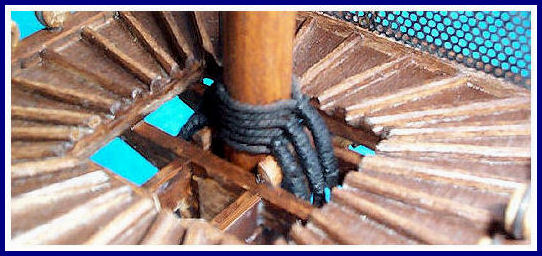
How do you deal with the seizing of the shrouds on masts?
Thank you.
-
...and Mort & Brian of course.
Thanks mates!!
-
Again special thanks to Ray, Alexey and Jim.
Cheers
-
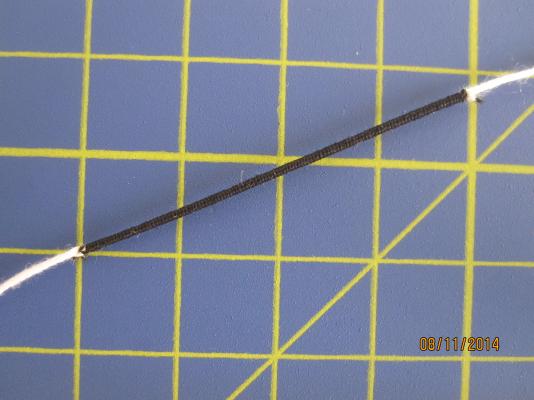
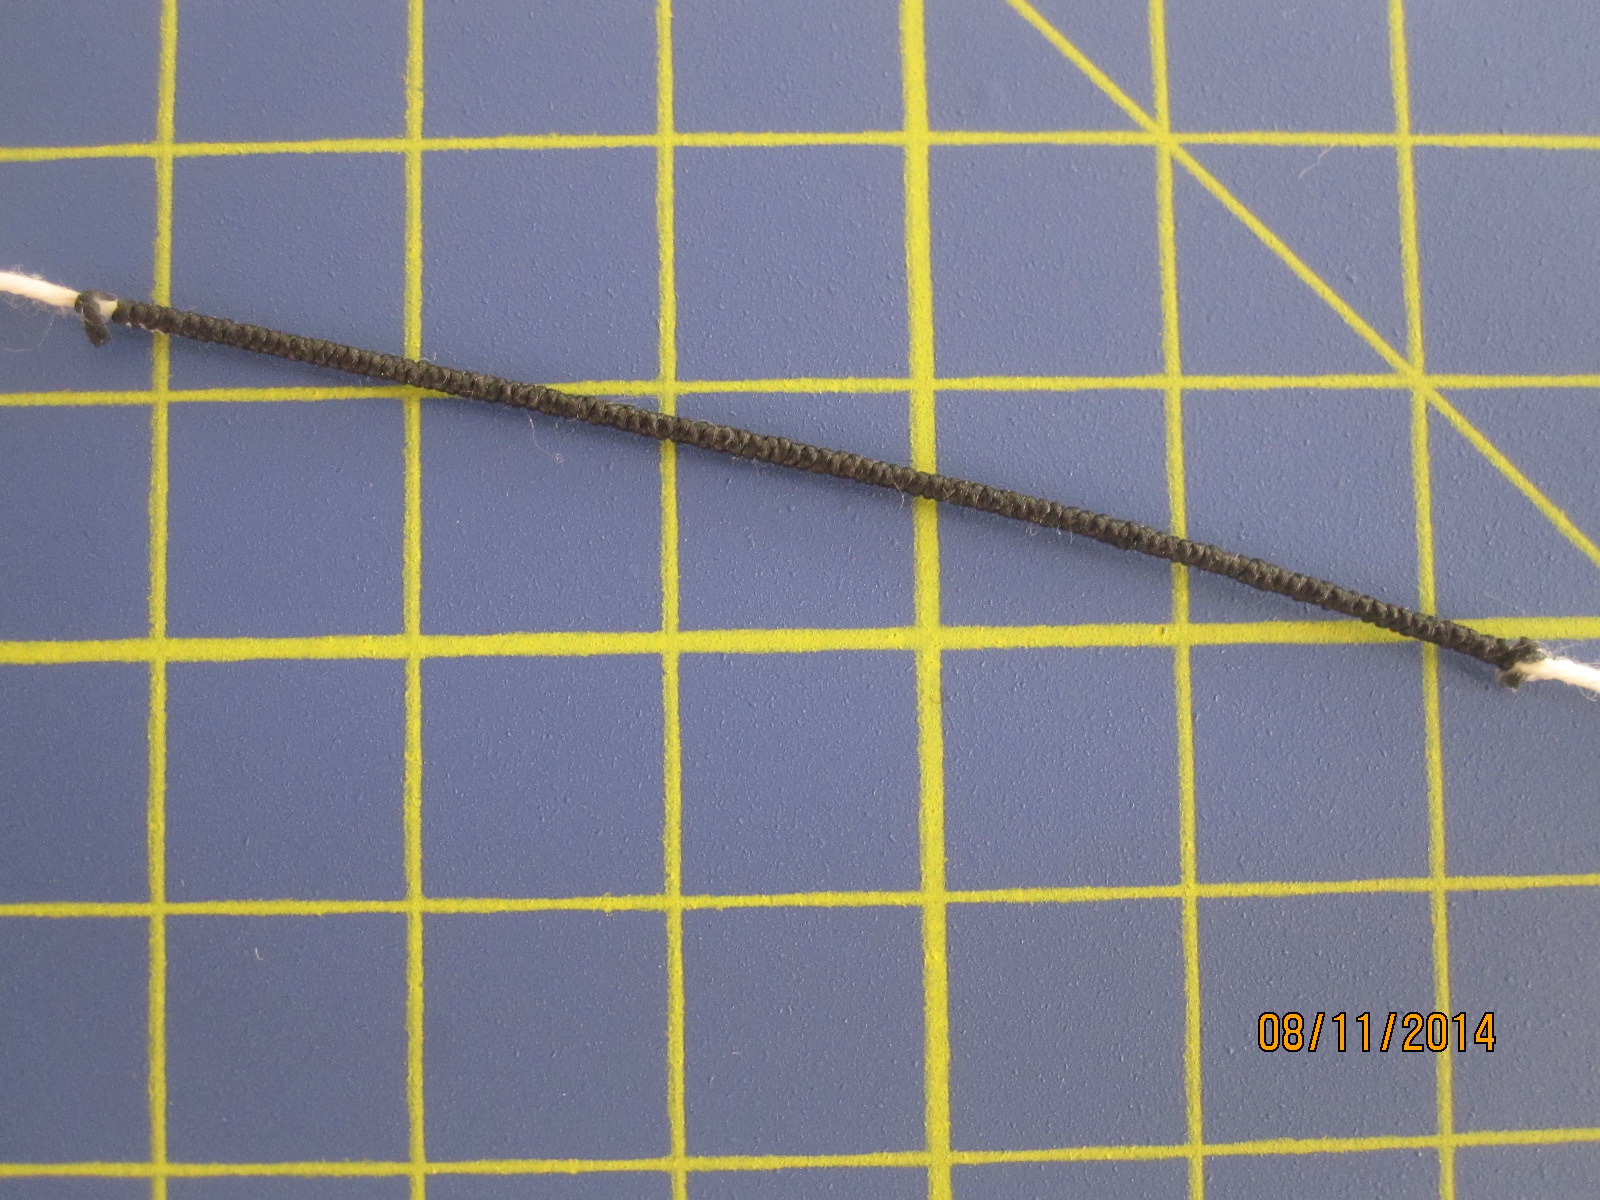
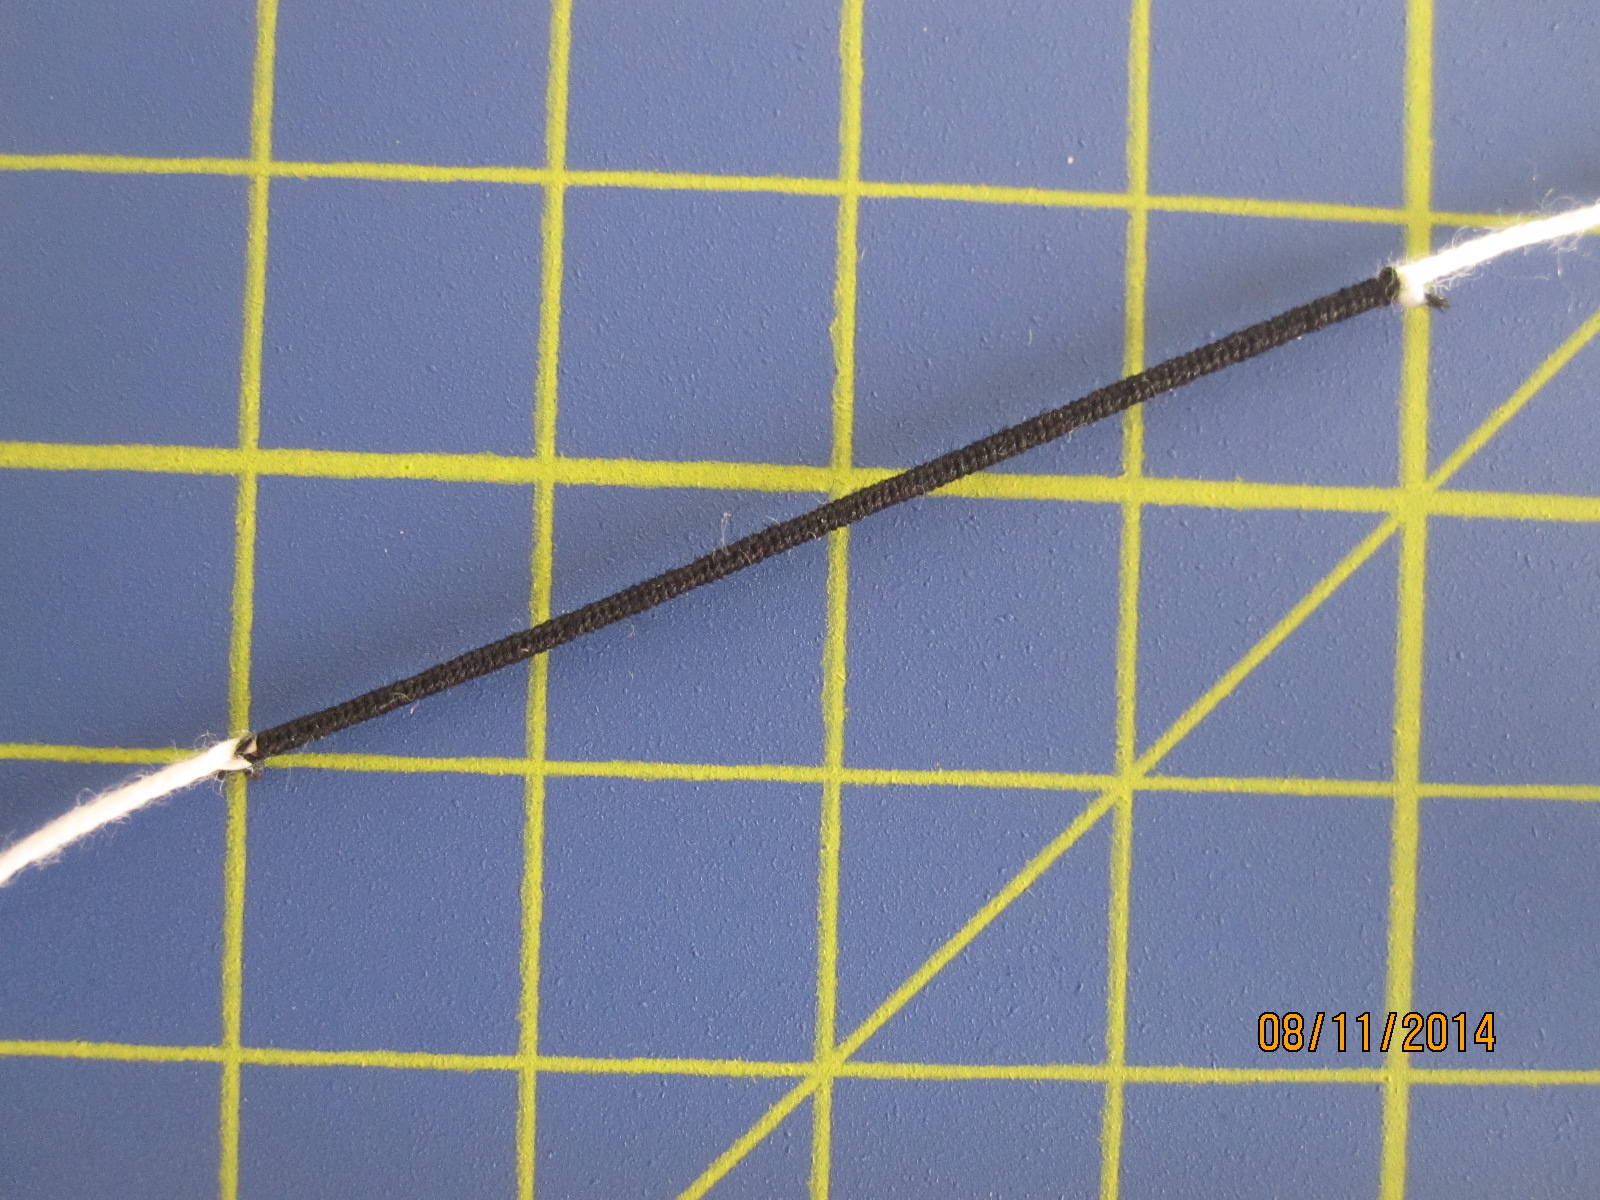
Here is my 1st attempt using the cotton line No 10
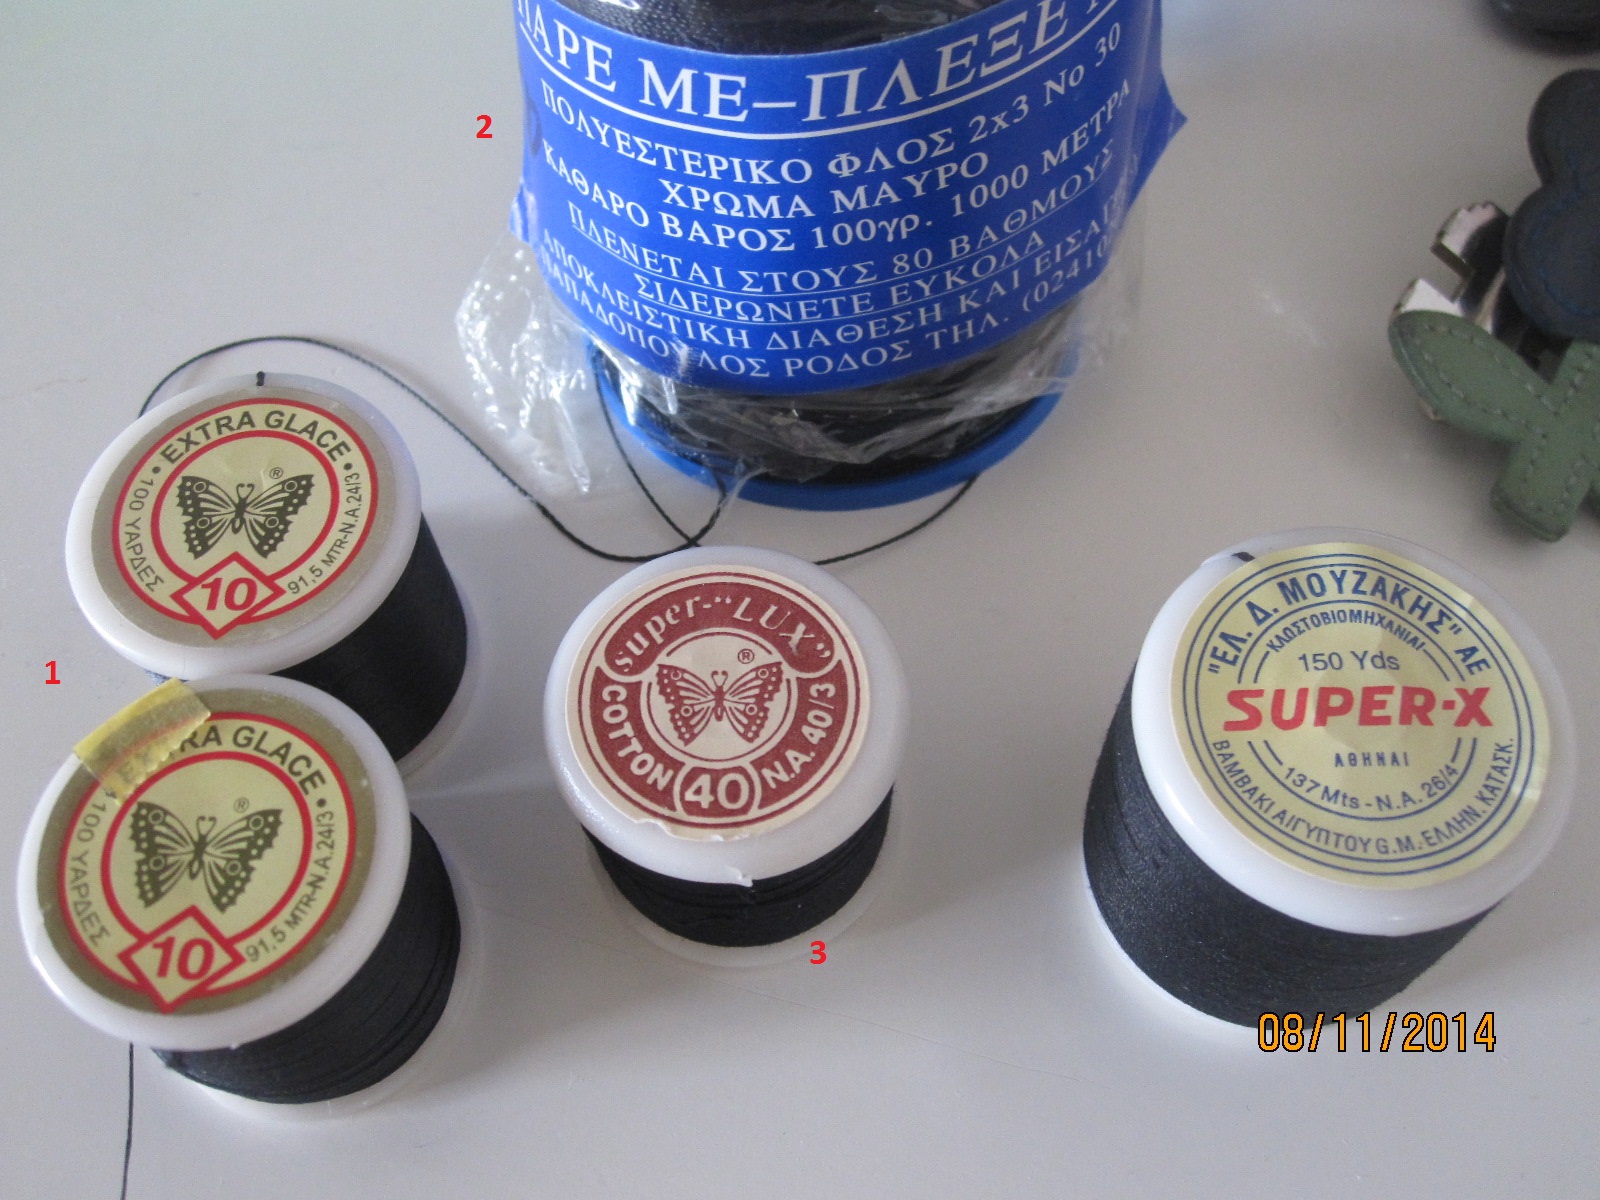
A photo shot showing the three different serving lines (cotton 10 on the right, polyester in the middle and cotton 40 on the left) from a distance

A close up view of the cotton 10
A close up view of the 100% polyester line
and the close up view of the cotton 40...
For the mo I really don't know which one is the best to use as my serving line....
That's for today
Thanks again.
Cheers
-
Well it's time to present you my progress according to Jim's steps and recommendations.
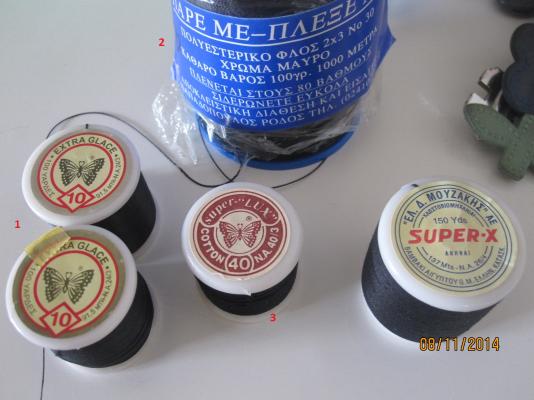
First of all the serving lines I've tested are 1) regular sewing cotton line No 10, 2) a 100% polyester line and 3) regular sewing cotton, from local stores.
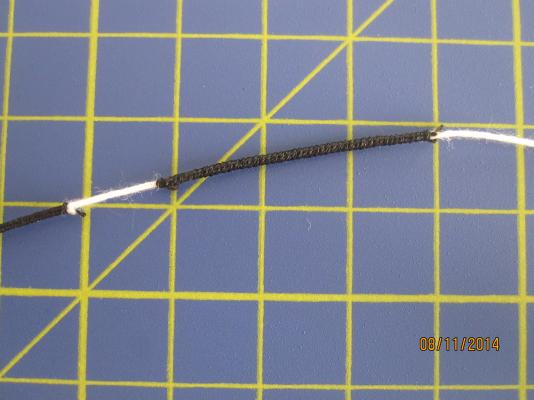
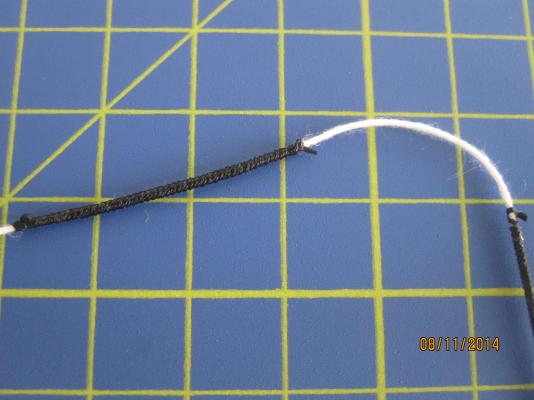
I've used a simple white [for contrast] main rope to serve
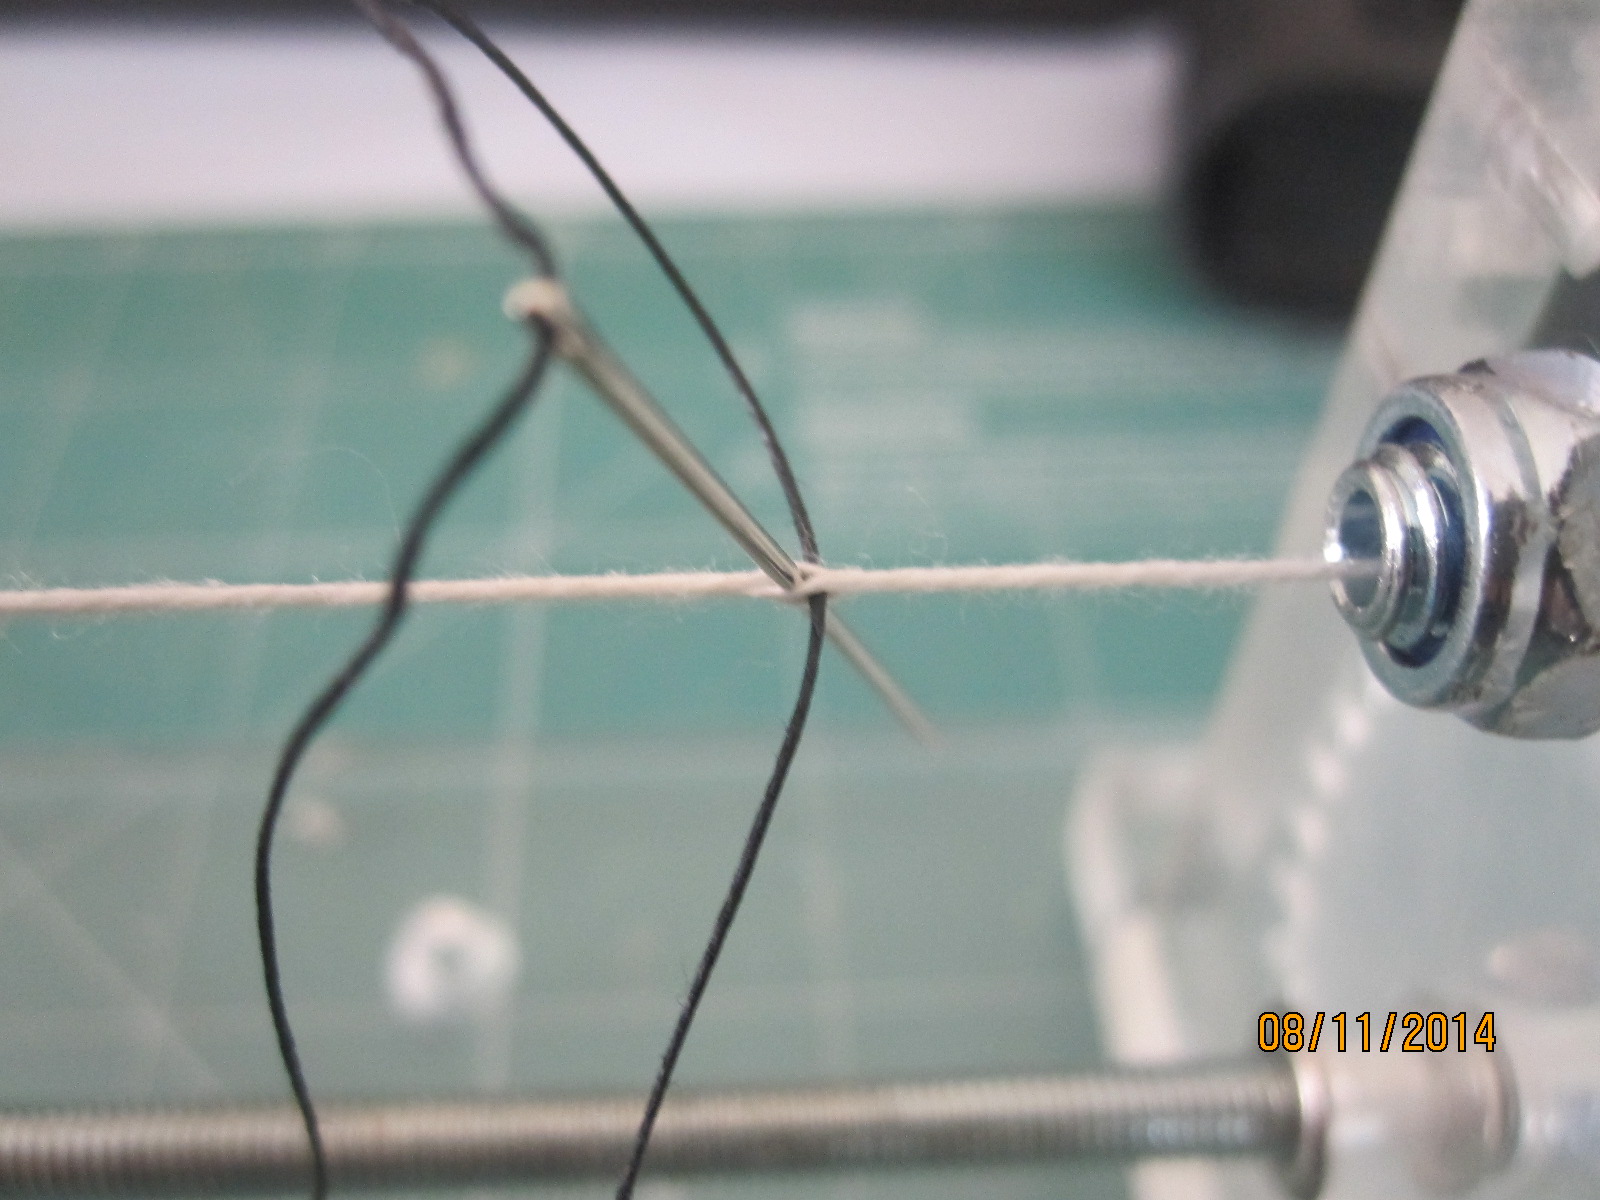
The first passing of the serving line
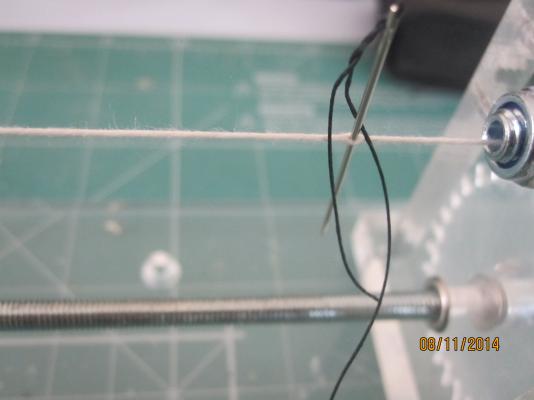
and the following second passing of the needle at 90 degrees compared to the 1st one

Here is the serving line after the 2nd passing and

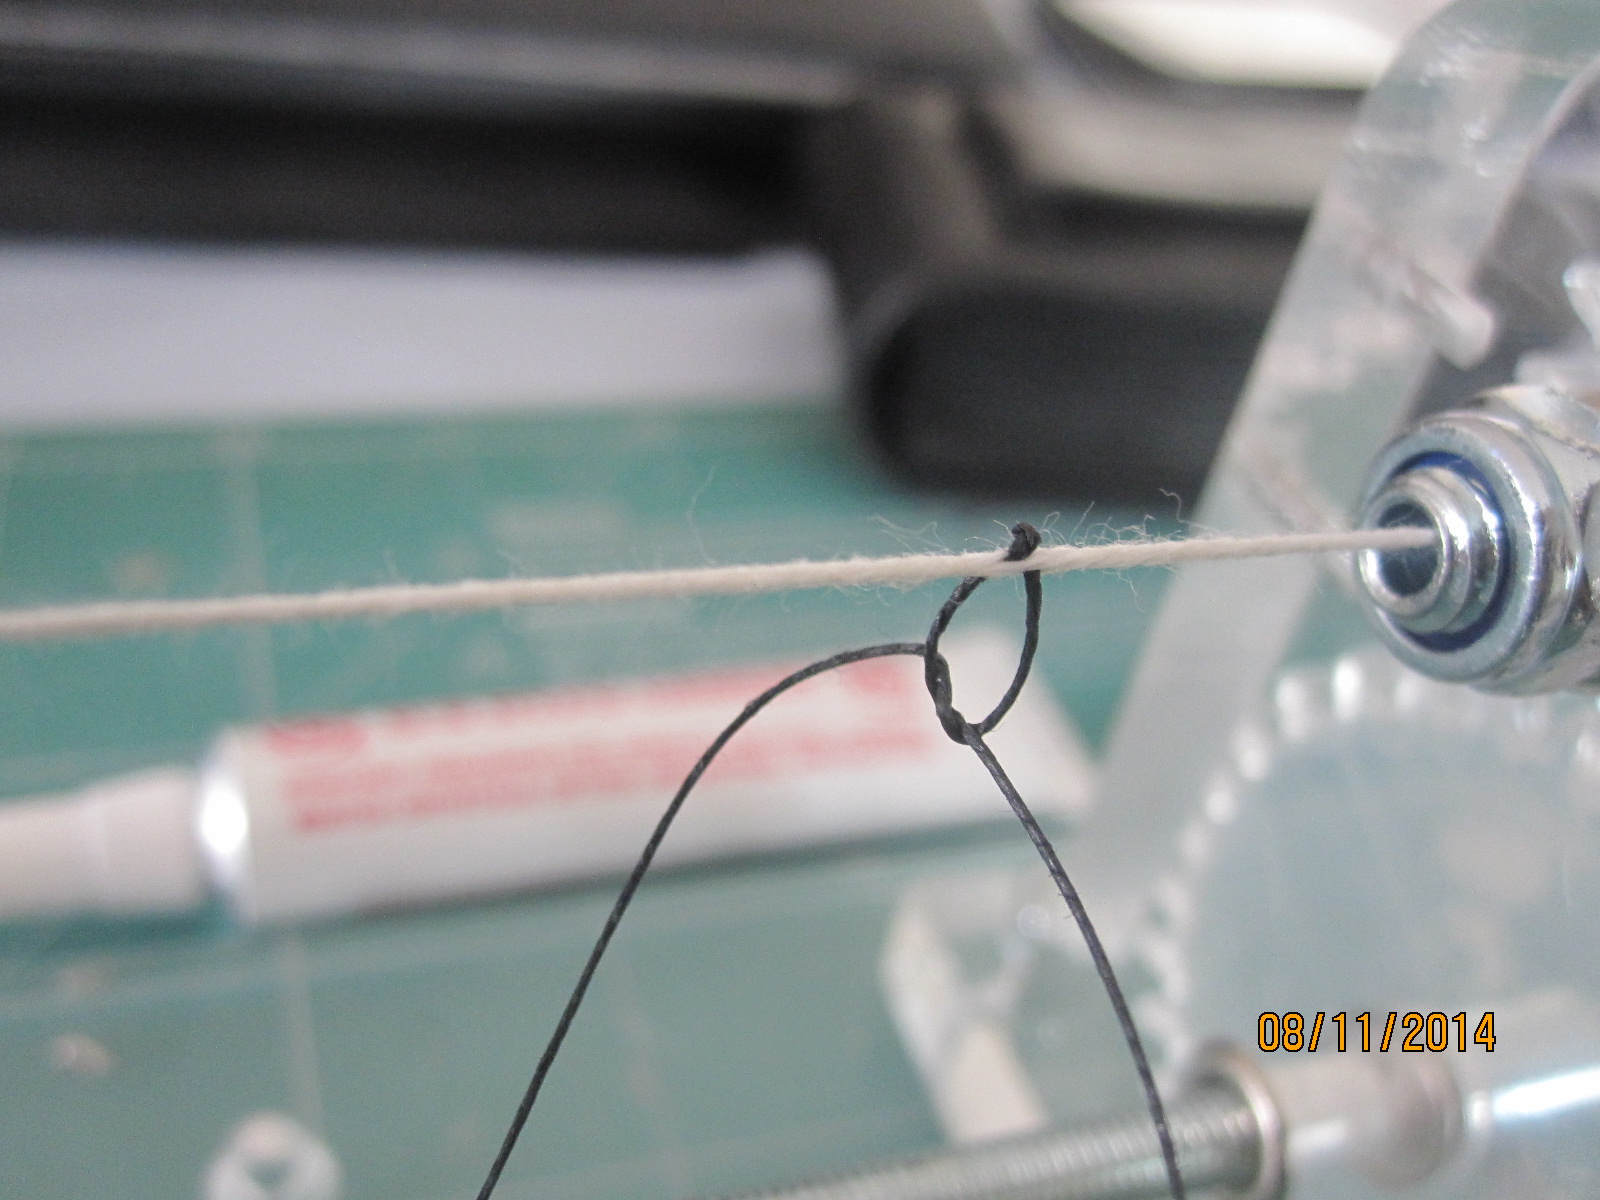
a simple knot is ready to follow
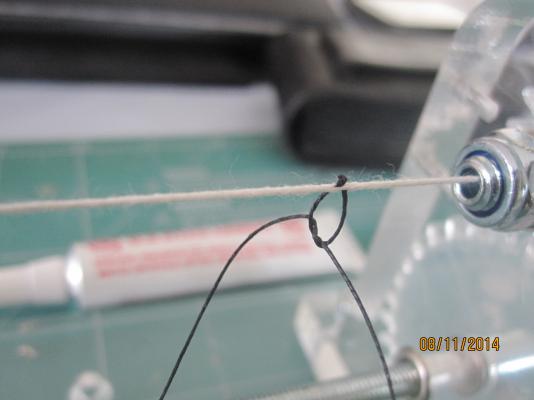
The knot is then tightened
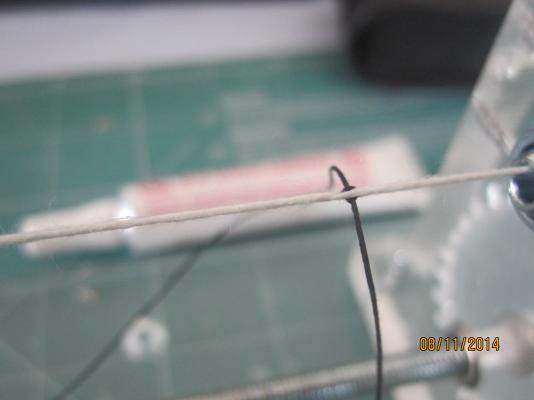
and the free adge of the serving line trimmed with a spot of undiluted pva

...which is slightly pressed against the knot, before the starting of the serving
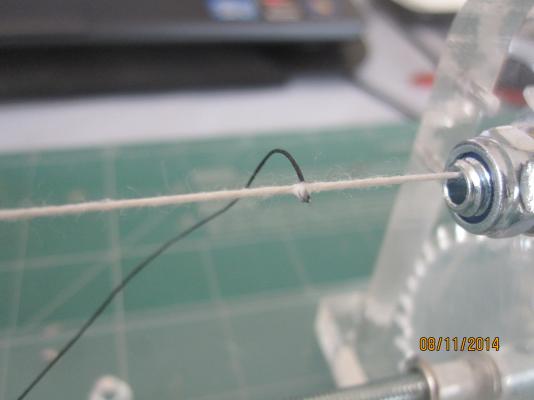
... to be continued.....
-
gia sou ksana Stergie
pantos prohoras arketa grigora. to log sou fenete oti parakolouthite apo arketous pou sou dinoun ke arketes simvoules.#
kali sinehia ke kali doulia

Costa se efxaristo
to grigora einai poli sxetiko....
Ena apo ta pleonektimata ton mi Ellinon einai oti efkola kai aploxera sou metadisoun ti gnosi kai tis simvoules tous.
Kali sinexeia!
-
Thank you again Jim!
I'm "practising" myshelf all the time this Saturday.
I'm about to show you my progress following Jim's recommendation to serving.
Photos to follow later.
-
Hi Stergios
I used the rope diameters as stated in the plans. To do the actual serving my current method is as follows:
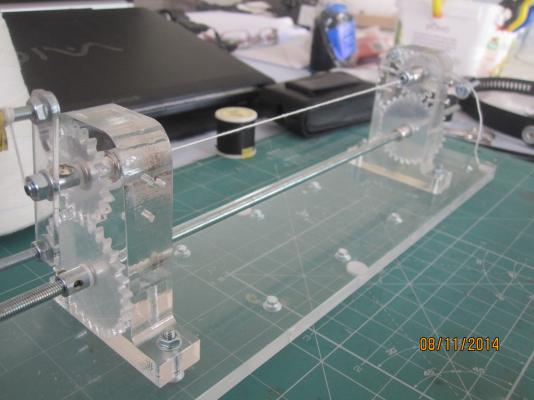
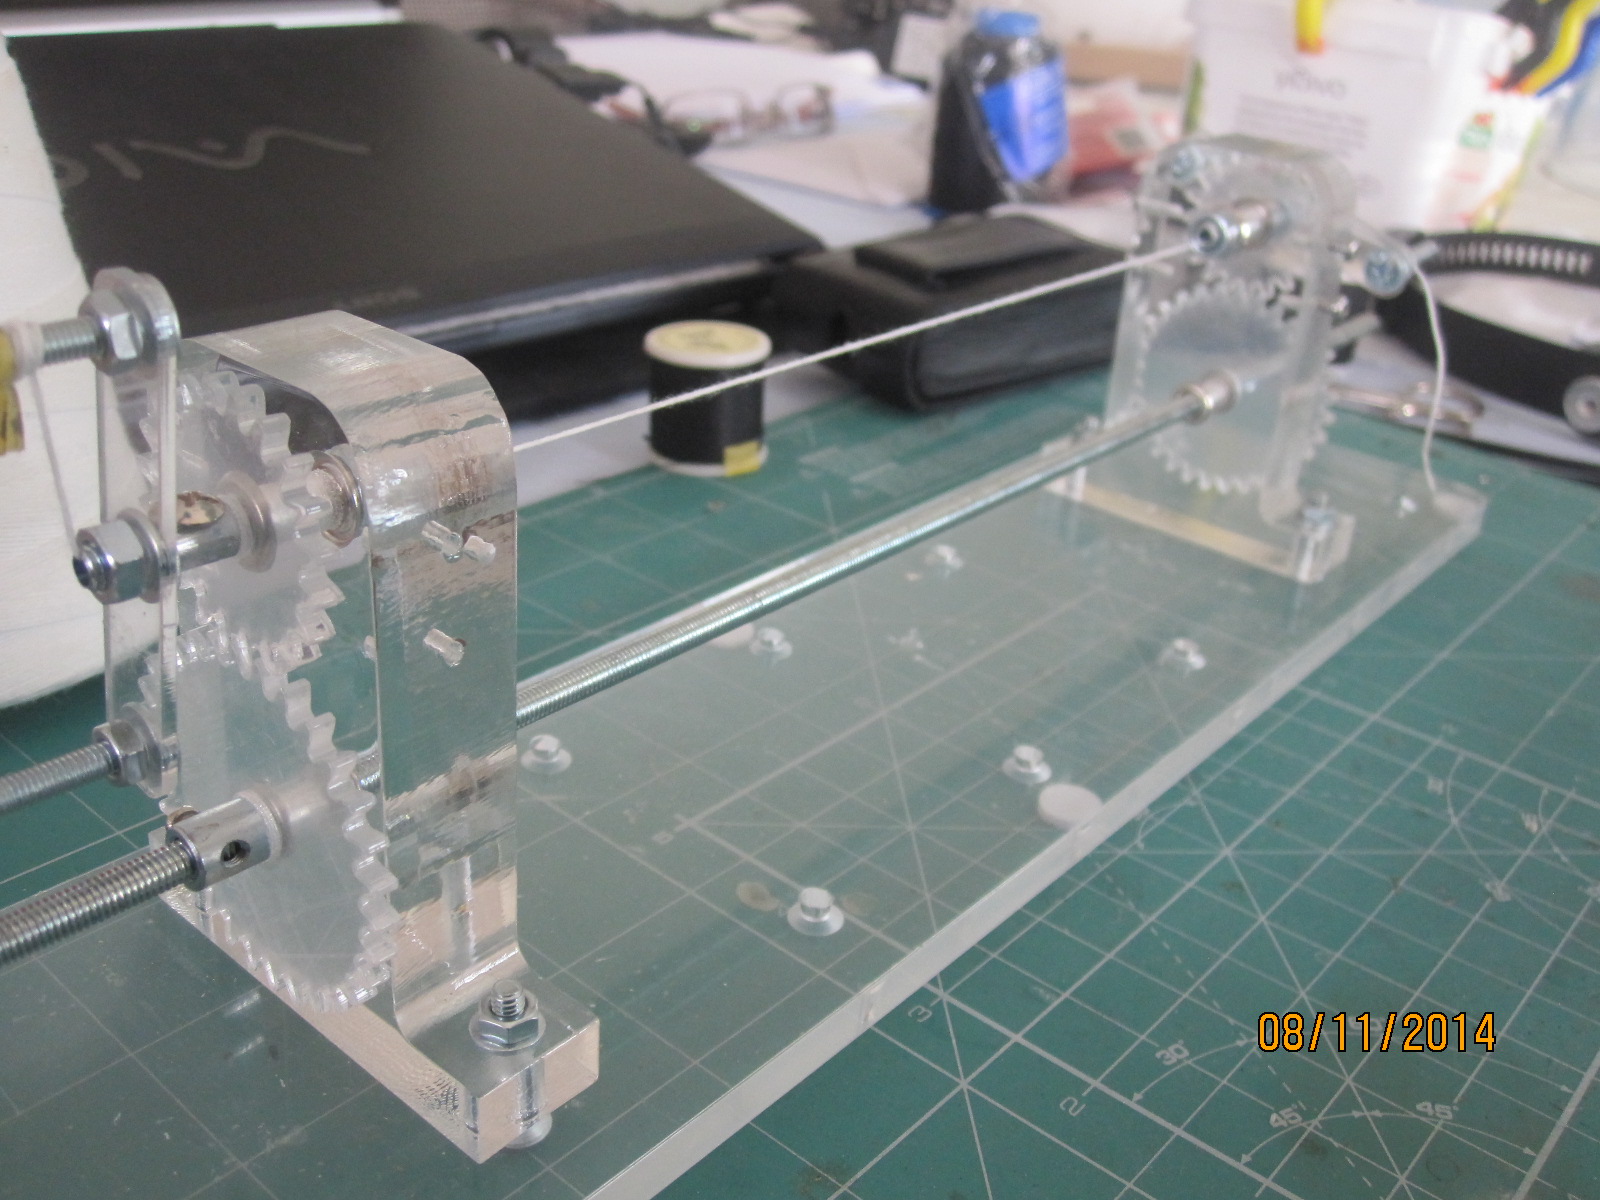
Attached the line to be served to the serving machine having confirmed the length to be served.
Pass a sewing needle through the line at the start point and leave it in the line. Thread the serving line into needle and pull through. Keeping needle threaded, pass it through the same point gain at 90 degrees to first pass.
Knot the lines with a basic knot and dab a little watered PVA on the knot. This will hold fast and you can start serving immediately before PVA dries.
I use my right hand to turn the serving machine and my left hand to hold the serving thread. I use my index finger and thumb to hold the line keeping it slightly taut and slightly ahead of the serve, whilst allowing line to pass through as the serving takes place.
Once at the finishing point you have to be careful. Pass a needle through (still holding serving line in left hand!) at the ending point. Thread the end of serving line through keeping taut. Pull needle though twice as before. Line will now be held. Knot and glue with watered PVA.
I will post some pictures later if that helps.
Jim, do you use any pva glue or something to make the serving more secure around the main rope?
Thank you.
-
You mean the rope that you are doing the serving on? That rope should be the standard rigging - so if you are serving the top of your shrouds for example, you would use the regular rigging supplied (or something like Chuck's rope if you are replacing the kit rope) and then 'serve' that line with thread or very small rope, much like you would seize the normal rigging with thread.
Since the served rigging is typically not served for the entire length (with some exceptions), it wouldn't work to use a thin thread as you would then need to somehow attach the thicker rope for the non-served part. The served part should appear thicker anyway, since it's been wrapped with another smaller rope.
Back to shrouds as an example, most shrouds were served where they go over the masthead (I think that's what it's called. At the top of the shroud in any case) for a short distance, but were not served from there down to the dead eye. The exception is the trailing shroud where it might be exposed to sails which is often fully served, but even in that case, you would use the full sized shroud line and serve it.
I've concluded to buy new ropes (to make the serving on) from local sewing stores. I can find better material than those of the kit or those from the cornwall model boats. All I need is to have the same diameter, as the plan indicates.
-
Hi Stergios
I used the rope diameters as stated in the plans. To do the actual serving my current method is as follows:
Attached the line to be served to the serving machine having confirmed the length to be served.
Pass a sewing needle through the line at the start point and leave it in the line. Thread the serving line into needle and pull through. Keeping needle threaded, pass it through the same point gain at 90 degrees to first pass.
Knot the lines with a basic knot and dab a little watered PVA on the knot. This will hold fast and you can start serving immediately before PVA dries.
I use my right hand to turn the serving machine and my left hand to hold the serving thread. I use my index finger and thumb to hold the line keeping it slightly taut and slightly ahead of the serve, whilst allowing line to pass through as the serving takes place.
Once at the finishing point you have to be careful. Pass a needle through (still holding serving line in left hand!) at the ending point. Thread the end of serving line through keeping taut. Pull needle though twice as before. Line will now be held. Knot and glue with watered PVA.
I will post some pictures later if that helps.
Jim thank you again
Now, I think I've understood clearly.
In case of need I'll recall!
-
Brian, Mort and Jim
thank you so much mates for the continuous support and your time to typing!
-
I've never done serving (yet), but everything I've read indicates that it is done with a much smaller rope or thread around the larger rope.
Watch the video from the Alexey on Youtube - http://youtu.be/o5gZQRN6yoU?t=7m22s
You can see in the video how he uses what appears to me to be thread, or possibly very fine rope.
Hi Brian and thank you for stopping by
I have well understood the basic options for the serving line.
My concern for the moment is the main (served, larger) rope and whether should I use the original from the kit or regular sewing rope from the stores...
Cheers.
Stergios
-
Where are you all, guys ??

-
Thanks again Alexey, I'll show you asap.
A lot of questions before my first attempts to serving, folks:
1) For the main ropes, do you serve the sames ropes (in quality, width etc) included [indicated] in [by] the kit plans or other simple threads from the local sewing stores?
2) What’s the best way to keep the serving line as tight as I can around the main rope?
Thanks in advance.
-
................ I'd also recommend you buy some GS-Hypo glue, it works really well with rigging. Dries clear and slightly flexible, works well on false splices.
Hey jason
Have you figured out the bonding strength of hypo gs glue?
It is somewhere between pva and cyano or stronger?
Thanks.


HMS Snake by drtrap - Caldercraft
in - Kit build logs for subjects built from 1751 - 1800
Posted · Edited by Stergios
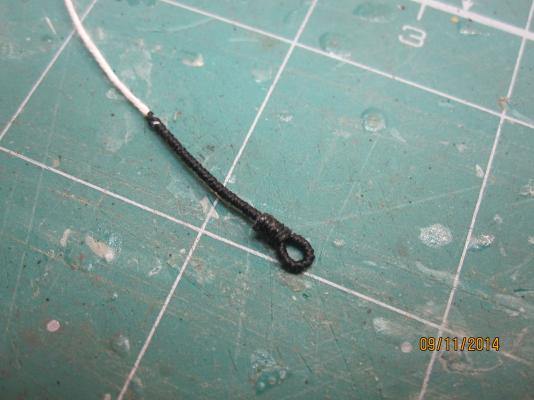
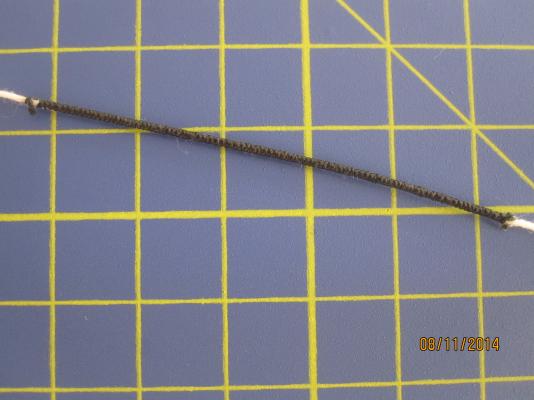
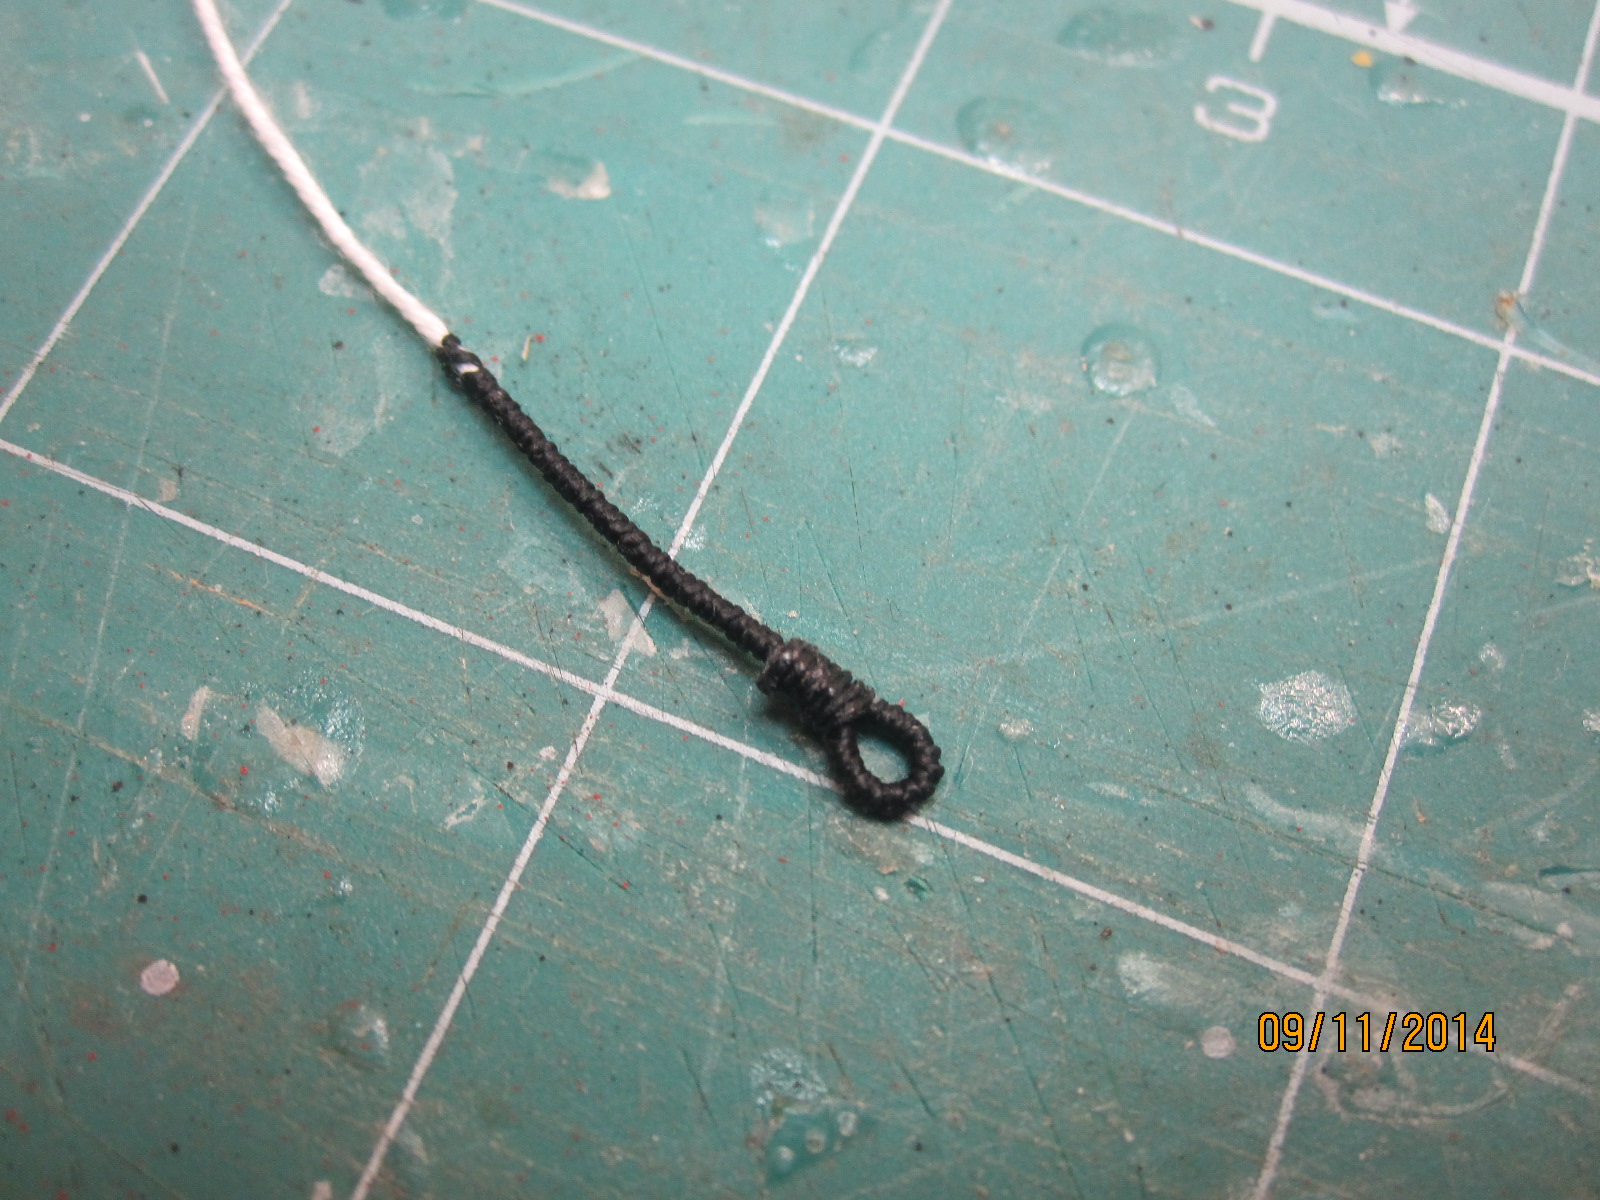
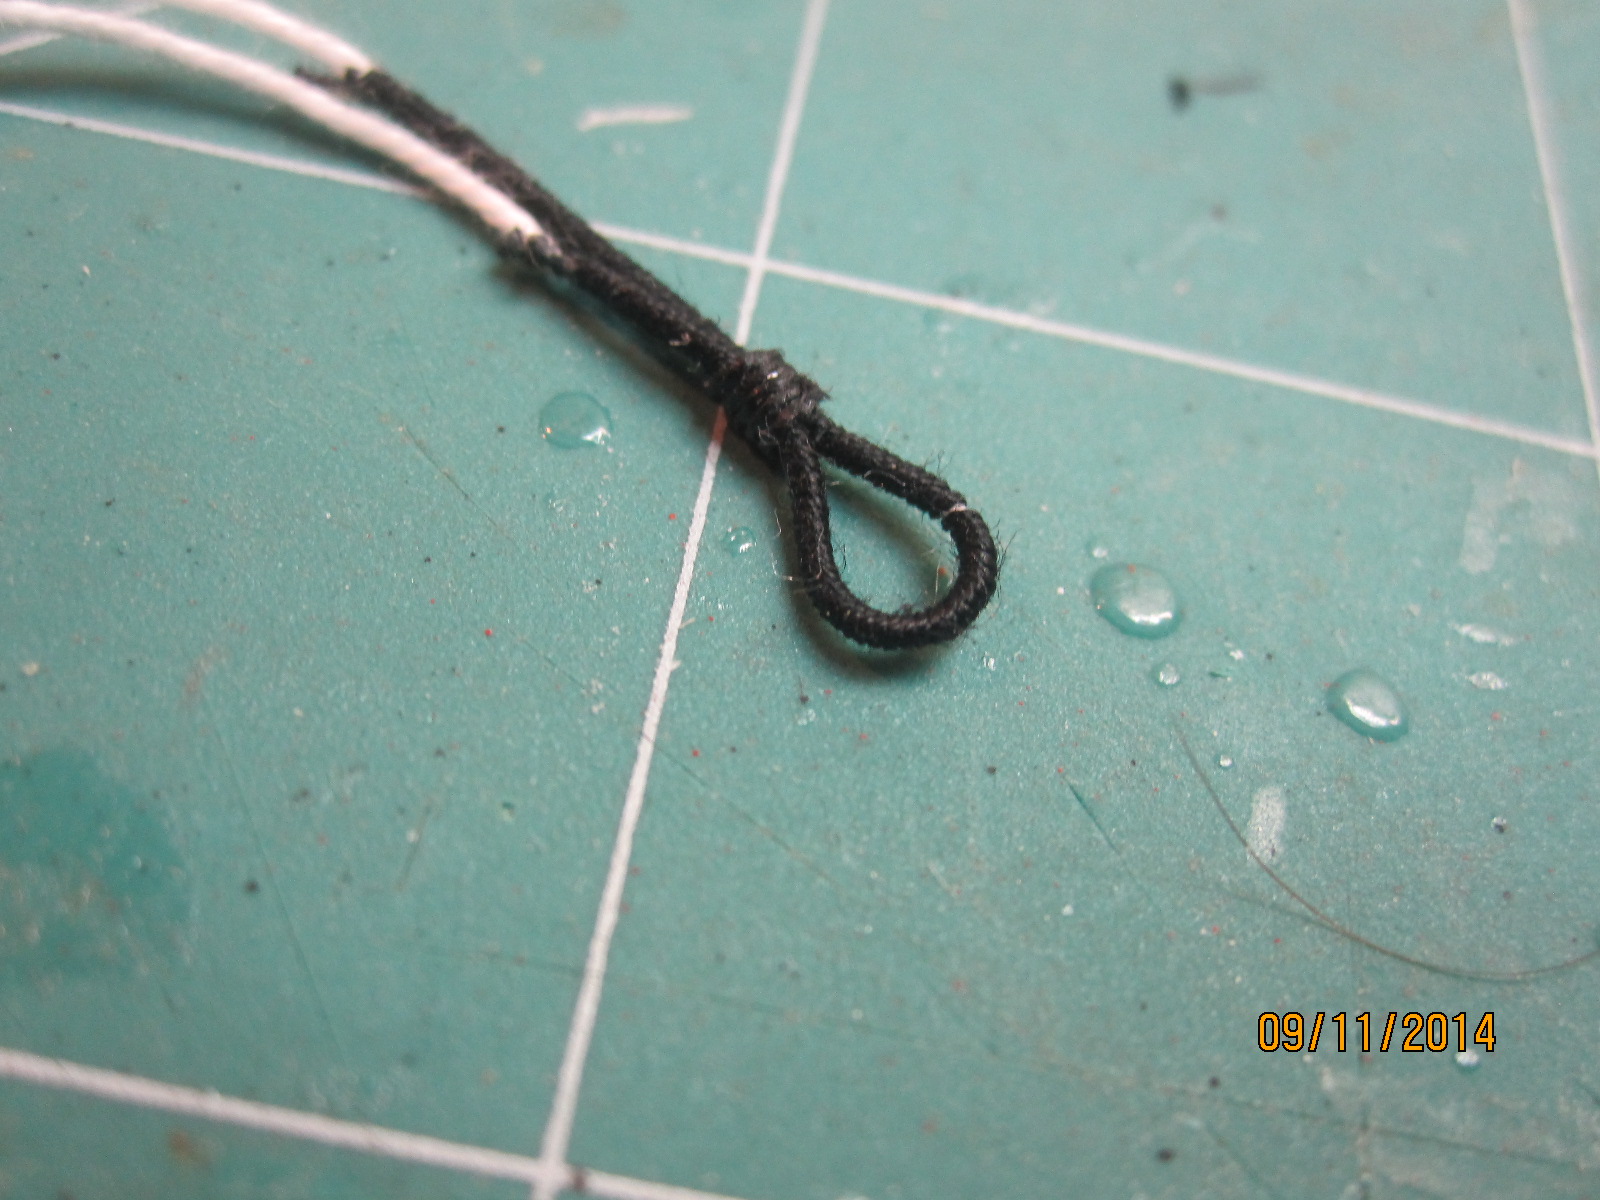
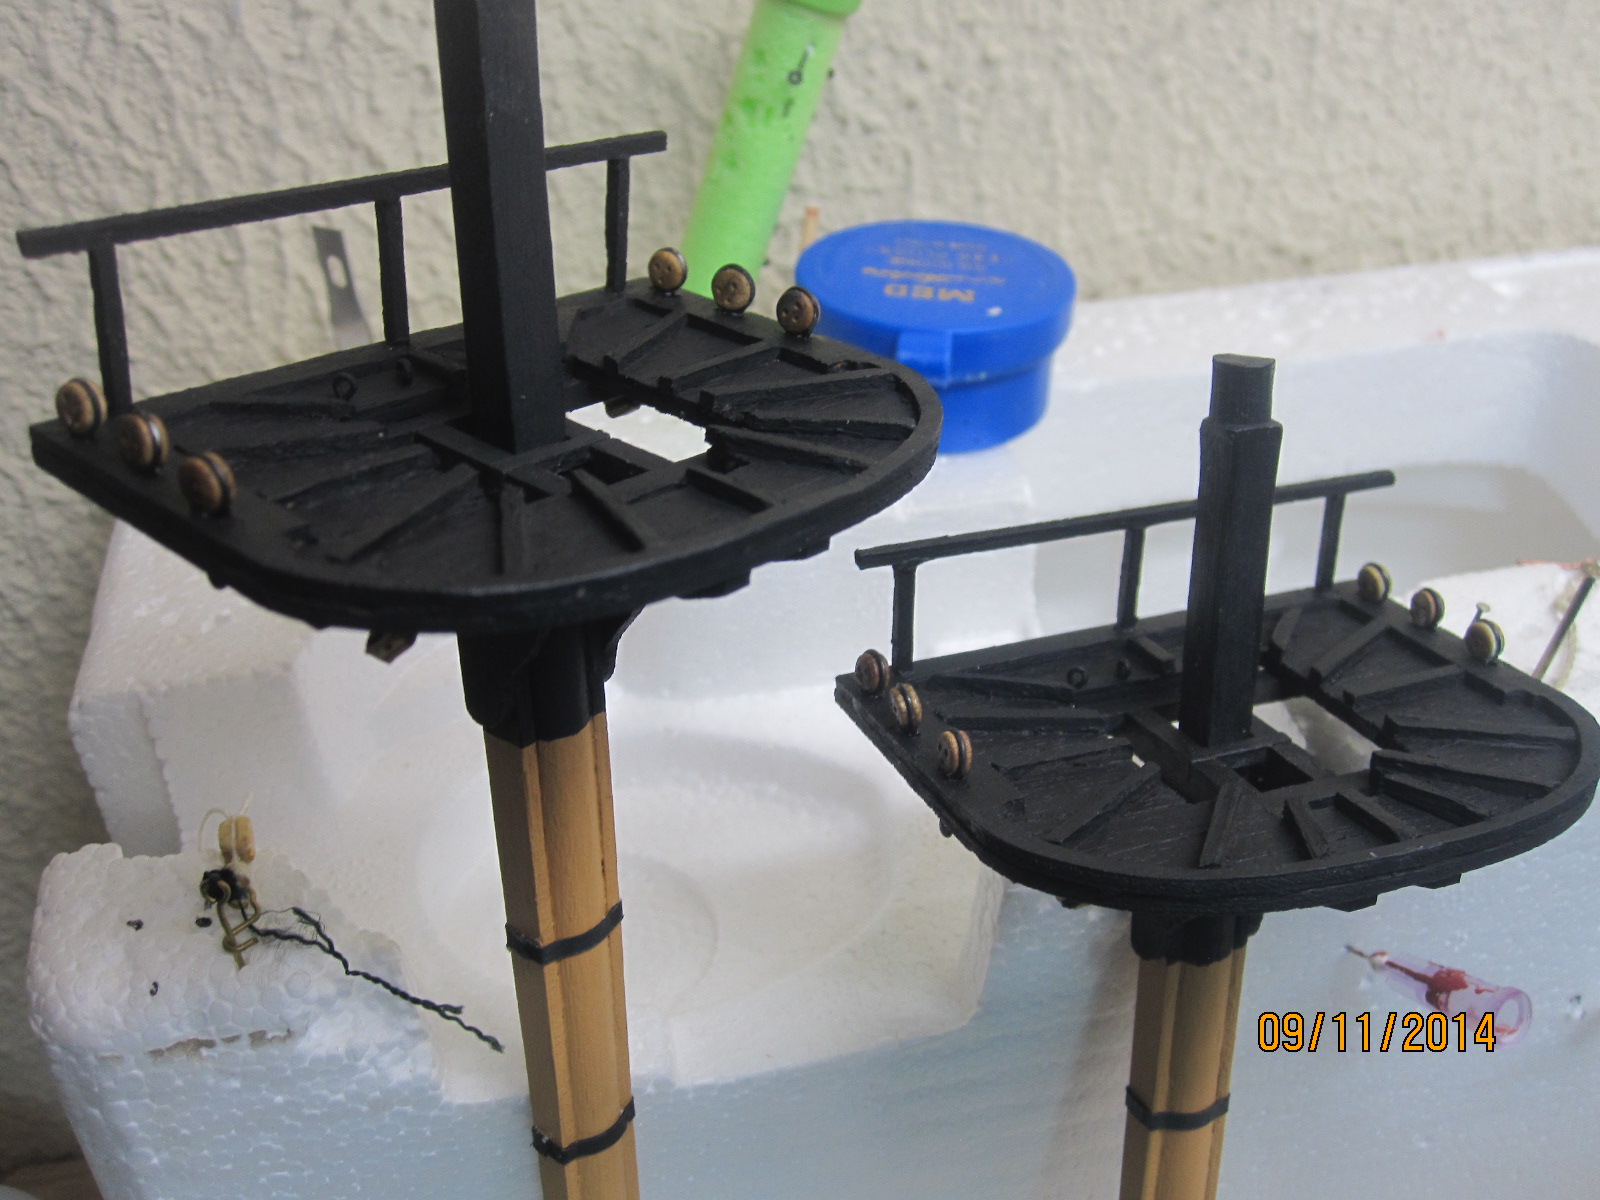
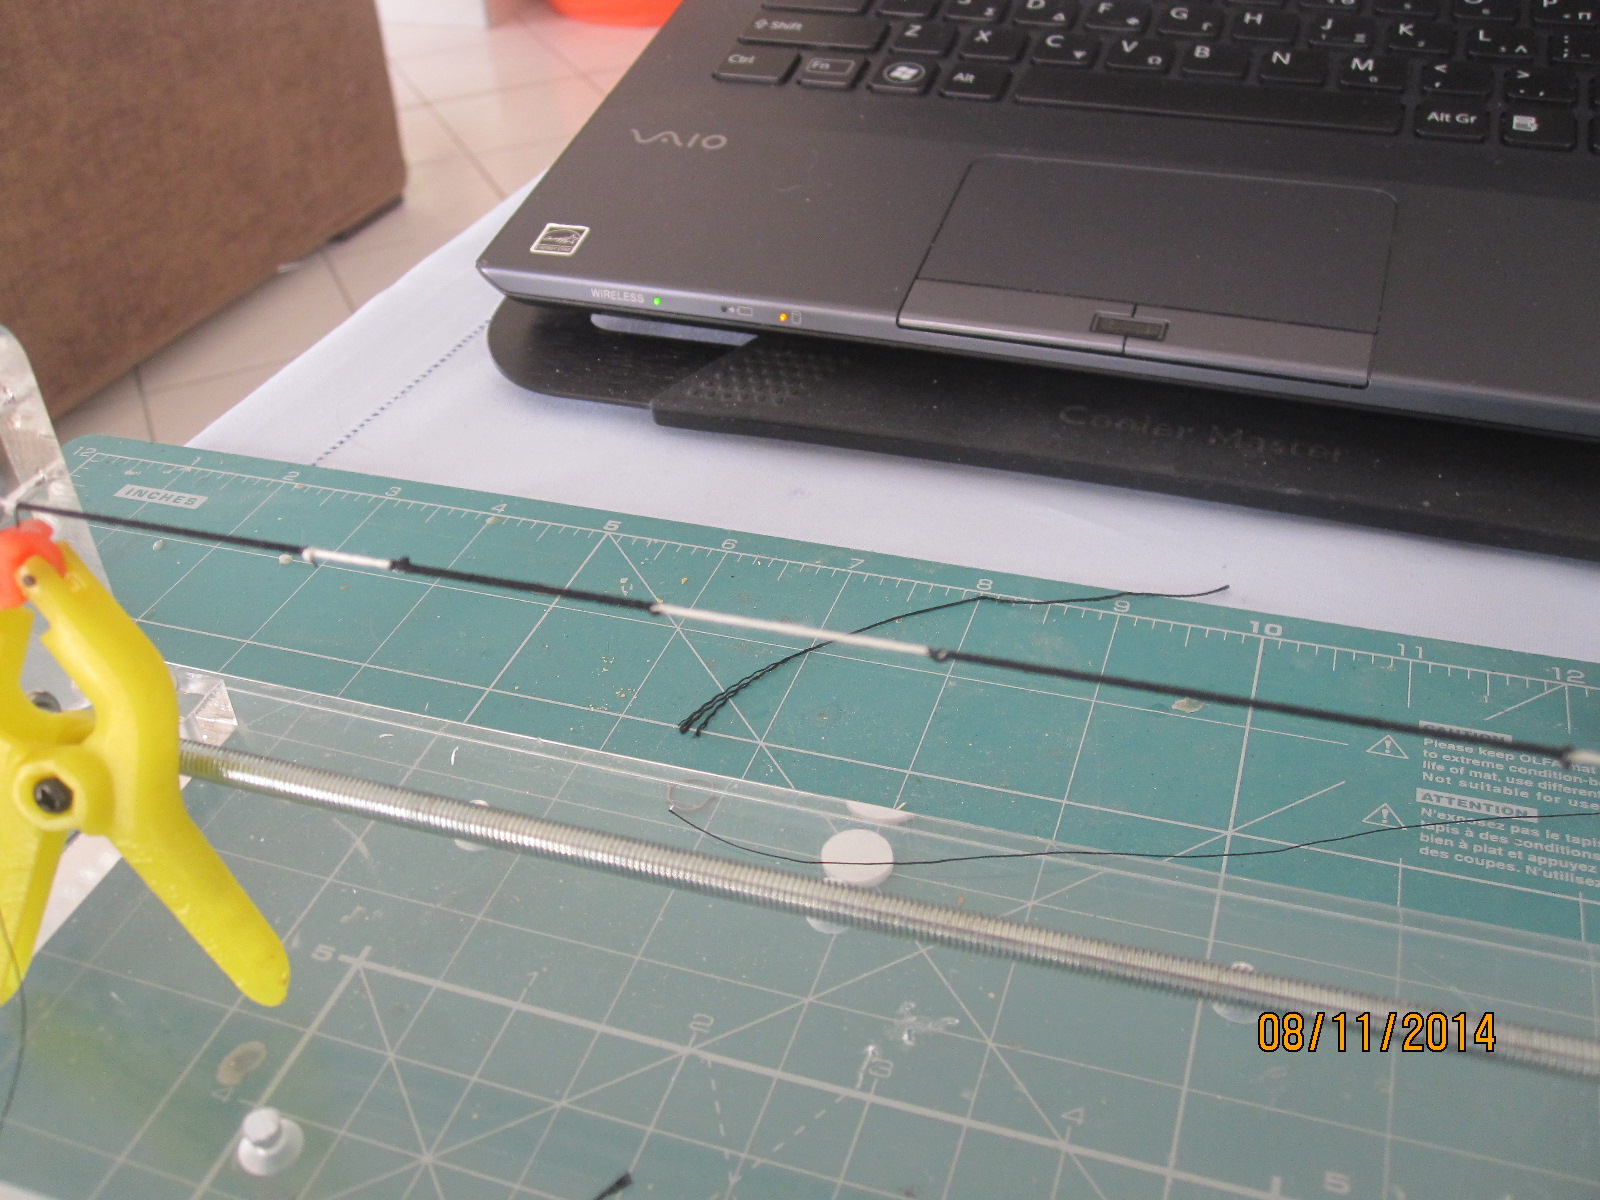
I had served (before your last posts) enough 1mm rope to create served burton pendants for the mizzen mast of the Snake.
My plan was to make the serving of a desired length of rope in advance and turn/create the loops of the pendants at a later step, like Ray.
I don't know yet what's the easiest way for the loops.