HOLIDAY DONATION DRIVE - SUPPORT MSW - DO YOUR PART TO KEEP THIS GREAT FORUM GOING!
×


fmodajr
-
Posts
868 -
Joined
-
Last visited
Content Type
Profiles
Forums
Gallery
Events
Everything posted by fmodajr
-
 Beautiful log Mark! Quick question, you and Michael mention "The Landstrom Book"Can you point me to the name of the book? Thanks, Frank
 -
Michael, Happy New Year! I hope all is well. The thickness sander I have is from a company called "Ship Ahoy Models and Miniatures" Website is www.shipahoymodels.com It was started by a good friend of mine (and a former employee of mine for many years) Bob Prezioso. I bought his 6" thickness sander and it works beautifully. Well built. I also own the disk sander with the tilting table and the seizing and serving tool. You can look at everything at his Web site. Hopefully I will be able to post more picts tomorrow! Frank
-
JanV and S. Coleman Thanks for the kind words! DiKri, Yes I was worried that with all the wonderful Wasa logs on this Web site, I would not have much to add! Hopefully I can. Thanks, Frank
-
Thanks for the kind words and great to meet everyone. Happy New Year to all!! Frank
-
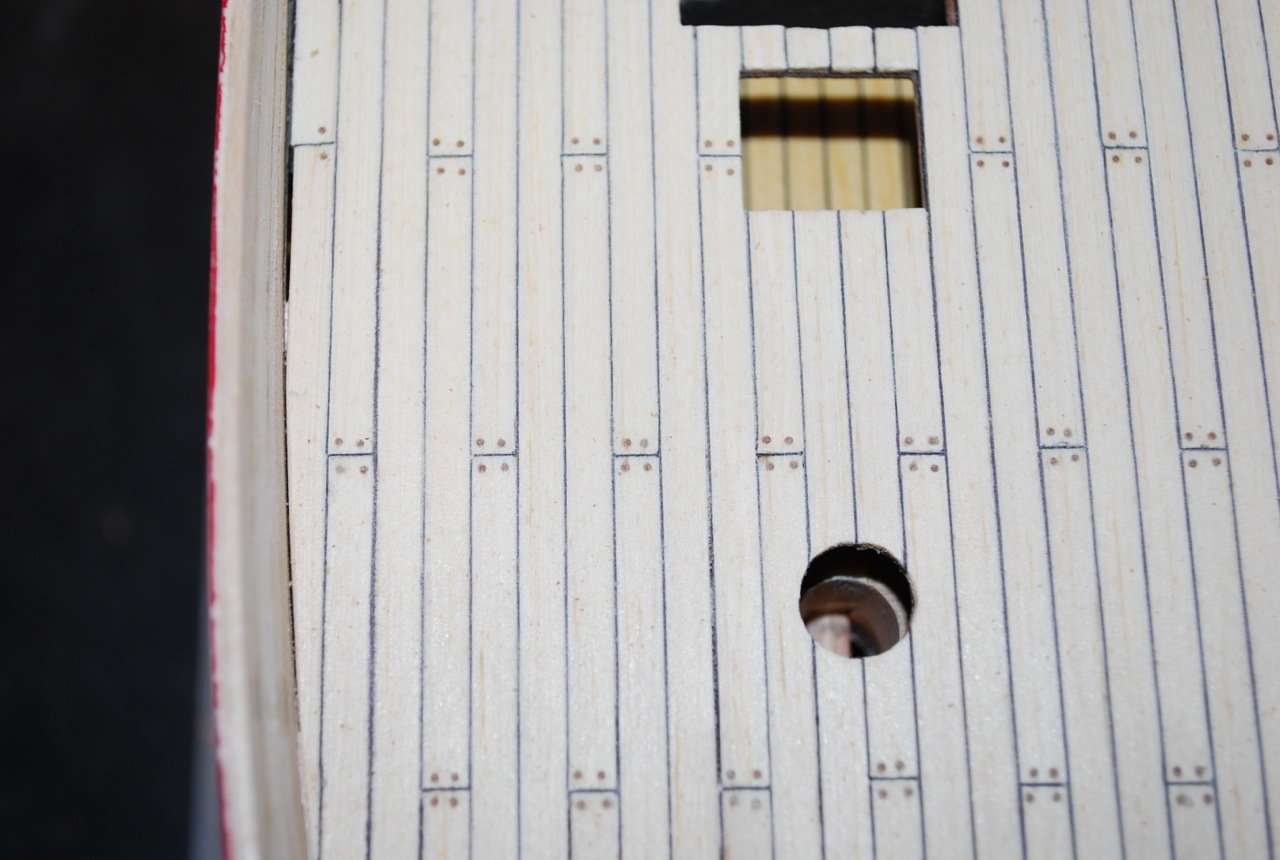
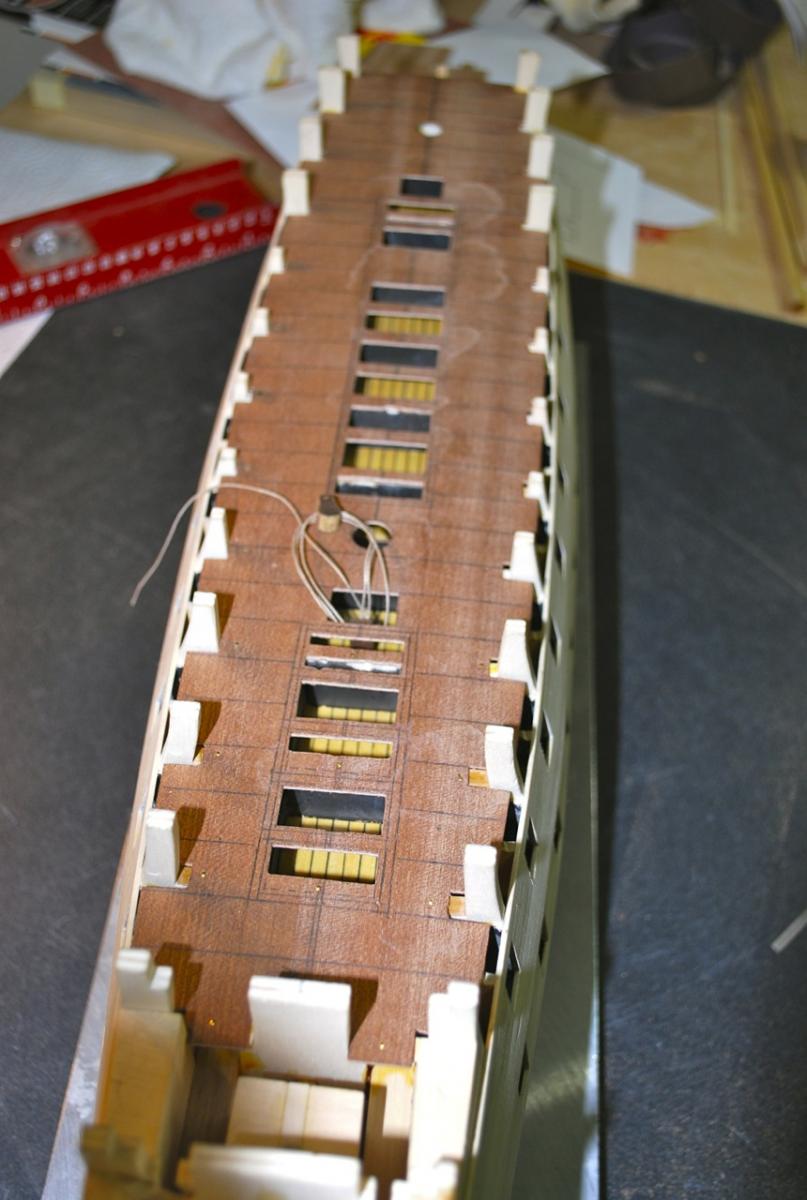
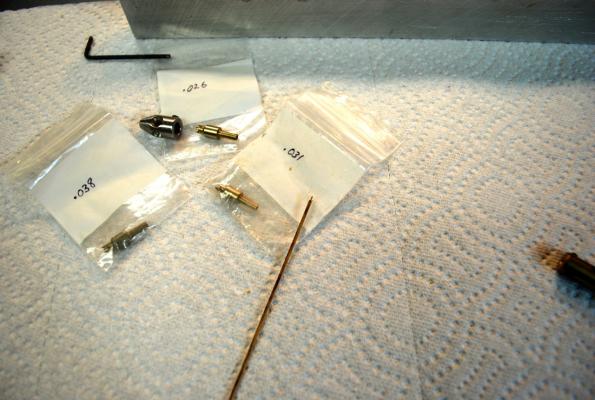
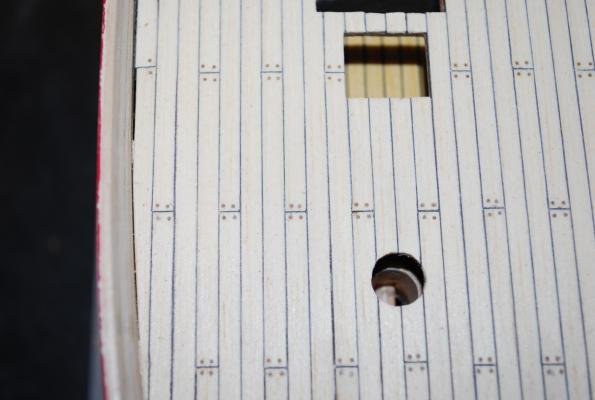
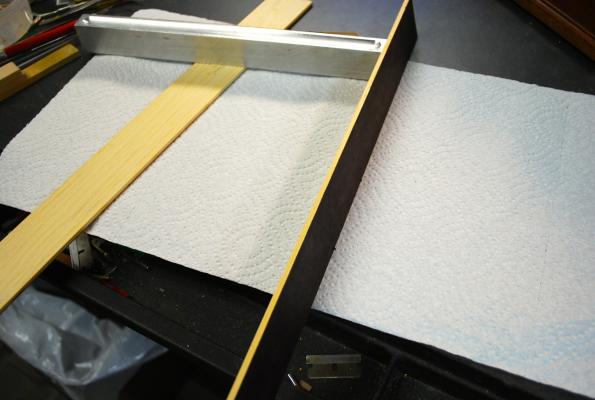
For the tree nails I used the following method: A few years ago, I bought a set of wood dowel cutters from a company in California. Vanda-Lay Industries Running Springs, CA (I don't know if they are still in business) The cutters came in 3 sizes (.026, .031, and .038 Dia.) and they attach to a cover and onto my dremel tool. I cut some walnut strips square, using my table saw, close to the dia of the cutter. (For the Wasa I used the .026 tool). When I turn on the dremel, I run the square walnut piece into the opening and it turn the end round to the correct dia. I pre-drill the planking and insert the now round walnut dowel, cut and sand flush. After final sanding, I stained the deck with a light oak finish and put a coat of Satin Poly as a sealer.

-
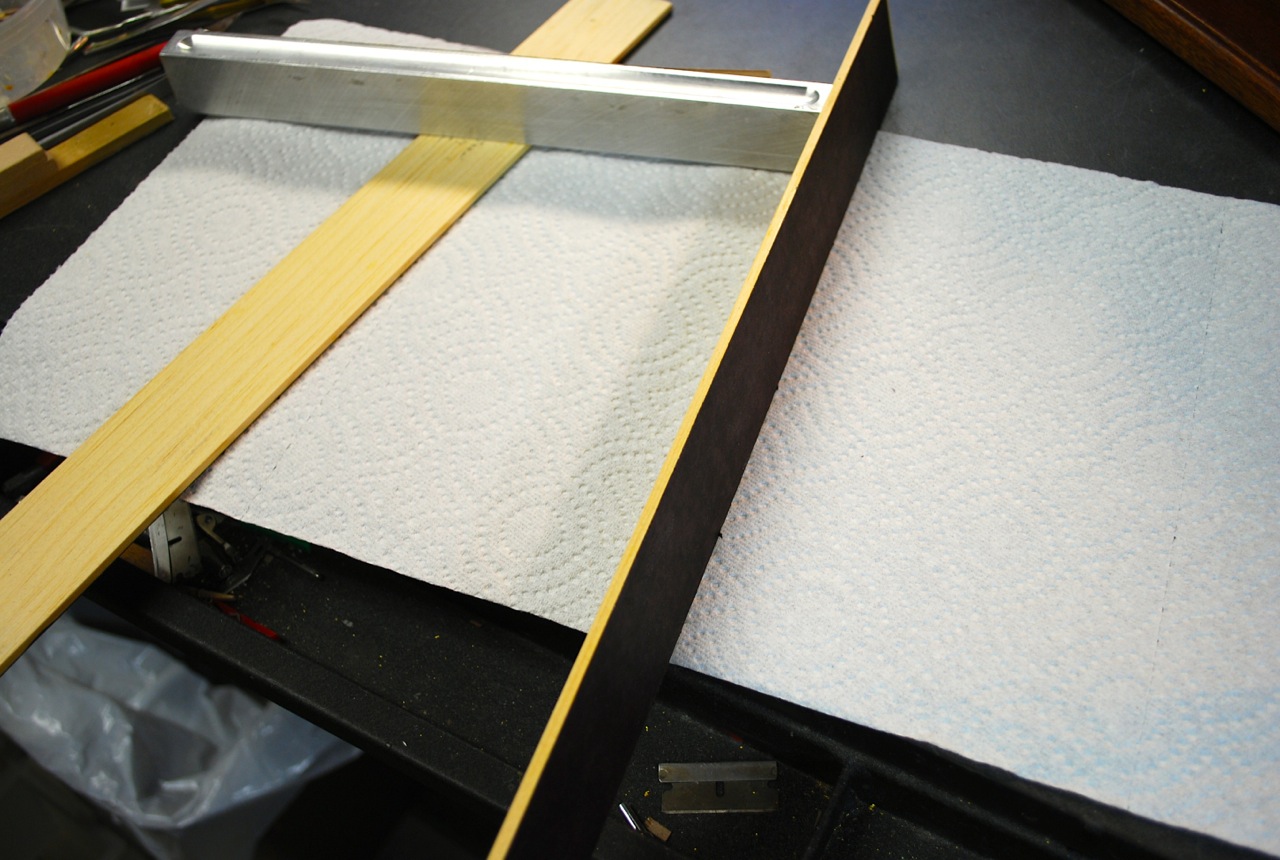
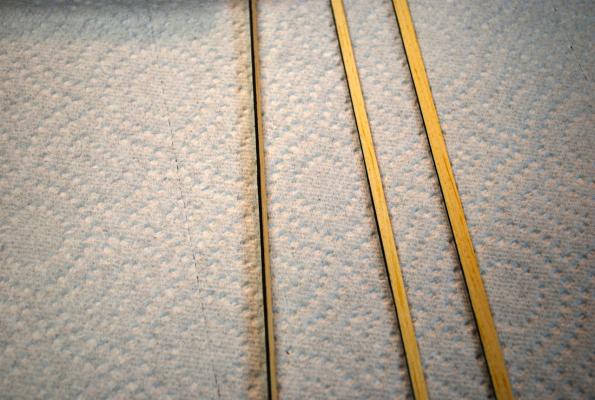
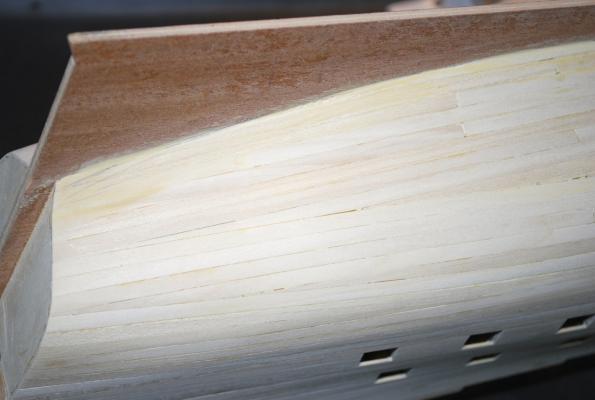
My attempt at the decking went as follows: I found a nice piece of Eastern White Pine at the local lumber yard. I cut it down into 2 to 3" wide strips (So it would fit into my thickness sander). Once I determined the width my planks would be, I ran the strips through the thickness sander and made the thickness the dimension for the width of the plank. Then, using flat black construction paper, I glued the paper onto 1 side of the strips (using Elmers Rubber glue). I let it dry overnight. Now I cut the width of the strips to the thickness I wanted to have for the planks. Then I filed the corners of the plank strips. The result is planks with black paper on one side ready for laying on the deck. When laying the planks, I inserted small pieces of the black construction paper on the ends and butting up the next plank to it.
-
Michael, Great picture! Thanks for the great log postings (and advice!) this year. Best wishes for a Happy New Year! Frank
-
Ulises, If I recall correctly, it was viewing your detailed log that reminded me to add and rig the block before closing the deck!!! Thanks, Frank
-
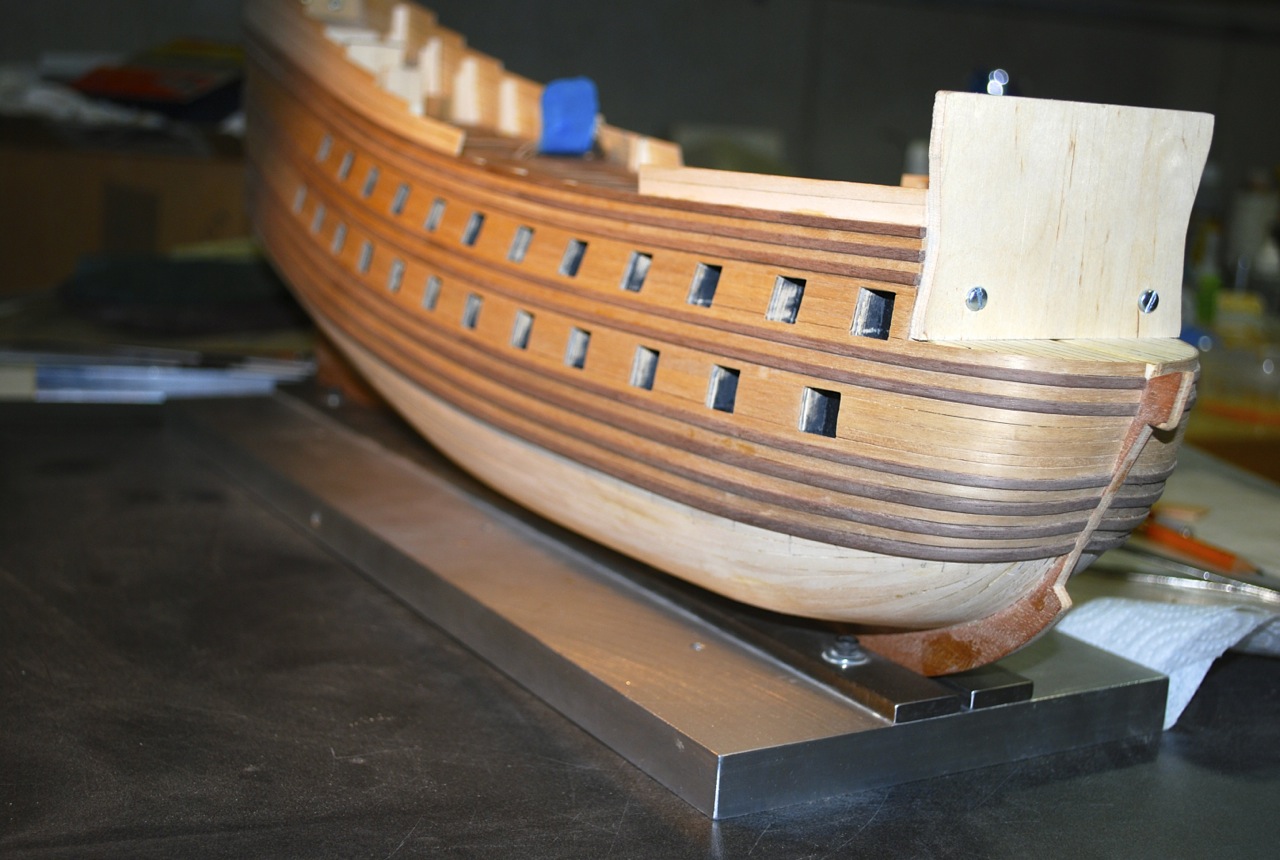
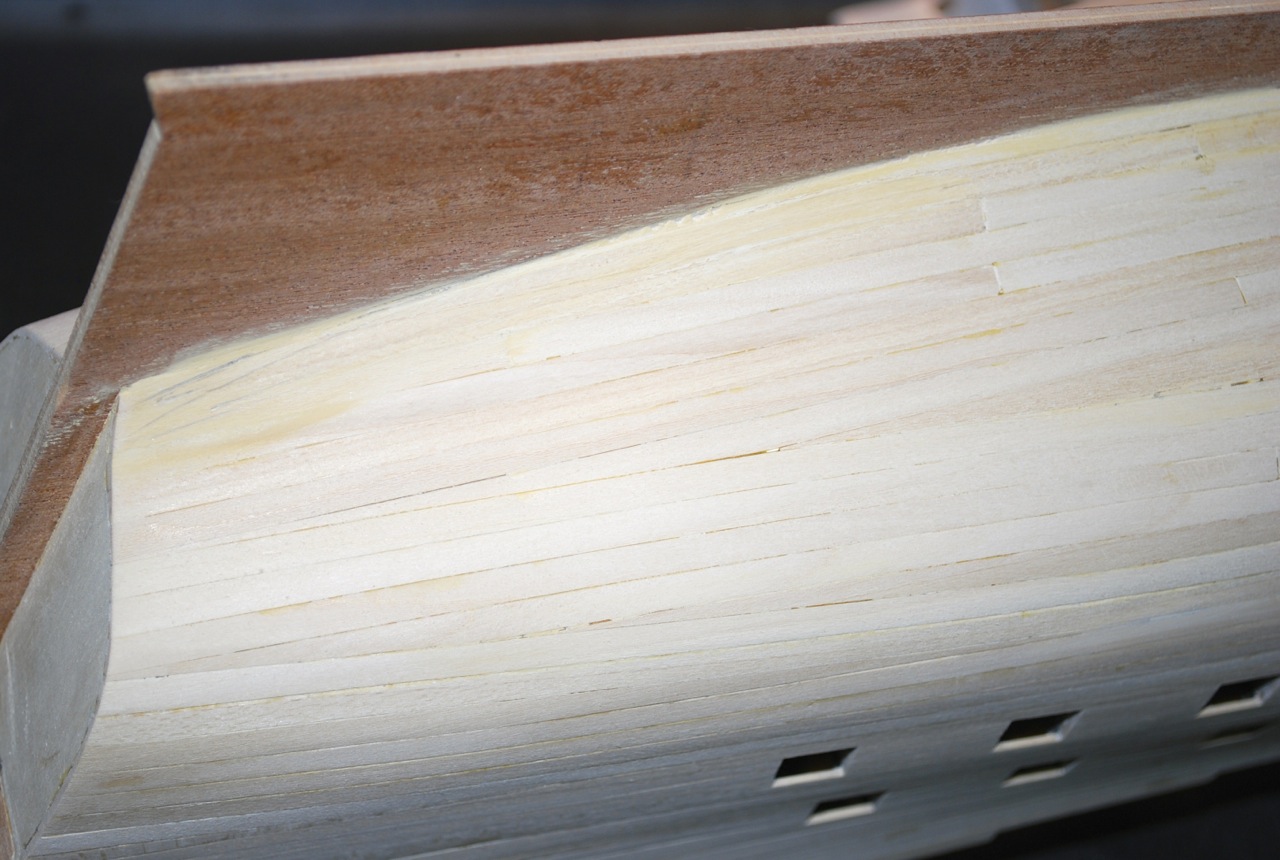
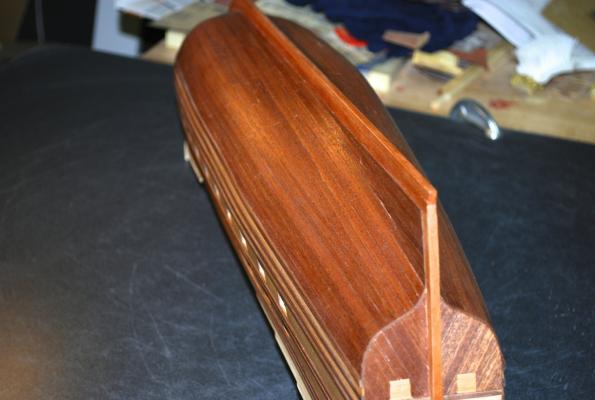
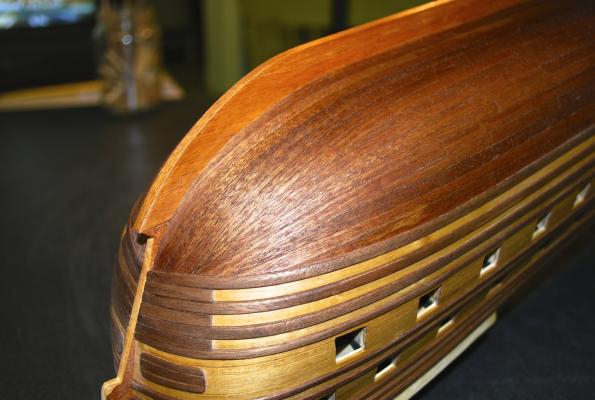
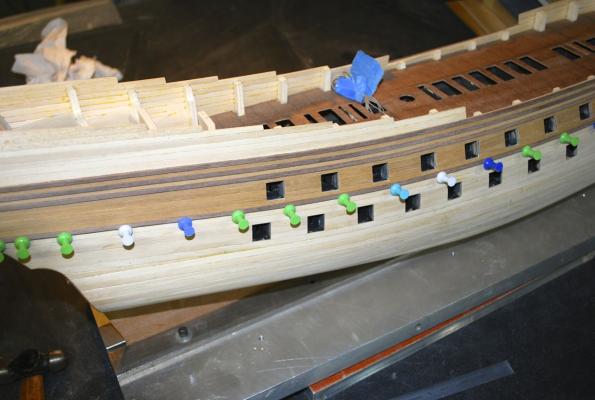
Finish planking of lower hull using mahogany strips I veneered the keel with lighter mahogany wood and then I sanded and coated the entire Hull with a satin sanding sealer Framed the gun ports and added the partial carriages Overlap the upper planks near the stern

-
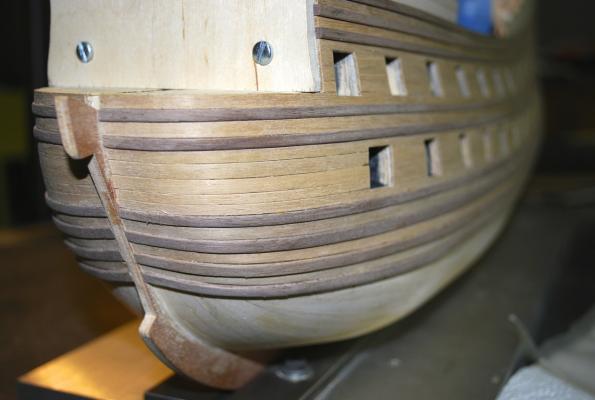
Thanks for the kind words everyone! Jeff, I bolted on a temporary piece of wood on the bow and stern so I could flip the ship over (without damaging the top) and work on the underside of the hull. (See picture above with the ship flipped over). I remove the pieces of wood later in the build.
-
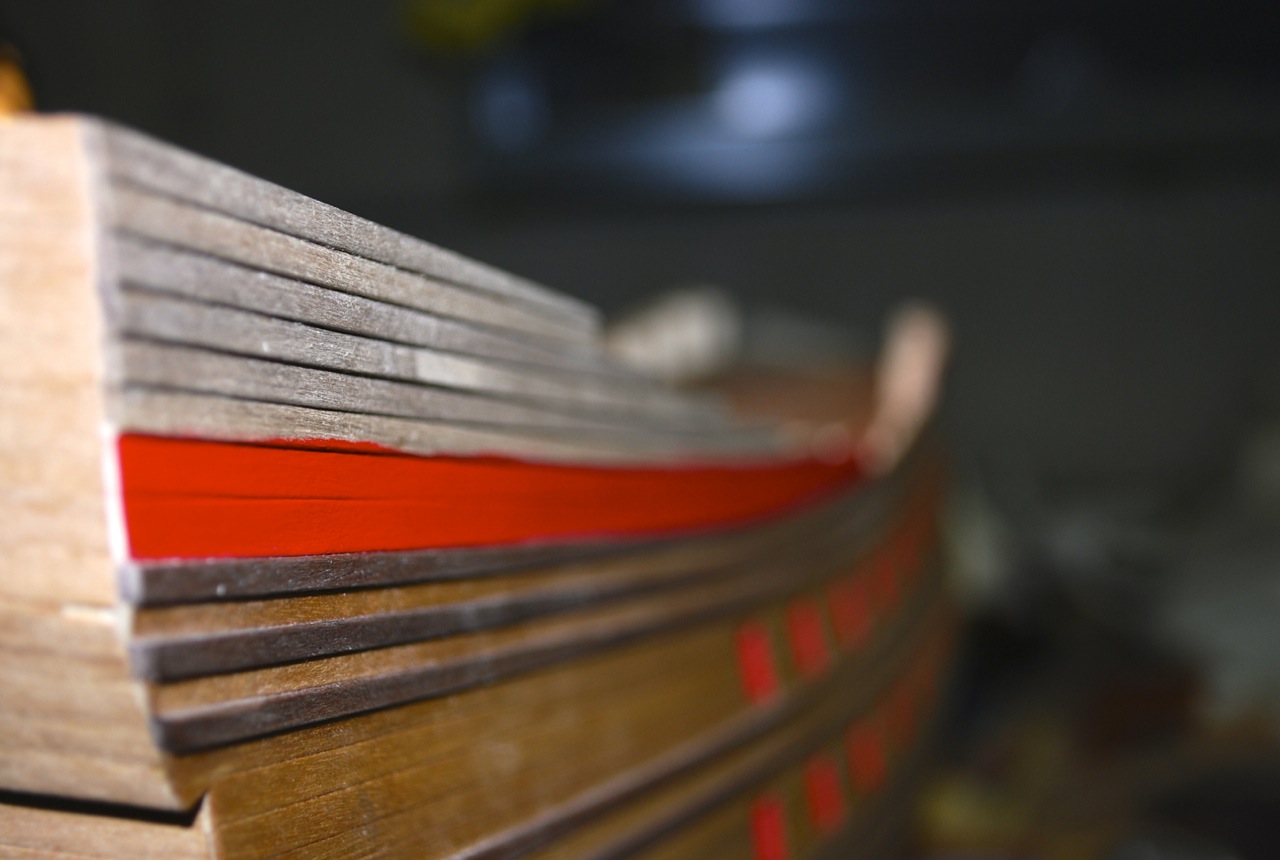
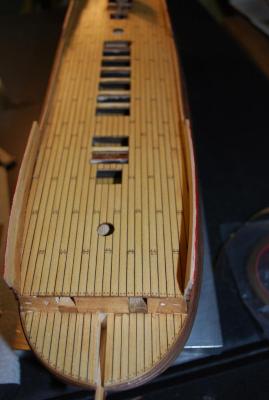
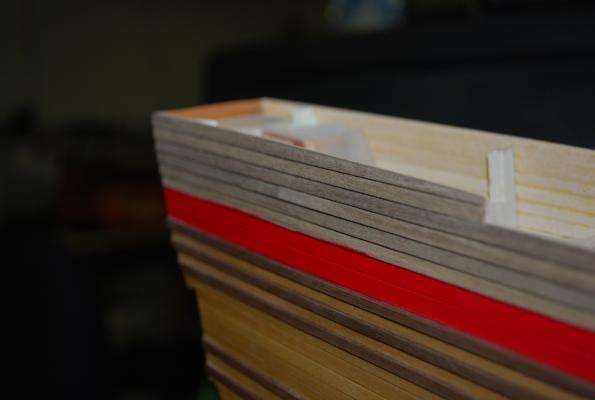
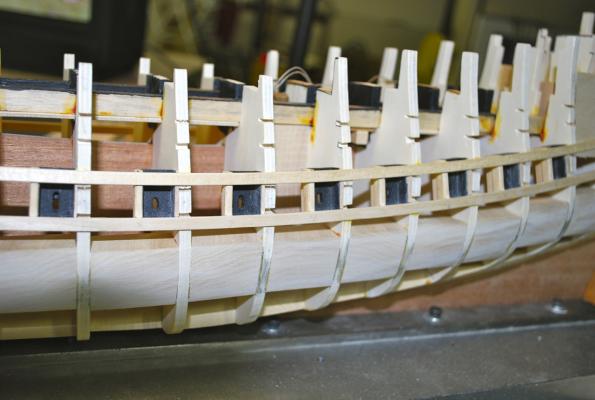
Adding the False Deck Finishing the first layer of planking For the second layer of planking I selected and cut some darker Walnut wood for contrast on the wales. I soaked the planks in a 50/50 mix of ammonia and water, then bent the planks and glued after drying.


- 493 replies
-
- 15
-

-
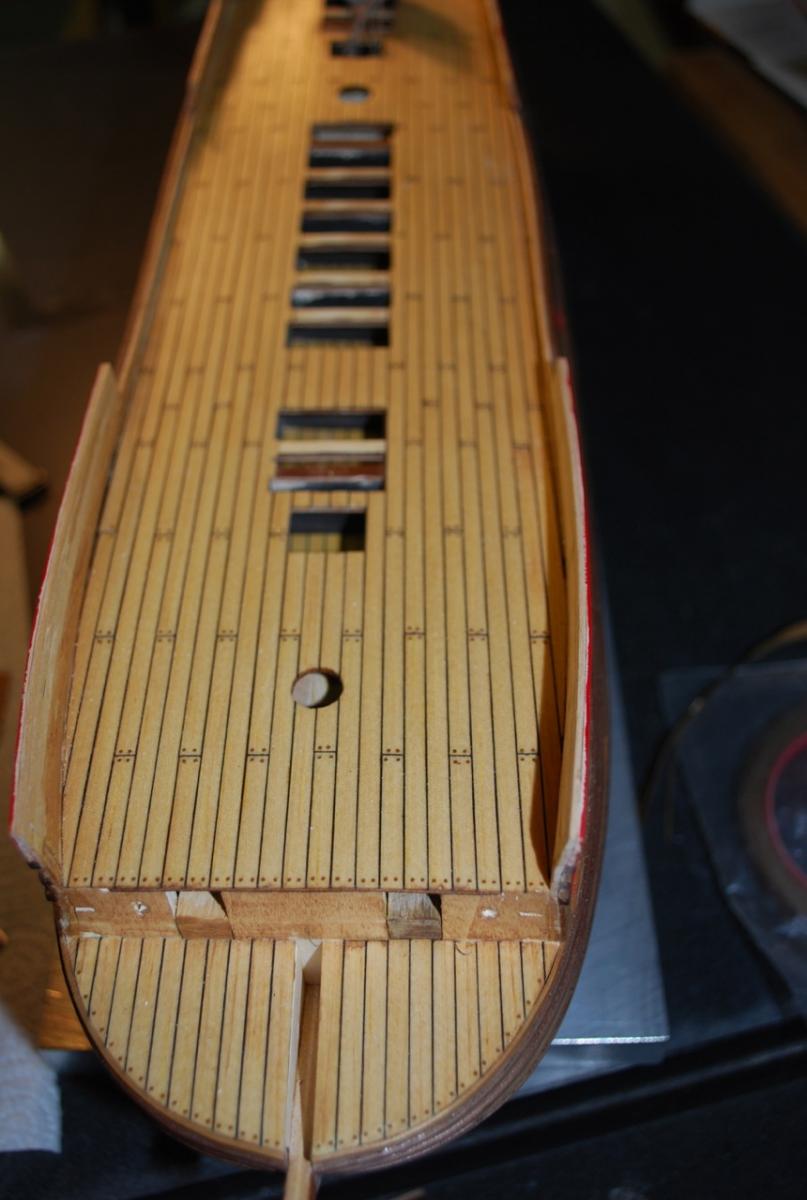
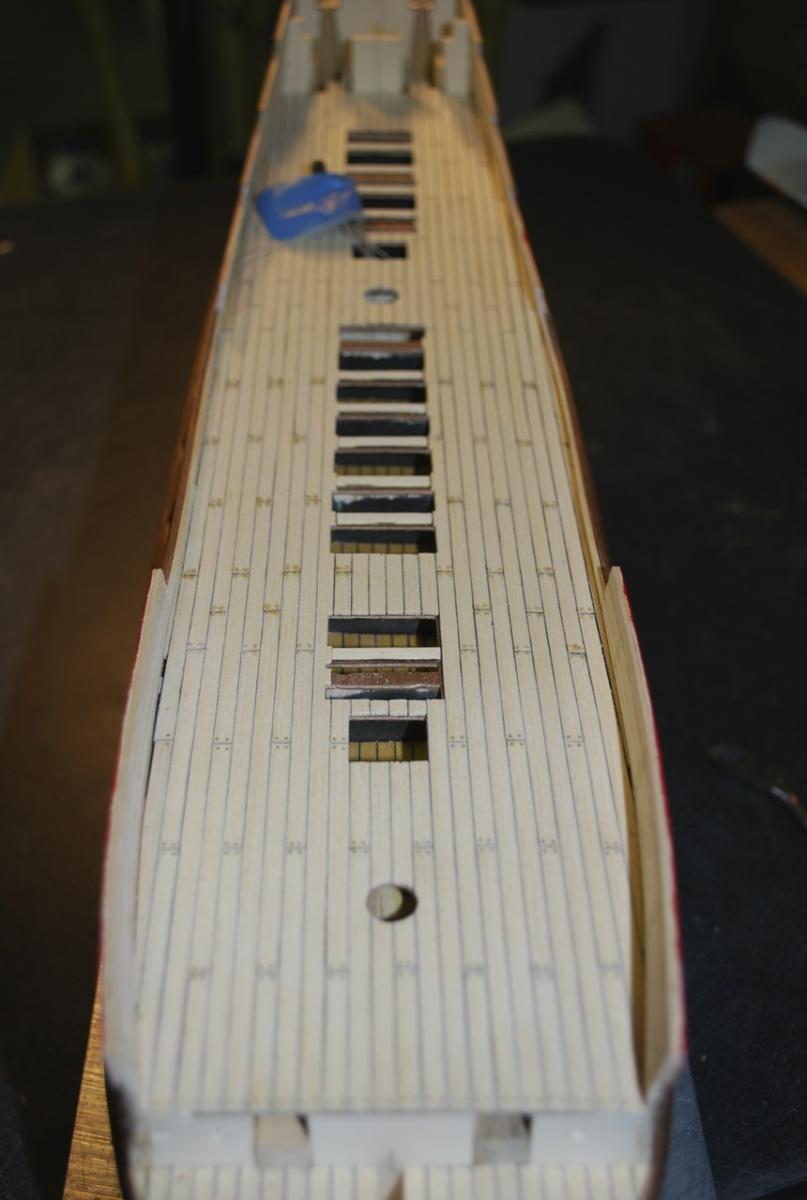
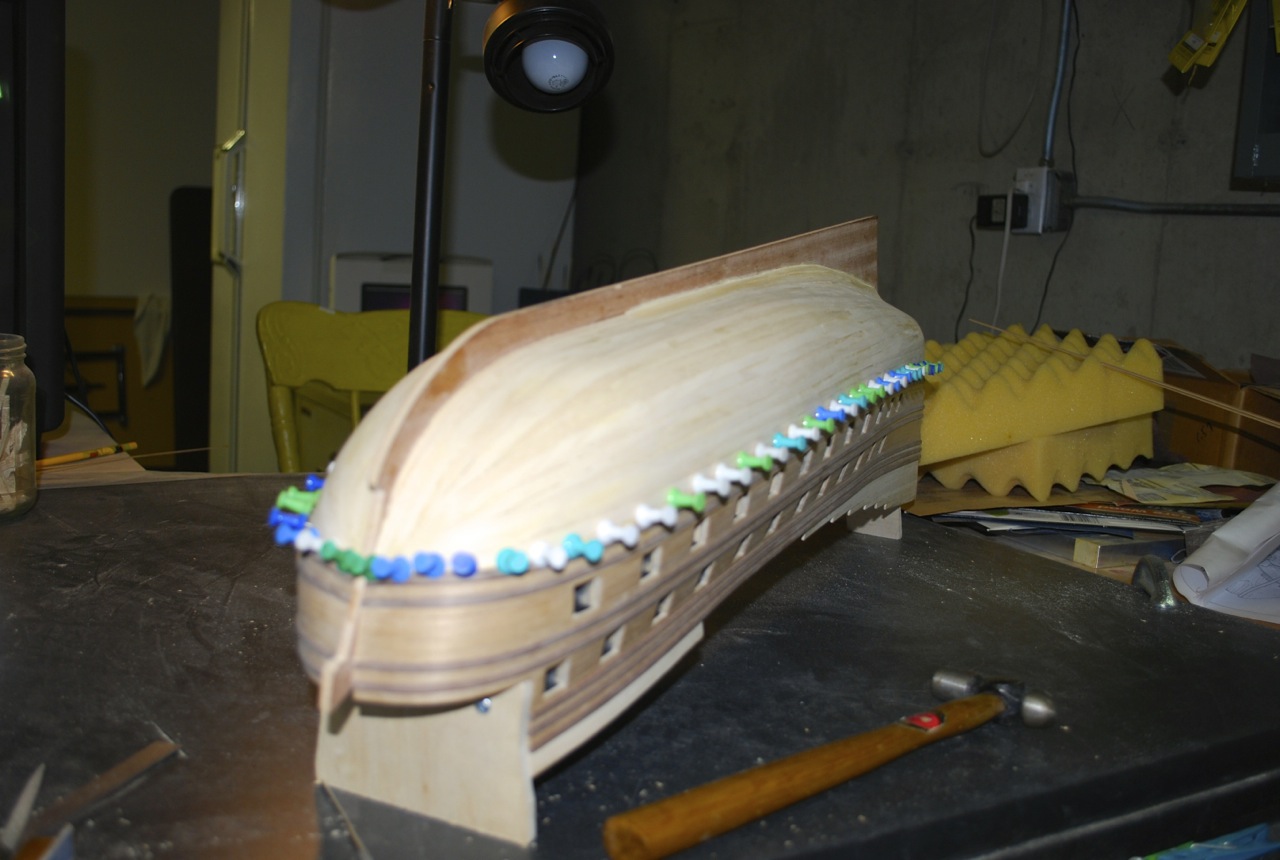
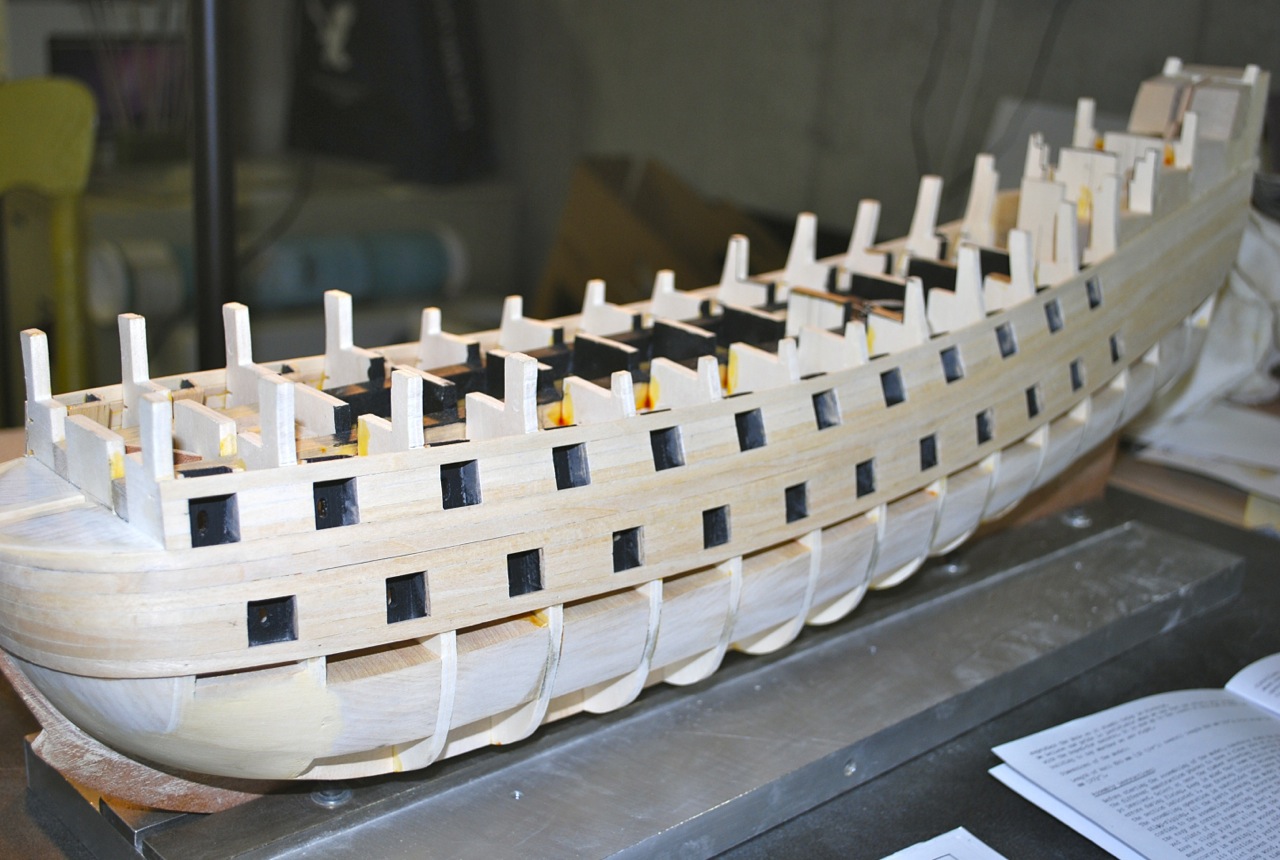
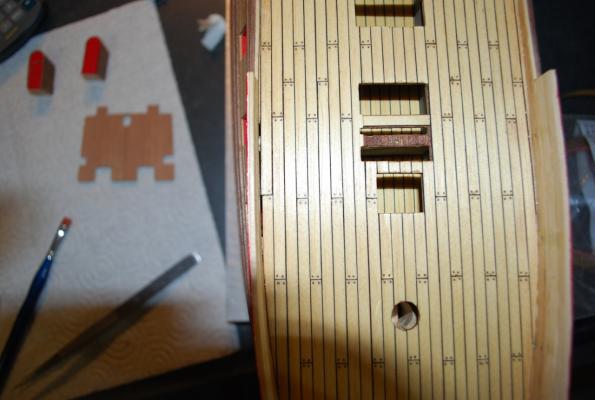
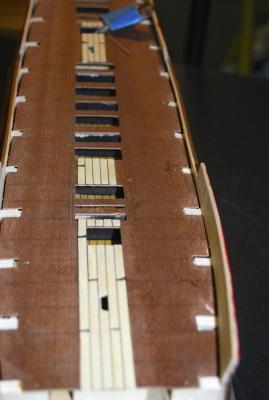
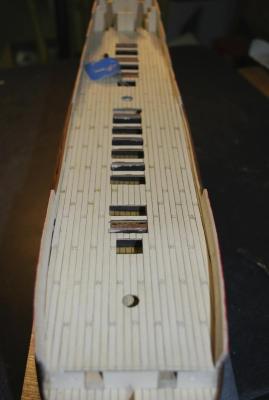
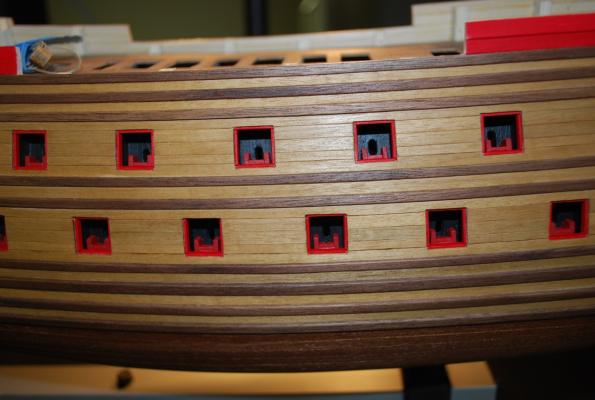
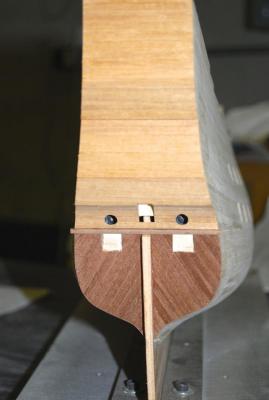
Hi Everyone, I’m Frank from Massachusetts. I have been working on my Corel Wasa for about 2 years now. My parents visited the ship in Sweden 2 years ago and brought me back some books and plans of the ship. I selected the Corel kit for my build, and I have been so inspired by the fantastic work of other Wasa logs that I thought I would create my own log for your review. I will skip the pictures of the keel and framing photos and start in on the gun port construction and slowly build my log to where I am currently. (Just finishing the bow section!) Let me know your thoughts! I cut and enlarged the width of the gun port channels supplied with the kit, in order to accommodate the framing of the gunport openings. Then I made a full set of false gun carriages for the guns to sit on. slotted the backs of the gunport frames, so the guns could be inserted and then glued down onto the false carriages. Then I glued a "floor: to the frames so the carriages can sit on them at the correct height. First set of planks with the gun ports set at the correct height. Both rows of gun port openings completed with 1st layer of planking


-
Thanks for providing the link! Frank
-
Hi Michael, Congrats on the new milling machine! What brand is it and what is the x and y travel limits? Looks like you are going to have a lot of fun with it. Regards Frank
-
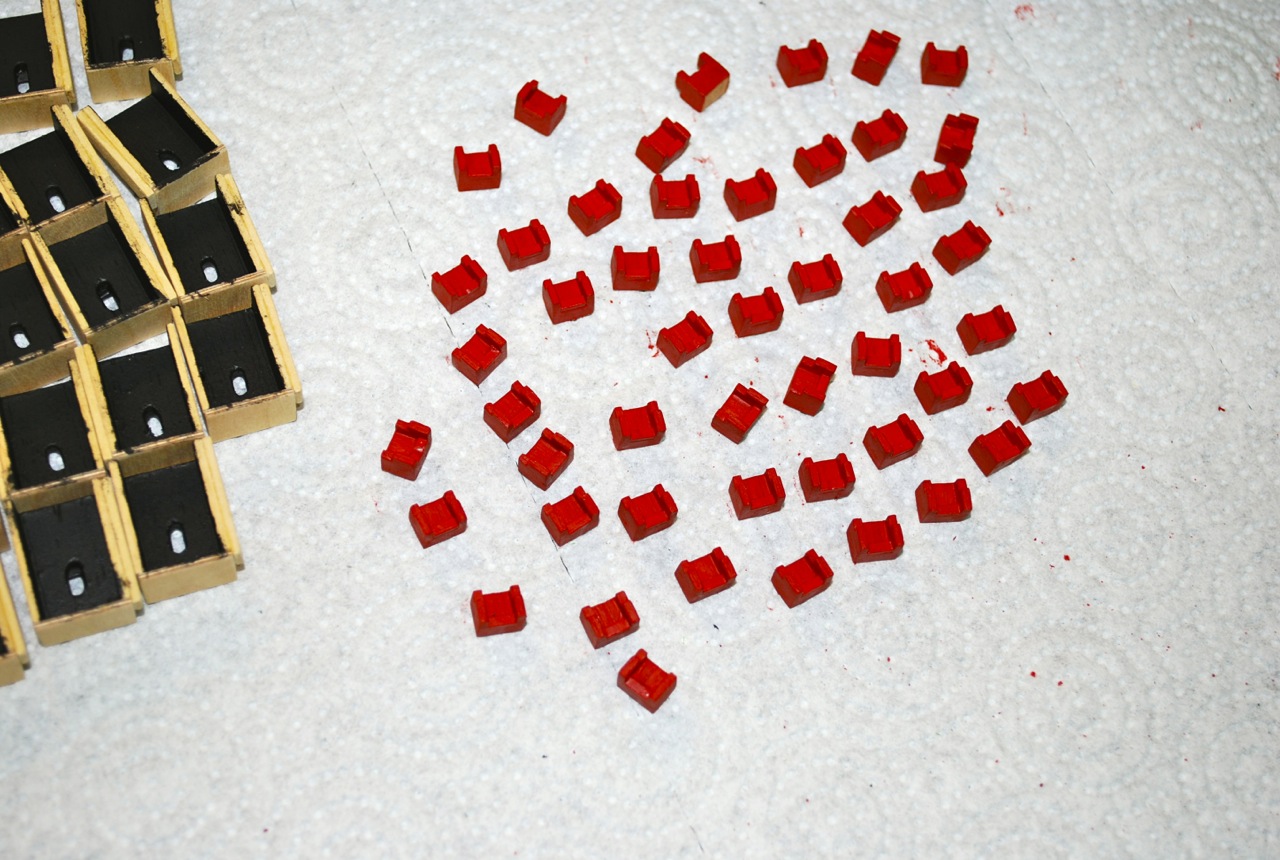
Michael, Great job on your ship. Thanks for the information on the railing stanchions. I received them today and they look great! Frank