HOLIDAY DONATION DRIVE - SUPPORT MSW - DO YOUR PART TO KEEP THIS GREAT FORUM GOING!
×


fmodajr
-
Posts
868 -
Joined
-
Last visited
Content Type
Profiles
Forums
Gallery
Events
Everything posted by fmodajr
-
 Ulises, Everything is looking great! How do you you like that Byrnes Ropewalk machine? Frank
 -
Thanks for the comments Nigel! Hopefully I will have more pictures posted next week on my progress with the railings! Thanks again, Frank
-
Thanks for the information and help Ferit! I will pick some up for my rigging! I have been using the CA glue in the past and I don't care for it (for the same reasons you mentioned above)! Thanks for your comments on my model. Hopefully I will post more pictures soon, as I am working on the railing system. Frank
-
Hi Ferit, If you have the time, could you tell me a little bit more about this glue?! Thanks, Frank
-
Hi Michael, Fantastic job on your ship. The attention to detail is amazing and you are very courageous to put your ship on its nose!! I don't know if it is too late (I wish I had seen your latest picts sooner, but I have been layed low by a persistent intestinal infection) but 4 or 5 years ago I built a Zebec (modified from an Amati kit) and I used their supplied swivel cannon. See picture If you find your cannon on the stern too big, I'm sure you can find some Amati ones. I came across this link http://www.makemodels.eu/index.php?CATEGORY=20&SUB=2&ALL_SUBS=0&THISPAGE=57&RADIOSORT=4&SUPPLIERSCHOICE=&RNZ=631778 Scroll half way down and you will see them. Anyway, I'm not sure buying these Amati swivel guns will make it any easier to install!! Anyway, very impressive, Frank

-
Hi Jan, I went to the Seawatch Books Web site tonight http://www.seawatchbooks.com and they have a paragraph on upcoming books. They feel that the book will hopefully come out in June! I think this could work for me. I still have to finish the railings, kevels, guns, deck items, channels, and of course the longboat! I'm glad I will not be entering the rigging stage of the ship alone Thanks, Frank
-
Ulises, I'm trying not to think that far ahead! Be prepared for many questions (by me) when I get to that point Thanks Frank
-
Thanks Michael! Working on the railings these next few days. Tedious! Frank
-
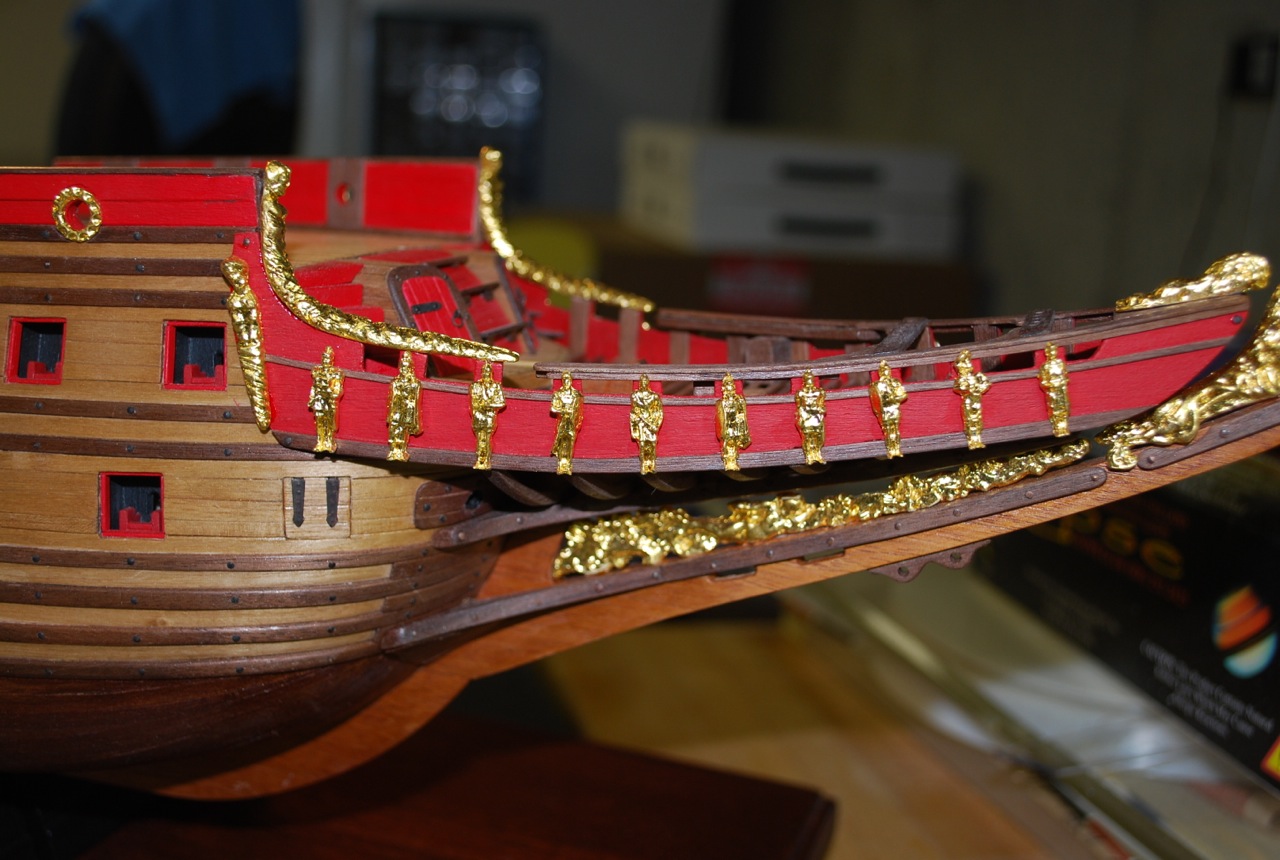
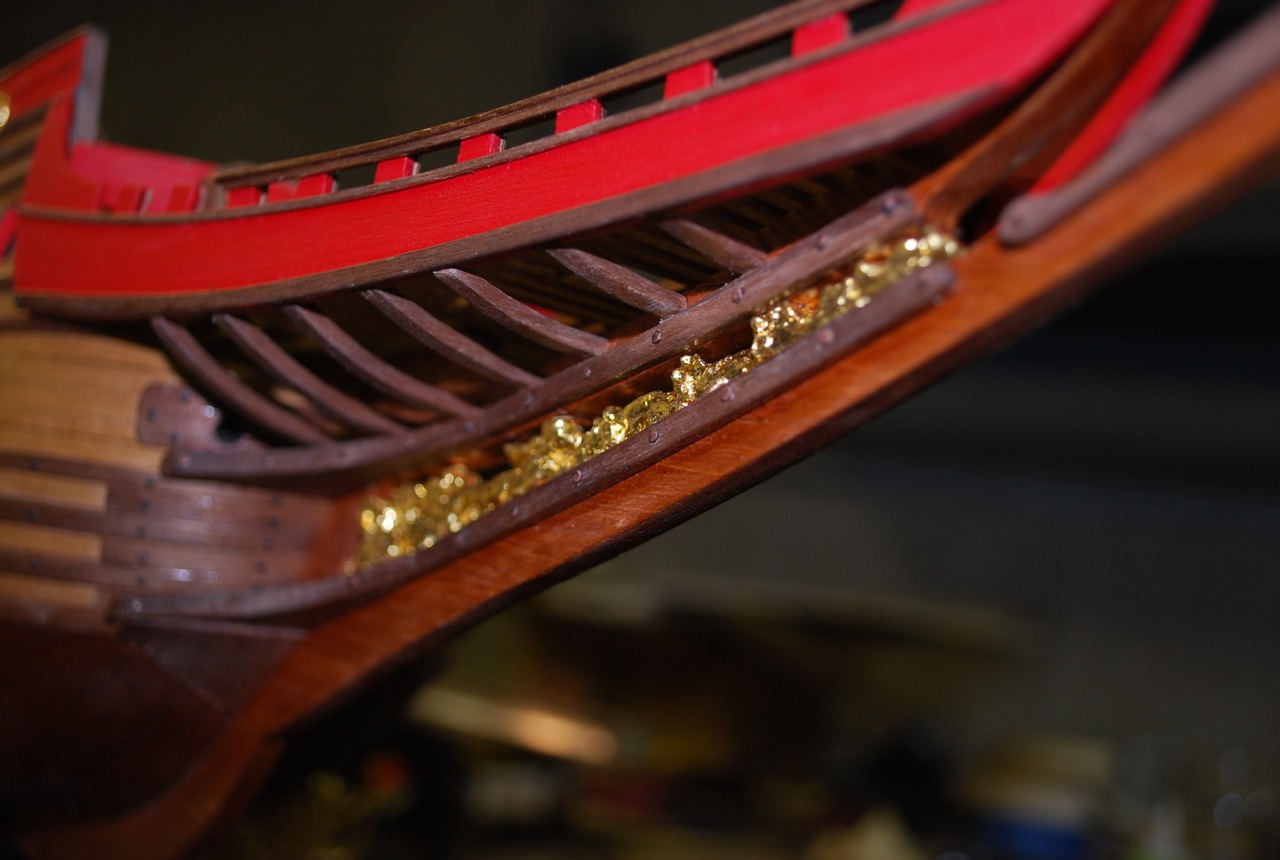
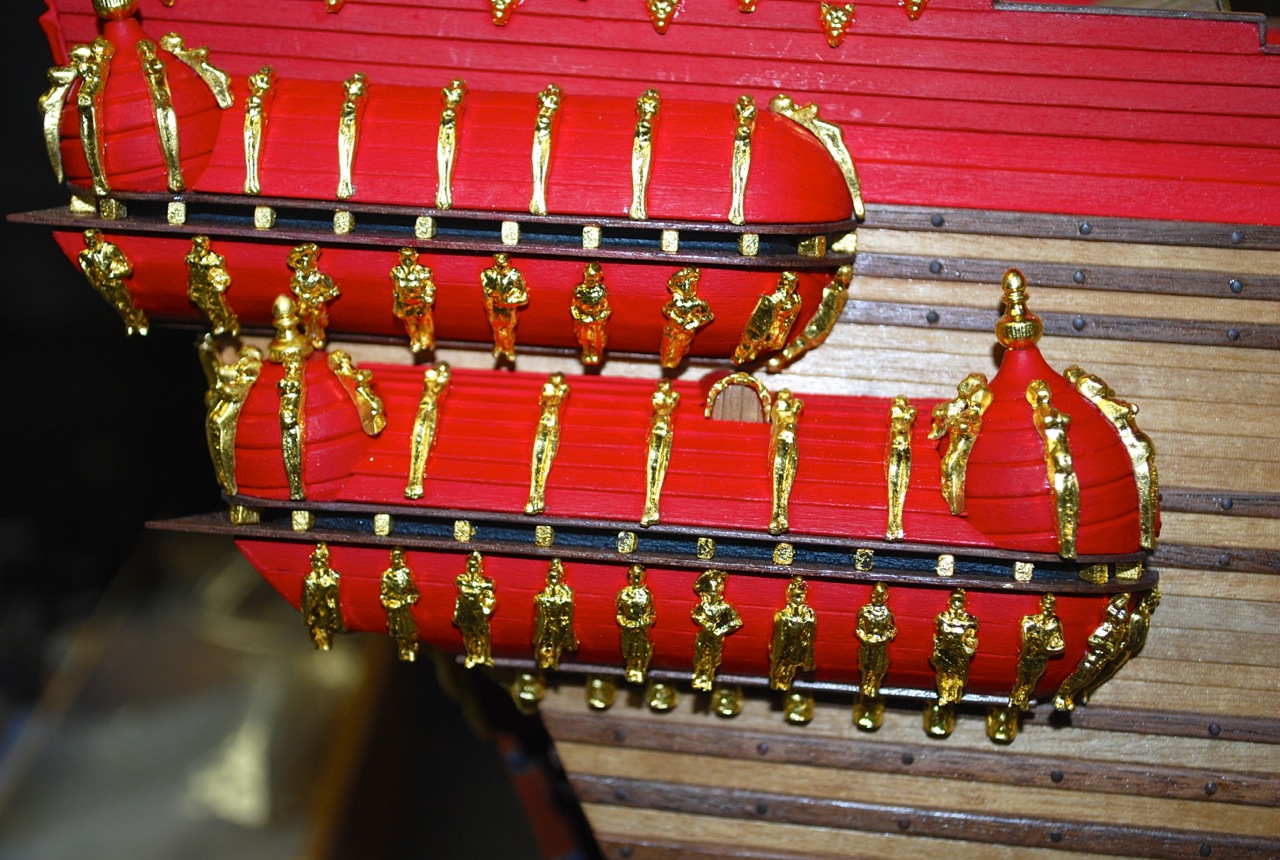
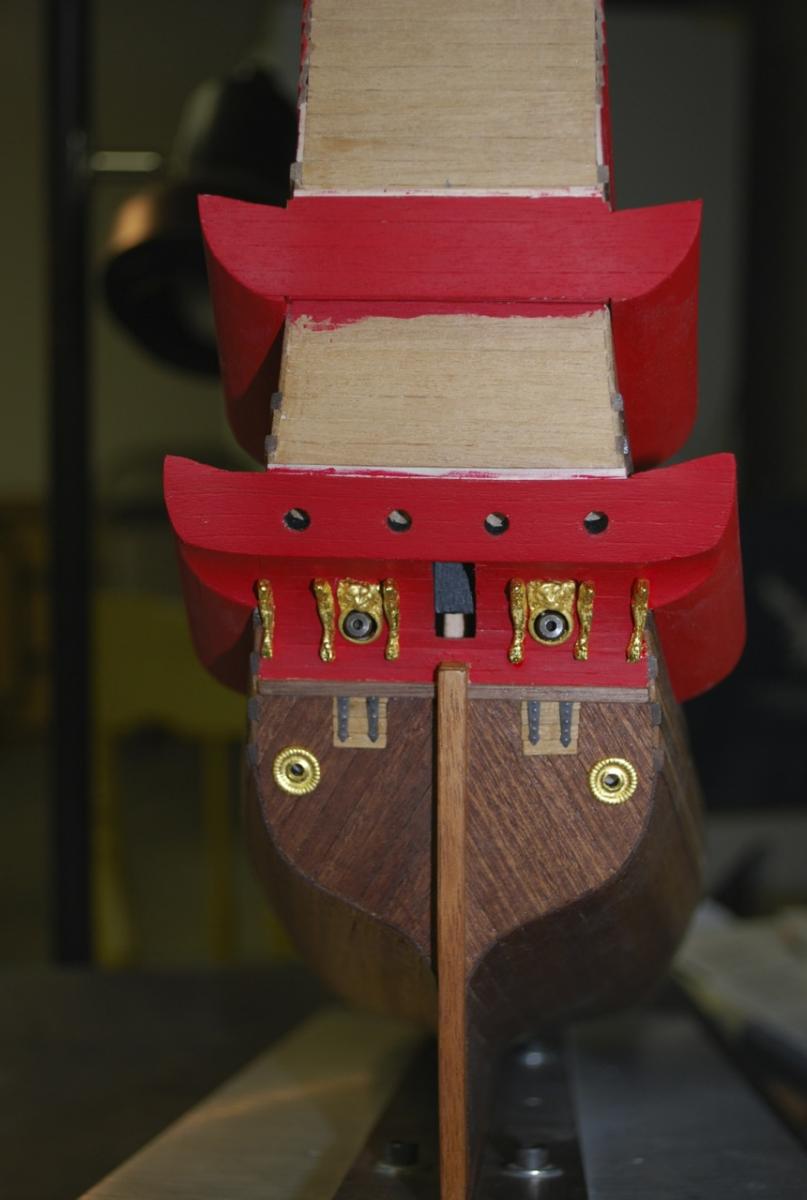
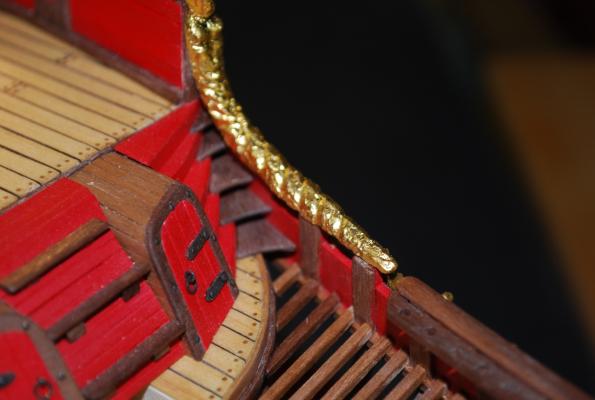
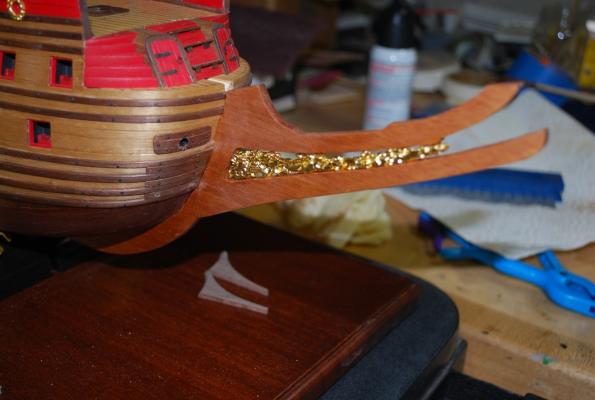
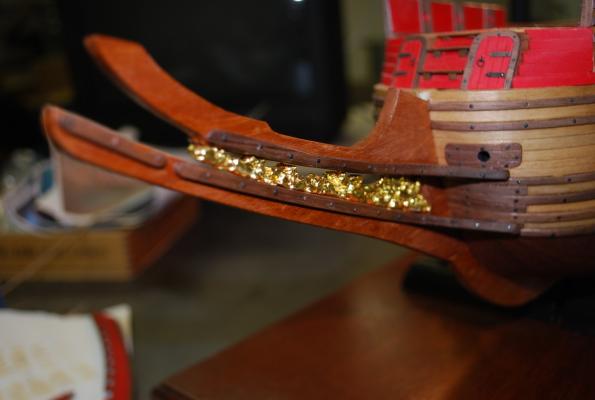
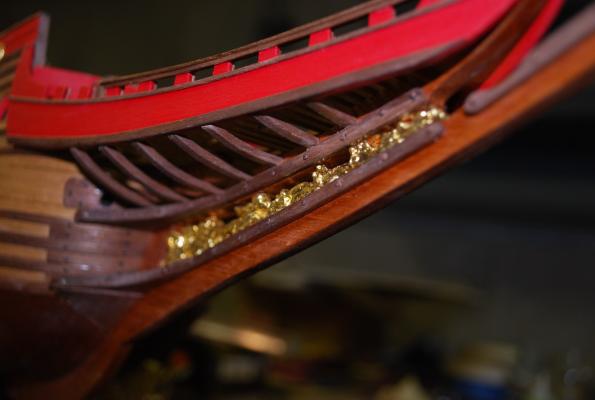
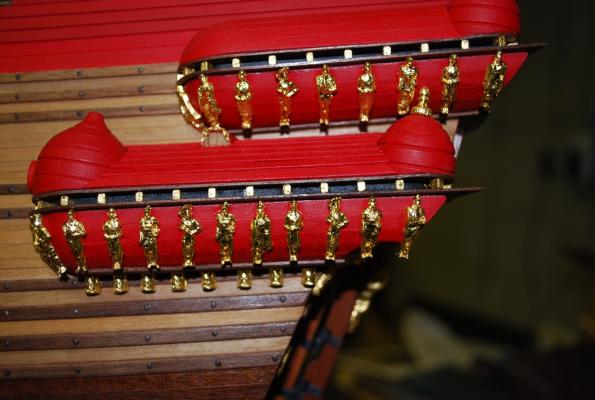
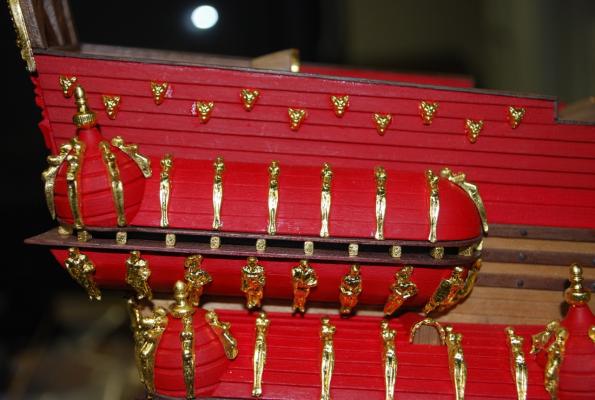
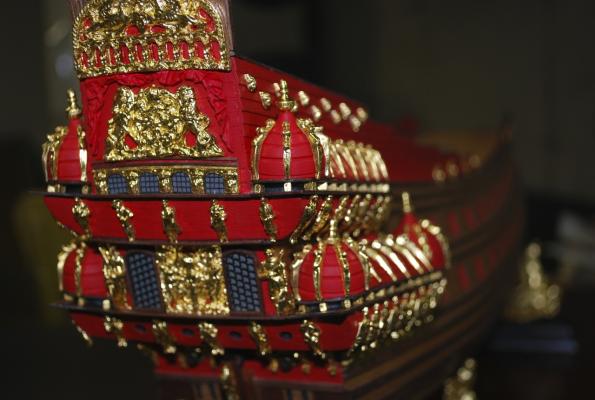
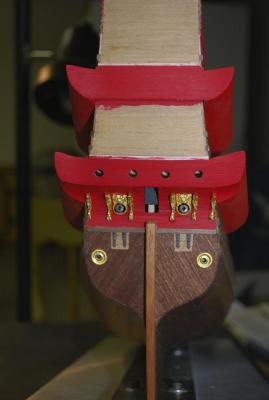
Added gold Leafed Figurines to bow area. I am now starting to work on the side railings and bow railing! I will continue to post as I progress! Thanks, Frank

-
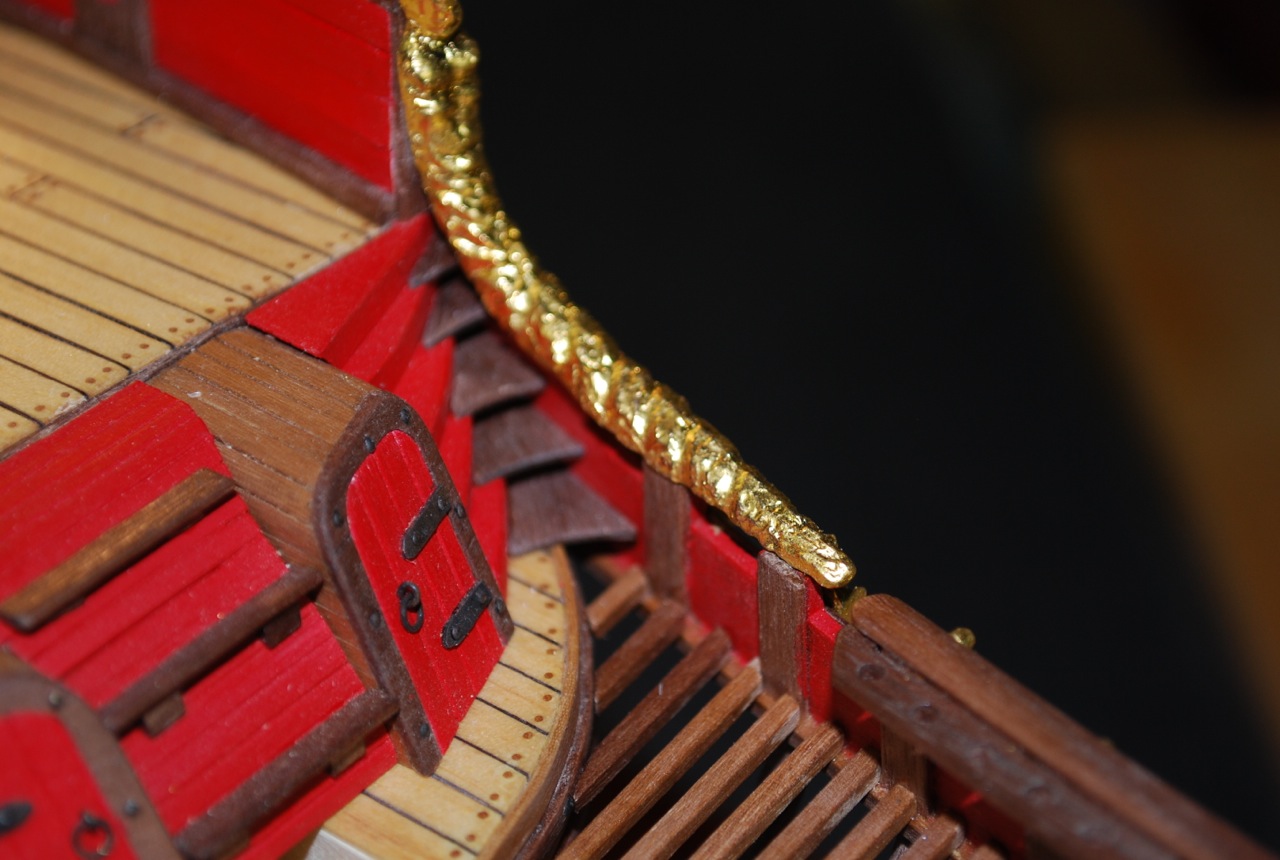
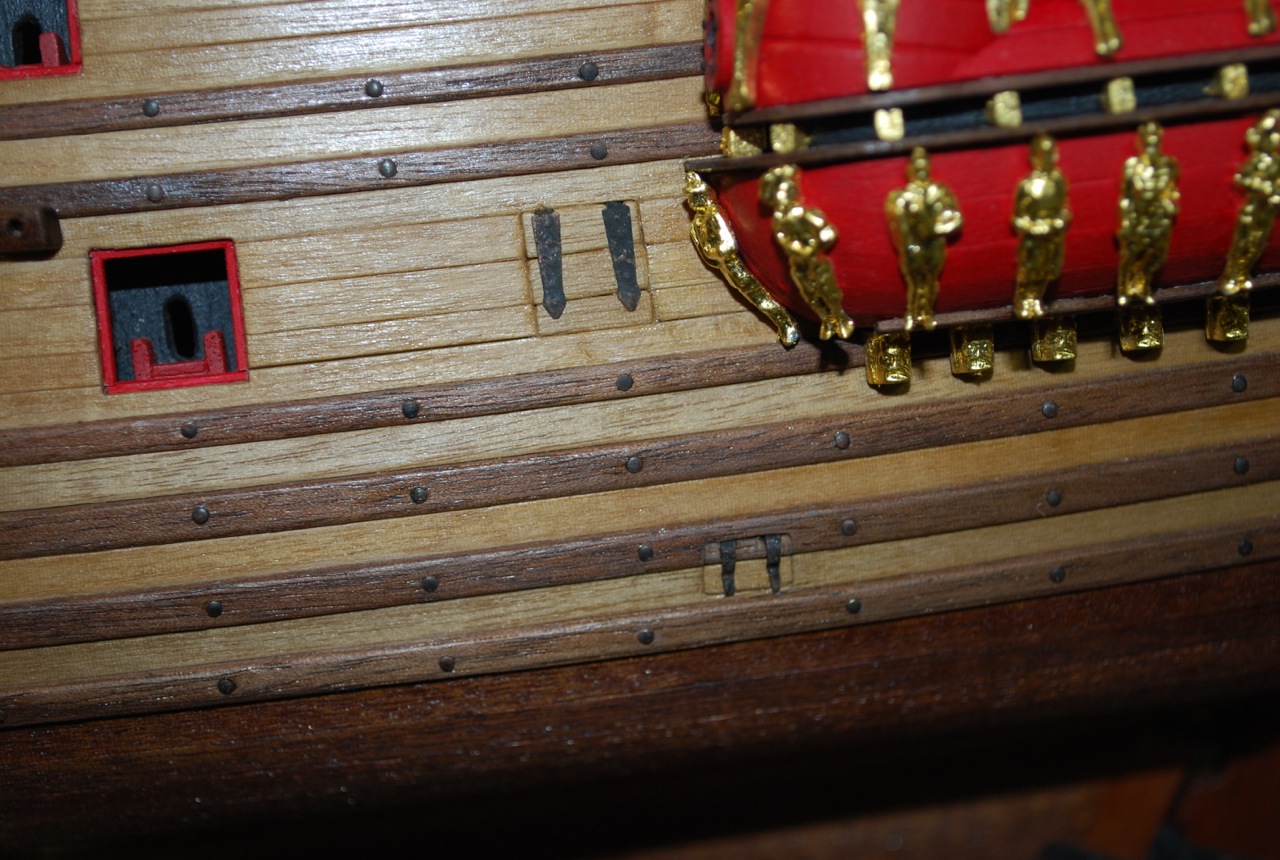
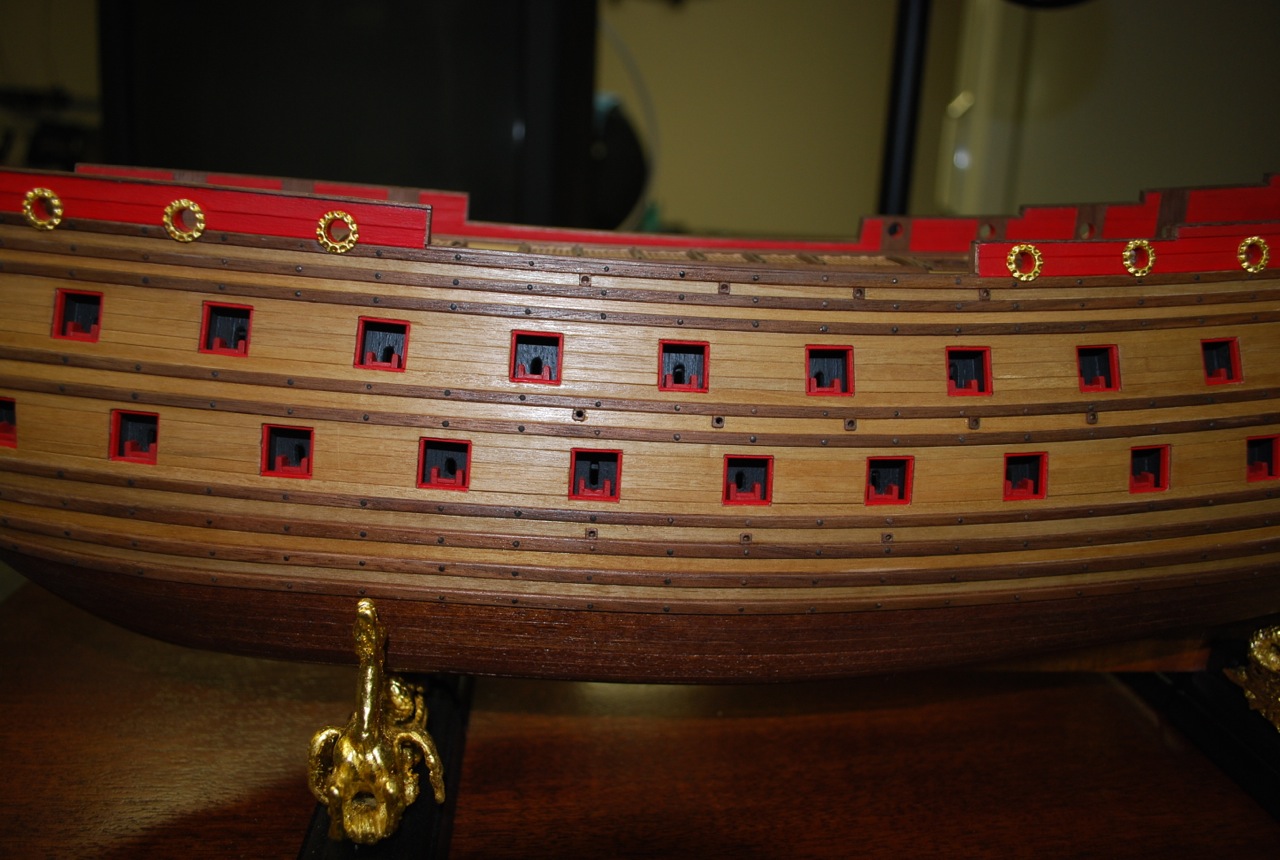
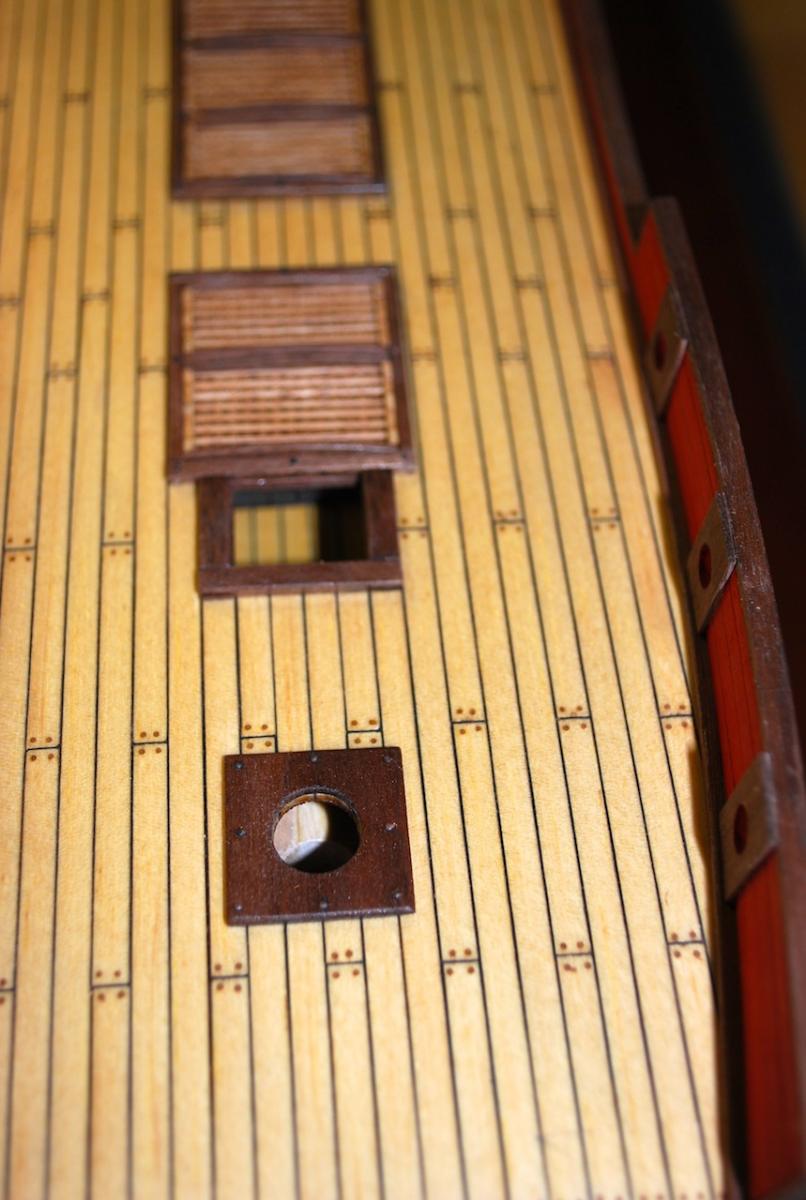
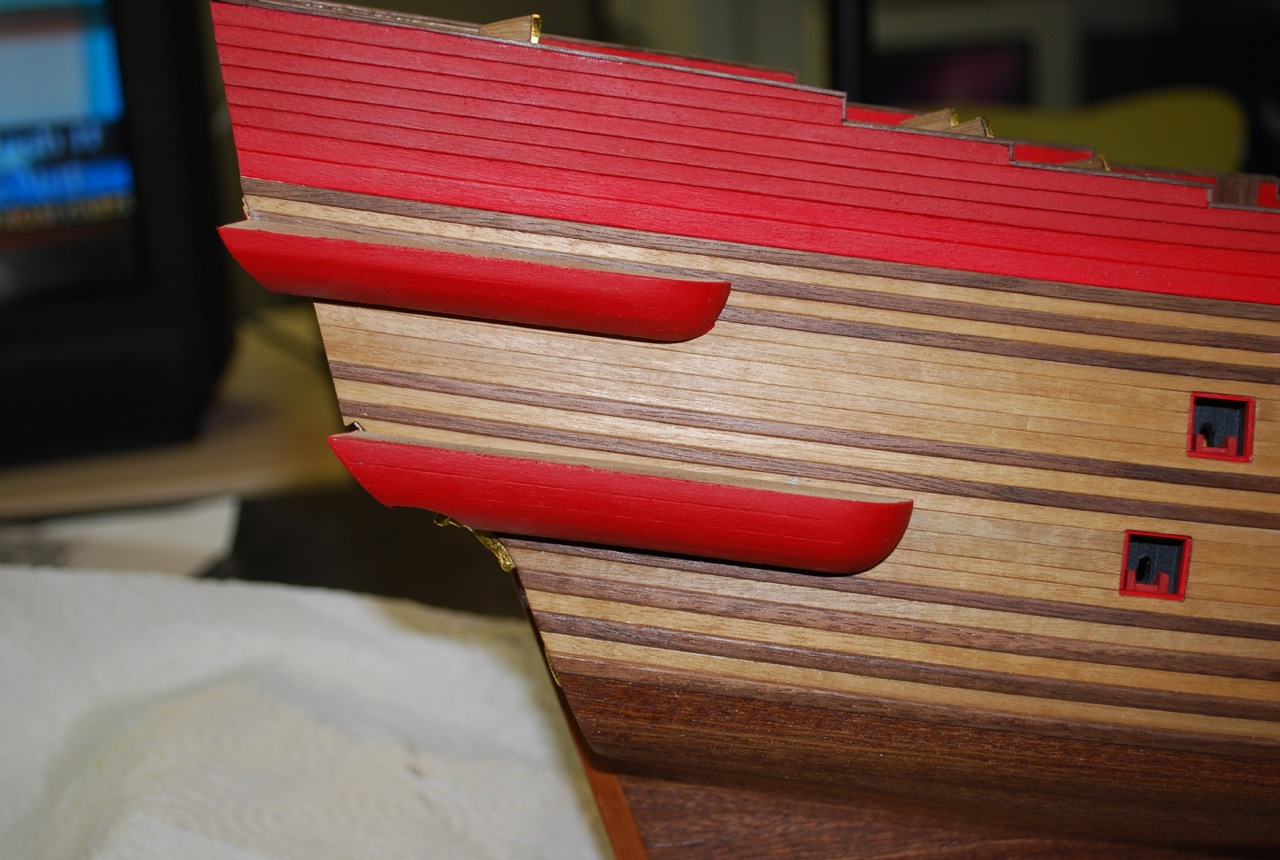
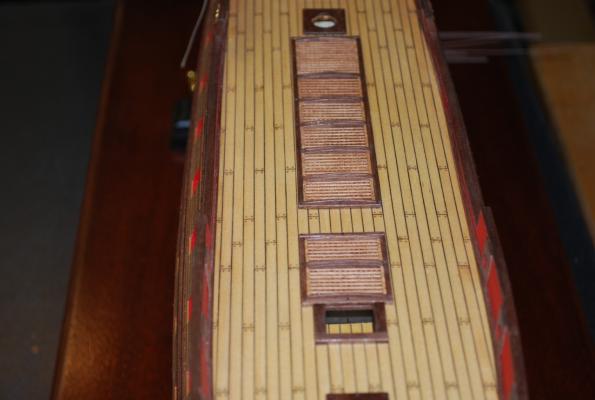
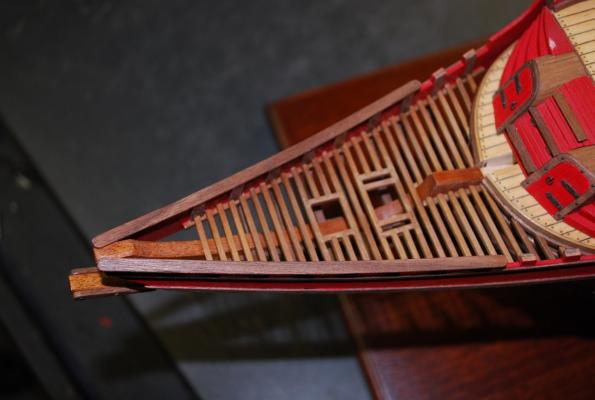
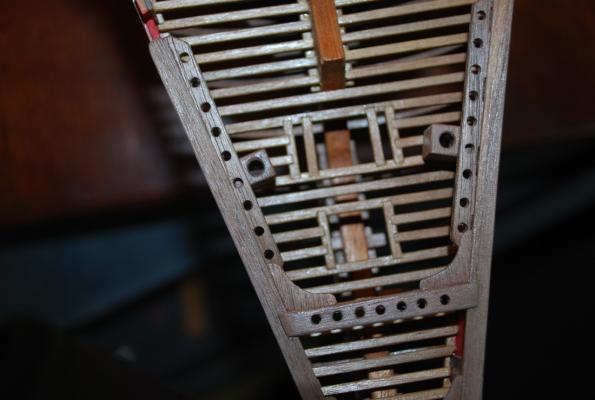
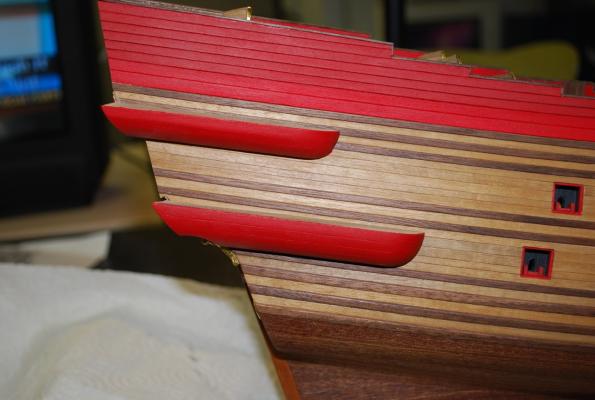
Added some features that are not part of the Corel plans. Gunport near bow Gunport and Message Port near rear Gallery Windows Water Drainage holes I did not drill through into the top deck yet. I will wait until I have finished the side railings


-
Jan, The ship model and the paint job looks fantastic. Very neat. Frank
-
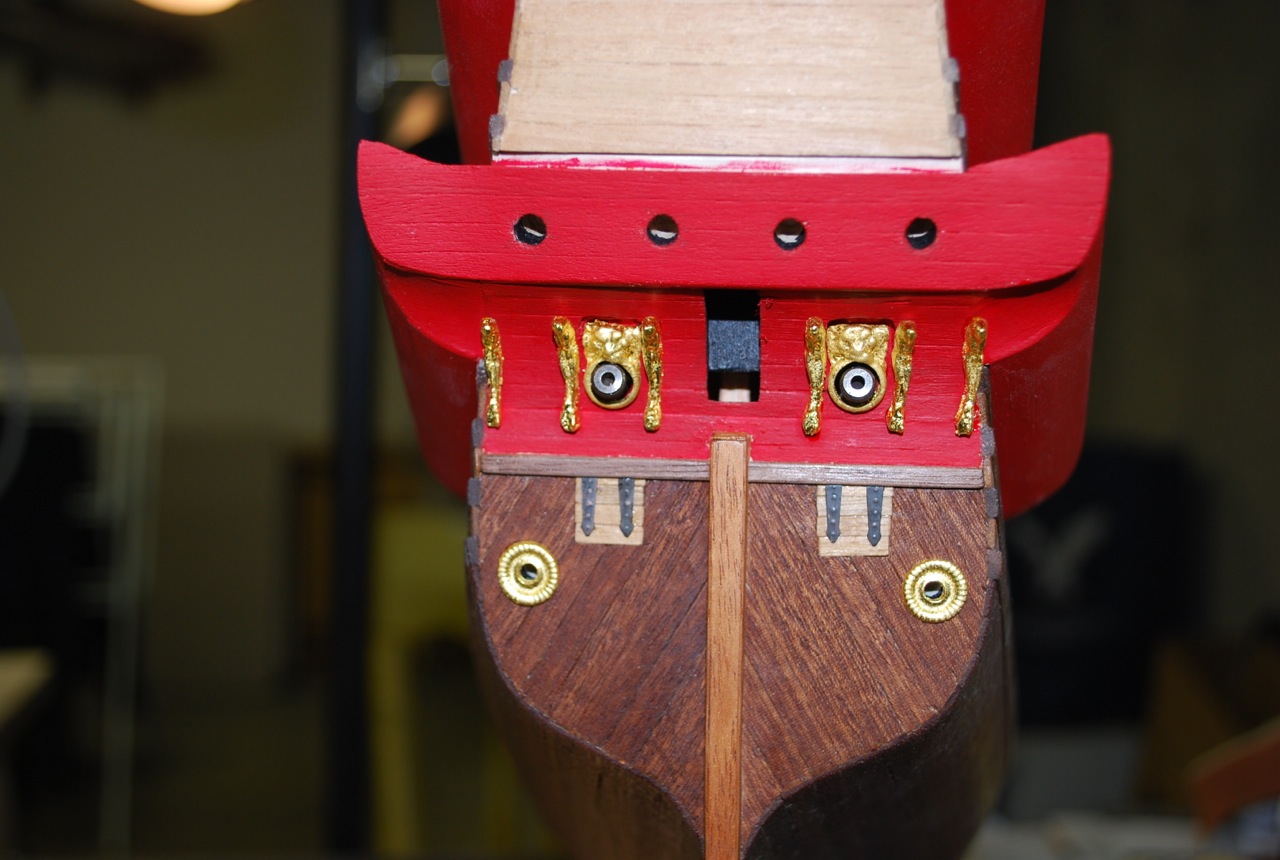
Continuing on! I used walnut for all the trim for my gratings, hatches, etc. Finished gratings I made a new bow stem beak from a solid piece of mahogany. The figurine is also gold leafed. Added supports underneath--made from walnut View from top

-
Thanks Demonborger! The only thing that I don't like about model ship building is that I end up awake late a lot of nights trying to figure out in what order do I add things to the model. If I add item A to the model now, will I be able to get at item B later. (i.e. Building the false gun carriages early on, while not placing the guns until much later). Drives me nuts sometimes and I find myself overthinking things Frank
-
Michael, Too funny! I agree, when things don't line up, I can now say it was done on purpose Yes, Yes, I would love the pdf's of the lower main mast when you receive them! I am a few months away from starting the masts, but I definitely want to be prepared. Thanks for everything Michael, with all your help and your detailed log, my model is shaping up to be much better than I envisioned it just a few months ago. Thanks again, Frank
-
Mark, I think you did guess right! I have a copy of the Wasa plans from the museum showing them roughly where I put them. Oh well! He (Hocker) also mentioned in his talk that the carpenters working on the ship were from different nations and that the starboard planking does not match the port and and the gunport openings on the port side don't line up with the starboard side! Frank
-
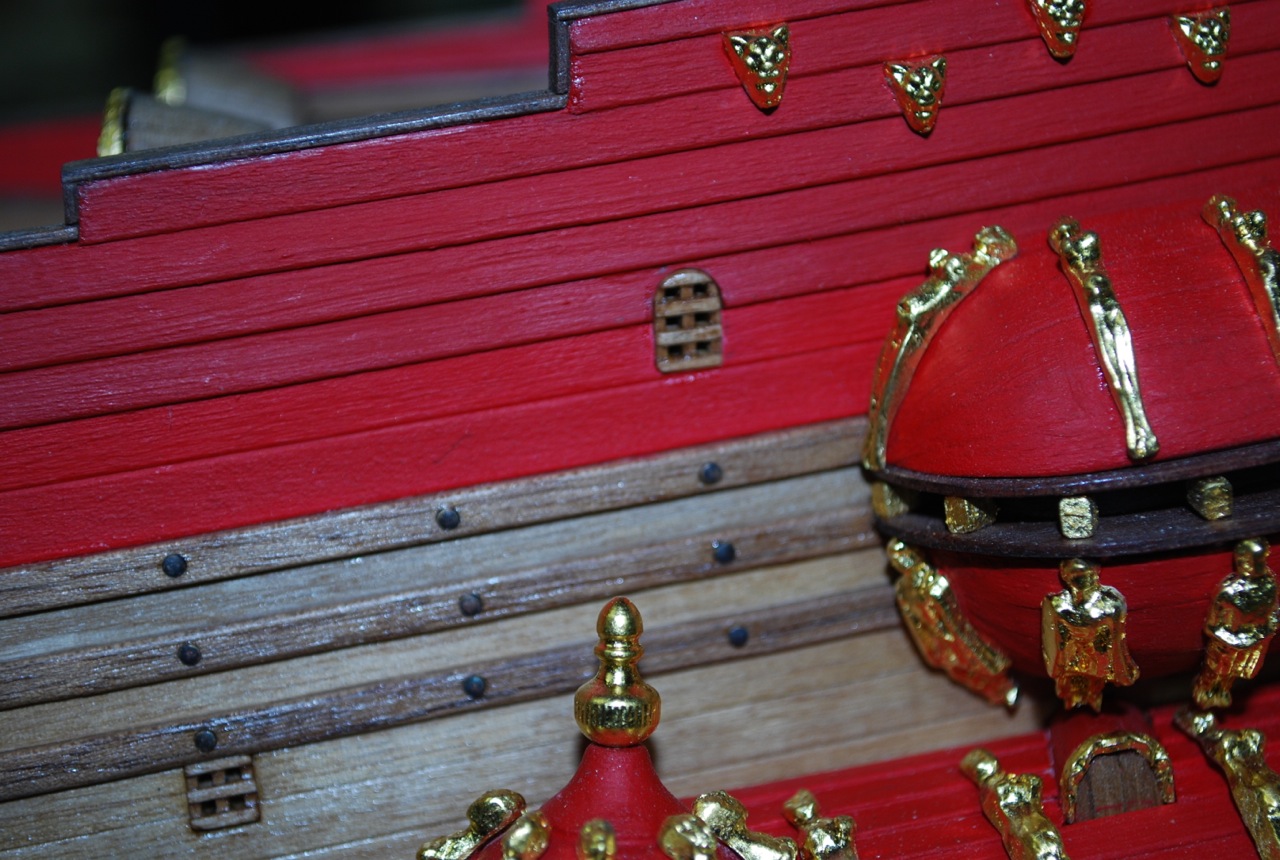
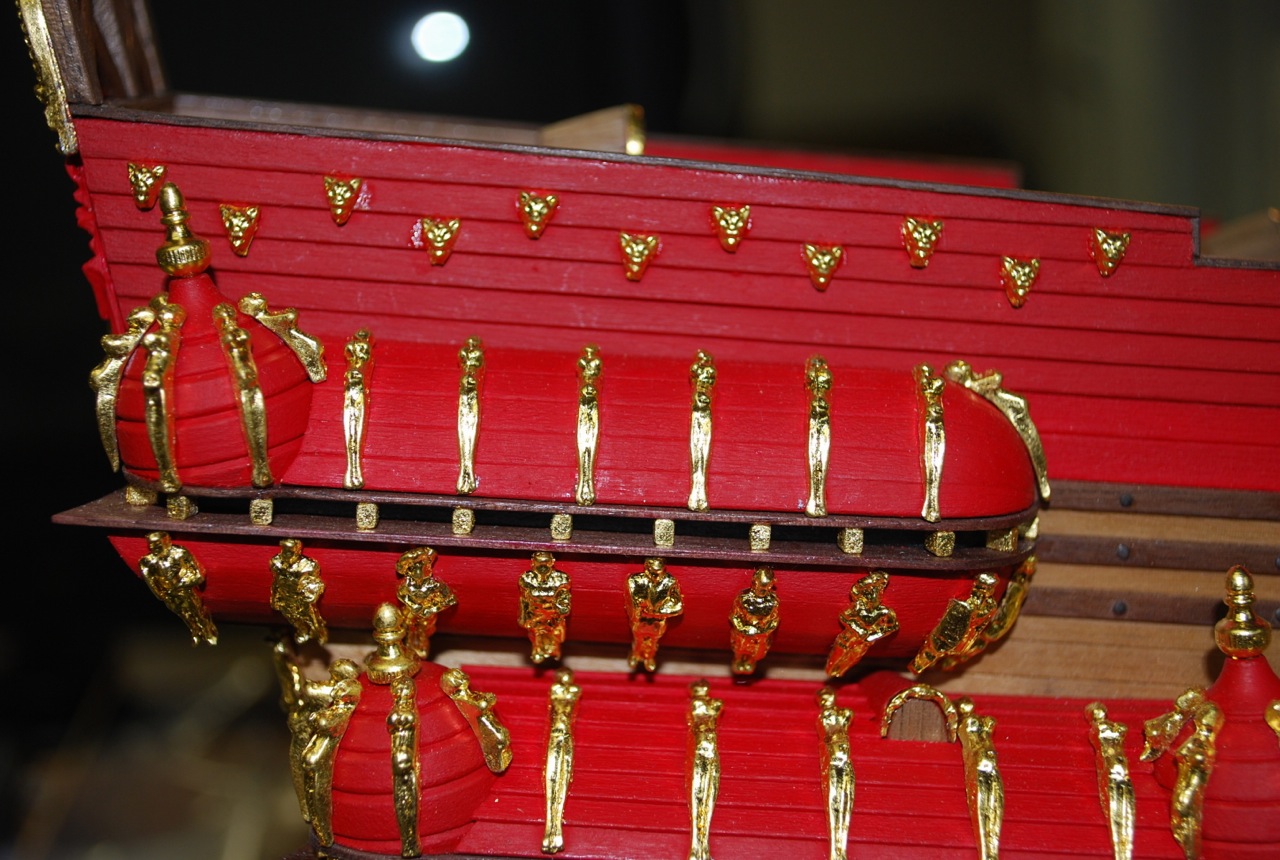
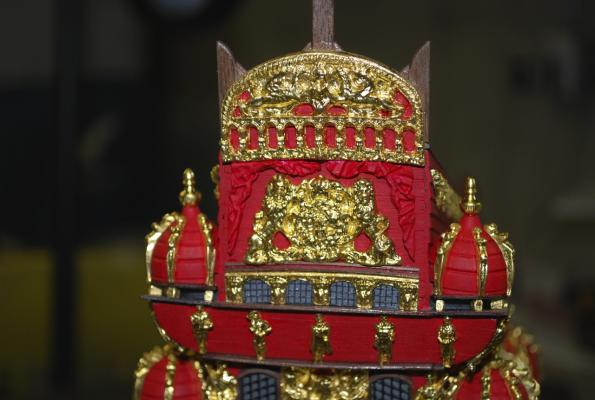
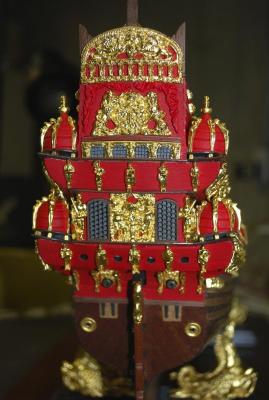
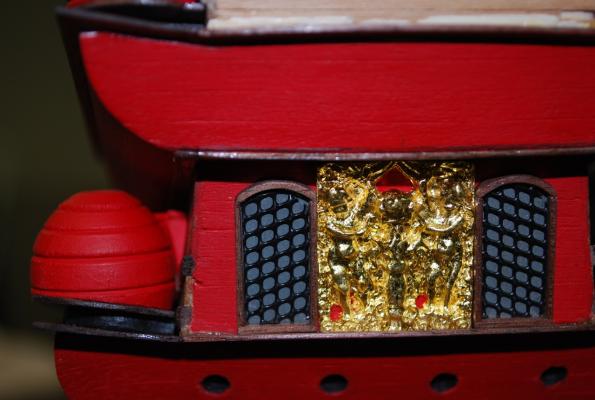
Ulises, Nigel, and Mike, Thanks your for your kind impressions! When I was down in Charleston, South Carolina (for the NRG Meeting), I attended a lecture by Fred Hocker. He gave an amazing talk about some of the new findings they are still making about the ship. After the lecture, I was fortunate to be able to meet him and he saw some of the pictures of my model on my iPad. He commented that there now is evidence that the small triangular figurines above the gallery (see picture below) were actually further down in the openings in the middle of the galleries! Frank

-
HI Mark and Michael, Thank you for your kind comments. I agree that the leafing is a time saver. I don't know how you guys do it with the painting of the figurines! My eyesight is not great and my hands not too steady. The problem I did have with the gold leaf was that it is so thin that even my normal breathing would blow it away! So I have to wear a mask when I work with the stuff. Frank
-
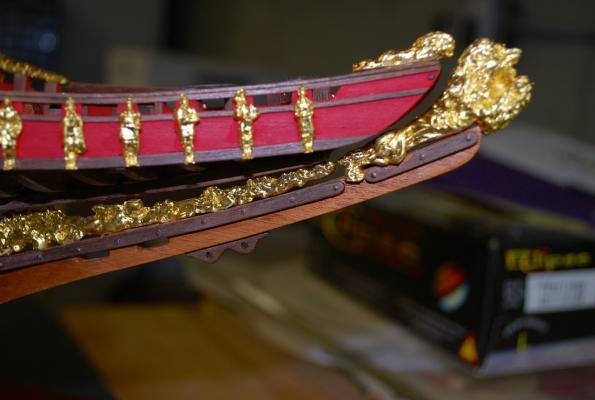
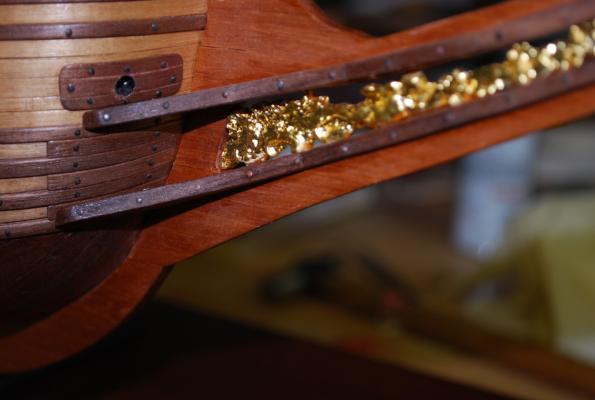
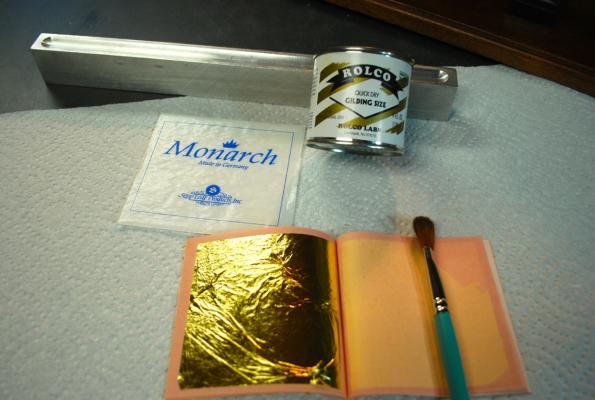
When finishing the figurines, I decided to go a different direction. I decided to Gold Leaf the figurines for a couple of reasons. 1. I tried grinding the figurines down as thin as I could to try to get them to a better scale and in doing so, I took off a lot of the gold finish that was on them. 2. I did not like the gold finish that was on the figurines from Corel and I thought that they were too bright and shiny and I wanted to mute them a little. 3. I was hoping that they would look well with the red paint I used. And 4. Although I am very very impressed with the paint job's done on the other log builds on this site, I thought I would make my ship a little different. Let me know what you think! I bought my gold leaf supplies at Sepp Leaf Products in New York. http://www.seppleaf.com The Gold Leaf I chose is the "Monarch 22 karat Leaf in 3 3/8" by 3 3/8" size. After grinding, fitting, and cleaning the figurines (I did only a few at a time) I applied the "Rolco Quick Dry Gilding Size" or glue to the figurines using a paint brush. I then let them sit for 2 hours until tacky to the touch. (If I tried to apply the leaf sooner than 2 hours, things would get too sticky and messy. Longer than 2 hours and the glue would be too dry for me). After 2 hours, using tweezers, I would separate sections of the gold leaf and apply them to the figurines. Then, using a very soft "makeup" brush, (see picture) I would work the leafing in to all the crevices. If I have to gold leaf a large piece (like the Pegasus stands, I would only do a section of the piece and then another section the next night. After applying the Leaf, I would let the figurines sit over night until dry and the fit them on the ship. I left off the 2 tall figurines on each side of the stern, until I finish the side railings! Thanks and let me know what you think! Frank


-
I am having the same issue Mark! The photo's and drawings are not too clear on the rigging of the extra anchor supports. Frank
-
Thanks Michael, I am away for the weekend. When I return early next week I will post my next set of pictures and try to explain the "why and how" of my attempt at gold leafing. Looking at all the Wasa logs in this forum and seeing the wonderful paint jobs of the figurines, it will be interesting to see what the members think about the different direction I took with the figurines! We'll see! Thanks again Michael for pointing me in the right direction for purchasing the decorative stanchions for the bow railing. I just finished installing the 2 fwd catheads and I will start working on the bow railing and the side railings on both sides of the ship. Frank
-
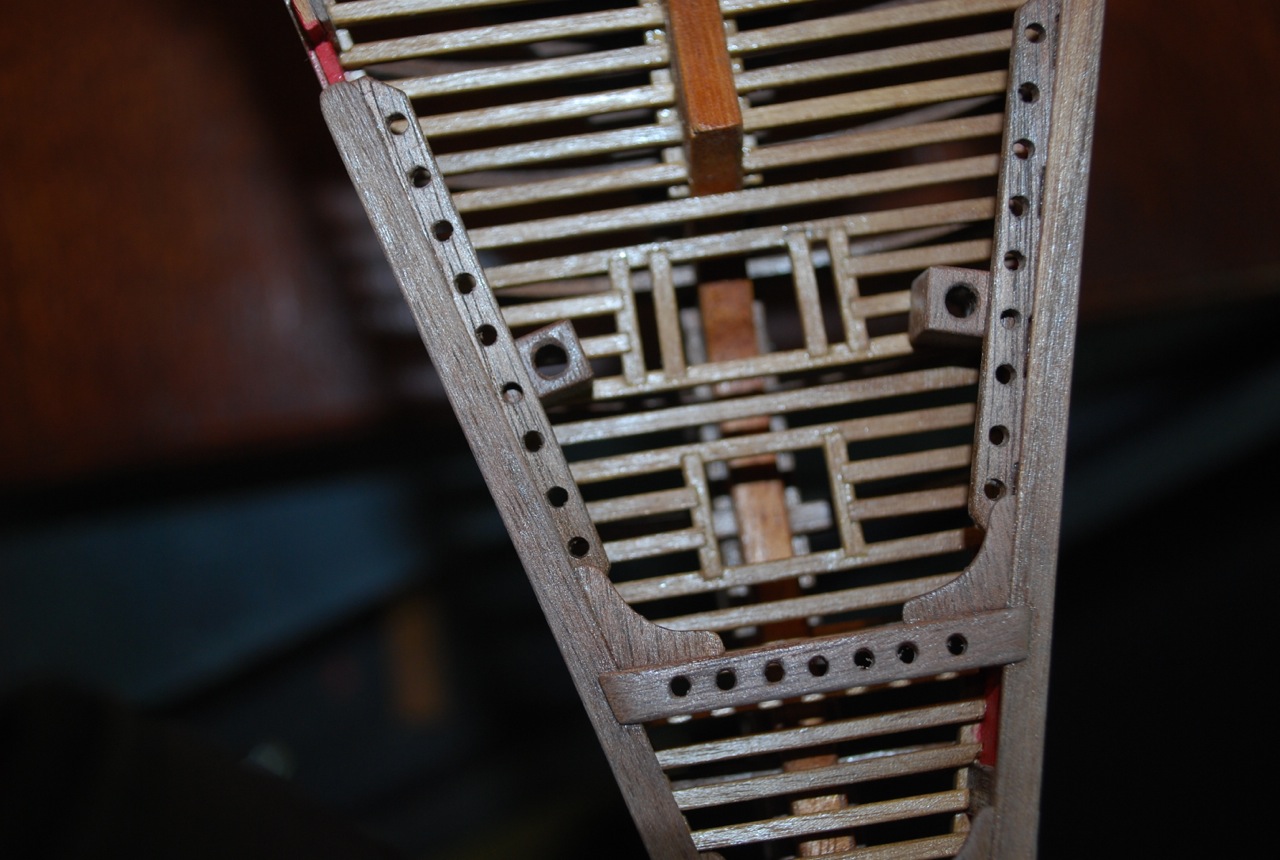
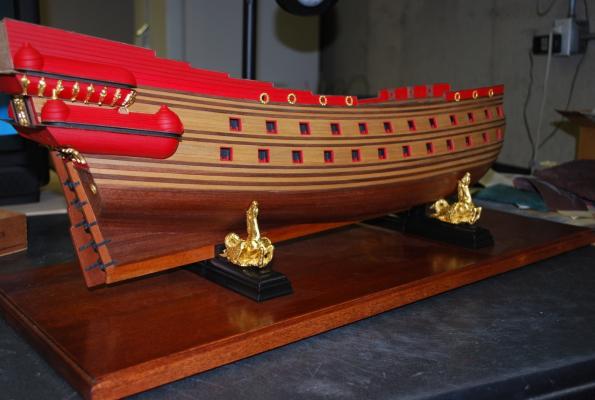
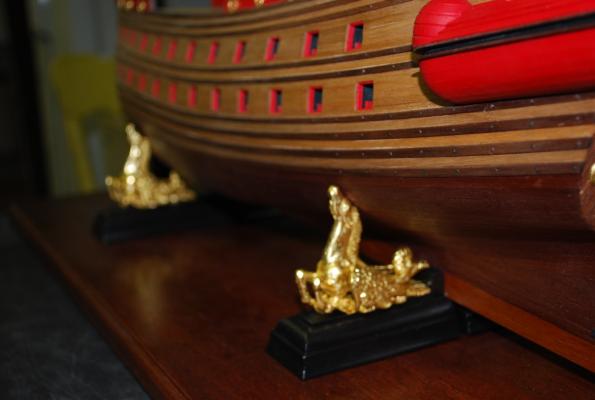
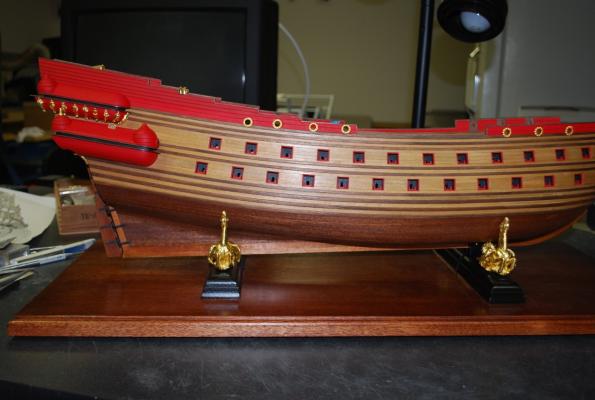
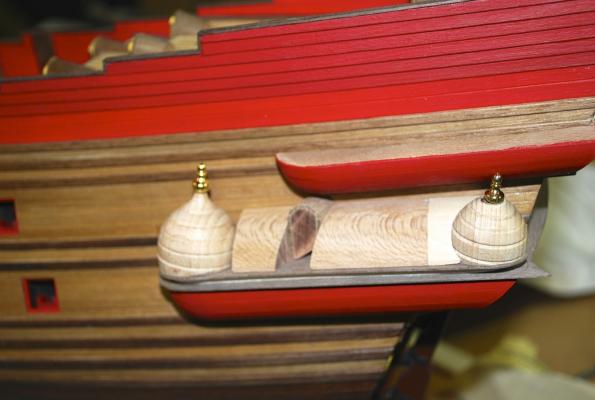
Before going too far with the ship build, I thought it might be prudent to get the ship on a stand. I was worried that if I went too far in the build, I might damage something trying to get the ship fitted on a stand. I made a Mahogany base for the stand. I had a Pegasus stand kit, given to me by a friend, and I thought it might work well with the ship. I thoroughly cleaned the Pegasus figurines and then I gold leafed them. I mounted them on the 4 pedestals and then mounted the ship to the completed stand. I drilled 2 holes in the keel of the ship and then pinned the ship to the stand. This way, if I had to, I could easy pull the pins and remove the ship from the stand.
-
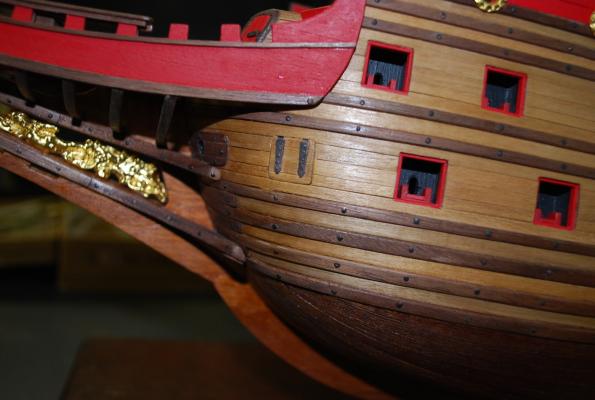
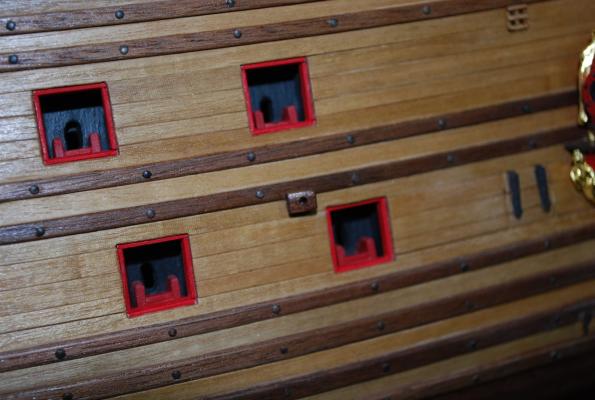
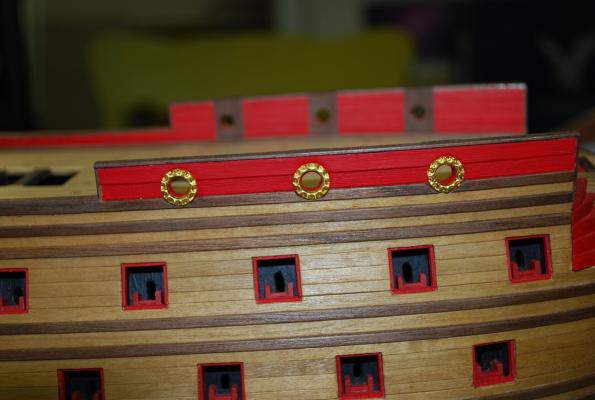
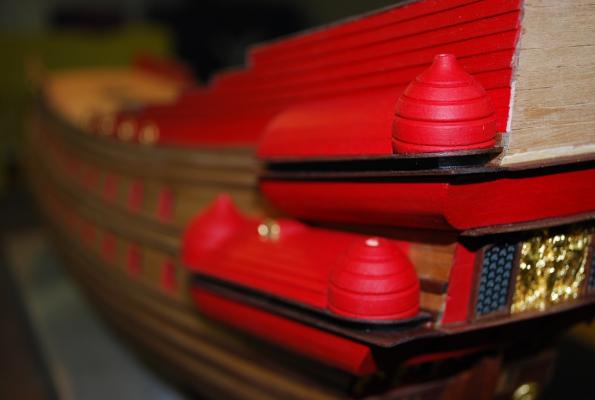
This section is from my work on the stern area of the ship! Drilling of the fwd gun holes with gold leafed ornaments Decking near stern Stern Windows

-
Ulises, Beautiful work on the rigging! Especially the seizing of the lines around the blocks. The detail is amazing. Frank
-
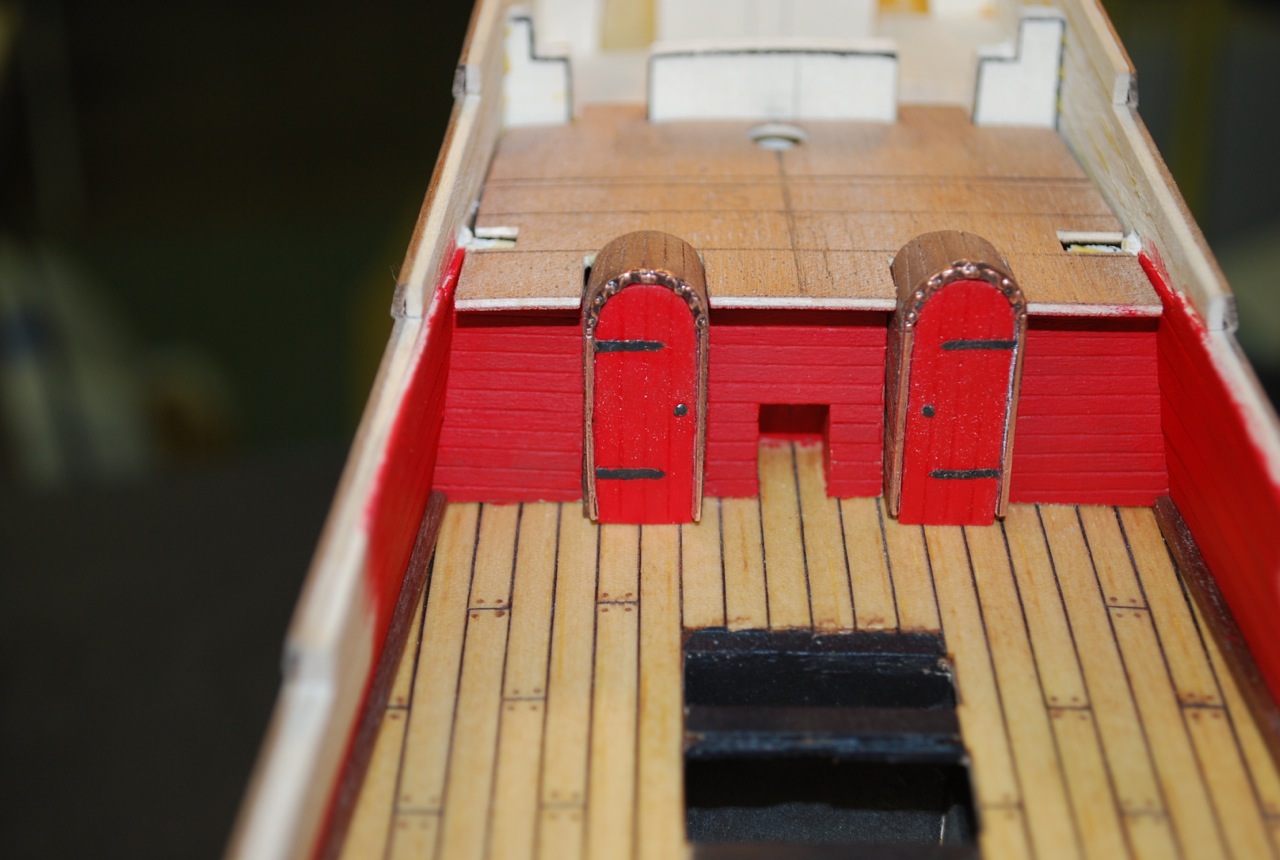
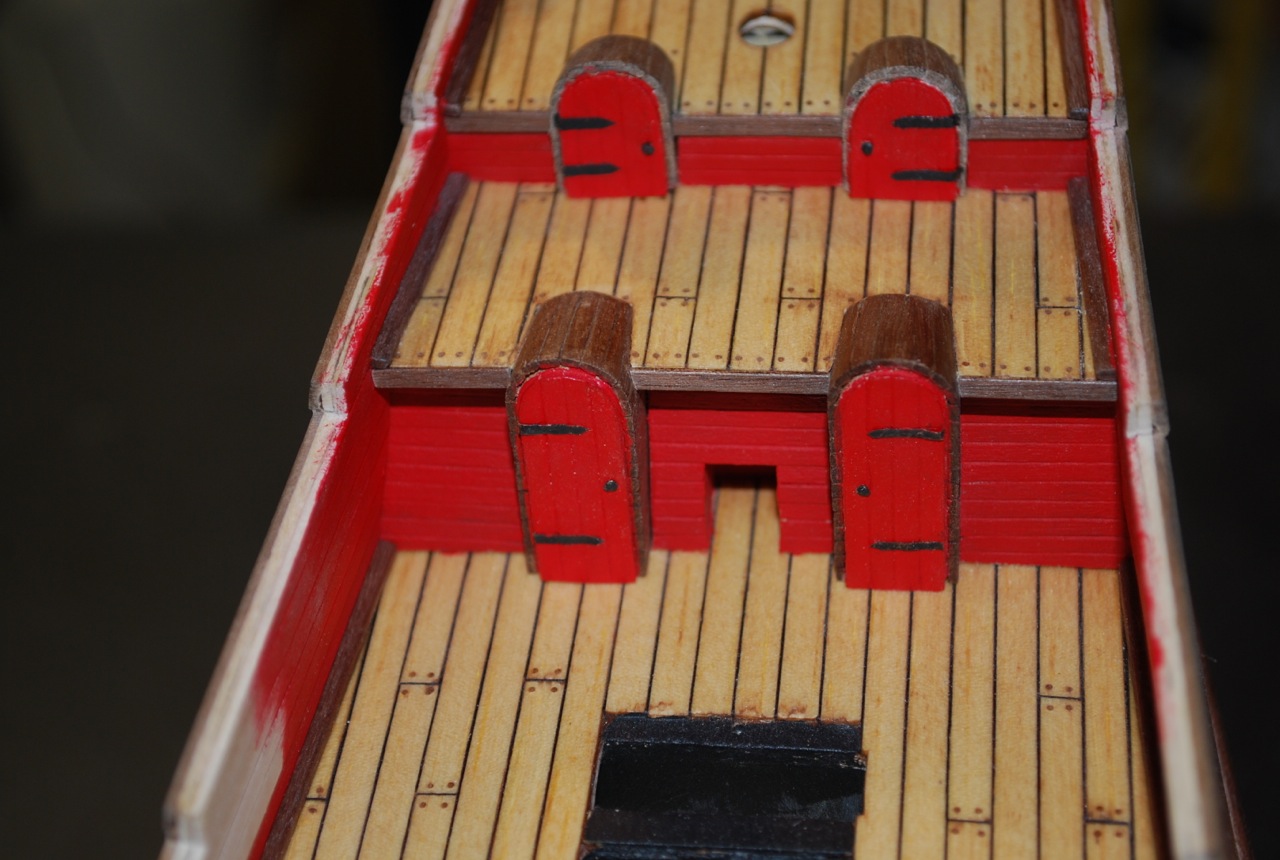
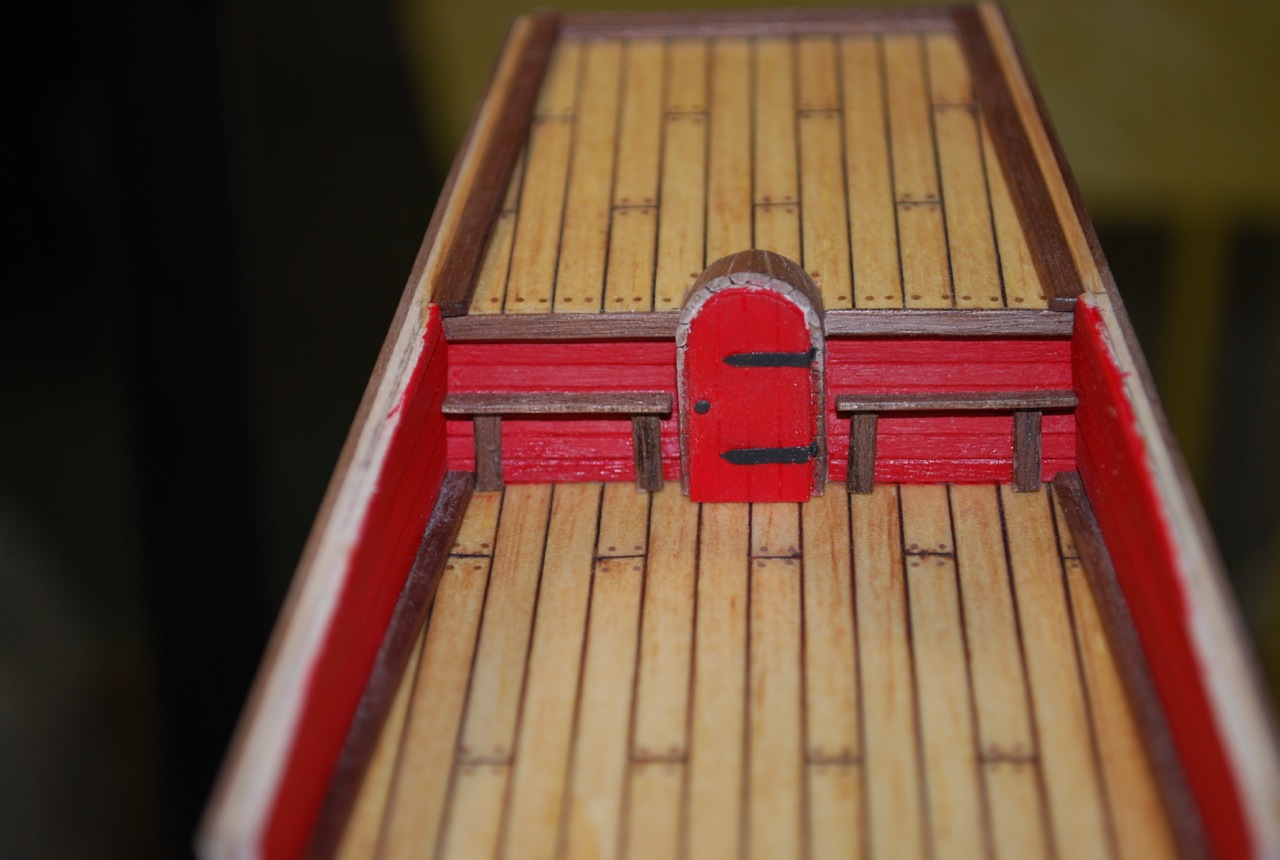
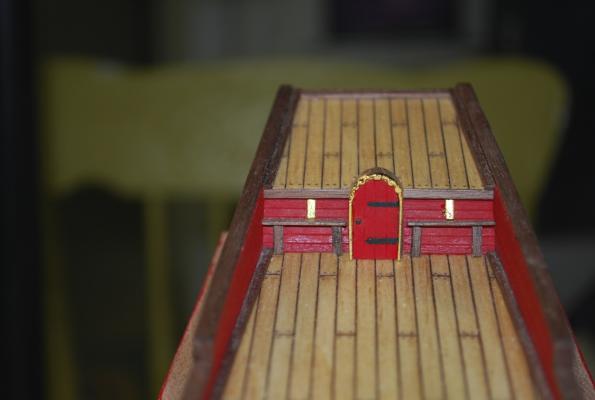
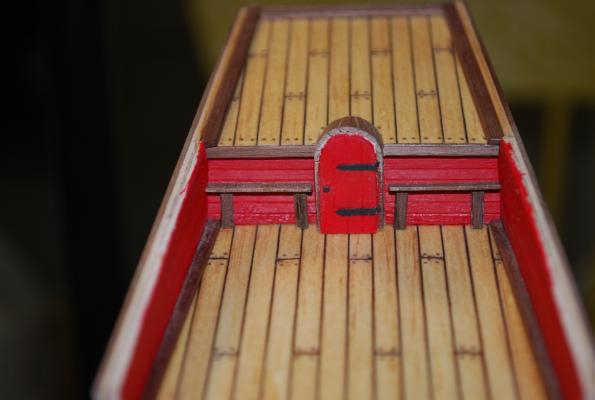
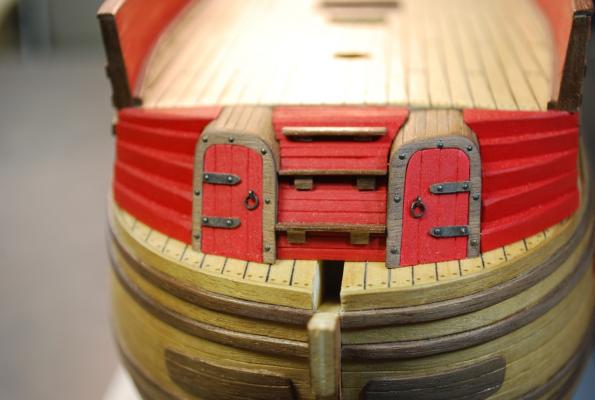
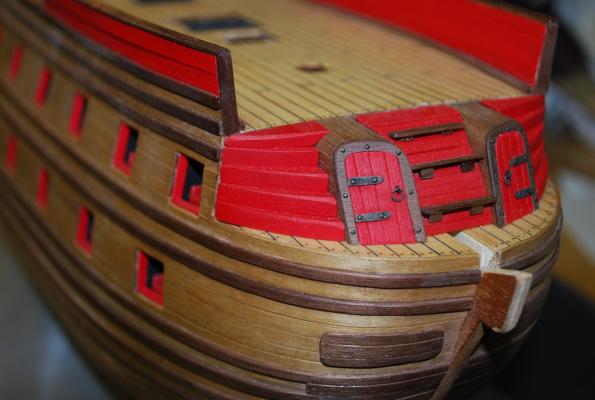
Continuing on with the deck items! The Corel kit comes with metal door pieces. I was able to grind away all of the middle parts of the metal, leaving the decorative frame. I then made the doors out of wood and inserted the decorative frame around the edges. I later take these off and gold leaf them along with all the other fittings later. (I'll get into my gold leafing process (why and how I did them in future posts)! Working on the bow section.


-
Hi Michael, Thanks for the above pictures on the 2nd set of catheads. Clears up where they should be located for me! Frank