HOLIDAY DONATION DRIVE - SUPPORT MSW - DO YOUR PART TO KEEP THIS GREAT FORUM GOING!
×


fmodajr
-
Posts
868 -
Joined
-
Last visited
Content Type
Profiles
Forums
Gallery
Events
Everything posted by fmodajr
-
 Mark, Great work up to this point! Personally, I like the look of your darker line for the standing rigging. It helps the viewer better differentiate between the standing and running rigging. I plan to do the same. Great job! Frank
 -
Hi Joe and Matti, Thank you for visiting my log and for your kind comments! Frank
-
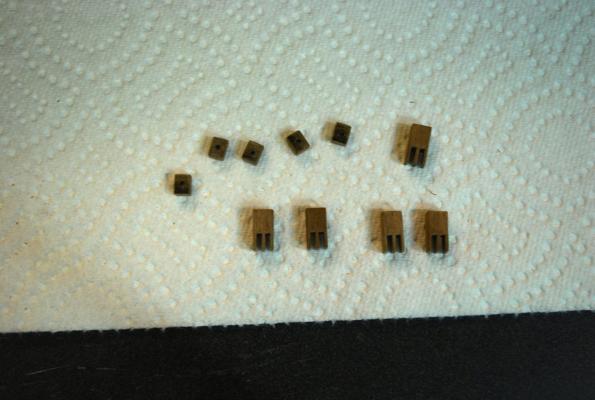
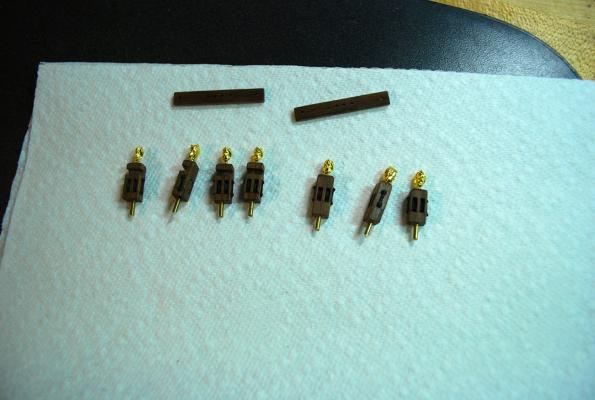
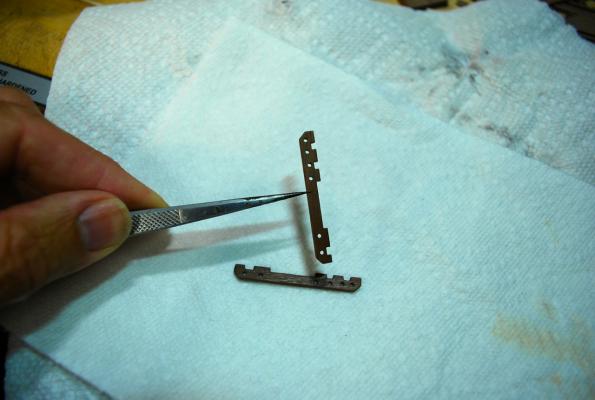
I now started to work on the channels. I made new ones out of walnut, with pins to help with the mounting. The mizzenmast channels and mainmast channels mounted to the ship The foremast channels: Another view I am starting to work on the deadeyes and chainplates. I will give Michael's (md1400cs) method a try. In his log he showed us how he used the "J-B Weld" product to help modify the chainplates that came with the Corel kit. Hopefully I can make mine look as good as his! Thanks, Frank
- 493 replies
-
- 10
-

-
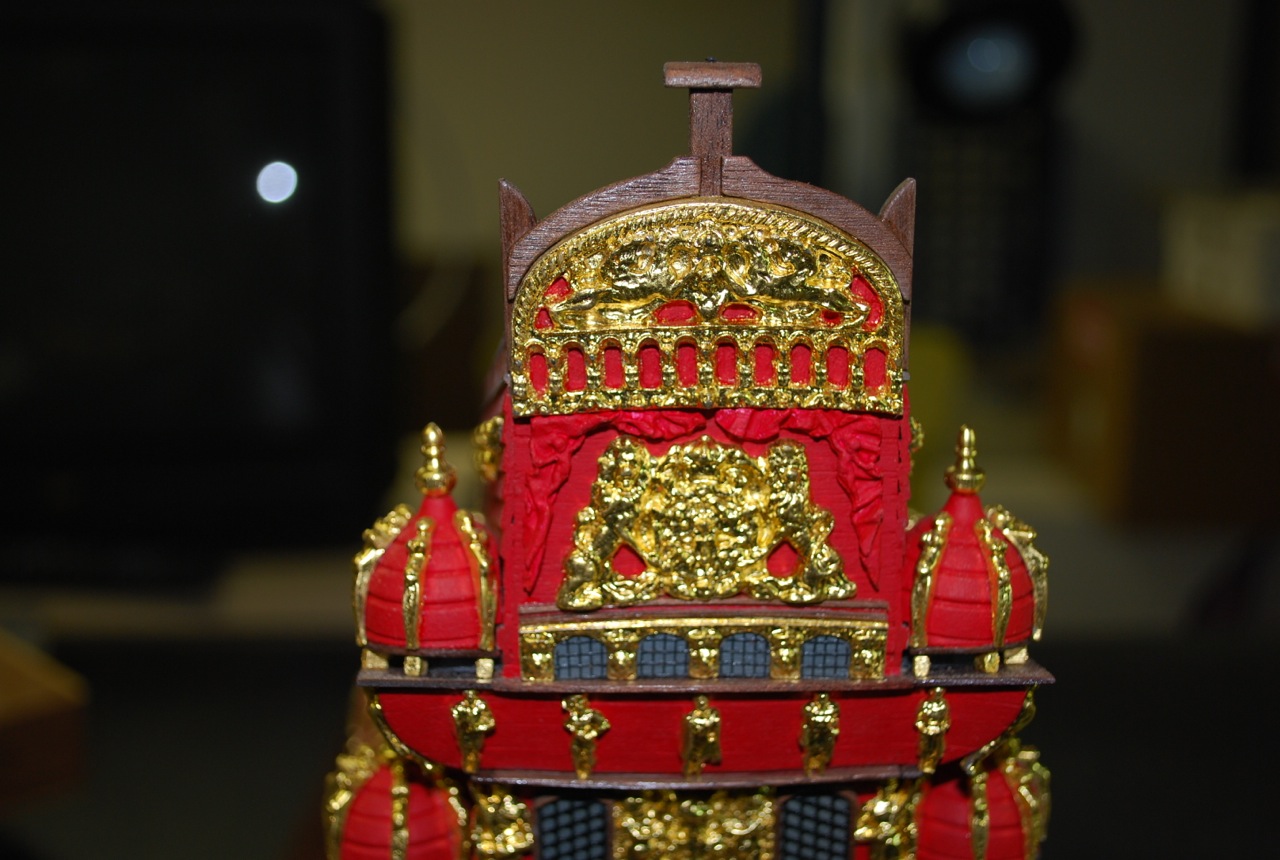
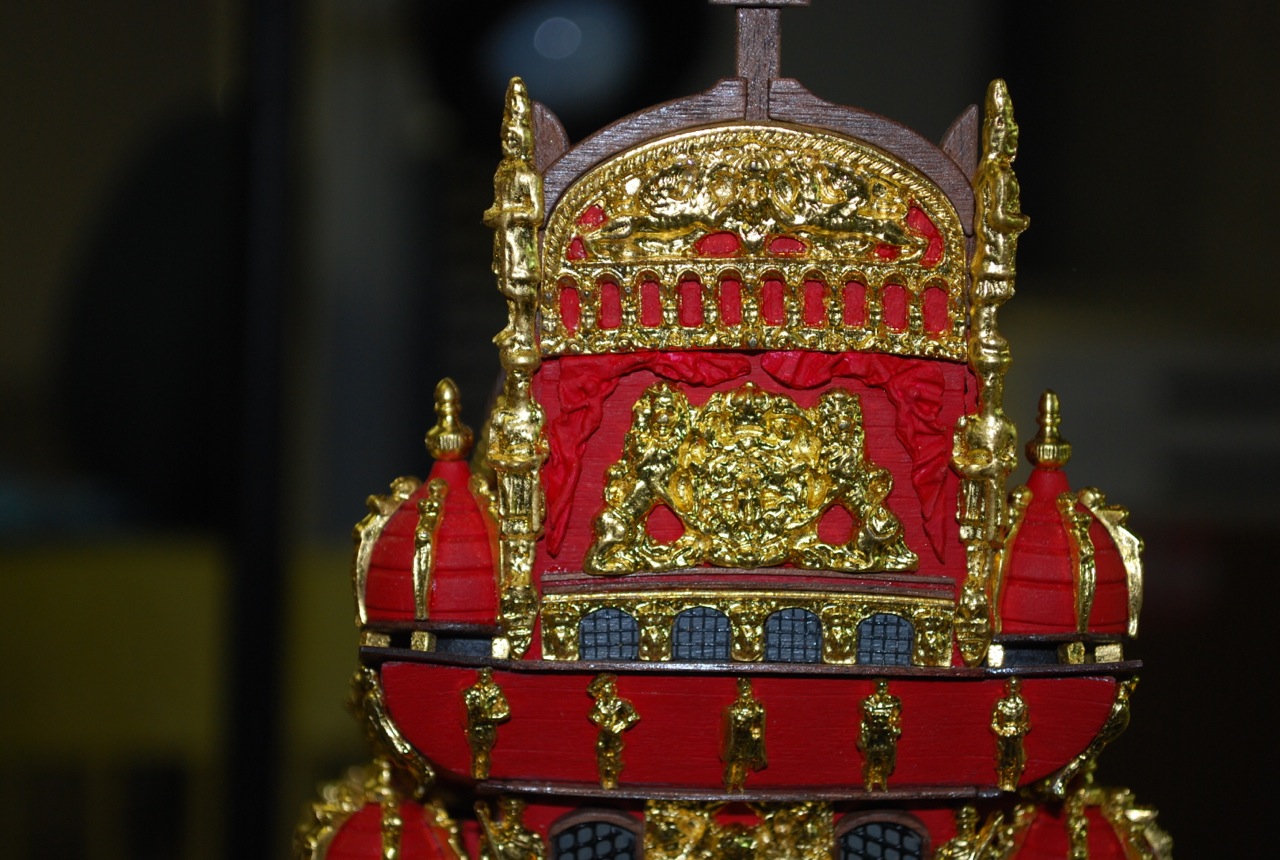
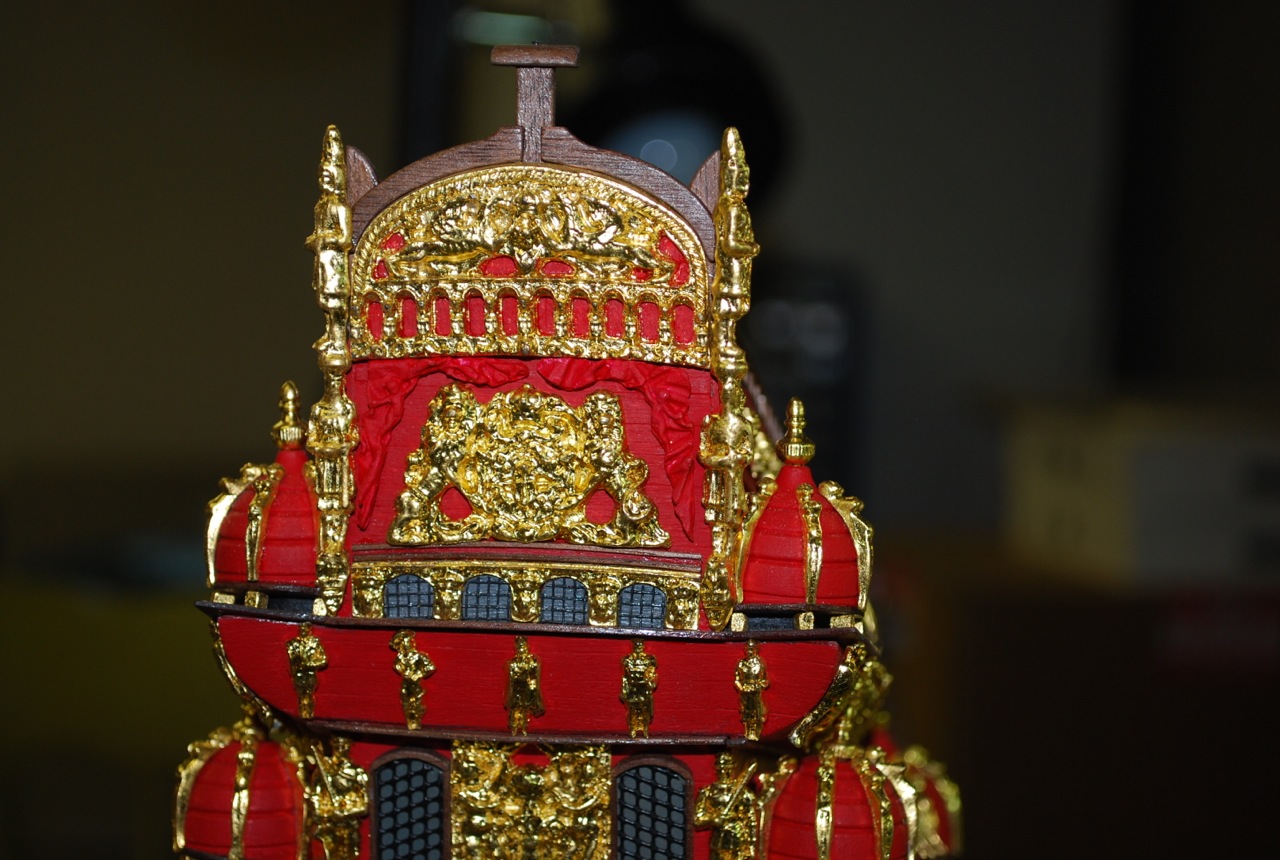
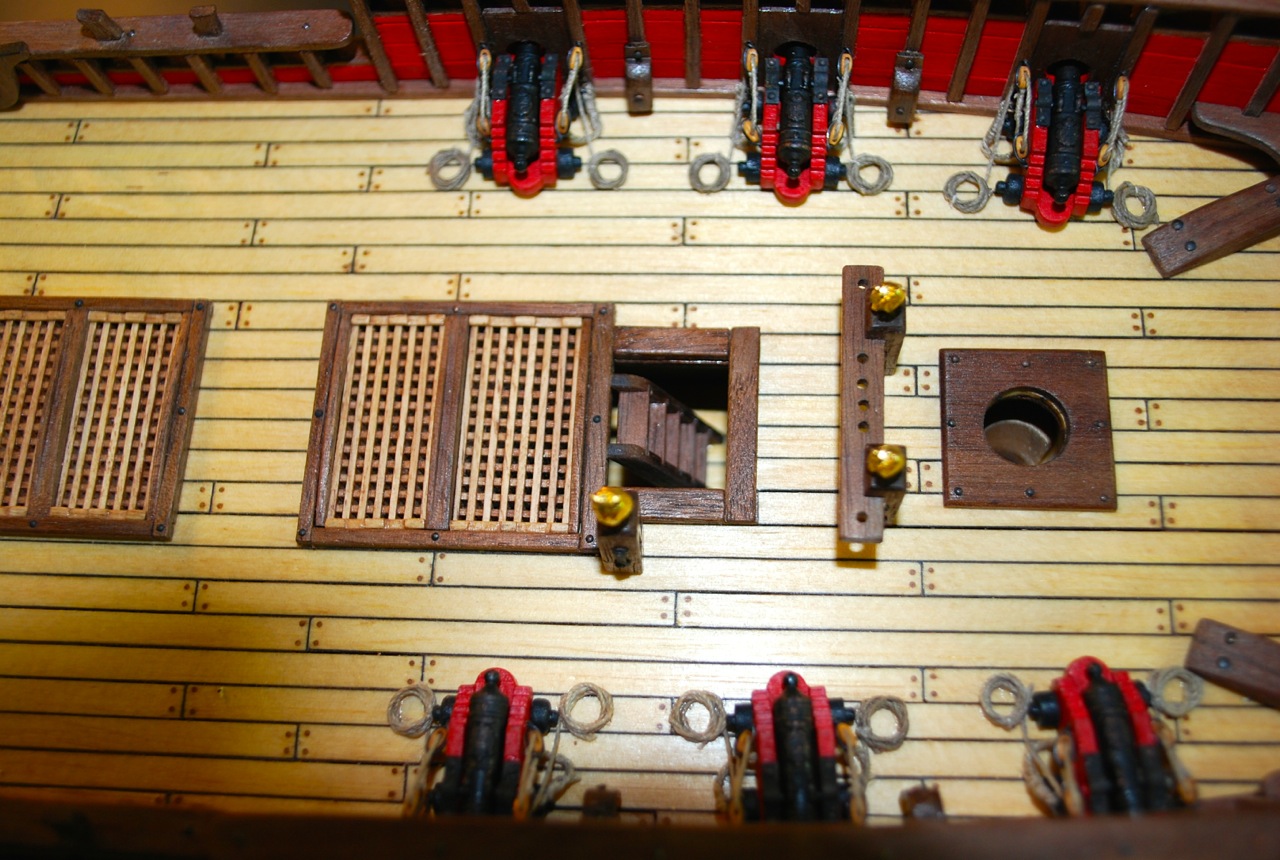
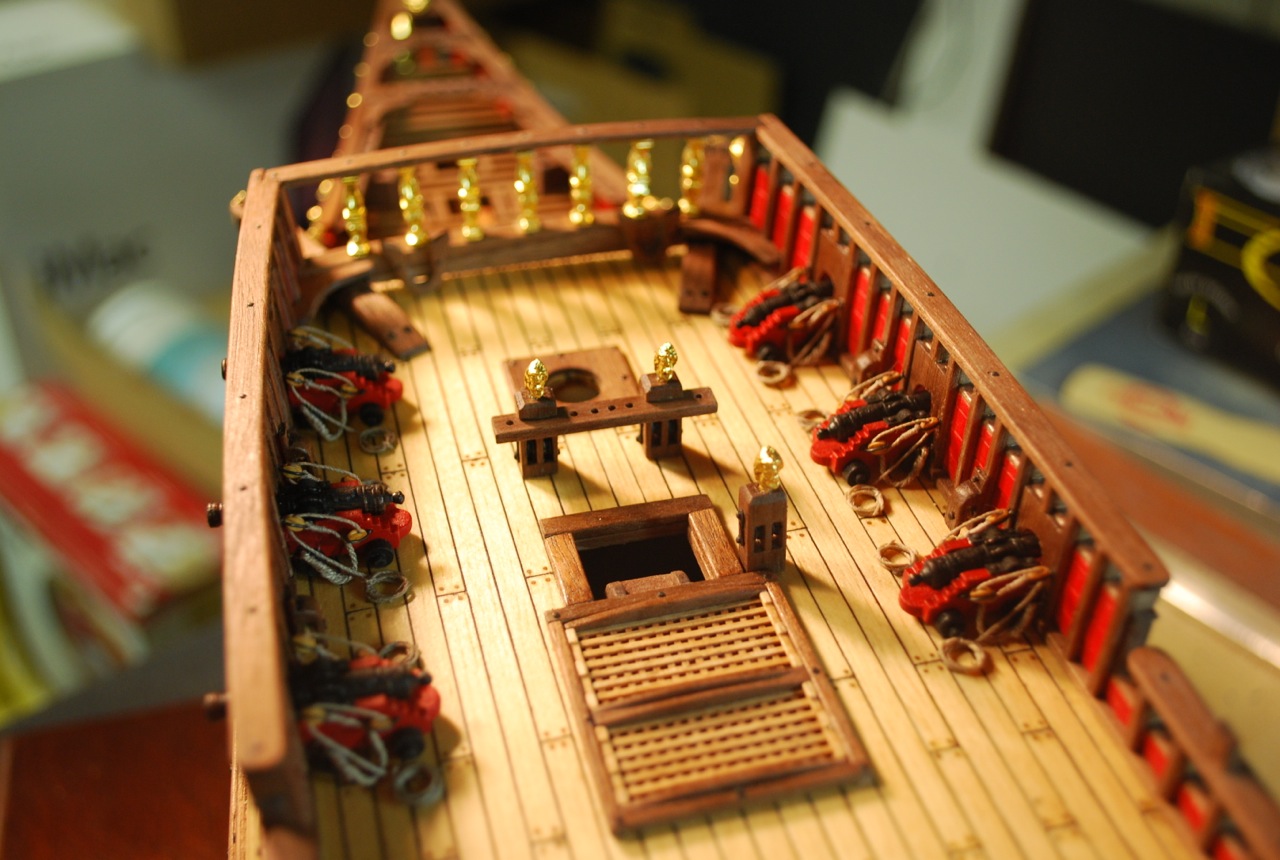
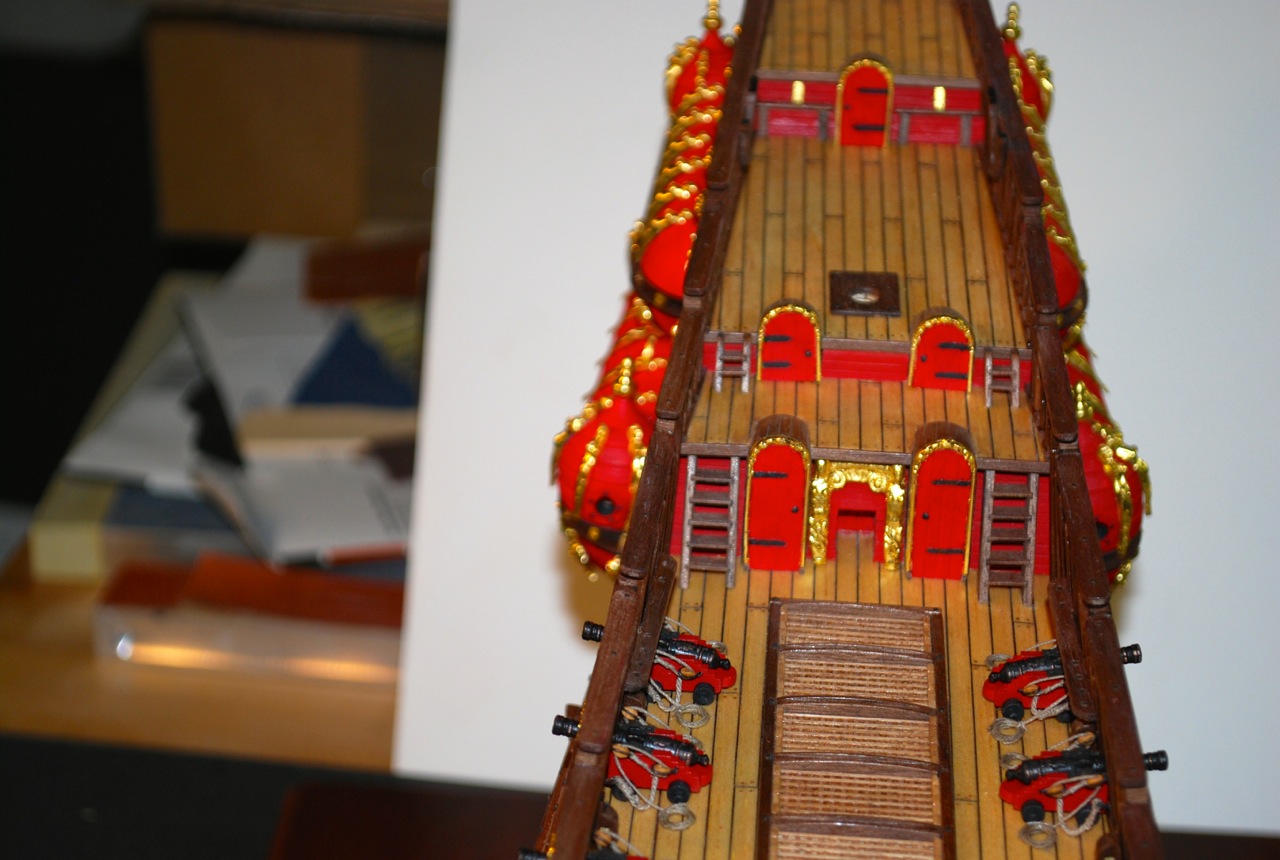
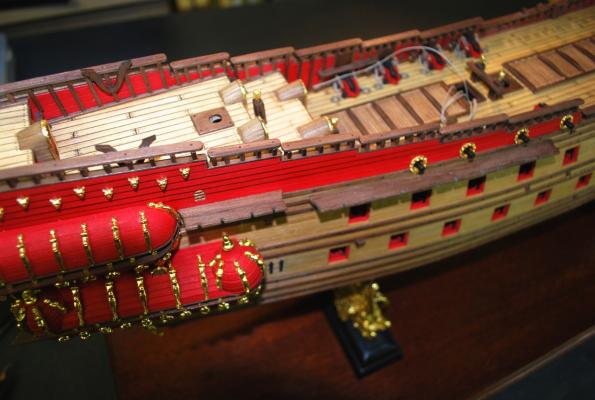
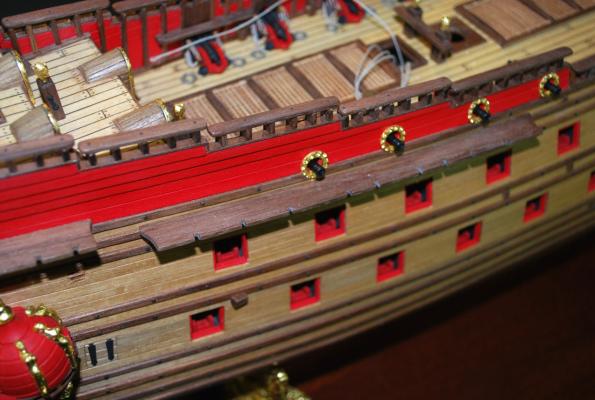
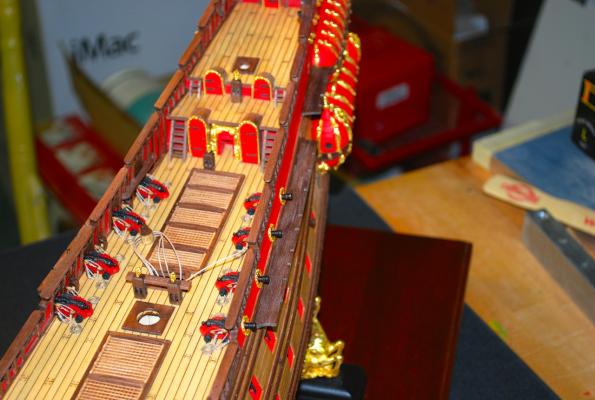
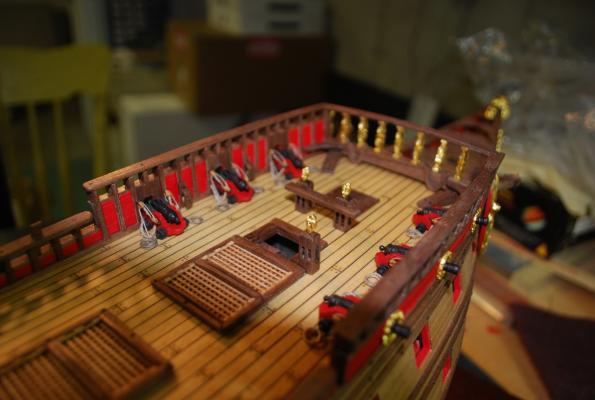
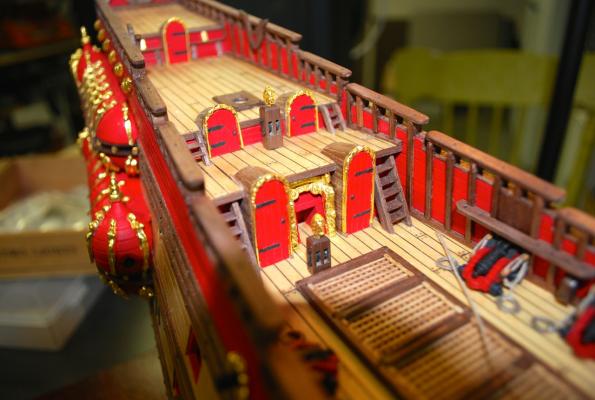
I went back over to the stern of the ship to tidy up a few loose ends. Installed the curved pieces above the center ornamentation. Then I gold leafed the two tall figurines and attached to the ship. Added the figurines to the lower part under the galleries.


-
Hi Matti, Your ship is setting the bar high for the rest of us "Vasa" builders! Keep up the great work! Frank
-
Hi Karl, Glad to be of some help. Thank you very much for pointing me to Clayton's link. What a beautiful job he has done! Frank
-
Hi Jan, Thanks for the update. Sad to hear that there will be a delay in the book. I'm thinking about adding some sails to the ship when I get to that point, but I would hesitate if I didn't have any plans for the sail rigging. We'll see! Frank
-
JanV Nice job on the gunport lids! I will be doing mine in the next month or so and I like your method of installing the ropes to the gun ports! Frank
-
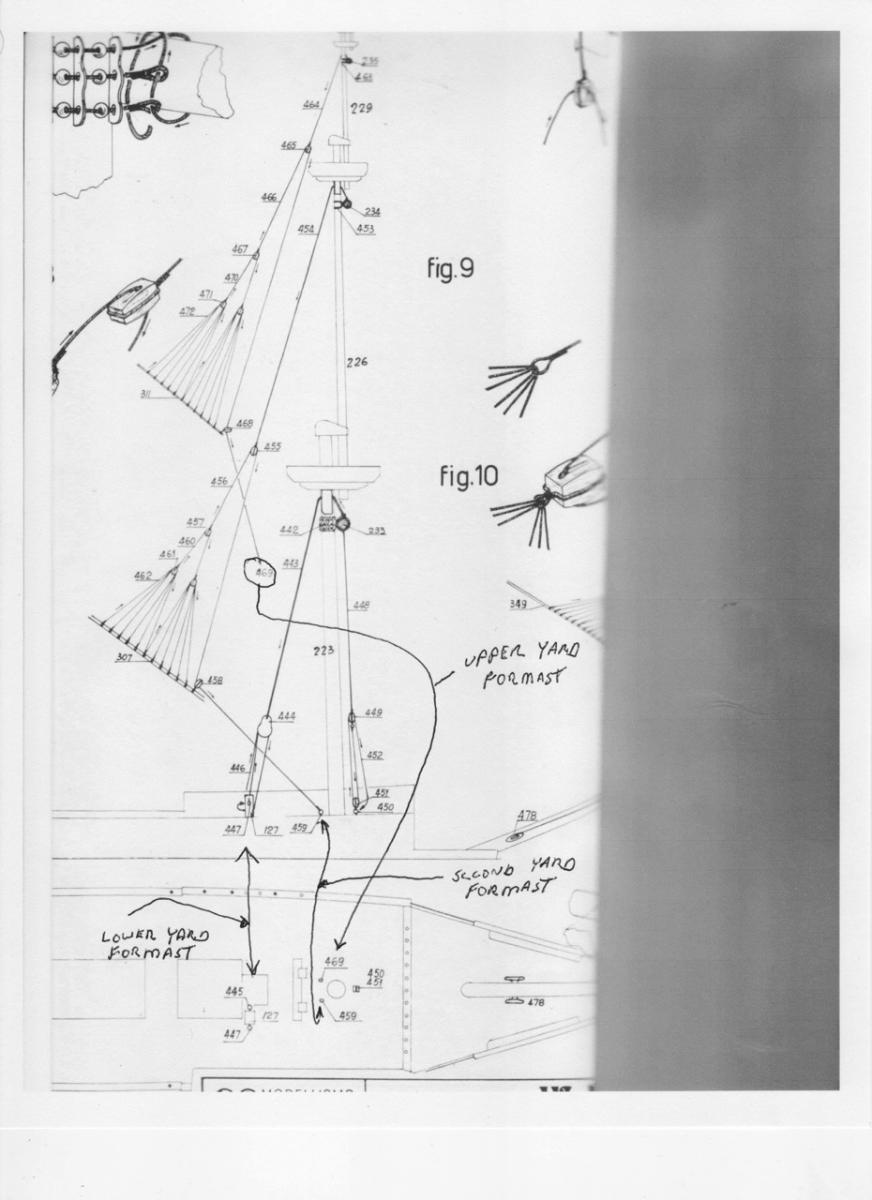
Karl, Here is the Corel plan for the yards on the Foremast. (If you have trouble viewing, sent me an email and I will send you a PDF. Thanks, Frank

-
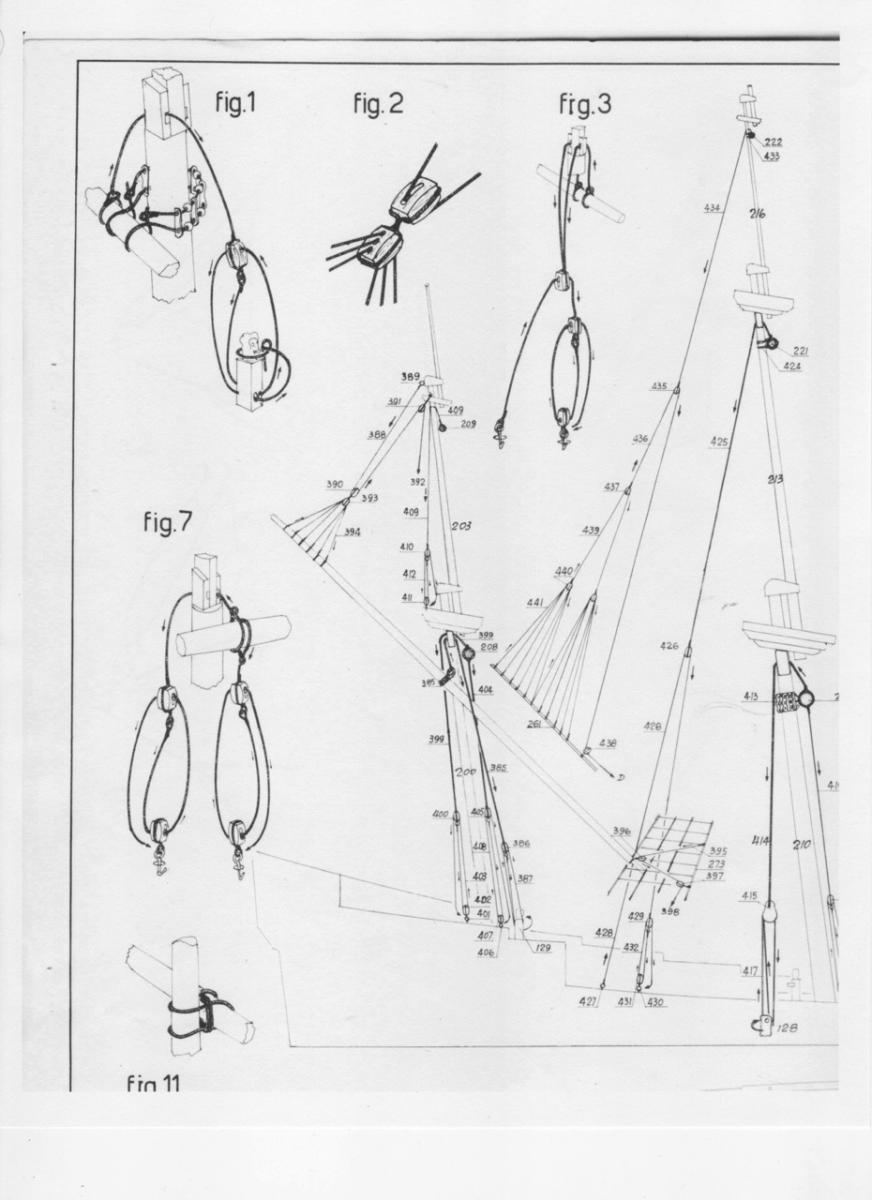
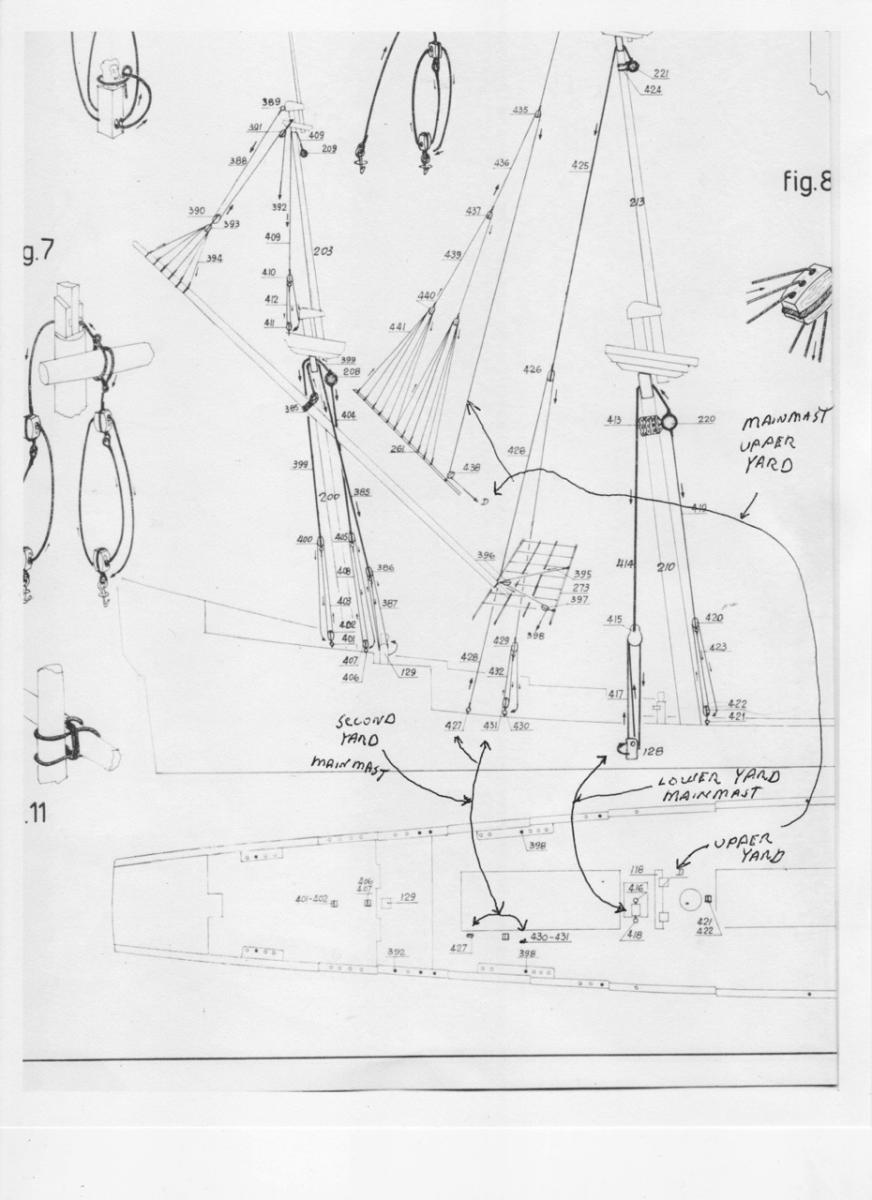
Hello Karl, You are ahead of me in the build, but I think I found what you are looking for. The Corel plans shows the rigging of the mainmast yards onto the deck. (I don't know how accurate the Corel plans are. I know that the Vasa Museum is supposed to be coming out with a rigging book soon). Here is pictures of the mainmast from the Corel plans. Frank

-
Thanks for the post Michael (and the help with the capstan)! I am now cutting and shaping the wood for the channels and figuring out what I need to install the deadeyes and chain plates. I hope your cannon rigging is going well! Frank
-
Hi Tom, Thanks for visiting my log! When I started my Corel Vasa 2 1/2 years ago, I didn't realize how inaccurate it was. If I had to do it over again, I would have done a lot more research into kit selection. I understand from other logs that the Billings kit is more accurate, but I am sure that the members who are building the Billings version can speak more knowledgeably about how the kit is to build! As for the metal nails, I just order mine from micromark.com. Once I get the sizes I need, I dip them in a chemical blackener to turn them black. The product I use is " JAX Pewter Black" but I am sure there are plenty of other products out there. If you decide to continue with the Corel kit, I think there must be ways to get the interior of the gun ports installed after the fact. Will have to think on that a bit! Thanks, Frank
-
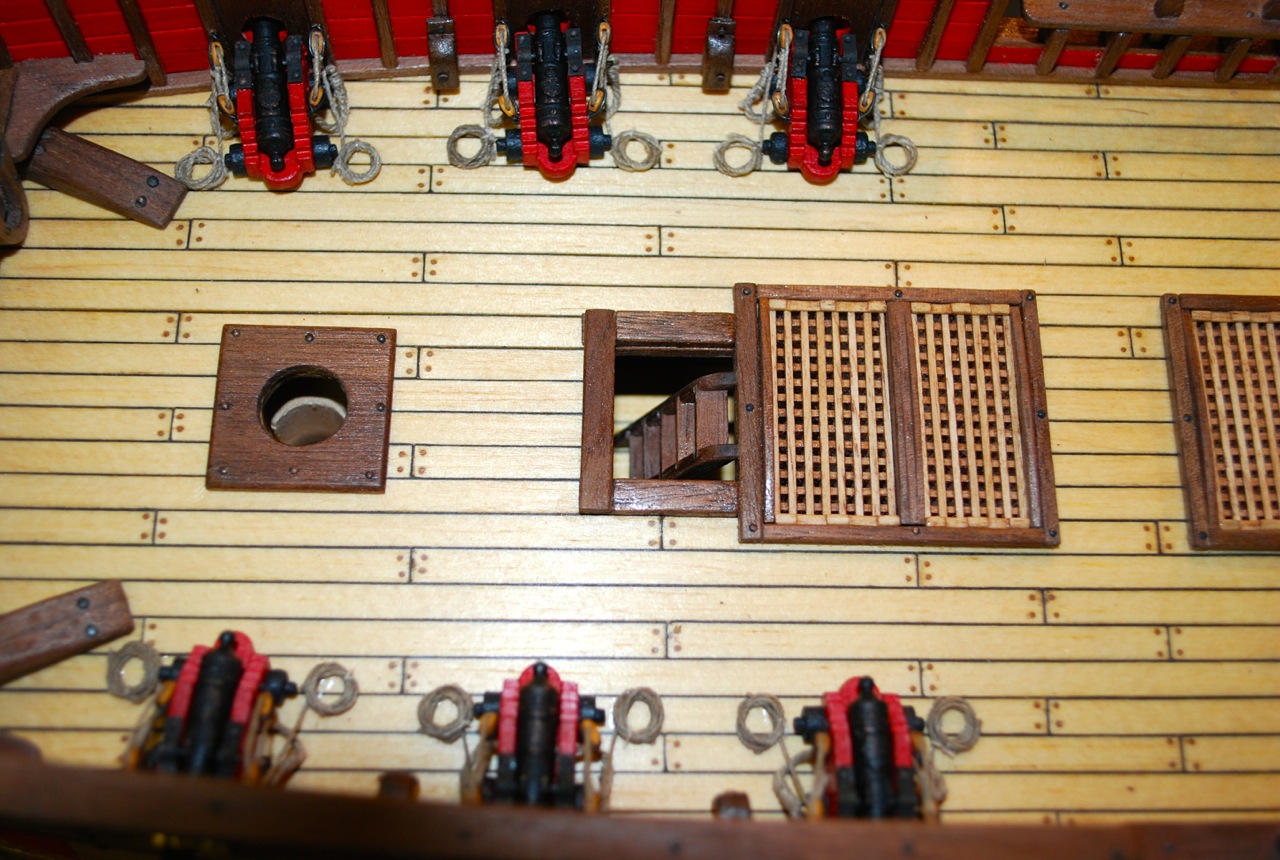
I decided to add the small railing around the opening to the lower deck and leave off the stern railings (in front of the mizzen mast) that the Corel kit called for. Stanchions pinned to deck. Finished railing Now turning my attention to the channels! Thanks, Frank


-
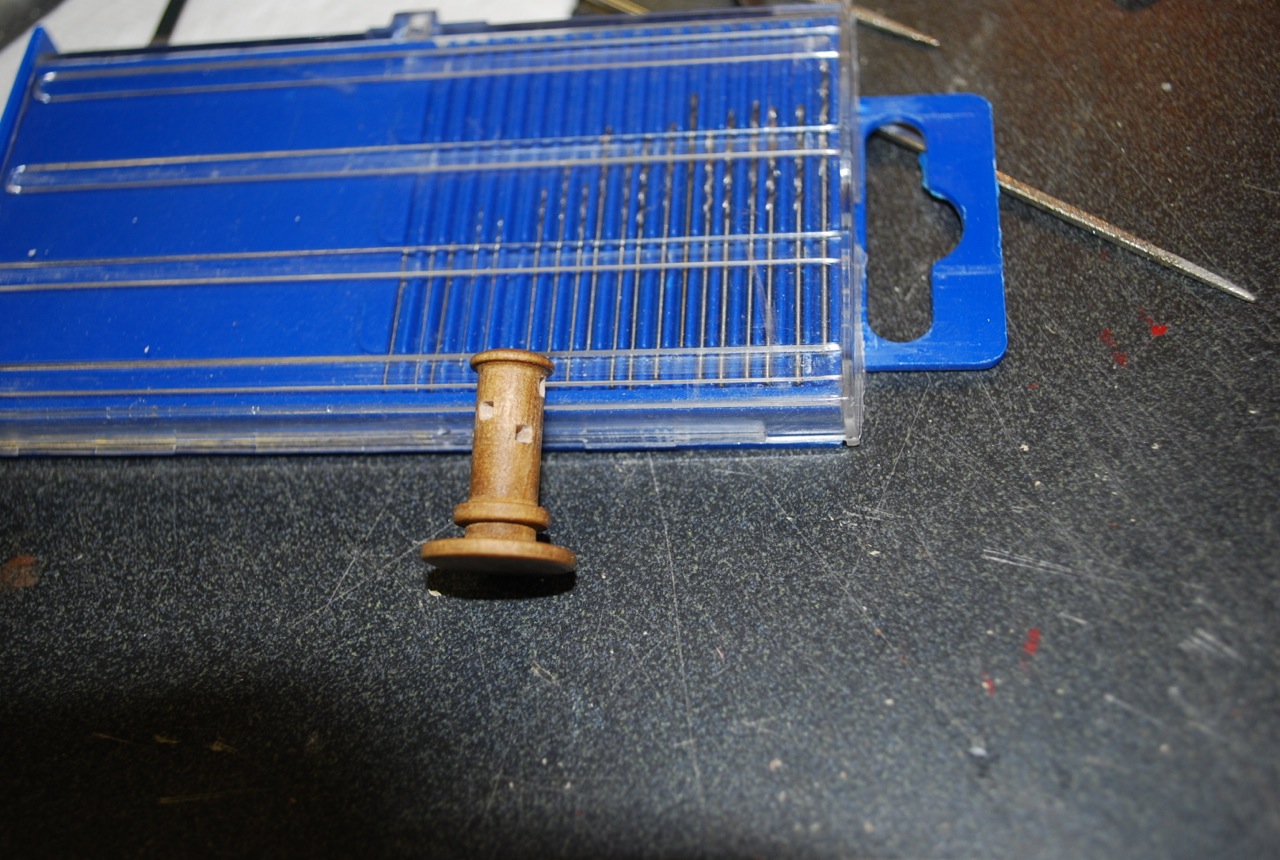
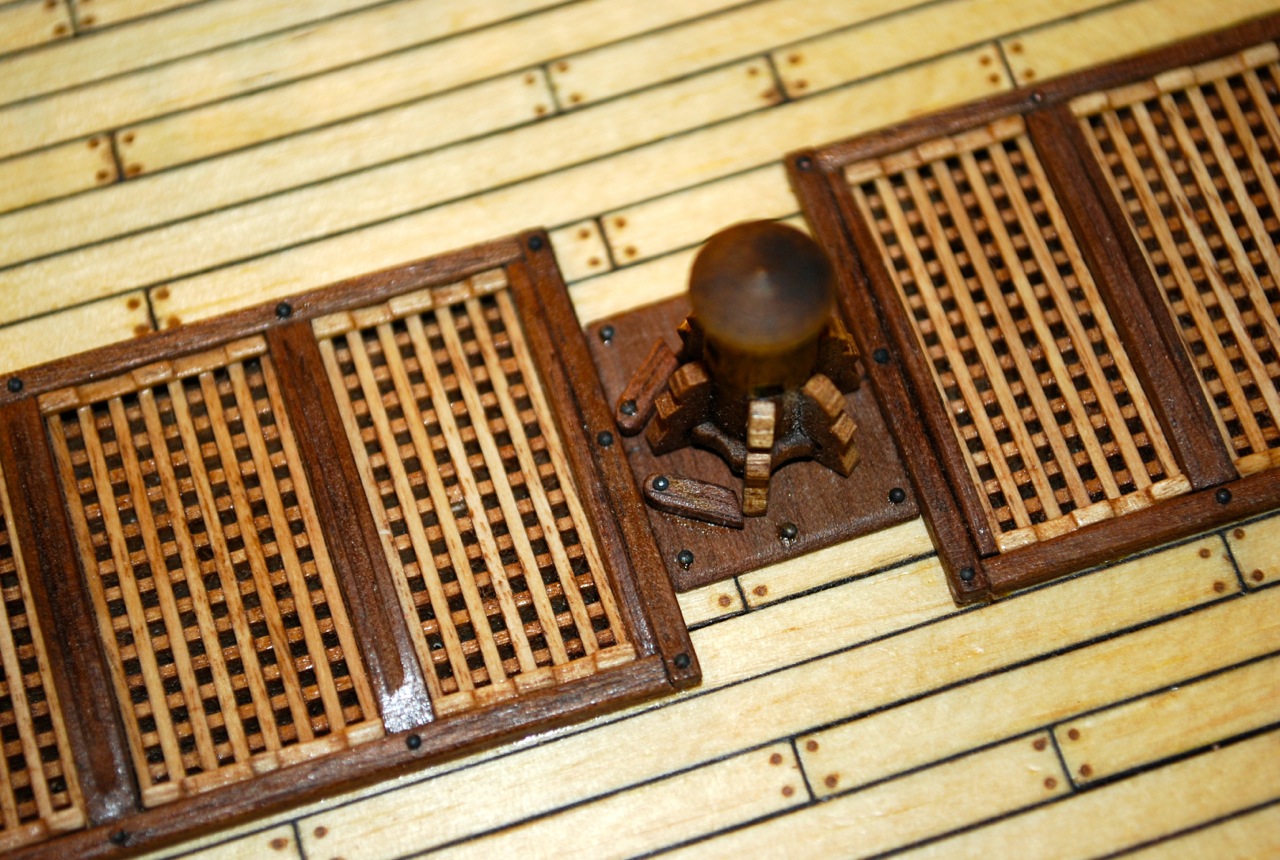
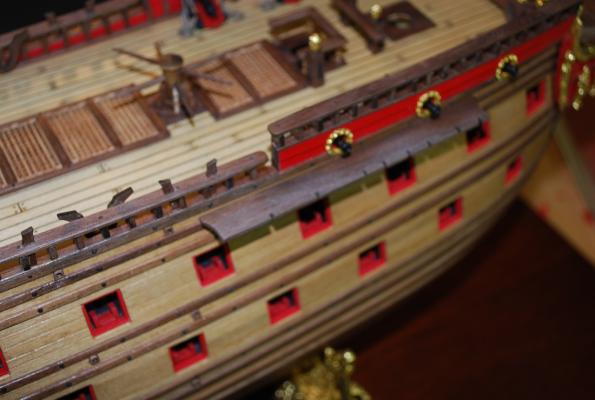
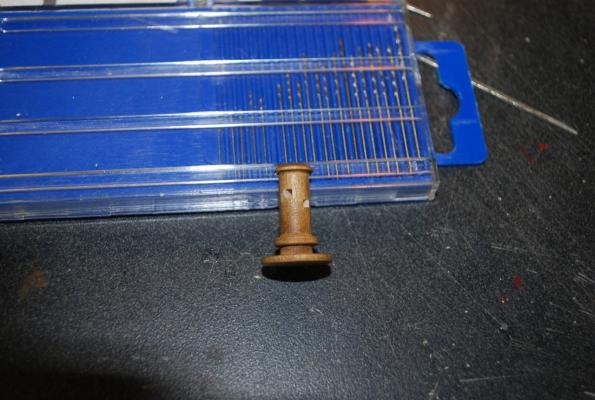
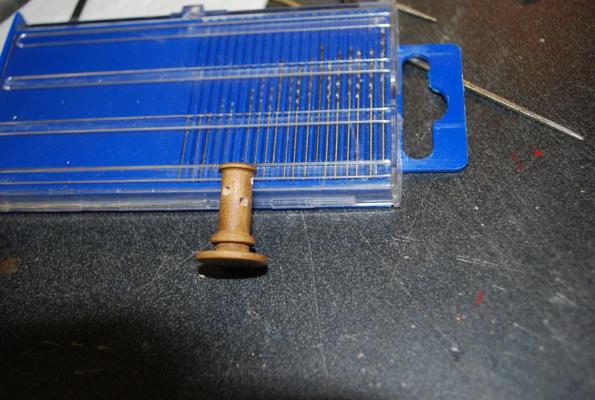
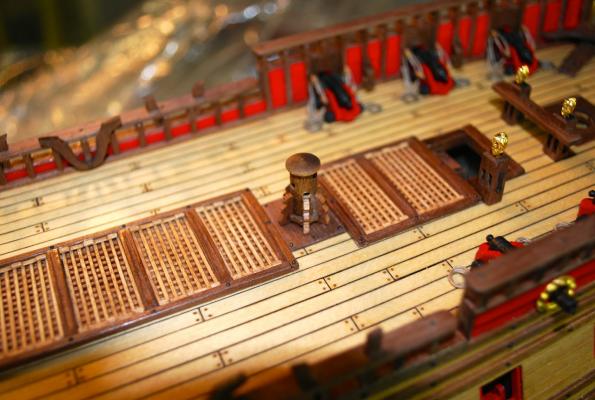
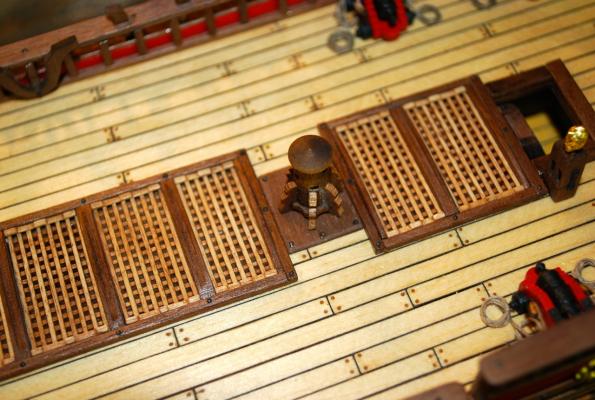
Working on the Capstan. I drilled out the holes of the Corel Capstan and squared them up. Installed the base for the capstan I removed the large base from the Corel capstan, added the 6 vertical pieces and shaped in-between. Installed the capstan to the base Finished capstan


-
Hi Matti, How true!! I'm sure a sailor's life in the 1600's wasn't very romantic! Frank
-
Hi Mark, Thanks! Yes, It is strange! I Guess the Vasa didn't last long enough for the ship builders to get enough data on whether or not railings should be added Frank
-
Thanks for the fine input Karl! I know there are so many areas of my model that don't match the original (and I'm sure there will be other areas when I start the rigging ) However, if I can change something to make it closer to the original, I probably should do it! We'll see. I have some thinking to do! Thanks, Frank
-
The Corel kit plans call for a small railing behind the foremast, where the ladder to the lower level is, and a larger railing in front of the mizzenmast (above the 2 doors on the main deck. I do not see these railings on the Vasa Museum plans, the 1/10 scale model or in Landstrom's book. Am I missing something? Or should I install them or leave them off? Any thoughts would be most welcome! Thanks, Frank
-
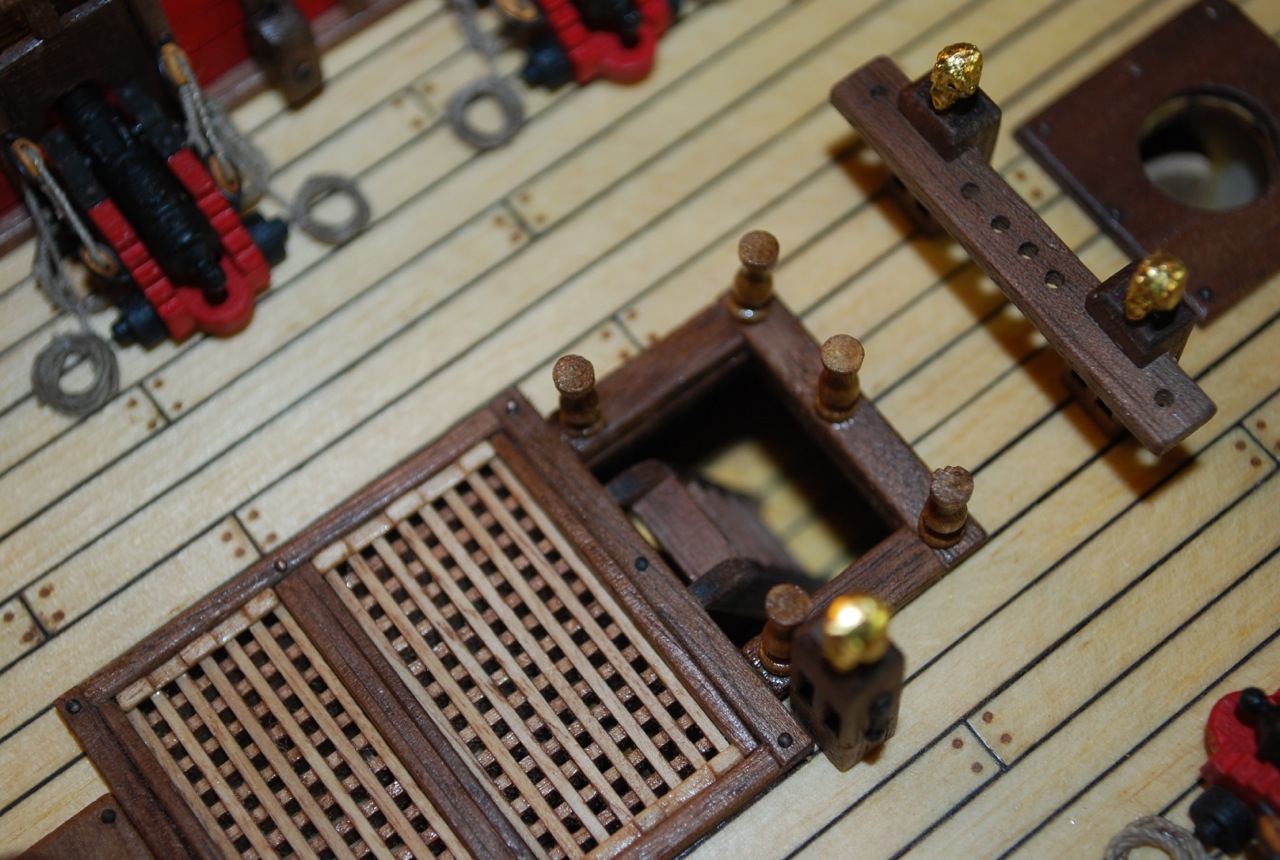
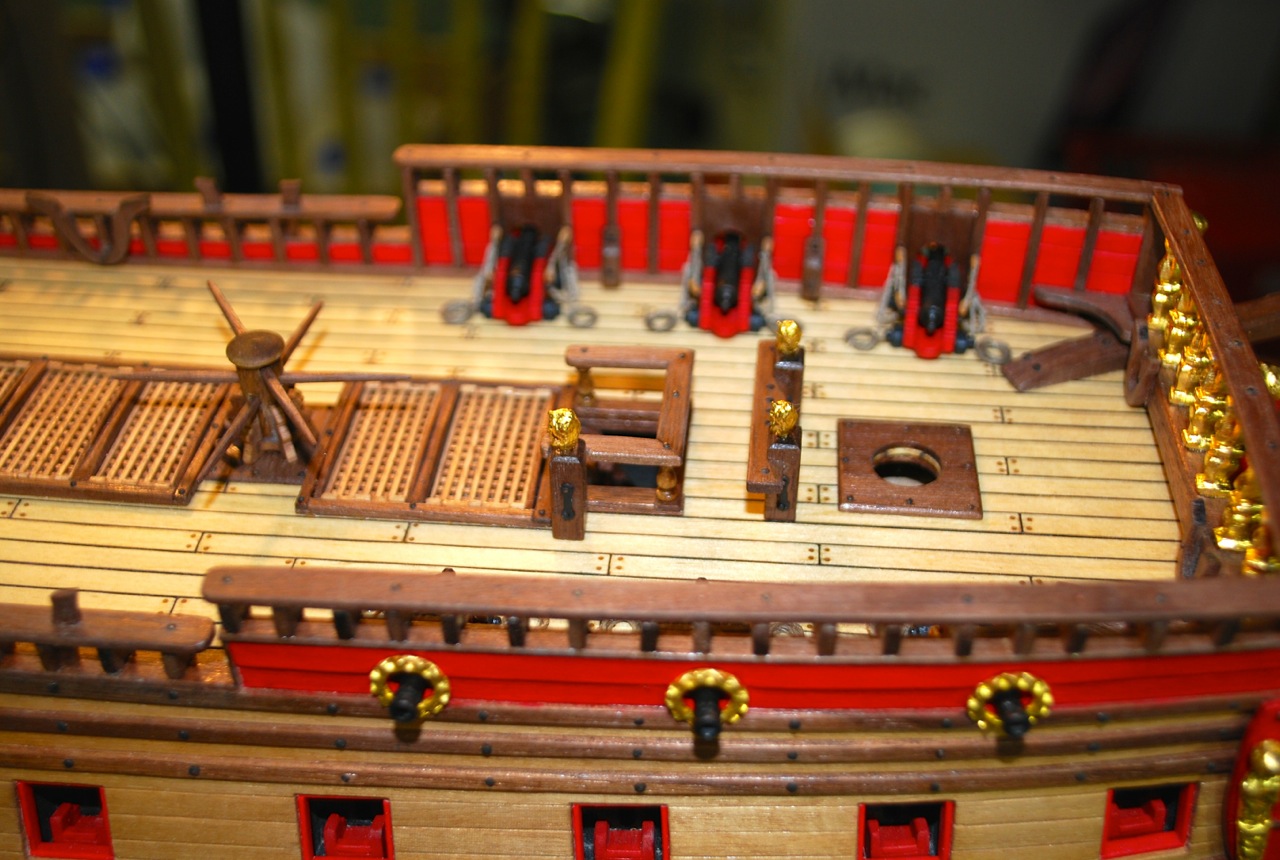
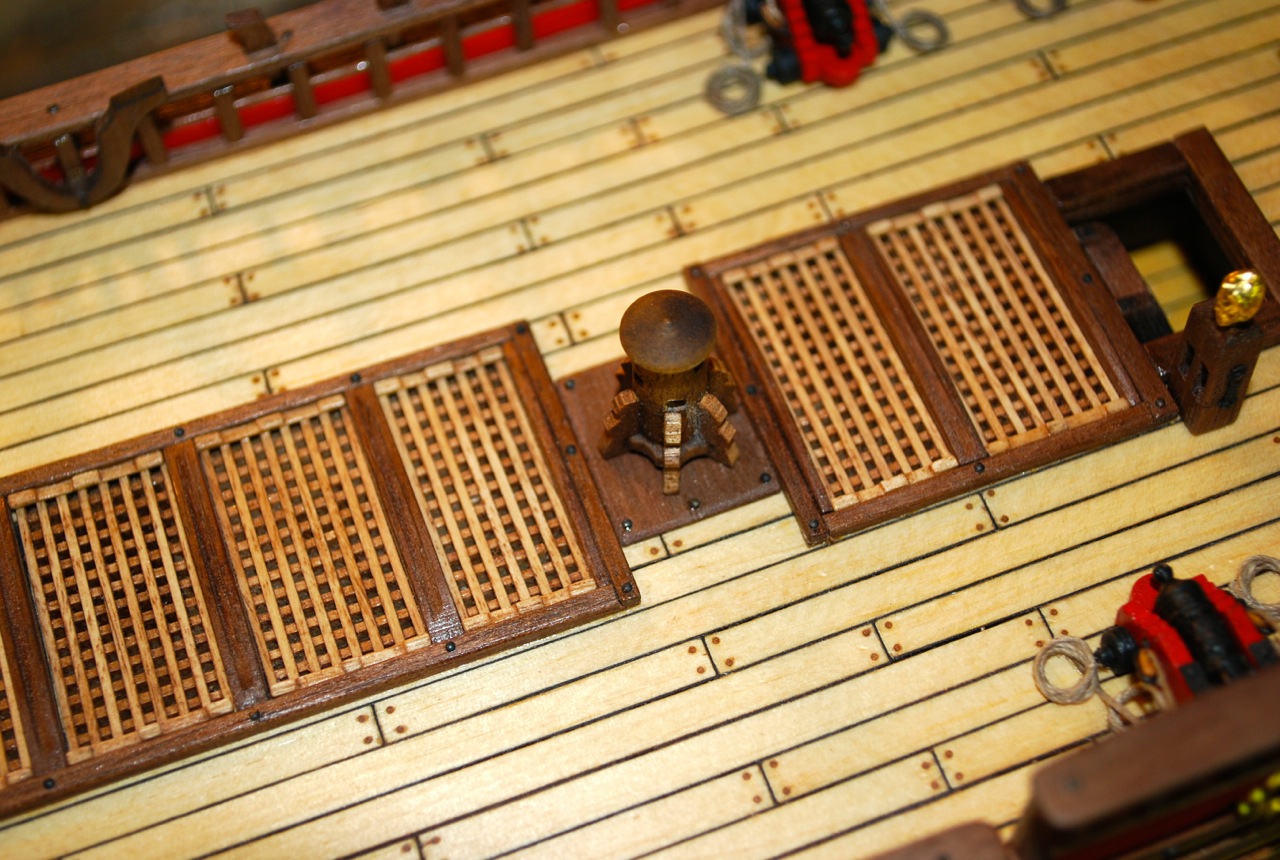
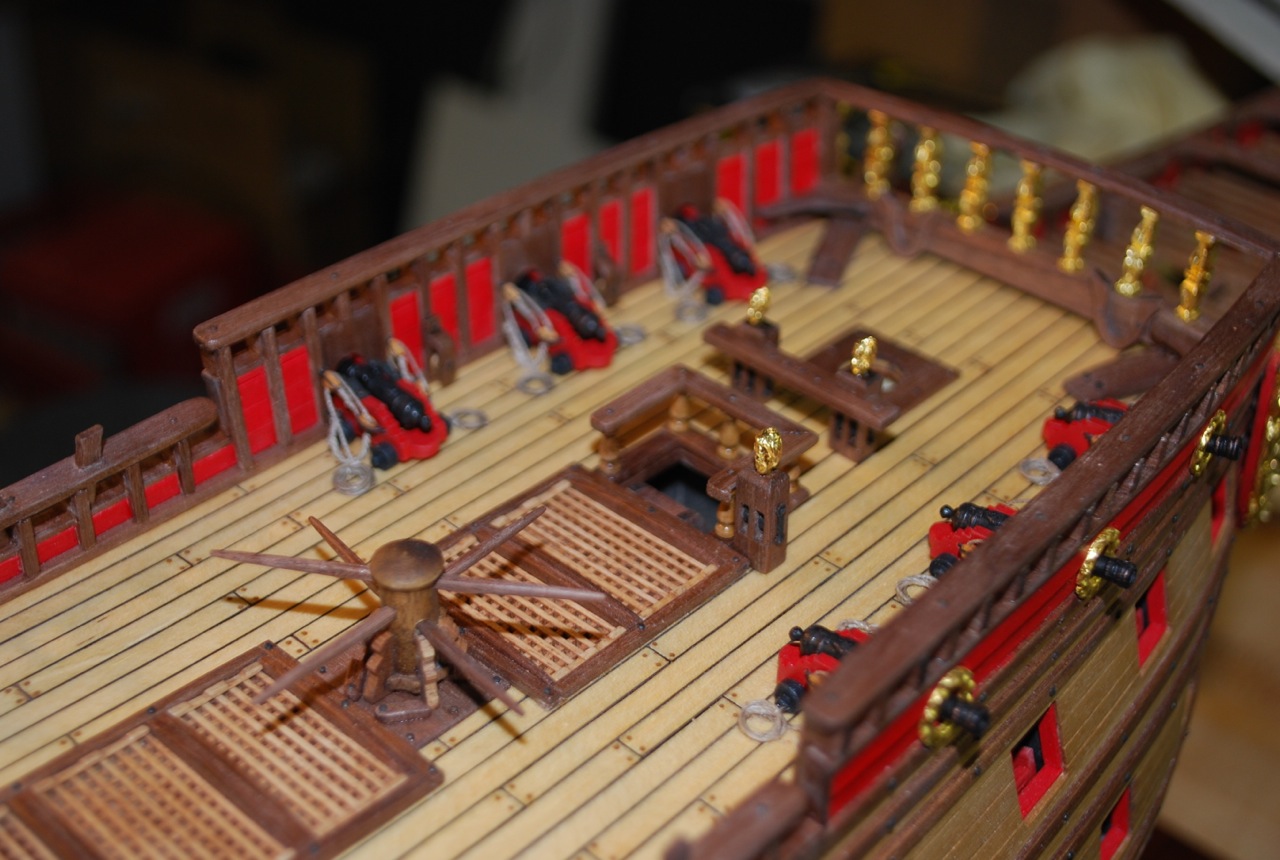
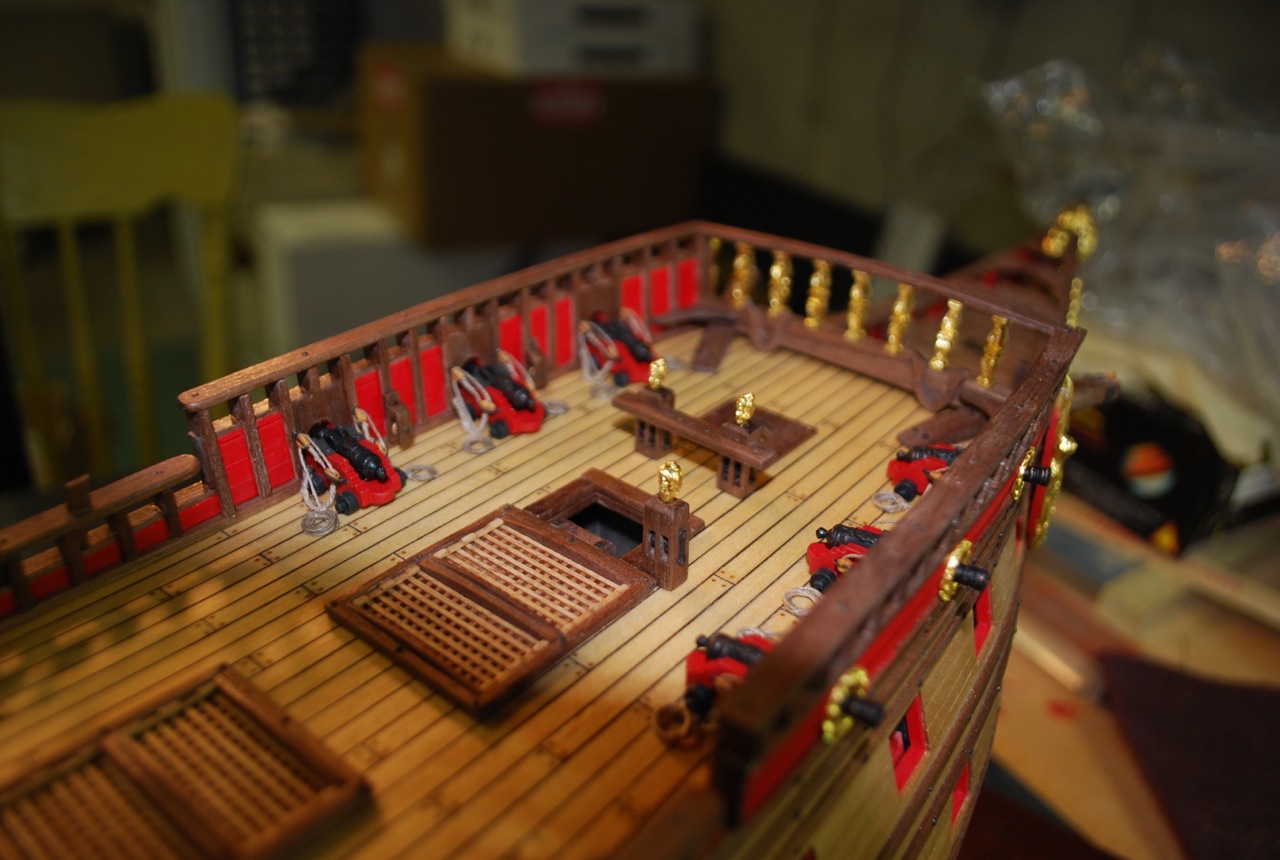
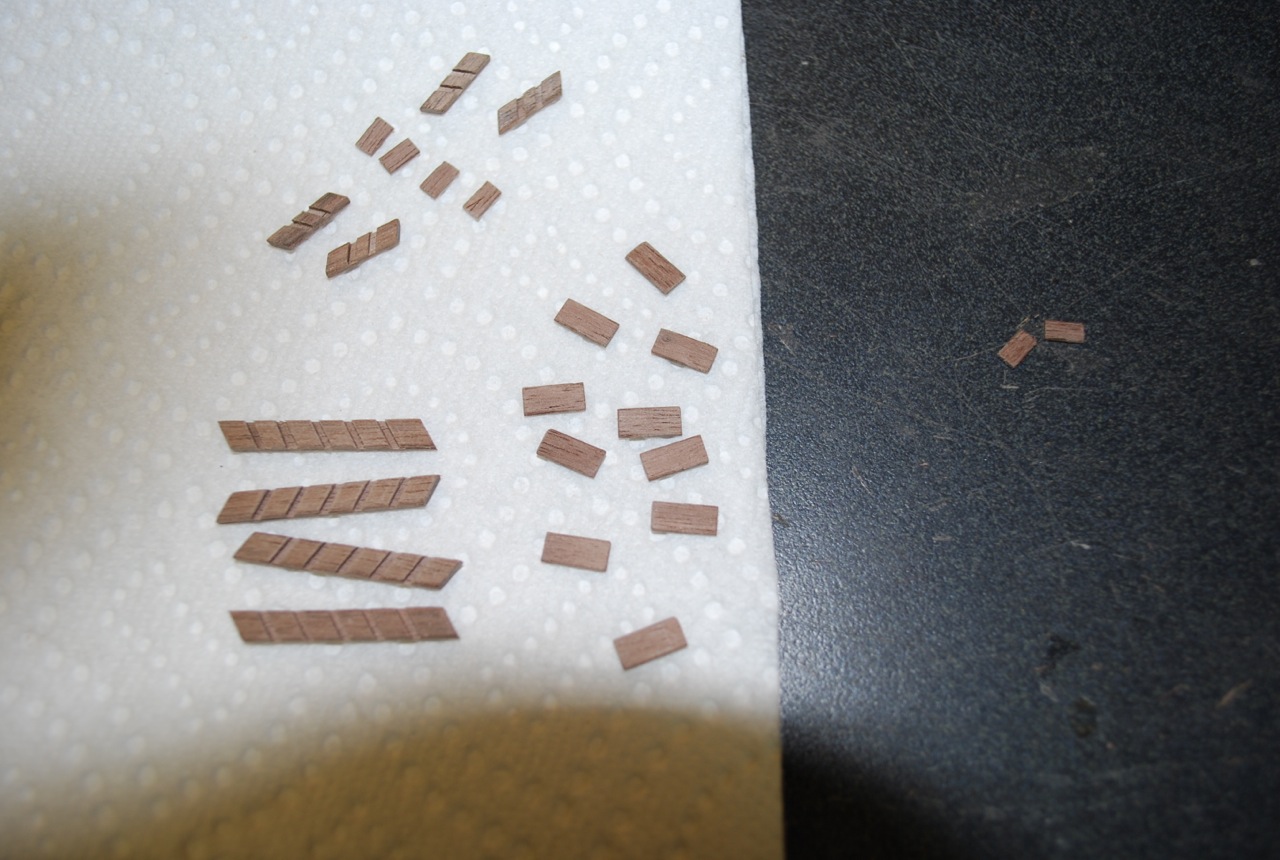
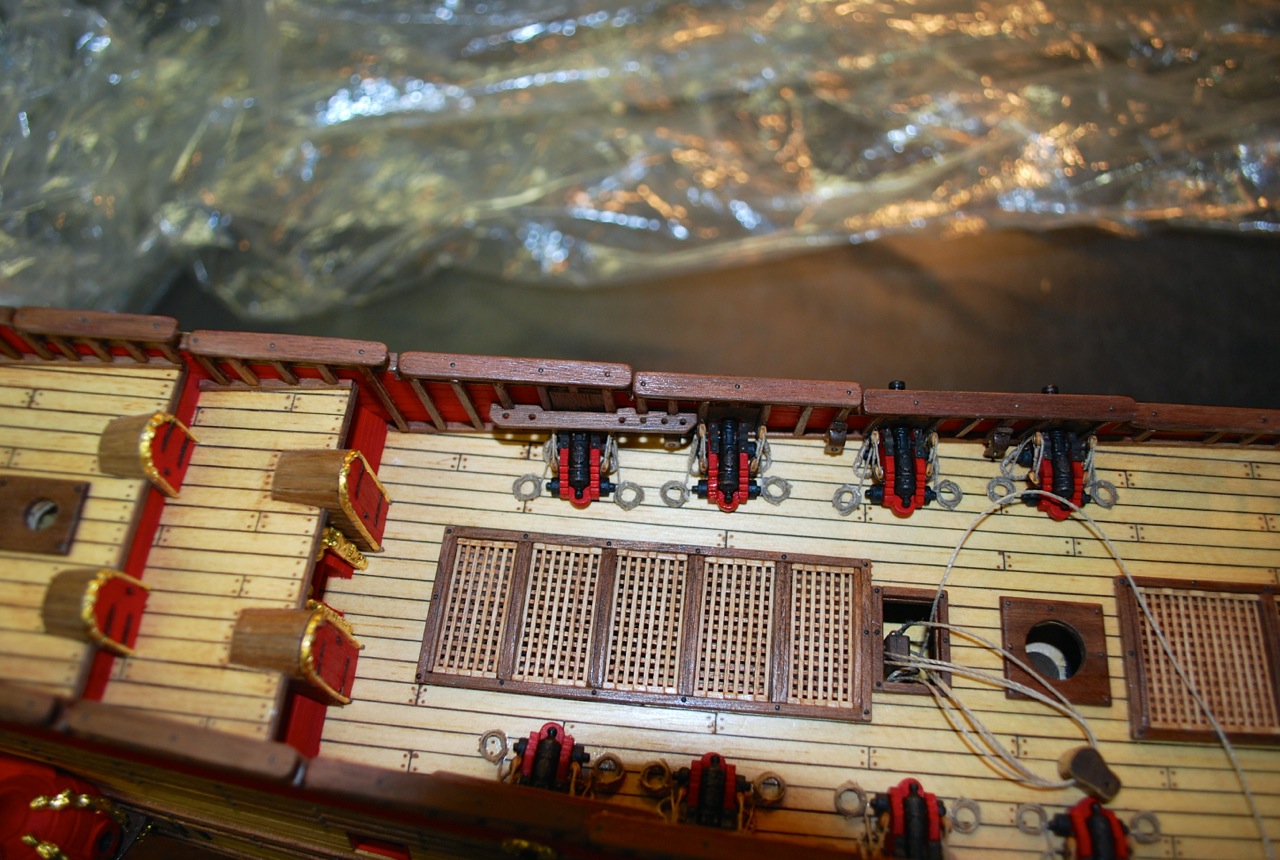
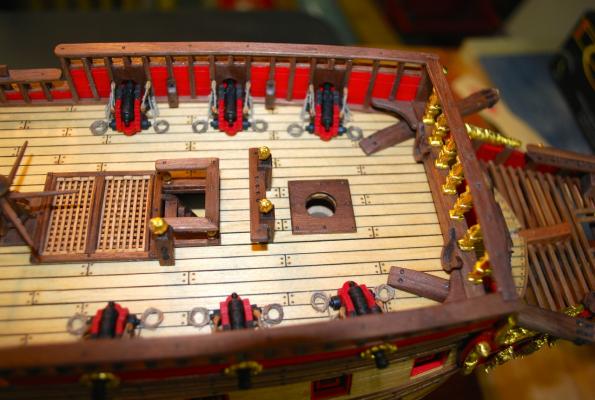
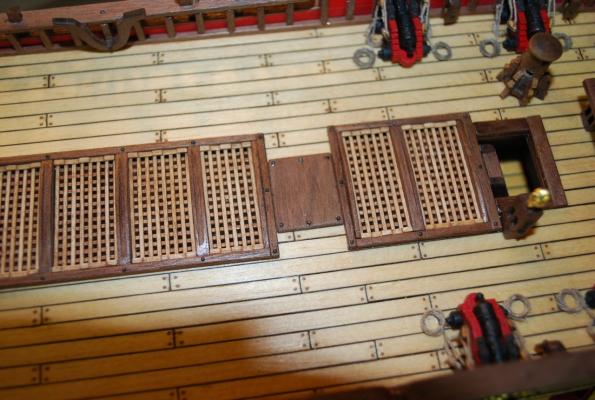
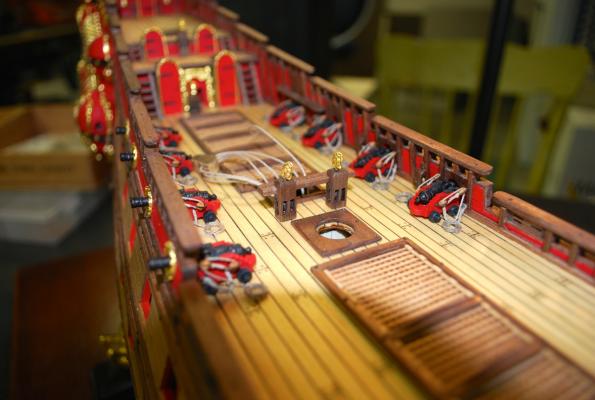
Made some more progress on the model! Started work on some of the deck fittings. I cut out the slots for the sheaves and made the bottoms for the stanchions. Now I inserted the sheaves, pinned the bottoms (to help keep them in place on the deck), gold leafed and fit the head figurines to the stanchions, and made the belay pin racks. Some photos of the finished assembly's on the deck


-
Michael, Beautiful job on the cannons. I look forward to seeing them mounted on the deck! Frank
-
Thanks Mark! Frank
-
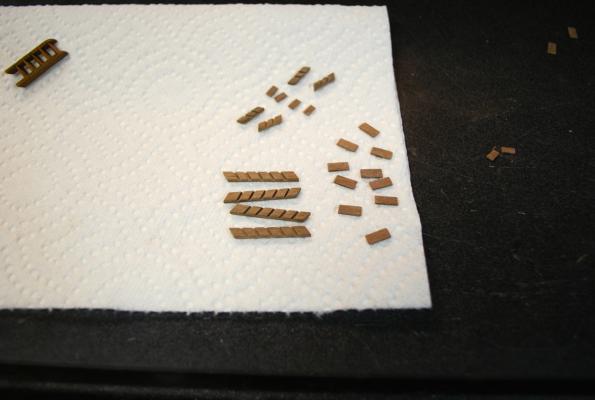
I did not use the kit ladder assemblies, but made my own (hopefully more to scale!) Ladders are made from walnut. Ladder to lower deck Assembled ladders


-
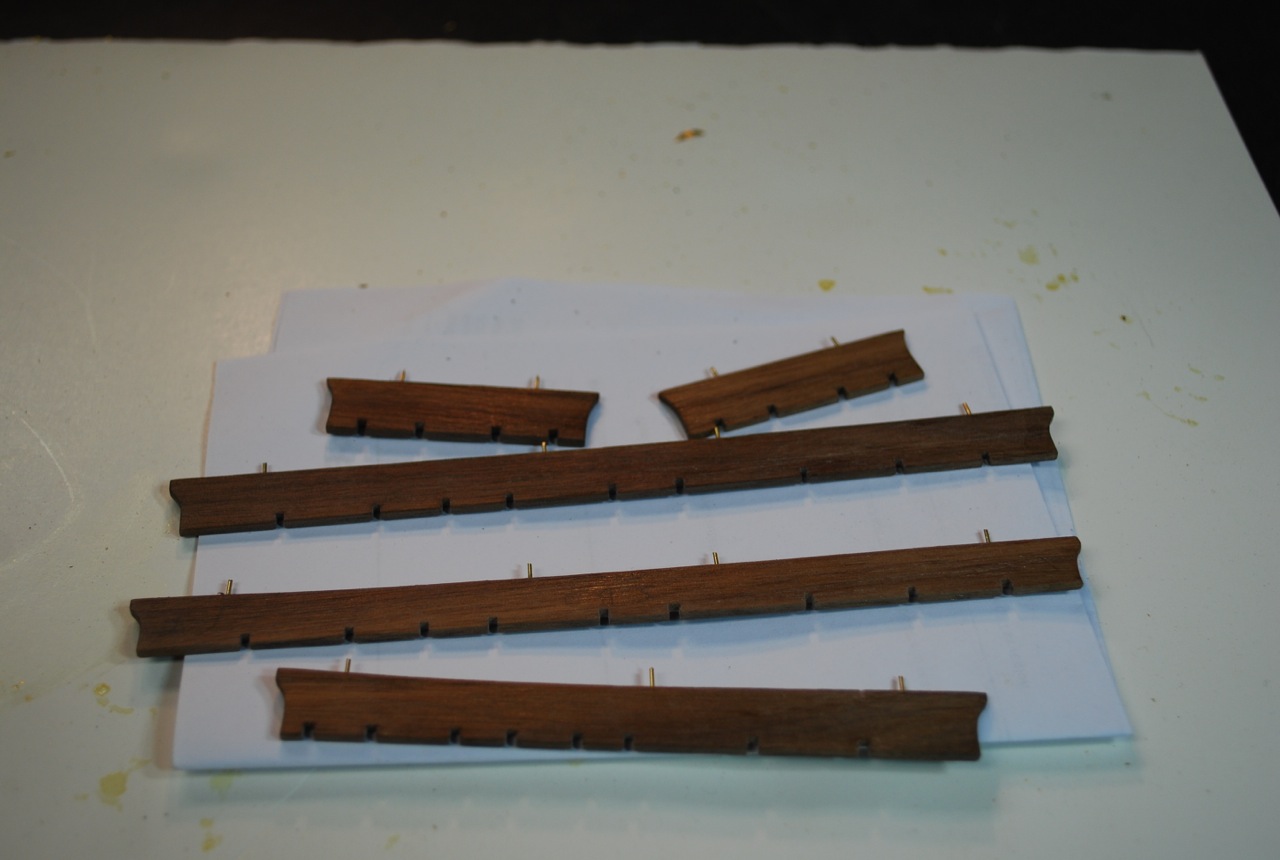
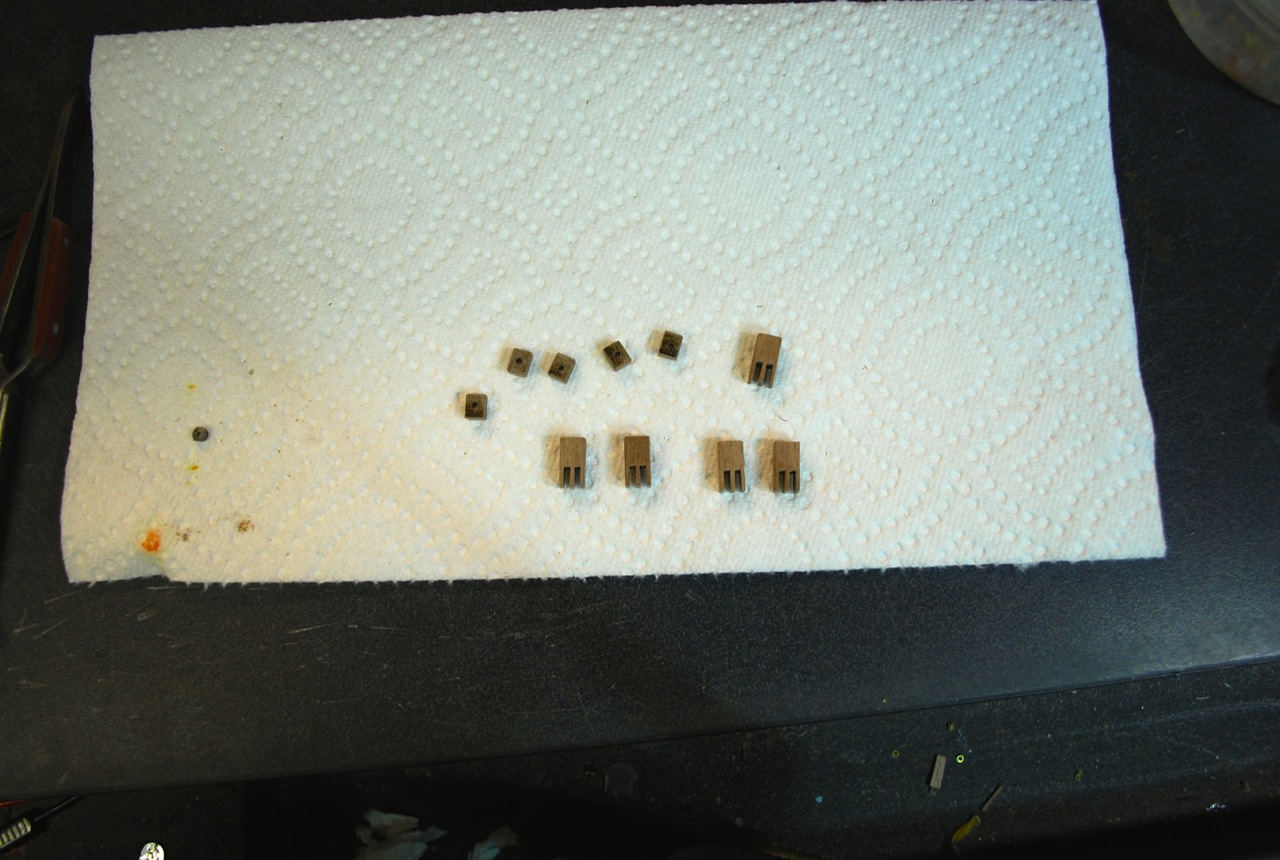
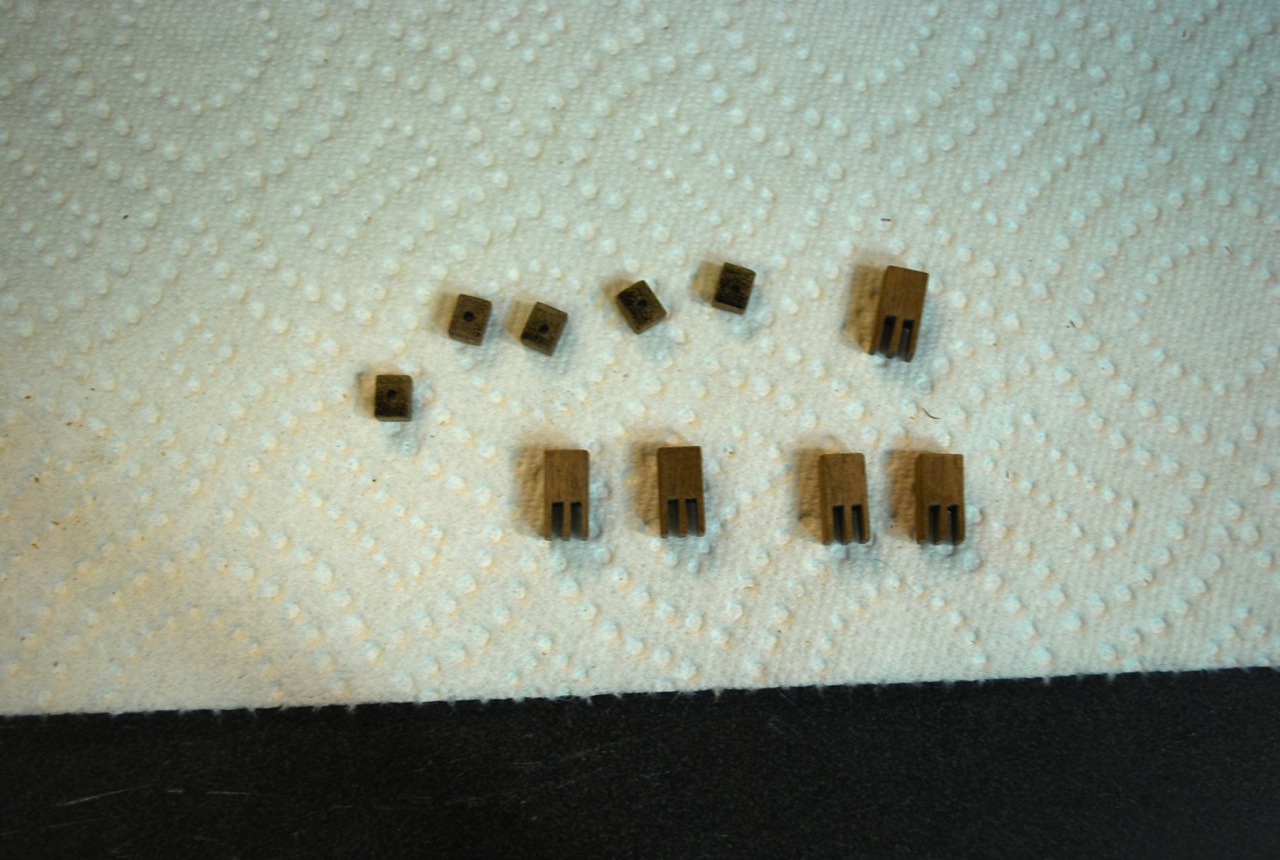
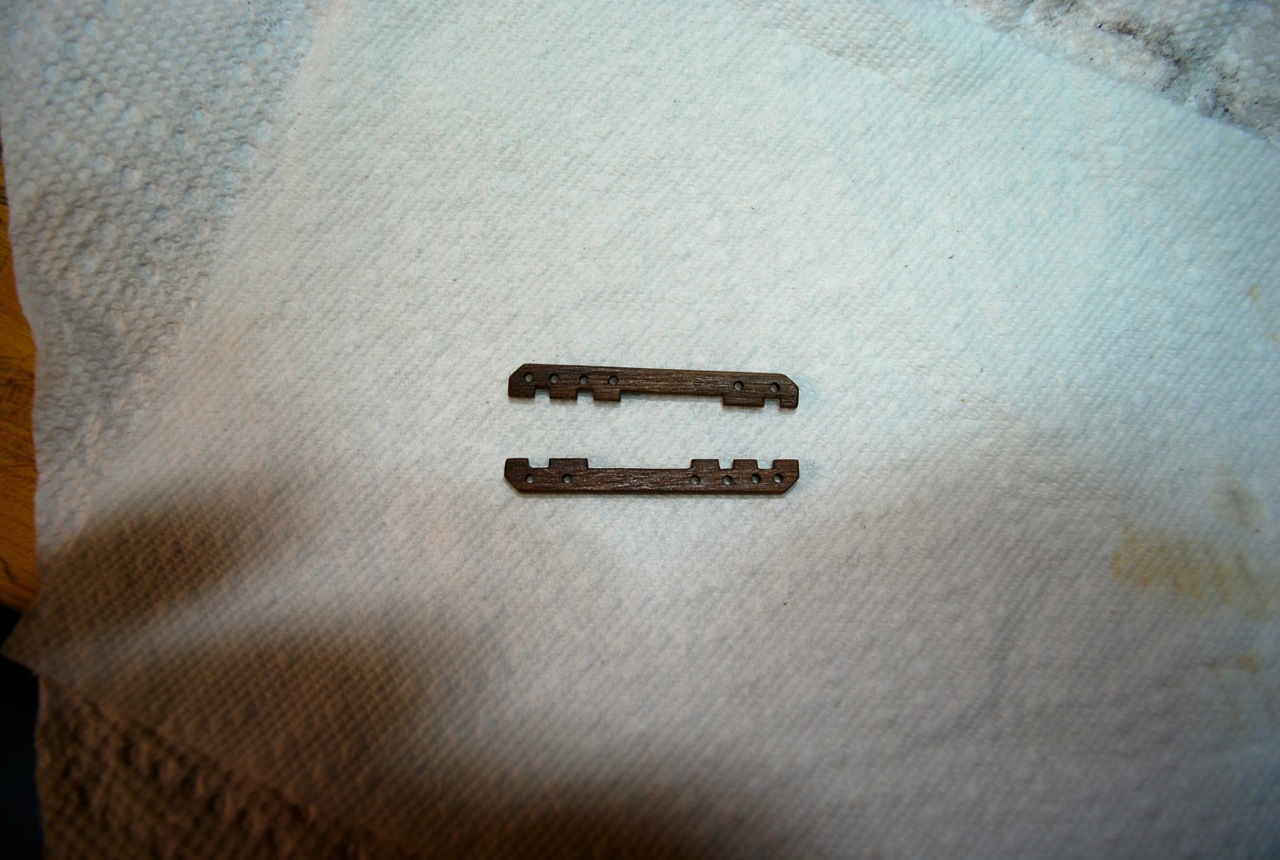
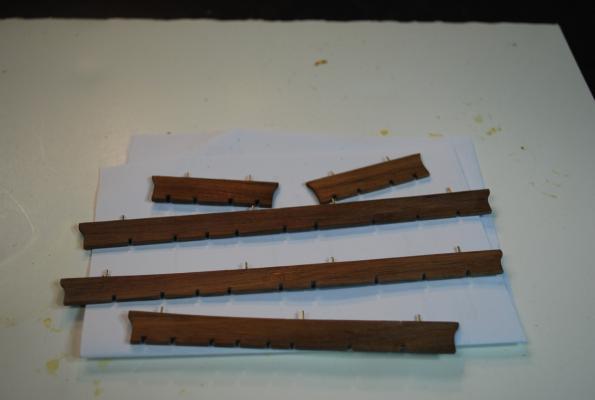
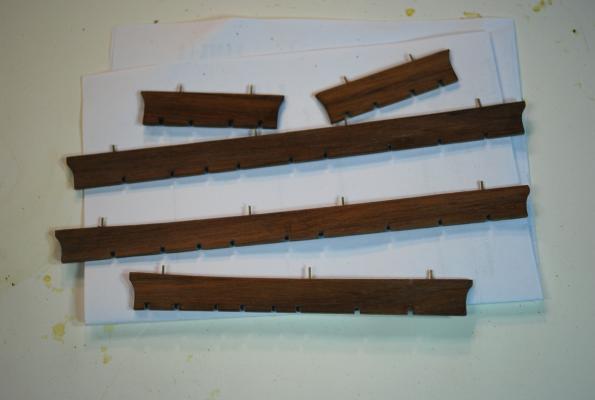
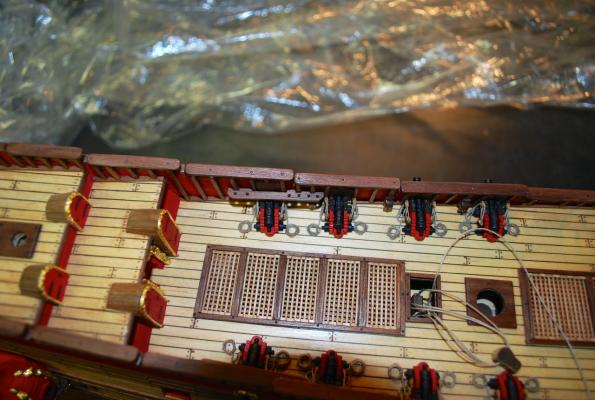
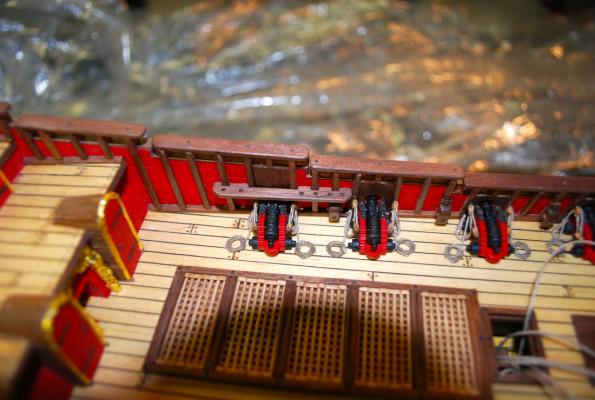
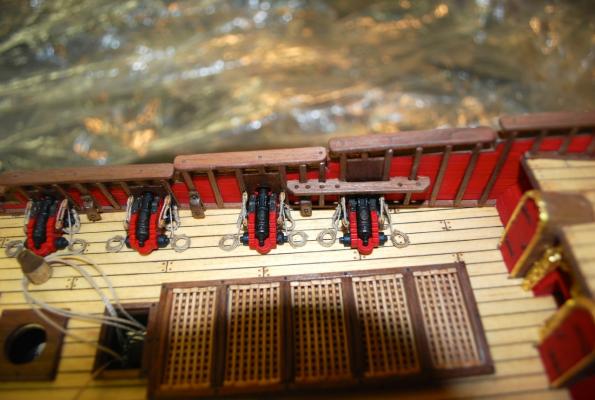
Now I turned my attention to the pin rails. Notched out the wood to fit the railing posts. Added belay pin holes Mounted over the cannon

-
Hi Mark! Thanks for you input. It is appreciated! Yes, I agree hanging the coils on the sides would have been better. However, I made the carriages a little bit smaller lengthwise, in order to have them stay some distance from the grating. So with this situation, they would have been hanging off the back wheels, hence I put them on the deck! Frank