HOLIDAY DONATION DRIVE - SUPPORT MSW - DO YOUR PART TO KEEP THIS GREAT FORUM GOING! (Only 13 donations so far - C'mon guys!)
×


fmodajr
-
Posts
868 -
Joined
-
Last visited
Content Type
Profiles
Forums
Gallery
Events
Everything posted by fmodajr
-
 Hi Karl, Thanks for the information about the Patina product. I started diluting my paint about 5 to 1 and it went on too thin so I went with a ratio of 3 to 1 and I think it went on too thick!! Oh well. P.S. I stopped by your log today and I loved the work you did on the stern lantern. I will need all the help I can get when I reach that stage of the build. Great job! Frank
 -
Edwin, It is a pleasure to meet you! Thanks for visiting my log and for you kind comments! Frank
-
Hi Michael, Thanks for the kind words. I would have missed the pulleys completely, if I hadn't visited your log! Frank
-
Hi Michael, Beautiful work on your cannon! In perusing your log, I am repeatedly amazed at your continued attention to detail! Good luck on finishing them. Frank
-
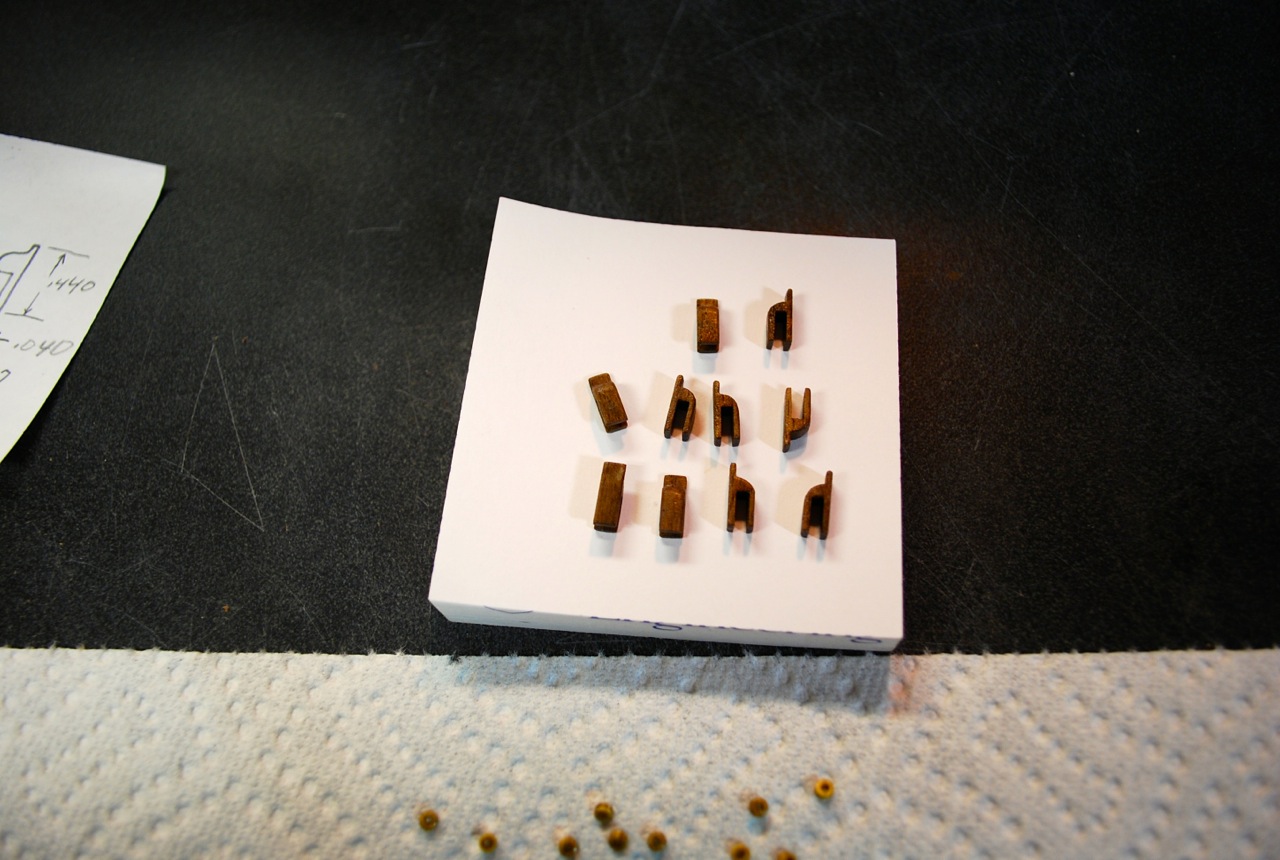
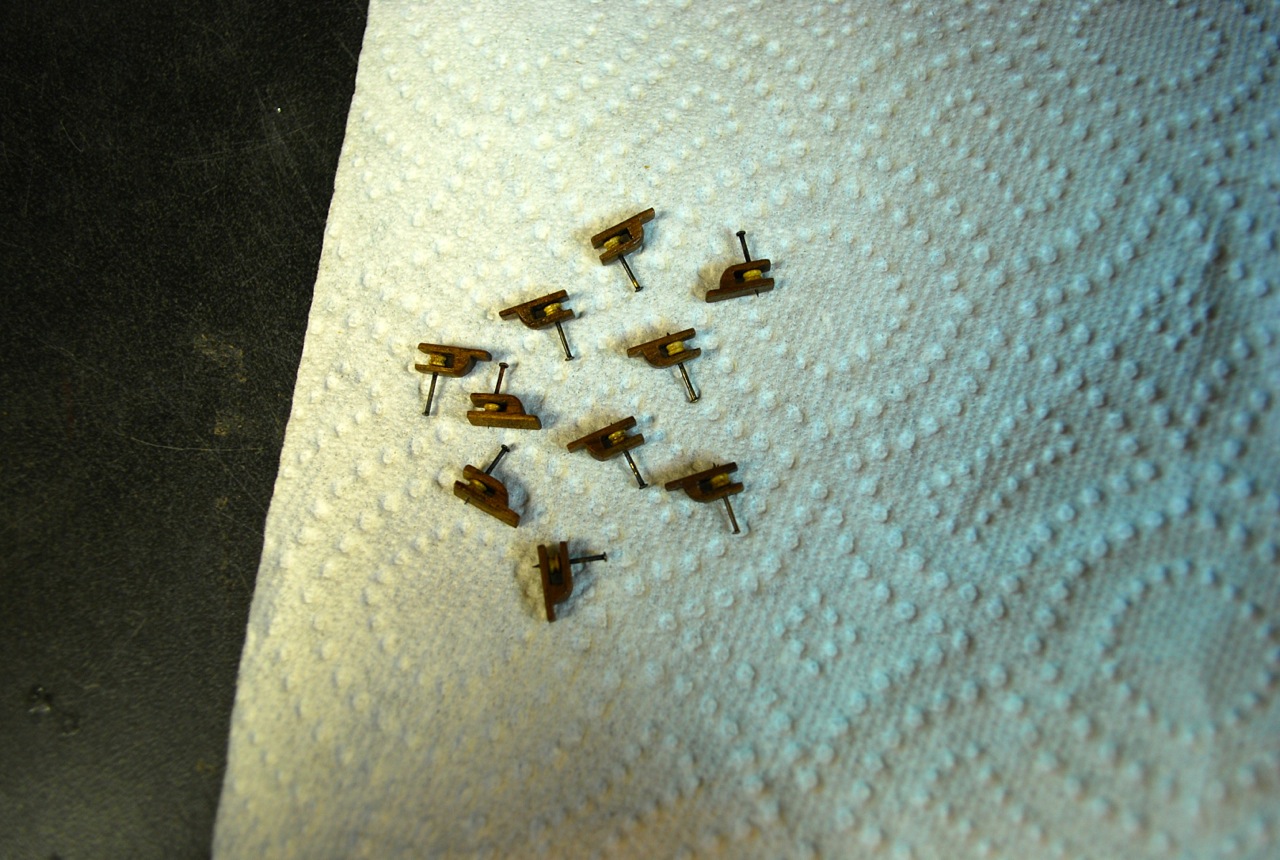
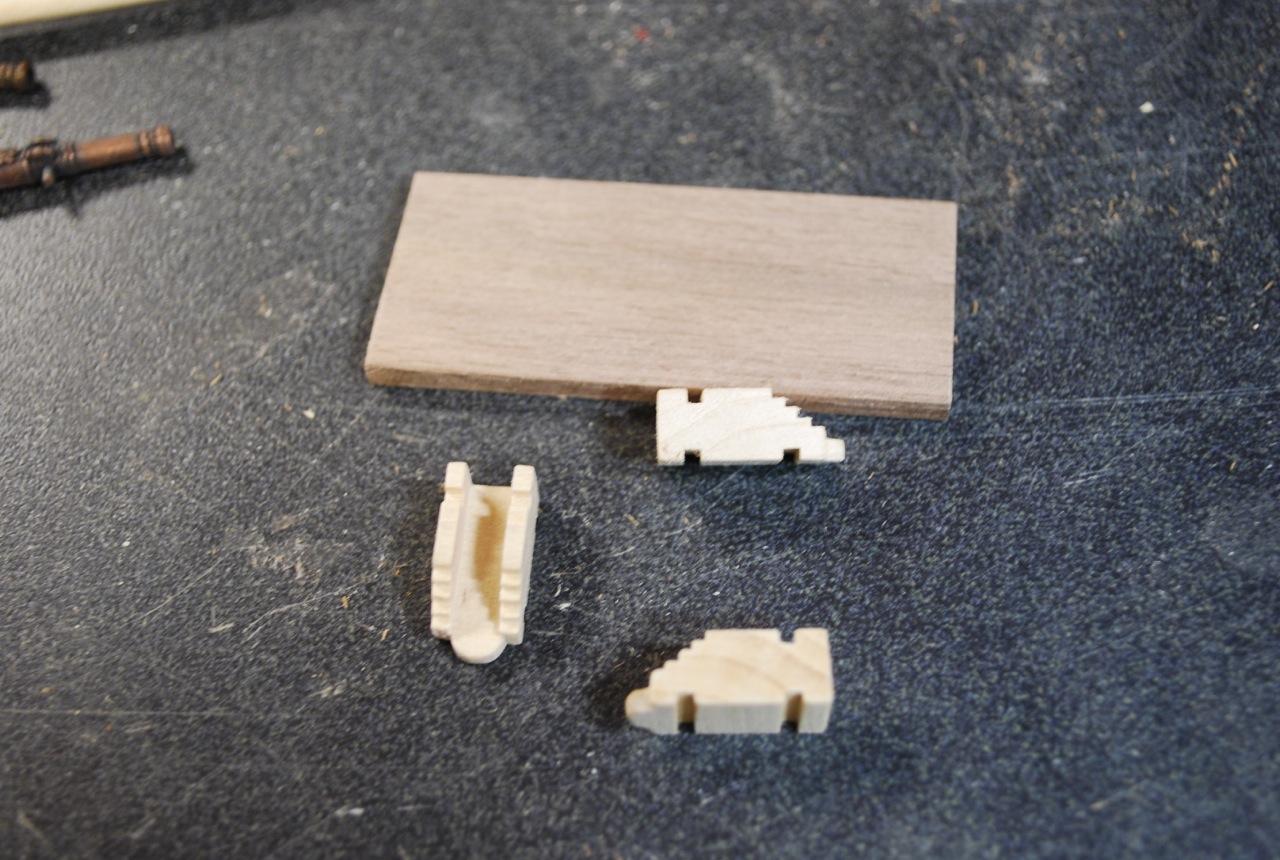
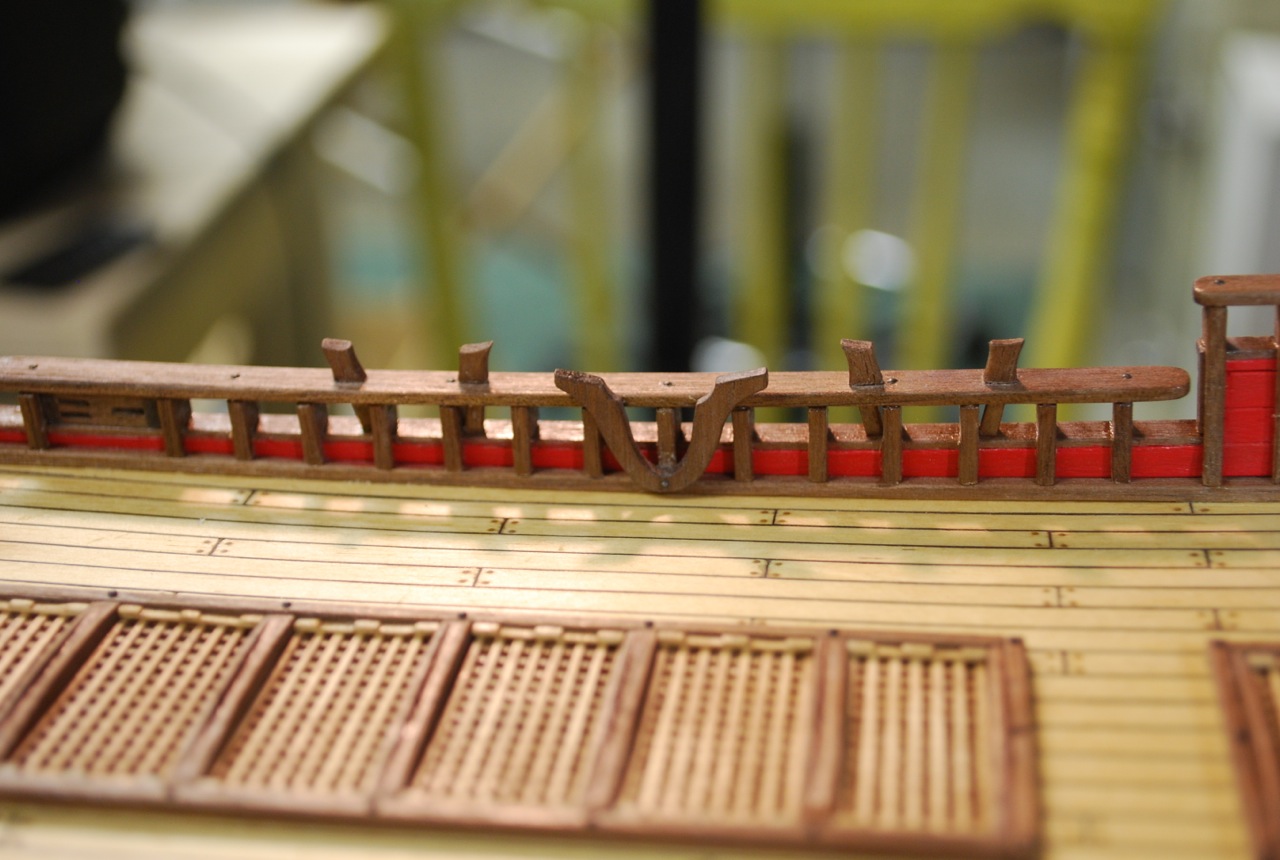
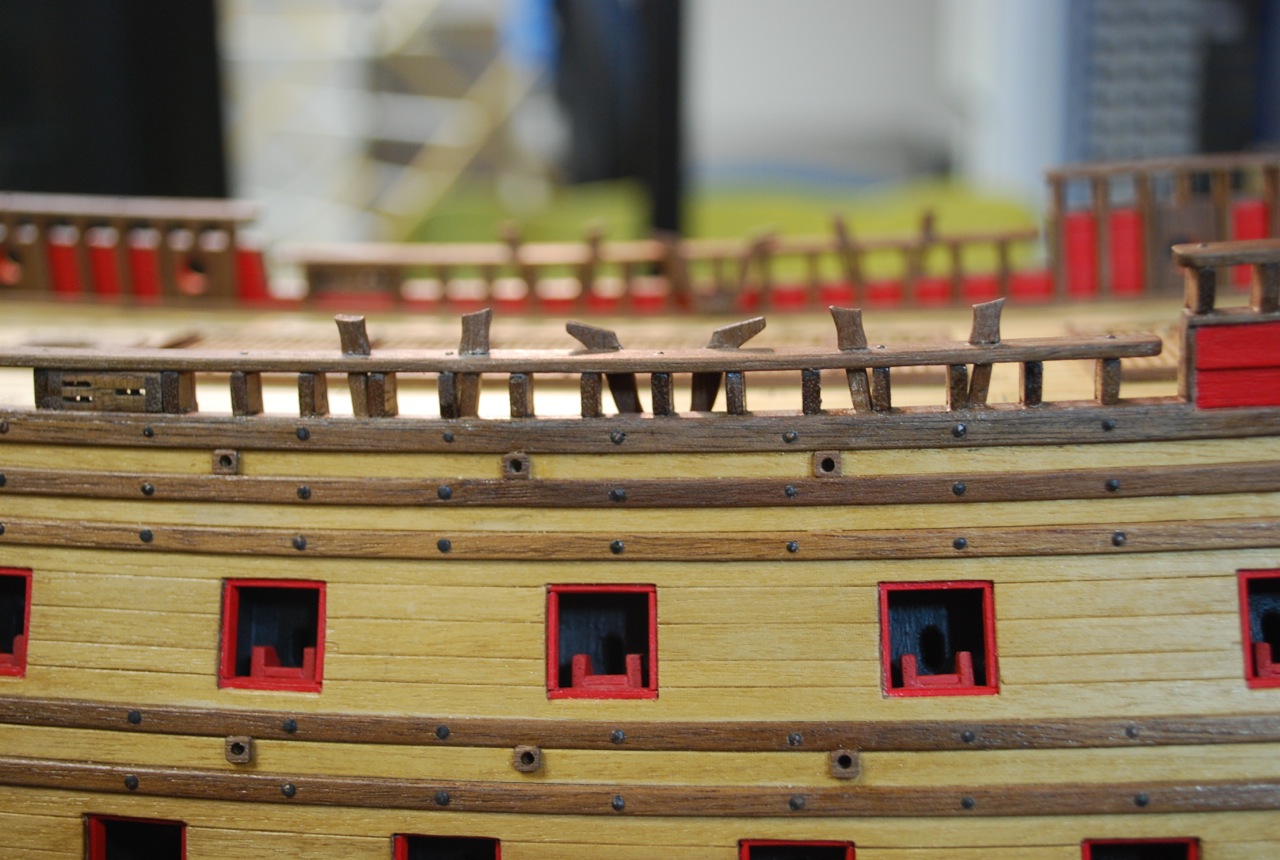
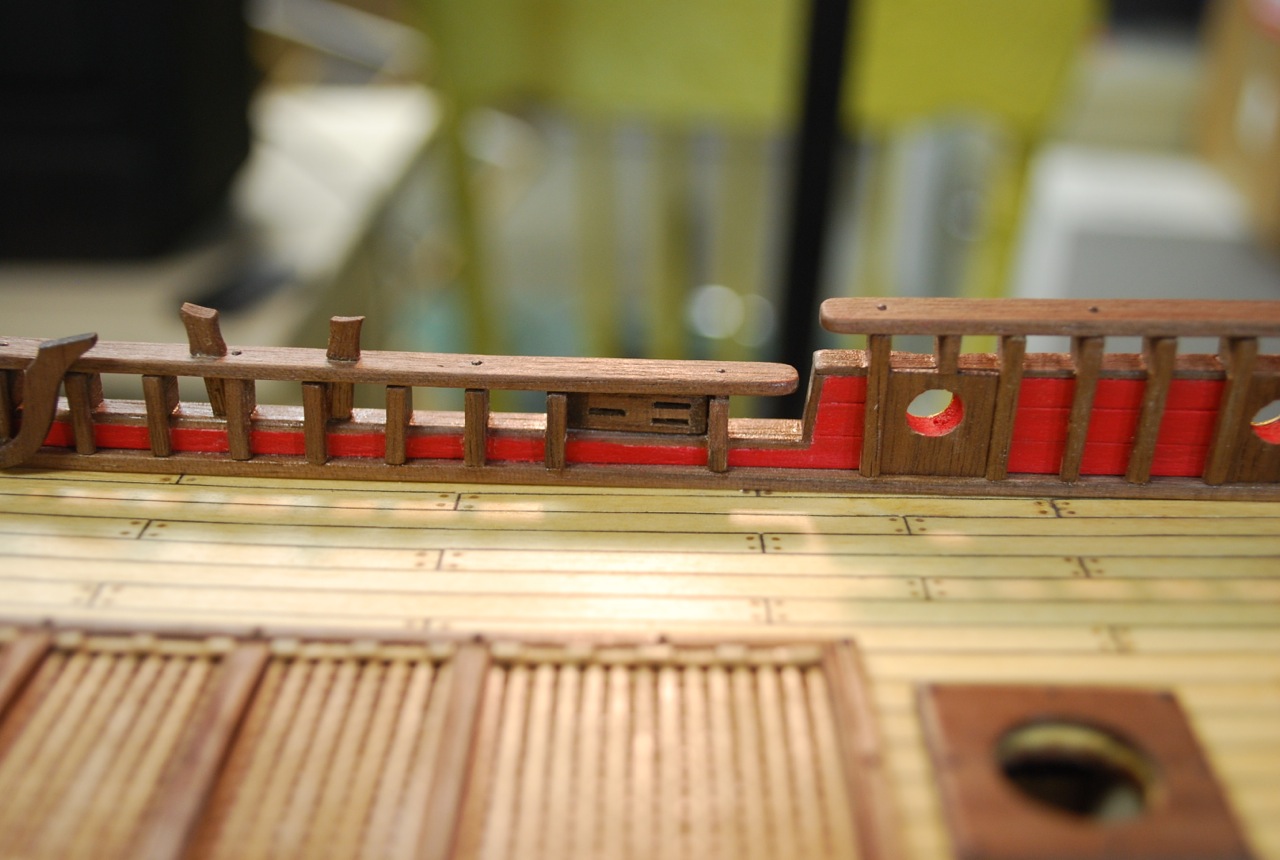
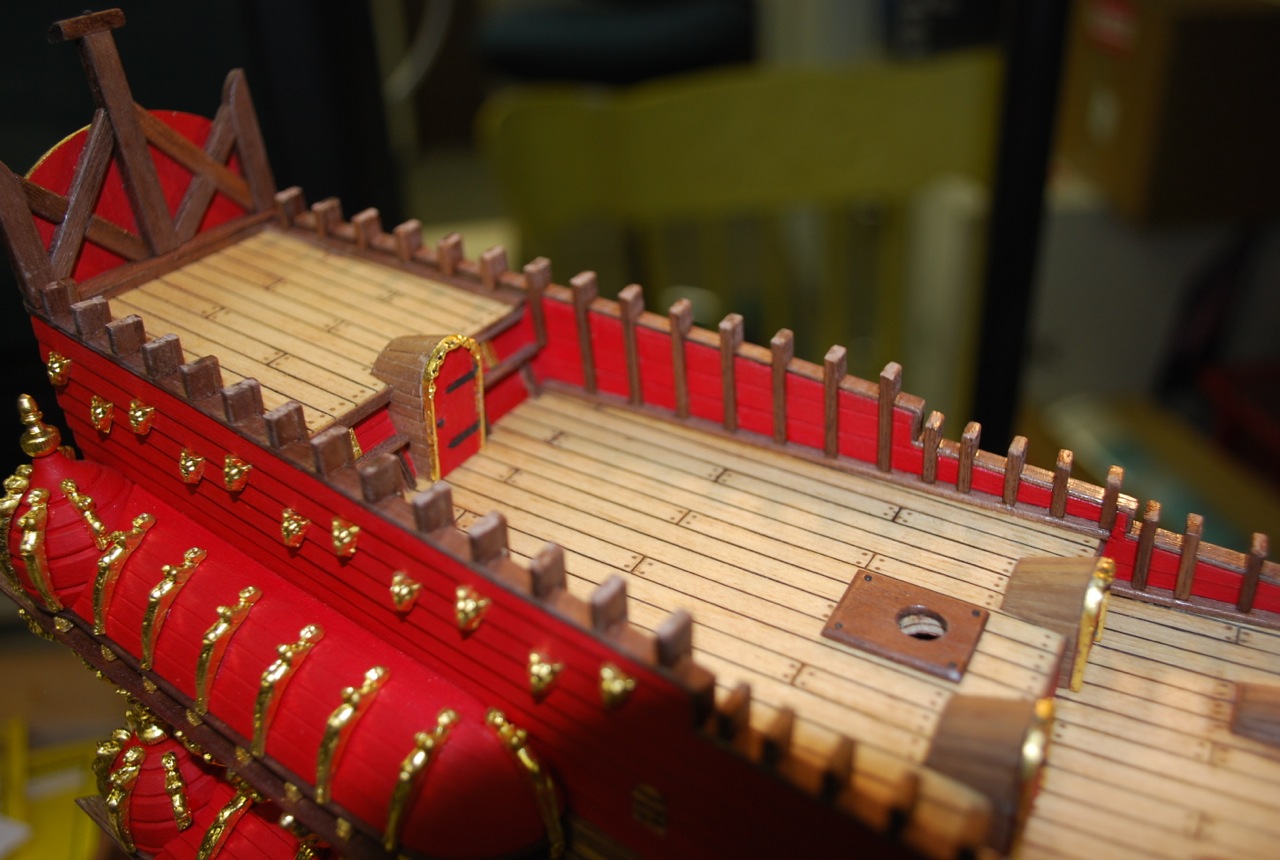
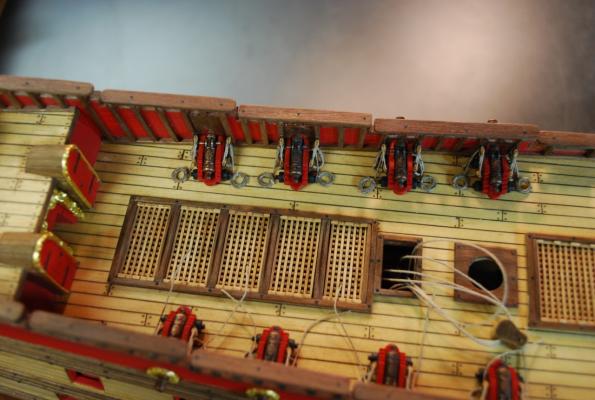
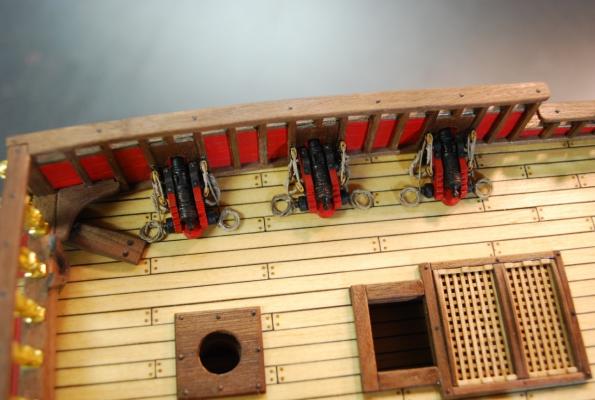
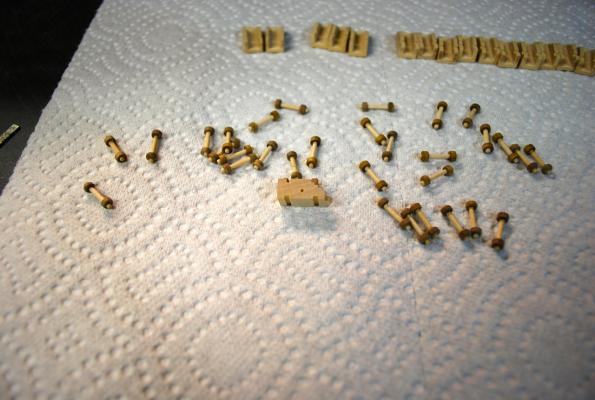
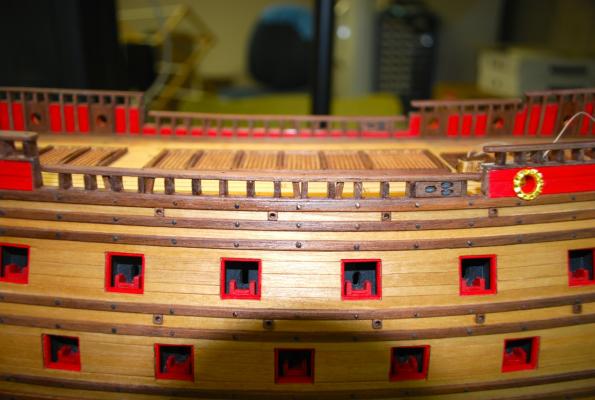
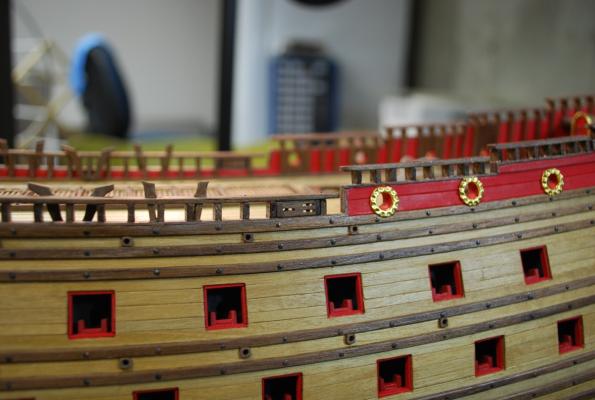
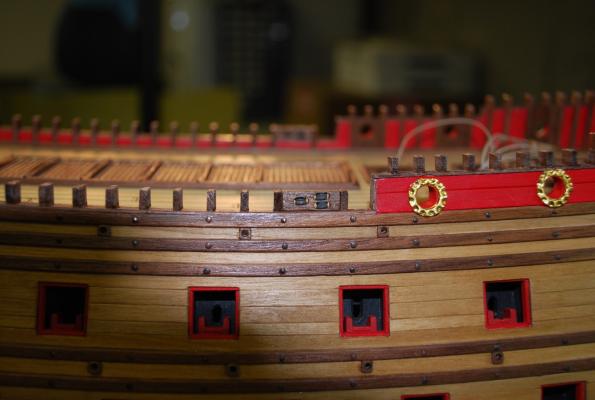
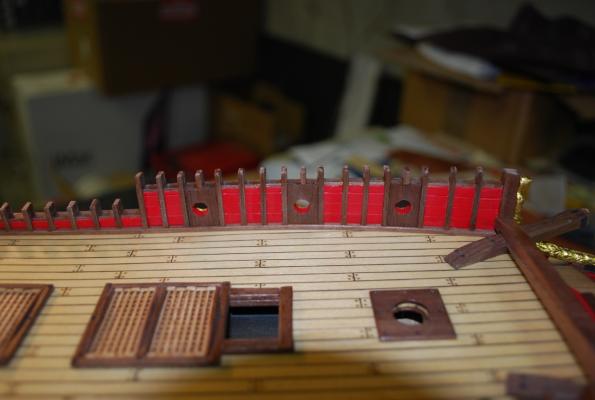
Moving on to the 10 railing pulleys (5 on each side), I made them each out of a single piece of walnut. Now I inserted the sheaves and drilled holes for the mounting nails The pulleys installed in-between the cannon. I will now start working on the belaying pin rails for the bulwarks and the ladders! I am glad to be moving on from the cannon!

-
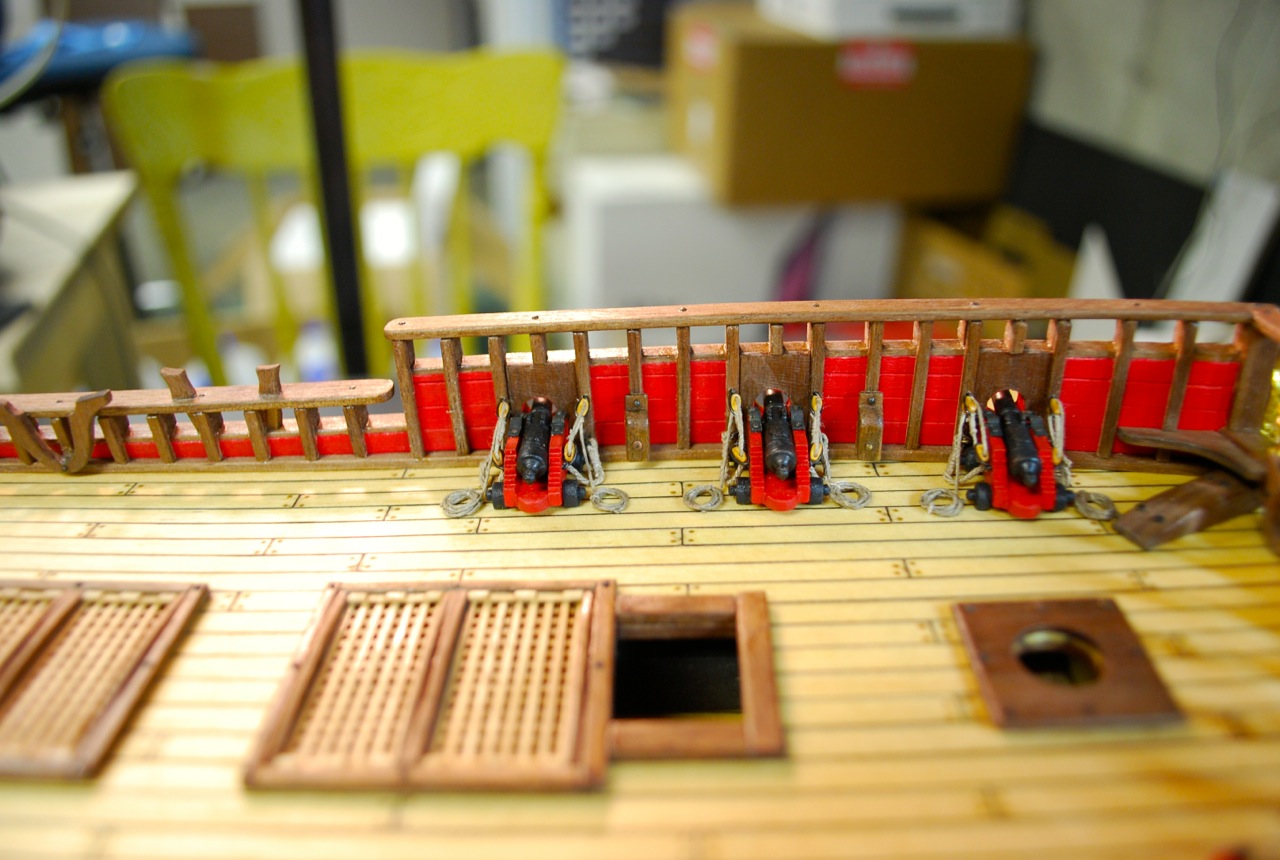
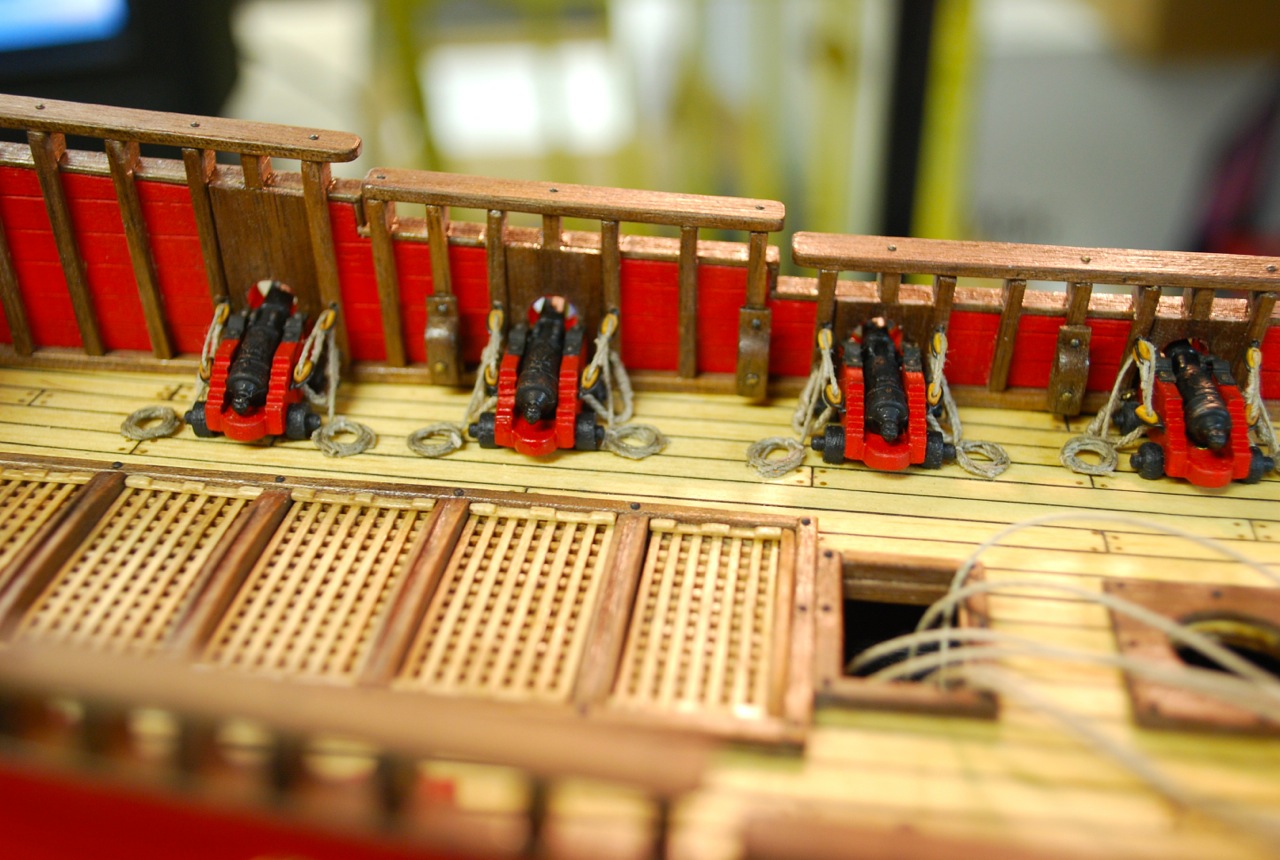
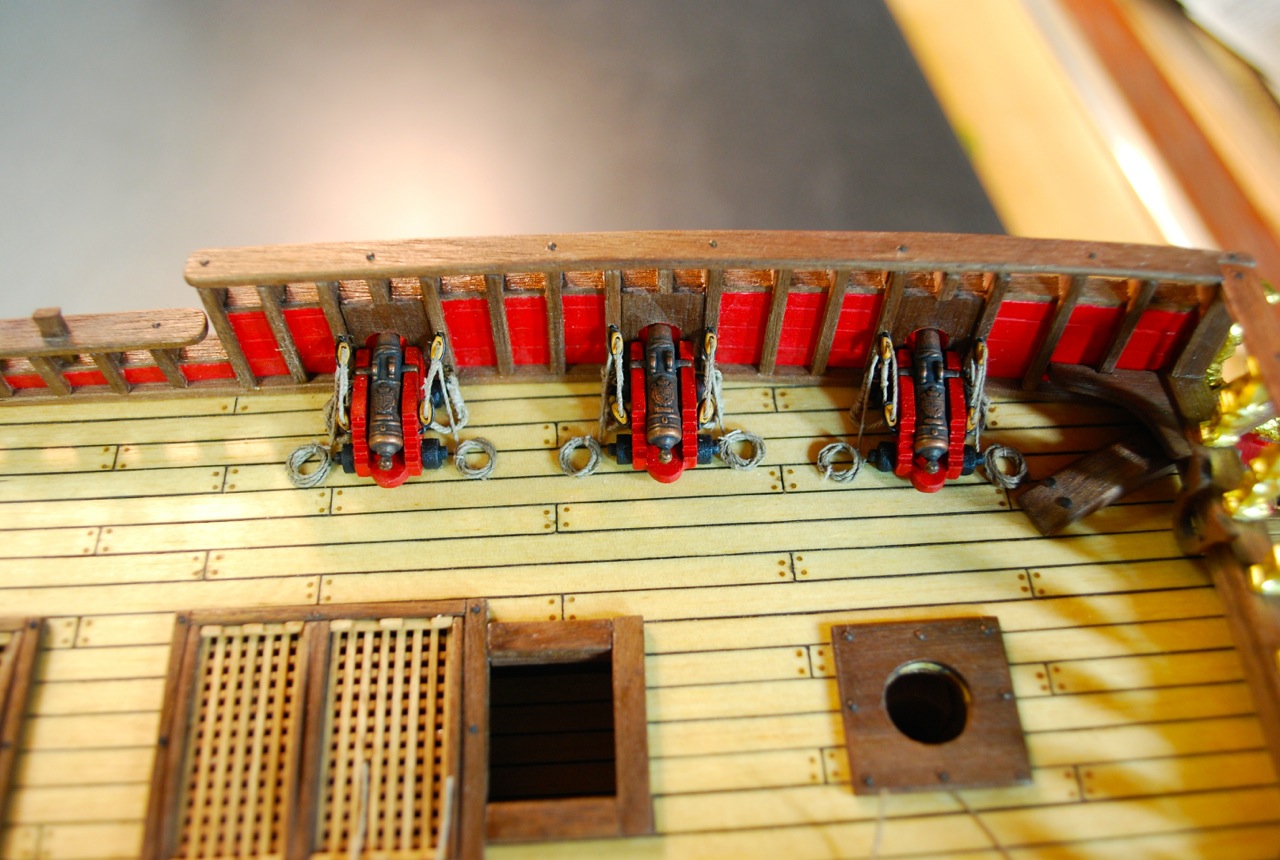
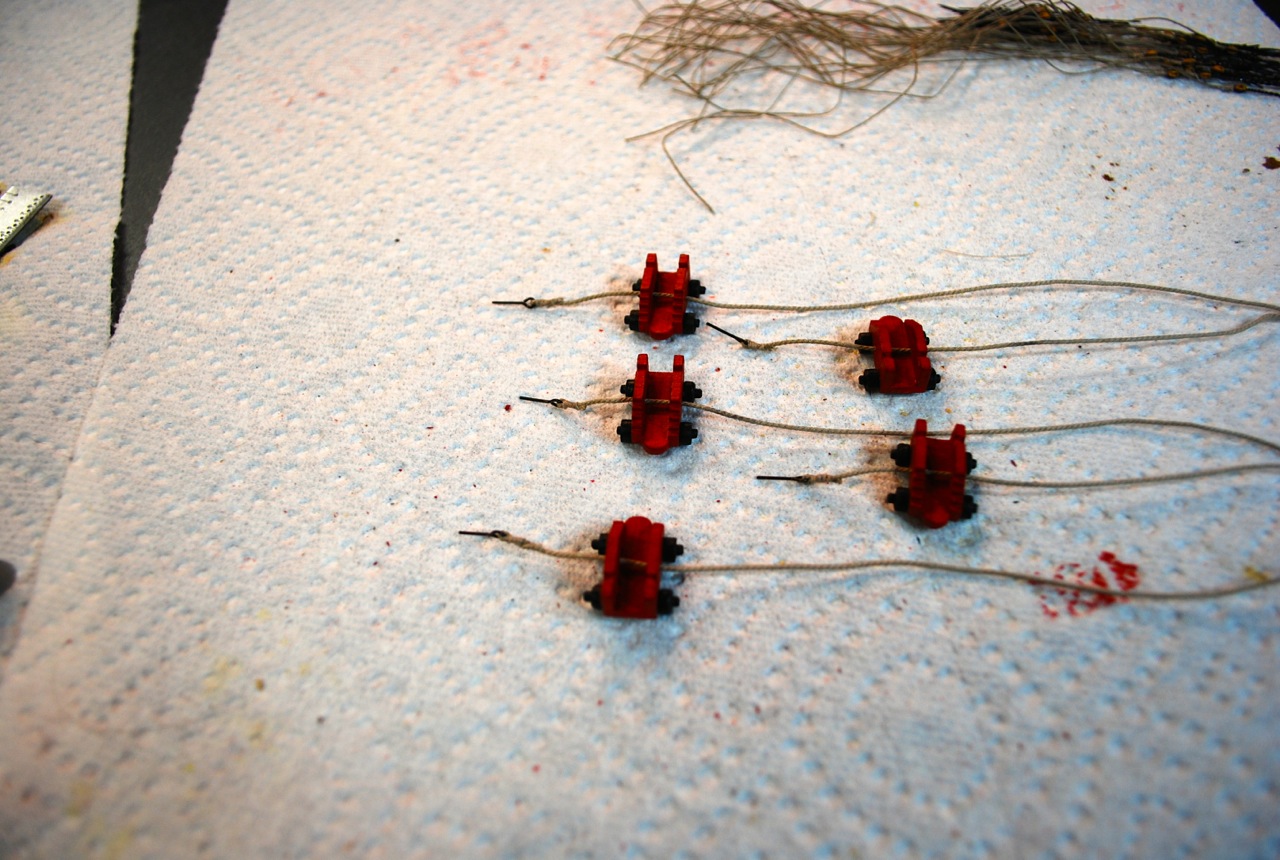
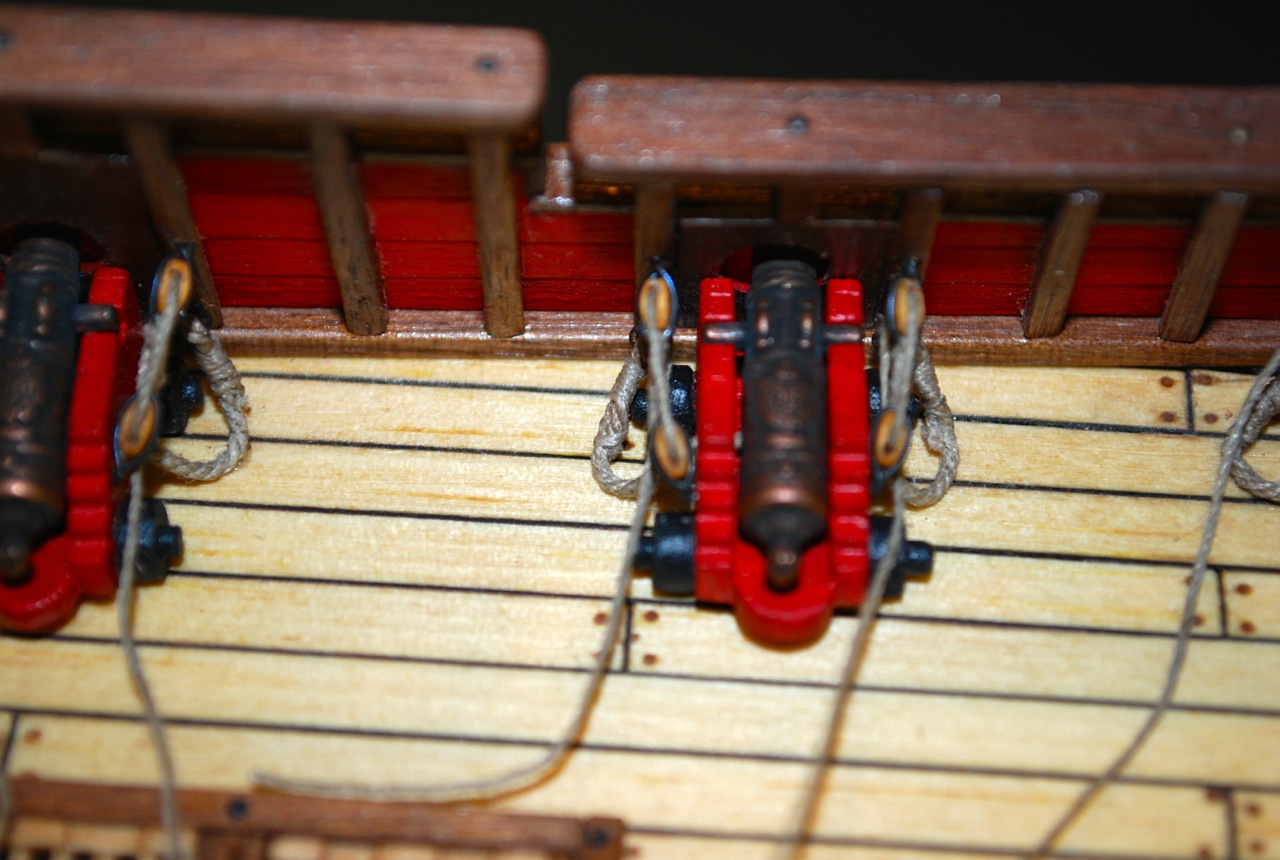
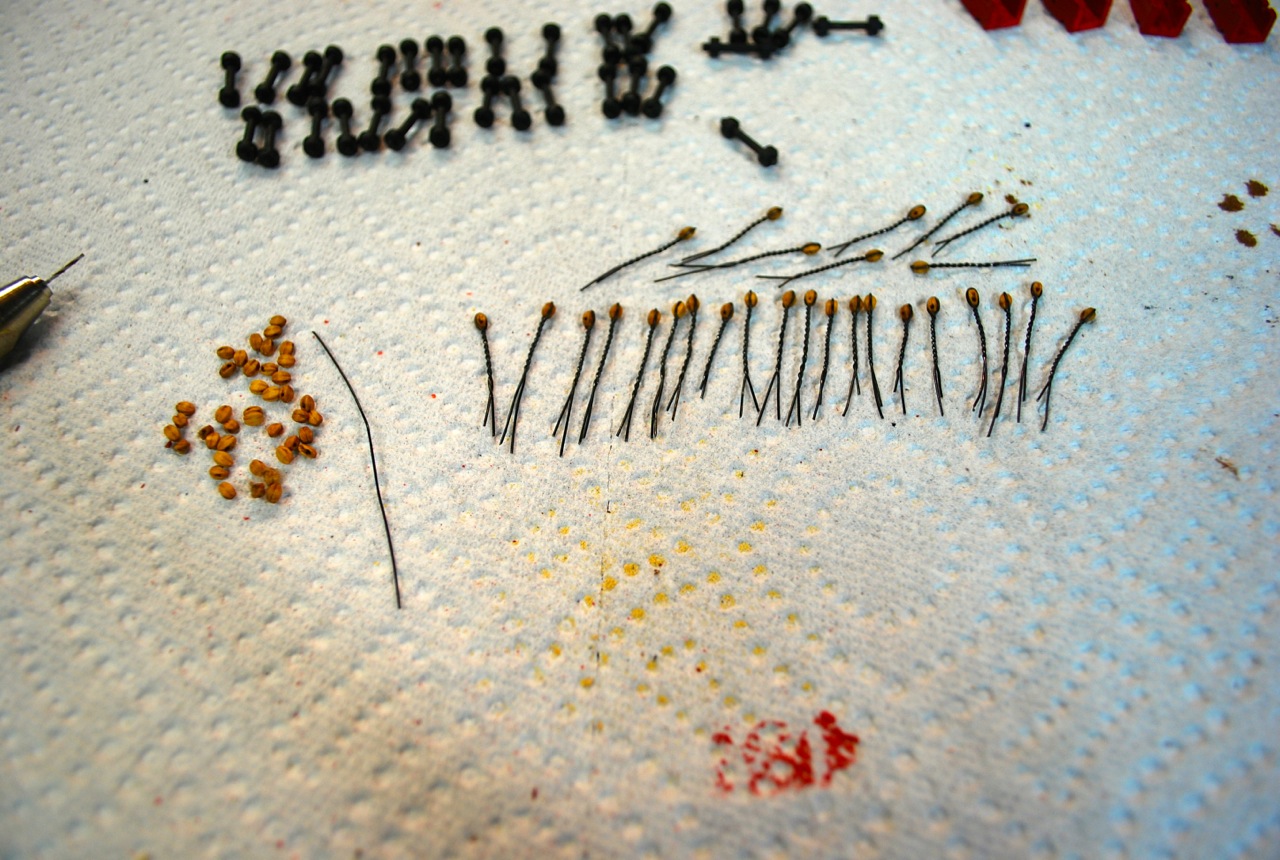
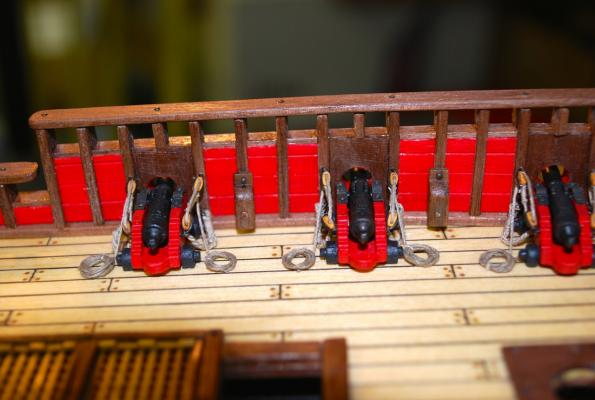
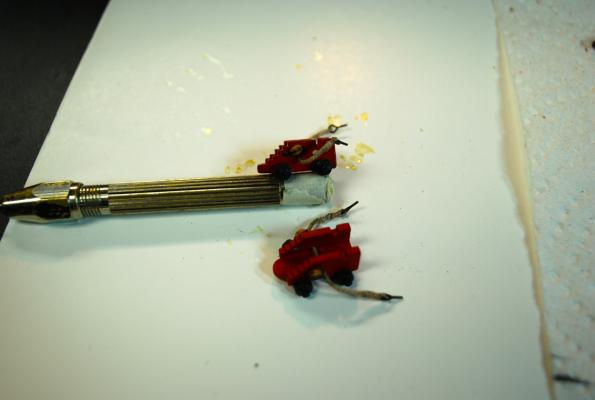
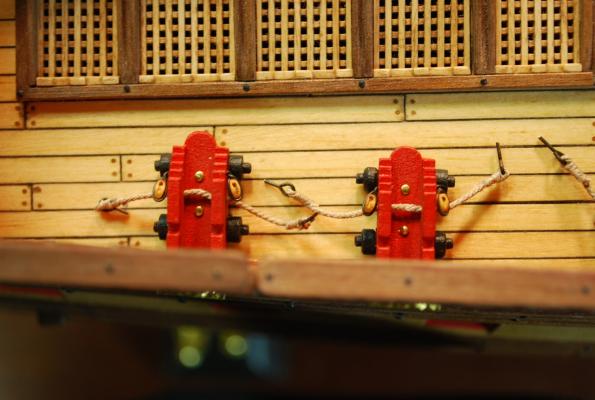
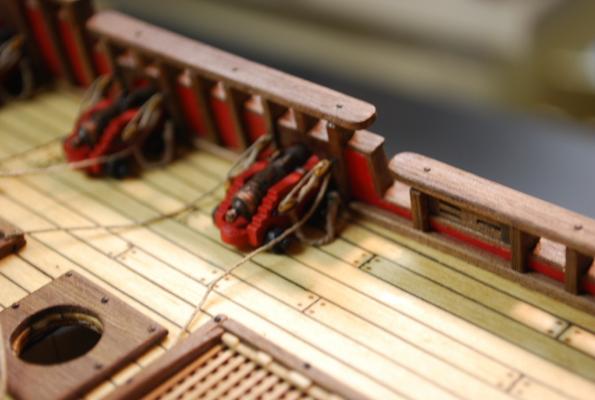
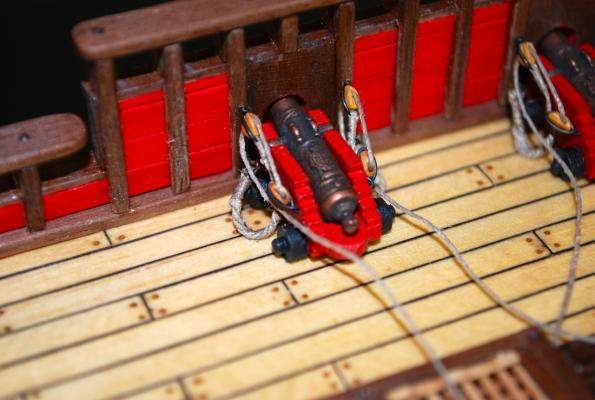
Continuing on, I made up a bunch of line bundles for the cannon rigging. Rigging of cannon is finished with bundles. I darkened and mounted the cannon into position


-
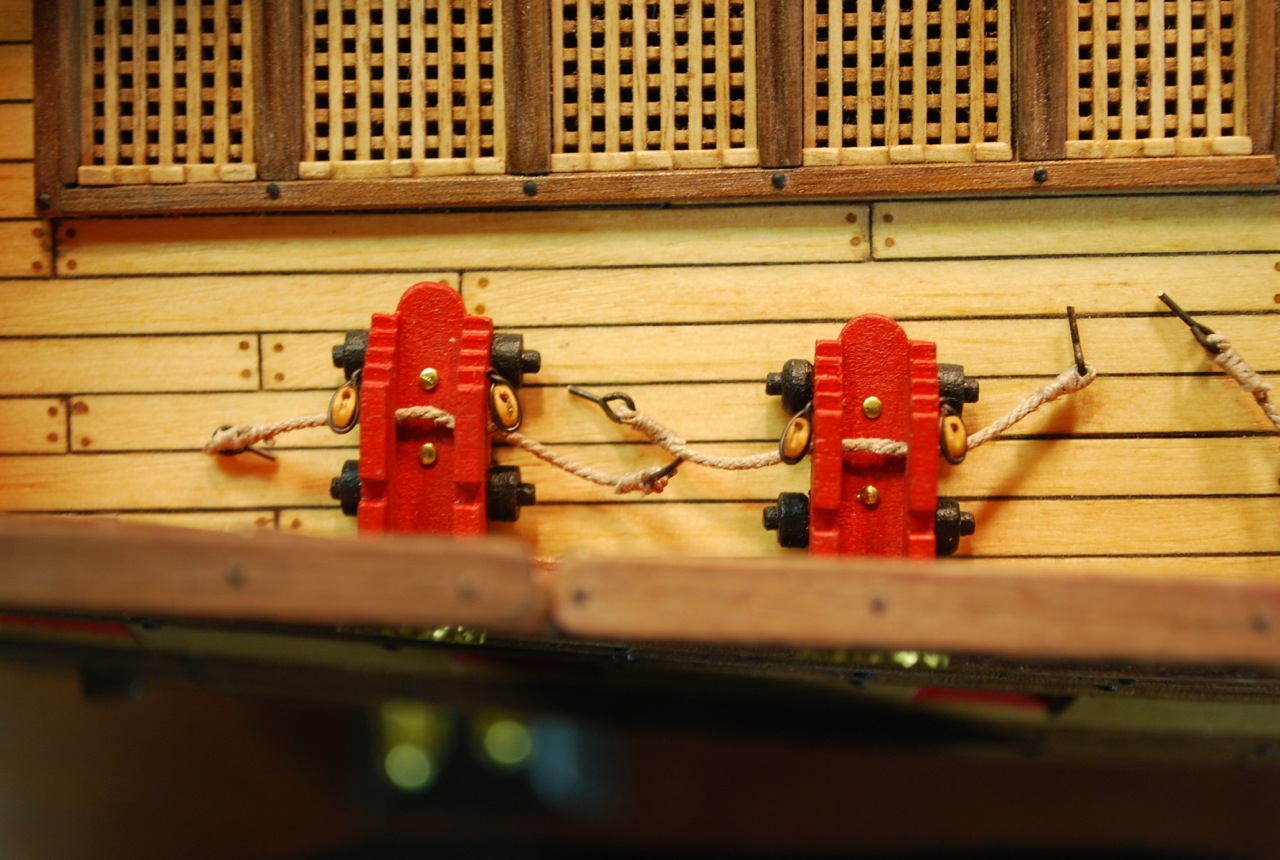
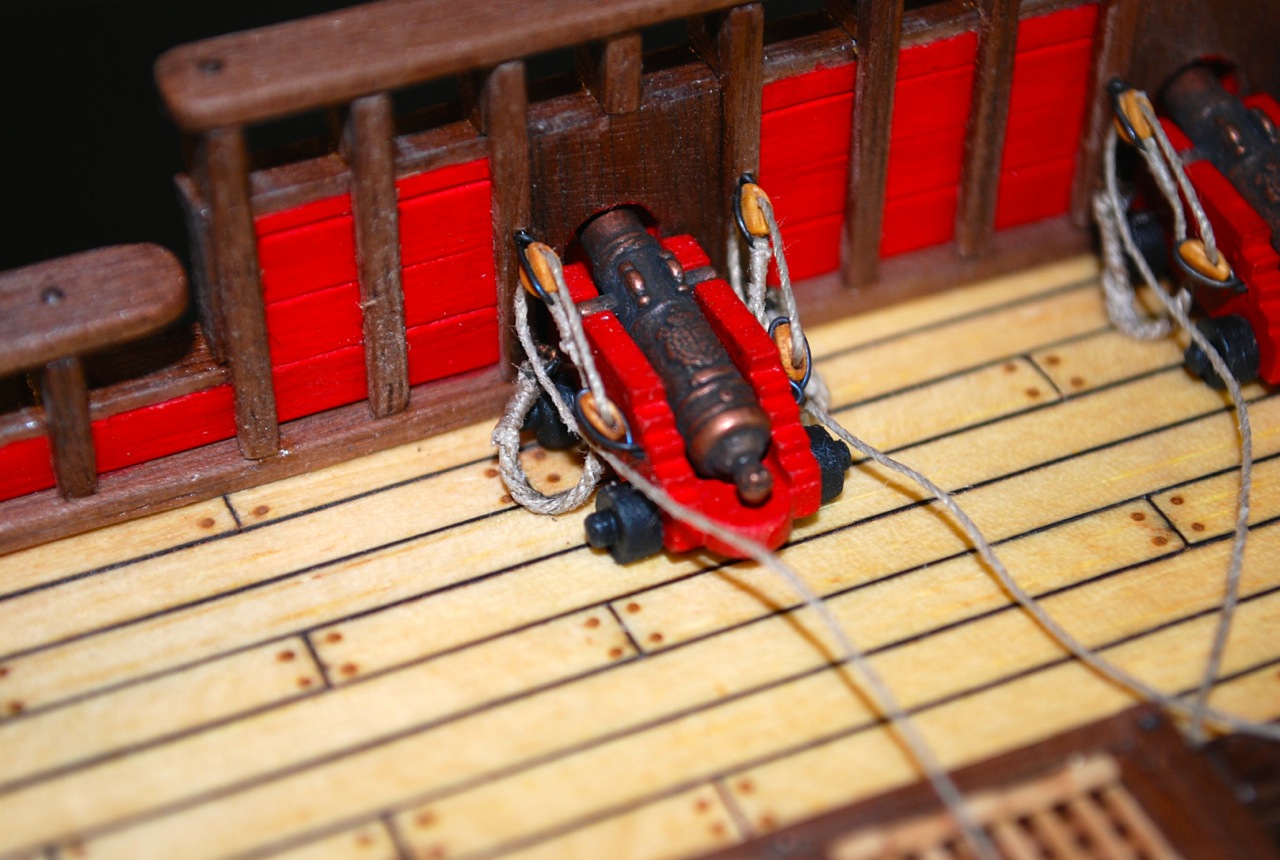
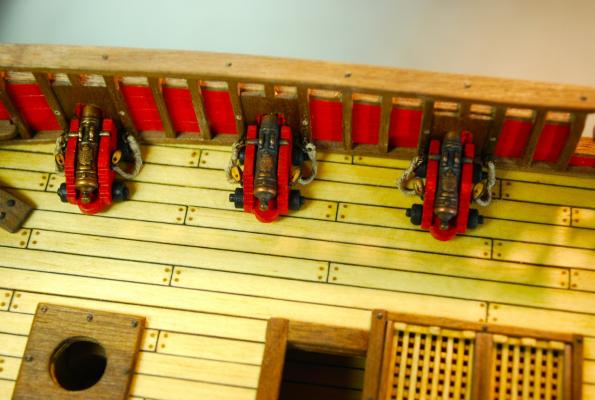
I haven't been able to work on the model much lately. Life just keeps getting in the way! I continued working on my cannon and carriages. First I seized the 3mm blocks in preparation for mounting. This seizing tool is from "Ship Ahoy Models" Then I attached the breeching rope to the eyelets on one side, passed them through the cannon and attached to another eyelet on the other side. The carriages were positioned and pinned to the deck (and glued), and then the breeching rope was fitted to the railing. The cannon barrels in the second picture are not finished or mounted yet. (I still have to decide on the black wash that was talked about earlier) Now I rigged the 3mm blocks to the railing and carriage. I am now working on making up some line spools to lay next to the rear wheels of the carriages and finishing the rigging of the blocks. Next step (I am off to a fishing trip down south for 2 weeks so I will pick up in a couple of weeks!) will be to finish the cannon barrels and mount them to the carriages. Thanks, Frank


-
JanV, Very nice job with the figurines and the painting! My compliments Frank
-
Hi Mark, Thanks for the instructions! I have a few extra cannon on hand, so I will experiment with different ratio's. Thanks again, Frank
-
Thanks Michael, I appreciate the comments! FYI, I was able to order the Amati false cannon from another company in England. Hopefully they will work and match the weather deck cannon! Frank
-
Hi Mark, Thanks for the input. I tried blackening one of the cannon chemically with a blackener and it did not take. Could you walk me thru how I would do a "thin black wash" as you state above? Thanks for your help, Frank
-
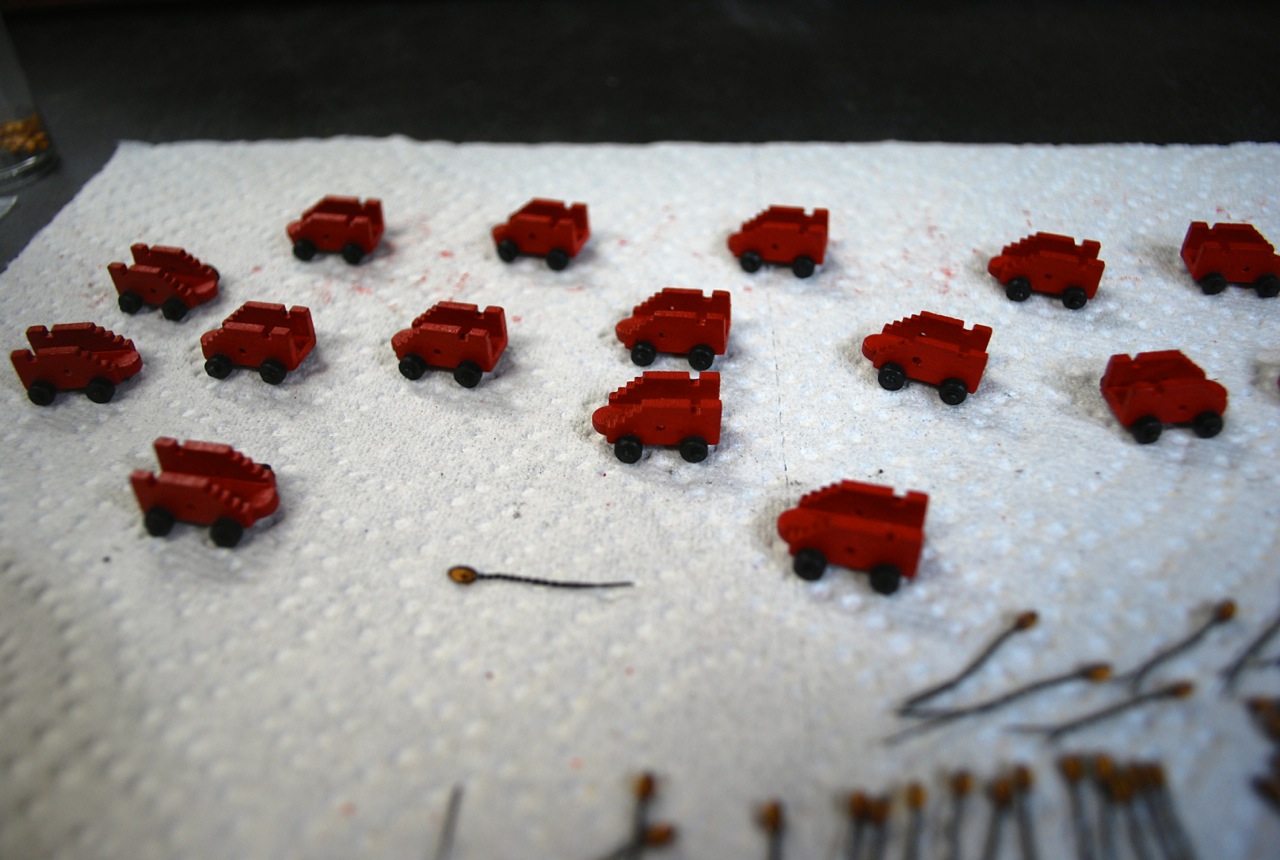
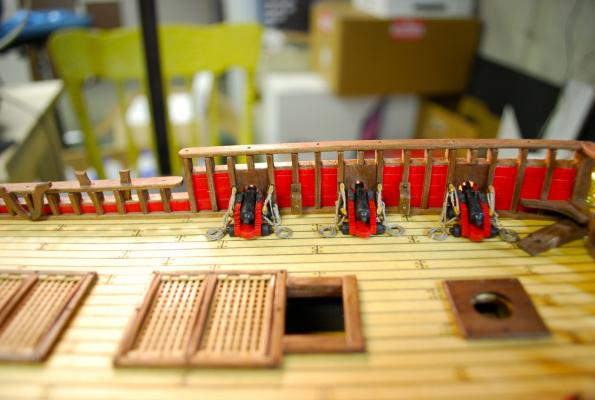
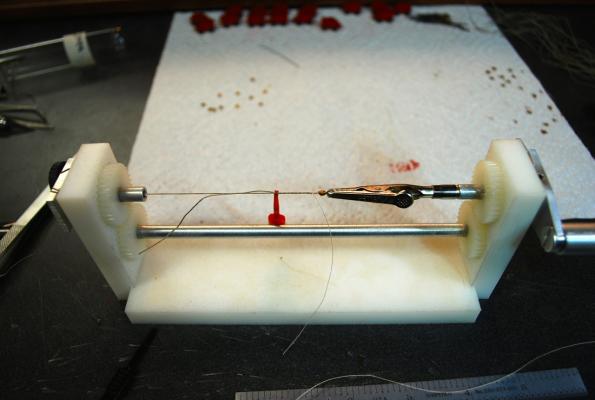
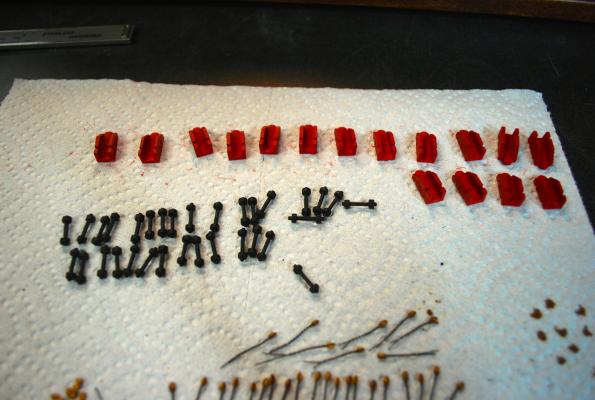
I have started working on the cannon and carriages. I decided not to use the kit carriages and made them from scratch to look a little bit more like the actual carriages. Also, I decided to replace the cannon that came with the kit with the ones from Amati with the decorative tops. (This has been referenced in other Vasa logs). I next made new axles out of wood instead of the brass bar and drilled the hole on the side of the carriages for the breeching rope. I painted the carriages to match the false carriages that I put in earlier in the build and then I painted the wheels and axles black. I am using 3mm blocks that I purchased from Warner Woods (Boxwood). I really like his blocks. Started to pre-rig the blocks, to get them ready for mounting onto the sides of the carriages, with thin black wire. View of assembled carriages and wheels. My next steps are to Mount the 3mm blocks to the carriages Mount 3mm blocks to the bulwarks Rig the breeching ropes Fasten the carriages to the deck and finish rigging the blocks Then I have to decide whether to mount the cannon as is (antique brass look) or paint them black. We'll see! Any thoughts would be appreciated! Thanks Frank


-
Michael, Beautiful work on the pulleys! You are definitely incorporating every detail from the original ship. You keep finding things that I overlook Frank
-
Thanks Michael, I will now turn my attention to the cannon and carriages. I ordered and received new cannon with decorations from both Amati and "Cast your Anchor". I have to decide which I like better and I will be making new carriages to look a little bit more like the original. I will keep you posted and talk to you about your thoughts. Thanks, Frank
-
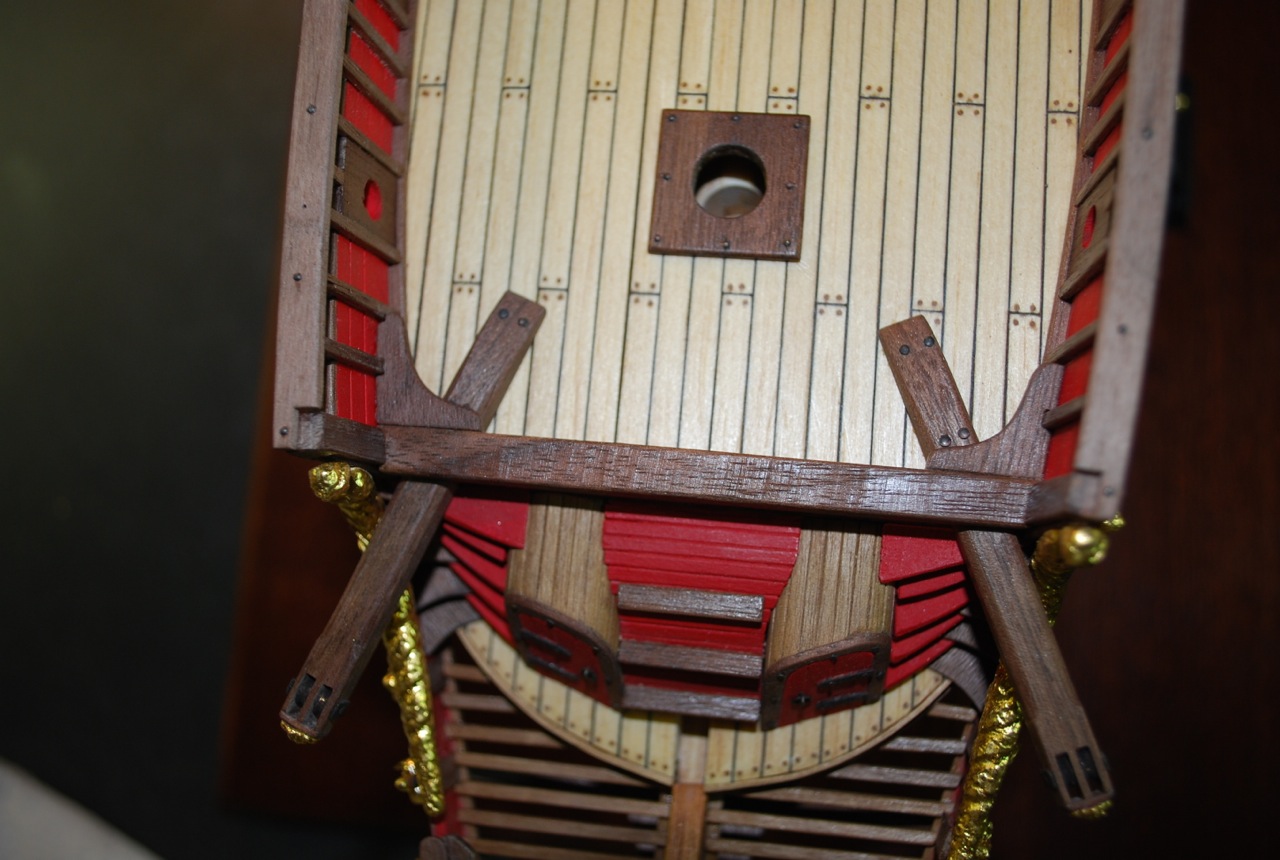
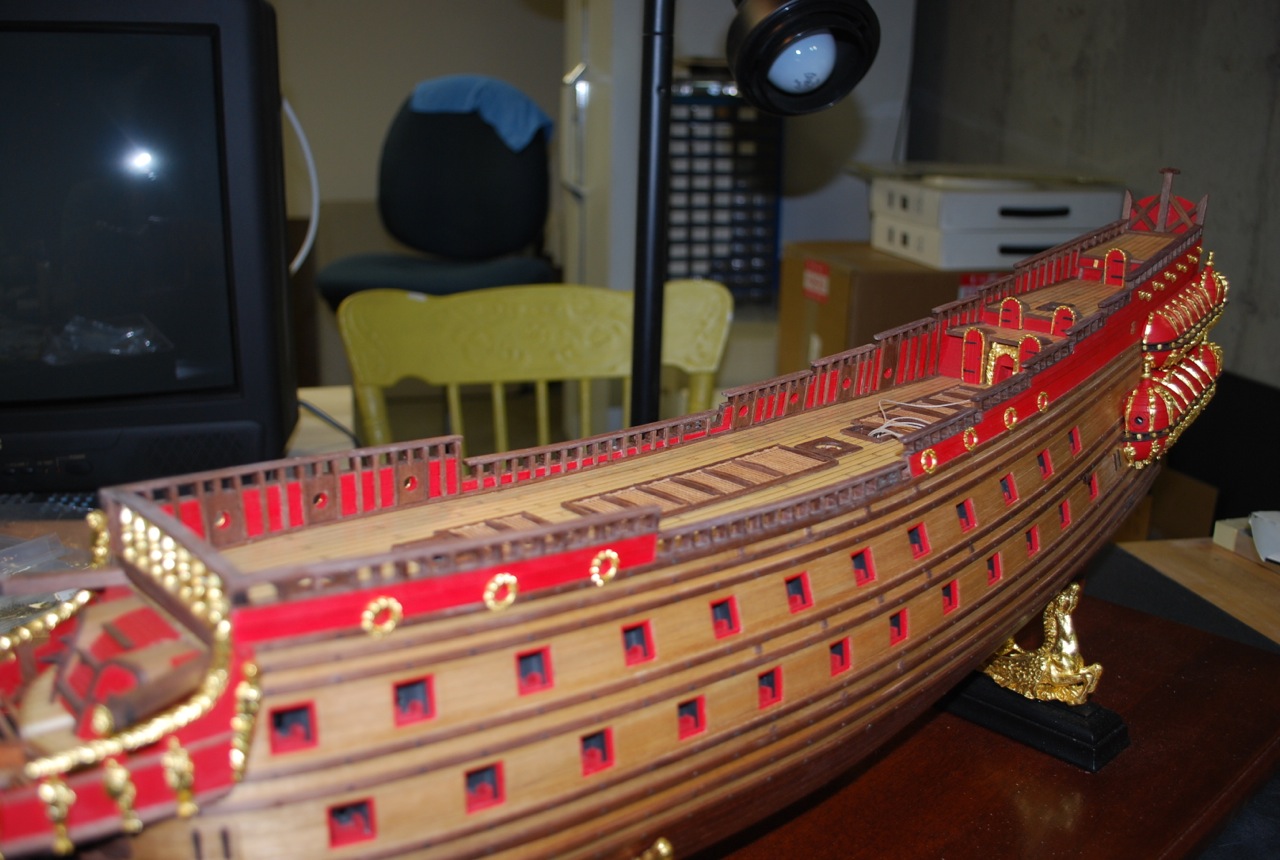
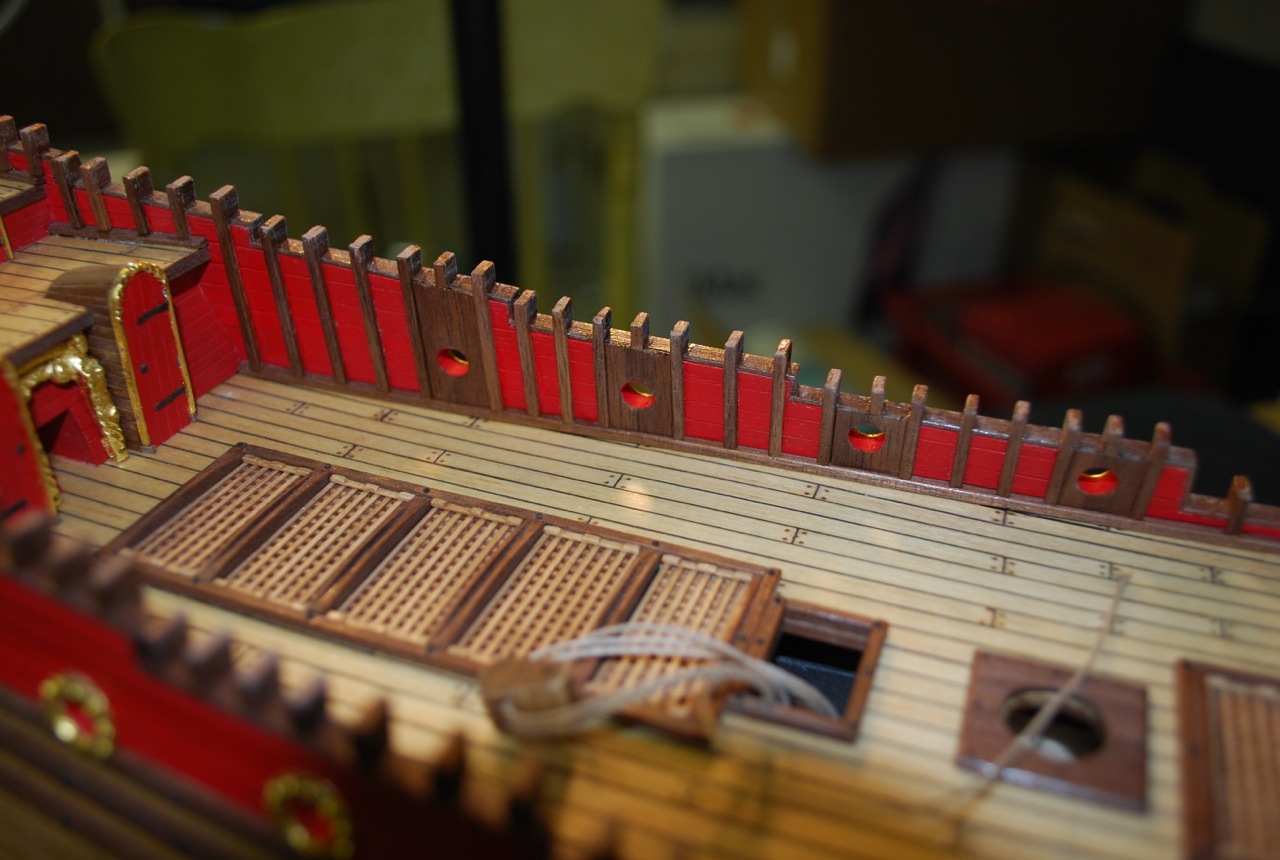
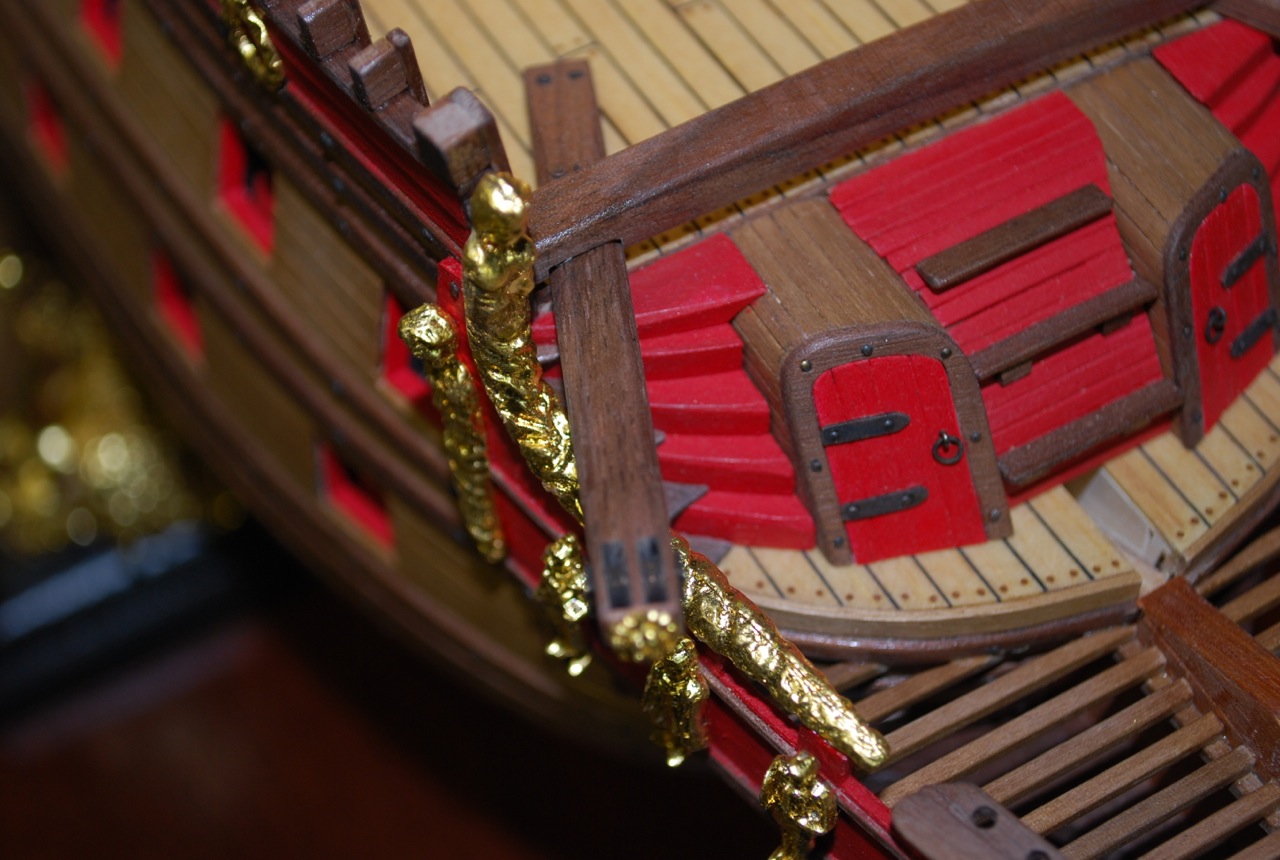
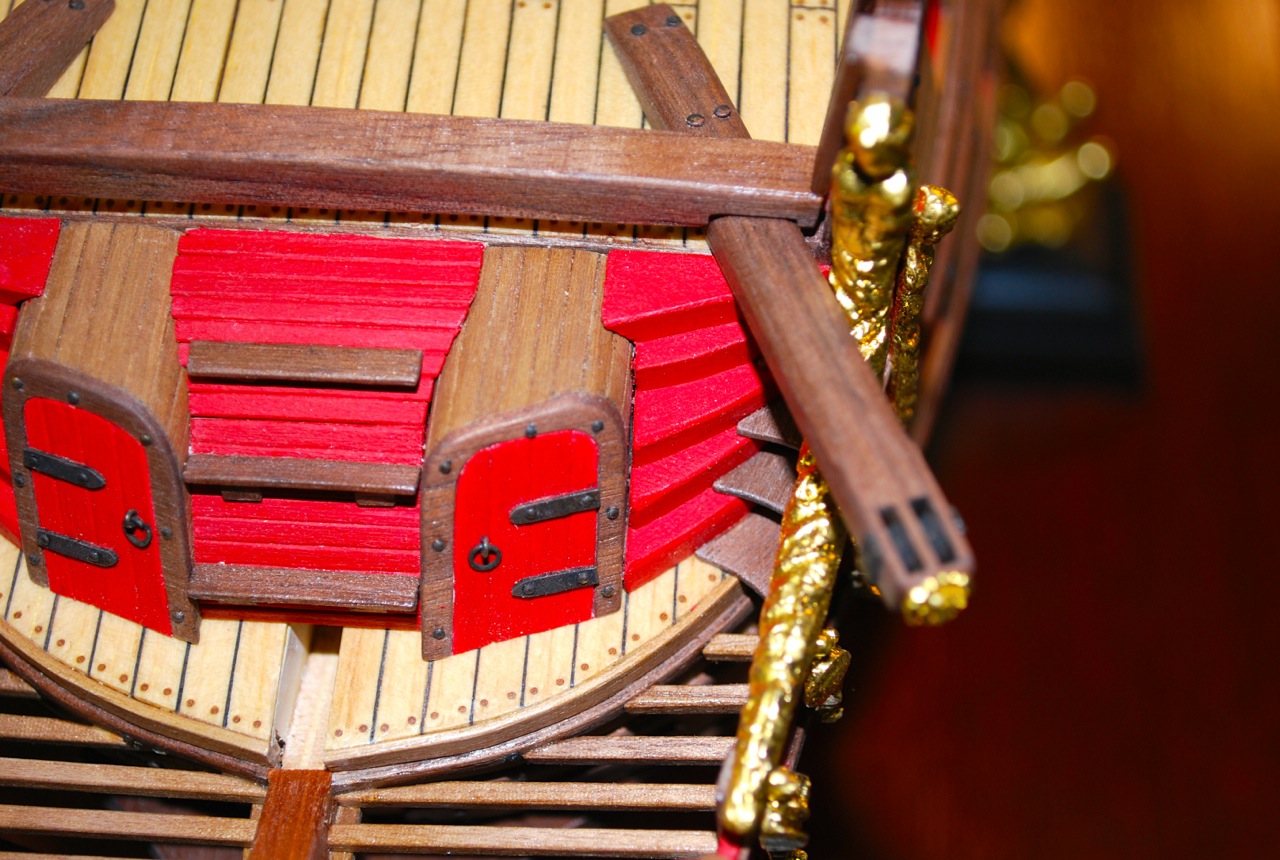
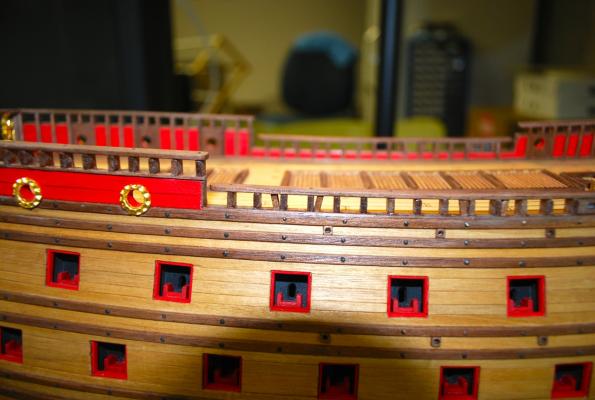
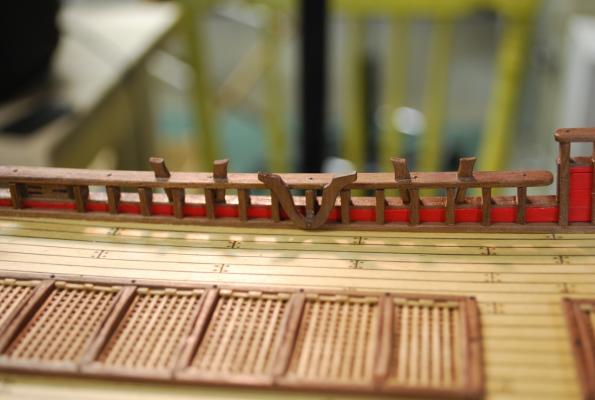
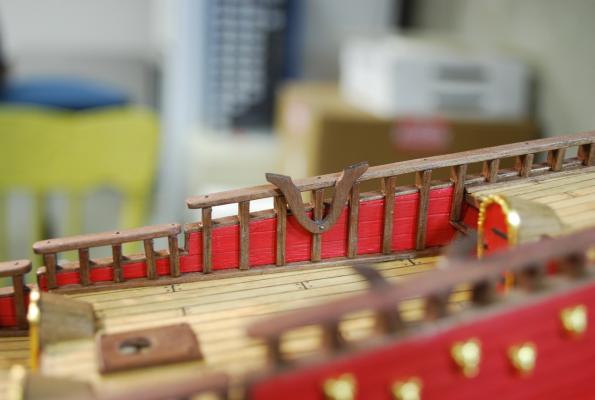
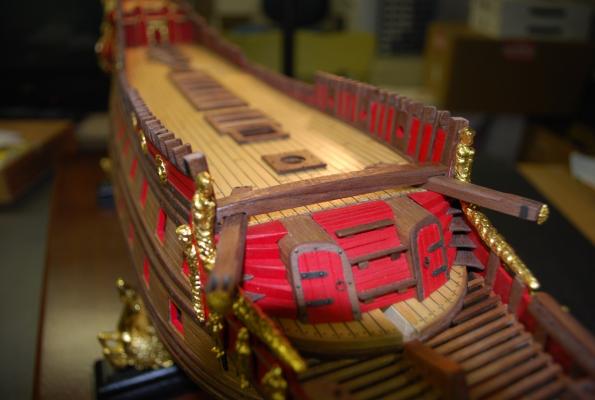
Continuing on with the build, I have made and installed what I believe are called the Kevels. ?? I made them in one piece instead of two. Added the angled pieces into the railings Referring to Fred Hocker's email to another member, I left off the Kevel on the side behind the main mast and only added 1 kevel to the quarterdeck instead of the two in the plans. Added smaller ones to the bow railing for the anchor rigging


-
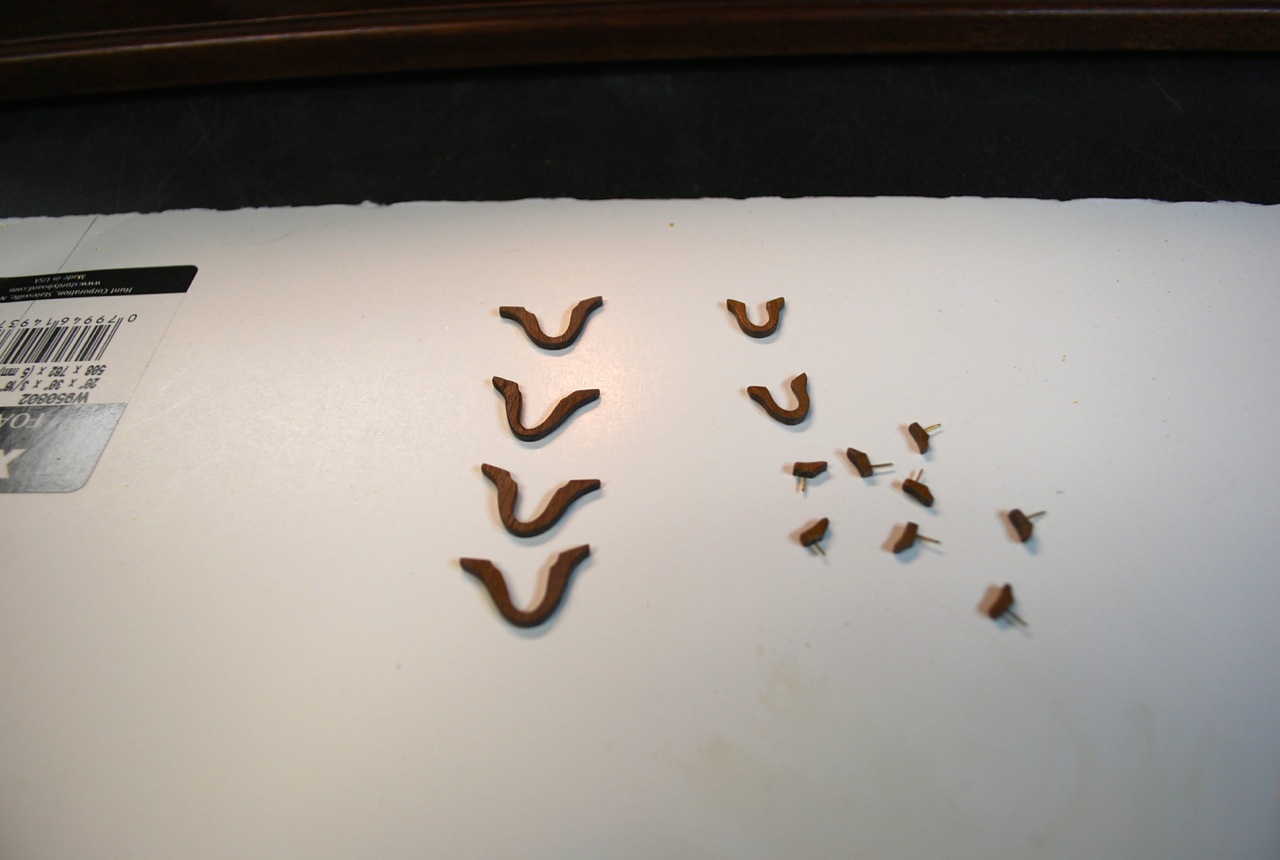
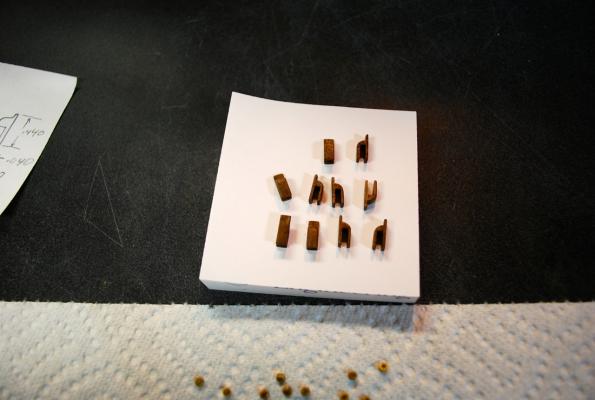
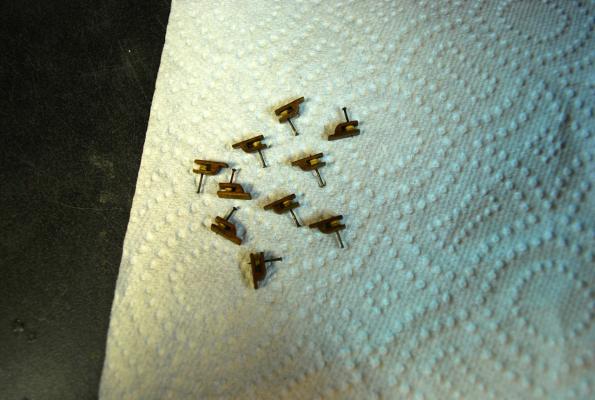
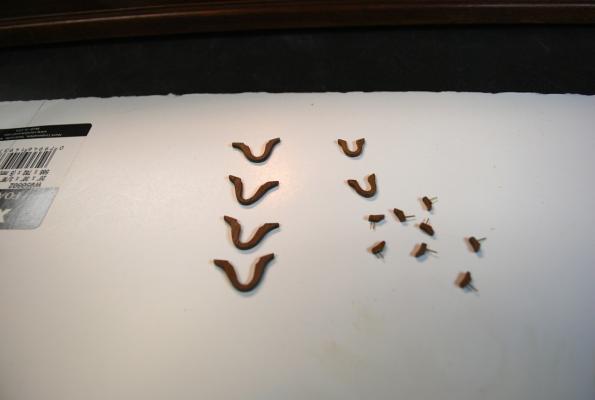
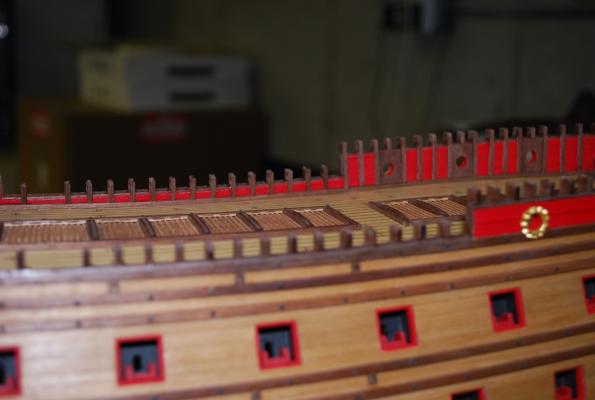
I decided to remake the rigging pulleys on the side railings. I didn't like the scale and workmanship of the original pulleys. Old Rigging Pulleys New set Slots are much thinner and hopefully look closer to the plans!

-
Ulises, Ship is looking great! I share your problem of a messy work table. Once I get going on a project, my workroom goes to downhill! I have to force myself to clean up about once a month Frank
-
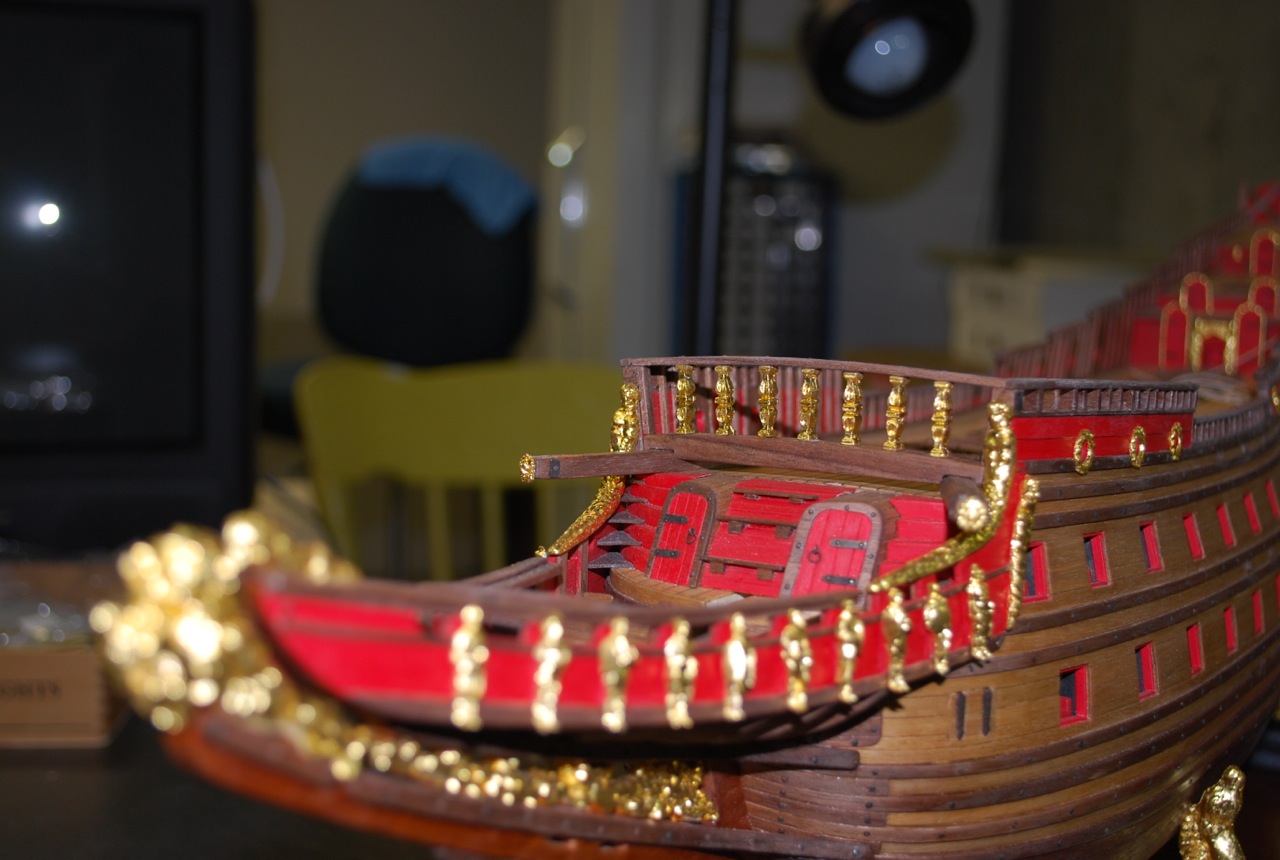
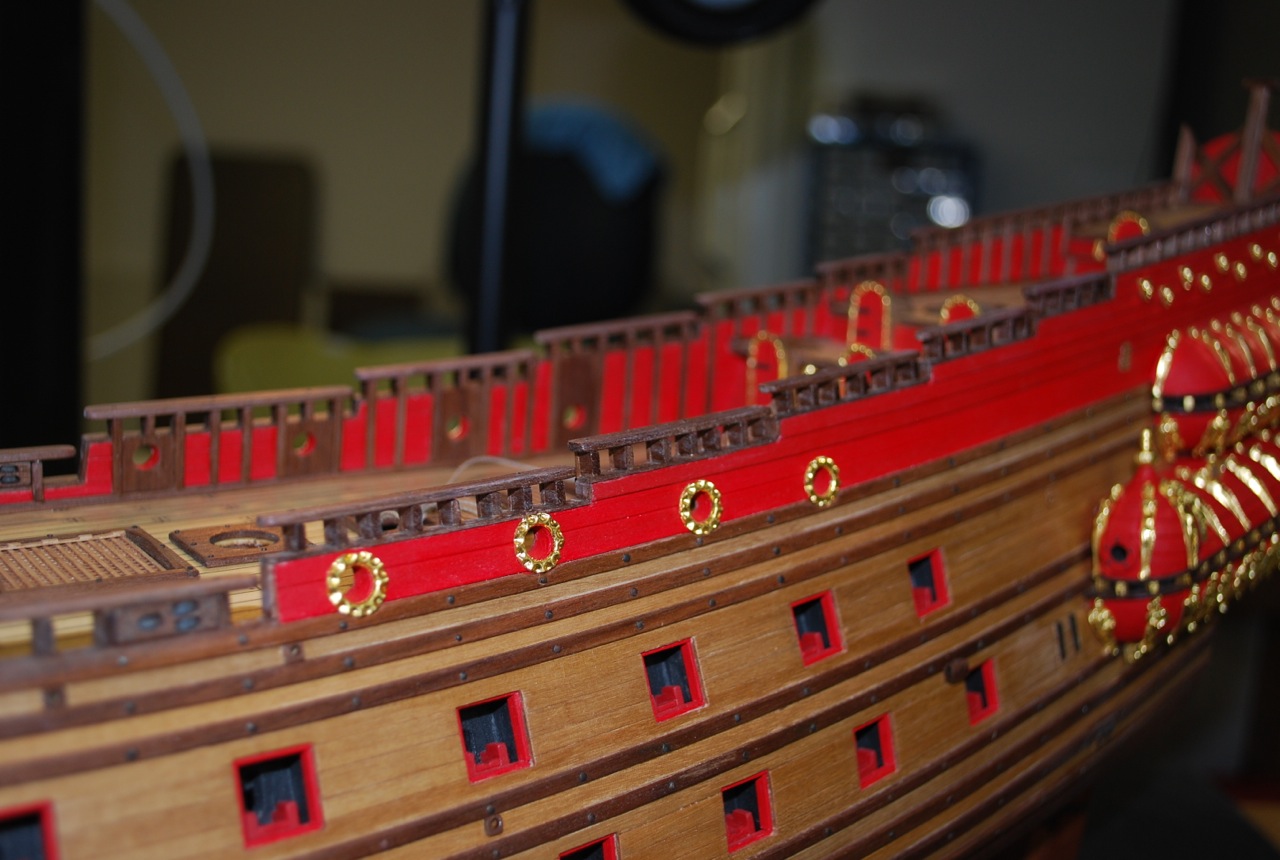
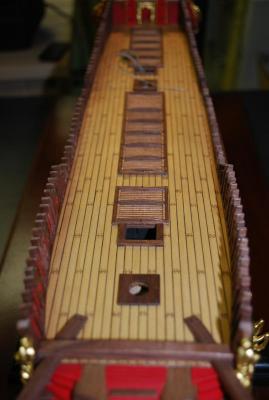
Posting some more pictures! I'm not to happy with the way these came out. I might redo them when I make the bitts. Added the knees to the lower bow railing Finished Bow railing I have finished the tops of the railings and now I will start working on the kevels.


-
Michael, Thanks for the detailed description of the deadeye assembly with the pictures! You have put a lot of thought into the process. Well done! Frank
-
Hi Michael, Thanks for letting us view your Santa Maria. Great work. You haven't missed a beat in the last 40 years! Get ready for another big glass case for your Wasa! Frank
-
Thanks Michael, Grinding out the doors, leaving the gilded frames, almost gave me a heart attack! I came so close to destroying them with the grinding bit, but I survived! Frank
-
Hi Jan, I had the same problems with my figurines. I was able to put a carbide grinding bit onto my Dremel tool and grind the backs of the figurines to get the right curves and to thin them out. Frank
-
I have finished the railing posts on both sides of the ship. I will start working on the railing tops, finishing the bow railing, and the rigging pulleys on the middle lower railings.


-
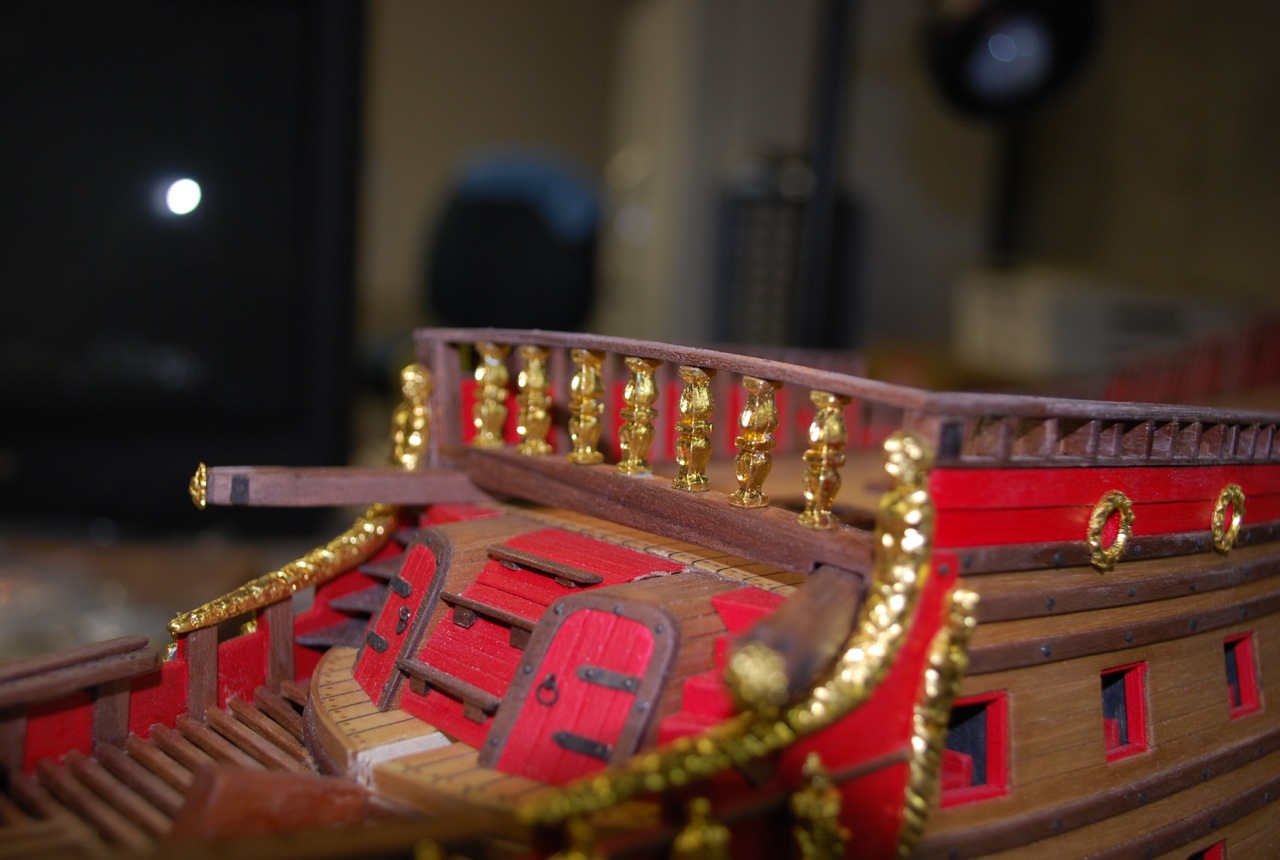
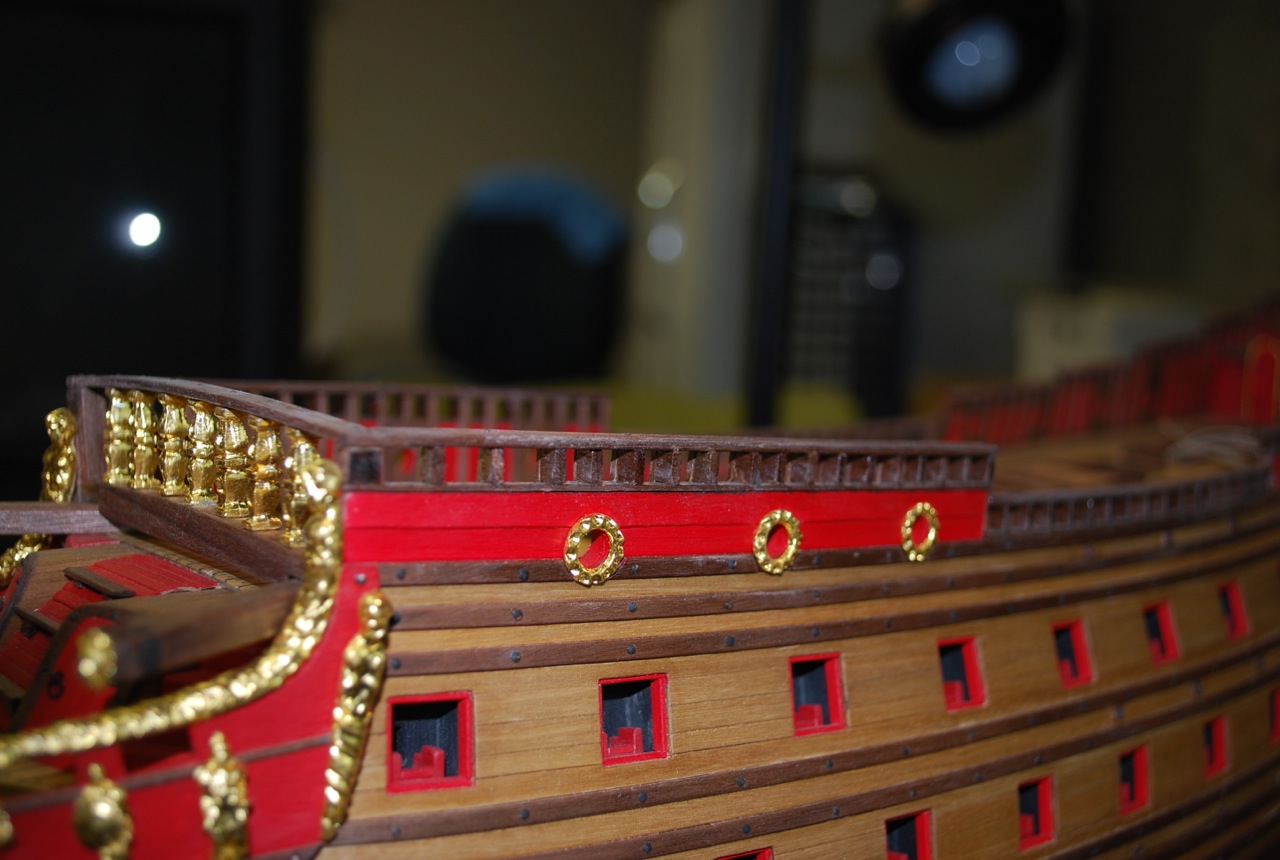
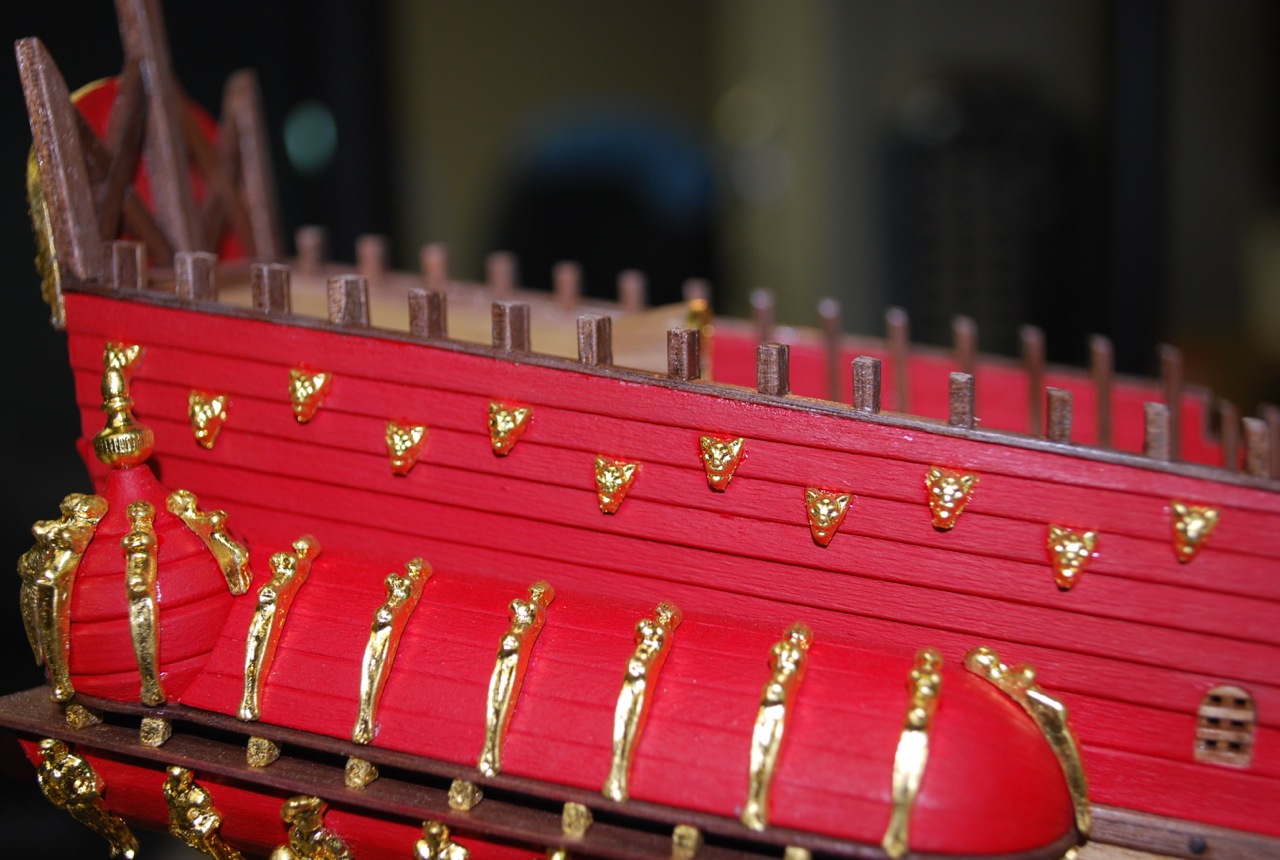
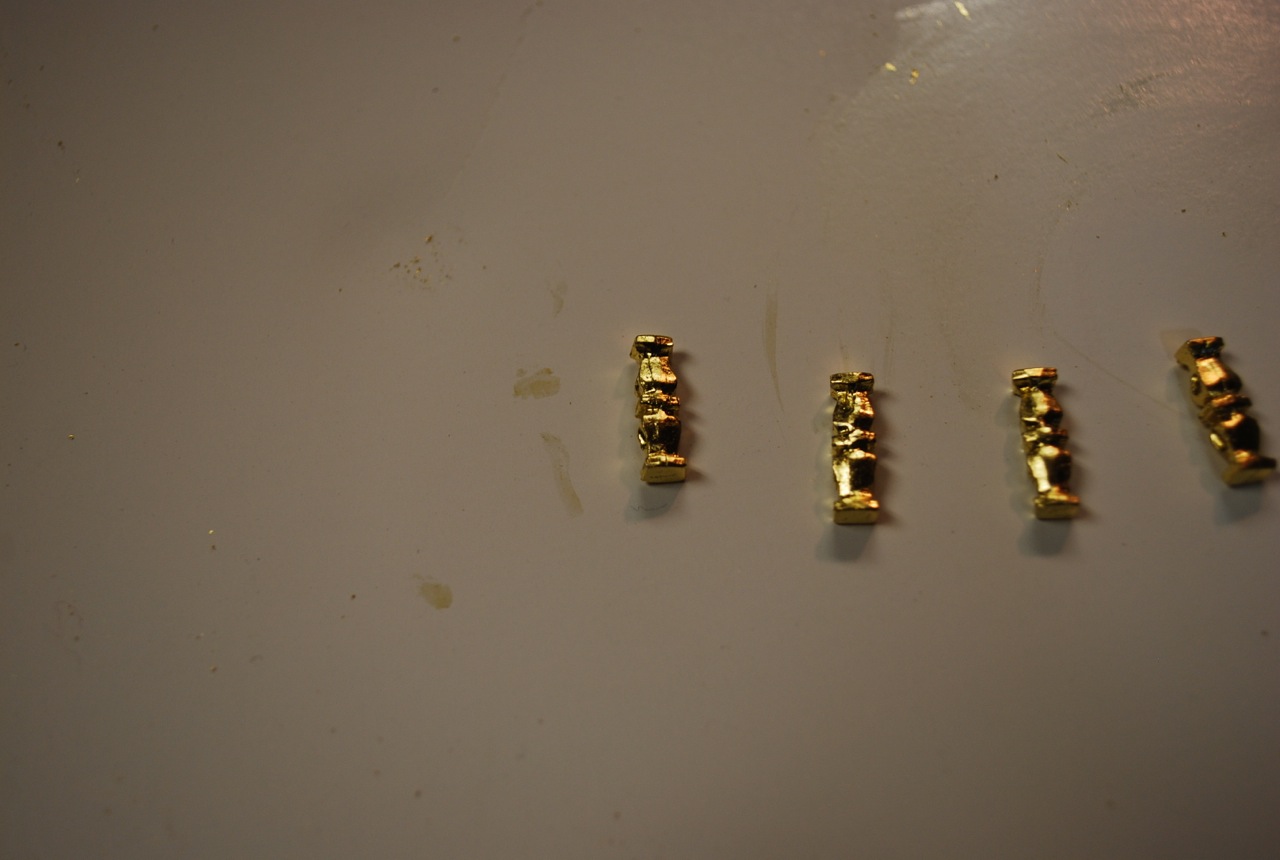
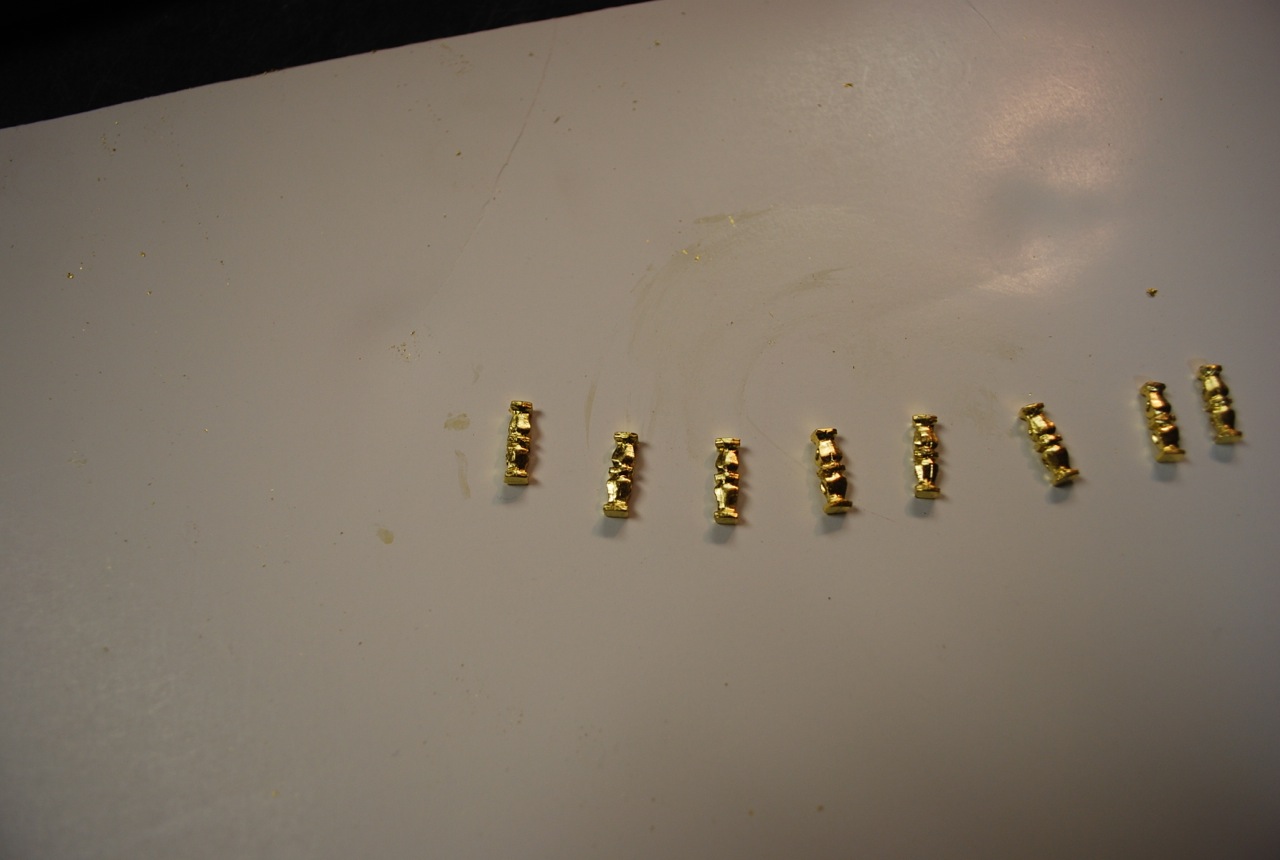
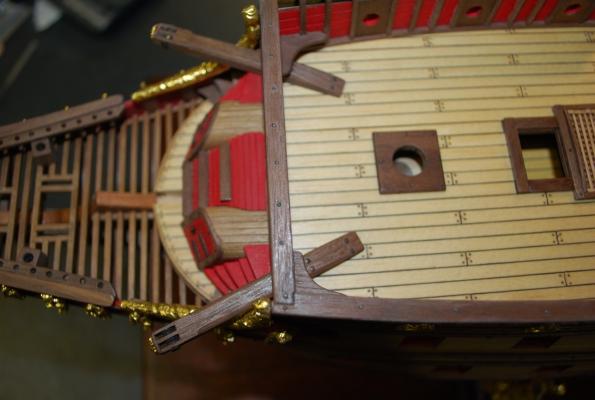
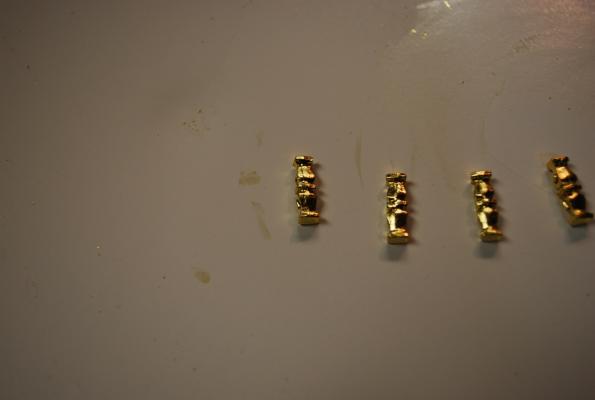
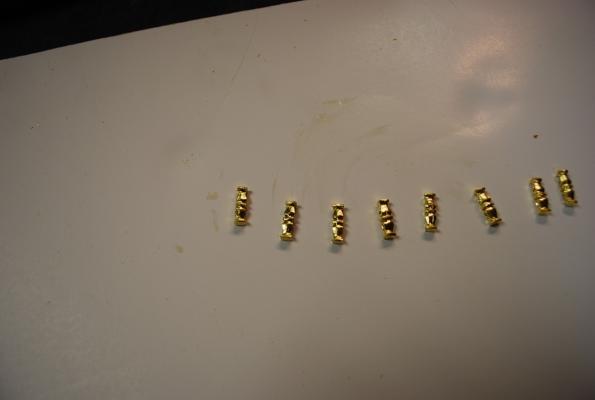
Hi everyone, I have installed the catheads and the lower portion of the bow railing. I still have to make up the knees that sit behind the lower portion of the railing. Thanks to Michael, (md1400cs) I was able to obtain stanchions for the bow railing (replacing the dolphins that came with the kit) and I have gold leafed them. They are ready to be installed.


-
Thanks Max! Yes, the quality of the wood of the Corel kit is pretty nice. However, Some of the wood I have been using is not from the kit. I.E. The deck is Eastern White Pine and a lot of the hull trim is a darker walnut that I picked up at the lumber yard.. My only real complaint about the kit is that I wish it was more accurate! Oh well! Frank