Javlin
-
Posts
1,681 -
Joined
-
Last visited
Content Type
Profiles
Forums
Gallery
Events
Everything posted by Javlin
-
Thanks Mike I wish I had not missed up the upper insignia I layered it in wash but forgot to clear it.
-
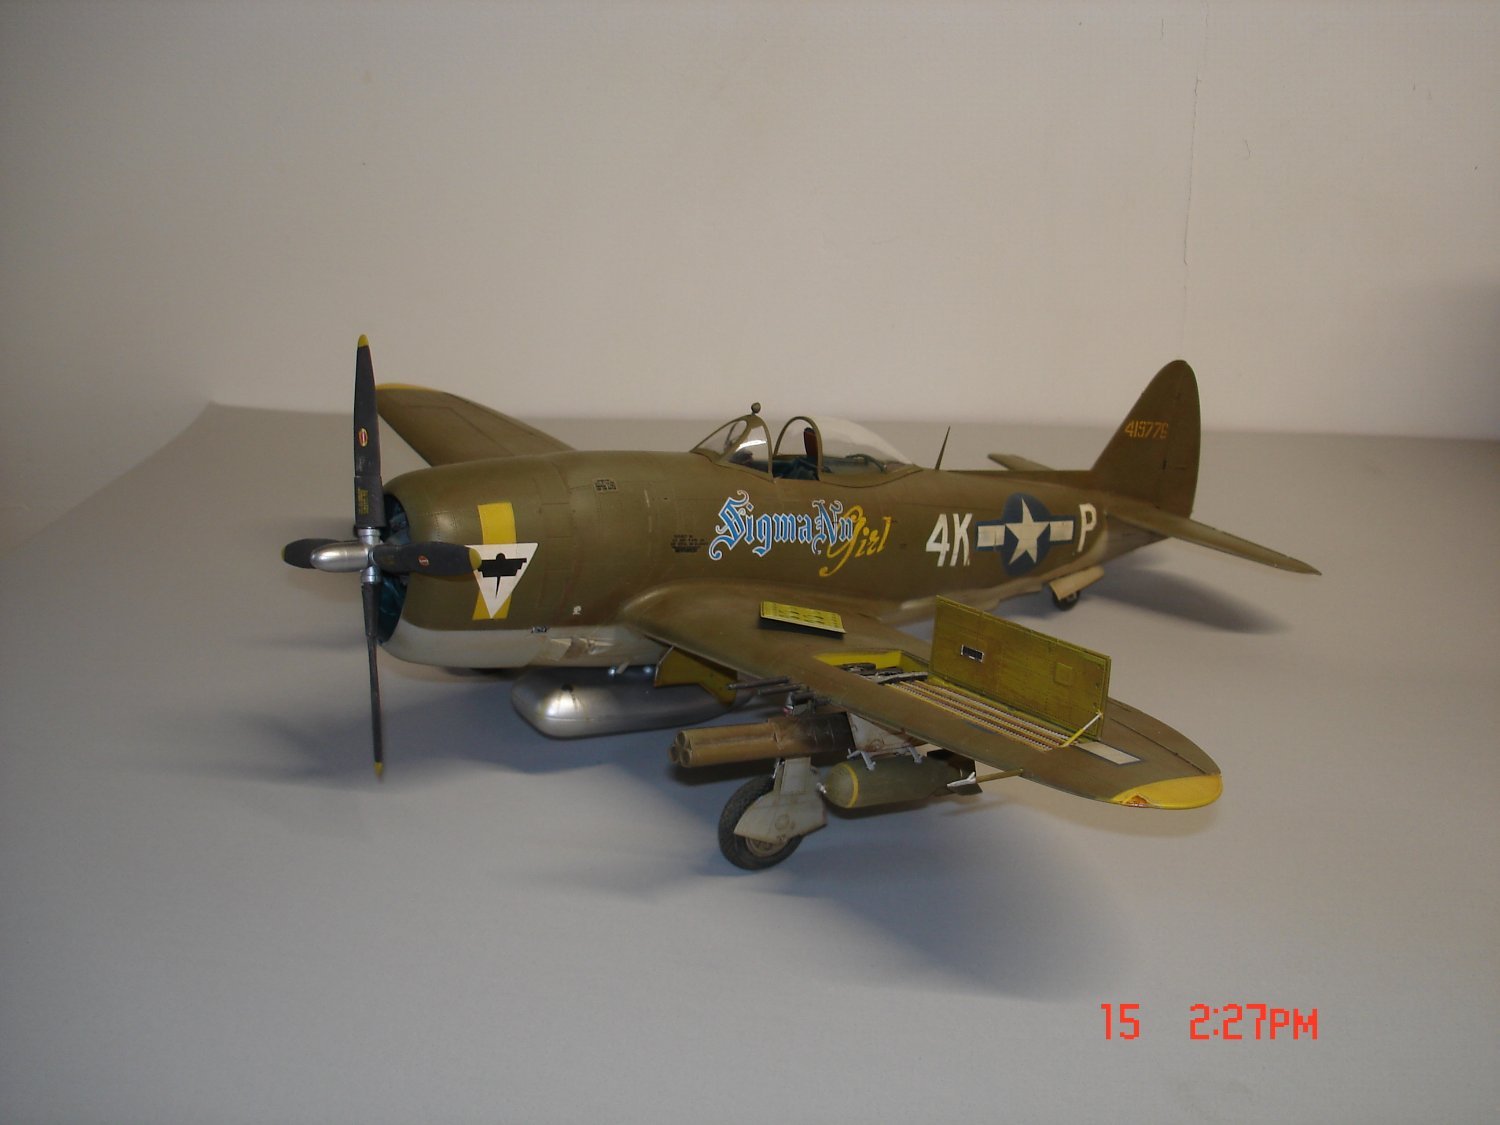
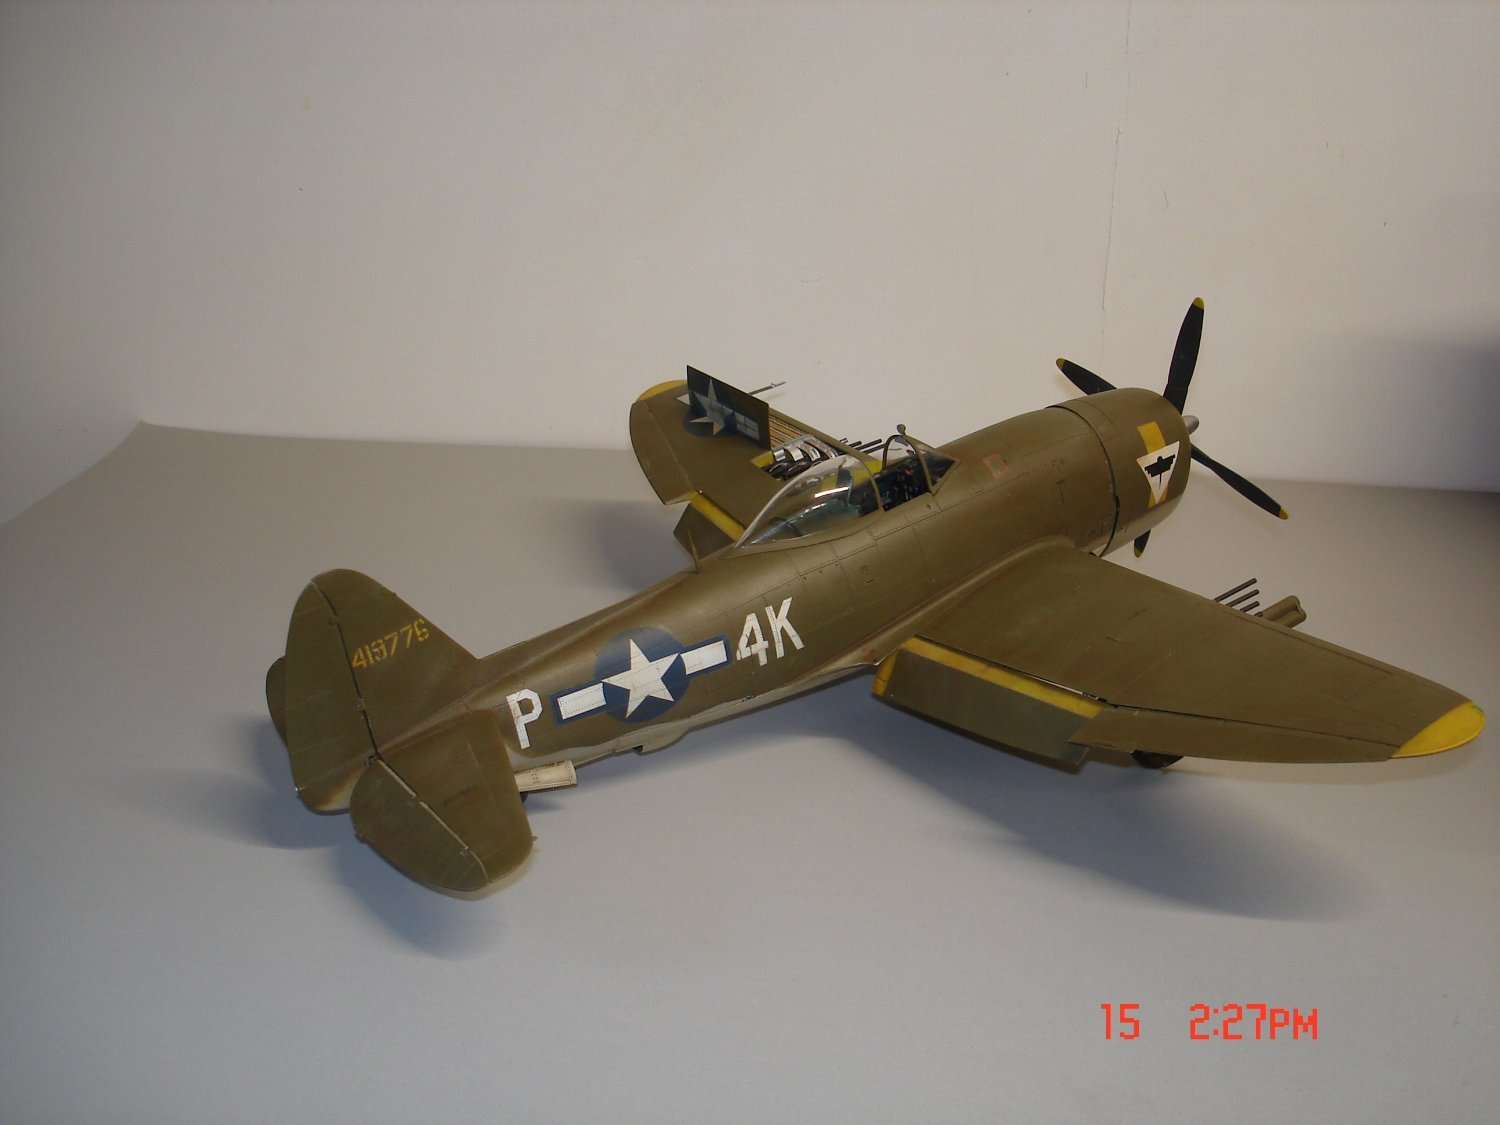
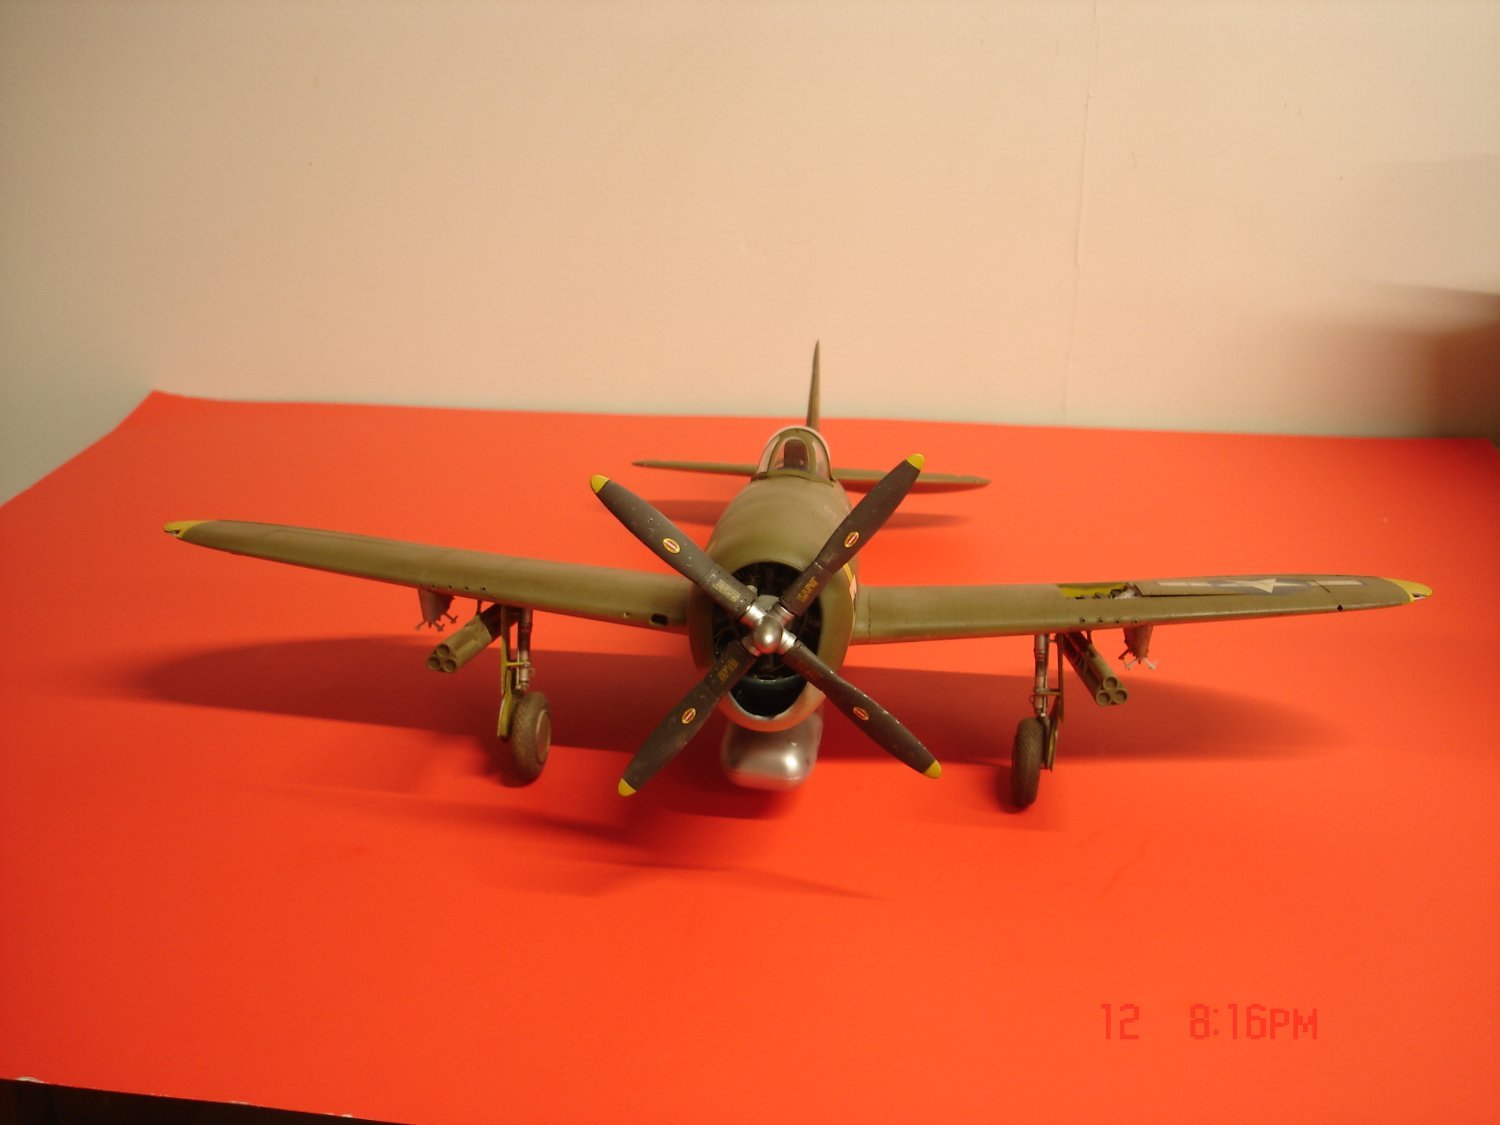
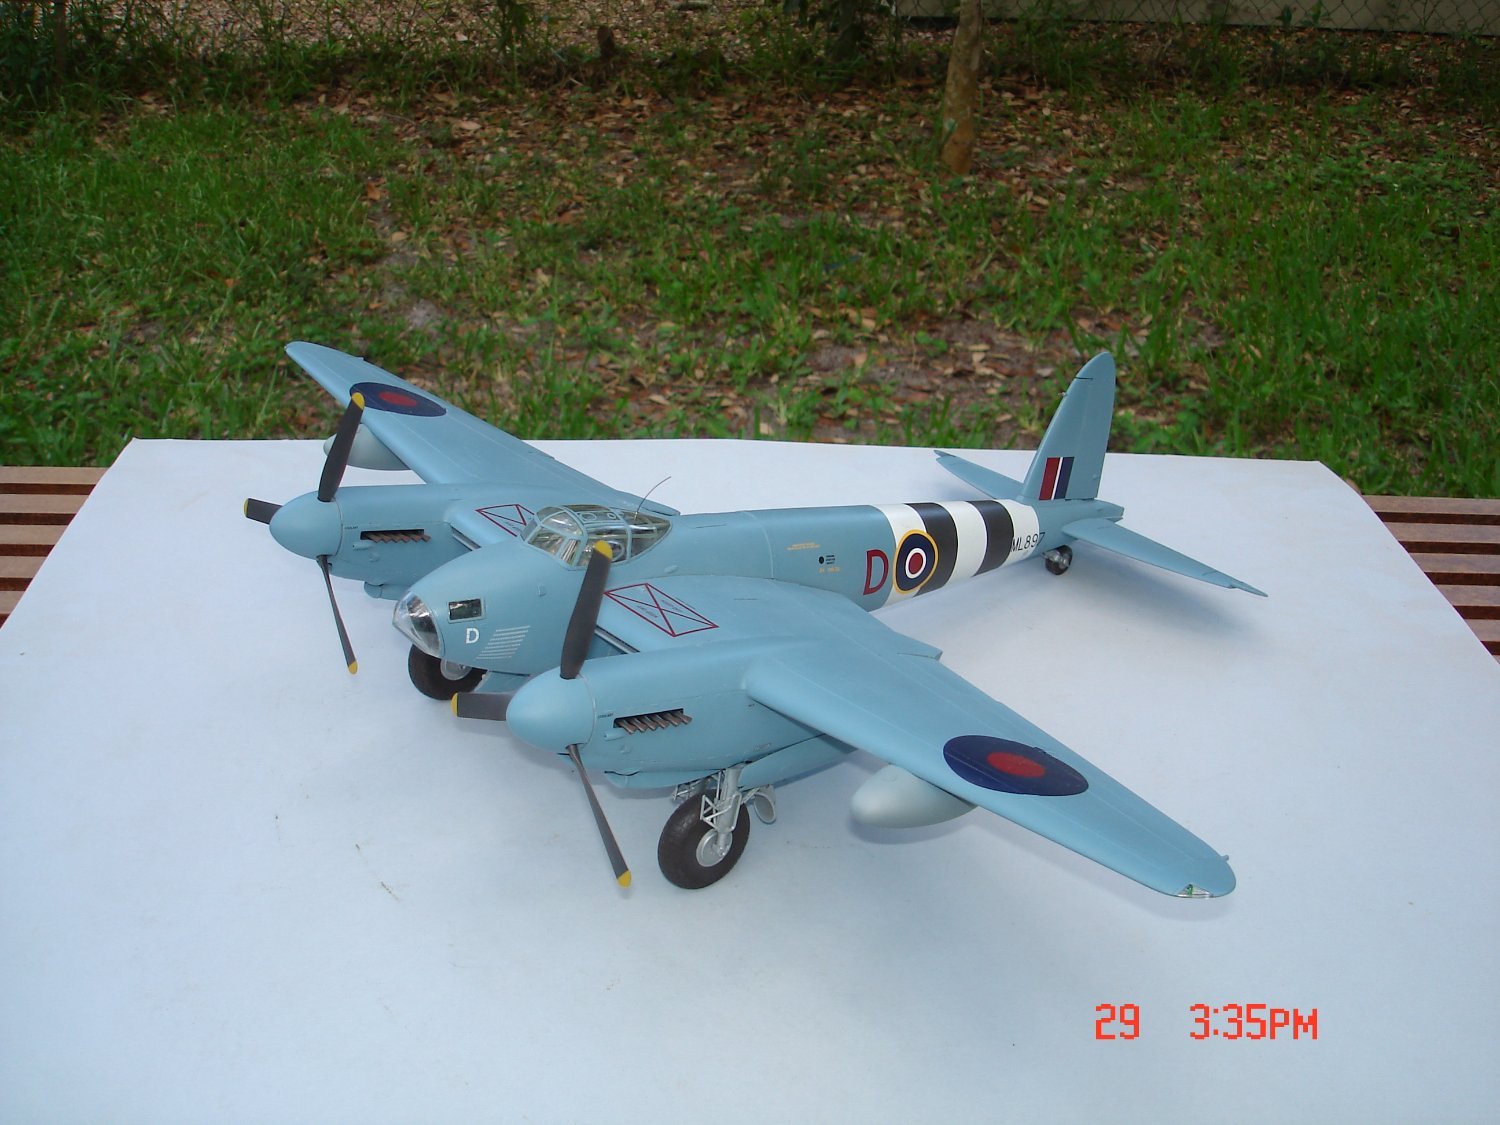
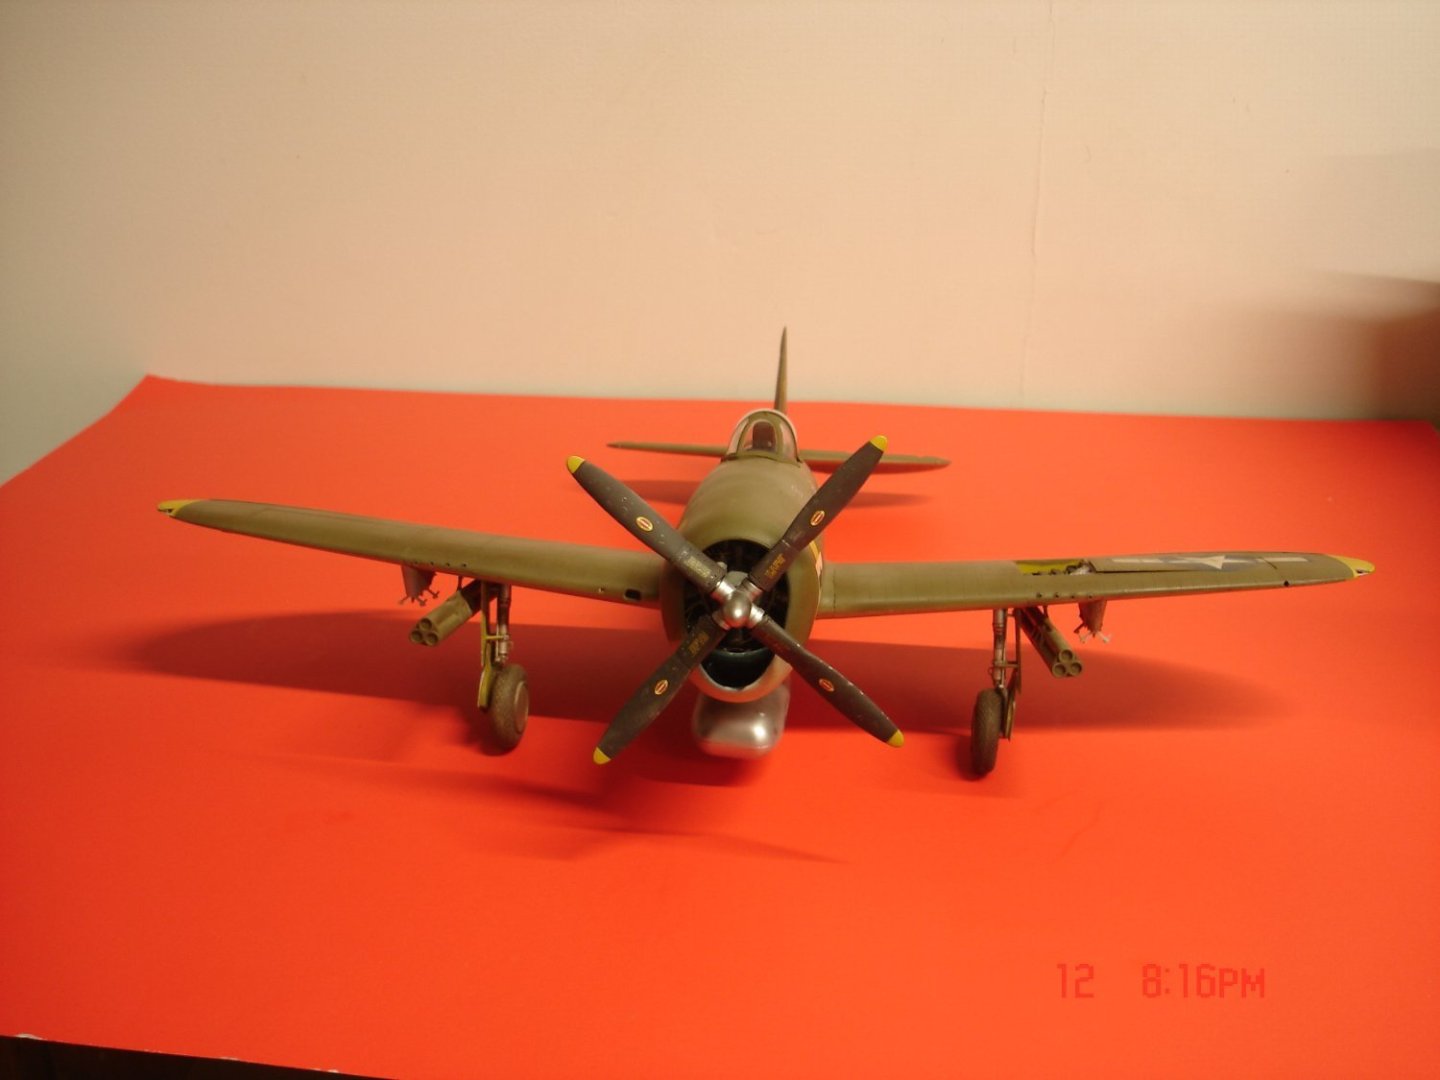
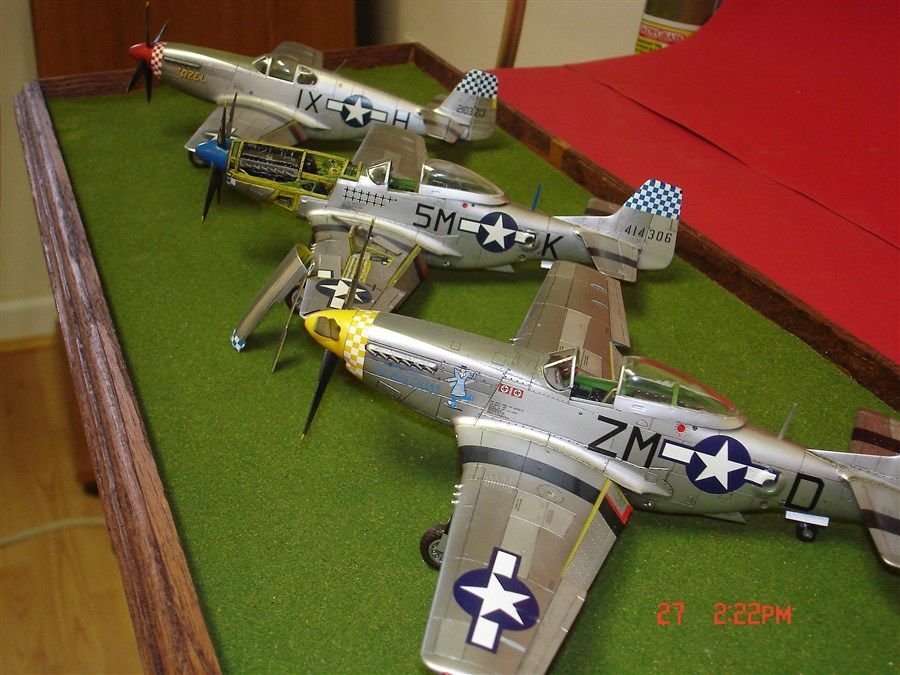
I am ready to position this one in the cabinet feels good to get her finished!I learned a bit with this one using mask and more weathering I have like 8 more mask coming from Hannants.Thanks for looking in guys and the support along the way even a Trumpter can look OK.


- 18 replies
-
- 15
-

-

-
I do both Craig just habit.
-
Thanks Craig been trying to teach myself different techniques on this one she is not perfect but that is OK by me learning is the important part.
-
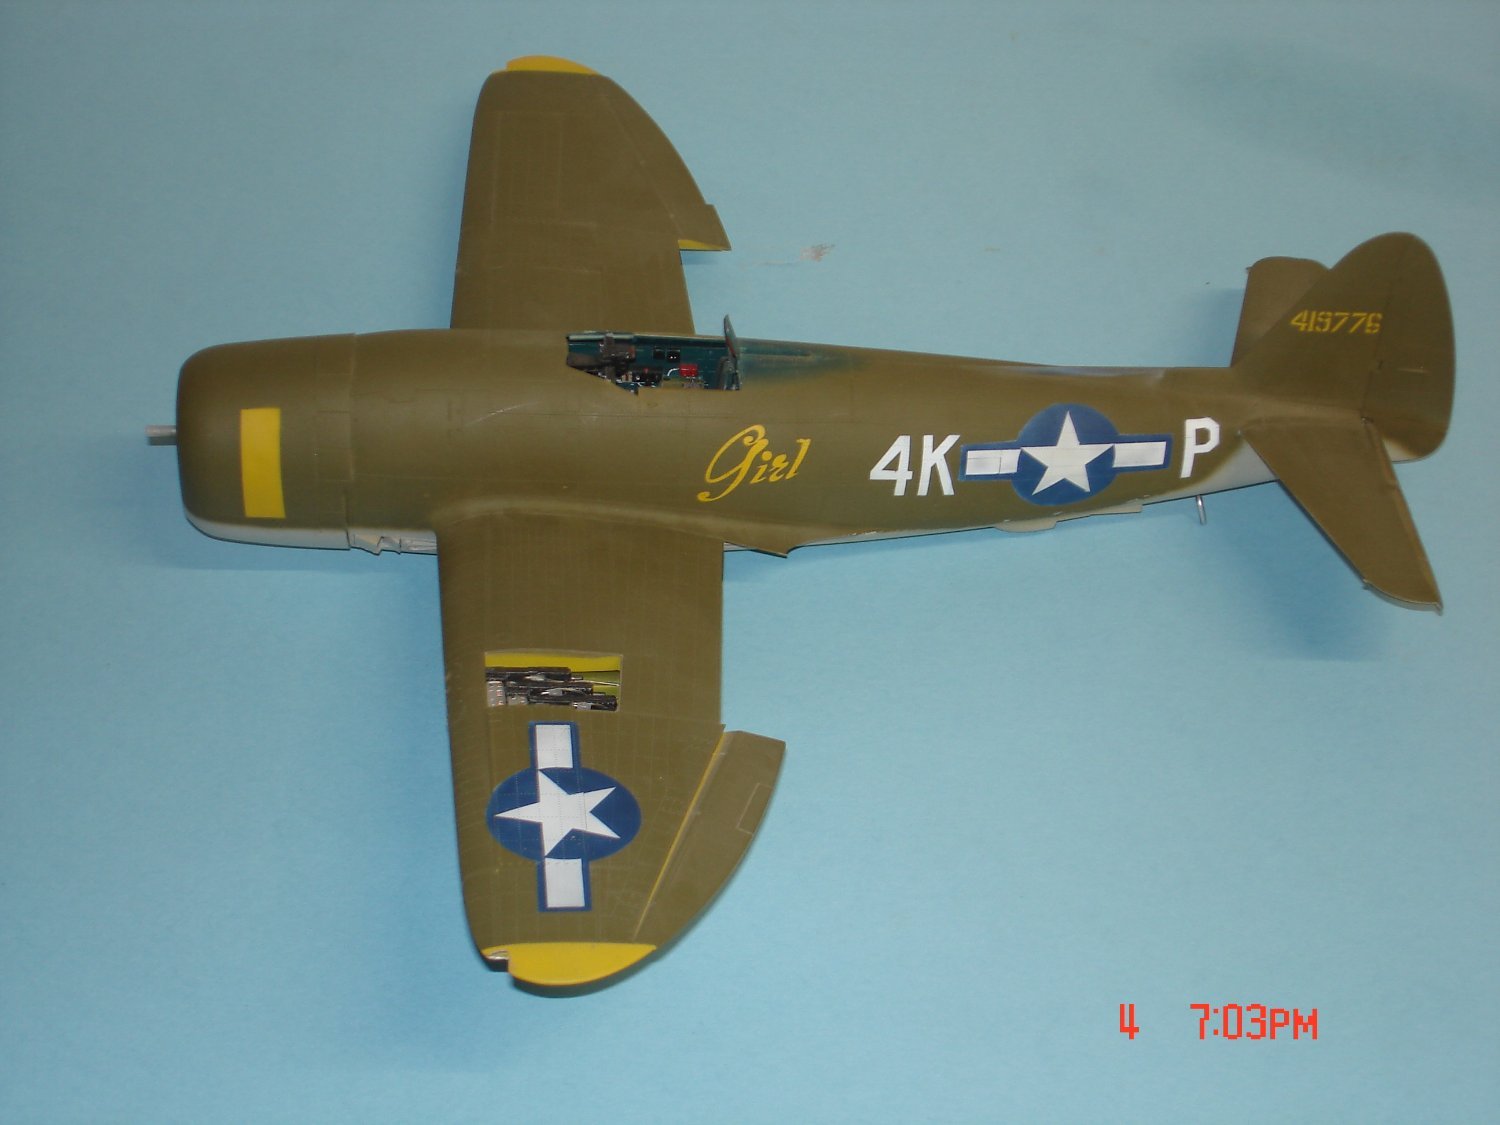
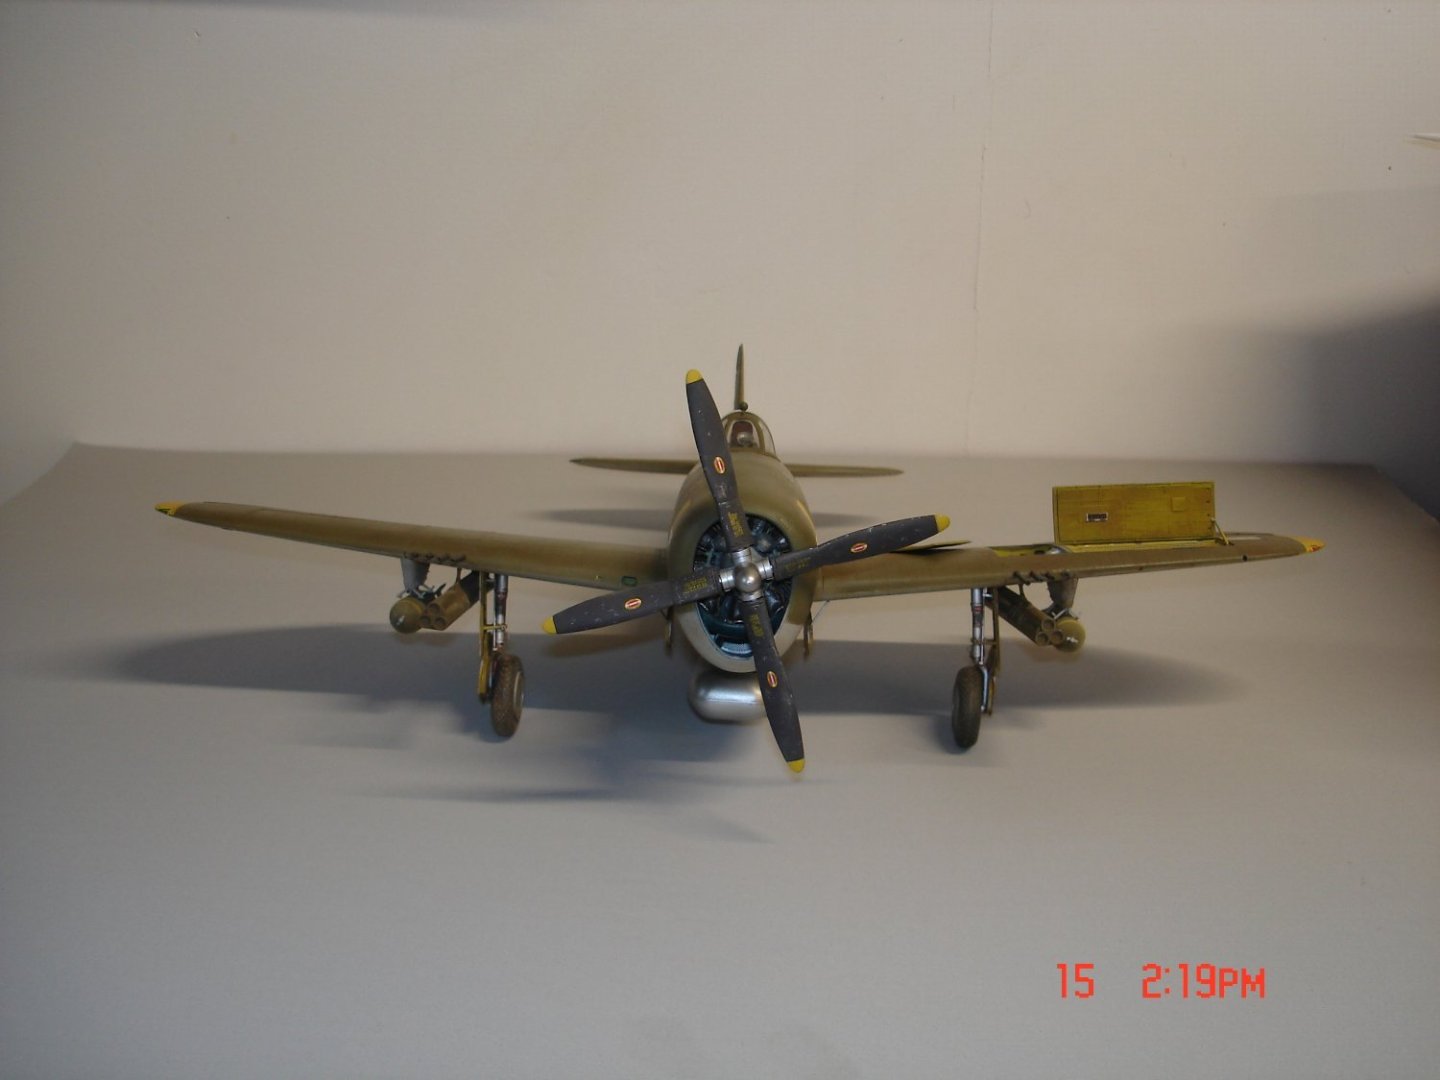
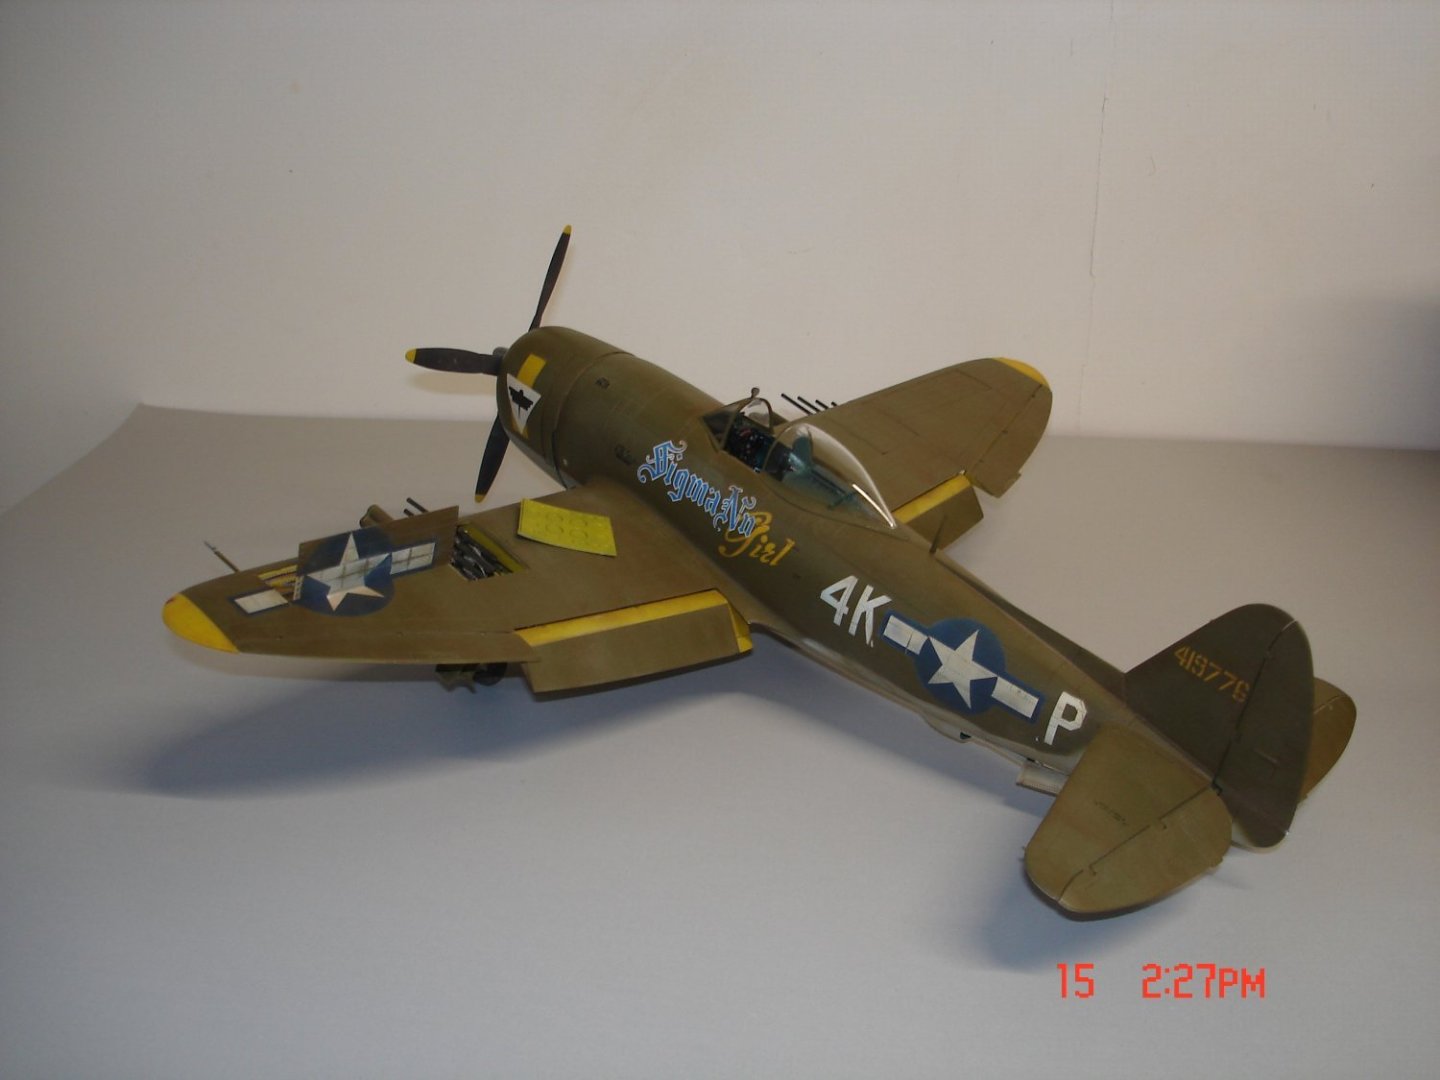
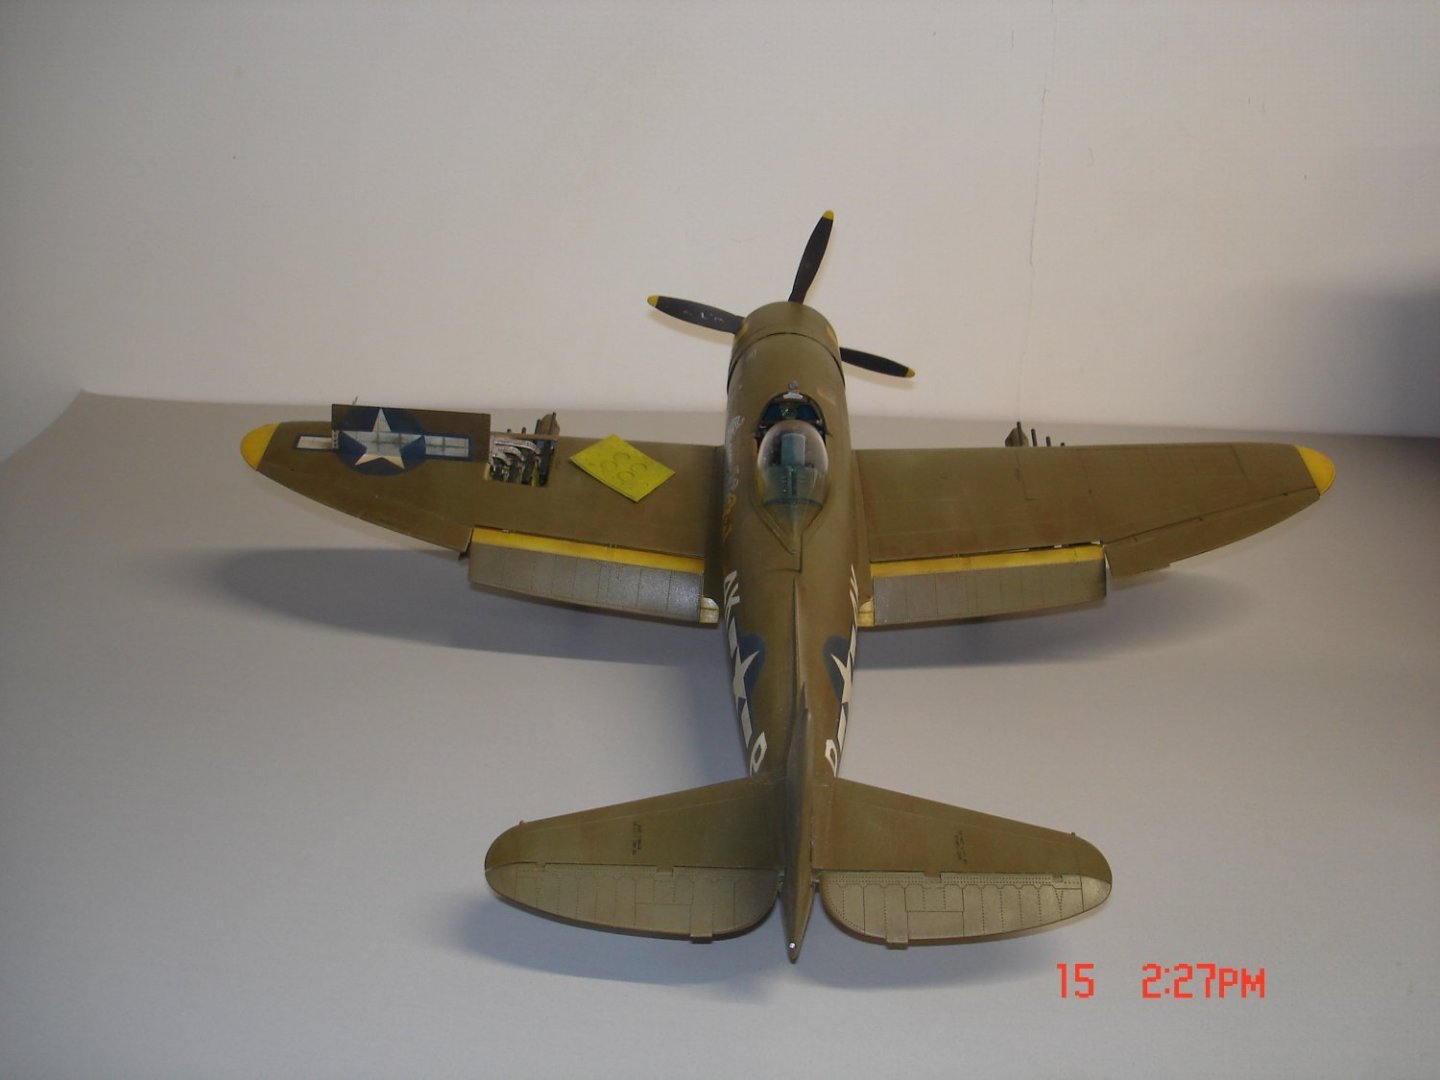
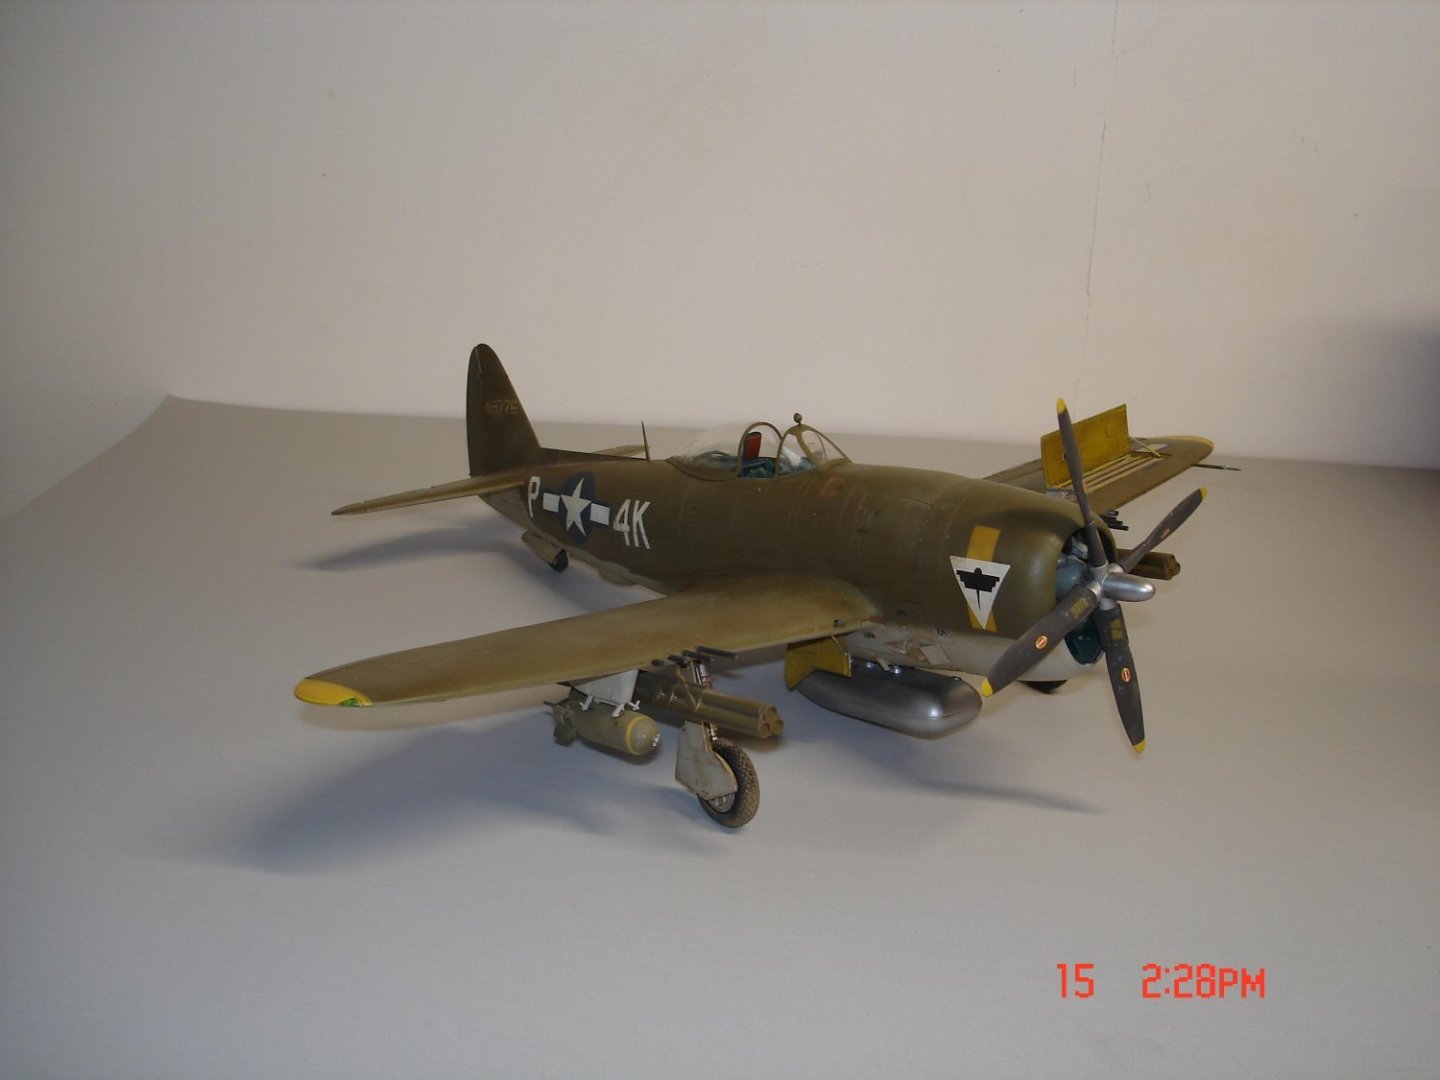
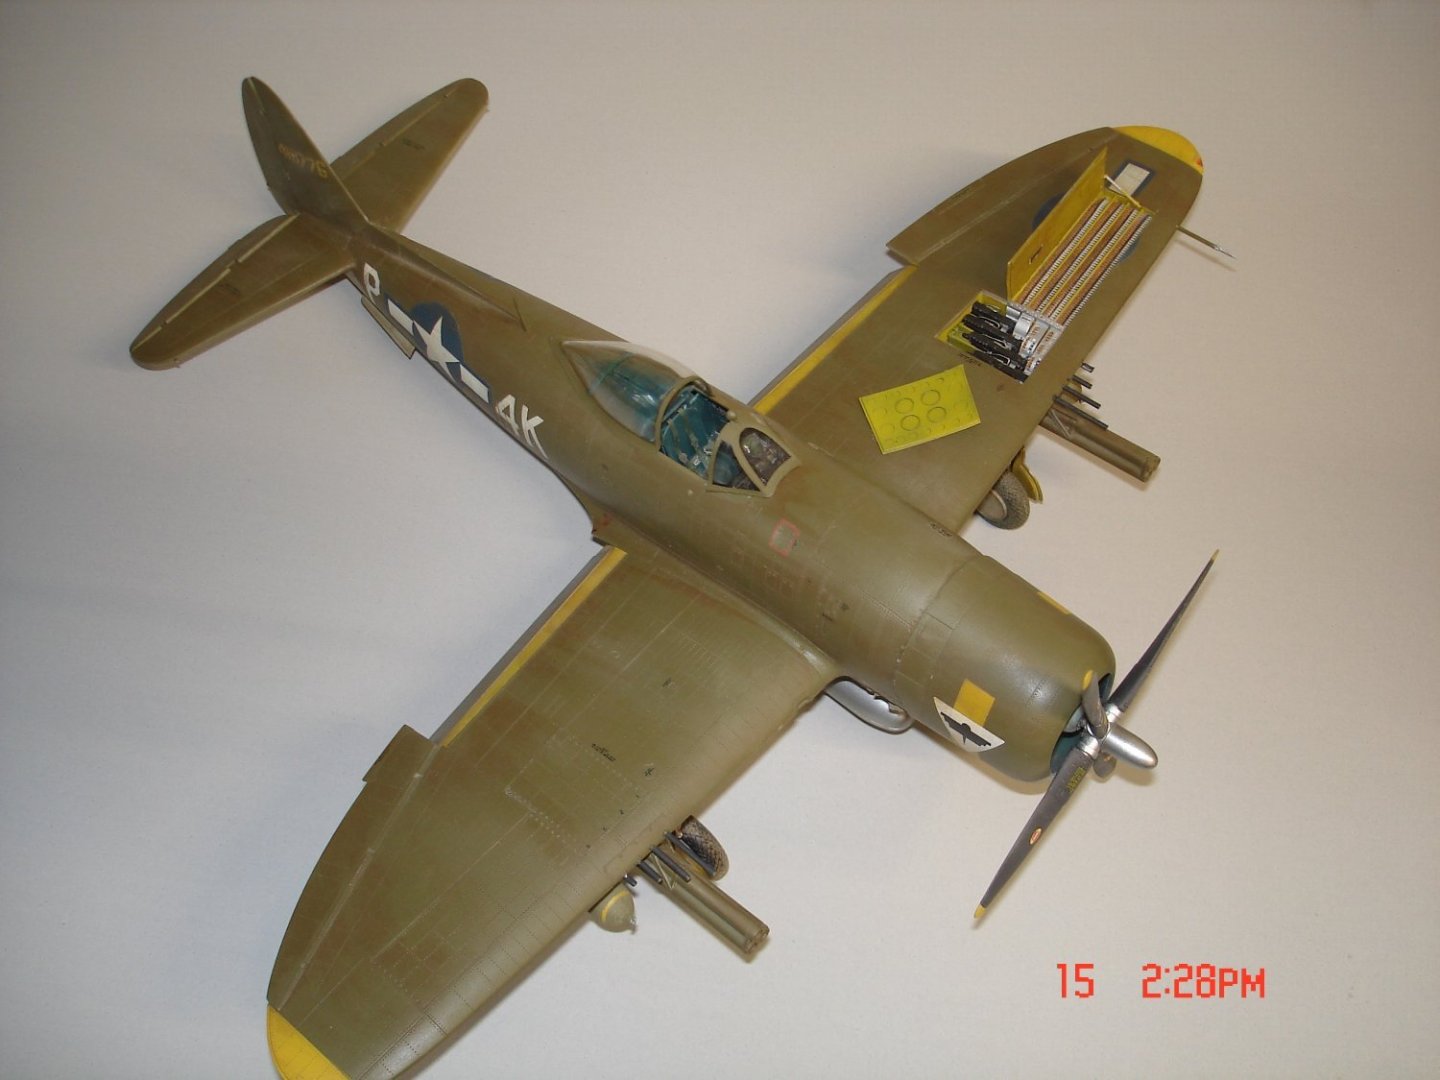
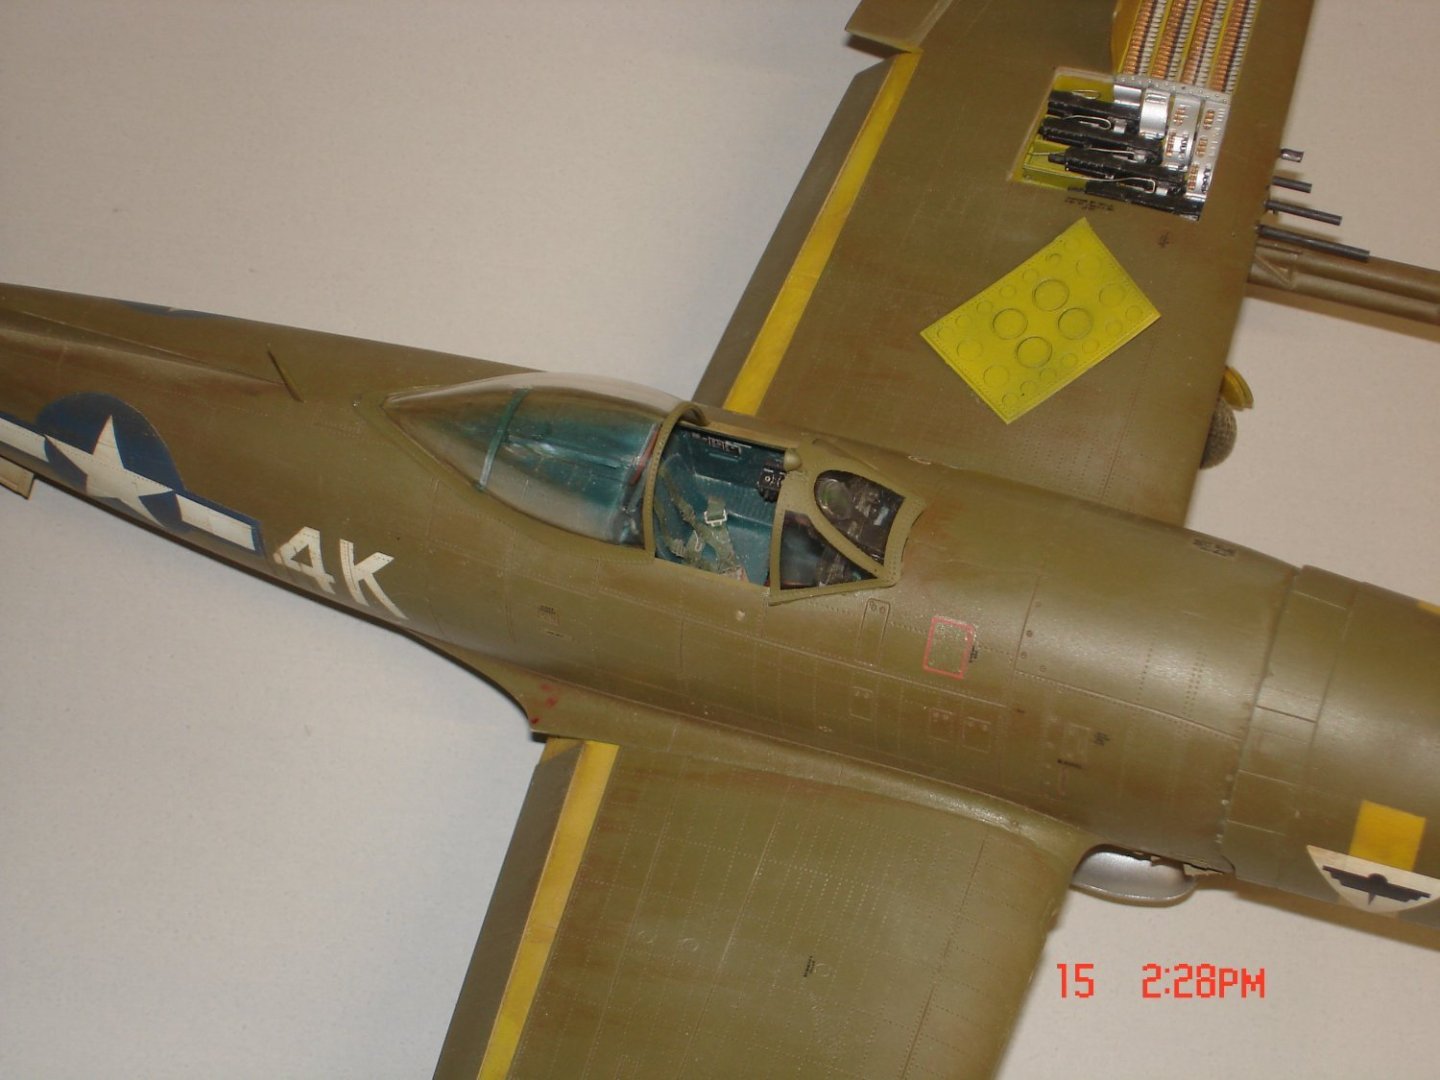
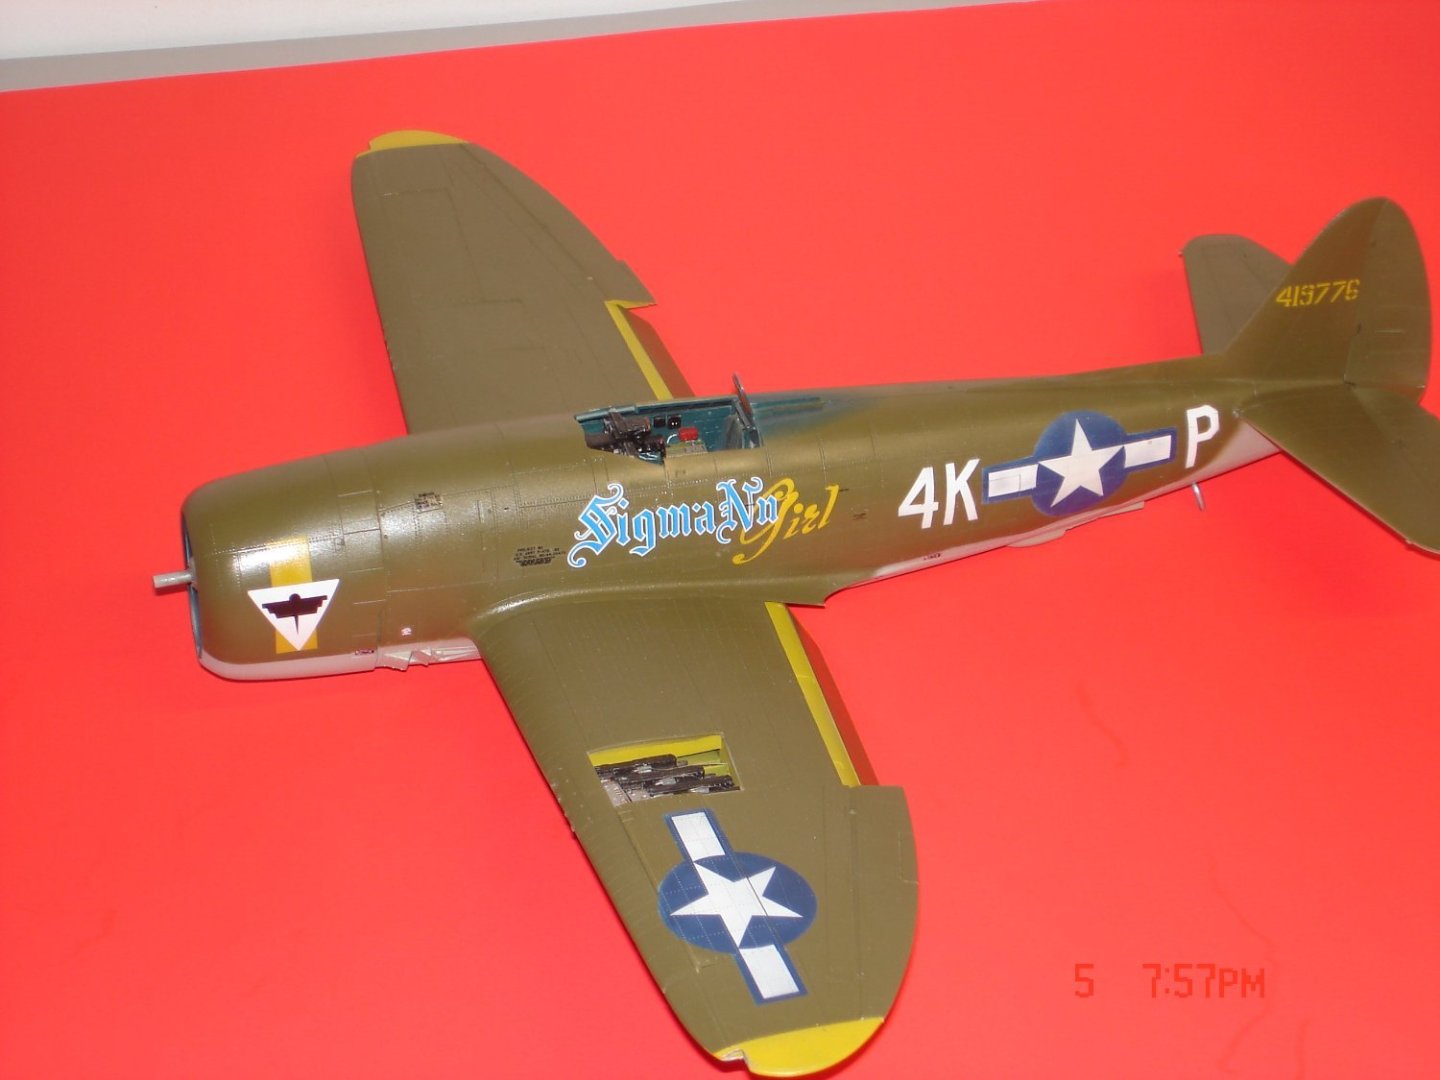
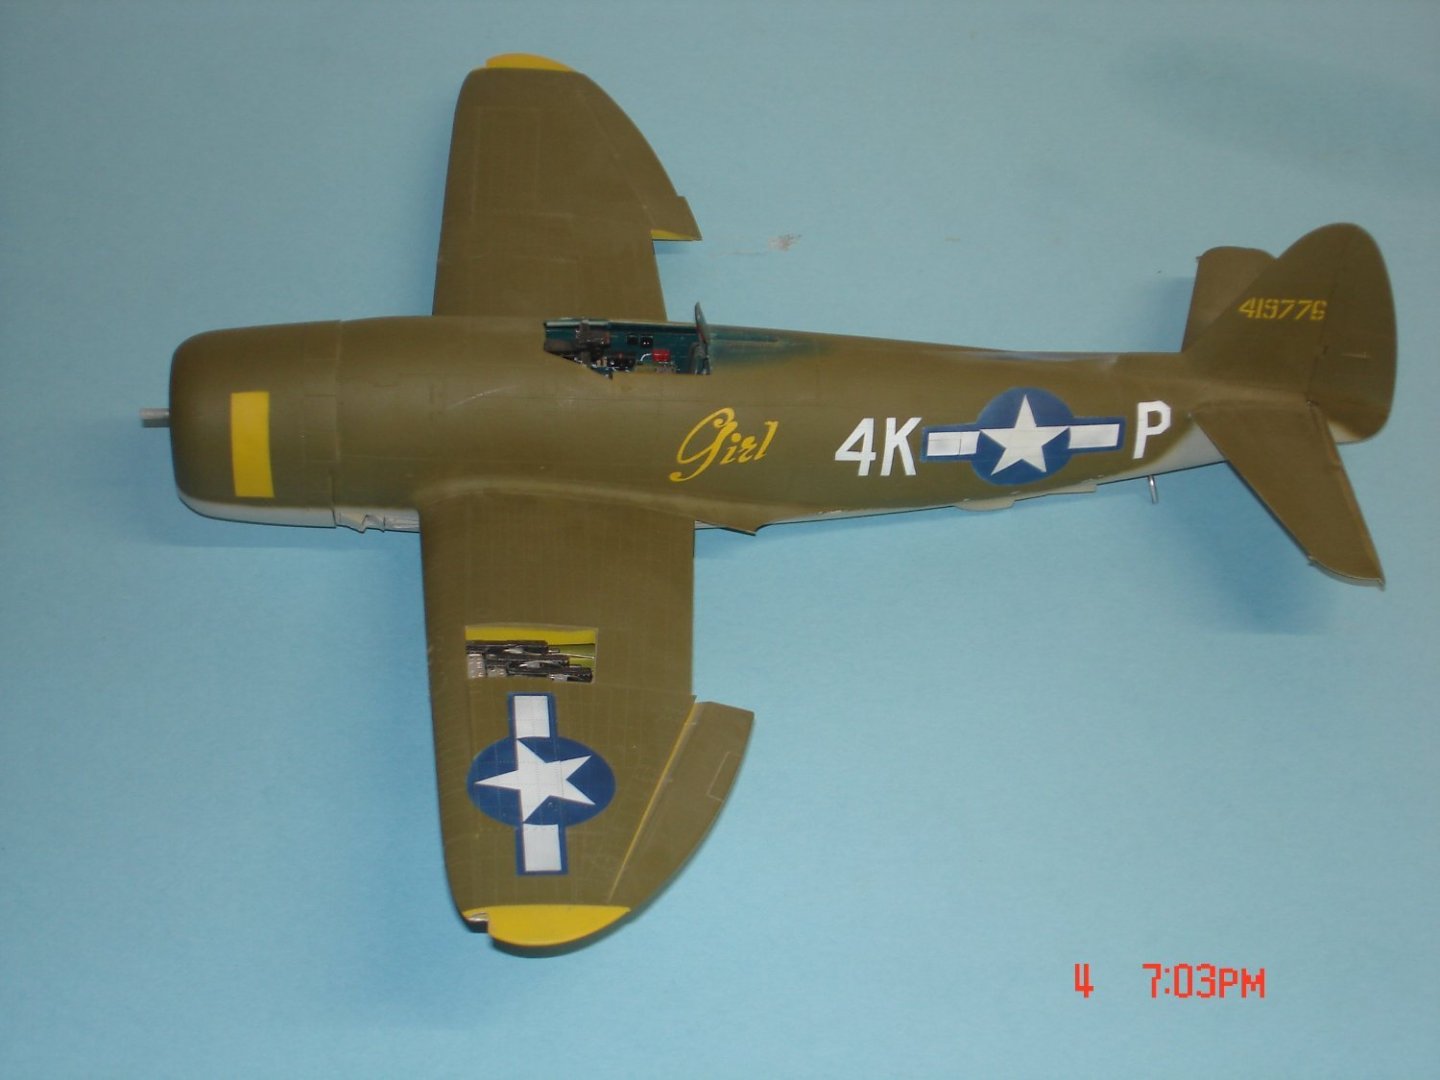
She might come out a good looking "Girl" after all?The canopy is not glued down and neither is the tank.The 250lb bombs are drying and need to be weathered .The whole model got covered with Tamiya brown wash with a 1/2" brush sit for thirty minutes and started the wipe.I then came back over that with Tamiya light dust on the upper surfaces and sand on the bottom.The flat clear went on very low pressure and light from a distance so as not to soak the pastels then you can lay it.The prop was painted silver way back and Nato Black very thin on top use a knife to chip.The wheels is the most I have ever gone after a set and think it will pass AK mud paint mixed with the Tamiya pastels from earlier thinking the mud was a waste here but needed to play with it.She's going to look the work horse when done!

- 18 replies
-
- 10
-
-
Airplanes and Tanks in plastic by Jörgen
Javlin replied to Jörgen's topic in Non-ship/categorised builds
Nice room and layout mine is about 1/2 size @6'X16' and cramped. -
Barncave Shipyard by mbp521 - Scale 1:1
Javlin replied to mbp521's topic in Non-ship/categorised builds
Brian we have a local mill shop of sorts stocks some exotic woods and those of the area which are semi-rough cut 4/4 and 8/4 and I finish the planing.You may look around for a place like that if it suits ya that cedar runs under $4 a b/f in my neck of the woods.I really like your shop wish I had a concrete floor but was working to keep those pesky inspectors away after Katrina she's endure a few more storms. Keep up the excellent work!!Kevin -
Barncave Shipyard by mbp521 - Scale 1:1
Javlin replied to mbp521's topic in Non-ship/categorised builds
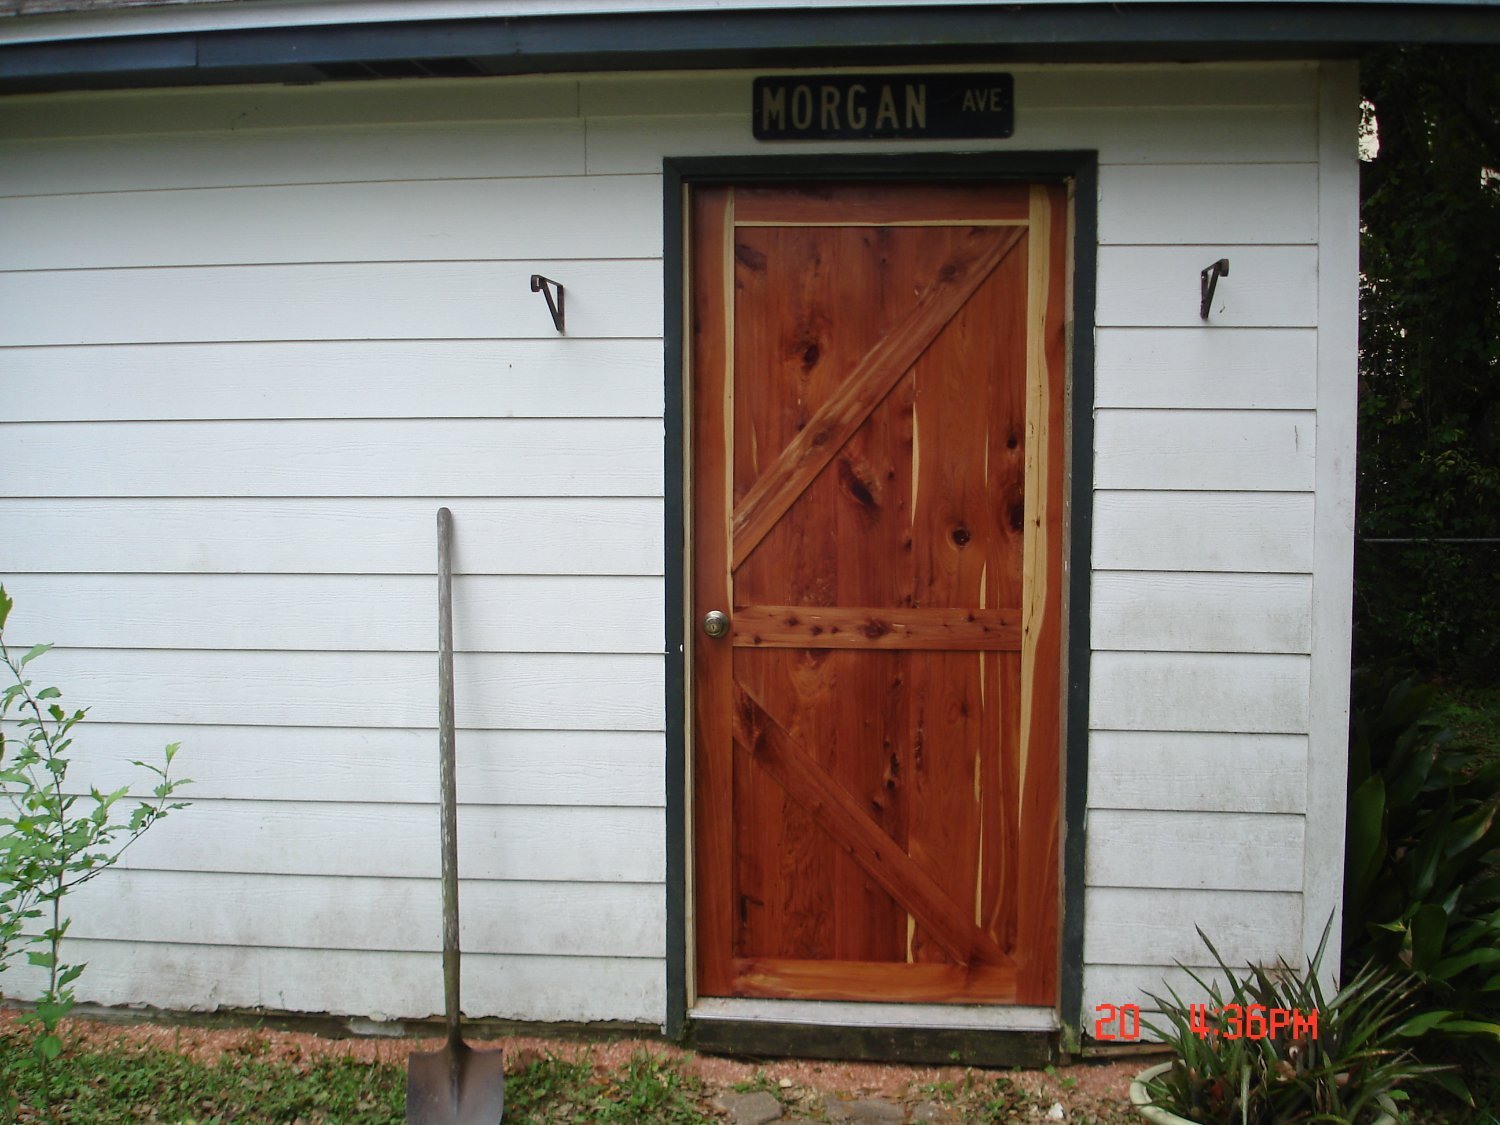
Brian I have not had any issues with this door on the shop it's Aromatic Cedar main boards are 1" thick with the outside layers bring it to 1 3/8".I did like you glued and biscuit with clamps with a marine varnish.Termites had eaten 3 steel doors and two frames I live on the MS Gulf Coast so they are an issue here.
-
Renault RE20 Turbo by DocRob - FINISHED - Tamiya - 1/12
Javlin replied to DocRob's topic in Non-ship/categorised builds
That looks real Rob just like replacing the f/lines added authenticity. -
De Havilland Mosquito by Javlin - FINISHED - HK Models - 1/32
Javlin replied to Javlin's topic in Non-ship/categorised builds
Thanks been clearing out these SOD kits no more 1/32 kits left on the shelf 1=1/72 and 2=1/48 1=1/56 (ship) 1/350 Eugen it was 10-15 1 1/2 years back forgot 1/35 Tiger -
It was clear Mike at first it looked like it was going to be opaque looking but applied some softener and it cleared up and hid itself.Mike life must be keeping you busy of late? alittle of the incognito been going on
-
This is to cool and I may do one myself of the B-17
-
Scott that came out real Nice!Now if I was you make a display base for multi armor builds something simple but will enhance the look/aesthetics liek this for my PRU Mustangs.
-
Thks Alan there is a learning curve to me but already looking for more.
-
I am beginning to think even with my mistakes this "Girl" will look fine in the cabinet.
- 18 replies
-
- 11
-
-
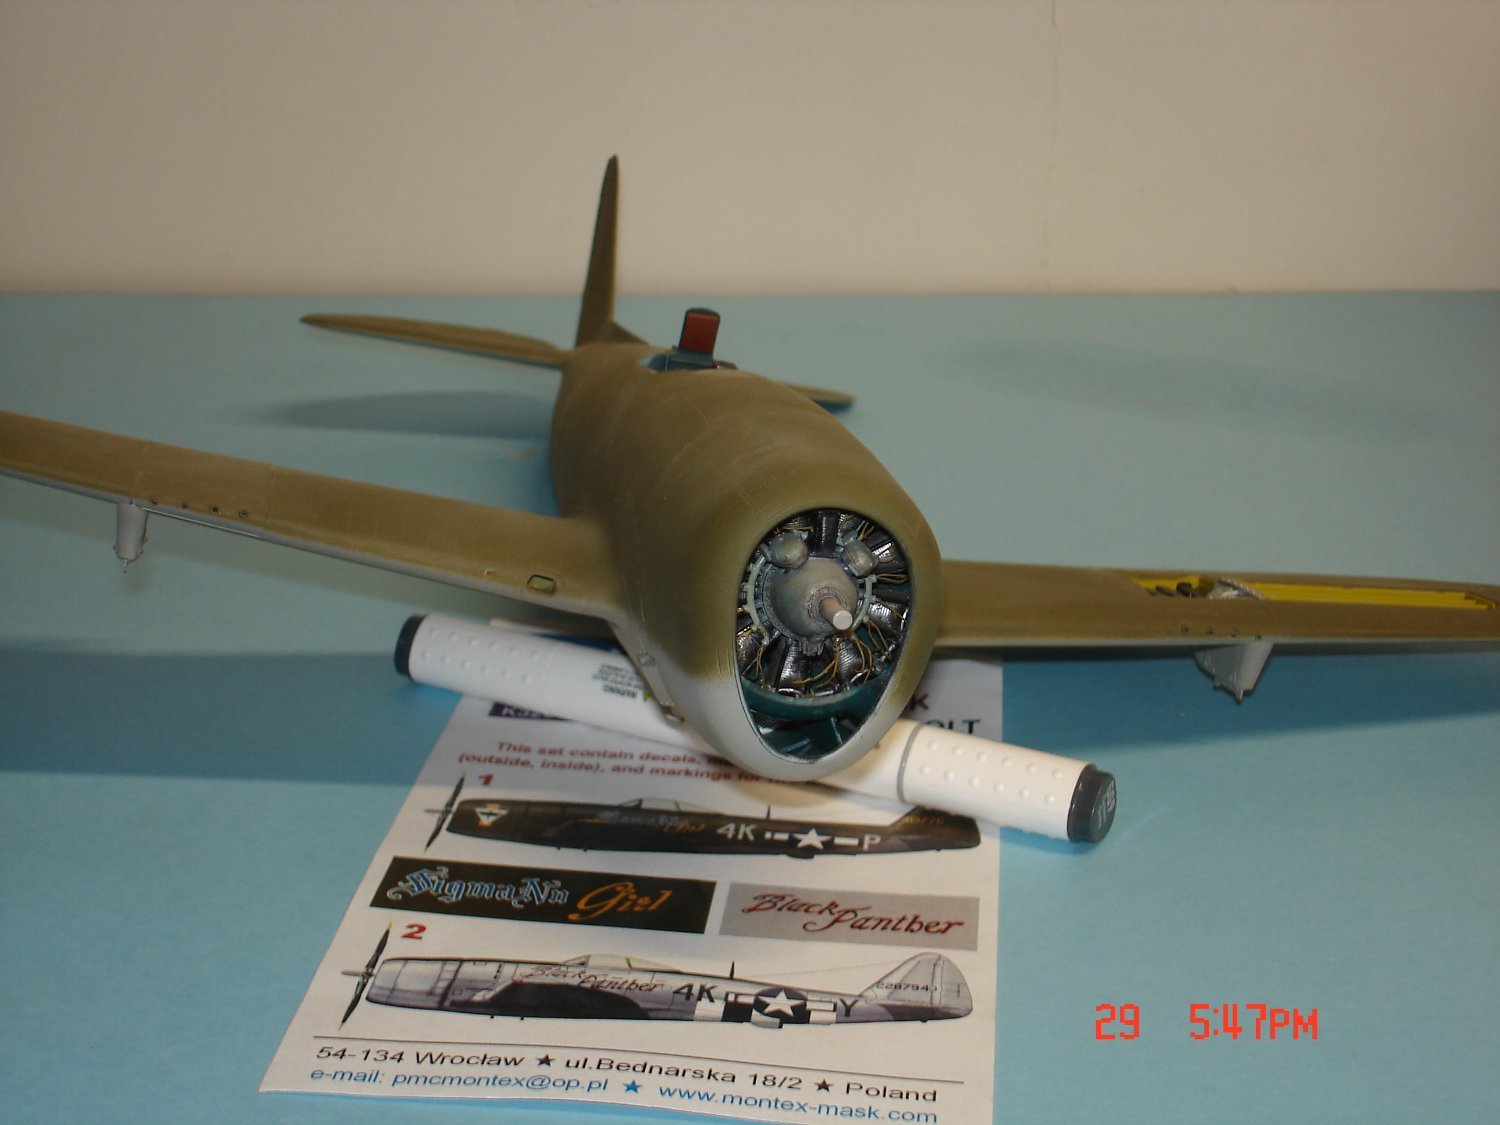
The mask are complete though not perfect I think it will function well enough for my first Rodeo it's all decals from here on out.I can pic it apart this here and that there so if I am grading myself I go 80/C,I'll take it.I also do not think this is the end of my Rodeo career. Well here's the pics warts and all.

- 18 replies
-
- 11
-
-
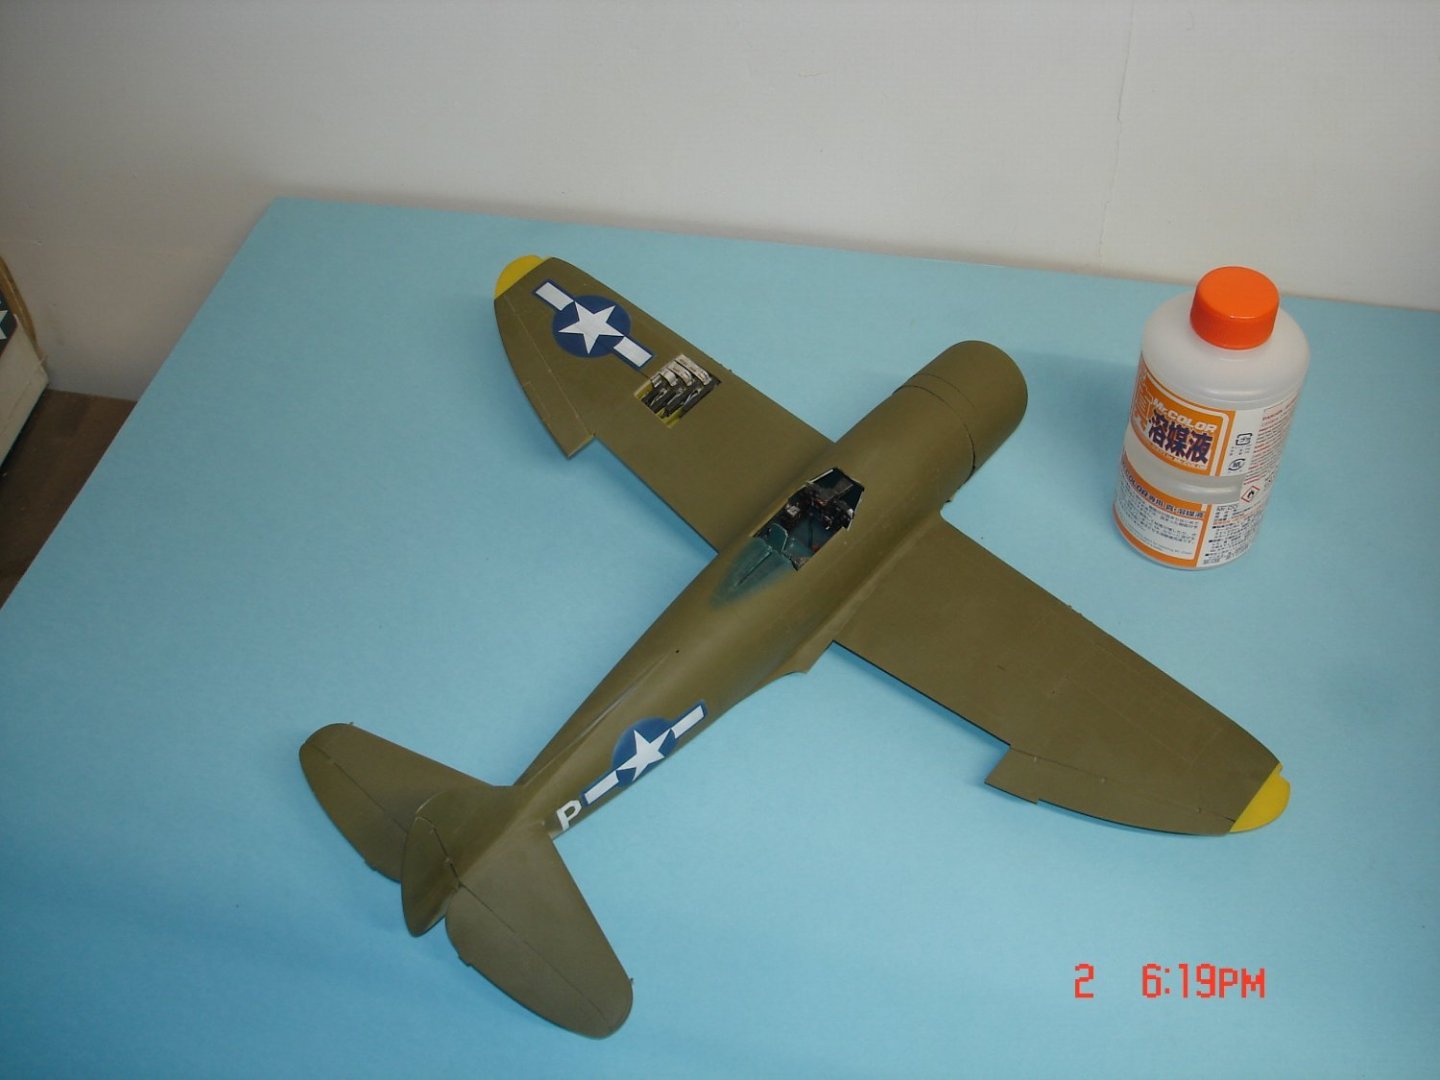
So here's my first attempt at using production mask and by Montex.The event is a bit time consuming for me but give it that it's my first rodeo.The "P" was positioned about 1/8" to low and the "stars/bars" about a 1/4" to high got to redo it no bigee.The mask pulled off some OD over some grey I call it my mistake it had been painted literally 45 mins earlier me impatient I say.I do not know if anybody has used this Mr.Color re-conditioner but the stuff is excellente. I brought back some MM Insignia Blue tonight that just about ready for the trash can.I am off tomorrow night will give it another crack I do like the effect!

- 18 replies
-
- 15
-
-
De Havilland Mosquito by Javlin - FINISHED - HK Models - 1/32
Javlin replied to Javlin's topic in Non-ship/categorised builds
Thanks You Ken and Alan for the compliment. -
Hanok Giwazip by Modeller_masa - Young modeler - 1/40
Javlin replied to modeller_masa's topic in Completed non-ship models
That is very Nicely done Sir!! -
Renault RE20 Turbo by DocRob - FINISHED - Tamiya - 1/12
Javlin replied to DocRob's topic in Non-ship/categorised builds
Now were Talking looks mucha better!! -
De Havilland Mosquito by Javlin - FINISHED - HK Models - 1/32
Javlin replied to Javlin's topic in Non-ship/categorised builds
I even looked at chips from different manufactures EG and yes they are almost an intermittent blue grey kinda like the PRU Mossie we have in the states then some of the British stuff was like that little MkXVI I just finished it definitely varies and that is a blue that has been exposed a bit.I should dirty it up some SOD builds are "Getter Done" mentality. Thanks Craig I think she looks purrty! -
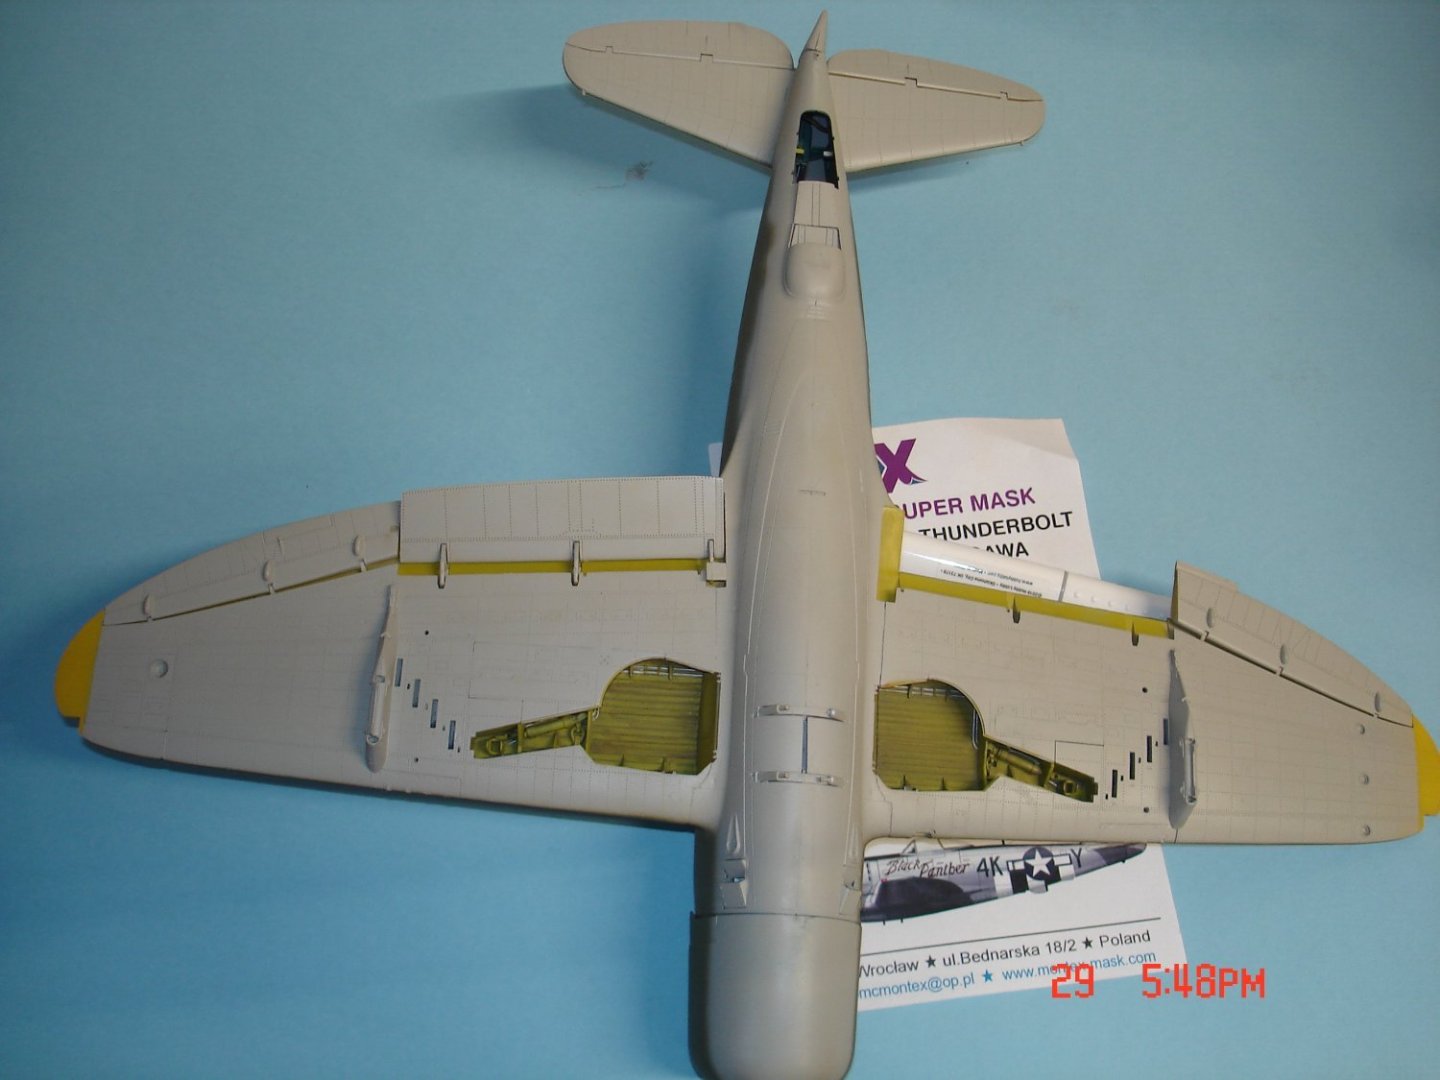
I started this one some years ago have lost the front windscreen 2/3 times and found it again(thought I would graph the Hase).This will be my first time using mask for the letter code and insignia provided by Montex.I usually keep my fighters clean but this girl gets the full layout 500lb bombs with rocket launchers(Hasegawa).I have only three unfinished kits after this from the SOD.


- 18 replies
-
- 13
-
-
De Havilland Mosquito by Javlin - FINISHED - HK Models - 1/32
Javlin replied to Javlin's topic in Non-ship/categorised builds
Thanks OC! -
De Havilland Mosquito by Javlin - FINISHED - HK Models - 1/32
Javlin replied to Javlin's topic in Non-ship/categorised builds
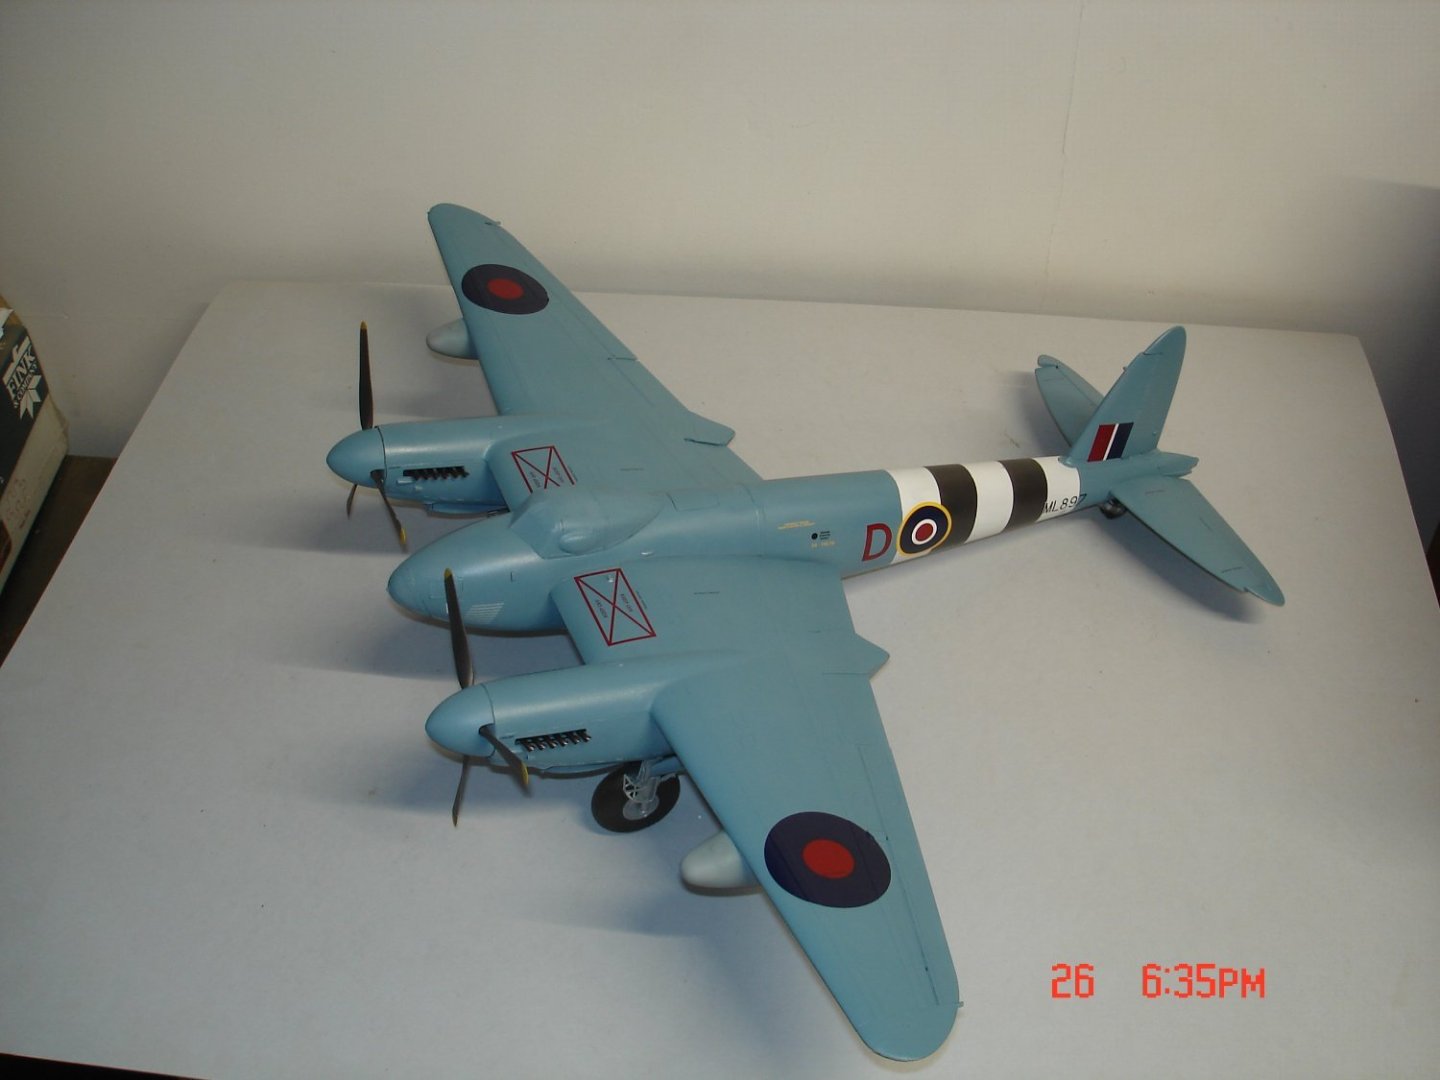
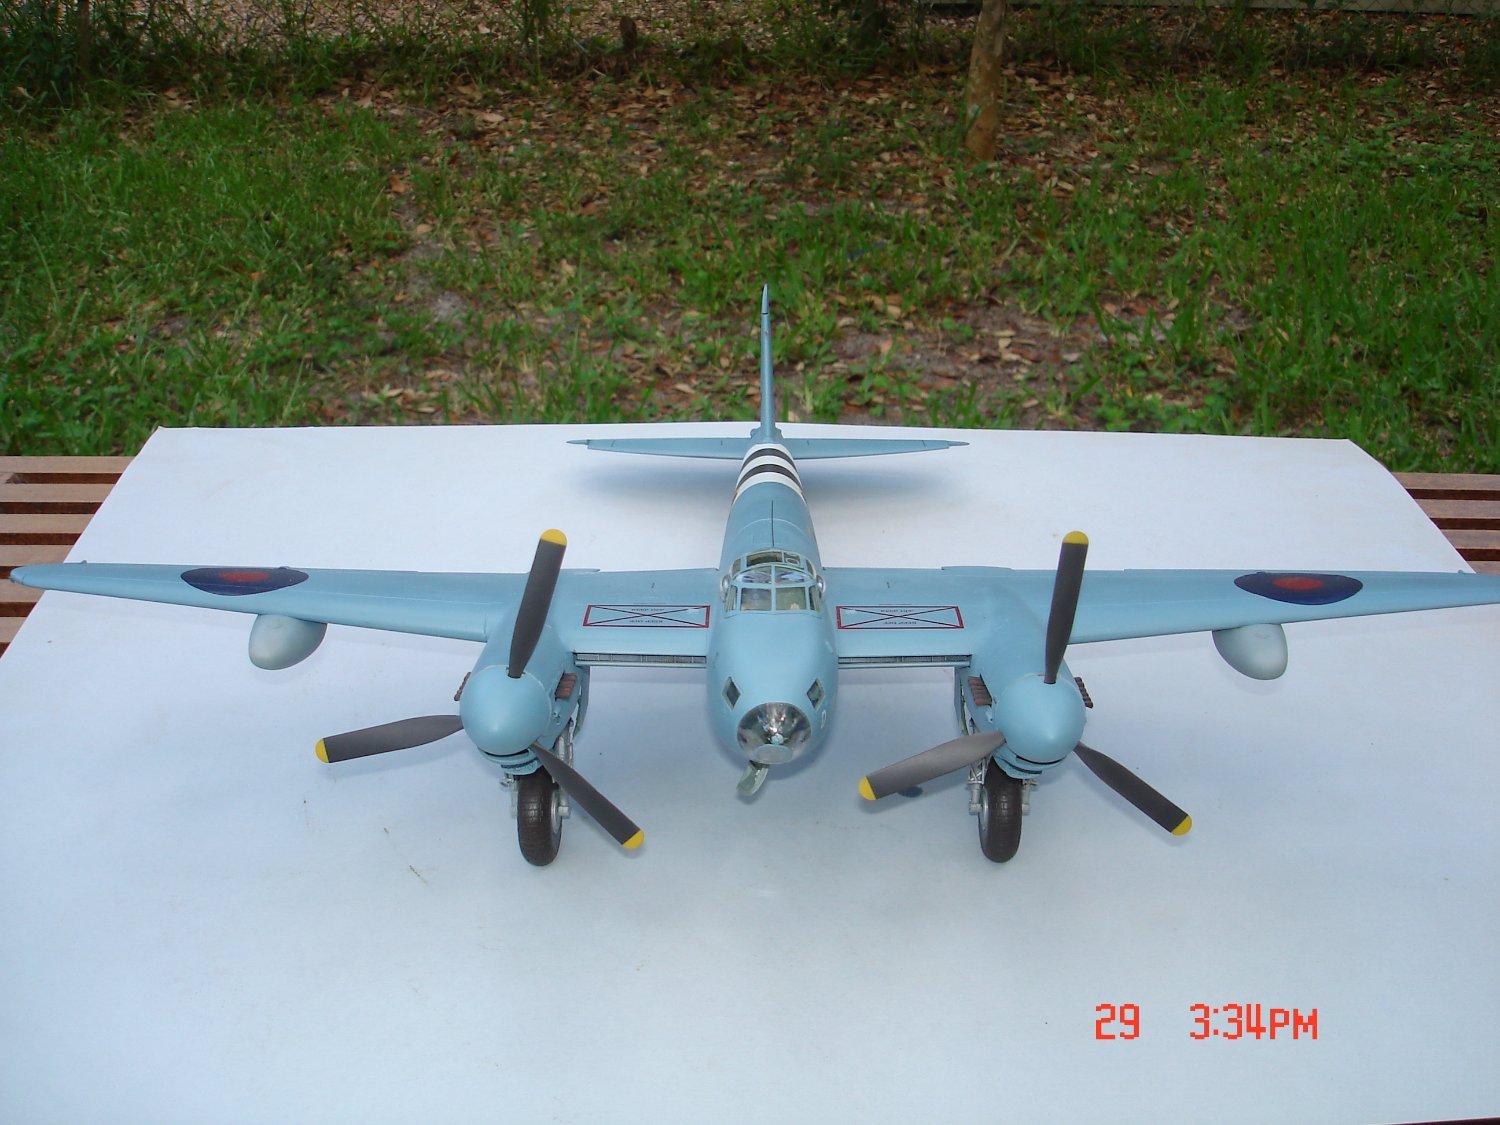
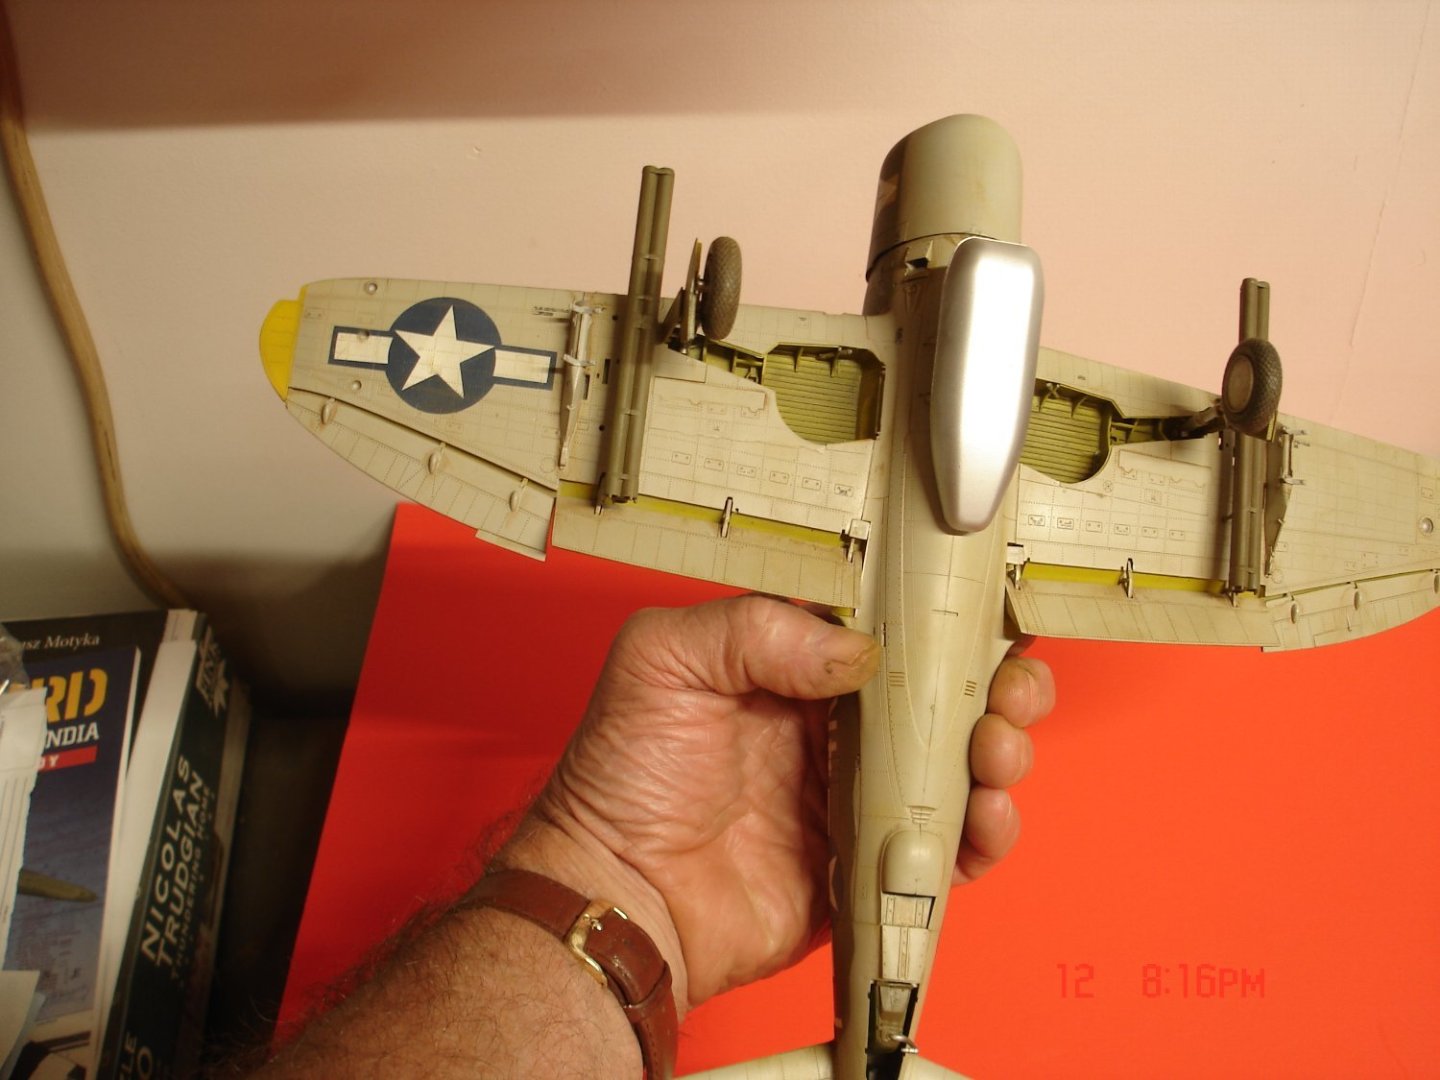
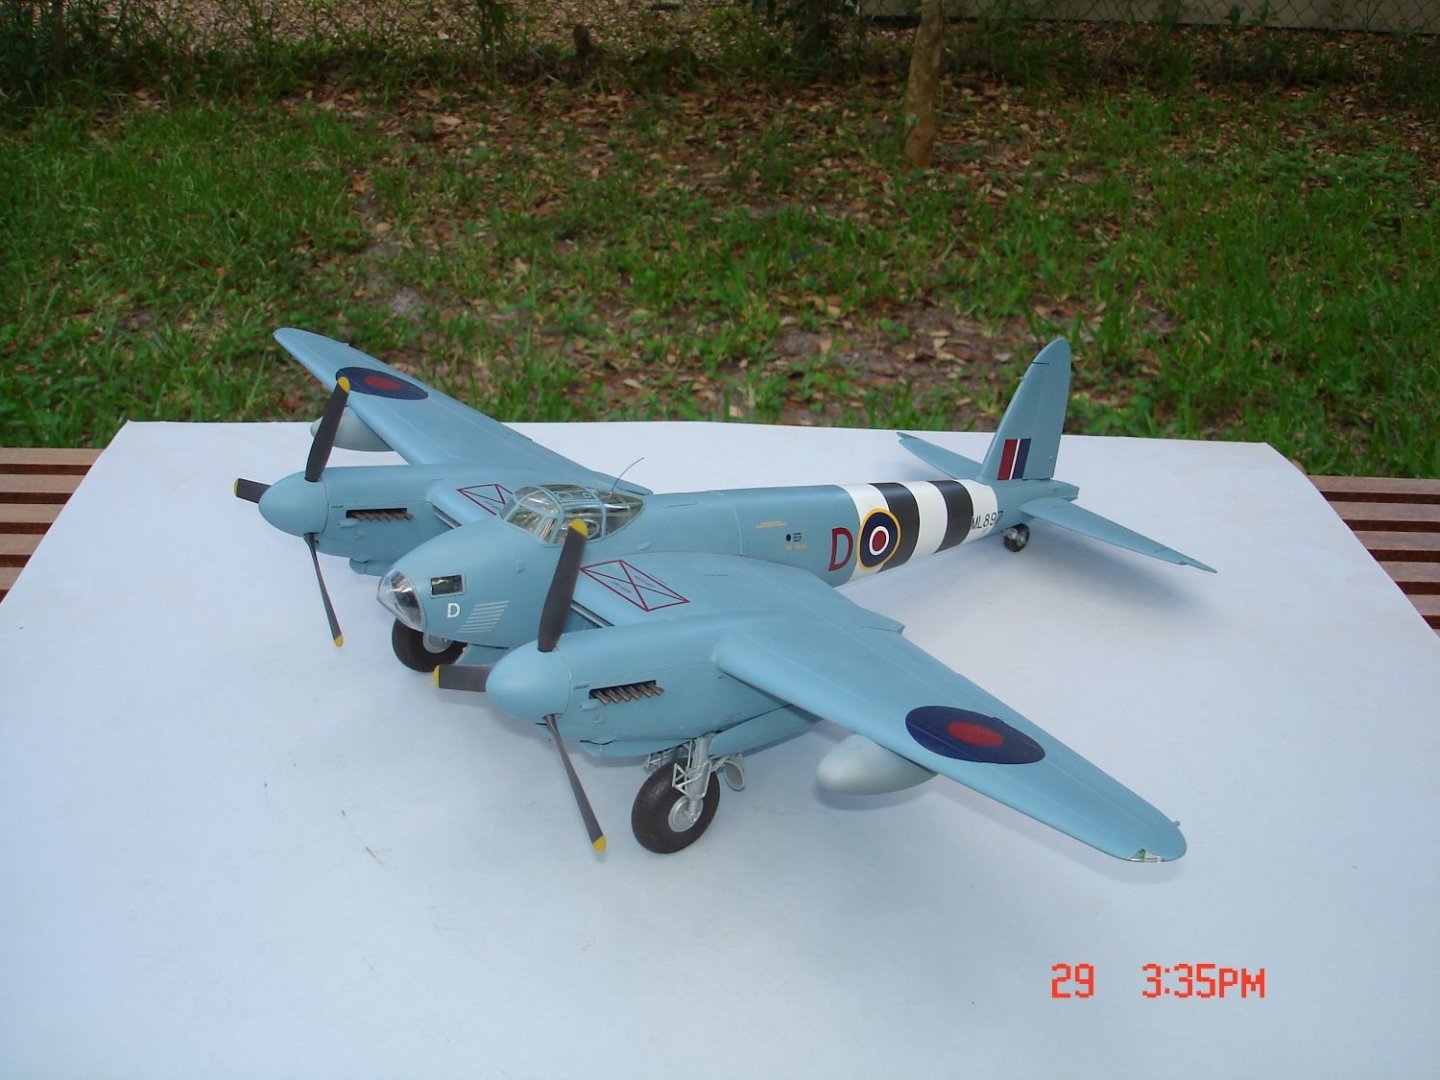
Time to hit the cabinet with this one fellas.I will never ATTM use a liquid mask (suggestions anyone) it was a bear to get off the ALL the glass were it was applied.I had to use alcohol to remove and then polish everything with Mequiars added another 2/3 hrs of work.I like her was an enjoyable kit over all much like the B-25.The next one to hit the desk is another off the SOD a 1/32 Trumpter P-47 D Montex Mask.
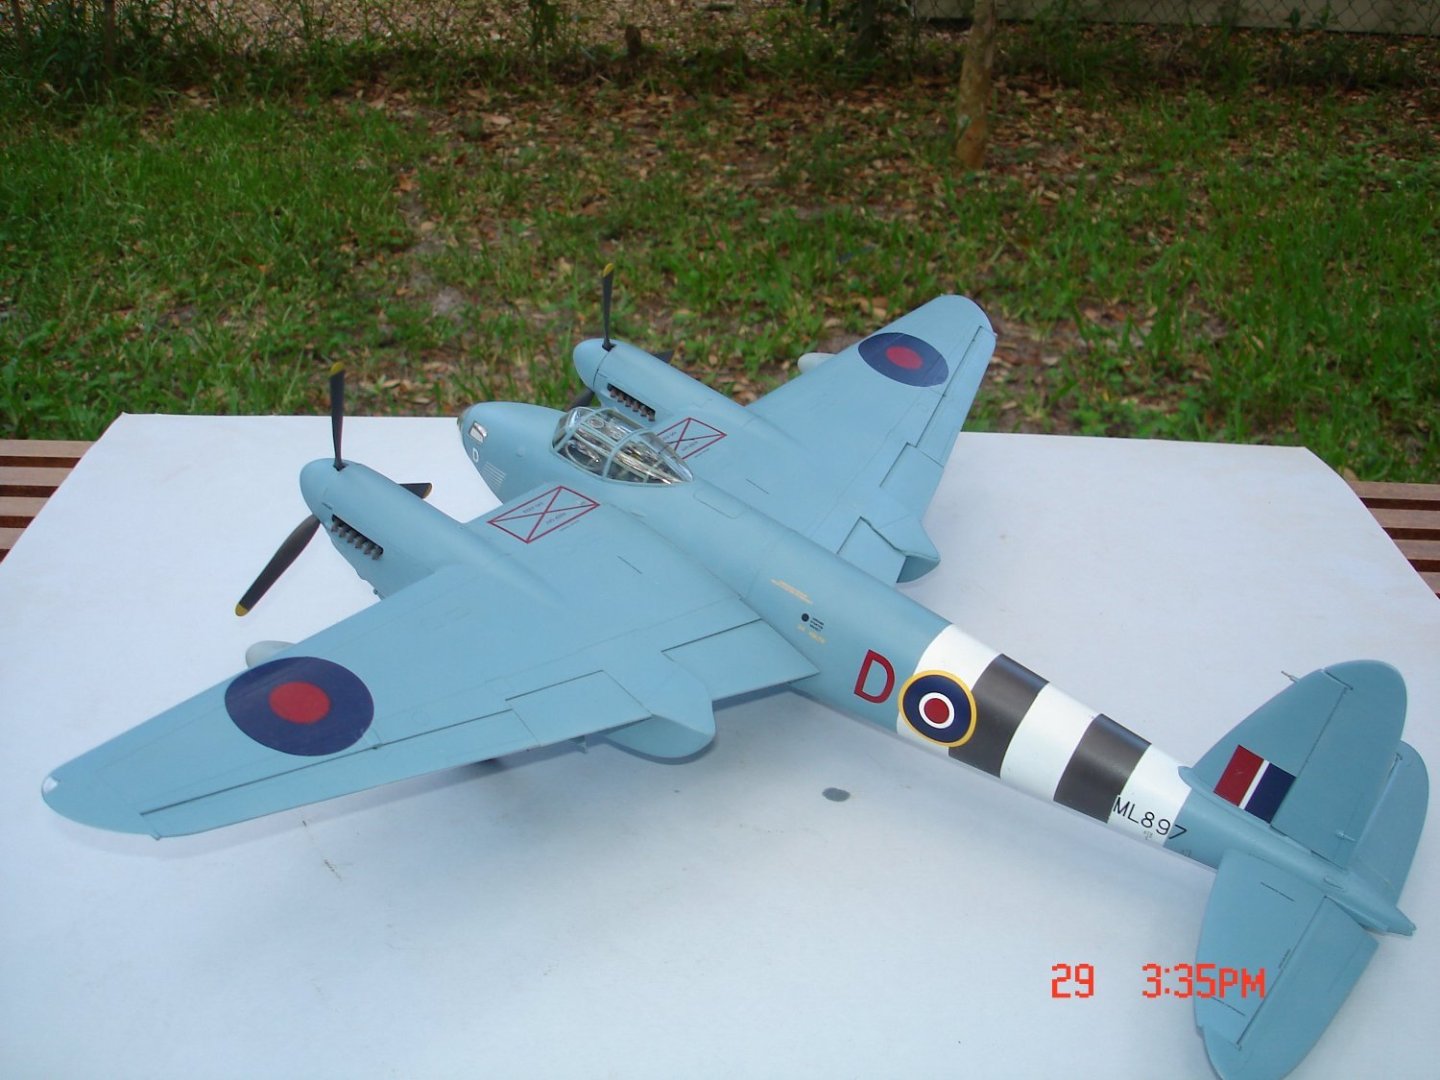
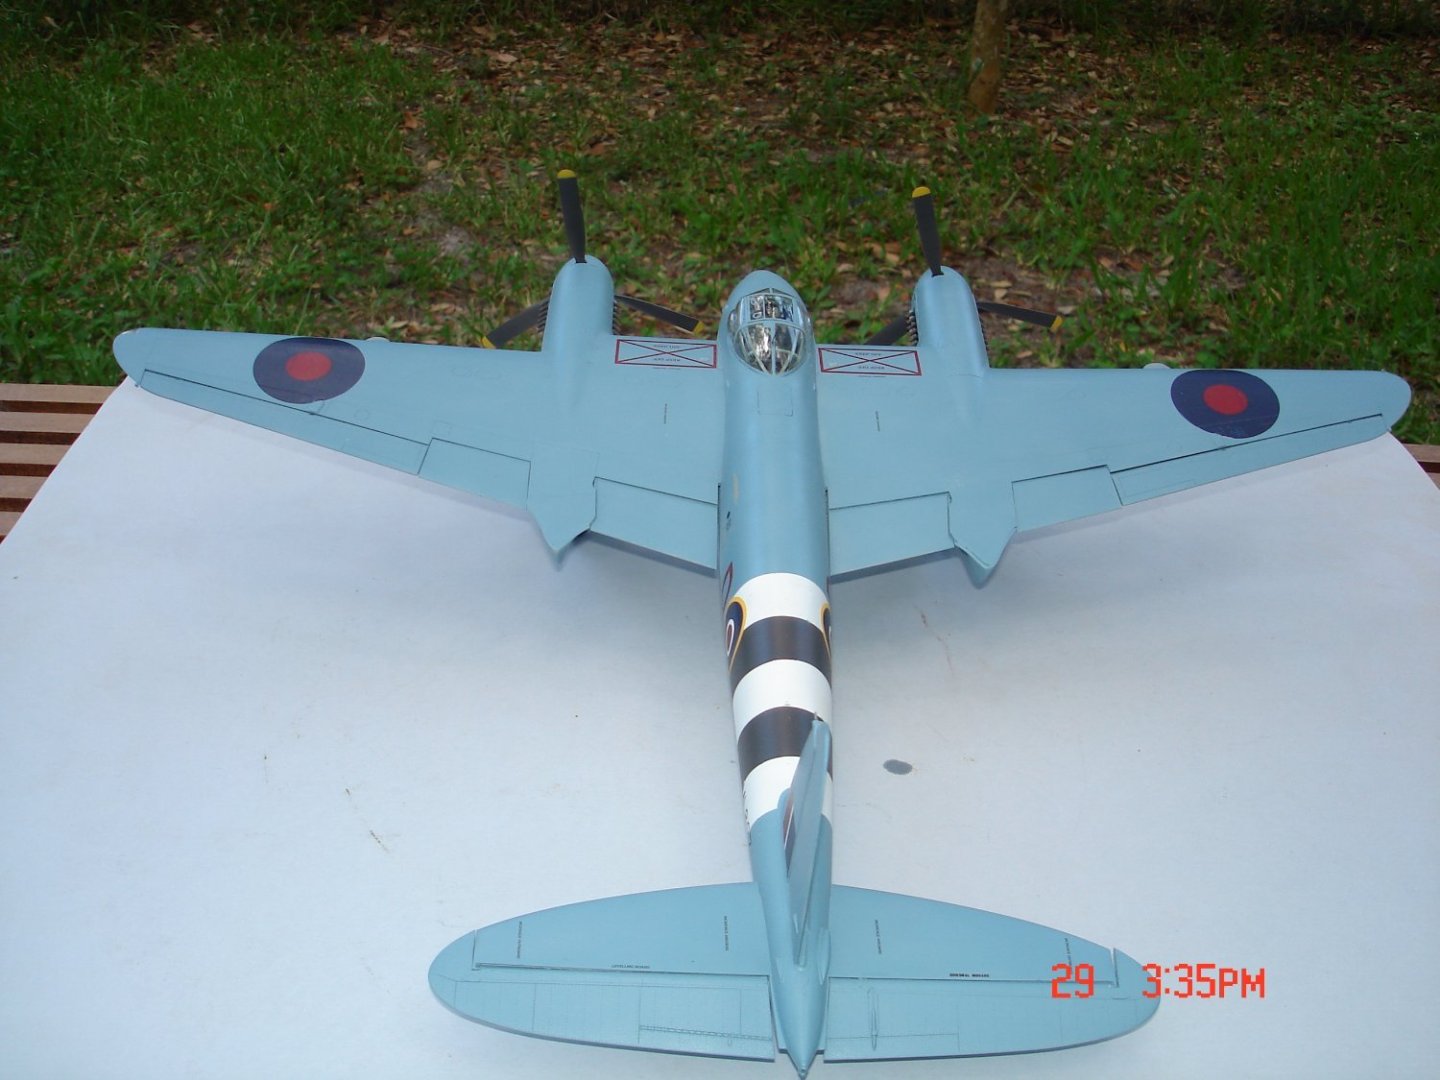
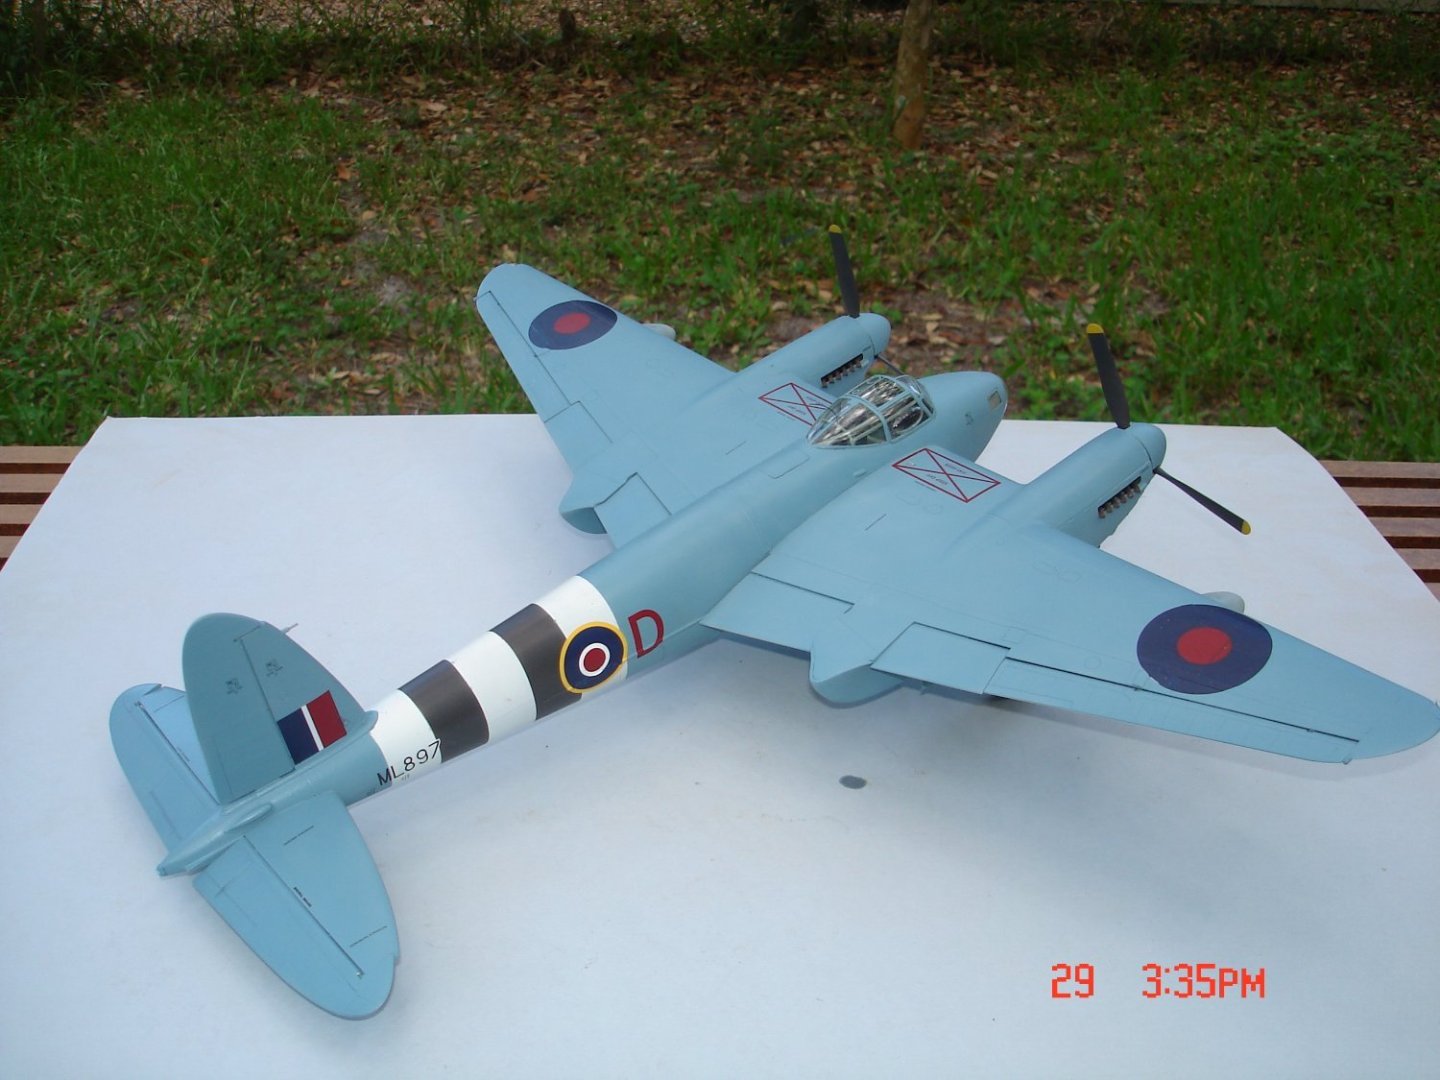
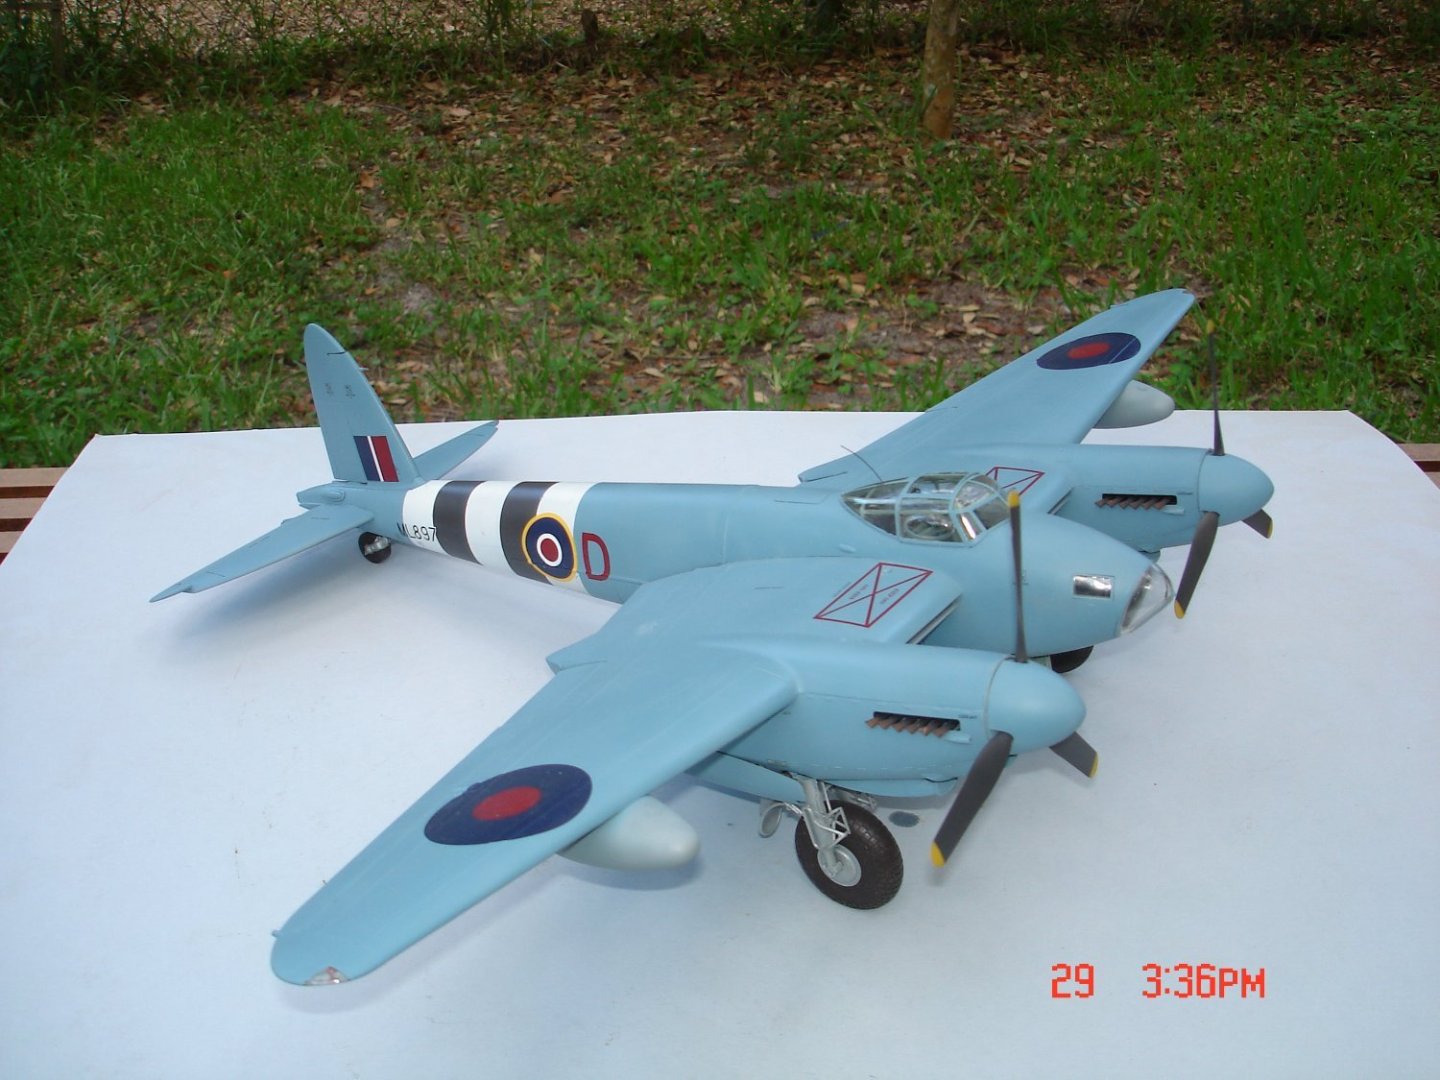
- 99 replies
-
- 13
-
-

-
De Havilland Mosquito by Javlin - FINISHED - HK Models - 1/32
Javlin replied to Javlin's topic in Non-ship/categorised builds
All the decals have been applied and the final gloss coat taken care of.The hatch is one of the last pieces I need to apply along with a whip antenna no aerial wire on this one.I did lose one of the hinges for the hatch in the copit with just enough frigg'in glue to make it stick somewhere plane was inverted.