Ciciak35
-
Posts
98 -
Joined
-
Last visited


-
 Ciciak35 reacted to a post in a topic:
Armed Virginia Sloop by Ciciak35 - FINISHED - Model Shipways - 1:48
Ciciak35 reacted to a post in a topic:
Armed Virginia Sloop by Ciciak35 - FINISHED - Model Shipways - 1:48
-
GrandpaPhil reacted to a post in a topic:
Armed Virginia Sloop by Ciciak35 - FINISHED - Model Shipways - 1:48
-
GrandpaPhil reacted to a post in a topic:
Armed Virginia Sloop by Ciciak35 - FINISHED - Model Shipways - 1:48
-
Ciciak35 reacted to a post in a topic:
Armed Virginia Sloop by Ciciak35 - FINISHED - Model Shipways - 1:48
-
CiscoH reacted to a post in a topic:
Armed Virginia Sloop by Ciciak35 - FINISHED - Model Shipways - 1:48
-
bruce d reacted to a post in a topic:
Armed Virginia Sloop by Ciciak35 - FINISHED - Model Shipways - 1:48
-
Haliburton reacted to a post in a topic:
Armed Virginia Sloop by Ciciak35 - FINISHED - Model Shipways - 1:48
-
BobG reacted to a post in a topic:
Armed Virginia Sloop by Ciciak35 - FINISHED - Model Shipways - 1:48
-
WalrusGuy reacted to a post in a topic:
Armed Virginia Sloop by Ciciak35 - FINISHED - Model Shipways - 1:48
-
JpR62 reacted to a post in a topic:
Armed Virginia Sloop by Ciciak35 - FINISHED - Model Shipways - 1:48
-
Ciciak35 reacted to a post in a topic:
Armed Virginia Sloop by Ciciak35 - FINISHED - Model Shipways - 1:48
-
GuntherMT reacted to a post in a topic:
Armed Virginia Sloop by Ciciak35 - FINISHED - Model Shipways - 1:48
-
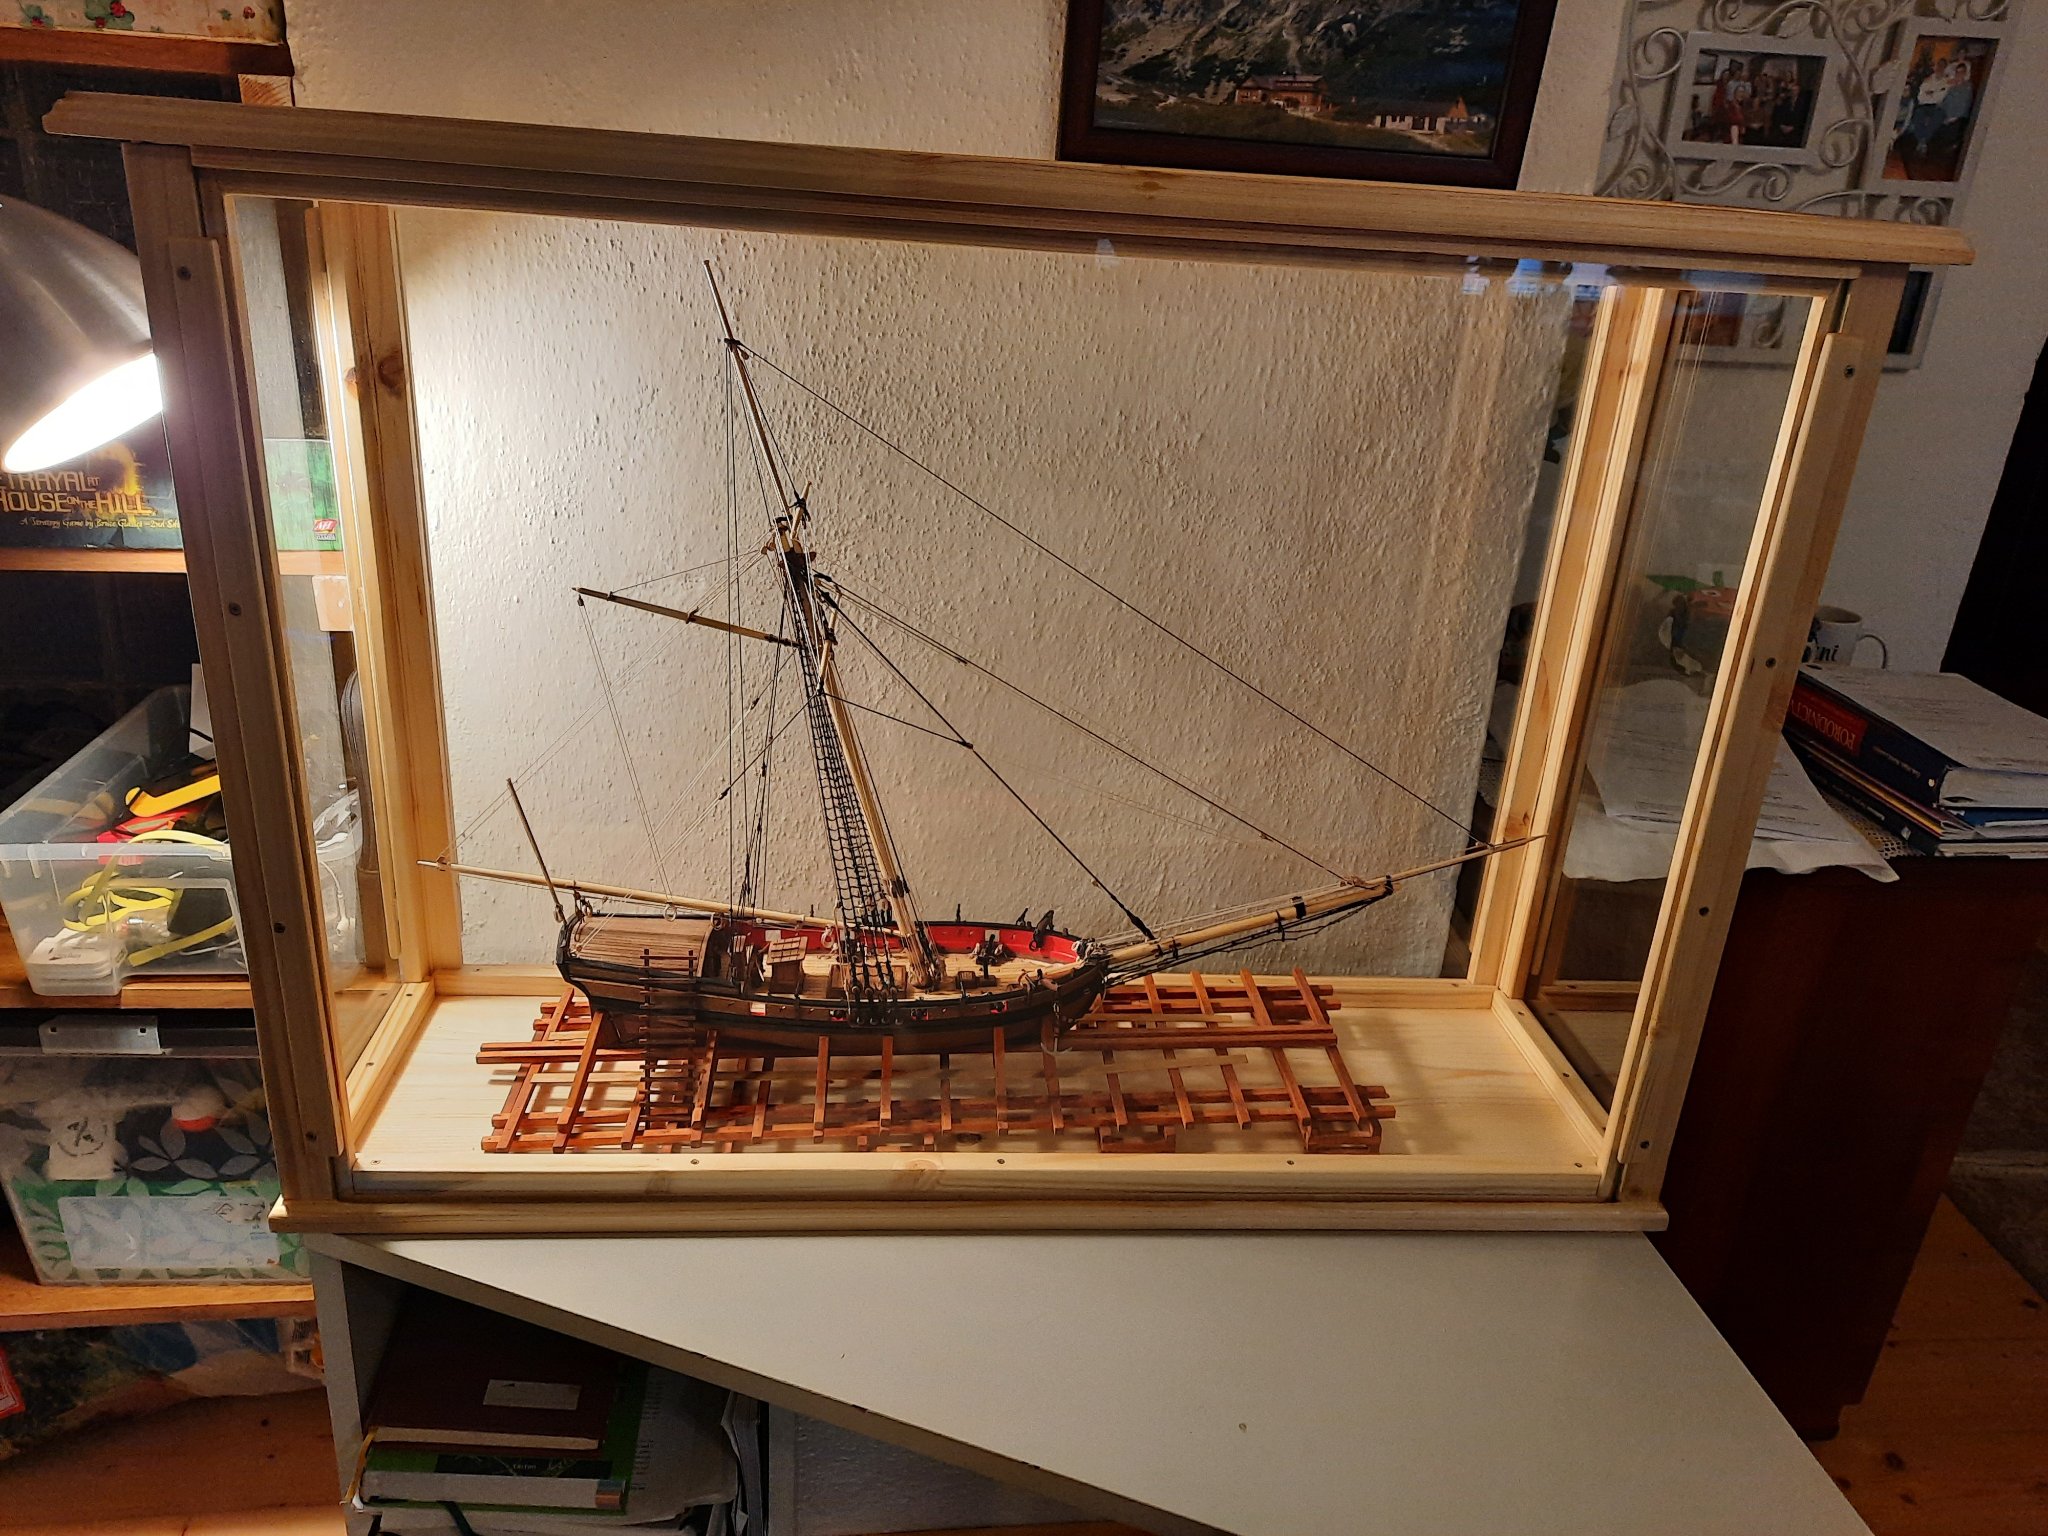
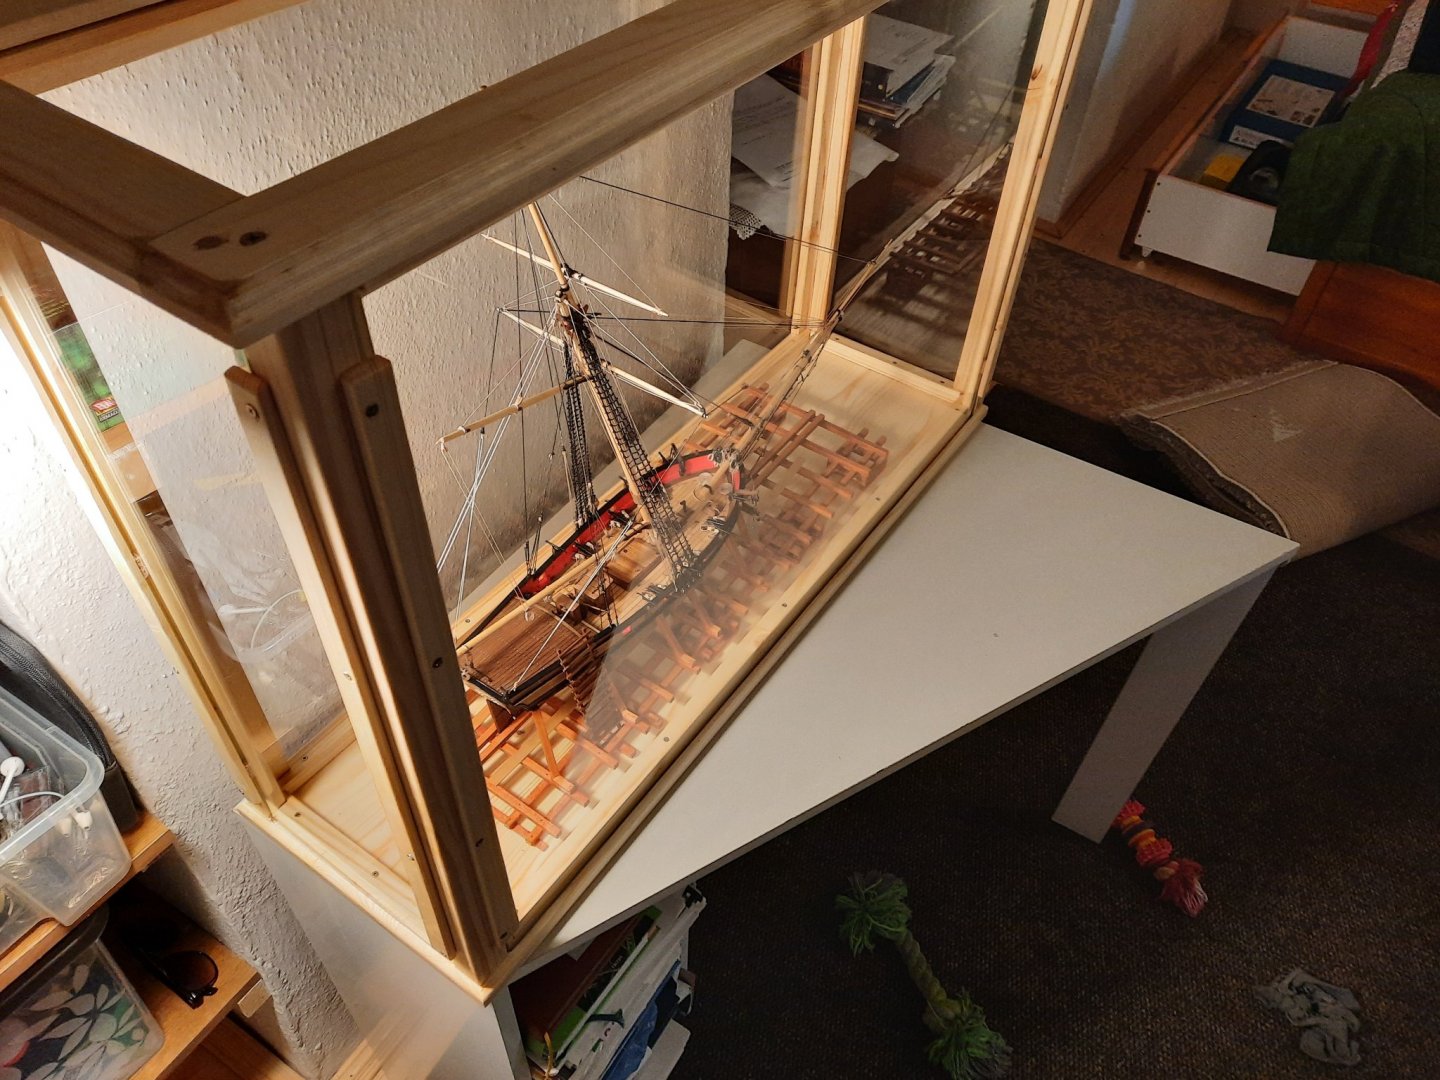
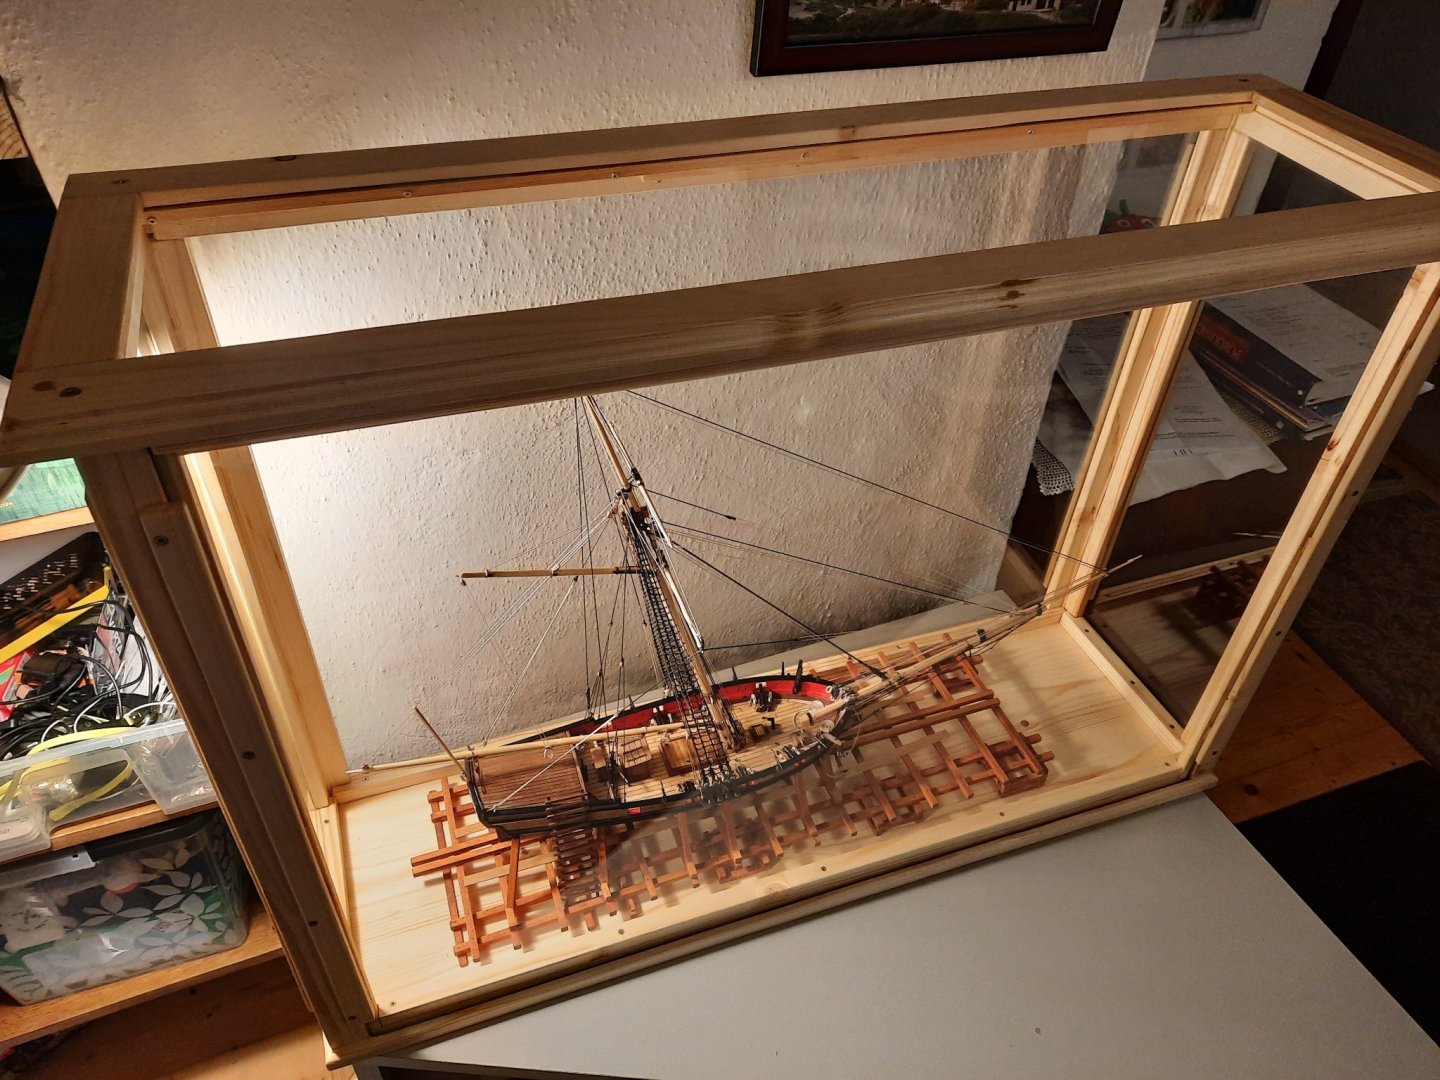
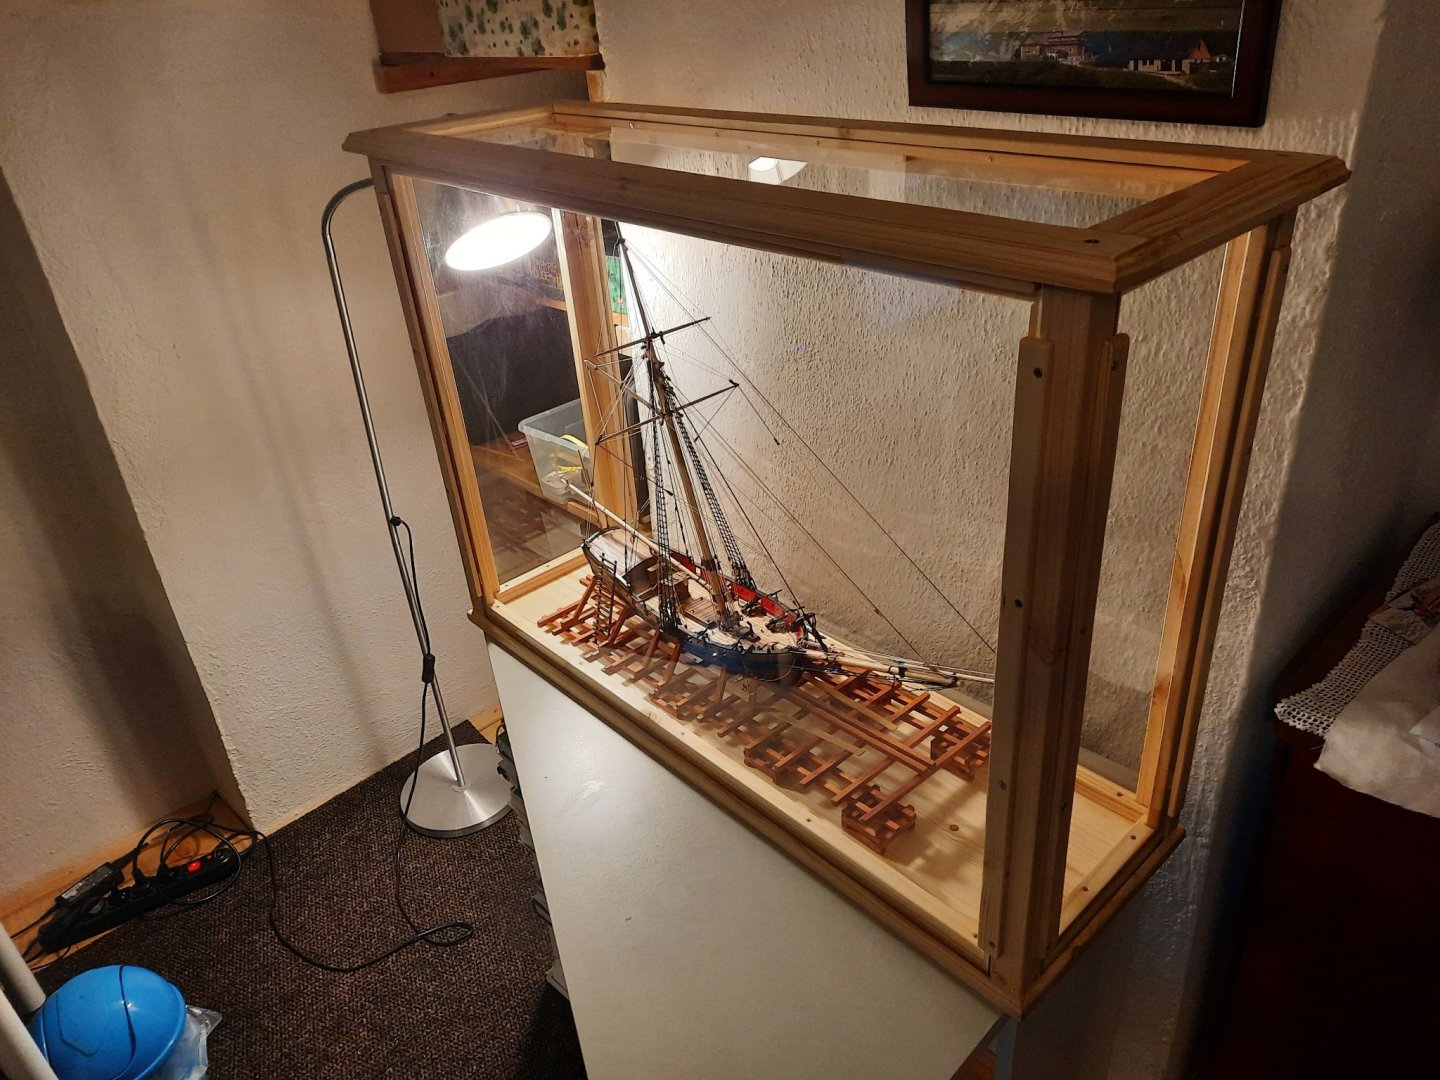
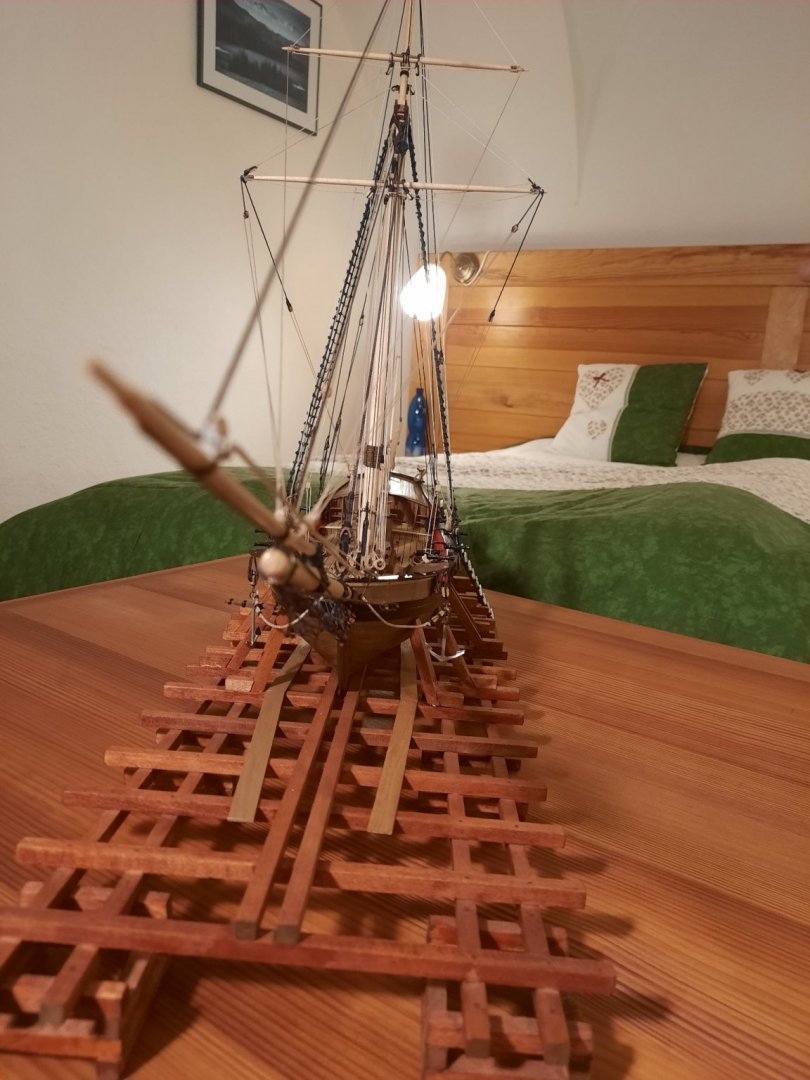
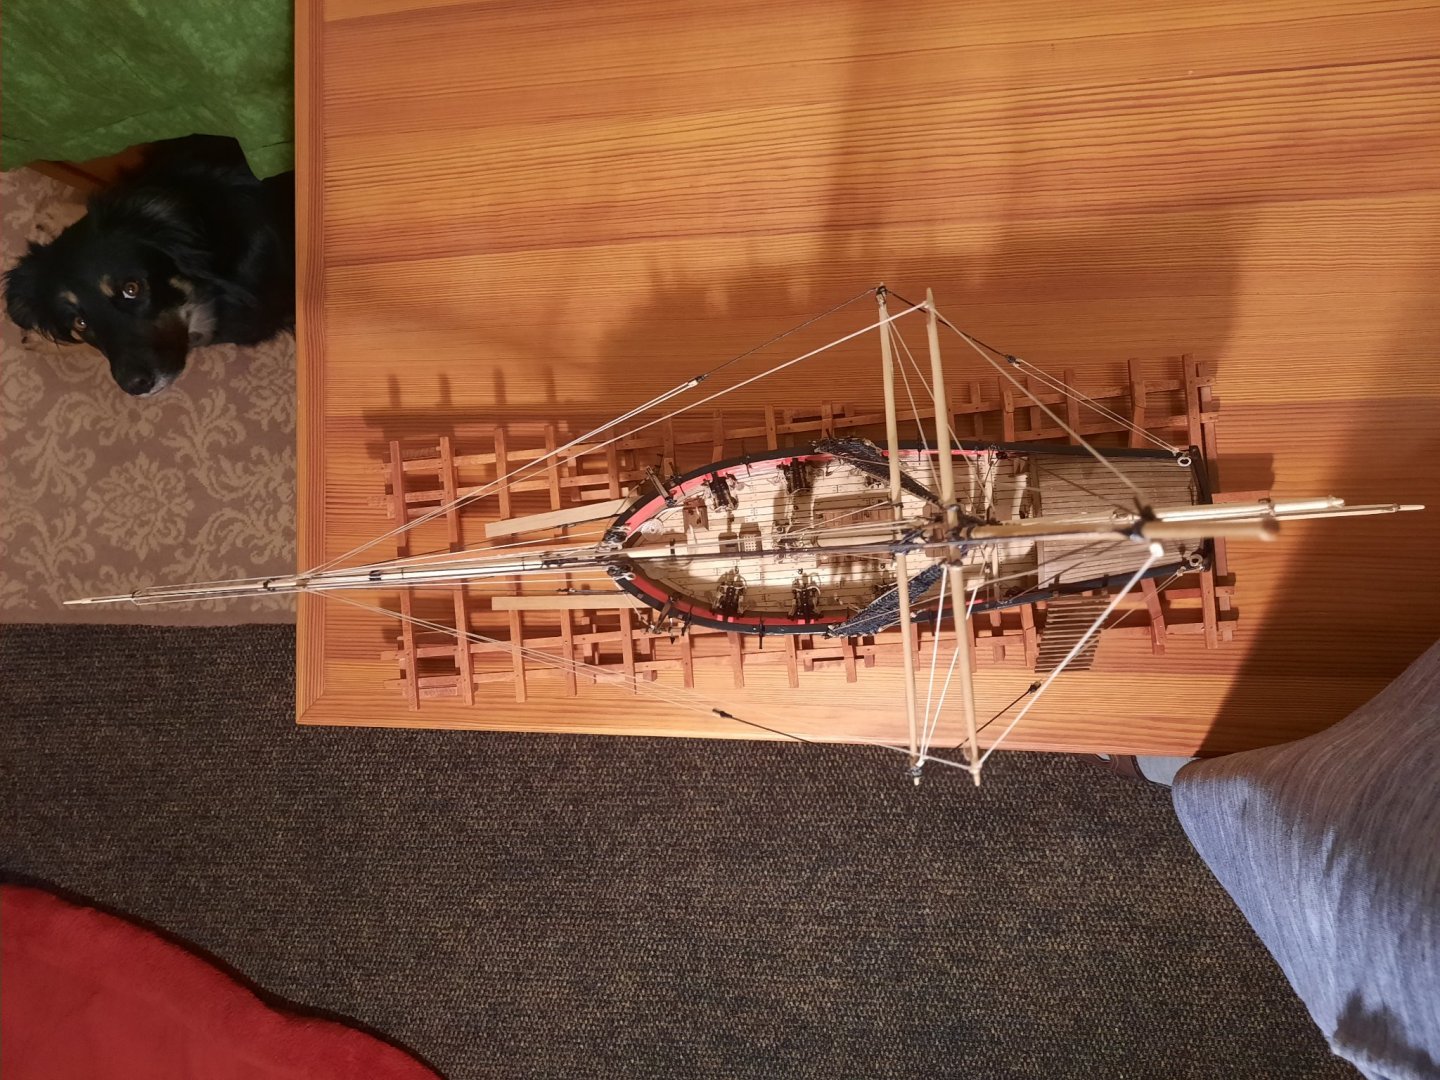
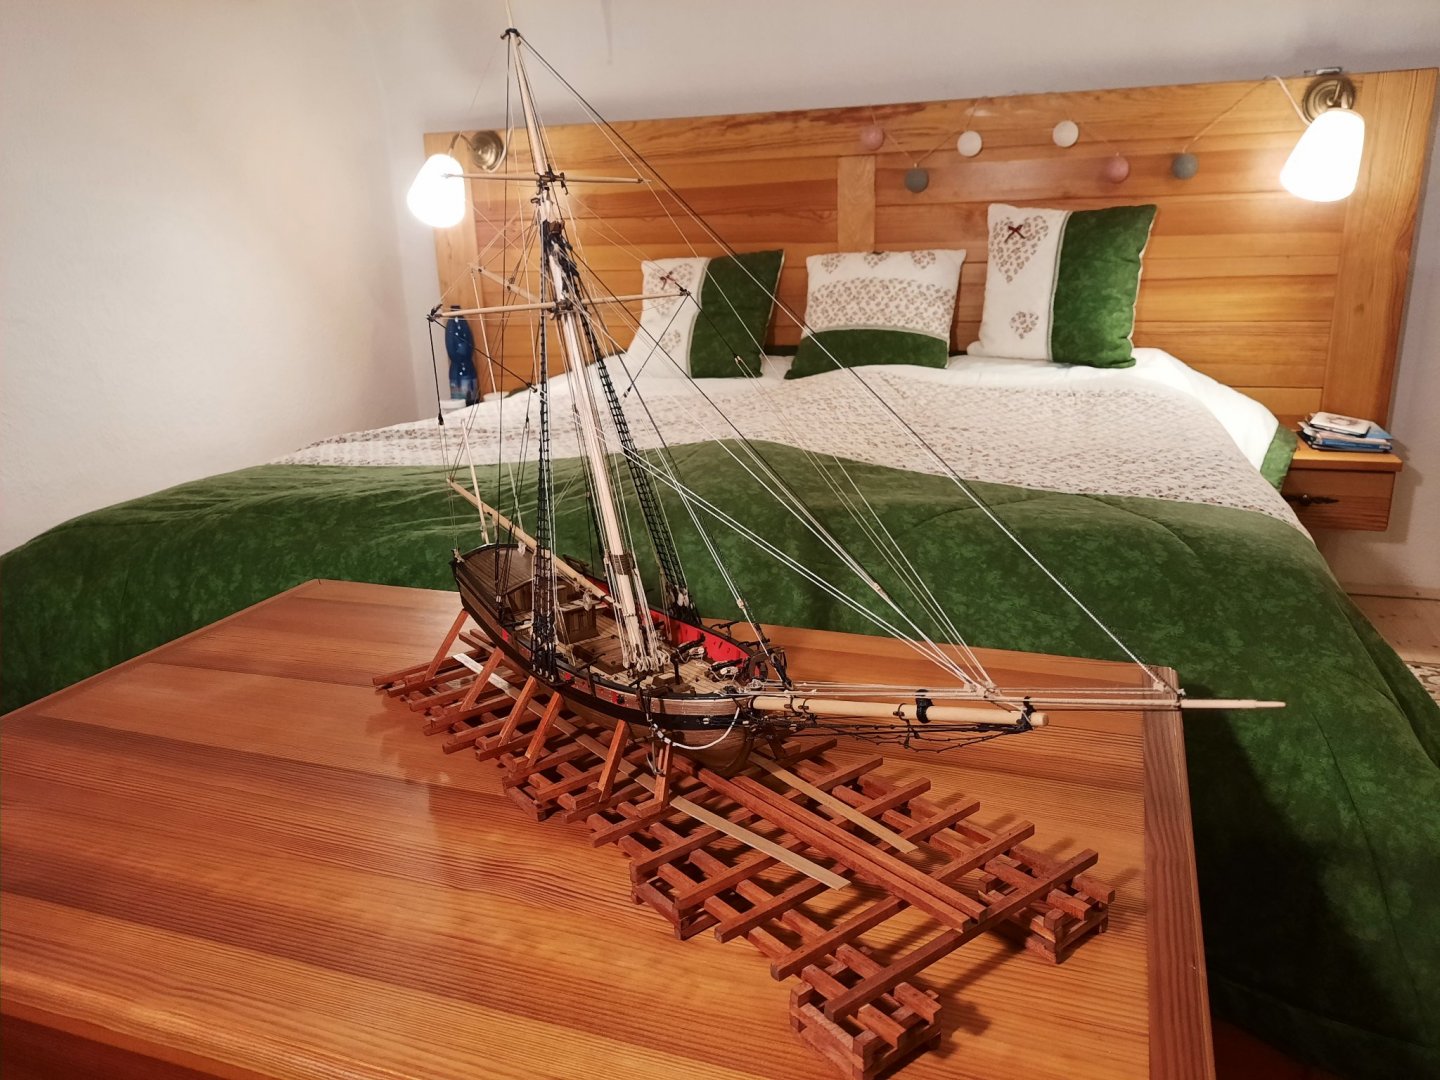
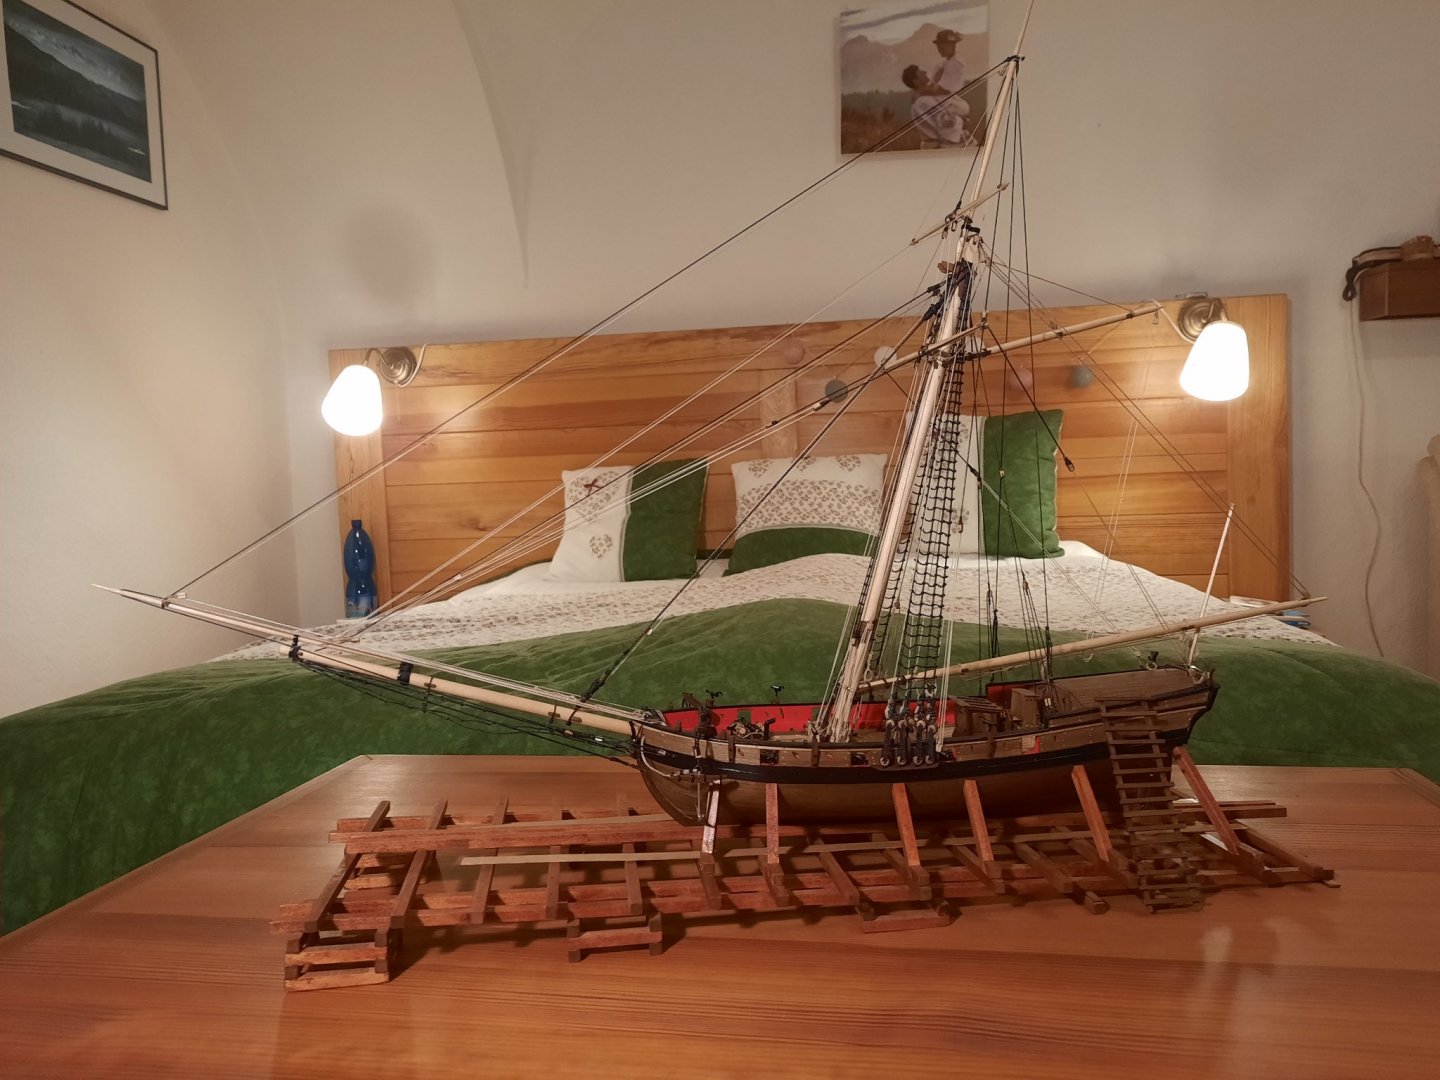
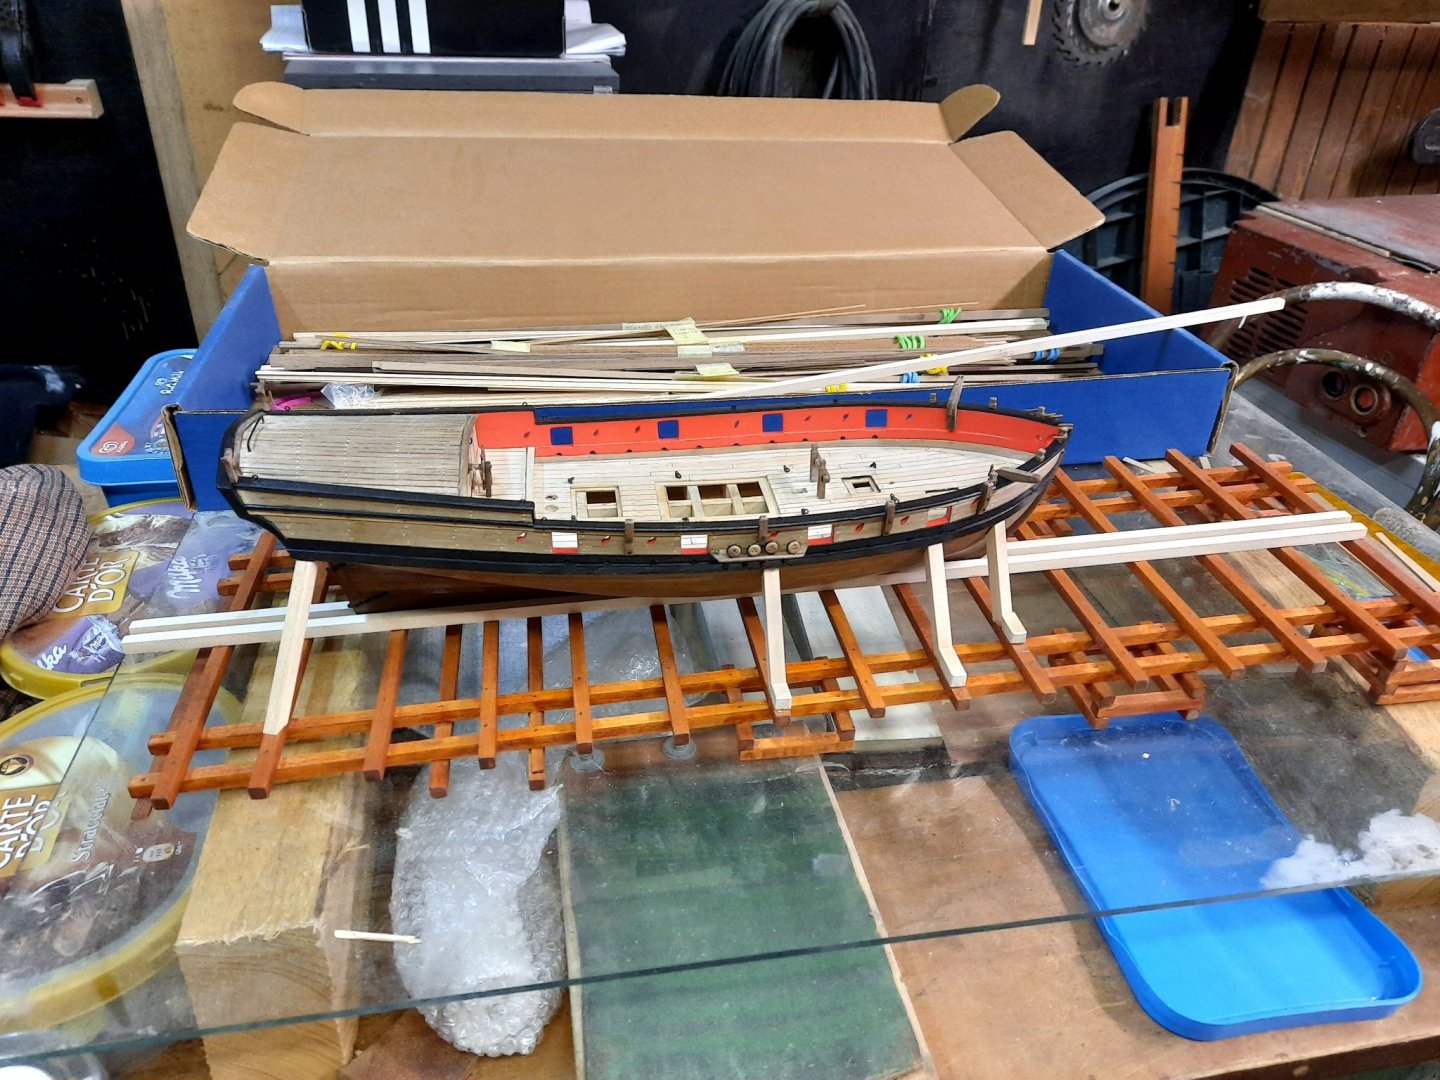
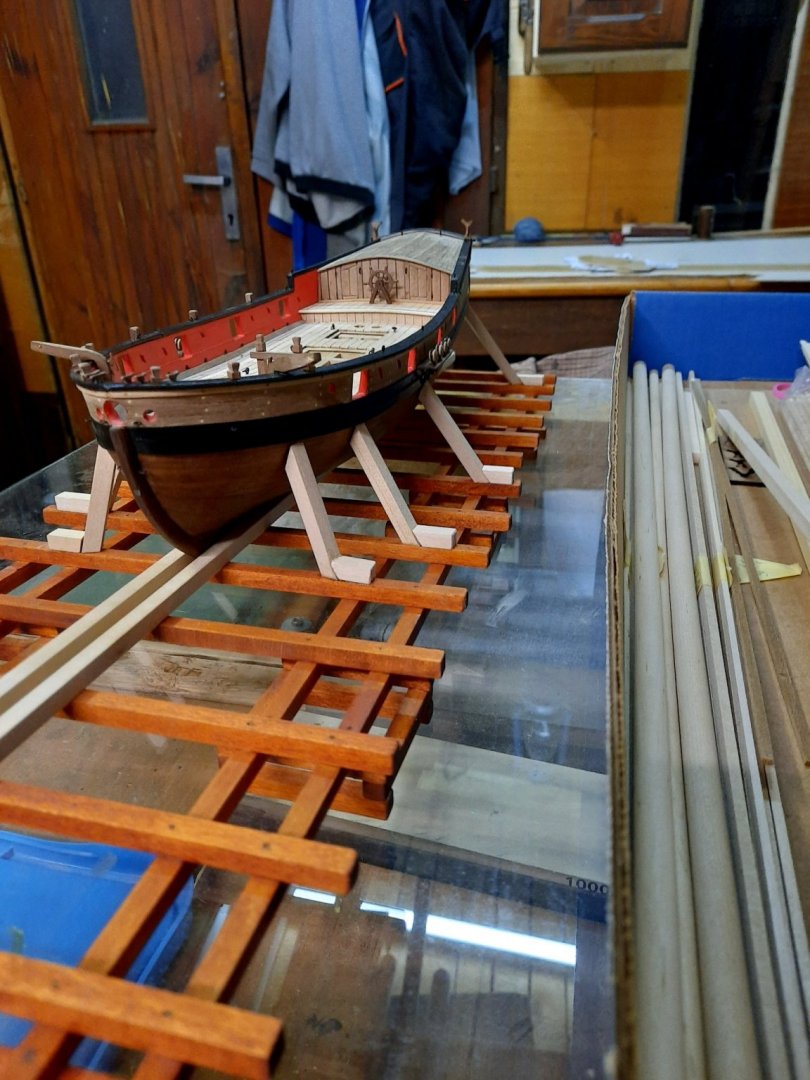
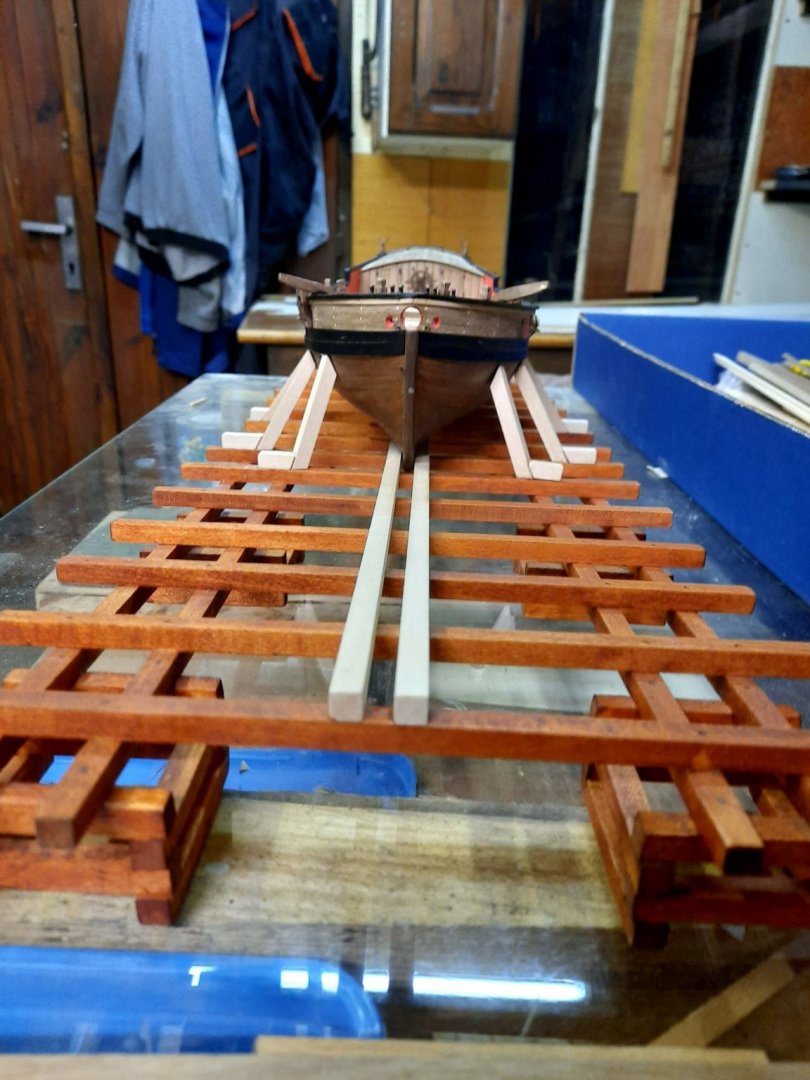
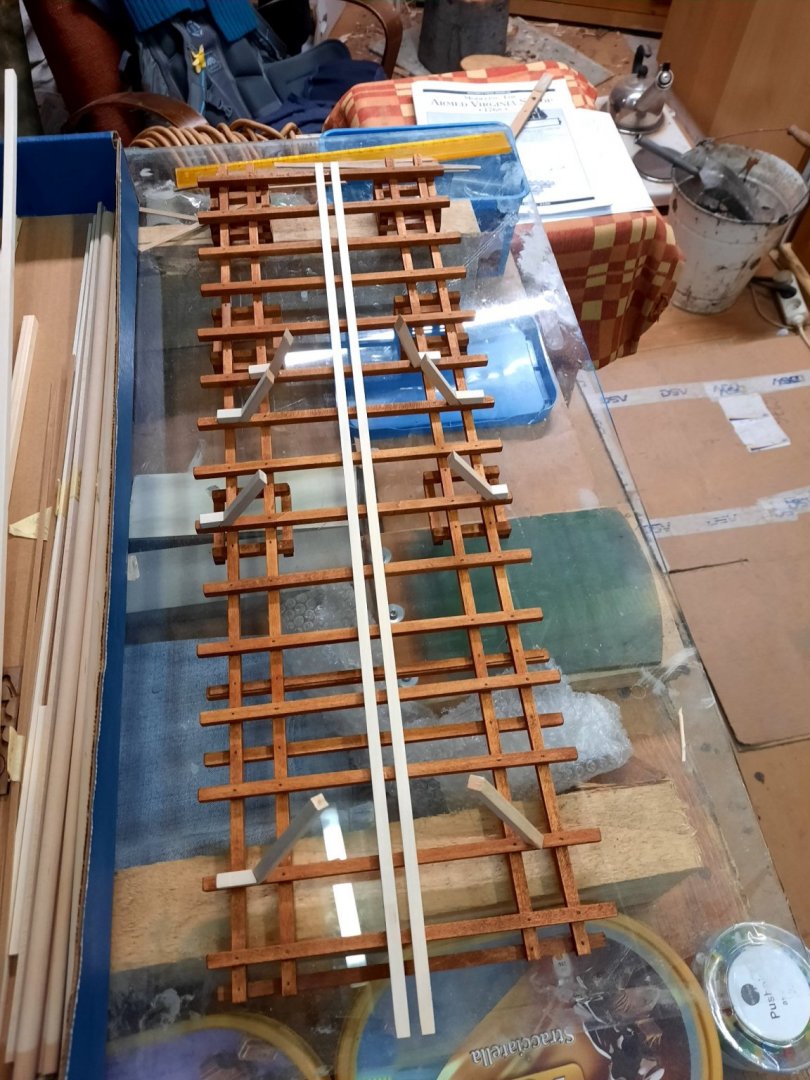
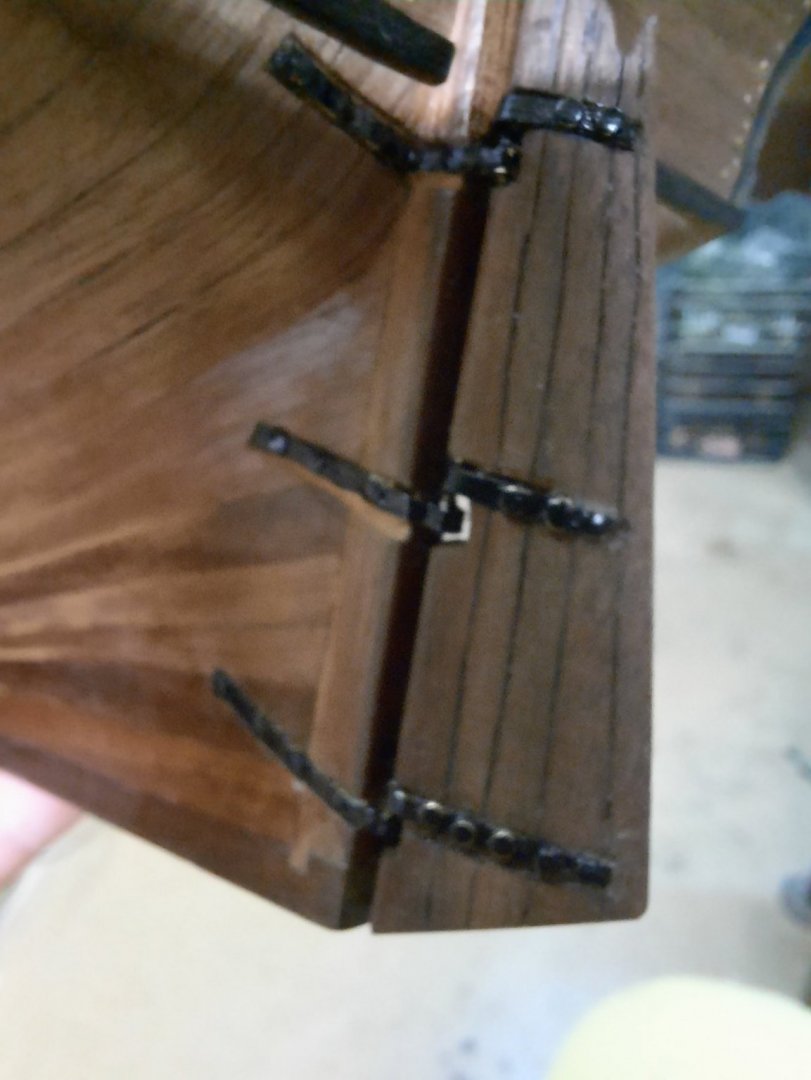
 Dear Fellow modelers, this is my last post with creation context under this building log. Again it was a blast. From begininig until it ended. Here are last pictures from displaying box I made. I finished it today. Thank you again for all the likes and help.
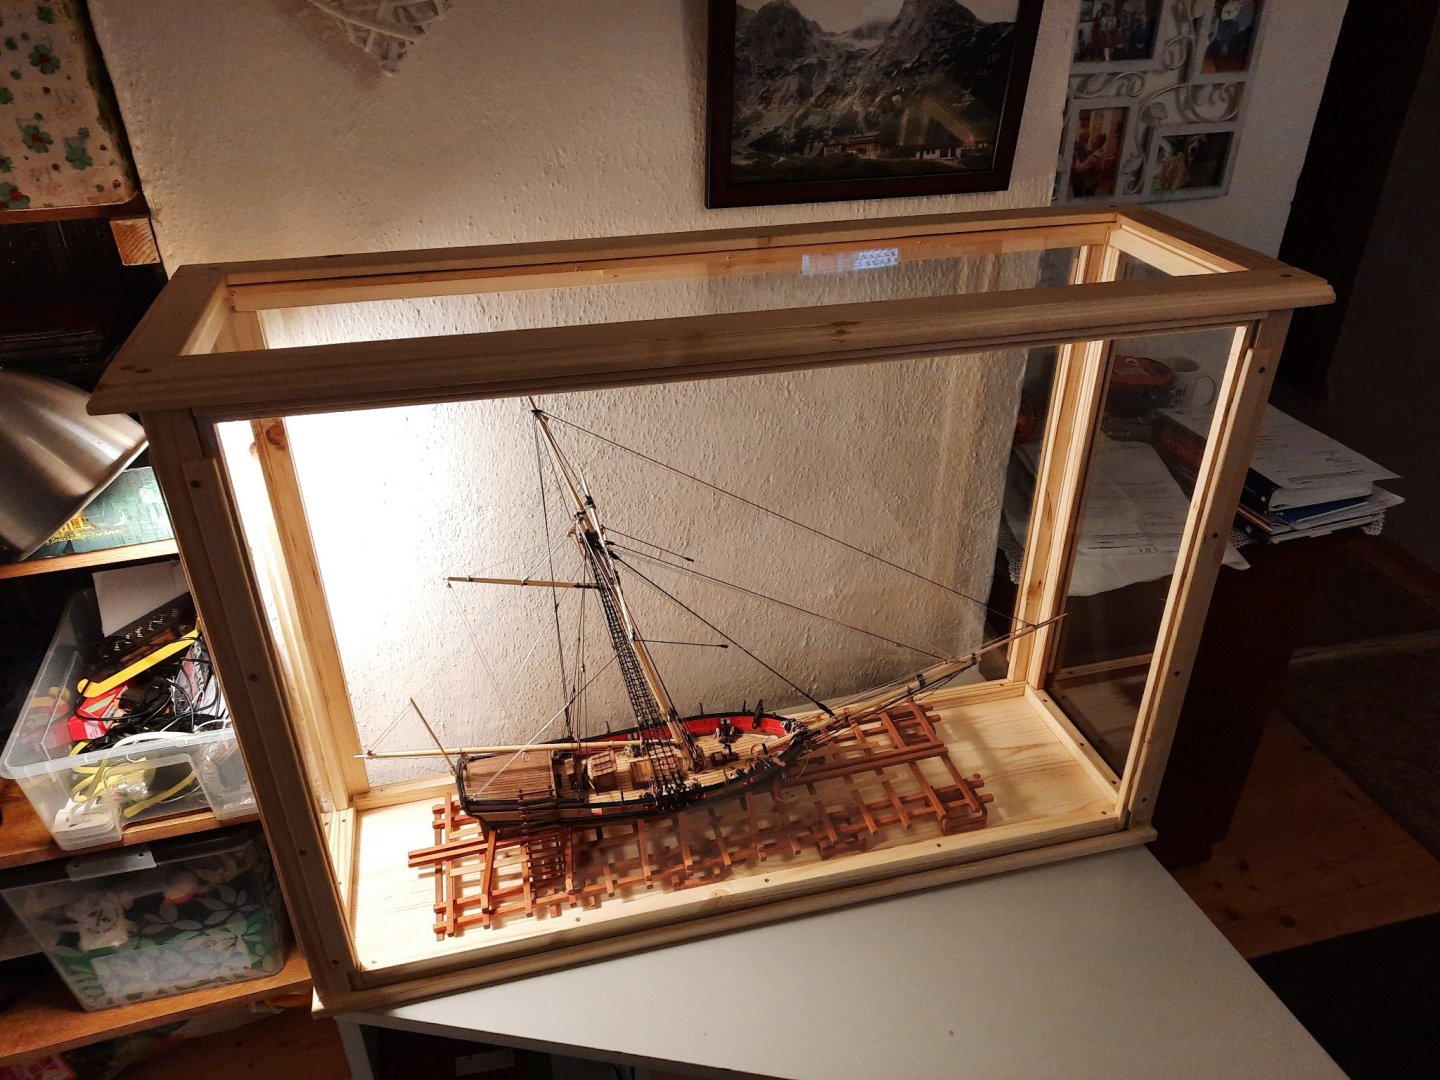

- 108 replies
-
- 8
-
-
- armed virginia sloop
- model shipways
- (and 1 more)
-
Ciciak35 reacted to a post in a topic:
Armed Virginia Sloop by Ciciak35 - FINISHED - Model Shipways - 1:48
-
Thank you very much guys for all the nice comments and likes. They are really appreciated. I will probably make a dispalying box for ship in next few days. I have still some time until the birth. And my hands are really itchy :D.
- 108 replies
-
- 1
-
-
- armed virginia sloop
- model shipways
- (and 1 more)
-
Ciciak35 reacted to a post in a topic:
Armed Virginia Sloop by Ciciak35 - FINISHED - Model Shipways - 1:48
-
Ciciak35 reacted to a post in a topic:
Armed Virginia Sloop by Ciciak35 - FINISHED - Model Shipways - 1:48
-
Ciciak35 reacted to a post in a topic:
Armed Virginia Sloop by Ciciak35 - FINISHED - Model Shipways - 1:48
-
Ciciak35 reacted to a post in a topic:
Armed Virginia Sloop by Ciciak35 - FINISHED - Model Shipways - 1:48
-
Ciciak35 reacted to a post in a topic:
Armed Virginia Sloop by Ciciak35 - FINISHED - Model Shipways - 1:48
-
Ciciak35 reacted to a post in a topic:
Armed Virginia Sloop by Ciciak35 - FINISHED - Model Shipways - 1:48
-
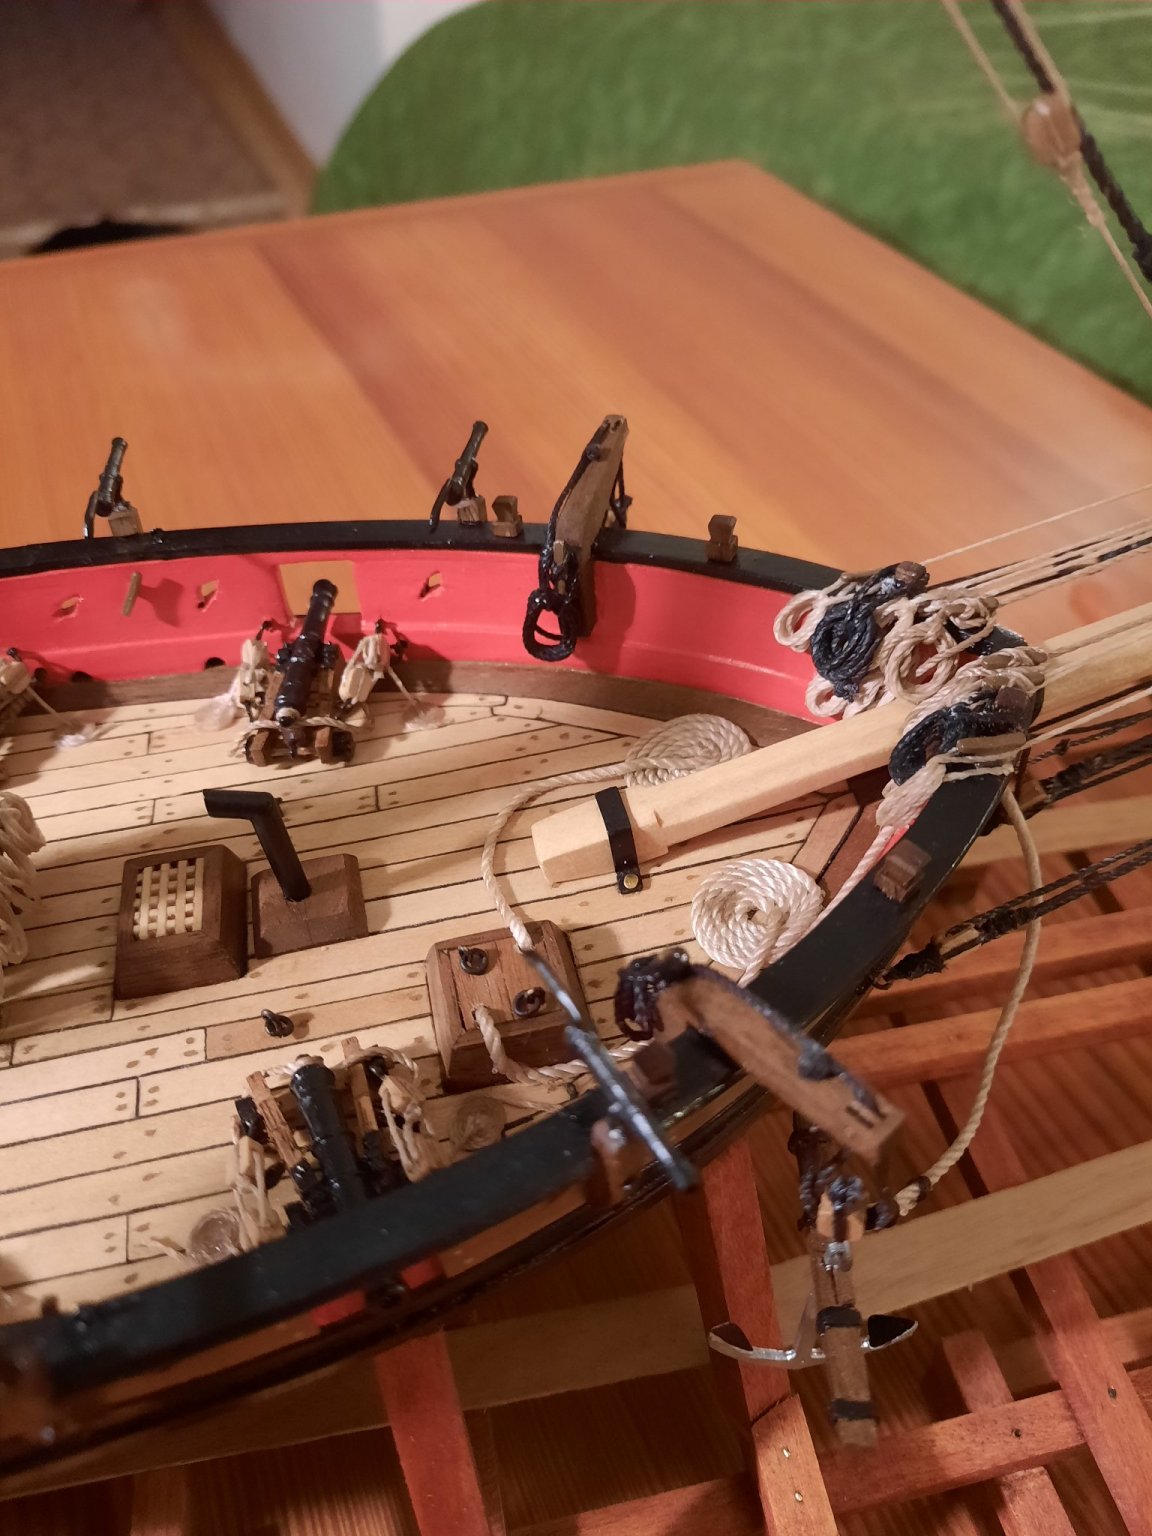
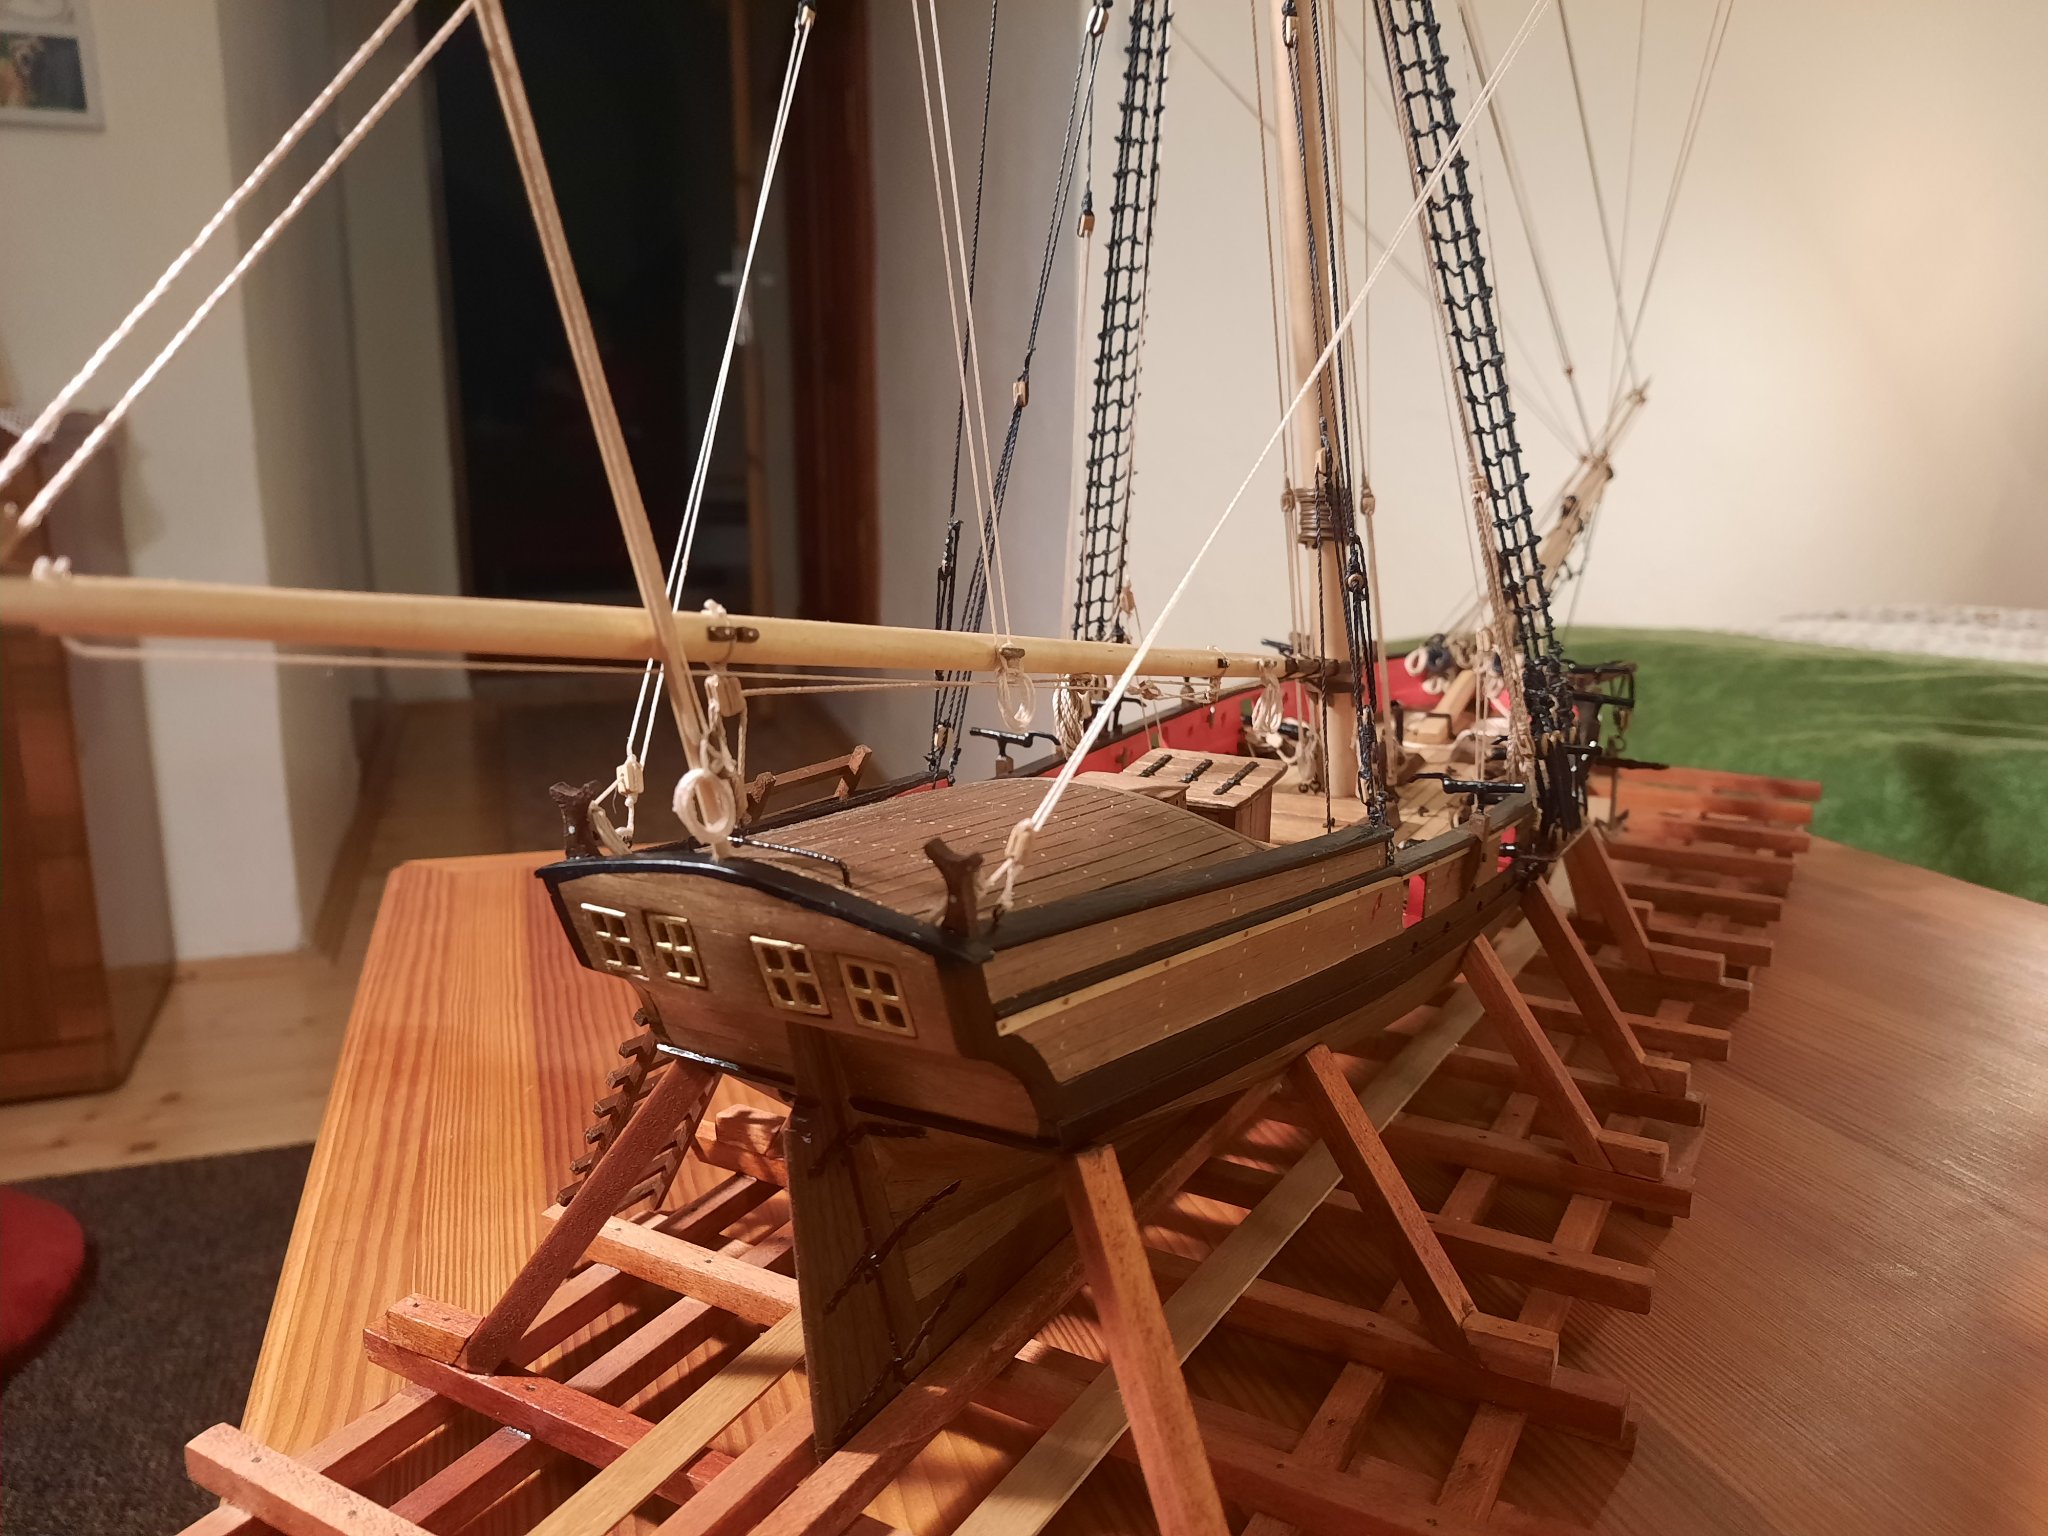
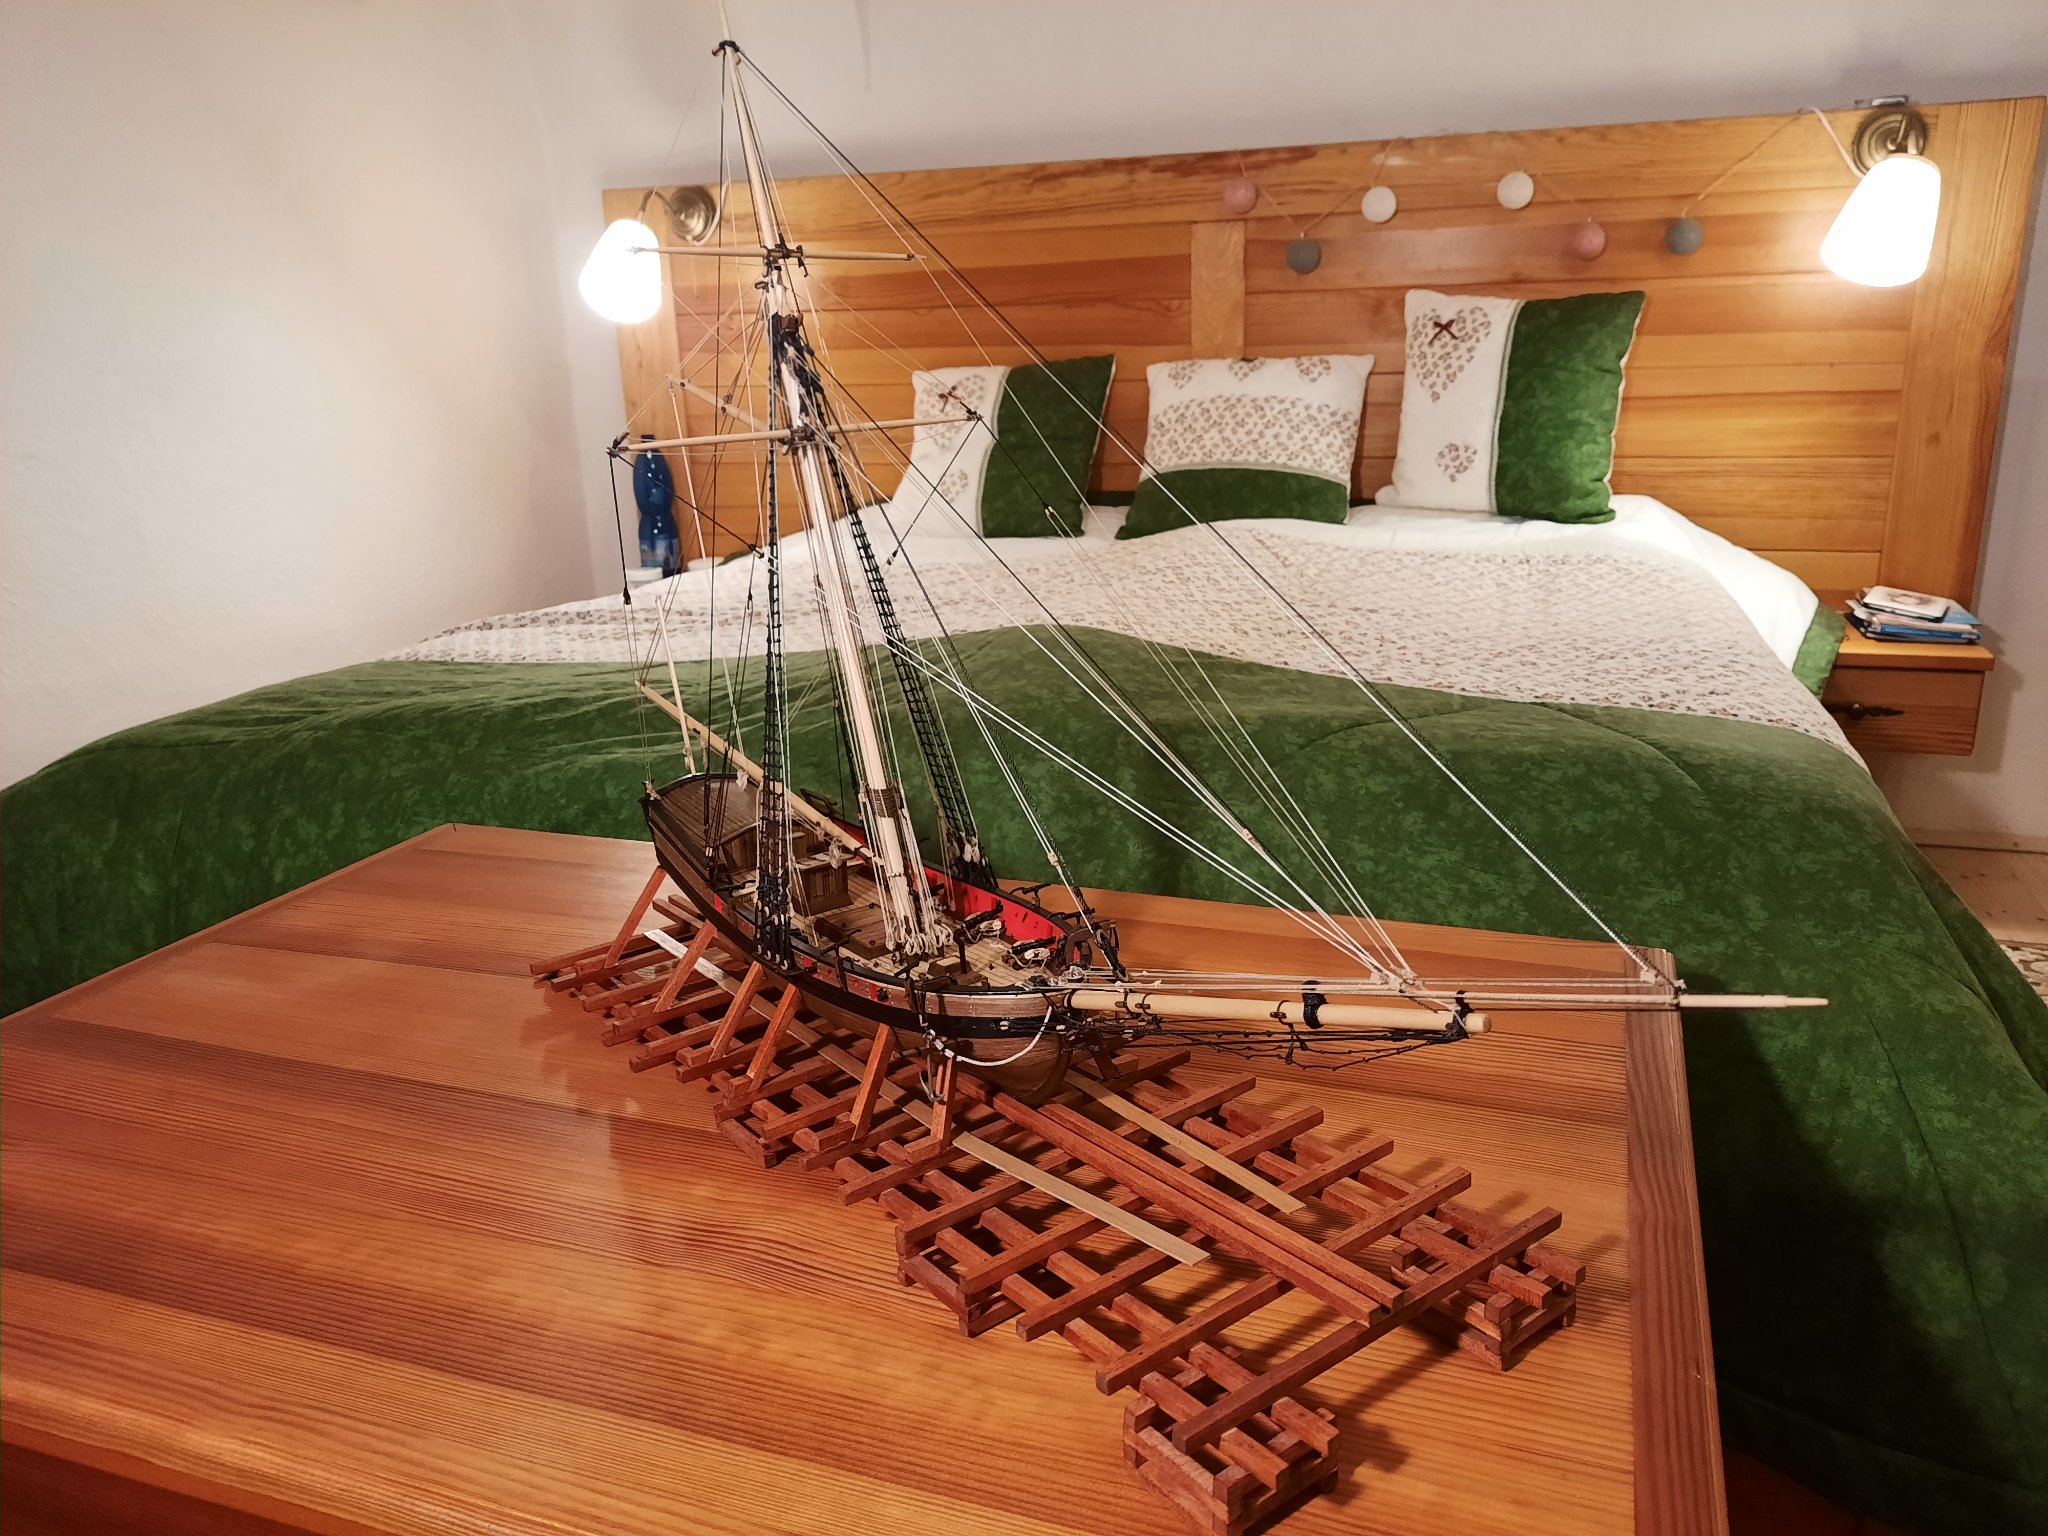
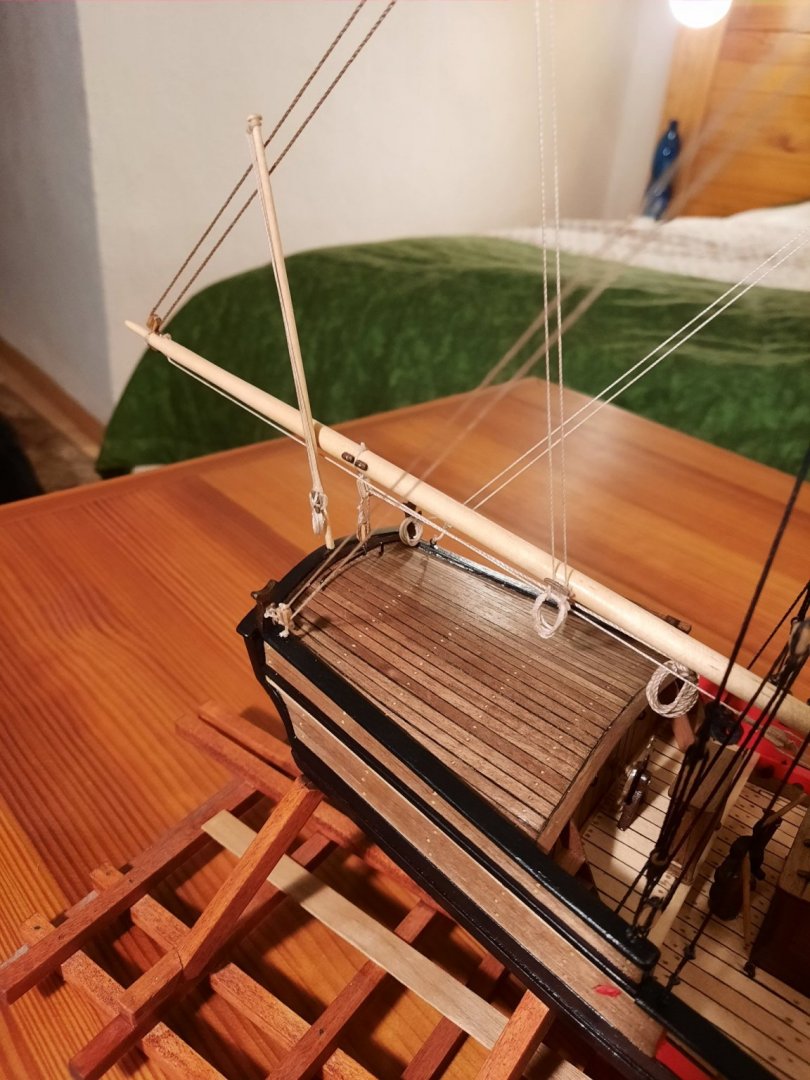
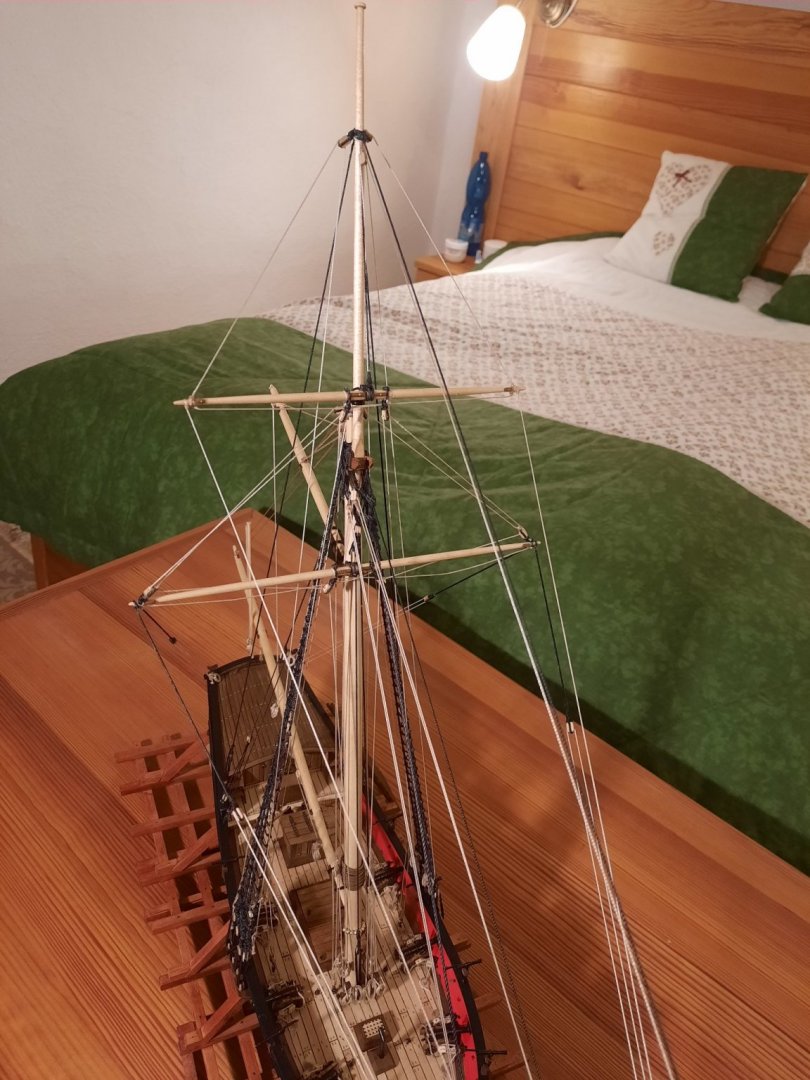
Dear fellow modelers, everything great needs to finish sometime. It is done. I was not able to share more progress photos because of lack of time. But here it is. Finished. It has taken 11 months. It was 450 hours of work. Here are the pictures. This is the end of my log. It was great jurney and in future I will definetely come back. Thank you for all your help, tips and experience. But now, I have other matters to deal with. My son will be born in few weeks and I am going to start build house for us. Thank you again.


- 108 replies
-
- 14
-
-
- armed virginia sloop
- model shipways
- (and 1 more)
-
Thanks for your experience. Yes there is danish oil on the ship. Hopefully it will be ok. (Tak uvidíme ako to bude vyzerať, pravdepodobne máš pravdu, no môže to byť aj inak :D.)
-
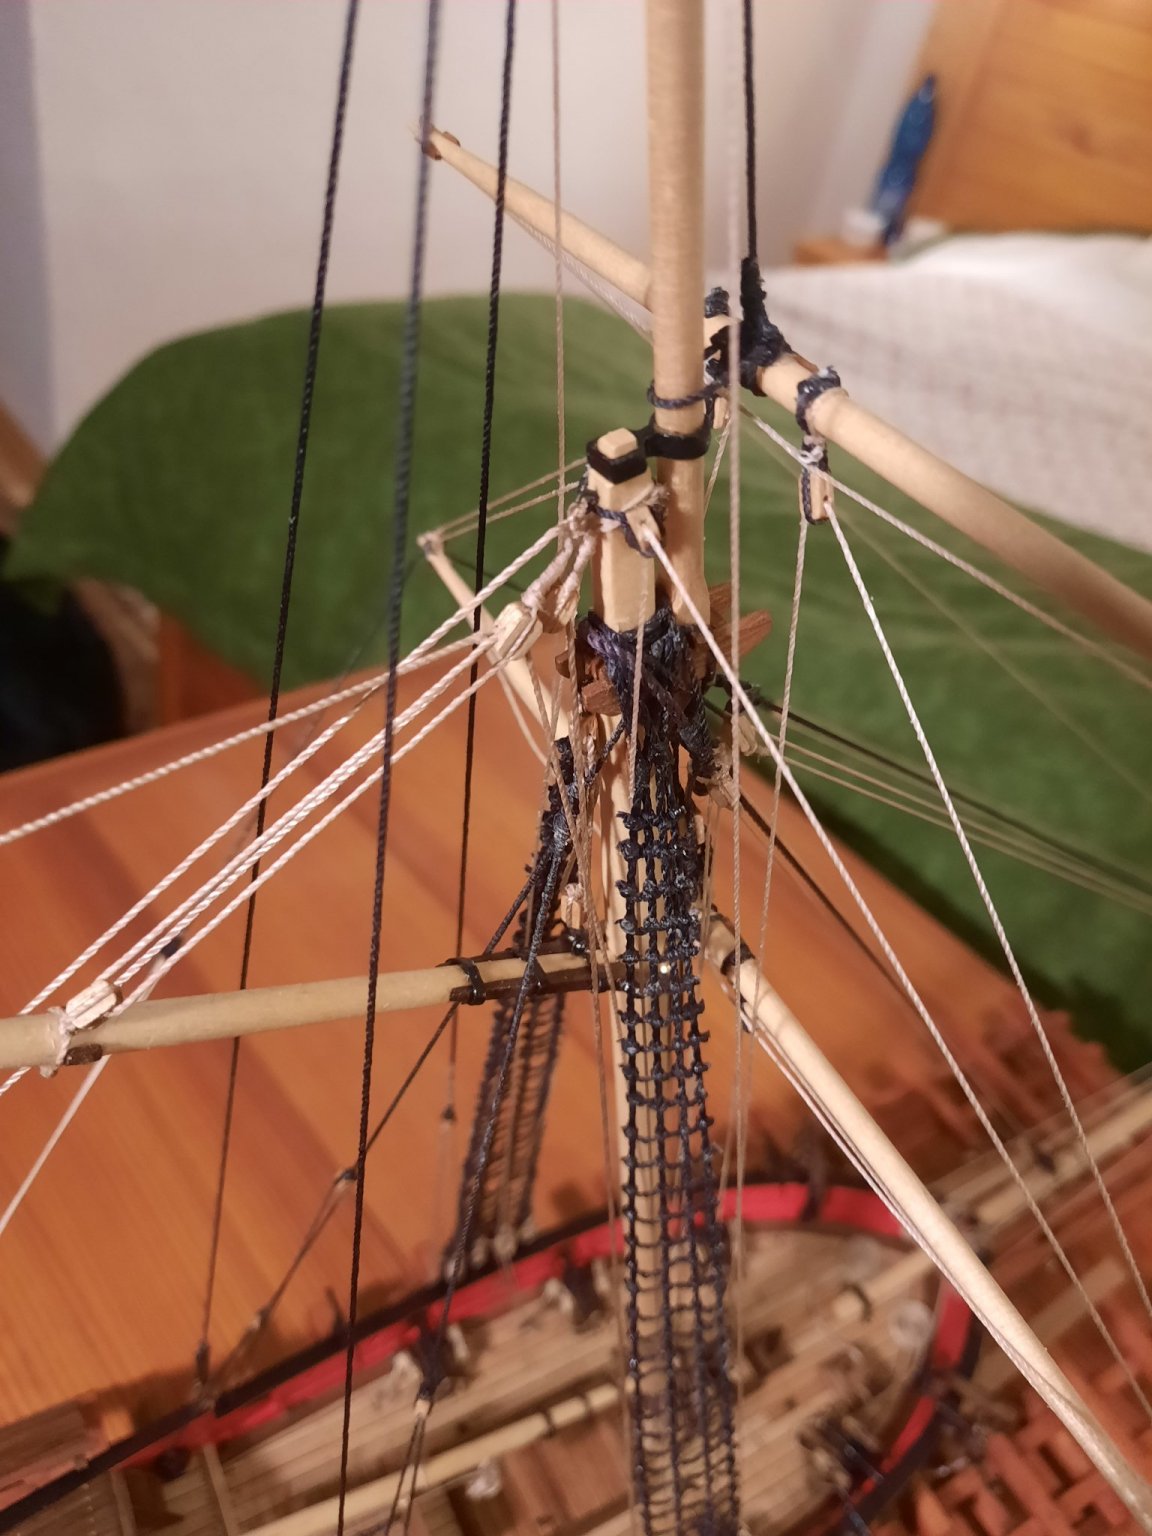
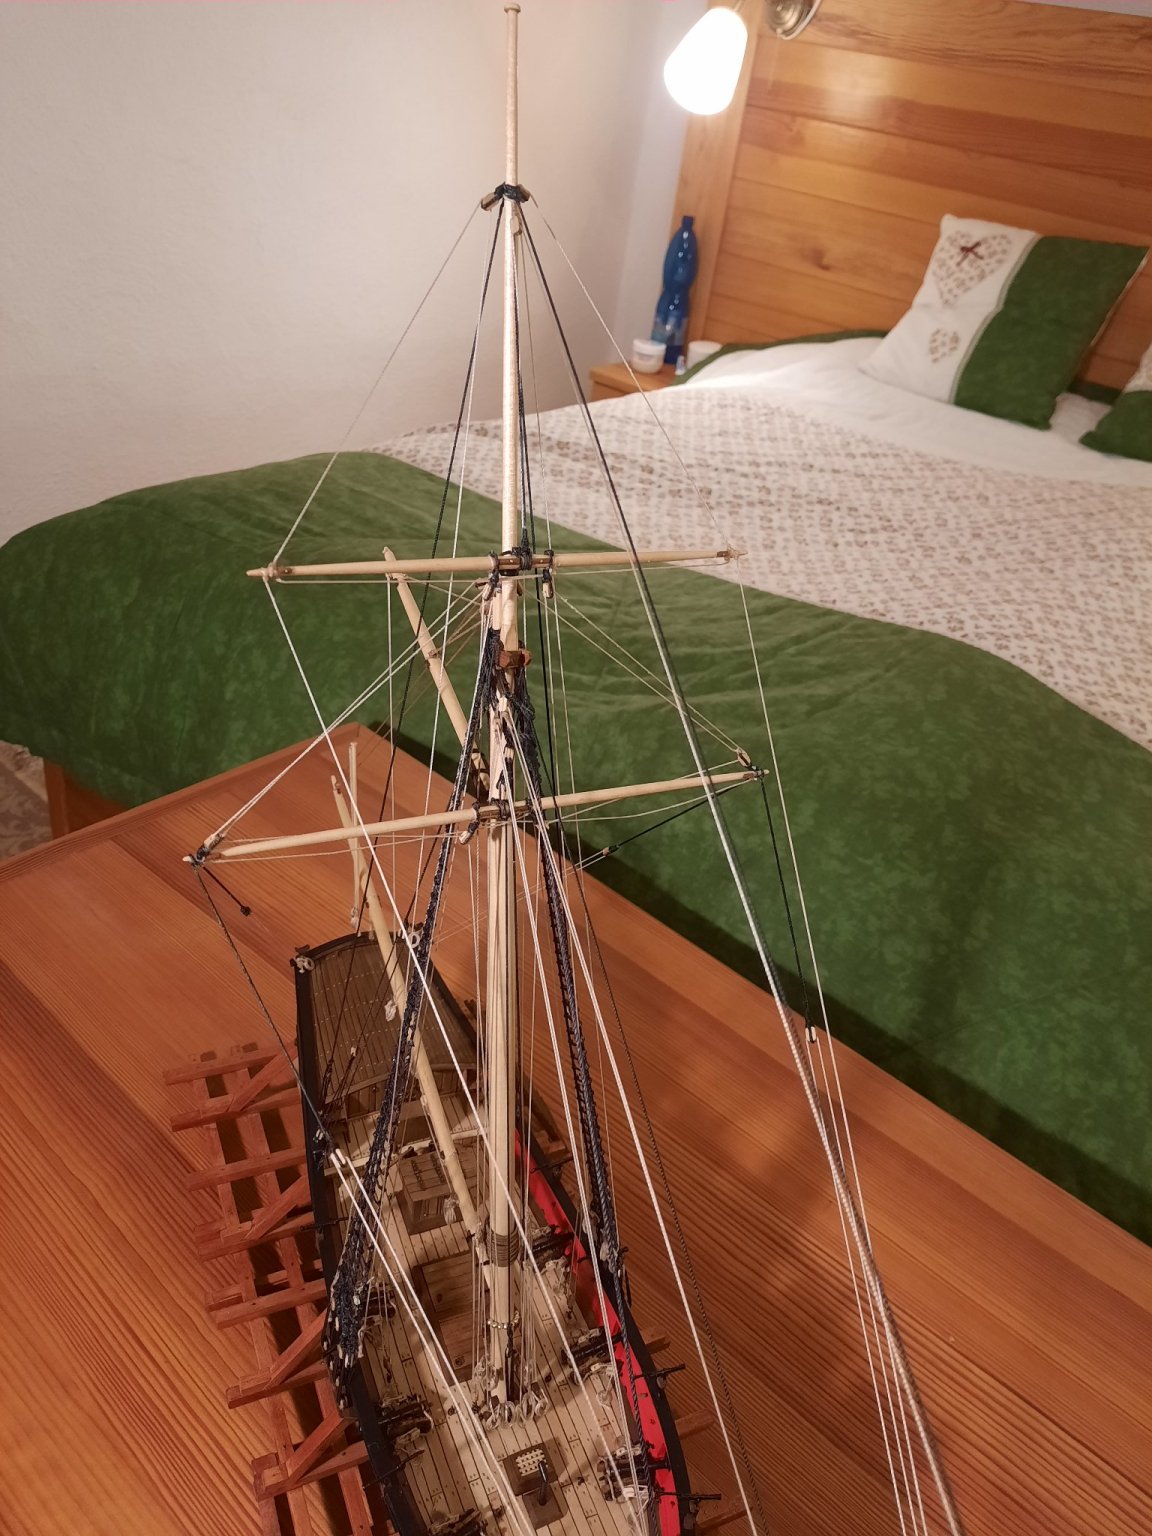
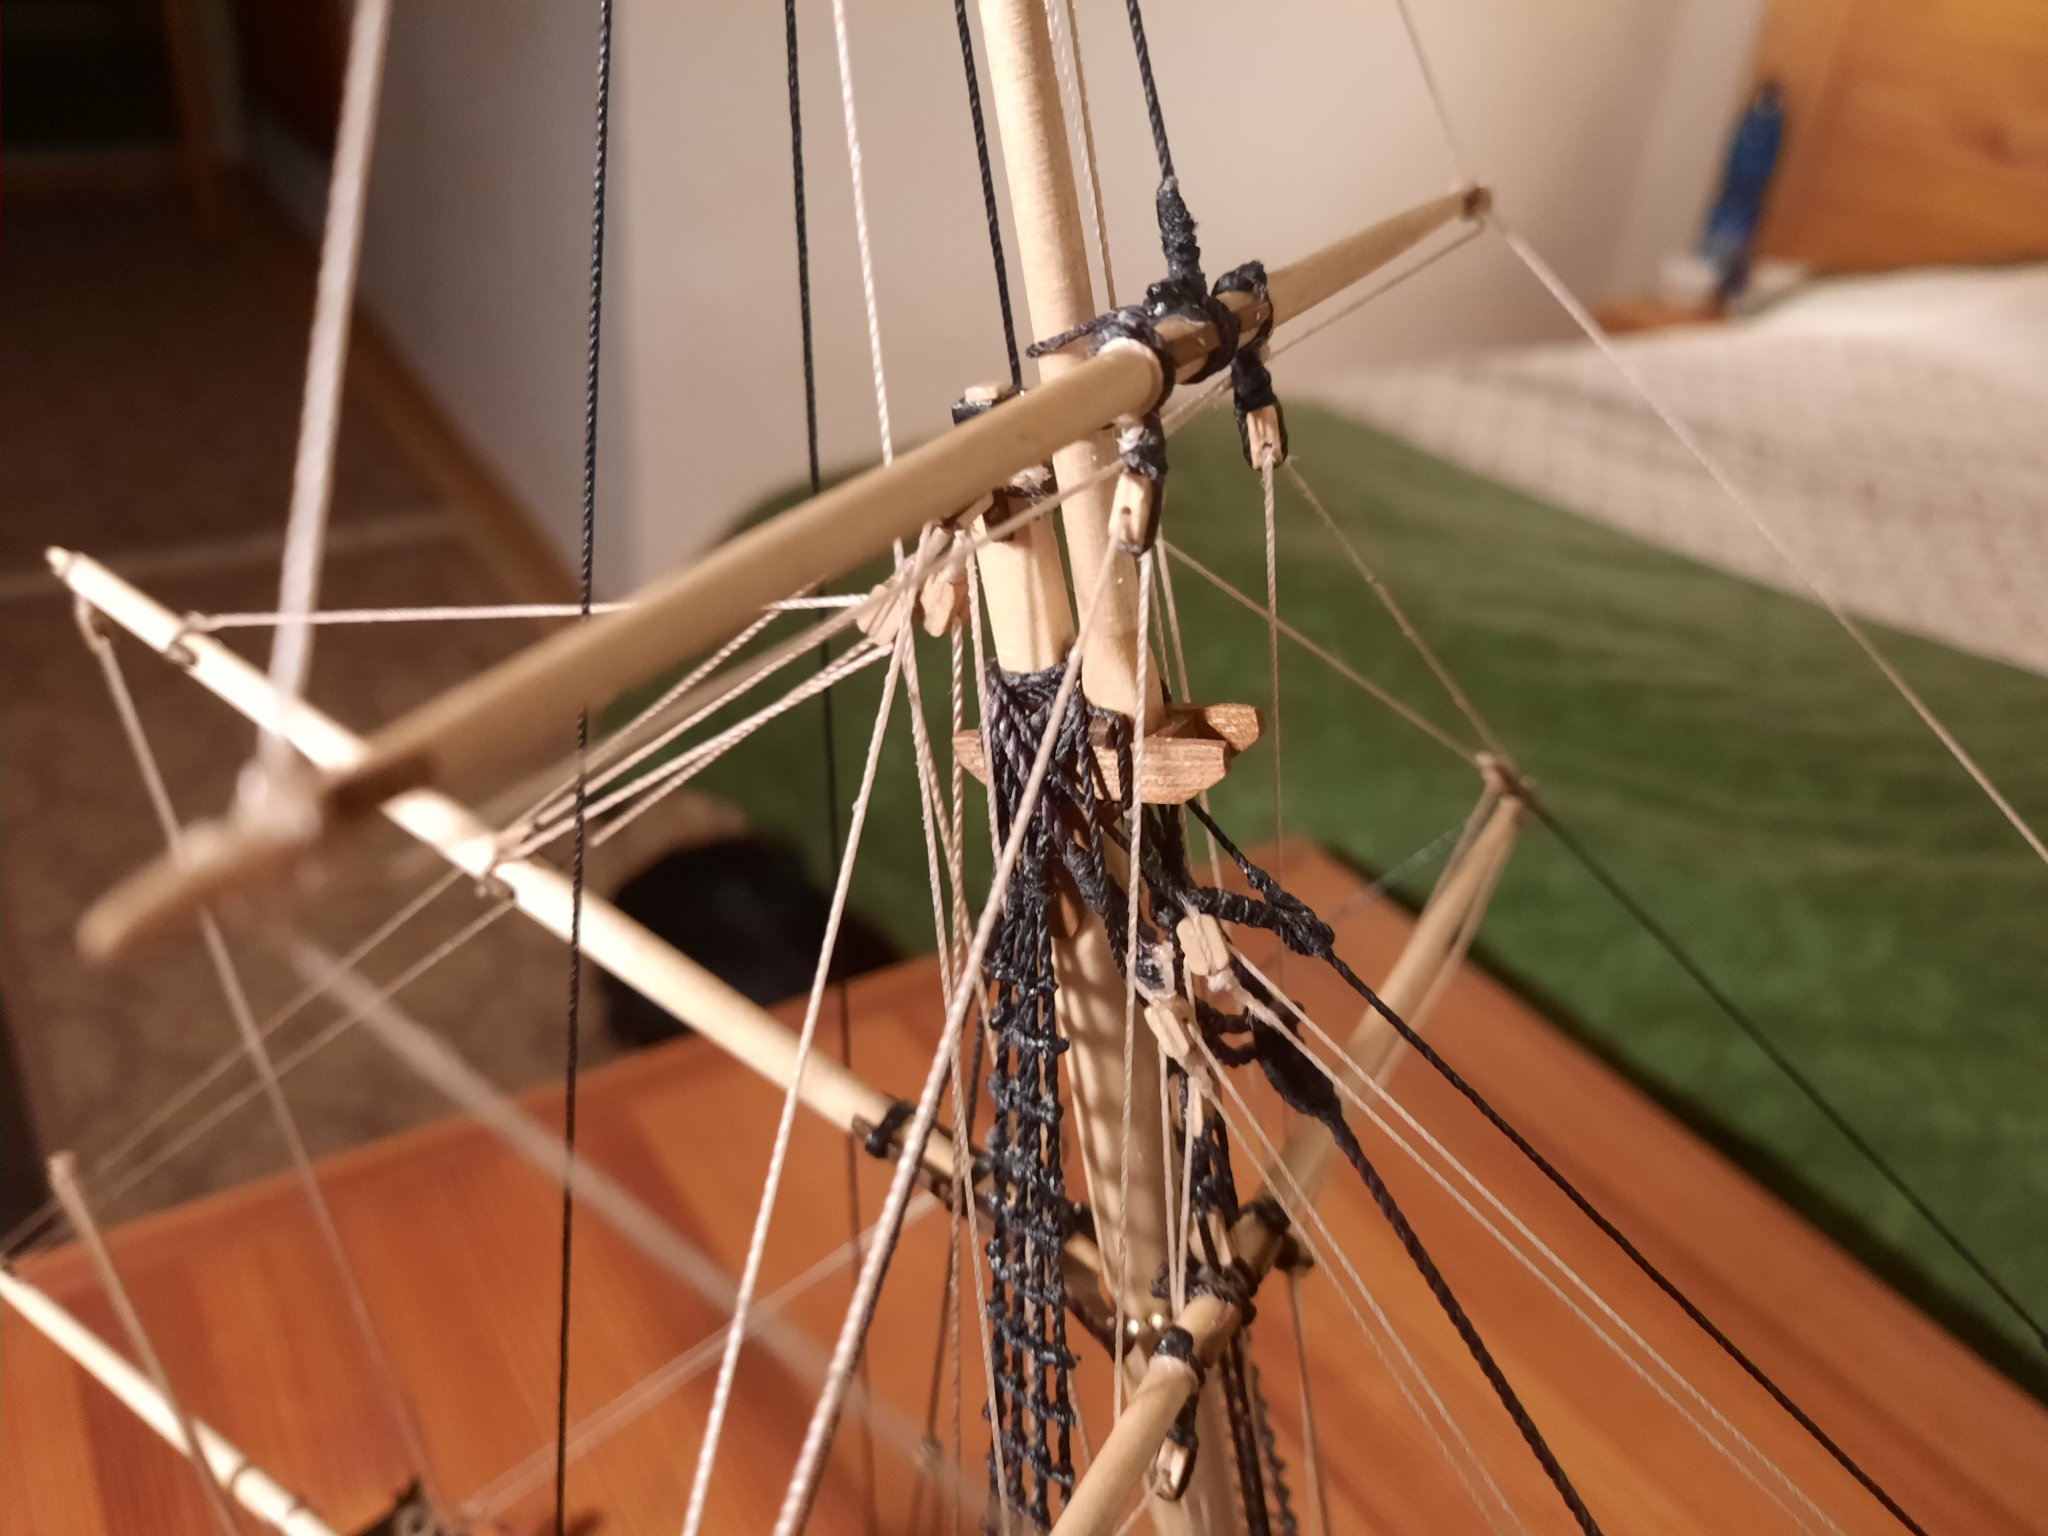
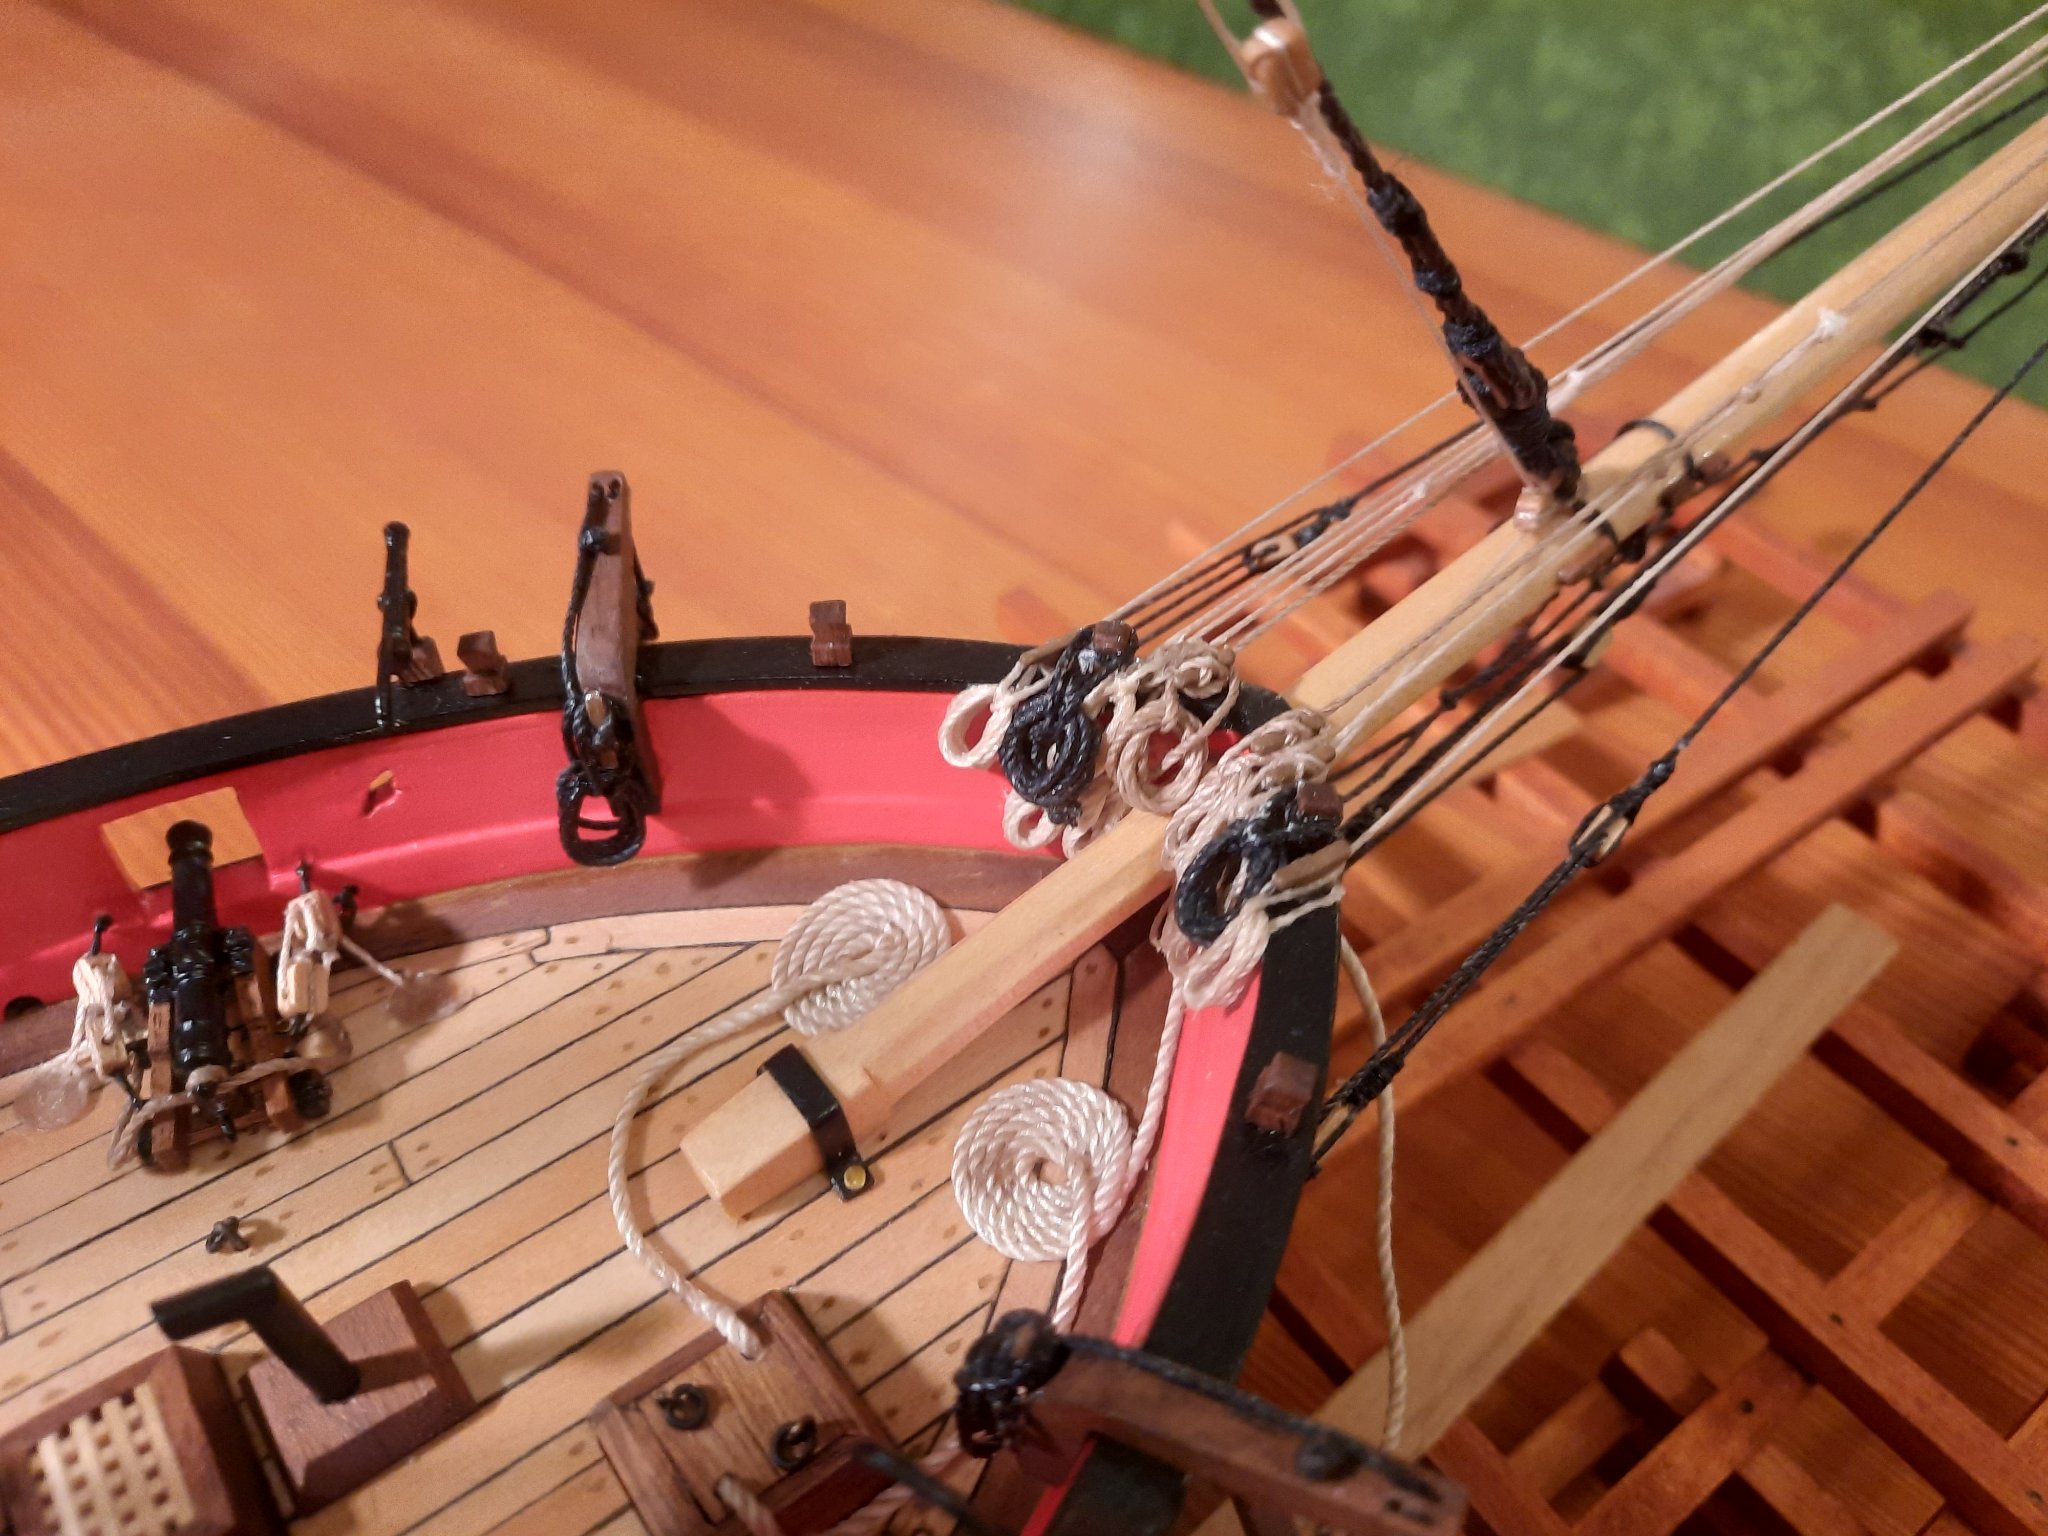
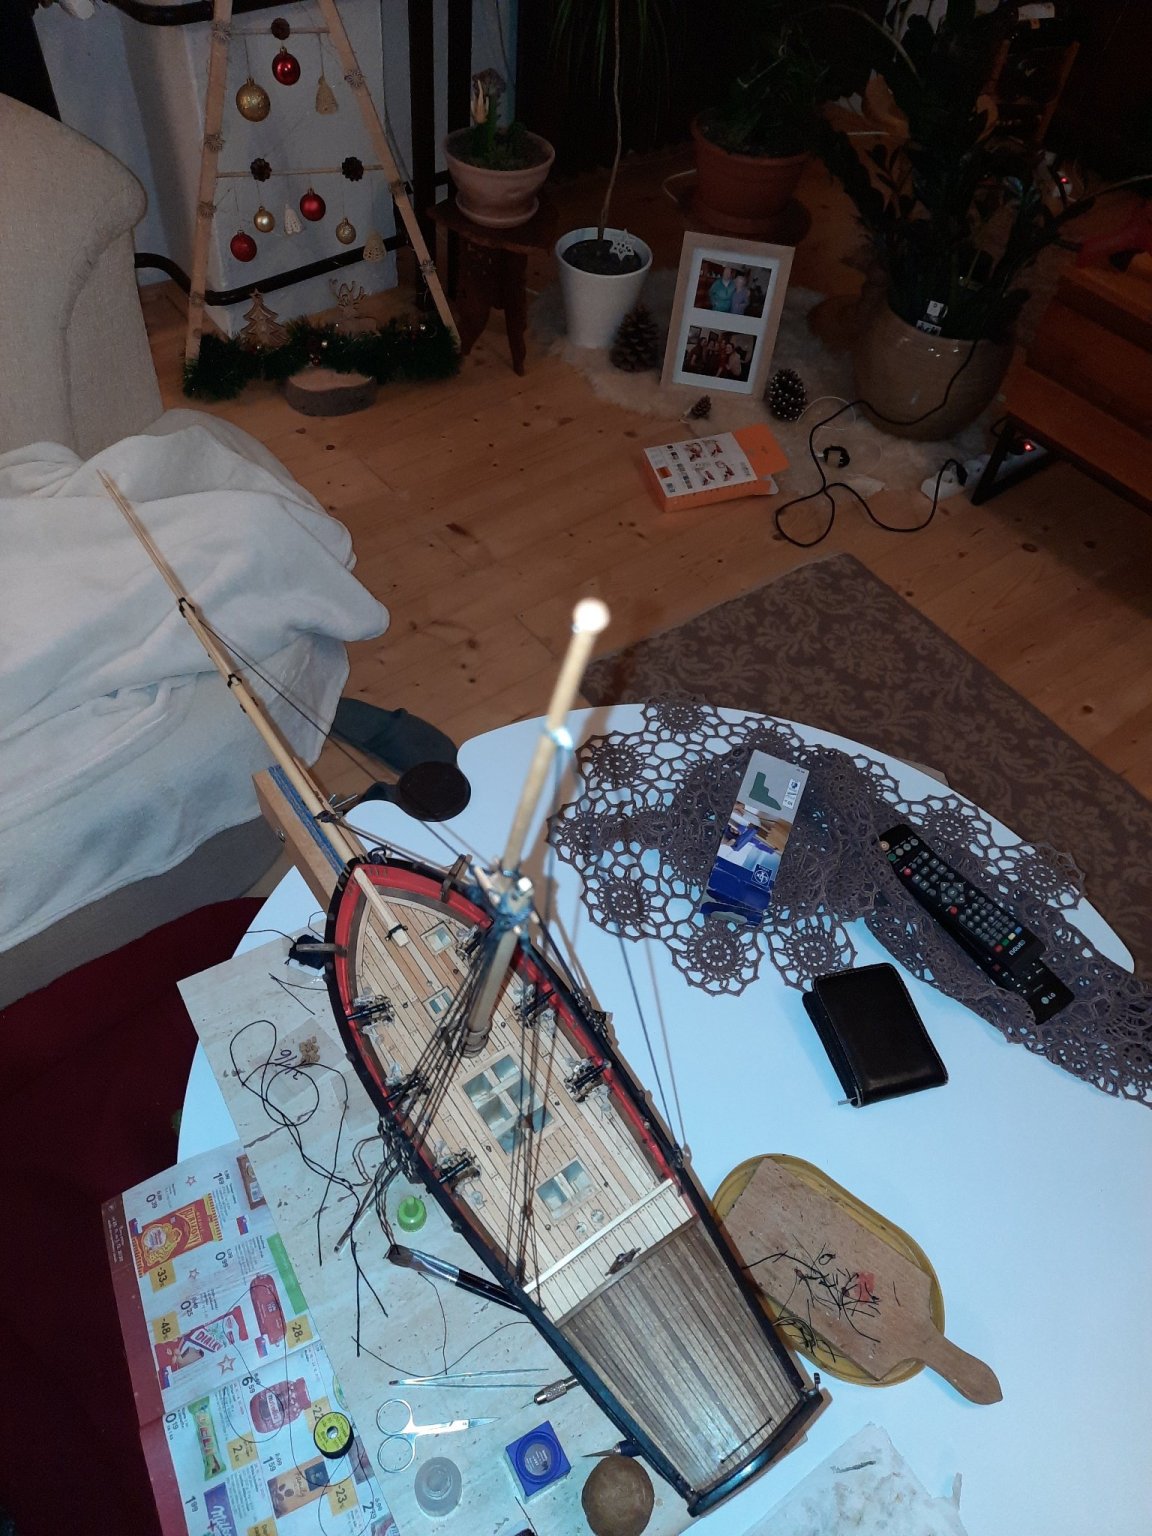
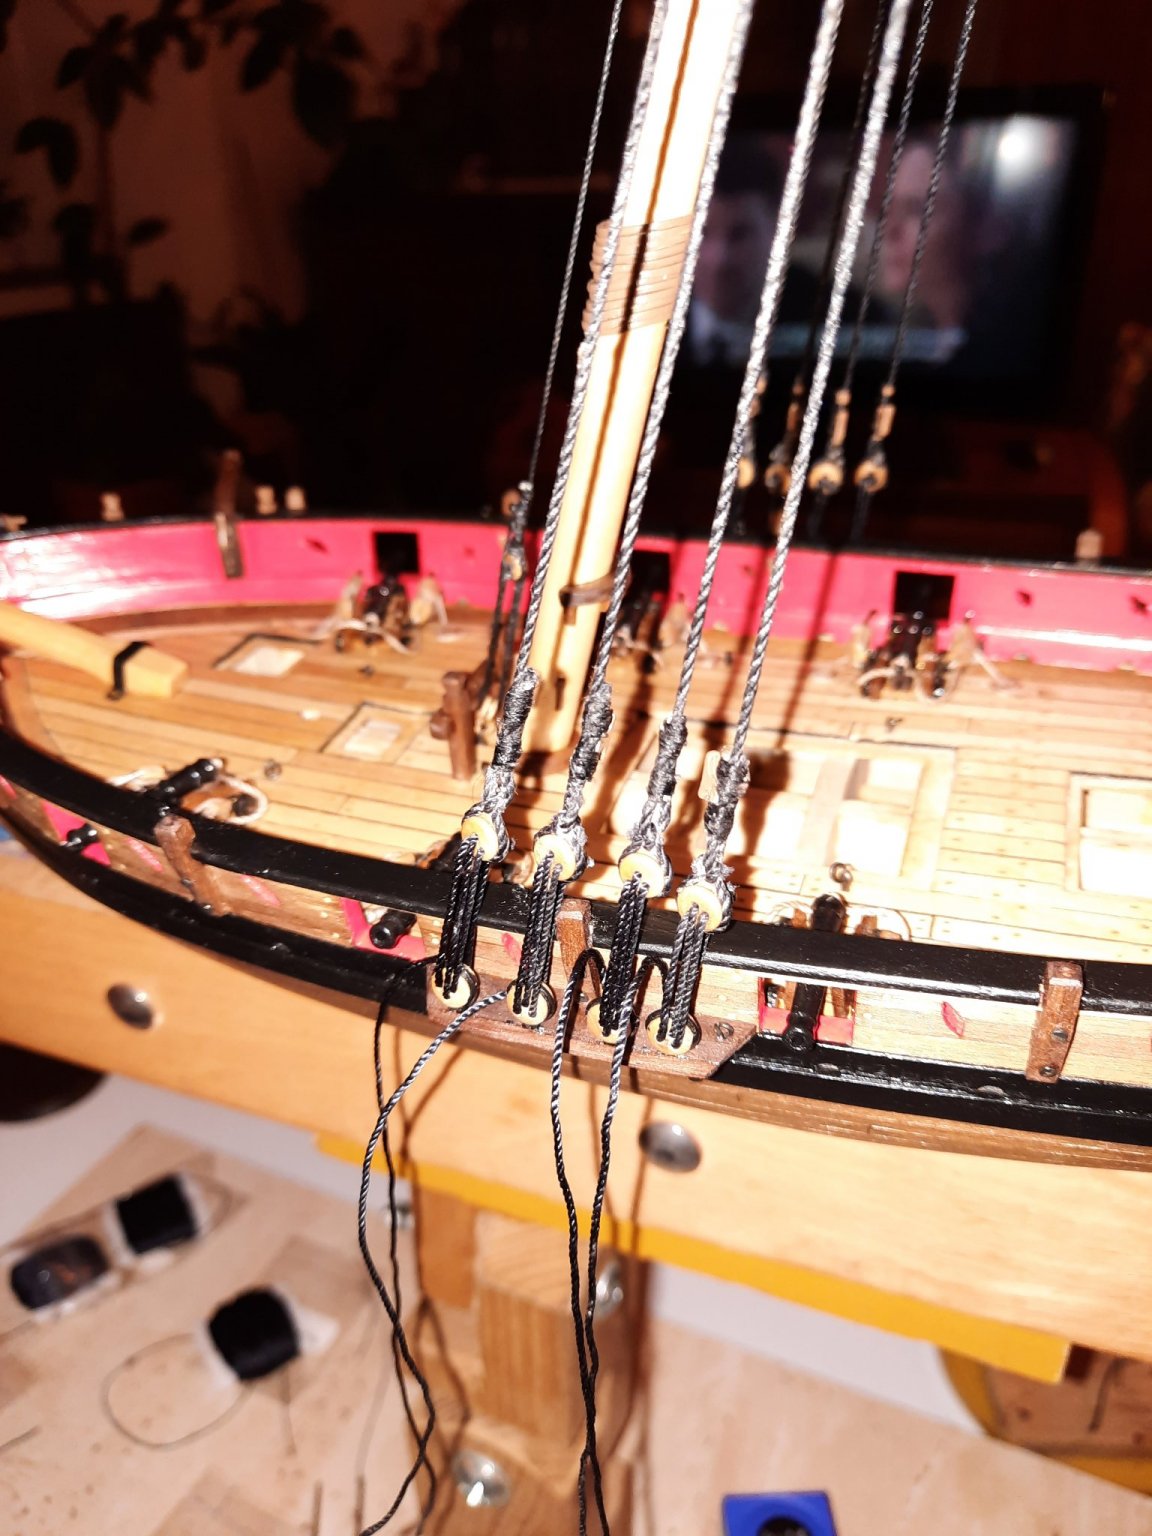
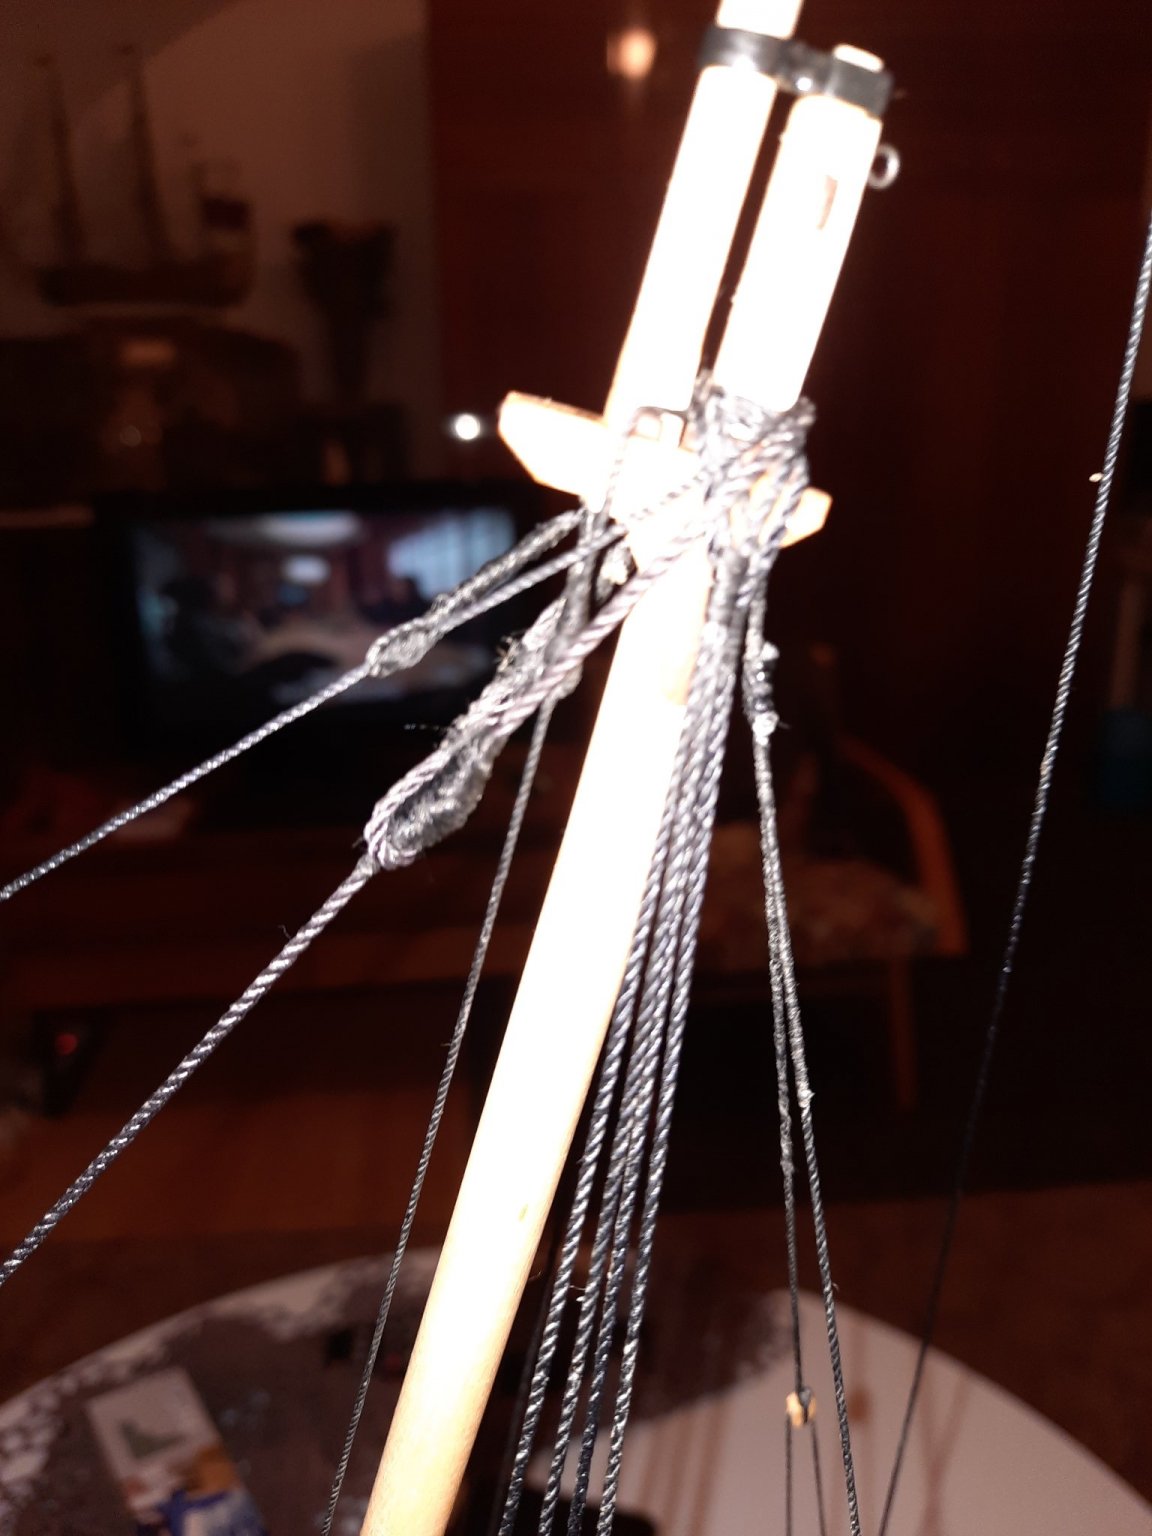
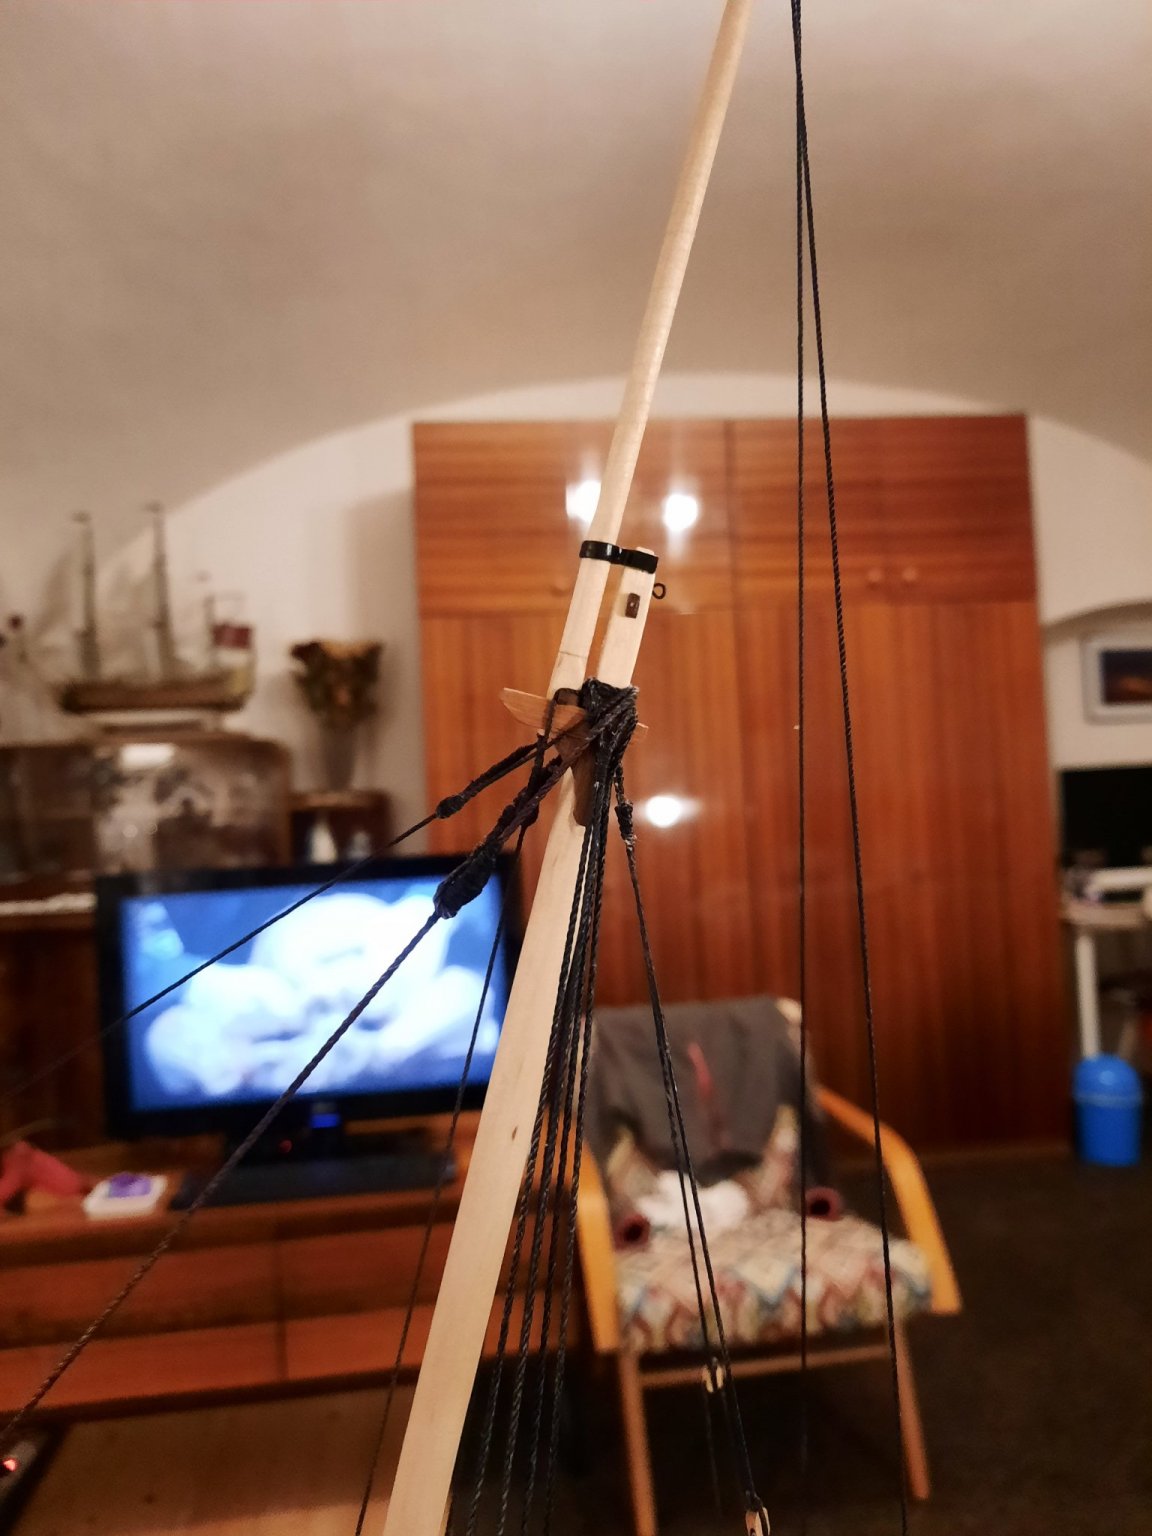
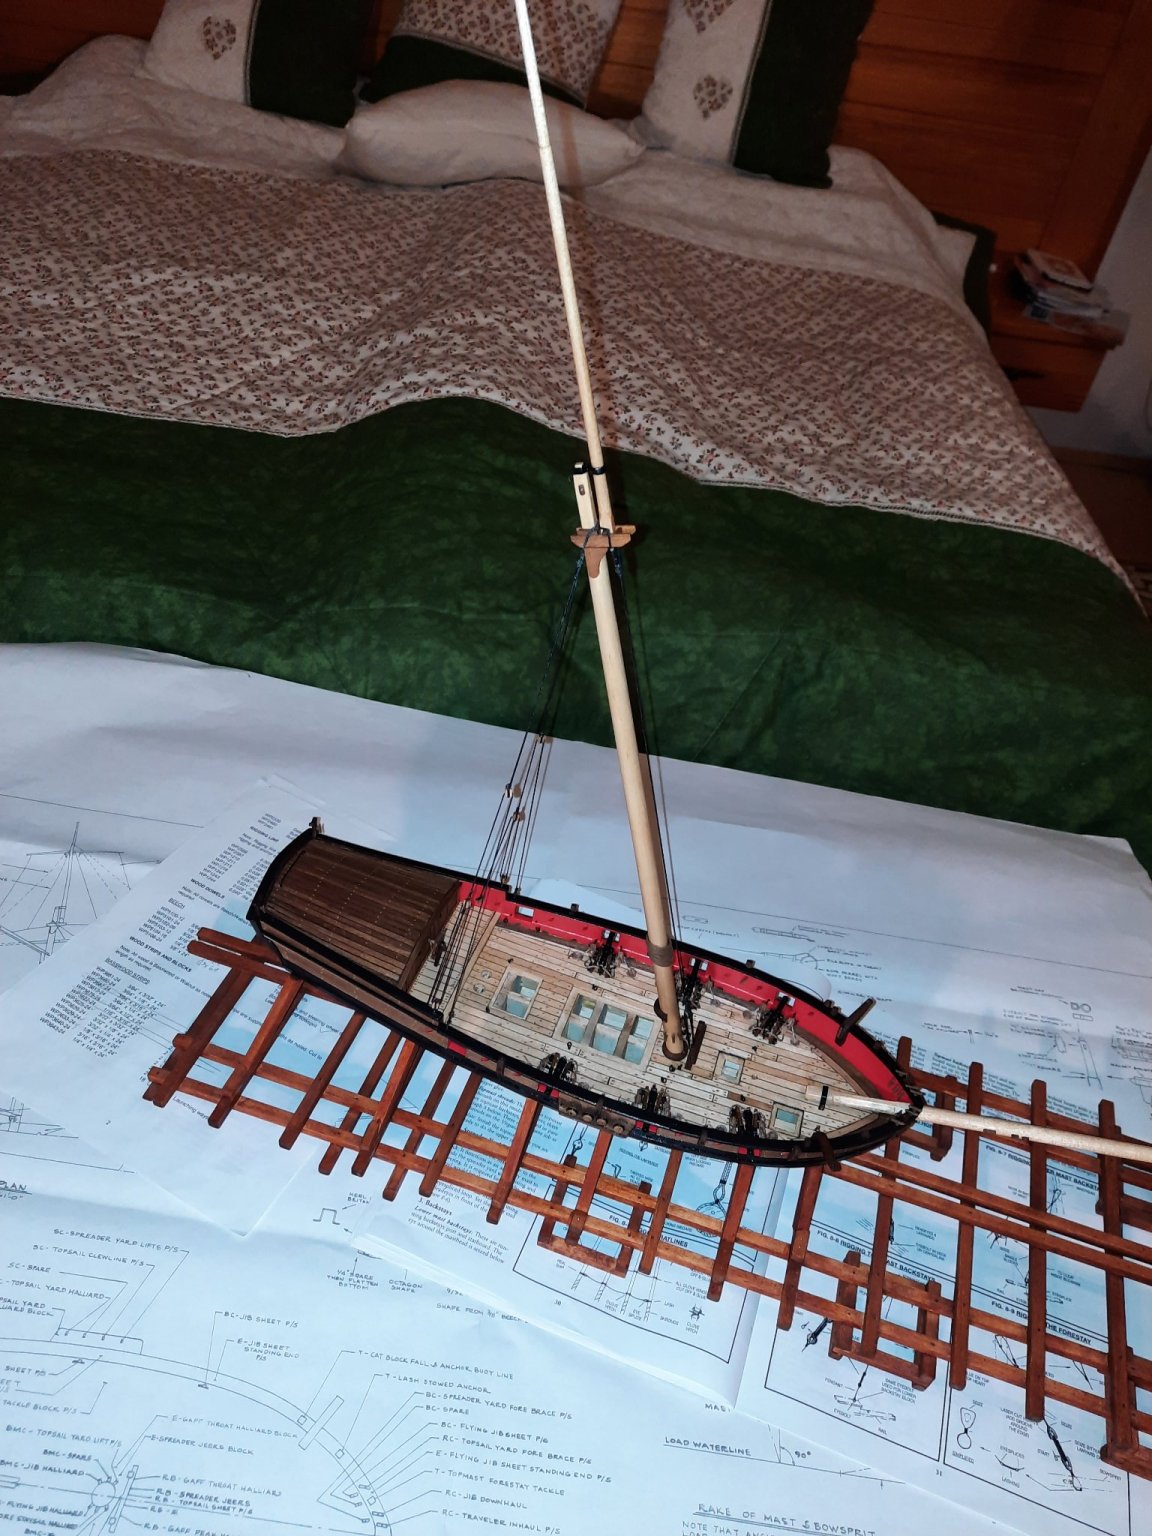
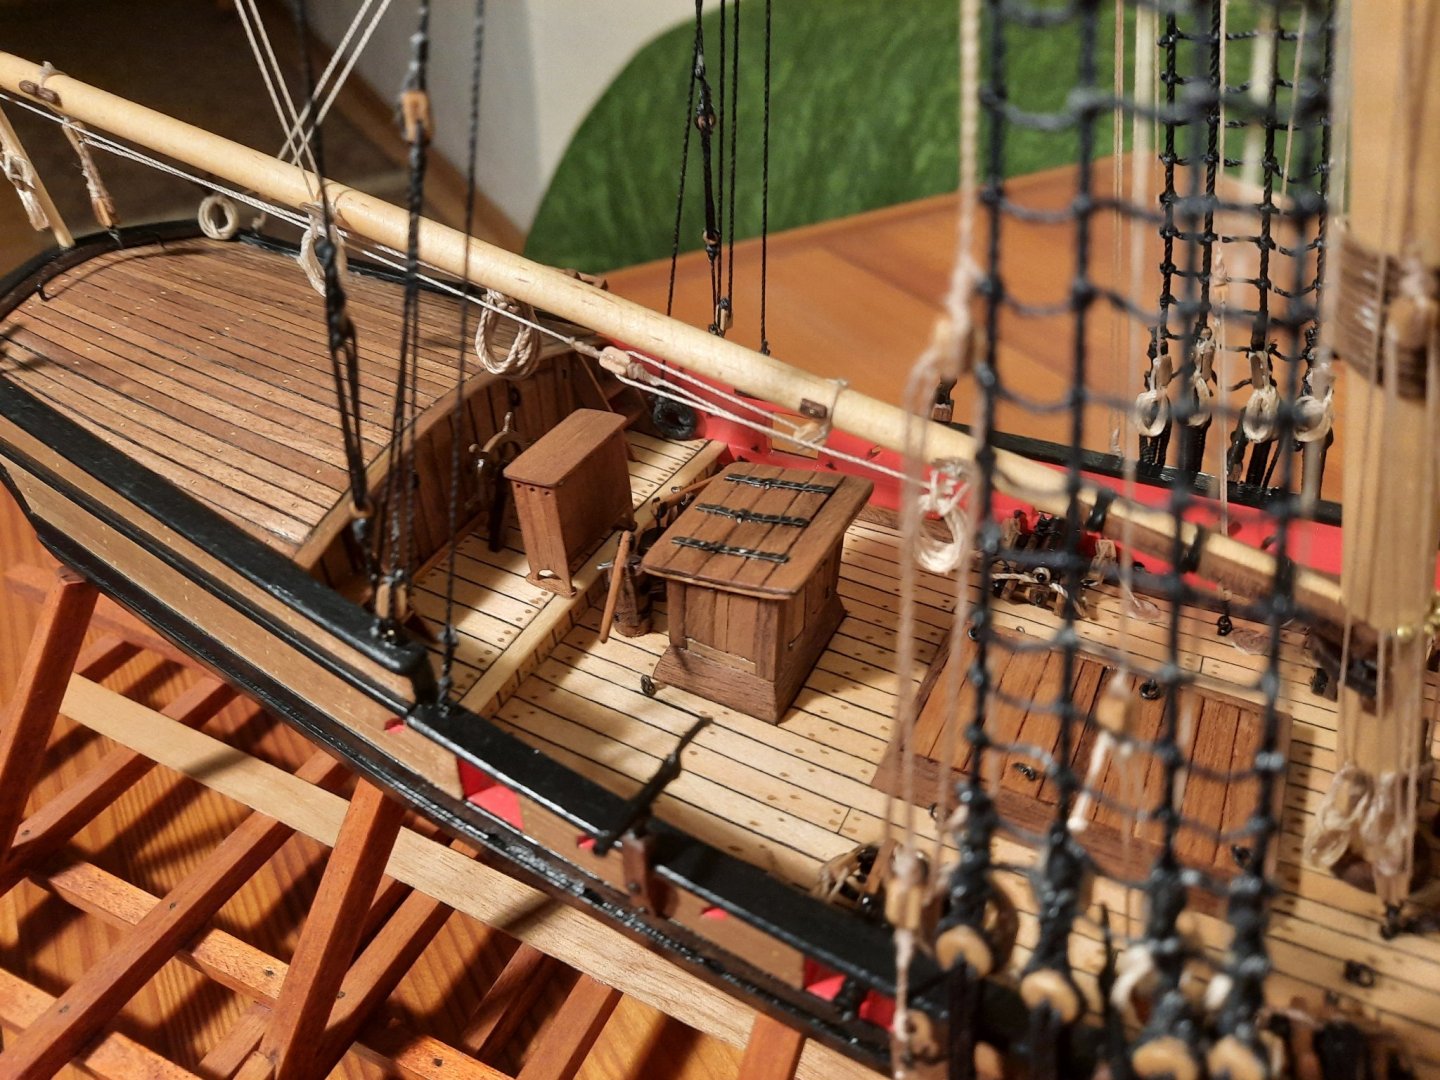
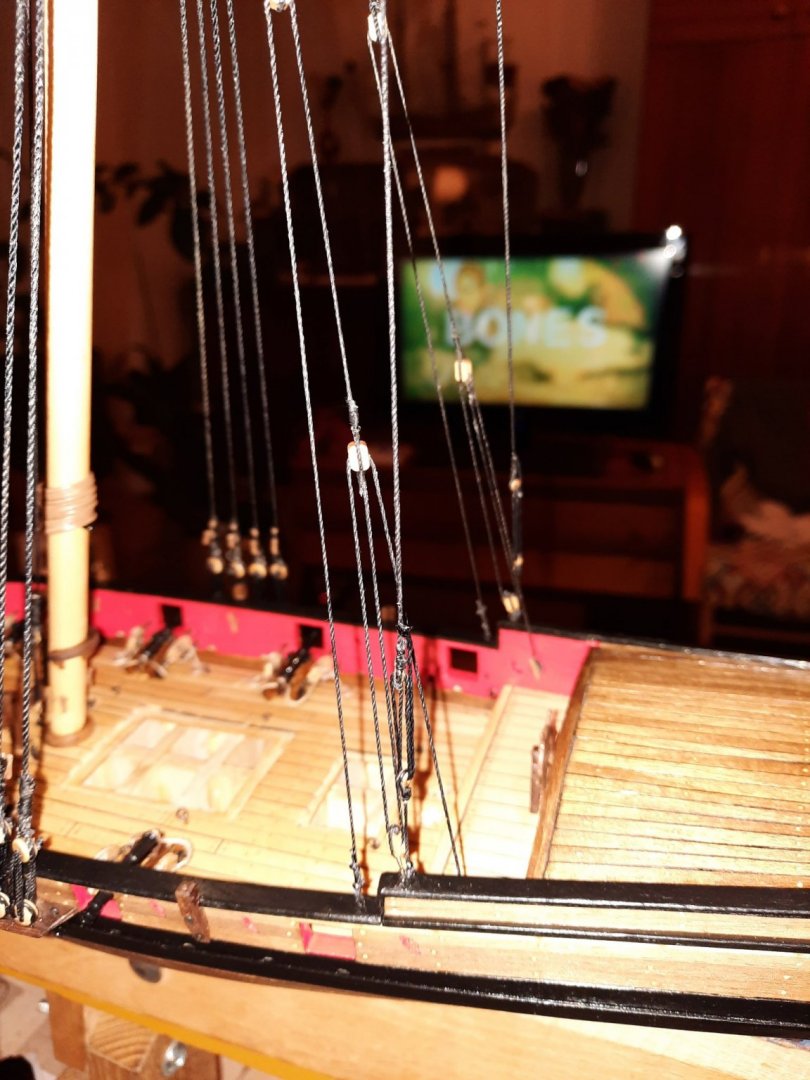
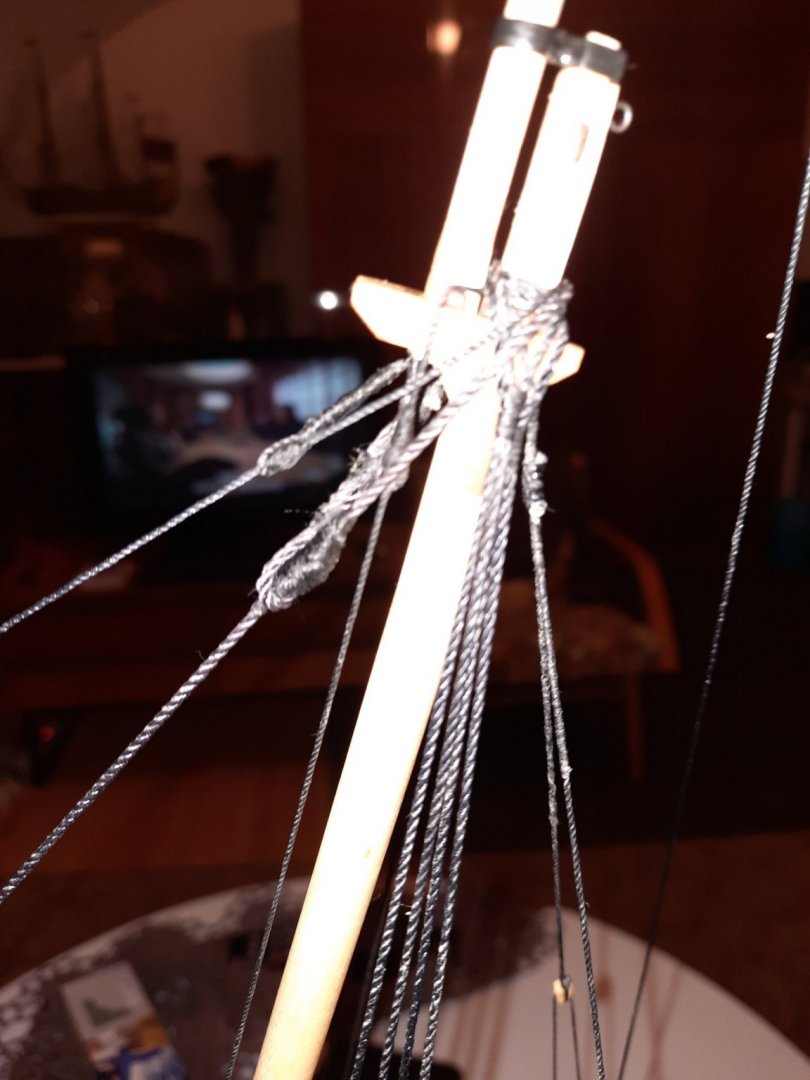
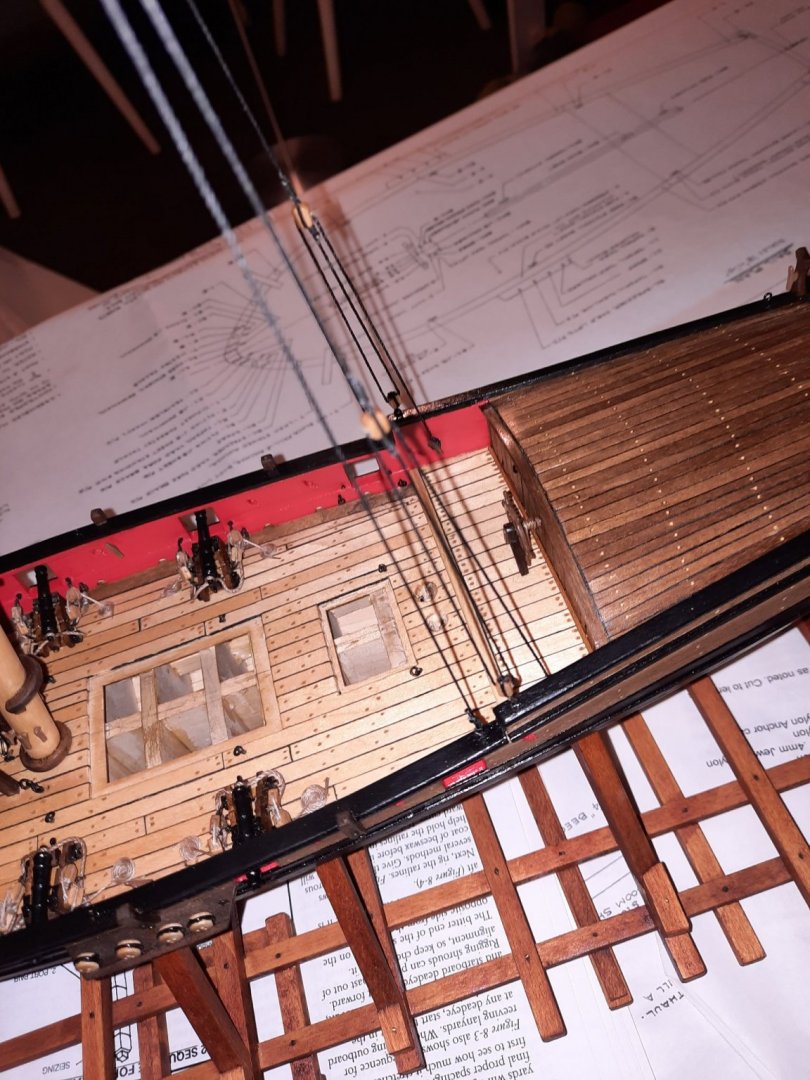
Dear fellow modelers, I made some progress with standing rigging. I added shrouds and deadeyes. Is till need to fill ratlines. Here are some pictures. I added top mast backstays, I rigged the forestay and the jibstay. Here are pictures of that. I have one question for you. Do any of you have any experience with drying of the wood on the ship? What I mean is it possible that it will somehow crack or make visible wider spaces between planks? I know that it depends on humidity of wood. But It should be dried up very well as it is old at least few years. Maybe quys who aleady build this model could share some knoledge and experience. Thanks you. Till next time.


- 108 replies
-
- 4
-
-
- armed virginia sloop
- model shipways
- (and 1 more)
-
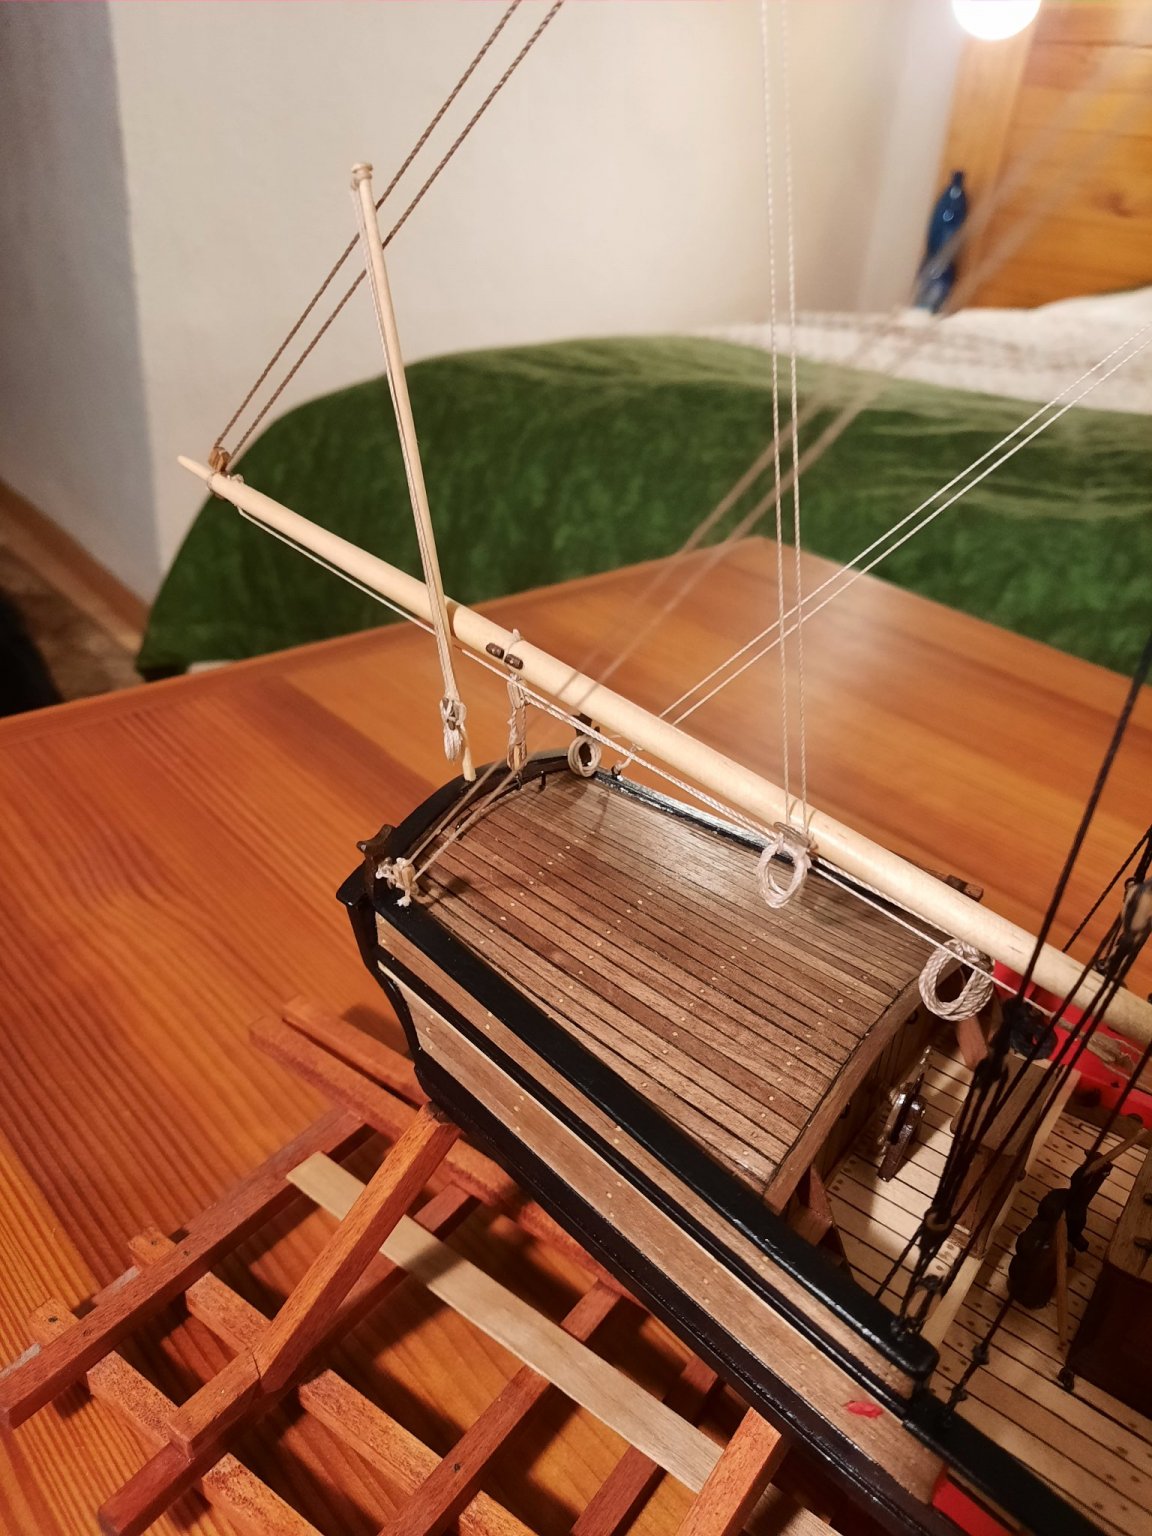
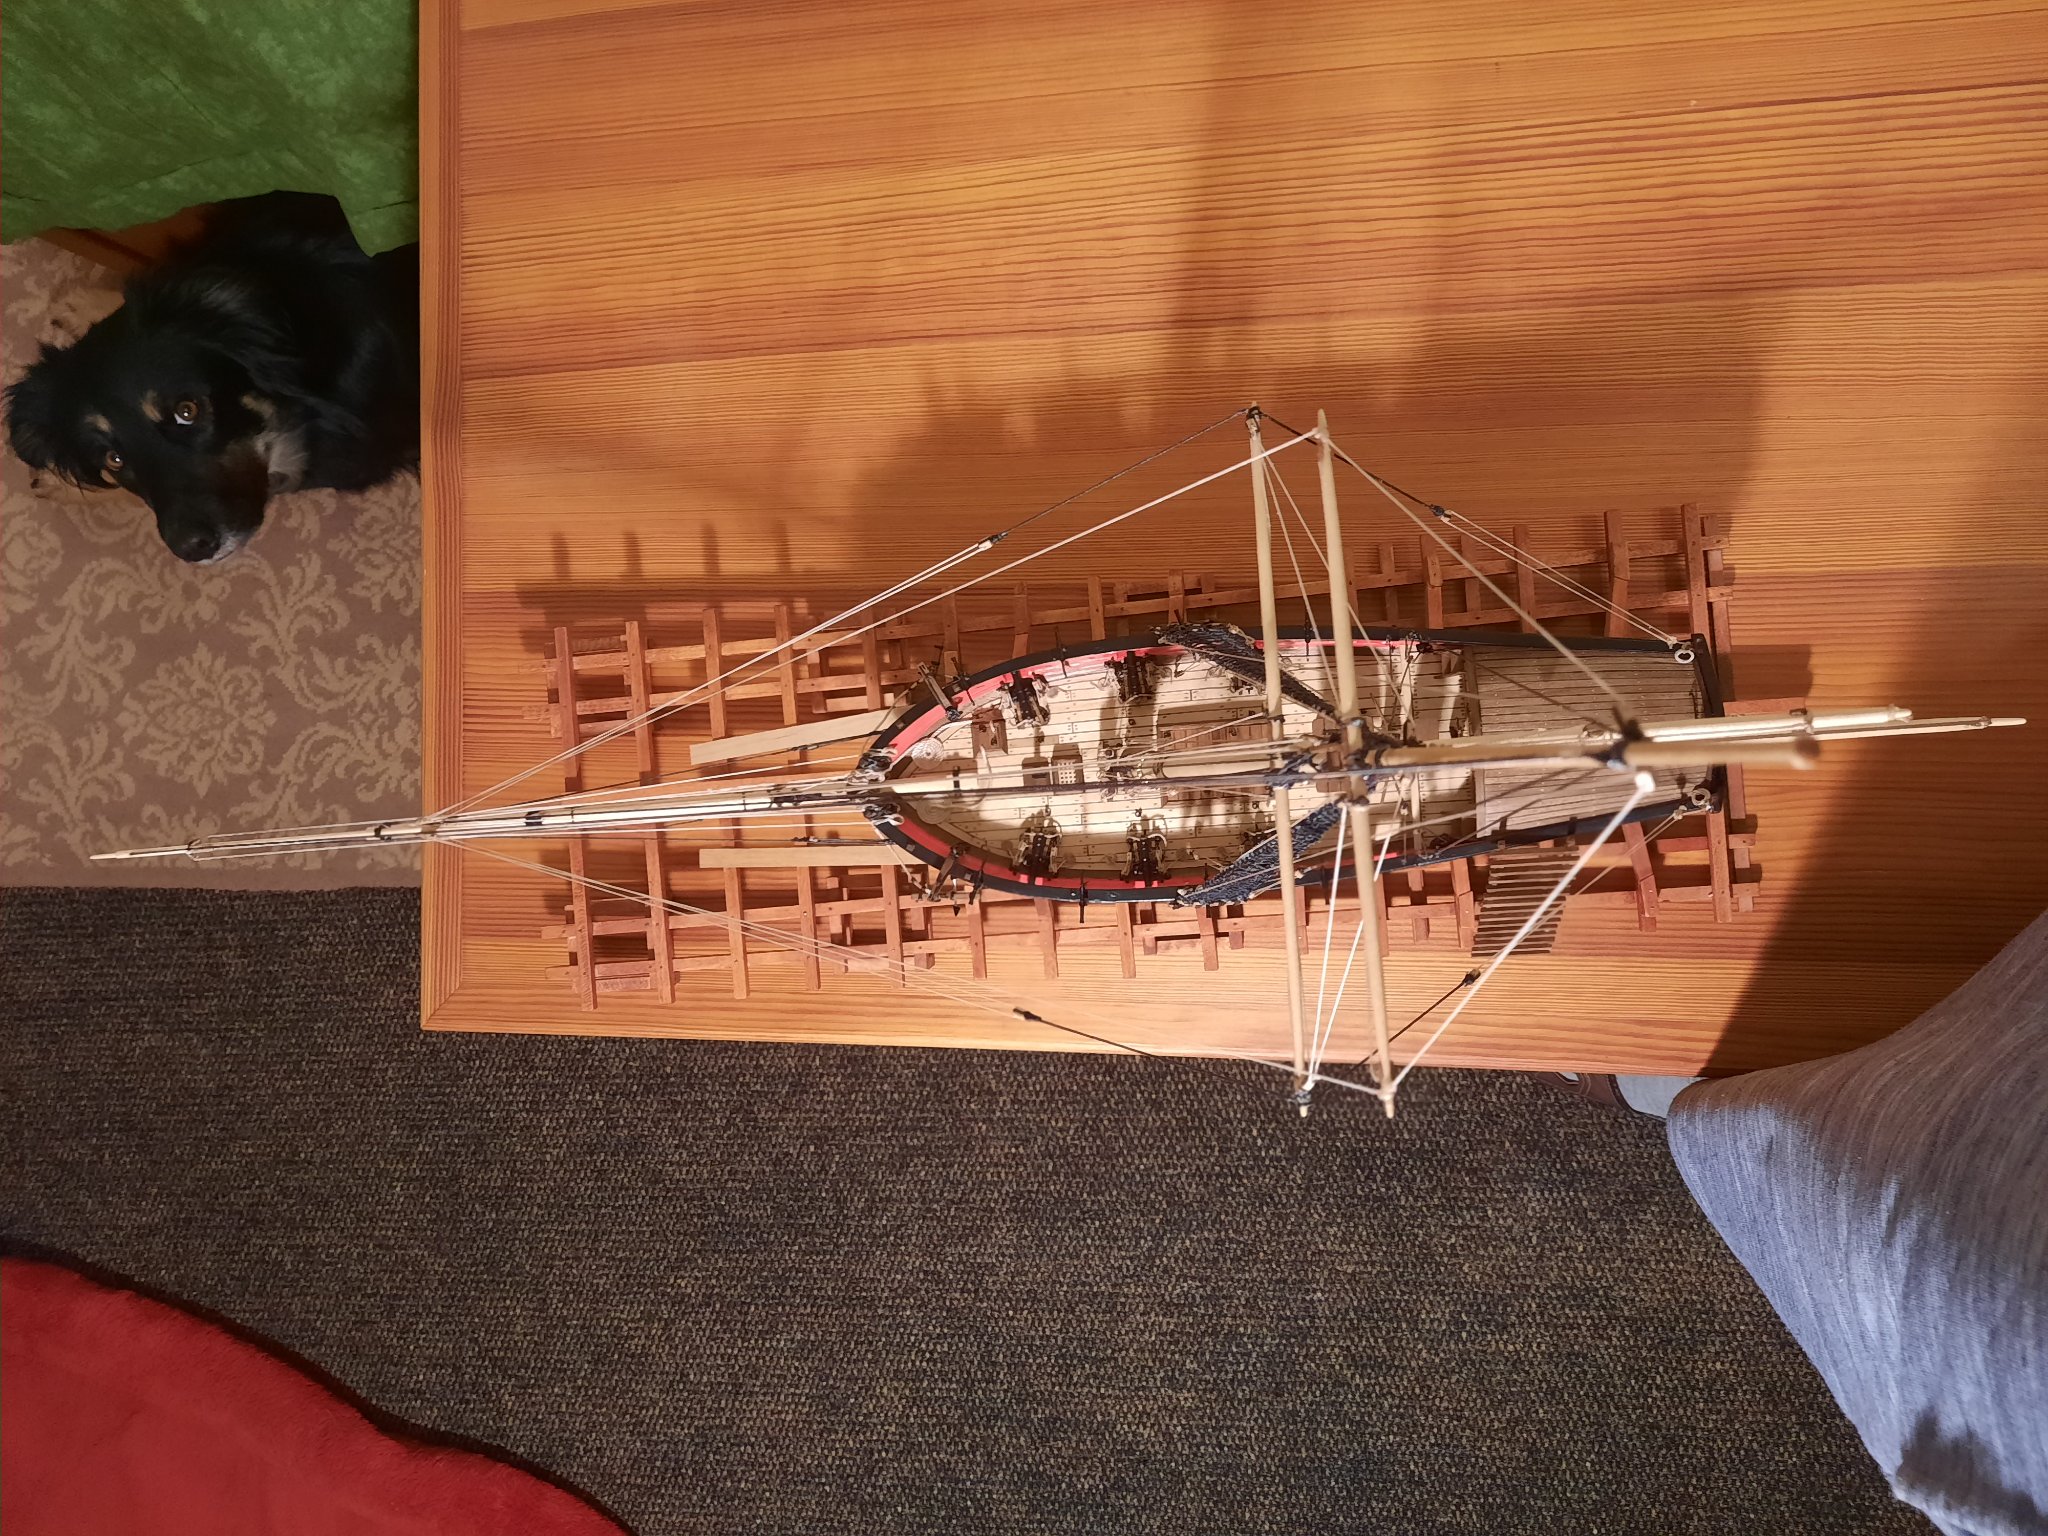
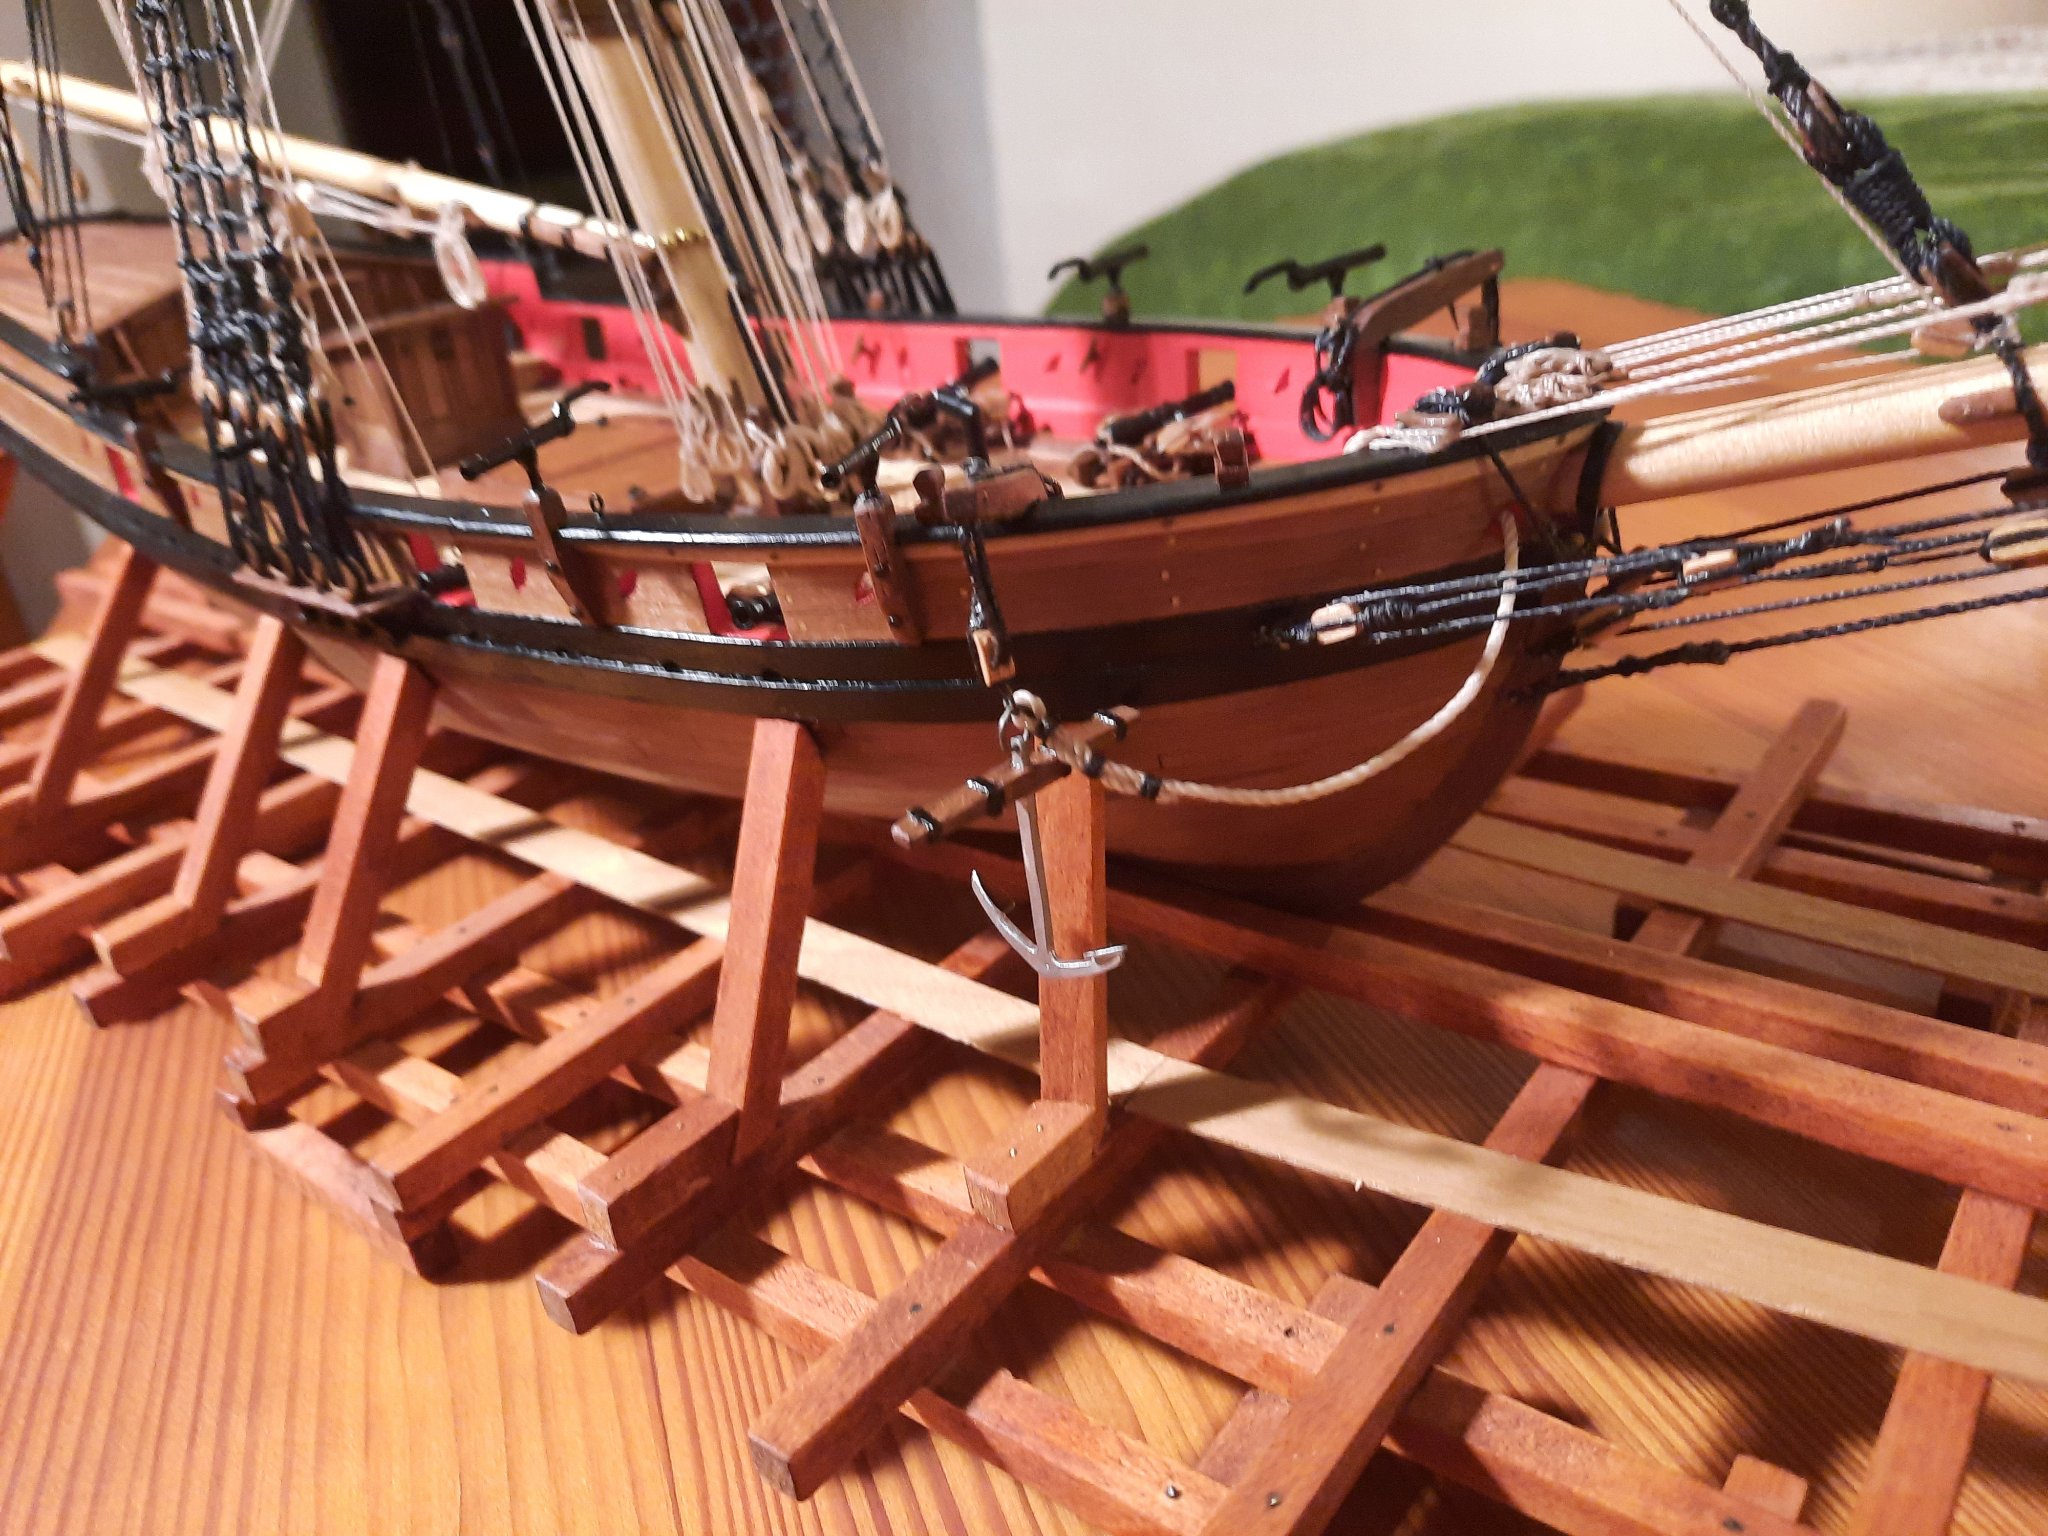
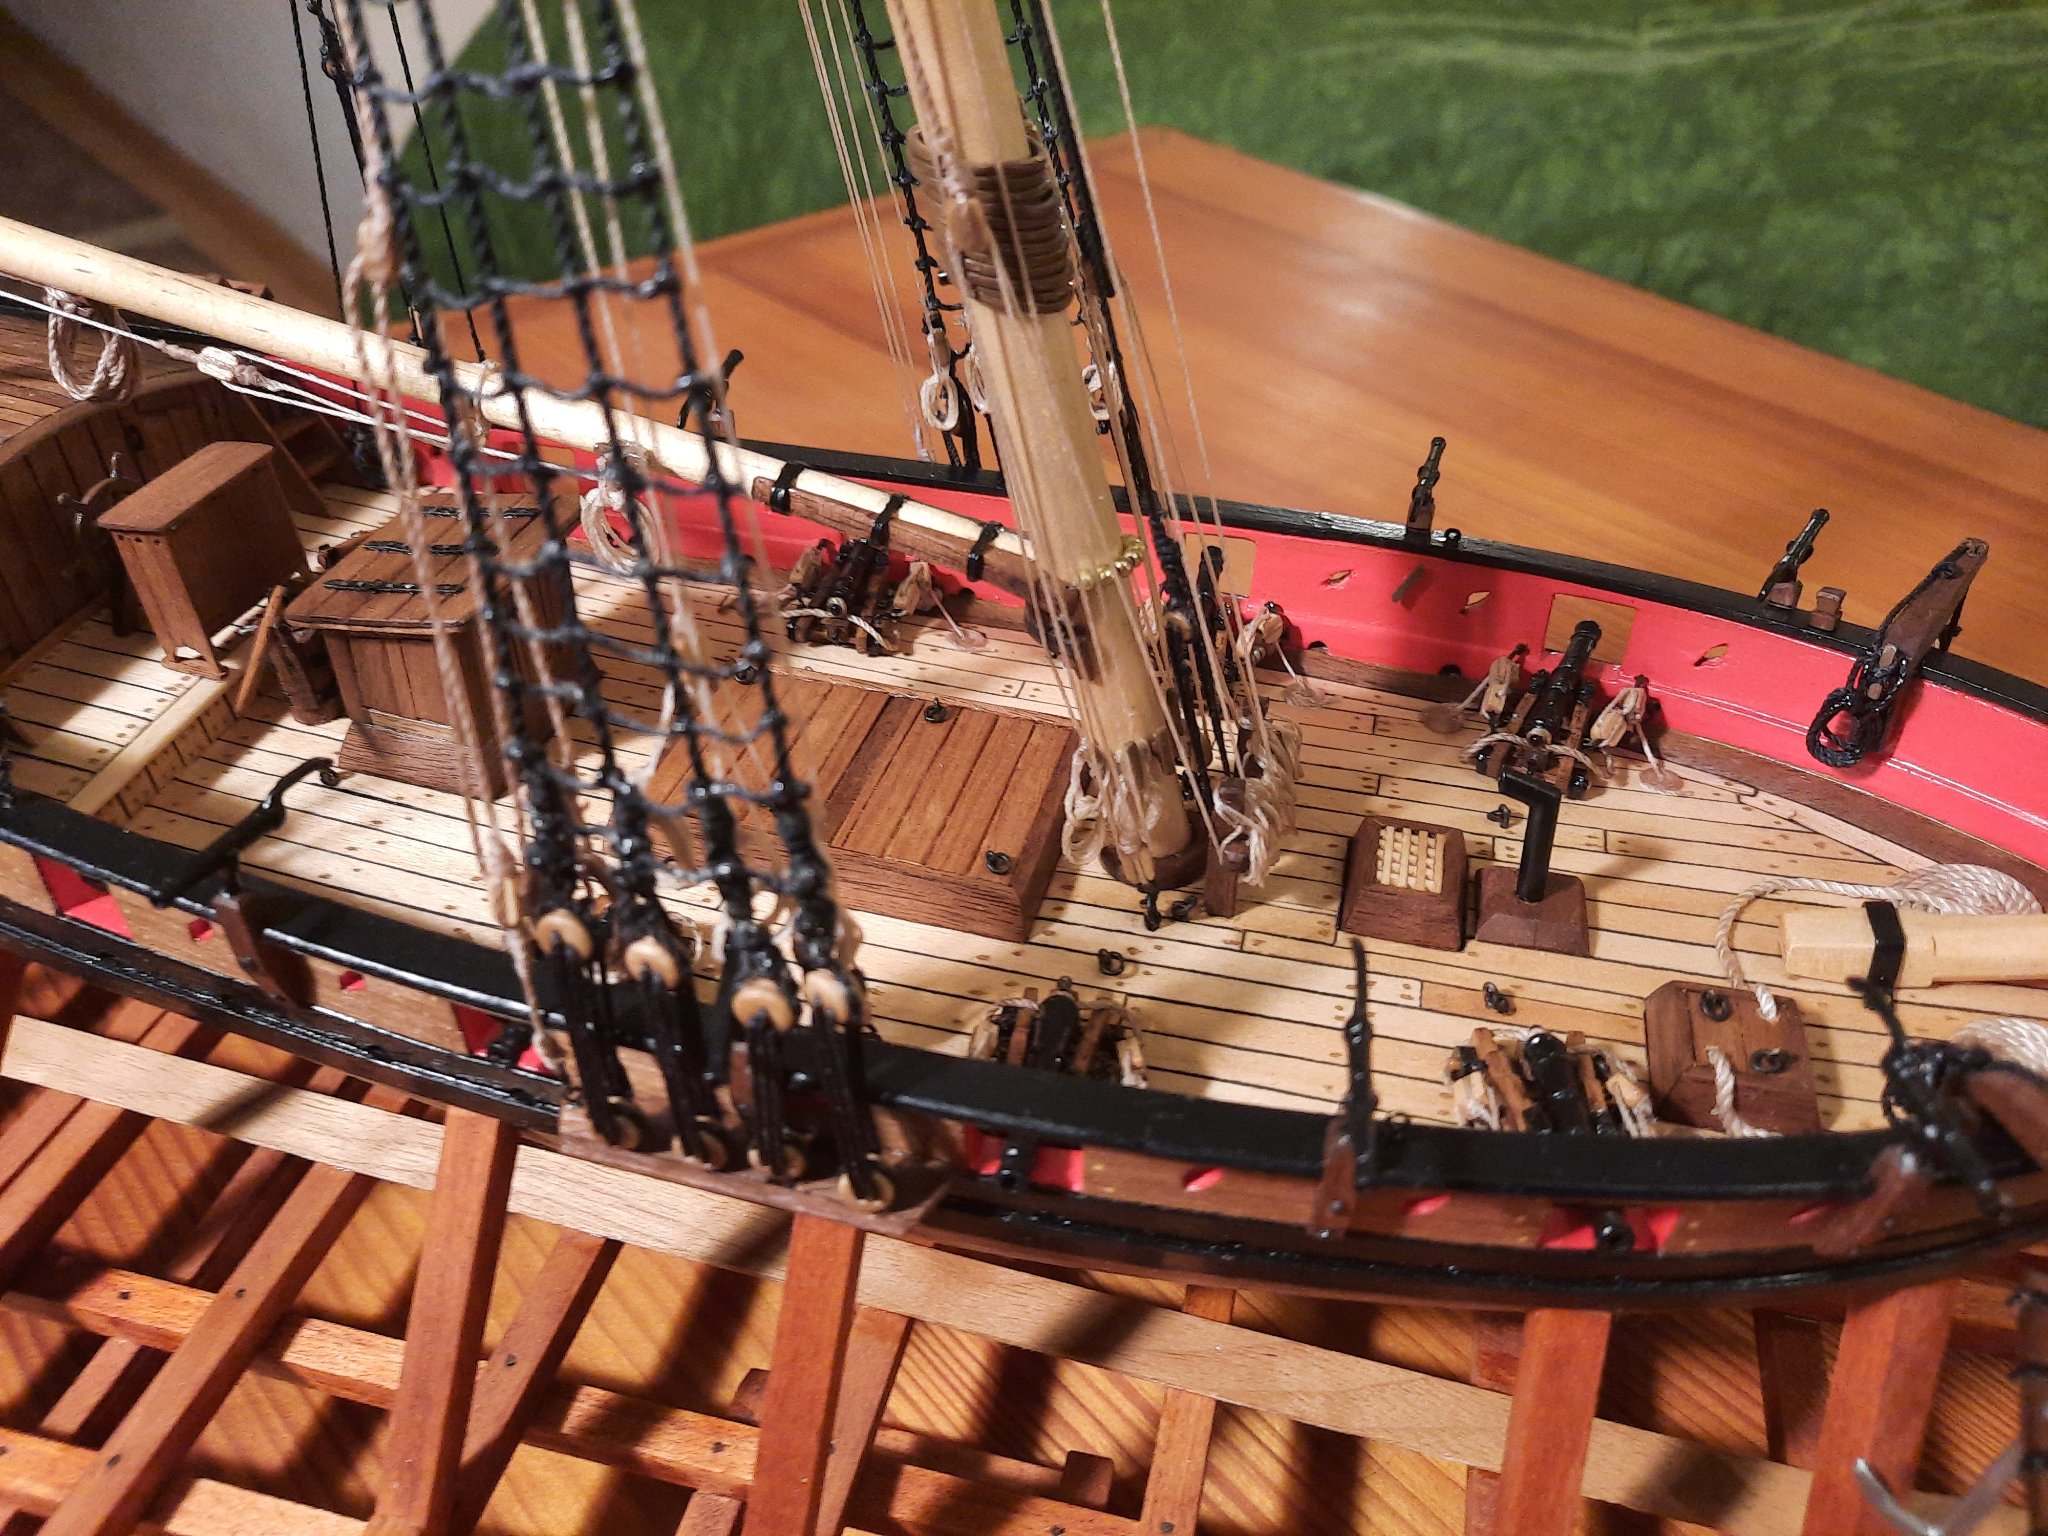
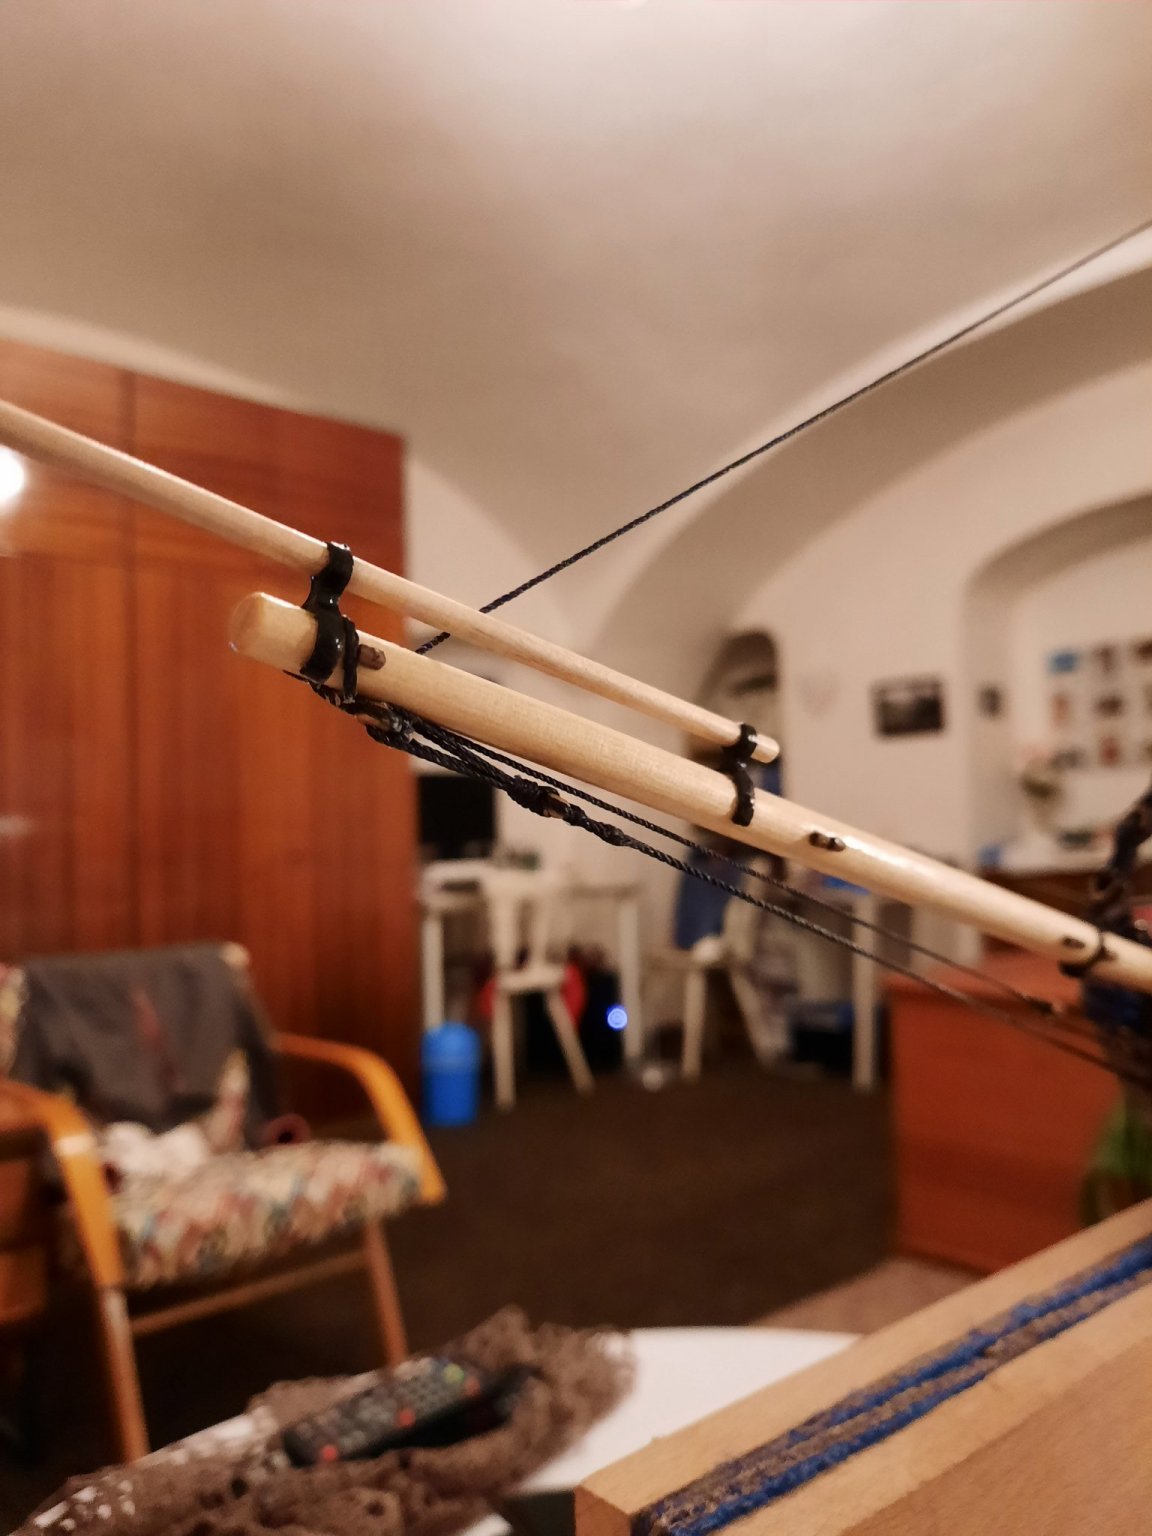
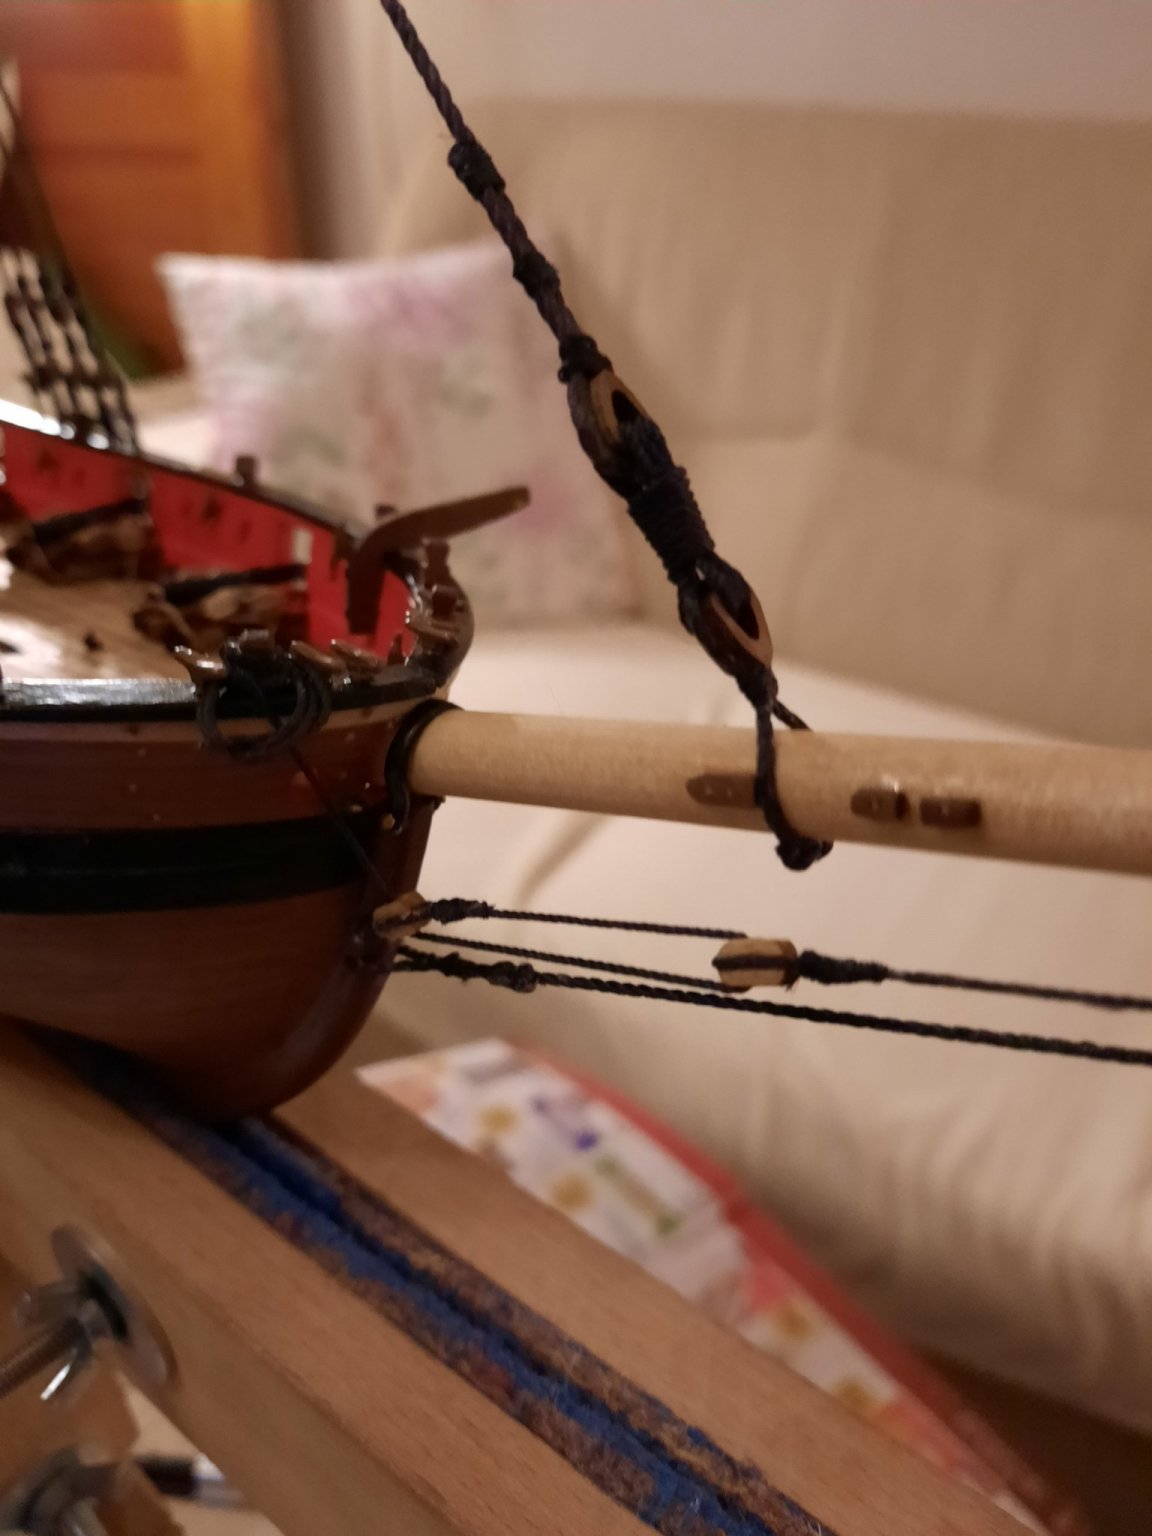
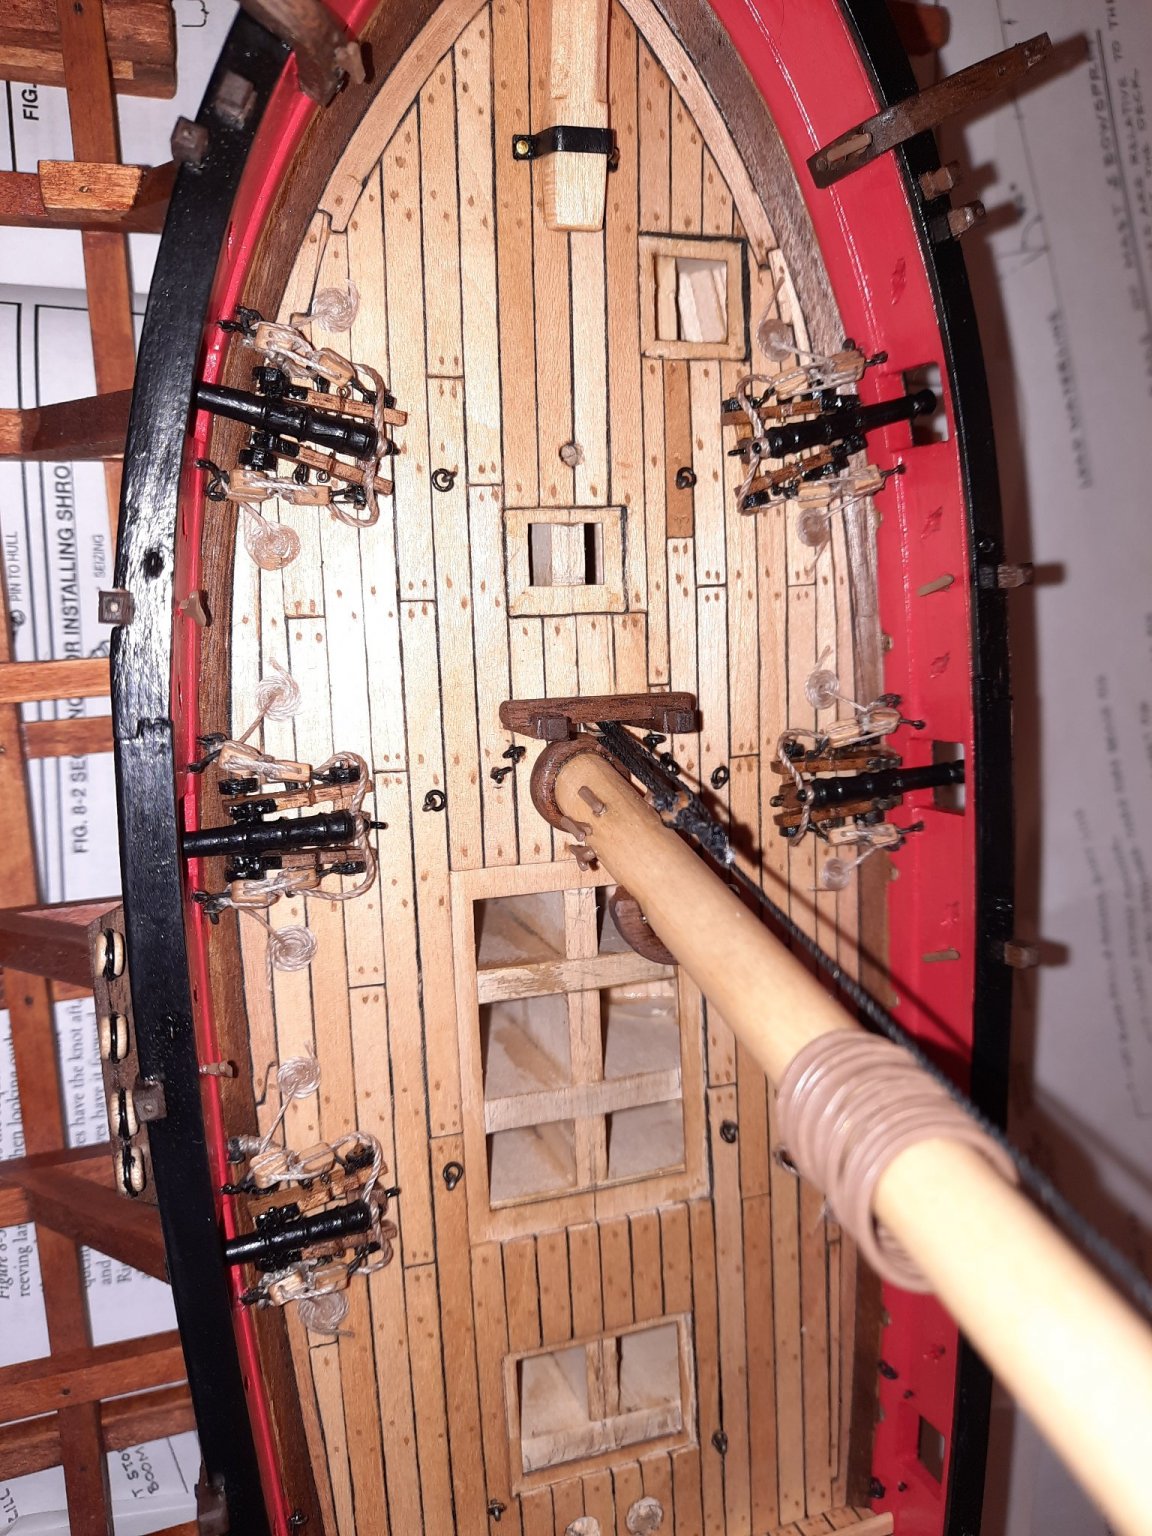
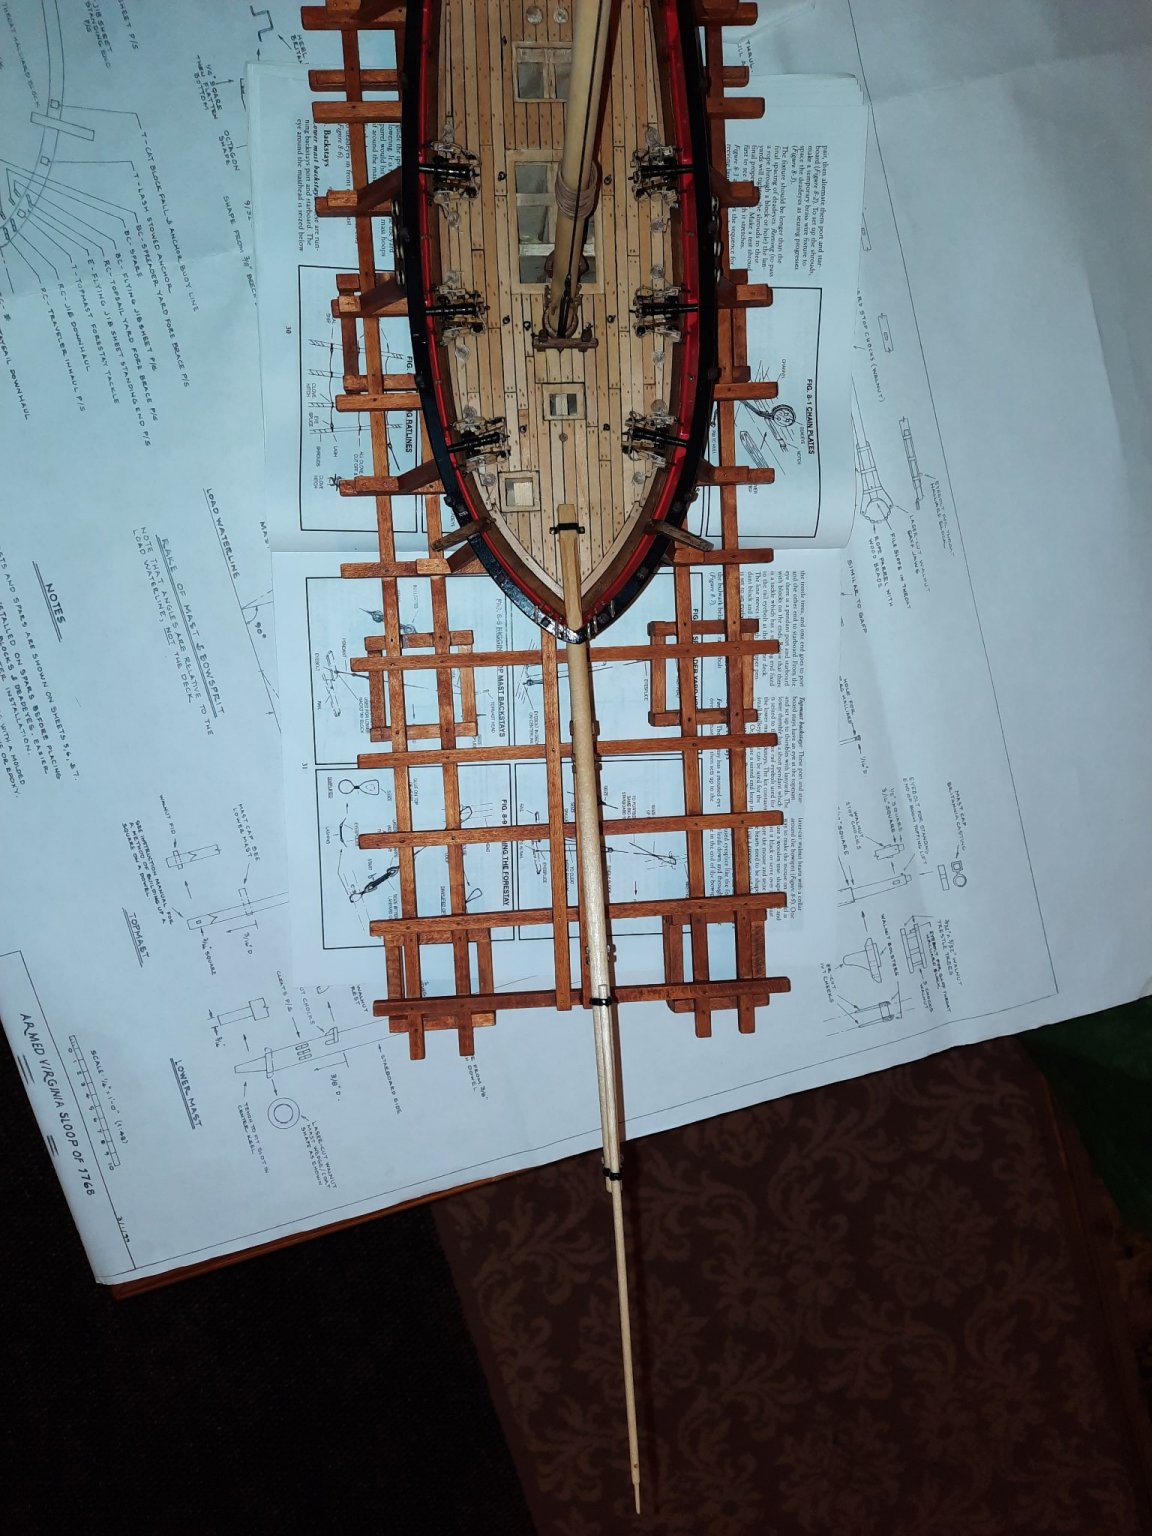
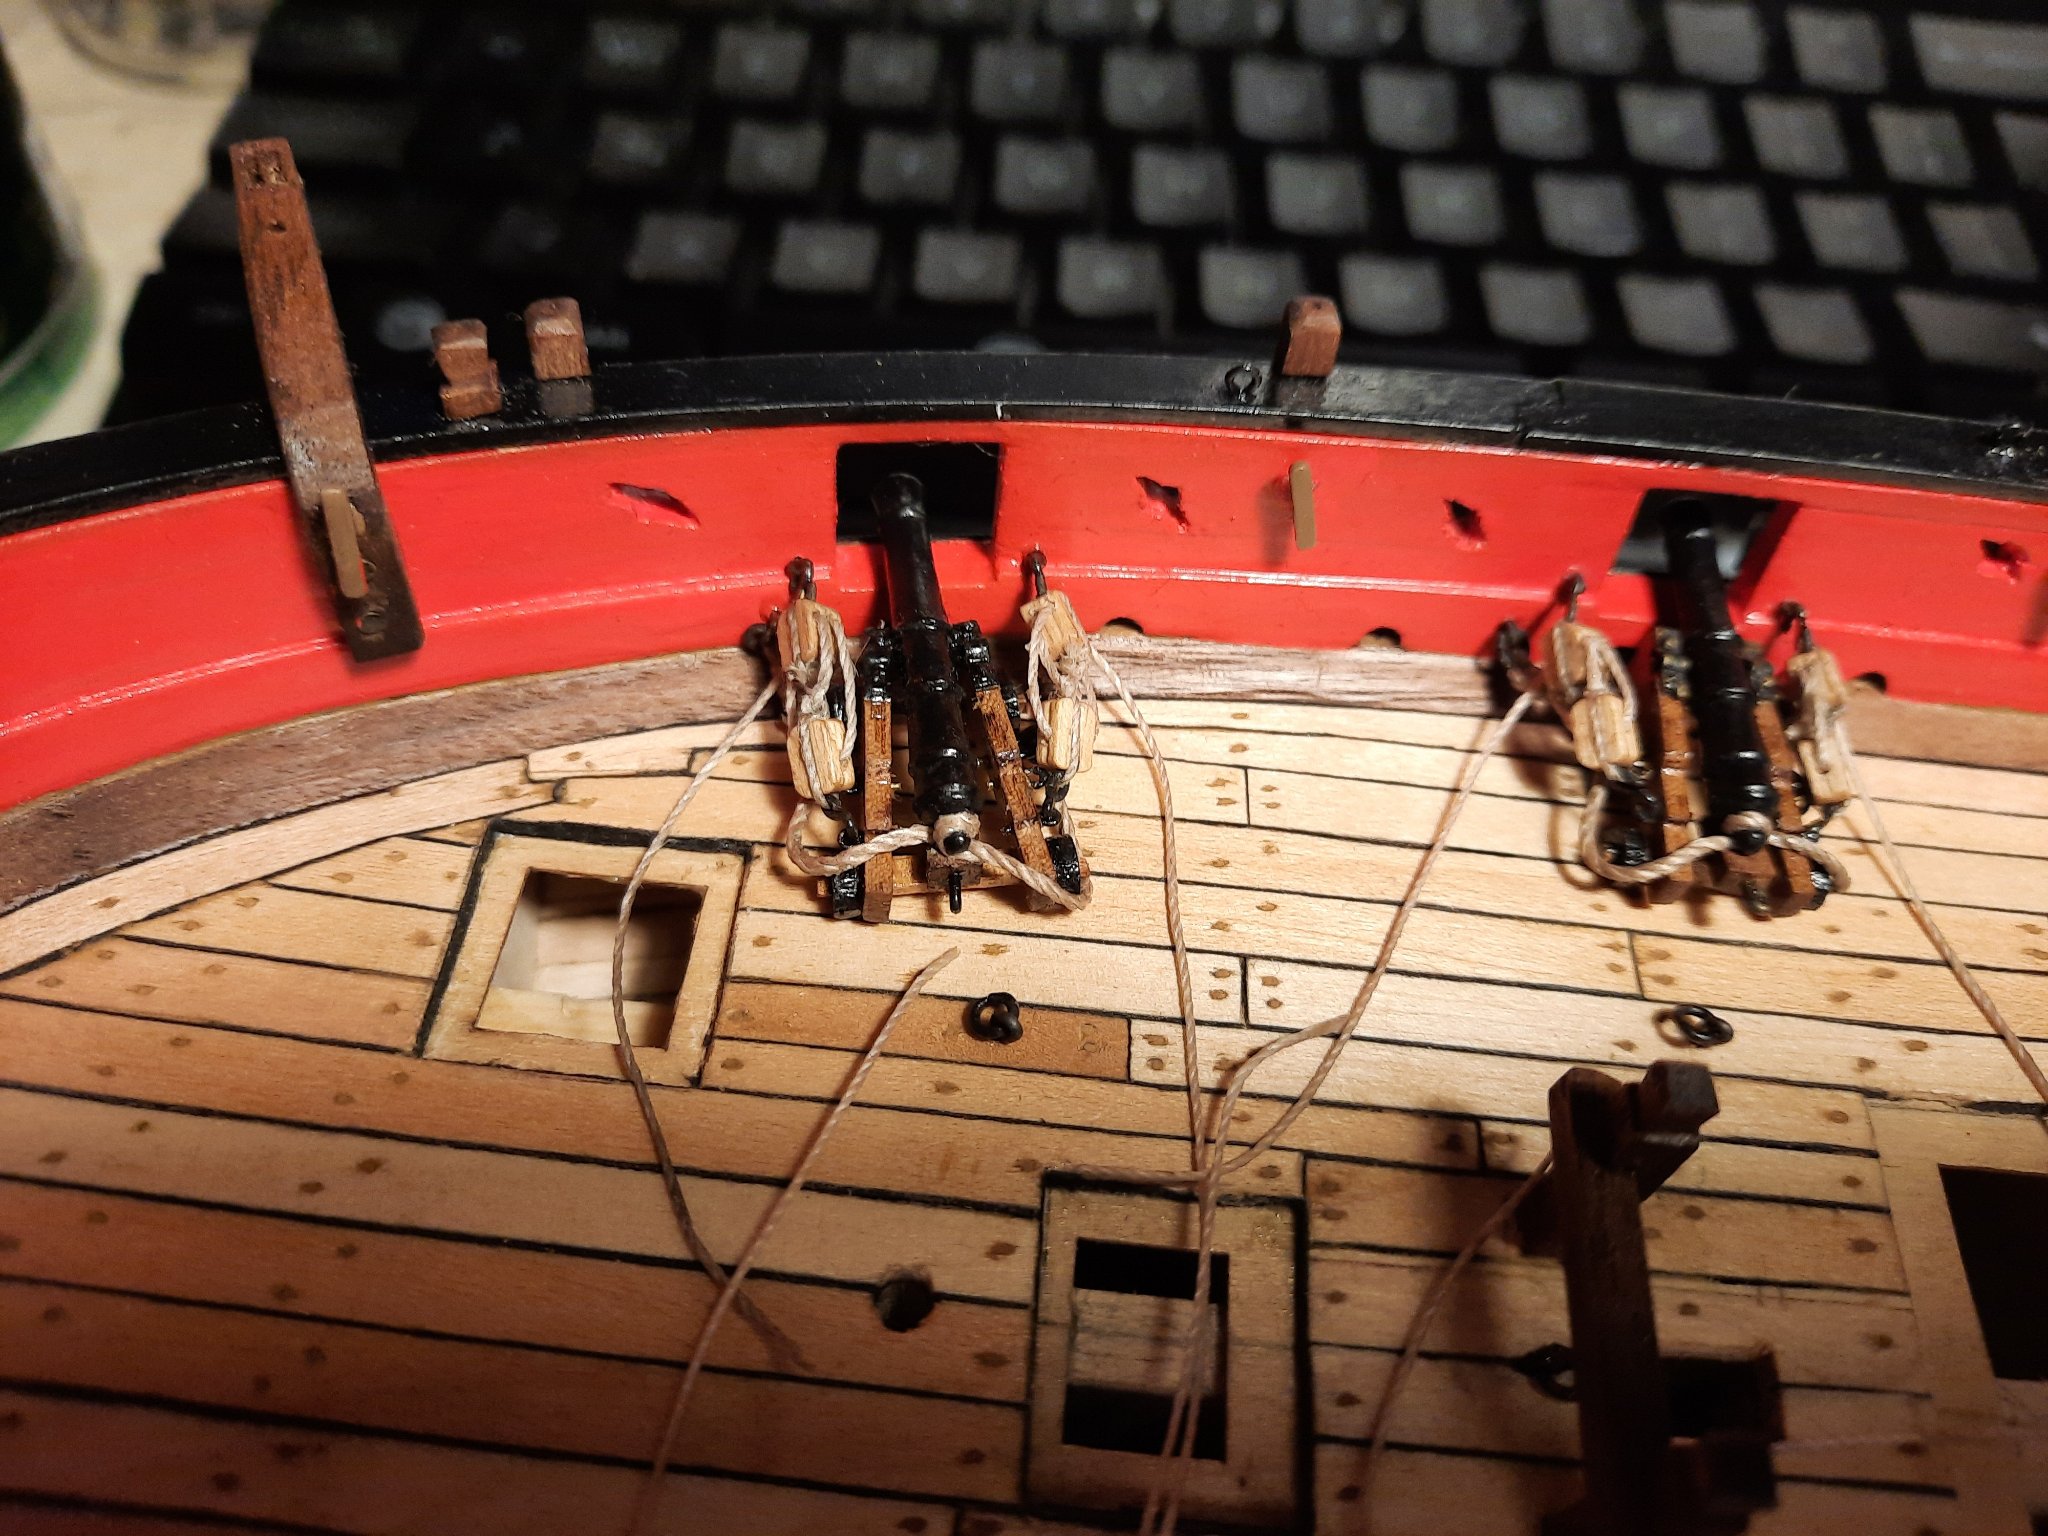
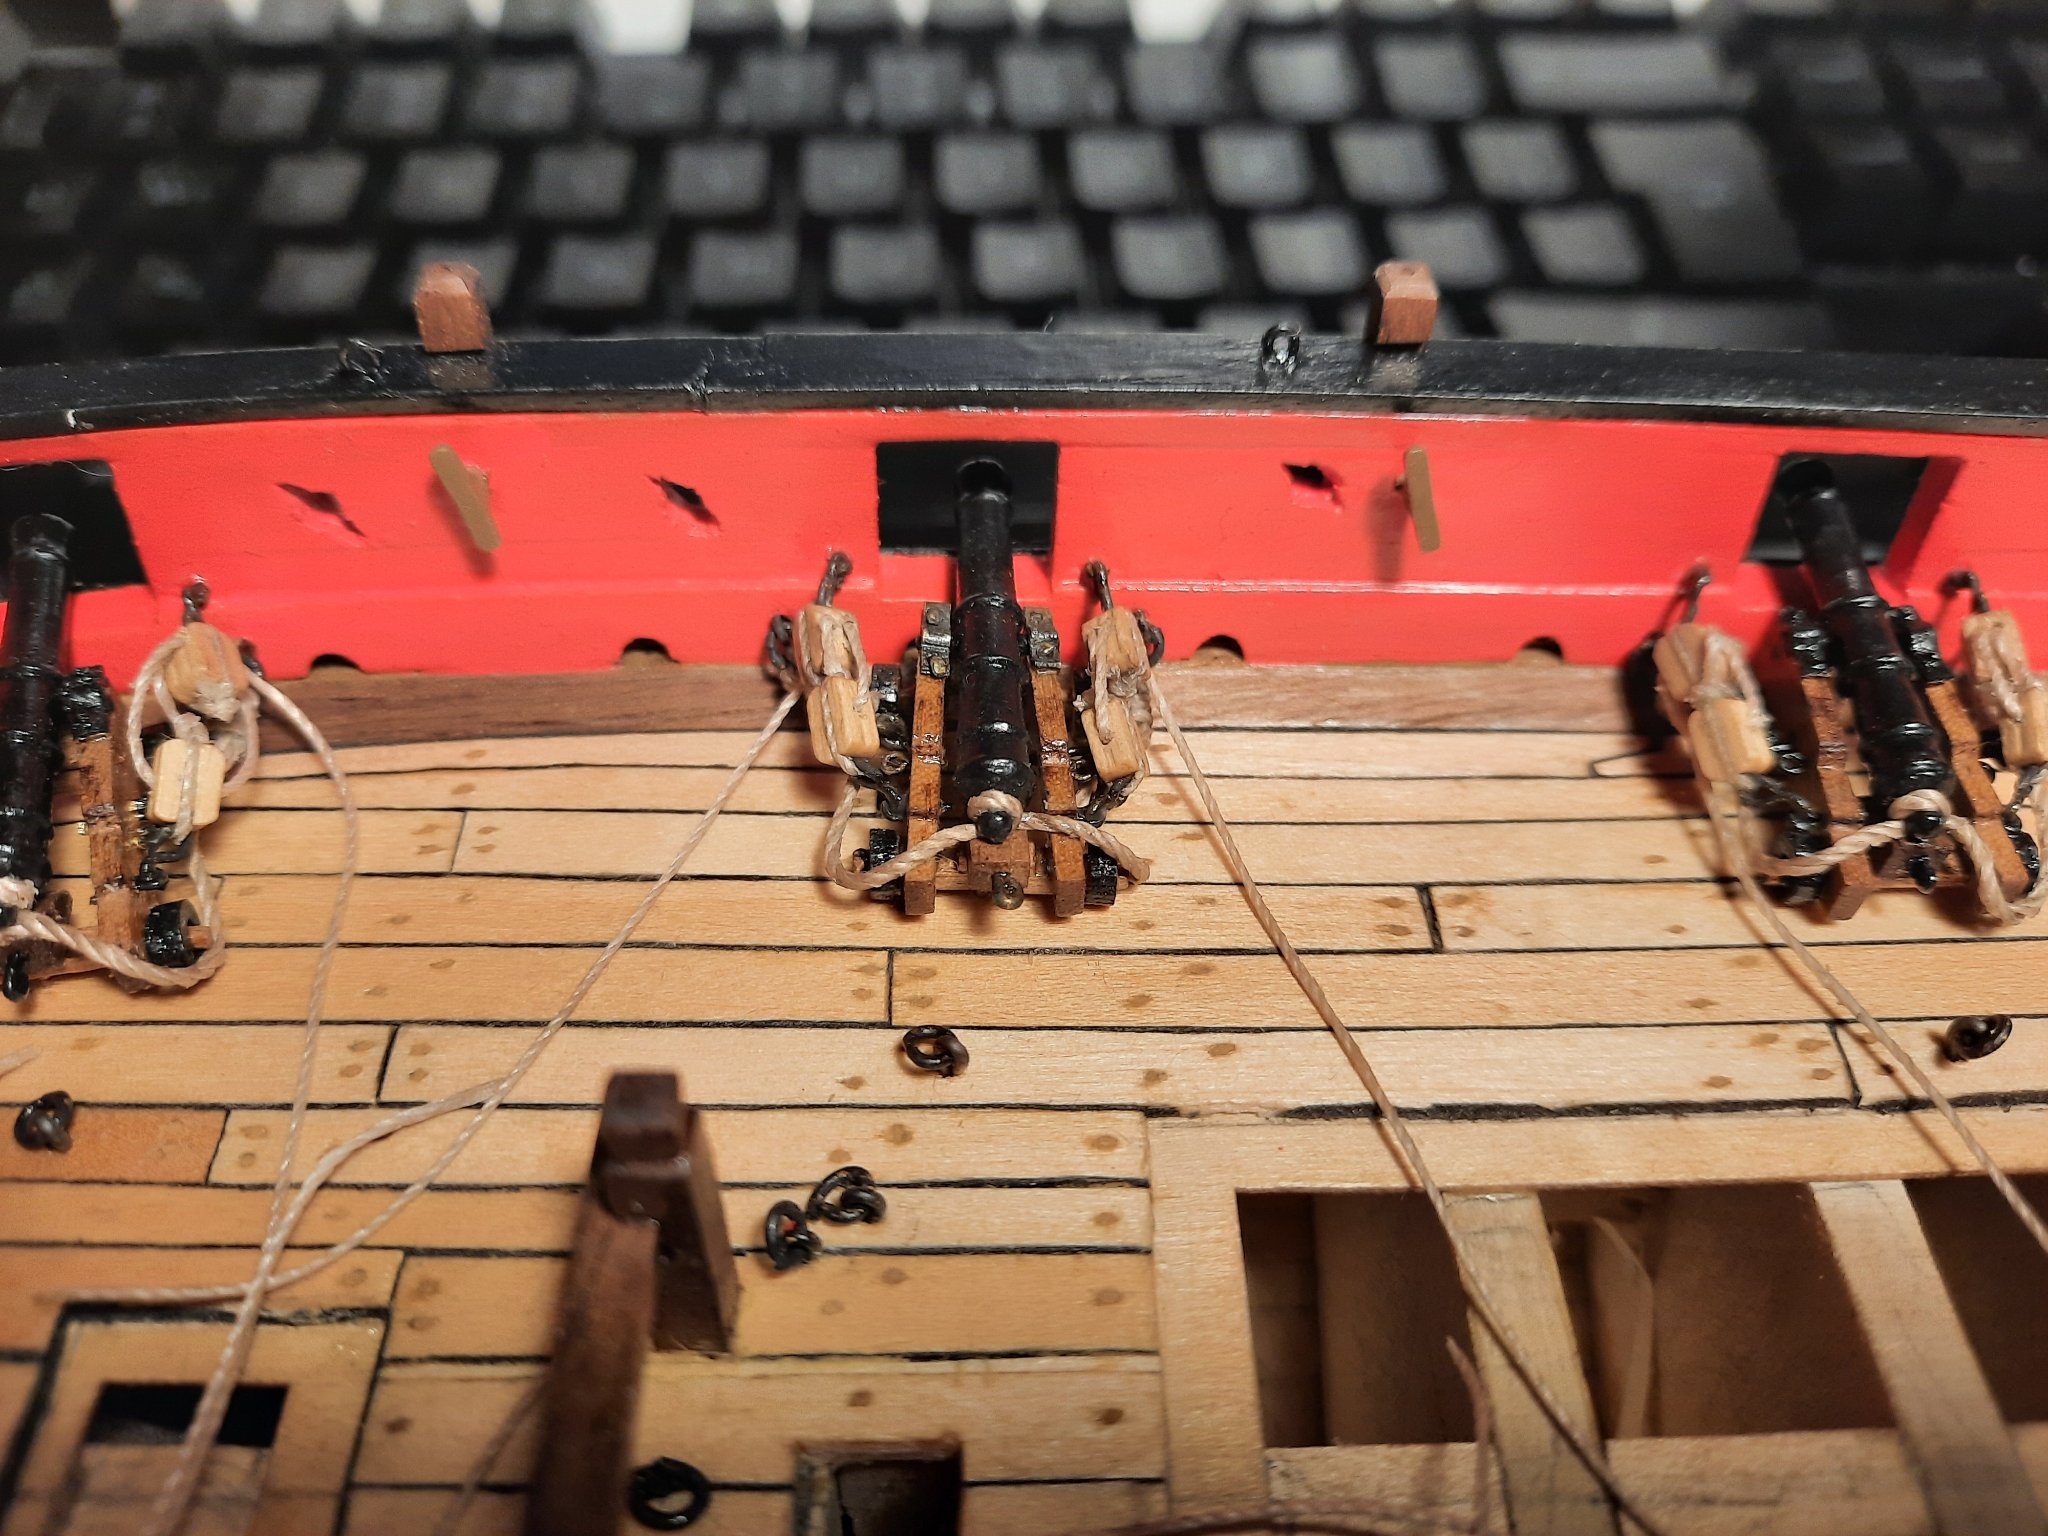
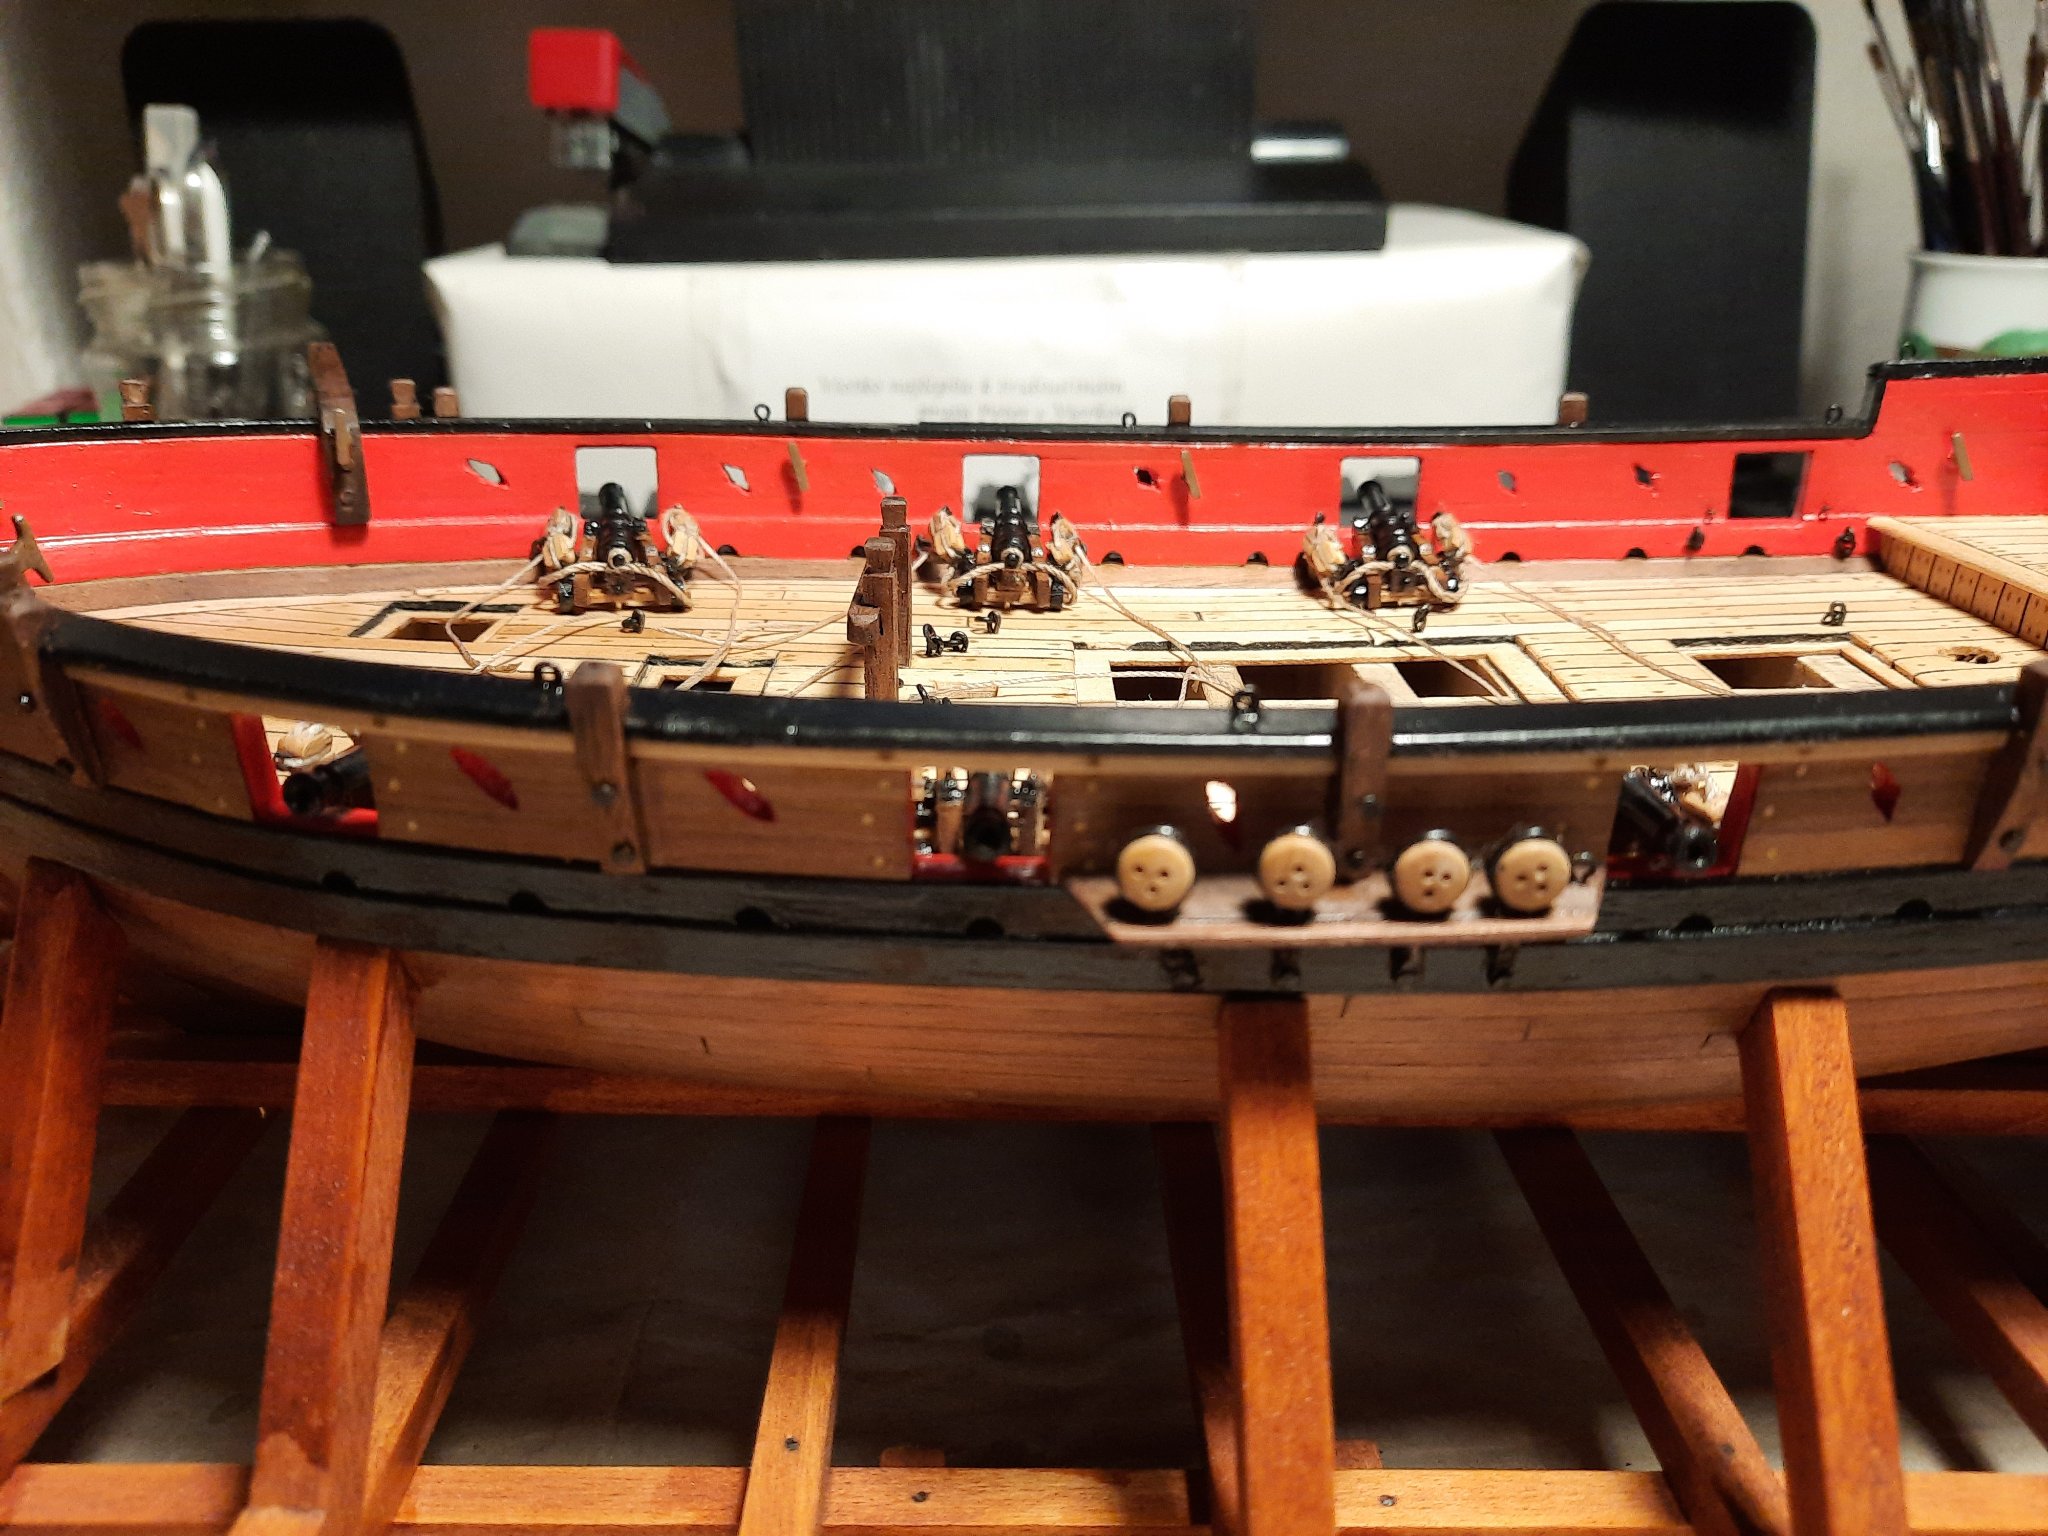
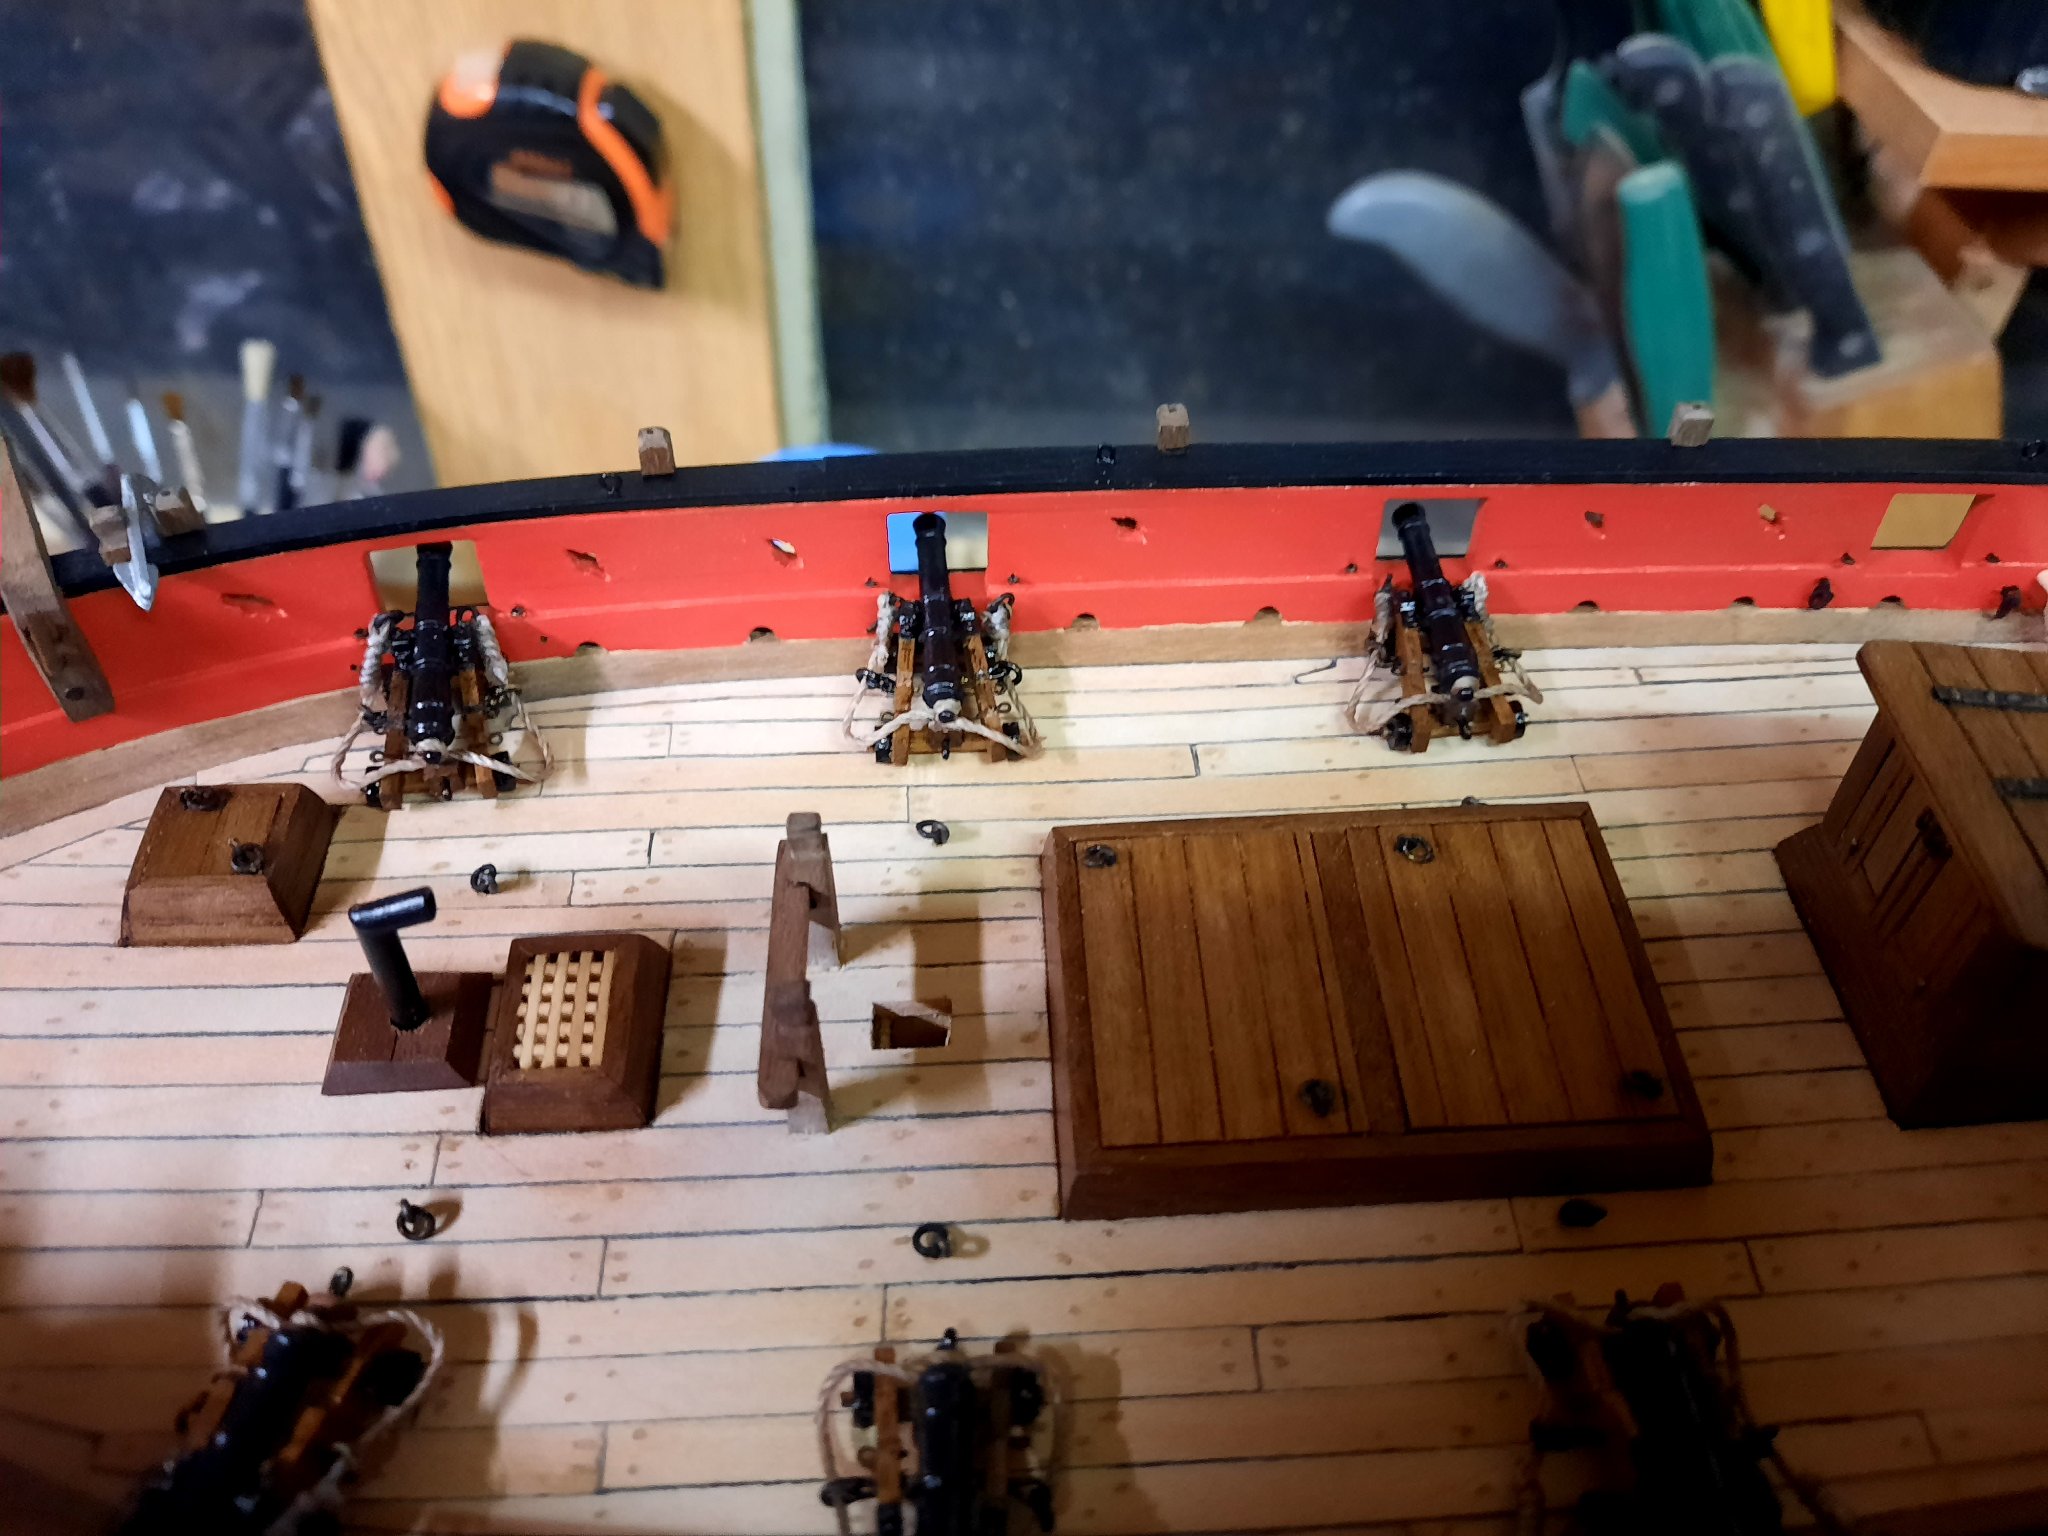
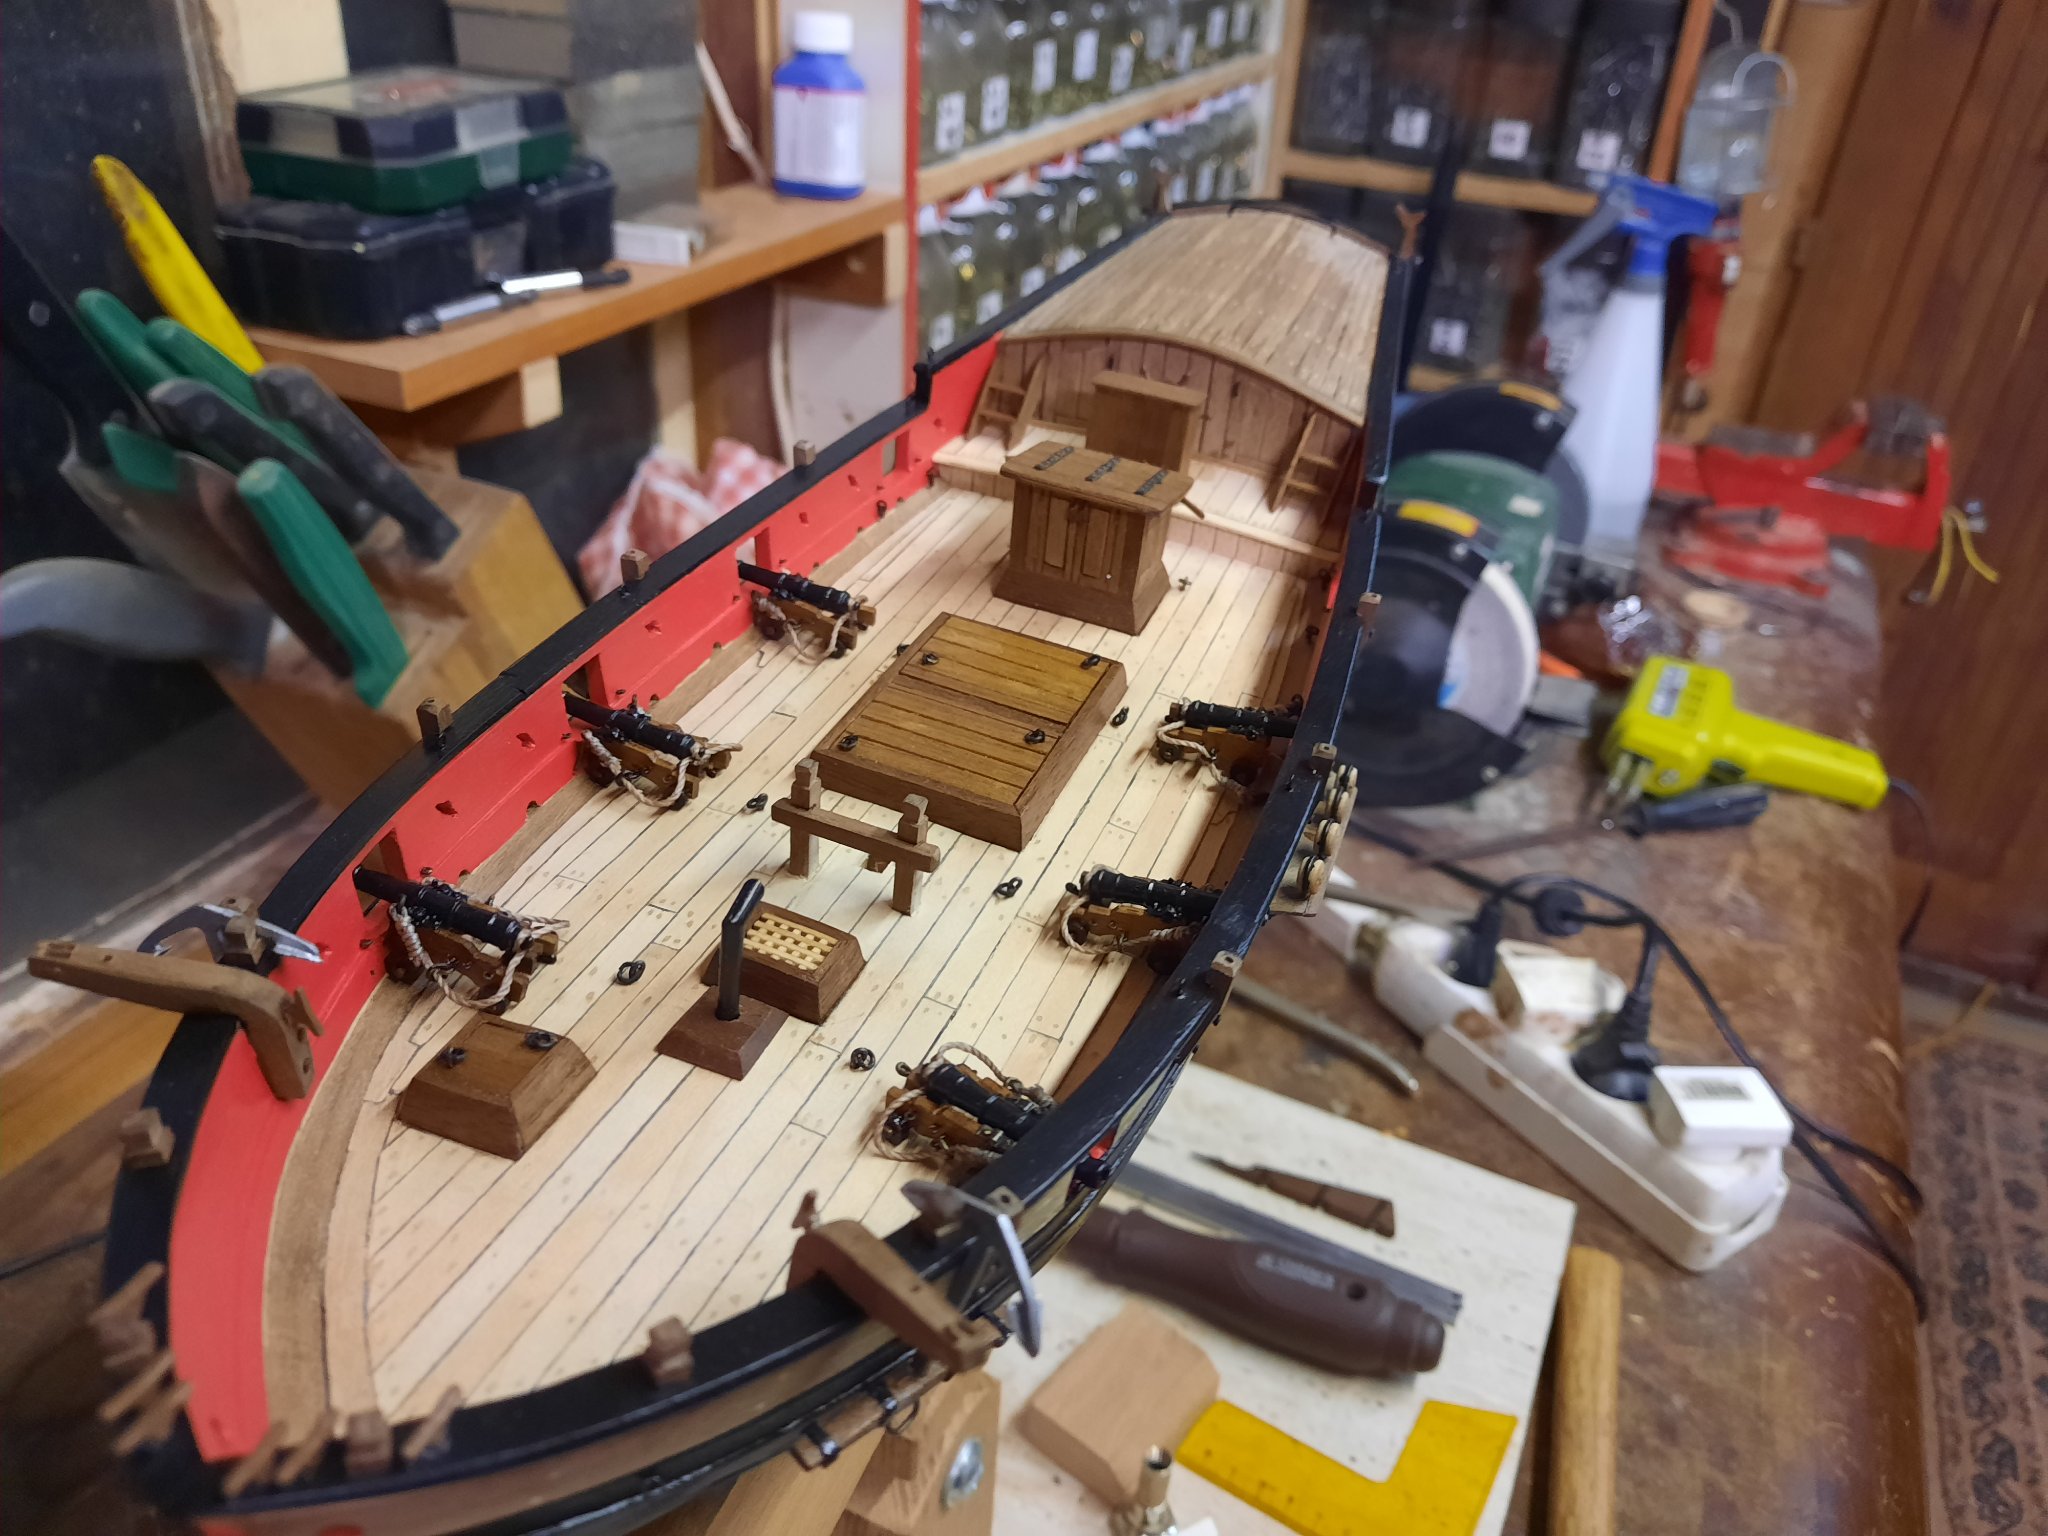
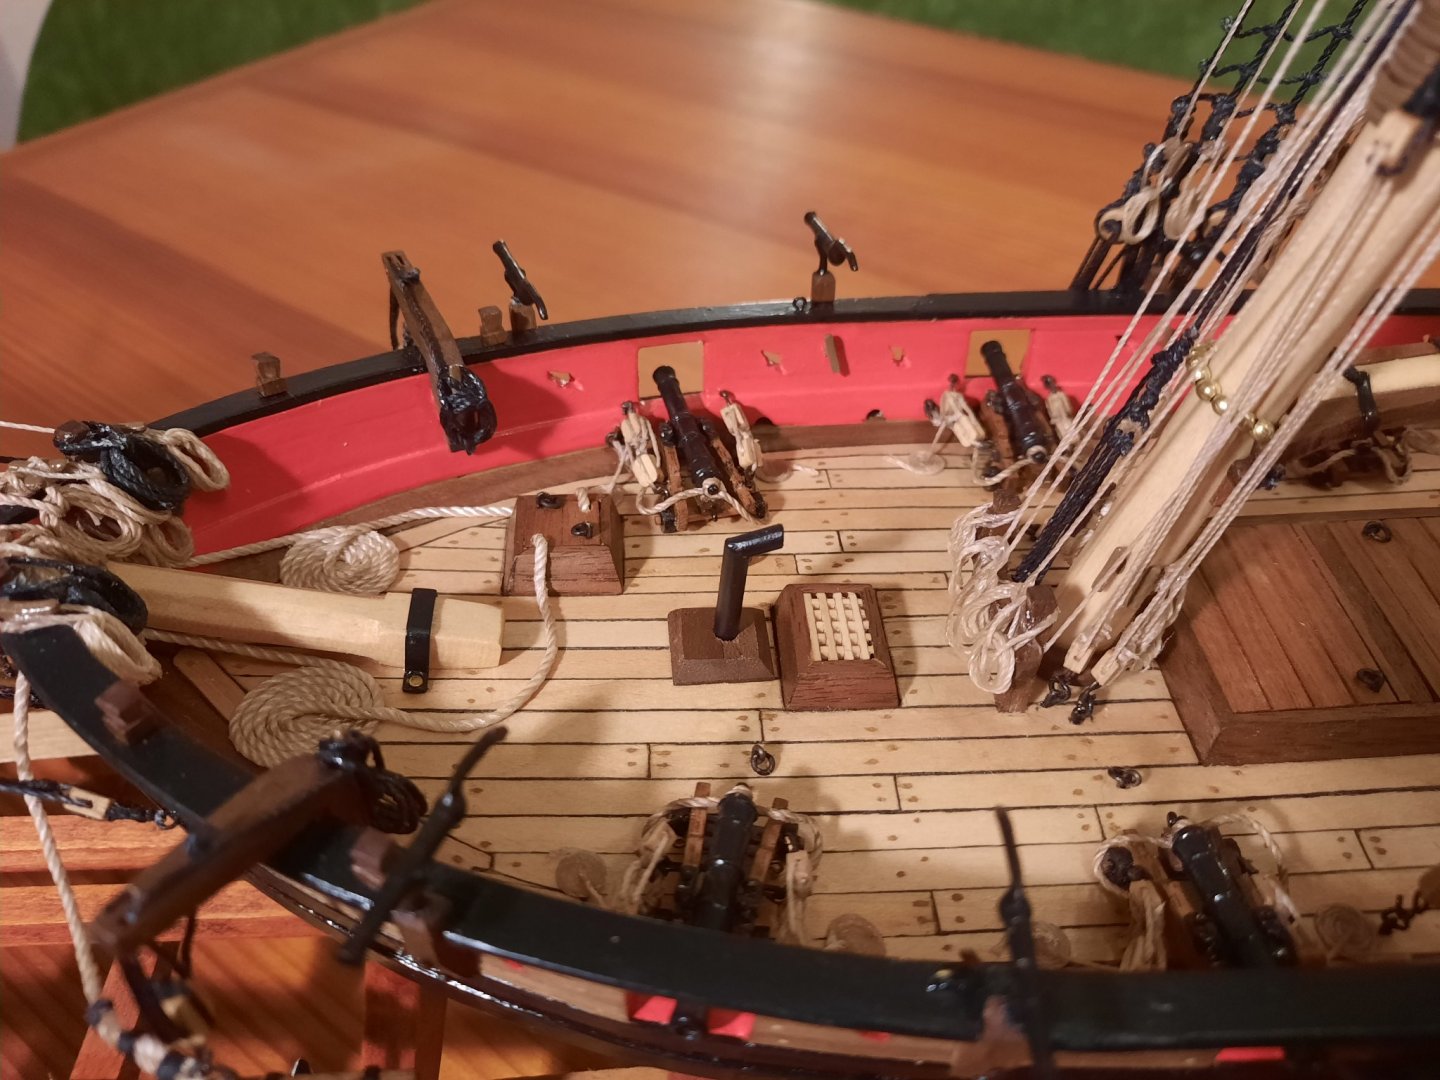
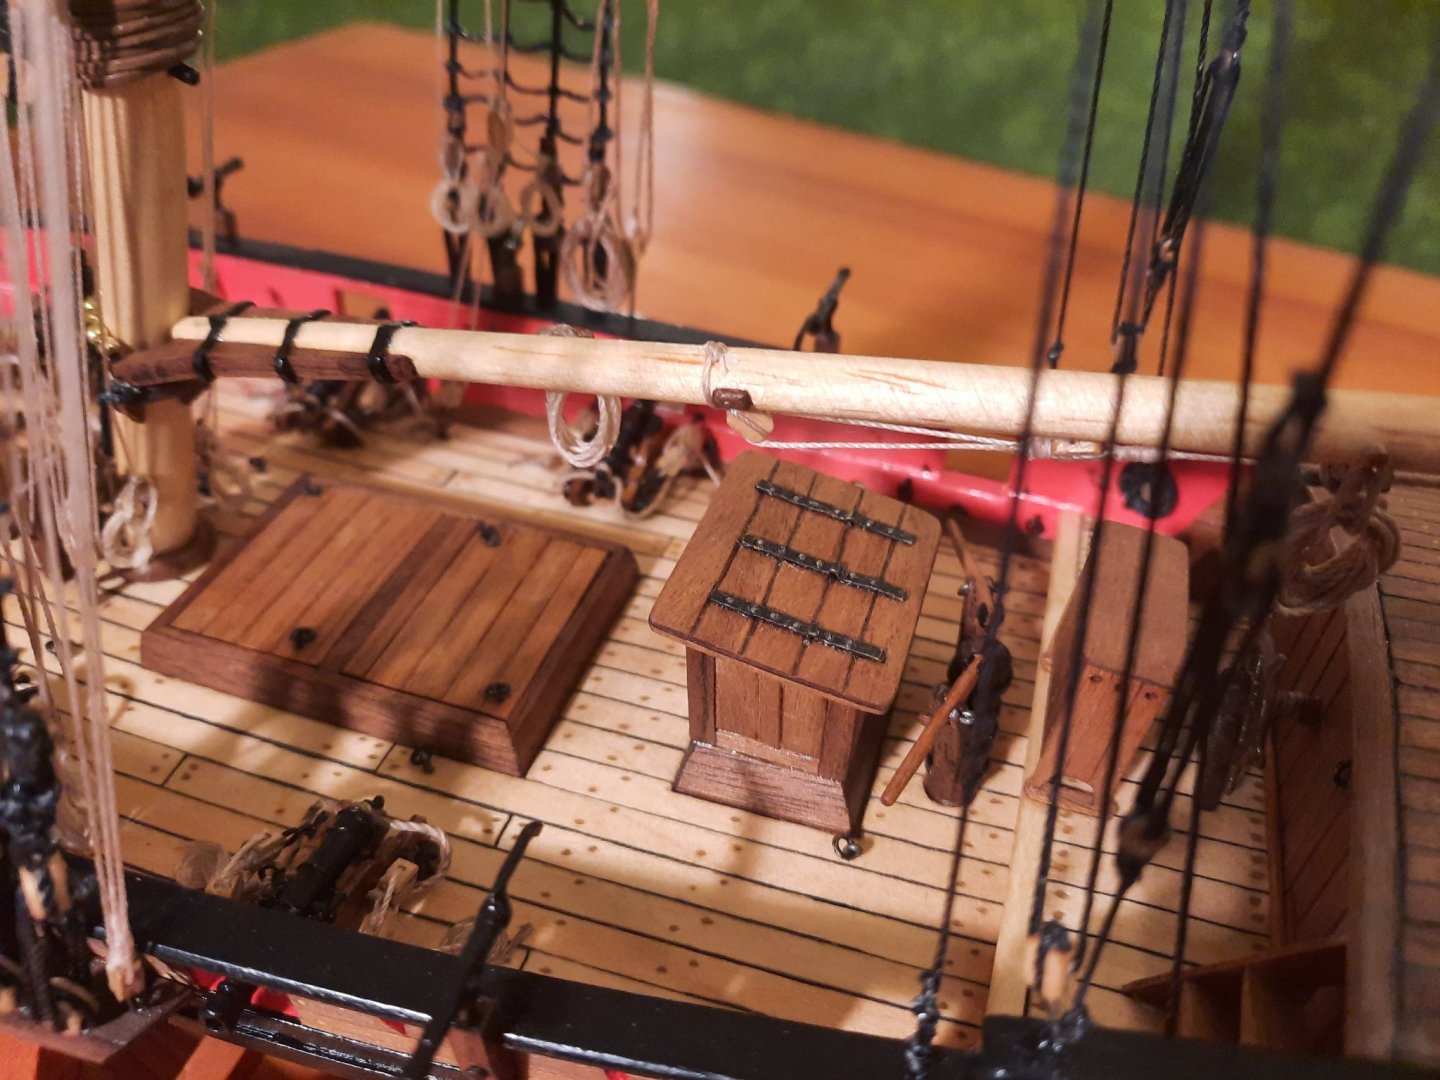
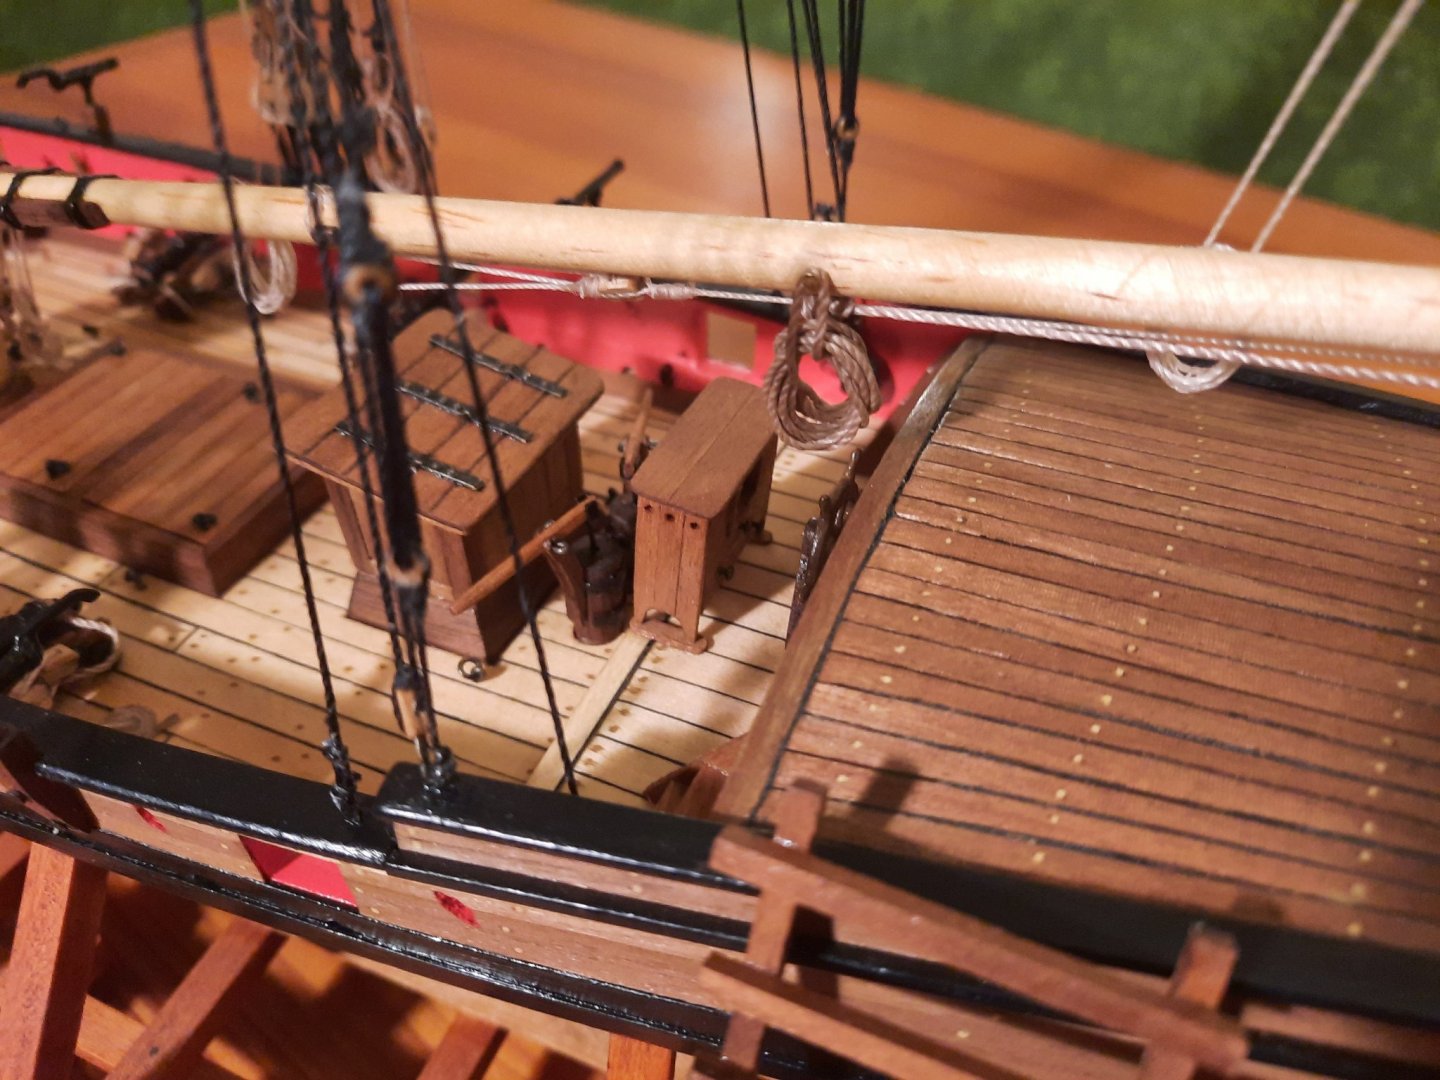
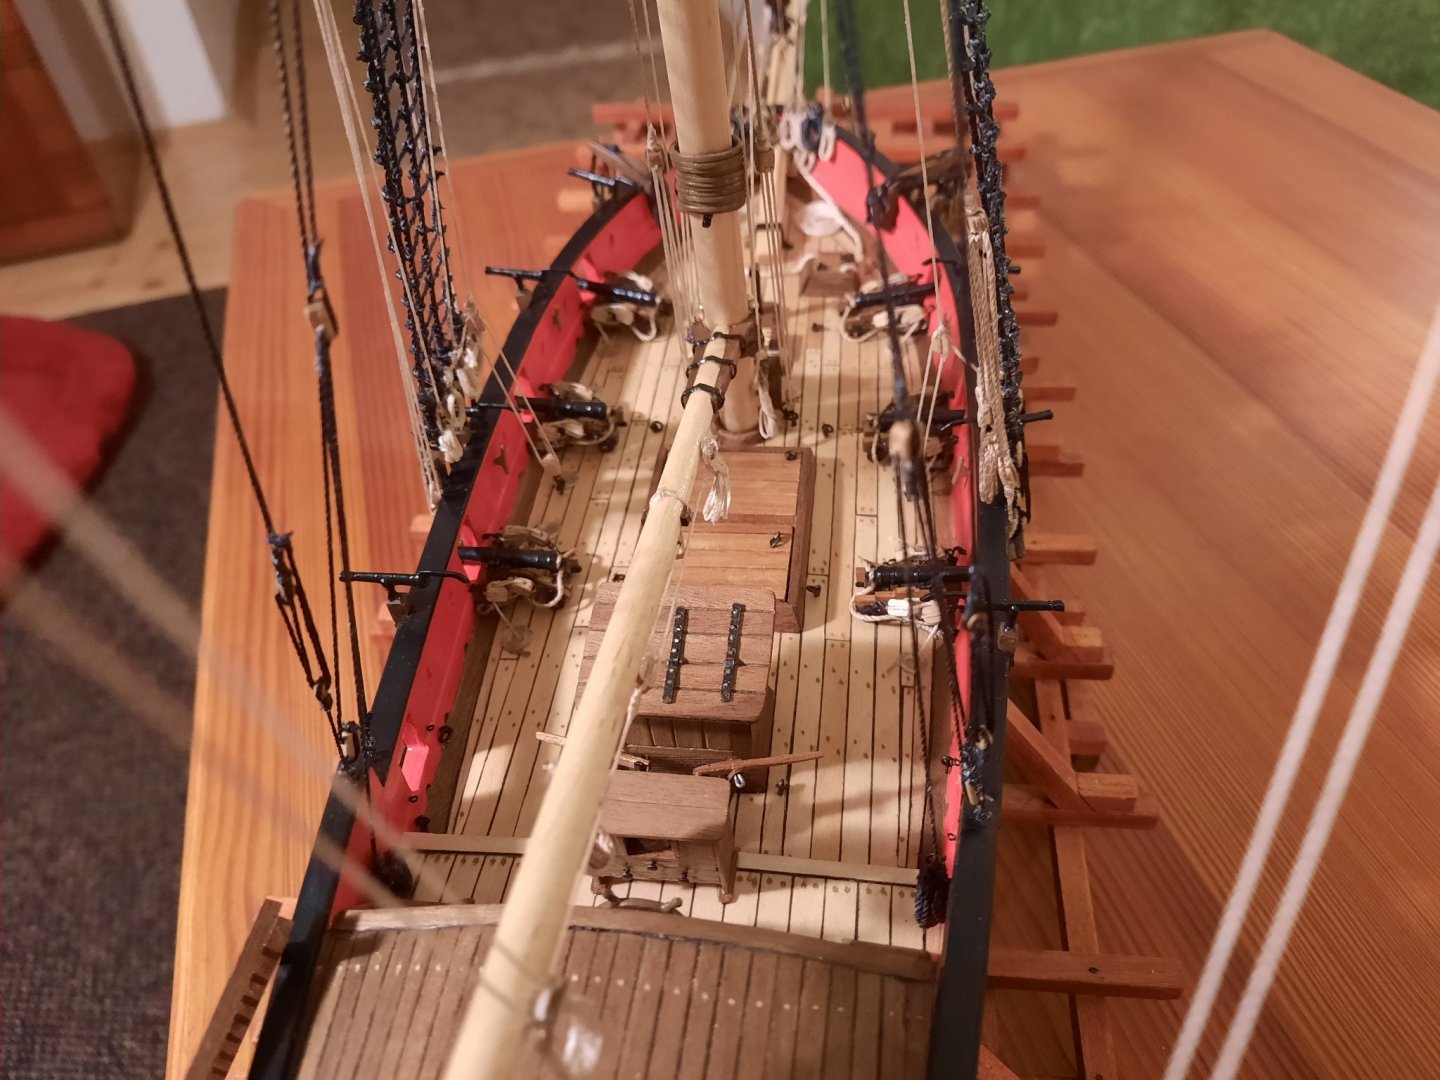
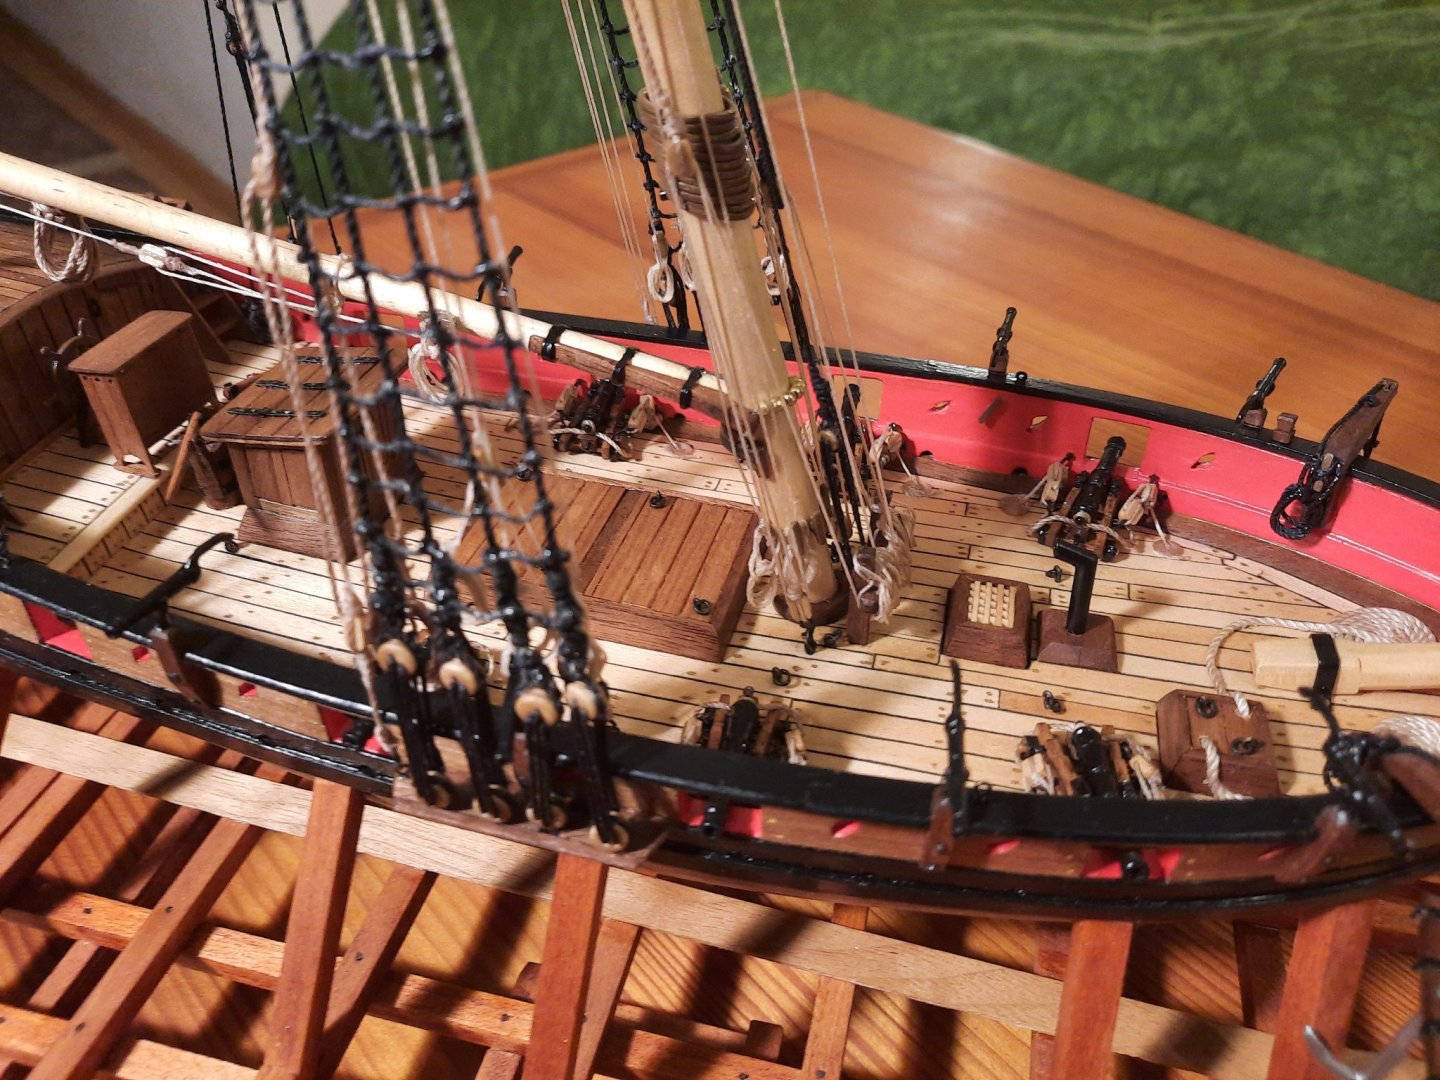
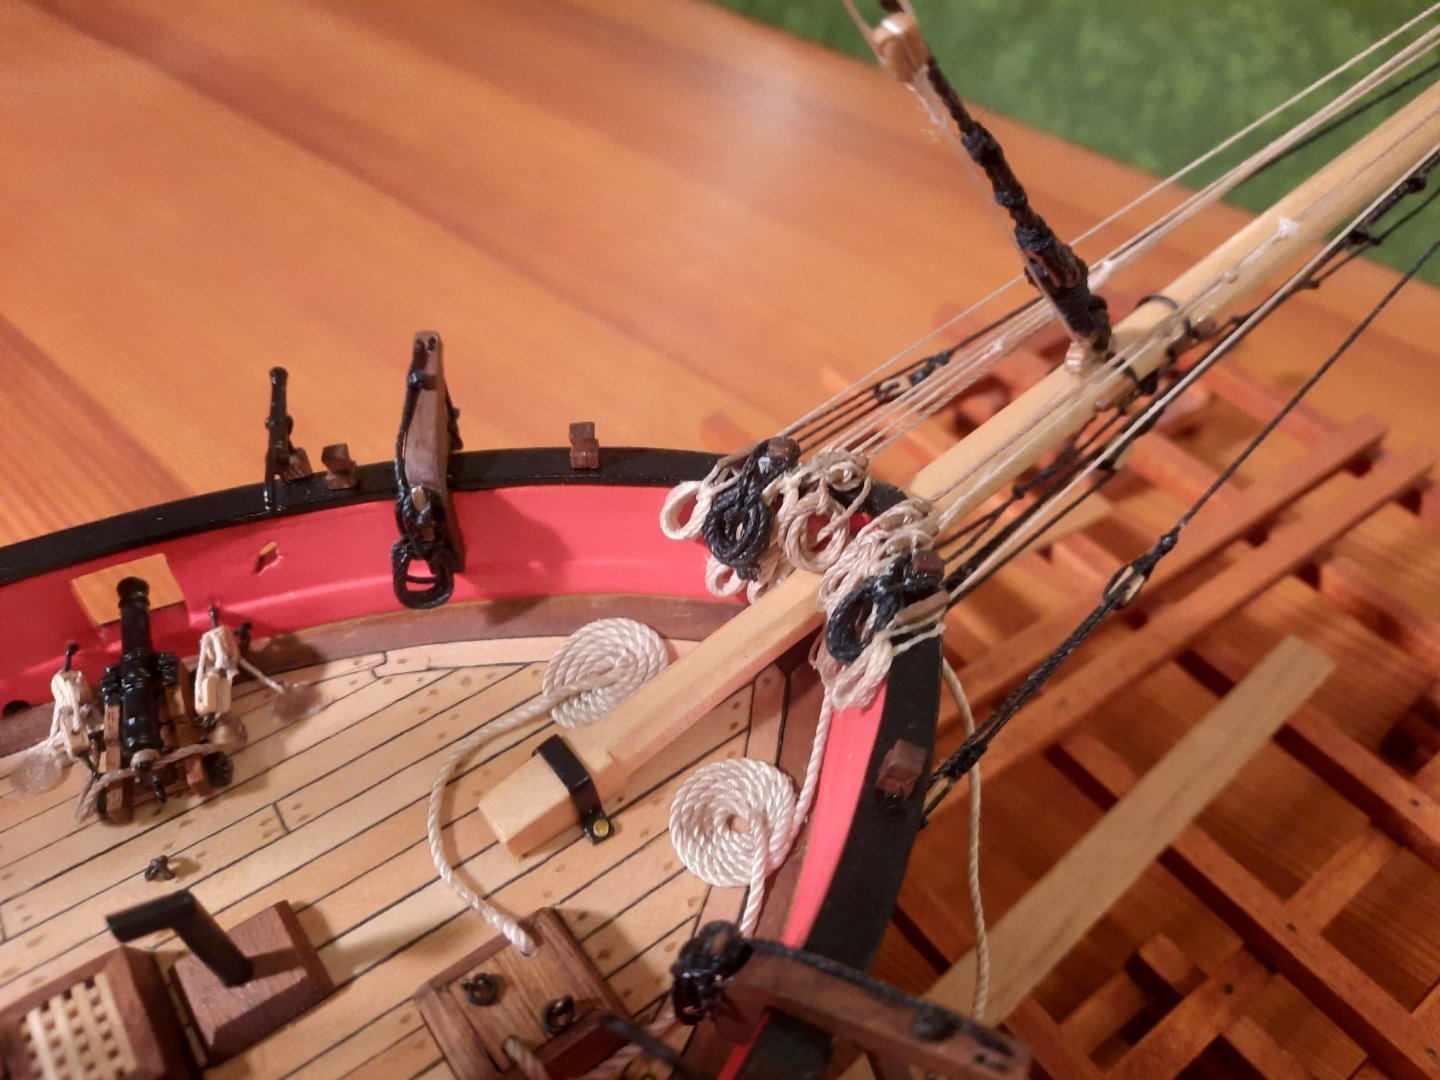
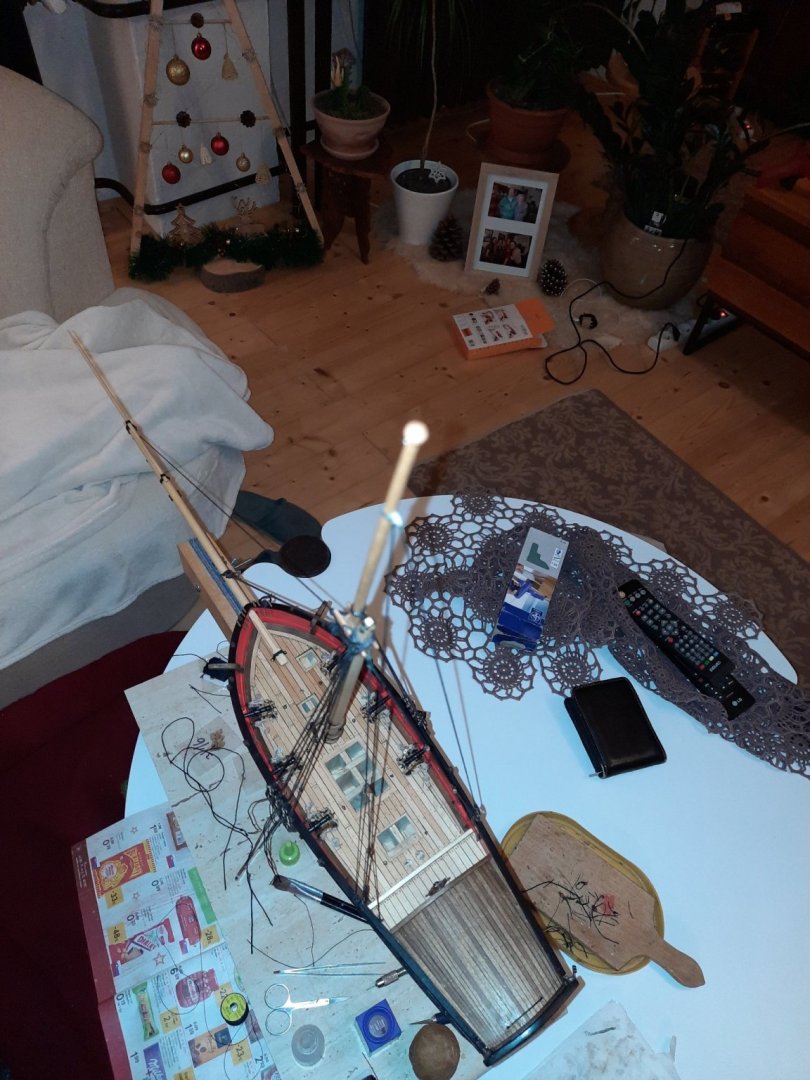
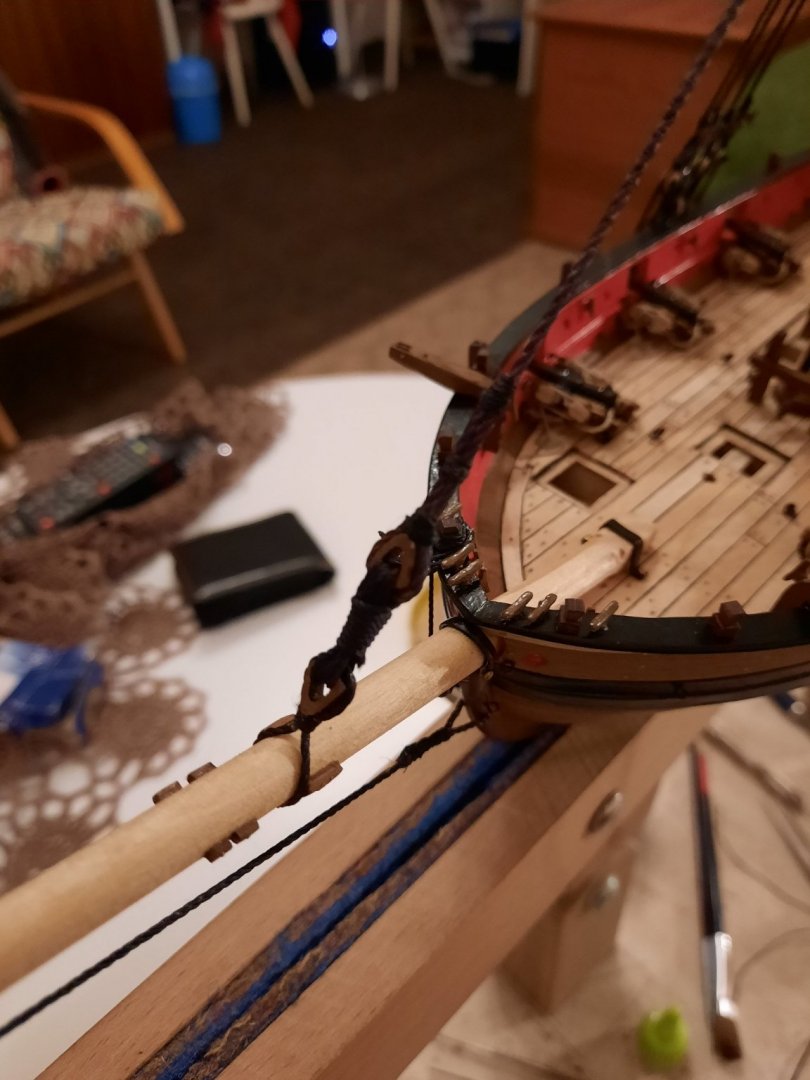
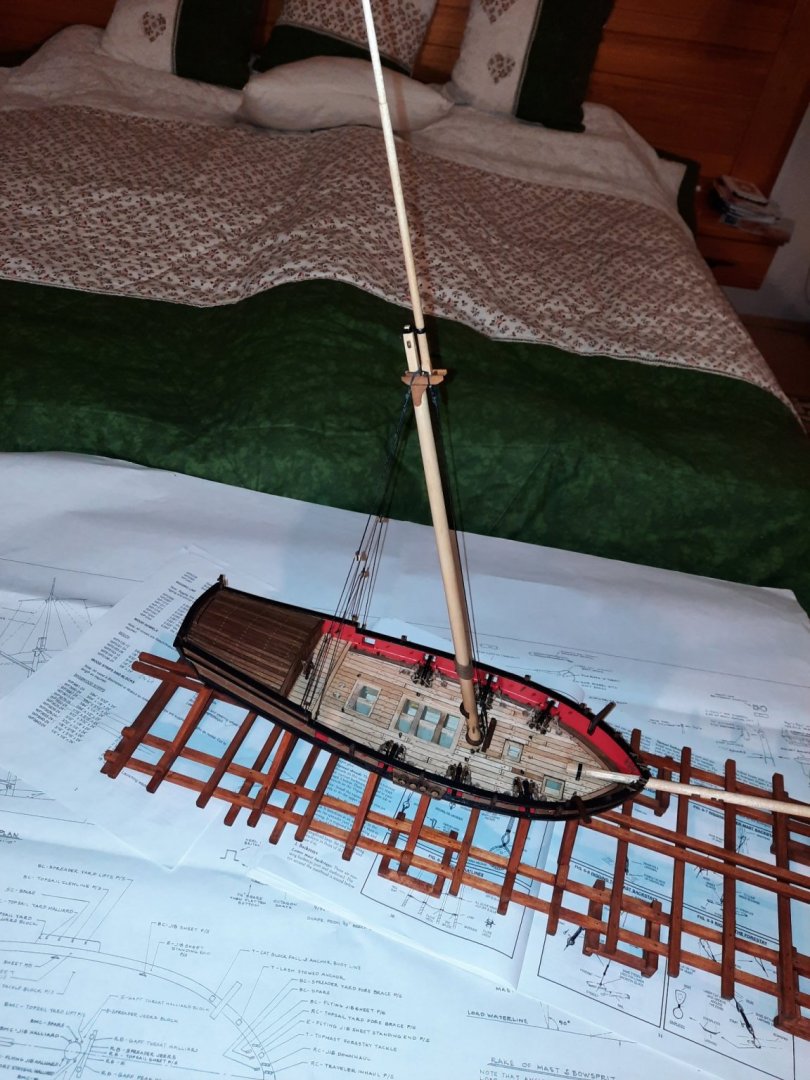
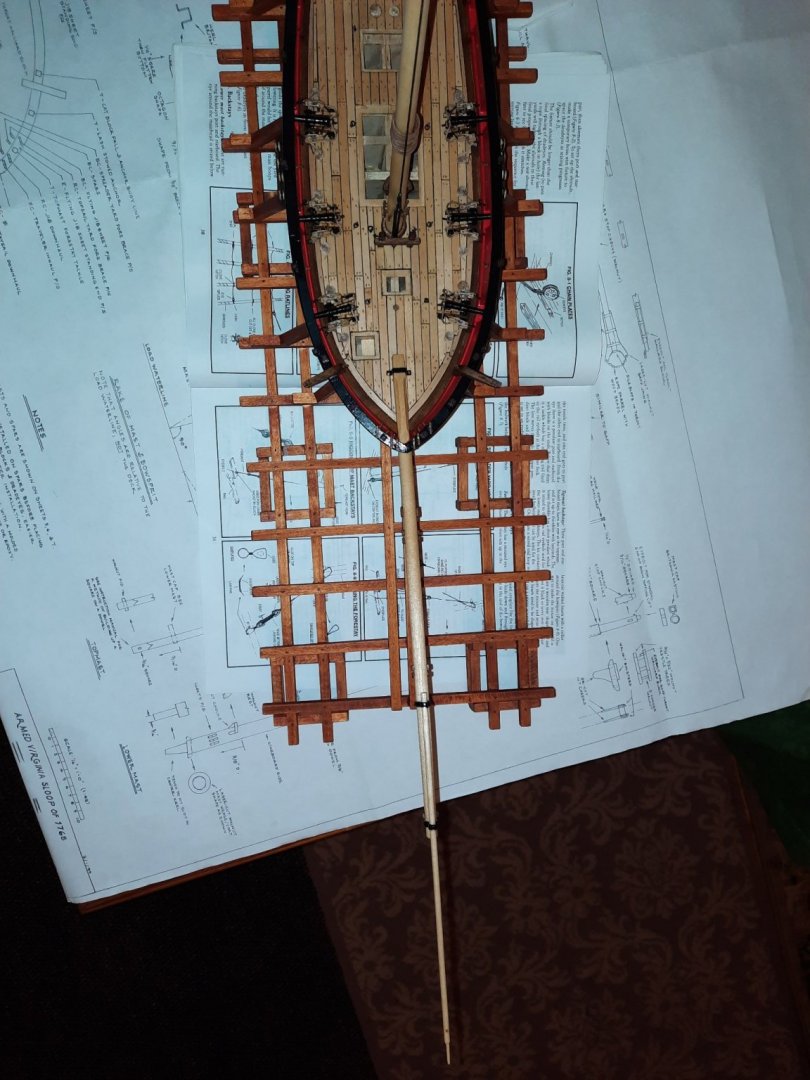
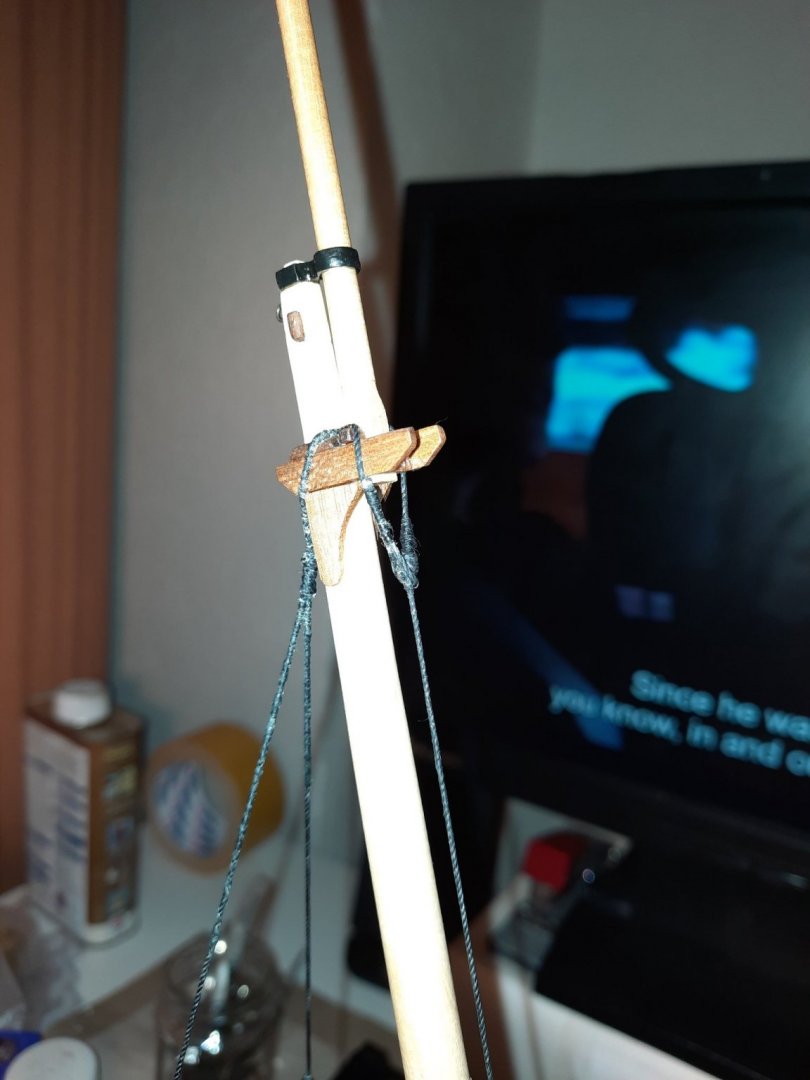
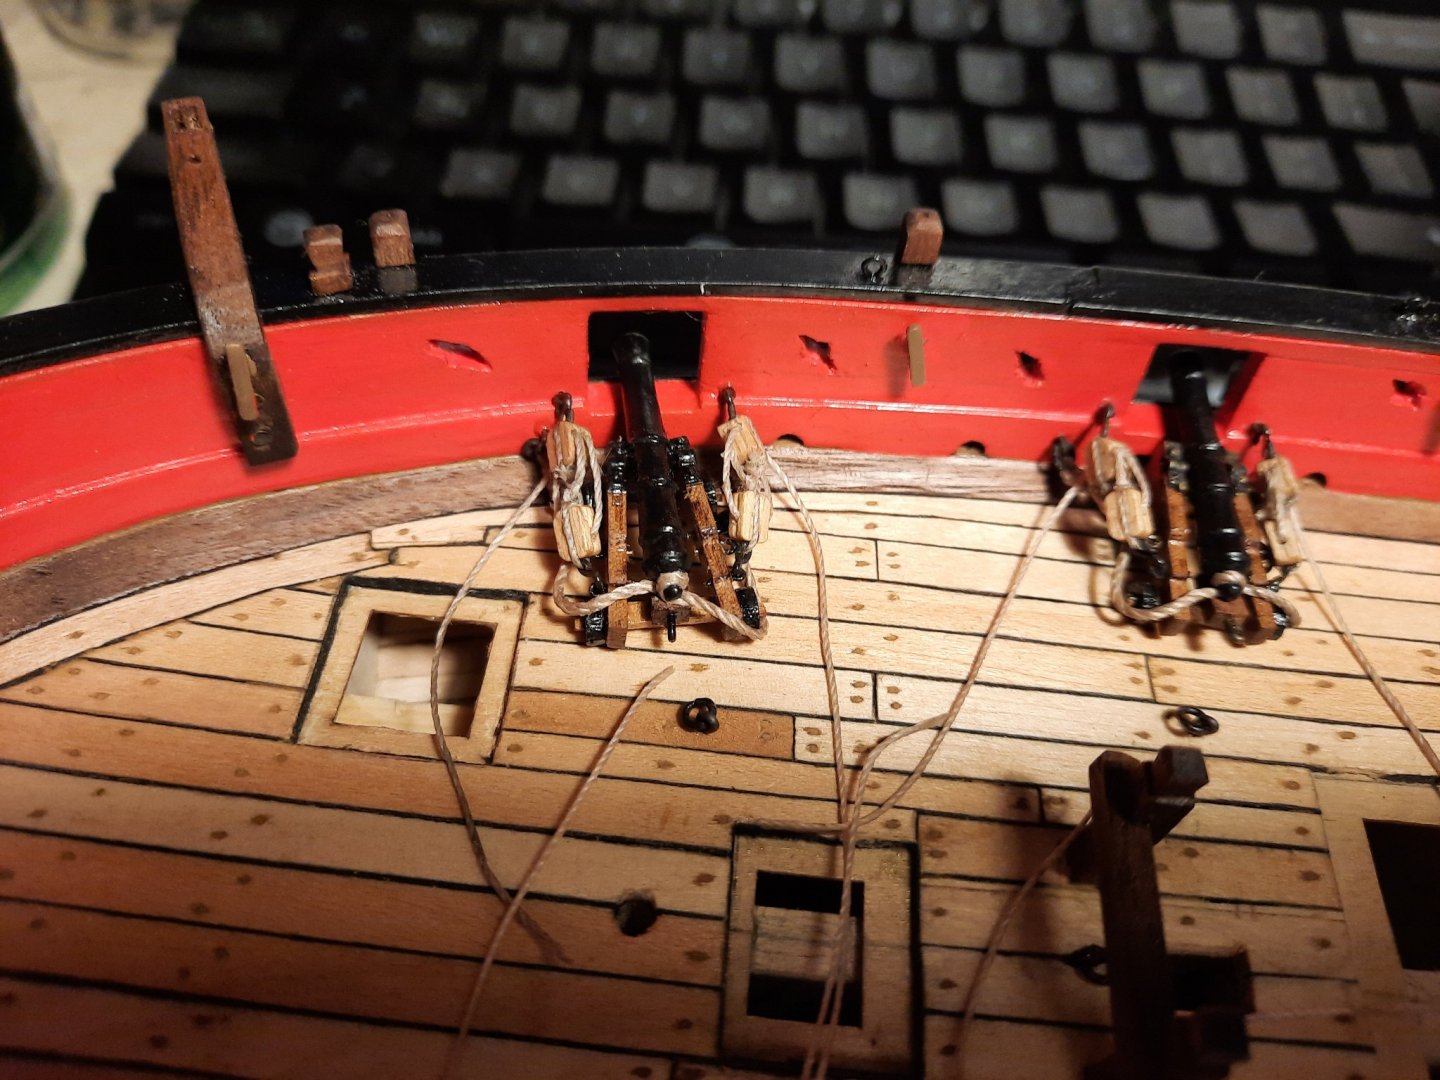
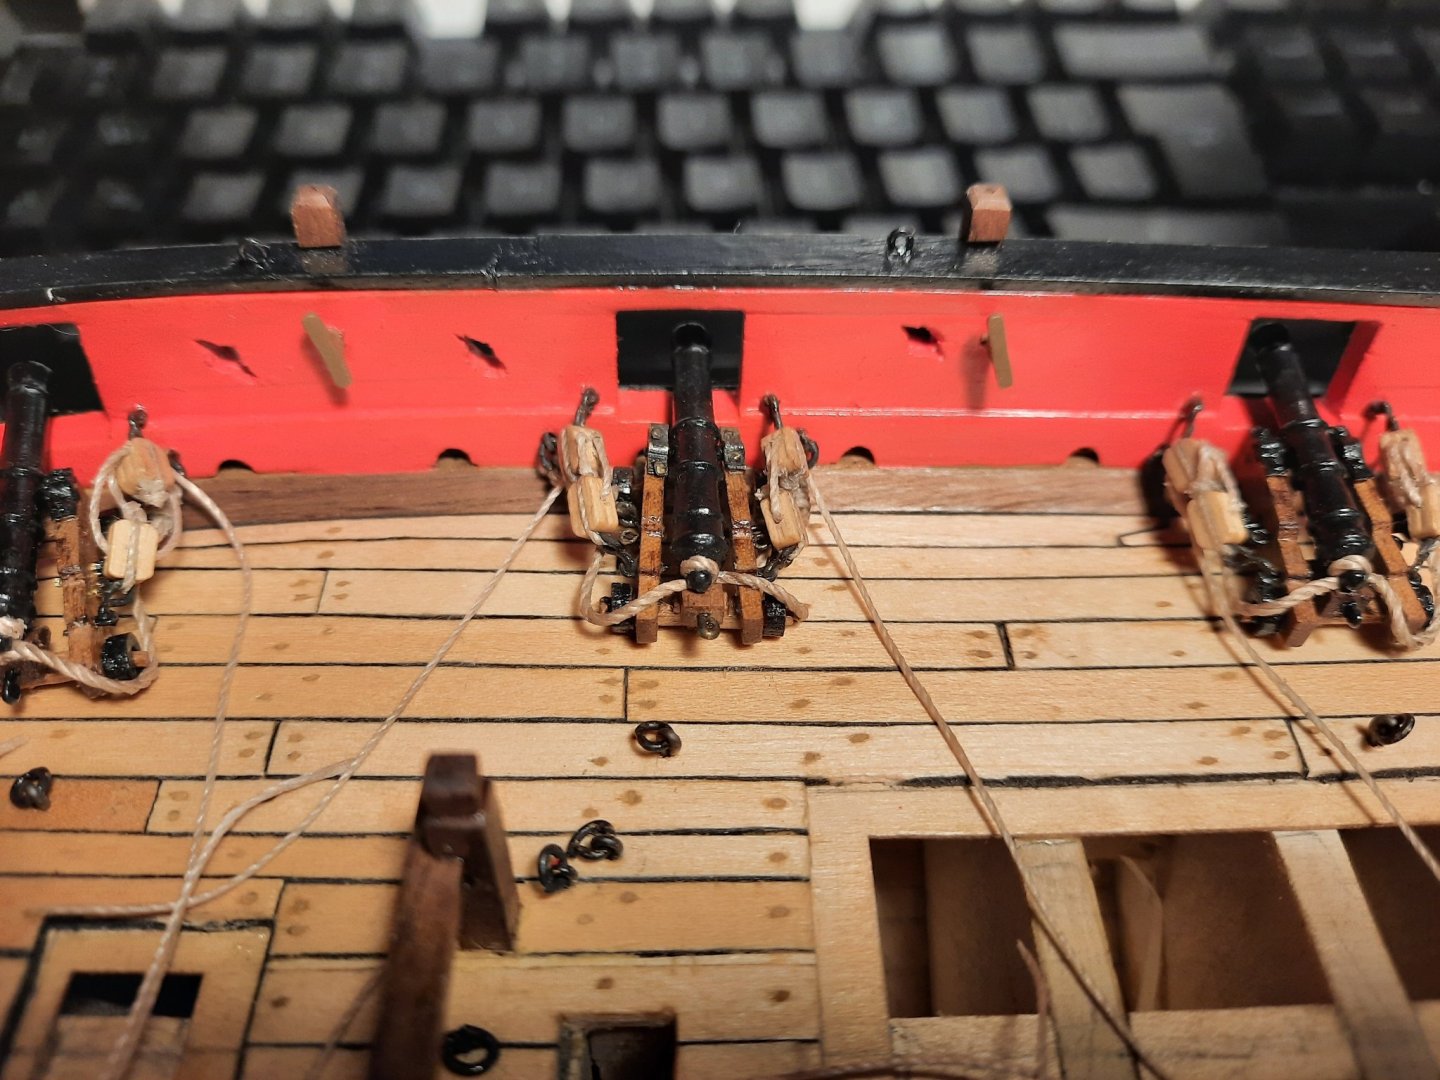
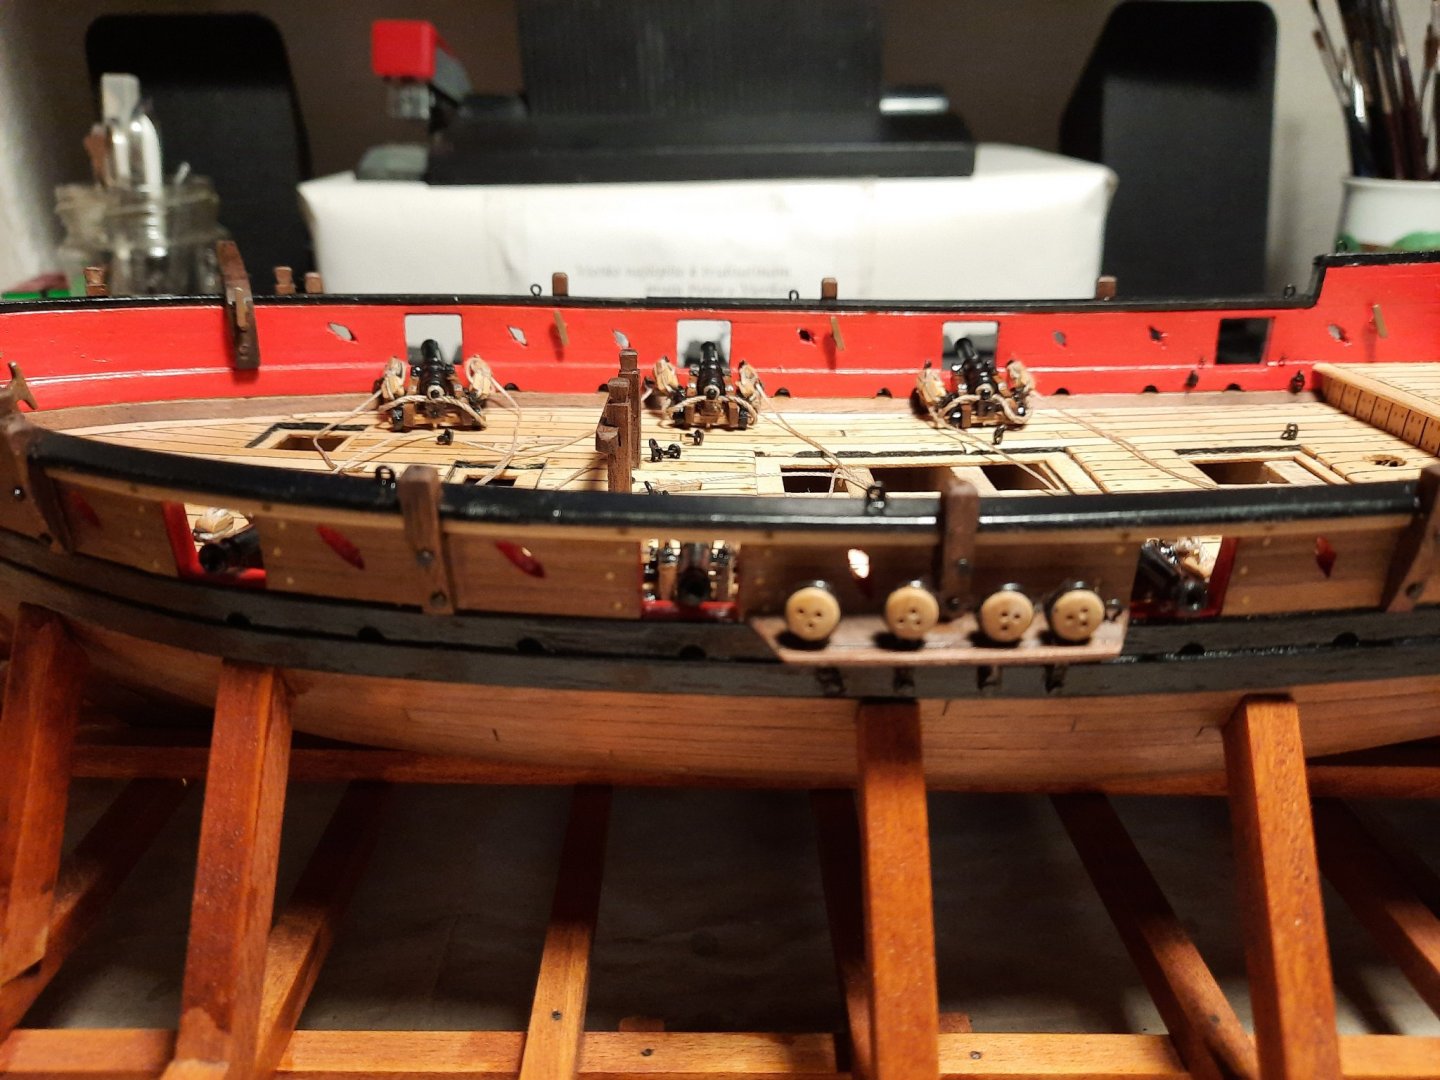
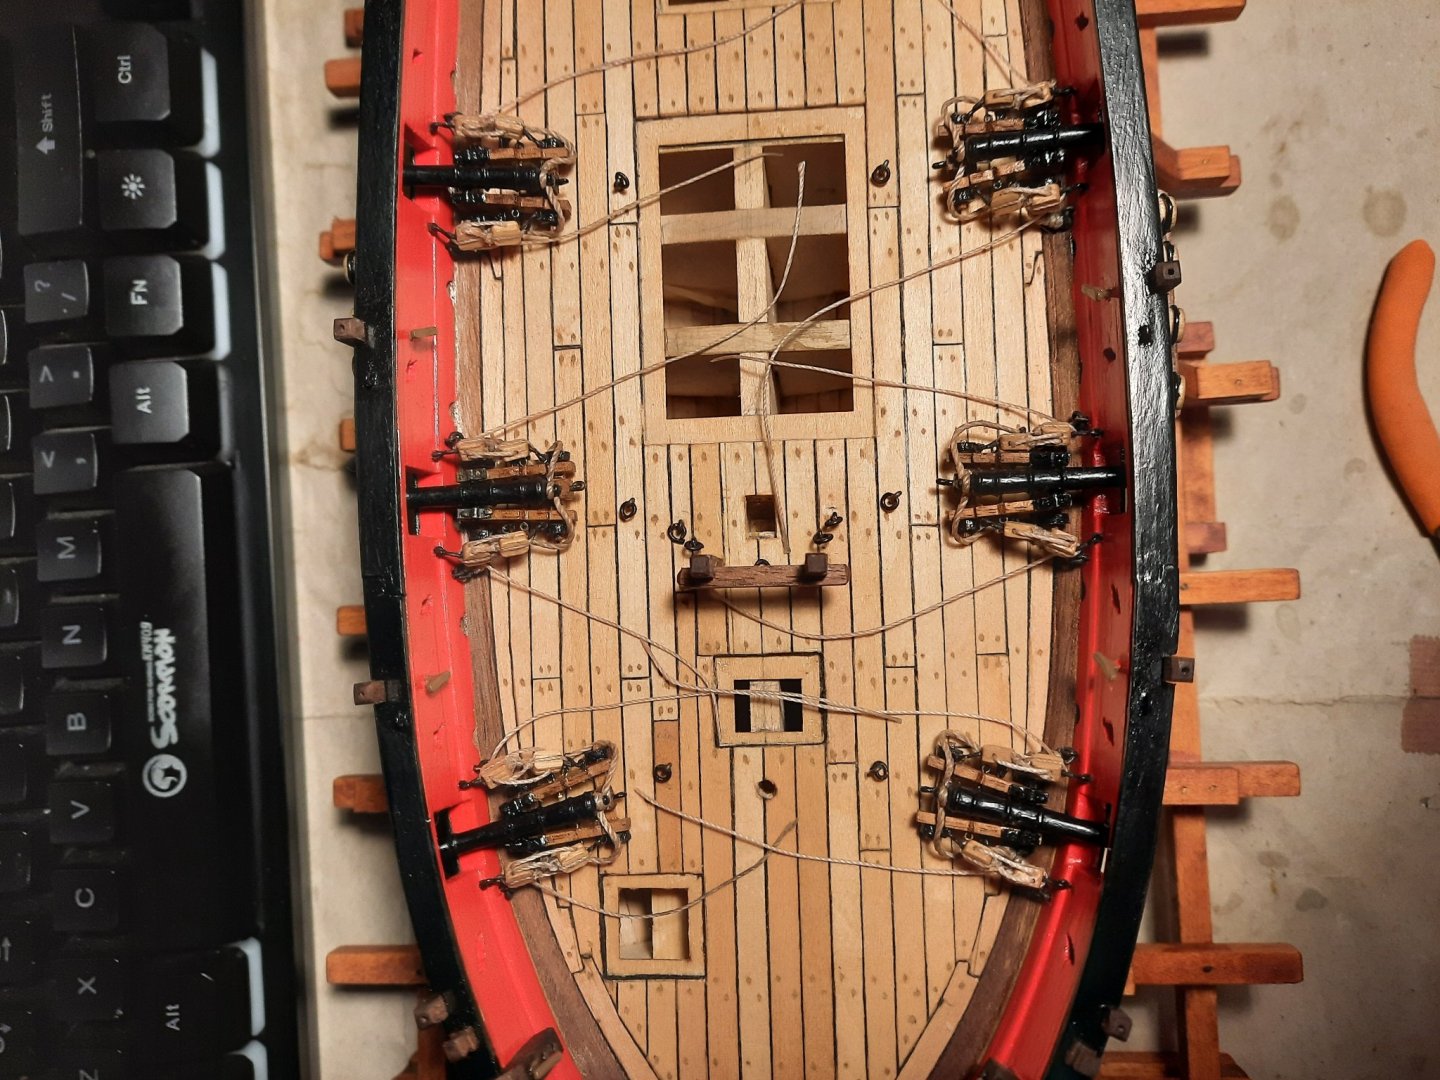
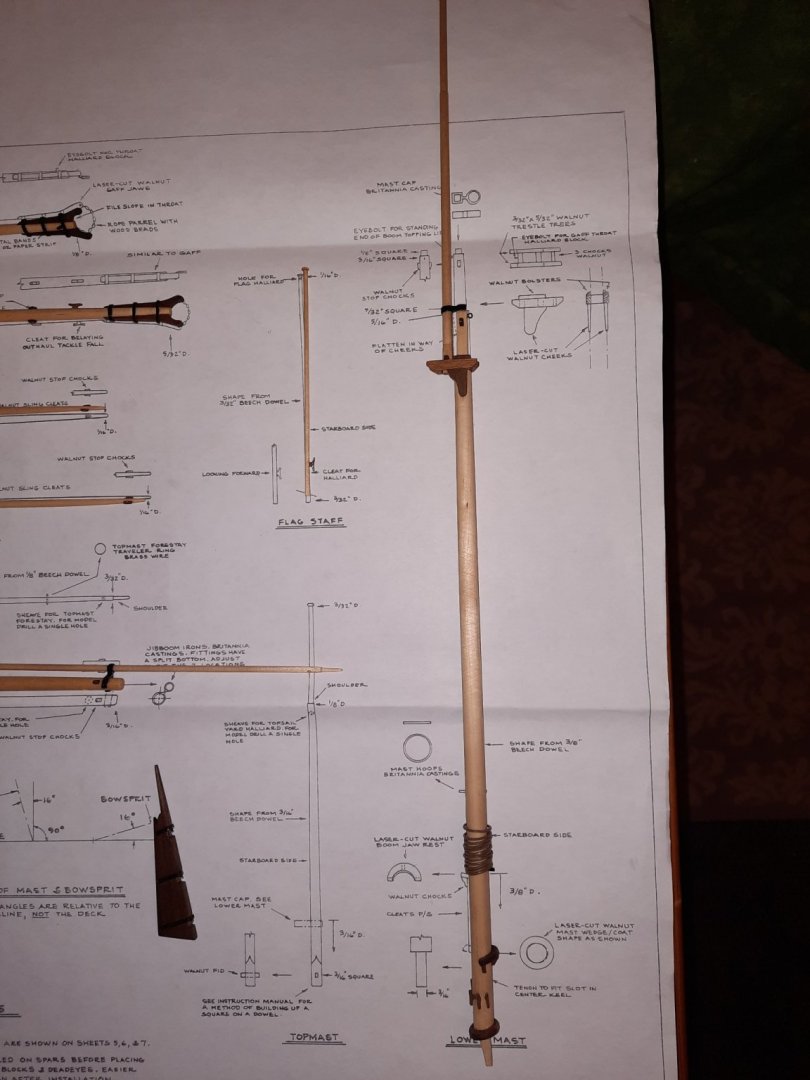
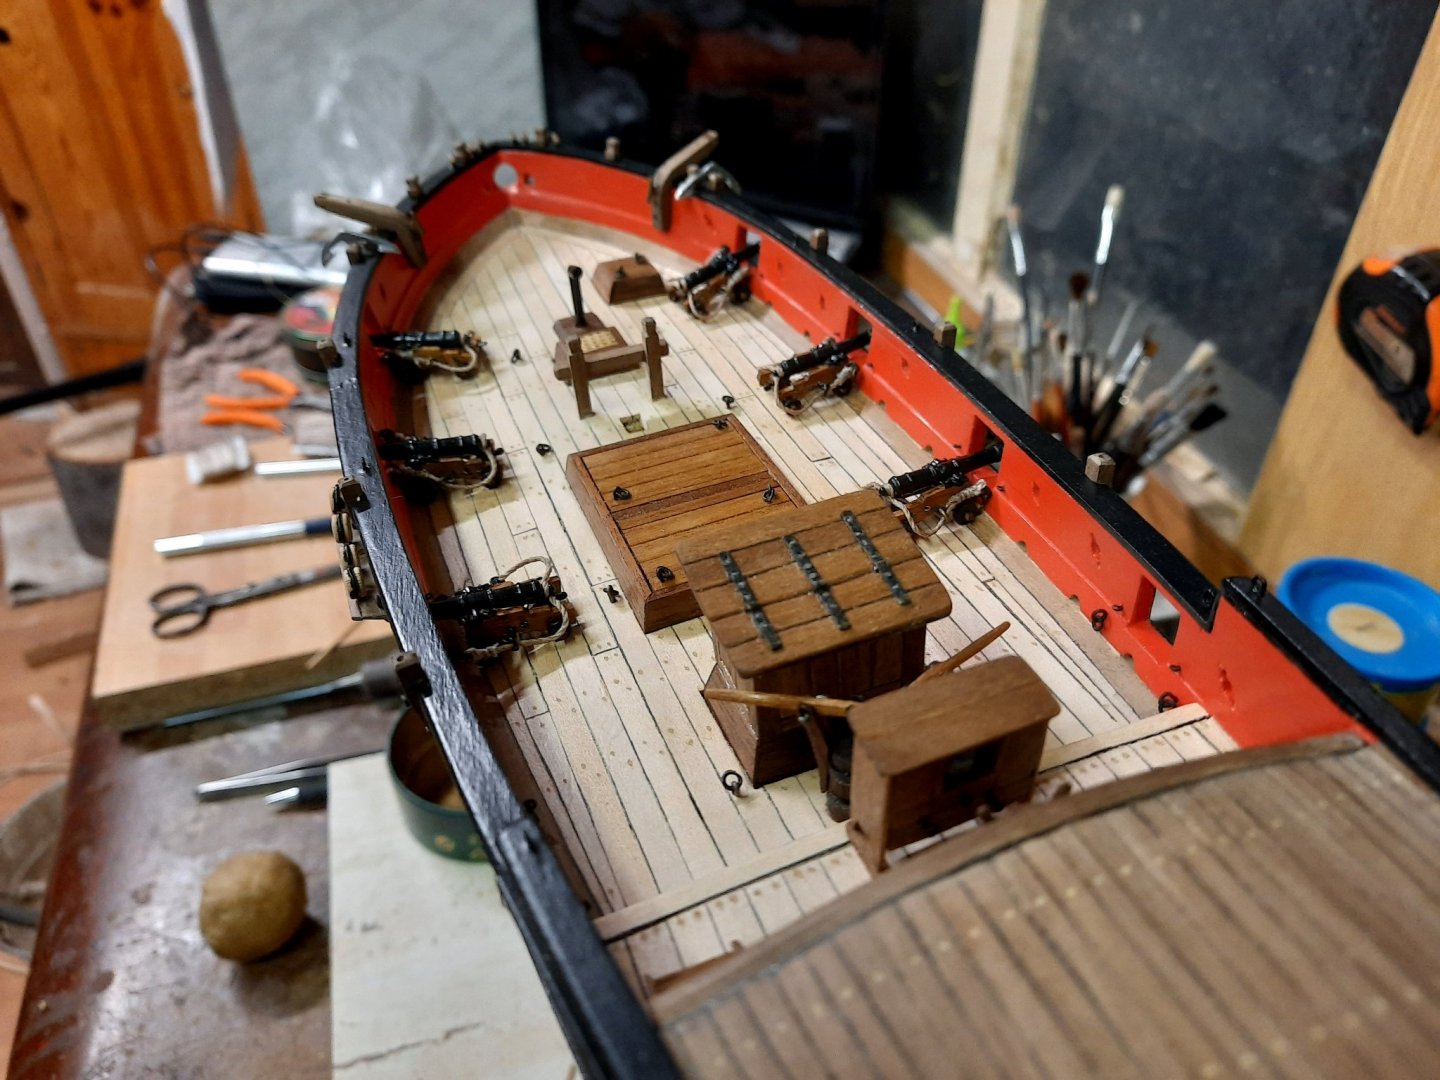
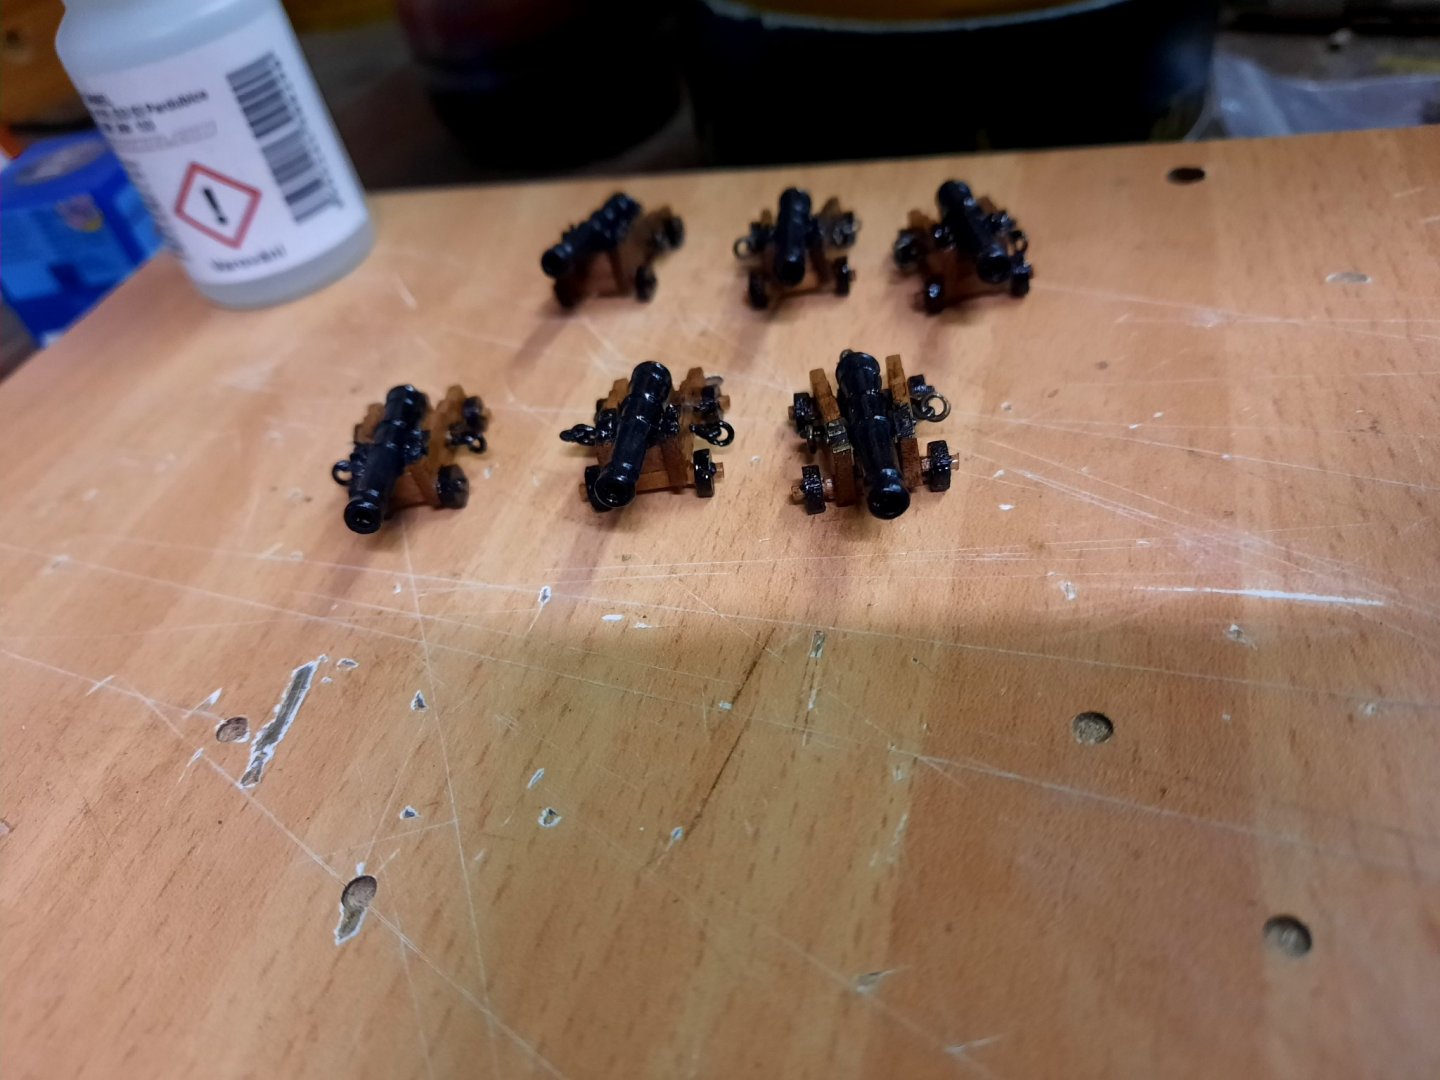
Dear fellow modelers, firstly thank you for all the likes. Yes the finish line is near and the finishing is happy and sad at once. Happy because everything is comming together and sad because part of something is ending. Also this is last modeling project for some time I think as I would like to start building my own house next year and in January we are expecting our first child. I would like to come back as soon as possible, but few years will pass definitely. Back to build. I manage to rig cannons. For the rope coils of cannons I used double sided tape. It has worked quite well. I also rigged LOWER MAST BACKSTAYS, you can see it here. Also the SPREADER YARD HORSE is rigged. This is the top look of lover mast. And last but not least the overal look of ship so far. I know I made a mistake when building the BOWSPRIT & JIBBOOM. I should glue Jiboom at slight angle. I did not. I do not want to change it as everything is secured with glue and 4 glued nails. When I was doing it I did not read plans well and I was wondering why on building logs it was angled :D. It did not look well...but..:D I am coming to 400 hours with this build. Till next time.

- 108 replies
-
- 7
-
-
- armed virginia sloop
- model shipways
- (and 1 more)
-
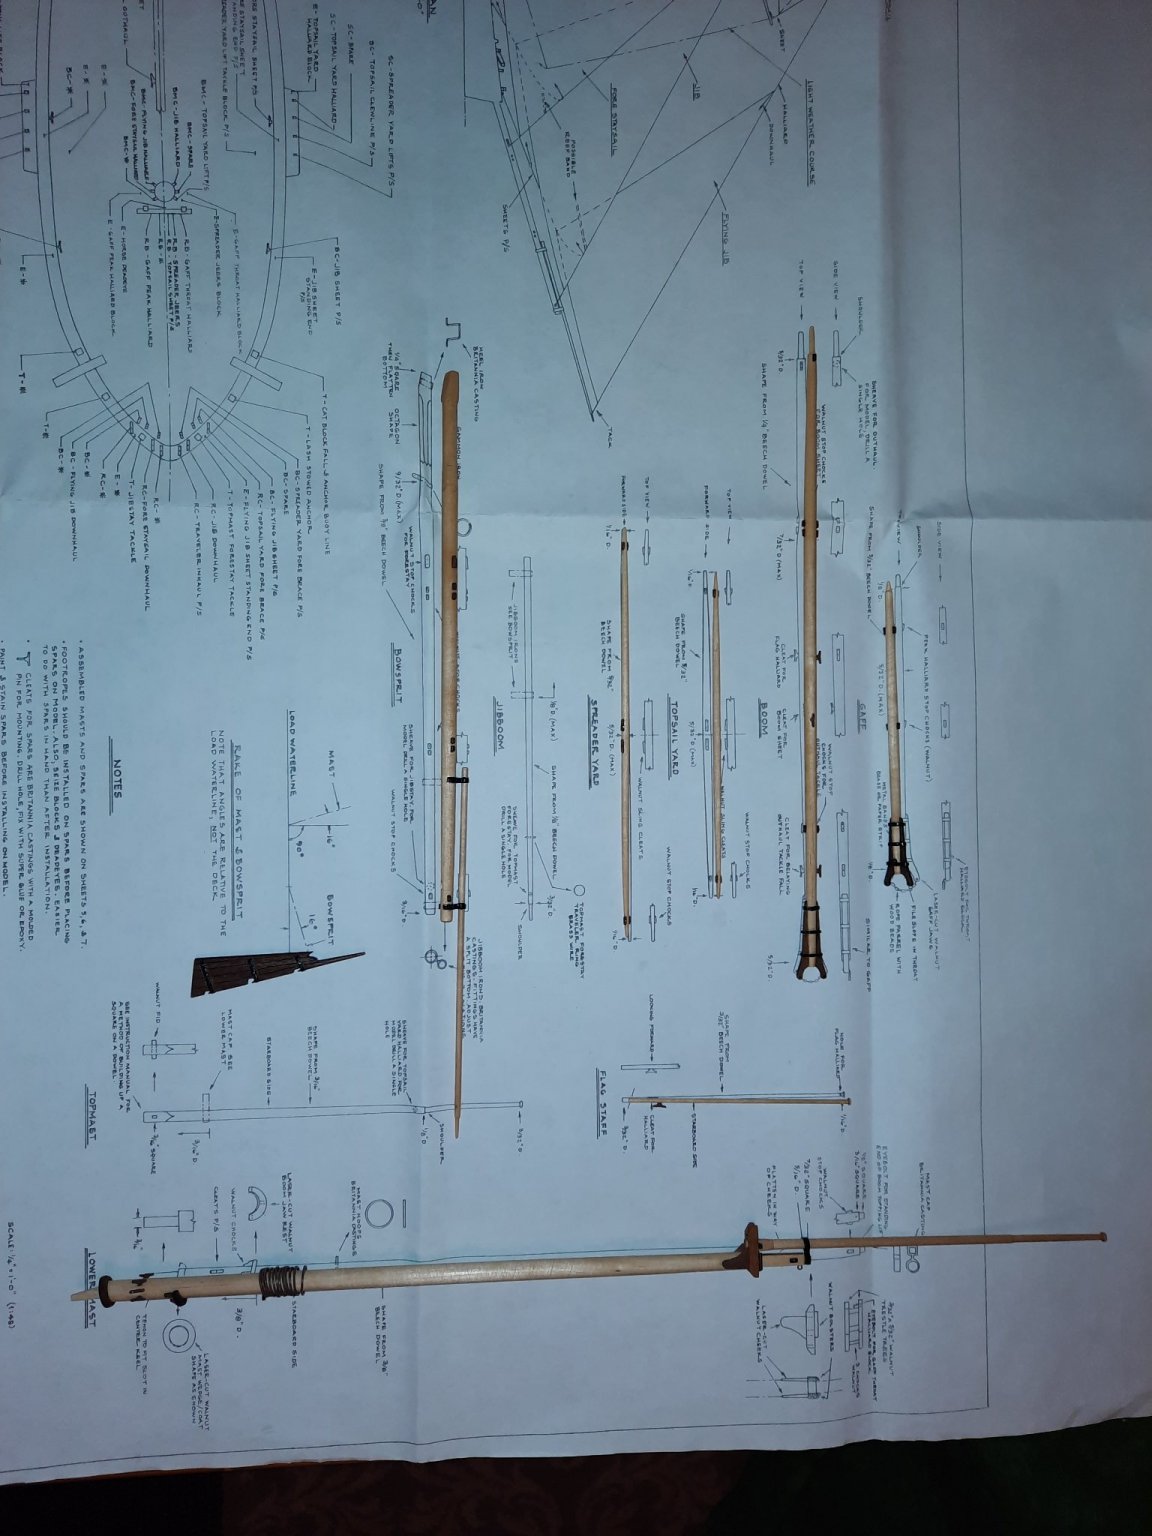
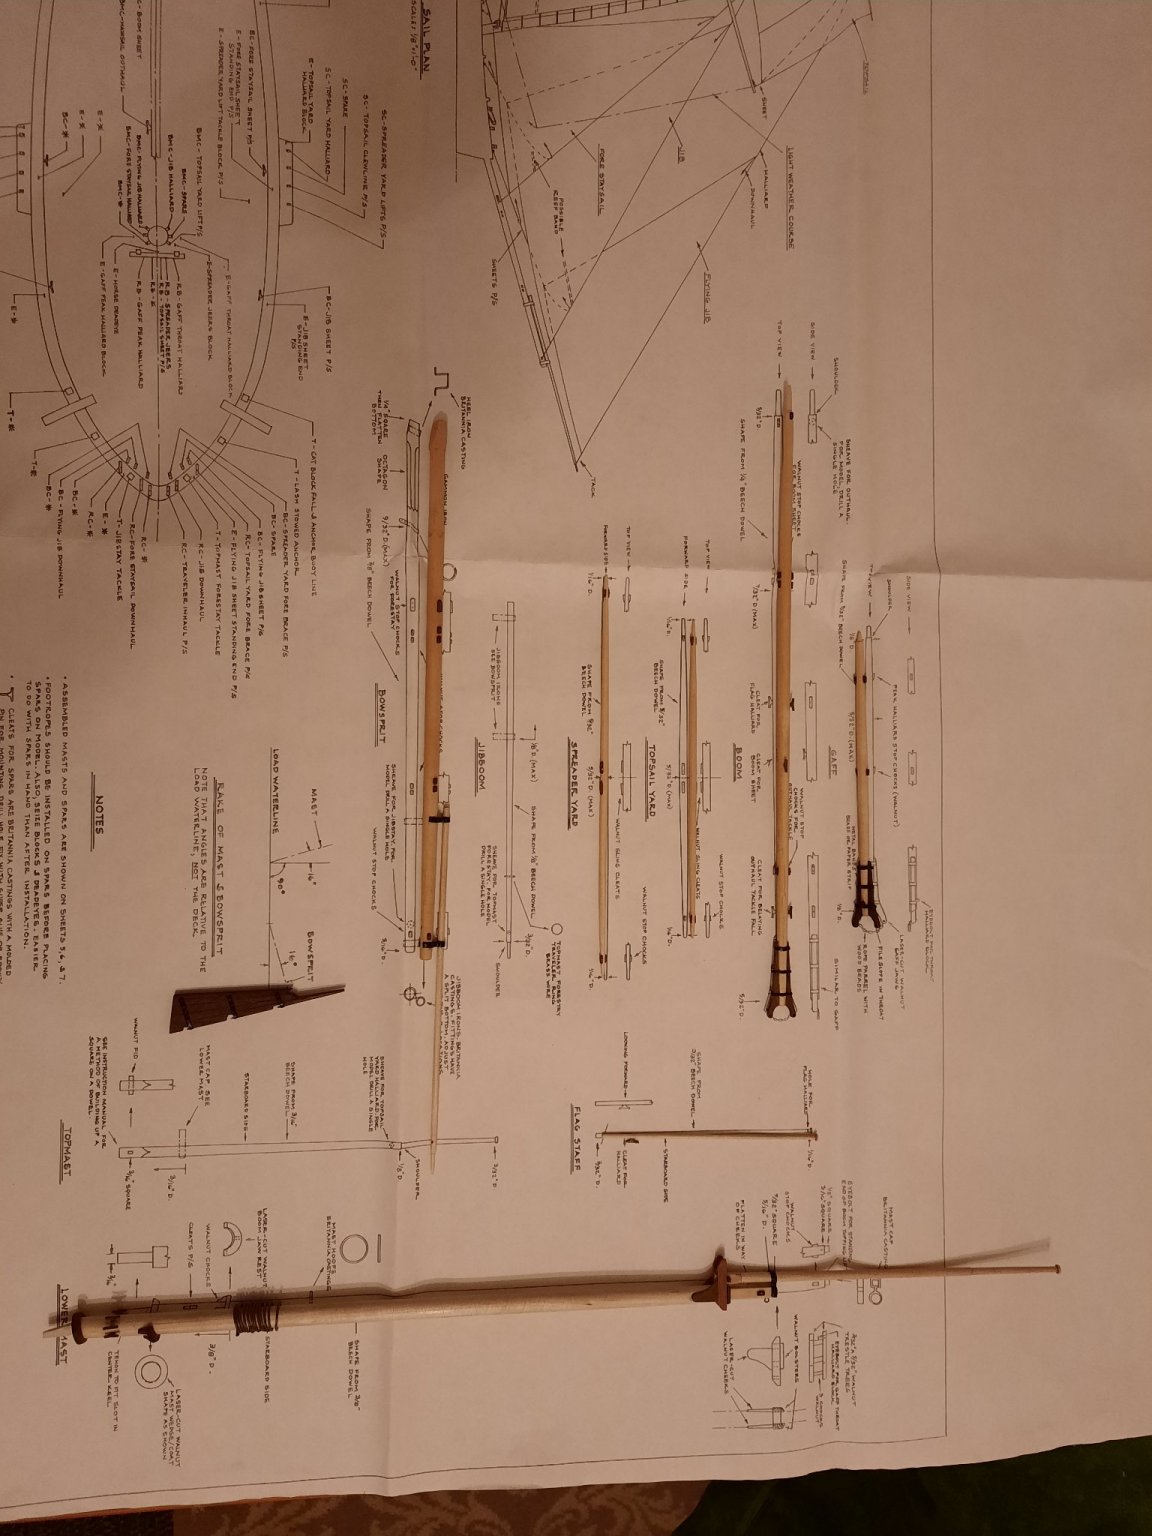
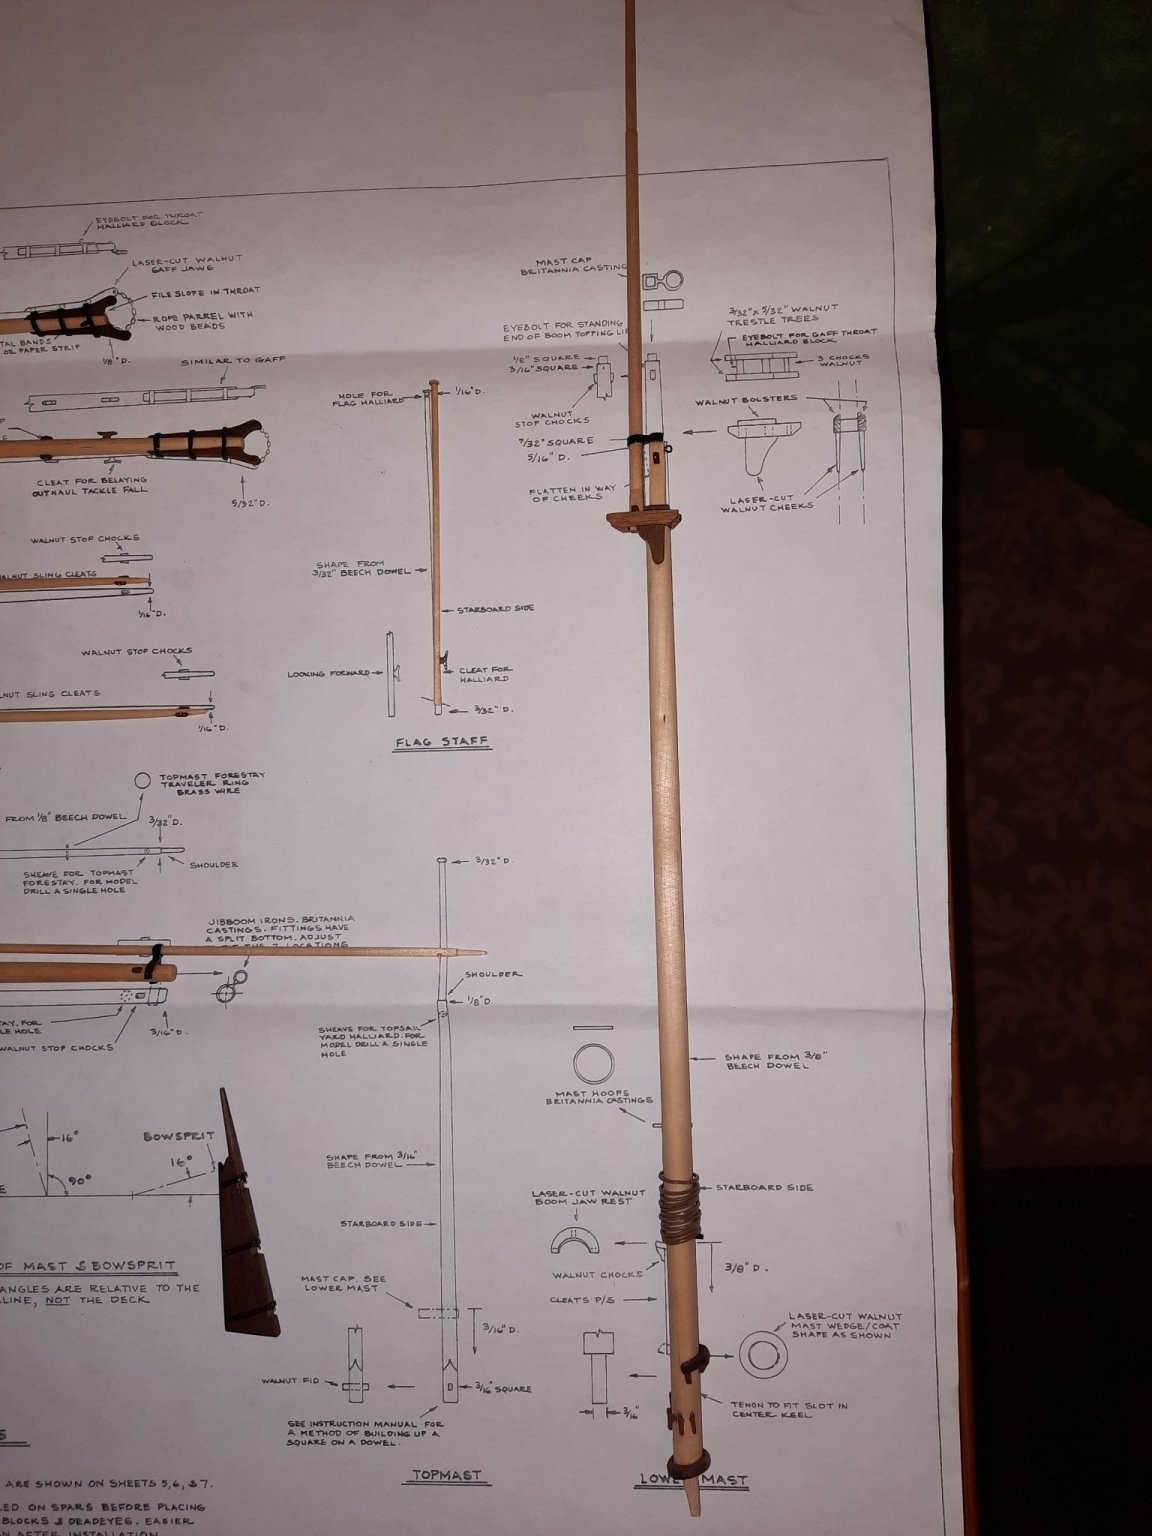
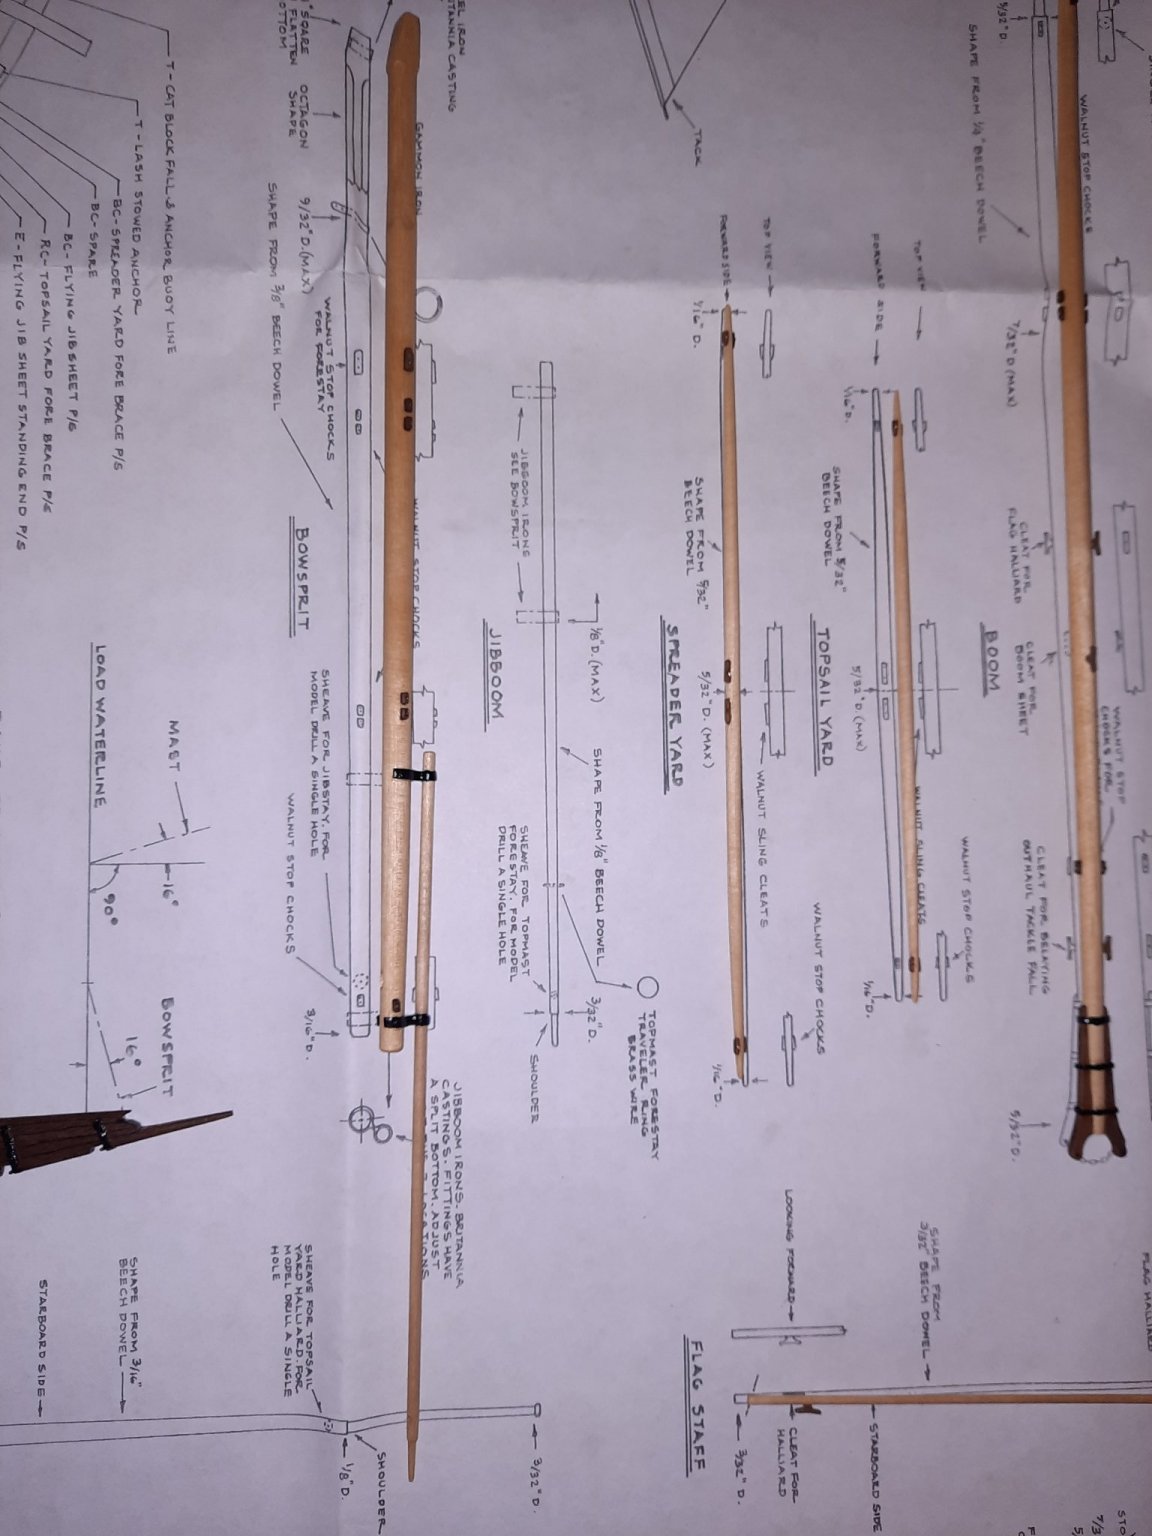
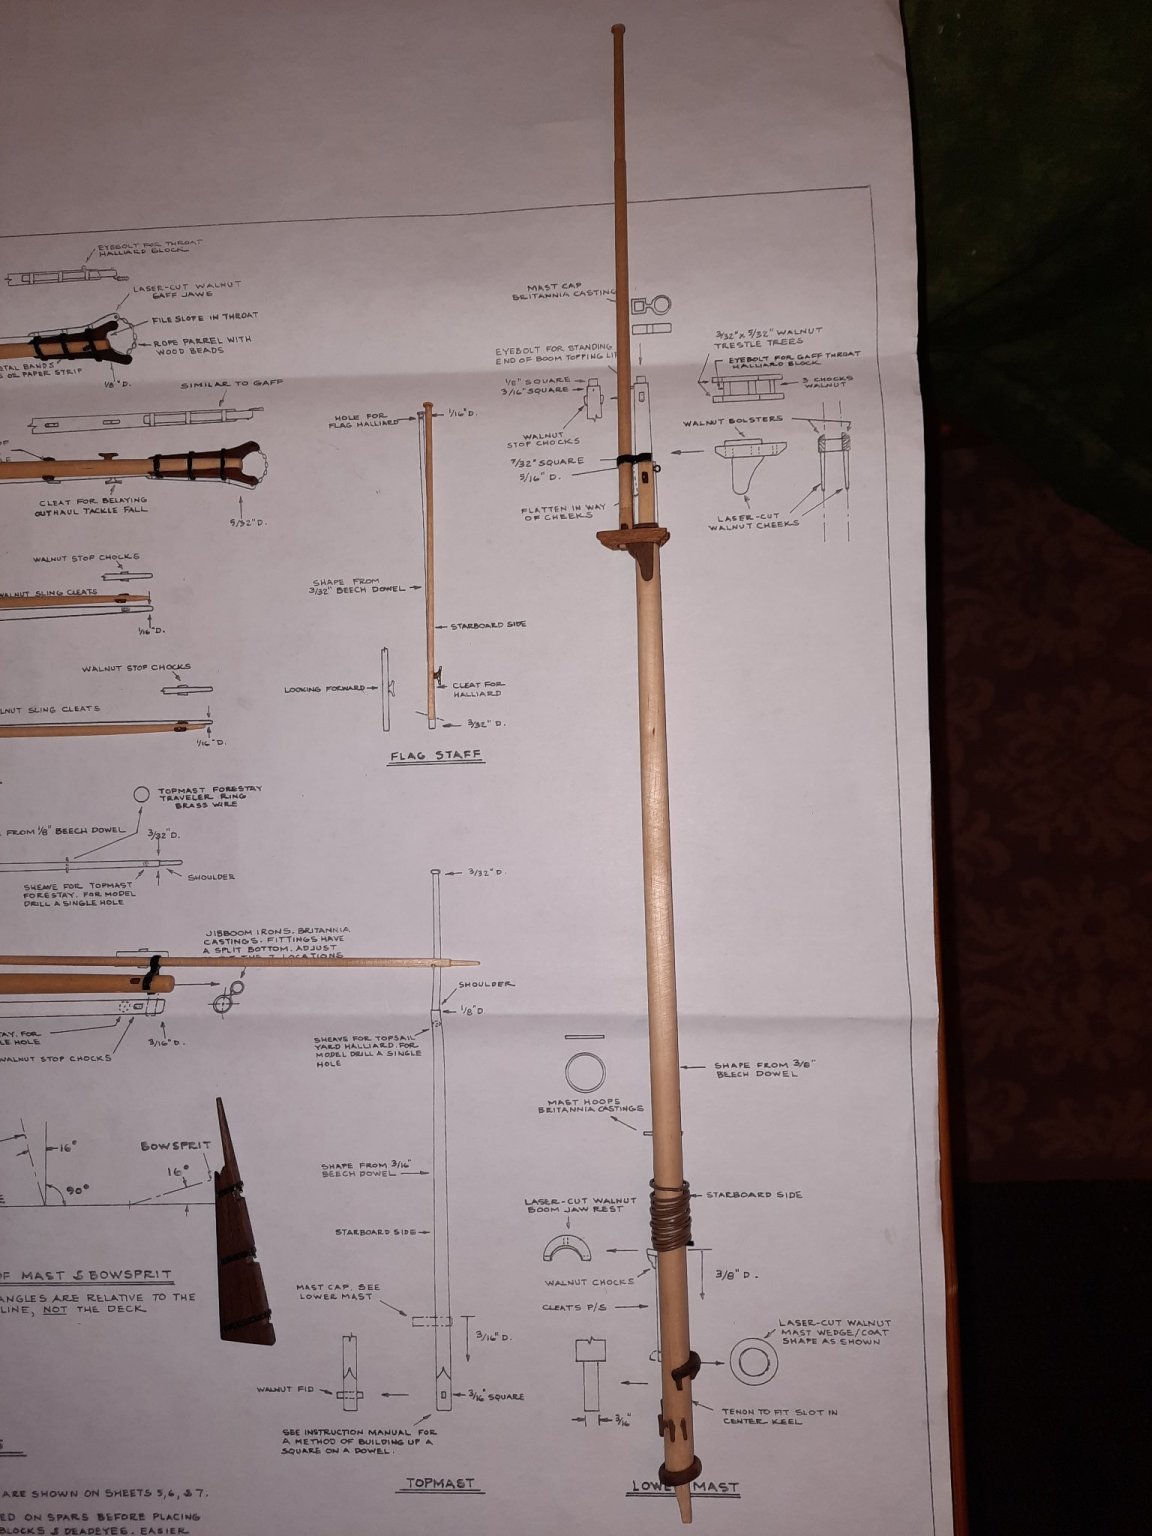
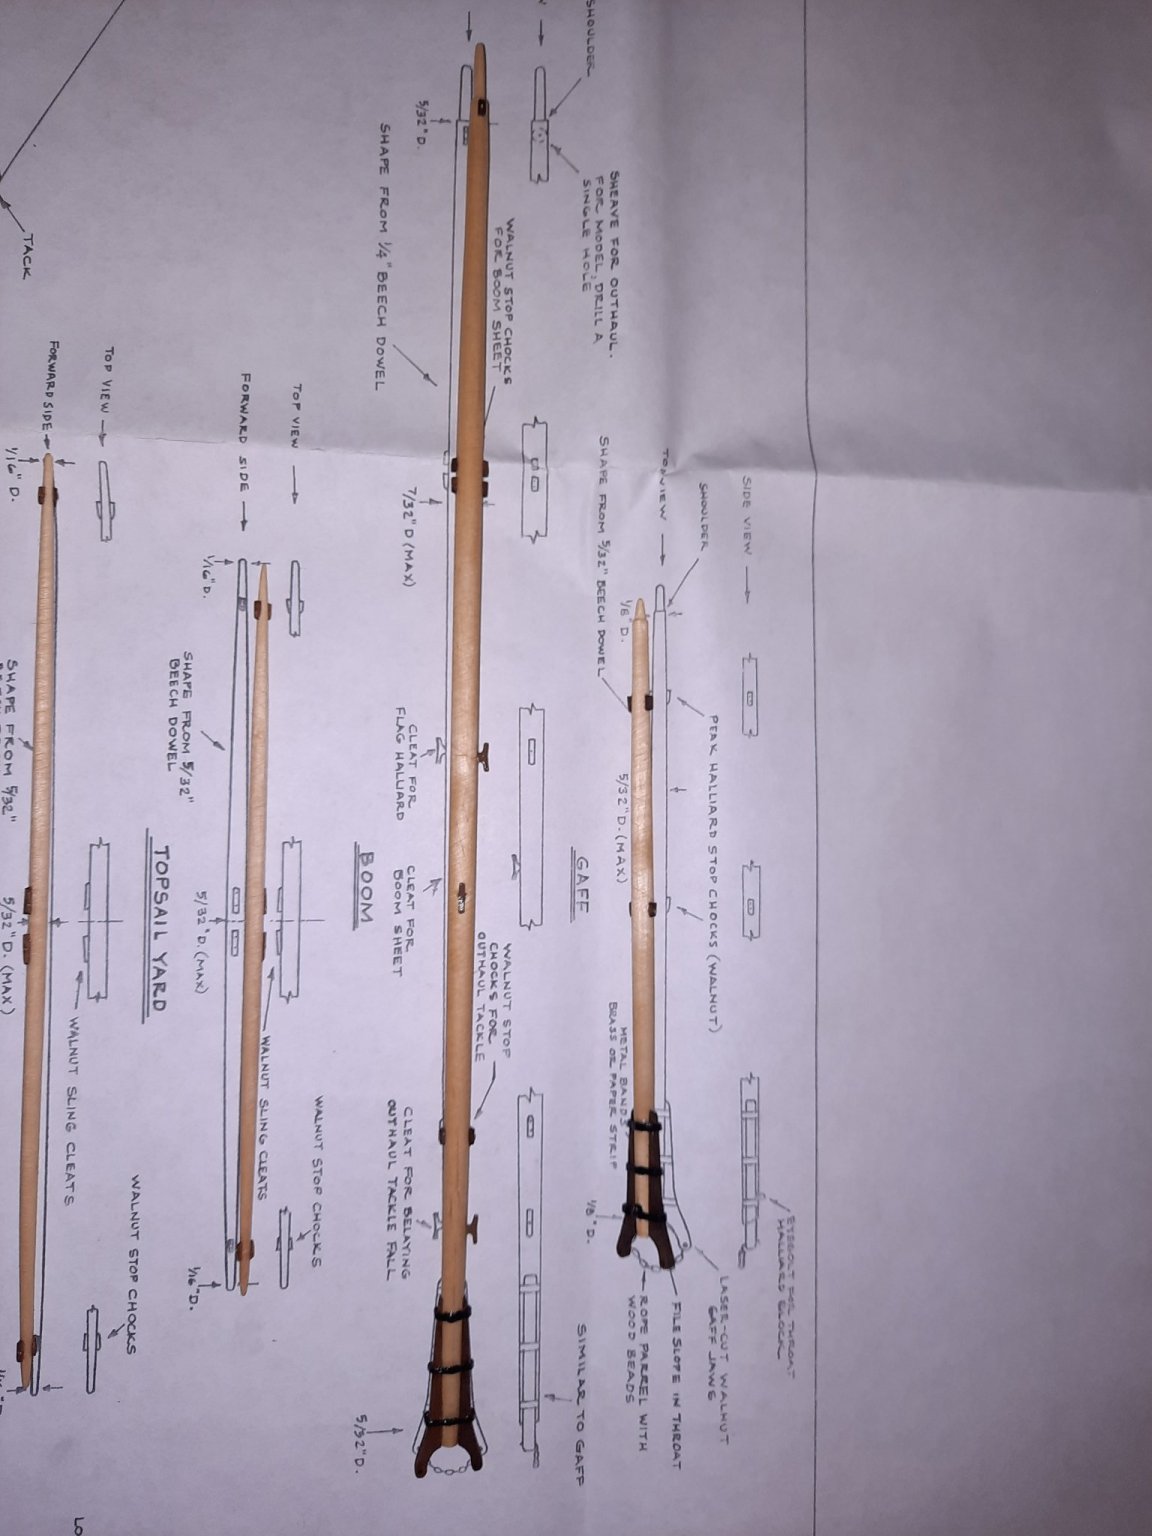
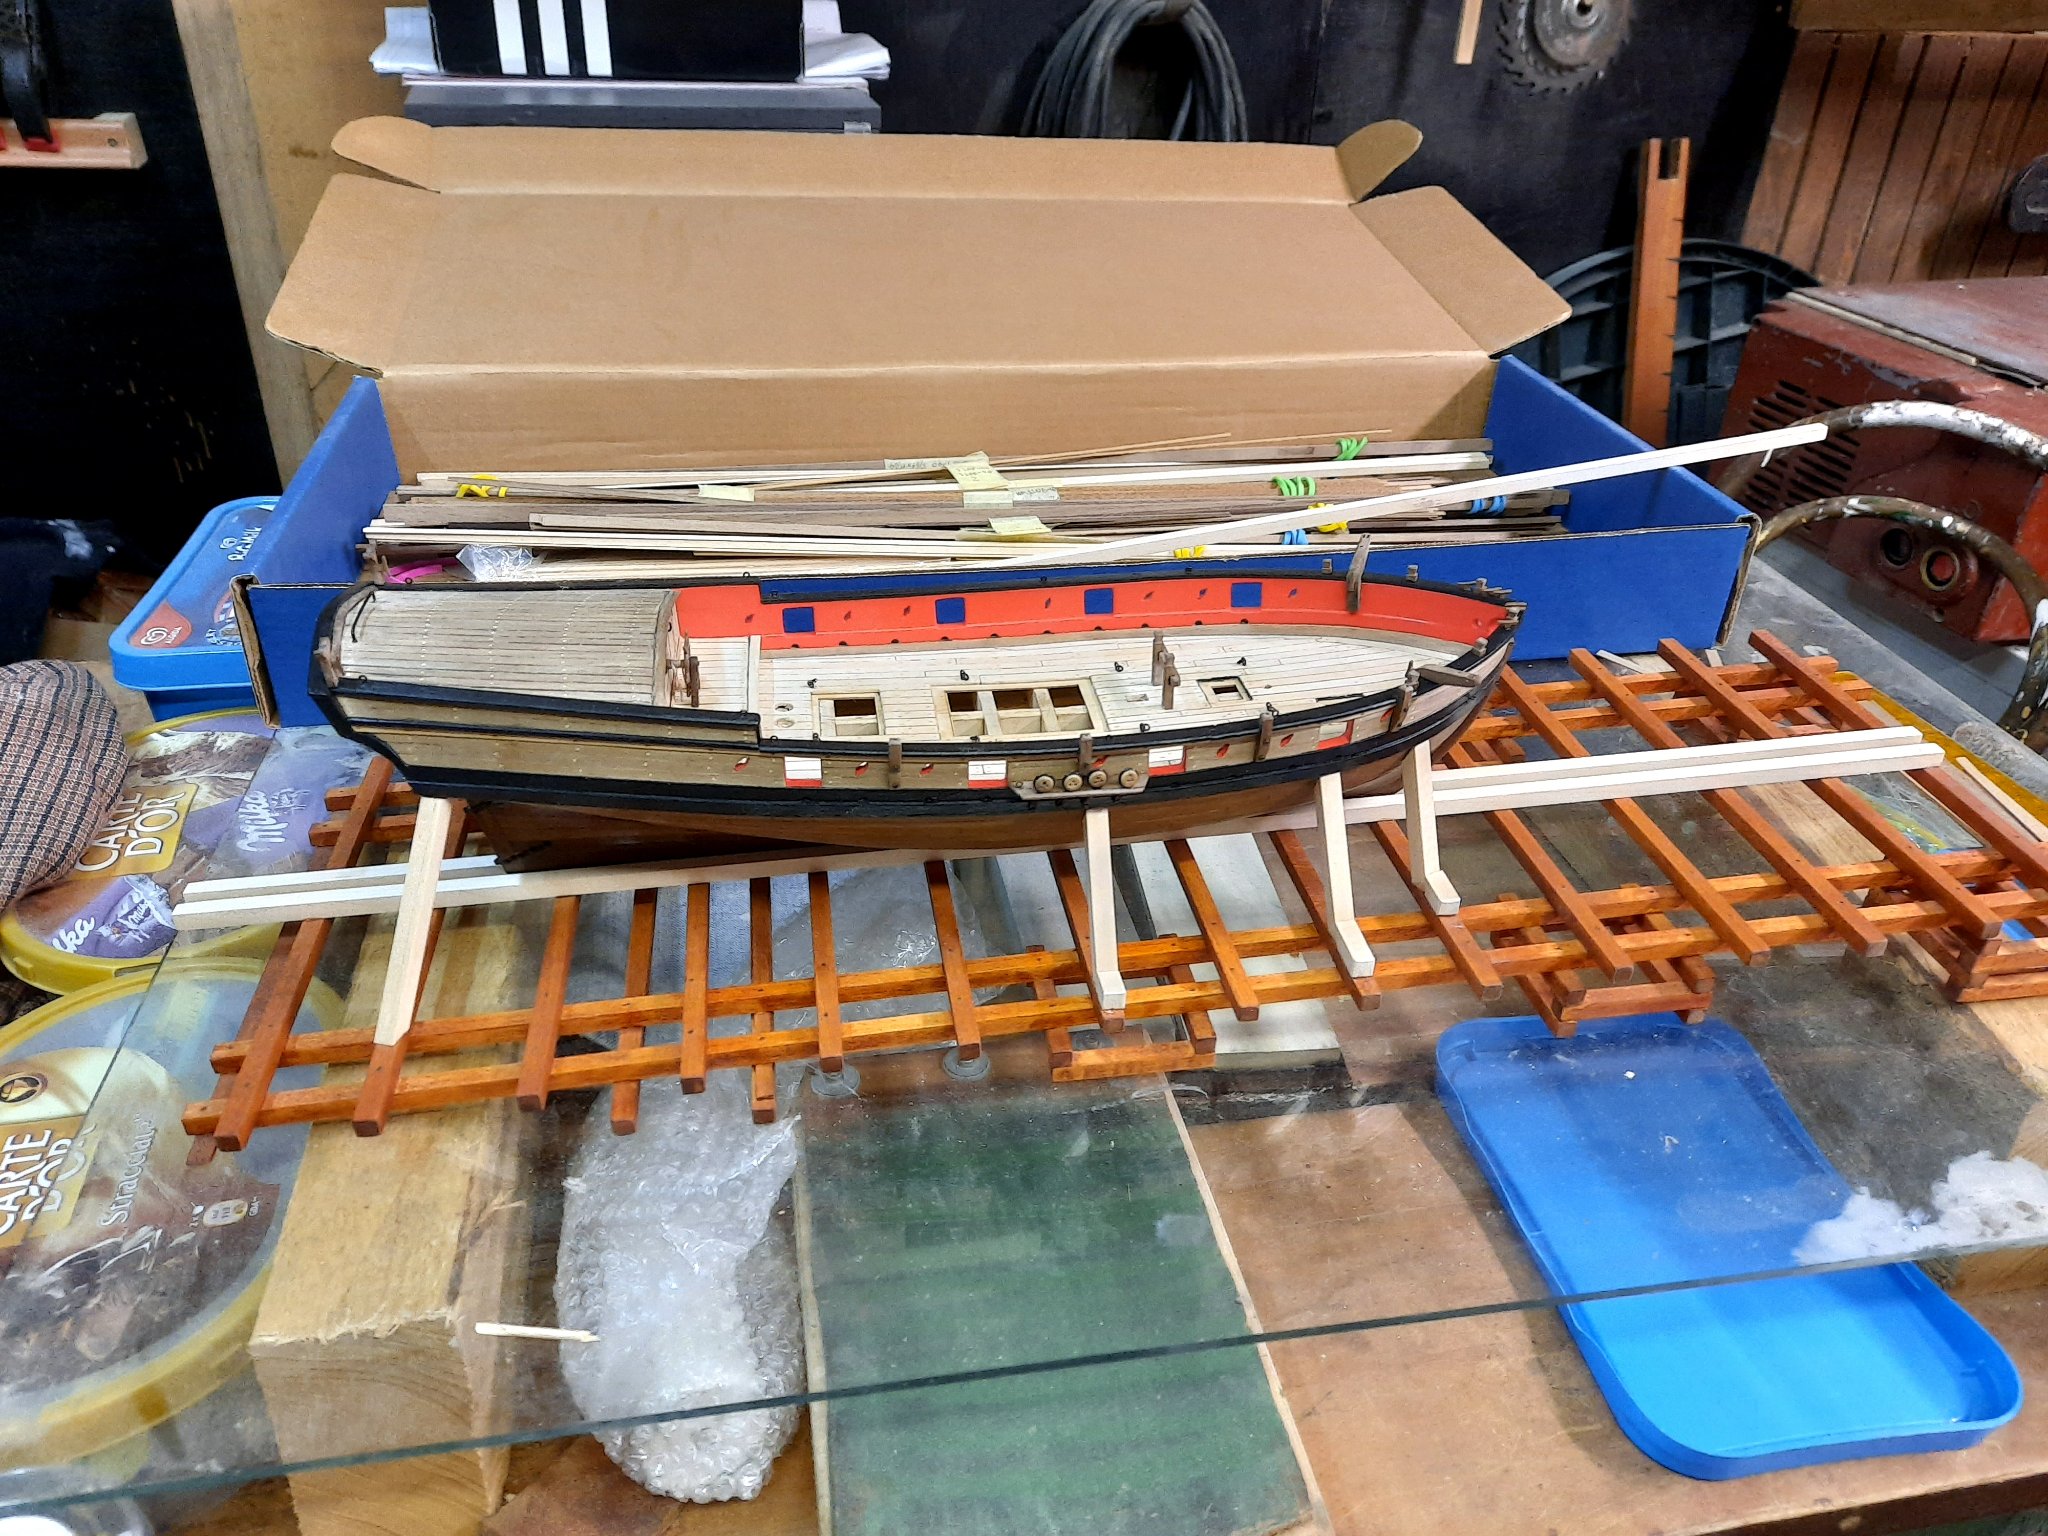
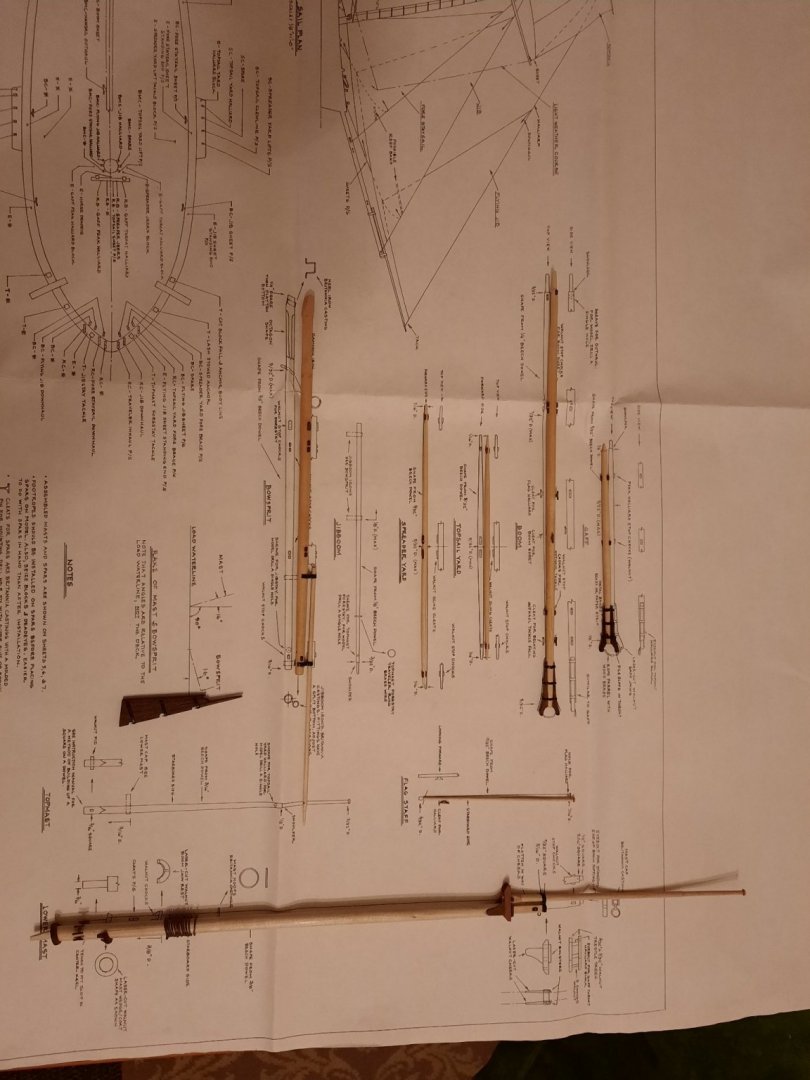
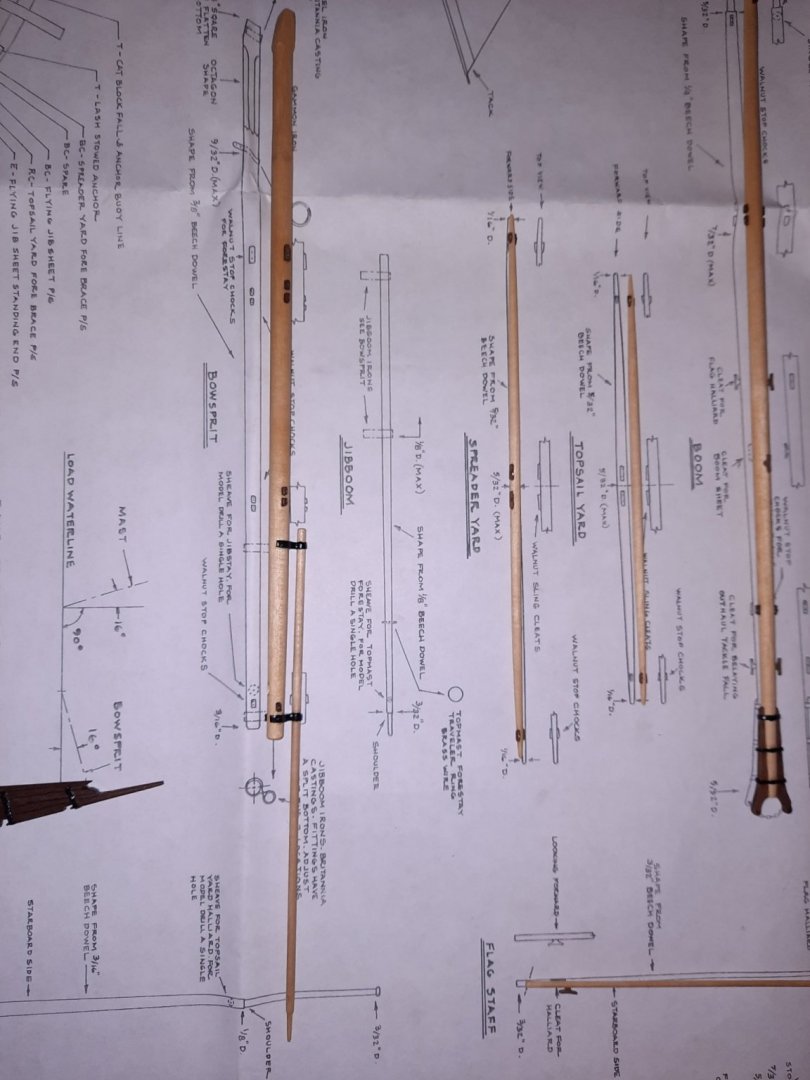
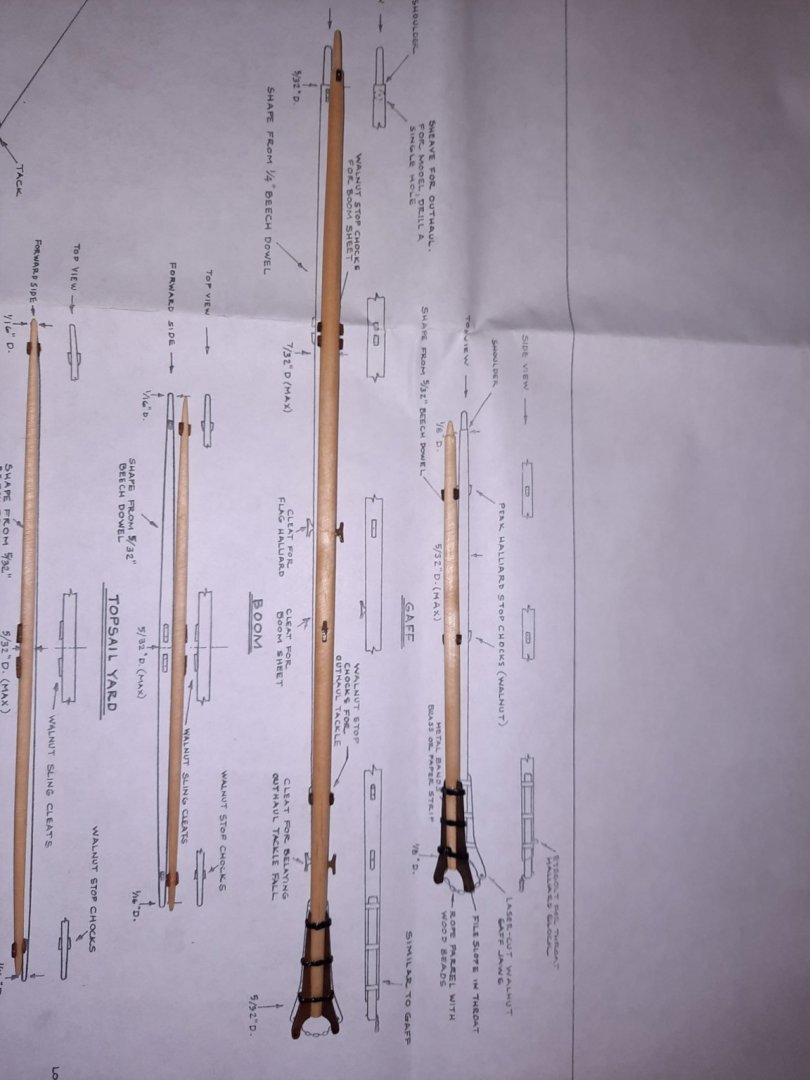
Dear fellow modelers, I made a lot o progress. I finished the hull and made all parts of mast and spar. I took everything from my workshop and transfered it to my house. It is warmer there and basically now I need "only" to assembly everything. Here are some pictureds from rigged cannons. Everythink on the hull is varnished with danish oil. And here are the parts for mast and spar. I never thought that I could do it so fast. I know it is not perfect, but I like it very much. Working with wood..it is just awesome. When you can feel the flow of it. I do not need to explain it again. Everybody who is working with wood knows what I am speaking about. It is just crazy that it has taken only 9 months to come here. Till next time.


- 108 replies
-
- 6
-
-
- armed virginia sloop
- model shipways
- (and 1 more)
-
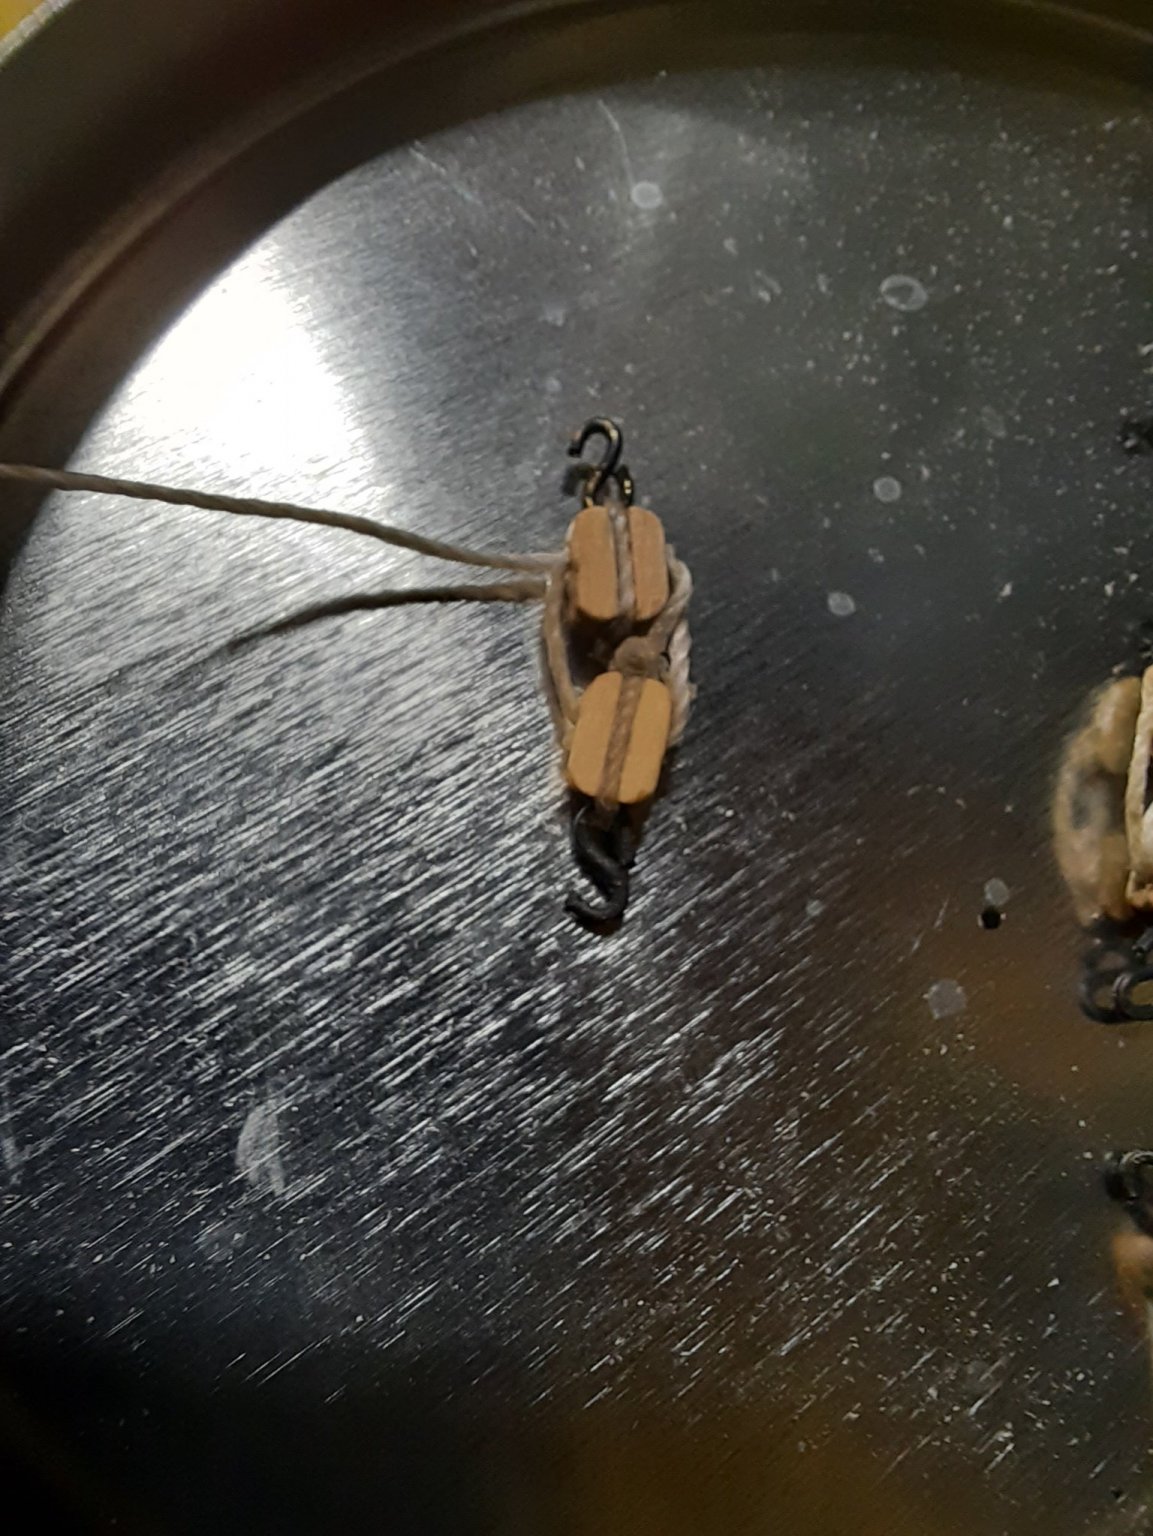
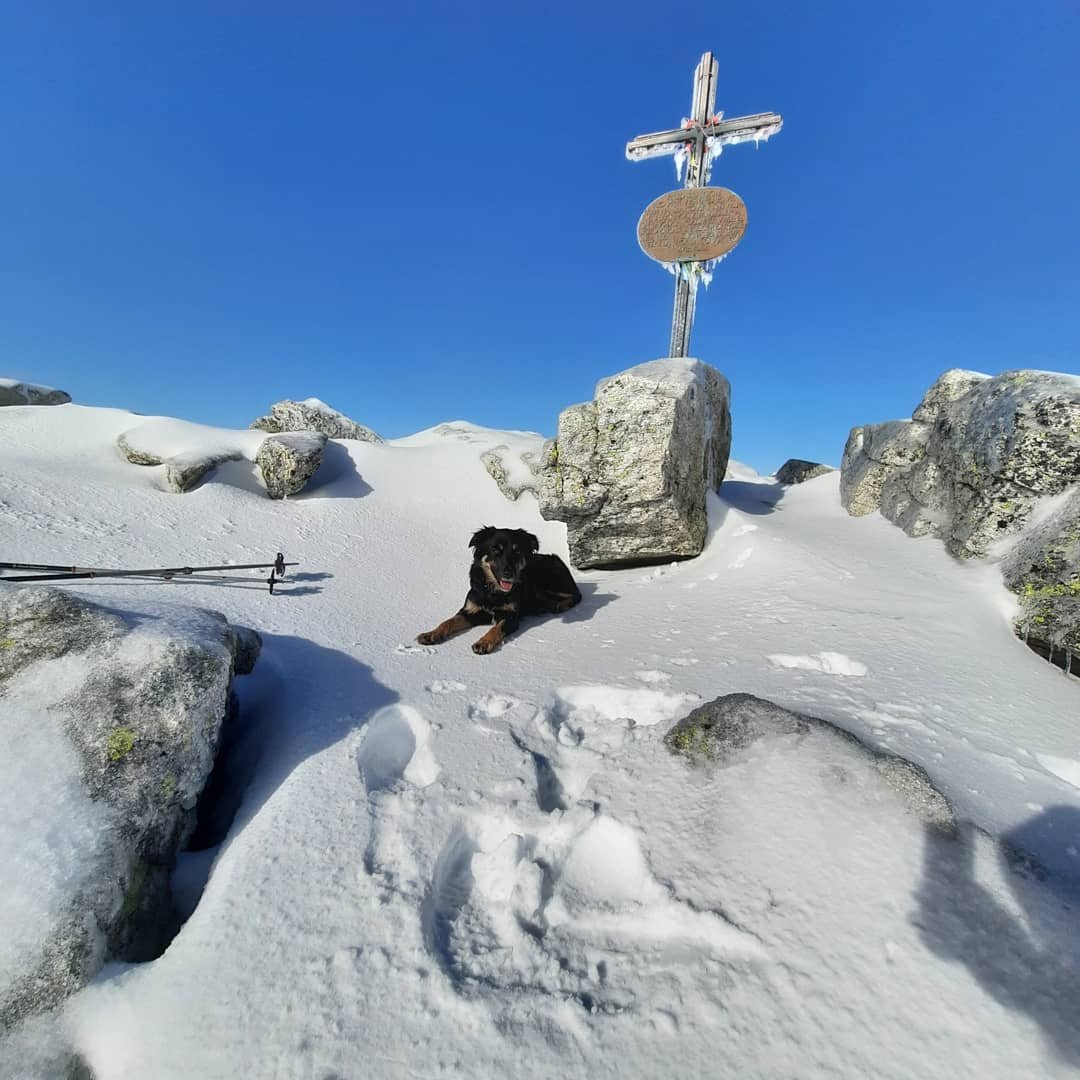
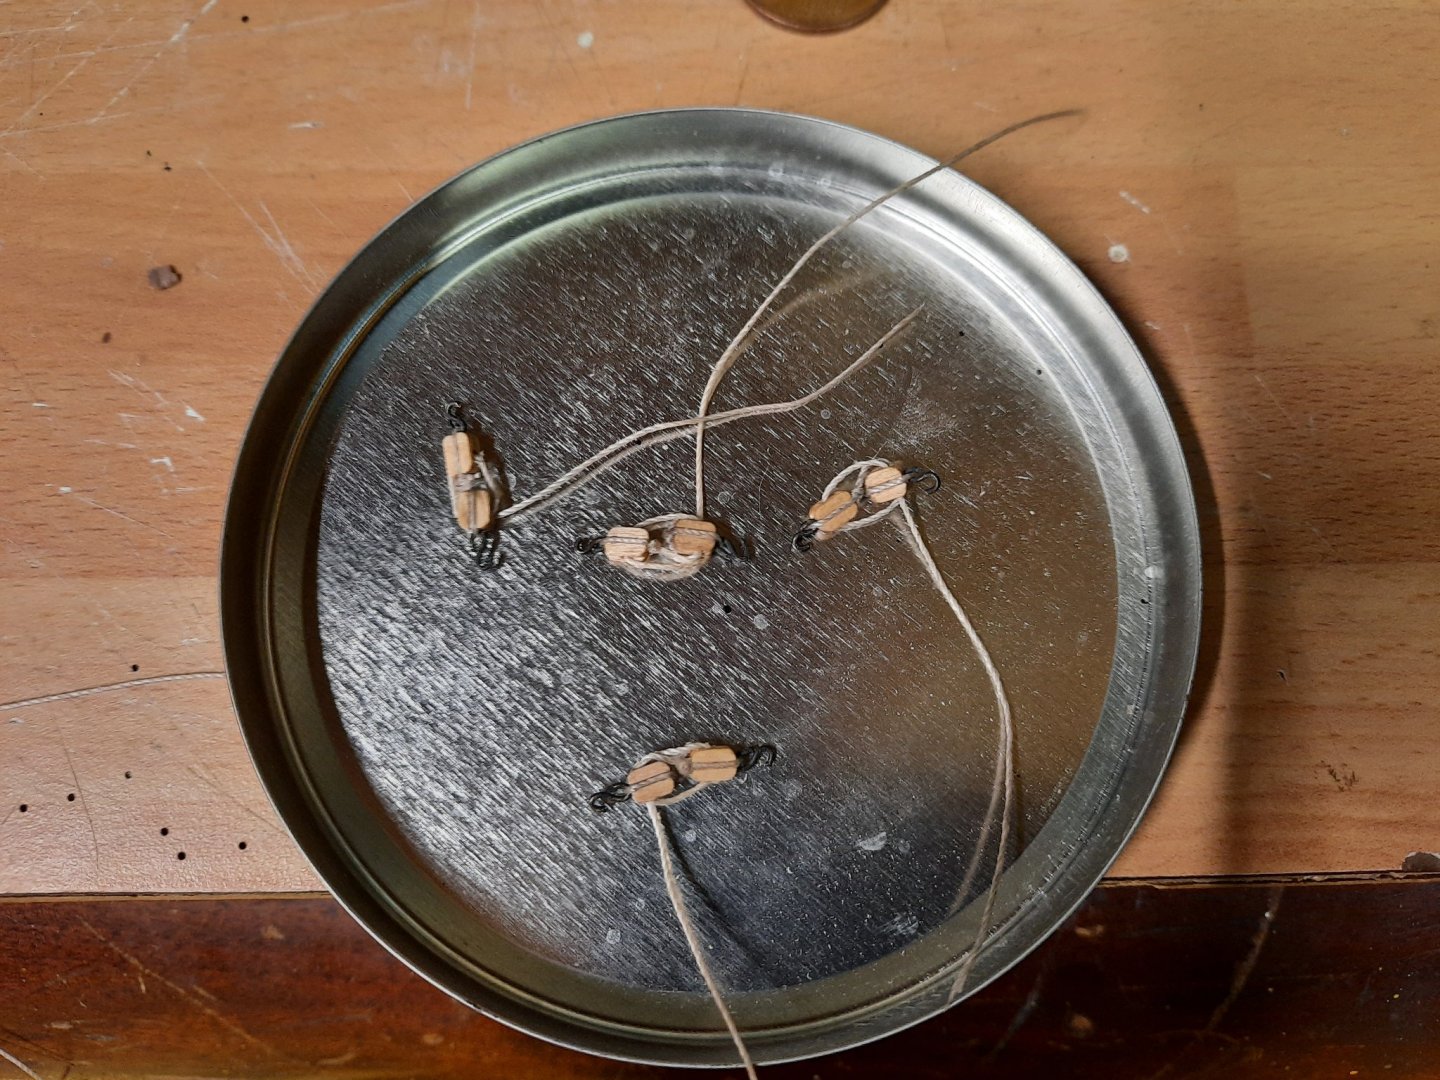
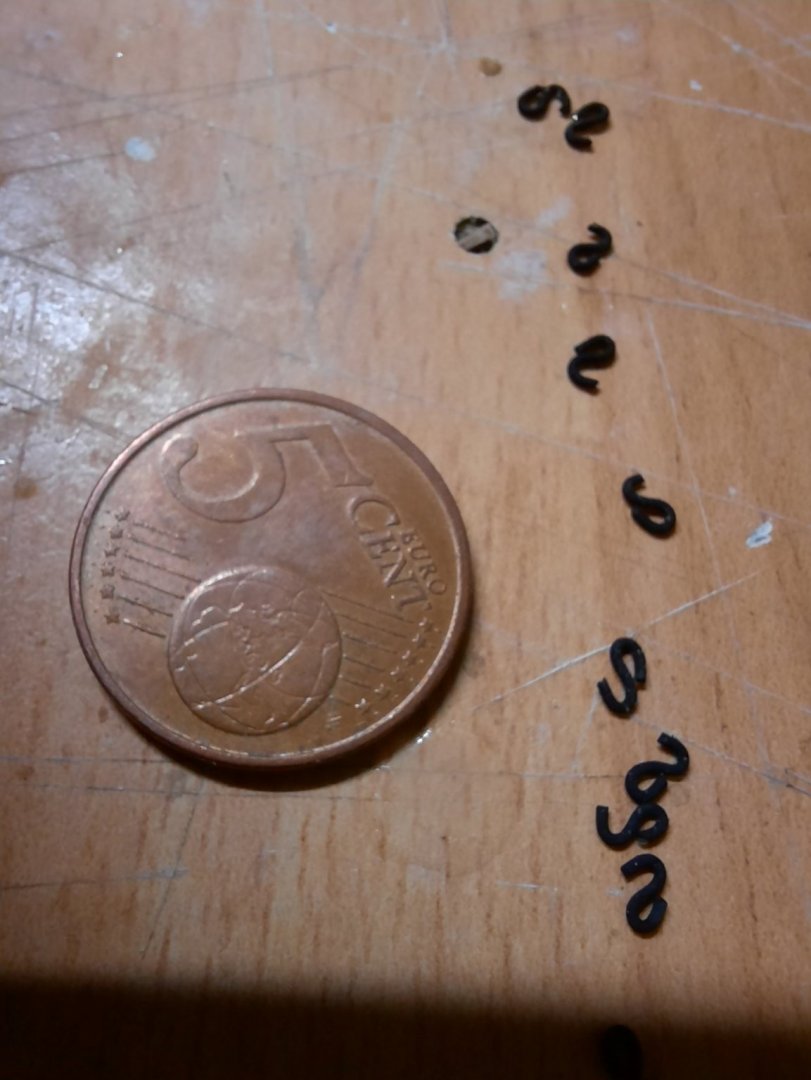
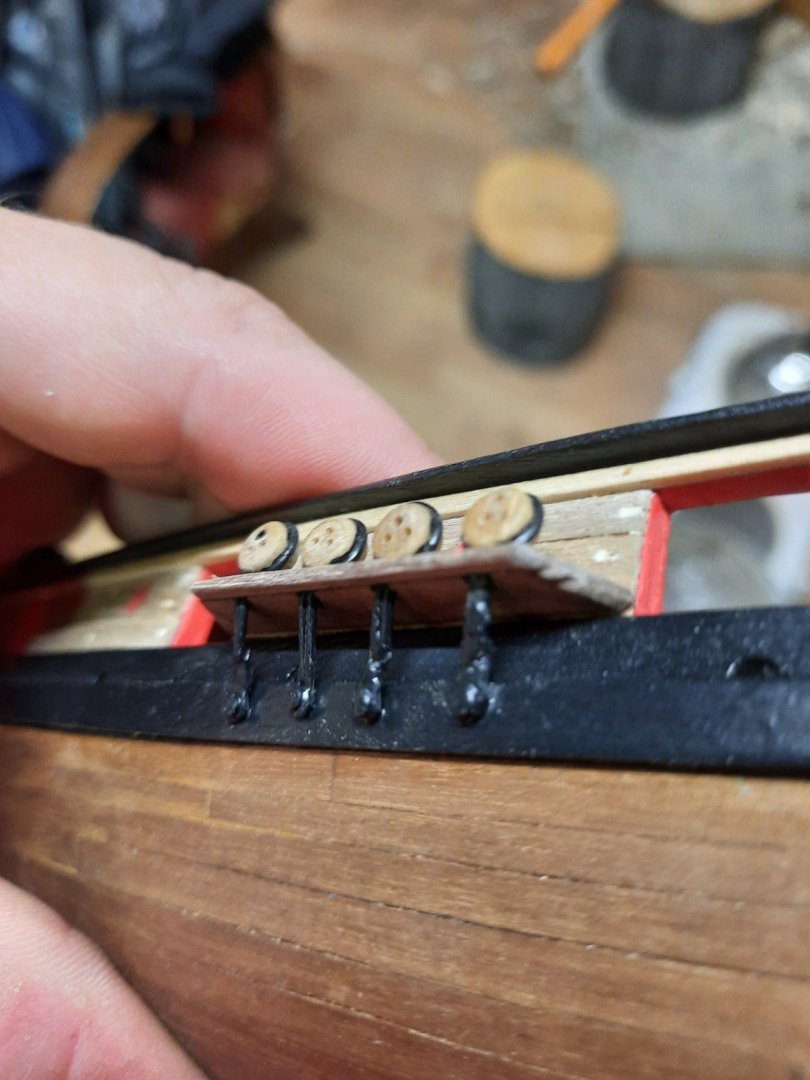
Dear felow modelers, yesterday I had some time in my workshop. I was working on rigging for cannons. I will show you my home made hooks. I used thin nail, nailed in board and couple of pliers. The wire was bent around nail with pliers. Here are pictures. Also I would like to share my saturday hike with you, on my favorite mountain in High Tatras with my doggo Zara. Enjoy. Till next time.


- 108 replies
-
- 7
-
-
- armed virginia sloop
- model shipways
- (and 1 more)
-
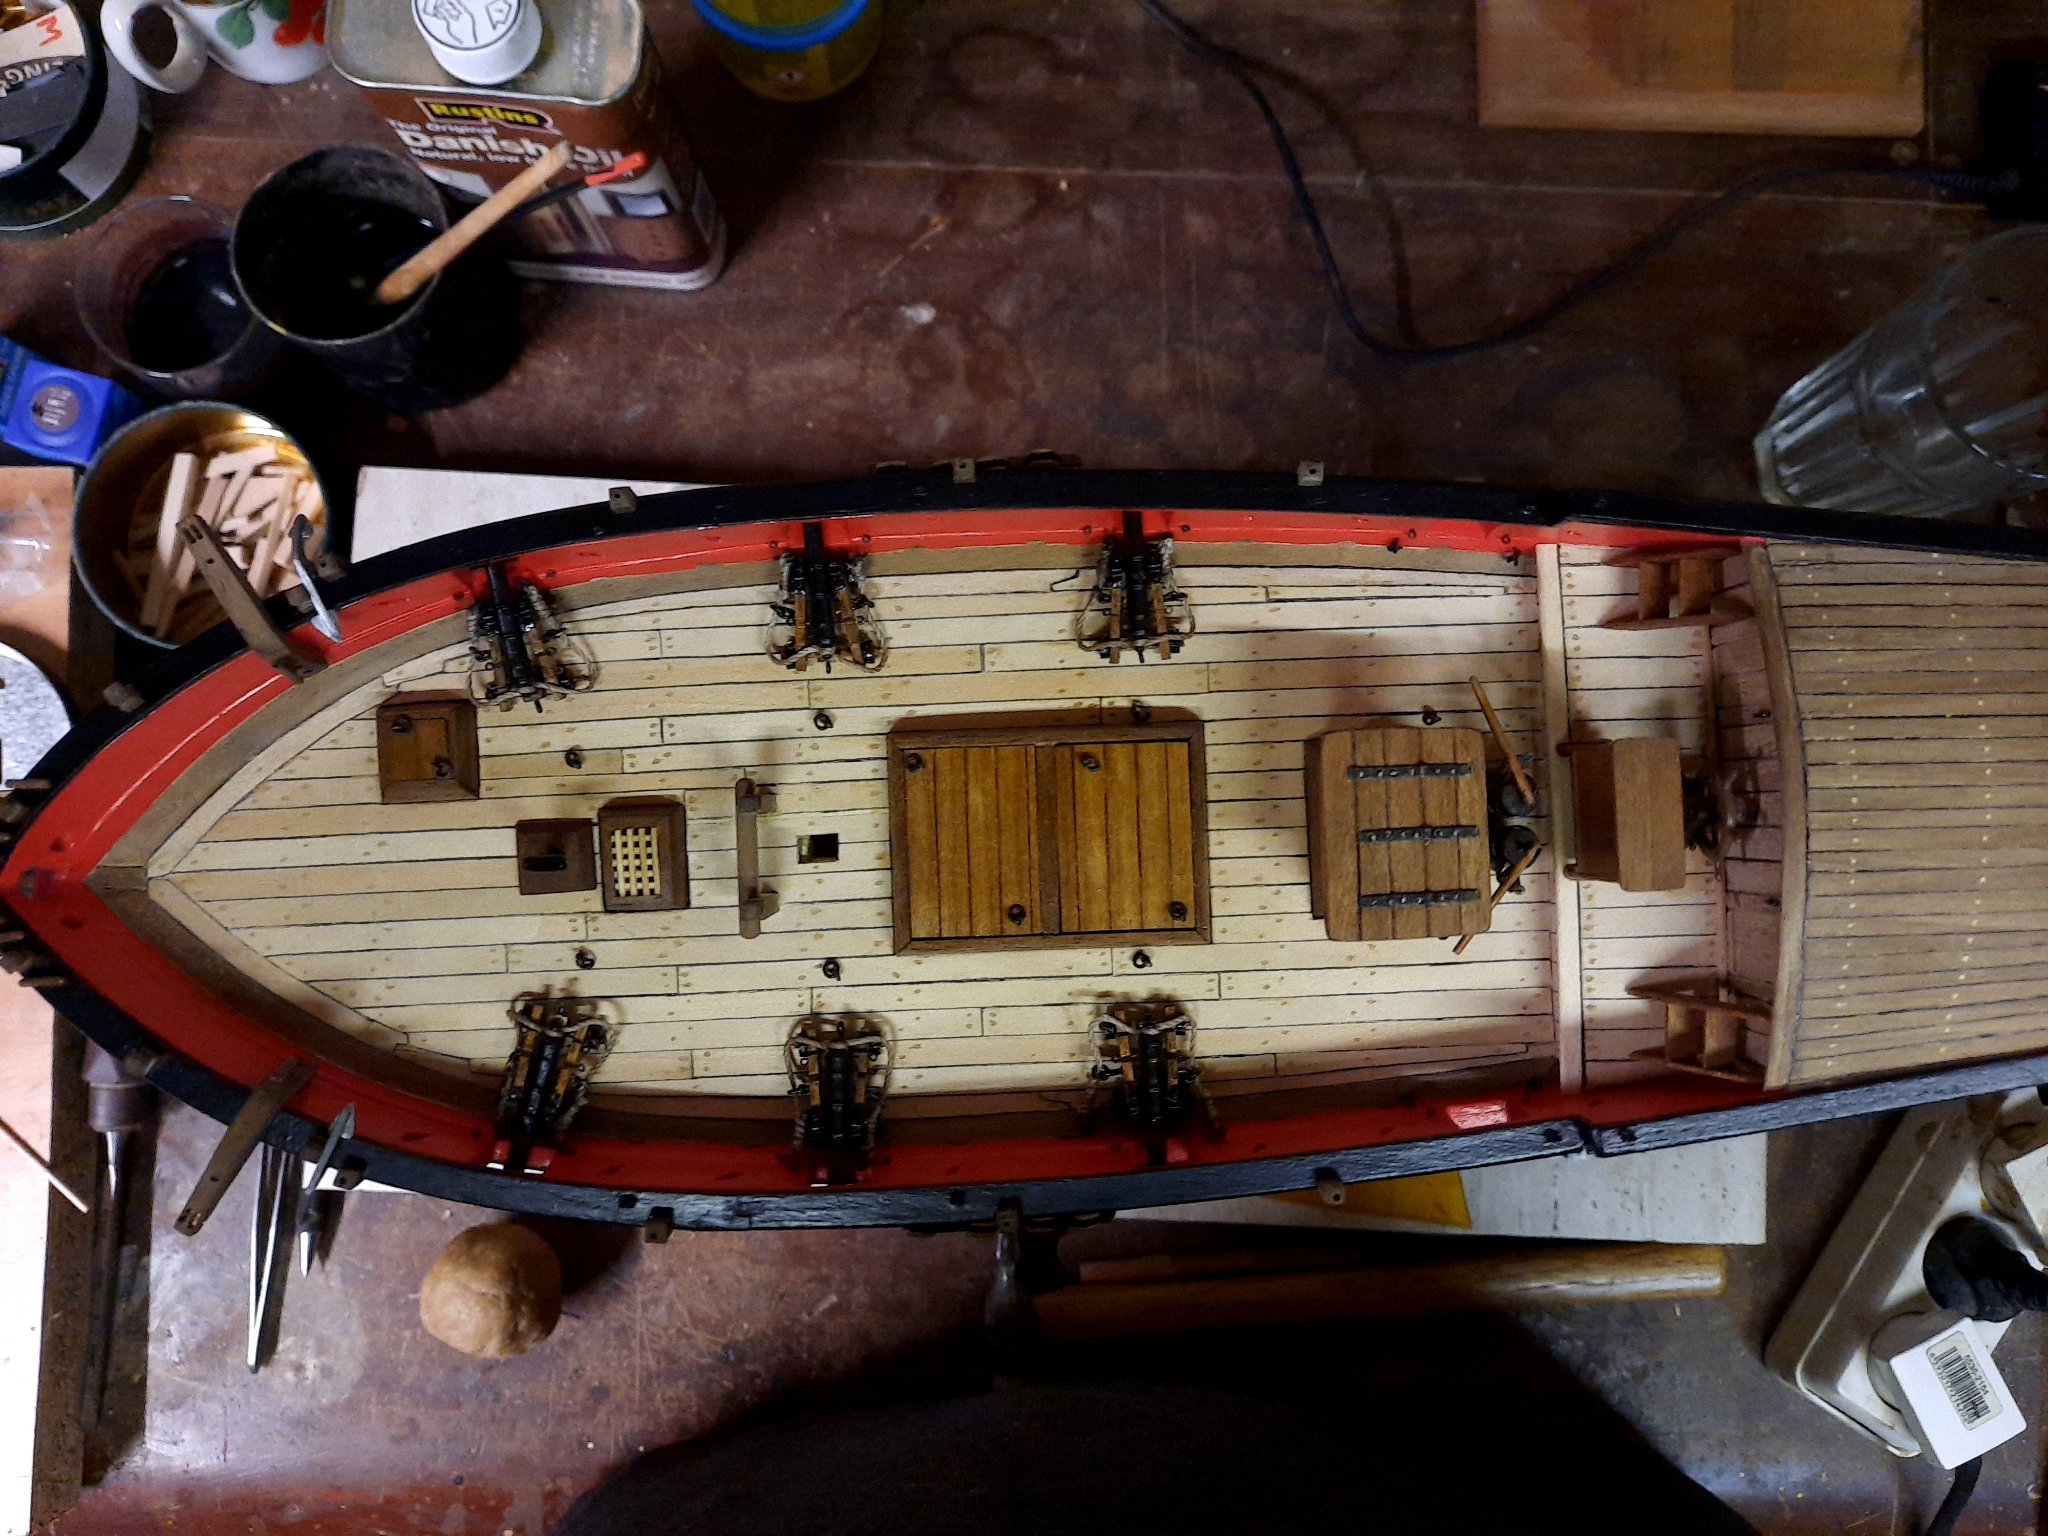
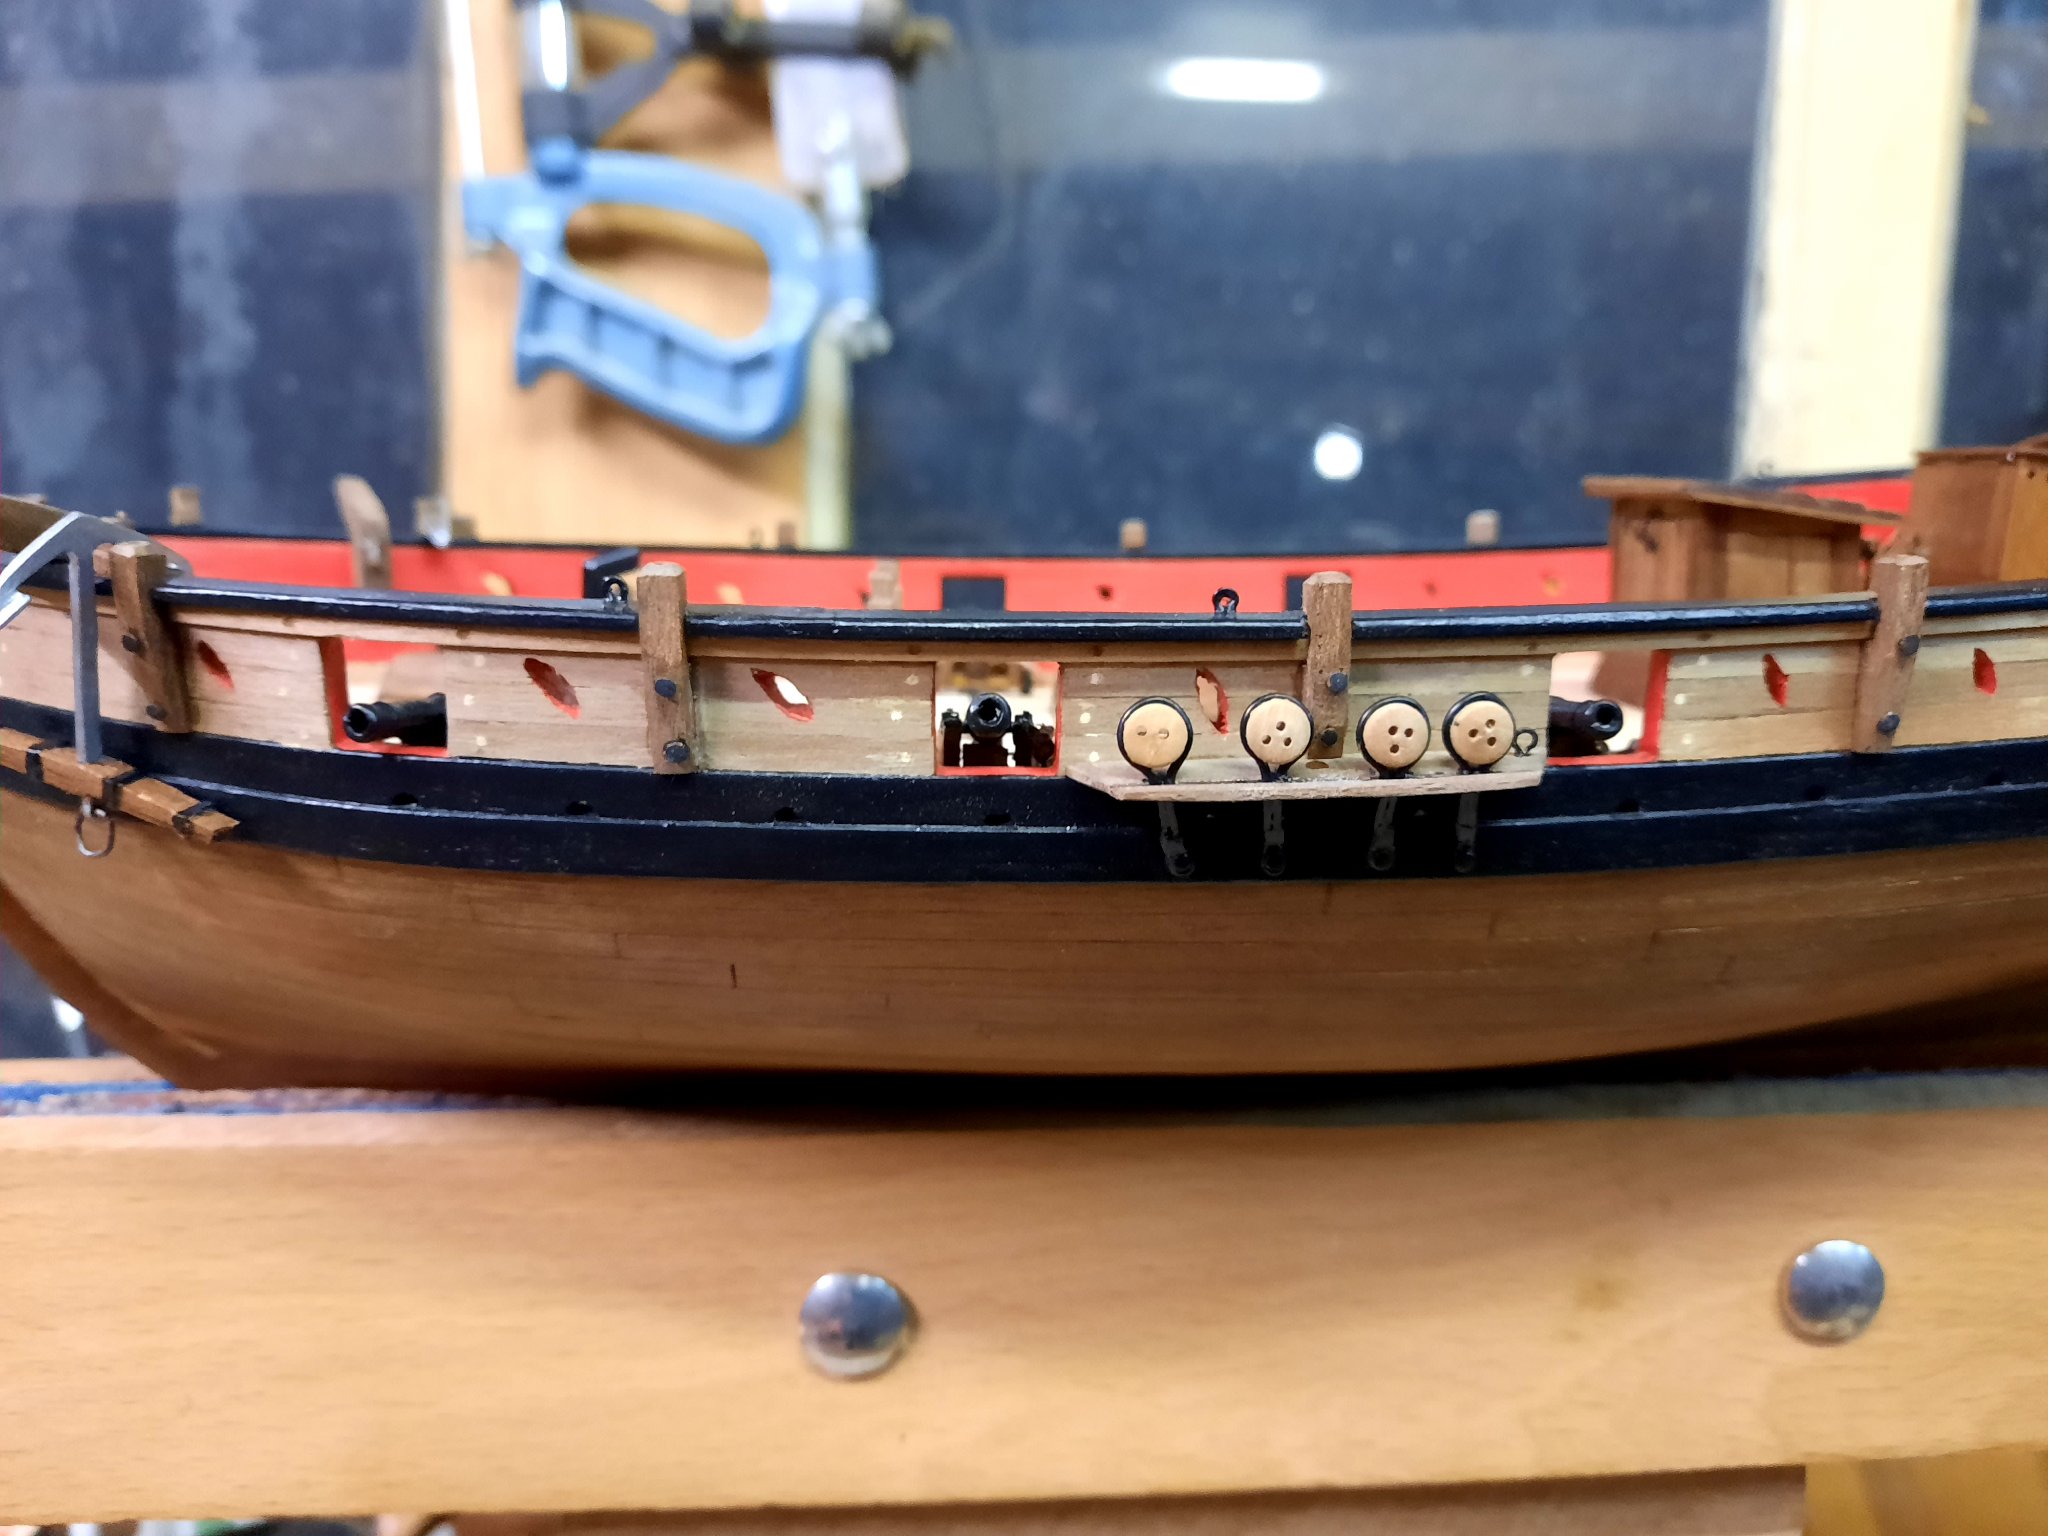
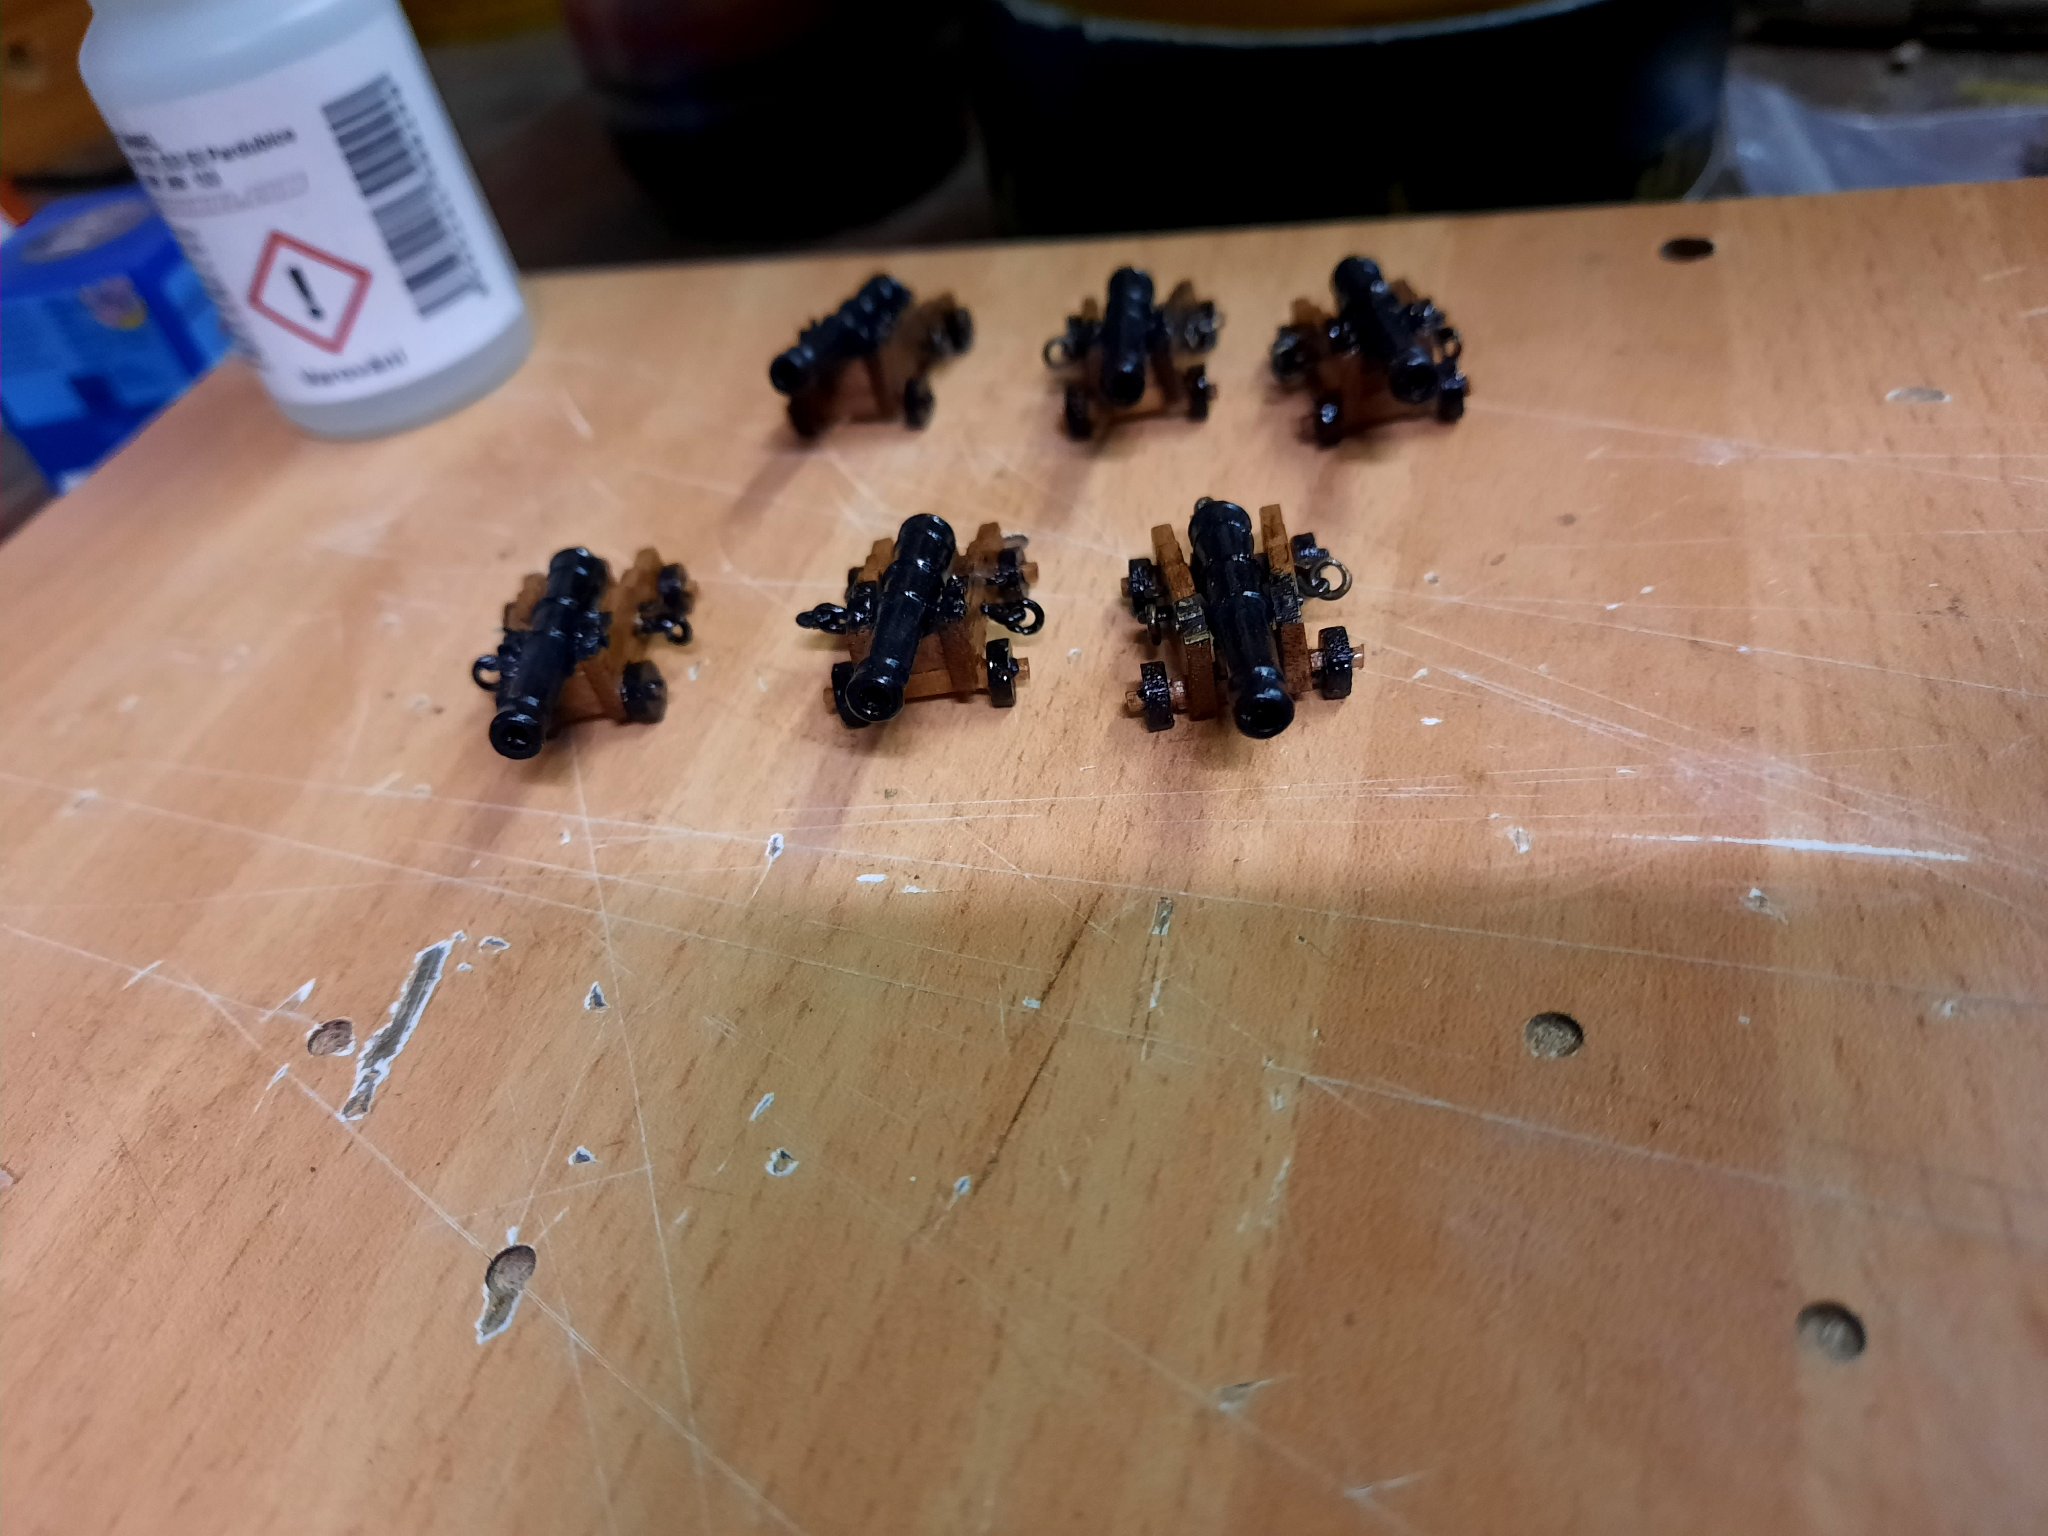
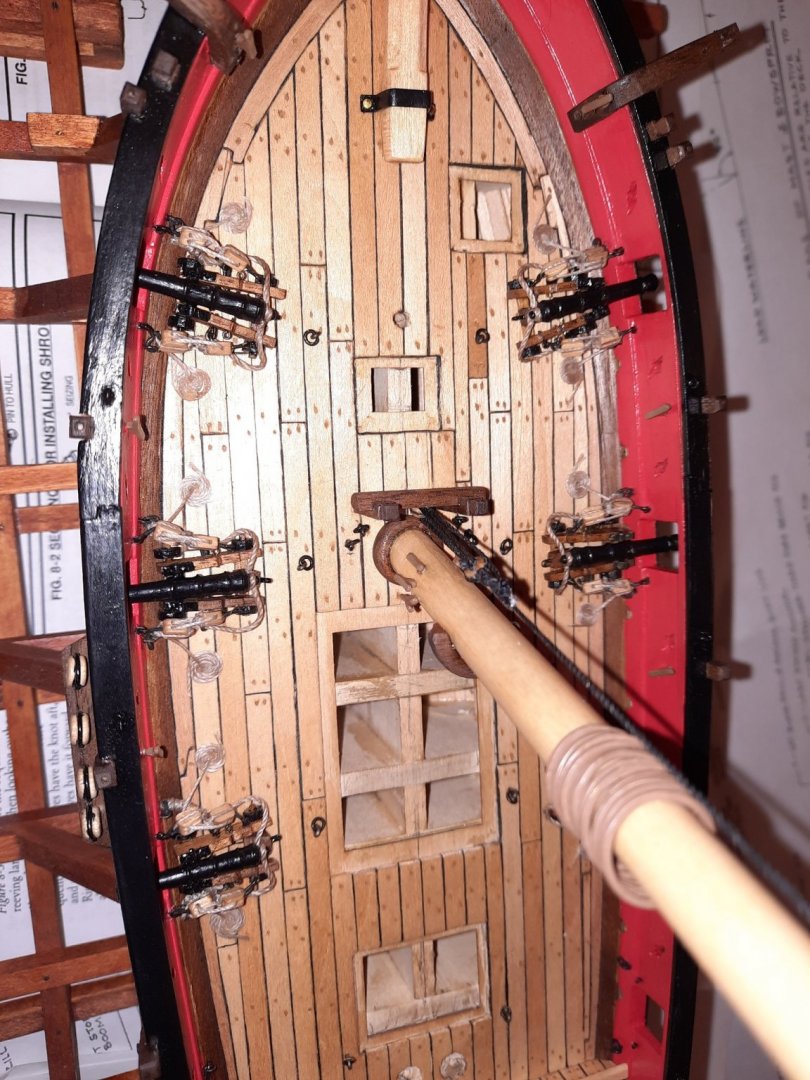
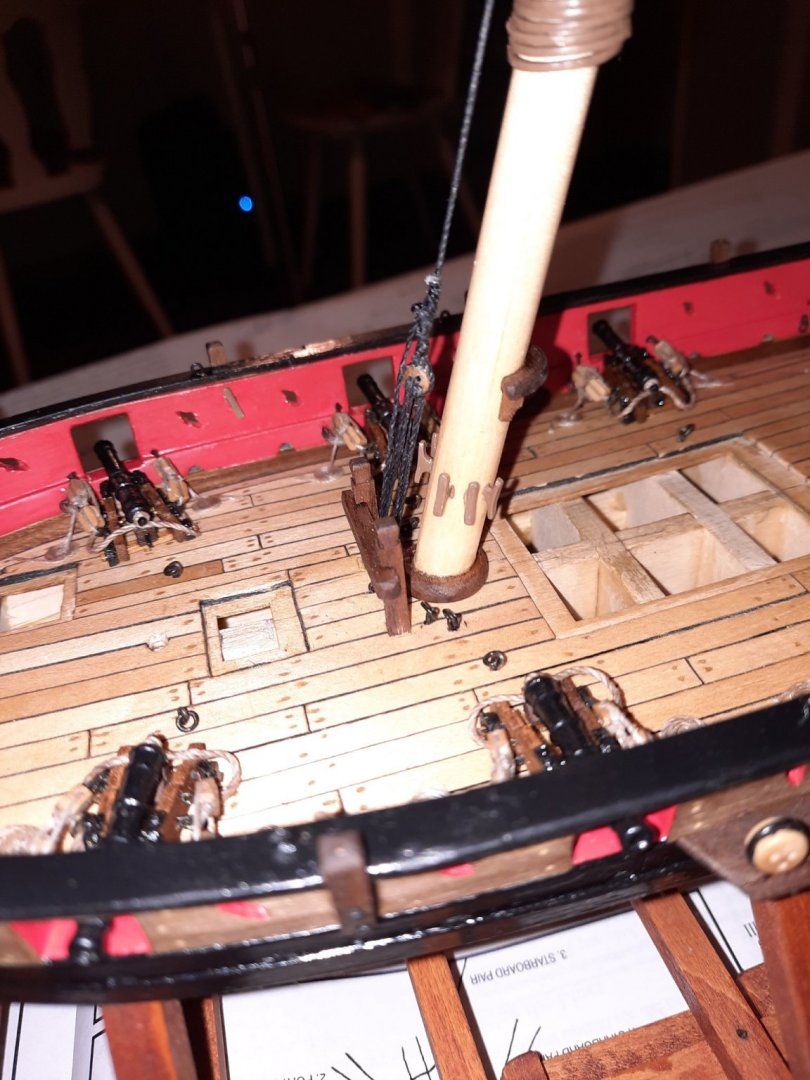
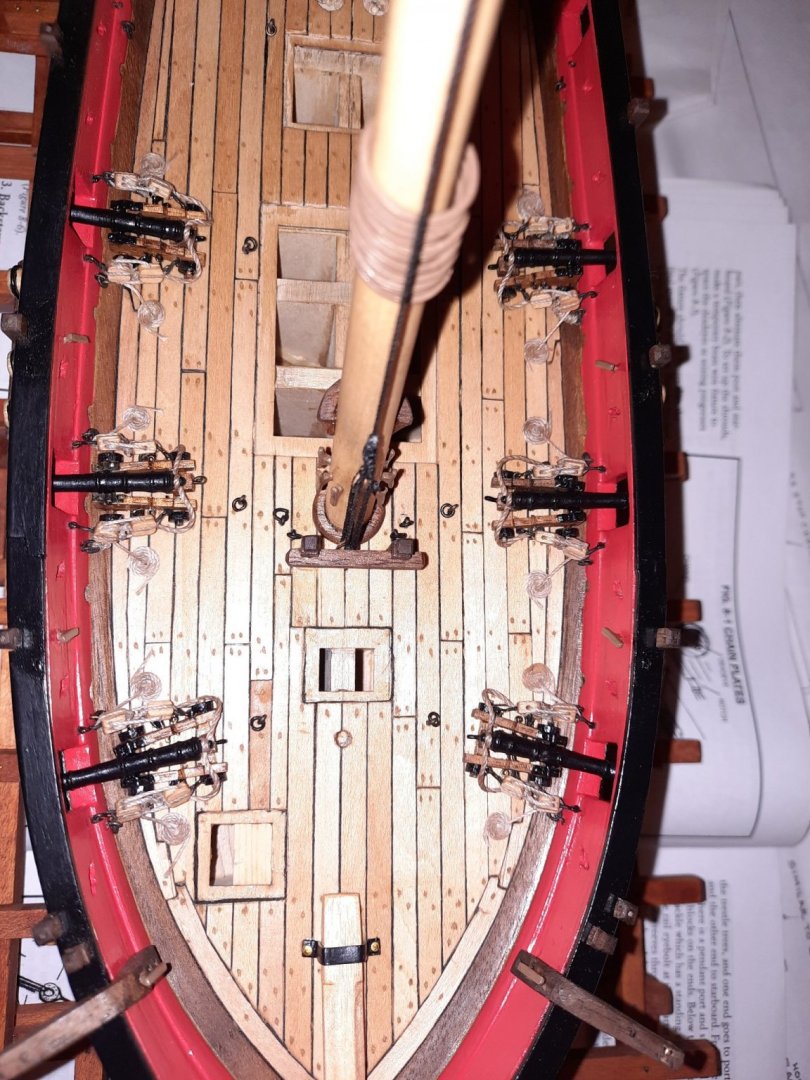
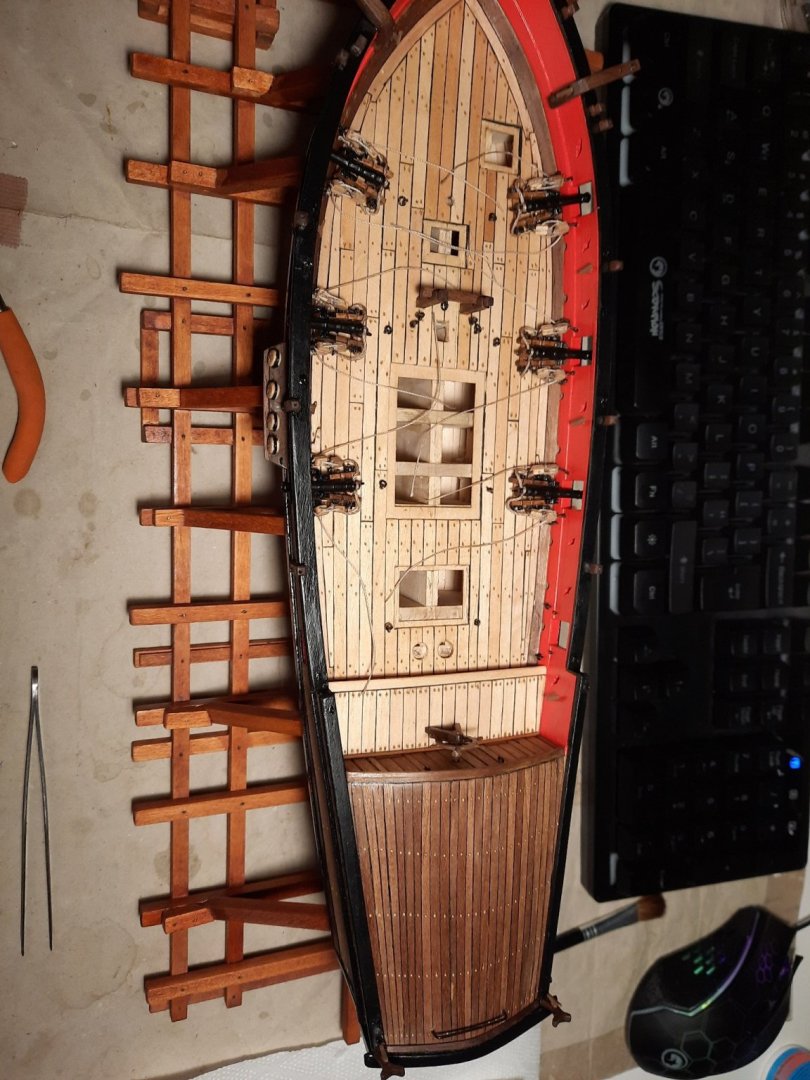
Dear fellow modelers, I started with rigging of the cannons and with production of home made hooks. I am happy how the hooks are looking. I will show pictures next time. Here are some pictures with all deck assembled. Still need to drill holes for some cleats. Enjoy. Till next time.


- 108 replies
-
- 5
-
-
- armed virginia sloop
- model shipways
- (and 1 more)
-
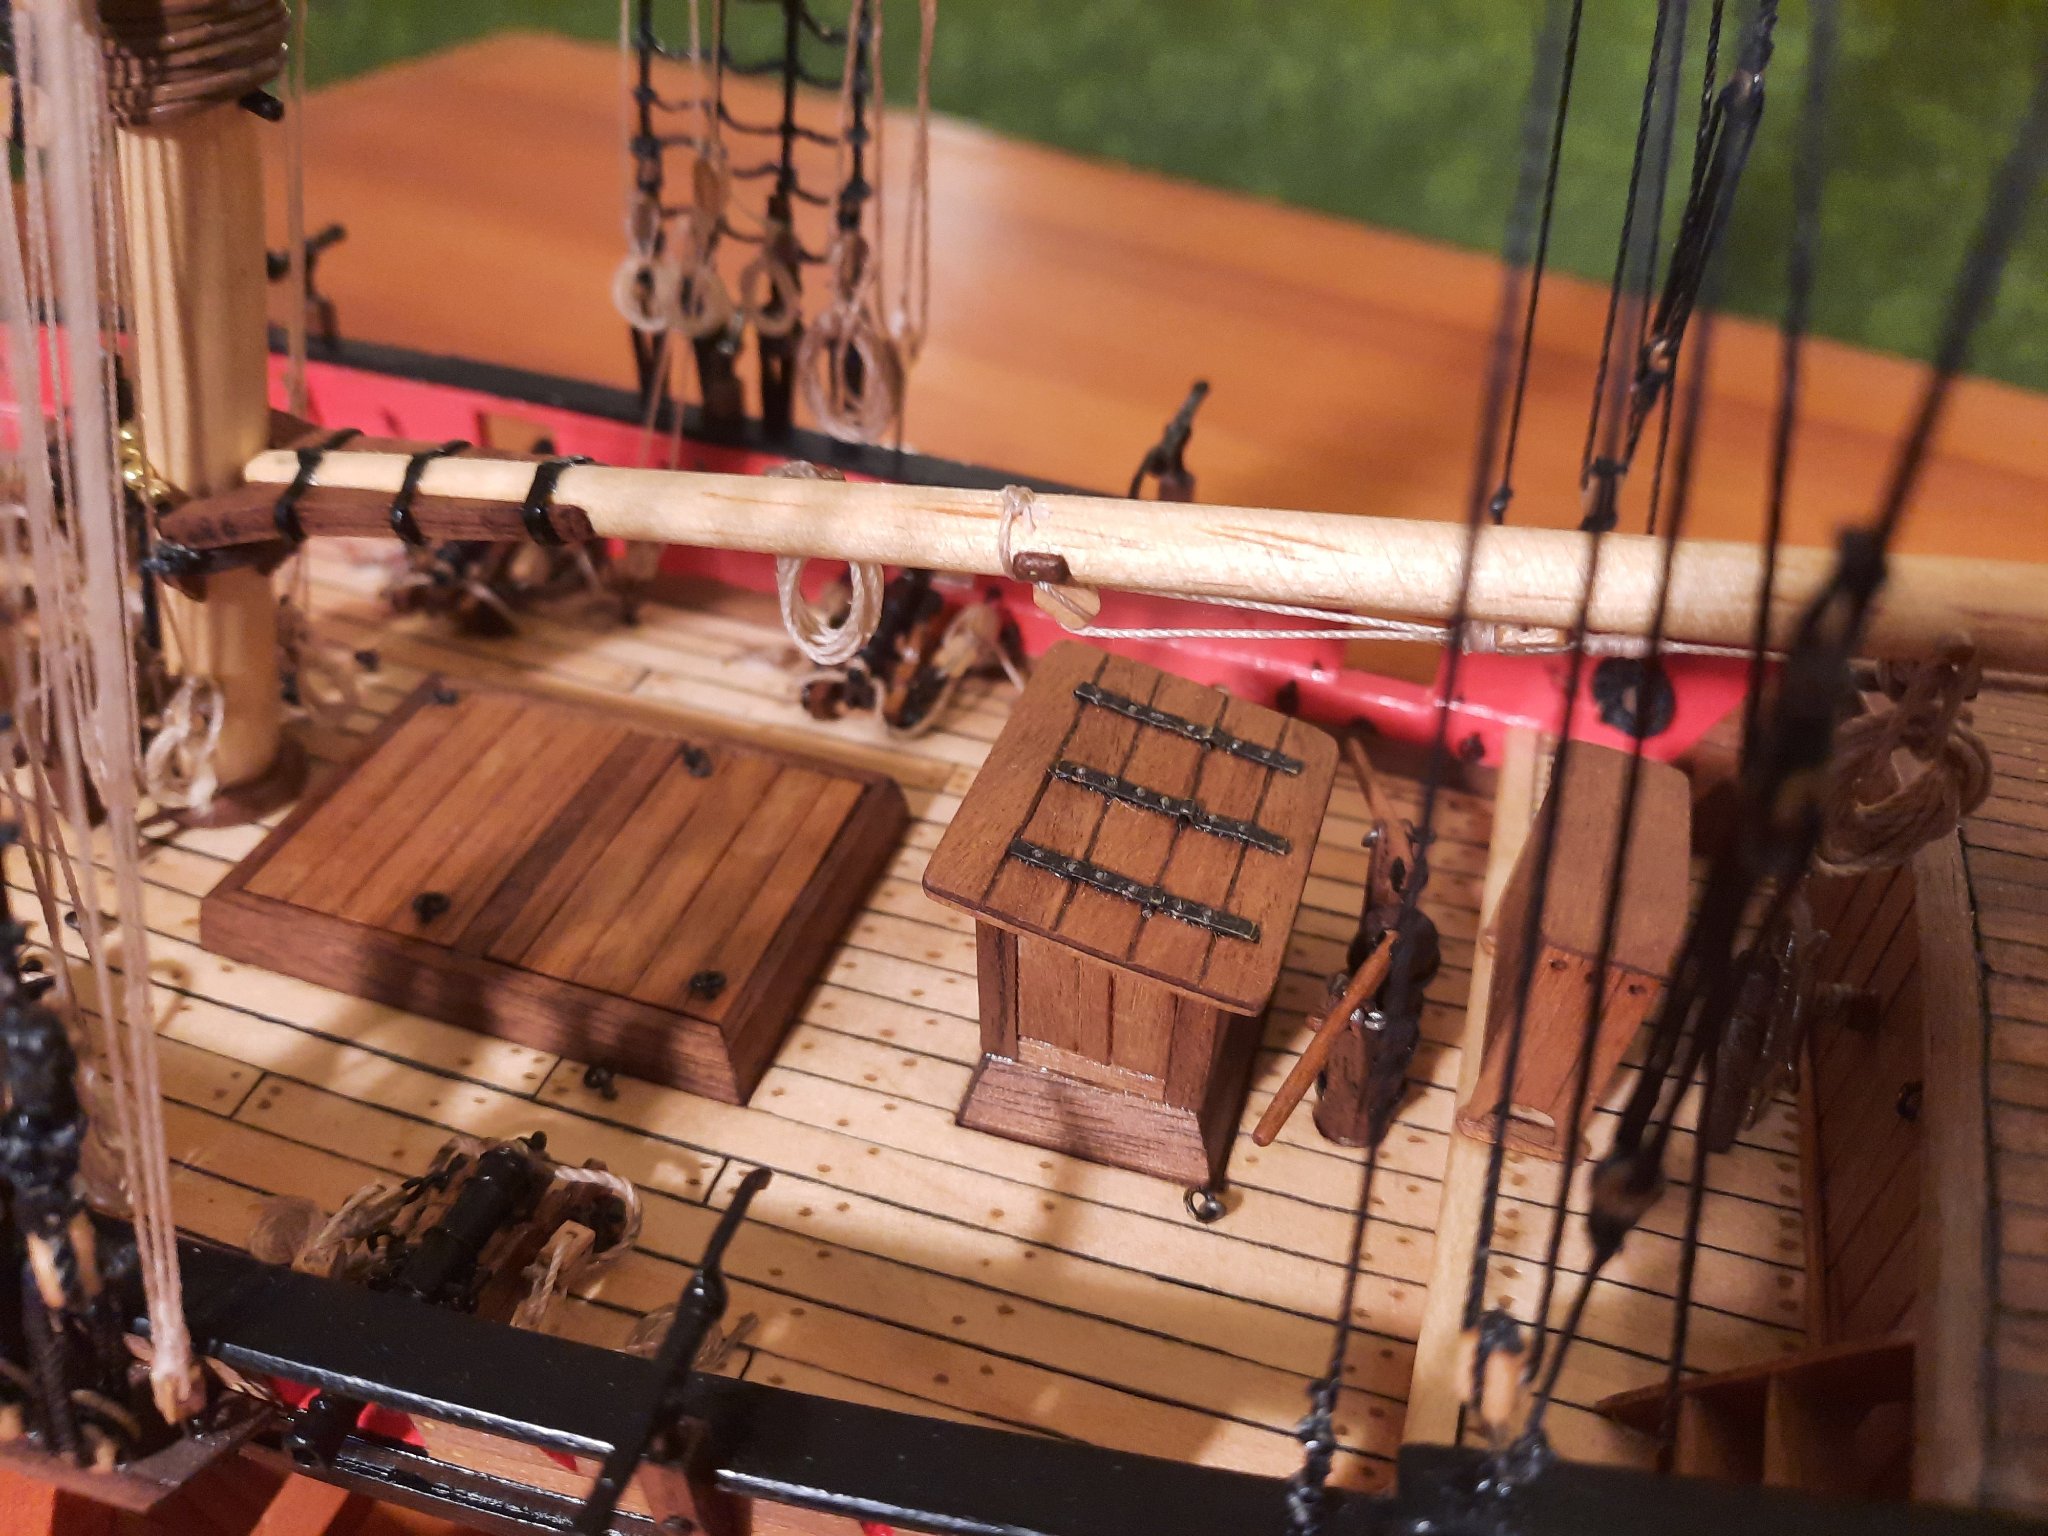
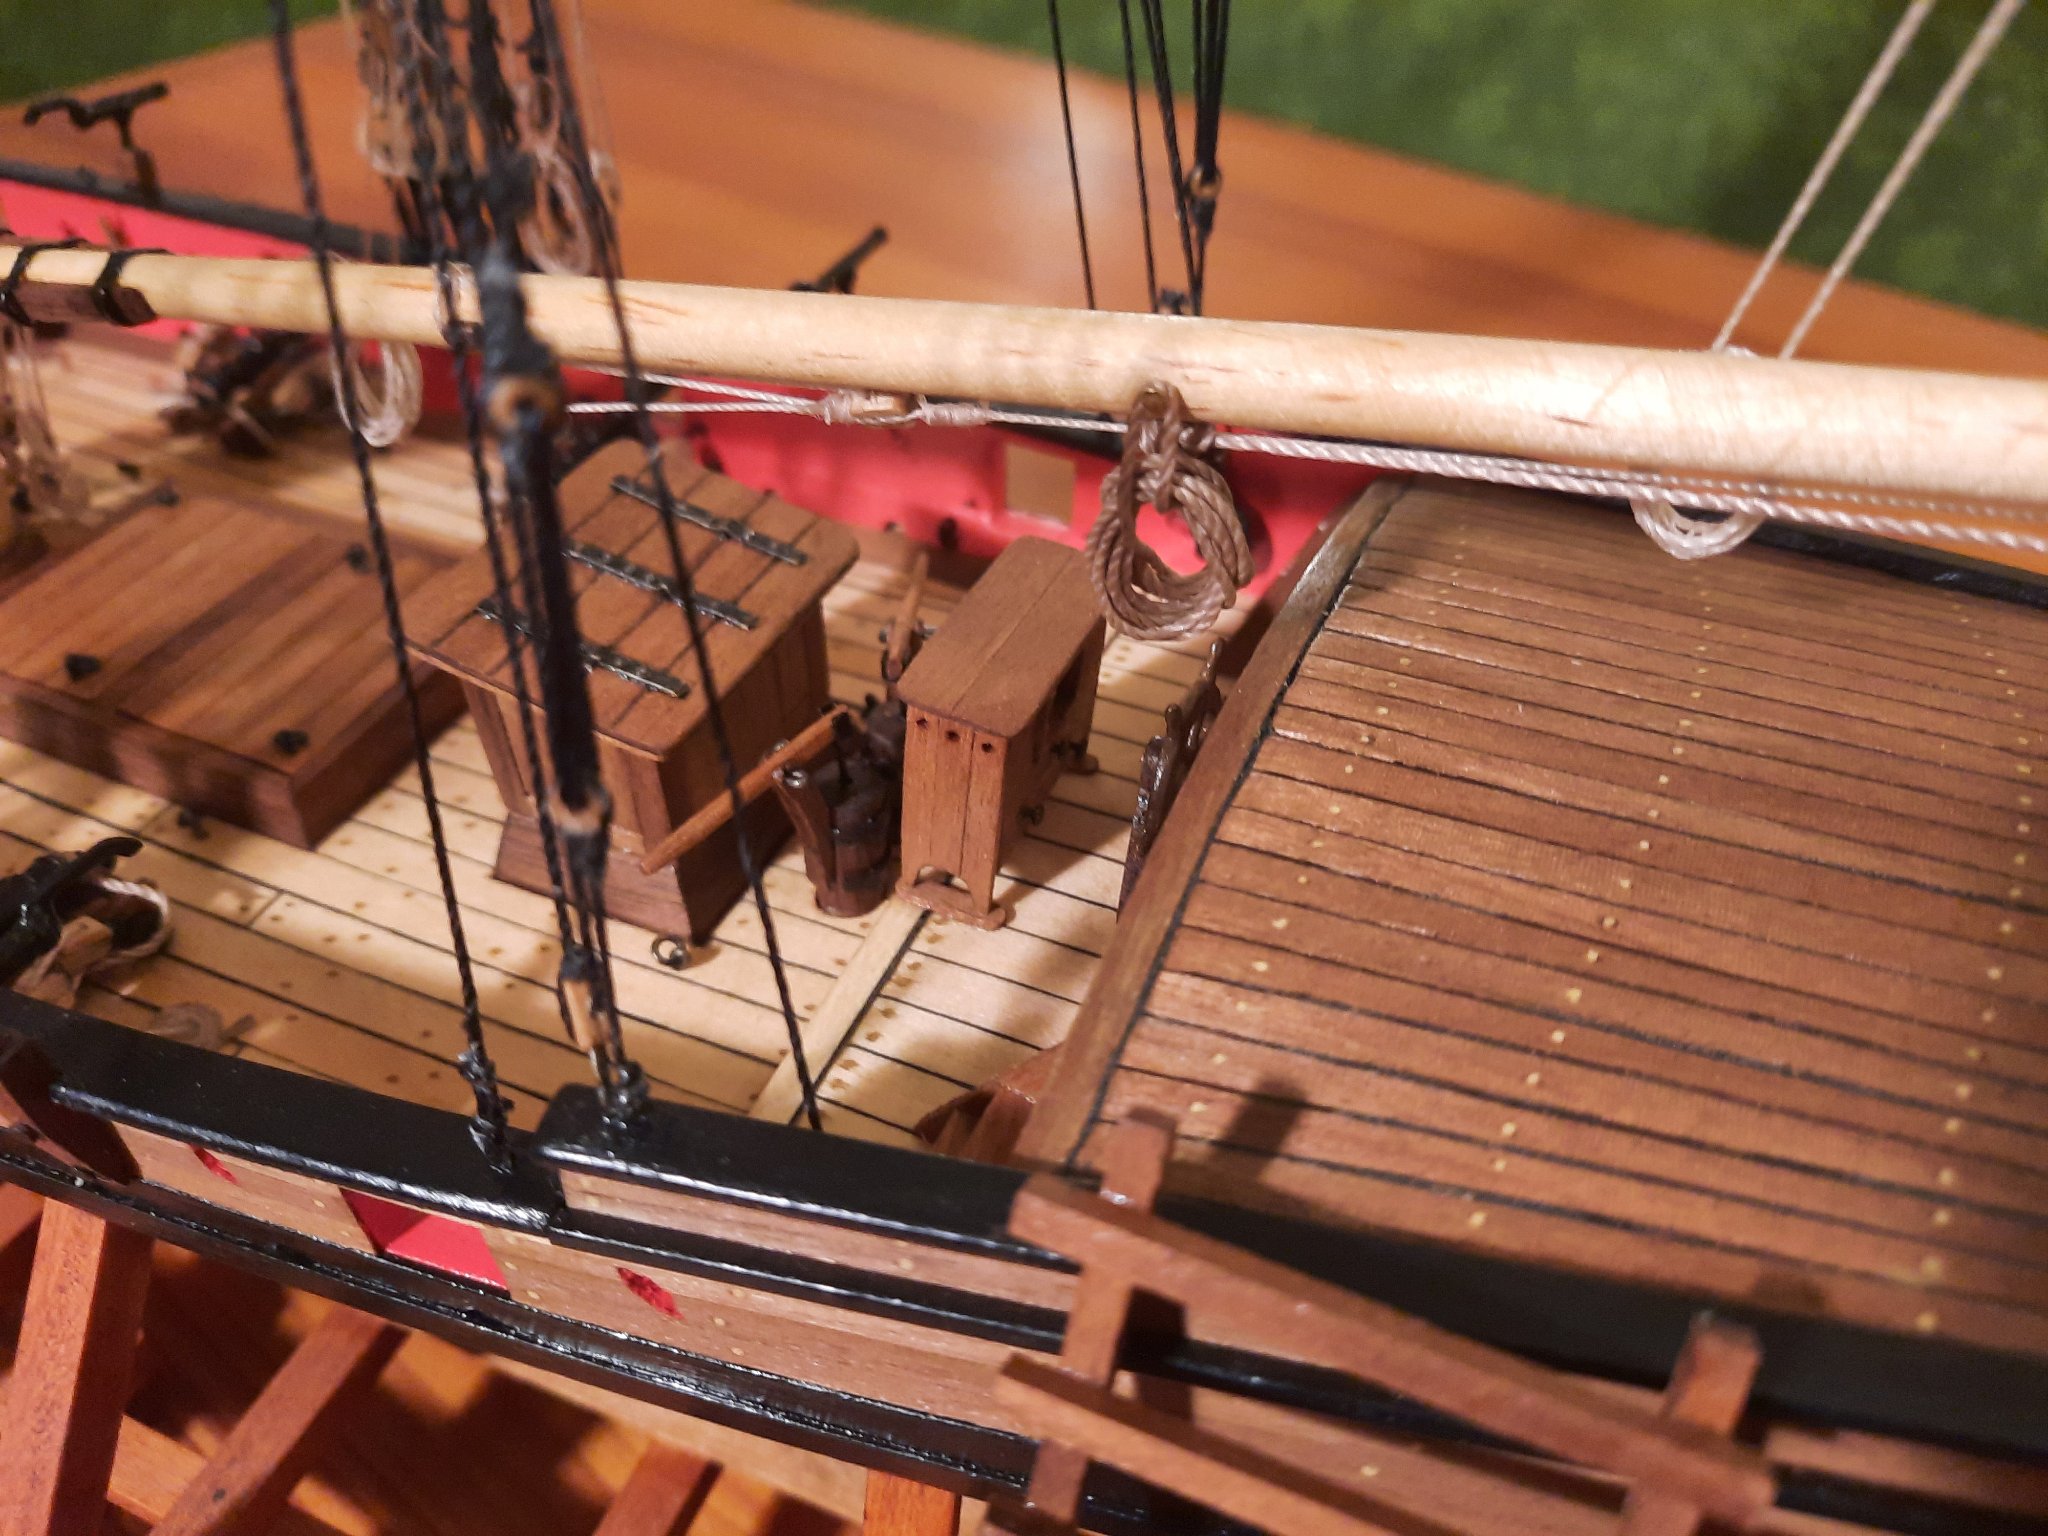
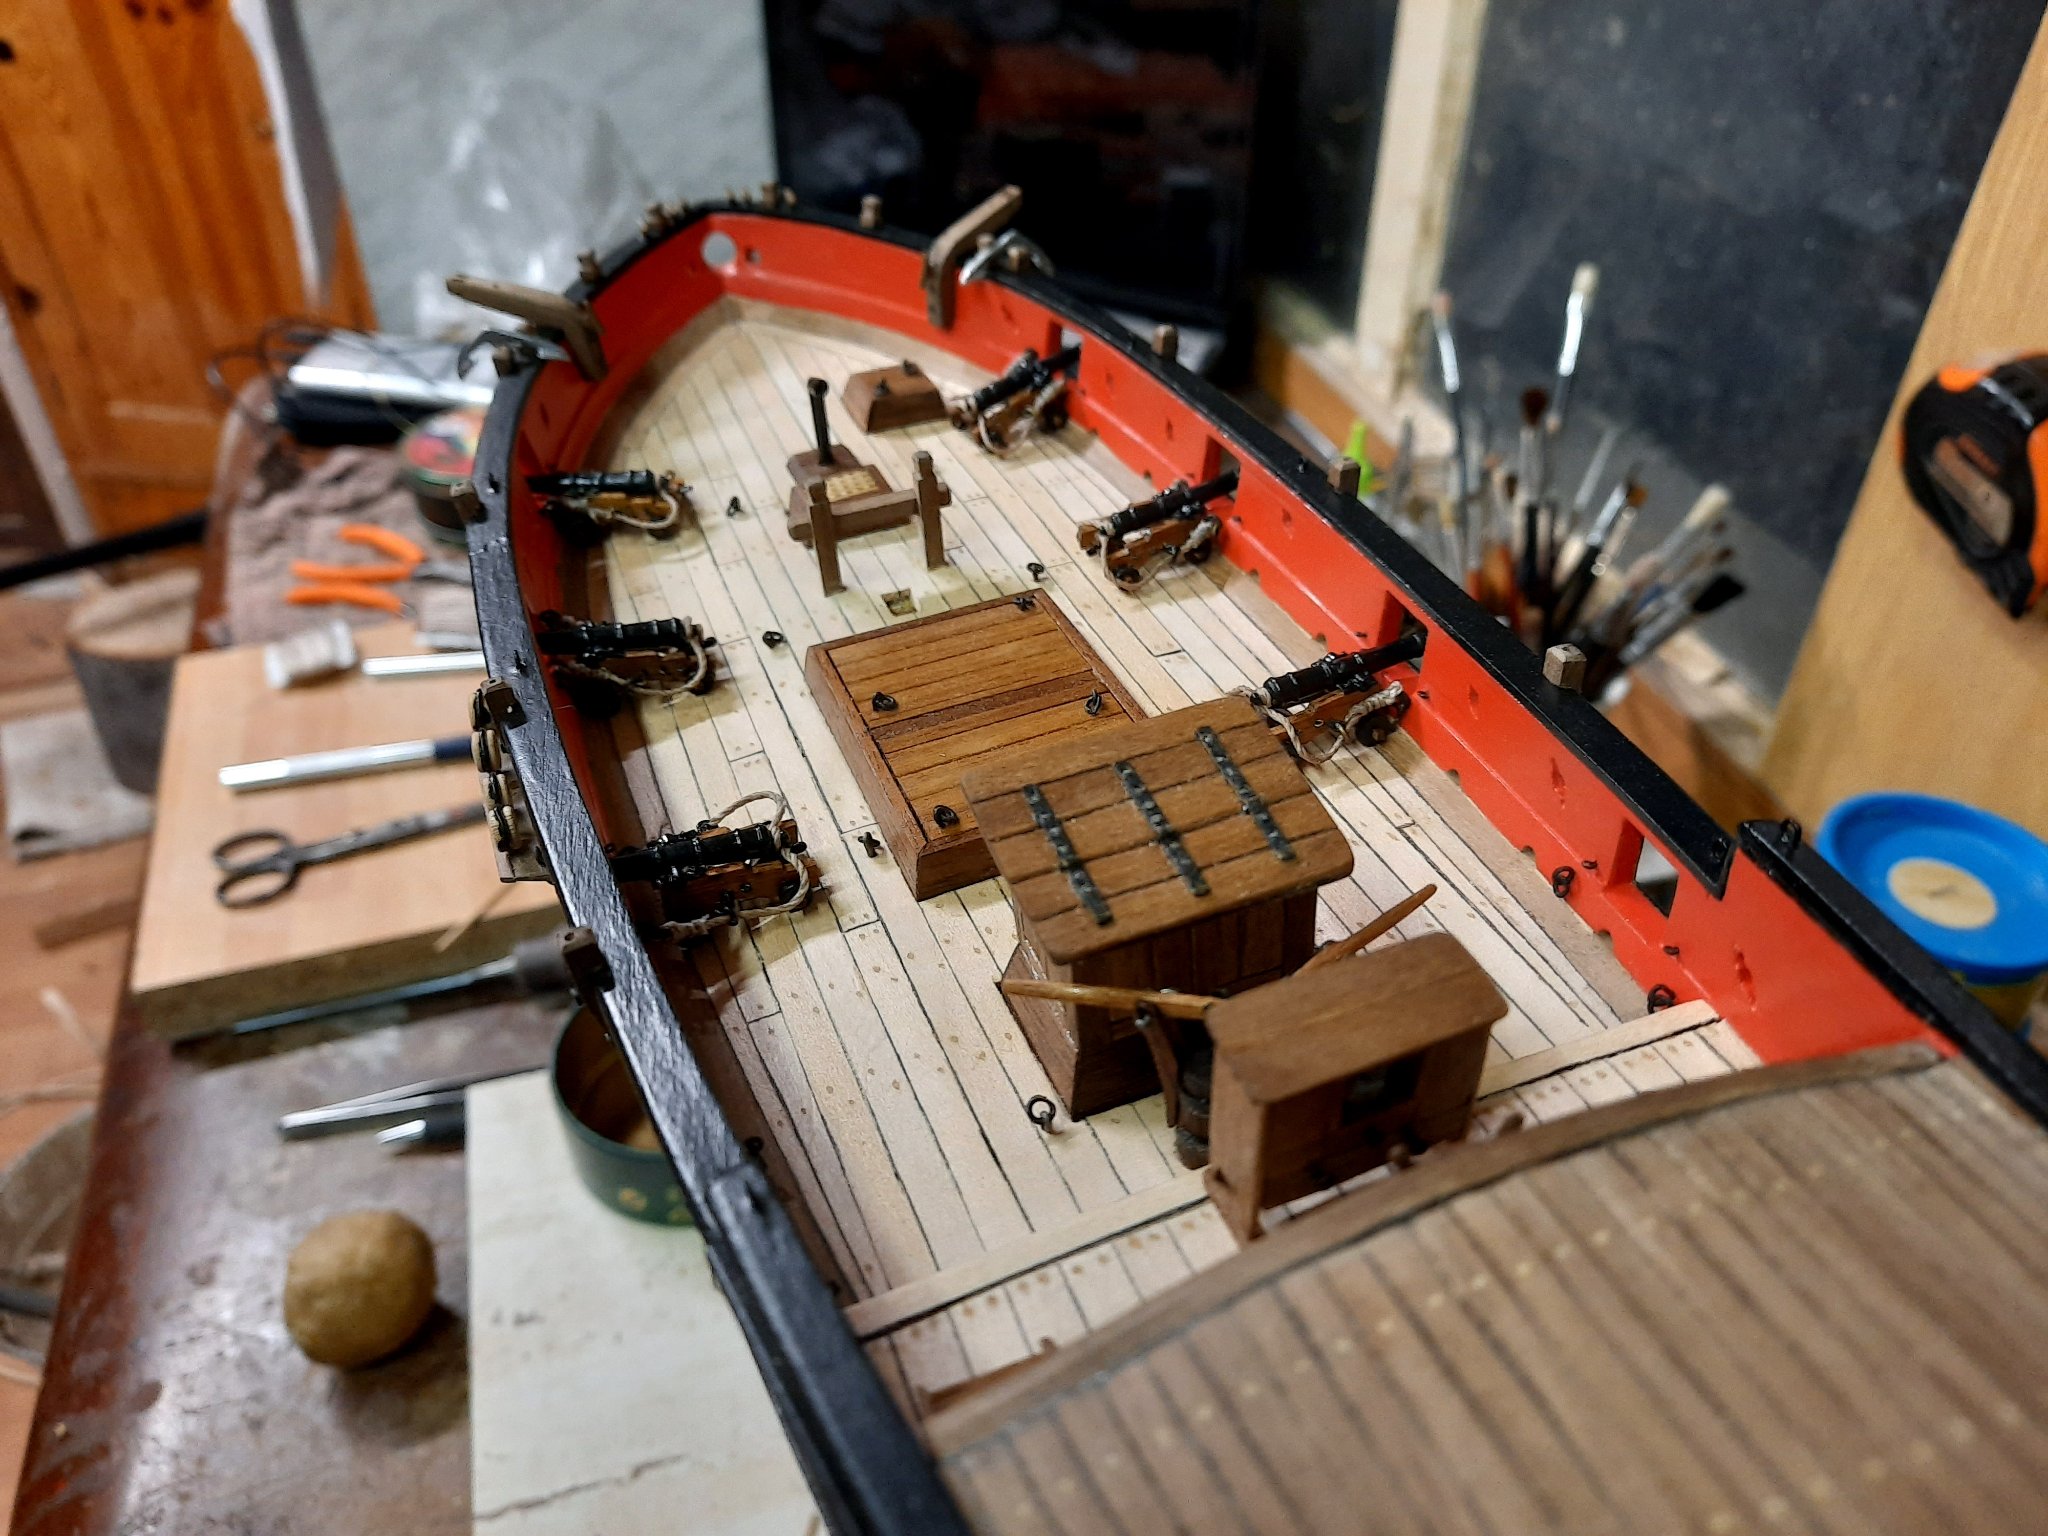
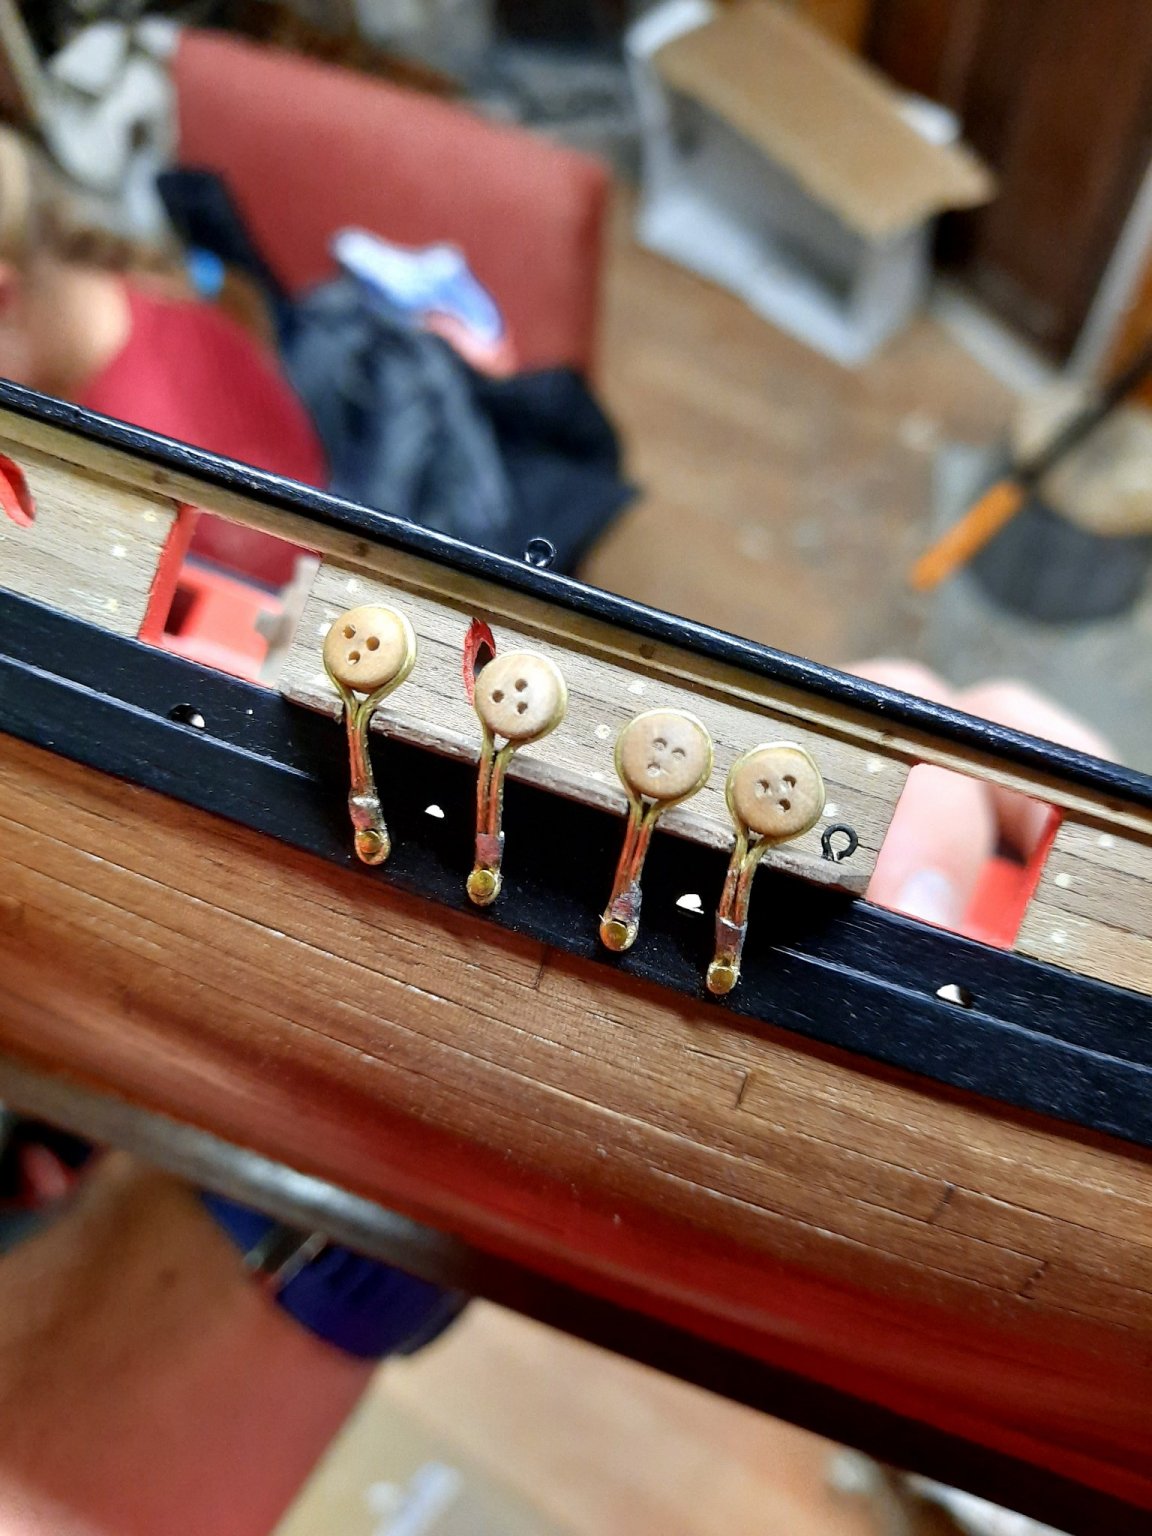
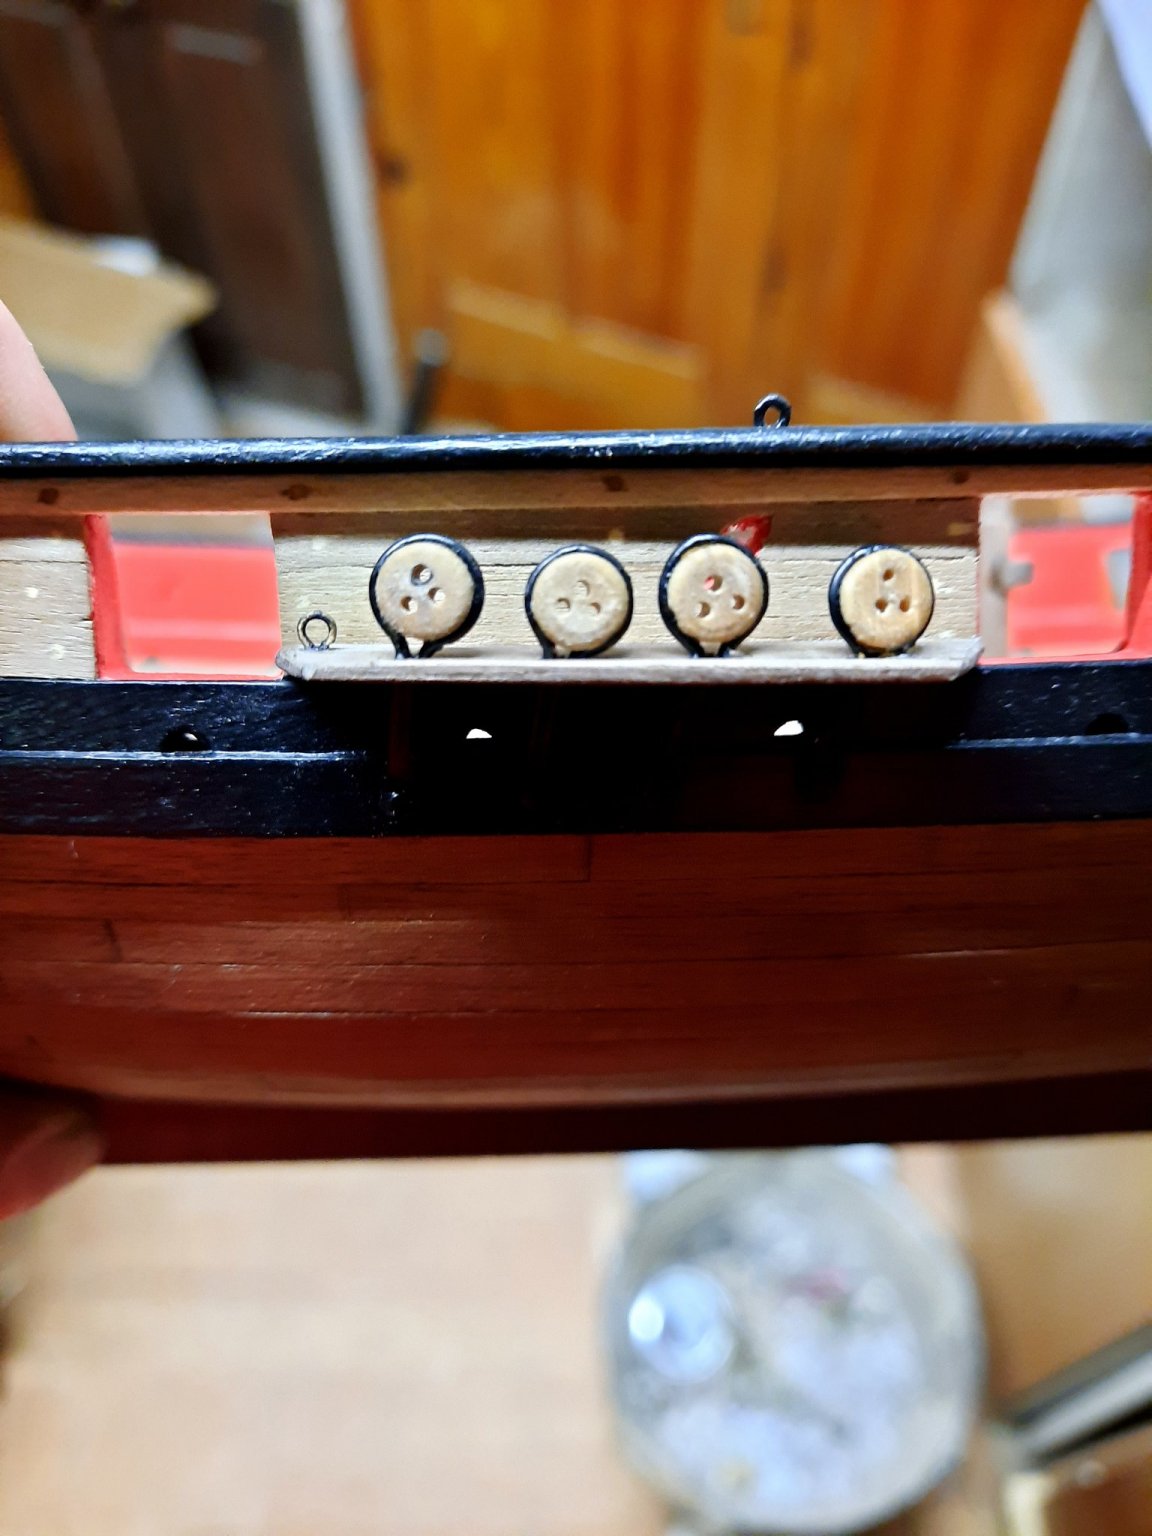
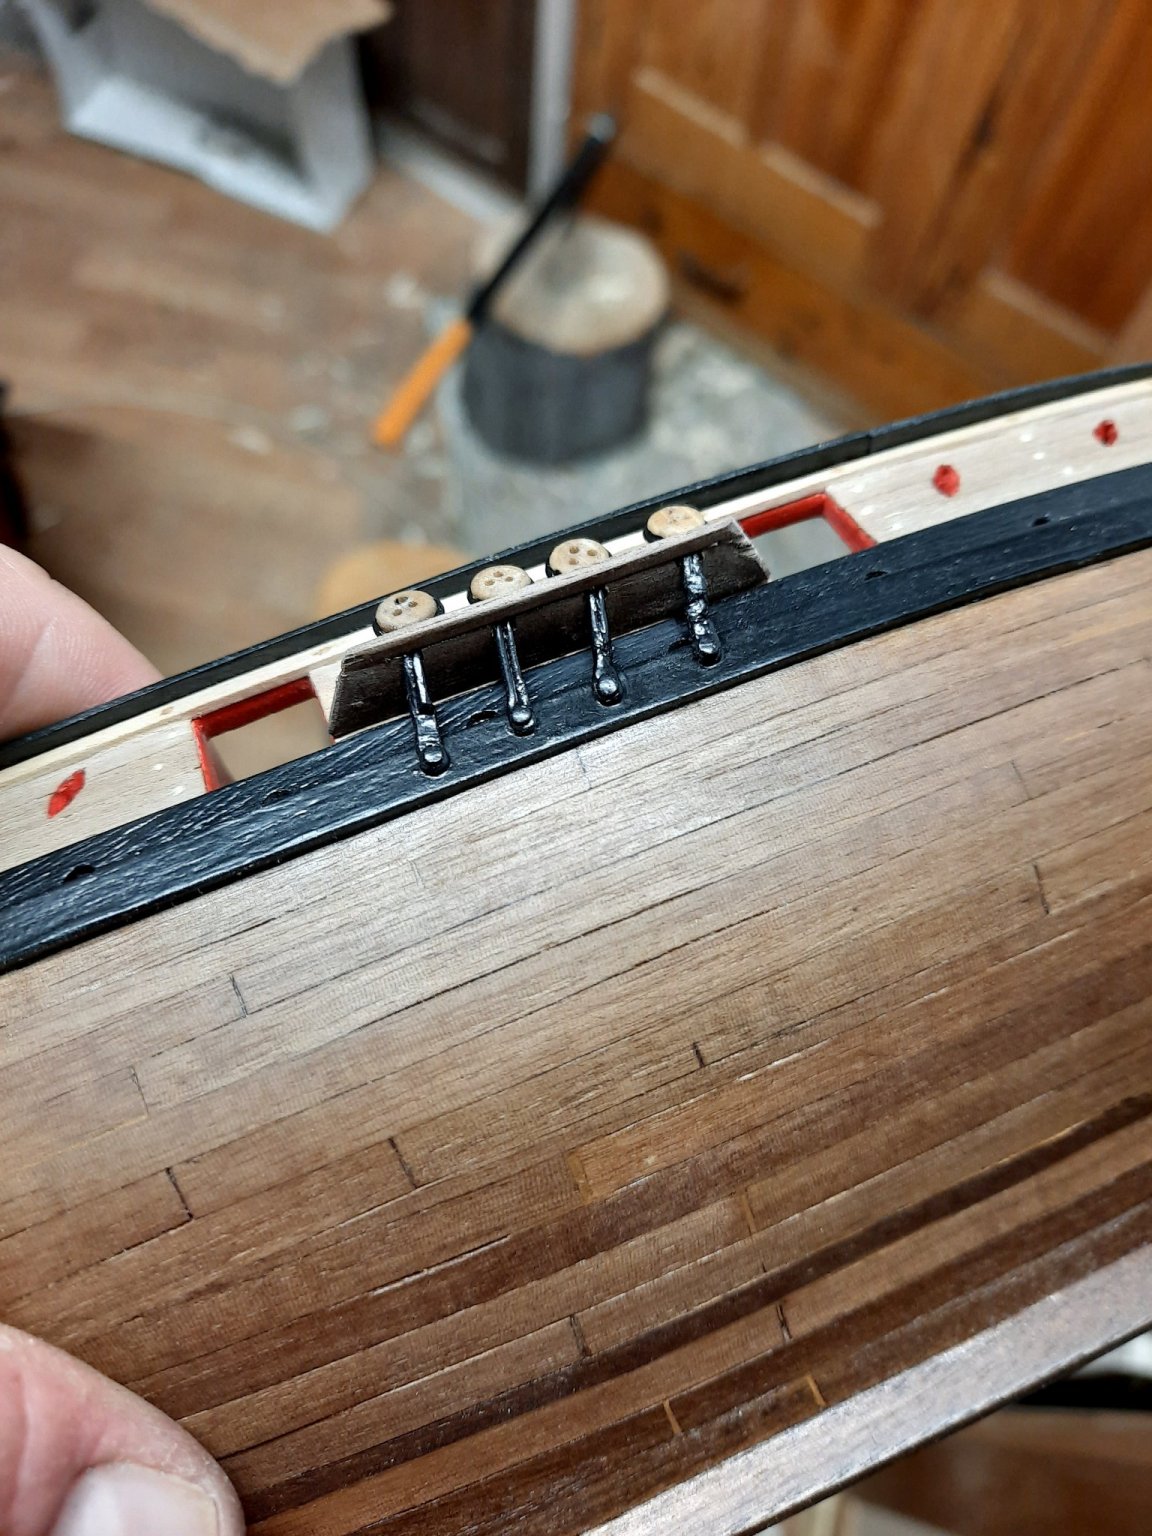
Hello felow modelers, I thought hard about what to do next, before I start with mast and spar . Probably I need to secure cannons on the deck. But before I thought I will finish shipyard. As you can see on the pictures. New added wood is withou any color. I also added swivel gun post on right side, you can see them on the pictures below. As my main rail is little bit thicker I needed to cut opennings in it for the swivels. I am planning to hav 6 or 7 supporting joists on both sides - I will see how i will like it. Till next time.

- 108 replies
-
- 5
-
-
- armed virginia sloop
- model shipways
- (and 1 more)
-
BTW very nice build. Very clean work. Again it is honestly very hard to express the feel when I look at your photos. Just amazing.
-
Hi Peta, can you please tell me from where did you buy these hooks?
-
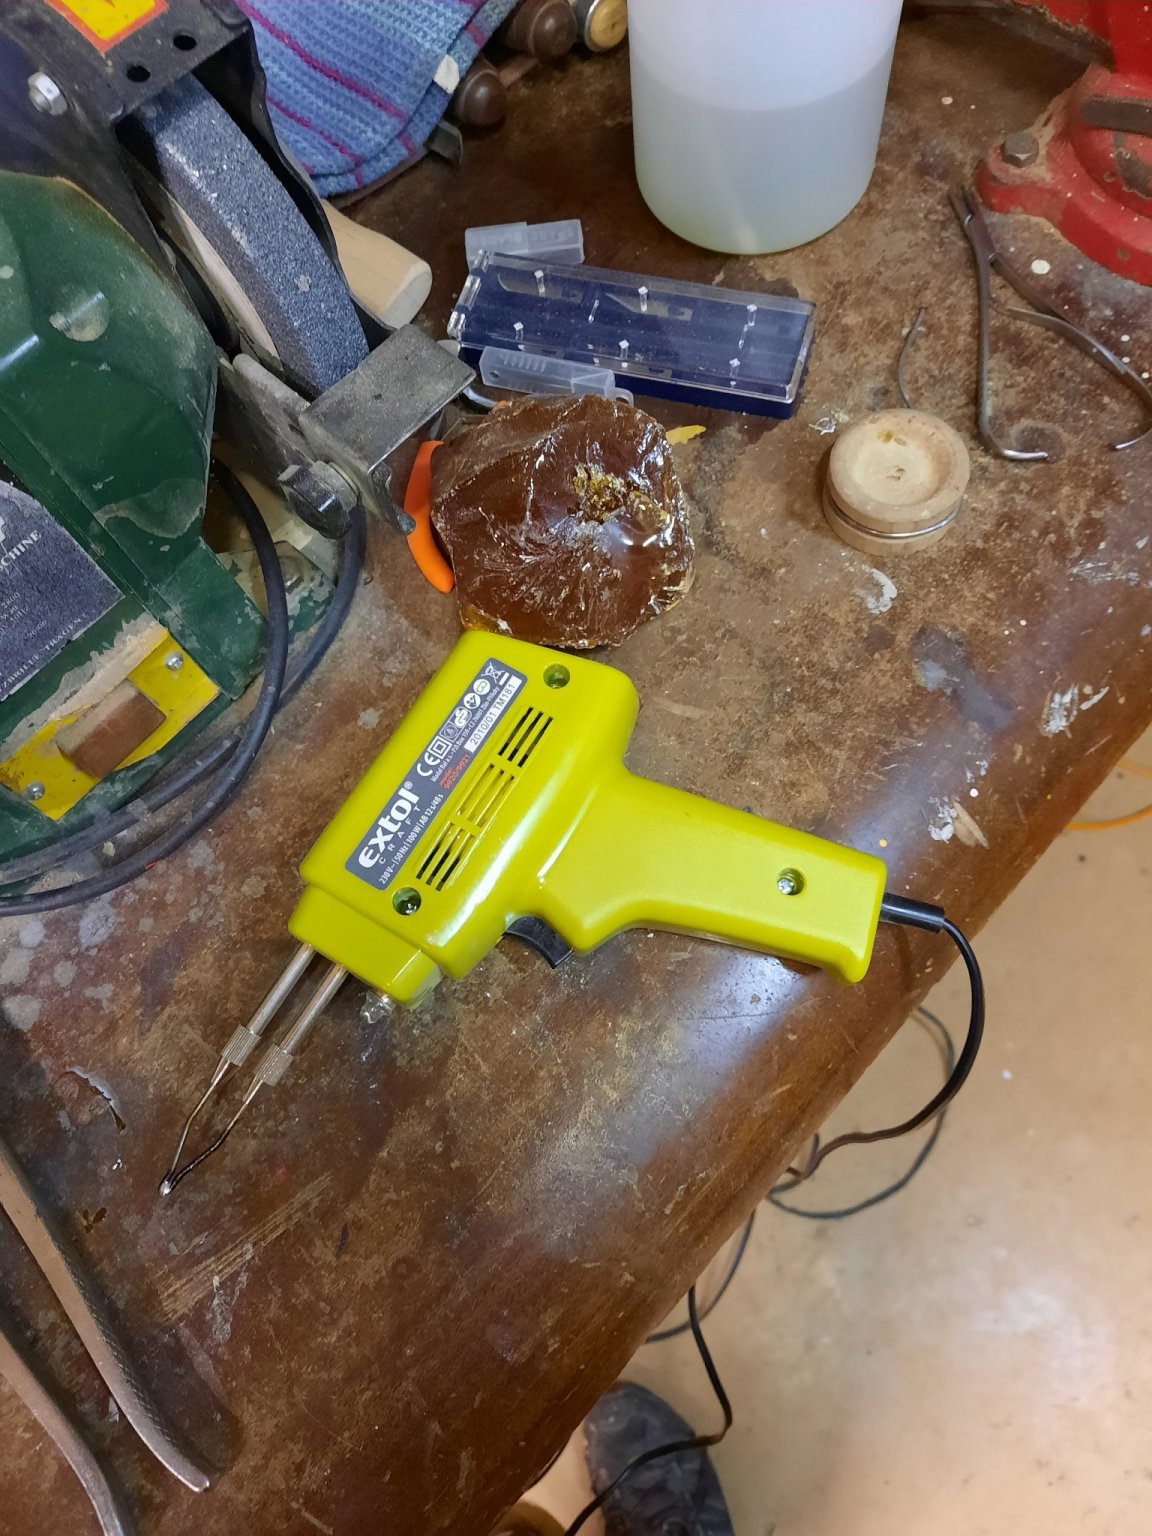
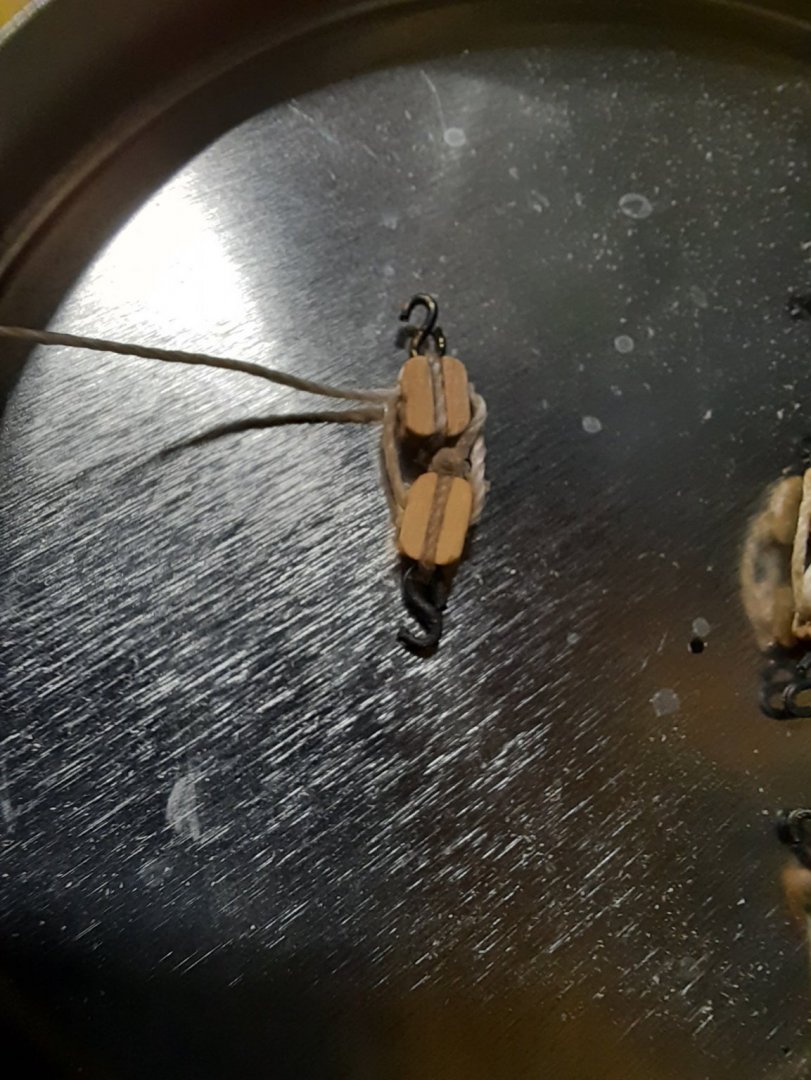
Dear fellow modelers, It is starting to get really cold and the sun is setting earlier, you are going to your workshop, start a fire in your stove and feel the warm from it getting stronger. This is the situation everyone from us loves. You start building your ship again. I made very small progress, but every step counts. I finished chainplates with deadeye on right side of ship and started left side. I used brass wire 0,8 mm thick. I wrapped it around the deadeye. I used pliers and bent the made chainplate in correct way. Then when both ends of wire were together i soldered them together. After that I used drill to make hole and inserted nail, from the kit, with little bit of CA glue. Everytihng was at the end colored with black color. I have questoin here. I use brass black for blackening the brass parts. So I put the brass into the chemical and then after 30-60 second I take it out onto piece of cloth. I let it set. But after it is dried the black color is still getting off. That is why I use black color fo chainplates. It just looks better. I use black brass for ringbolt, eyebolt and hooks. Am I making anything wrong with black brass? Is this the way how it works? That the black color is going off? Do anybody have any guide how to create nice little hooks? Because I was looking all around internet and can not find anything which could help me. I have found nice hooks but from USA. The hooks were priced reasonably, but the transport, it was very expansive. Nothing in EU region. OK back to the build. Here is my soldering equipment Here is the right side of the ship with finished chainplates and deadeyes And here is left side started. The soldering on this side is better, because I used clamps to hold the chainplate, so it was more stable. Till next time. Stay safe.


- 108 replies
-
- 3
-
-
- armed virginia sloop
- model shipways
- (and 1 more)
-
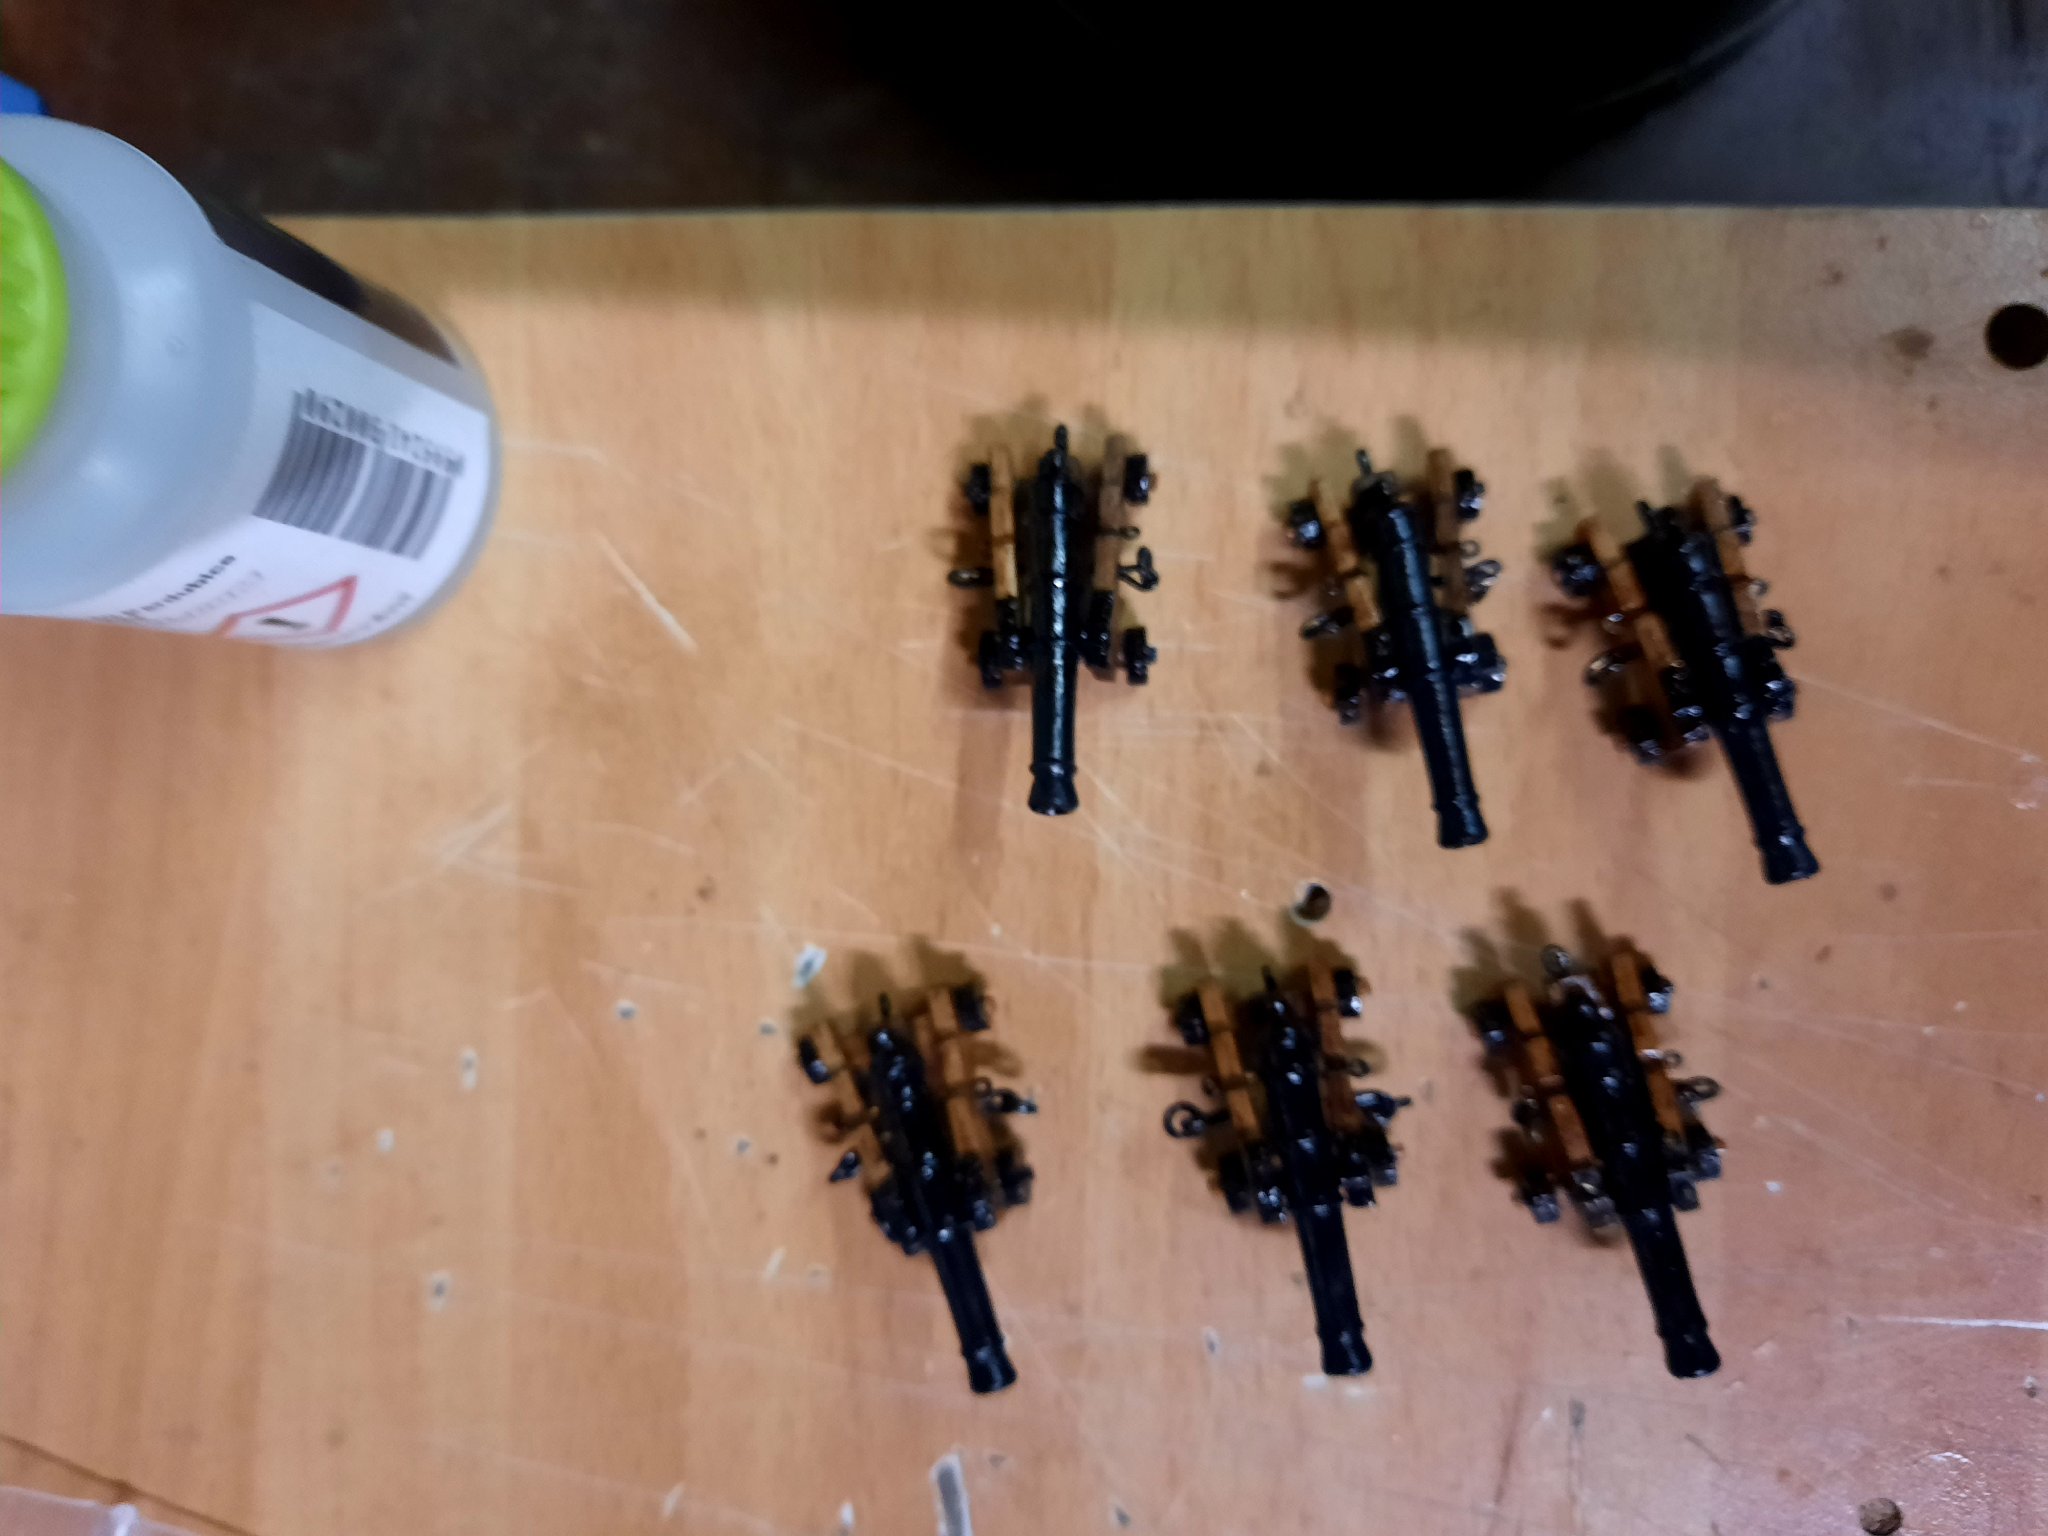
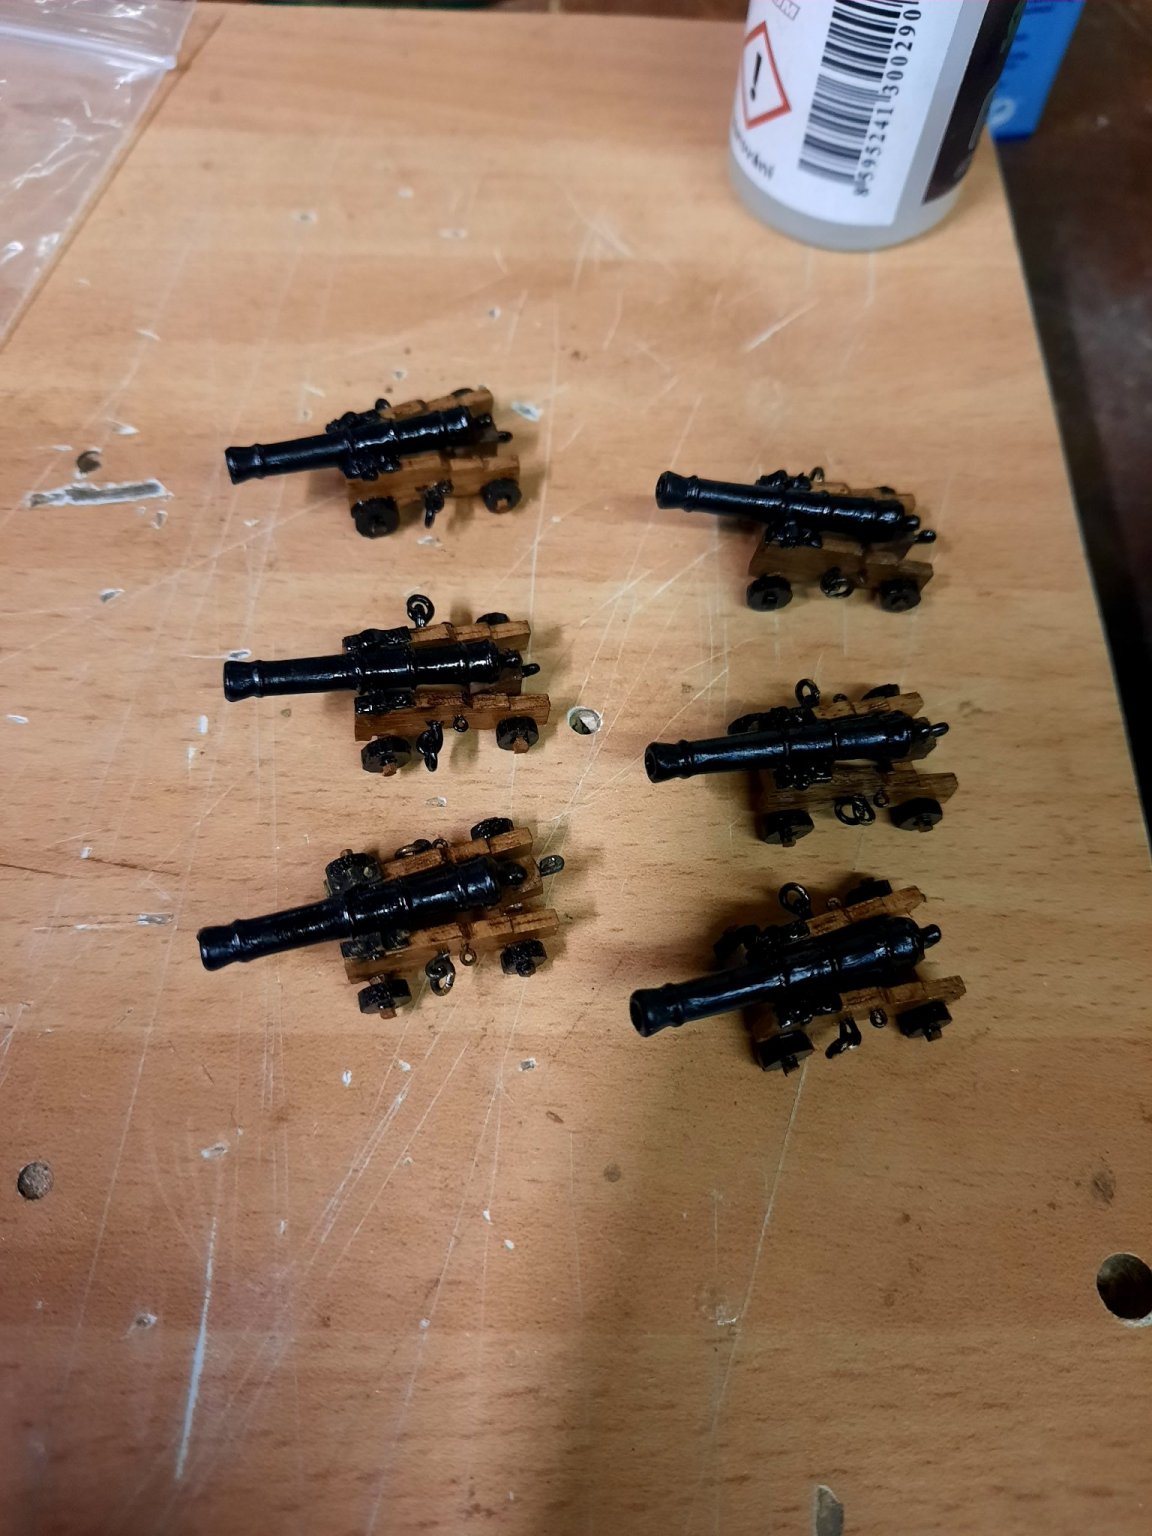
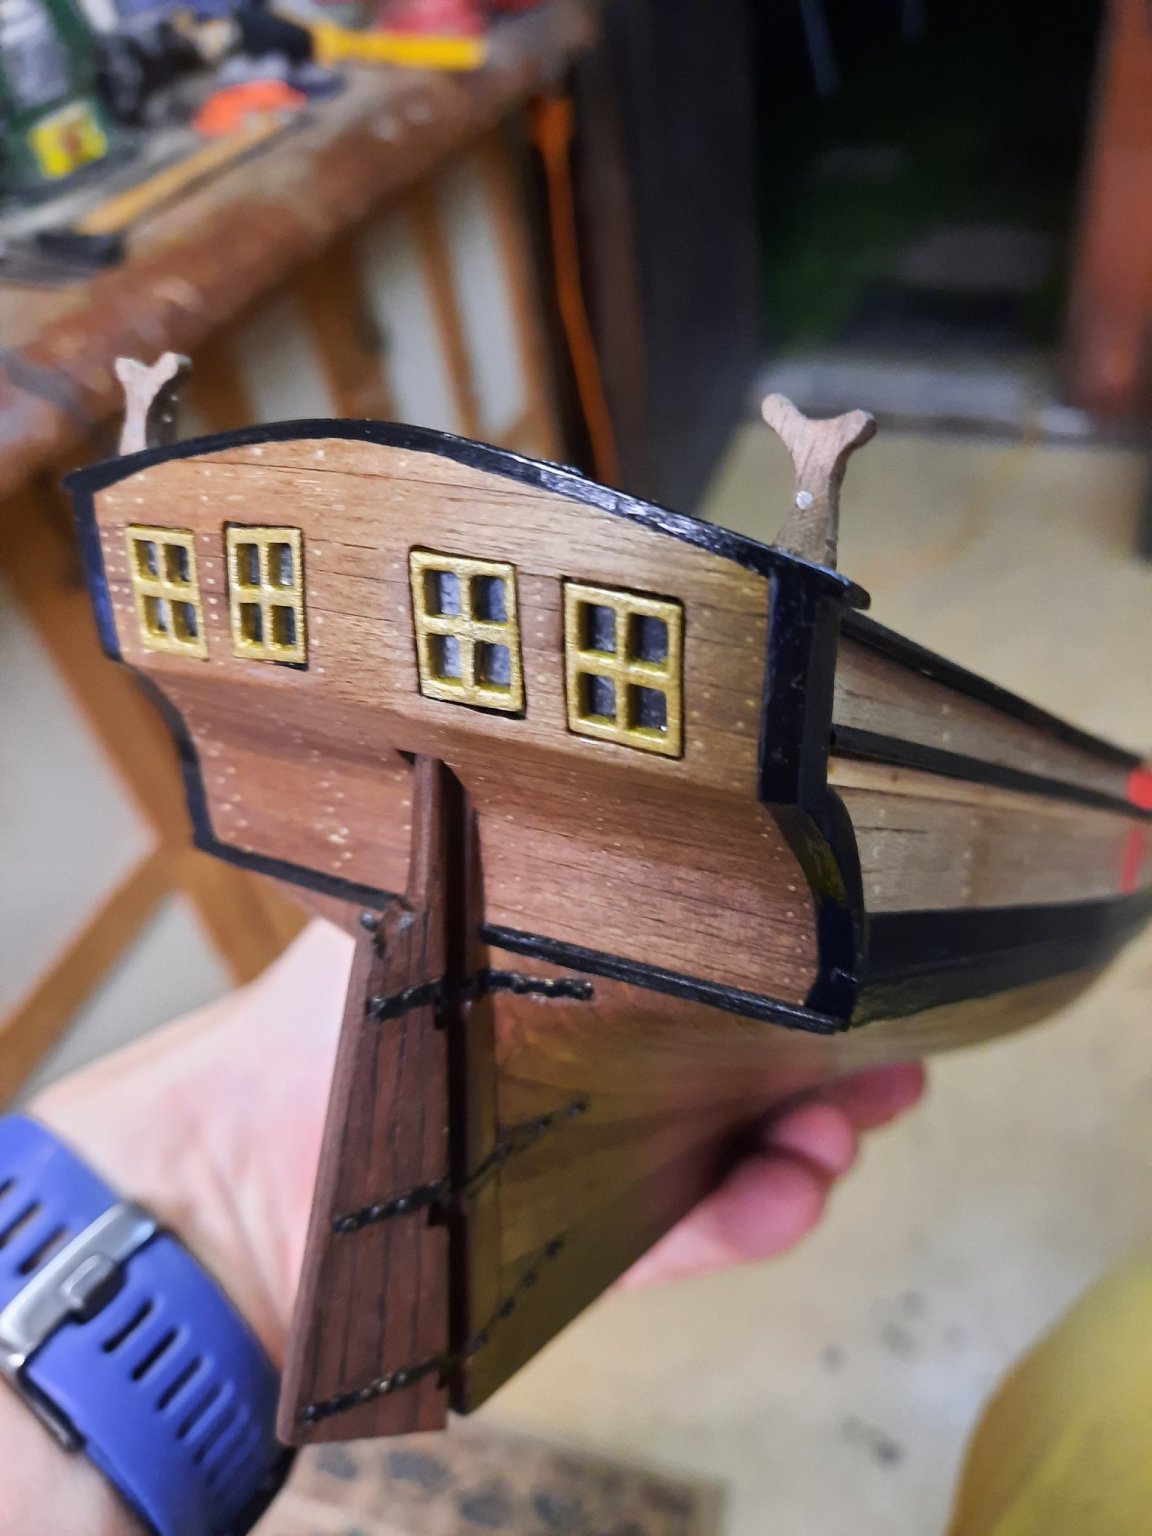
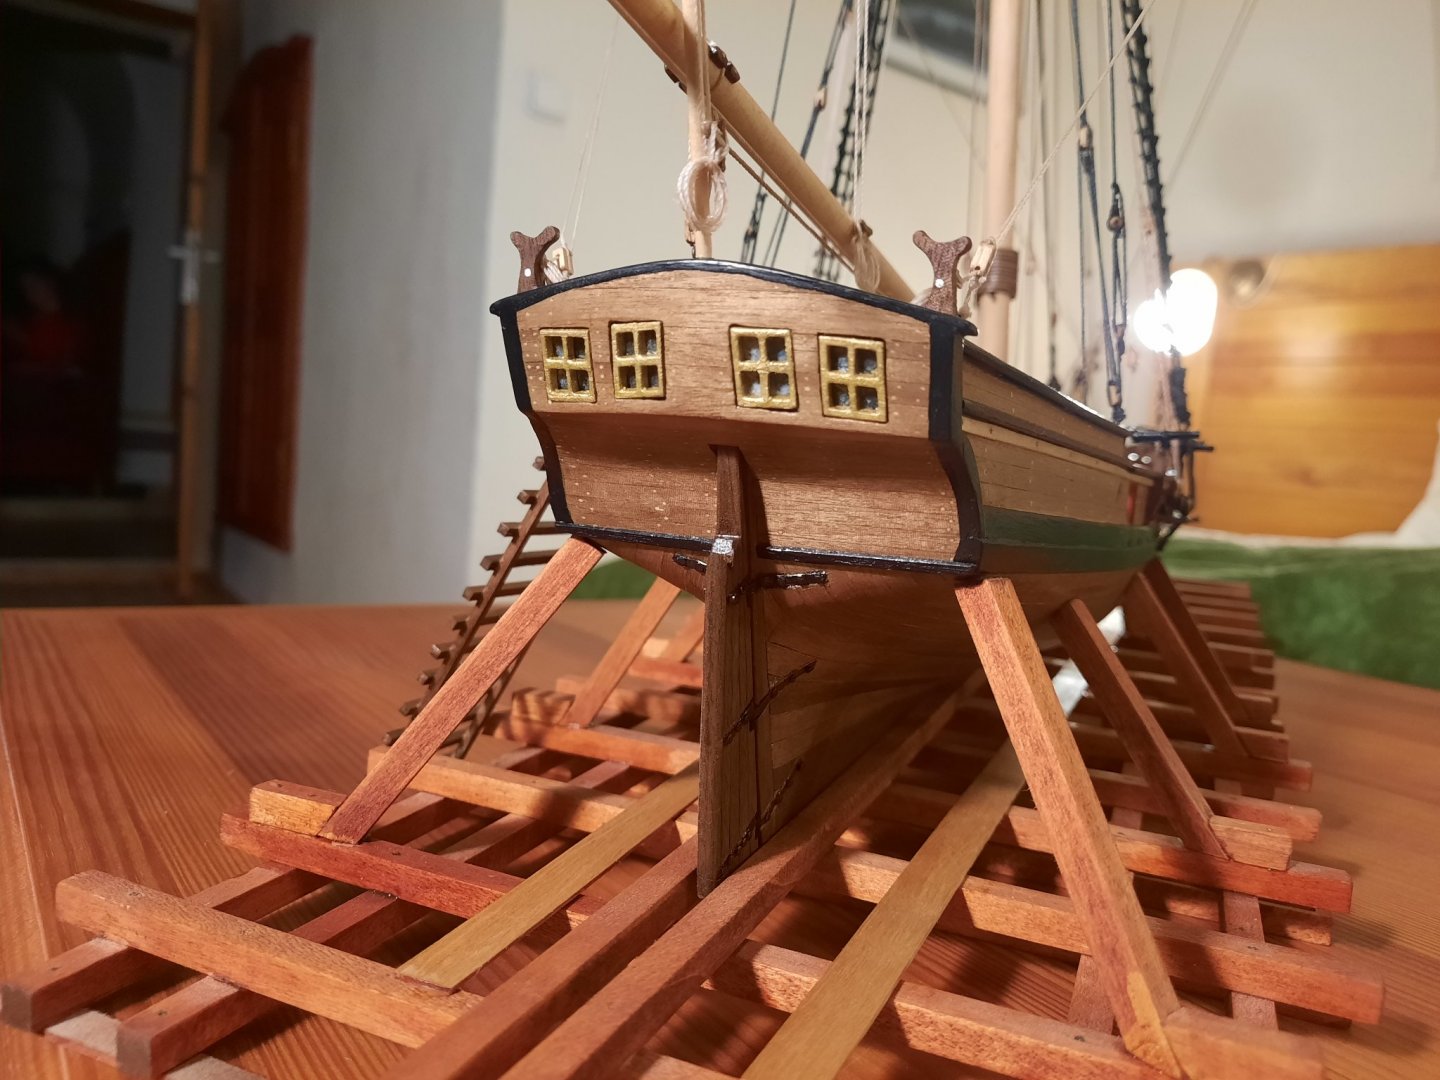
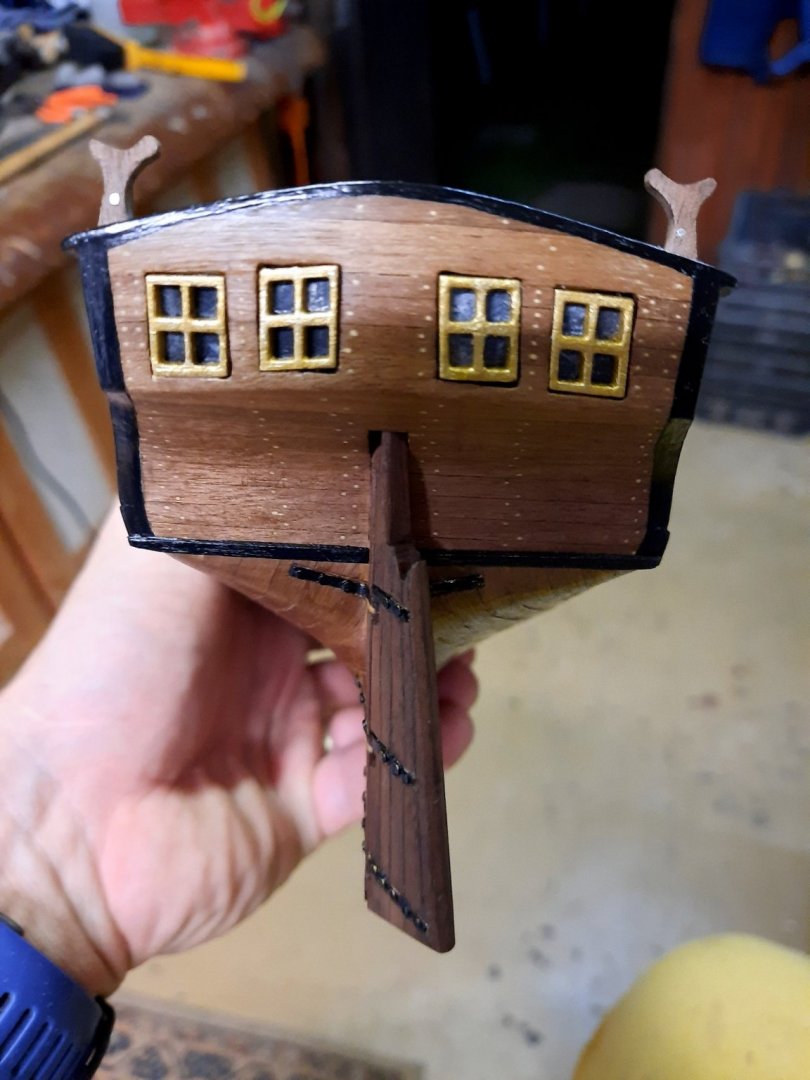
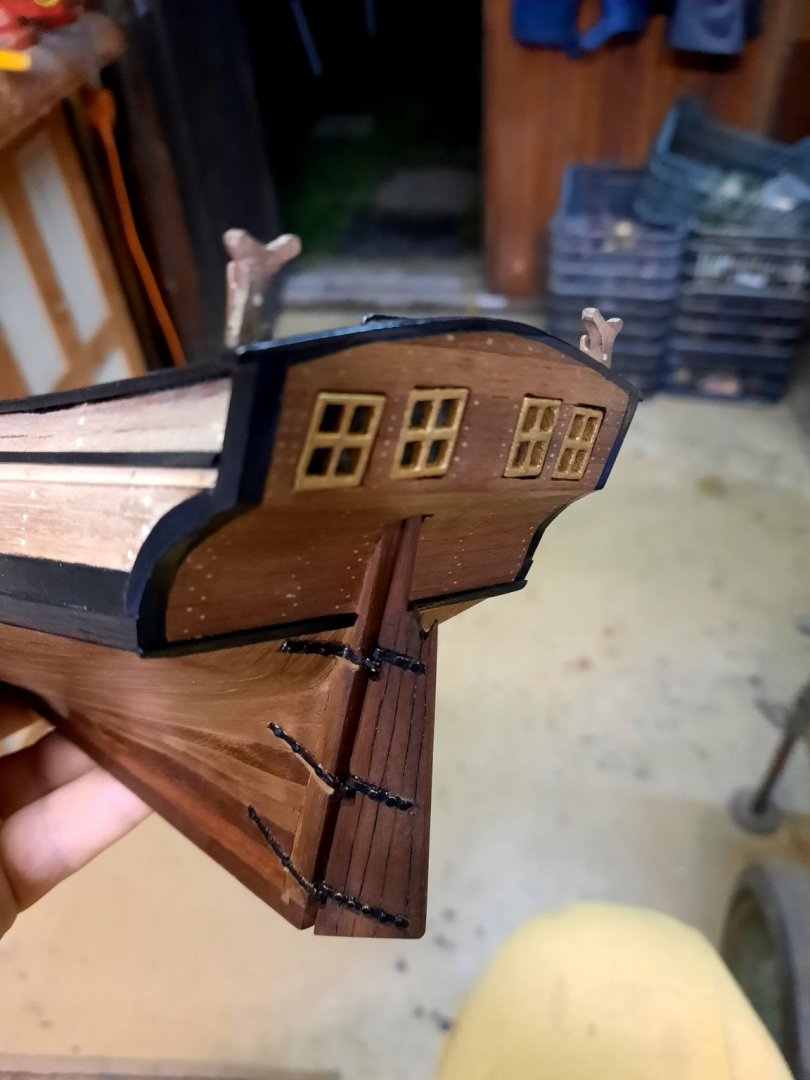
Dear fellow modelers, because situation with covid worsen every day in Slovakia and governement is restricting people, I had a lot of time to spent in my workshop. Even better is that my wife is spending this time with me. She has her own project. I was able to fininsh the sternpost part of the ship. I added the windows and made rudder. Here are some pictures from it. I also finished the cannons. I was little bit afraid of that because first cannon took like 6 hours of work to finish. But the rest five I made in 8 hours together. Total worked time is over 320 hours. Happy modeling. Till next time.


- 108 replies
-
- 4
-
-
- armed virginia sloop
- model shipways
- (and 1 more)
-
Yes thank you GuntherMT I understand now.
- 108 replies
-
- 1
-
-
- armed virginia sloop
- model shipways
- (and 1 more)