


AON
-
Posts
2,876 -
Joined
-
Last visited
9 Followers


About AON

- Birthday November 15
Recent Profile Visitors
6,614 profile views


-
 Thukydides reacted to a post in a topic:
HMS Bellerophon 1786 by AON – scale 1:64 – 74-gun 3rd Rate Man of War - Arrogant-Class
Thukydides reacted to a post in a topic:
HMS Bellerophon 1786 by AON – scale 1:64 – 74-gun 3rd Rate Man of War - Arrogant-Class
-
druxey reacted to a post in a topic:
HMS Bellerophon 1786 by AON – scale 1:64 – 74-gun 3rd Rate Man of War - Arrogant-Class
-
Jared reacted to a post in a topic:
HMS Bellerophon 1786 by AON – scale 1:64 – 74-gun 3rd Rate Man of War - Arrogant-Class
-
lawrence101 reacted to a post in a topic:
HMS Bellerophon 1786 by AON – scale 1:64 – 74-gun 3rd Rate Man of War - Arrogant-Class
-
lawrence101 reacted to a post in a topic:
HMS Bellerophon 1786 by AON – scale 1:64 – 74-gun 3rd Rate Man of War - Arrogant-Class
-
lawrence101 reacted to a post in a topic:
HMS Bellerophon 1786 by AON – scale 1:64 – 74-gun 3rd Rate Man of War - Arrogant-Class
-
lawrence101 reacted to a post in a topic:
HMS Bellerophon 1786 by AON – scale 1:64 – 74-gun 3rd Rate Man of War - Arrogant-Class
-
lawrence101 reacted to a post in a topic:
HMS Bellerophon 1786 by AON – scale 1:64 – 74-gun 3rd Rate Man of War - Arrogant-Class
-
lawrence101 reacted to a post in a topic:
HMS Bellerophon 1786 by AON – scale 1:64 – 74-gun 3rd Rate Man of War - Arrogant-Class
-
lawrence101 reacted to a post in a topic:
HMS Bellerophon 1786 by AON – scale 1:64 – 74-gun 3rd Rate Man of War - Arrogant-Class
-
 I cut all 28 upper deck beams with the jig and trim bit this afternoon. What an absolute joy! (once I got the hang of it). I inserted the rectangular blank against the flat back in the jig (position #1) and traced the concaved curve from the jig to the blank with a pencil. I removed the blank from the jig and removed the excess material on the blank to the line or very near with the oscillating disk sander. Placed the blank back into the jig and cut the blank with the trim cutter. I then moved that blank to position #2 and repeated the process but used my bench top disc sander to remove the excess from outside the convex tracing. NOTE: 1. the pencil line is by default just outside the jig face so the trim cutter need only remove that wee bit of material. 2. the jig is about 1-1/2" longer on both ends than the blanks so I can get the rollers in contact with the jig before and after the cut 3. if you don't remove the excess to or very near the line before trimming the trim cutter will tear out the blank. It is called a trim cutter, not a hogger (high volume deep cutting tool). Ask me how I know! I started with four extra blanks and now have one. Once I had the piece in position #3 I could also load position #1 so it was a little bit off an assembly line trim process.
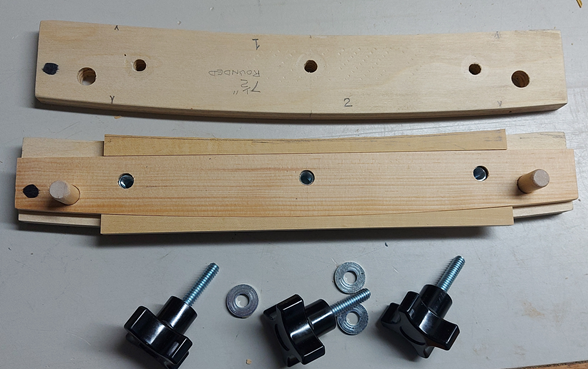

-
AON reacted to a post in a topic:
Golden Hind by Rock_From_Korea - 1:48
-
Trim cutter just got delivered. I hope to get some upper deck beams cut tomorrow so I can fit the bowsprit mast step and move on.
-
AON reacted to a post in a topic:
HMS Thorn by Kevin Kenny - 1:48 scale - Swan-class - David Antscherl practium
-
AON reacted to a post in a topic:
HMS Thorn by Kevin Kenny - 1:48 scale - Swan-class - David Antscherl practium
-
Been there. Still doing that.
-
 AON reacted to a post in a topic:
HMS Bellerophon 1786 by AON – scale 1:64 – 74-gun 3rd Rate Man of War - Arrogant-Class
AON reacted to a post in a topic:
HMS Bellerophon 1786 by AON – scale 1:64 – 74-gun 3rd Rate Man of War - Arrogant-Class
-
AON reacted to a post in a topic:
HMS Montague 1779 by garyshipwright - 74-gun Alfred-class
-
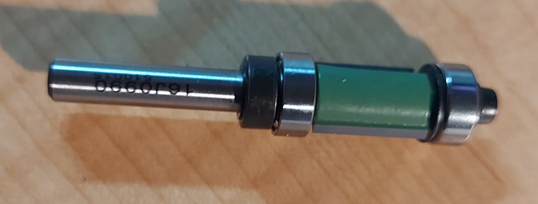
It has been just over three weeks since my last post and I have been doing quite a bit over this time. I lost half a week due to another eye injection. This is reoccurring, every twelve weeks now. I spent a few days making a sounding board for the Library board Chairperson. They have a mallet that they rapped on the table top, they shouldn't do that, bad for the table. What I made is an oak puck shaped disk, sanded, stained and polished with beeswax. I also epoxy glued a non-skid pad to the underside so it doesn't slide off the table. The dot on top centre is a 3/8" dowel insert... like a target to aim for! I made a deck beam rounding jig (like what Mark - aka SJSoane described in his build of the Bellona) for my upper deck beams. I prepared stock for all twenty-eight beams and purchased a router trim bit from Lee Valley Tools with both an upper and lower guide roller bearing. I've had bearings fly apart and the thought of that happening and ruining my jig is not something I relish. The additional bearing will hopefully be my protection from this ever happening. I am presently awaiting delivery... I ordered two spare rollers. I also ditched the trail board carving and prepared more suitable Castello blanks for the carving. These are ready to go (glued and cured to a base board and put in the clamp). I completed the upper cheek installation (you see this when I install the trail board carvings) and am into the forward gundeck beam assembly and bowsprit step. Lots going on.


-
AON reacted to a post in a topic:
HMS Montague 1779 by garyshipwright - 74-gun Alfred-class
-
AON reacted to a post in a topic:
St Roch by Lecrenb - 1:48 scale - RCMP Schooner rigged as schooner c. 1930/35
-
AON reacted to a post in a topic:
HMS Bellona 1760 by SJSoane - Scale 1:64 - English 74-gun - as designed
-
AON reacted to a post in a topic:
HMS Bellona 1760 by SJSoane - Scale 1:64 - English 74-gun - as designed
-
I find making card stock templates of items that need to nest against others a tremendous help. I also believe the hatch frame covers had lanyards attached so they wouldn't get washed overboard. If this is true you could make the cover and show it removed perched up on one corner of the frame. Maybe someone could confirm the lanyard as I cannot seem to find the source of this information. Great work BTW!
-
Good morning Mark. I want to thank you for your posting #1967 (7 Nov 2020) explaining how you made and use your deck beam jig. I am about to start re-making some upper deck beams that have a noticeable rise but my freehand method was a terrible idea (they've been torn out)... then I recalled you made a jig. It took a bit to find until I decided to do a search with "deck beam jig" and *BAM* there it was. I suspect my curved deck beams will be much better on the next run. Alan
-
Daniel I found "guns" to be quite confusing. Discovering that swivel guns on the fighting tops and carronades on the weather decks weren't counted as guns.... in this age I can only wonder why? Even some of that era questioned it. Alan
-
HMS ANSON 1781 by albert - 1/48 - 64 guns
AON replied to albert's topic in - Build logs for subjects built 1751 - 1800
DITTO! 😉 -
Dowmer I believe you might be correct. Carvers use boxwood, particularly Linden in this area, for normal figures at 10X or more the scale I am presently attempting. Alan
-
Jared... something to think about but as you know David Antscherl is a member of the club and is much better at it then I might ever be! Druxey... I had a brain fart and typed boxwood instead of basswood. I've corrected the post. Thanks for catching that. My chisels are quite sharp. It was likely a flaw in the wood. I suspect I will add the foot to the piece separately. If I do it well no one should notice.
-
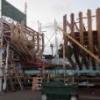
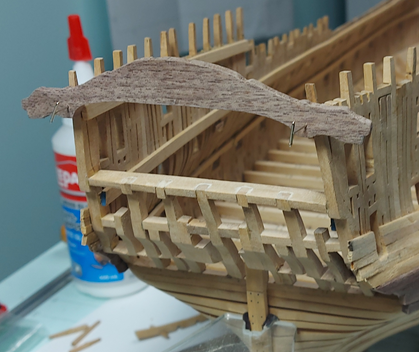
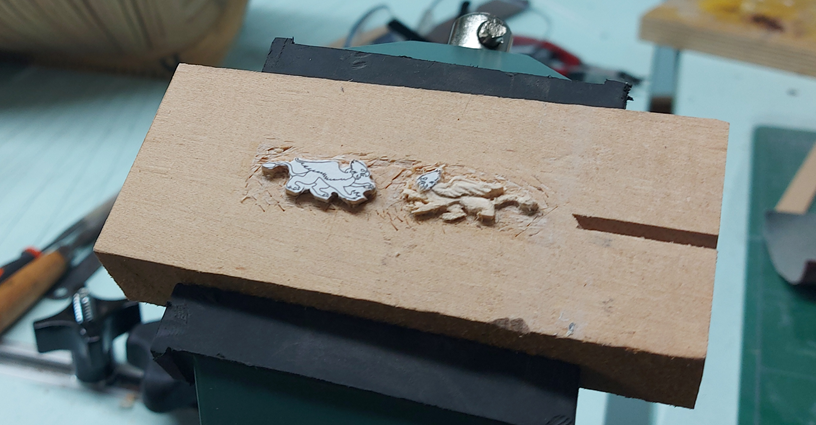
Hope everyone had a Merry Christmas and Happy New Year! some update pics The Taffrail has been drilled and pinned to the stern, and the counter timbers have been cut back to a proper termination level. The Griffon/Gryphon carvings are coming along but at such a small scale I wonder if I just need more practice or should I use a different wood — Castello versus boxwood basswood (Linden), as I've already lost a hind foot! I tried using rotary cutters but reverted to mini chisels. We'll have to wait and see how the head turns out! 🤔
-
Or the seal to the prop shaft is dry and tight?
- 72 replies
-
- 1
-
-
- Miss Adventure
- Model Shipways
- (and 2 more)
-
Golden Hind by Rock_From_Korea - 1:48
AON replied to Rock_From_Korea's topic in - Build logs for subjects built 1501 - 1750
They look pretty darn good to me!