popeye the sailor Posted May 15, 2013 #61 Posted May 15, 2013 I'm sure that there are other ship of the same construction with slightly different configuration..........as you say, there's always another ship on the horizon I yam wot I yam! finished builds: Billings Nordkap 476 / Billings Cux 87 / Billings Mary Ann / Billings AmericA - reissue Billings Regina - bashed into the Susan A / Andrea Gail 1:20 - semi scratch w/ Billing instructions M&M Fun Ship - semi scratch build / Gundalow - scratch build / Jeanne D'Arc - Heller Phylly C & Denny-Zen - the Lobsie twins - bashed & semi scratch dual build Billing T78 Norden in dry dock: Billing's Gothenborg 1:100 / Billing's Boulogne Etaples 1:20 Billing's Half Moon 1:40 - some scratch required Revell U.S.S. United States 1:96 - plastic/ wood modified / Academy Titanic 1:400 Trawler Syborn - semi scratch / Holiday Harbor dual build - semi scratch
captainbob Posted May 15, 2013 #62 Posted May 15, 2013 Walter, It's really starting to take shape. Looking good. Bob Every build is a learning experience. Current build: SS_ Mariefred Completed builds: US Coast Guard Pequot Friendship-sloop, Schooner Lettie-G.-Howard, Spray, Grand-Banks-dory, a gaff rigged yawl, HOGA (YT-146), Int'l Dragon Class II, Two Edwardian Launches In the Gallery: Catboat, International-Dragon-Class, Spray
Walter Biles Posted May 16, 2013 Author #63 Posted May 16, 2013 Thank you, Popeye, Bob, I am really enjoying this build. I can't imagine still being at it if I hadn't found this forum for help and interest. Something about sharing the hobby with others with similar interests just makes all the difference. Well, I am happy to announce that my wood order came in this late afternoon. I still have to get the pulleys installed, and I think I will get some plastic tubing at the hardware store to act as guides for my control lines. I want something big enough that I can re-string the rudder if necessary without fighting the line through each bulkhead. I will also need to do that for the routes to each sail. Walt Biles mtaylor and popeye the sailor 2 Current: America Schooner https://modelshipworld.com/index.php?/topic/10887-america-schooner-pof-by-walter-biles-radio-pof-scale-148-from-blue-jacket-plan/ Prior: MERIDEA https://modelshipworld.com/index.php?/topic/140-meridea-by-walter-biles-radio-34-scratch-cad-of-boat-at-usn-severn-river-repair-station-ca-1969/ SAMSON First build: Scratch POF Spanish Galleon
Walter Biles Posted May 28, 2013 Author #64 Posted May 28, 2013 Bob, I finally found that glass cloth I had remembered having. It was in my old box of plans etc. It should be the perfect weight to coat the hull. Also I found that Walmart carries the resin for the fiberglass in the automotive section. I may use that and disposable paint brushes for coating the outside of the hull. Then I'll sand lightly and build up a smooth resin layer like I used to do in the navy. I think if I work outside I can probably finish the hull in 1/2 hour to an hour. I may even paint the inside below the waterline with it. That would seal up the hull below the waterline. Walt Biles popeye the sailor 1 Current: America Schooner https://modelshipworld.com/index.php?/topic/10887-america-schooner-pof-by-walter-biles-radio-pof-scale-148-from-blue-jacket-plan/ Prior: MERIDEA https://modelshipworld.com/index.php?/topic/140-meridea-by-walter-biles-radio-34-scratch-cad-of-boat-at-usn-severn-river-repair-station-ca-1969/ SAMSON First build: Scratch POF Spanish Galleon
captainbob Posted May 28, 2013 #65 Posted May 28, 2013 Walt, Coating the inside of the hull is a great idea. In my experience every boat it the water gets water inside, even the plastic boats. So after the sail you need to open the deck to allow the insides to dry out. Have you been following Michaels build of his pilot cutter? Here's the site. http://modelshipworld.com/index.php?/topic/74-bristol-pilot-cutter-by-michael-mott-18-scale-pof/ Also have you been contacting any of the guys in the RC Kits & Scratch building - Questions and reviews You should be able to get some good information on rigging and sail control from them. Bob Every build is a learning experience. Current build: SS_ Mariefred Completed builds: US Coast Guard Pequot Friendship-sloop, Schooner Lettie-G.-Howard, Spray, Grand-Banks-dory, a gaff rigged yawl, HOGA (YT-146), Int'l Dragon Class II, Two Edwardian Launches In the Gallery: Catboat, International-Dragon-Class, Spray
Walter Biles Posted June 2, 2013 Author #66 Posted June 2, 2013 I have read through the RC related sections and it sounds like most of us are looking for the same information. Those that have asked, mostly hear the same thing. I think I will have to re-open my access to one of the sailing forum sites when I can get the time. Linda is back in the Hospital again with a leg infection. She may get out tomorrow or Monday. I'll bring my boat along when I go back up to my daughter's, and show you how far it is. Walt Biles Current: America Schooner https://modelshipworld.com/index.php?/topic/10887-america-schooner-pof-by-walter-biles-radio-pof-scale-148-from-blue-jacket-plan/ Prior: MERIDEA https://modelshipworld.com/index.php?/topic/140-meridea-by-walter-biles-radio-34-scratch-cad-of-boat-at-usn-severn-river-repair-station-ca-1969/ SAMSON First build: Scratch POF Spanish Galleon
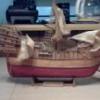
Walter Biles Posted August 11, 2013 Author #67 Posted August 11, 2013 (edited) These first seven pictures are with all the loose assemblies removed for painting boiled linseed oil on the inside of the lower planking . After I got the hull dried out, and did some more planking, I now have the hull fully planked on the port side with the first layer, and up to five or six strakes on the starboard side. I already had the second layer of planking with a denser Basswood of 1/16" thick on the keel ballast bulb to reinforce it for balasting. Tonight I built the masts. They are 1/8" plywood, with basswood block fillers between and edge spacers to provide the tapering. I capped the front and back of them with another 1/8" Basswood piece for the front and back edge of each mast. All of the strip pieces have staggered joints so there will not have a weak point. This brings me up to date. Walter Biles Edited August 11, 2013 by Walter Biles JerryGreening 1 Current: America Schooner https://modelshipworld.com/index.php?/topic/10887-america-schooner-pof-by-walter-biles-radio-pof-scale-148-from-blue-jacket-plan/ Prior: MERIDEA https://modelshipworld.com/index.php?/topic/140-meridea-by-walter-biles-radio-34-scratch-cad-of-boat-at-usn-severn-river-repair-station-ca-1969/ SAMSON First build: Scratch POF Spanish Galleon
captainbob Posted August 11, 2013 #68 Posted August 11, 2013 Walter, I've missed your entries. Glad to see you're still building. Bob Every build is a learning experience. Current build: SS_ Mariefred Completed builds: US Coast Guard Pequot Friendship-sloop, Schooner Lettie-G.-Howard, Spray, Grand-Banks-dory, a gaff rigged yawl, HOGA (YT-146), Int'l Dragon Class II, Two Edwardian Launches In the Gallery: Catboat, International-Dragon-Class, Spray
Walter Biles Posted August 11, 2013 Author #69 Posted August 11, 2013 (edited) Thanks, Bob. I had lost my camera download cable for a spell. I took pictures but until I found it, finally, I had no way to get them to the site. If I can get back into the planking, I could get ready to ballast it, then I could start permanent installation of the decks, cabin, and the cockpit. I am going to have to make my own wheel for steering. I guess silver solder could serve for the chroming on the wheel and housing. I think thats what I will do for the stantions and railing. It would not be too long before I will have to be making all the rigging hardware. Do you know how to solder? I may need some guideance on the how-to part of that. Walt Biles Edited August 11, 2013 by Walter Biles Current: America Schooner https://modelshipworld.com/index.php?/topic/10887-america-schooner-pof-by-walter-biles-radio-pof-scale-148-from-blue-jacket-plan/ Prior: MERIDEA https://modelshipworld.com/index.php?/topic/140-meridea-by-walter-biles-radio-34-scratch-cad-of-boat-at-usn-severn-river-repair-station-ca-1969/ SAMSON First build: Scratch POF Spanish Galleon
popeye the sailor Posted August 13, 2013 #70 Posted August 13, 2013 looking sharp Walter......good to see her with her skin on....Hee....Hee! the sheer is nice and the cabin looks awesome! I yam wot I yam! finished builds: Billings Nordkap 476 / Billings Cux 87 / Billings Mary Ann / Billings AmericA - reissue Billings Regina - bashed into the Susan A / Andrea Gail 1:20 - semi scratch w/ Billing instructions M&M Fun Ship - semi scratch build / Gundalow - scratch build / Jeanne D'Arc - Heller Phylly C & Denny-Zen - the Lobsie twins - bashed & semi scratch dual build Billing T78 Norden in dry dock: Billing's Gothenborg 1:100 / Billing's Boulogne Etaples 1:20 Billing's Half Moon 1:40 - some scratch required Revell U.S.S. United States 1:96 - plastic/ wood modified / Academy Titanic 1:400 Trawler Syborn - semi scratch / Holiday Harbor dual build - semi scratch
Walter Biles Posted August 14, 2013 Author #71 Posted August 14, 2013 Thank you for stopping by, Popeye, I still have 5-7 strakes to go on the starboard side, and amost of the secondary planking to go. I have been working on mast bracing in the cabin. It is still temporary until I get the rest of the planking done so I can ballast. I am beginning to get a bit excited about it. Walter Biles popeye the sailor 1 Current: America Schooner https://modelshipworld.com/index.php?/topic/10887-america-schooner-pof-by-walter-biles-radio-pof-scale-148-from-blue-jacket-plan/ Prior: MERIDEA https://modelshipworld.com/index.php?/topic/140-meridea-by-walter-biles-radio-34-scratch-cad-of-boat-at-usn-severn-river-repair-station-ca-1969/ SAMSON First build: Scratch POF Spanish Galleon
SailorGreg Posted August 14, 2013 #72 Posted August 14, 2013 (edited) Hi Walter, enjoying your build of a very pretty boat Regarding silver soldering, there is plenty of advice on line, including many Youtube clips showing how to do it - search "silver soldering". However, I wouldn't think it's a good way of simulating chrome. It would be tricky to get a really even coat over a large area, and the final colour isn't necessarily silver! To be honest, a good silver paint is likely to be a better route, and much easier to apply (and remove, if you find you don't like it). If you are really set on a chrome-like finish, do a search on electro-plating. I am intrigued by your masts. I have never seen masts like that on any boat, of that era or more recent. Most masts at that time were hollow wooden constructions but mostly or completely untapered, and much smaller section than are yours, especially at deck level. Do you have any pictures you are working from, or are you relying on memory? I am not saying it is wrong - just very unusual. Thanks for the build log, and I look forward to the next episode. Greg Edit: here's a picture of a ketch with the sort of masts I am more familiar with. http://www.sandemanyachtcompany.co.uk/uploads/512/Gudgeonnewmain.jpg Edited August 14, 2013 by SailorGreg
Walter Biles Posted August 14, 2013 Author #73 Posted August 14, 2013 (edited) Greg, Yes that was the way they were shaped. I drew the proportions of them off the boat using the inches of width and height from the seawall some way off. I transferred the dimensions from my ruler at arms length right onto the paper. I think it was a special made boat to try out some different things. For instance, the running lines for raising the sails ran to the inside of the masts. I think they may have had special gear to operate them. There were beaded slide pins that attached the sails into a track that ran up the back of the masts. I had seen one man bring in the boat, and the sails just seemed to let down. I never saw any crew working lines, except to throw the heaving line to him so he could tie to the posts on each side of the slip. I did see a group go out with him one time, but I never saw anyone do anything except cast off the lines from the dock. They mostly seemed to be along for the ride. That was what intregued me about the boat. She handled beautifully. He did not even seem to have a motor in use for the docking. He just pushed off with a long boat hook, to get the boat out of the slip and up went the sails and he was under way. I wish I had asked if I could go aboard her and look her over more completely. Although some boats were off limits, I never tried to see if I could get permission. I did get a work order to replace a cleat on the aft boom of the America replica which was in the slip next to her. A wind the night before strained the cleat which split, and I made a new oak one and put it on the boom after repairing the holes from the screws. That was the only time I was allowed on America. I did not even get to look around her. She was up for sale even then. I heard she sold much later. She had been repainted white for that tall ships parade in 1976. Walt Biles Edited August 14, 2013 by Walter Biles Current: America Schooner https://modelshipworld.com/index.php?/topic/10887-america-schooner-pof-by-walter-biles-radio-pof-scale-148-from-blue-jacket-plan/ Prior: MERIDEA https://modelshipworld.com/index.php?/topic/140-meridea-by-walter-biles-radio-34-scratch-cad-of-boat-at-usn-severn-river-repair-station-ca-1969/ SAMSON First build: Scratch POF Spanish Galleon
Walter Biles Posted August 14, 2013 Author #74 Posted August 14, 2013 Well I got the rest of the first planking on. I only have a top plank to put on around the sides. I am going to make it 3" taller (original scale) than the deck level for a toe rail, and put waterways through it to carry off any deck wash. I am glueing in some filler pieces onto the first planking to correct some irregularities so the contours will be more even. My masts came out a lot straighter than the plywood I used. I had to assemble it on a board to hold things straight until I got the pieces all joined together. Once I got them all sanded down, they held their shape when I swung them to see how much they would flex. Front to back was nil for flexing. Side to side allowed them to bow a little, but the shrouds and braces should keep them in check. I believe they should work okay. I built them up from 1/8" plywood, and used a 5/16" to 3/32" tapered 1/8" strips inside the plywood, and doubled that to the outside for the outer facings. I filled about each 5 - 6" with blocks for strengthing and rigidity, and placed substantial blocks where the external braces and or other attachments would need backing. I did not try to emulate the internal line handling feature. I added side to side bracing timbers across the cabin in front and back of the mast, making notches on each side of the mast to hold it securely. This should help take any strain that the mast might try to put on my cabin roof. It also helps to keep things in line. The centerline of both masts are parrallel at 15 3/4" top to bottom. Both appear to be directly in line with one another down the centerline of the boat. I'll get some pictures later. Walt biles Current: America Schooner https://modelshipworld.com/index.php?/topic/10887-america-schooner-pof-by-walter-biles-radio-pof-scale-148-from-blue-jacket-plan/ Prior: MERIDEA https://modelshipworld.com/index.php?/topic/140-meridea-by-walter-biles-radio-34-scratch-cad-of-boat-at-usn-severn-river-repair-station-ca-1969/ SAMSON First build: Scratch POF Spanish Galleon
Walter Biles Posted August 14, 2013 Author #75 Posted August 14, 2013 Popeye, Pardon my forgetfulness, but is the sheer, the upward curvature of the deckline? Walter Biles Current: America Schooner https://modelshipworld.com/index.php?/topic/10887-america-schooner-pof-by-walter-biles-radio-pof-scale-148-from-blue-jacket-plan/ Prior: MERIDEA https://modelshipworld.com/index.php?/topic/140-meridea-by-walter-biles-radio-34-scratch-cad-of-boat-at-usn-severn-river-repair-station-ca-1969/ SAMSON First build: Scratch POF Spanish Galleon
popeye the sailor Posted August 14, 2013 #76 Posted August 14, 2013 from what I gathered from the lobster boat build......it's the deck less walked on. down in the pit {or cockpit} it is called the deck. I looked it up......I can see why they would call it that, but it is the top shell of the hull. The upward slope of a ship's lines toward the bow and stern. the definition points more to the curvarture of the deck, more than anything else. you are correct......I shouldn't believe everything I read. I yam wot I yam! finished builds: Billings Nordkap 476 / Billings Cux 87 / Billings Mary Ann / Billings AmericA - reissue Billings Regina - bashed into the Susan A / Andrea Gail 1:20 - semi scratch w/ Billing instructions M&M Fun Ship - semi scratch build / Gundalow - scratch build / Jeanne D'Arc - Heller Phylly C & Denny-Zen - the Lobsie twins - bashed & semi scratch dual build Billing T78 Norden in dry dock: Billing's Gothenborg 1:100 / Billing's Boulogne Etaples 1:20 Billing's Half Moon 1:40 - some scratch required Revell U.S.S. United States 1:96 - plastic/ wood modified / Academy Titanic 1:400 Trawler Syborn - semi scratch / Holiday Harbor dual build - semi scratch
Walter Biles Posted August 14, 2013 Author #77 Posted August 14, 2013 (edited) Popeye, I just couldn't remember if I ever knew what the sheer was. I looked in wickipedia, and it seemed to me they were describing the crown in the main deck, but like I said, I can't ever remember using the term or knowing what it meant. I think most of my coworkers in R-Division were too recently land lubbers (like me). I learned a lot of terms, but never got them nailed down in my mind through use like I should have if I had actually had to work on deck with the nomenclature and doing the work. I cross rated to SeaBee before I got into active duty. Walt Biles Edited August 14, 2013 by Walter Biles popeye the sailor 1 Current: America Schooner https://modelshipworld.com/index.php?/topic/10887-america-schooner-pof-by-walter-biles-radio-pof-scale-148-from-blue-jacket-plan/ Prior: MERIDEA https://modelshipworld.com/index.php?/topic/140-meridea-by-walter-biles-radio-34-scratch-cad-of-boat-at-usn-severn-river-repair-station-ca-1969/ SAMSON First build: Scratch POF Spanish Galleon
mtaylor Posted August 15, 2013 #78 Posted August 15, 2013 Walter, Falconer's Dictionary of the Marine (here: http://southseas.nla.gov.au/refs/falc/contents.html ) is a big help with terms. Another good source is zu Mondfeld's Historic Ship Models. Both can give a very broad base of knowledge. Or if you're like me.. read it .. go "oh... now I know" and then promptly forget it. To that end I have Falconer's bookmarked. Walter Biles 1 Mark "The shipwright is slow, but the wood is patient." - me Current Build: Past Builds: La Belle Poule 1765 - French Frigate from ANCRE plans - ON HOLD Triton Cross-Section NRG Hallf Hull Planking Kit HMS Sphinx 1775 - Vanguard Models - 1:64 Non-Ship Model: On hold, maybe forever: CH-53 Sikorsky - 1:48 - Revell - Completed Licorne - 1755 from Hahn Plans (Scratch) Version 2.0 (Abandoned)
popeye the sailor Posted August 15, 2013 #79 Posted August 15, 2013 to read instructions.......to see a term.......you think it's right, so you use it. on most of the vessels that has this form of decking, it is "the deck less walked on". I used to build a lot of plastic kits.....in doing so, I never had need to learn the technical terms......just the part numbers. wood builds have thrown me for a loop......not wanting to stop and look up every term used, I just give them names and go with it. your too kind Walter I yam wot I yam! finished builds: Billings Nordkap 476 / Billings Cux 87 / Billings Mary Ann / Billings AmericA - reissue Billings Regina - bashed into the Susan A / Andrea Gail 1:20 - semi scratch w/ Billing instructions M&M Fun Ship - semi scratch build / Gundalow - scratch build / Jeanne D'Arc - Heller Phylly C & Denny-Zen - the Lobsie twins - bashed & semi scratch dual build Billing T78 Norden in dry dock: Billing's Gothenborg 1:100 / Billing's Boulogne Etaples 1:20 Billing's Half Moon 1:40 - some scratch required Revell U.S.S. United States 1:96 - plastic/ wood modified / Academy Titanic 1:400 Trawler Syborn - semi scratch / Holiday Harbor dual build - semi scratch
Walter Biles Posted August 15, 2013 Author #80 Posted August 15, 2013 (edited) Mark, Thank you for that book mark. I have added it to my favorites. Now I have a place I can go for those nautical terms that I never learned the meaning of. Popeye, "the longitudinal curve of a ship's deck or sides." It seems to be describing the curve along the length of the deck, or the side of the boat. Well, "Blow me down". Another one I might be able to remember next time. In the SeaBees, our training had "sheers" as being a pair or more of posts set together and bound at the top and set on ends and anchored by guy ropes anchored by triple staking in all directions, to use as a lifting boom for bridge timbers or other heavy loads. That was what had me confused. I couldn't think of it in a nautical terminology. I guess if using it, it appears to mean "curves" as applied to the fore to aft lines of a deck, or a boat's shape. Does that sound about right? Thanks for the compliment about my boat, Popeye! Walt Biles Edited August 15, 2013 by Walter Biles popeye the sailor 1 Current: America Schooner https://modelshipworld.com/index.php?/topic/10887-america-schooner-pof-by-walter-biles-radio-pof-scale-148-from-blue-jacket-plan/ Prior: MERIDEA https://modelshipworld.com/index.php?/topic/140-meridea-by-walter-biles-radio-34-scratch-cad-of-boat-at-usn-severn-river-repair-station-ca-1969/ SAMSON First build: Scratch POF Spanish Galleon
michael mott Posted August 15, 2013 #81 Posted August 15, 2013 Everything is looking very nice Walter. The lines of the hull are sweet. I too am surprised by the size of the masts. Michael Current builds Bristol Pilot Cutter 1:8; Skipjack 19 foot Launch 1:8; Herreshoff Buzzards Bay 14 1:8 Other projects Pilot Cutter 1:500 ; Maria, 1:2 Now just a memory Future model Gill Smith Catboat Pauline 1:8 Finished projects A Bassett Lowke steamship Albertic 1:100 Anything you can imagine is possible, when you put your mind to it.
mtaylor Posted August 15, 2013 #82 Posted August 15, 2013 Walter, The term "sheers" is also used as you know it. There's also a "sheer hulk" which was an old ship that was cut-down and had sheers installed to put masts on other ships. More trivia... Mark "The shipwright is slow, but the wood is patient." - me Current Build: Past Builds: La Belle Poule 1765 - French Frigate from ANCRE plans - ON HOLD Triton Cross-Section NRG Hallf Hull Planking Kit HMS Sphinx 1775 - Vanguard Models - 1:64 Non-Ship Model: On hold, maybe forever: CH-53 Sikorsky - 1:48 - Revell - Completed Licorne - 1755 from Hahn Plans (Scratch) Version 2.0 (Abandoned)
Walter Biles Posted August 15, 2013 Author #83 Posted August 15, 2013 Thank you Michael and Mark. Walt Biles Current: America Schooner https://modelshipworld.com/index.php?/topic/10887-america-schooner-pof-by-walter-biles-radio-pof-scale-148-from-blue-jacket-plan/ Prior: MERIDEA https://modelshipworld.com/index.php?/topic/140-meridea-by-walter-biles-radio-34-scratch-cad-of-boat-at-usn-severn-river-repair-station-ca-1969/ SAMSON First build: Scratch POF Spanish Galleon
Walter Biles Posted August 20, 2013 Author #84 Posted August 20, 2013 Here are the most recent pictures of my Meridea. I finished the inner planking, I made the masts, and have them fitted, I worked on planking the deck. I used pine. Here is a side view. An aft view of the deck. A front view. I have gone about as far as I can go until I get the second planking finished so I can do the ballasting. Then I can start glueing the decks and cabins on and finish the cockpit. At the end of most of that I need to add the waterway planking so it will extend out through the planking, and put on the top planking. I am extending it up above the deck and making the waterways through it. It will act as a toerail along the edge of the deck. The original had fiberglassing on hull, deck, and cabin including the roof. It had a mahogany toe-rail just inside the edge of the deck, with the stanchions for the safety line around inside it. I had to create a heavier frame for the stanchions to attach to, so I am putting the toe- rail as part of the top course of planking. Walter Biles JerryGreening and mtaylor 2 Current: America Schooner https://modelshipworld.com/index.php?/topic/10887-america-schooner-pof-by-walter-biles-radio-pof-scale-148-from-blue-jacket-plan/ Prior: MERIDEA https://modelshipworld.com/index.php?/topic/140-meridea-by-walter-biles-radio-34-scratch-cad-of-boat-at-usn-severn-river-repair-station-ca-1969/ SAMSON First build: Scratch POF Spanish Galleon
popeye the sailor Posted August 20, 2013 #85 Posted August 20, 2013 looks great Walter........sounds like you have some great plans for her I yam wot I yam! finished builds: Billings Nordkap 476 / Billings Cux 87 / Billings Mary Ann / Billings AmericA - reissue Billings Regina - bashed into the Susan A / Andrea Gail 1:20 - semi scratch w/ Billing instructions M&M Fun Ship - semi scratch build / Gundalow - scratch build / Jeanne D'Arc - Heller Phylly C & Denny-Zen - the Lobsie twins - bashed & semi scratch dual build Billing T78 Norden in dry dock: Billing's Gothenborg 1:100 / Billing's Boulogne Etaples 1:20 Billing's Half Moon 1:40 - some scratch required Revell U.S.S. United States 1:96 - plastic/ wood modified / Academy Titanic 1:400 Trawler Syborn - semi scratch / Holiday Harbor dual build - semi scratch
captainbob Posted August 20, 2013 #86 Posted August 20, 2013 Nice planking, Walter. She's realy starting to take shape. Bob Every build is a learning experience. Current build: SS_ Mariefred Completed builds: US Coast Guard Pequot Friendship-sloop, Schooner Lettie-G.-Howard, Spray, Grand-Banks-dory, a gaff rigged yawl, HOGA (YT-146), Int'l Dragon Class II, Two Edwardian Launches In the Gallery: Catboat, International-Dragon-Class, Spray
Walter Biles Posted August 20, 2013 Author #87 Posted August 20, 2013 (edited) Thanks Popeye, Cap'n Bob. I am currently working on making the stand more supportive. I have cut down the height of the stand legs, so I can have the keel nestled in a brace to keep it from wobbling side to side. I've been watching Michael and find that I may need to firm up the hull on the stand so that I can true up the masts plumb. I had better get it where it will stay in one place while I check it out. After fairing the deckline, I may find that I can no longer find level across the gunnels. I have been noticing some apparent inequities of spacing on deck features that got me wondering. I believe I can still correct masts to hull alignment if it has strayed. I left the top of the mast base sheaths loose, so I can shim them over if necessary at this stage. I wish I had had a better idea of the hull shape before I started construction so I could have made a jig to build the whole thing in. I just hope my original cad frames were all accurate and that accuracy will be holding the form true. Gotta run. Walt biles Edited September 6, 2013 by Walter Biles Current: America Schooner https://modelshipworld.com/index.php?/topic/10887-america-schooner-pof-by-walter-biles-radio-pof-scale-148-from-blue-jacket-plan/ Prior: MERIDEA https://modelshipworld.com/index.php?/topic/140-meridea-by-walter-biles-radio-34-scratch-cad-of-boat-at-usn-severn-river-repair-station-ca-1969/ SAMSON First build: Scratch POF Spanish Galleon
Walter Biles Posted August 31, 2013 Author #88 Posted August 31, 2013 (edited) I have cut the outer transom piece and installed all of the tiedown anchors in the deck. I did have to true up the masts. I have a couple of more secondary planks done on the hull, and have been fitting the gunnels and locating the waterways. It won't be a copy of the original Meridea, but you can recognize her lines. The most recognizable feature she has is the rectangular masts. I can't believe how strong they are. Once I get some guy wires for the stays, and make the spreaders, I believe she will be able to take a blow! I'm getting excited at the progress I've make. I'll need to get some more pictures. I get so involved in what I'm doing, I forget. Any one know where I can find some functional turnbuckles to adjust her mast stays? Do any RC'rs out there know if using fine cable for the stays will mess up the radio functions now-a-days? The boat is beginning to get pretty solid. I've dropped her on my foot while I was working on her, and it really hurt. It didn't do anything to the boat, but my foot hurt for several days. Well, I better go ahead and get to bed. I was up all night yesterday working on the boat, and I'm getting tired. Walter Biles Edited August 31, 2013 by Walter Biles Current: America Schooner https://modelshipworld.com/index.php?/topic/10887-america-schooner-pof-by-walter-biles-radio-pof-scale-148-from-blue-jacket-plan/ Prior: MERIDEA https://modelshipworld.com/index.php?/topic/140-meridea-by-walter-biles-radio-34-scratch-cad-of-boat-at-usn-severn-river-repair-station-ca-1969/ SAMSON First build: Scratch POF Spanish Galleon
Walter Biles Posted September 6, 2013 Author #89 Posted September 6, 2013 (edited) Sorry to be so behind on all my posts. I have been busy working on the boat. First, I finished planking the inner layer completely. Then I fabricated the waterways and gunnels all around. Then I re-adjusted the cabin roof clearance to the cabin and planked the deck, and the cabin roofs. I have the cabin window assembly where it fits inside the planking of the deck completely. I finished the fence around the cockpit to keep the water out of it. That is now an assembly that fits around the cabin frame which is integrated into the hull. I put a clear coating on the decking and roofs. I am using Minwax Polyurathane. It is the first time I have used the water cleanup formula. I hope it will sand out smoother than the first coat did. It sure makes that decking look nice color-wise. I have removed all the top deck and other assemblies, and spent a couple days drying out the boiled linseed oil that I poured inside of her. I let it set for a bit, then rolled the puddles into all the framework, and then put it upside down over a big drip pan, to drain for awhile. Then I recovered the leftover linseed oil, and put it back into the can for my next project. I put the hull in the stand and set it in my truckbed where the sun could get at the inside of it with the gentle breezes to dry. I am lucky I did it when I did, because just after I got it dry, the rains came back. It takes good dry air and sun to get a good coating dried inside. I tried that spray foam for sealing cracks around windows, but am going to have to remove it and try again. I wanted floatation, and that is not it. I still have not finished the second layer of planking, but as soon as I get that done, I can now ballast. Once both the ballast and the floatation are in, I can start putting back on all the assemblies permanently When it is all assembled, it really looks nice. I will try to get pix of everything and insert them into the text parts where I described it. #1 This one is down into the cockpit area. It shows the rudder and that's about all. The blue stuff is tape screening the bulwark so it can still have the inner lining put on to seal against the deck. #2 This is the port side of the boat assembled as far as I've gotten. #3 This is an elevated view from the aft showing the roof and deck planking. #4 Starboard side view with Roof off of cabin #5 Roof #6 With the cabin/cockpit assembly off. The after most part of this surrounds the mizzen mast. . #7 Showing with the deck off the subdeck. #8 This next one is of the main mast frame bracing Walter Biles Edited September 6, 2013 by Walter Biles JerryGreening and popeye the sailor 2 Current: America Schooner https://modelshipworld.com/index.php?/topic/10887-america-schooner-pof-by-walter-biles-radio-pof-scale-148-from-blue-jacket-plan/ Prior: MERIDEA https://modelshipworld.com/index.php?/topic/140-meridea-by-walter-biles-radio-34-scratch-cad-of-boat-at-usn-severn-river-repair-station-ca-1969/ SAMSON First build: Scratch POF Spanish Galleon
popeye the sailor Posted September 6, 2013 #90 Posted September 6, 2013 looking sweet Walter.......she's really coming around! very glad to see an update never dropped on on my foot........but I have dropped a couple.......I can second how strong these hulls can be. the only one to date that saw ant real damage, was the Gothenborg.....snapped the head of the bow stem right off it. darn lucky I was able to fix it. very nice work your doing I yam wot I yam! finished builds: Billings Nordkap 476 / Billings Cux 87 / Billings Mary Ann / Billings AmericA - reissue Billings Regina - bashed into the Susan A / Andrea Gail 1:20 - semi scratch w/ Billing instructions M&M Fun Ship - semi scratch build / Gundalow - scratch build / Jeanne D'Arc - Heller Phylly C & Denny-Zen - the Lobsie twins - bashed & semi scratch dual build Billing T78 Norden in dry dock: Billing's Gothenborg 1:100 / Billing's Boulogne Etaples 1:20 Billing's Half Moon 1:40 - some scratch required Revell U.S.S. United States 1:96 - plastic/ wood modified / Academy Titanic 1:400 Trawler Syborn - semi scratch / Holiday Harbor dual build - semi scratch

Recommended Posts
Create an account or sign in to comment
You need to be a member in order to leave a comment
Create an account
Sign up for a new account in our community. It's easy!
Register a new accountSign in
Already have an account? Sign in here.
Sign In Now