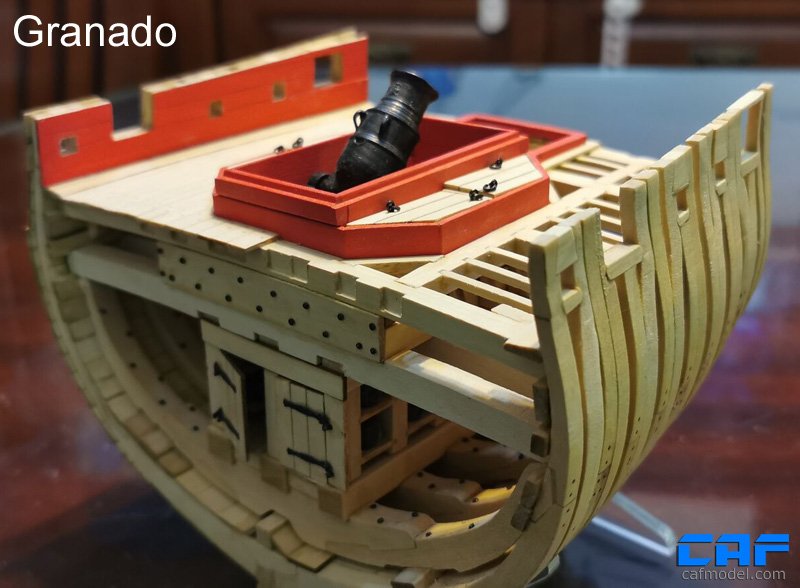
James H Posted February 15, 2021 #1 Posted February 15, 2021 One thing you'll notice about building the 9 double frames for this model is that each is labelled A & B. These are generally built with 'B' on the plan first, but #12 and #13 are built with 'A' FIRST built. The reason behind this seems to be because the twist in at least #13 is opposite to the earlier gun port frame. Not sure of the reason for #12, but hey ho! As you're building, you'll notice that 'B' frames are built over the red lines, and 'A' over the purple lines. I think a good tip would be to glue the fillers onto the plan with glue you can peel, such as photo-mounting rubber cement. That way, it's a little easier to construct frame 'A' after 'B' is constructed. If you haven't, then you will find the outside bevelling marks on frames 'B' as good guide as where to lay the parts for 'A'. BE CAREFUL in ensuring that you get the laser etched bevel lines on the correct side of each assembly. Generally, you'll see the outside ones are upwards on each frame built, except for frames #12 and #13. As a quick guide to frame layout, you might find this useful. thibaultron, Ryland Craze and Edwardkenway 3 SAY NO TO PIRACY. SUPPORT ORIGINAL IDEAS AND MANUFACTURERS. KEEP IT REAL! On the bench: HMS Surprise - (Prototype) - Vanguard Models - 1:64 COMING SOON On Hold: HMS Winchelsea Double Capstan - Syren Ship Models - 1:48 'Oseberg' Viking Ship (V3) - Pavel Nikitin - 1:25 Finished US Baltimore Armed Privateer Schooner Grecian 1812 (prototype) - Vanguard Models - 1:64 'Zulu' fishing boat, Vanguard Models - 1:64 Fifie' fishing boat, Vanguard Models - 1:64 HMS Flirt 1782, Vanguard Models - 1:64. Duchess of Kingston c.1780 - Vanguard Models - 1:64 HMS Sphinx 1775, Vanguard Models - 1:64 ERYCINA - Plymouth Ketch-Rigged Trawler 1882, Vanguard Models - 1:64. 'Nisha' - The Brixham 'Mumble-Bee' - Vanguard Models 1:64 'Saucy Jack' fishing boat - Vanguard Models - 1:64 Ranger 'Barking Fish Carrier' - 1864 - Vanguard Models - 1:64 HMS Indefatigable - 1794 (production prototype), Vanguard Models - 1:64. HMS Harpy - 1796 (production prototype) - Vanguard Models - 1:64 Indeterminate: Tender Avos - Master Korabel - 1:72. H.M.S. Victory (production prototype) - Amati - 1:64. HMS Granado 1742 (cross section) - CAFModel - 1:48


Recommended Posts