Bowline Posted July 18, 2022 Share #1 Posted July 18, 2022 35 years ago I completed my first build "Le Hussard" (Artesania Latina) I really enjoyed the build and kit quality was good, but any guidance on; bearding lines, rabbets, fairing was absent and made it a challenge and not a first time build (imho). Later I bought the Amati "Bounty" and realized that it was definitely beyond my experience and skill set, so I sold it on eBay, not starting it. So fast forward and I was impressed with the Vanguard Model line with its great instructions and kit contents - bought the "Erycina" Vanguard Model kit and start a build log. So far straight forward (Amati keel clamp from the Bounty purchase not a requirement for the Vanguard kit). Kit construction kept the framework square and the suggested fairing lines on the bulkheads a big help. Photos in the manual and on other build logs in Model Ship World certainly a big help to a modelers' confidence. Love the pear wood in the kit. One lime wood plank was used to check final fairing. ccoyle, BenD, DB789 and 3 others 6 Quote Link to comment Share on other sites More sharing options...
bolin Posted July 18, 2022 Share #2 Posted July 18, 2022 Nice start, and welcome to MSW! Bowline 1 Quote Current builds Meta - Billing Boats - Pentikontoros - Navarino Completed builds Swampscott Dory - BlueJacket - Will Everard - Billing Boats - Bohuseka (Swedish west-coast rowboat) - scratch build - Medieval long-ship Helga Holm - scratch build - Sloop from Roslagen - scratch build Link to comment Share on other sites More sharing options...
Jim Lad Posted July 18, 2022 Share #3 Posted July 18, 2022 Hello Bowline, and a warm welcome to MSW from 'Down Under'. Looks like you've made a very good start to your model. John Bowline 1 Quote Link to comment Share on other sites More sharing options...
Bowline Posted July 19, 2022 Author Share #4 Posted July 19, 2022 Gunwales installed - definitely trickiest part so far to get really accurate. If I was to do this again I would soak, clamp, pin and let dry before gluing. chris watton 1 Quote Link to comment Share on other sites More sharing options...
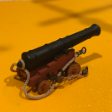
Bowline Posted July 19, 2022 Author Share #5 Posted July 19, 2022 Both sides fore and aft. Barrel placed just for scale. BenD, chris watton and DB789 3 Quote Link to comment Share on other sites More sharing options...
Bowline Posted July 19, 2022 Author Share #6 Posted July 19, 2022 Btw the starboard rear bulwark posts look taller than the gunwales - but aren't. It's actually that the gunwale flairs out in this photo. I corrected this later to be like the port side. Quote Link to comment Share on other sites More sharing options...
Bowline Posted July 20, 2022 Author Share #7 Posted July 20, 2022 Recent progress - fitted and glued down the stern. Definitely needed to be presoaked, wrapped round a can (10 cm diameter), and dried overnight. Painted the inside Vallejo Saddle Brown 70.940 and test dry fitted the bench - its not fully pushed home and will need some fiddling (technical term) to get a tight fit with no gap on the bulwarks, Saddle Brown is probably also going to be color choice for the outside bulwarks (a change from green). Top rail is prone to cracking, while I was gluing it down I used a mini clamp - you can see the witness mark DB789, BenD and AJohnson 3 Quote Link to comment Share on other sites More sharing options...
Bowline Posted July 20, 2022 Author Share #8 Posted July 20, 2022 (edited) First planking started - OK I know this is "skiing off piste" here, it's just that when I offered up the first plank seemed like it needed a lot of three dimensional bending to make it lay flat, so I left room for a small steeler at the stern. It will mean more tapering on later planks. I hope I don't hear a collective sigh from MSW. Anyway here it is, one side with steeler (at the stern), 3 planks and one tapered plank glued down with CA medium space filling. Planking was done it two halves . Stern rails painted Vallejo Black. Edited July 21, 2022 by Bowline chris watton, AJohnson, DB789 and 2 others 5 Quote Link to comment Share on other sites More sharing options...
Bowline Posted July 20, 2022 Author Share #9 Posted July 20, 2022 Temporary offered up the bow cutwater (not glued it) to pencil in the line to guide forward planking. Photo of the tools I'm using - the Tamyia masking tape is great - and the putty filler sands very smooth. No airbrush - maybe later, if I do another Vanguard model, but I plan on using the Plastikote spray cans for the hull. AJohnson, bolin, DB789 and 2 others 5 Quote Link to comment Share on other sites More sharing options...
Bowline Posted July 21, 2022 Author Share #10 Posted July 21, 2022 Slower progress - but added another two planks. Also a redo on the painting of the stern railing - lightly sanded and couple of well thinned (50:50) coats of Vallejo Black. Nothing like a close up digital photo to make a modeler tidy up!! chris watton, AJohnson, longshanks and 1 other 4 Quote Link to comment Share on other sites More sharing options...
longshanks Posted July 21, 2022 Share #11 Posted July 21, 2022 Looking very neat Kev Bowline 1 Quote Link to comment Share on other sites More sharing options...
Bowline Posted July 23, 2022 Author Share #12 Posted July 23, 2022 (edited) Port side 1st planking completed. The Tamiya filler sands very fine and goes on with a very thin skim (so that part is ideal), but it creates dusty stains on the rest of the planks. This may not be the best choice for the pear wood 2nd planking? Used two steelers in total at the stern, I will search MSW for ideas on the 2nd part, but in the meantime I need to finish up the other side. Rabbet lines look good so far. Edited July 23, 2022 by Bowline DB789, longshanks, ct mike and 3 others 6 Quote Link to comment Share on other sites More sharing options...
Bowline Posted July 23, 2022 Author Share #13 Posted July 23, 2022 (edited) Keel side is not clued on - it's just offered up for measuring. - Thinking about it, the filler would only be used below the waterline to get an ultra smooth hull before painting and so above the waterline would be masked off. So maybe Tamiya is up to it, it certainly sands very smoothly as I experimented taking the uneven thickness of the lime planks rather than sanding down to a common denominator. I need to scan the MSW site. Also I haven't a clue on the 2nd plank layer pattern. The "suck and see approach" was OK for first planking but I could get in a lot of difficulty on the 2nd. Edited July 23, 2022 by Bowline Quote Link to comment Share on other sites More sharing options...
Bowline Posted July 23, 2022 Author Share #14 Posted July 23, 2022 (edited) Btw. Here’s a photo of “Le Hussard” I first time built in the 1980’s!! Photo of a photo (no digital in those days! Imagine attempting this when there was no MSW?? What I didn’t like about this model build was (in no particular order and not a reflection of the kit but a comment on my new-b-ness): the bulwarks seemed very thin and there weren’t enough of them so put a lot of demands on a builder’s experience (to use filler blocks and accurate fairing etc); the rope (thread) was very hairy aggravated by inexperienced handling (rather spoilt the look); manual for non experienced builders not up to it; there was no painting guidance; (eg. should have been instructed to dye the rat lines etc). You can see why Vanguard models encouraged me to take up the hobby again in retirement. Just looked at this again and saw that I made the ship stand out of a drawer front panel and two drawer pulls - !!!🤣 Edited July 23, 2022 by Bowline DocRob and bolin 2 Quote Link to comment Share on other sites More sharing options...
Bowline Posted July 23, 2022 Author Share #15 Posted July 23, 2022 Back to "Erycina" build - 1st planking nearly completed - photos later. Quote Link to comment Share on other sites More sharing options...
Bowline Posted July 26, 2022 Author Share #16 Posted July 26, 2022 some more sanding to do. The hull is an amazing shape . ct mike, DB789, DocRob and 3 others 6 Quote Link to comment Share on other sites More sharing options...
Jim Lad Posted July 26, 2022 Share #17 Posted July 26, 2022 That hull's looking really nice, mate. John Bowline 1 Quote Link to comment Share on other sites More sharing options...
bolin Posted July 27, 2022 Share #18 Posted July 27, 2022 Good progress! It looks like you have a good foundation for the second planking. Your old "Le Hussard" also looked nice. Well done given the little information you had to work with. Bowline 1 Quote Current builds Meta - Billing Boats - Pentikontoros - Navarino Completed builds Swampscott Dory - BlueJacket - Will Everard - Billing Boats - Bohuseka (Swedish west-coast rowboat) - scratch build - Medieval long-ship Helga Holm - scratch build - Sloop from Roslagen - scratch build Link to comment Share on other sites More sharing options...
DocRob Posted July 27, 2022 Share #19 Posted July 27, 2022 First planking looks very well done on that racehorse like hull. Still can't really believe, it's a fishing vessel. Cheers Rob Bowline 1 Quote Current builds: AEG G.IV Creature of the Night - WNW - 1/32 McLaren Mp4/6 - Ayrton Senna - Fujimi - 1/20 - paused Duchess of Kingston - paused Finished builds: F4U-1A Corsair - Tamiya 1/32 USS Arizona 1/350 Eduard Caudron C.561 French Racing Plane 1/48 Nachtigall on Speed Arado 234 B-2N by DocRob - 1/32 - Fly Renault RE20 Turbo - Tamiya - 1/12 P-38J Wicked Woman - Tamiya - 1/48 Link to comment Share on other sites More sharing options...
Bowline Posted July 27, 2022 Author Share #20 Posted July 27, 2022 Stern parts attached - it helped that I painted these before assembly. I committed to Saddle Brown for this model, just seemed like a very vintage colour. I applied the rest of the keel parts - I found that because the pegs were a good interference fit, I pushed them in first and wiggled the facing pieces, into place with the Titebond applied. Tape on the bulwarks for protection. I'm probably using little too much CA, definitely will stick to the medium - maybe even thick would be a better choice - from experience the thin will bleed through the grain. DB789, AJohnson, Glenn-UK and 4 others 7 Quote Link to comment Share on other sites More sharing options...
Bowline Posted July 27, 2022 Author Share #21 Posted July 27, 2022 Ok - keel pieces and outside gunwales on - this is about as far as I can go - need to stop here in the build to spend time reading the MSW build logs to figure out the 2nd planking, what model varnishes people have been using etc. etc. So much useful info in those logs. btw the bow keel pieces have a mark to indicate the outer side, visible in the photo but the left and right sides look symmetrical - wonder why, hope I'm not missing something. longshanks, DB789 and Glenn-UK 3 Quote Link to comment Share on other sites More sharing options...
Frank Nichols Posted July 30, 2022 Share #22 Posted July 30, 2022 Looks good. Question on your putty. Have you tried a DIY putty using sanding dust and Titebond ever, and if so, how does it compare to the Tamiya filler (putty?) you are using? I am starting my first build soon (after reading everything I can here) and I expect some "gaps" that will need to be filled. Quote First build - in process: Model Shipways - 18th Century Armed Longboat - Scale 1:24 Link to comment Share on other sites More sharing options...
Bowline Posted July 30, 2022 Author Share #23 Posted July 30, 2022 (edited) Hi Frank: - Remember I'm a new-B so take what is written here with a pinch of salt - its only my opinion. I have a love/hate relationship with Tamiya filler. It's plusses are it goes on with a really good skim which makes covering up imperfections really good. It also sands extremely smooth its softer than the wood so leaves a very smooth surface and should take paint excellently. The down side is its messy with the sanded residue able to get in the grain of adjacent planks. Its primarily meant for plastic models so its blue in hue!! In my opinion its good for 1st planking as long as it's not big gaps you are trying to fill - Im thinking less than 1/32". I'm pretty sure most builders would just press on or use Titebond/sandings here for small stuff (if it bugged them) and major booboos use a water based wood filler - but my goal was to assess if I had low spots (hollows that would be taken up by the 2nd planking) so smoother the better to feel those out. For the 2nd planking it should be excellent for only those areas that are going to be painted and I'll mask off everything else to prevent staining. If I had a small gap (whadda mean if ??) in a to be in an unpainted 2nd layer planking I know that Titebond and sandings will fix it -- but I don't know what I would do here because the Titebond might stain the wood and give me a blotchy finish - but perhaps that's where a clear varnish would even everything out - frankly I don't know - there was a build log where the author tried different varnishes to experiment - that's probably what I'll have to do. I have zero experience with pear wood. Now go back and read the first sentence again. Good luck in your build - its a hobby Edited July 30, 2022 by Bowline typo Quote Link to comment Share on other sites More sharing options...
Bowline Posted August 1, 2022 Author Share #24 Posted August 1, 2022 (edited) Sunday's progress - 2nd planking starboard side - I decided to go the route of simple tapering but with each length in two halves. It was way beyond my skill set to do this as one long plank. I will need a single steeler this side at the stern to finish this off but below the waterline, 5 planks left. I'm thinking is the mark on the forward keel at the bow an indication of where the waterline is supposed to be? - just a guess it's not in the manual. Edited August 1, 2022 by Bowline ct mike and Glenn-UK 2 Quote Link to comment Share on other sites More sharing options...
Bowline Posted August 1, 2022 Author Share #25 Posted August 1, 2022 and another photo BenD, Glenn-UK, ct mike and 1 other 4 Quote Link to comment Share on other sites More sharing options...
Bowline Posted August 6, 2022 Author Share #26 Posted August 6, 2022 One side 2nd planking completed, light sanding - to be continued after I complete the opposite side. It was all a challenge particularly the stern!! longshanks, Glenn-UK, DB789 and 3 others 6 Quote Link to comment Share on other sites More sharing options...
Glenn-UK Posted August 9, 2022 Share #27 Posted August 9, 2022 I am enjoying your build, you seem to be doing a great job so far. My next project, once I have finished building the Sphinx, will be two small fishing boats, the Erycina and Saucy Jack. The kits have arrived today and I will use you build log as a reference guide along with Jim prototype build log(s) when I get started, hopefully early October. Quote Glenn (UK) Link to comment Share on other sites More sharing options...
Bowline Posted August 10, 2022 Author Share #28 Posted August 10, 2022 (edited) I started the Erycina because I wanted an entry level build aspiring to eventually an 18th century HMS Naval ship of the line, a Brig or suchlike. But I have to say I'm pretty smitten with these fishing vessels that Vanguard are producing and all being well on this build I would do Saucy Jack or the Zulu next. I picked up E. March's book on Sailing Trawlers on eBay for $39, its a great book and great read for your part of the world. Hopefully another Erycina build will start soon as mine might be a little limited !! 😅 Edited August 10, 2022 by Bowline typo DB789, Glenn-UK and AJohnson 3 Quote Link to comment Share on other sites More sharing options...
Glenn-UK Posted August 10, 2022 Share #29 Posted August 10, 2022 After completing the Erycina I am sure you will be able to tackle a bigger build, such as Alert, Flirt or Duchess Of Kingston. I have already built Speedy, Alert and DOK. I have a few more weeks work left to complete the Sphinx, as can be seen in the attached two photos. I will enjoy building both the Erycina and Saucy Jack which will be a nice project before my next major build which will be the Indy. Chris is hoping the Indy kit will be ready for release by the end of the year. Bowline and DB789 2 Quote Glenn (UK) Link to comment Share on other sites More sharing options...
Bowline Posted August 10, 2022 Author Share #30 Posted August 10, 2022 That's a beautiful build. Hopefully Flirt or Alert is in my future, I have a British Navel officer's sword c1780 that would make a terrific combination display - that's my goal. AJohnson and Glenn-UK 1 1 Quote Link to comment Share on other sites More sharing options...

Recommended Posts
Join the conversation
You can post now and register later. If you have an account, sign in now to post with your account.