Search the Community
Showing results for tags 'Model Shipways'.
-
 Yikes, I goofed. I don't know how I set this build log up in the wrong era. I couldn't see a way to move from one era to another, so I deleted everything I could. I'll try setting up the build log again tomorrow - hopefully in the right place. sorry...
 -
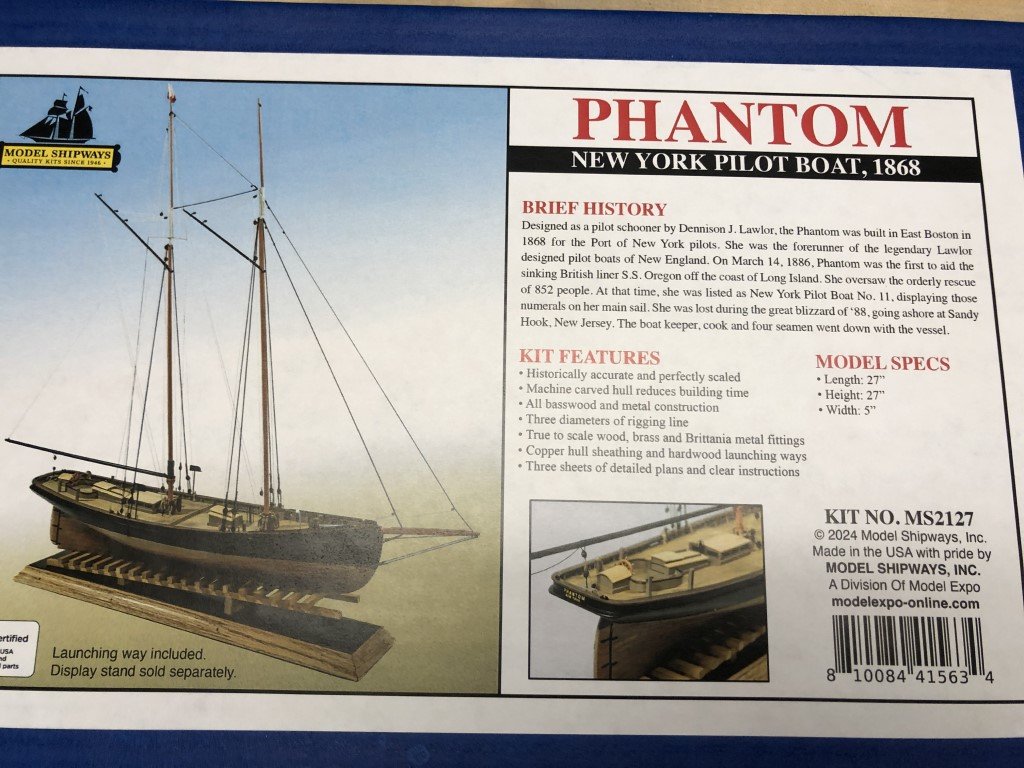
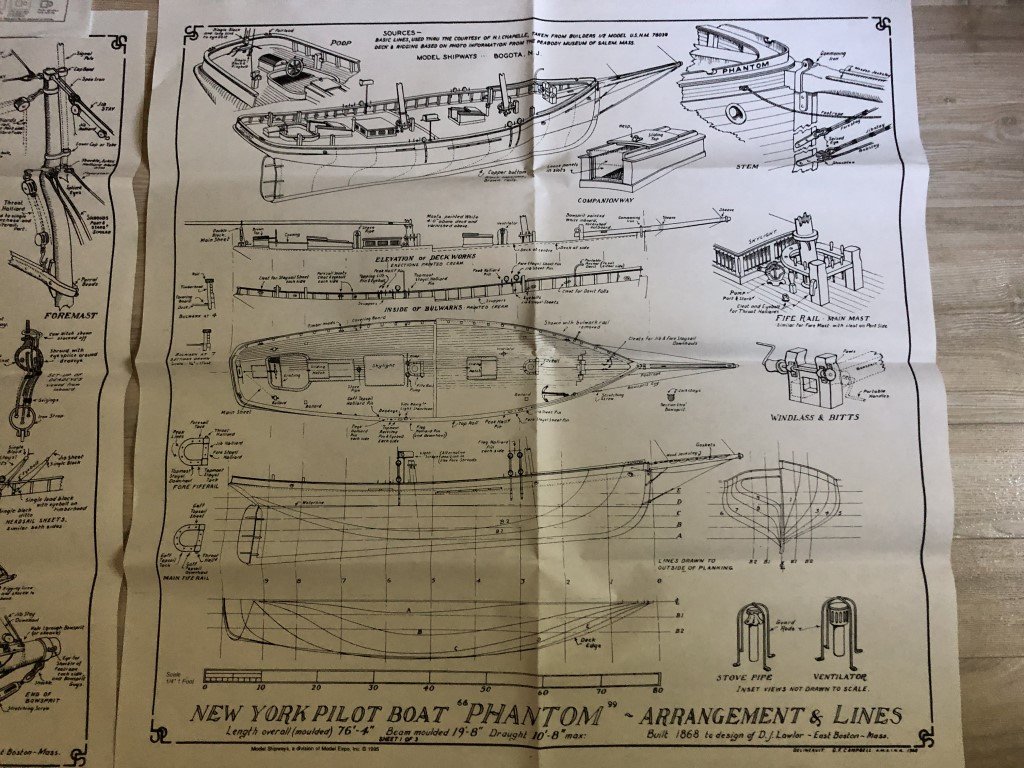
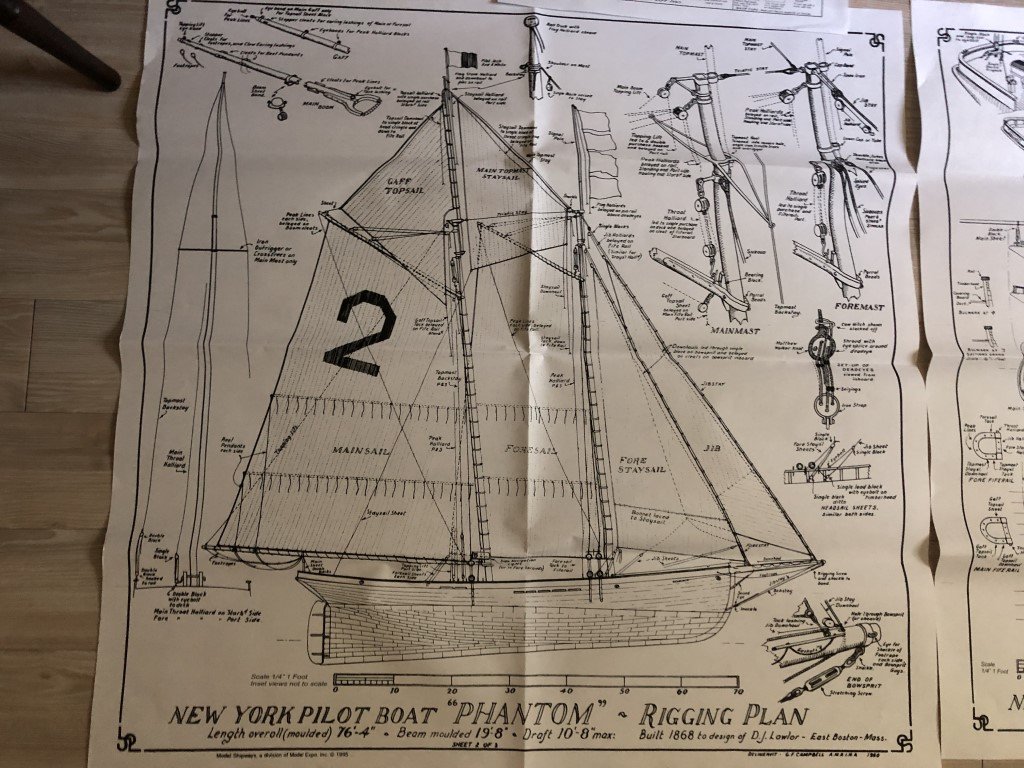
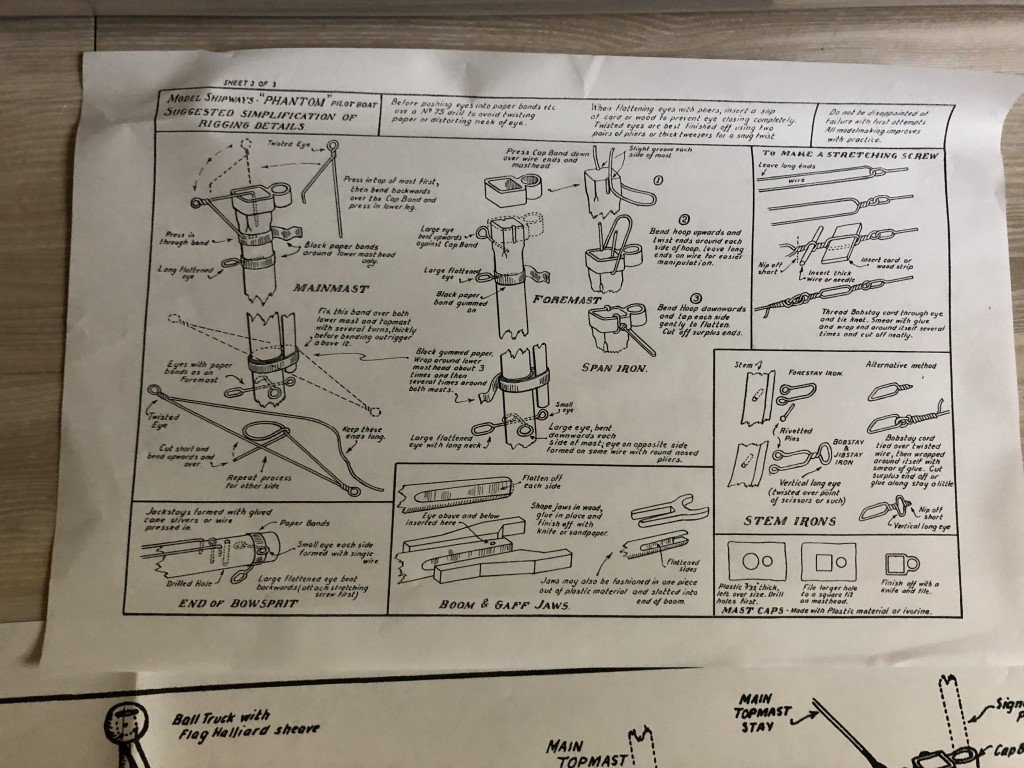
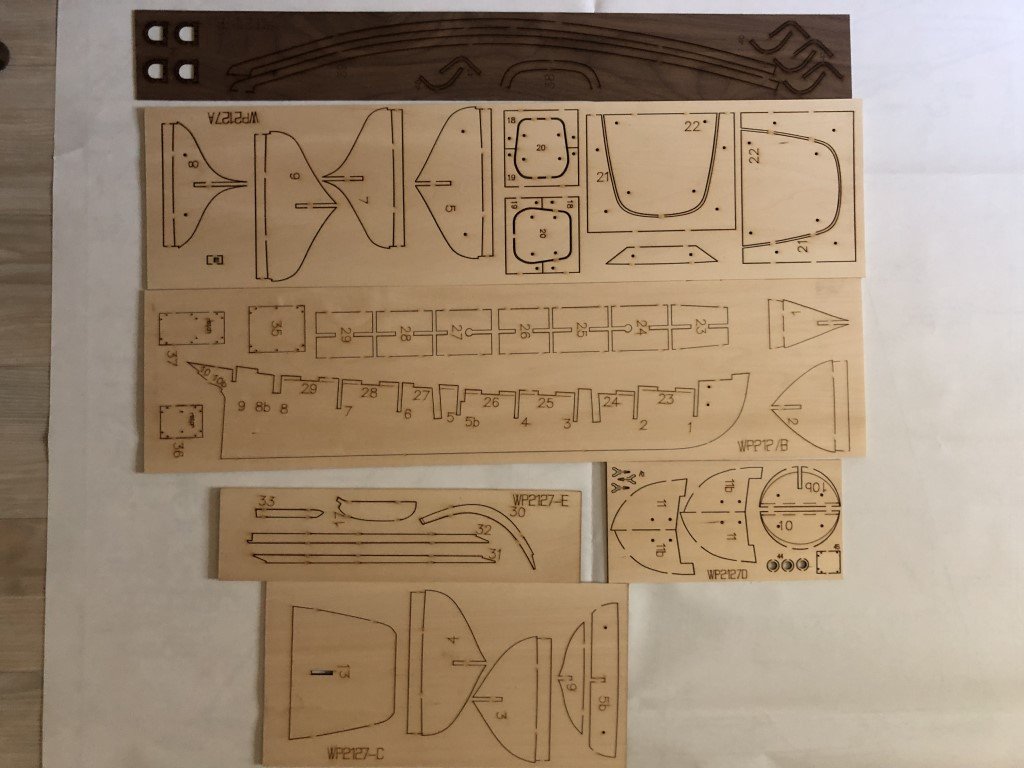
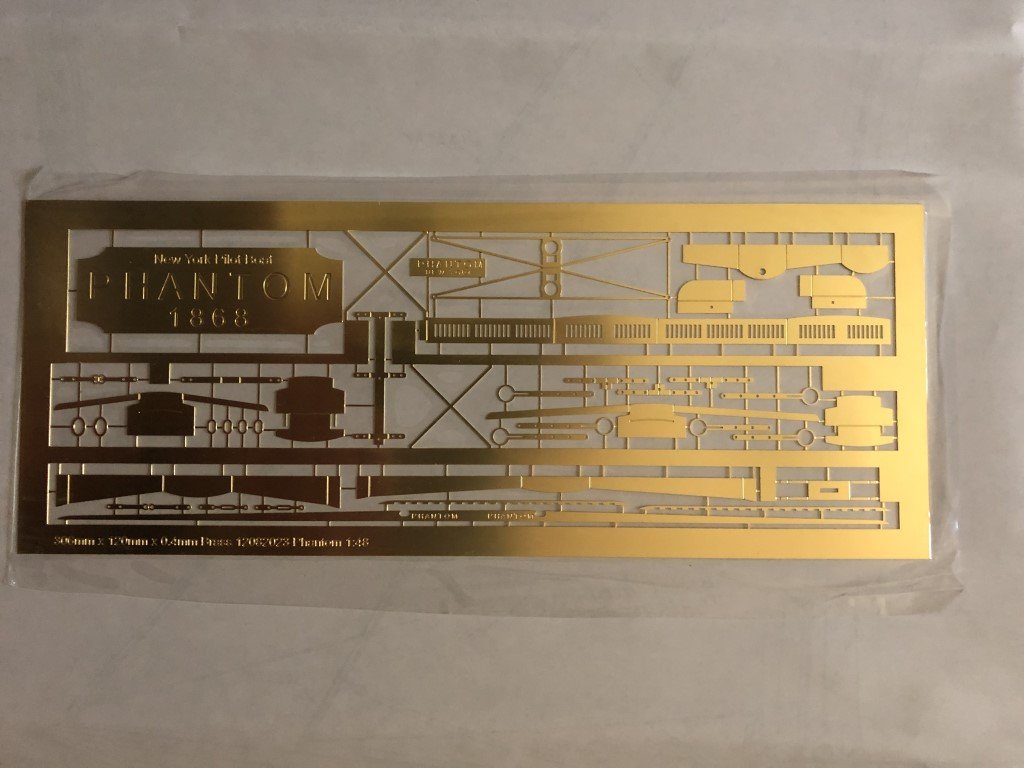
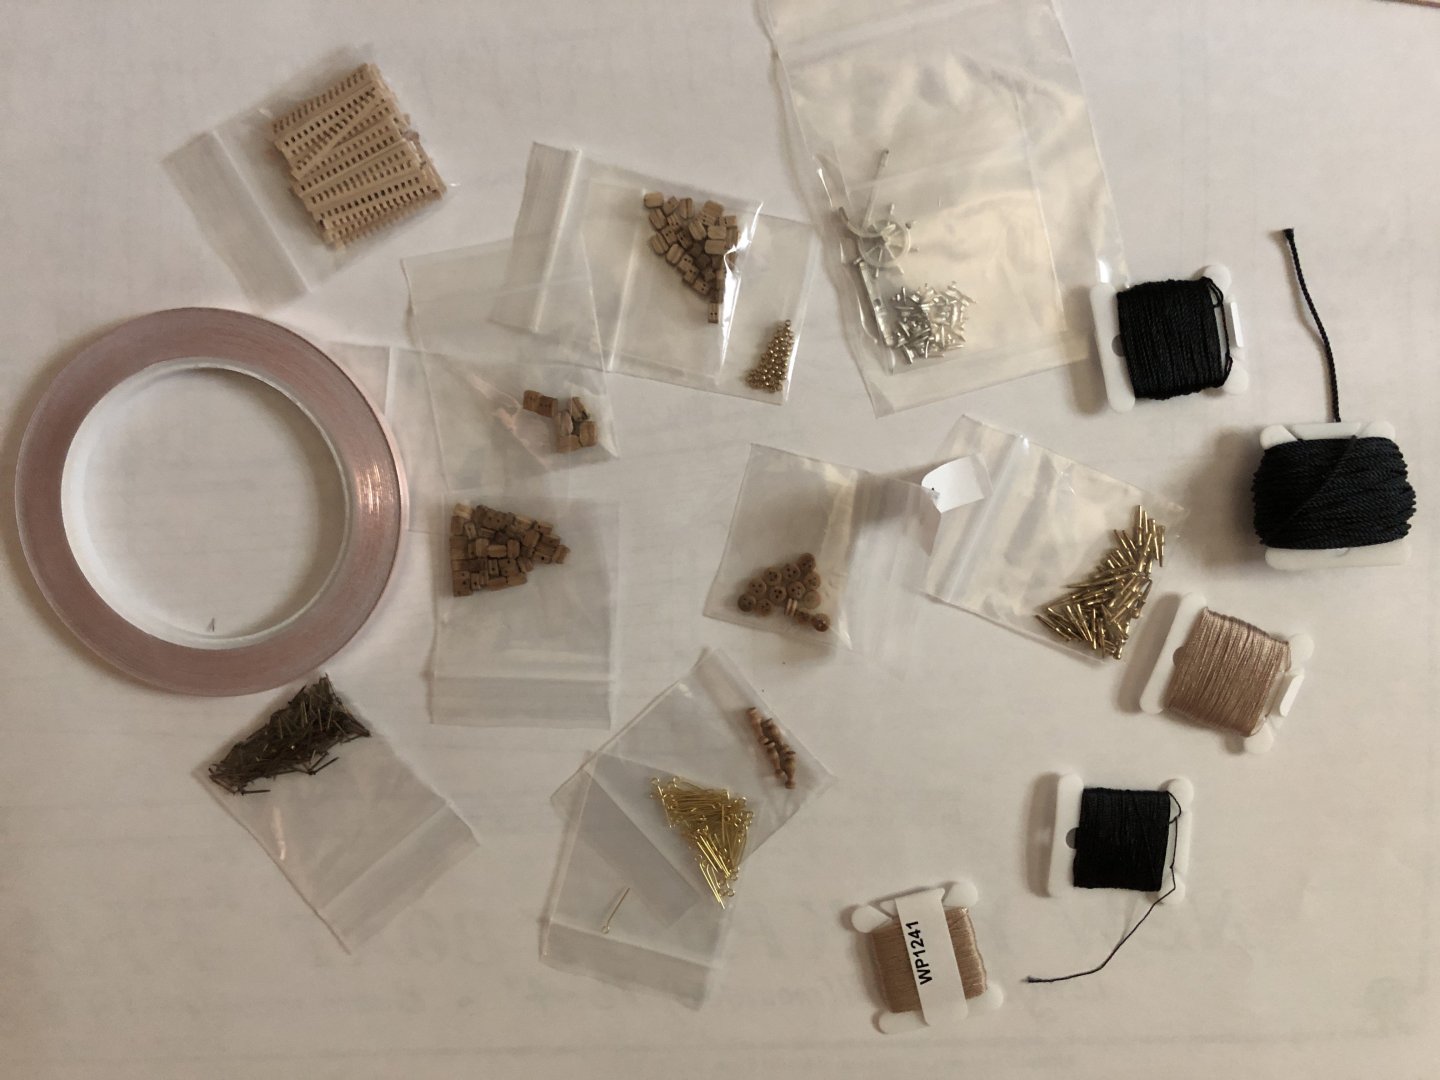
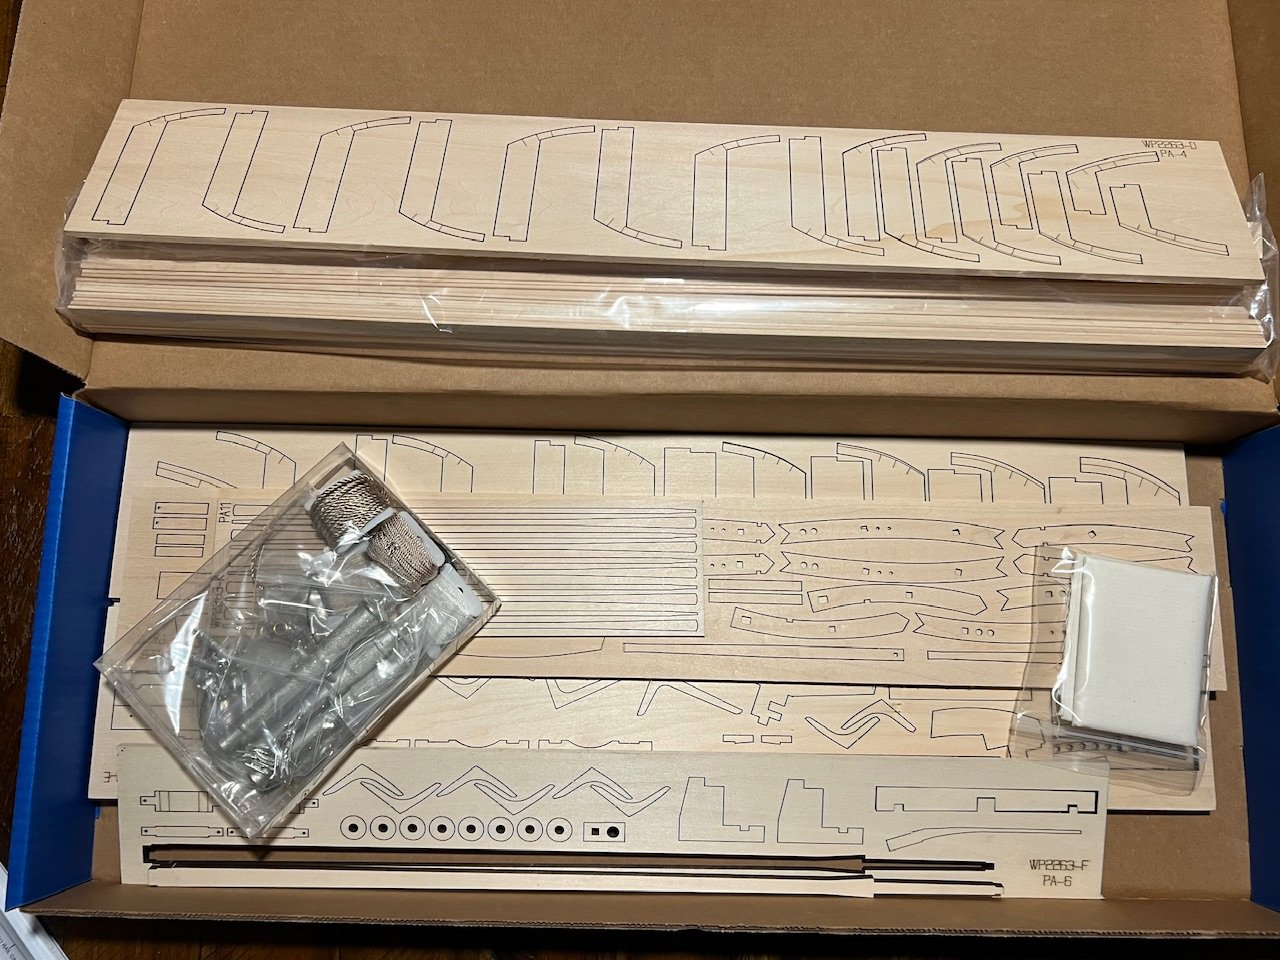
 Today I received the newly released 1:48 scale Phantom New York Pilot Boat 1868 manufactured by Model Shipways. I wanted to build this kit for at least two reasons. First, in 2007, the 1:96 scale Phantom was the first wooden model ship that I completed (not the first I started!) and now after 17 years and many models I hope to do much better this time around. Second, I have a dog that I named after the boat and he is getting up in years - just turned 14 - so we don't know how much more time we will have with him. This model will help cement my memories of him. A young Phantom is the one on the left below; we lost Zargon, on the right, nearly 10 years ago. So back to the kit! As noted above, this is a reintroduction of Phantom at a larger scale. One of the biggest differences is that the new 1:48 version is plank on bulkhead; whereas the 1:96 version is a solid hull model. The plan set has not changed, short of making enlargements from the 1:96 scale kit. Thus if you have built the small model, there is really nothing new in terms of documentation. The instruction book for the 1:48 scale kit features color photographs to aid the construction process. It's sort of funny that Model Shipways continues to use the same basic material at the start of the booklet as they have for years. Once and a while they should update! For example in the Painting and Staining section, they still refer to making use of Floquil and Testers Model Master paints - both of which have been discontinued for years. Nevertheless, it appears that the construction is laid out in a thoughtful manor with many photographs to aid in the process. However, it won't be until the model is completed that I will really know how good they are (for me). In terms of materials, there is a slew of limewood strips and several sheets of laser cut materials: Note that the keel / stem / stern post components are separate from the false keel. This may simplify tapering of bulkheads and creation of the planking rabbet. There is a sheet of photo-etched parts. Some I will likely discard, e.g., the wheel and deck houses as they deserve to be built with wood. Finally, there is a collection of fittings, rigging line, etc. I'm not sure how much of this material will be used verses replaced. Certainly the blocks need to go and probably all the rigging material as well! Hopefully soon the construction will begin!

-
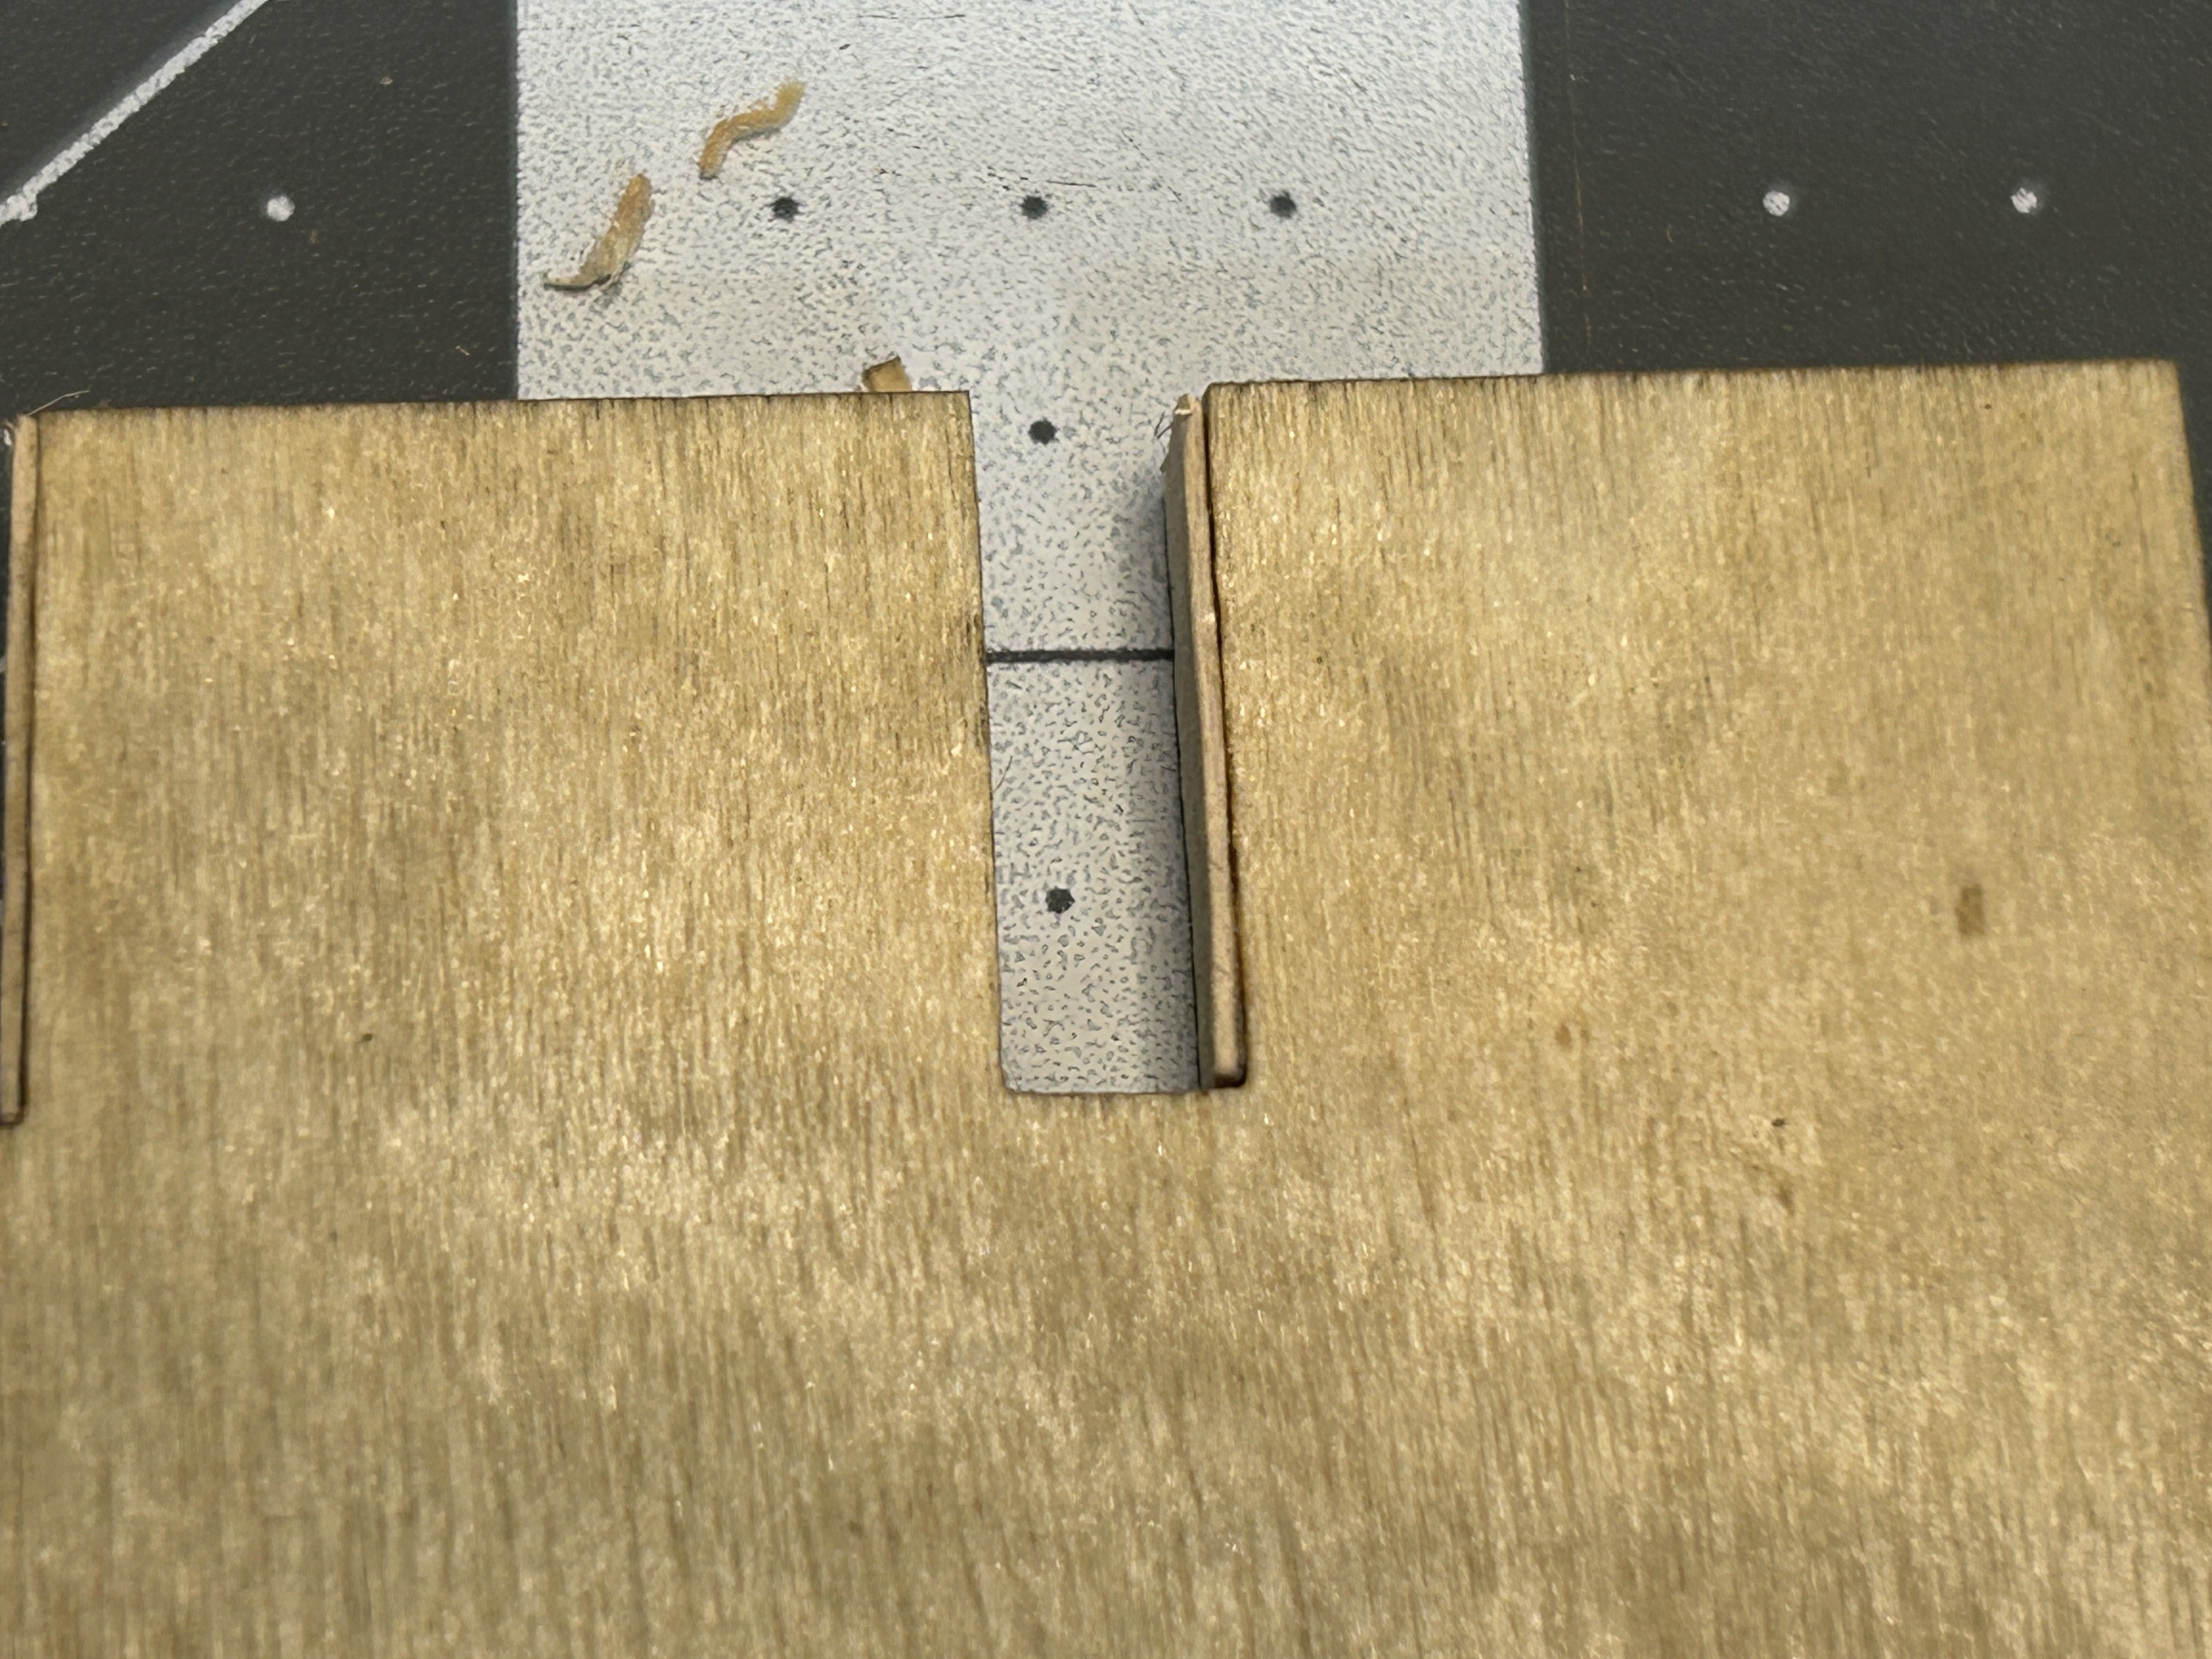
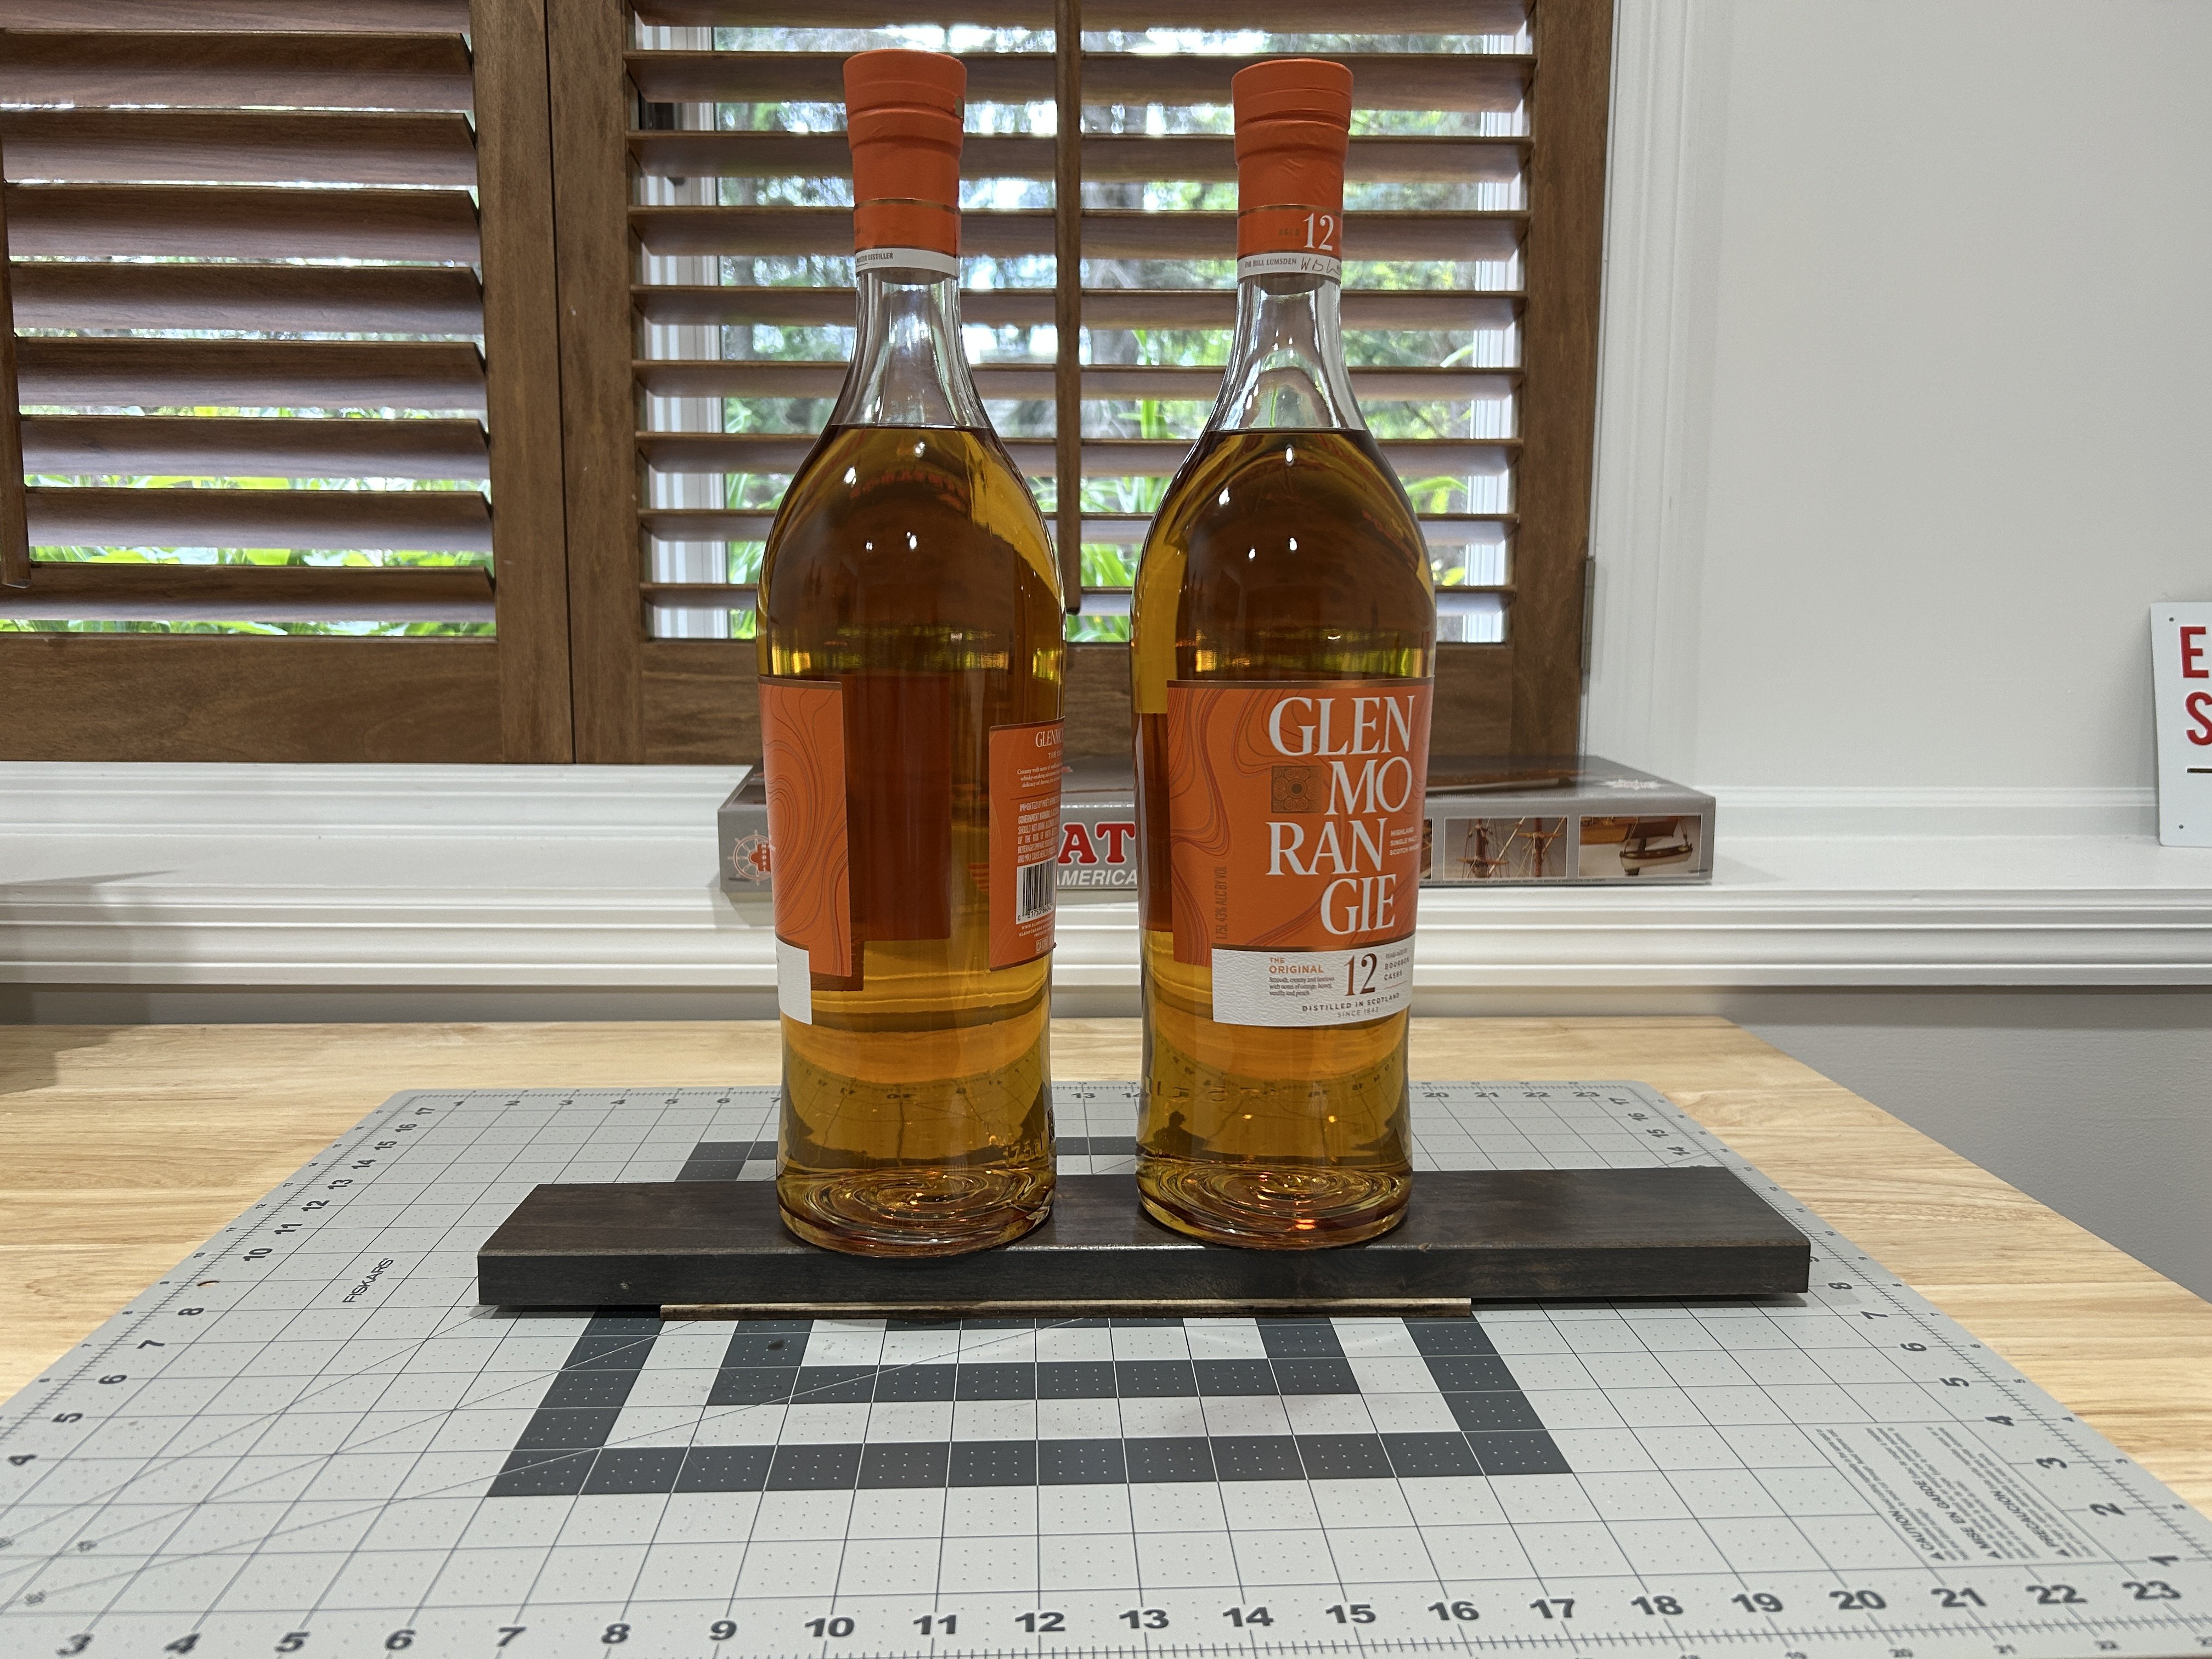
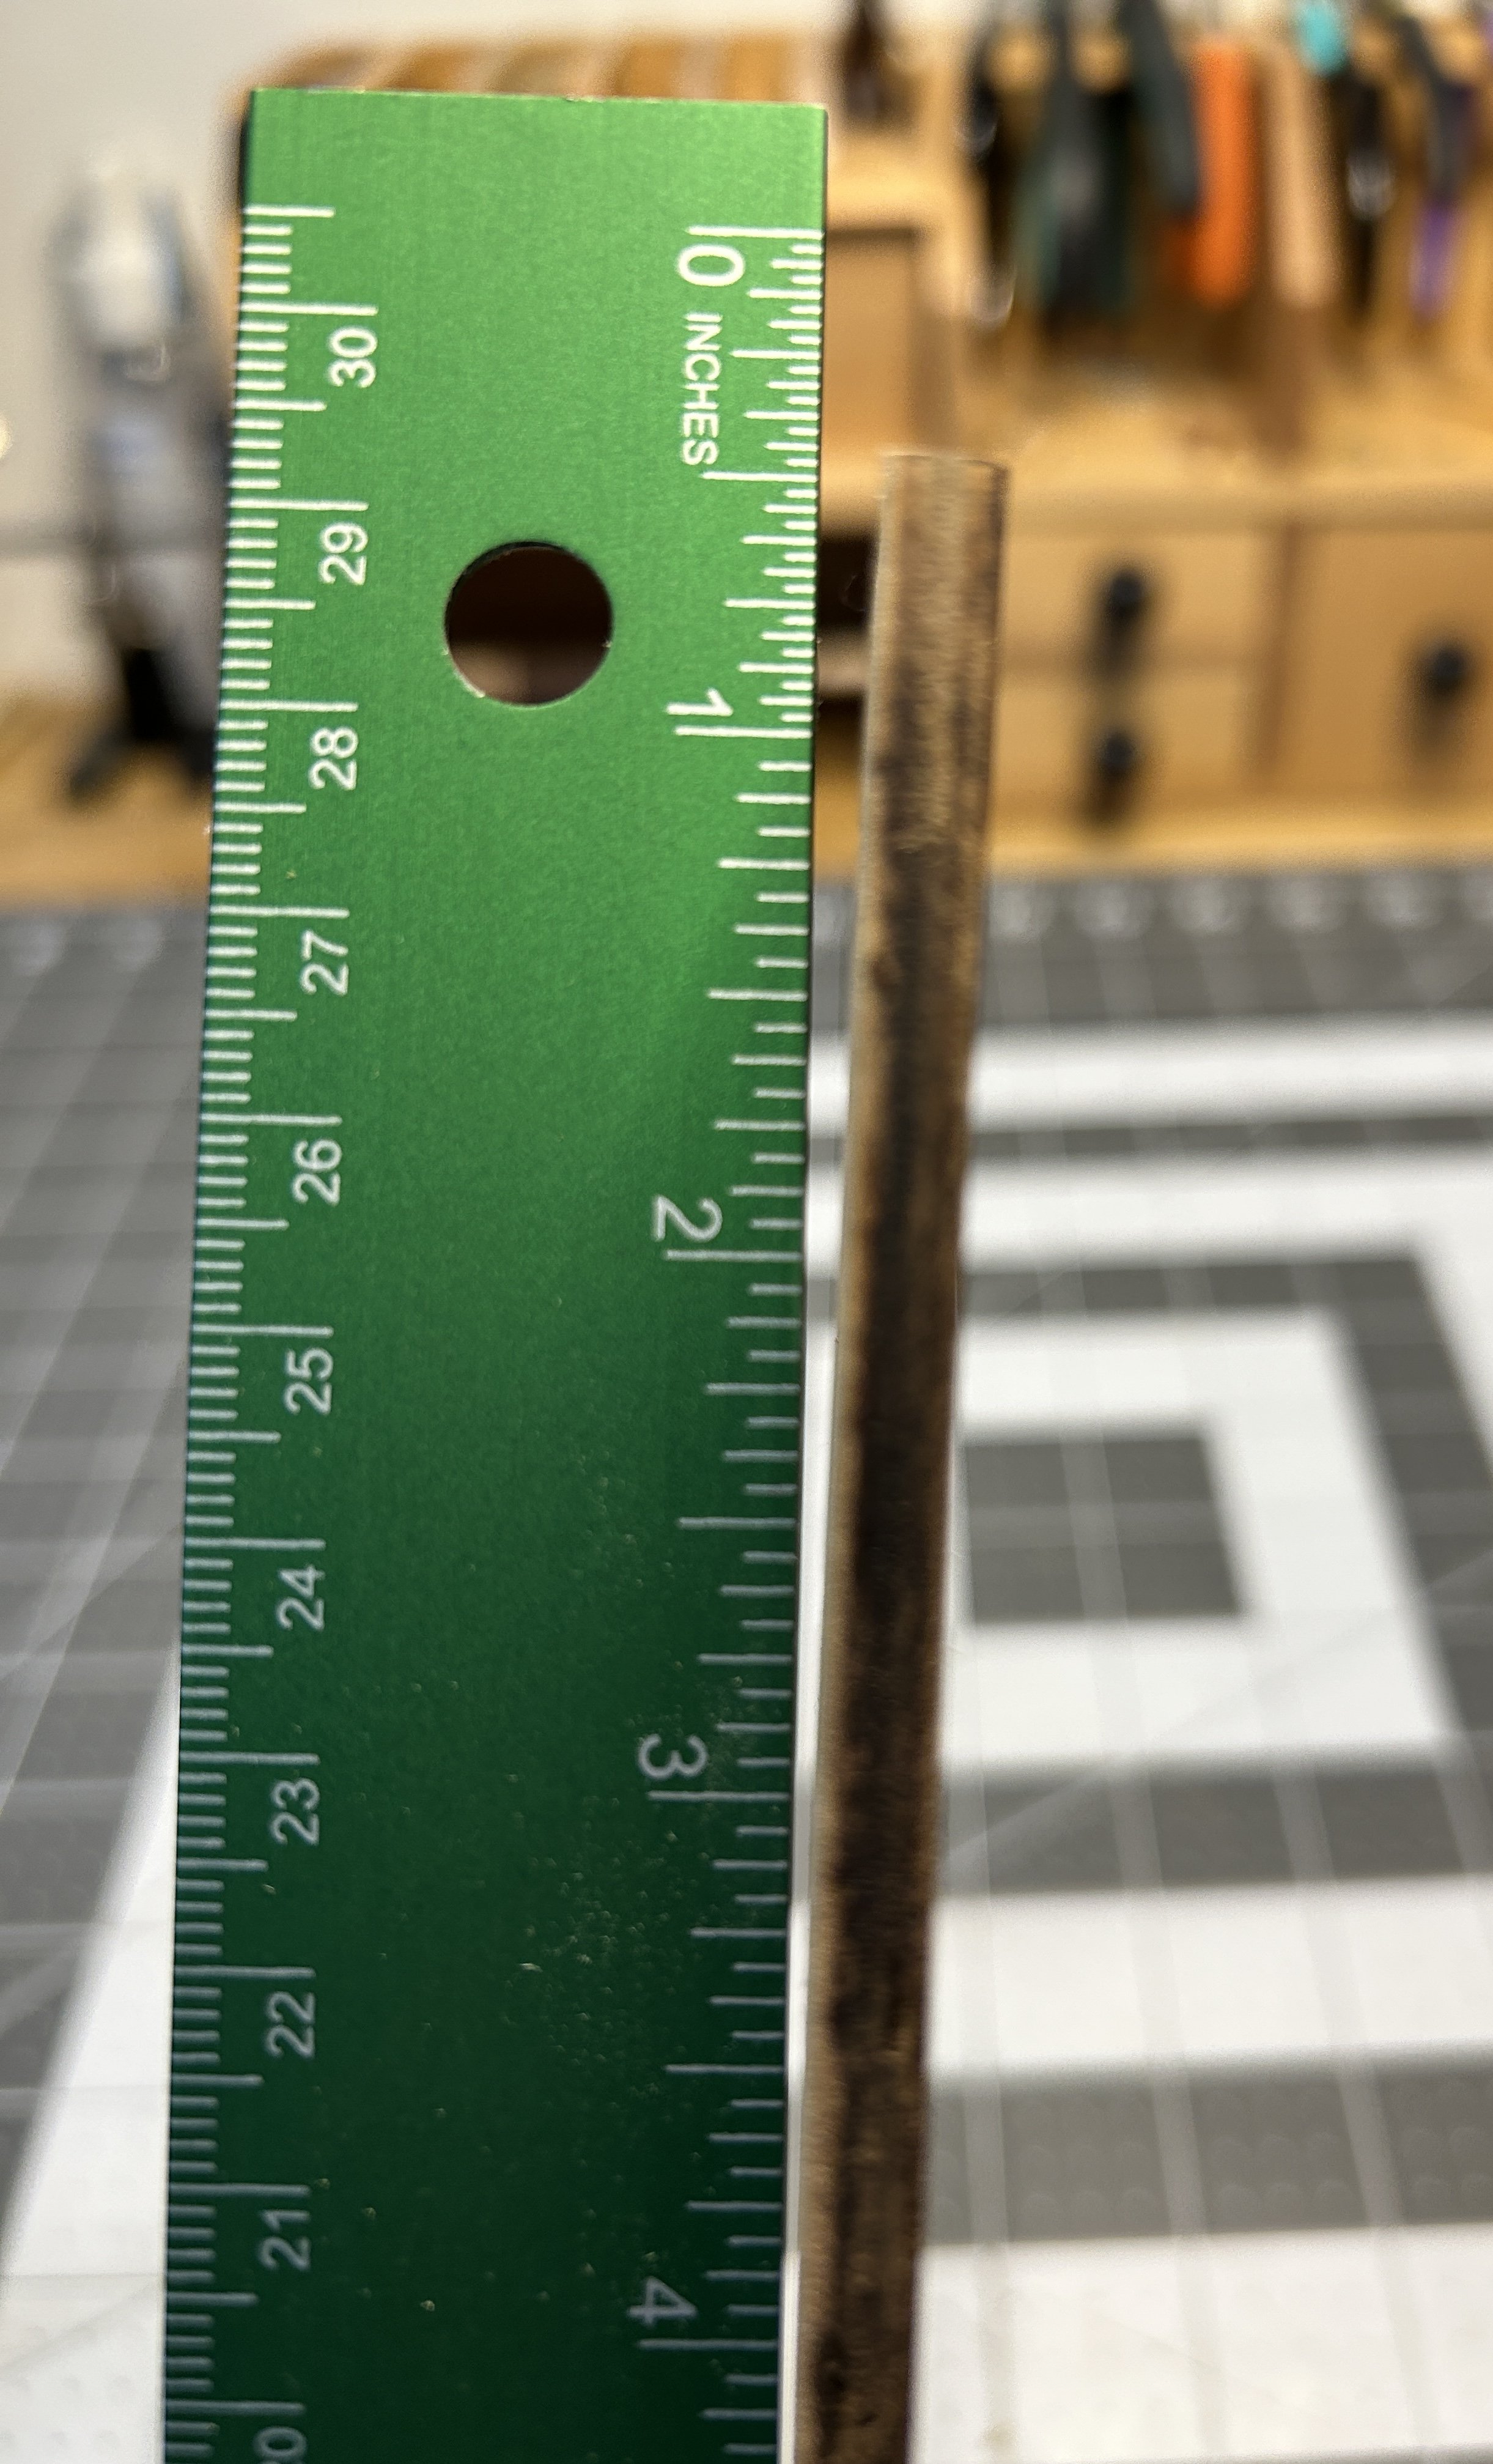
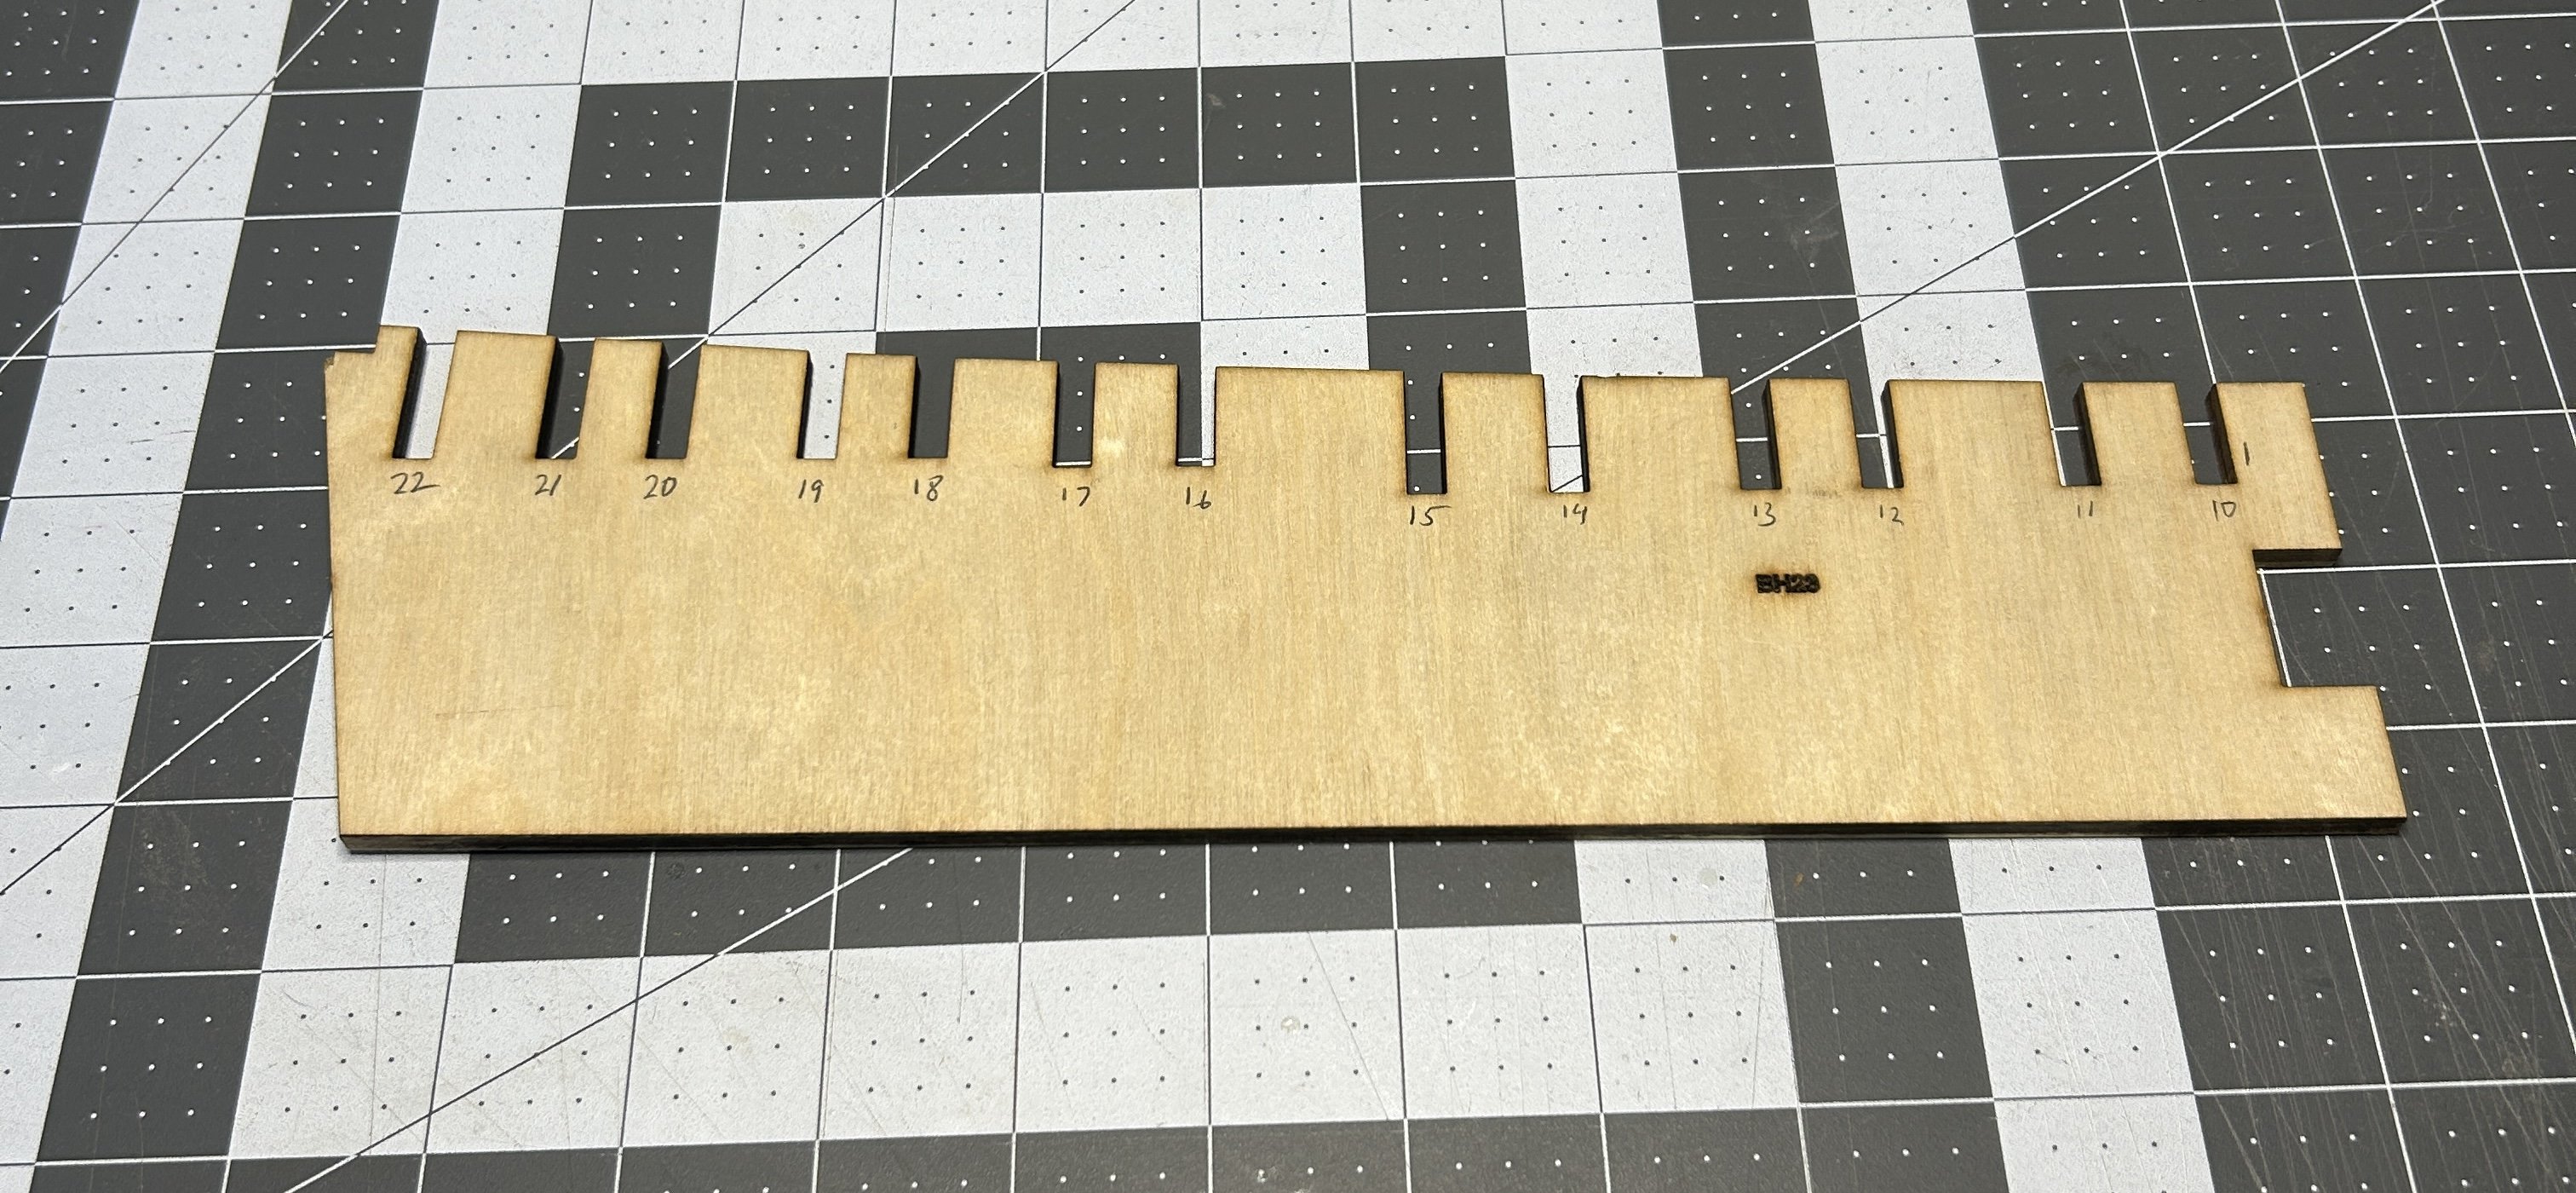
.thumb.jpeg.ffac2f8a24d212961a83eab4efb06a6c.jpeg) Until recently I assumed I would build my Syren next, but I think I felt a little burned out on rigging with my Frigate Diana so I decided to go with the Essex instead. I was drawn to this kit in large part from the details like the pumps, stove, and Binnacle. I am looking forward to building those items. I am also looking forward to building that allows the gun deck to be viewed though areas of the upper decks that are left open. The instructions say that each builder can decide what portion of the upper decks to leave open. I plan to leave as much as possible on one side of the ship open. I think I will plank as much as I need to to support the deck features that are placed along the center of the ship, and leave the area between those features and the margin plank open. I will leave the cannons off on the side of the ship that I left open As I get started, I am considering a few updates to the kit. I am considering upgrading the blocks (used mainly for the guns), and possibly looking into finding someone to 3D print the gun barrels. After opening the kit and going through all the parts, if there is one thing that is disappointing, it is the quality of the cast metal parts. The gun barrels will take a lot of time to file/sand smooth. I am a little familiar with the process of die casting parts from a former job, and it is clear that the molds that are being used for these parts have outlived their useful lives. If model shipways ever wanted to rejuvenate their lineup of models, replacing these metal parts with 3D printed parts would go along way towards making these kits more modern. The model isn’t designed to have any decks below the gun deck, but the instructions do show an option of cutting away parts of the bulkhead former and certain bulkheads and adding some sections of deck below the hatches in the gun deck. I am not sure how visable those decks will be, and I think I will skip this option. One other option that you won’t see if you look at the online instructions is the optional strongbacks. The bulkheads have been cut with a slot on either side of the bulkhead former to accommodate a 5/16 inch x 5/16 inch piece of wood glued along both sides of the bulkhead former to help keep it straight. I will add this option. This model has 22 bulkheads spread over about 20 inches, so on average less than an inch between bulkheads. This should provide a good framework for planking the hull. I will need to be patient and be sure to fair it properly. It took me at least two weeks on my NRG half hull, this model has two sides and more bulkheads, this process may take me a month. I do have more confidence in successfully fairing the hull and planking the hull after the NRG Half Hull. I can’t speak highly enough of this kit if you are struggling with planking. I will expand my planking skills on this model by using the edge bending technique with the 1/16 x ⅛ inch planking material that is supplied with the kit. The bulkhead former comes in two pieces. The aft section on mine had a slight warp in it so I soaked it in some hot water and used an iron for heat to attempt to flatten it. I put some weights on it to be sure it stayed flat. Those are 1.75 liter bottles of scotch. Part of my tariff protection stockpile. I found that the slots in the bulkhead former are all a little bit oversized, so I have added shims to the slots. I will need to sand a little bit to get a good snug fit. With 22 bulkheads, I will be spending a lot of time removing laser char so it might be awhile until my next post.
Until recently I assumed I would build my Syren next, but I think I felt a little burned out on rigging with my Frigate Diana so I decided to go with the Essex instead. I was drawn to this kit in large part from the details like the pumps, stove, and Binnacle. I am looking forward to building those items. I am also looking forward to building that allows the gun deck to be viewed though areas of the upper decks that are left open. The instructions say that each builder can decide what portion of the upper decks to leave open. I plan to leave as much as possible on one side of the ship open. I think I will plank as much as I need to to support the deck features that are placed along the center of the ship, and leave the area between those features and the margin plank open. I will leave the cannons off on the side of the ship that I left open As I get started, I am considering a few updates to the kit. I am considering upgrading the blocks (used mainly for the guns), and possibly looking into finding someone to 3D print the gun barrels. After opening the kit and going through all the parts, if there is one thing that is disappointing, it is the quality of the cast metal parts. The gun barrels will take a lot of time to file/sand smooth. I am a little familiar with the process of die casting parts from a former job, and it is clear that the molds that are being used for these parts have outlived their useful lives. If model shipways ever wanted to rejuvenate their lineup of models, replacing these metal parts with 3D printed parts would go along way towards making these kits more modern. The model isn’t designed to have any decks below the gun deck, but the instructions do show an option of cutting away parts of the bulkhead former and certain bulkheads and adding some sections of deck below the hatches in the gun deck. I am not sure how visable those decks will be, and I think I will skip this option. One other option that you won’t see if you look at the online instructions is the optional strongbacks. The bulkheads have been cut with a slot on either side of the bulkhead former to accommodate a 5/16 inch x 5/16 inch piece of wood glued along both sides of the bulkhead former to help keep it straight. I will add this option. This model has 22 bulkheads spread over about 20 inches, so on average less than an inch between bulkheads. This should provide a good framework for planking the hull. I will need to be patient and be sure to fair it properly. It took me at least two weeks on my NRG half hull, this model has two sides and more bulkheads, this process may take me a month. I do have more confidence in successfully fairing the hull and planking the hull after the NRG Half Hull. I can’t speak highly enough of this kit if you are struggling with planking. I will expand my planking skills on this model by using the edge bending technique with the 1/16 x ⅛ inch planking material that is supplied with the kit. The bulkhead former comes in two pieces. The aft section on mine had a slight warp in it so I soaked it in some hot water and used an iron for heat to attempt to flatten it. I put some weights on it to be sure it stayed flat. Those are 1.75 liter bottles of scotch. Part of my tariff protection stockpile. I found that the slots in the bulkhead former are all a little bit oversized, so I have added shims to the slots. I will need to sand a little bit to get a good snug fit. With 22 bulkheads, I will be spending a lot of time removing laser char so it might be awhile until my next post.


-
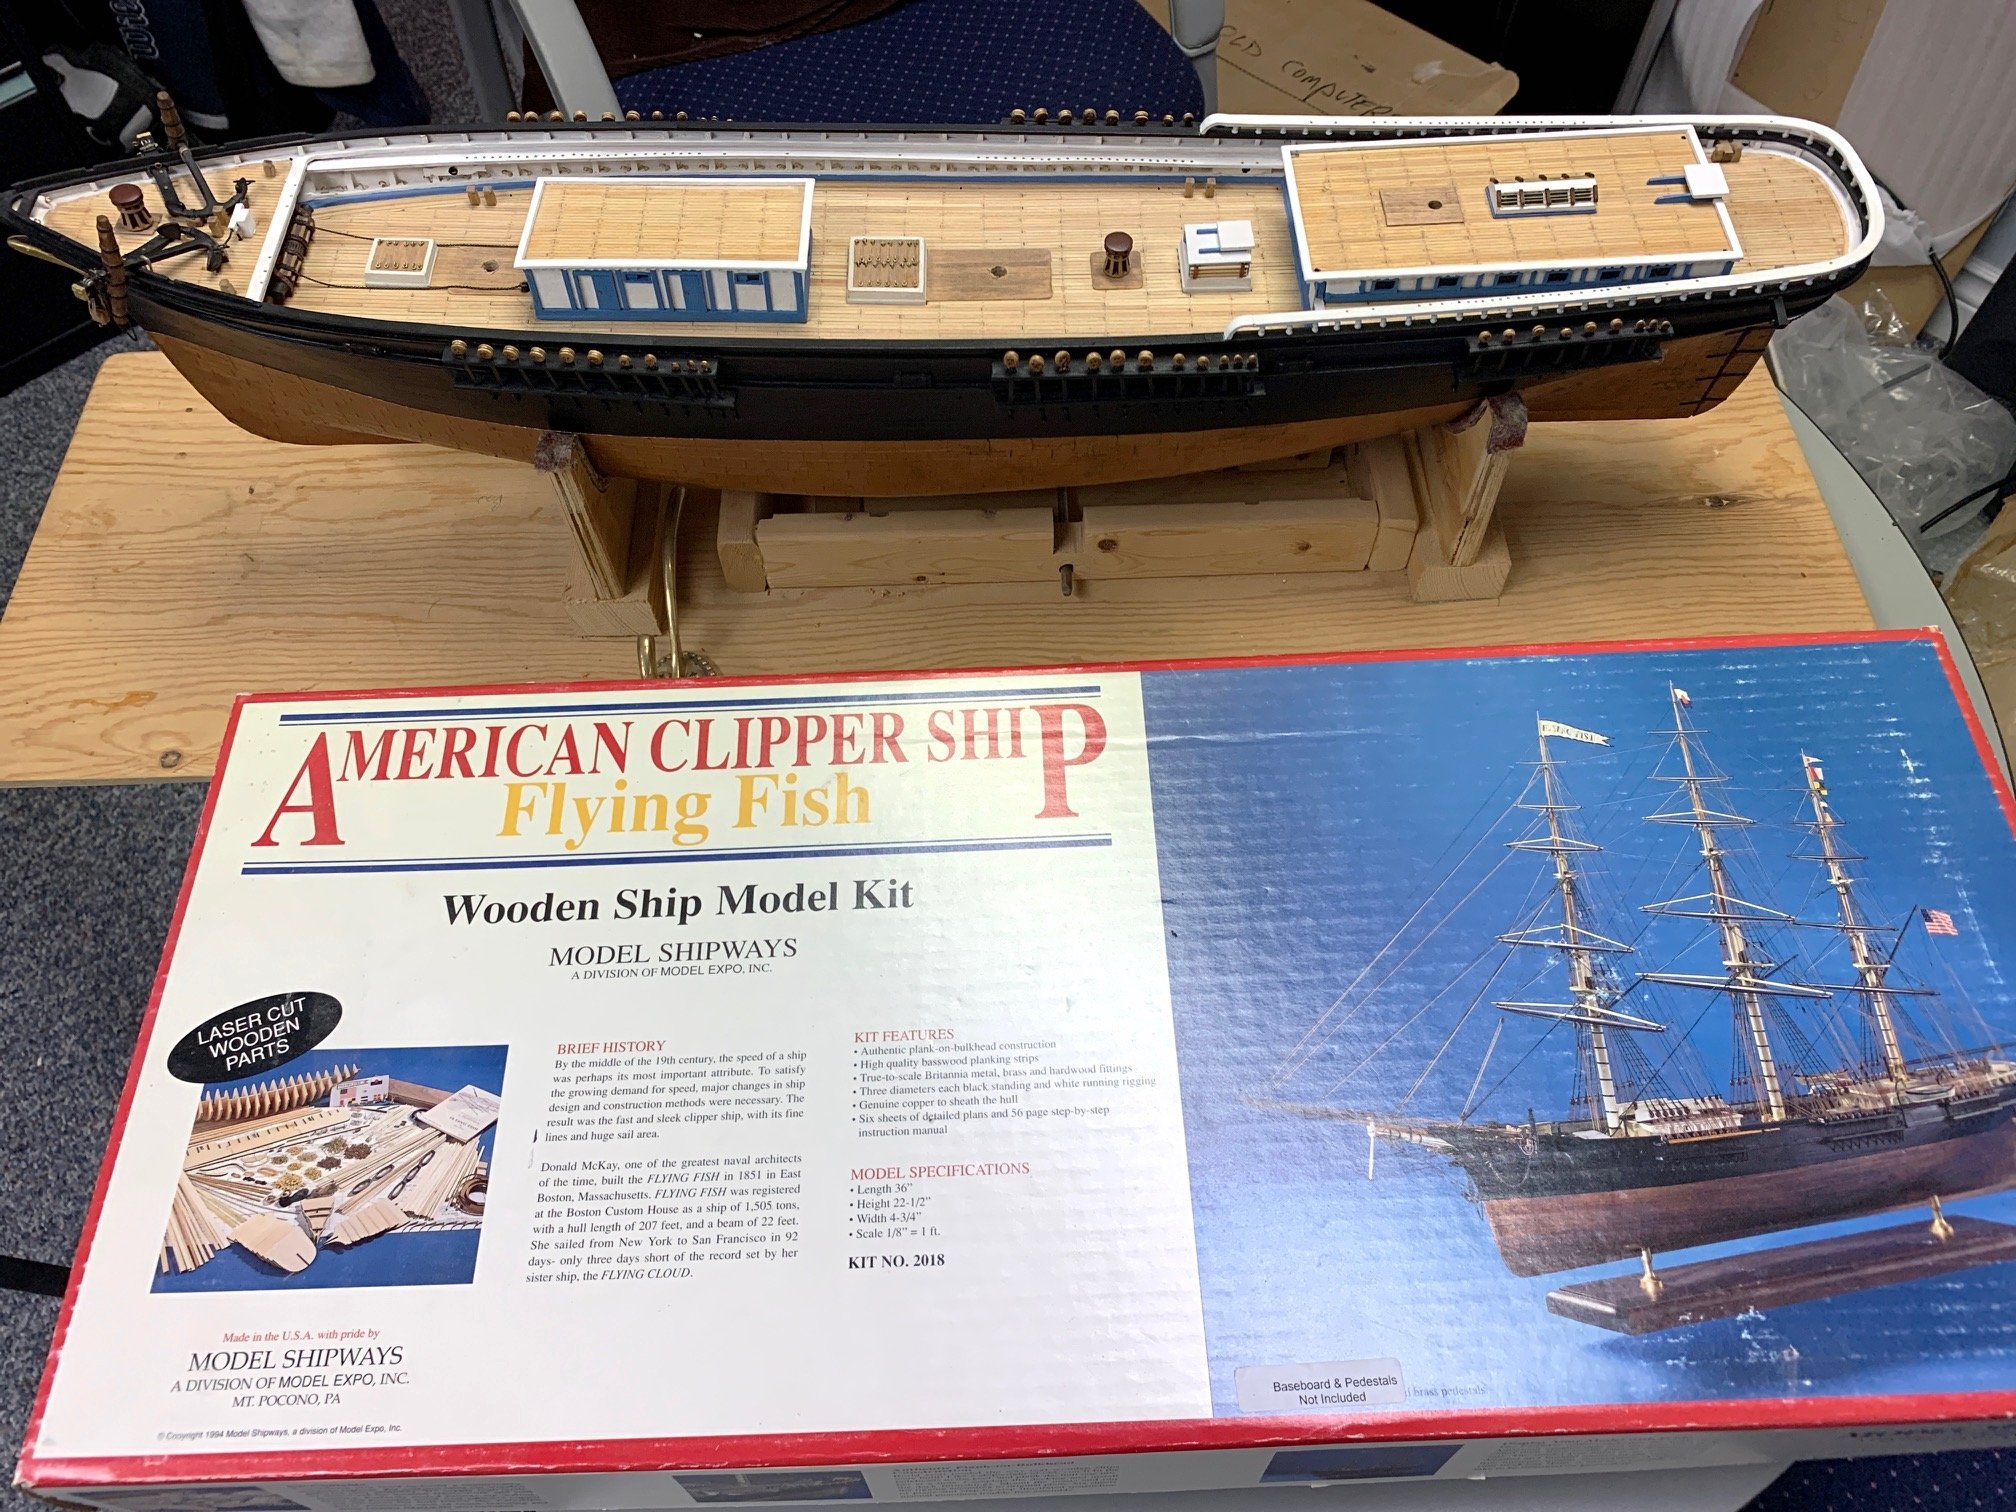
 I have been reading with interest the blogs about buildings Model Shipways Flying Fish. This is opportune for me as I have been building the solid hull version of this model for over 40 years. I have been particularly interested in other builders interpretation of the aft cabin and stem of the Flying Fish. I have been fortunate in that I was able to observe and photograph the china trade painting of the Flying Fish when it was up for auction in 2005(?) at Northeast Auctions.. Since then we have all benefited from the pictures of the Flying Fish painting by James Buttersworth that is now available to view online. Both these paintings have cleared up questions about the ship such as mast and bowsprit colors aft cabin face and to some degree, the figurehead. While I think I am the only builder building the solid haul version, I will attempt to relate my own experience building this model and the results of my own research and thoughts. I hope you did this interesting.
- 313 replies
-
- 5
-

-
- Flying Fish
- Model Shipways
- (and 1 more)
-
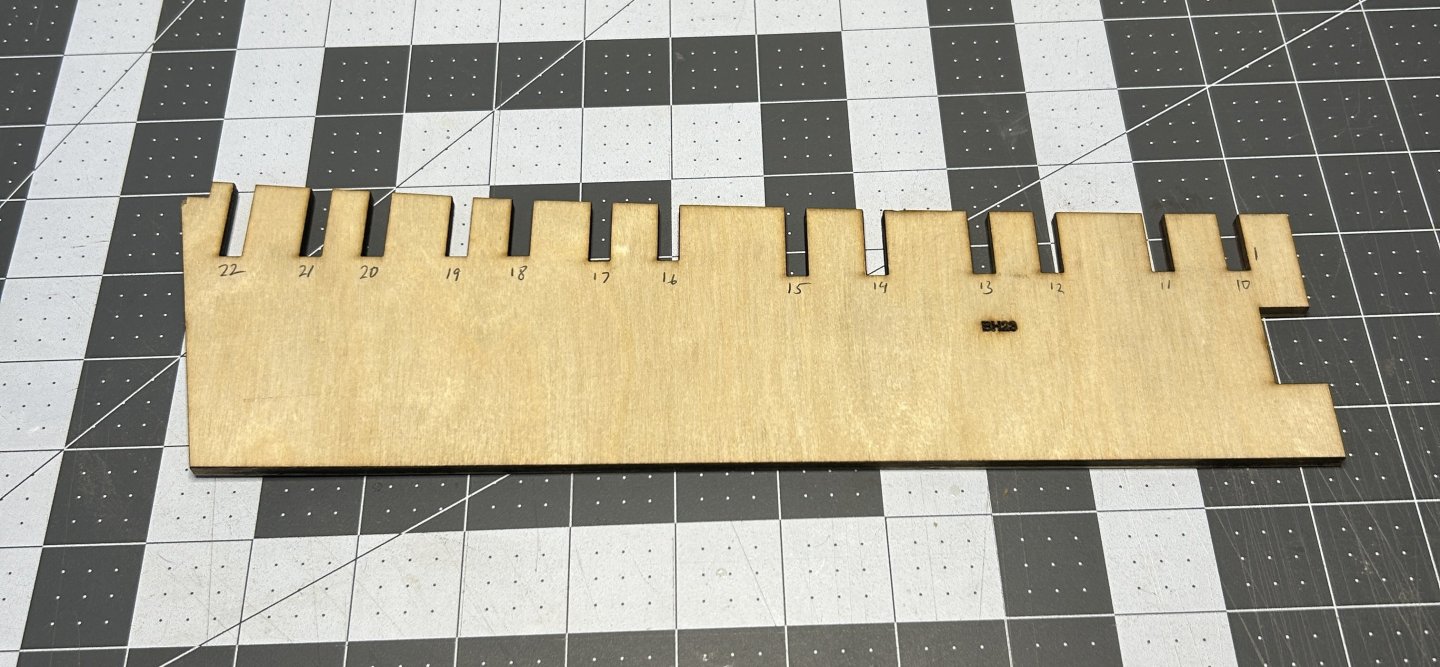
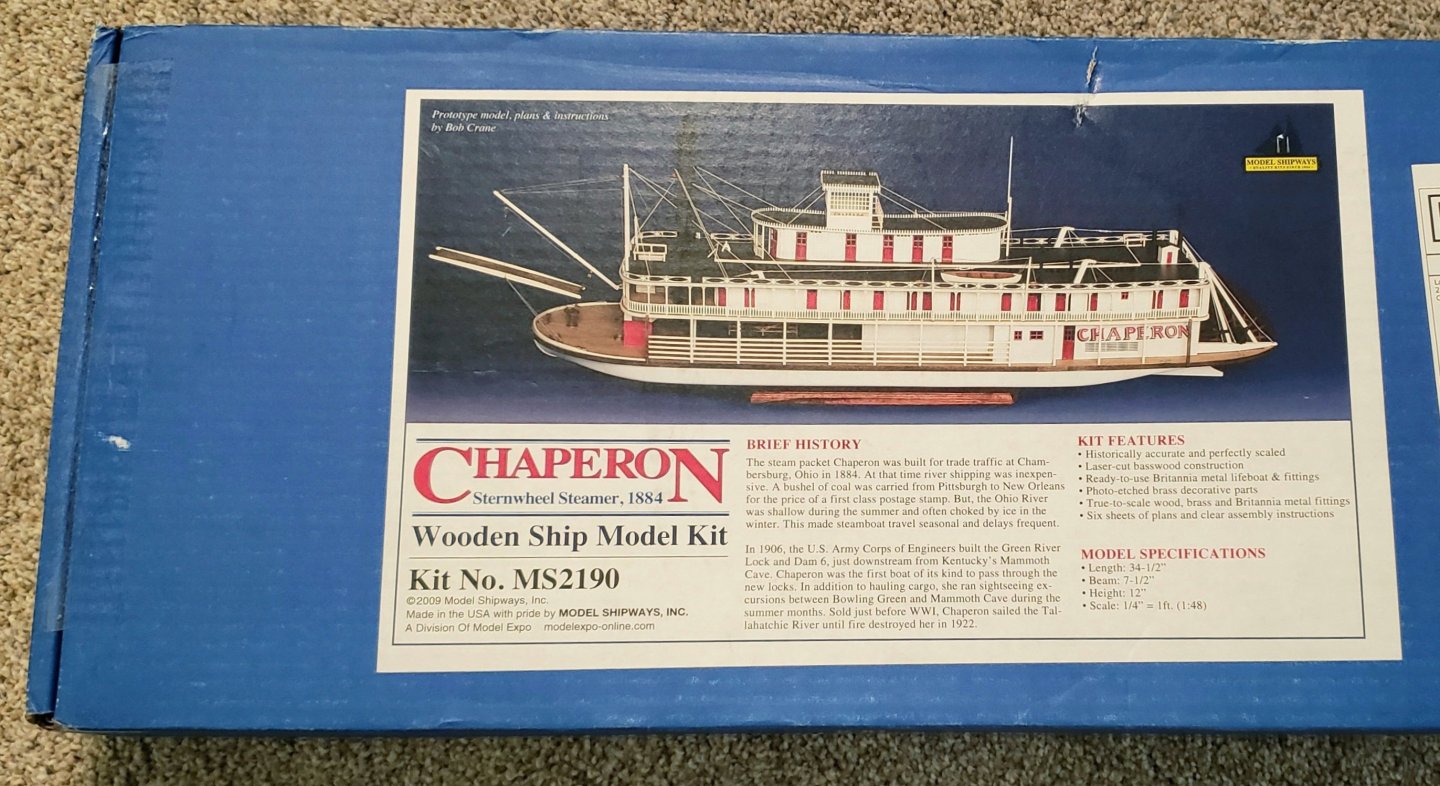
 Hello, I'm a new member. First post. Various builds on this site have turned up countless times in my searches over the years, so I decided I should just get on-board. I am not familiar with actually using the site, and I have never tried a build log before, but I'll give it a shot. I have certainly benefited from seeing the process and progress of others. My main thing is steamboats, namely paddleboats, and especially sternwheelers. Here, I'll be working on the Chaperon. I didn't get this model because it was the Chaperon, but because it is the most realistic looking, typical packet boat kit I've run across. I might even change the name. I will certainly customize it, adding my own modifications and "improvements" along the way, to make it my version of the ideal steamboat. The first thing I came to that "needed fixing" was the flat-topped bulkheads of the hull. The main deck certainly needs to have some camber to it. And all the other decks, for that matter! This will, of course, complicate things for me later on [which I seem to be good at doing]. So, I scanned one of the middle bulkhead pieces, and traced it in CorelDraw on my computer, adding a camber line to the top. I printed out a bunch of these templates, rubber-cemented them to the front and back of sandwiched stacks of bulkheads, then sanded along the camber line, which is only between 1/32"-1/16" lower on the edges, but should be noticeable. [You can see one side done in the photo.] Well, I'd better stop here for now, to make sure this works...
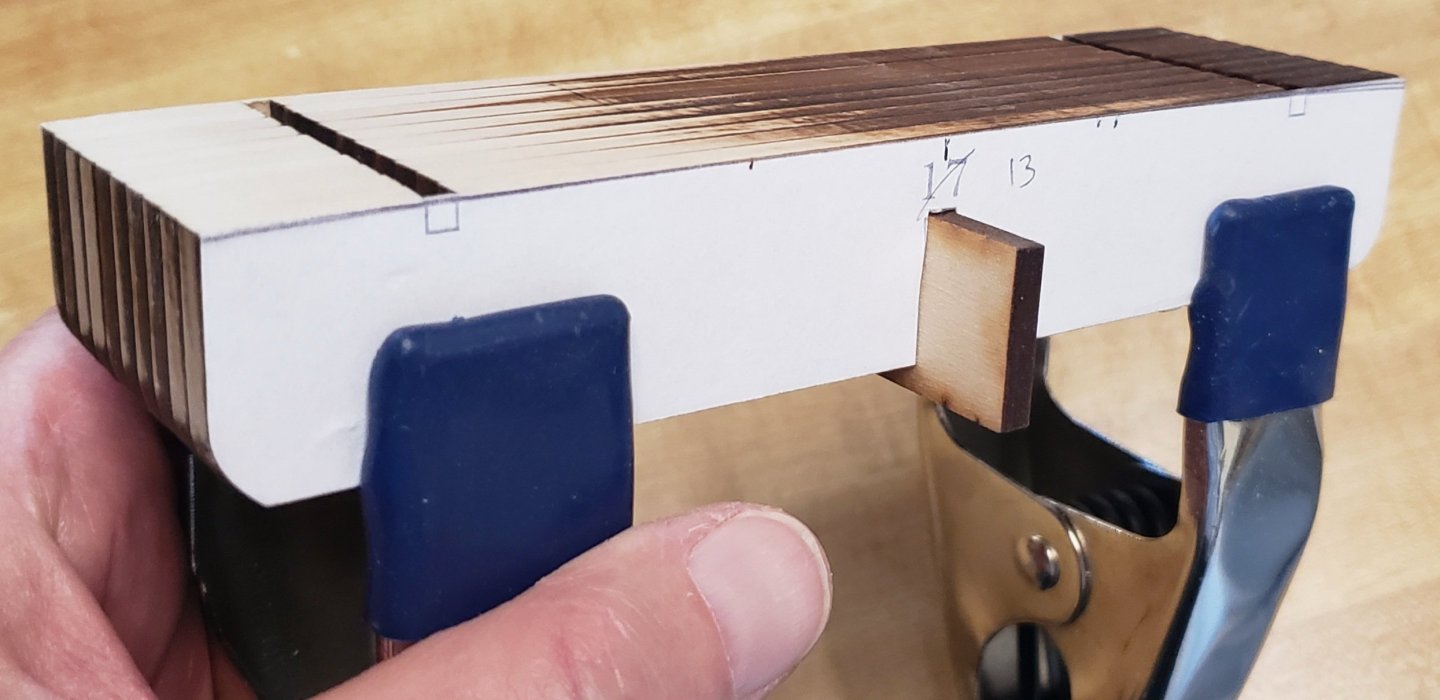
- 12 replies
-
- 4
-
-
- sternwheeler
- Chaperon
- (and 3 more)
-
 Hello all! As my first build, I am tackling Model Shipways "18th Century Armed Longboat". I picked up a few kits a long time ago in college, one of which I don't ever want to build, and the other I am in the (re)design phase on. I recently started purging my many collections and have moved on from spending too much time outside of work on a computer playing games and flight simulators (I'll still do that one some). Pulled out my model kits, mostly WW2 airplanes, and found the ship kits. Both are in great shape, so I thought about selling them both. Then I decided it was a good way to spend my time, and I have always had a love for ships. I grew up waterskiing / wakeboarding, and have almost always had access to a boat, or family members have owned them. I have also done woodworking and metalworking of various types, having worked on some sword fittings back in college. Leather-wrapped scabbards on western style swords and full fittings for Japanese swords. I started with an airplane model first, which is in the final stages of construction. Eduard 1/48 F6F-5N Hellcat: I then quickly realized that the majority of airplane modeling was spent during the finishing process. Fun, but I also really like the planning, design, and building portions of the process. The ship models on the shelf moved from the sell pile to the keep.... I received the kit last weekend, and when I returned from the lake, I opened the kit to get started right away. Monday night, I started by removing the false keel and keel parts, then cleaning those up. The last several days have been spent chiseling the rabbit, gluing the keel parts to the false keel, and using some water and heat to get the bend the pieces had out of the box in the bow area. Next up:
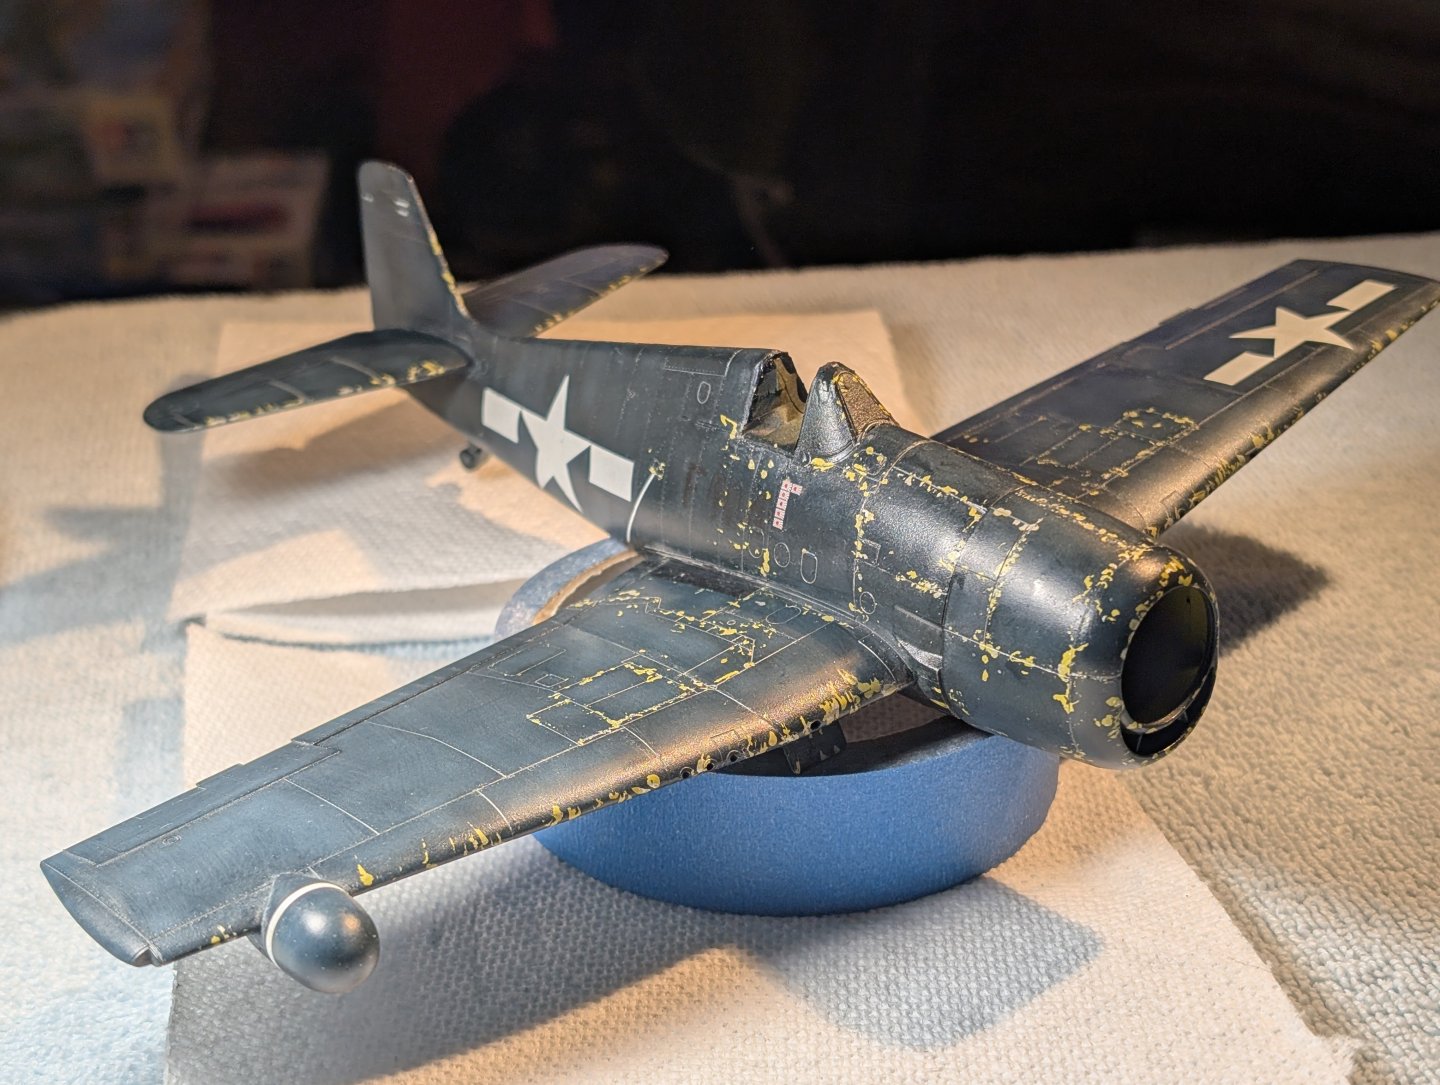


- 6 replies
-
- 5
-
-
- Model Shipways
- 18th Century Armed Longboat
- (and 1 more)
-
 Good day! This build log will cover the second wooden model ship I am tackling, after the Drakkar Amati. Unlike the Drakkar I decided to do a build log of this. Why the Niagara - two reasons: My wife is from Erie PA where the reconstructed Niagara can be found, and thought that this should be my next build - who am I to disagree especially as she purchased the kit! I like the lines of the ship and it is simpler than other multi deck models out there Pictures of in progress build to follow - I have been working on it for a few weeks now making steady progress as work and other things allow - happy for all comments/suggestions Stuart
 -
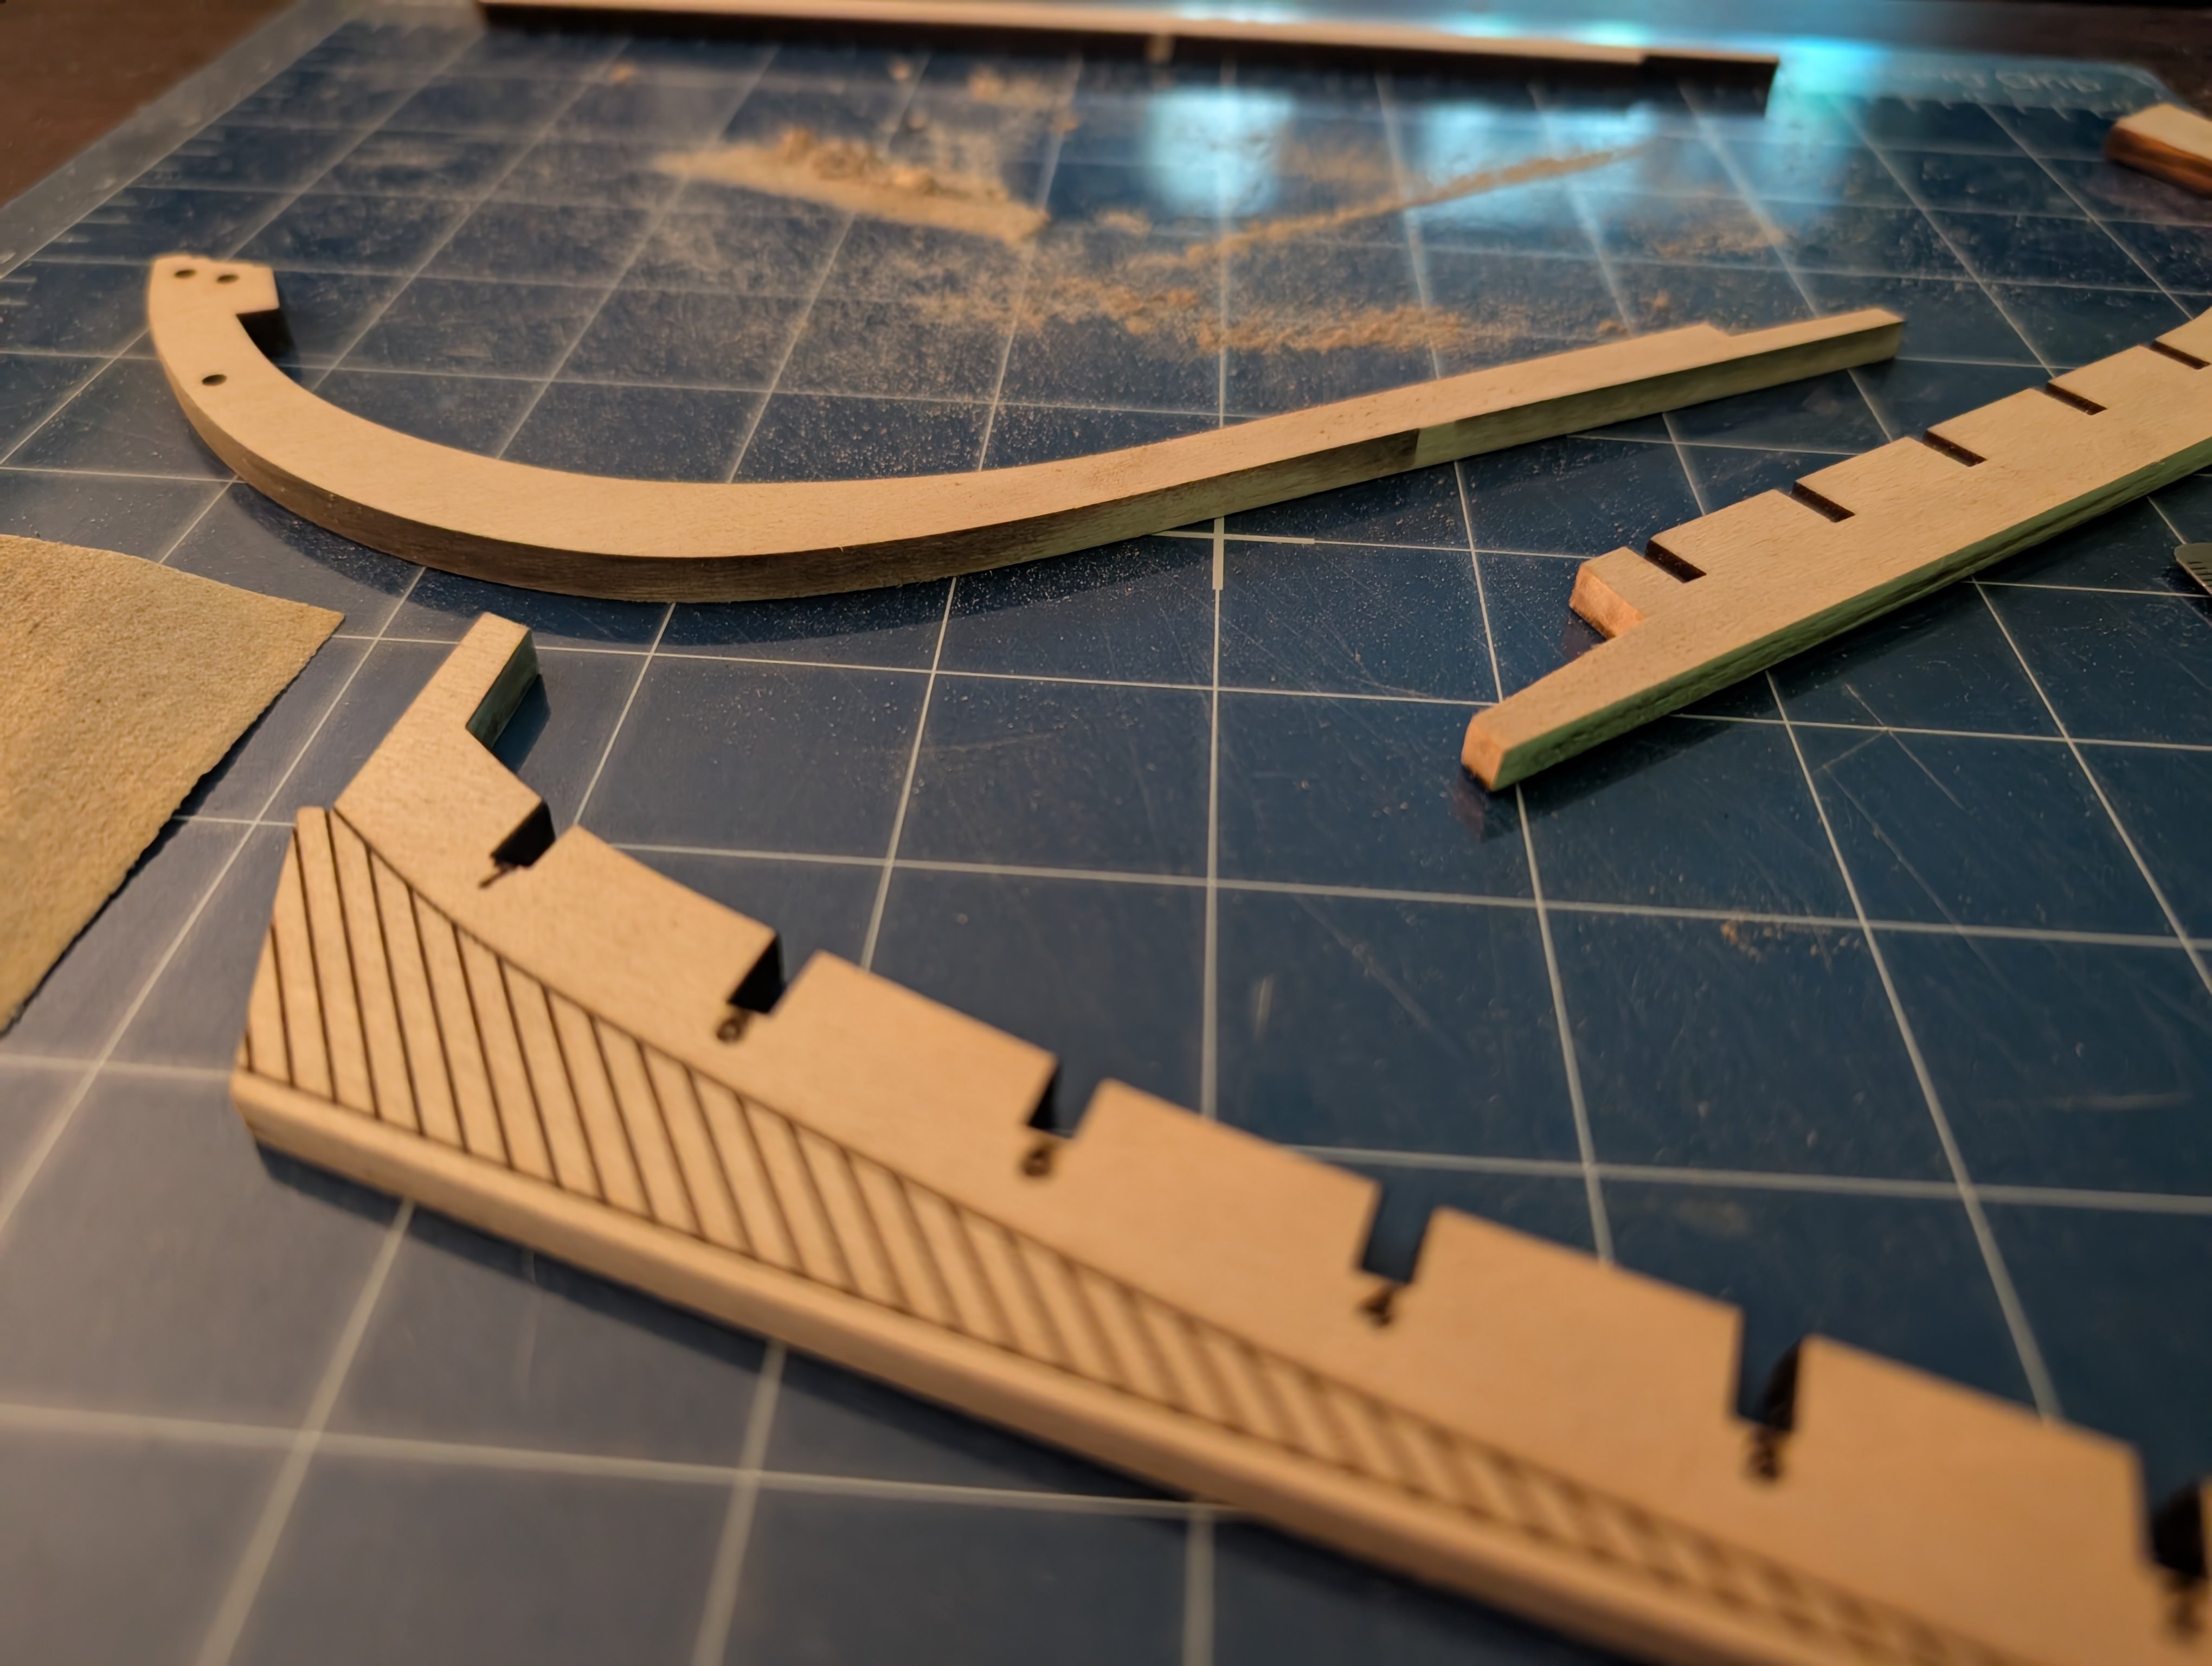
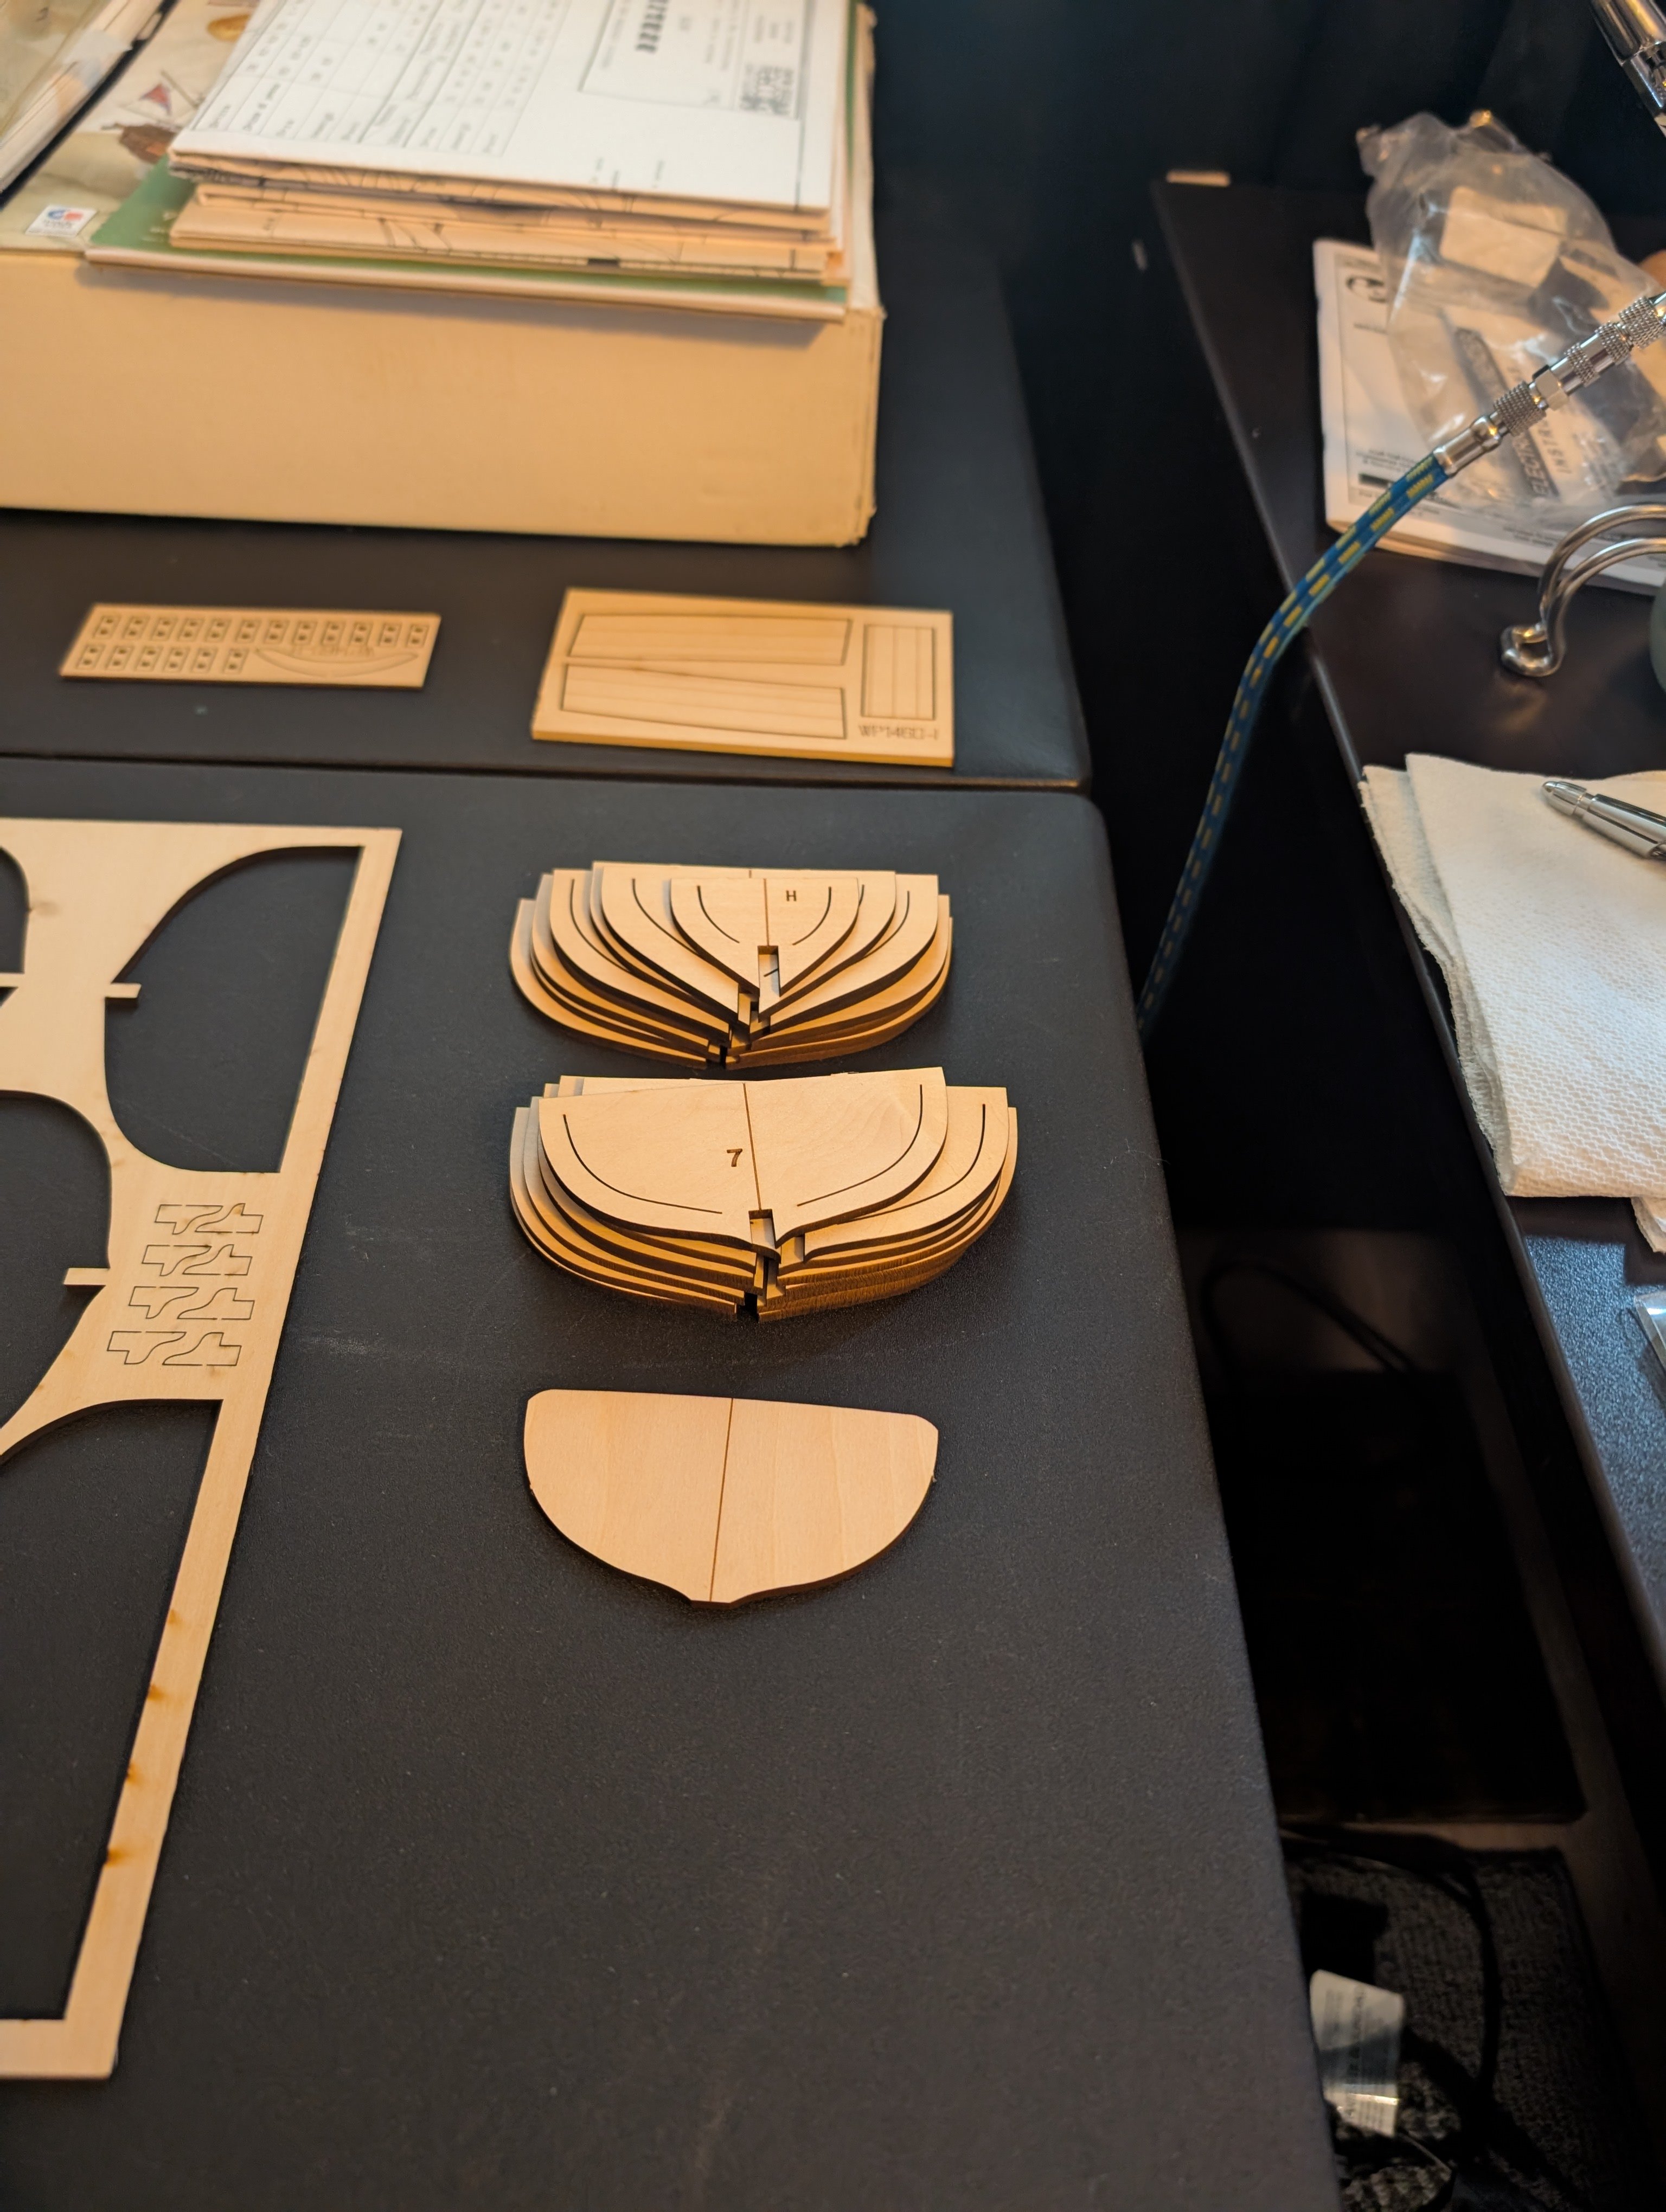
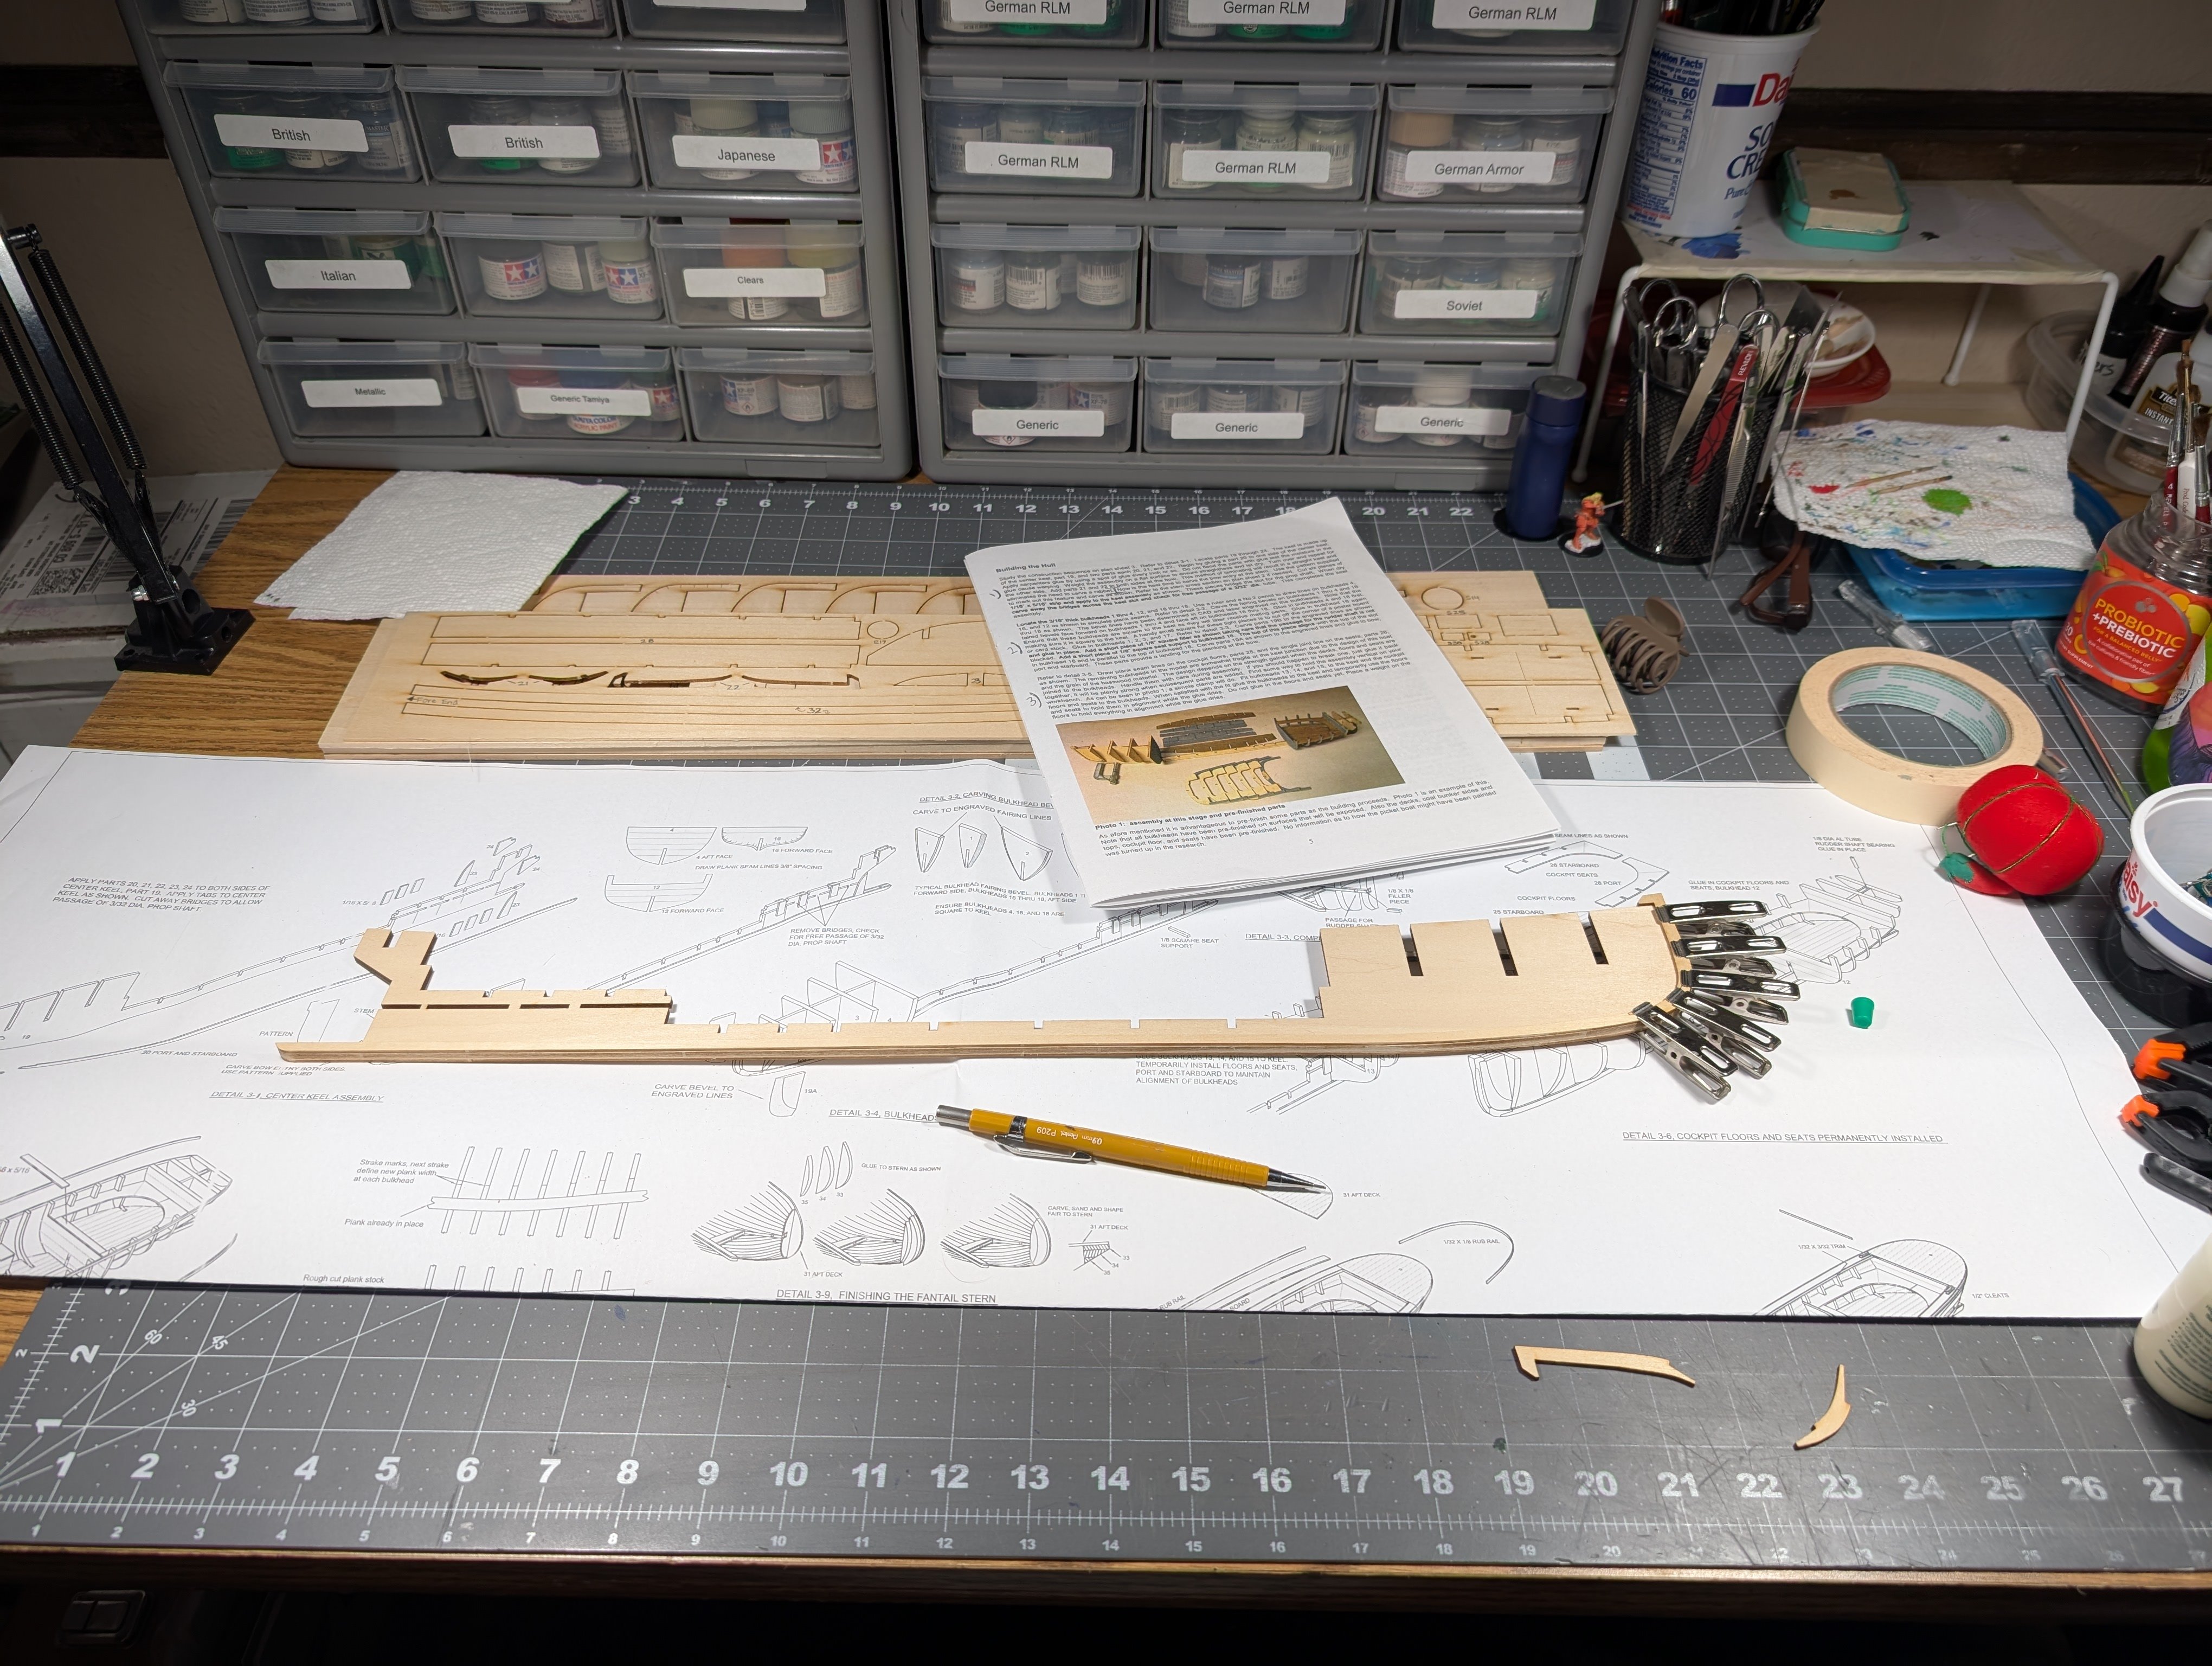
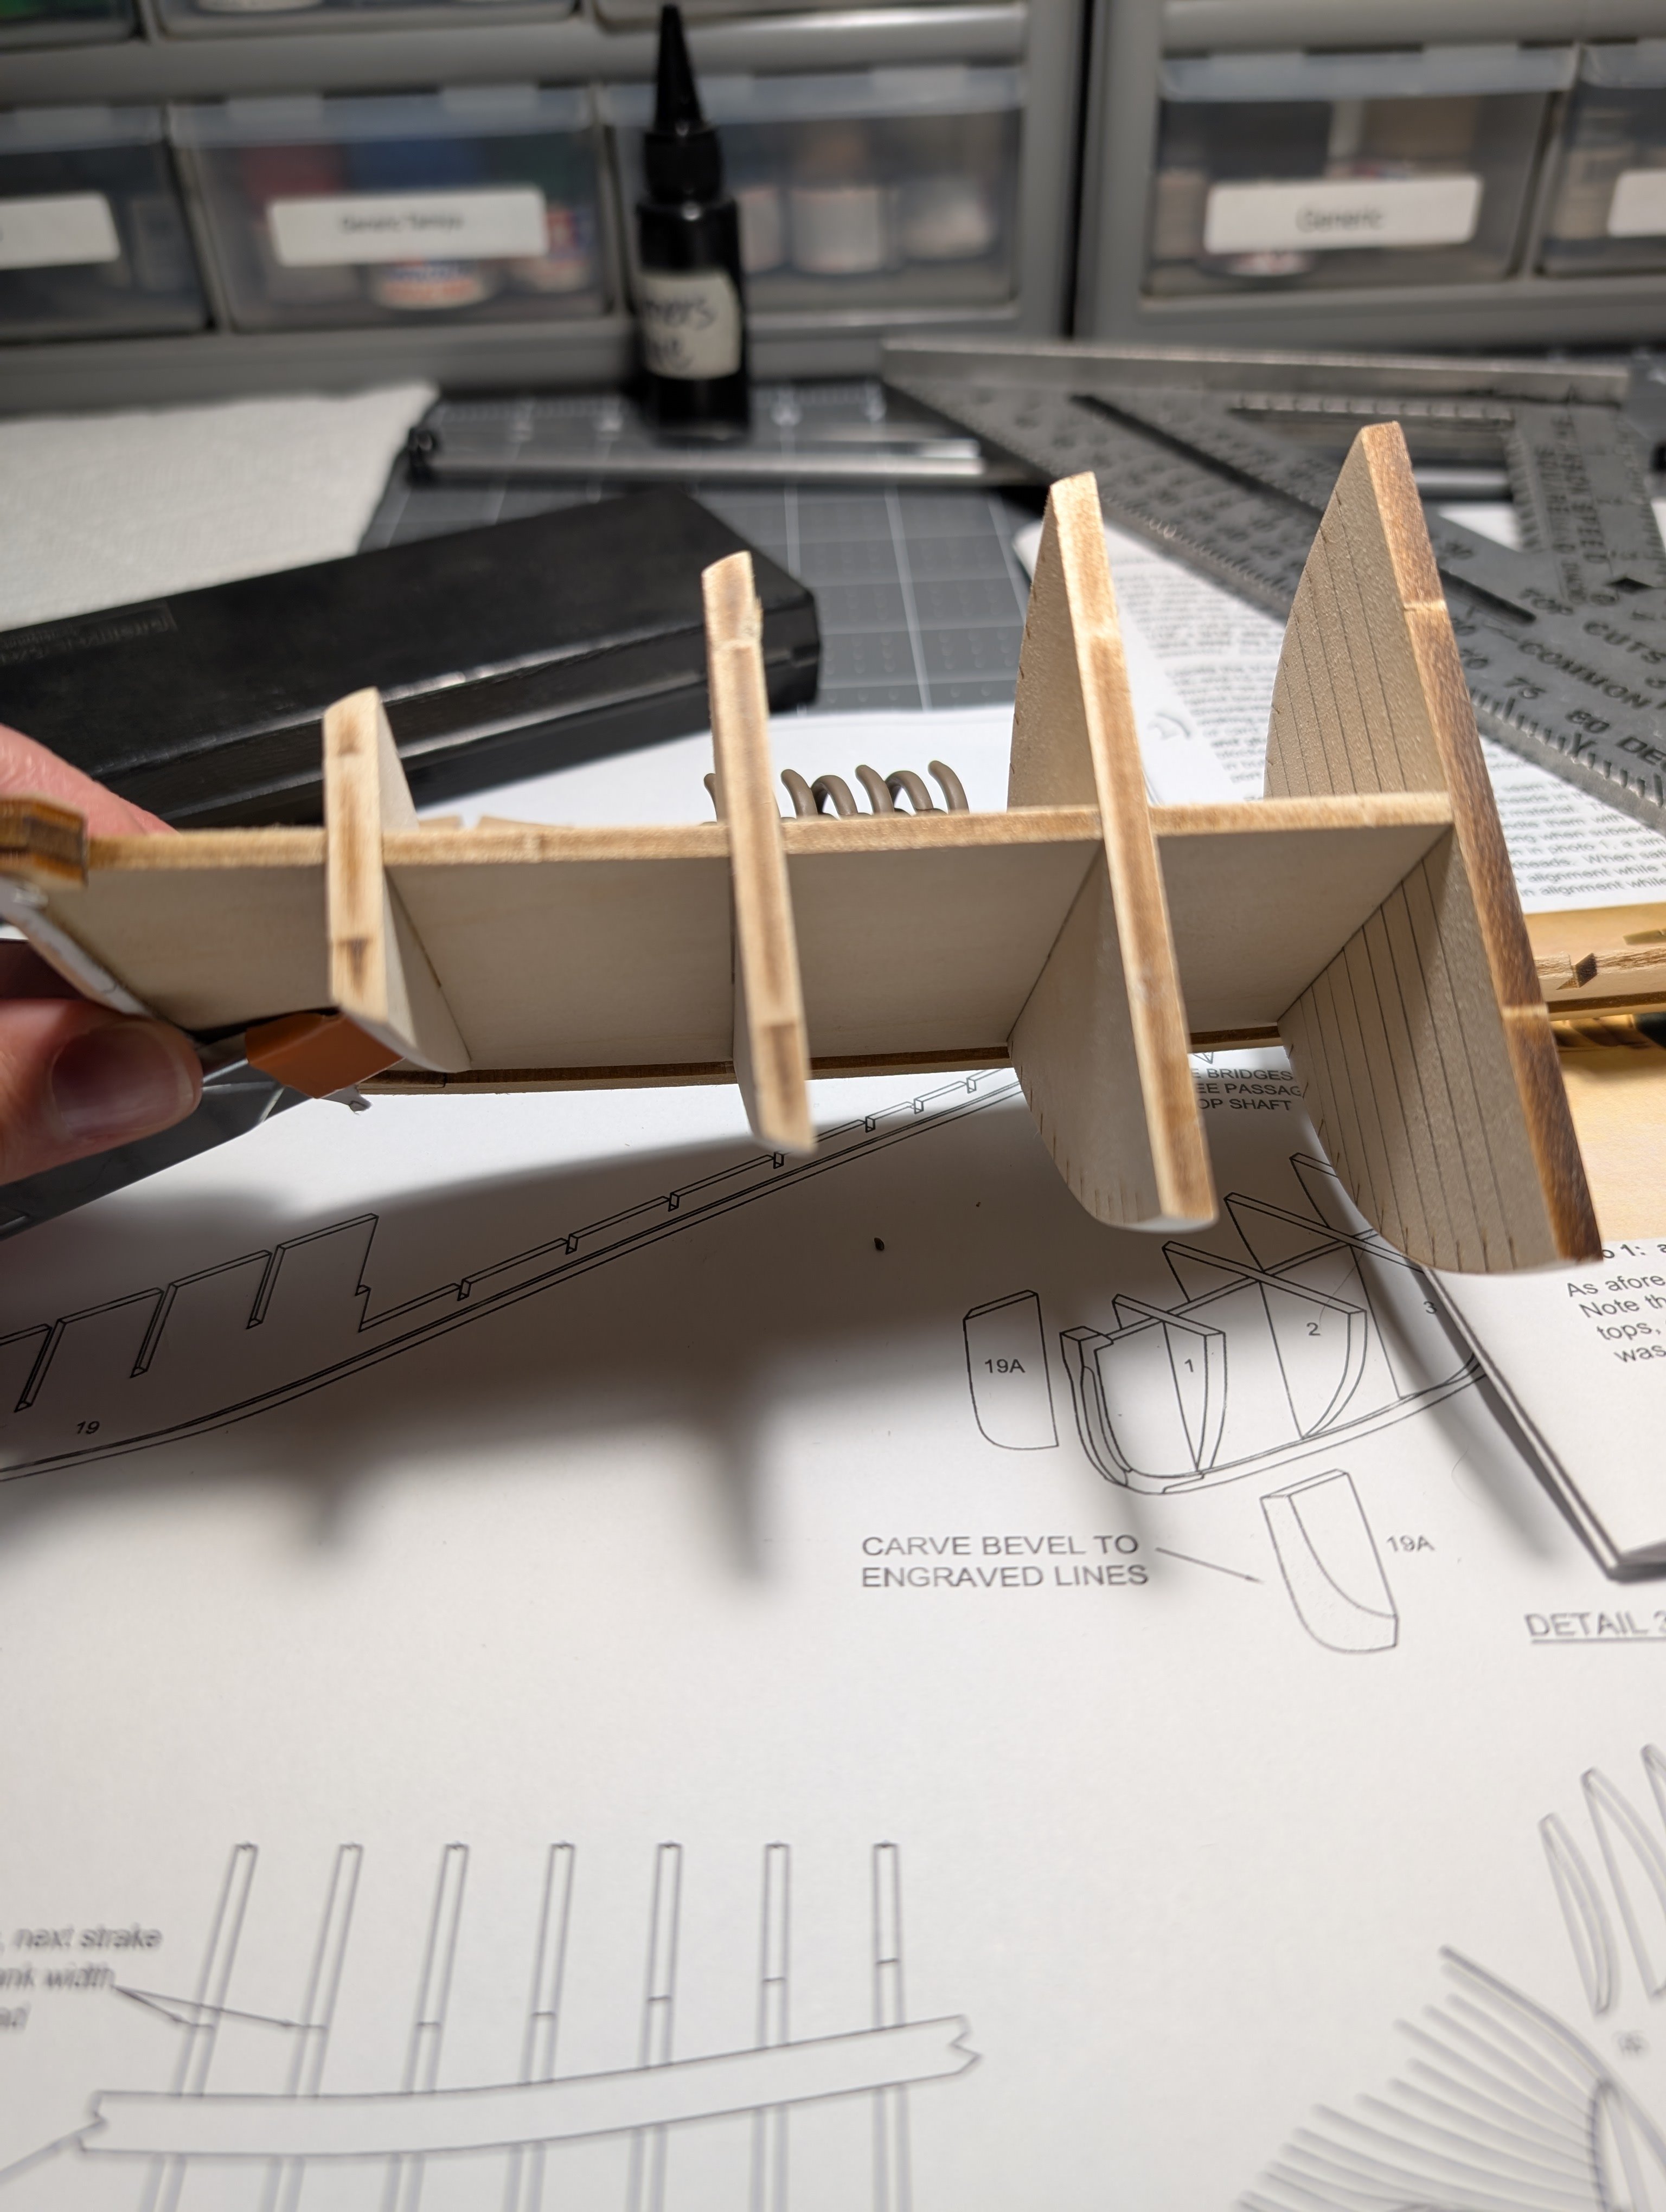
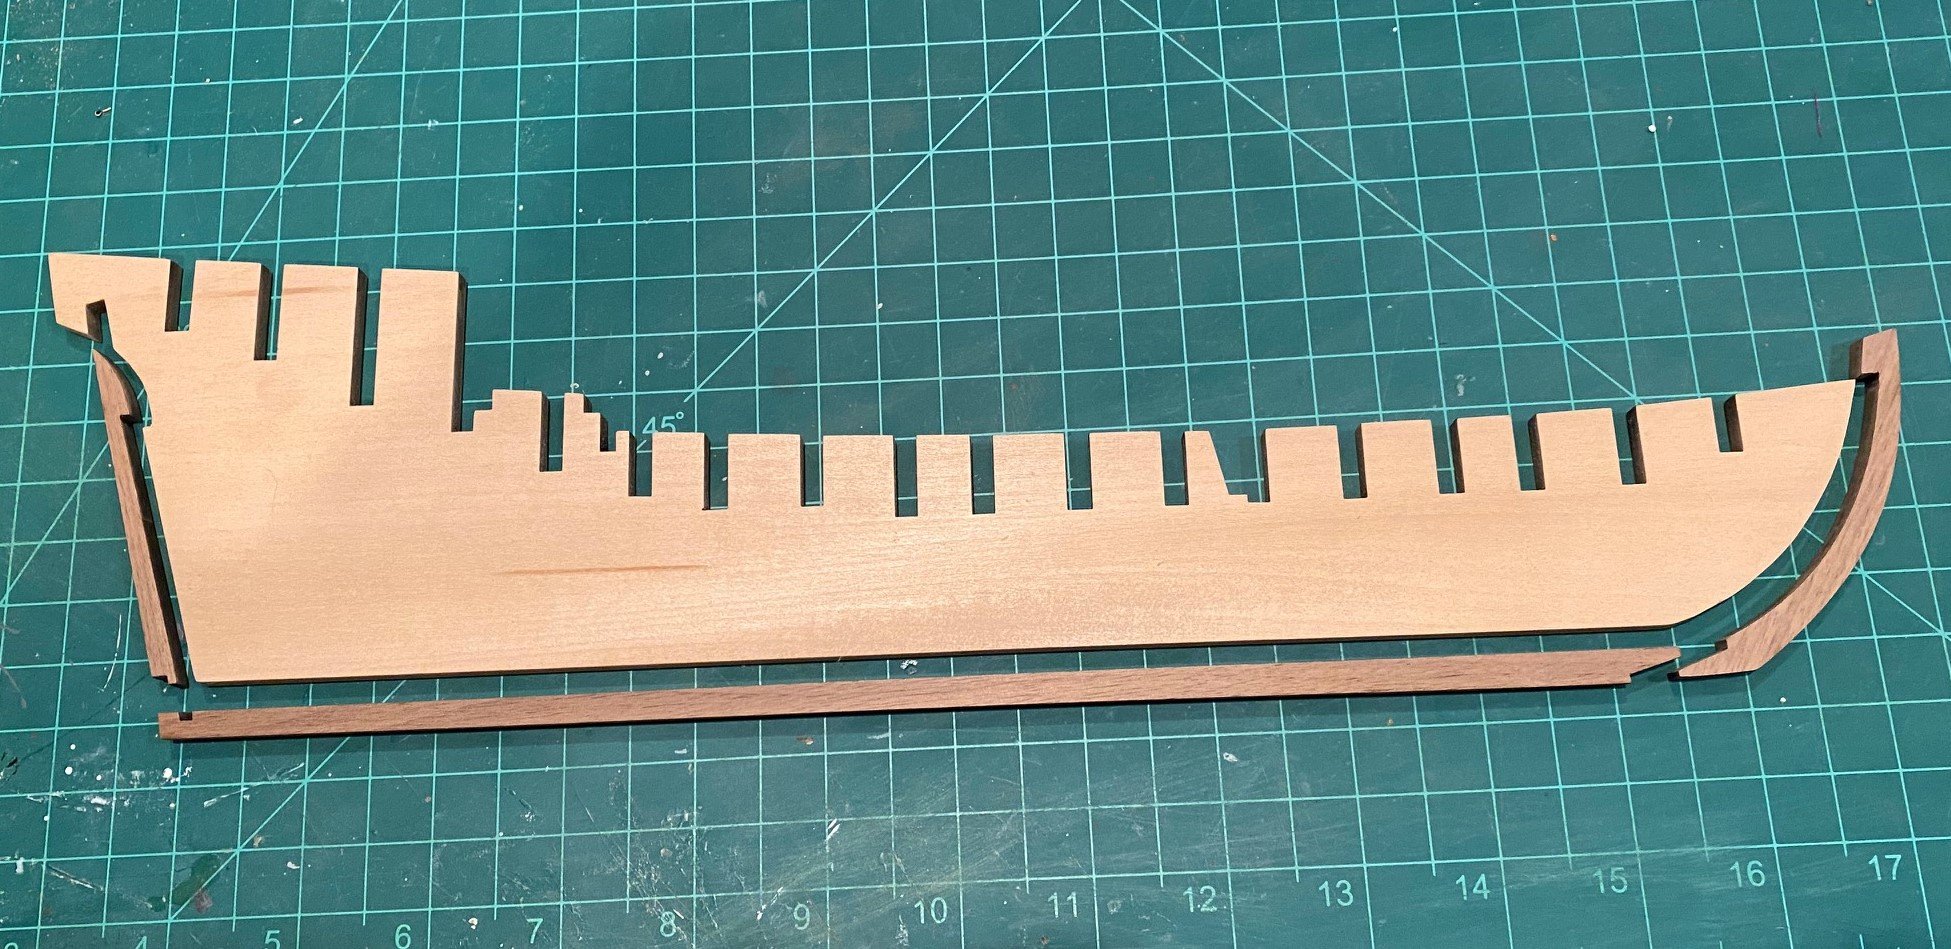
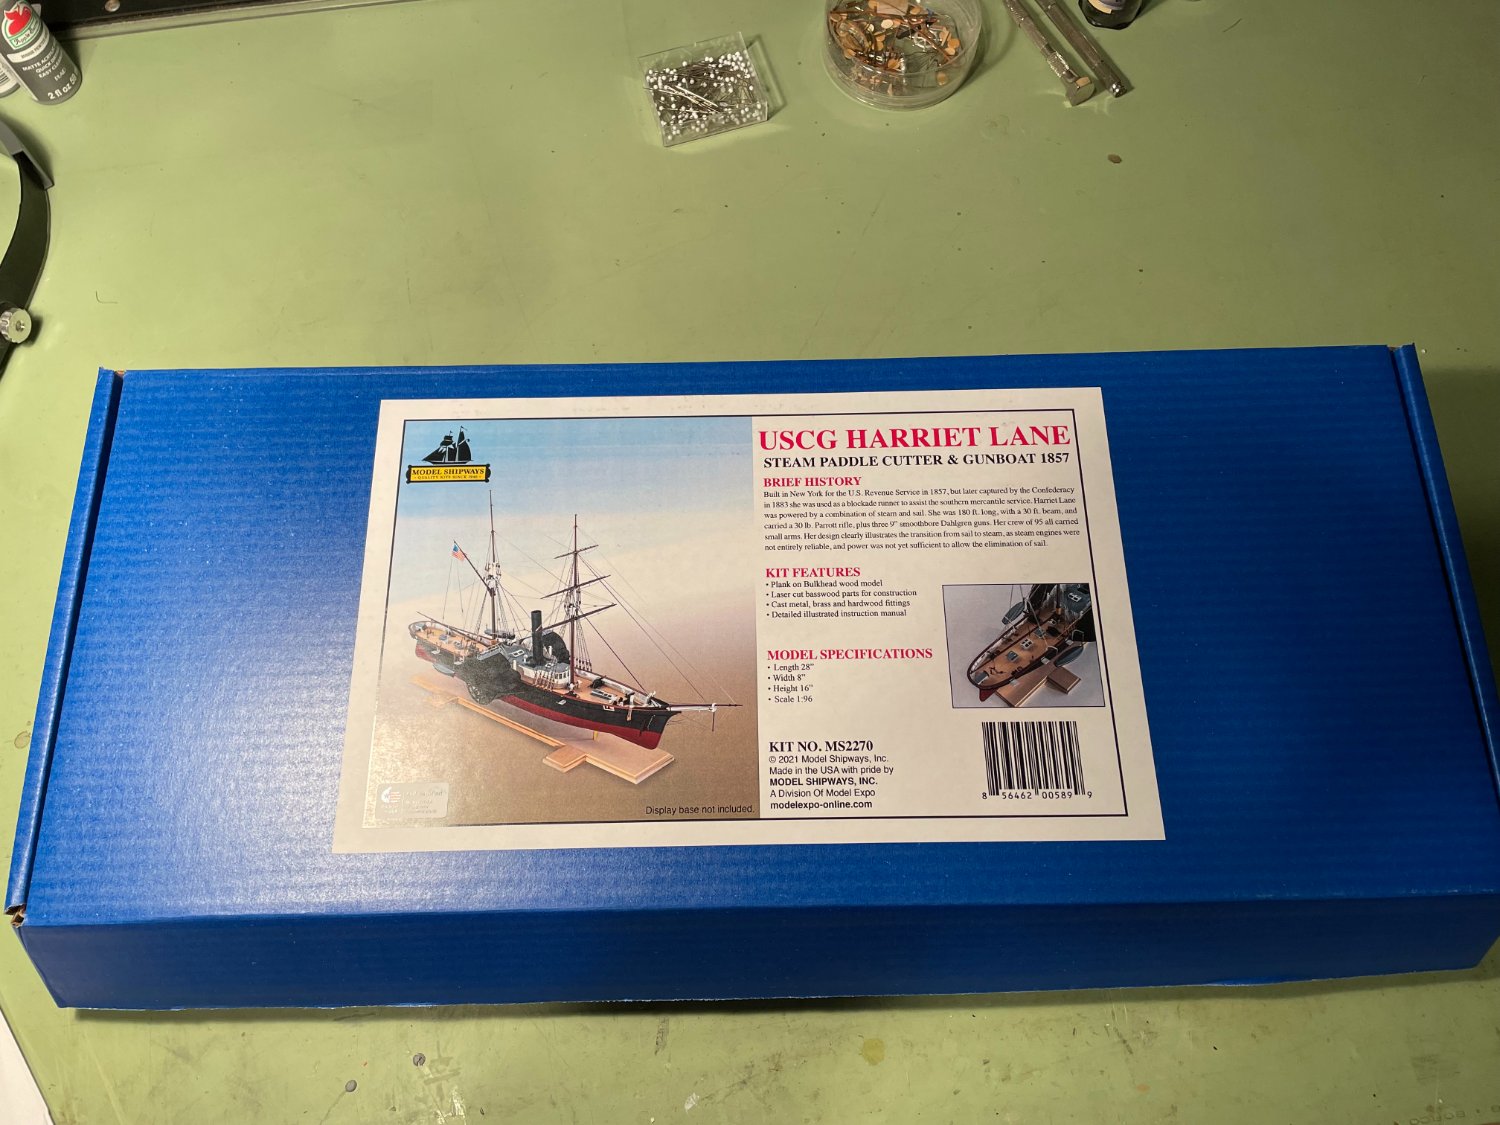
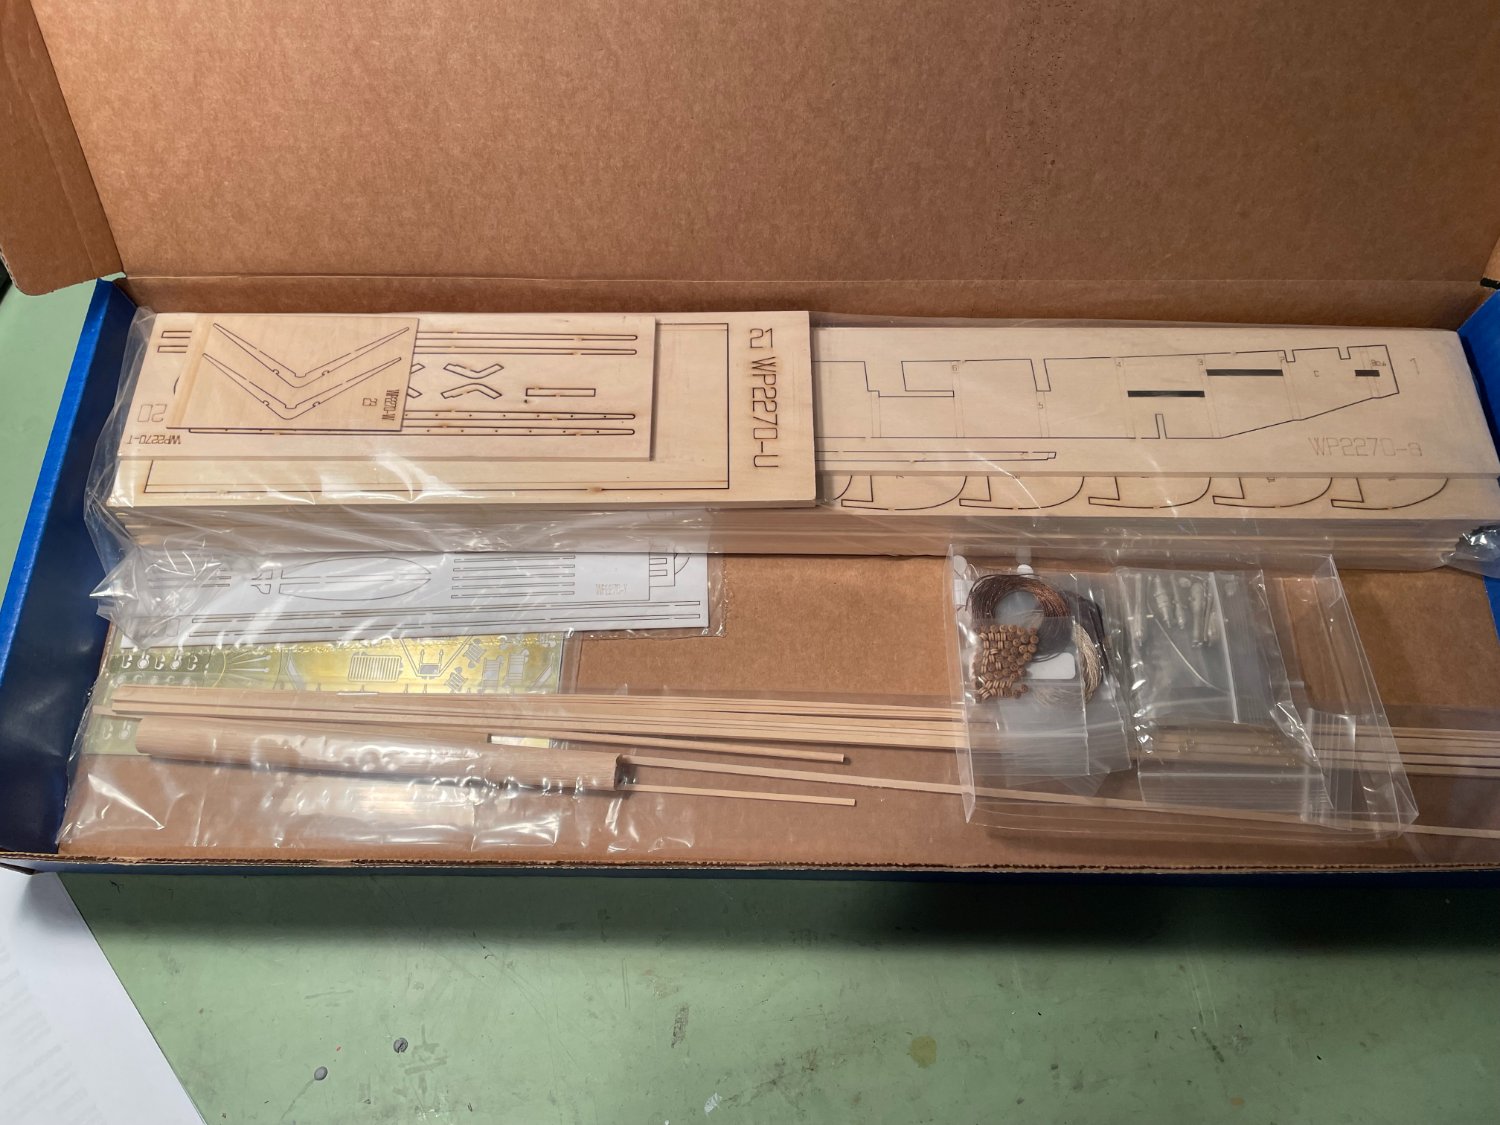
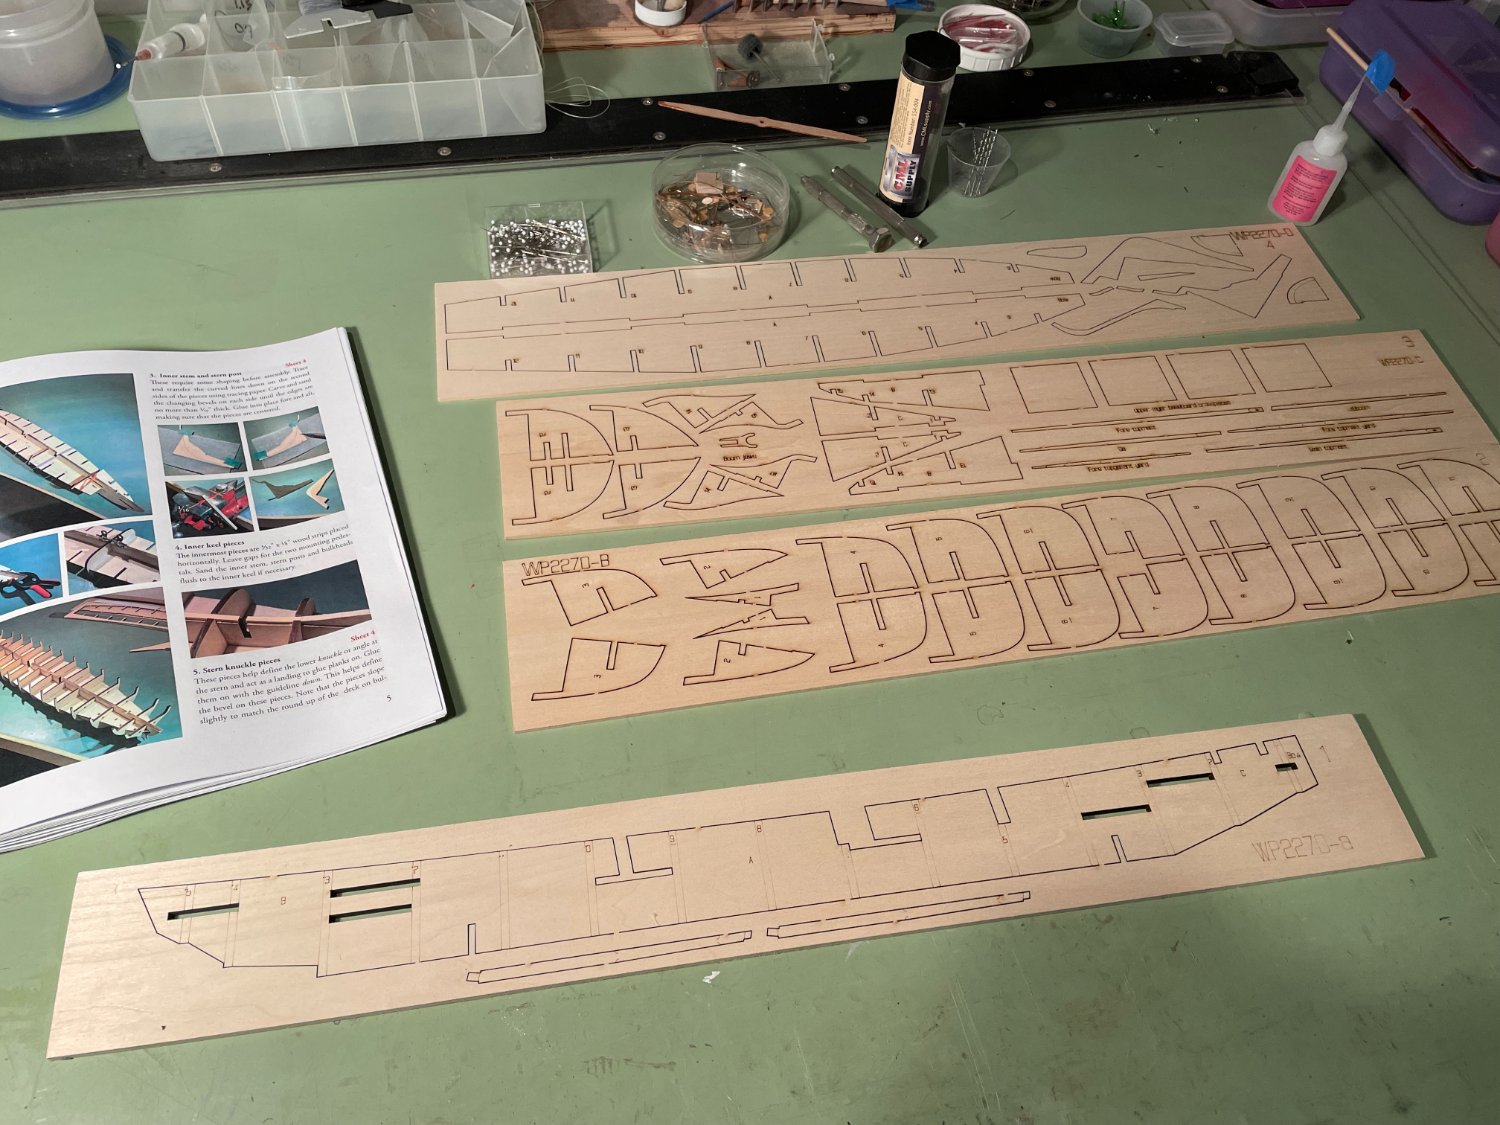
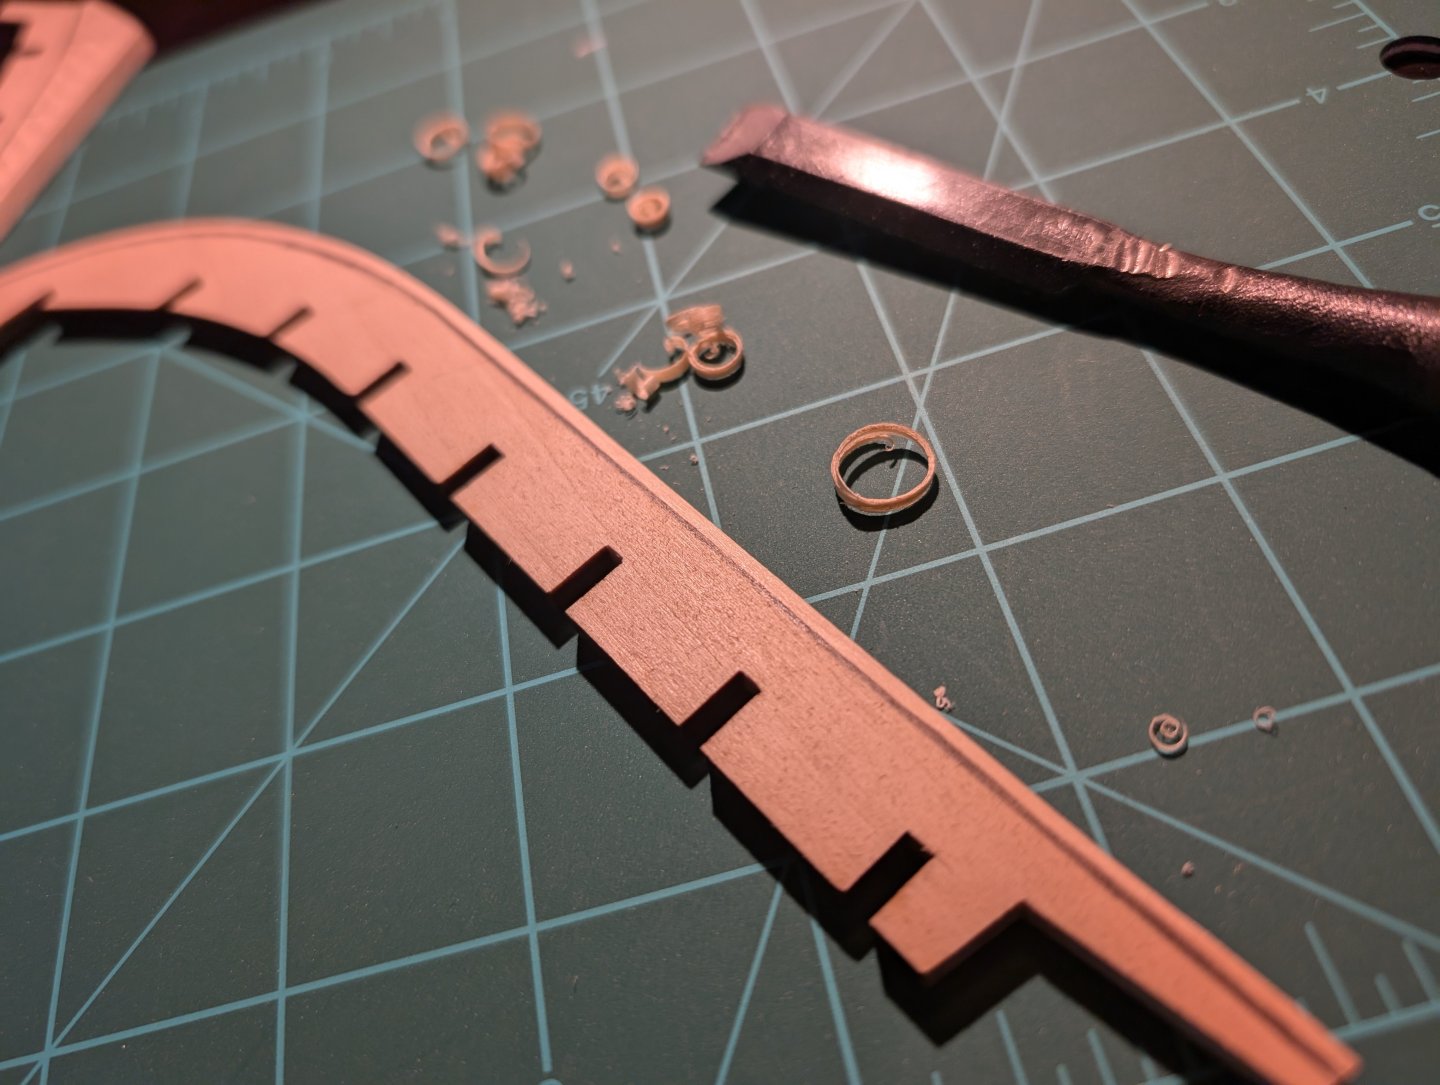
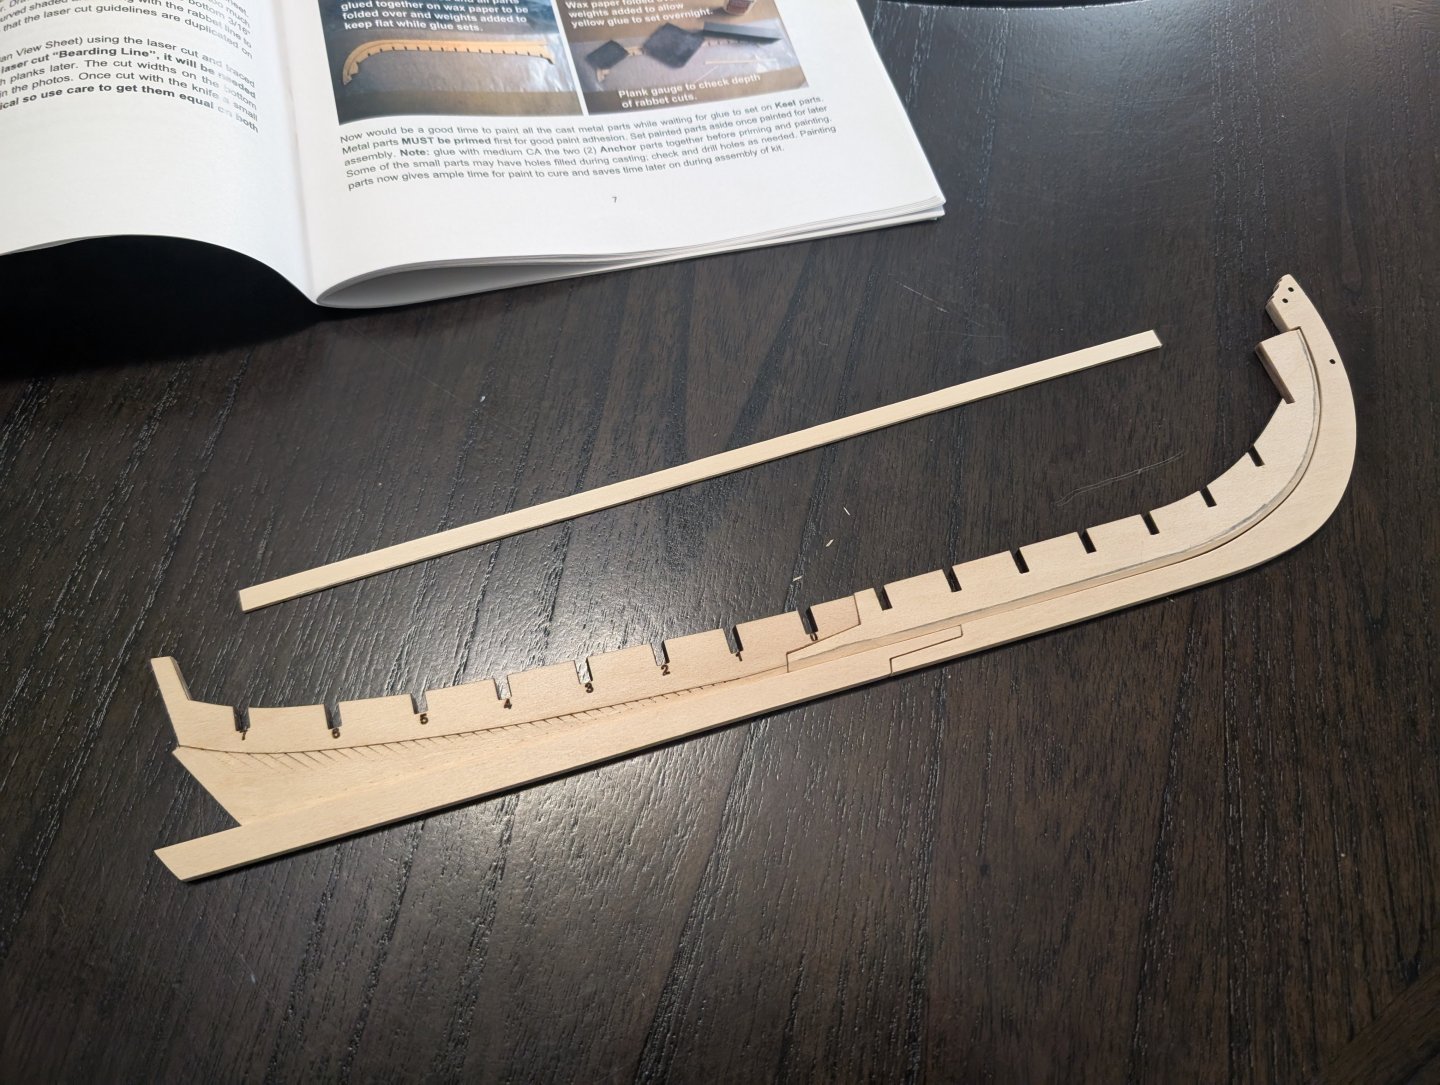
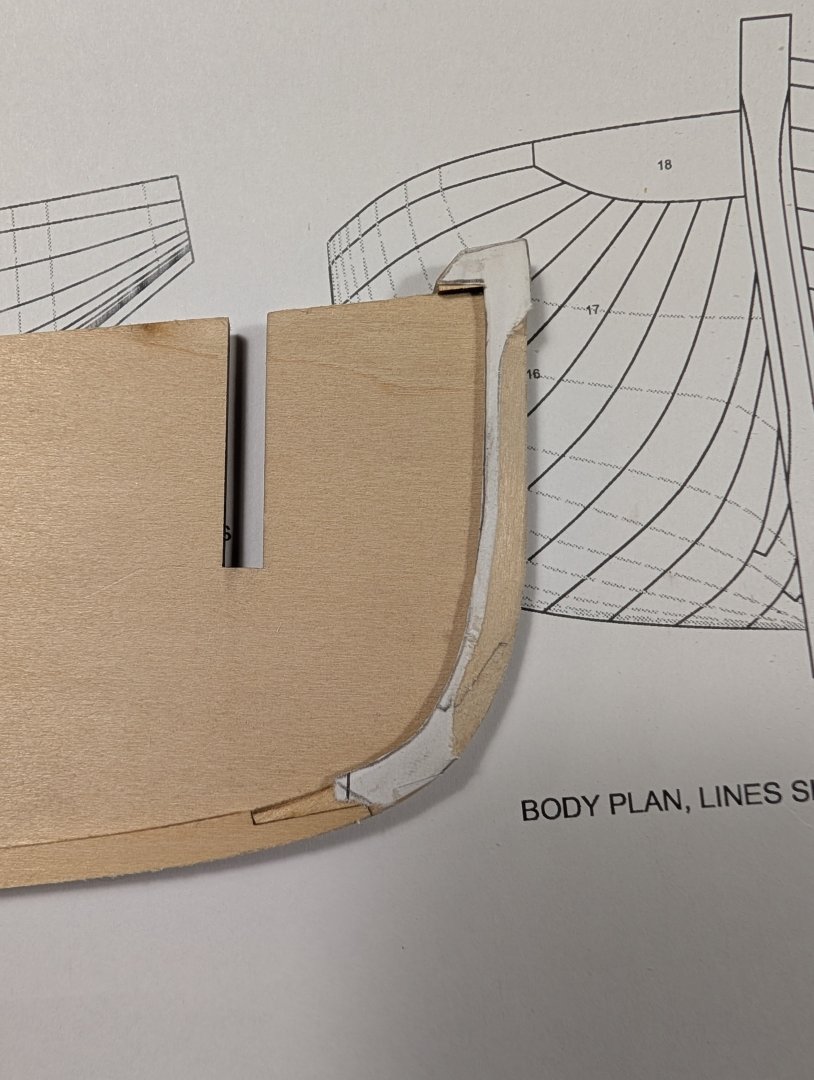
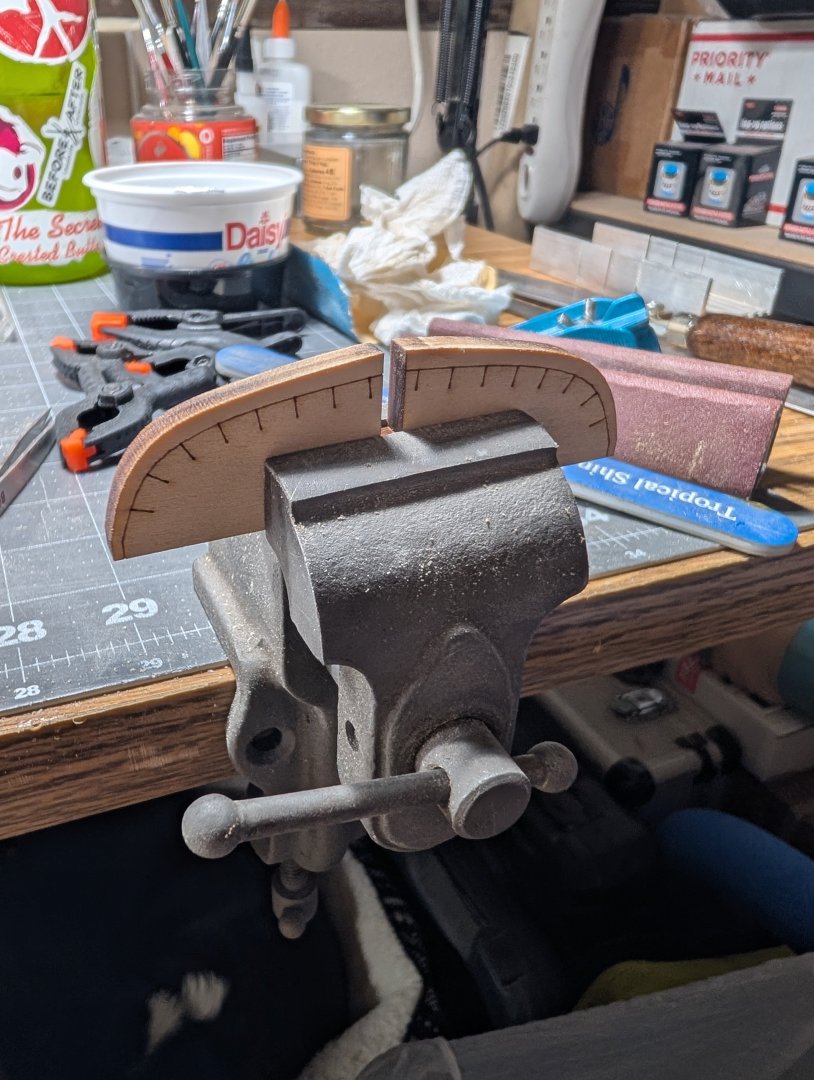
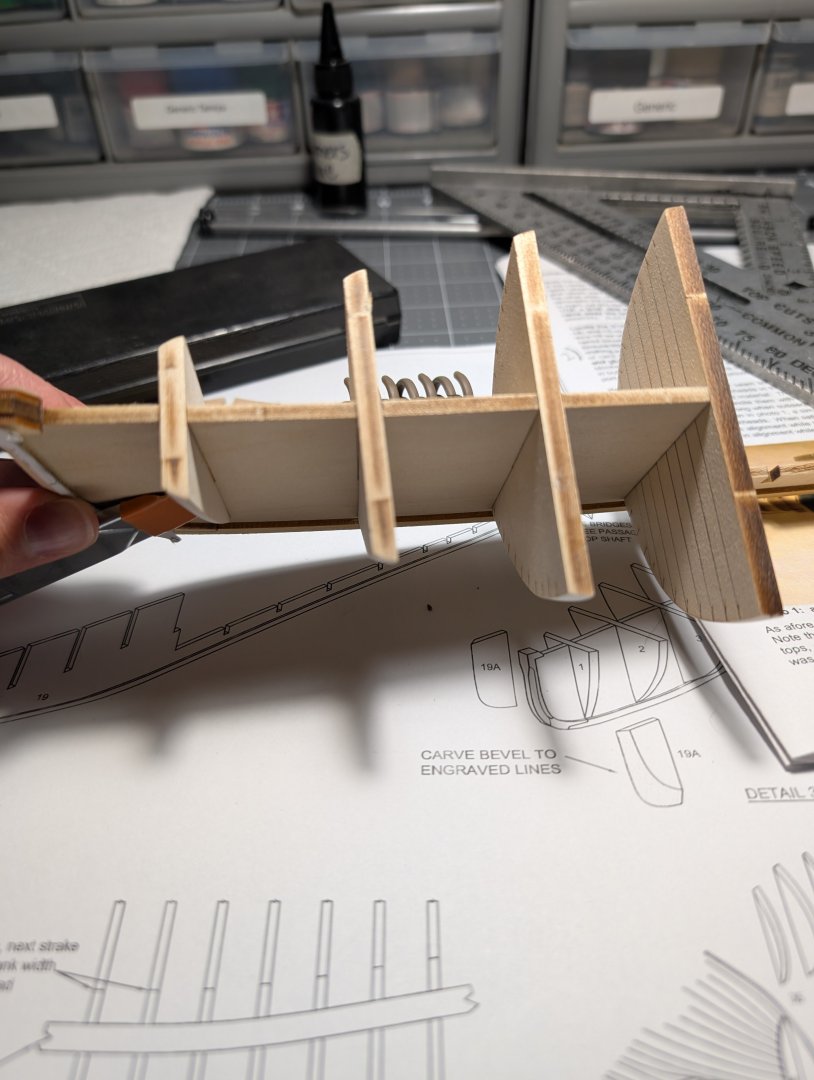
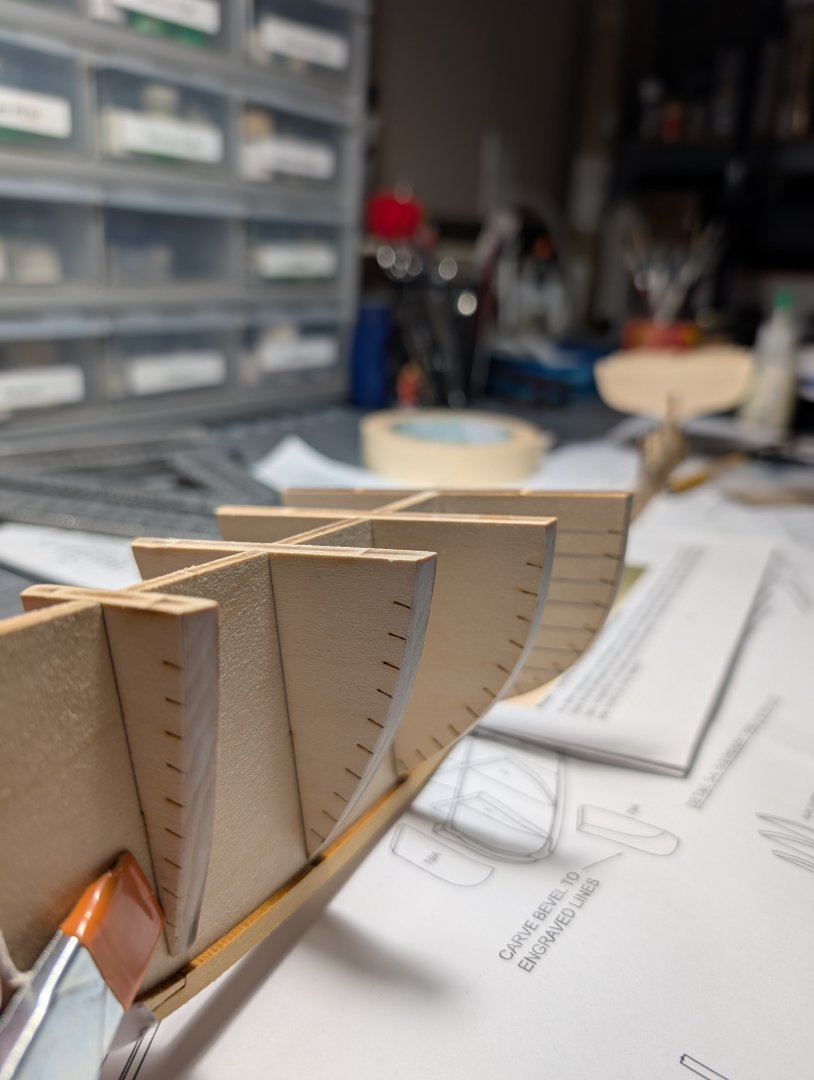
 Next boat on my bench is Picket Boat #1. I have many to choose from but most are tall ships. I thought this would be a good way to practice and develope better planking skills along with some other unique/different features. For those that will follow along know this build log will be slow as I can only really work on it during weekends and we just started car show season (we have some 1950's cars). I'll try to post as I make progress and hope to share a little more frequently than I did with my first build log. We got this kit in a trade a while back. After laying it out about a month ago I found I was missing two lazer cut pieces. Nothing huge to keep me from starting but I delayed and reached out to Model Shipways. Took a little biut got the parts in and that motivated me to start. So with new sandpaper on the block and pulling out the files the dust started flying and glue flowing. I find early that, like many logs have mentioned, while the instructions and drawings are great compared to other brands, it is still written so that the reader/modeler needs some background or knowledge of ship building. The section that tripped me up the most was the center keel assembly. It mentions on the drawings to reference a template but in my review of the plates I did not locate a template. So using a different image I traced the center keel and made my own template then carved away. Picture below shows the plate in the set. Then picture of keel as O carved. I wrapped up my bench session with the bulkheads, shaping them and then putting in place and ensuring they were 90 degrees off keel. Overall made some progress and its not going back in the box anymore :). (I drew the lines on the wrong side of the bulkhead as this won't be visible I opted to not erase)
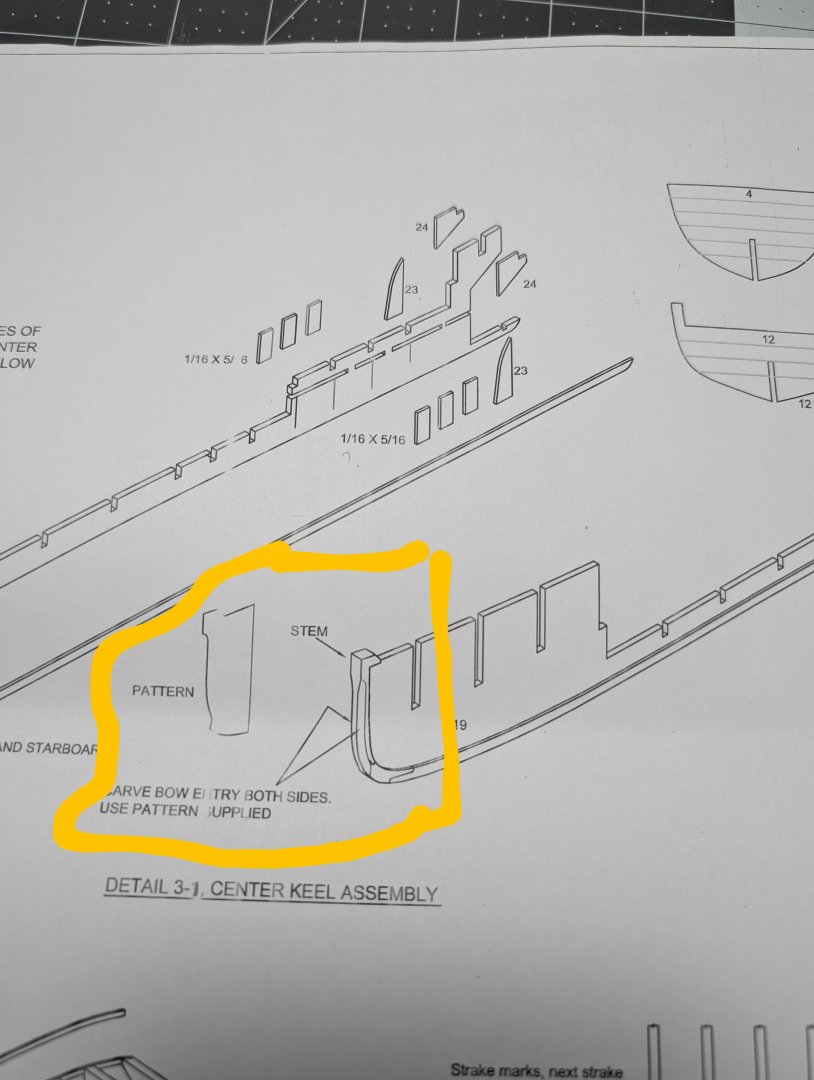


-
 Hi. I am new to Model Ship World. I began building the Flying Fish in early 2006 and worked on it slowly over the next 6 years. And there is remained gathering dust until this month, when I decided to pick it up again in hope of taking it to completion. As can be seen in the photos I will be adding, the Hull has been completed and the deck structure are at an advanced state of completion. I look forward to meeting others of you who are also working on this model. Jared
- 355 replies
-
- 6
-
-
- Flying Fish
- Model Shipways
- (and 1 more)
-
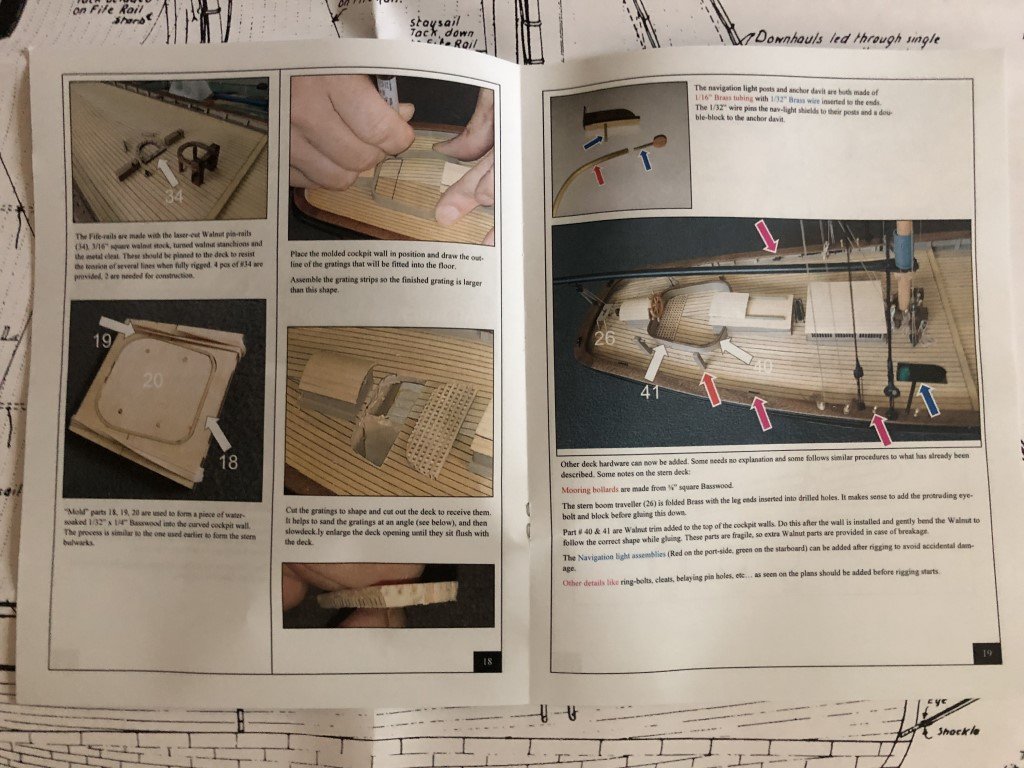
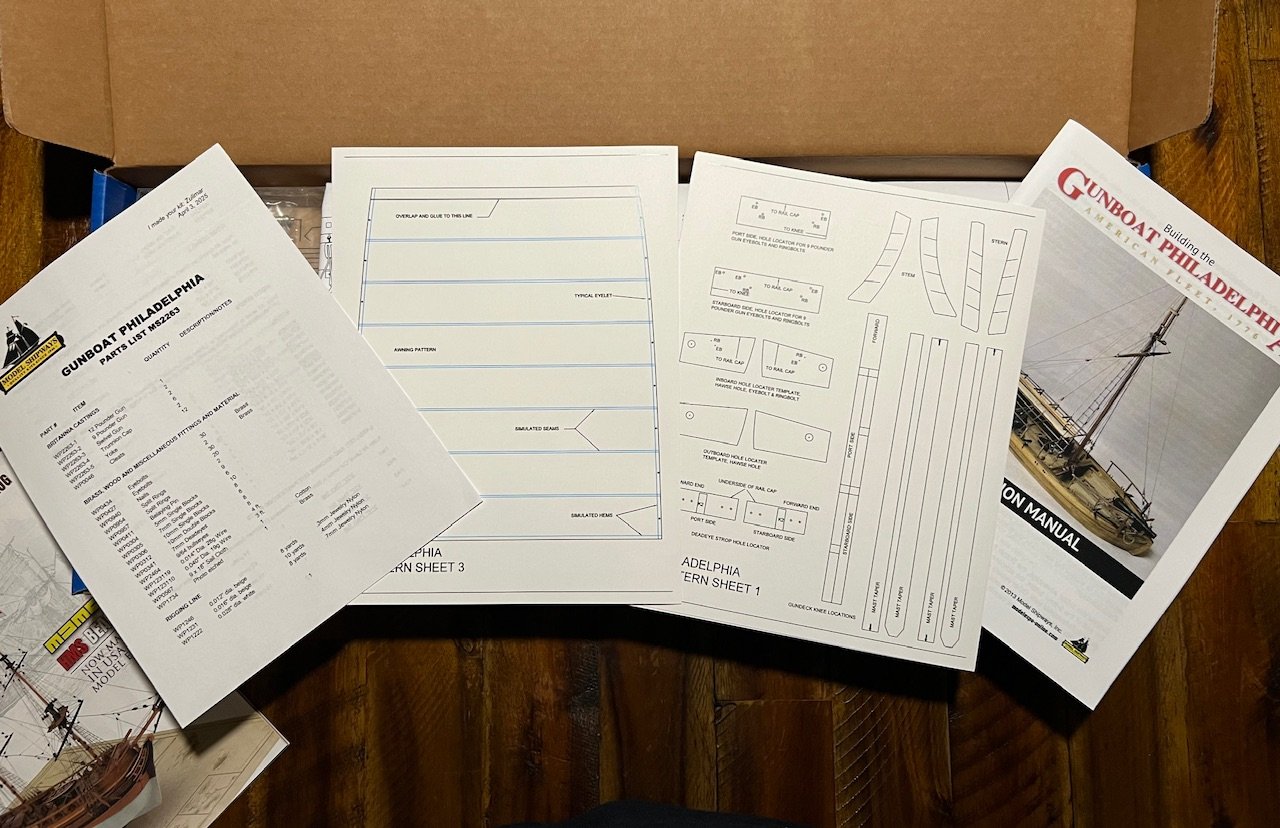
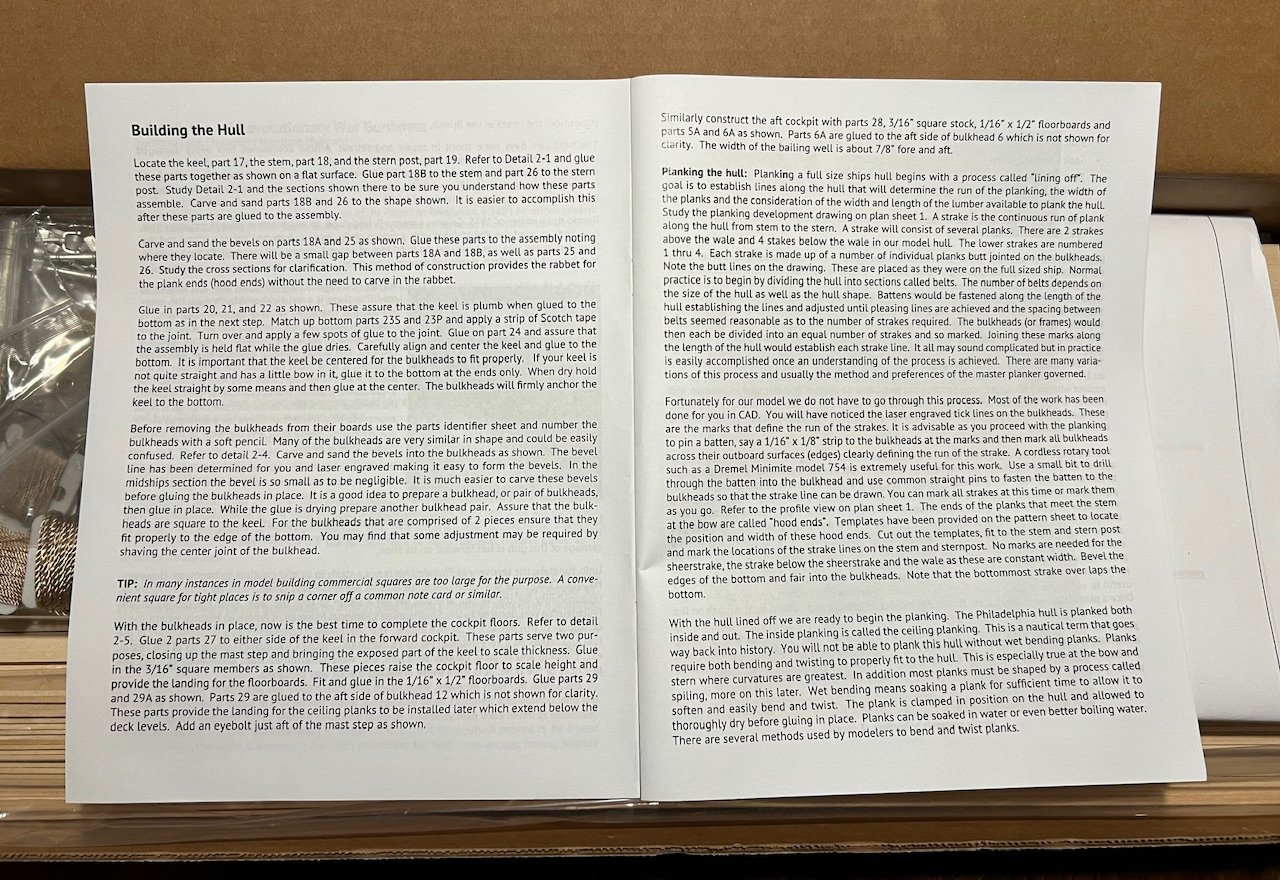
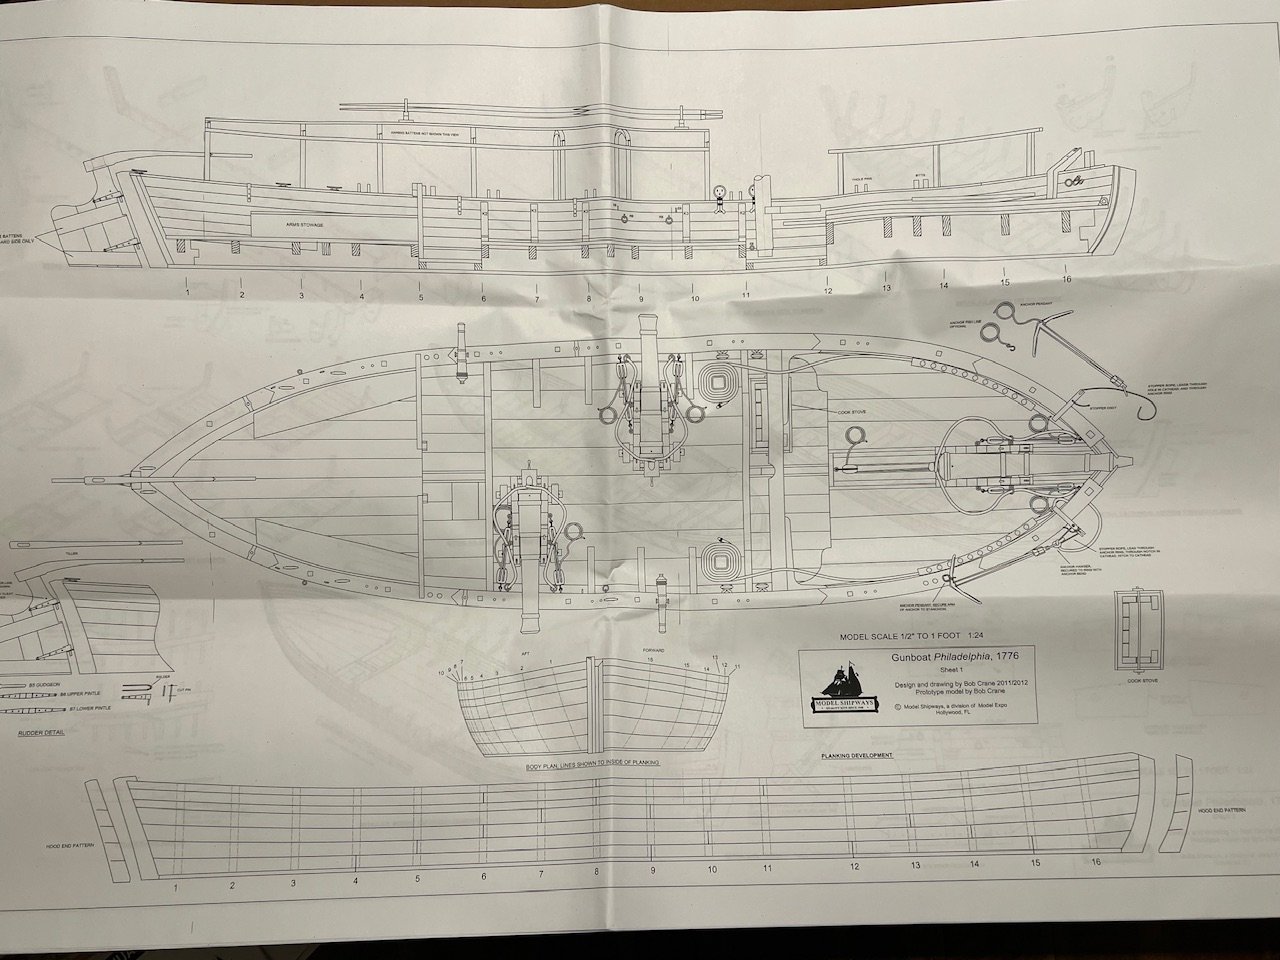
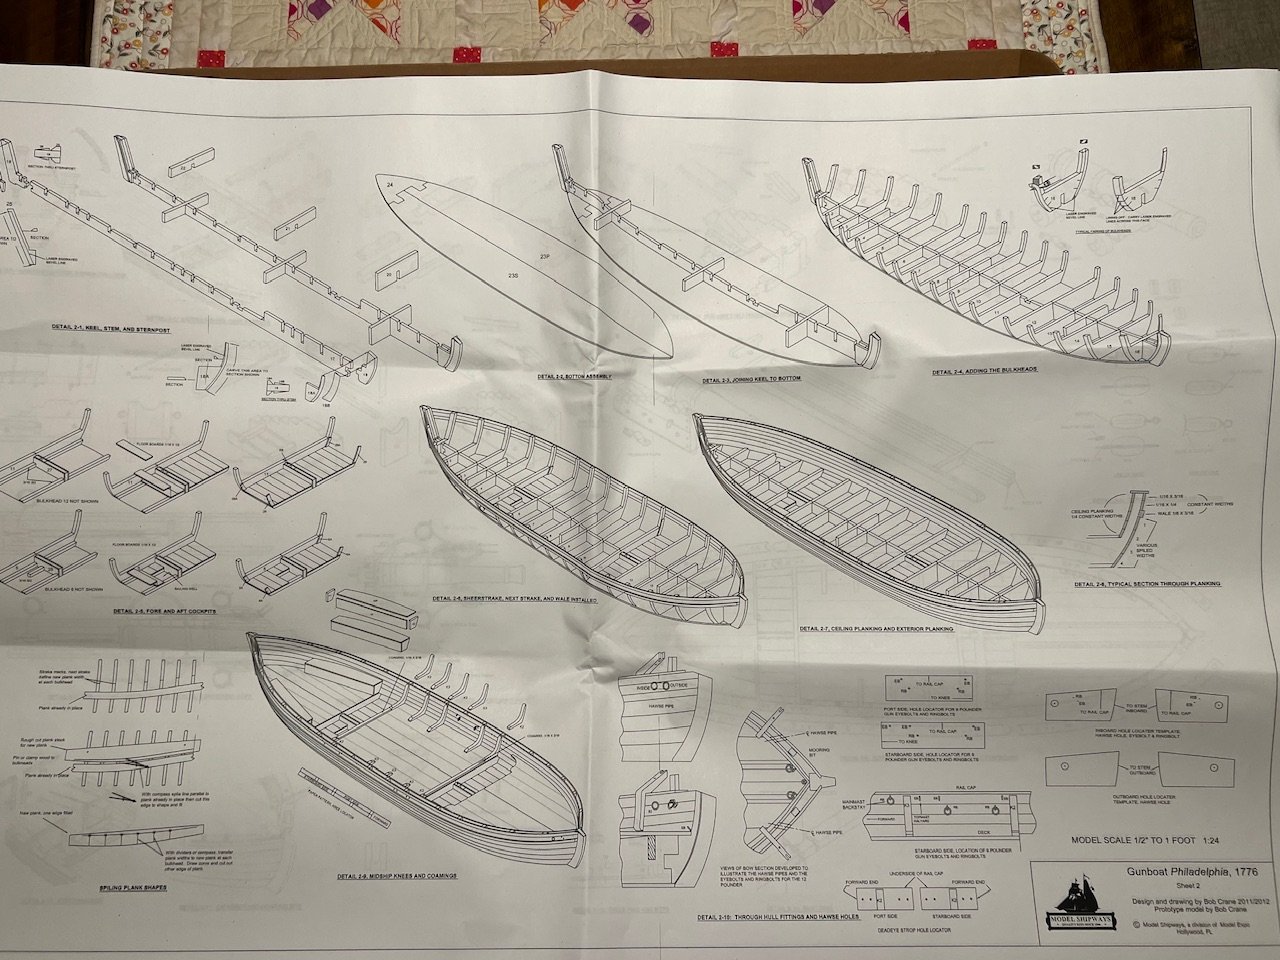
 I've been following some of Olha Batchvarov's videos ()https://www.youtube.com/c/OlhaBatchvarov/videos. She's been doing a group build on the Midwest Models Lobster Smack for a while that should wrap up in a week or two - I had just completed the Model Shipways Lobster Smack and was not interested in building another one of those to follow along. Next weekend (Sat May 10), she is starting a new group build on the Gunboat Philadelphia by Model Shipways. I wasn't sure if I wanted to follow along on this build since I had so many other models in my stash and that I was trying to work on, but I was able to get a copy of the Philadelphia for over 50% off the usual price and decided to jump on this group build. It's a different style of model from anything else I've built or have in my stash. And the instructions are also quite different from any model I've worked on so far. The instruction book is text heavy with almost no illustrations. Instead, there are lots of large paper plans that include build instructions as well as the usual kinds of things that are on plans. I'm going to try to follow along fairly closely to what Olha does and at the pace of her group build. She said she expects this group build to take at least 6-8 months. I'm sure I'll fall behind a few weeks from time to time because of travel, vacation, and work, but I don't plan to go ahead of her in the instructions. Ships in Scale apparently had a multi-part series on the Model Shipways Philadelphia back around 2014. I've been thinking about buying the back issues from the NRG web site: https://thenrgstore.org/collections/ships-in-scale
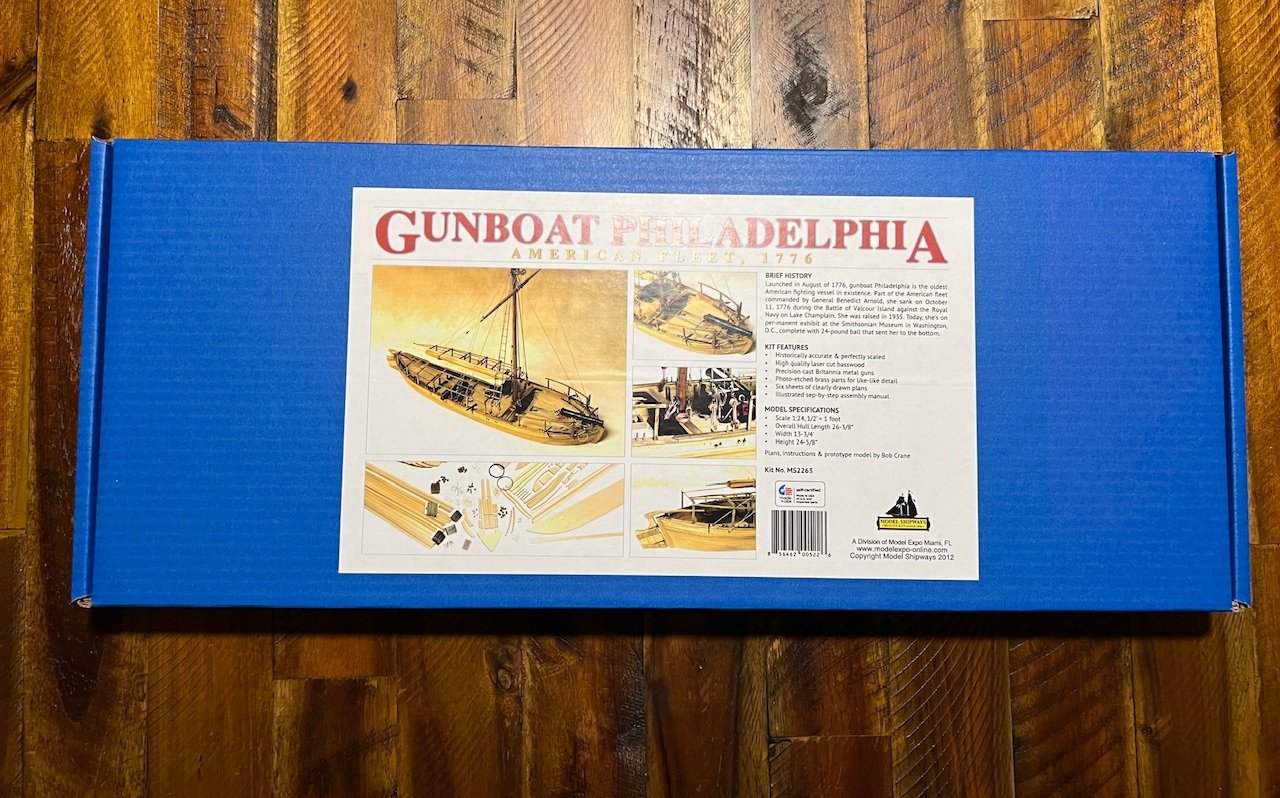
-
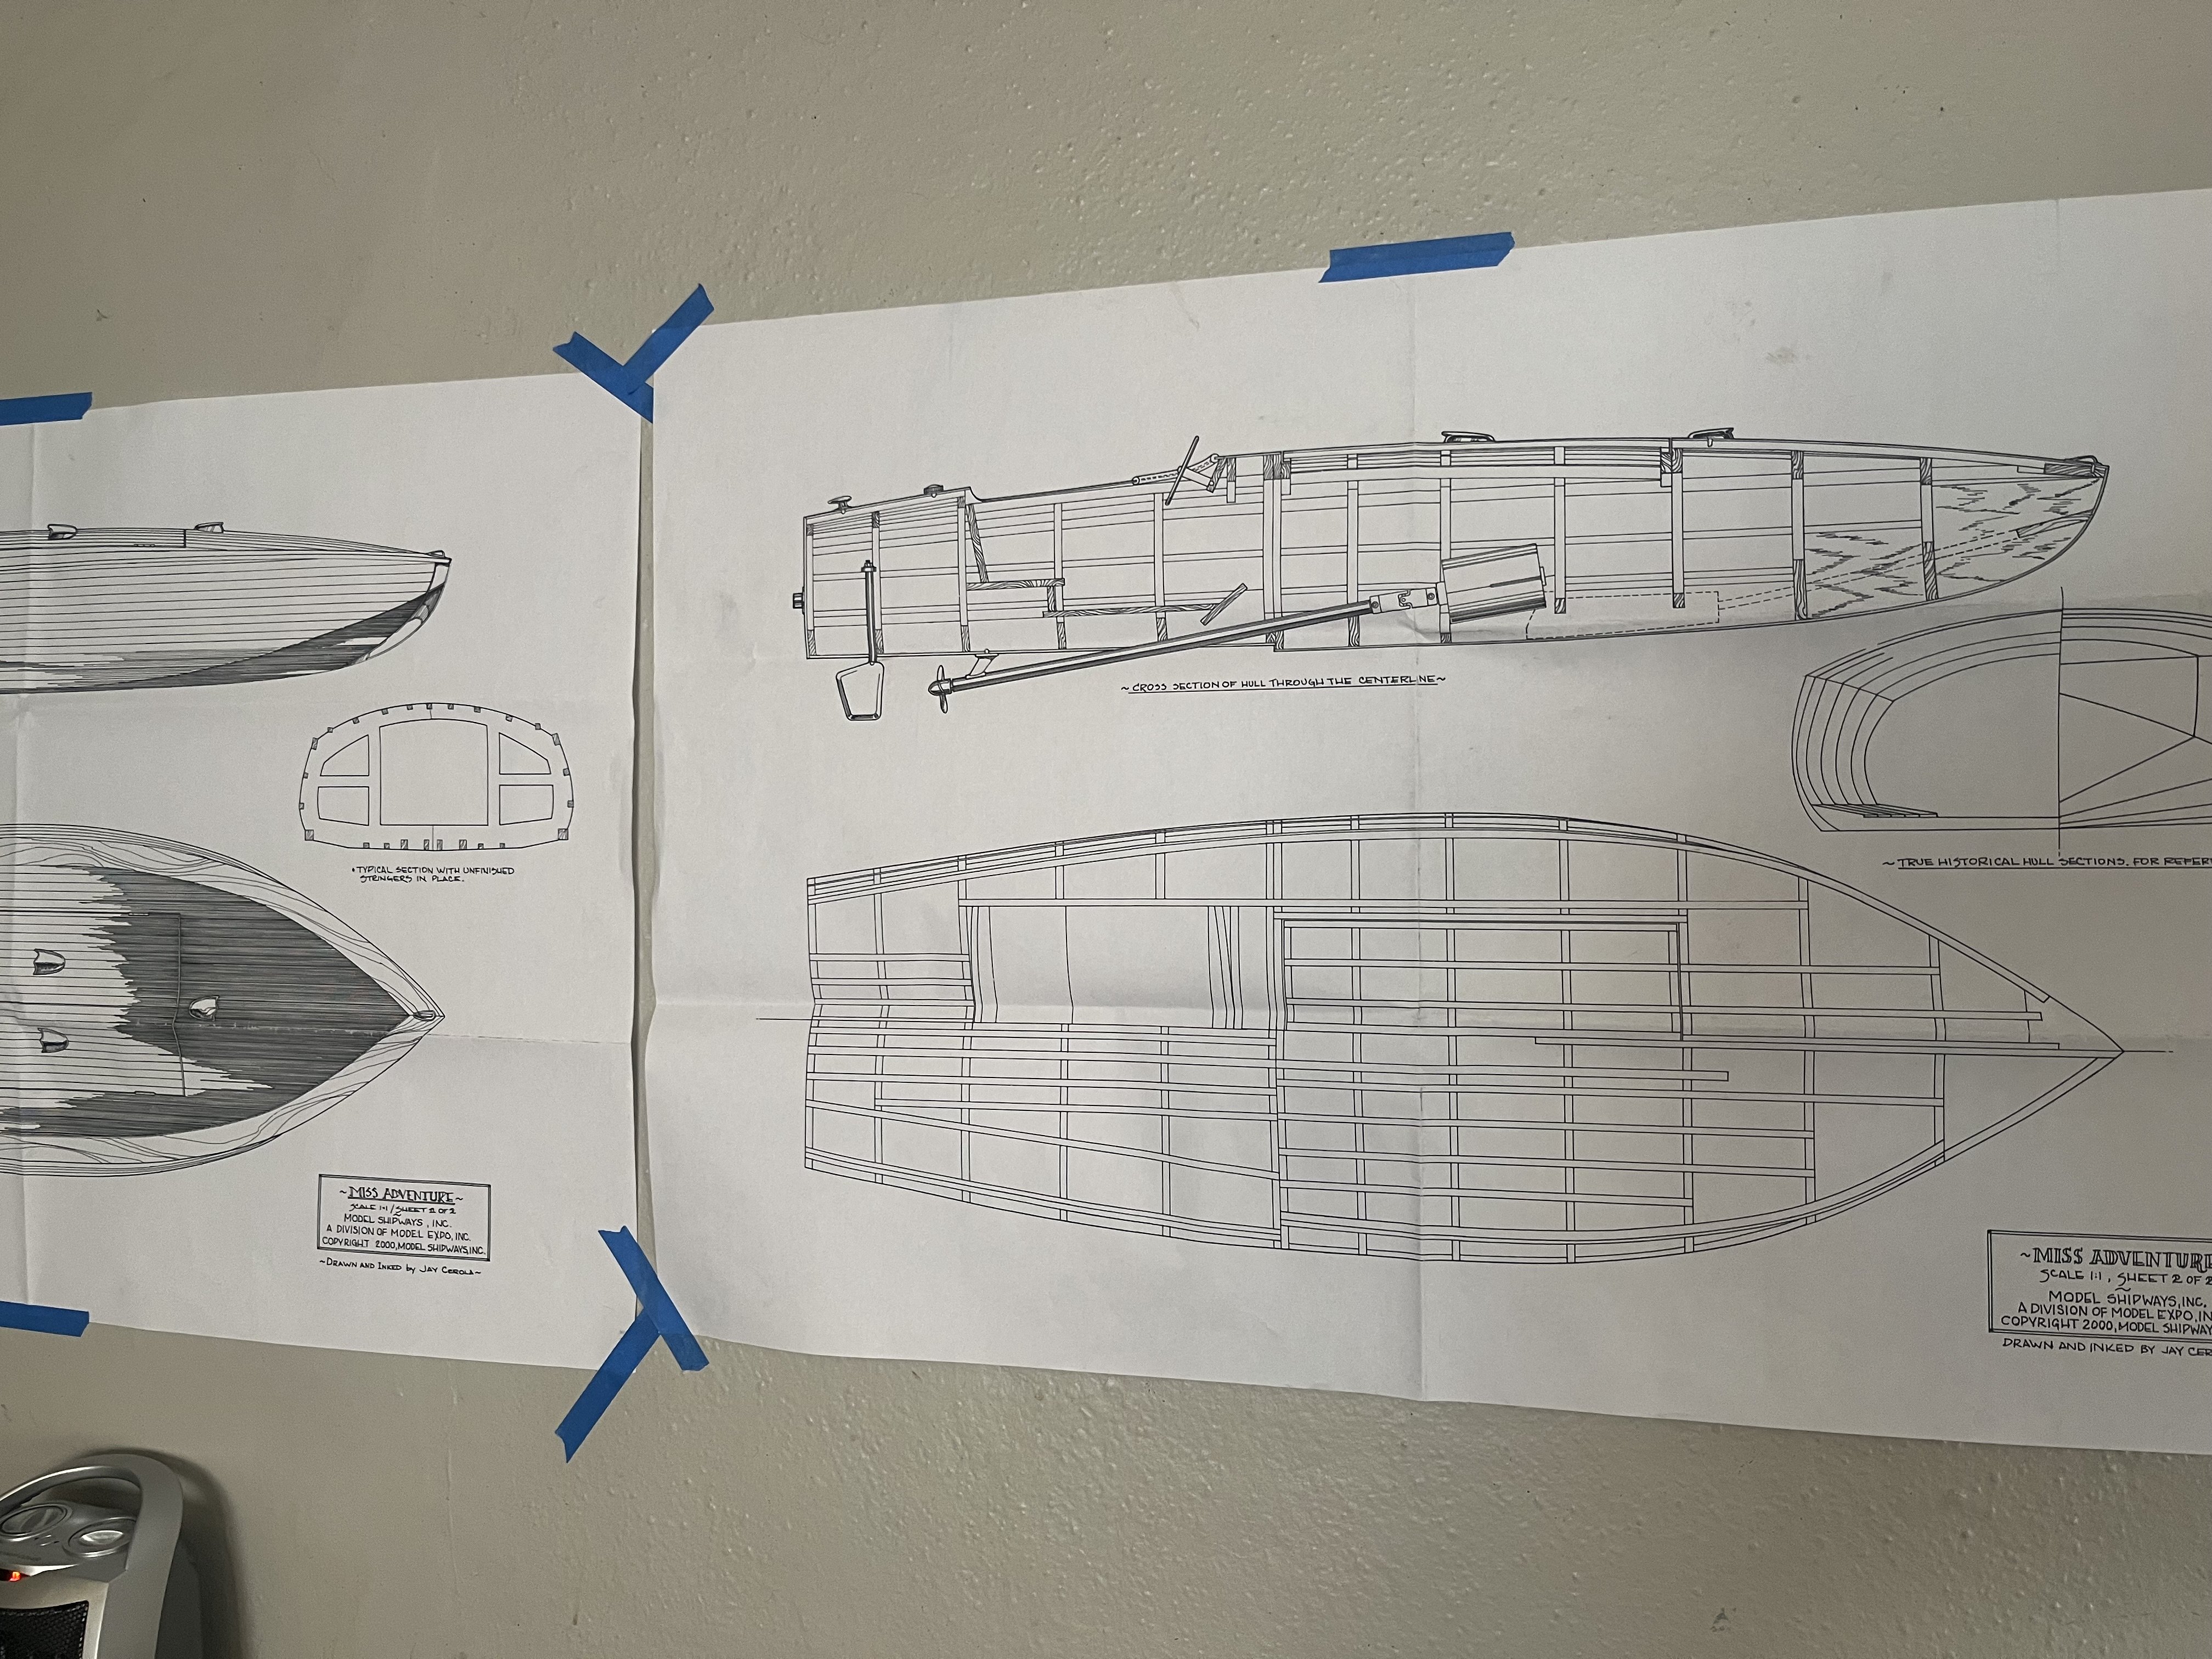
 I am finally getting around to making this build log. I started this kit in 2016 and since then have had long stretches of time of not working on it. I am finally near to completion so I thought it was time to share my experience. I will be posting the actual dates taken from the meta data from my photos. I have done a moderate amount of kit bashing to this kit since I felt some things needed improving. 5-9-2016 Frame-up mostly done. It's a good idea to bend the stringers before you glue them on as not to create tension that can warp the frame
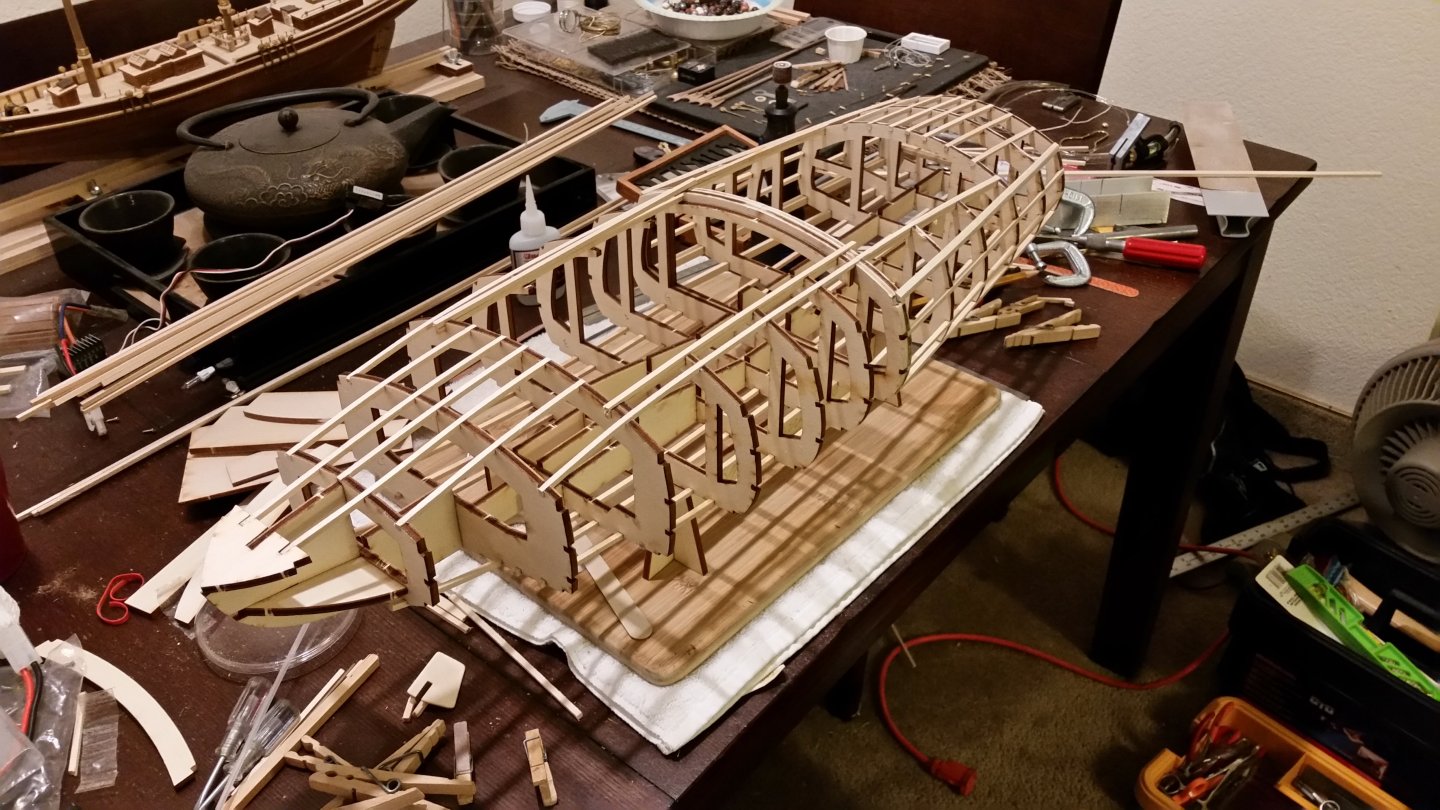
- 17 replies
-
- 1
-
-
- Model Shipways
- Miss Adventure
- (and 1 more)
-
 Started this build a week or so ago , so I'm a little behind on the build log. But I still have pictures of my progress up to this point. It all started off fairly smooth, getting the bow transom knee on and assembling the stern transom and knee. Got everything placed in the build jig and the first 2 bottom planks sanded, curved, and glued on. Keel plank went on after the bottom planks were dried. Next up were the garboard planks. I was a bit nervous about the rabbets that had to be cut, but practicing on some scrap wood helped. Soaked, formed, and glued the garboards. Then it was on the the first of the second planks, where I am currently. I got some better pictures of the rabbet on this plank, prior to soaking and forming.


-
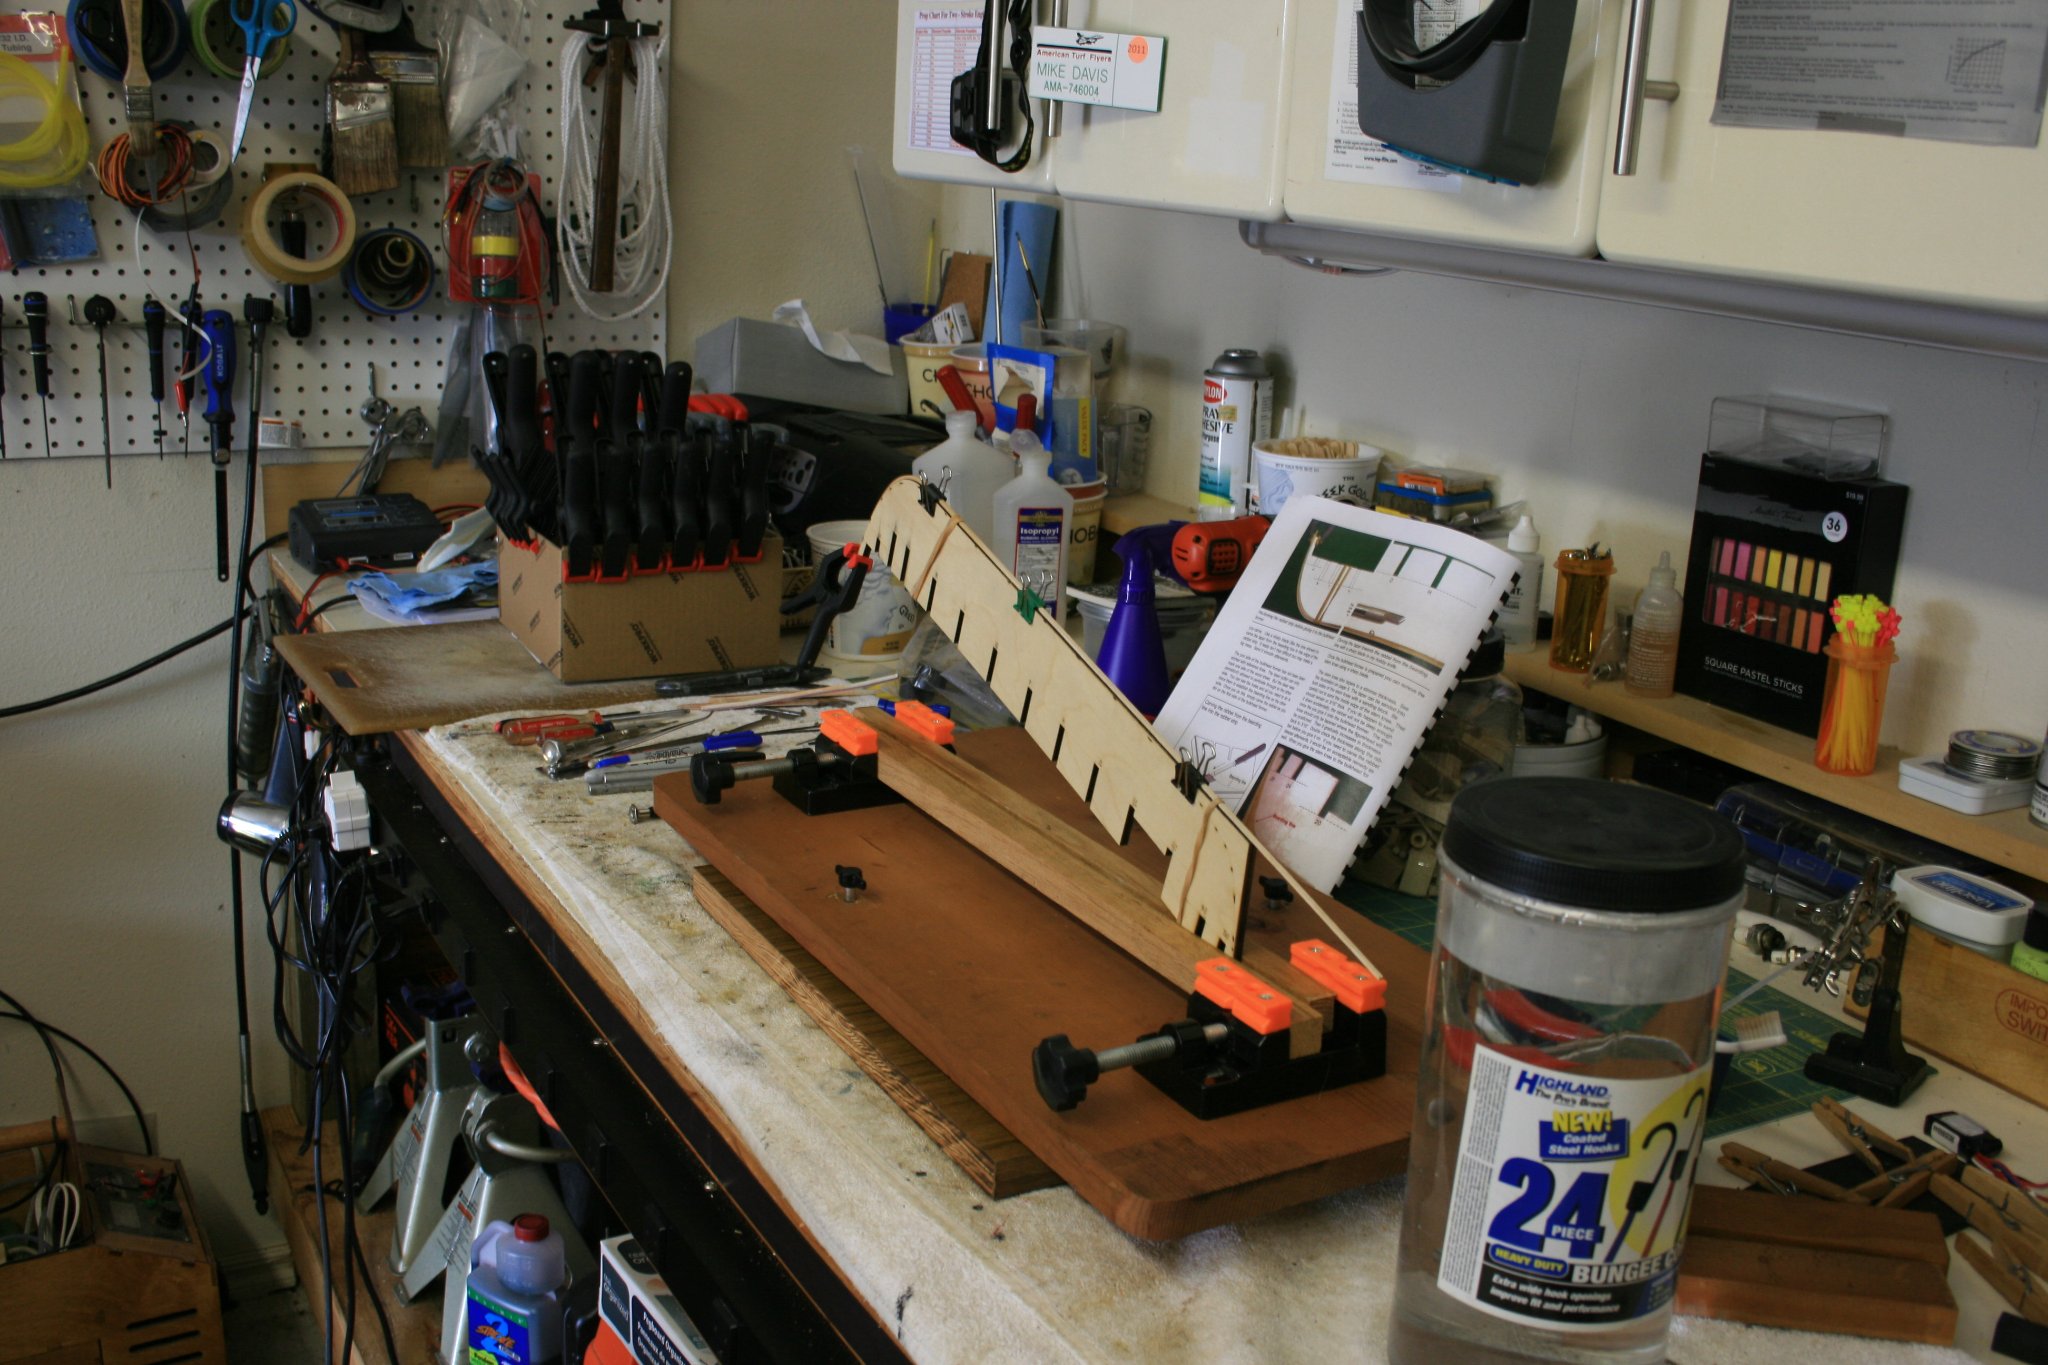
 I am going to attempt to create a build log that is somewhat different. It is intended to follow my first ship construction including both the good and bad that occurs. I have built and flown RC Aircraft for about 18 years now, and have some experience with wood construction. However, I know that what I am starting is quite different. I have to stop building planes since some are now so big, they barely fit in my pickup bed. That being said, I will gladly take advice and comments as I go along. Since there are numerous build logs by experienced builders here, I will try to stay with a photo log and keep the writing to a minimum. It will be mostly from a newbie point of view any way, and I am not sure what tips and skills will convert from planes to ships. So here we go.... First, I needed to add some items to my tool box/bench. Not much need for a 9mm wrench, hex wrenches, or other larger tools. So I bought some diamond files, spring clamps in different sizes, and built my own building board that can be seen in the pictures. I used scrap wood I had laying around, added a lazy susan to be able to turn the model 360 degrees if needed. I built clamp devices that will allow me to turn over the build when I begin planking. To keep the table from spinning, I put in two blind nuts and a butterfly screw on each side. This will allow me to clamp it from either side so it will stay put. Today, I was able to begin the first step..... Hoist Anchor and get under way. 😃
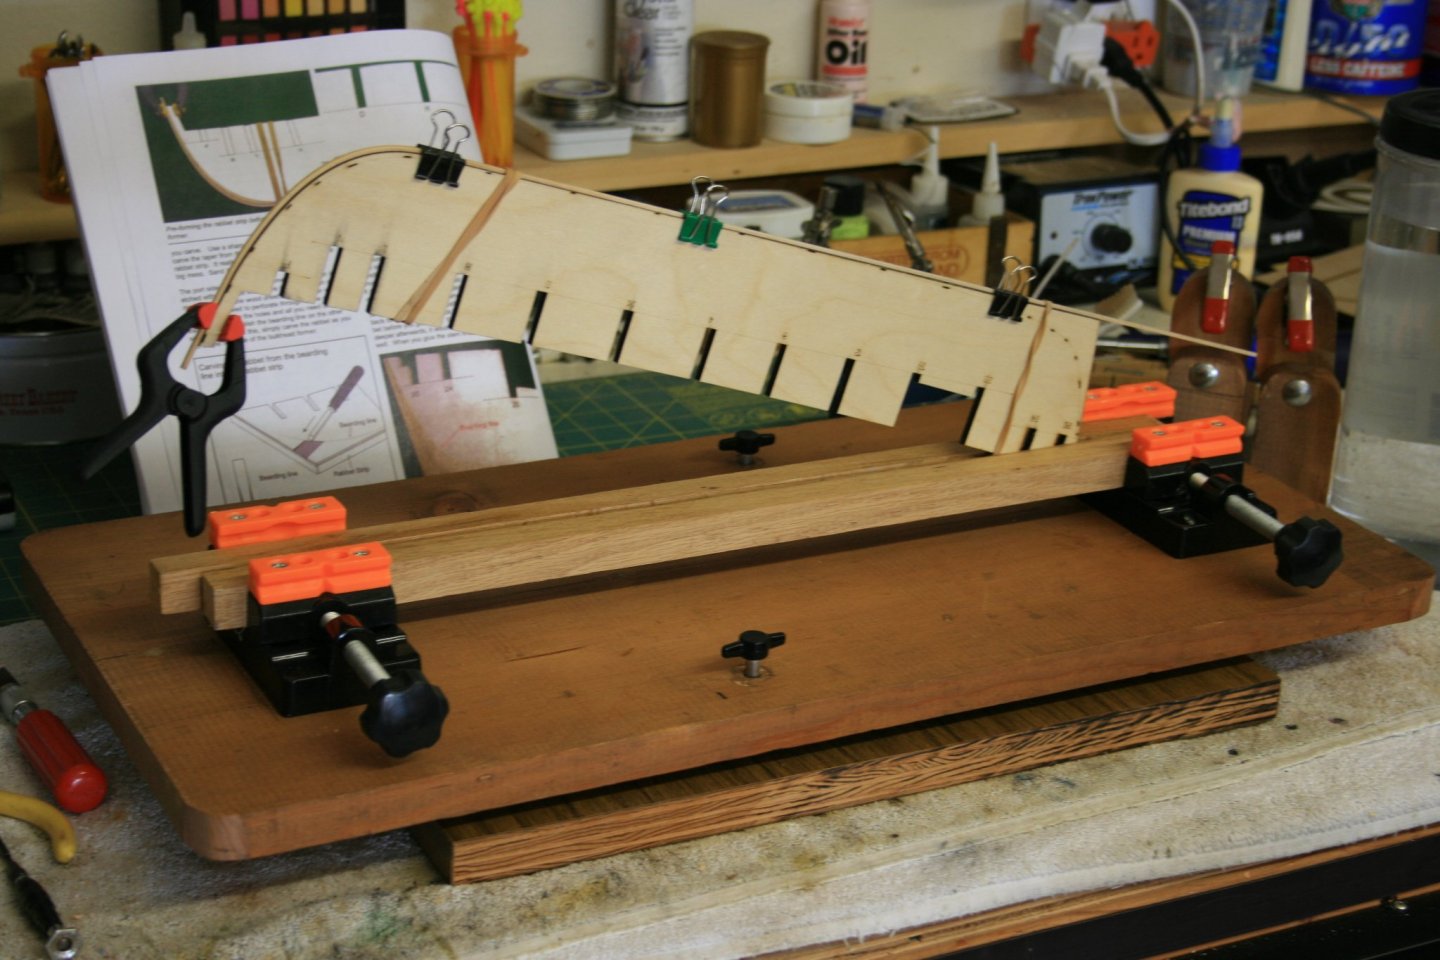

- 423 replies
-
- 8
-
-
- Syren
- Model Shipways
- (and 1 more)
-
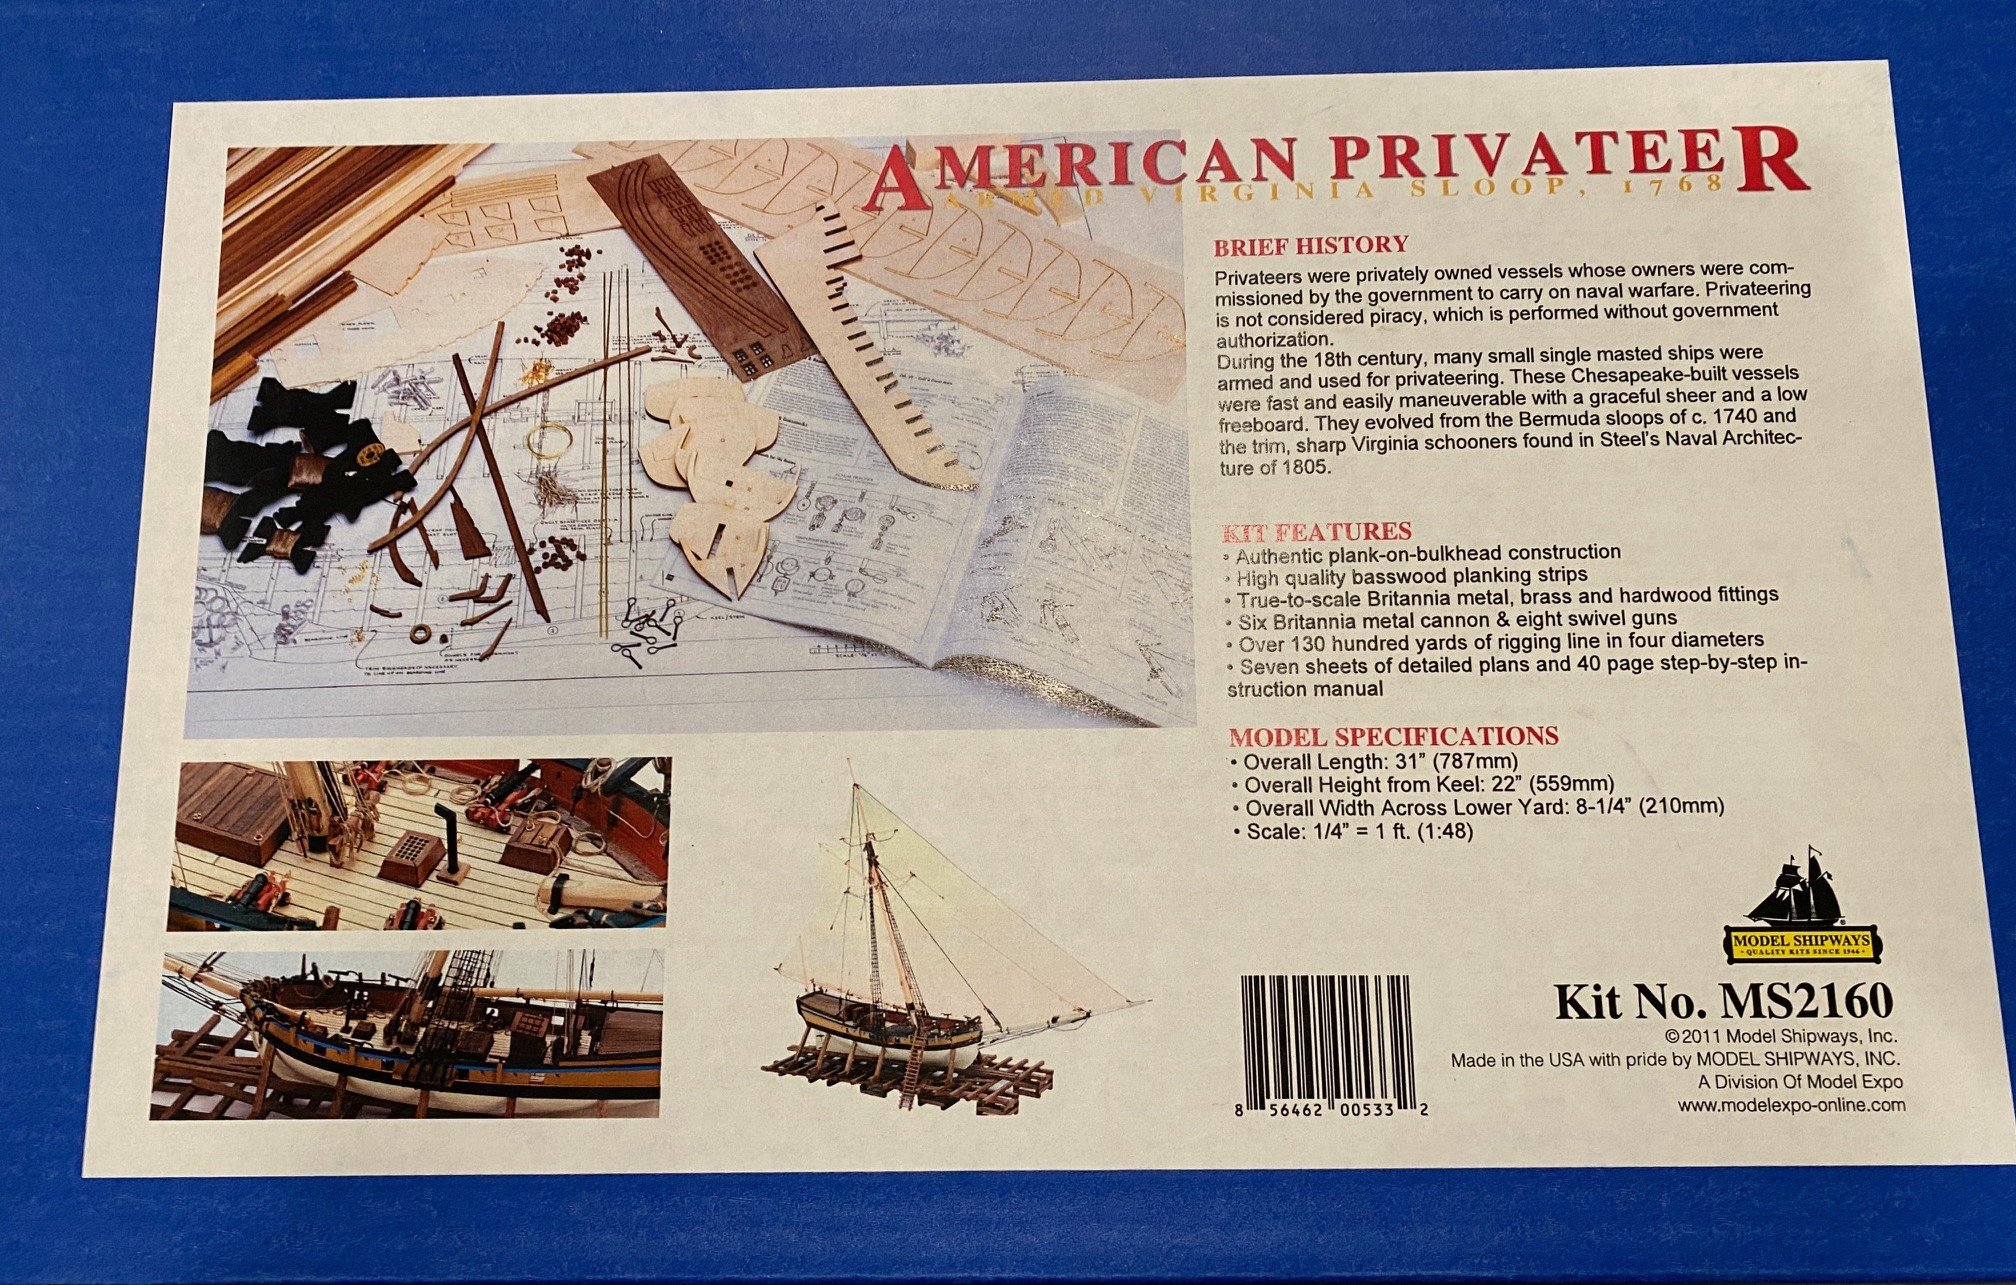
 I'm taking a break from building the New York Pilot Boat Phantom and going to start building the Armed Virginia Sloop by Model Shipways. I chose this model because there are some great sources of information beside the kit instructions, there is a Practicum by Robert E. Hunt via Lauck Street Shipyard, and some great Ship Logs, especially CiscoH's. Here is the normal start picture of the box, I started by removing the laser char from the center keel, keel, sternpost and stem. I might have removed to much from the sternpost notch, but I think I can work around that. I'm going ahead and using the included walnut for the keel, sternpost and stem. I'm trying to decide now if I only put one level of planking or do the two levels per the instructions. I don't think I want to use the walnut since I plan to paint the haul but would like to keep the definition of the planks. I would have to buy some additional planks if I went with two layers. Not sure what wood is available and pre-cut for planking, especially at the thickness of the walnut planks, 0.02 inch. Plus, I don't have a way to cut planks to width and thickness. Any recommendations would be appreciated.

-
.thumb.JPG.33e8fc9704bbb01f03cf31c187b62df9.JPG) Hi, Just join this site and what a great site it is 👍 I see that a lot of people (most from Canada) build the Canadian fishing schooner Bluenose 1921 and so happens I am building this too, hope this is not to many do like the shape and lines of this schooner. When I bought this model I also purchased the Fair-A-Frame from Model Shipways as well, while building I did modify it so that head stock would slide in a grove this makes it more ridged and keeps everything nice and square, also they show that the adjusting rail which moves to clamp the keel was at a different height than the one you glue down, so I notched the rail to allow both rails to be the same height, these are small changes which I found really helped. Did not take any pictures of the start when I joined three parts to the center keel once that was dried I took some tracing paper and traced the beading lines and rabbet lines onto the center keel. Next up was to remove 1/16 from bulwark stanchions just below the deck then took some tracing paper and traced each bulkhead so that I could mark out how much beveling I had to do all these bevels were done before gluing to center keel, also bevel inboard bulwark stanchions, once this was done I did a trial fit to see how it all fit. Regards Richard
Hi, Just join this site and what a great site it is 👍 I see that a lot of people (most from Canada) build the Canadian fishing schooner Bluenose 1921 and so happens I am building this too, hope this is not to many do like the shape and lines of this schooner. When I bought this model I also purchased the Fair-A-Frame from Model Shipways as well, while building I did modify it so that head stock would slide in a grove this makes it more ridged and keeps everything nice and square, also they show that the adjusting rail which moves to clamp the keel was at a different height than the one you glue down, so I notched the rail to allow both rails to be the same height, these are small changes which I found really helped. Did not take any pictures of the start when I joined three parts to the center keel once that was dried I took some tracing paper and traced the beading lines and rabbet lines onto the center keel. Next up was to remove 1/16 from bulwark stanchions just below the deck then took some tracing paper and traced each bulkhead so that I could mark out how much beveling I had to do all these bevels were done before gluing to center keel, also bevel inboard bulwark stanchions, once this was done I did a trial fit to see how it all fit. Regards Richard -
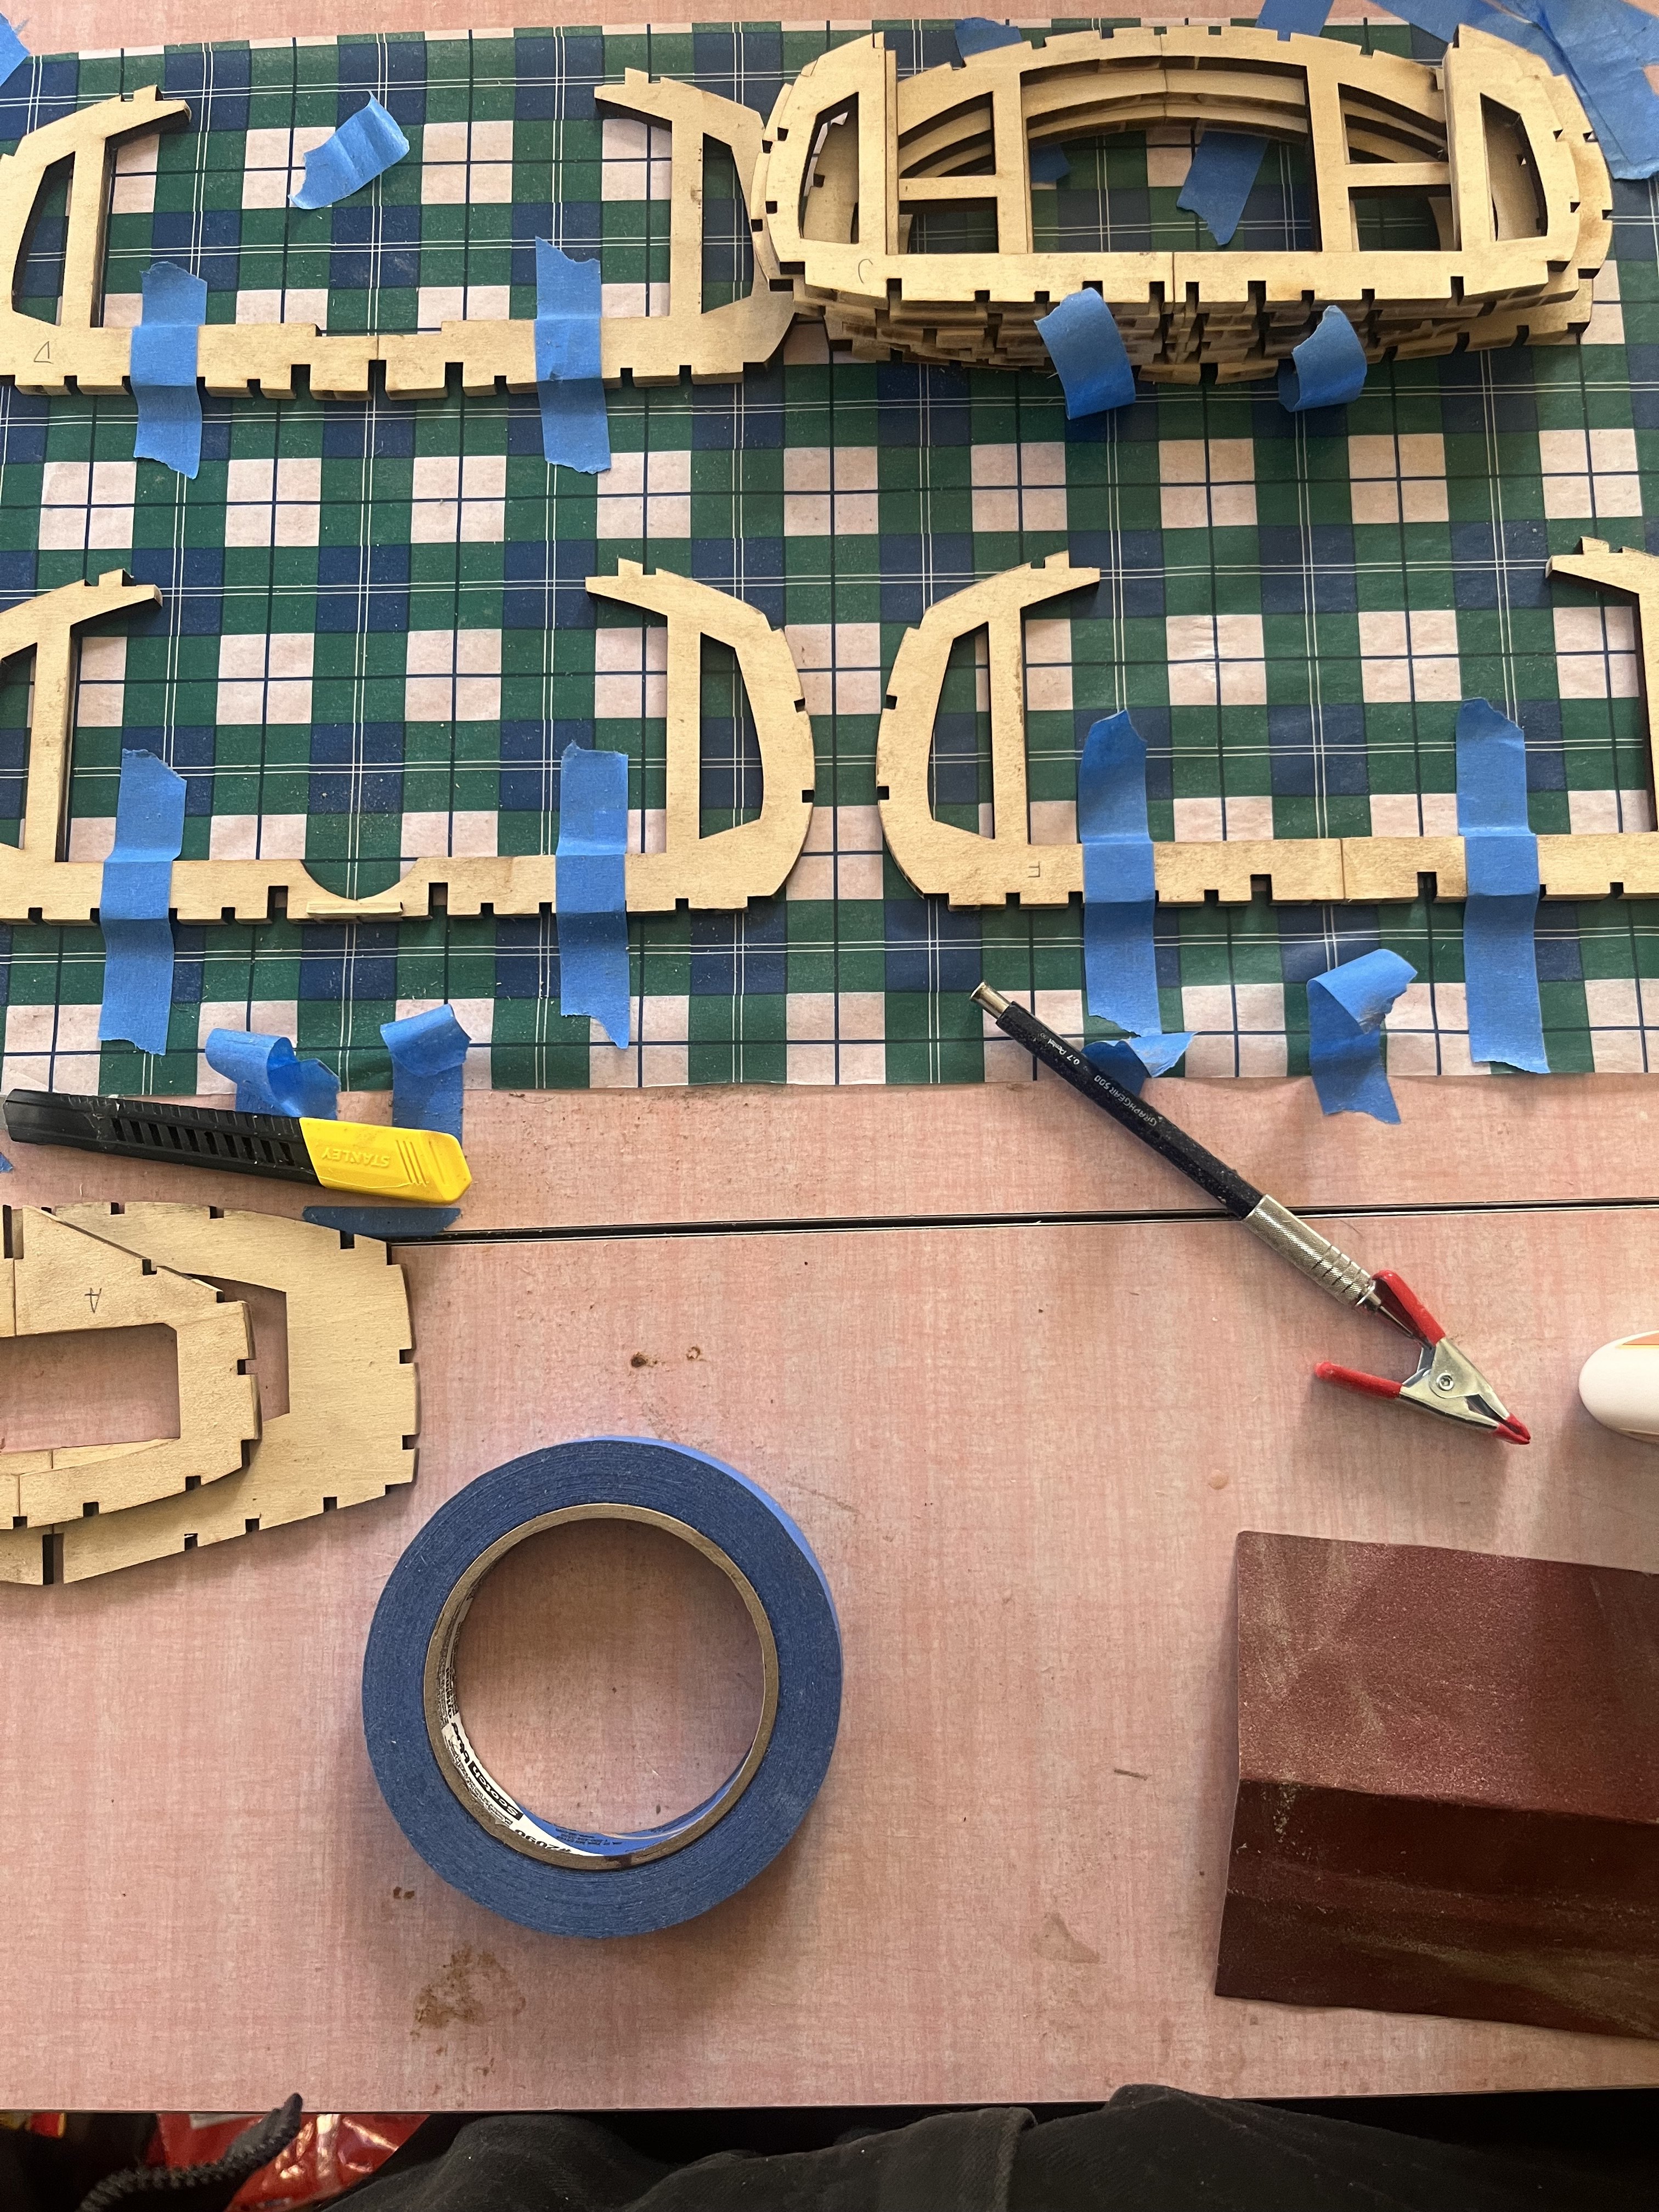
 I have began working on this and should be done glueing the frames together this is my third build and biggest yet. I will be making this RC and I’m setting my finish date for opening day for boating here in Seattle (May 3rd) so I have a bit of work to get done and and may have some questions along the way. I have not seen anyone post much further than just glueing the frames together so if anyone has done a similar build please show me thank you day 1 frames glue. Don’t mind the plaid wax paper it is all I could find but it’s slightly helpful lining things up
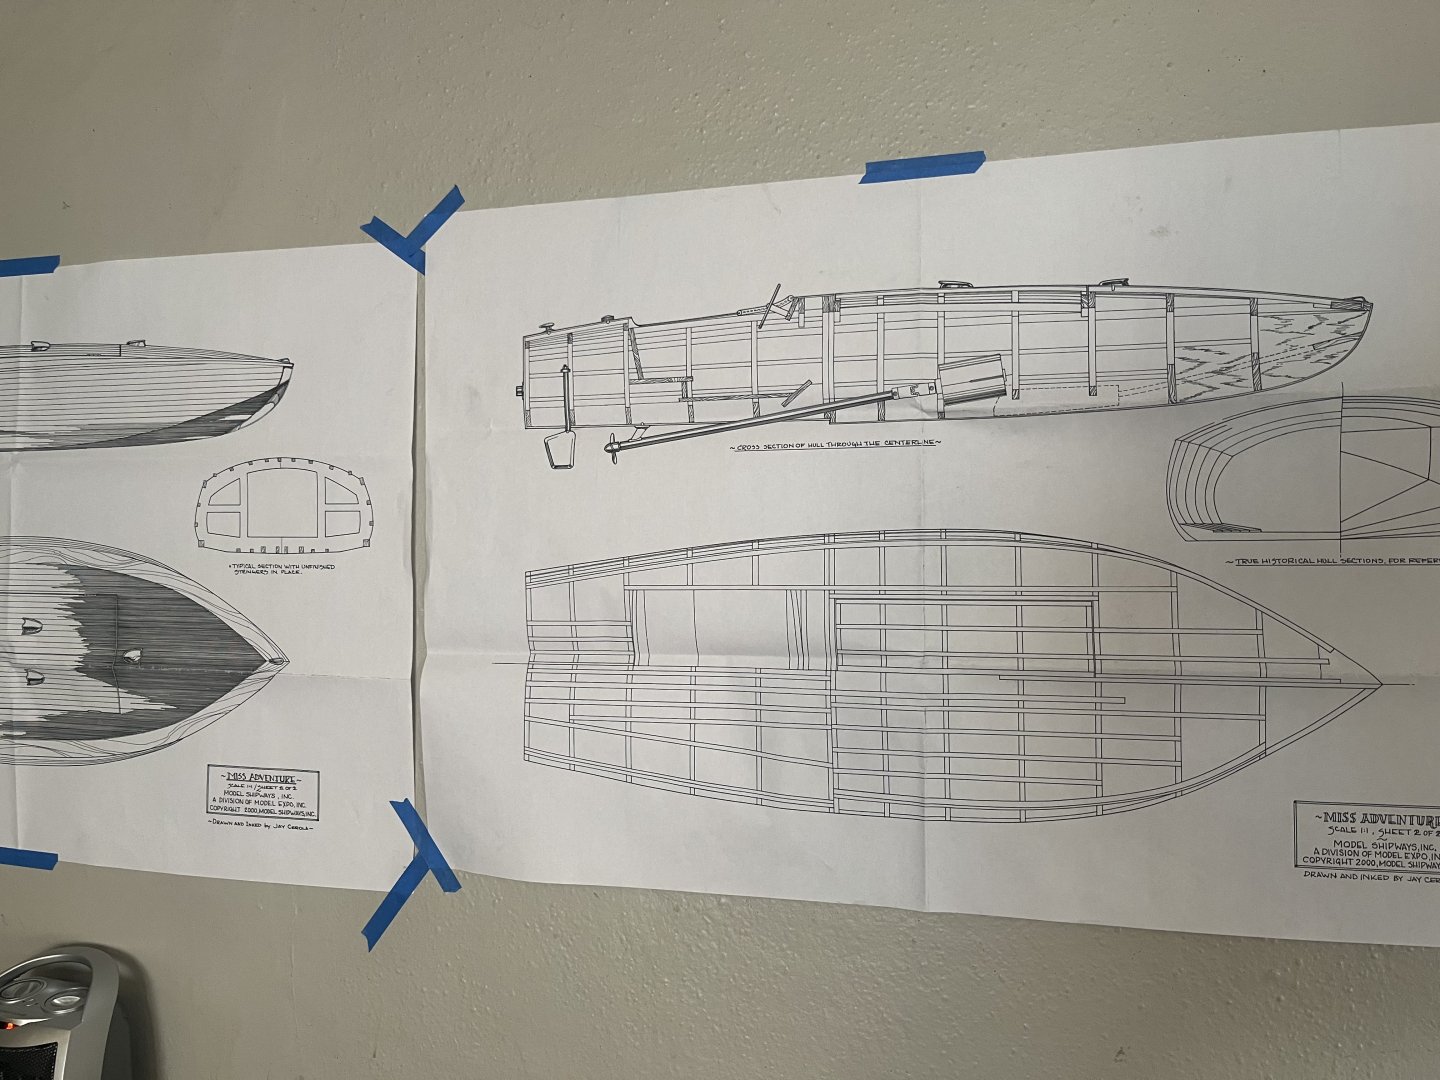


- 46 replies
-
- 10
-
-
- Miss Adventure
- Model Shipways
- (and 1 more)
-
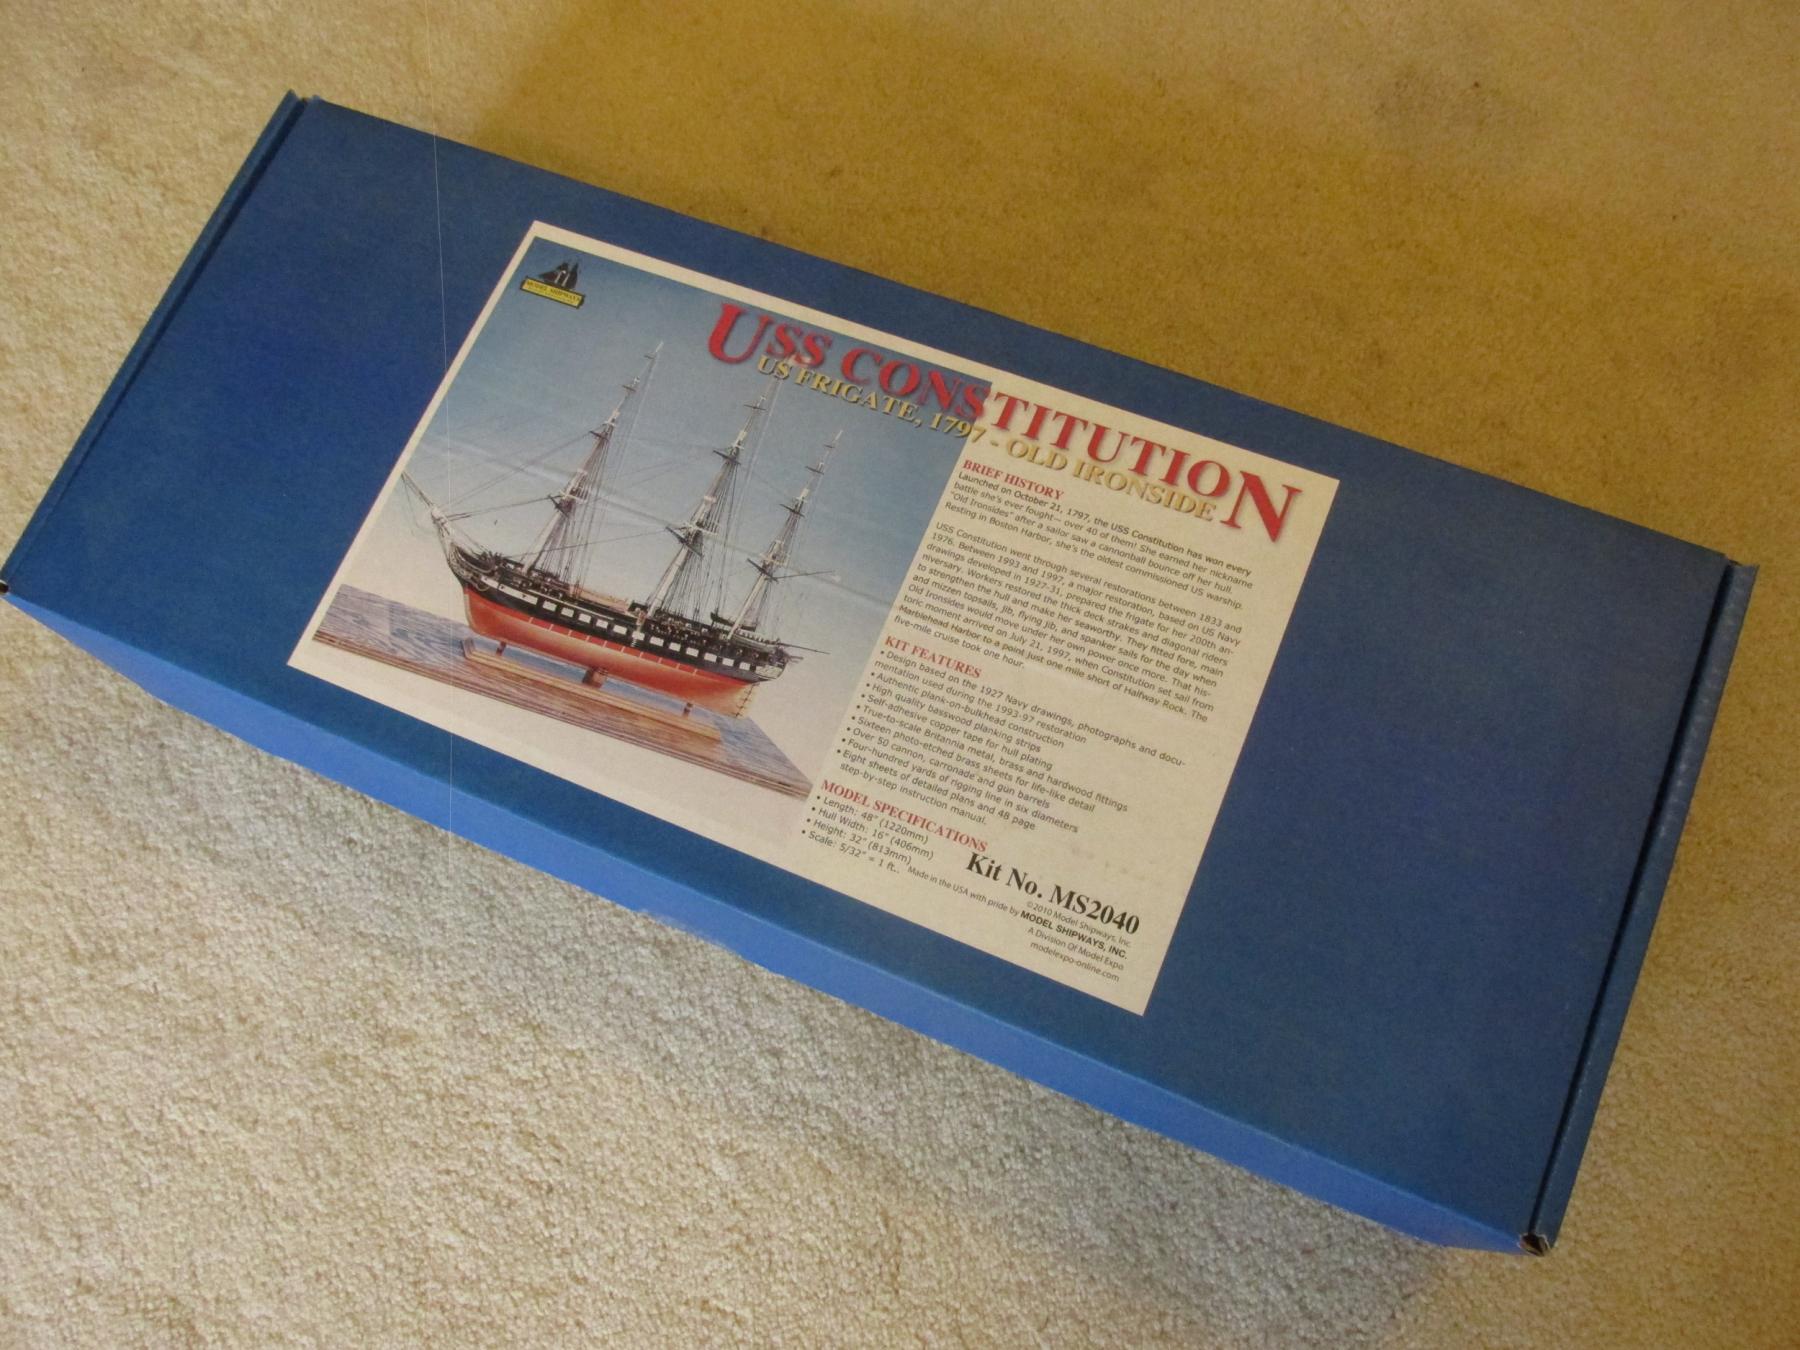
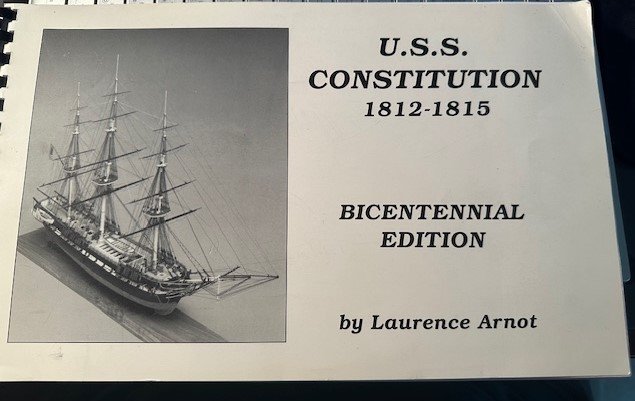
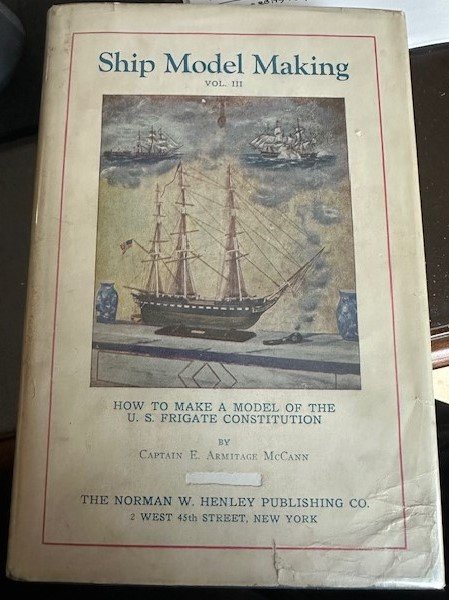
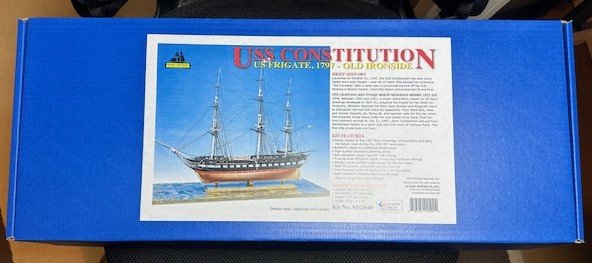
 Yep, sorry, gang… Another Constitution build log… Those that have read any of my posts on my recently-completed Santa Maria build log or seen comments that I have made on some other’s current Constitution build logs are probably aware that the Model Shipways’ USS Constitution was next on my shipyard list. I am excited to get this one started! I purchased this Model Shipways kit back in March 2024 when Model Expo had a huge discount sale so, along with a store credit I had with Model Expo, I was able to buy the kit for cheap cheap and could not resist adding this historic ship to my shipyard. So, since that March date, I have been trying to do as much research as possible, jumping in, taking notes and asking questions on several of the current Constitution build logs. In that research, I have acquired numerous books and documents that everyone is familiar with and that I am sure I will continue to use as resources during this build: Anatomy of the Ship: The 44-Gun Frigate USS Constitution – Karl Heinz Marquardt USS Constitution 1812-1815 (Blue Jacket) – Laurence Arnot Ship Model Making, Volume III, U.S. Frigate Constitution – Captain E. Armitage McCann Constitution Close Up: Minutiae for the Modeler and Artist – Cmdr. Tyrone G. Martin As I was preparing for this build after I bought the Model Shipways kit, I also purchased Bob Hunt's complete Constitution practicum and, as others have done, will use it as an additional resource during the build process. I was fortunate when I began this model shipbuilding hobby a few years back to find this Model Ship World website, where we can share ideas, ask and answer questions, receive praise in our triumphs and receive comfort in our tribulations. Active Constitution builders that I have been following and that have been invaluable in my preparation include @JSGerson, @mtbediz, @Der Alte Rentner, @Unegawahya, @kmart and @Geoff Matson. I have also reviewed some amazing completed build logs by @xken, @usedtosail, @Modeler12 and others. Thank you to all! You are all to be commended for your model shipbuilding skills and your ability to find solutions in difficult situations. Even though I am sure to stumble often, your collective display of perseverance will hopefully carry me through to a magnificent completion… however long it takes! 😅 With all that said, the $64,000 question is… what version of this iconic Constitution will I be building? Well, you could probably conclude from my reading list above that I have really wanted to concentrate on the 1812 version. But there have been countless times where I have changed my mind to its present-day version. I never really considered the original 1797 ship version, or the 1927 and 2015 major revisions. I’ll do my best to stay as close as I can to that 1812 Captain Issac Hull model. If I can steal the term that Tom ( @usedtosail ) used several times in his awesome build log, my Constitution will strive to be “1812-ish”. And, as several others have done, I will do some kit bashing, and I will have a detailed gun deck and some form of exposed spar deck. I’m even taking a trip to Boston this fall and, of course, both a Fenway Park ballgame and a Constitution tour are on the itinerary. Let’s just say right now, though, this will not be a historically accurate museum piece, but rather I will enjoy building it as mine. I am guaranteed to get frustrated multiple times in the build process, but I will definitely have fun. And that’s what it’s all about… So… the month of June is going to be a busy “family time” month with grandkids visiting, so I probably won’t get much done in the coming weeks, but I’m looking forward to this journey. I will encourage and I appreciate all the comments, advice and criticism fellow builders have to offer. Y’all are awesome. Carry on. Thanks…
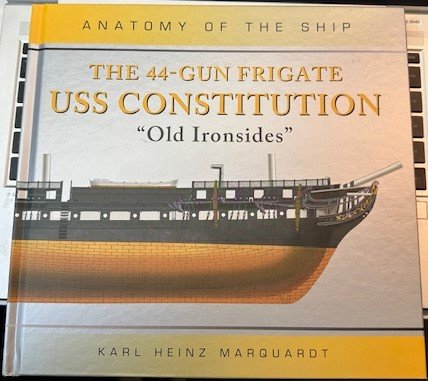
-
 Hello all! It's been way too long since I've worked on a model ship. ANY model ship. The past few years have had a lot of ups and downs; especially for my family's health. With this said, I wanted to get back into ship building. At first, I wanted to get back into my Winchelsa build. I brought it back out, and quickly realized that I really needed to brush up on my skills before I continue the build. So after talking with my wife, I picked up a much smaller kit. The Occre Polaris. I didn't feel confident enough to make a build log for it, but I did have a blast successfully building it. I'll add some pictures later. I then got the confidence to then Syren ship model company's Queen Anne kit. Again, I was too shy and didn't create a build log for her either. This kit was fantastic and really helped to improve my skills. The cherry wood looks fantastic and I had a great time with the build. I finished her as well. I can include pics later too. Afterwards, I felt more confident to start a new ship to build up my skills. I had bought the USF Confederacy a long while back and finally felt confident enough to tackle the project. In my upcoming posts, I will go into detail of what I have already completed. Wish me luck on this build! It's quite an adventure and challenge but I finally feel ready to take it on! Thanks! Jeff (Zarkon)
 -
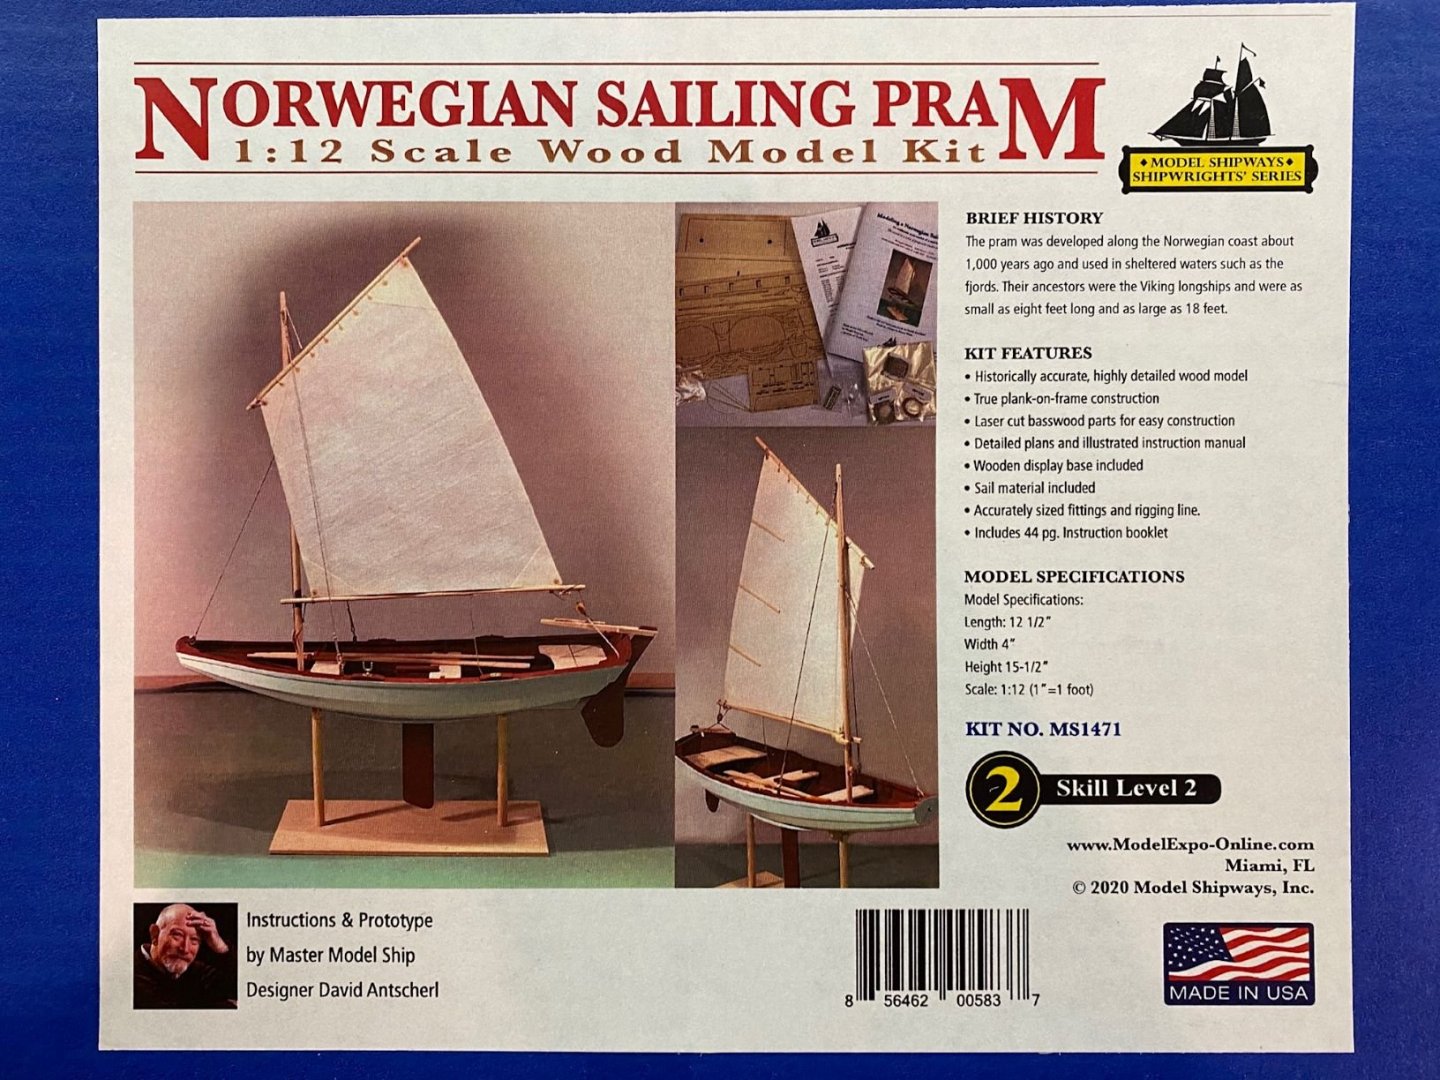
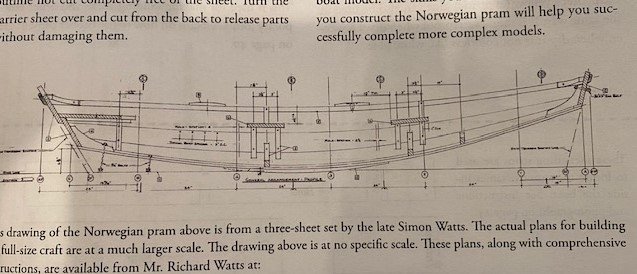
This is kind of my second build, I finished the ‘Lowell Grand Banks Dory’ and got about half way through the ‘18th Century Long Boat’ both by Shipways when I decided to shift to this boat the ‘Norwegian Sailing Pram’. This is the second in a beginner series of “progressive model tutorials” designed by David Antscherl. I did learn a lot about wooden ships and how to build wooden models from the Dory. I decided to shift sails when I noticed that the Pram was finally for sale by Model Shipways and I thought I could use the additional learning experience especially rigging. The Long Boat rigging is supposed to be fairly simple but the Pram rigging looked even simpler. One thing I’ve noticed is that the instructions for these ‘beginner’ models seem to assume the builder knows a fair amount of how to build a model boat. In my years I’ve built many plastic models but not wood models and I’m really a novice. So, I’m keeping track of recommendations to improve the instructions as I progress through this build. First, I’ve notice that the Pram instructions are missing a lot of instruction points that could easily be corrected with a few annotated pictures and plans. I strongly recommend that a set of scaled plans be included in the kit. The only plan is the one below that is from a real pram design. Even though the Dory was a simple boat to build, I used the plans constantly to figure out things that were not written in the instructions.
- 53 replies
-
- 5
-
-
- norwegian sailing pram
- model shipways
- (and 1 more)
-
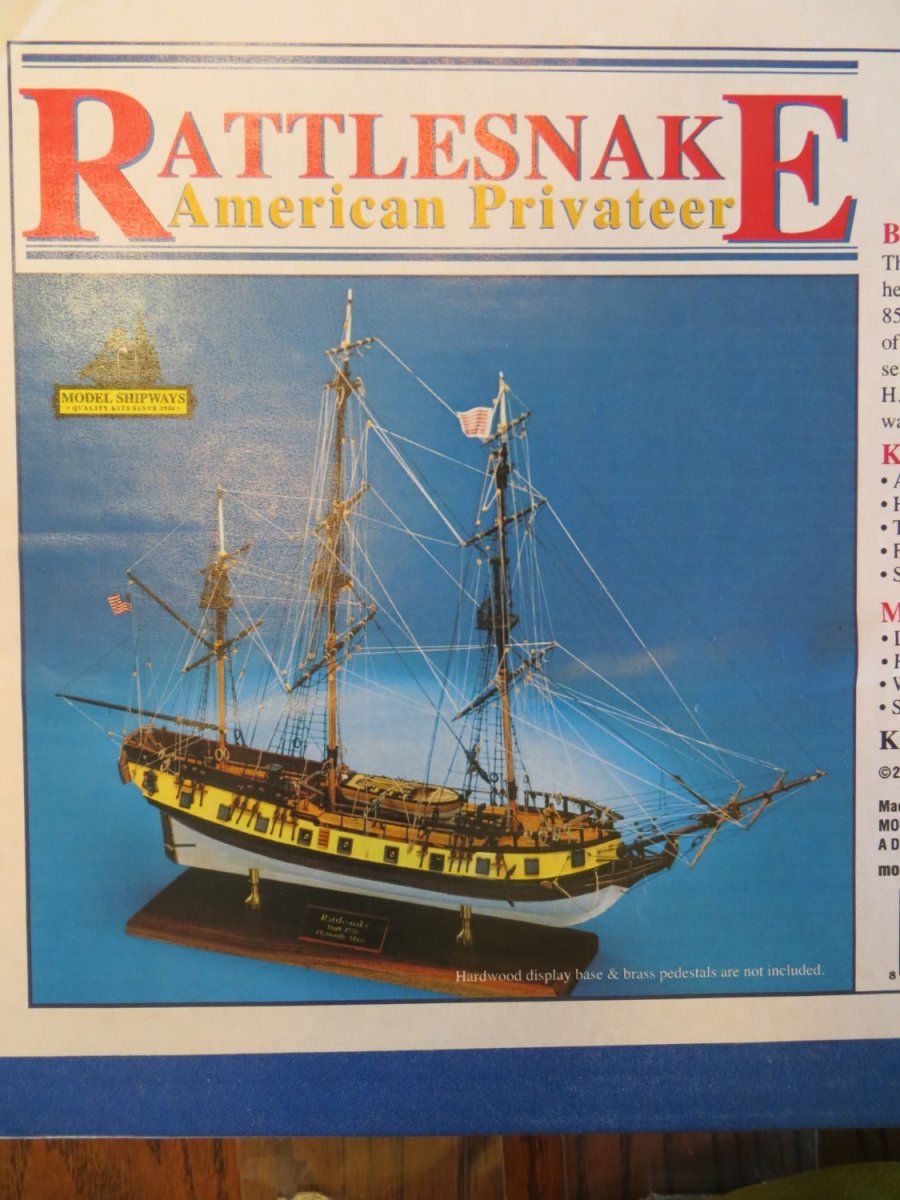
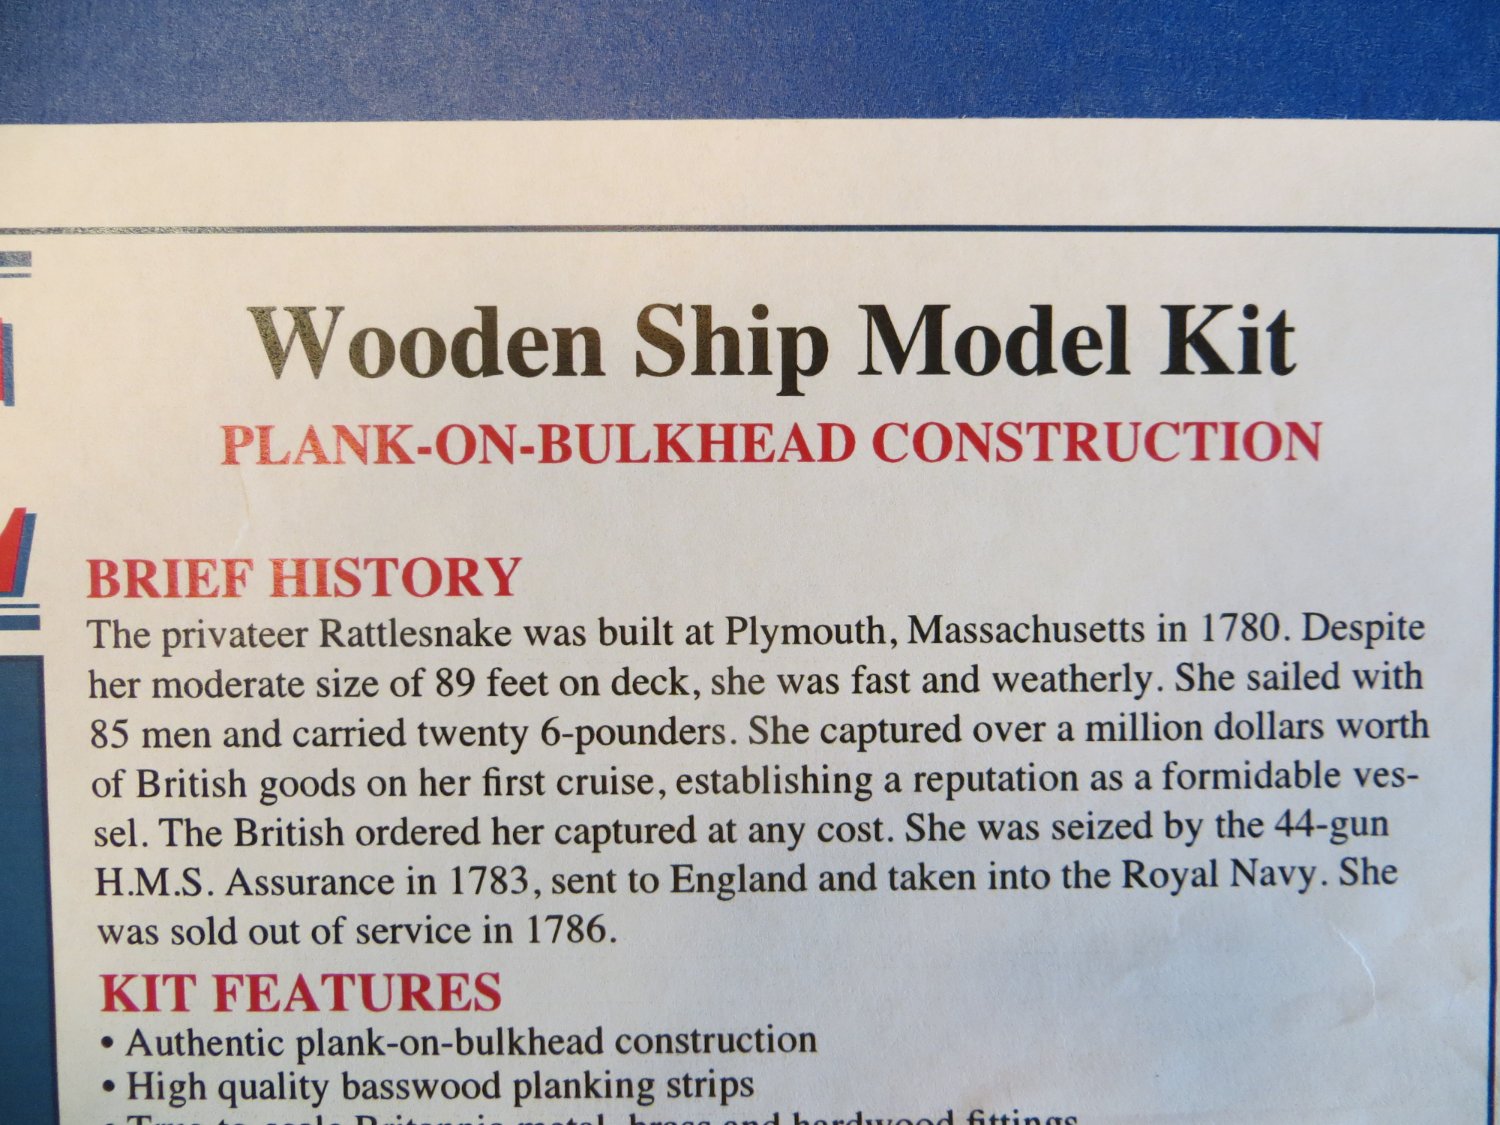
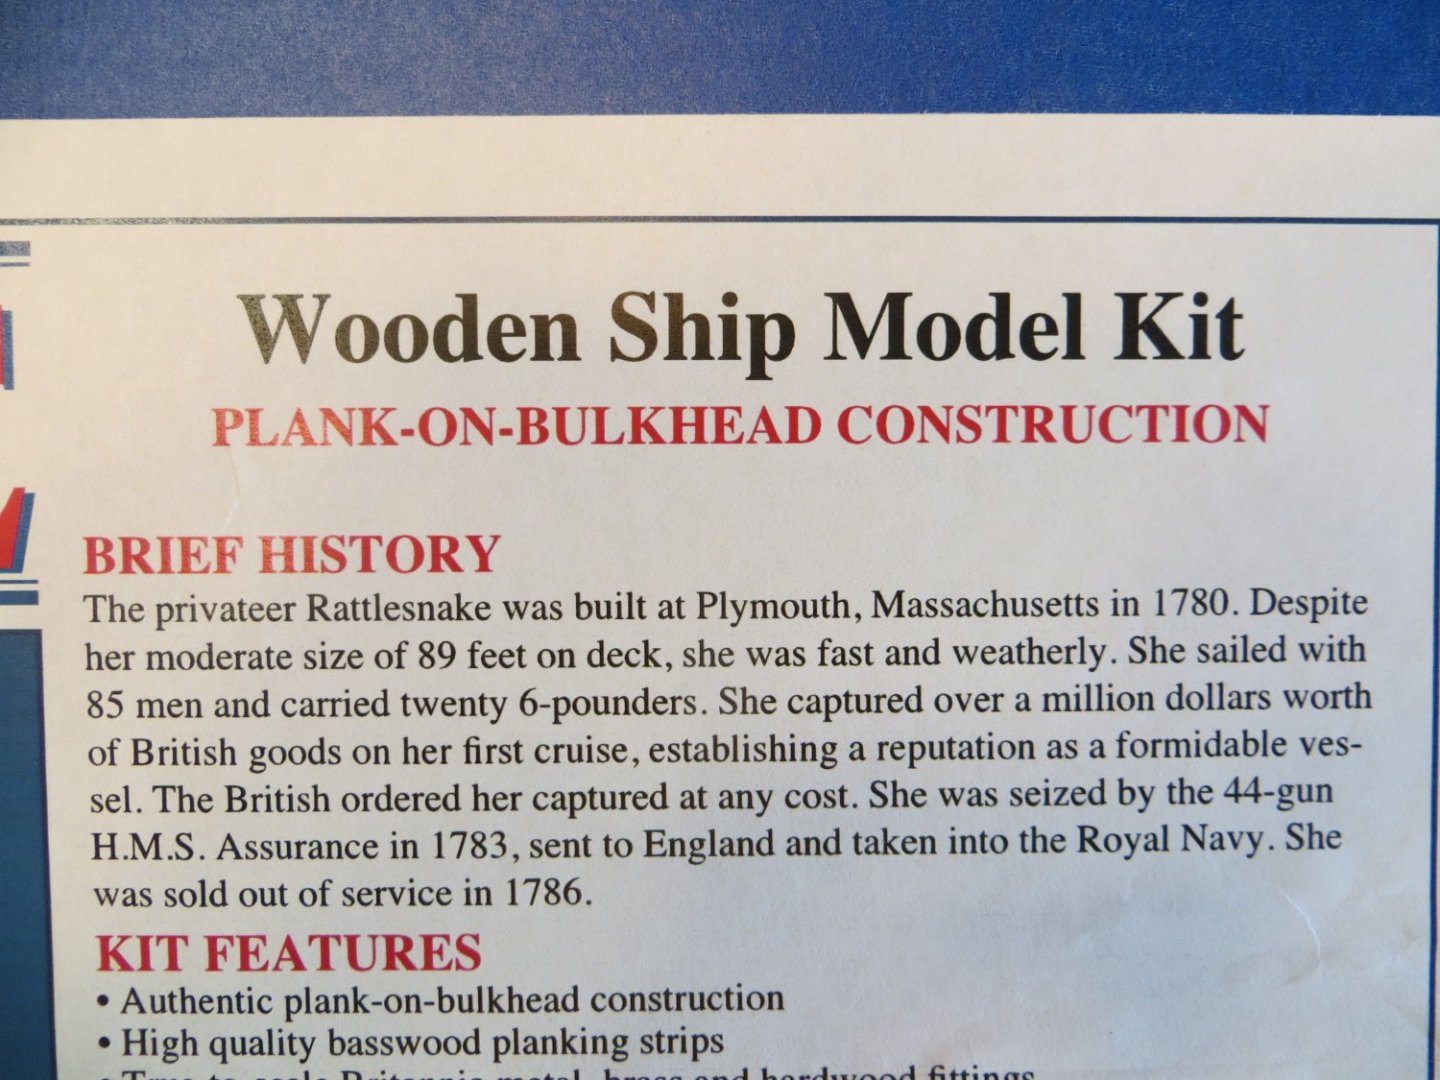
 Introduction Rattlesnake is my second model build. I finished Bluenose 1 back in June. This took me 2 years to finish. I decided to take a little summer break from modeling before starting Rattlesnake. I think that it was a good idea to give modeling a rest because I am now very eager to go. I consider my “official start date” as October 8th. In August I completed inventory of the kit. I also spent a lot of time throughout 2022 studying build logs for Rattlesnake and putting together my own build plan & instructions. I created an Excel spreadsheet to compare the instruction manual from Model Shipways, the plan I used for Bluenose and several build logs from this MSW website. Using all this information, I created my own plan. I thought about purchasing the Bob Hunt Practicum from Lauck Street Shipyard. But after reading JS Gerson’s build log, I decided not to. The Mamoli kit seems to be quite different from Model Shipways and I’m not ready to do a major kit-bash. I do plan on buying the masting & rigging practicum from Lauck Street. But that’s a ways off!! I share this thought process for anyone who is considering how to proceed with their own Rattlesnake build. I look forward to sharing my build log with you and I encourage you to share any comments or words of wisdom that will help me with this project! Thanks! Here are a few pics showing the completed inventory and the kit box cover:

-
 This will be my first wooden ship model; I completed a Revell HMS Victory plastic model ship a few years ago, and I really liked it. It sparked my interest in wooden model ships, and I wanted to build one of my own. My father bought this kit for Christmas in 2019, and I really like the overall shape of the hull. Even though this is my first wooden model and the kit doesn't have them, I'd like to add sails. It will be a challenge, especially the rigging, but I believe I can do it. I started this model at the end of December 2019, and am currently working on the bow section, so maybe ~1/2 way done. I will share photos and construction details up to this point, and then continue to post progress as I go. I work full time during the day, so I only have a few hours a week to dedicate to the build, so my progress after a year and a half is SLOW. I have seen a lot of other builds/ships with high quality planking. I hope that mine will be good enough to leave unpainted, since I really like the look of the hull planking As with other builders of the MSW's kit, the keel is short ~1/4". I used a piece of extra wood to shape and glue the missing portion. Not awesome, but acceptable. I also purchased a Bulkhead Mounting Kit from a local hobby shop. After reviewing the plans, I cut the bulkhead frames loose, sanded and transferred the bevels with a compass. The rabbet was a pain....chiseling didn't do well, so I ended up sanding. A lot of sanding. In hindsight later on, I should have sanded deeper. I shaped the bulkheads and glued to the frame using the Mounting Kit. I squared them to the model with C-clamps on each end, and slowly tightened until I measured the distance between bulkheads was the same on both sides. The Filler blocks took a while to shape right, and even after they were glued, they needed more sanding to get blended with the bulkheads. Next time I might leave the bulkhead bevels ''thick'' and sand together with the blocks for a better transition. More photos and progress tomorrow -Jason-


-
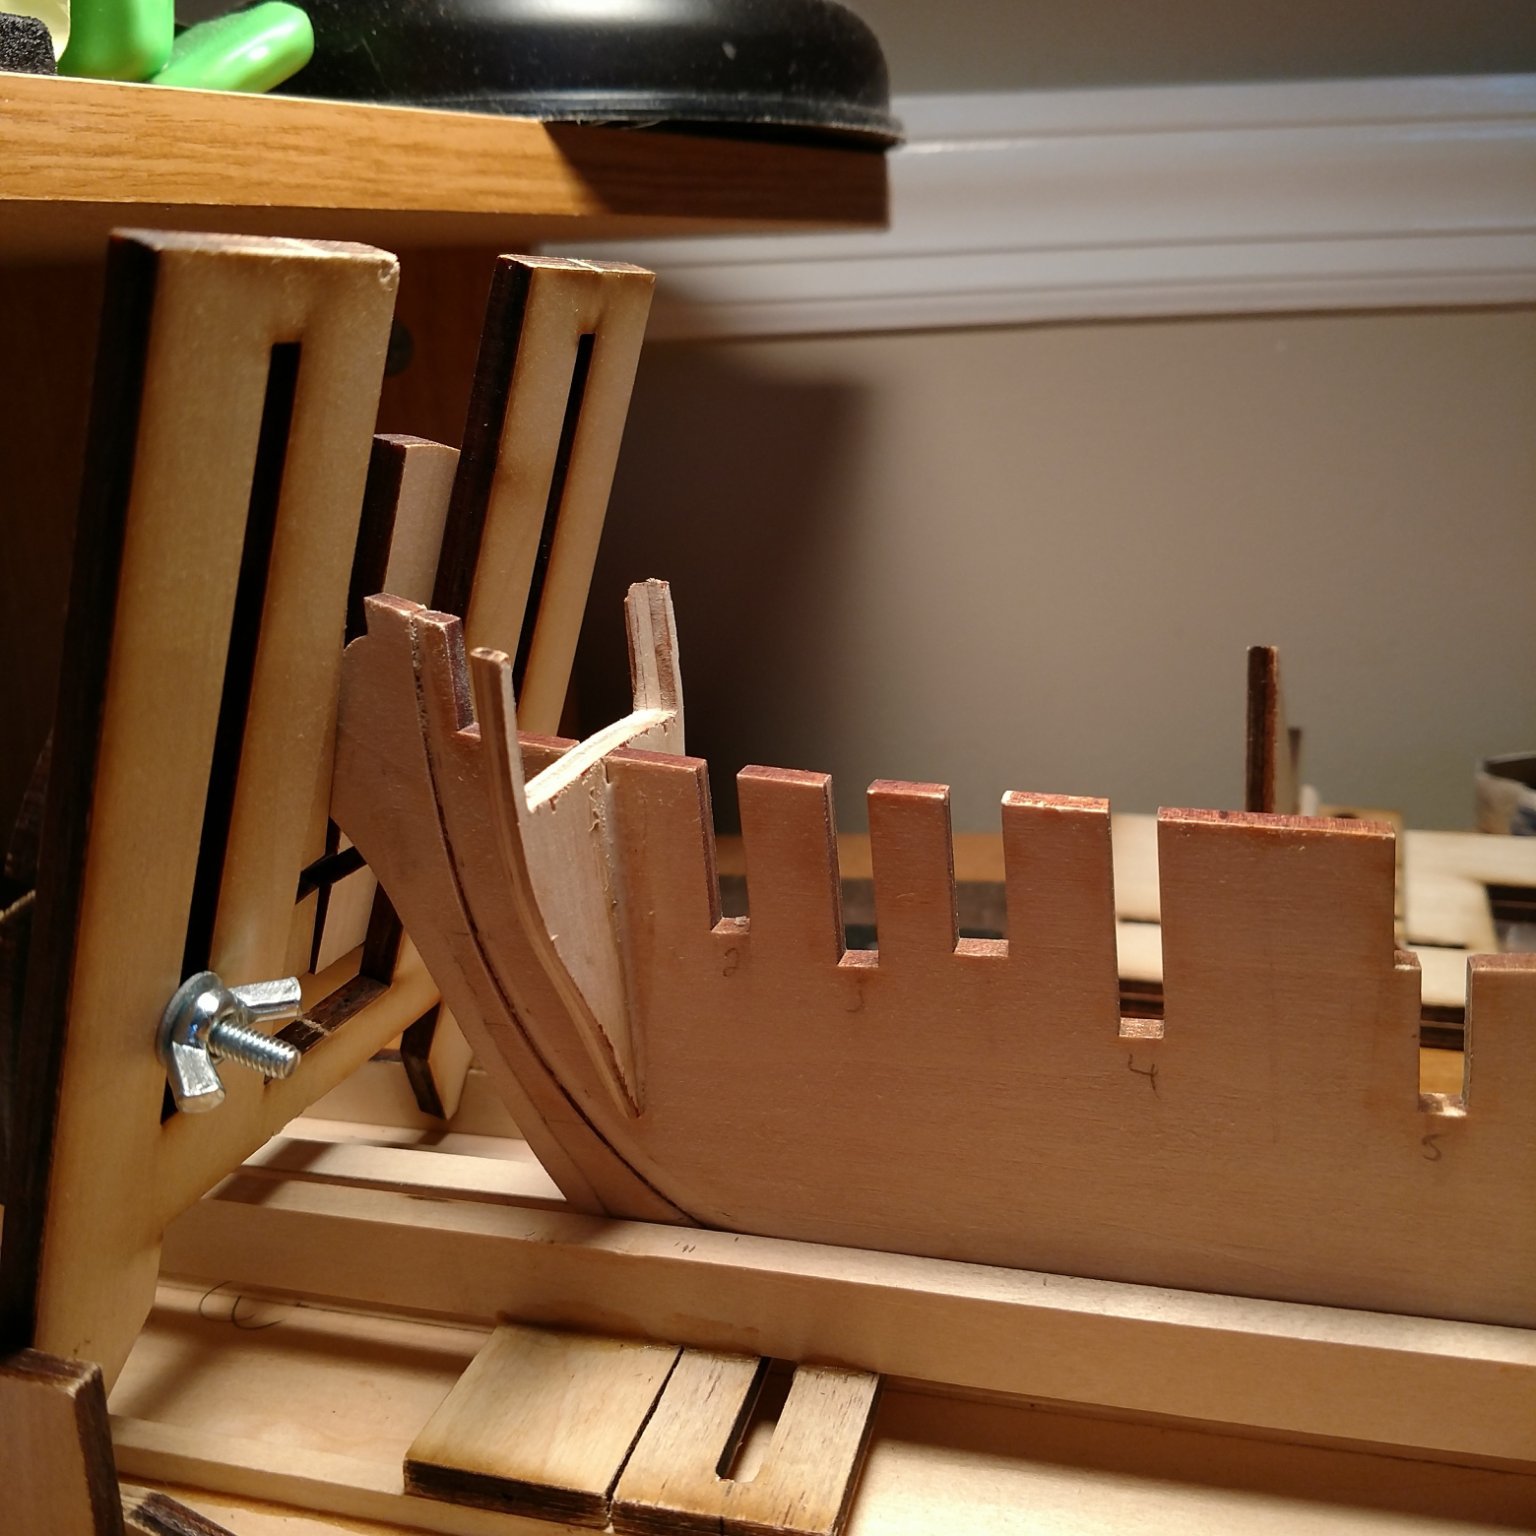
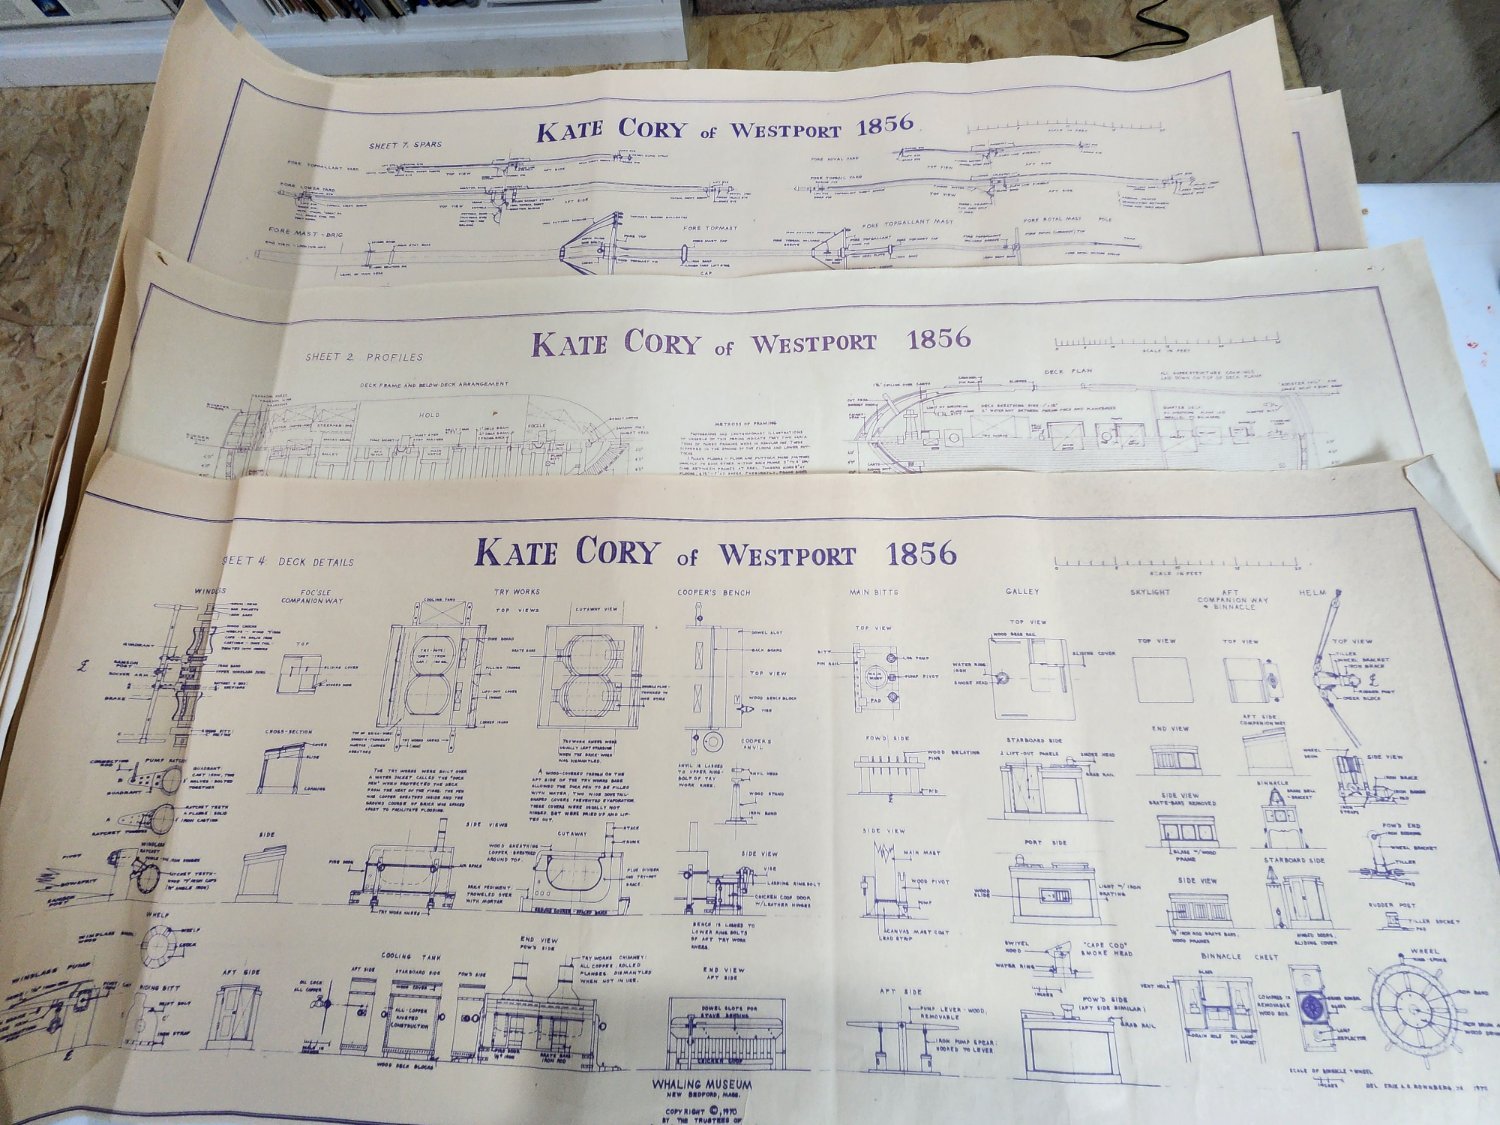
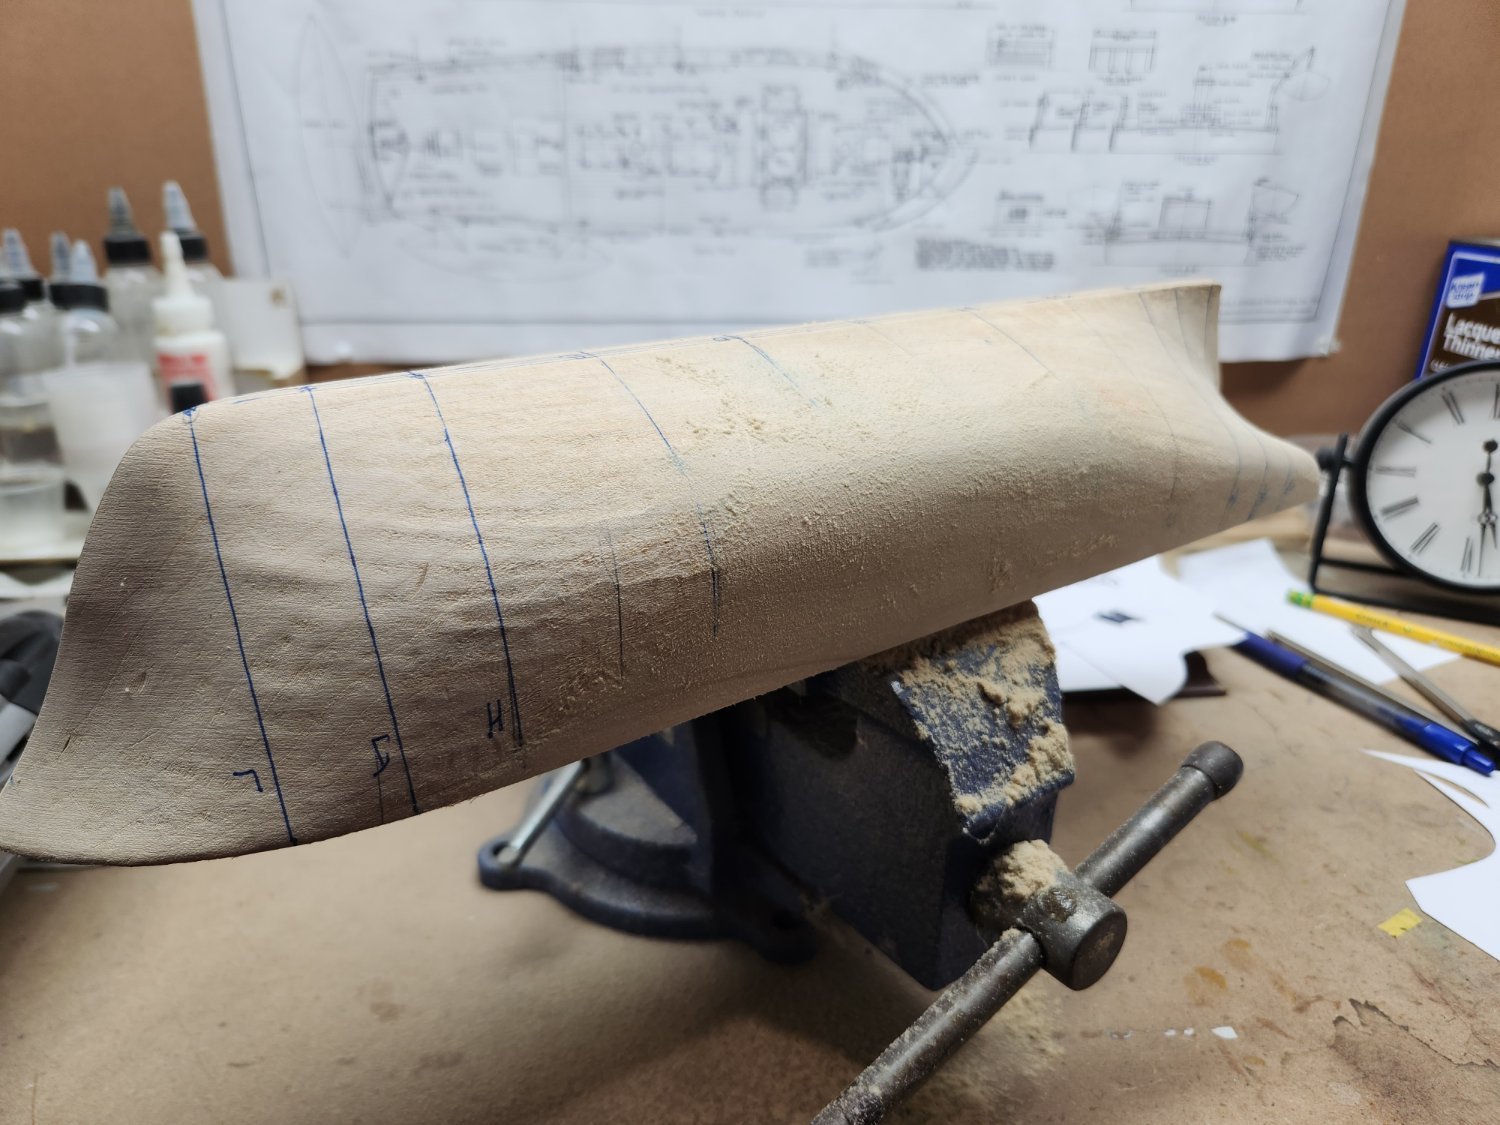
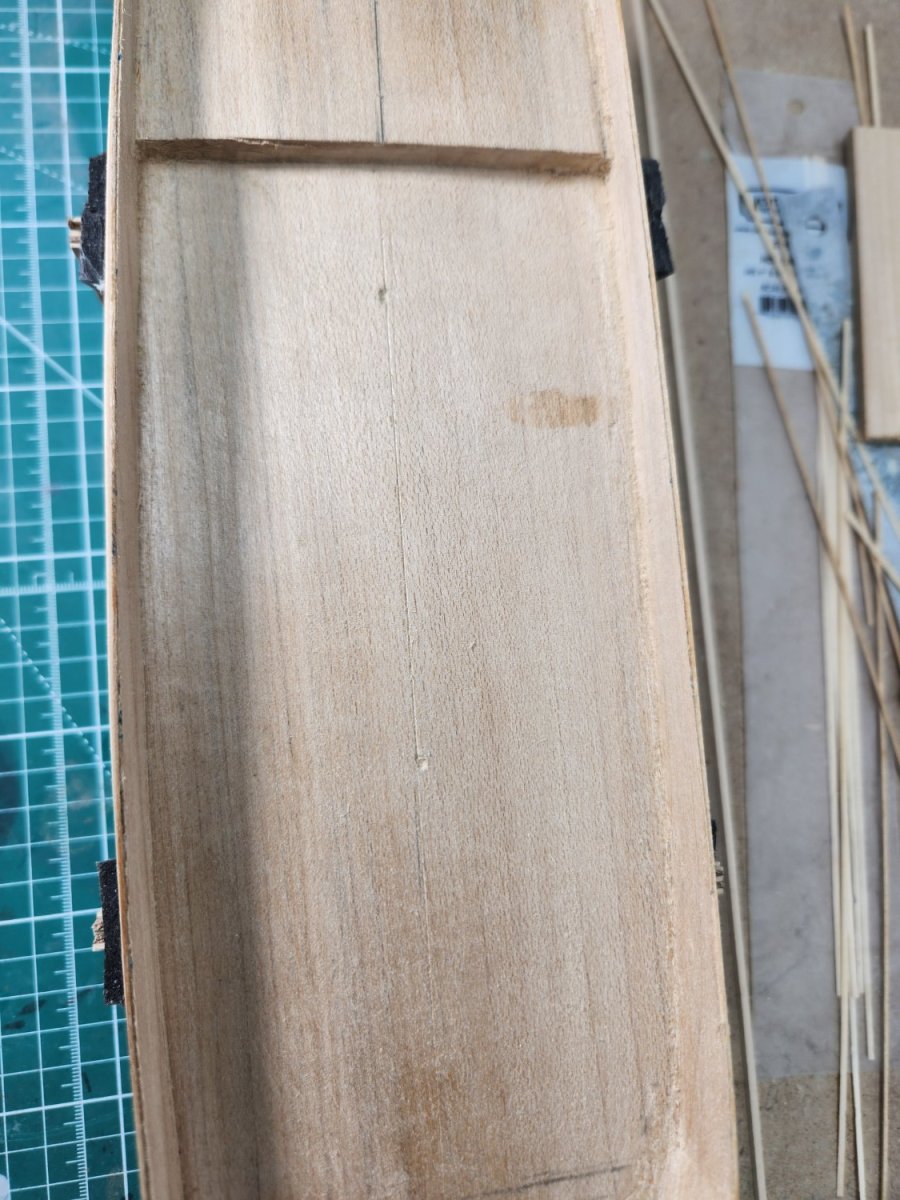
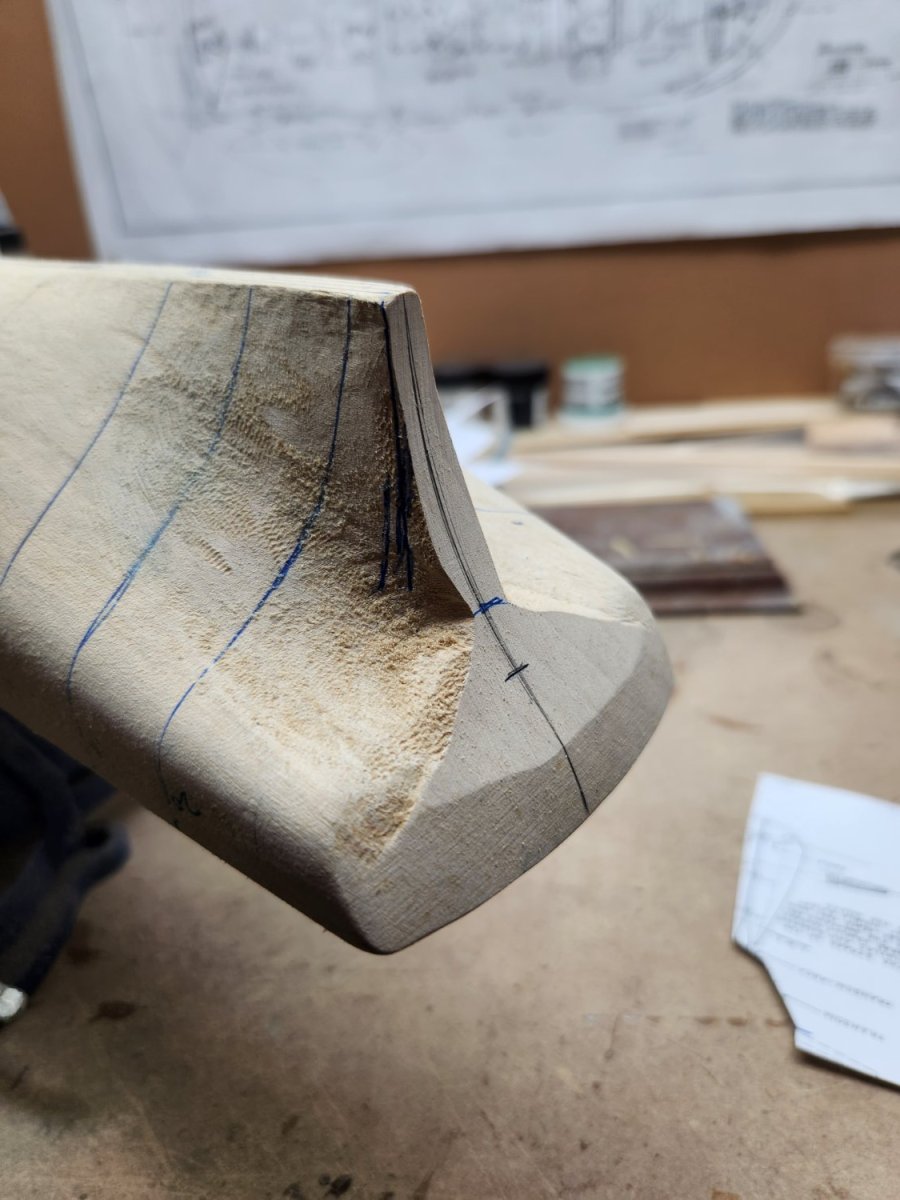
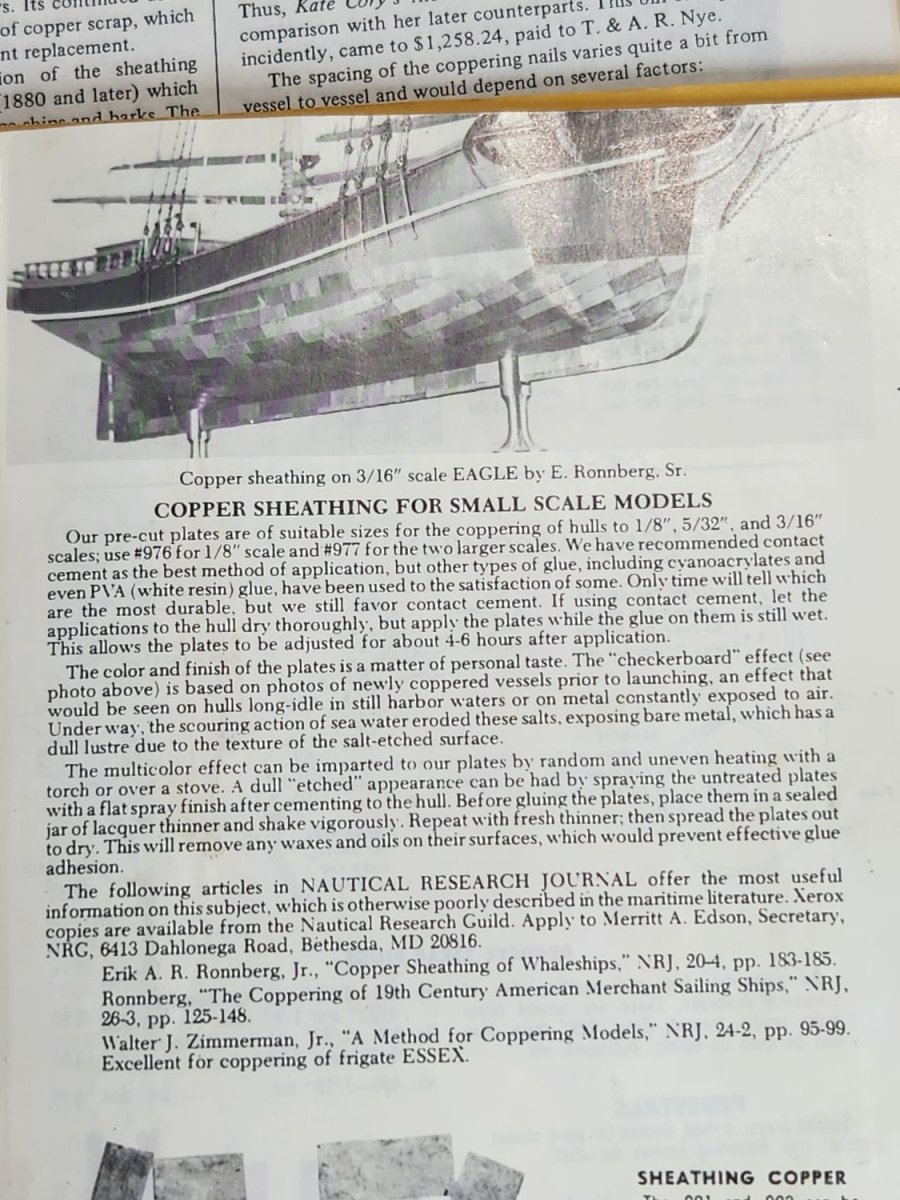
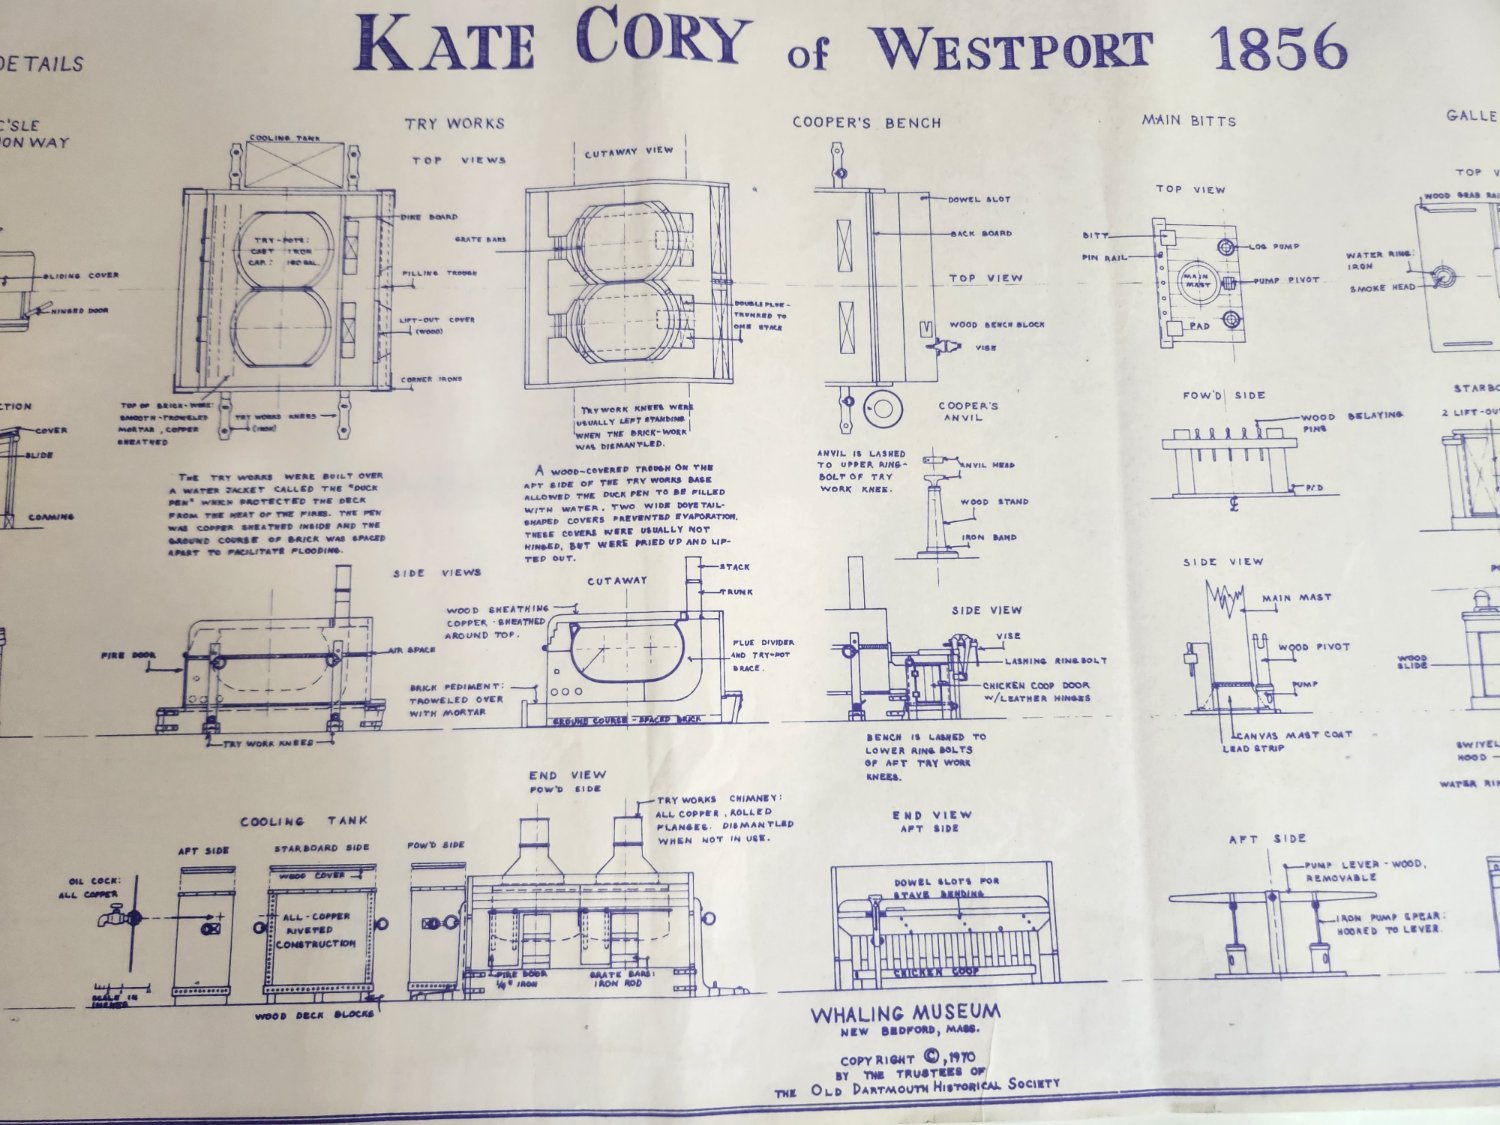
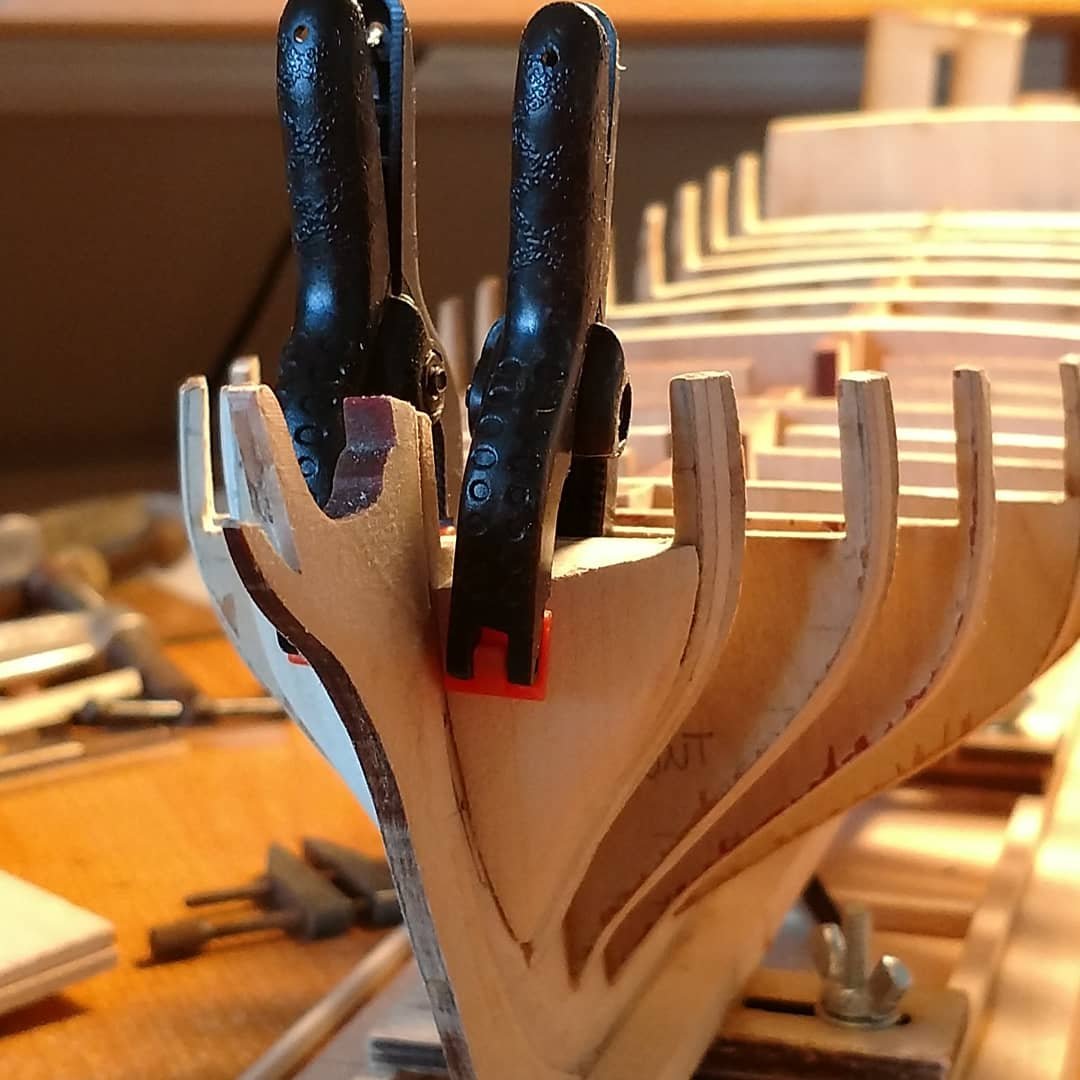
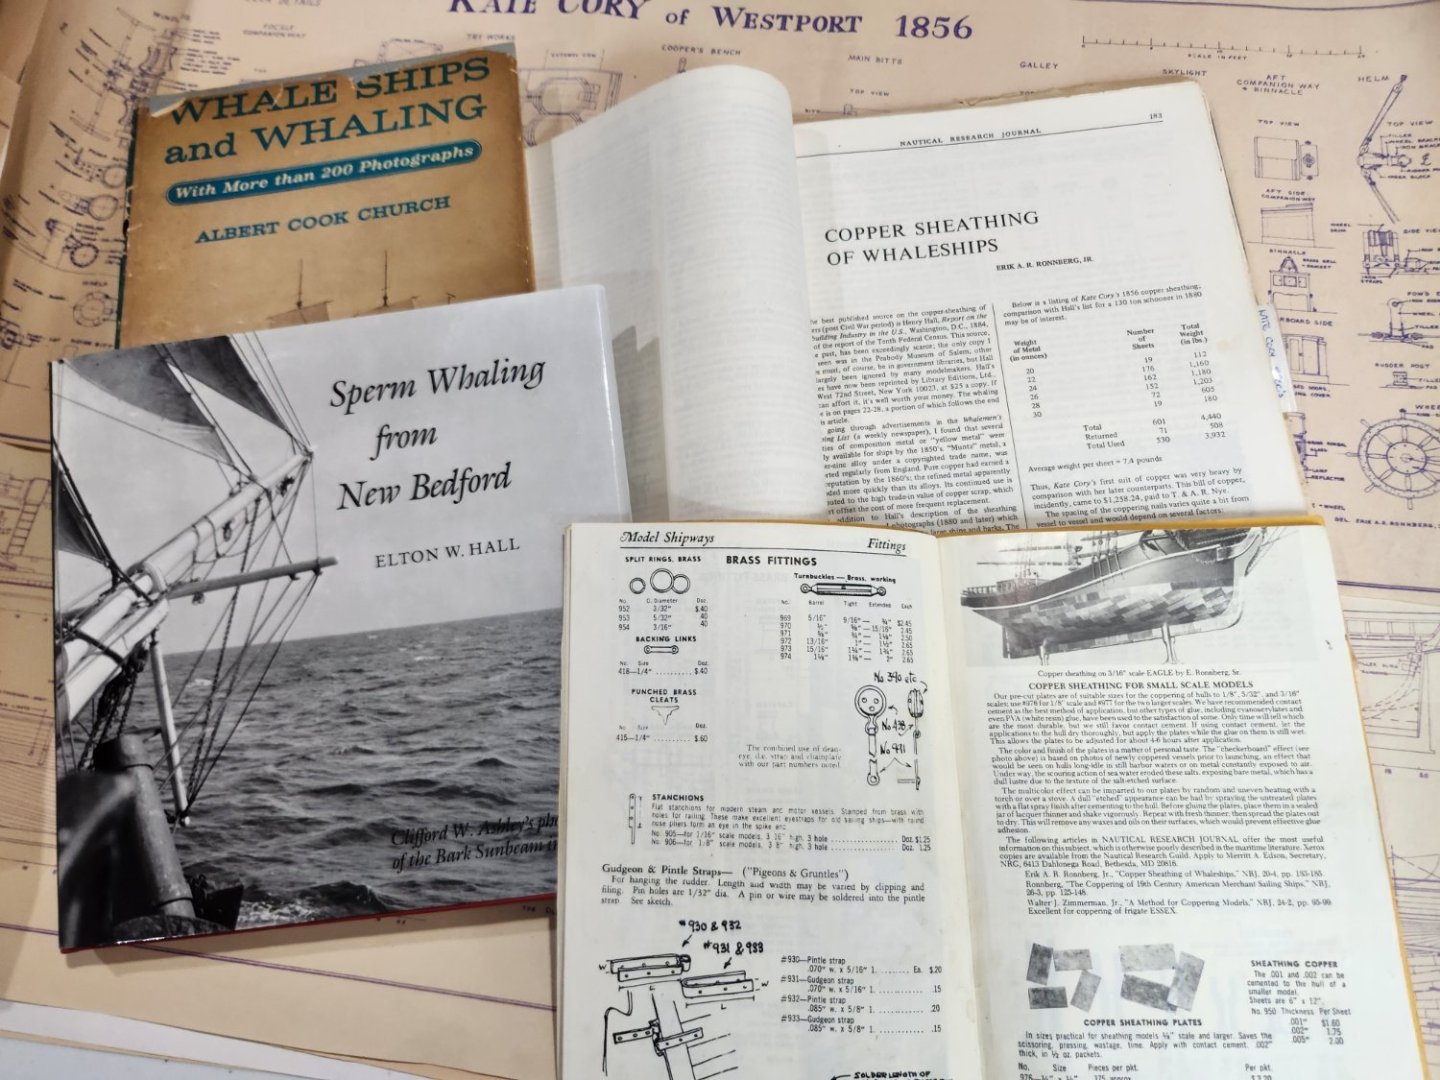
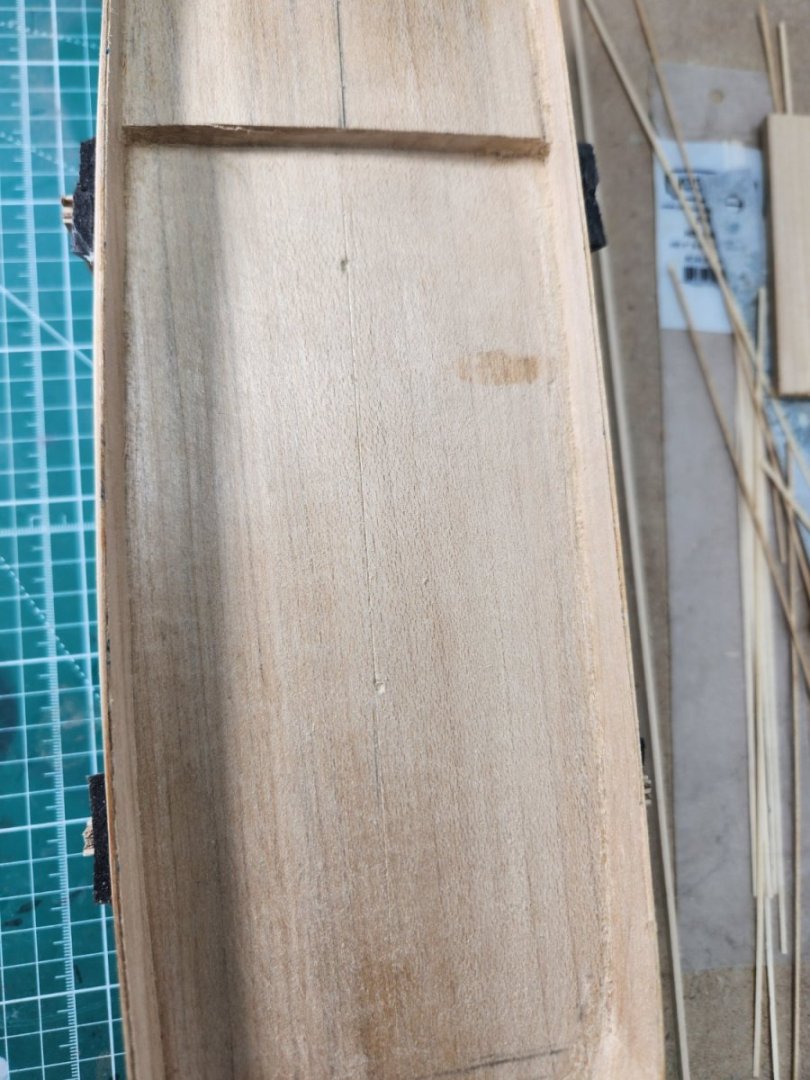
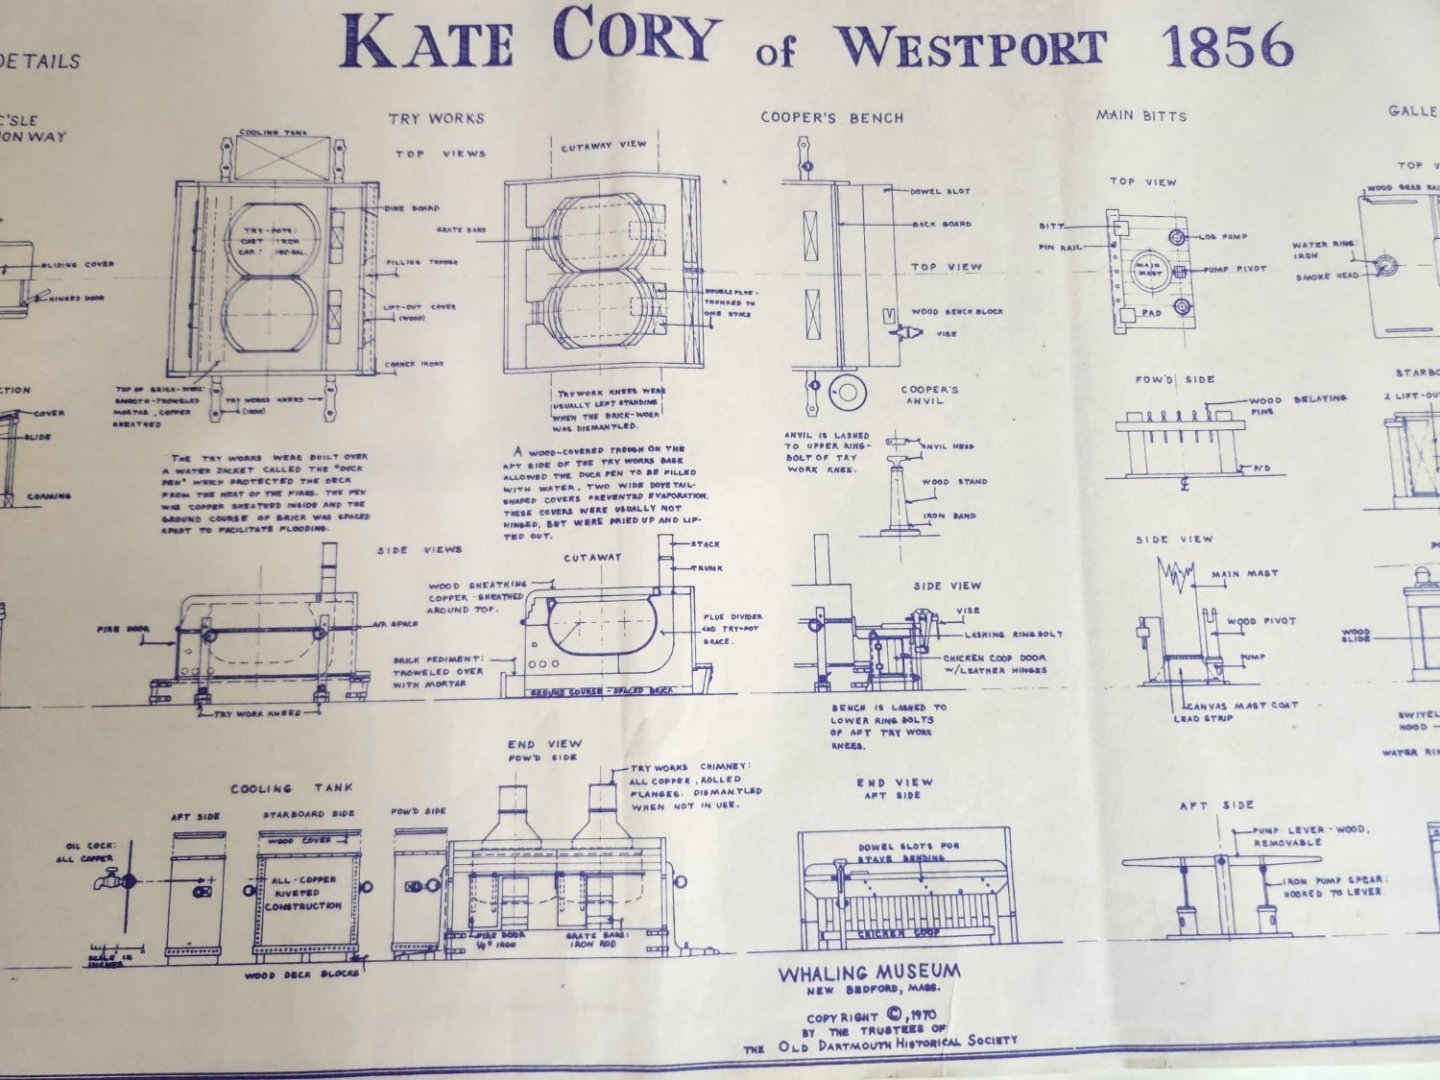
 Bought this kit along with a set of plans from New Bedford Whaling Museum many years ago and finally decided to build it. I saw the kit listed in the first Model Shipways catalog I received in 1986 when I was considering the hobby. I decided on a starting with their KATY, 1/4" scale Virginia Pilot Boat. Since then, I have built several other kits along with my other hobby interests. However, completing the Kate Cory has always been one of my primary ship modeling goals. Unlike the Charles W. Morgan, there is not a great deal of historical documentation available regarding this specific ship. The New Bedford Whaling Museum, New Bedford, Ma. (USA) is the only resource I could find that offered credible documentation. This is where I obtained plans by Erik Ronnberg, Jr. which provide significantly more details and views then the kit plans. Additionally, I obtained copies of the Nautical Research Journals referenced in the Model Shipways Catalog regarding Coppering techniques, i.e., "Copper Sheathing of Whaleships", etc. I coppered two other kits using this technique and feel it provides a more realistic appearance. However, one could argue using this process without some weathering of the rest of the model is inconsistent. Despite all the research and obtaining all the documentation I could find, I still felt I needed a good visual representation of the ship. Finally, a key motivating factor for me to starting the project was the 1/4" scratch-built model by Thomas J. Lauria, (https://tjlauria.com/gallery/whaling-schooner-kate-cory/). Tom has many other excellent builds and has been helpful answering my questions. This will be a planked solid hull model. I've never built a plank on frame kit other than a small Dory. Then only other change from the kit is to swap out the solid wood whale boats for a set of updated laser cut boats.
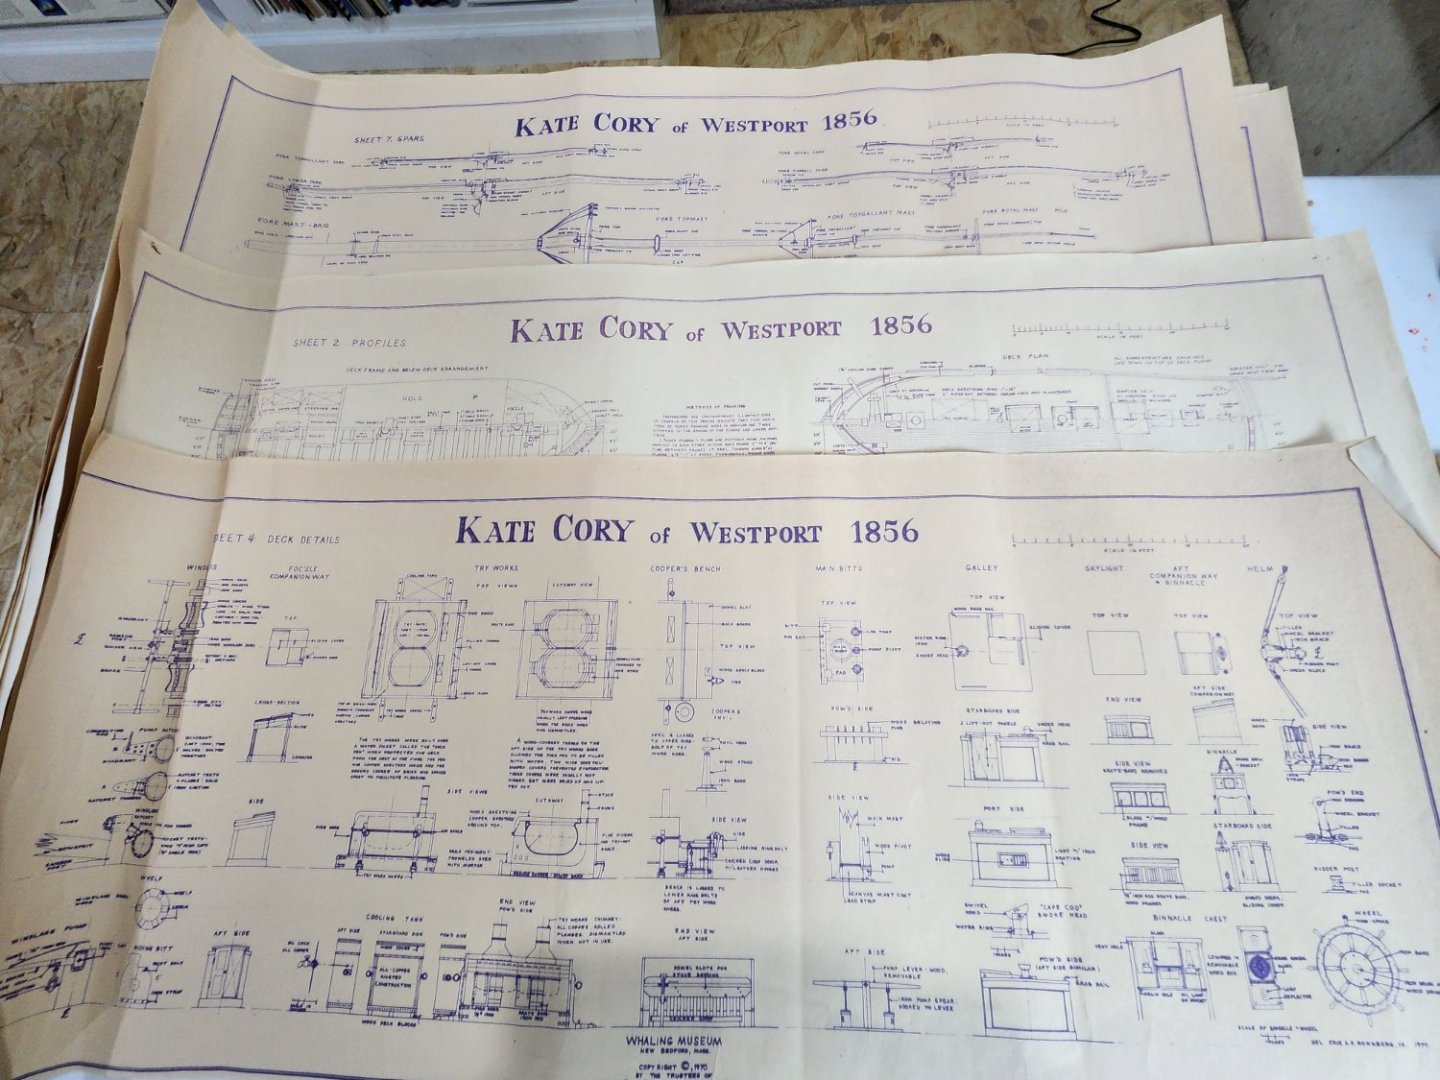


-
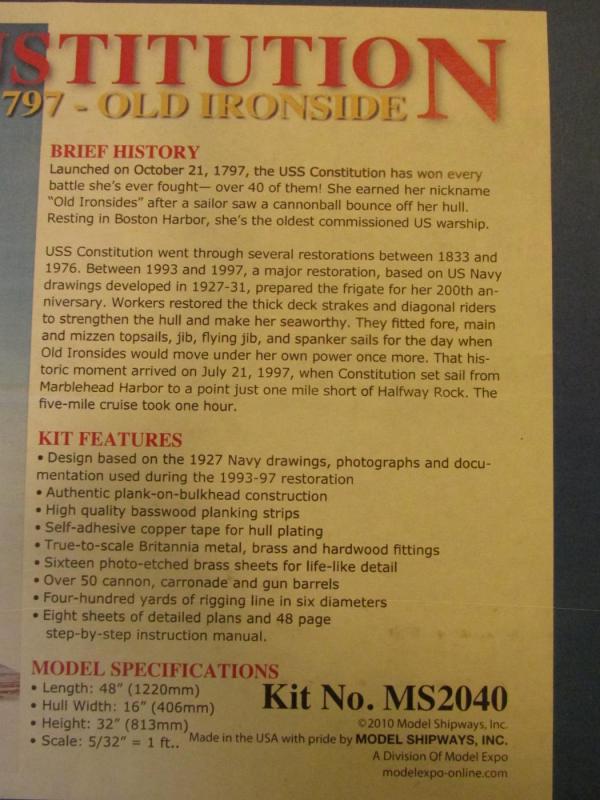
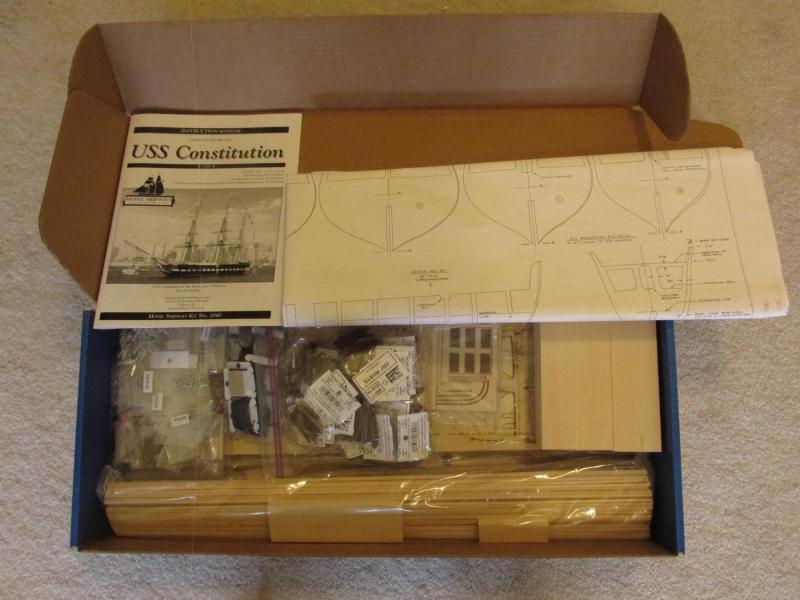
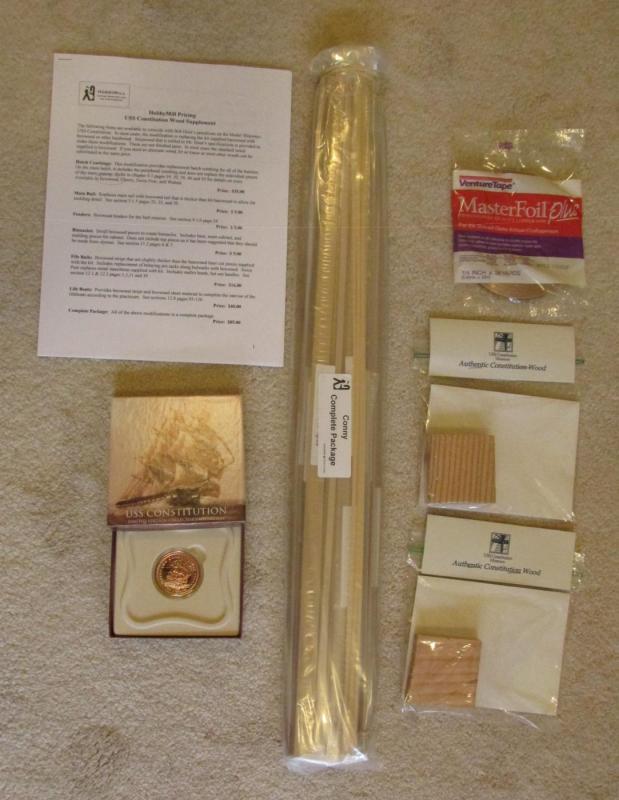
 USS Constitution - Model Shipway’s Kit No.: MS2040 “Old Ironsides” 1797 Frigate Scale: 5/32” = 1 ft. (1:76.8) This is my second POB square rigged ship; I spent about seven years building my first, Mamoli’s Rattlesnake. Like the first one, I will be following Robert Hunt’s practicum, but unlike the first, I have a multitude of excellent build logs and books to supplement it and help guide me through the inevitable pitfalls that are sure to raise their ugly heads. Hopefully, based on this and my hard-earned experience with the Rattlesnake, it won’t take another half a lifetime to build. Now for the obligatory part. Below is the kit box and contents. I won’t bore you with showing all the little packets that are stuffed in the box, that has been done very well by numerous other builders. I will state that in addition to what came with the kit, I purchased a few more items: · Robert Hunt’s practicum · Hobby Mill’s wood supplement package (based on Hunt’s practicum) * · Additional copper plate tape (as I understand it, the kit was a bit too frugal with their supply) · 2 - 2½” x 2½” x ¾” genuine pieces of USS Constitution wood ** · Medallion made from genuine USS Constitution copper plate. Not sure yet how or if it will be used. * Wood package purchased before HobbyMills closed shop. The supplement package was derived by HobbyMills where Mr. Hunt made his substitutions in the practicum. It was not identified as a package that could be purchased in the practicum. I have the original price list which describes what the wood is being substituted for and where in the practicum it is being described. If anyone wants a copy of the supplement wood list, please send me a PM. ** Constitution wood was purchased from the museum just before the ship went into drydock, December 2014. I have since tried to get a larger size for the keel or nameplate but accordioning to popeye2sea (who as I understand it volunteers on the ship), the US Navy is withholding any more wood from the public for now for reasons unknown. The museum told me, maybe in the Spring sometime. This will be my third attempt at constructing this model. The first attempt was done when I was a child building Revell’s small plastic model which I really botched. I hadn’t yet learned to read and follow instructions, but just dove into assembling the parts with expected results. My second attempt was as a young teenager and when the wounds of that failed build had waned, went a bit better. This time I got the larger plastic model. I did follow instructions and even painted the parts but had absolutely no idea how a rigged ship worked let alone how the lines were attached or what they were for. It looked decent to my young ignorant eyes at the time. Both models met their demise at my hand with firecrackers; usual method of disposing such items This time I expect a glorious finish…I hope.
-
 INTRO I don’t have a proper box-opening picture, but I didn’t decide to join a forum and post the build until I had already started. This is only my second ship model. My first was Model Shipways’ Bluenose II that I completed in 1994. I started a couple others along the way and lost interest, or I wasn’t satisfied with my workmanship and abandoned them. So far, I’m very much enjoying this kit. I could have completed the model already but continue researching documents, plans, and photos as I go in anticipation of another build. The materials seem to be very good quality though I only have a few data points for comparison. Incidentally, I have seen many builds of the Mamoli cross section, but only one of Model Shipways’ kit (Tomculb’s build). In addition to the manual, I have a copy of Marquardt’s USS Constitution, Magoun’s The Frigate Constitution and Other Historic Ships (1st Ed.), all the downloadable resources from the USS Constitution Museum, and various other documents and pictures from the Internet. BASIC HULL FRAME STRUCTURE The initial framing and main hold construction were straightforward. The 96-page manual with color photos of the build is very instructive. There are three plywood frames with the “bow” frame corresponding to the half-beam aft of beam 17, the “main” frame to beam 20, and the “stern” frame to beam 22. Beam numbering corresponds to a 1992-1996 restoration diagram. MAIN HOLD I painted the hold white, thinned with a little water, which seemed to do a good job of whitewashing while preserving the wood grain. This was followed with a scribe along the seams and a very diluted gray wash to bring out some of the details. I’m not sure I like the Model Shipways water-based paints. They’re very thick, I find them difficult to properly thin, and though I enjoy the easy cleanup, I believe the solvent based Floquil paints I used on the Bluenose II to be superior. (I just read that Testors discontinued the Floquil line in 2013.) I have some questions/comments about the main hold. I am not critiquing the model. I want to build the model again or maybe scratch build the same cross section in the same or larger scale and have questions on details not included in the kit. This area is proving difficult as I haven’t found any pictures. Diagonal Riders The diagonal rider angle appears too acute relative to the keel compared to any drawings I have seen. I read that the 1797 diagonal riders were removed in 1820 and then new ones installed in the 1992-1996 restoration so maybe that is where the discrepancy originates. Marquardt illustrates an approximately 40-degree angle from the keel with riders terminating at beams 18, 20, and 22 for the original riders and current photos and illustrations show about the same or greater angle, but shifted aft and terminating at beams 20, 22, and 24. The photo of my model shows the instructed placement (~20-degrees). The second photo is the 1992-1996 restoration diagram with Marquardt diagonals overlaid in yellow and Model Shipways in blue. Ballast I understand that most ships were brought into trim at this period using pig iron ballast and kentledge, but that in September 1813 John Tilley had seventy tons of pebble ballast delivered to the ship. What I’m not certain of is if it would be evenly distributed in the hold as pictured in many models. Some of the illustrations depict what appears to be a structure around the bilge pump tubes and main mast, perhaps with hatches to allow traveling the length of the ship’s hold? The illustration also depicts no ballast or stores directly on the keelson. Shot Lockers? Marquardt depicts two shot lockers; one would be near the model’s bow frame at beam 18 and the other forward of the model’s stern frame at beam 21. Are there any representative illustrations or pictures of these shot lockers? How was the shot retrieved? Spirit Room? Other illustrations show a forward bulkhead for the spirit room. Are there any illustrations or pictures of this area? Would the only difference in this room and the main hold be the type of stores kept there? Limber Holes and Limber Boards? Marquardt shows a limber gate on either side of the keel. Other illustrations also show a limber plank (waterway cover) on either side of the keelson. Would the bilge pump tubes terminate into this waterway? What I like: Quality of materials including the barrels and gravel. 96-page instruction manual also available online. 30” x 40” full-scale drawings included What I would change: Increase diagonal rider angle to match Marquardt’s. Questions: Were there structures in the main hold around the bilge pump tubes and/or main mast? What did the shot lockers look like and how was shot retrieved (e.g., hinged top)? Did the limber planks remain uncovered and accessible underway? Was there a dividing bulkhead on the Spirit Room?
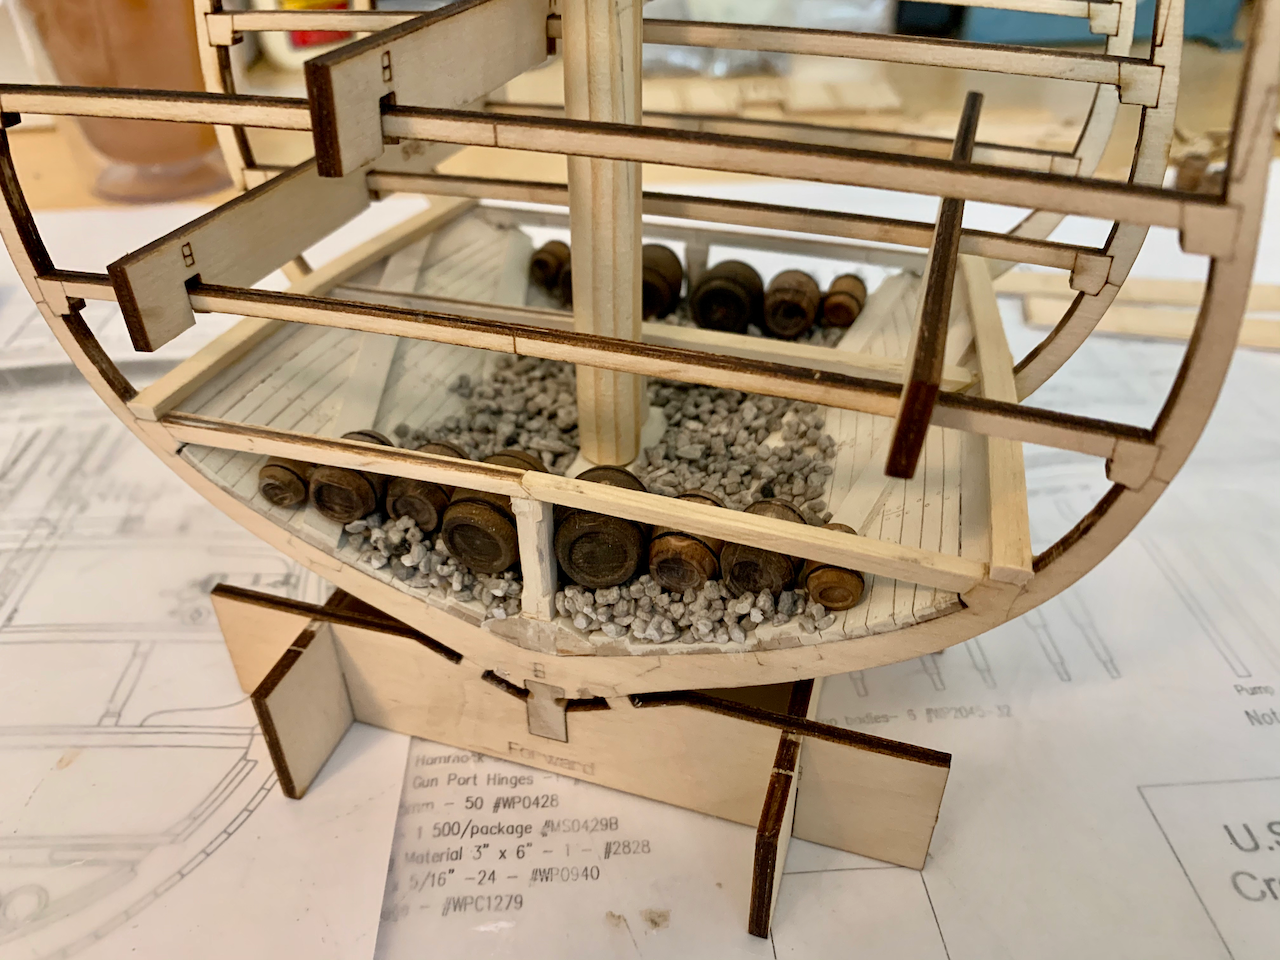
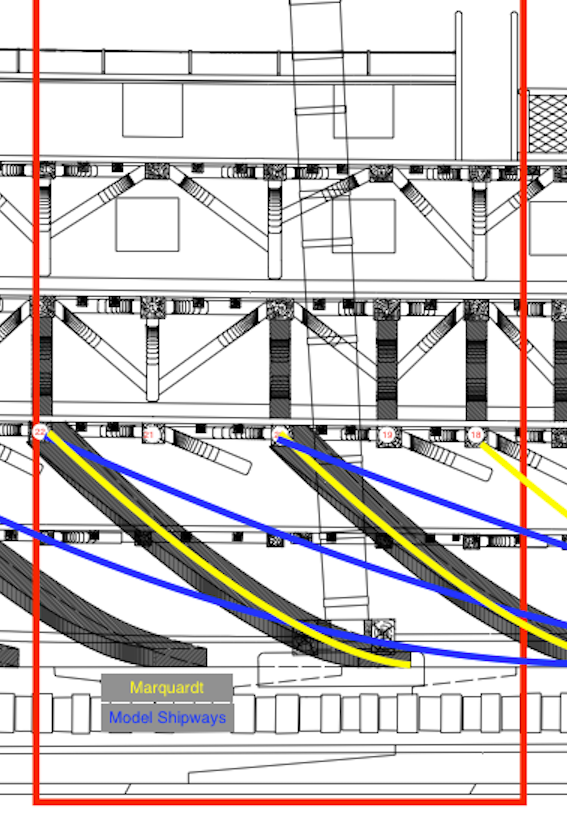
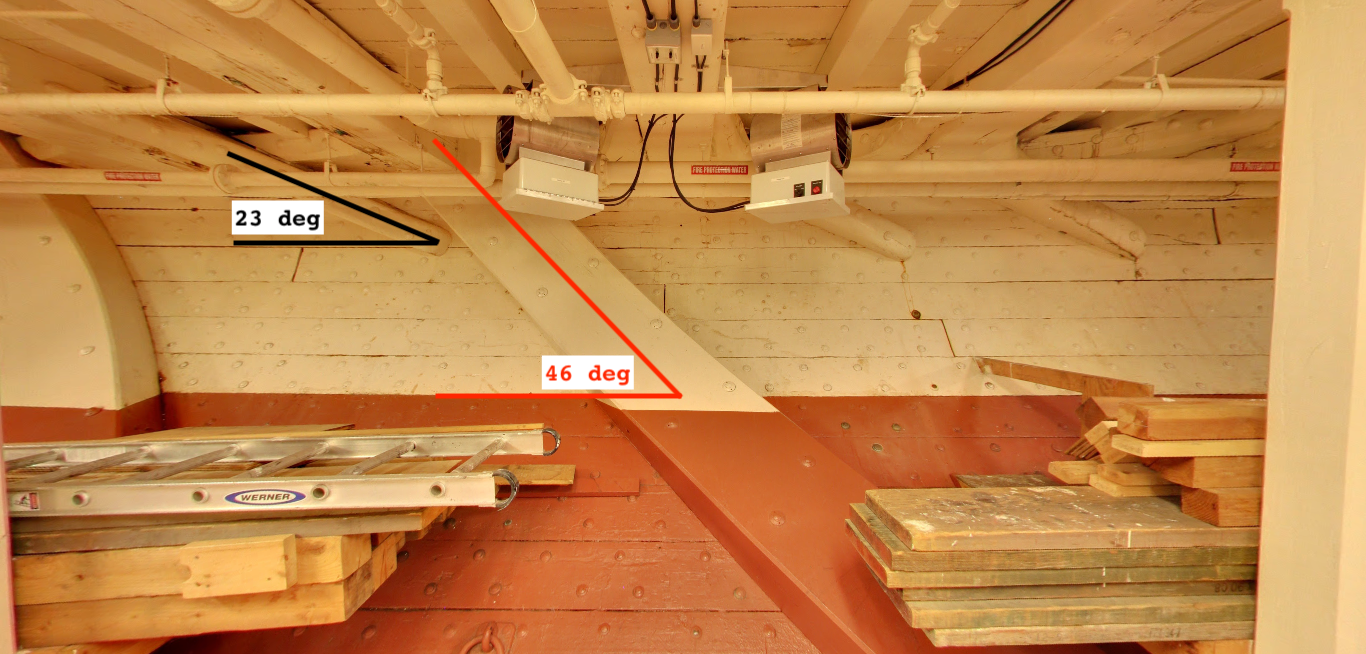
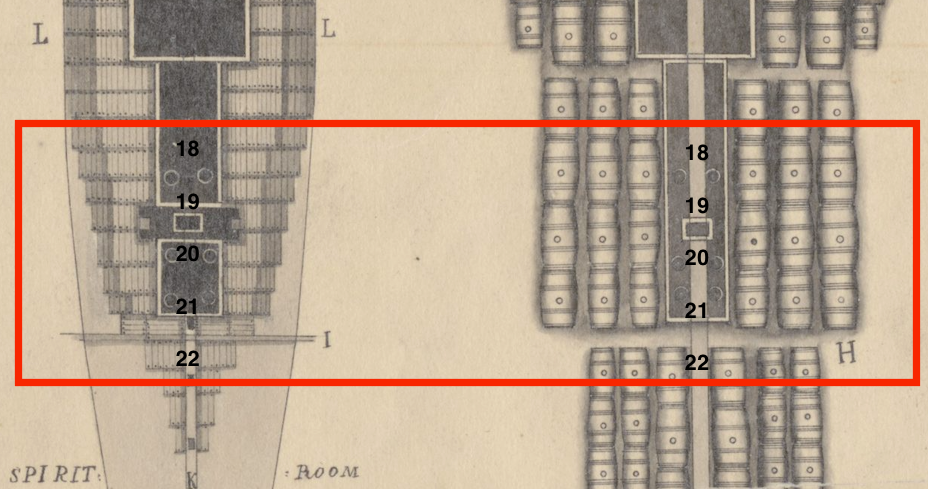
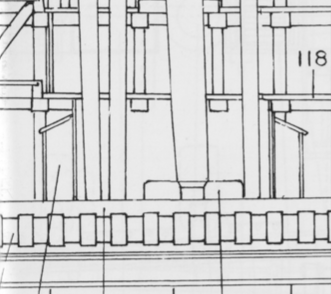
- 26 replies
-
- 2
-
-
- Constitution
- Model Shipways
- (and 1 more)
-
 Hello all. I have some time I my hands so I thought I would do a build log of the USCG HARRIET LANE that I got as a Christmas present (to myself). I wanted to try something a little different so the combination of paddlewheel and sails appealed to me. I’ve been away from MSW and the NRG for a few years and had always liked the forum discussions and model postings so I thought I would give it another go. The model’s scale is 1:96 (⅛" = 1' 0") and the overall length will be 28", width 8", height on base 16". The model was designed and instruction book was written by David Antscherl. The kit is from Model Shipways and was purchased from Model Expo. Description of the ship from the instruction book. The Harriet Lane was 177' 6" long and 30' 6" wide, with a 12' 0" depth in her hold. Her mode of power was provided by double marine steam engines driving two side paddles, as well as two masts for sailing. When launched, her armament was described as ‘light guns’. However, when she joined the West Gulf Squadron her firepower was increased. She was given a 4" rifled Parrott gun and a 9" Dahlgren forward, with two 8" Dahlgren Columbiads aft. Her full crew complement was 95. Launched in November 1859, she was named for the niece of President James Buchanan, who was unmarried. Harriet acted as his First Lady. Mandatory pictures of the box and contends.

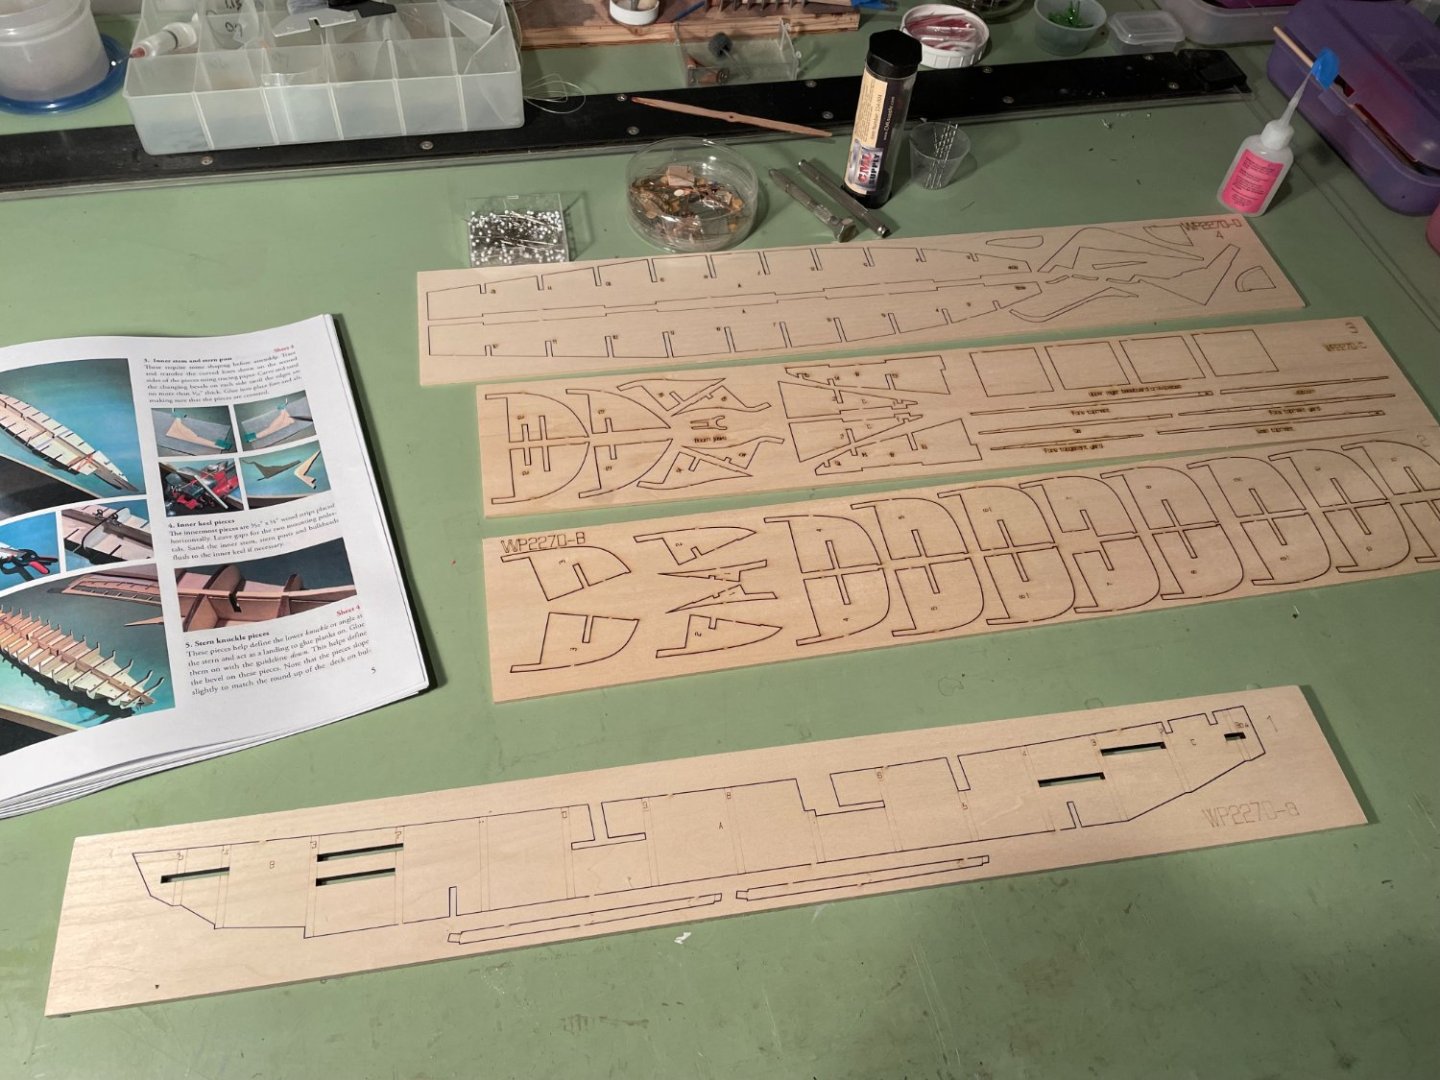
- 144 replies
-
- 8
-
-
- Harriet Lane
- Model Shipways
- (and 1 more)