KennyH78
-
Posts
168 -
Joined
-
Last visited
Content Type
Profiles
Forums
Gallery
Events
Everything posted by KennyH78
-
 Allen, No confusion on my part. I can see the difference. I have a rope walk as well from Model Shipways that I bought like 5 years ago. I will pull it out and use it for sure when I build My Occre Endurance kit that I have in my stash.
- 50 replies
-
- 3
-

-
- 18th century longboat
- model shipways
- (and 1 more)
-
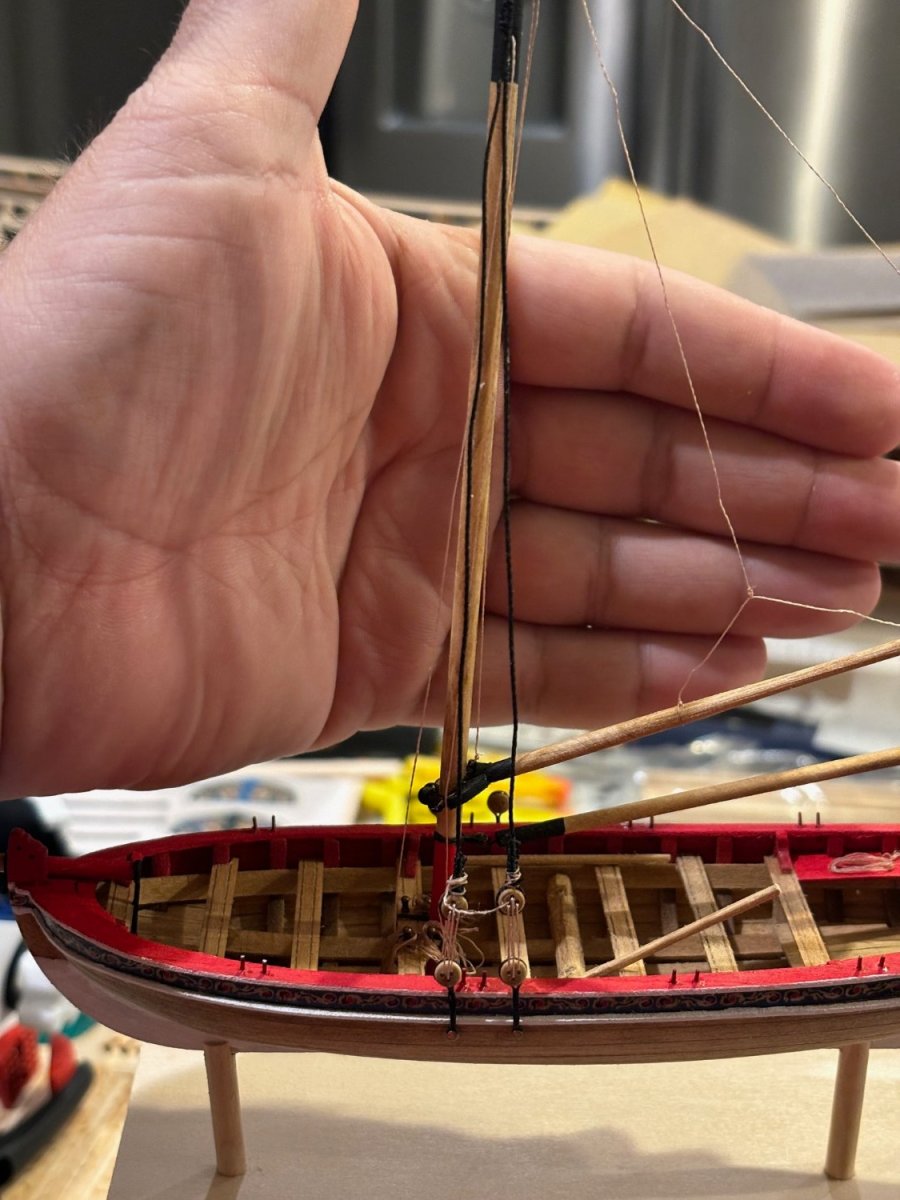
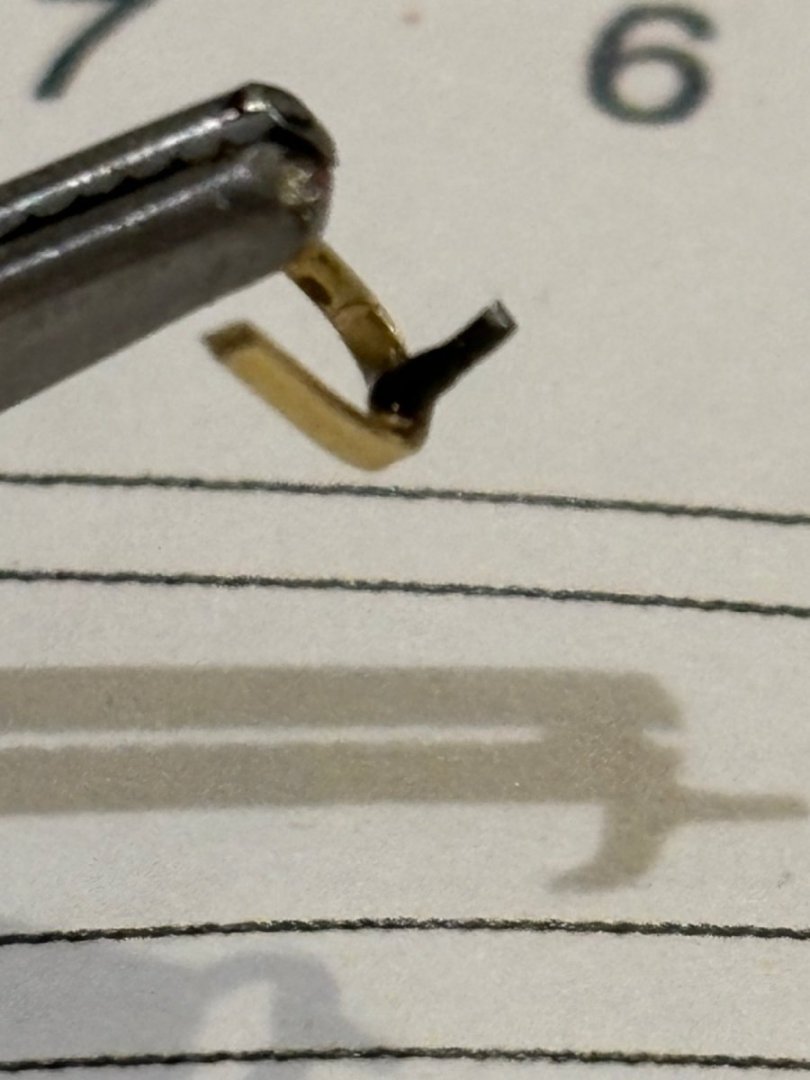
The tan thread is from the kit. The black thread for the shrouds is from my stash of thread from Model Shipways. It is .028 thread, slightly bigger than what the instructions call for (.021); but it’s all I have. The black thread from the kit was scrapped due to the do-overs I had to do on the shrouds.
- 50 replies
-
- 1
-
-
- 18th century longboat
- model shipways
- (and 1 more)
-
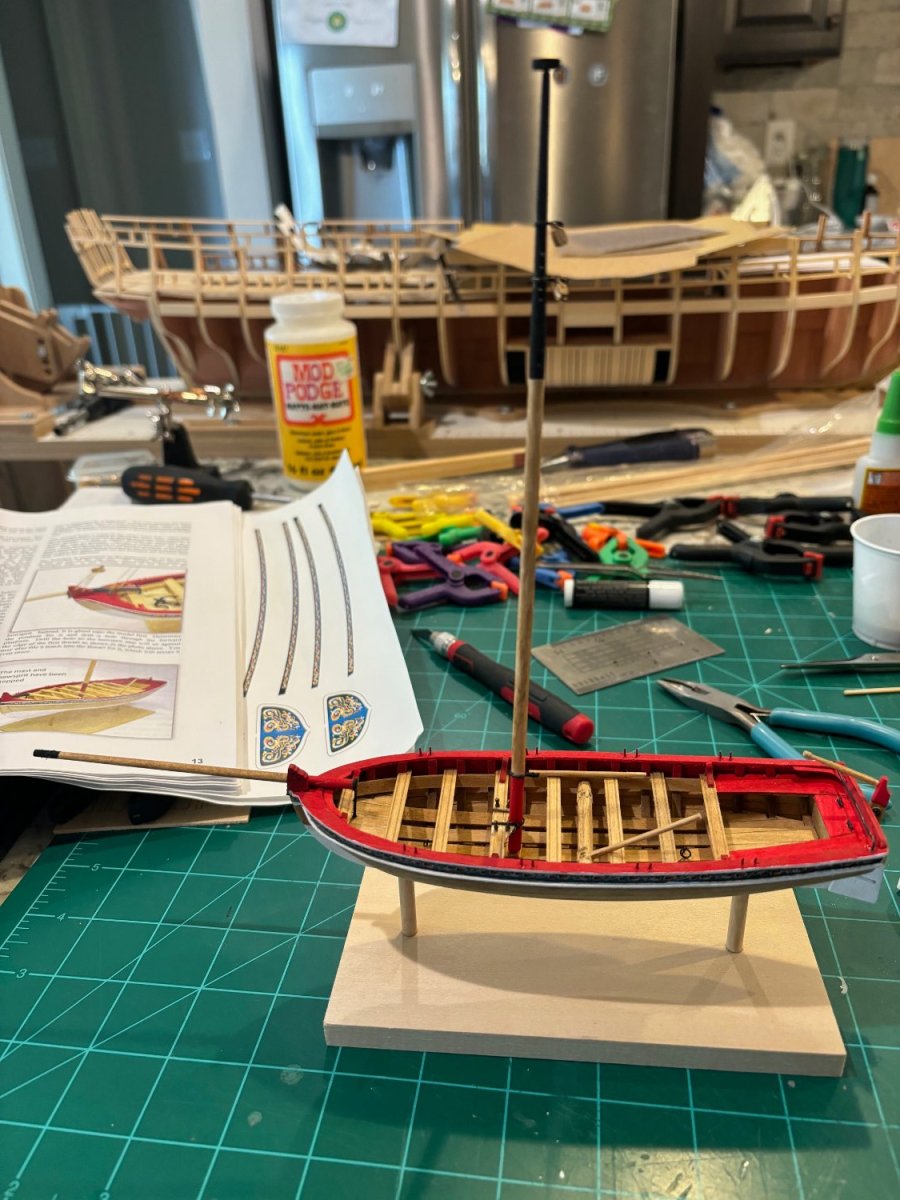
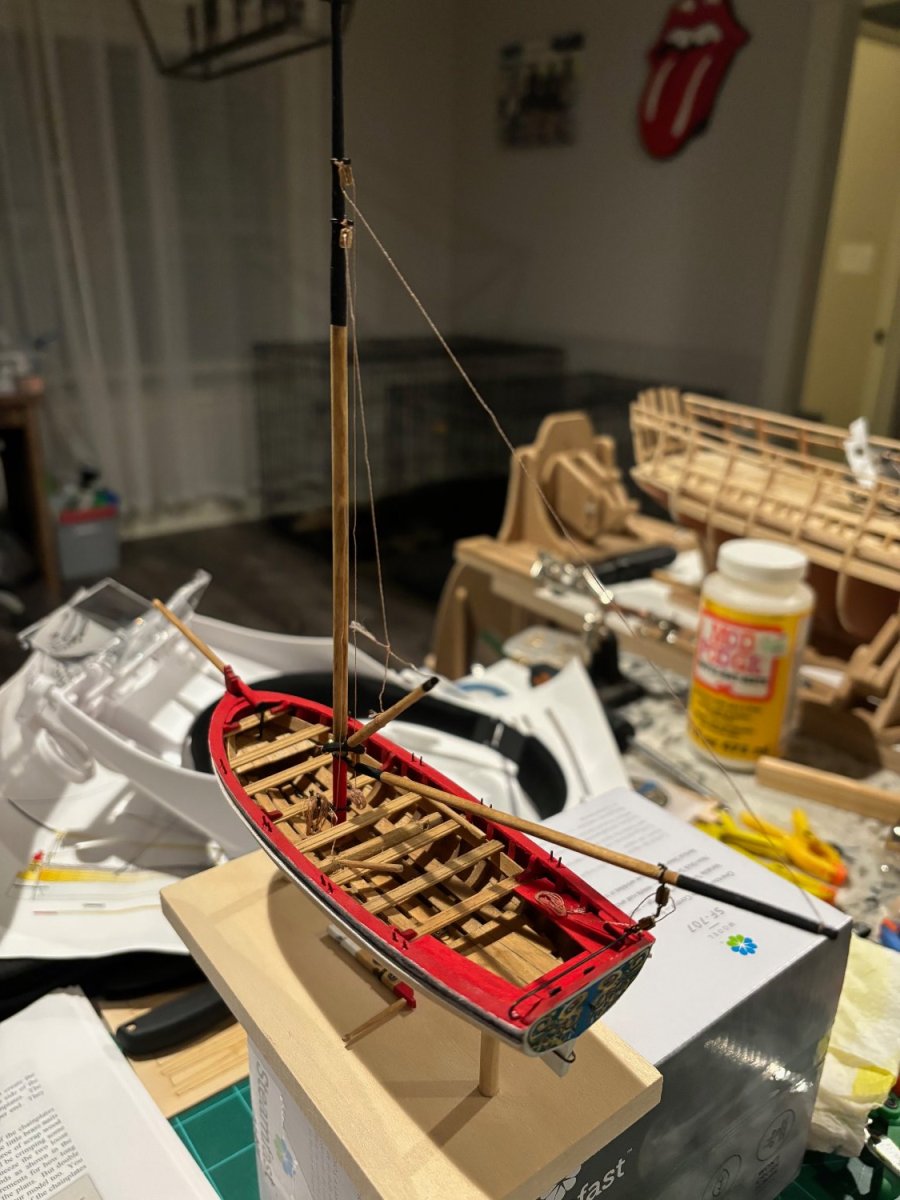
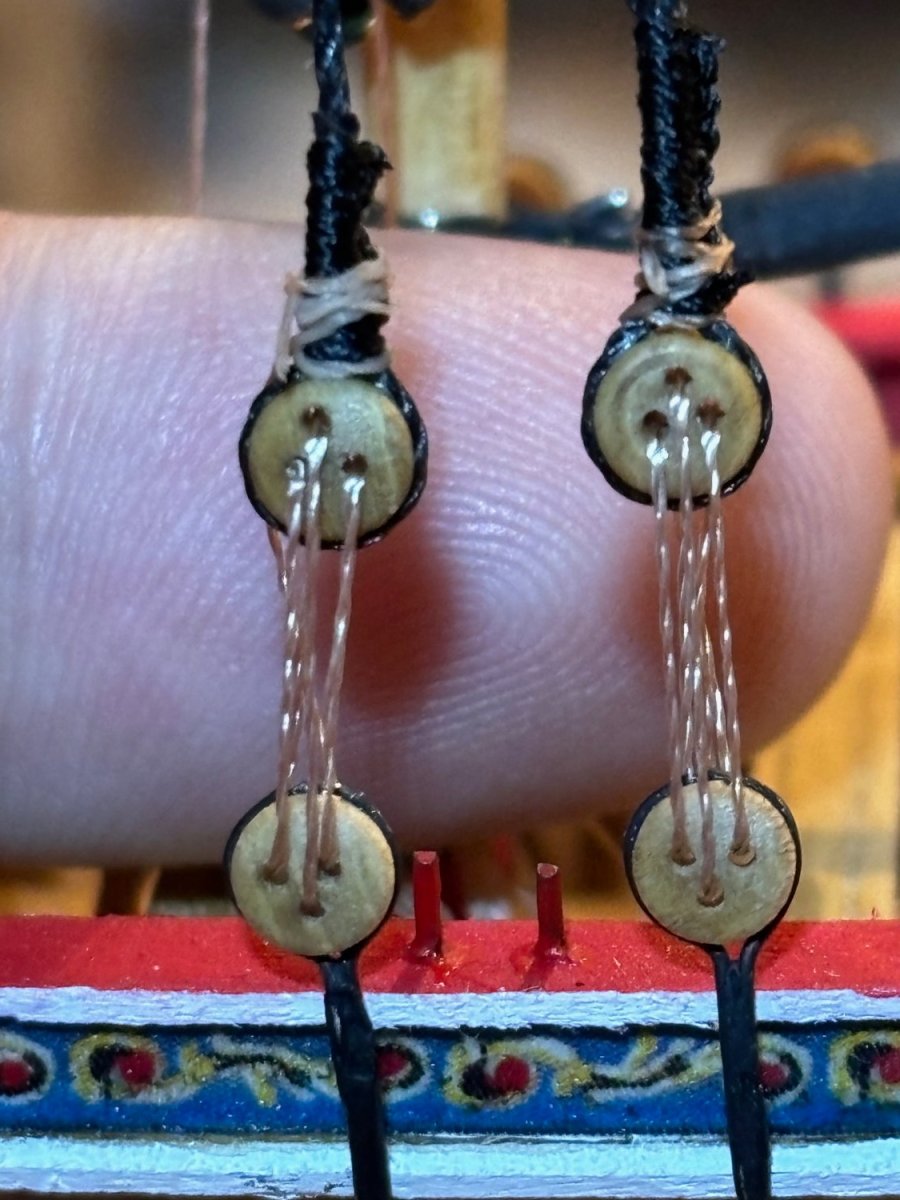
I got some work done on the longboat since my last update. Making and installing the mast, bowsprit, boom, and gaff was pretty straight forward. Rigging the boom and gaff wasn't too difficult either. But I have sort of struggled with the shrouds. I was finally able to complete port side of the shrouds after 4 attempts at it. The rigging of the deadeyes could have been done better, but I'm happy with it; especially since it was the first time I have done those and at this scale. Tomorrow I am going to start on the starboard side. Here's hoping that that side goes a little quicker to complete than the port side did.


- 50 replies
-
- 5
-
-
- 18th century longboat
- model shipways
- (and 1 more)
-
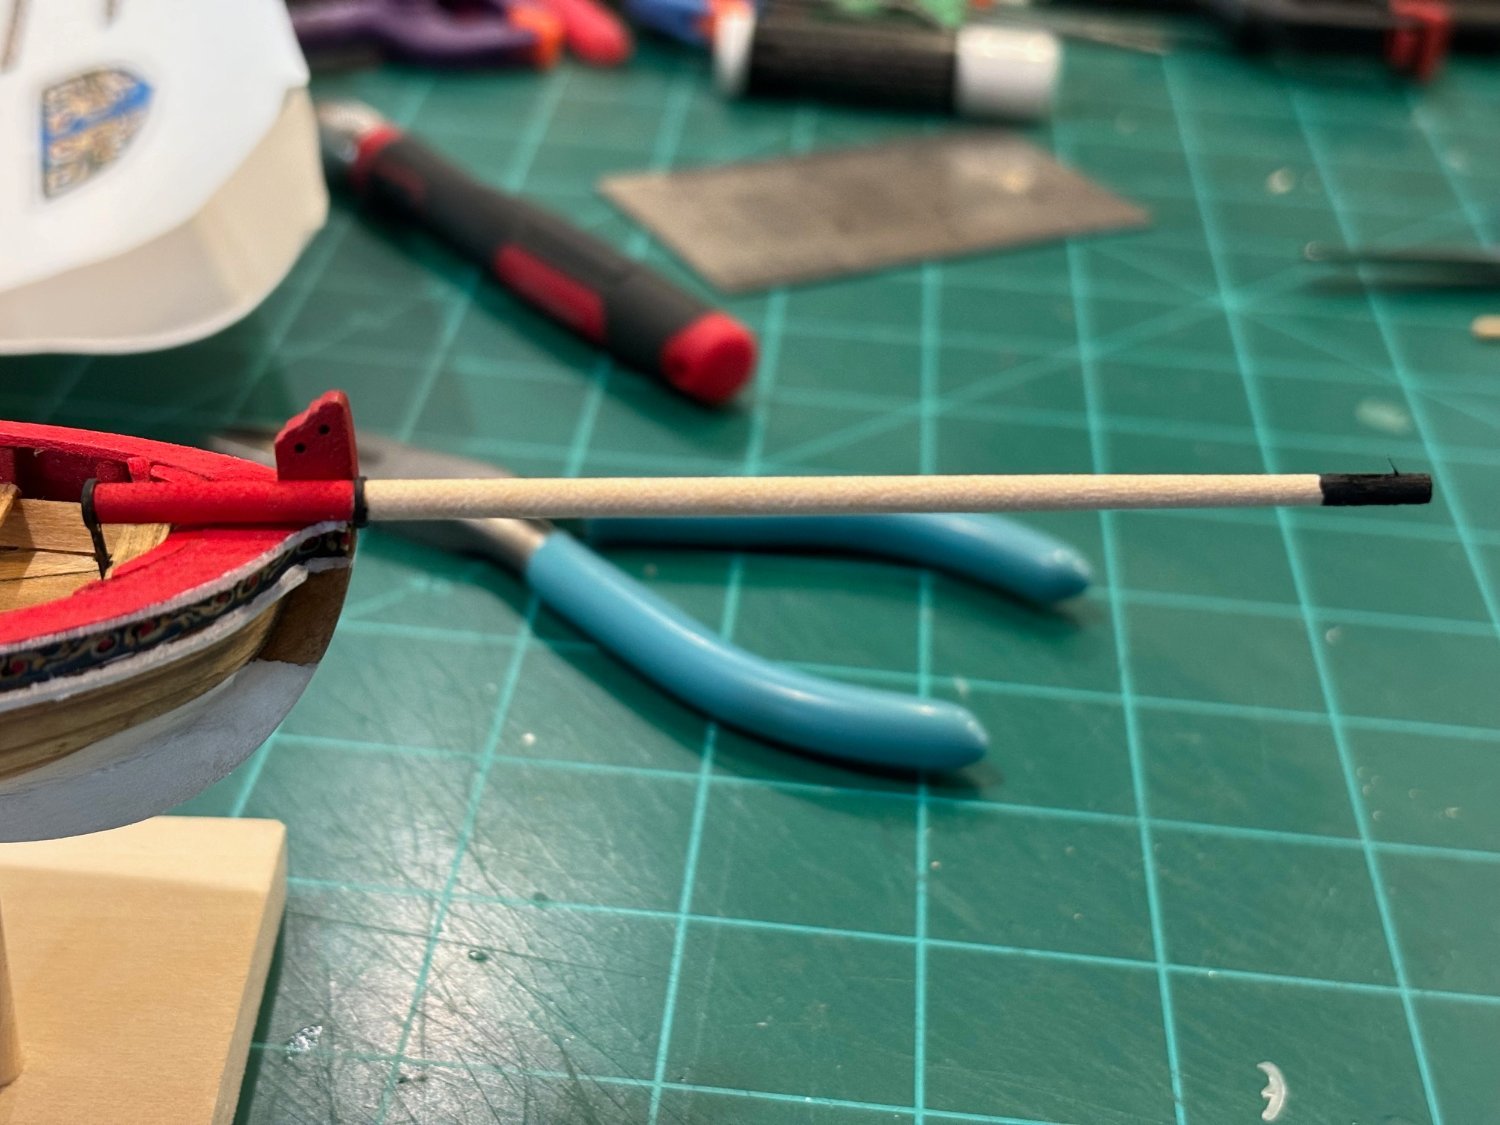
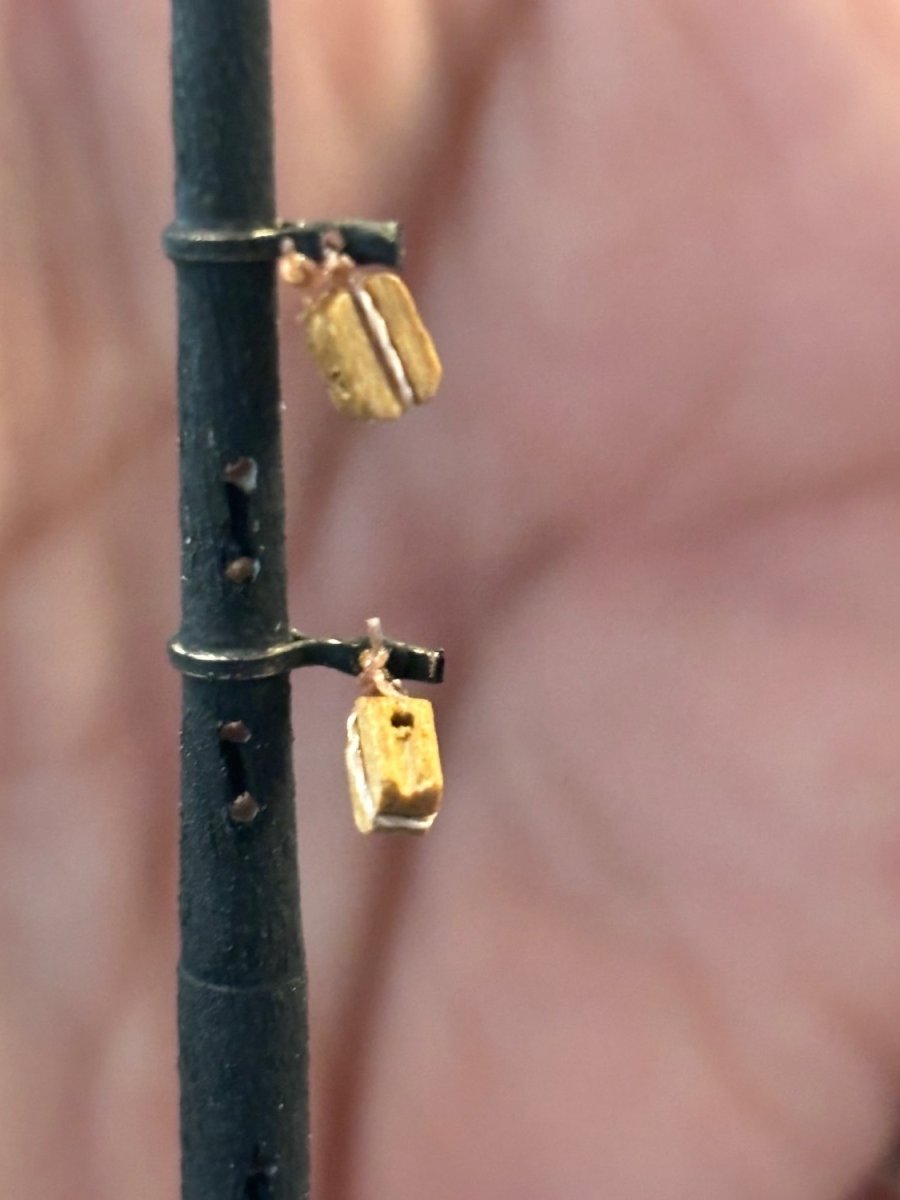
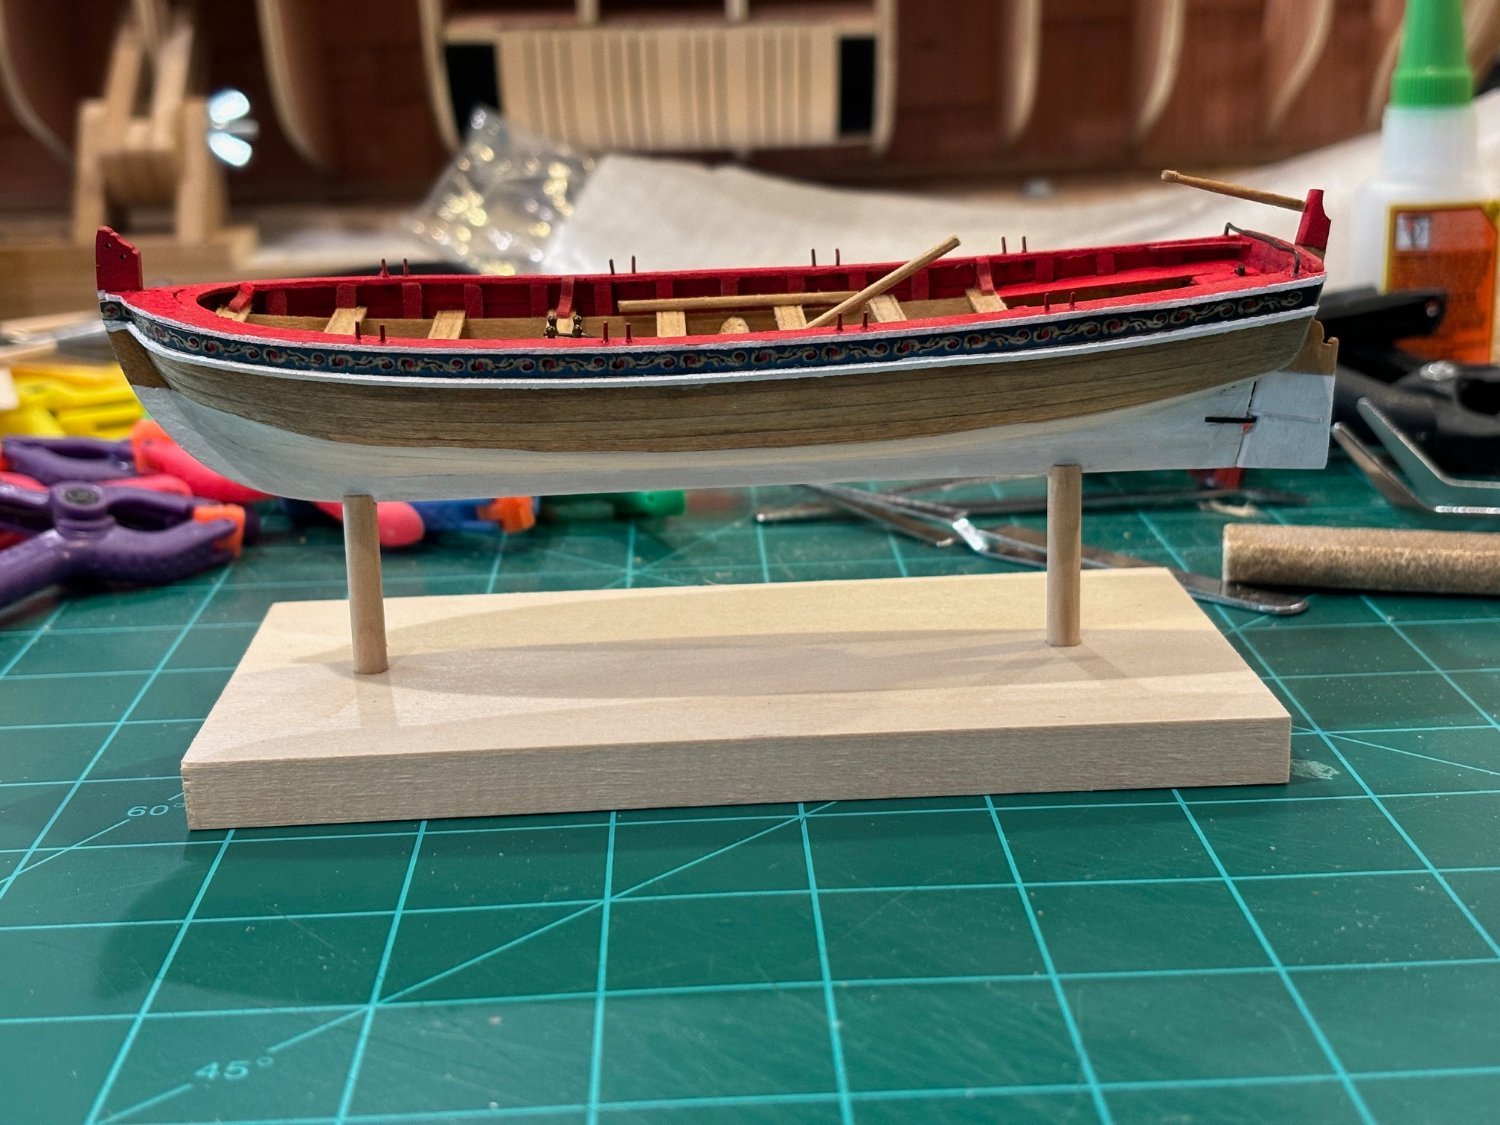
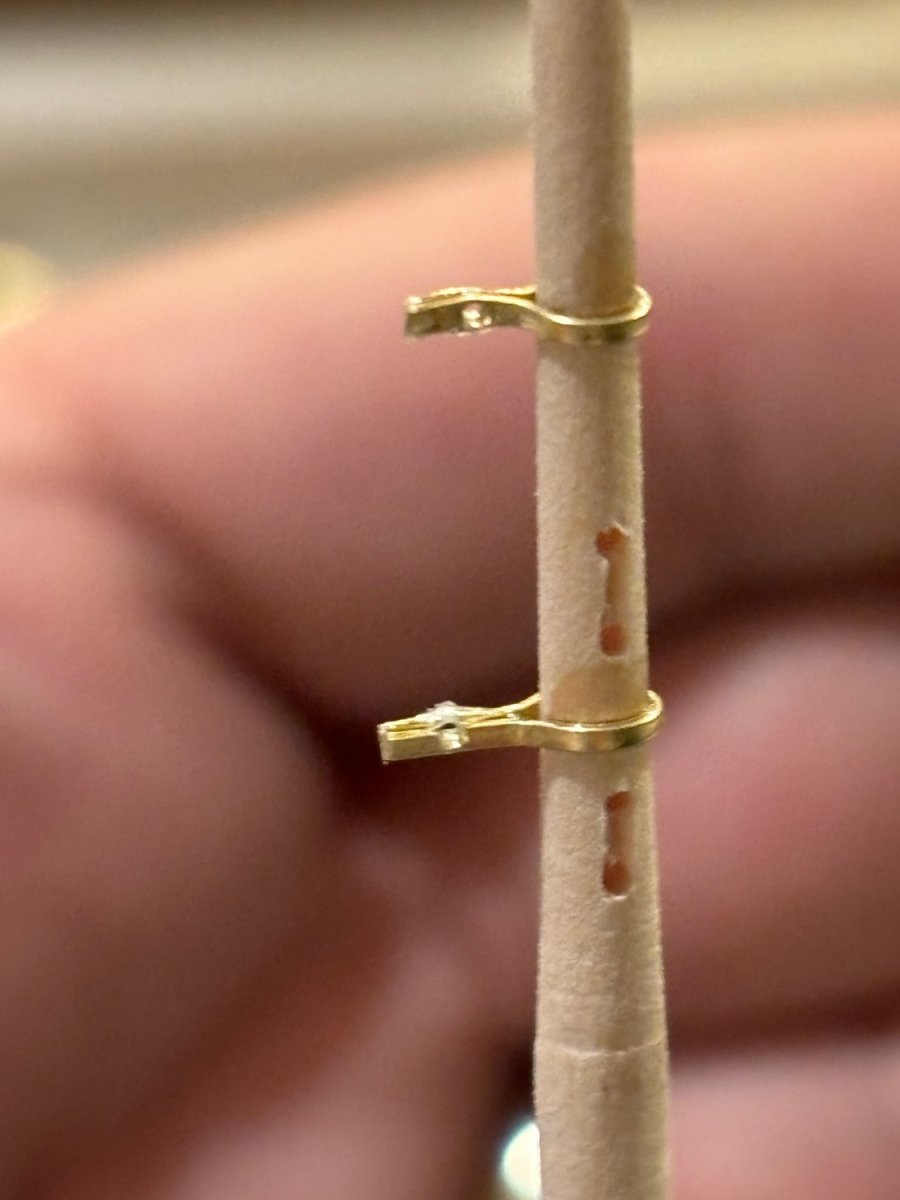
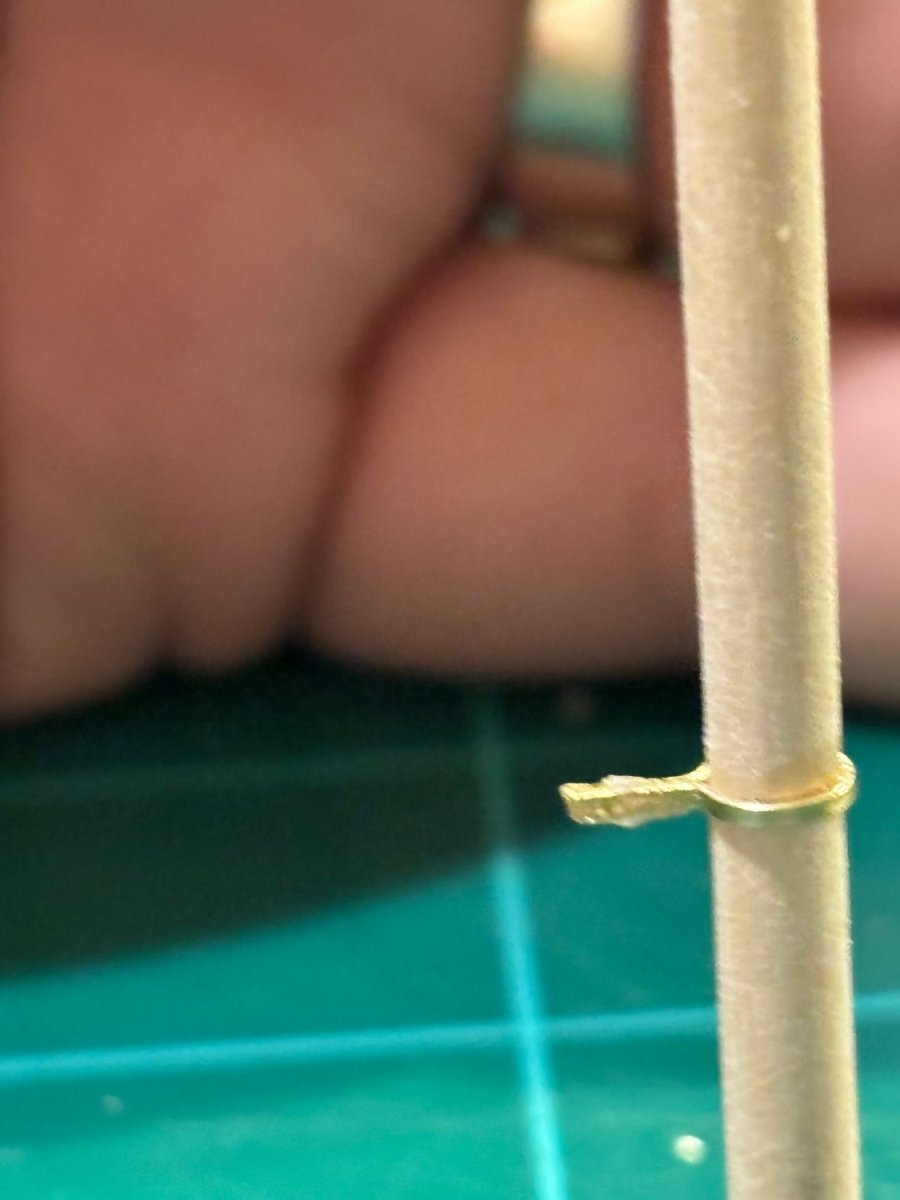
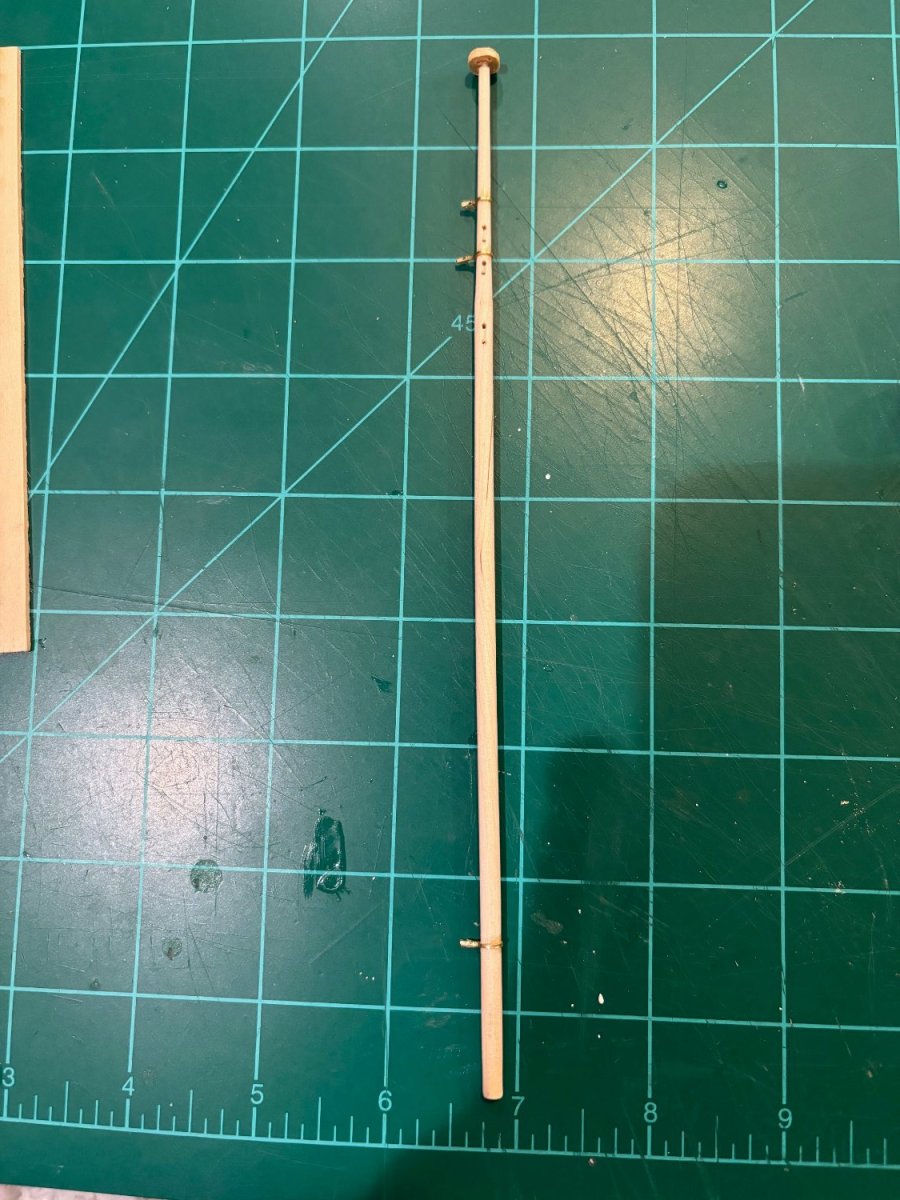
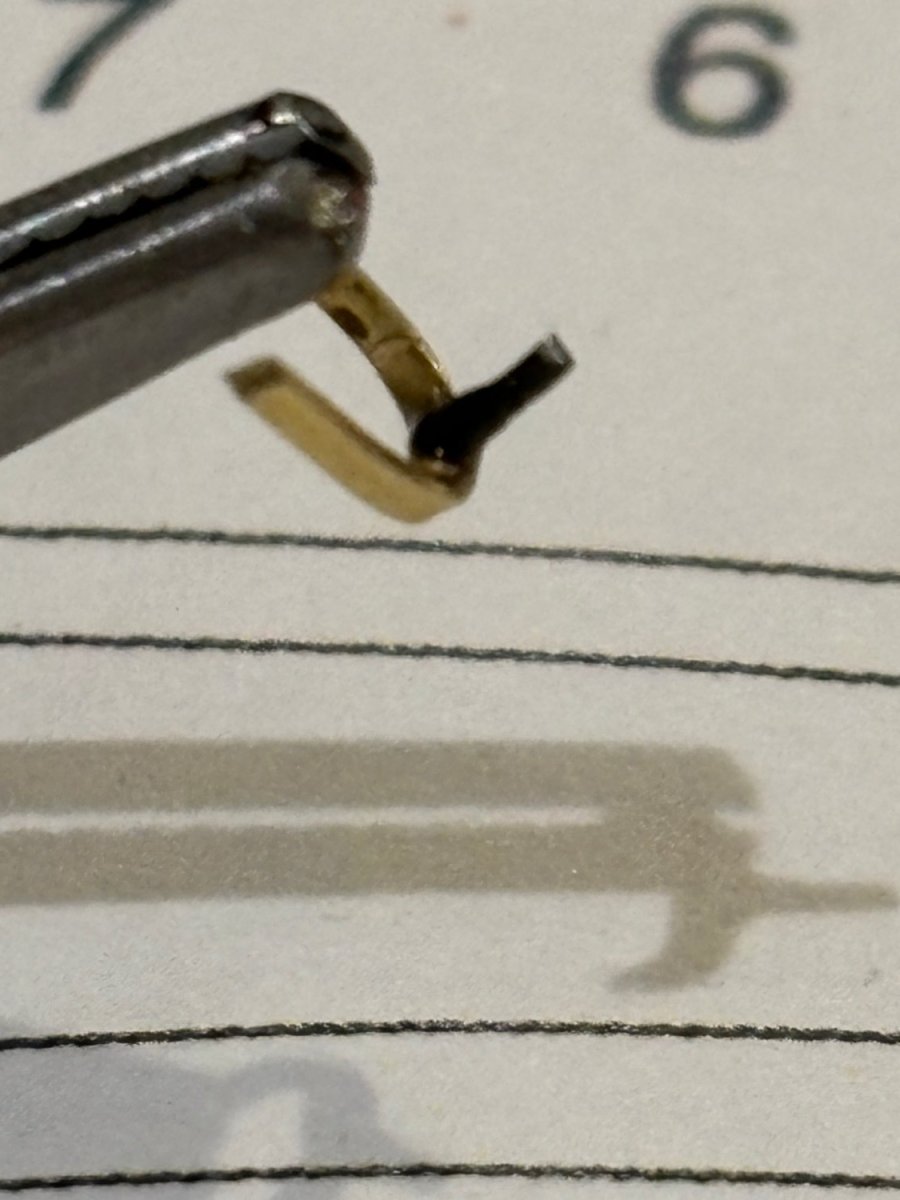
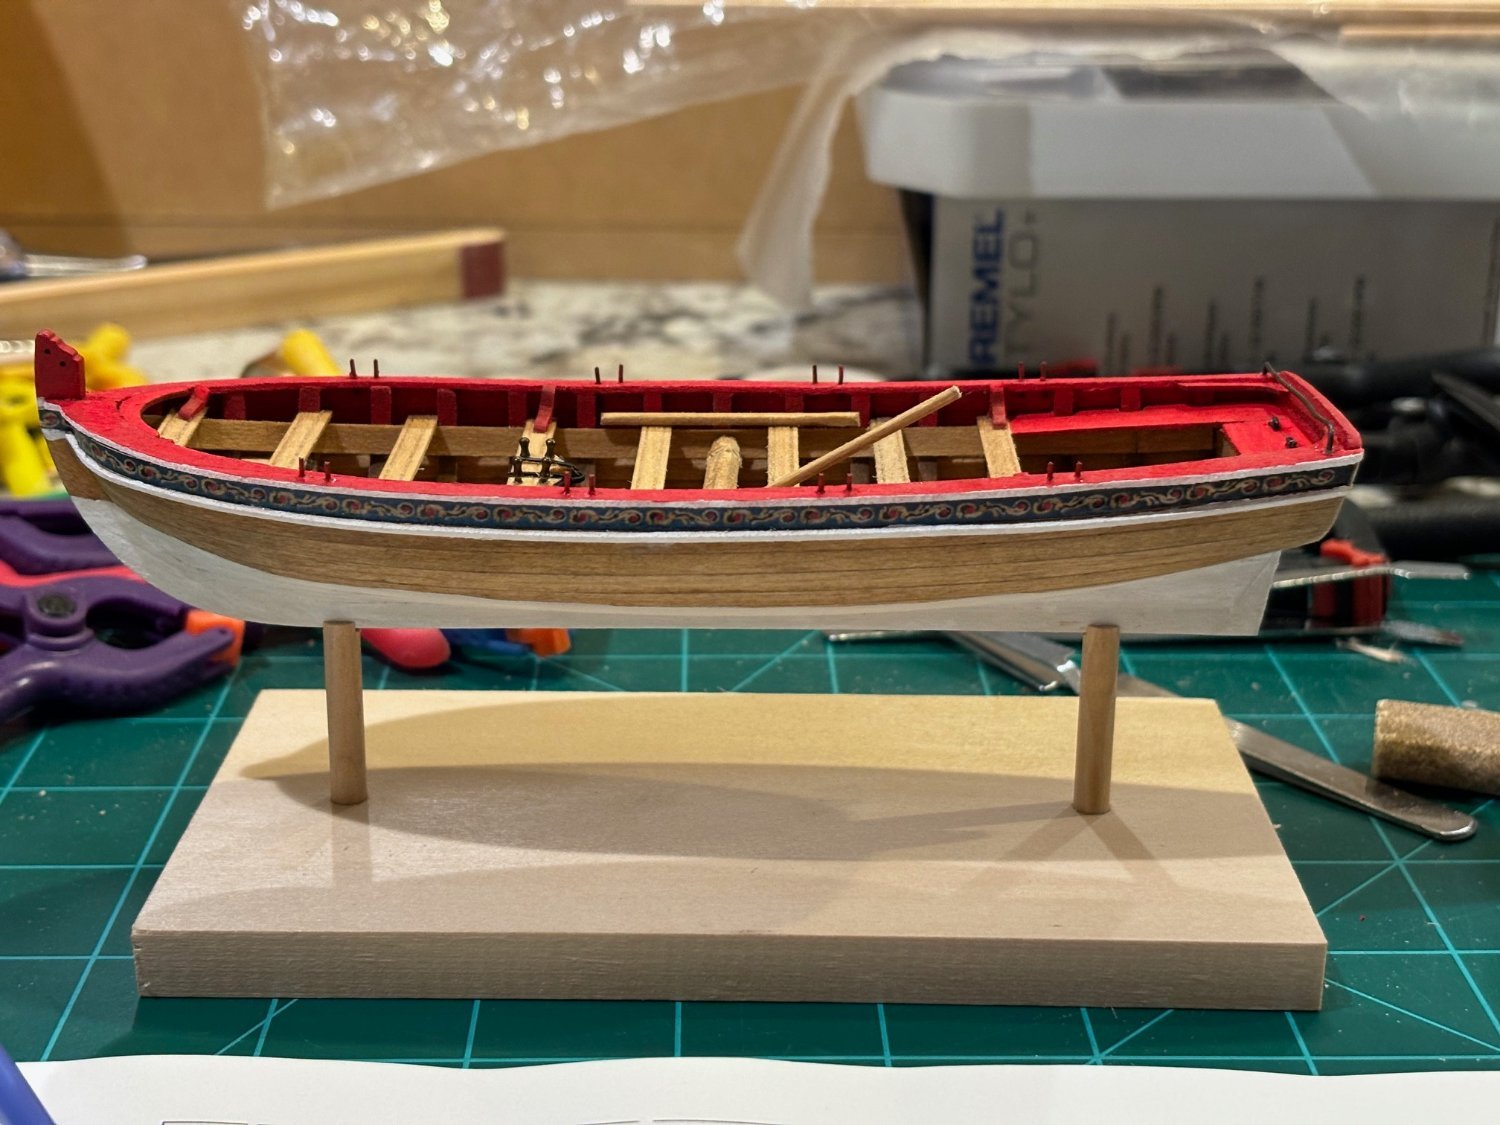
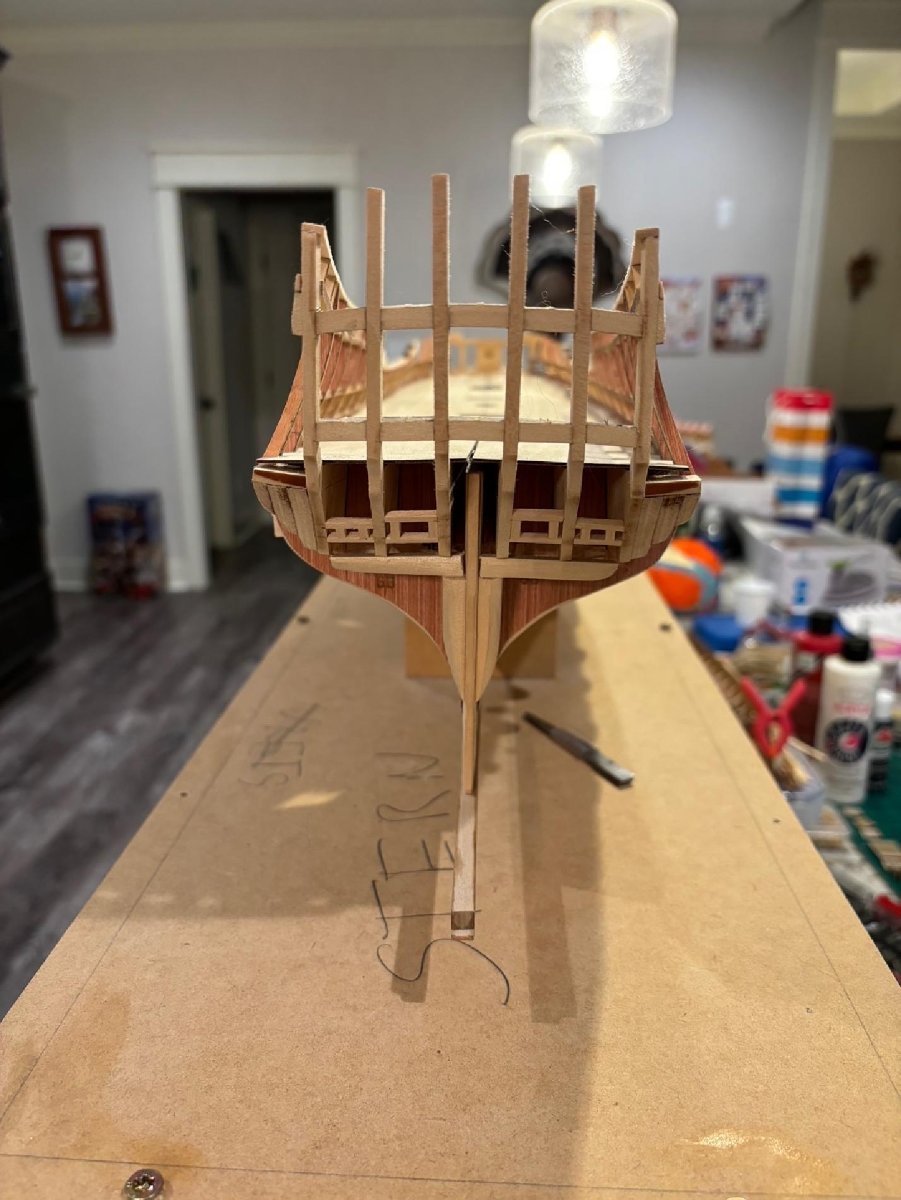
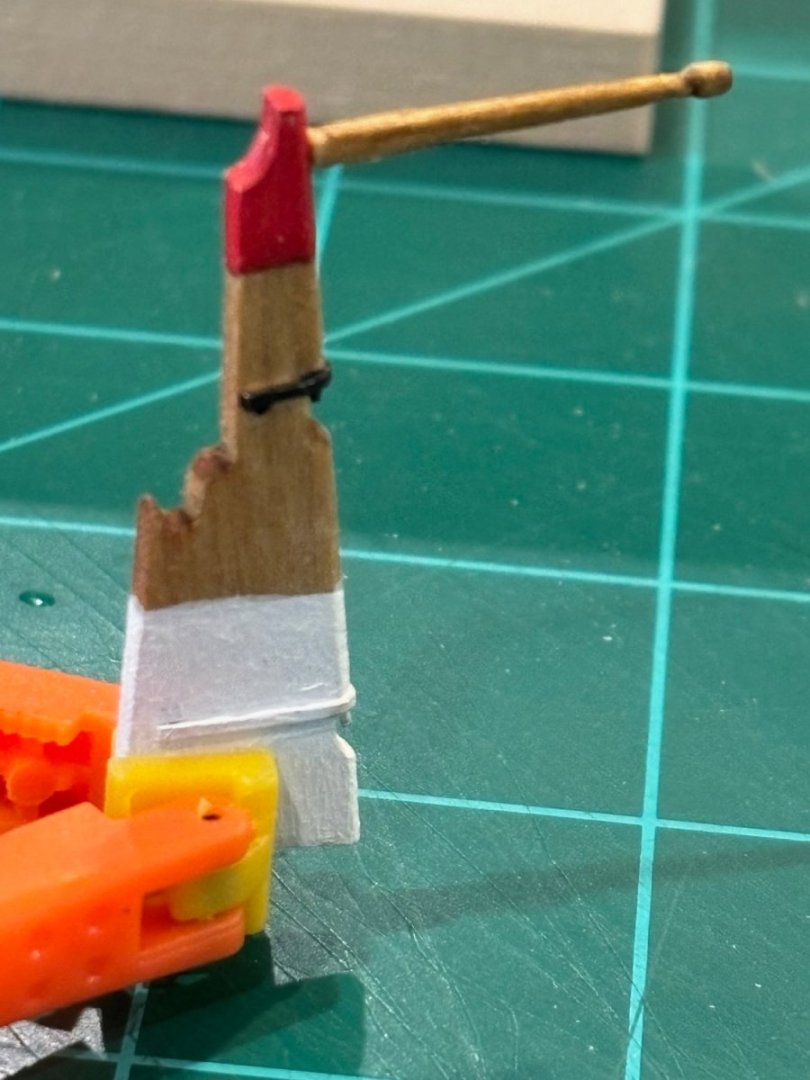
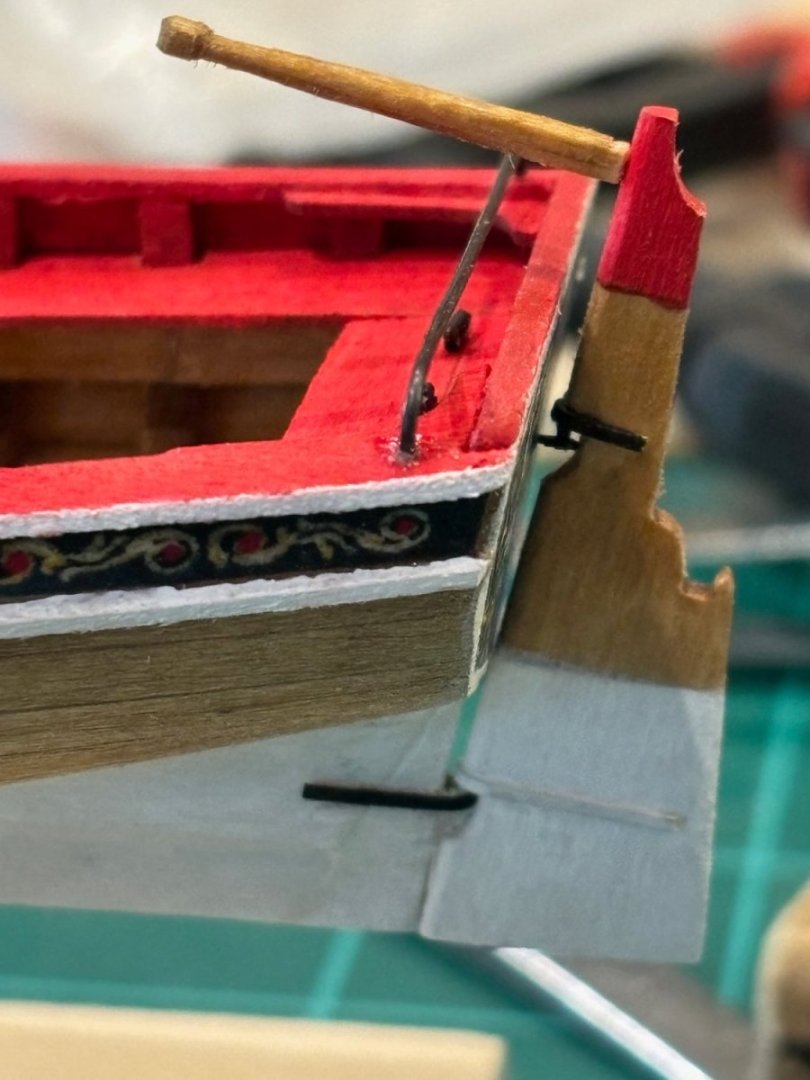
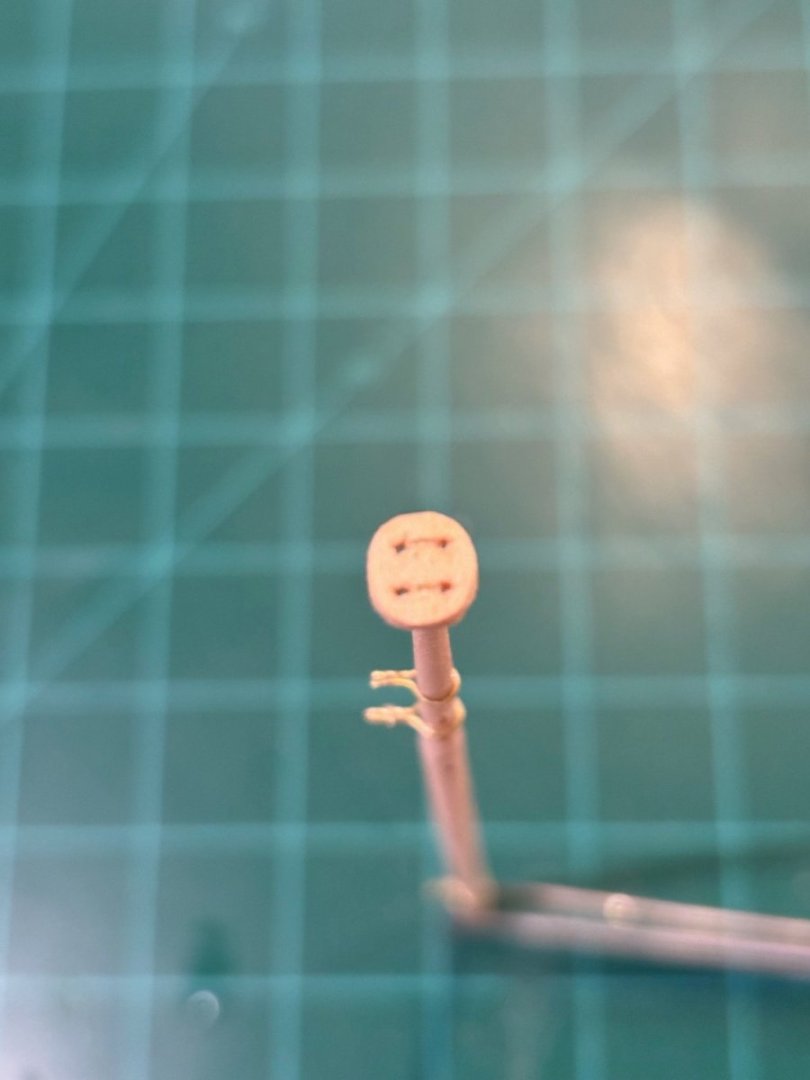
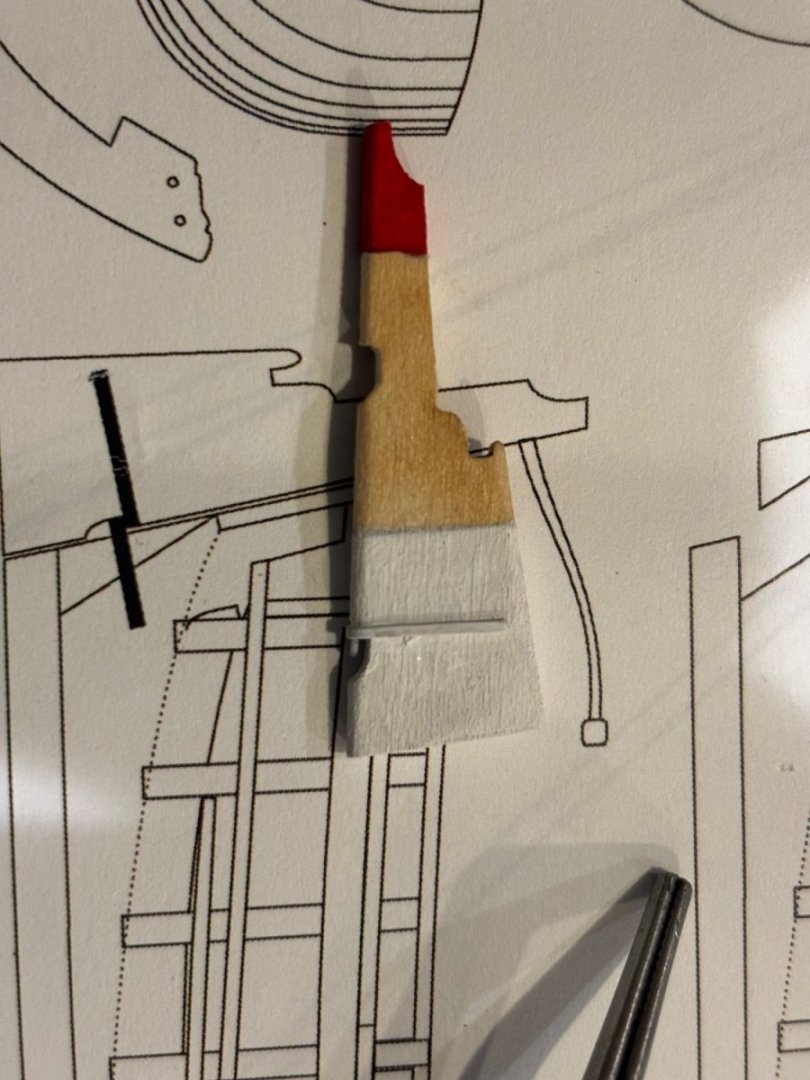
Over the last couple of days I was able to get the rudder finished up and installed on the longboat. Then I permanently attached the boat onto its base. The next day, I started the tedious task of tapering the mast. Using my drill just as Chuck suggests in the instructions made the task a little easier. The button on the top was a little nerve racking to make along with the iron work for the mast. Took a while, but it worked out in the end. After I got the button installed and the iron work onto the mast, I finished it according to the plans. Tomorrow I plan on adding the blocks to the mast and continuing on with installed the mast into the longboat.


- 50 replies
-
- 4
-
-
- 18th century longboat
- model shipways
- (and 1 more)
-
Thanks, I try my best. Handling these tiny parts can be very tricky
-
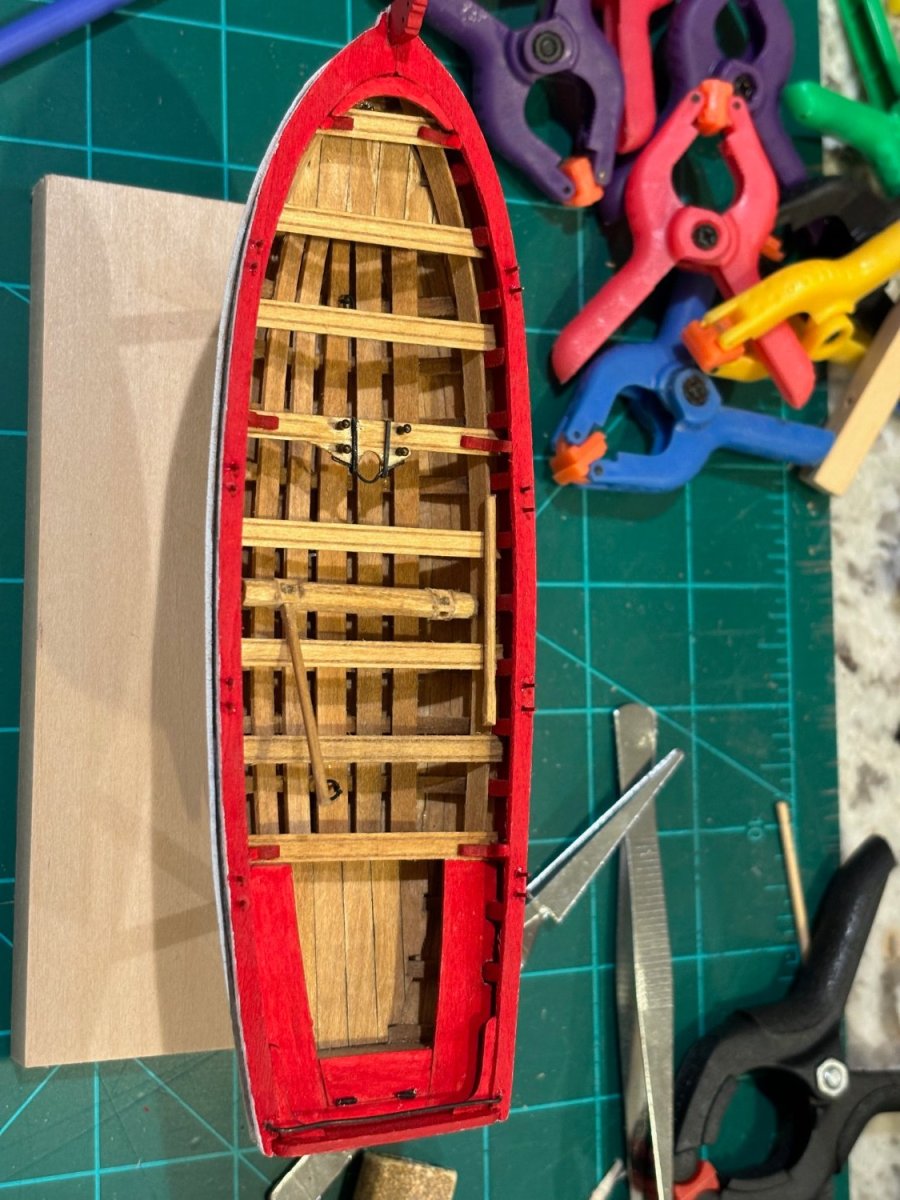
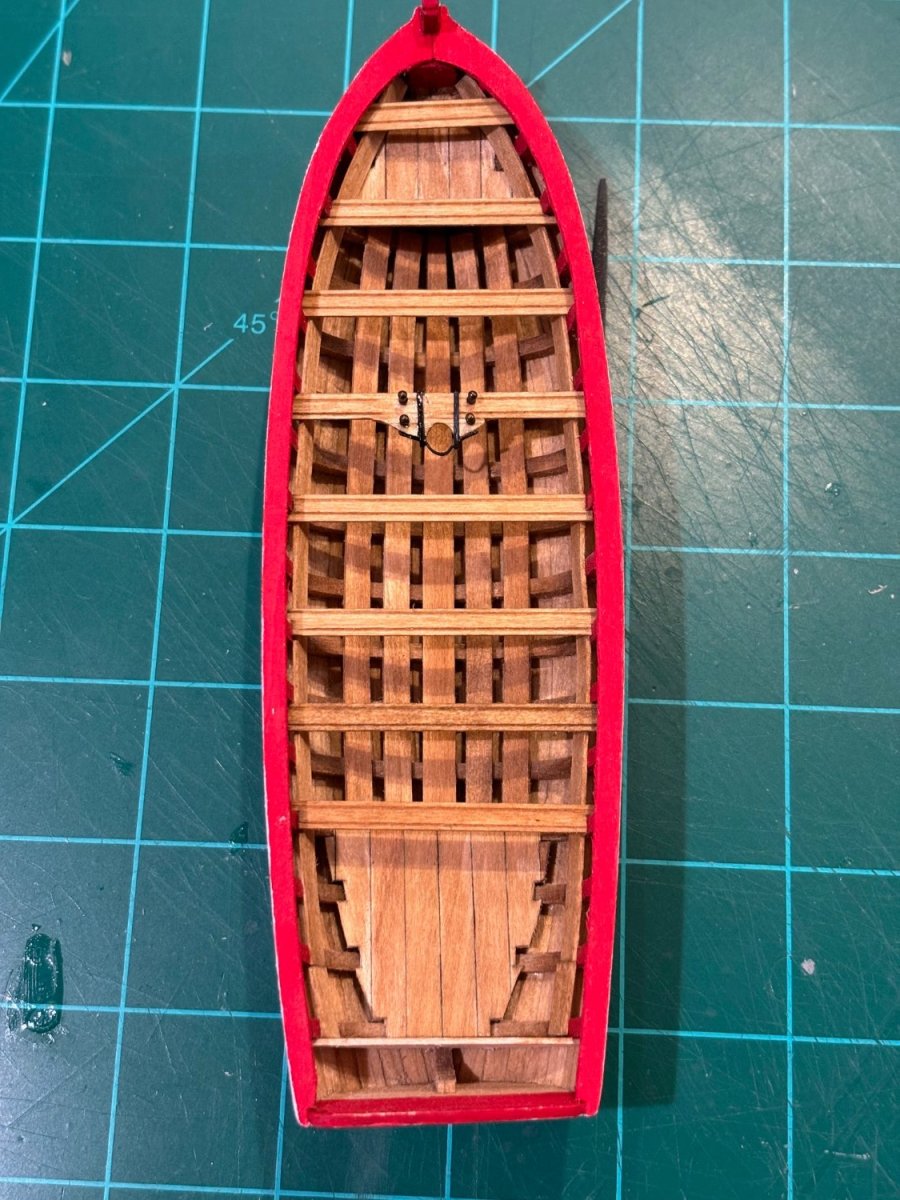
Got a little more work done on the longboat since my last post. Finished up the seats in the cockpit along with the locker. Also got all of the knees installed along with the windlass and handles. I also installed the oar holder pins and eye let rings for lifting the boat in and out of the water. After a little break, I began work on the rudder. I still have to get the top gudgeon installed and painted on the rudder, then I can install the pintles on the transom and stern post and hang the rudder. I also made the display base for the longboat. The boat is not yet permanently attached to the base, I will do that just before I install the masts and rig the boat.


- 50 replies
-
- 5
-
-
- 18th century longboat
- model shipways
- (and 1 more)
-
I haven't gotten any work done on Confederacy today, but I was able to get her dry dock built. The Professional Build Slip from Hobby Zone should help out greatly. I will get her transferred over to her new dock tomorrow sometime.
-
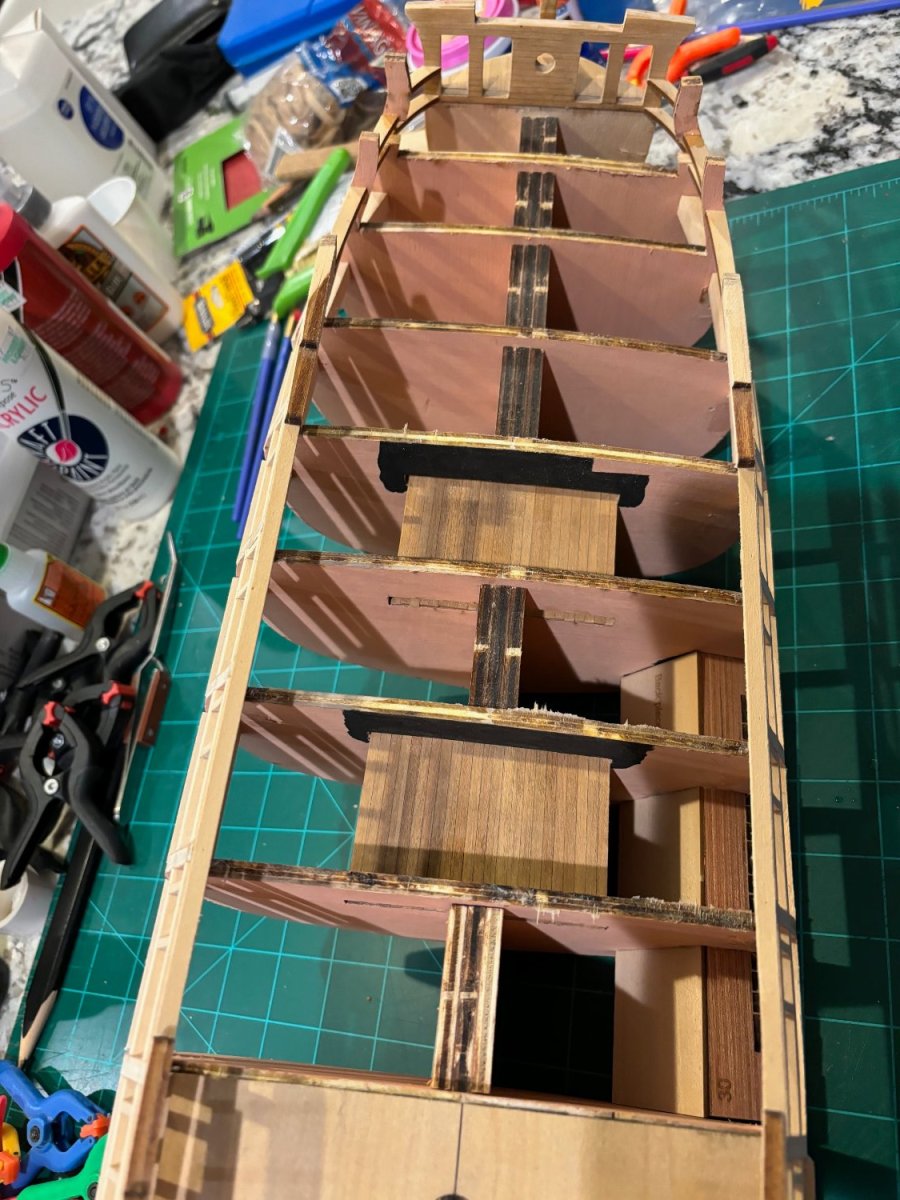
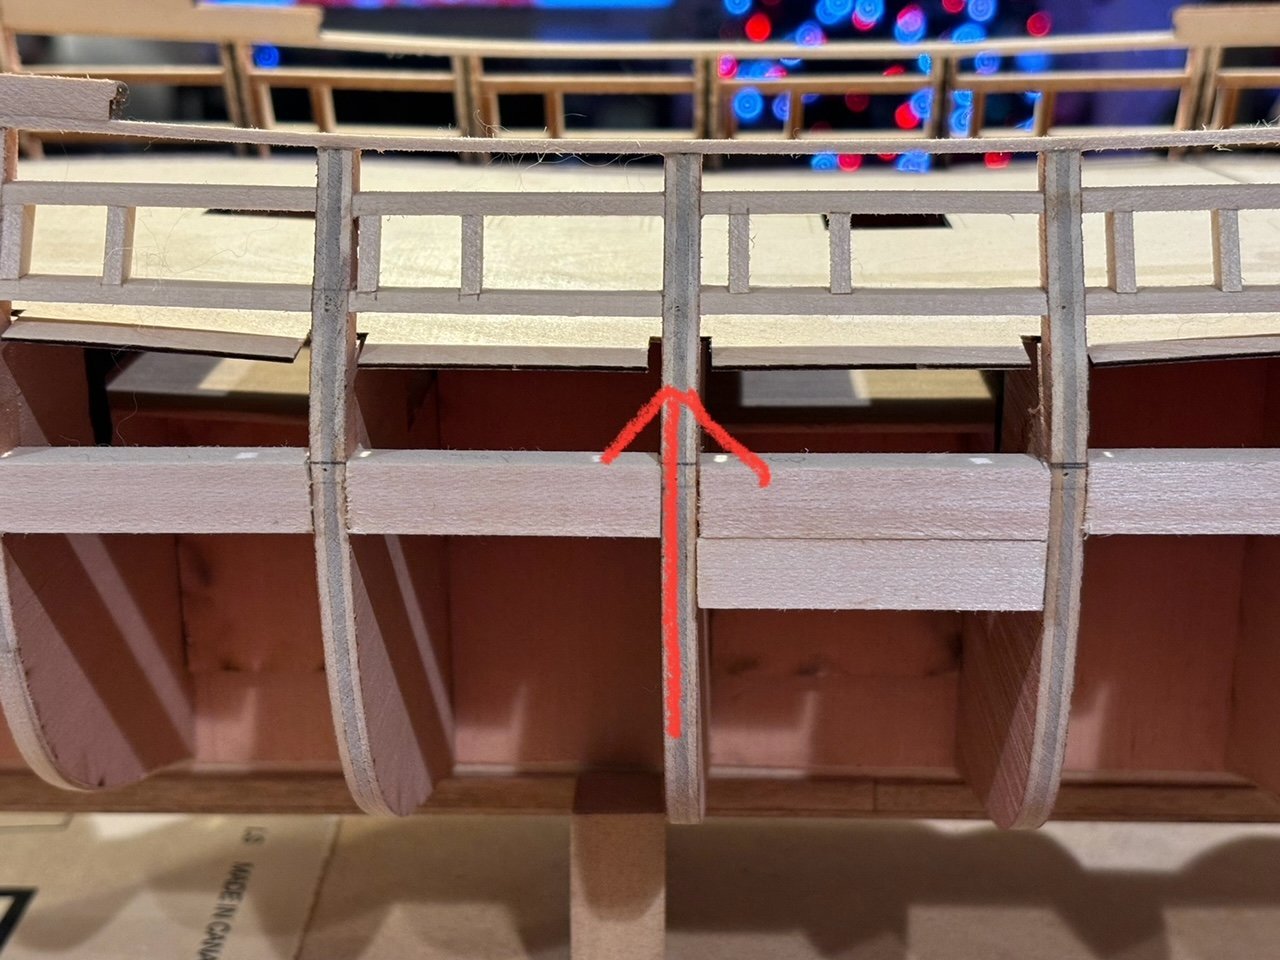
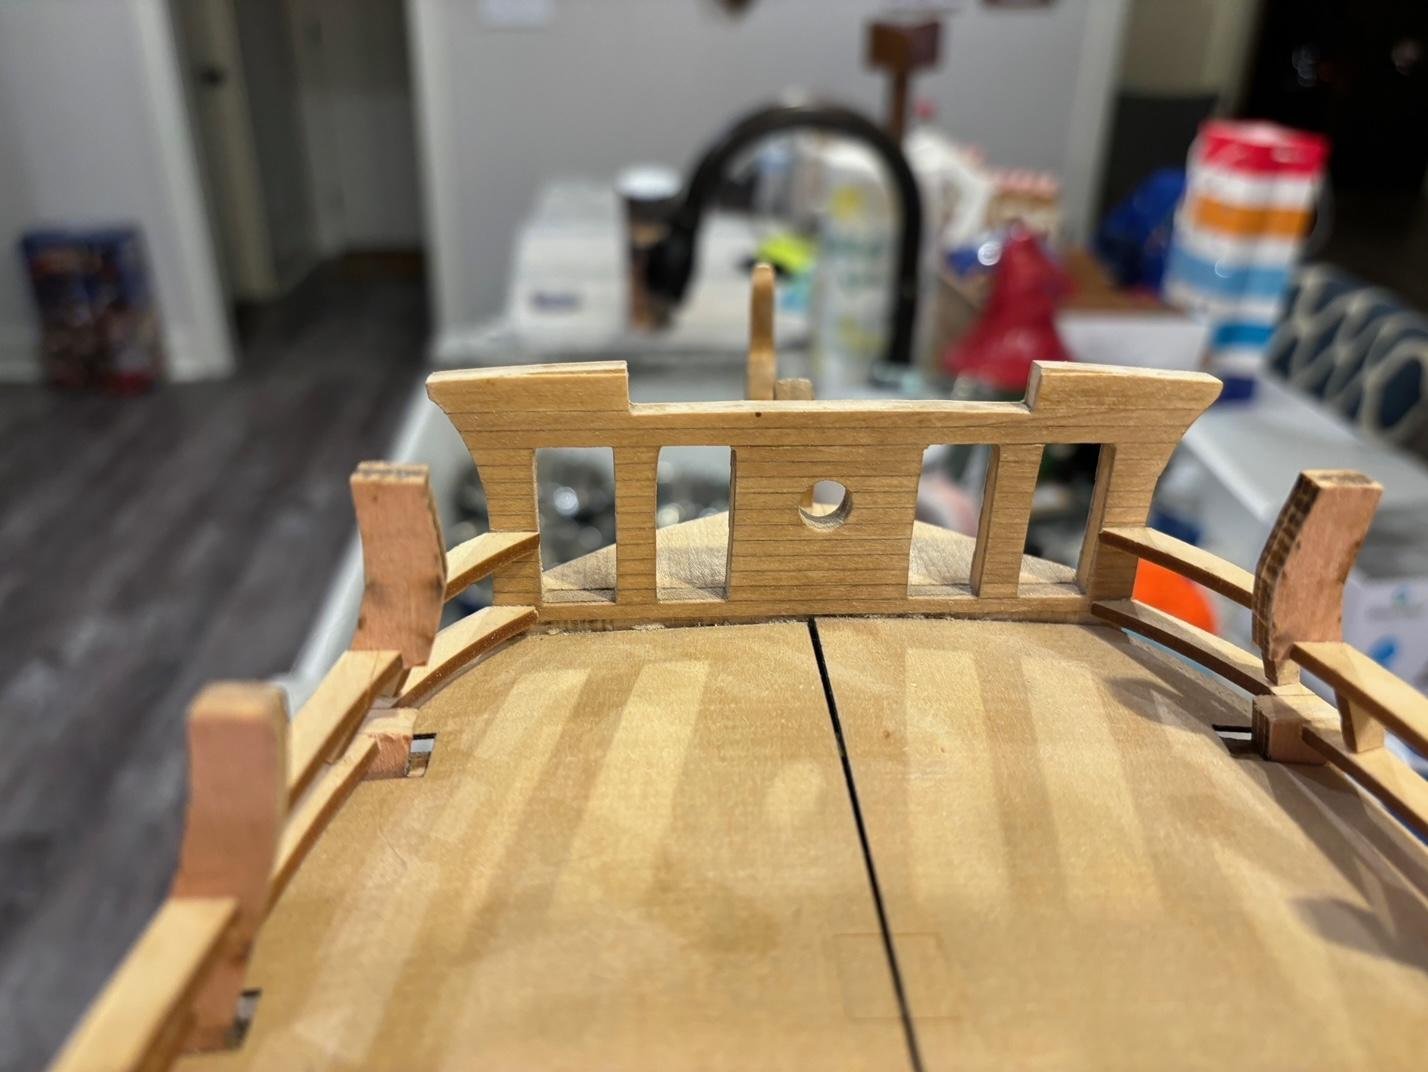
Got the forward part of the false deck removed and added some shims. I ended up having to add shims to 5 bulkheads. The last pic shows the false deck back in place. I haven't glued it down yet; but can already tell that shims is what it needed. Next up is to fix the sheer between hances. I sure am glad that the kit has extra pieces for the hances in it.


-
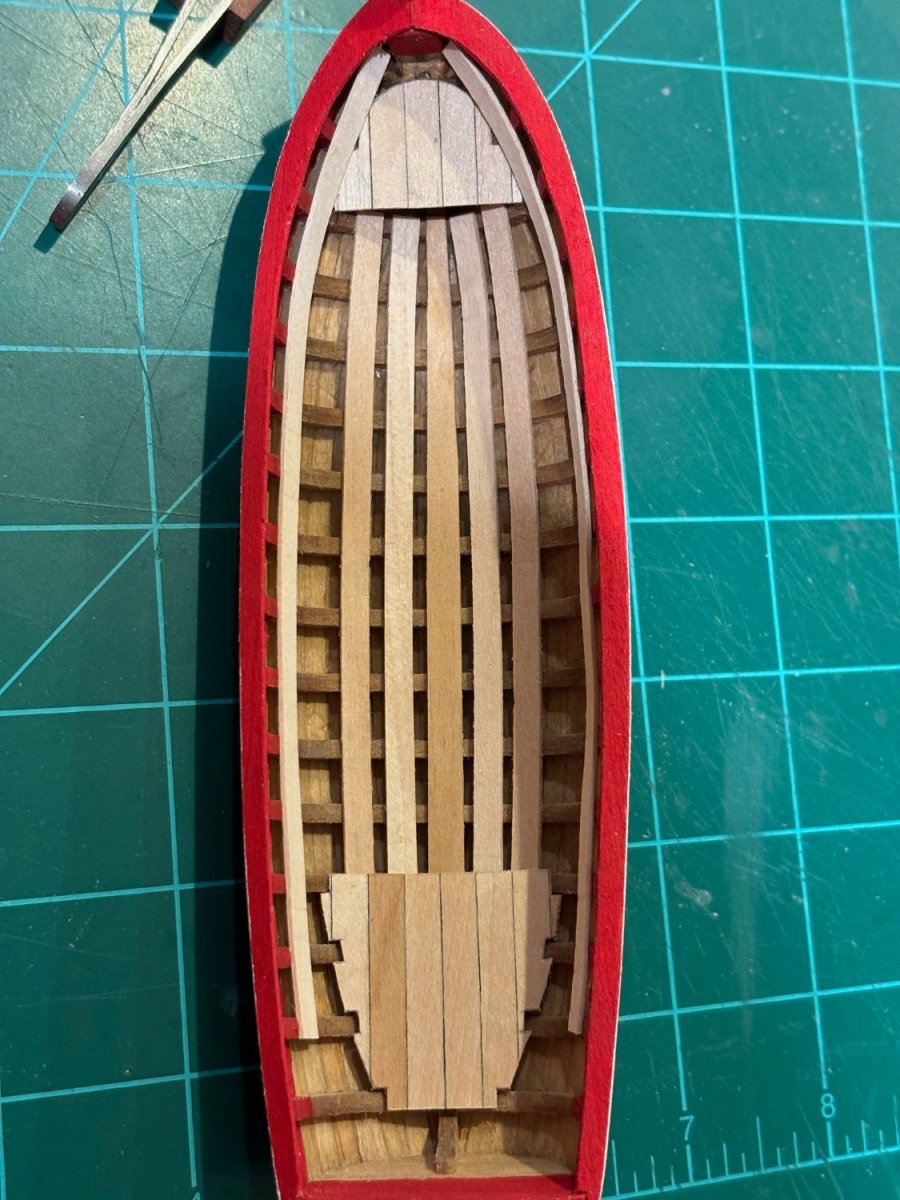
A little more work done today. Made and installed the thwarts and the front bulkhead piece for the locker at the back of the boat. Then I stained all of the interior parts with golden oak.

- 50 replies
-
- 5
-
-
- 18th century longboat
- model shipways
- (and 1 more)
-
My gap may be a little too large, the instructions only say to “Leave a consistent air space between each floor board.”
-
That was my thinking as well, just not something I’m looking forward to. I have the isopropyl and syringe out now. Hoping everything works out good
-
Hello Werner, Your model is absolutely stunning and a masterpiece! I can only hope that my attempt at the Confederacy will be half as good as yours.
-
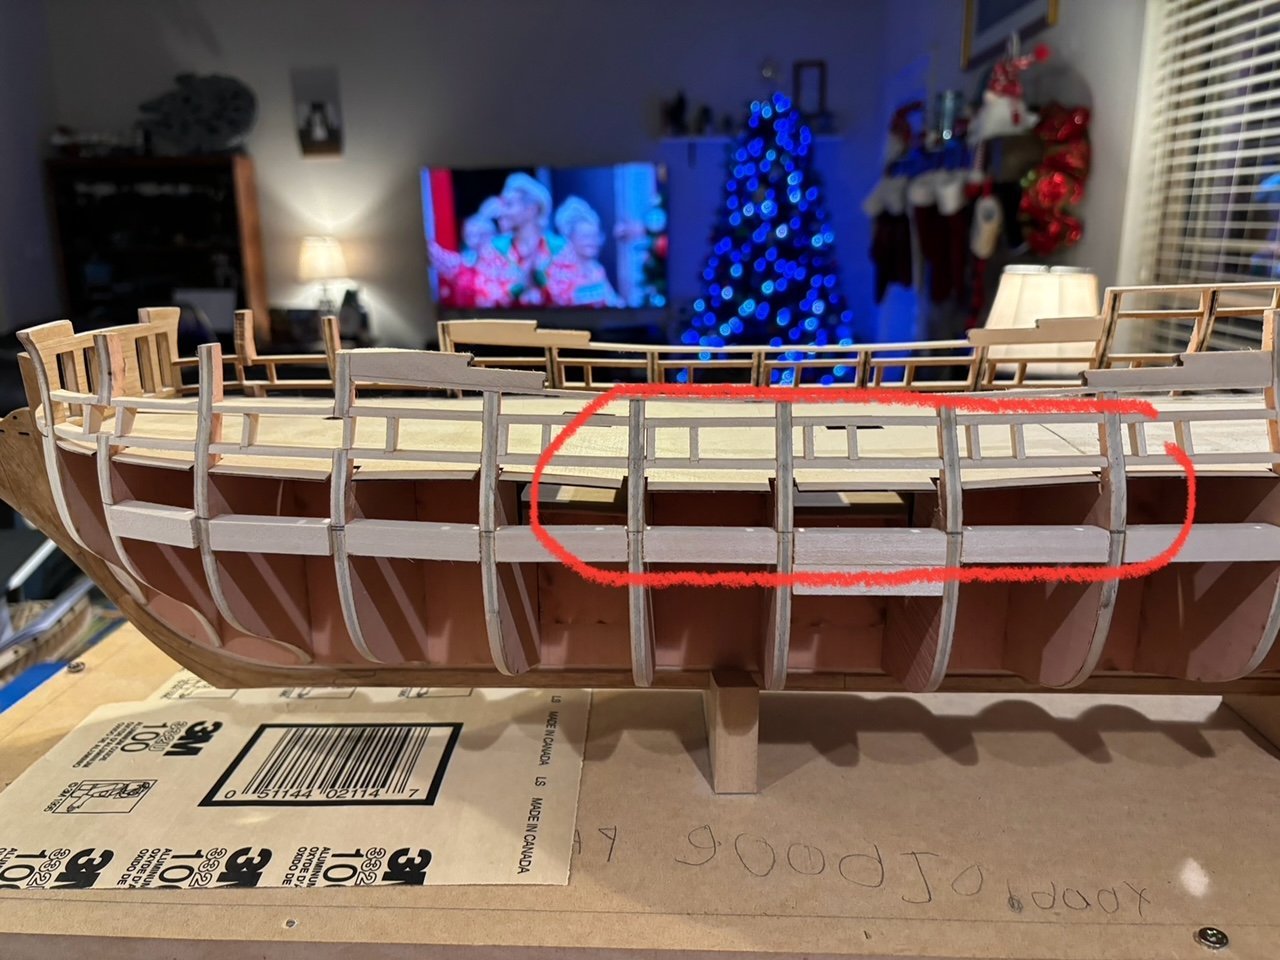
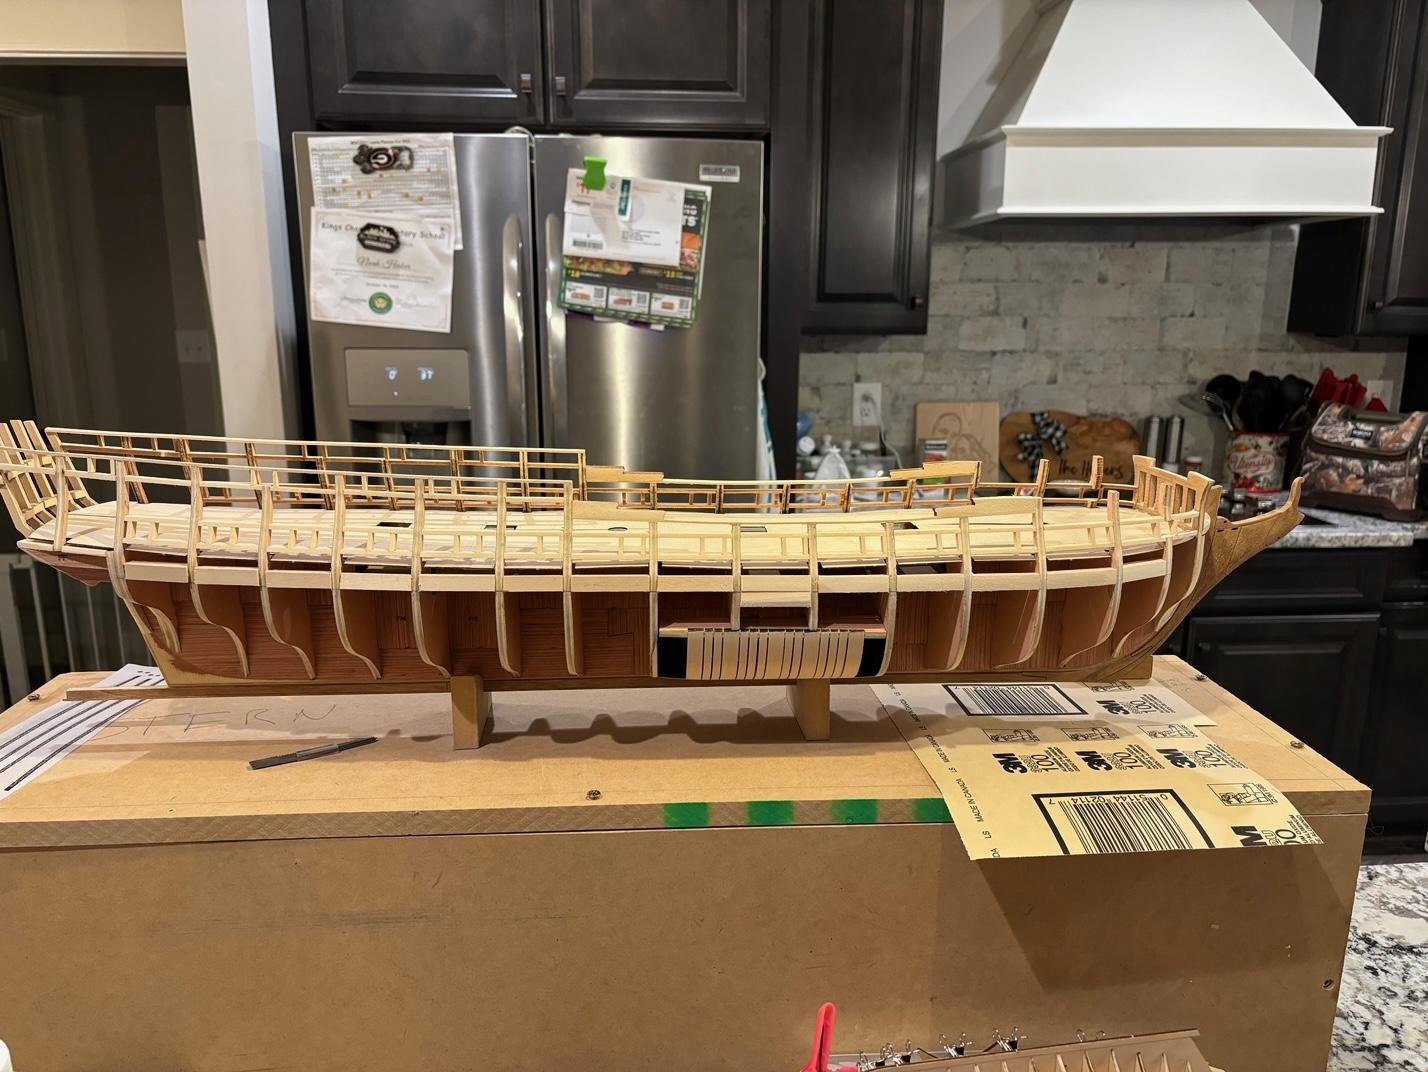
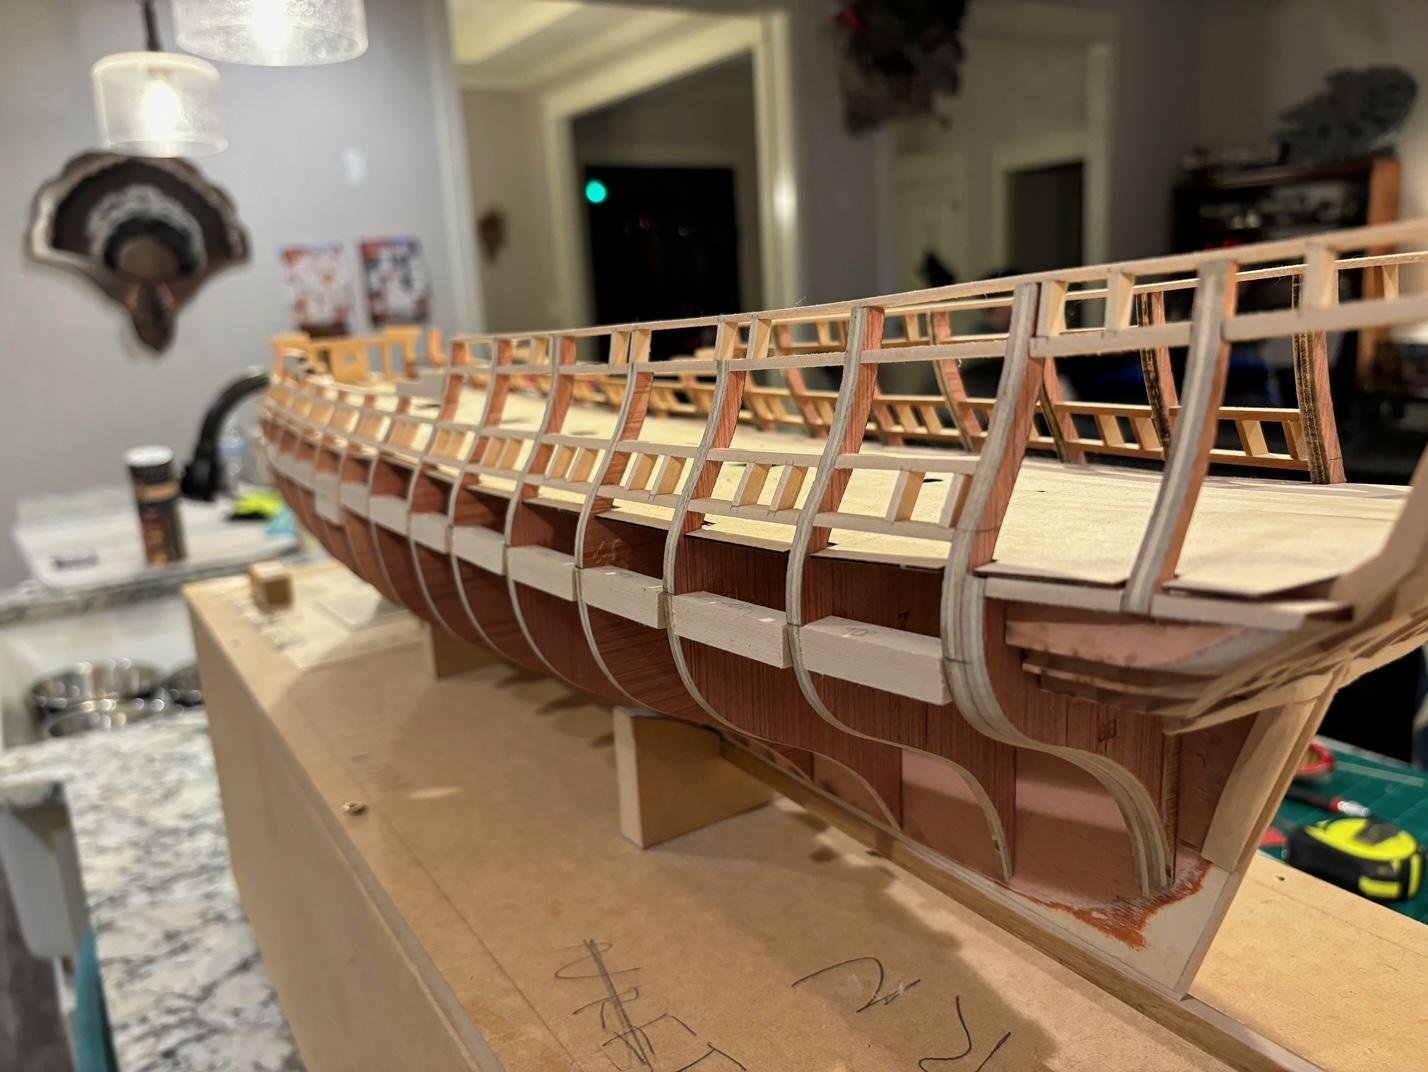
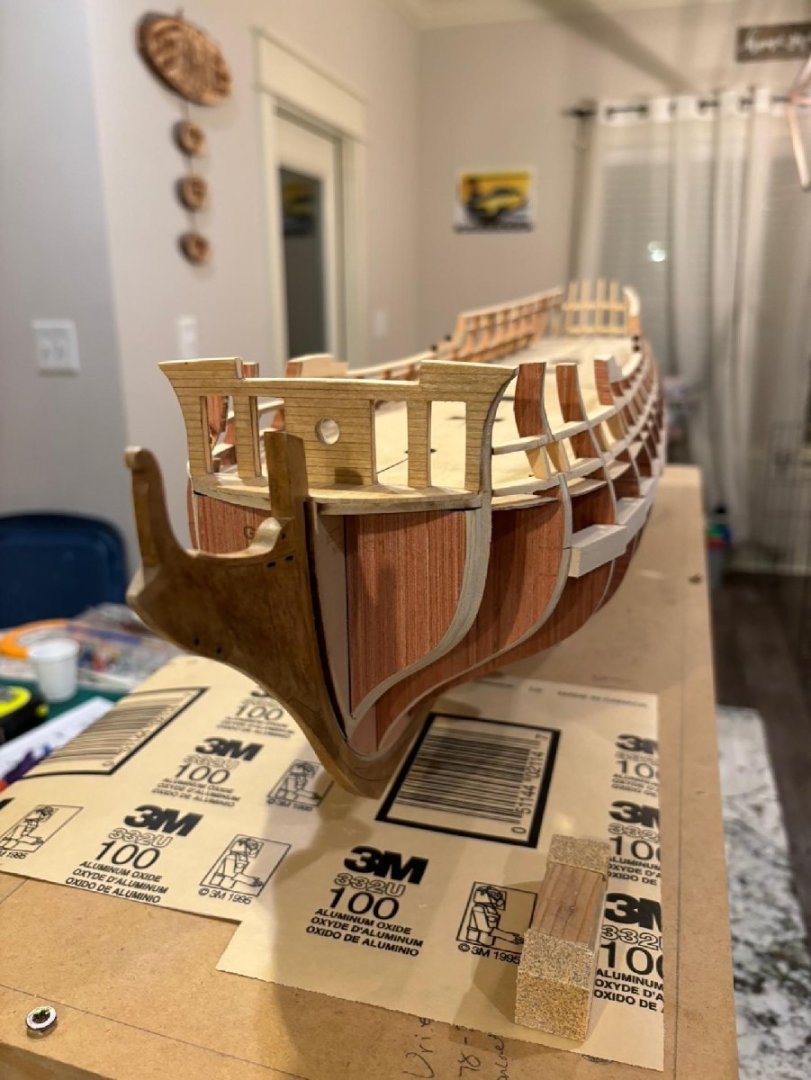
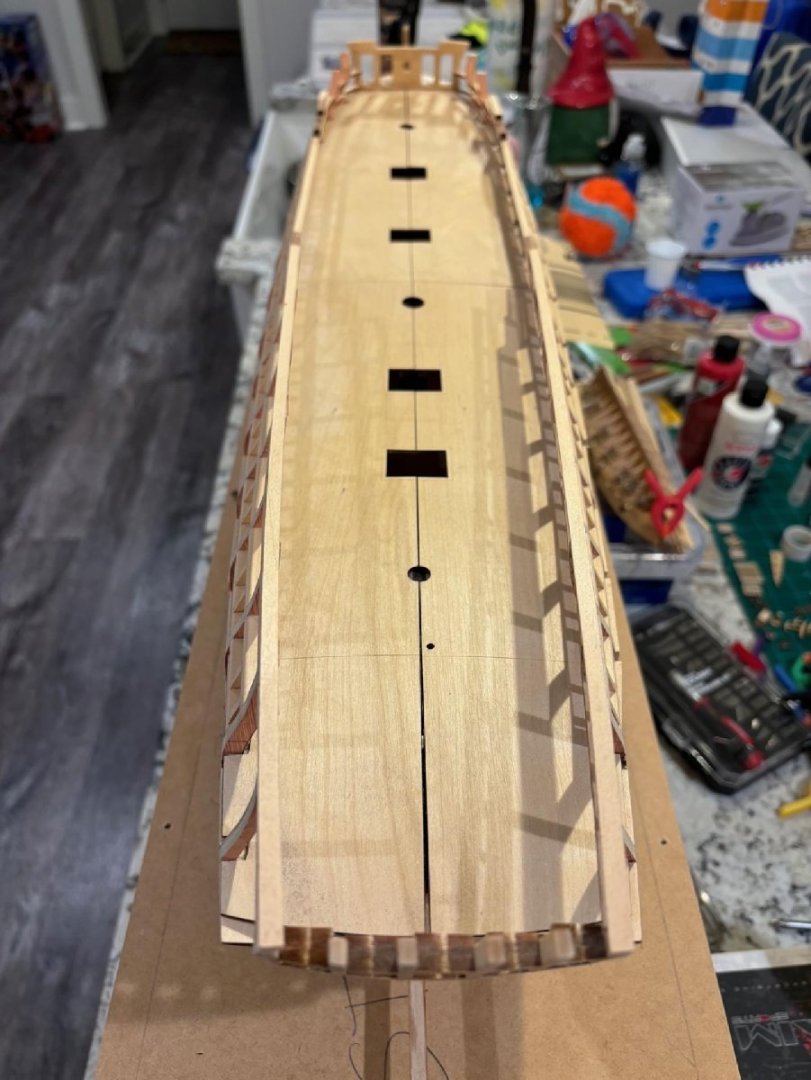
Continued with the fairing of the sweep ports. I'm about 1/4 of the way done. It is slow going since I am fairing them by hand. While I was steadily sanding away, I noticed that the false deck has a very noticeable dip at bulkheads A and 0. I know that I need to fix this and am thinking that i will just unglue them and attempt to add a spacer in between the bulkhead and false deck to get the false deck to the proper height. Not sure if that is the best way to go about it; I'm all ears if anyone has any better/easier options.
-
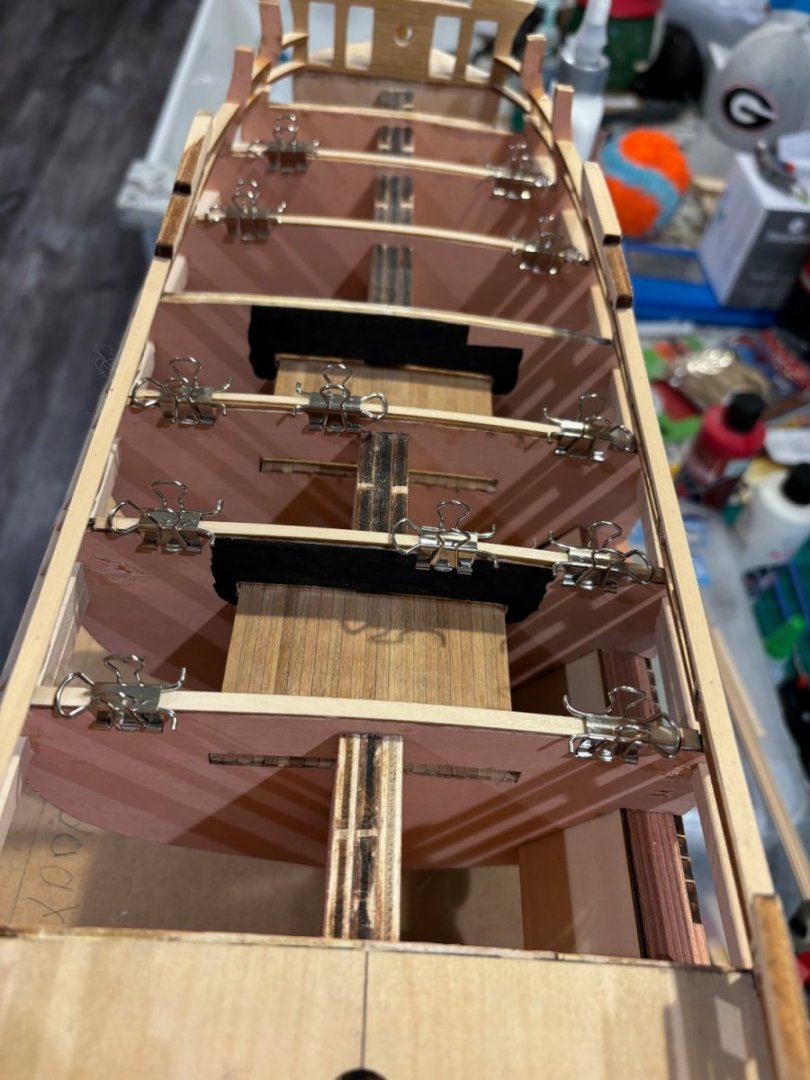
Started work on the interior of the boat. Got the floor boards, fore and aft deck and the rails installed.

- 50 replies
-
- 6
-
-
- 18th century longboat
- model shipways
- (and 1 more)
-
Werner, Thank you and I will check out and follow your build log.
-
Allan, thanks for the tip. I will definitely do that the next time I have to paint a model below the water line.
- 50 replies
-
- 1
-
-
- 18th century longboat
- model shipways
- (and 1 more)
-
Tom, I just found your build log and will be following it intently since I plan to build this kit in the future. So far I love the way you explain all of your processes. Please keep up the great work and Happy Holidays to you as well.
- 108 replies
-
- 1
-
-
- Endurance
- Shackleton
- (and 1 more)
-
Better late than never, I guess; but here is my build log for the USF Confederacy. There are many like it, but this one is mine, lol. I started this build over 5 year ago. Then it got put on hold in Jan of 2018 due to my retirement from active duty Air Force, move from Texas to Georgia and starting a new job. Before I knew it, 5 years have past and I was looking at the MDF box the model was placed into for the move on the shelf in my closet. I decided to pull it down and open up the box. Then I decided it was time to start work on it again. I don't have any pictures of my progress up to this point, but I have a pictures of the current state of the build. I am currently in the process of fairing the sweep ports.


-
Thanks, Mark. I'm sure that I will be making a little saw dust on the Raleigh before too long. There is only so much you can do on a model before you have to set it down and walk away to let things like glue set and dry or paint dry. I think that is why I have 3 different builds in various states at the moment.
-
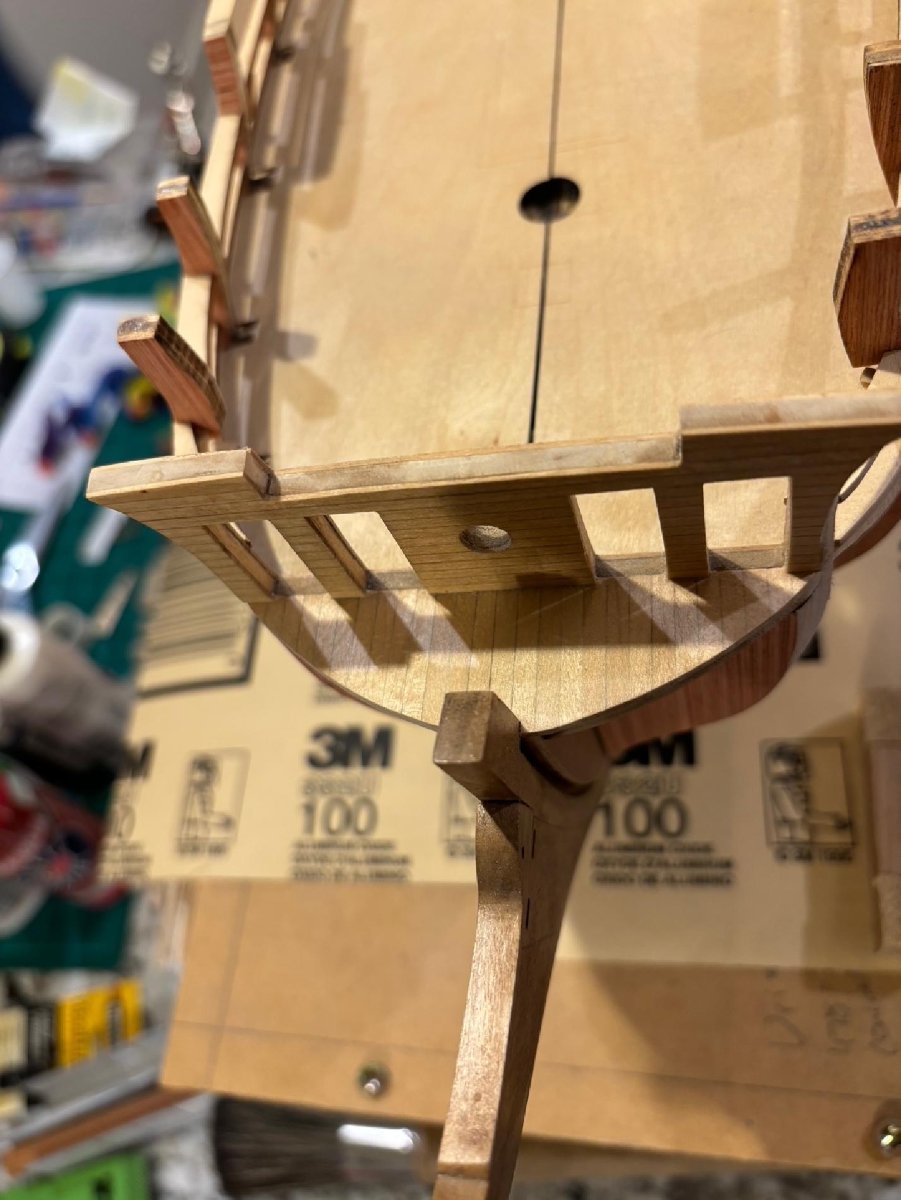
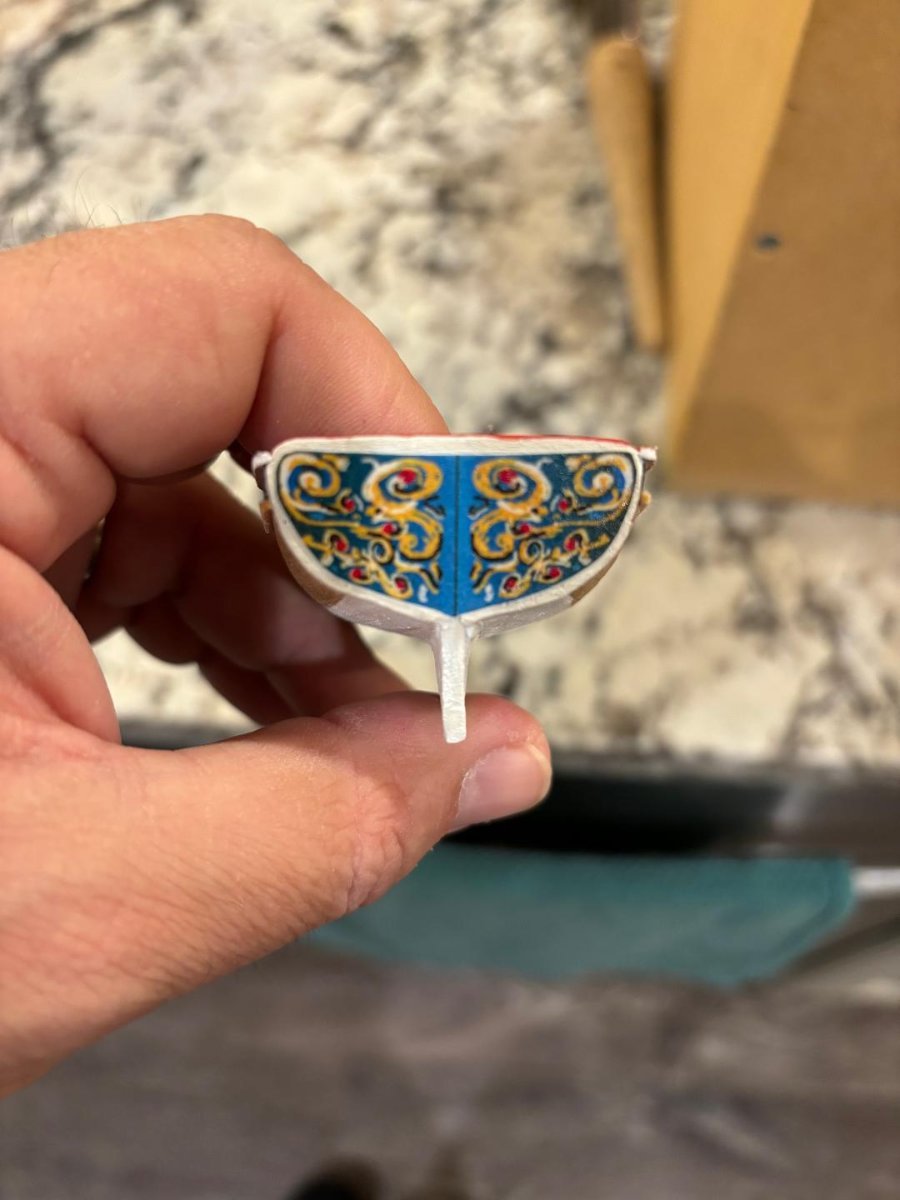
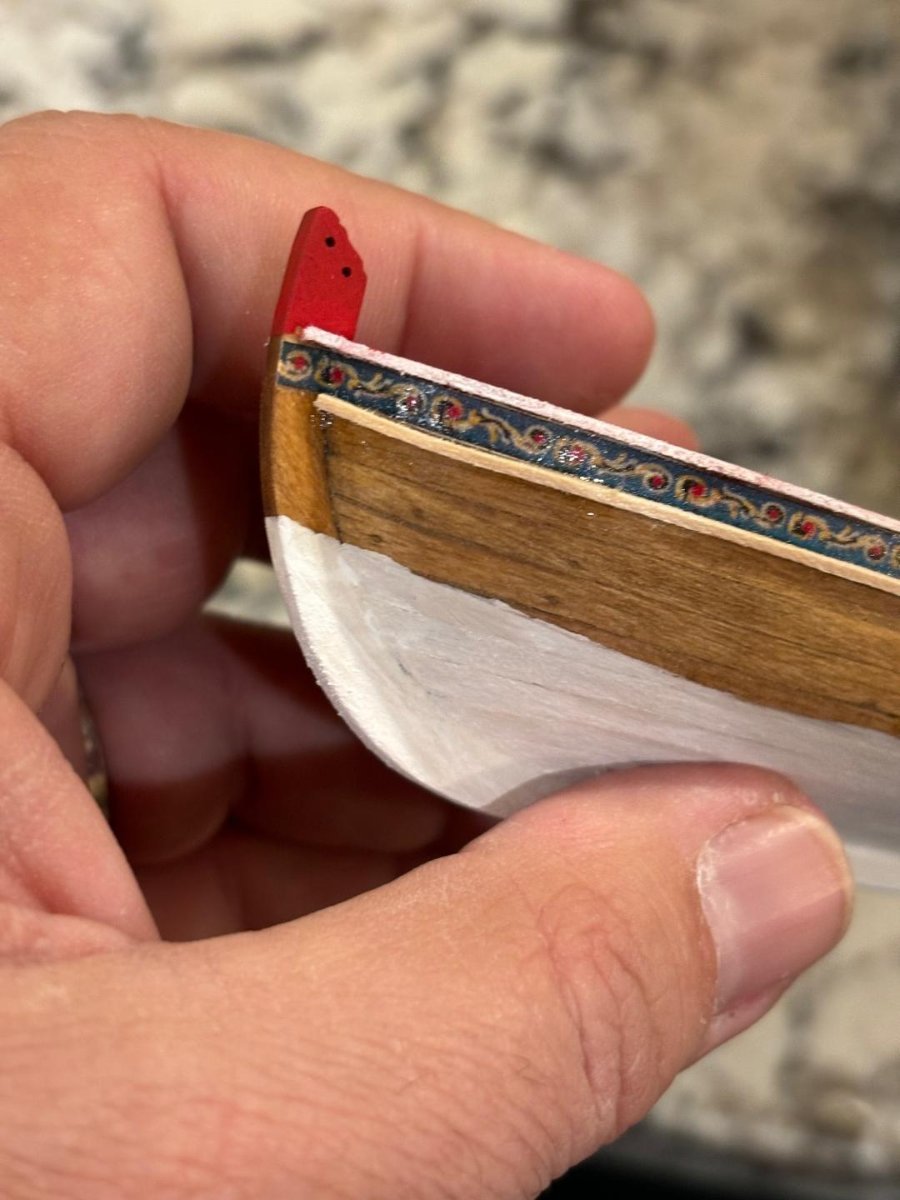
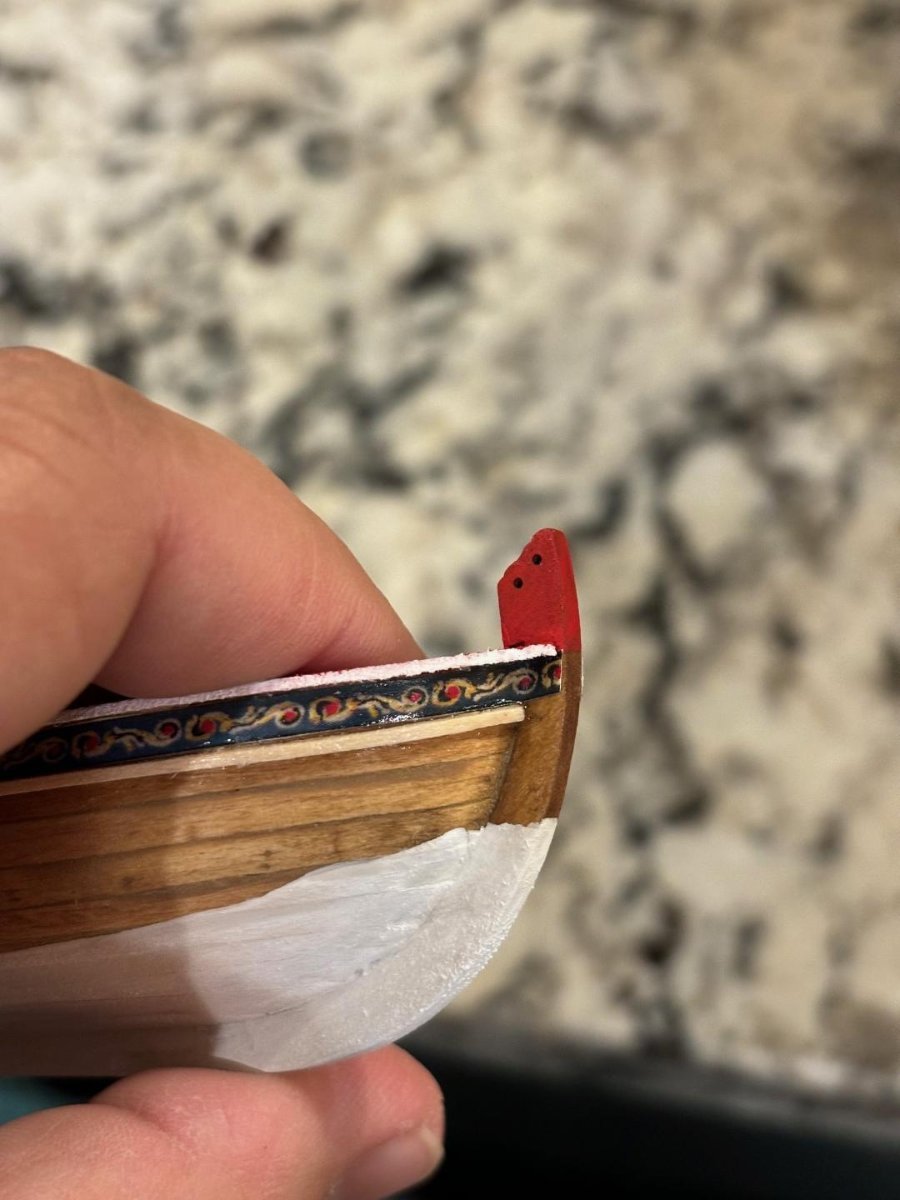
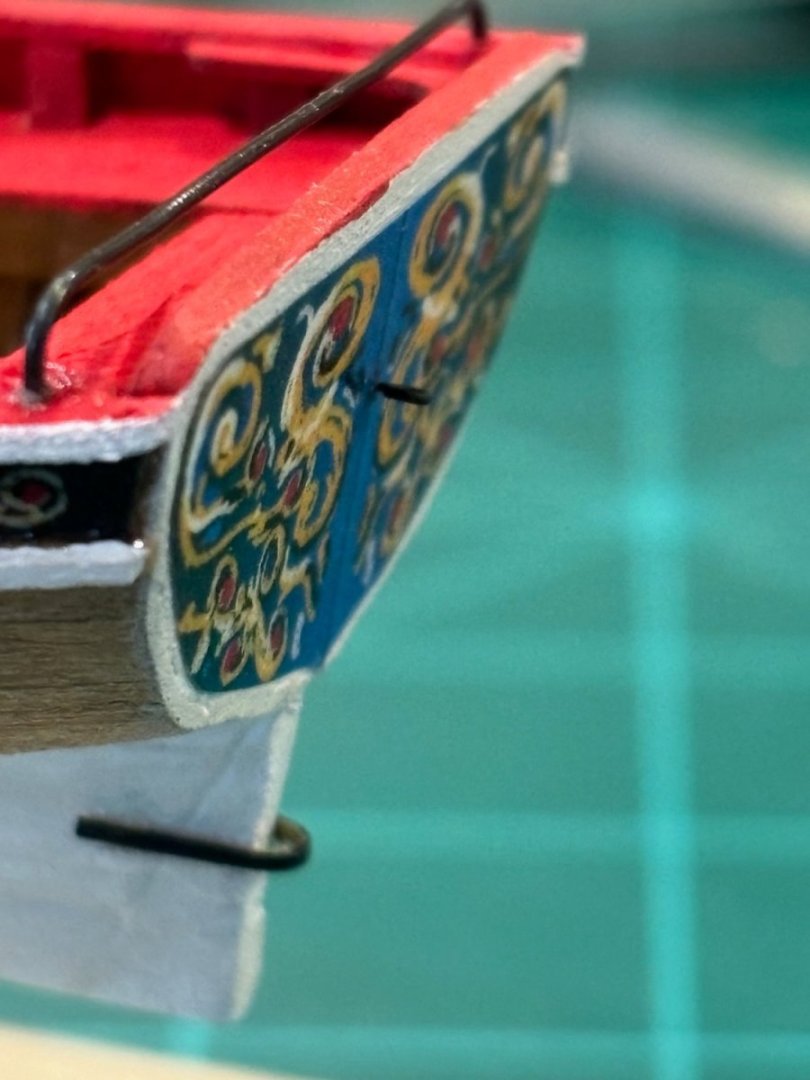
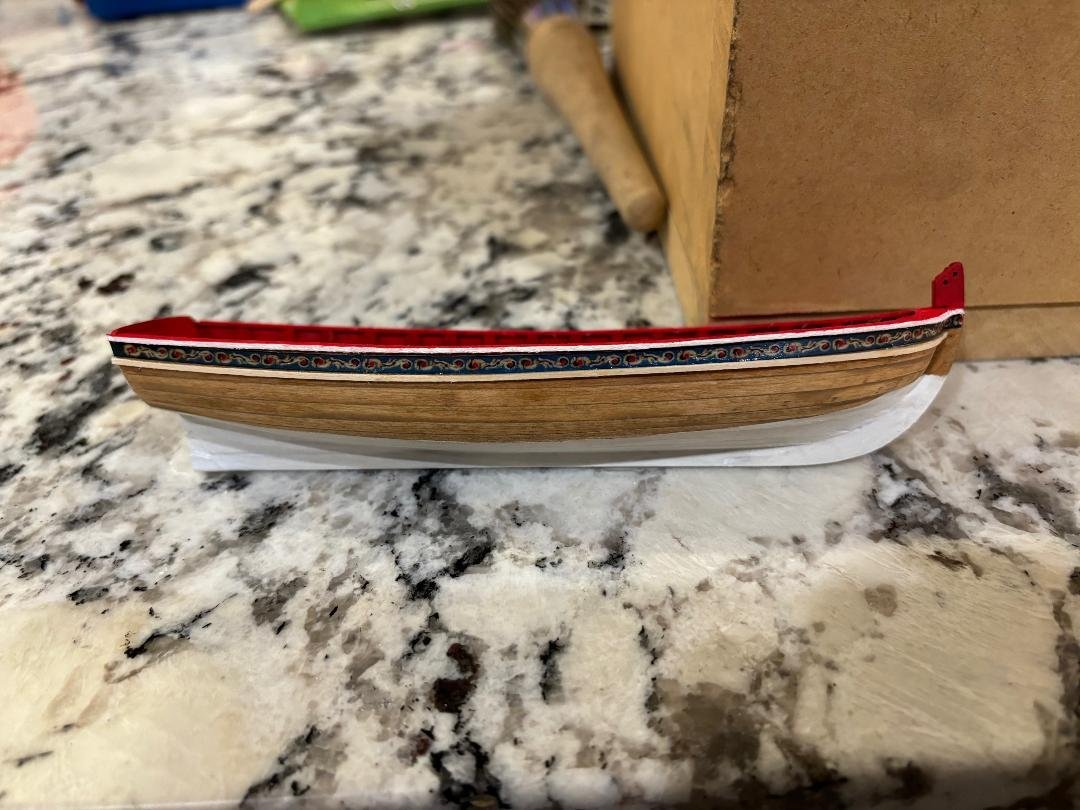
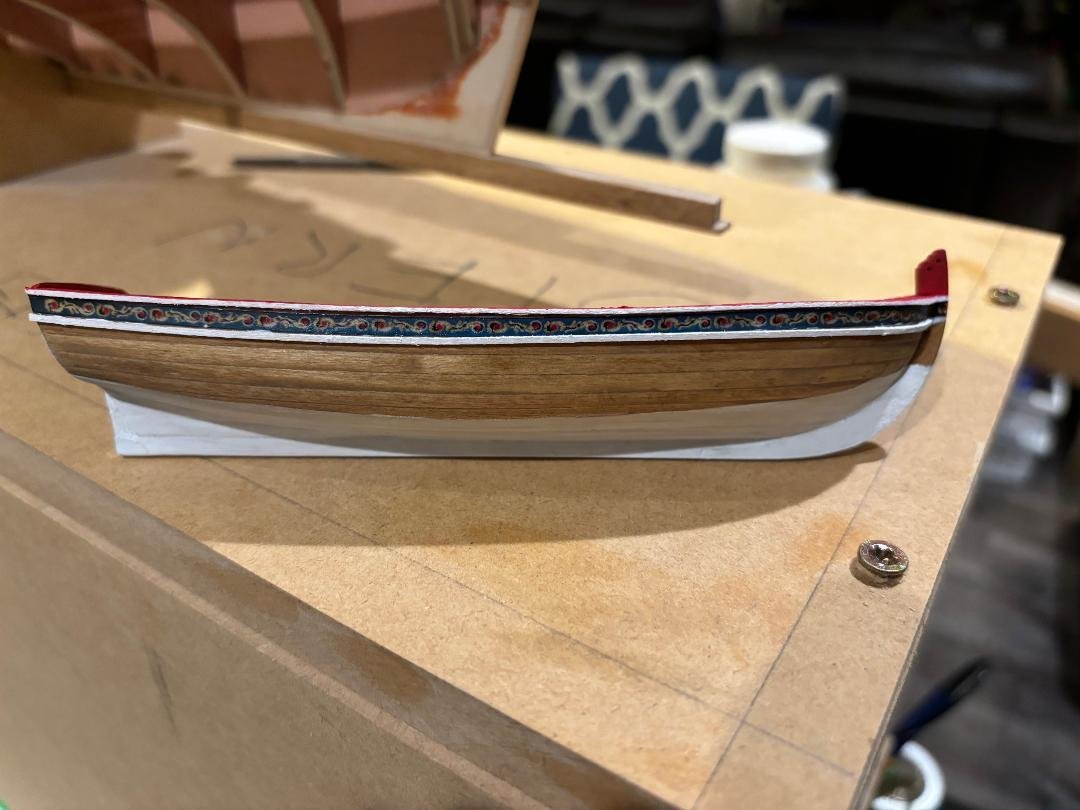
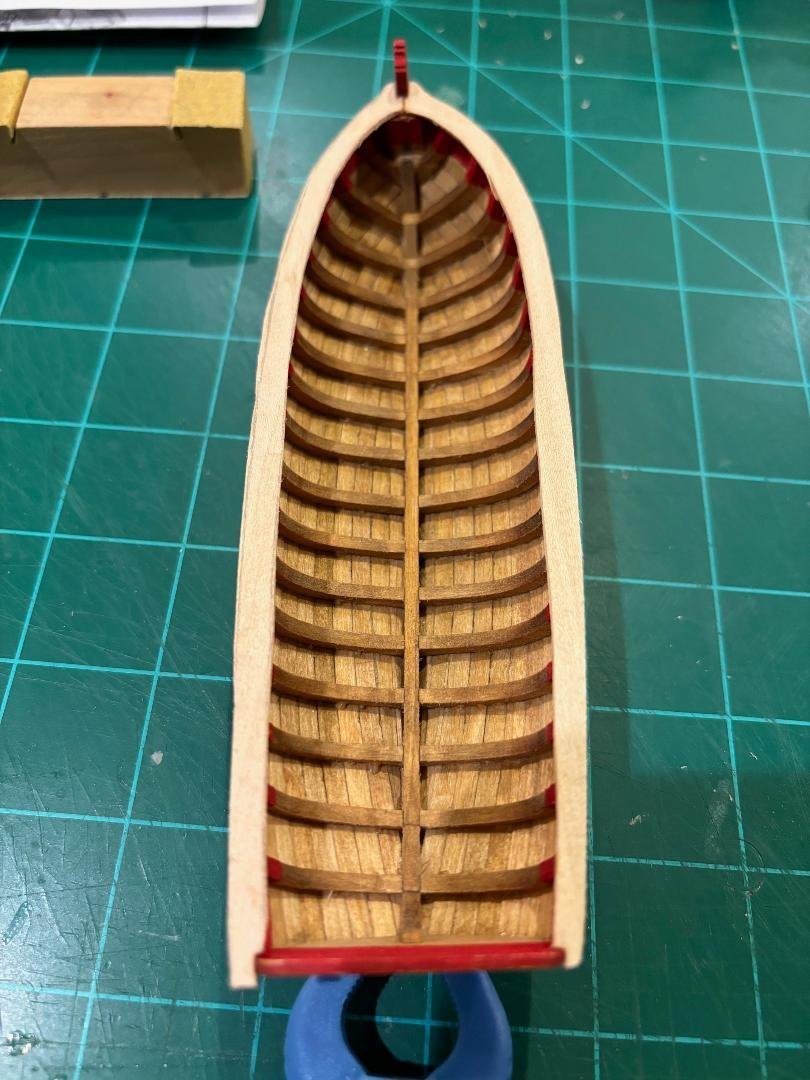
Had about an hour or so to work on the longboat today, so I cut out and installed the frieze. I sprayed the paper with the frieze on it with an acrylic sealer that I had in the garage. Then I cut them out and glued them onto the longboat with ModPog glue. Once that was done, I installed the rail under the frieze. Once the glue was dry, I painted the rail white and then touched up any of the other painted areas as needed.


- 50 replies
-
- 13
-
-
- 18th century longboat
- model shipways
- (and 1 more)
-
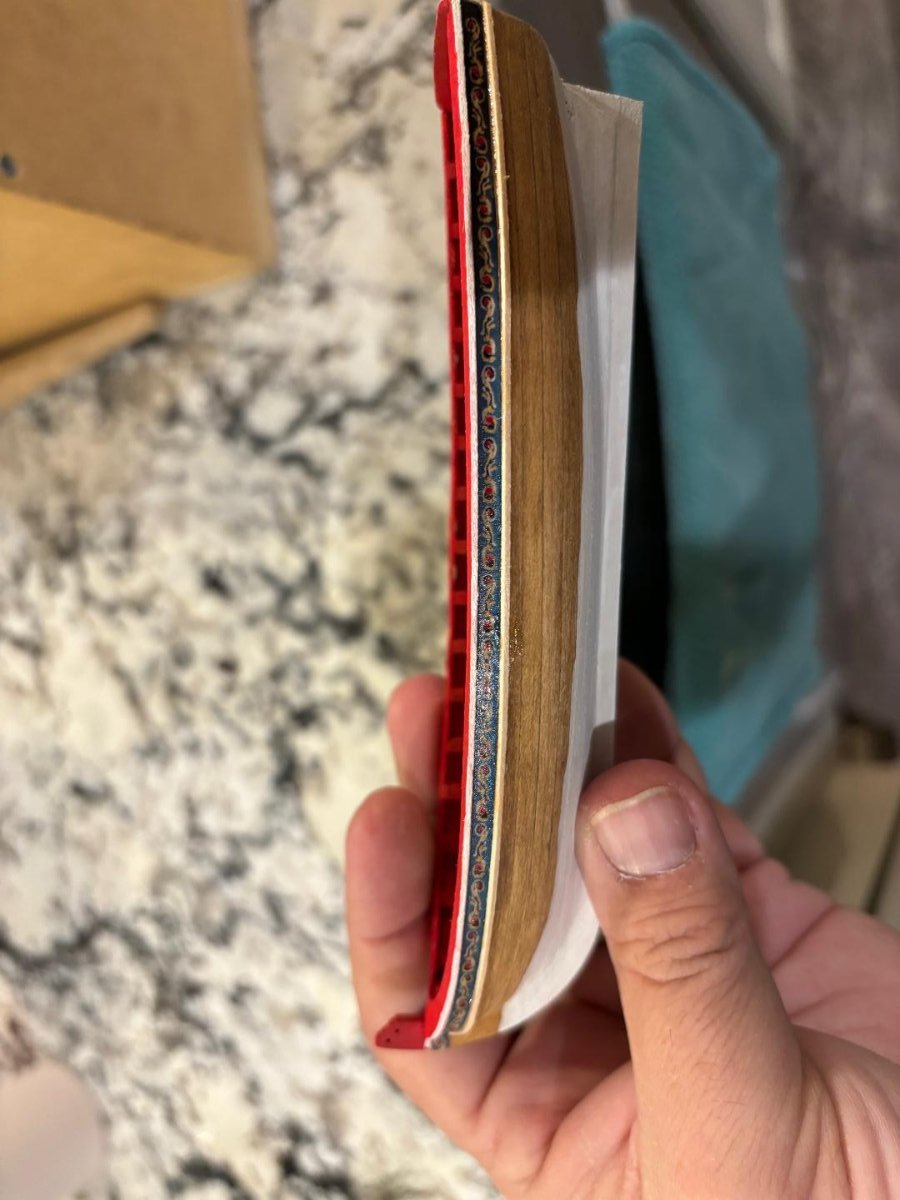
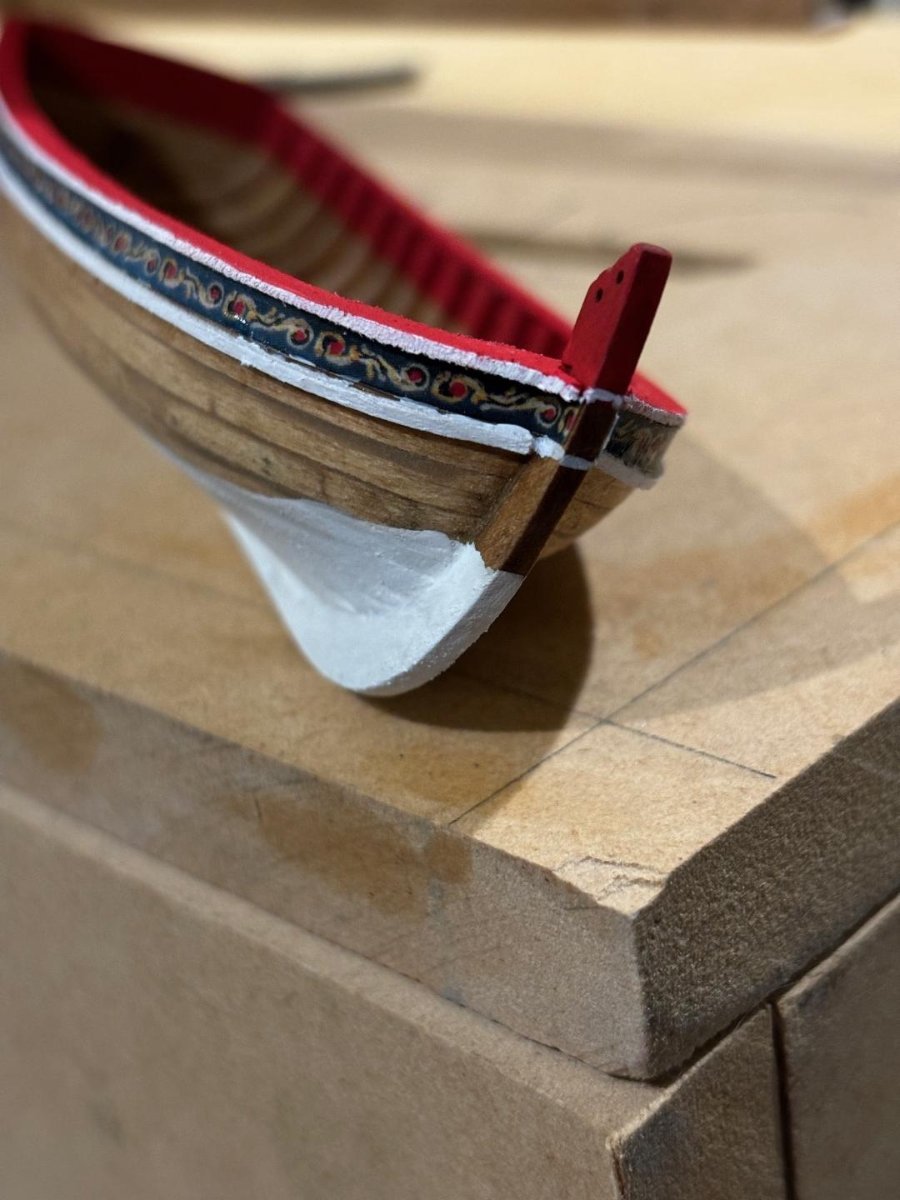
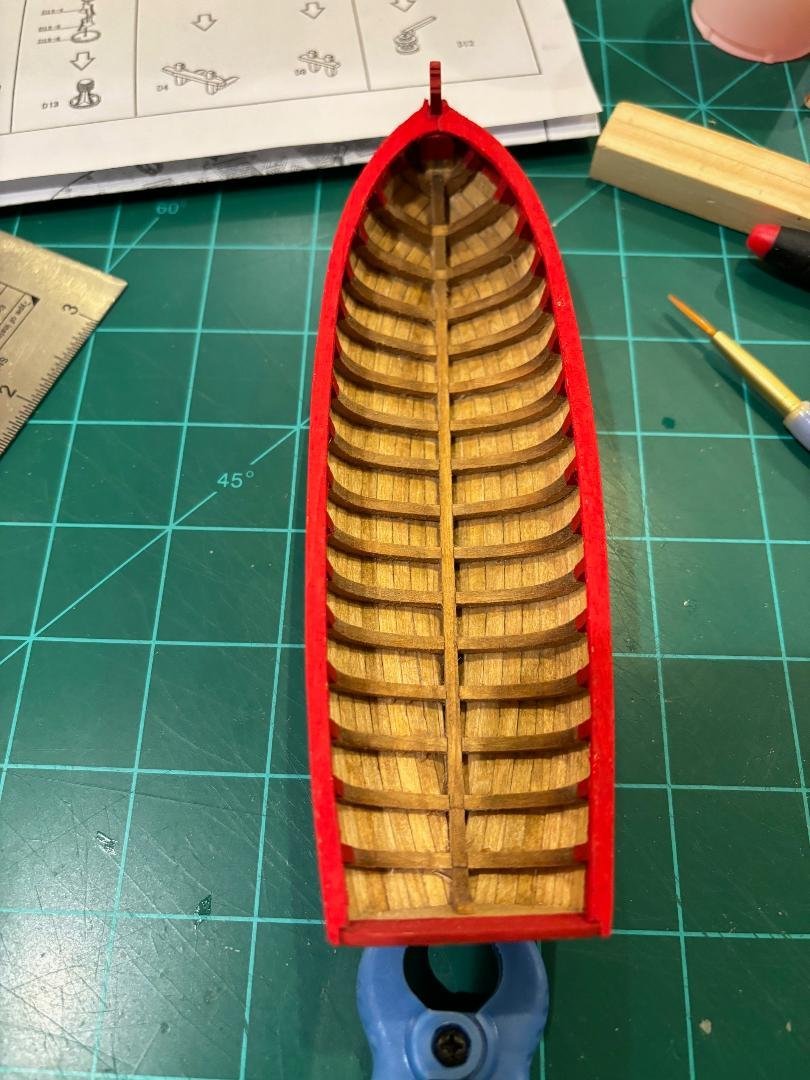
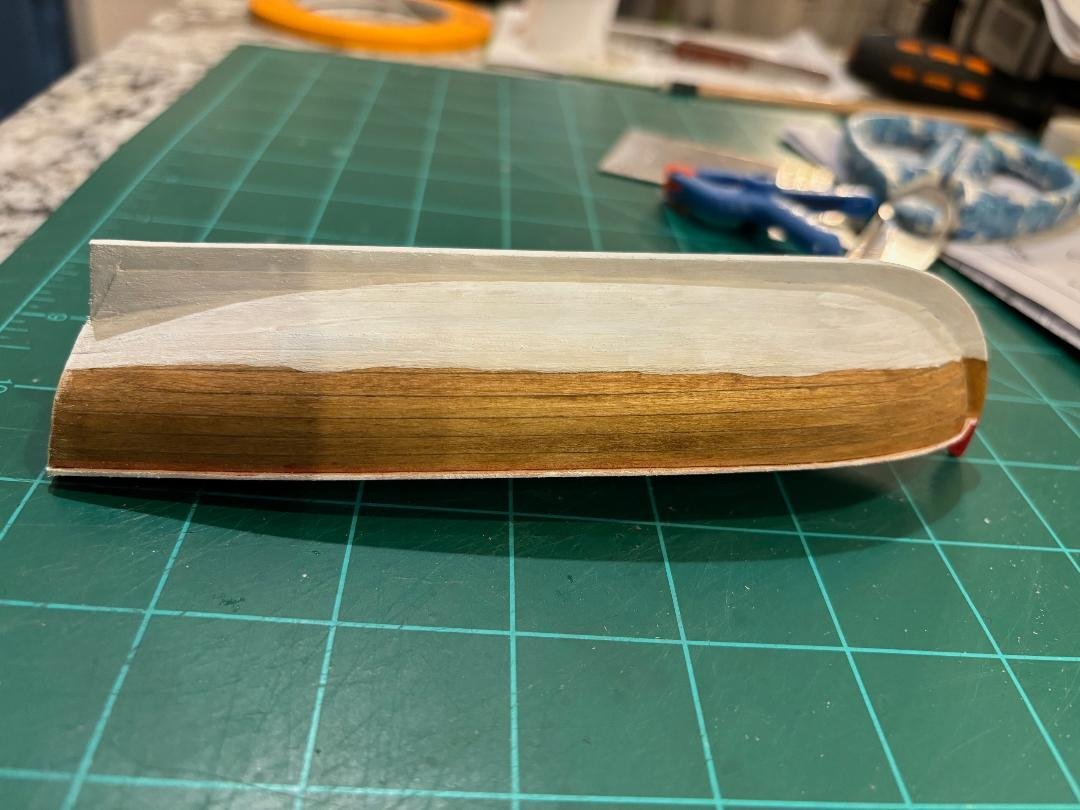
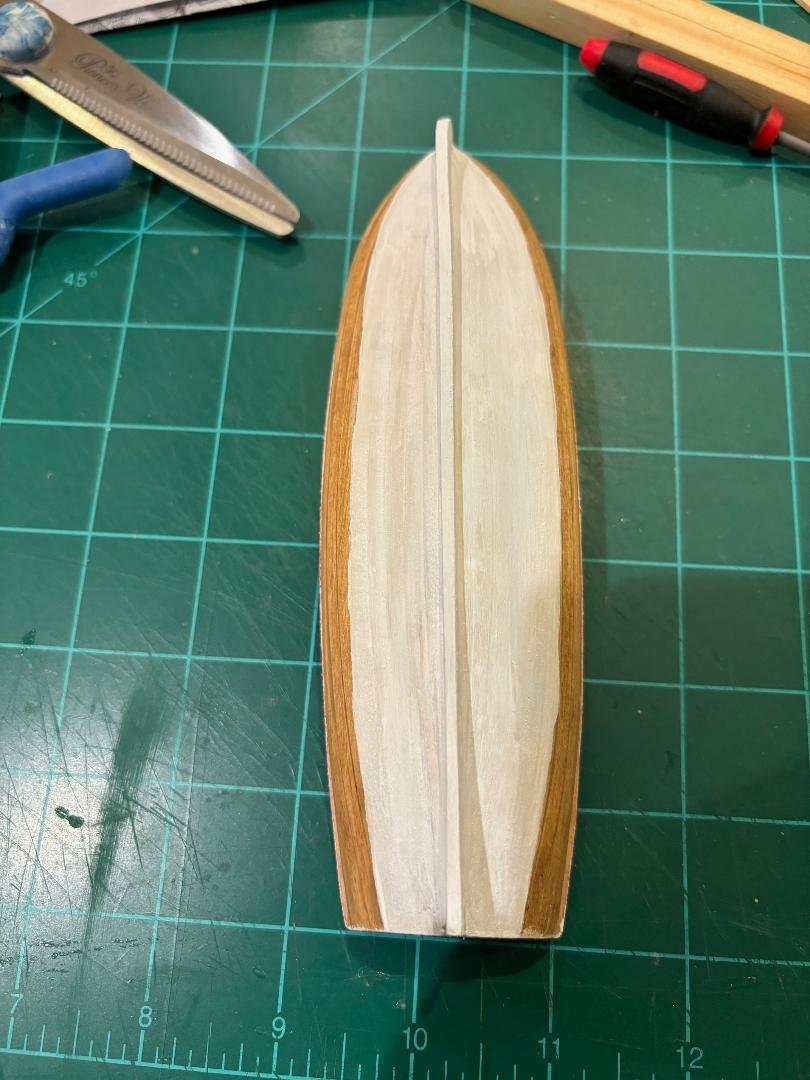
A little more progress to report. I finished sanding and fairing the interior of the frames and then stained the boat with golden oak. Once that was dry, I made, installed and shaped the cap rail using the photocopy of the plans and cutting out a template of the rails. Once the oversized rails were cut from the bass sheet, I glued them onto the model and shaped them to their final dimensions with some files and sanding blocks. Then I added some red paint to the rails and the tops of the inside frames and some white paint to the bottom of the hull under the water line. I just eyeballed it as to where I felt the waterline would be and used a thin piece of masking tape that I use for polishing guitar frets to get a straight line. Next step is to add the painted frieze to the transom and sides. Anyways, here are the pictures:
- 50 replies
-
- 9
-
-
- 18th century longboat
- model shipways
- (and 1 more)
-
The build is on hold at the moment. Life happened between 2017 and now. Retirement from the Air Force in early 2018, a move from Texas to Georgia, started and new job, etc, etc. All of these things sent the build to the back of the closet along with my 18th century longboat and USF Confederacy. I have just now pulled them back out and started back on the longboat. I plan to get back onto this build soon, just not sure how soon.
-
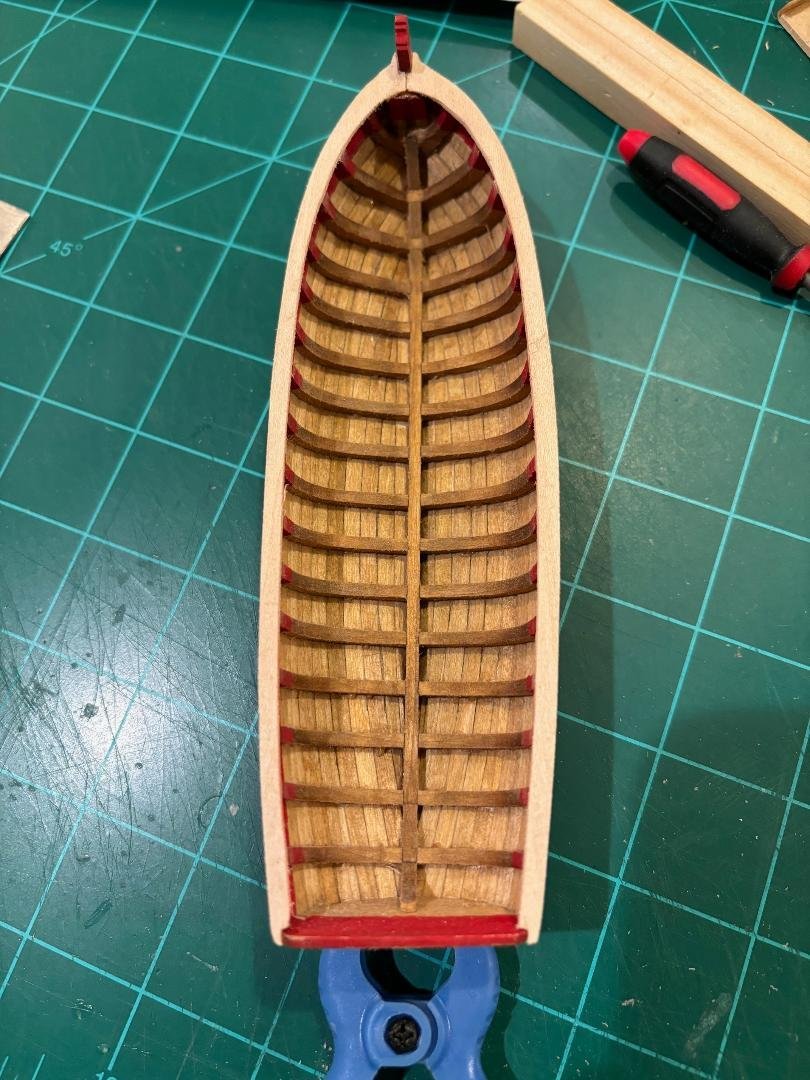
Got the insides of the frames sanded and faired. Now to apply some finish to the hull inside and out and add the cap rail.
- 50 replies
-
- 6
-
-
- 18th century longboat
- model shipways
- (and 1 more)
-
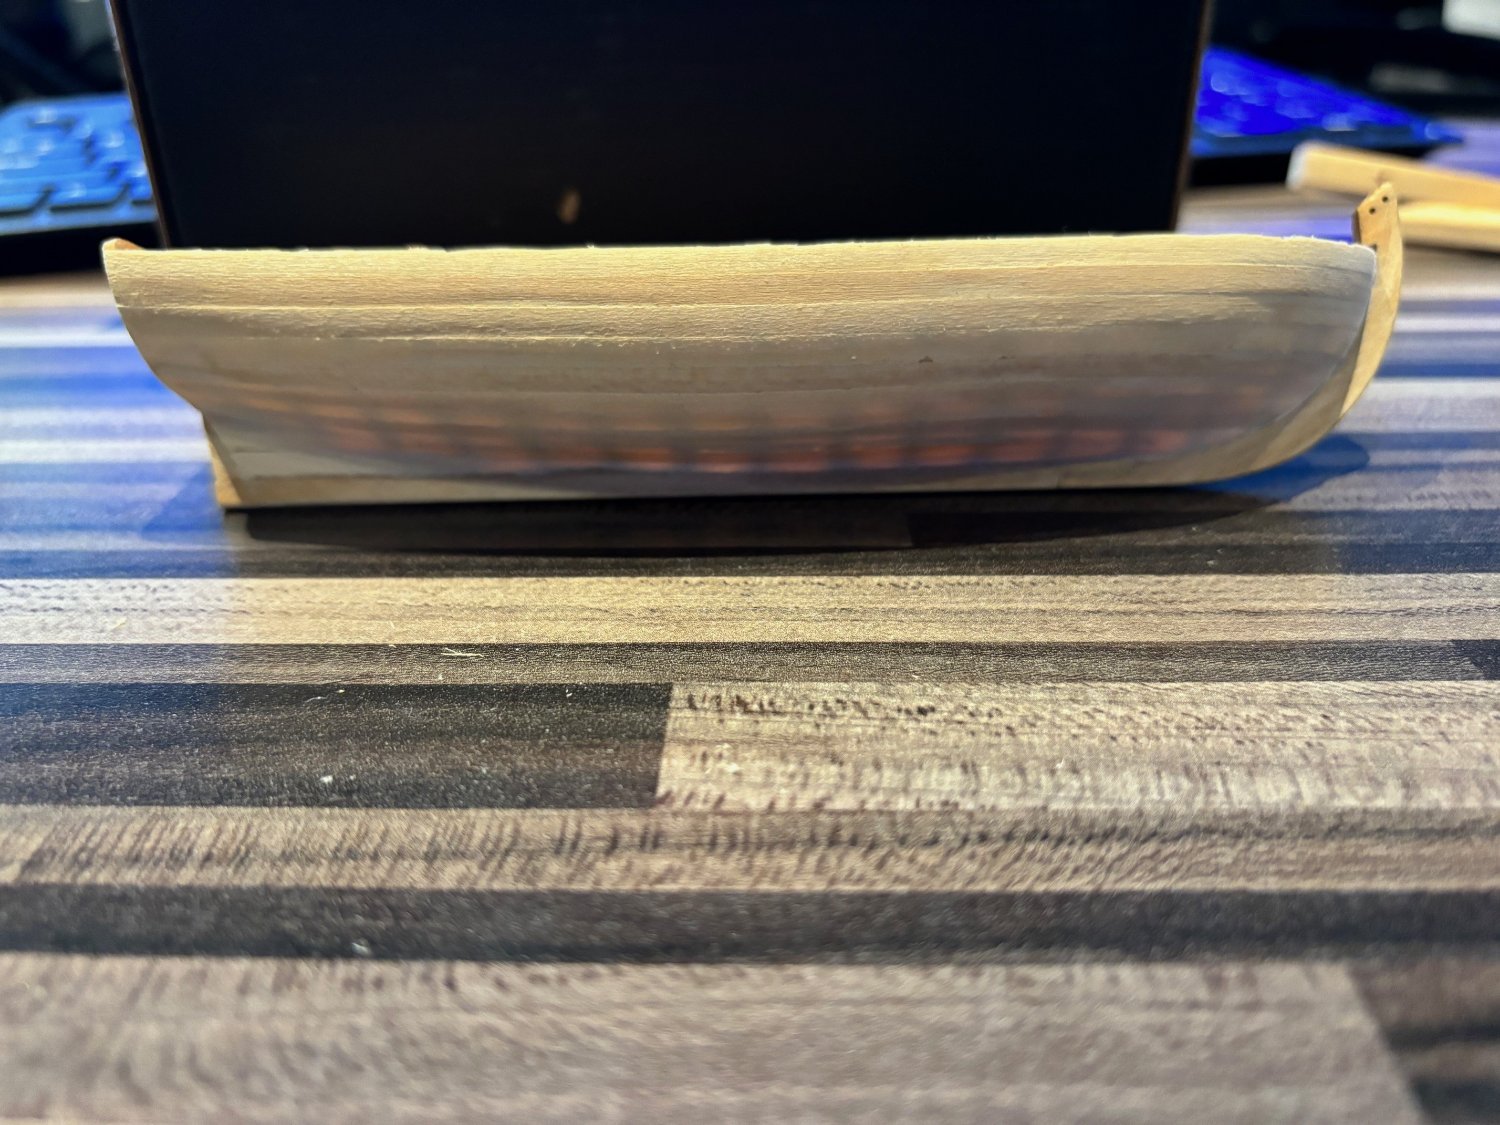
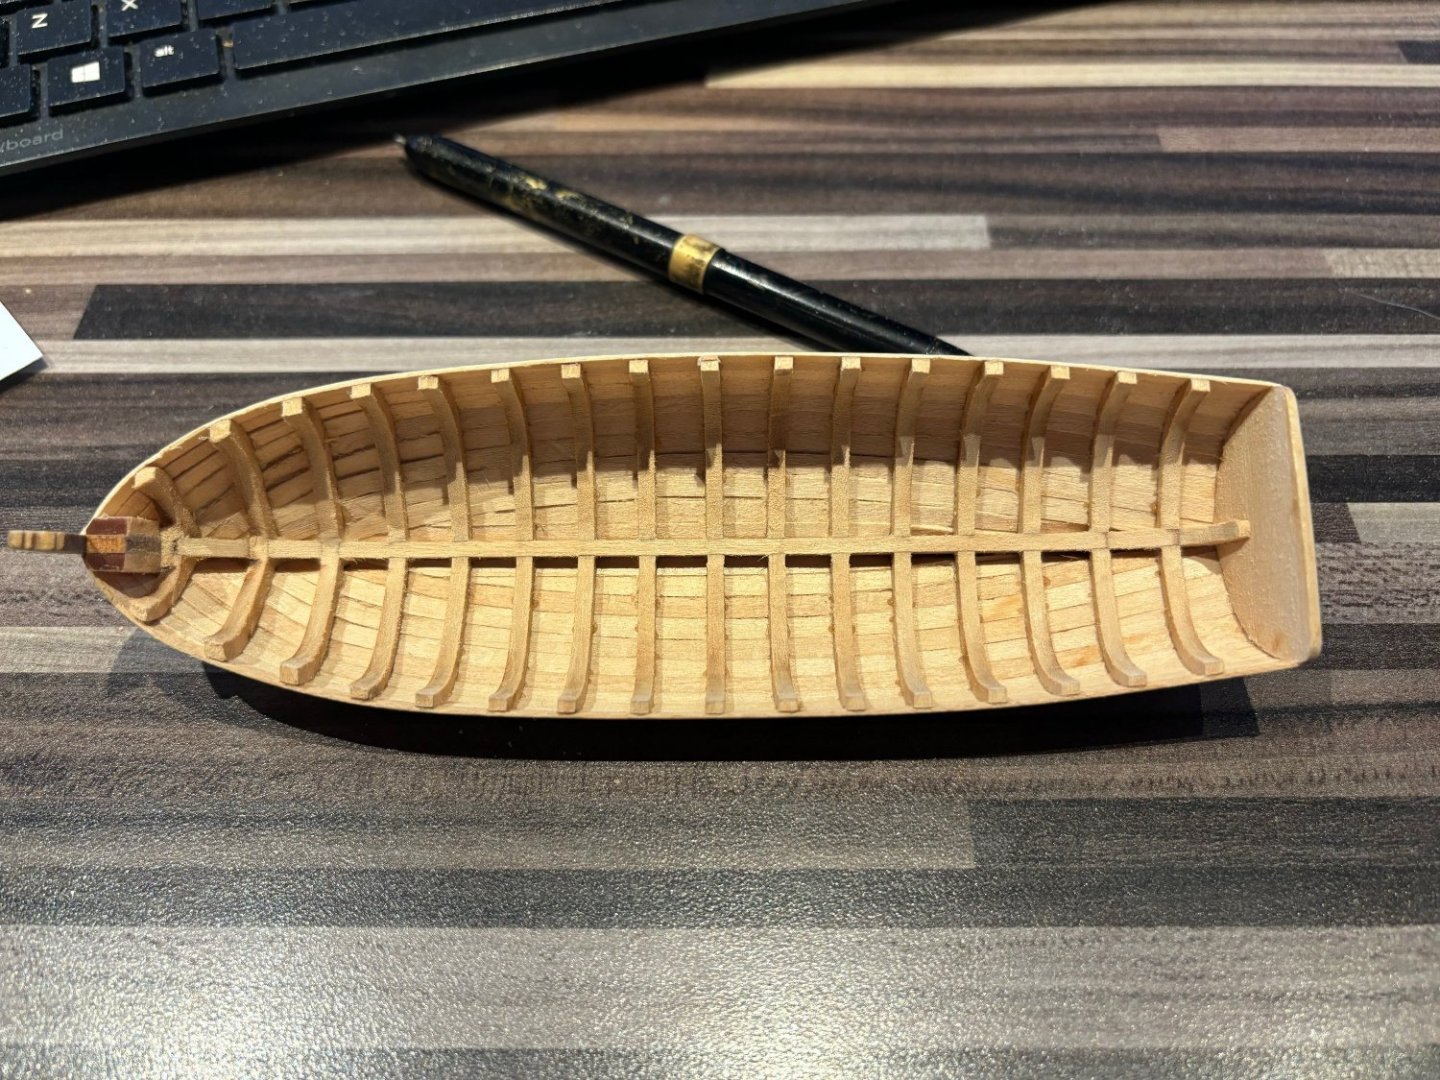
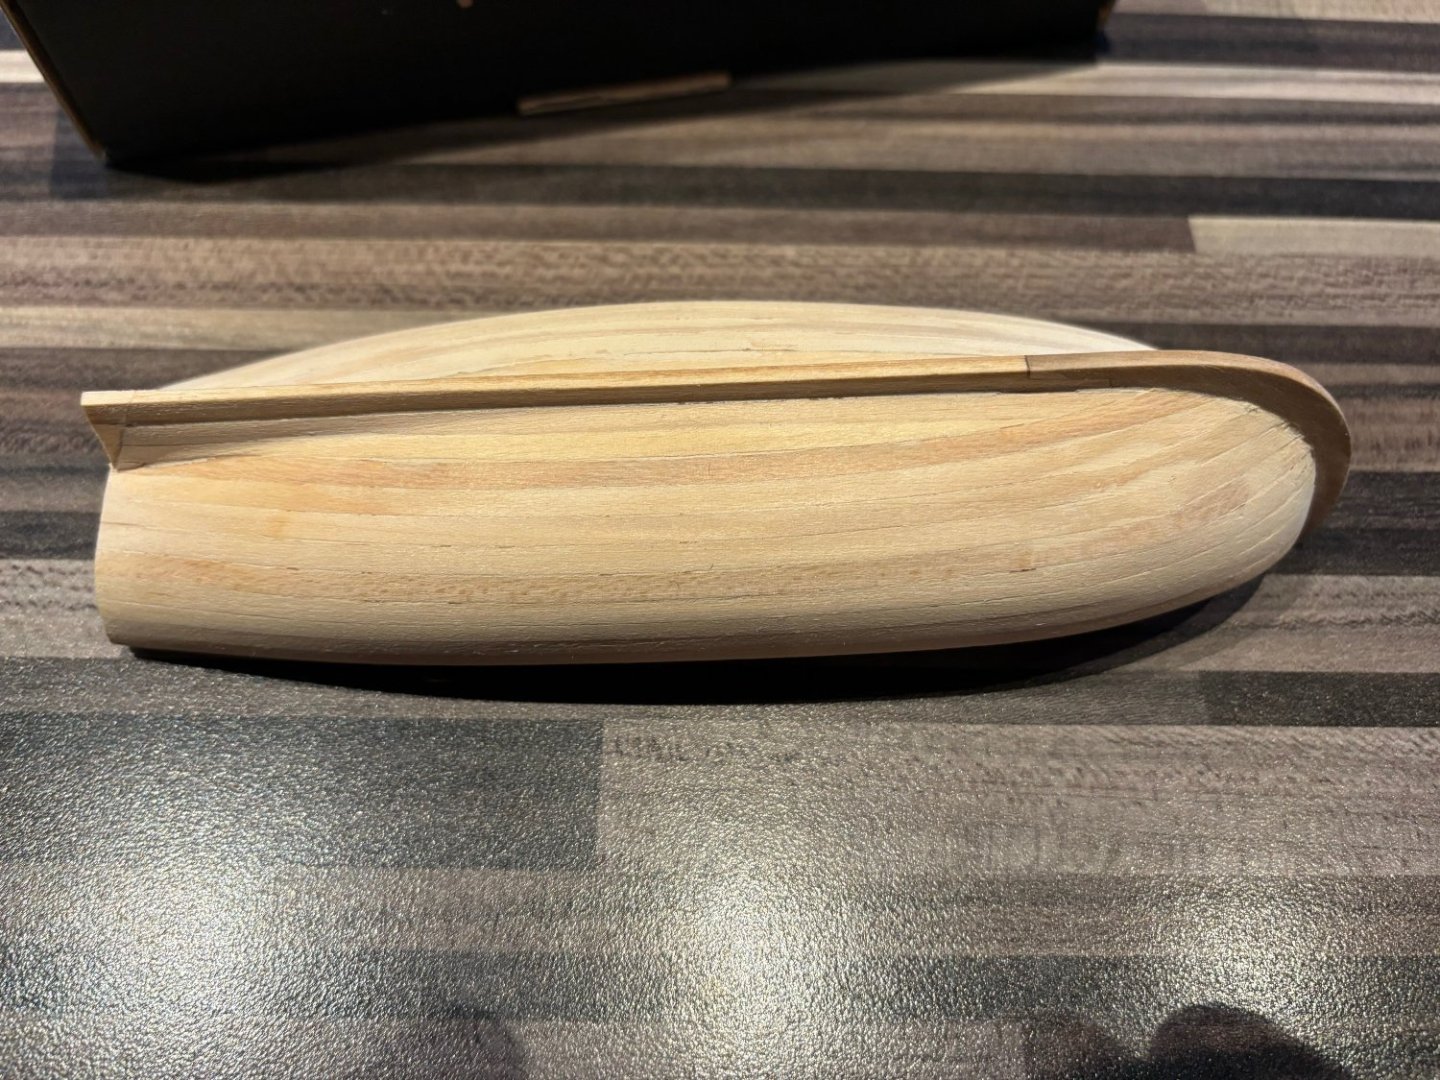
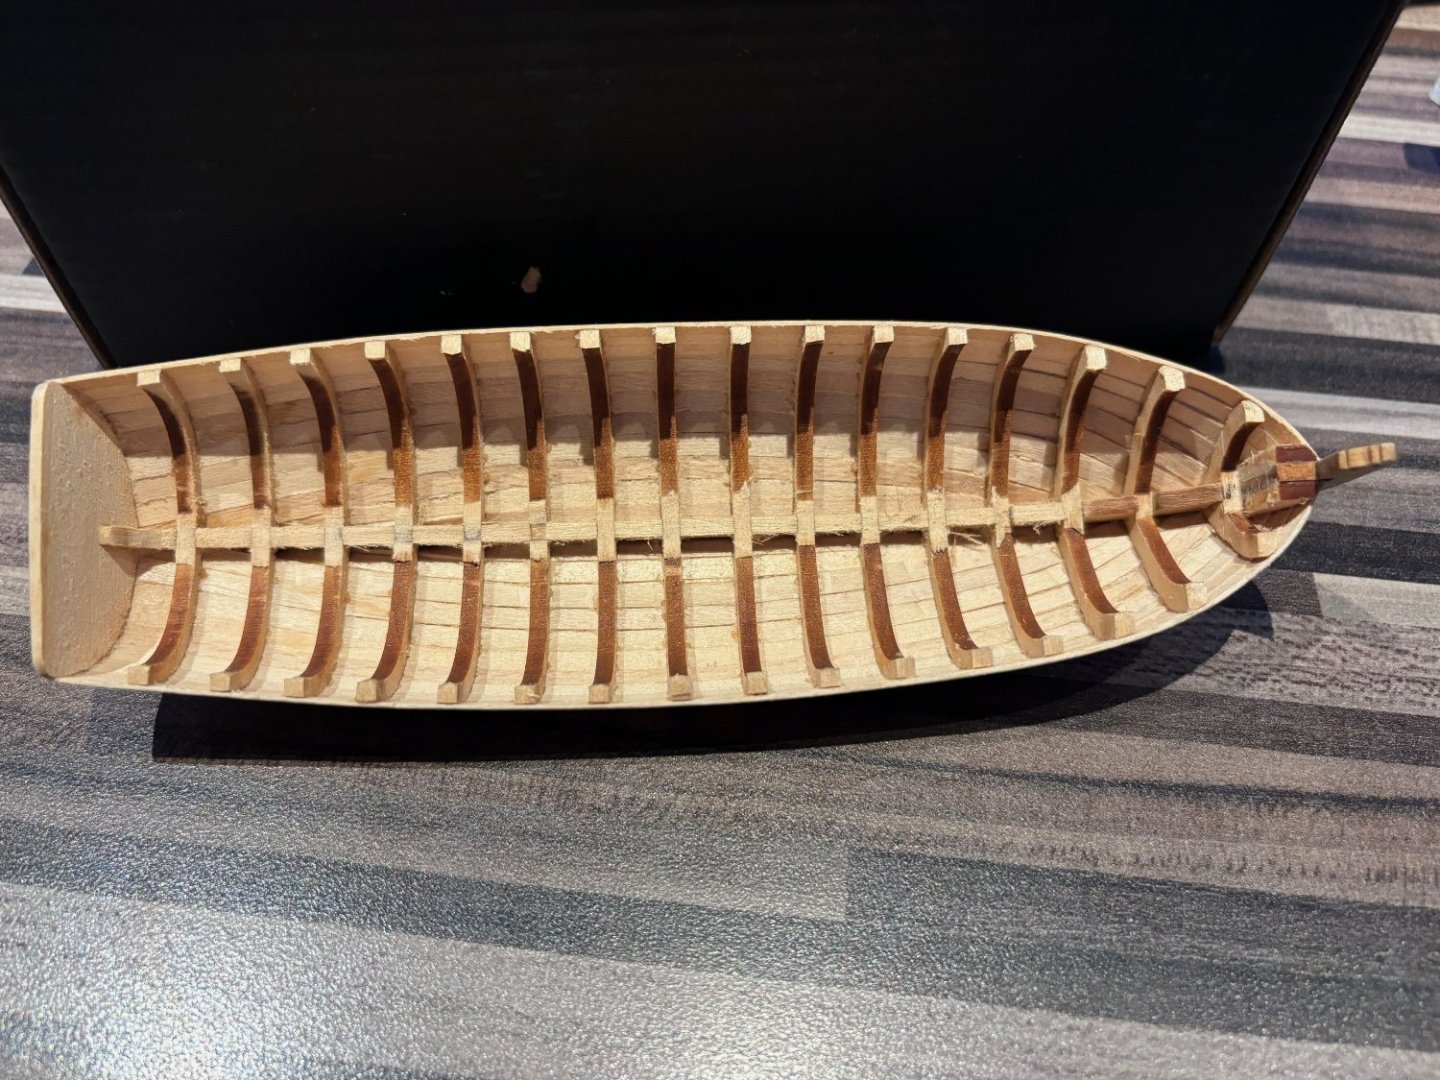
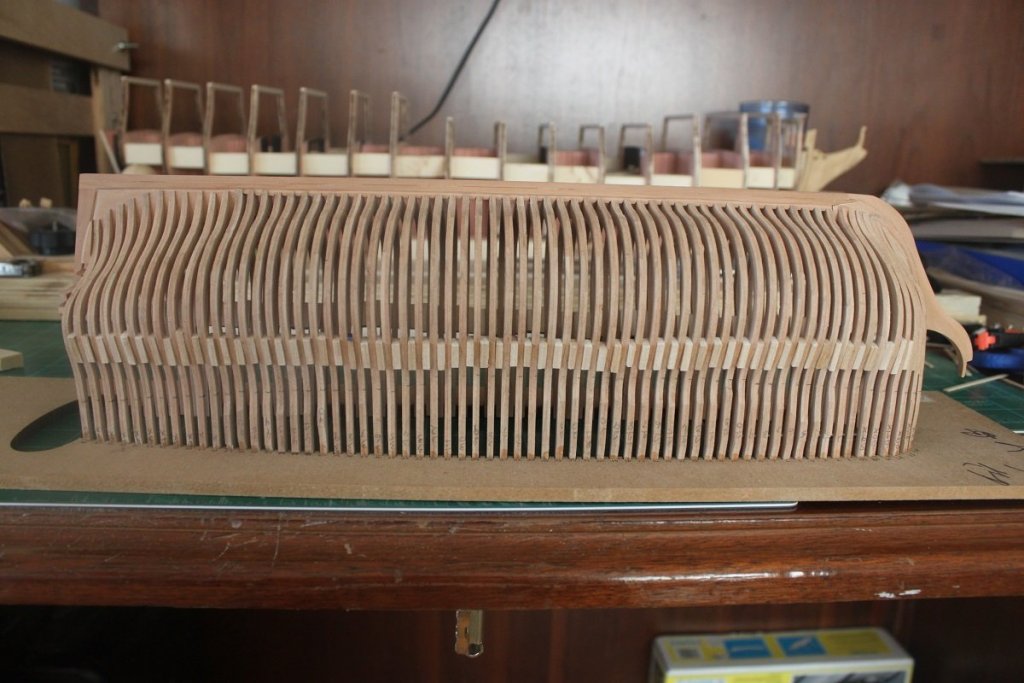
I know that it has been a long time since my last post (6 years); but I finally found the time to pick up the long boat again. I finished up the hull planking and I'm pretty happy with it especially since this is the first hull that I actually planked. I also removed the center of the bulkheads and started the fairing process of the interior. That is slow going since I am doing it by hand (to scared to try to use a Dremel).

- 50 replies
-
- 9
-
-
- 18th century longboat
- model shipways
- (and 1 more)
-
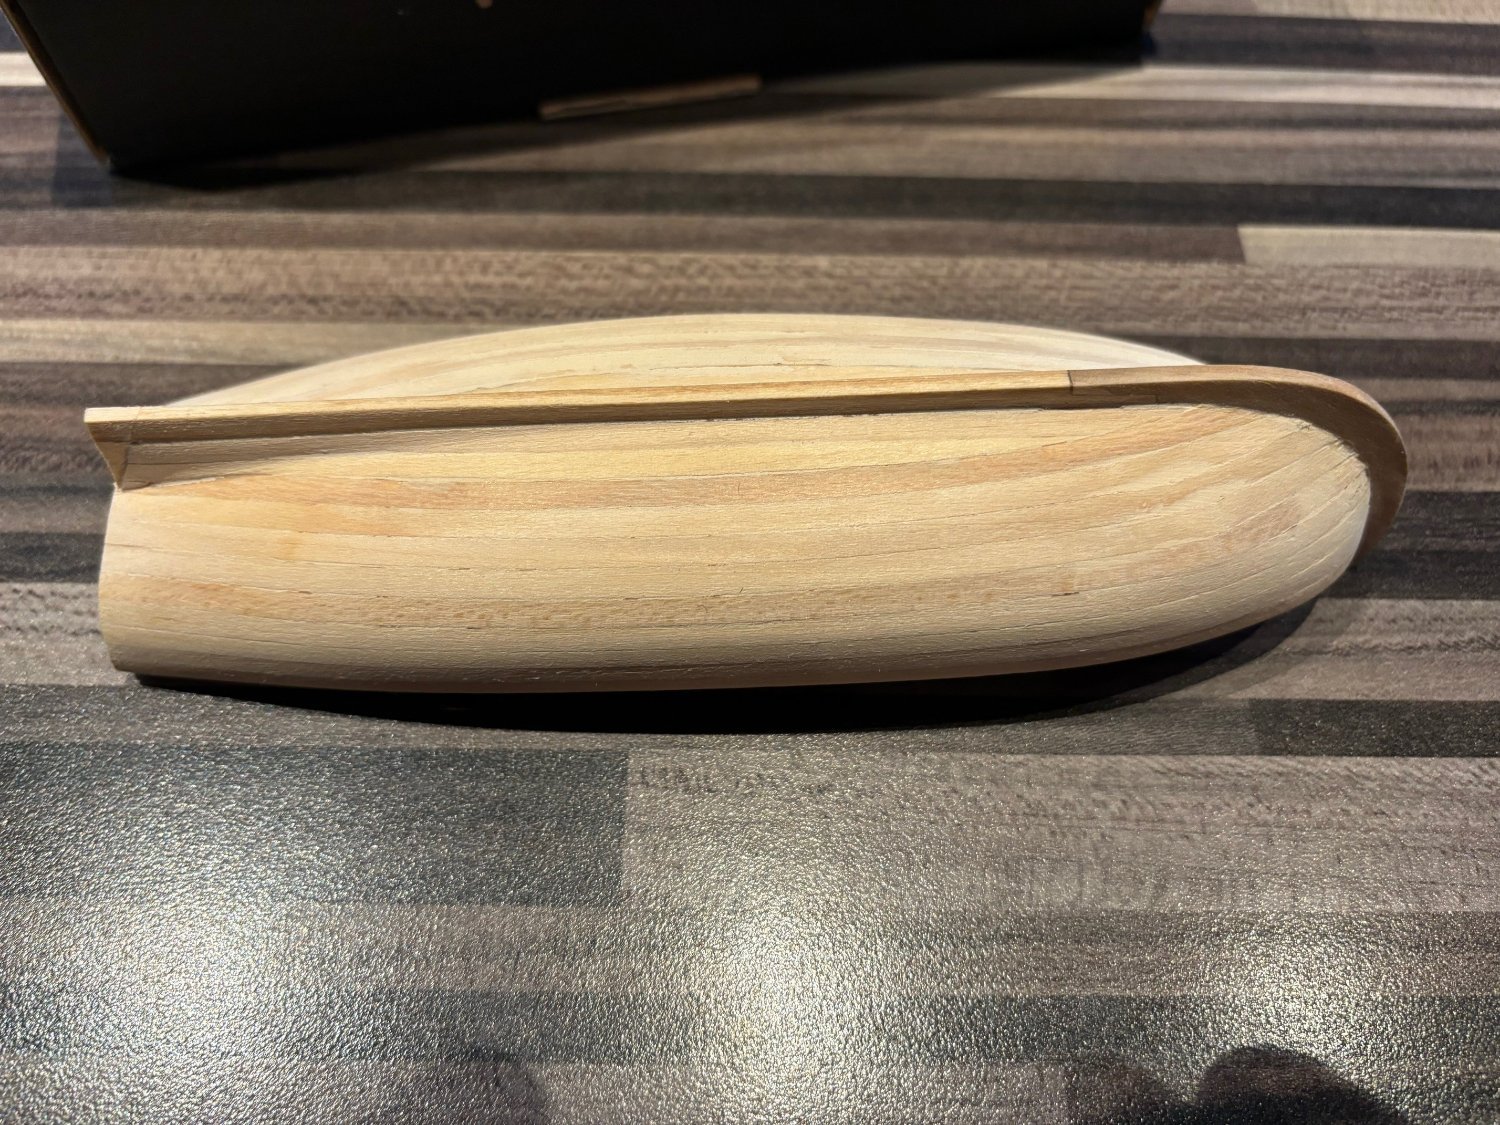
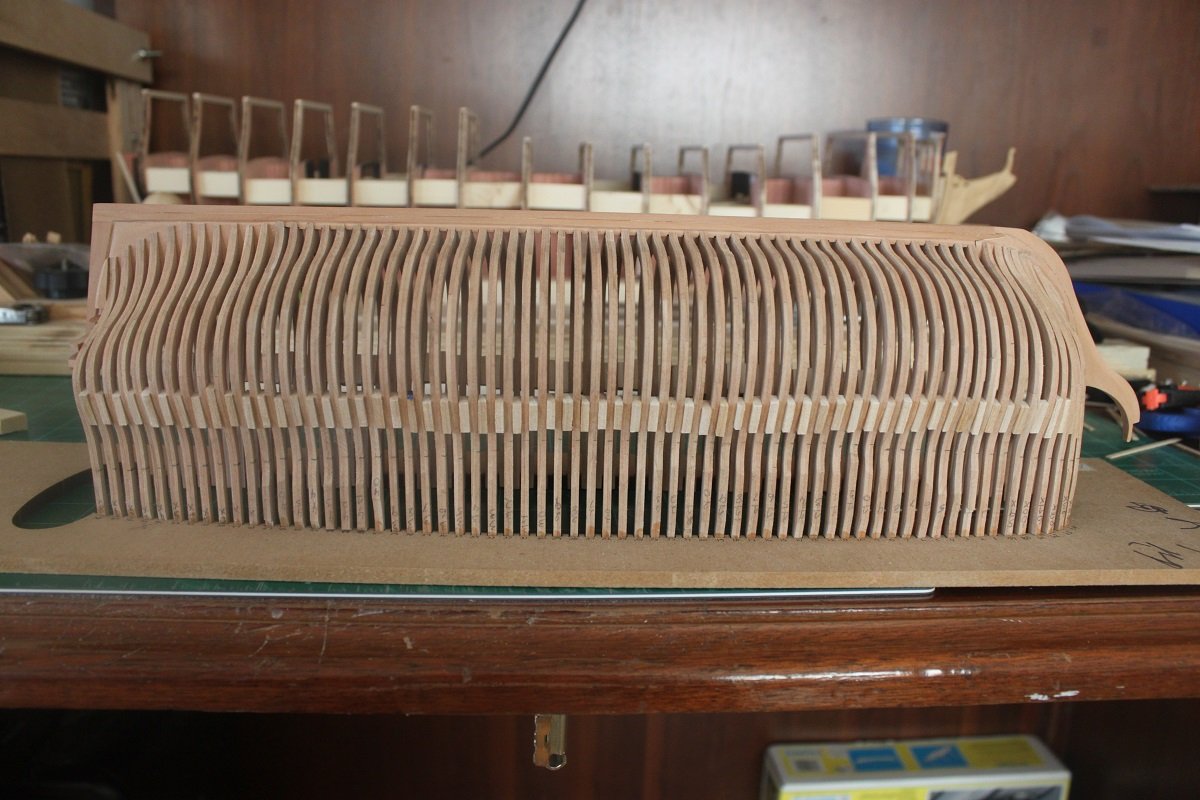
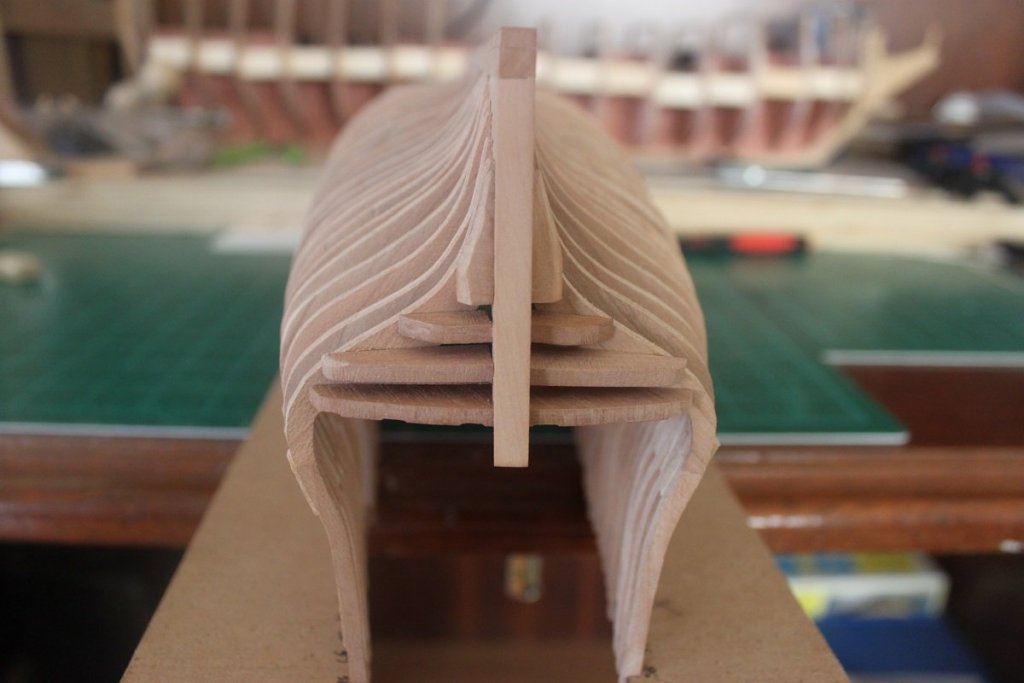
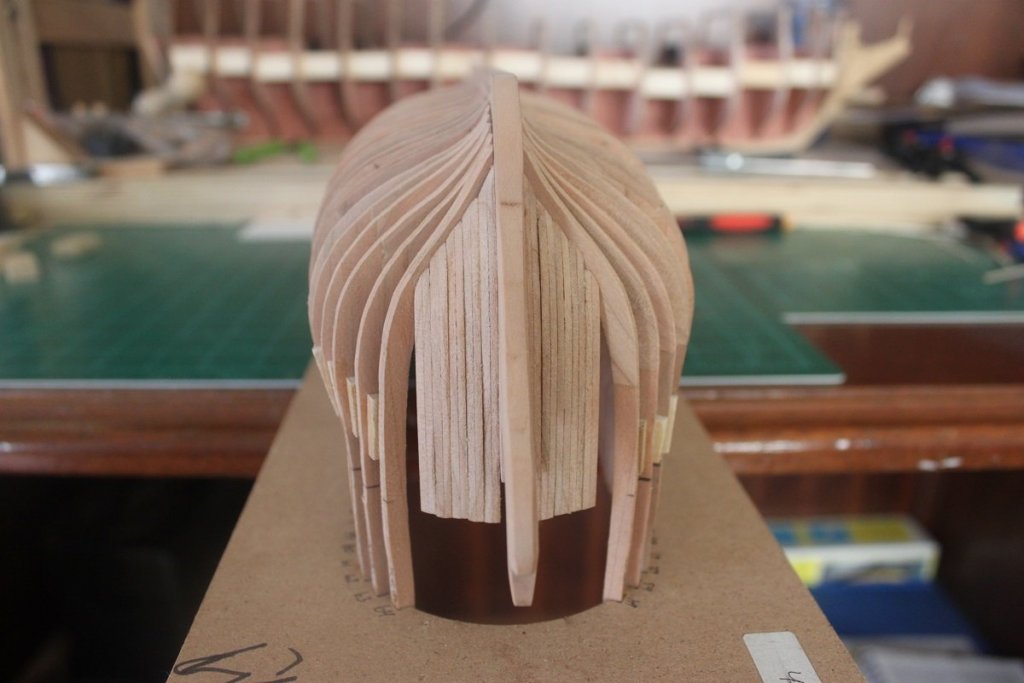
I have shaped and installed the hawse timbers and rough shaped and installed the transoms. The hull is now ready for the tedious task of fairing. Over the next few weeks, I will be making the saw dust fly. I also added small filler blocks to the hull to help stabilize the frames while sanding. Its a small milestone, but a milestone none the less.

- 47 replies
-
- 14
-