

Dominik
-
Posts
28 -
Joined
-
Last visited


-
 dgbot reacted to a post in a topic:
Wasa by md1400cs - FINISHED - Corel - 1:75
dgbot reacted to a post in a topic:
Wasa by md1400cs - FINISHED - Corel - 1:75
-
fish reacted to a post in a topic:
Rattlesnake by Dominik - Mamoli - (Massachusetts Privateer)
-
CaptainSteve reacted to a post in a topic:
Rattlesnake by Dominik - Mamoli - (Massachusetts Privateer)
-
CaptainSteve reacted to a post in a topic:
Rattlesnake by Dominik - Mamoli - (Massachusetts Privateer)
-
 Many thanks for sharing this with us Martin. May I ask what wood you used to plank the deck? It looks a lot brighter than the wood Mamoli provides for this purpose...
 -
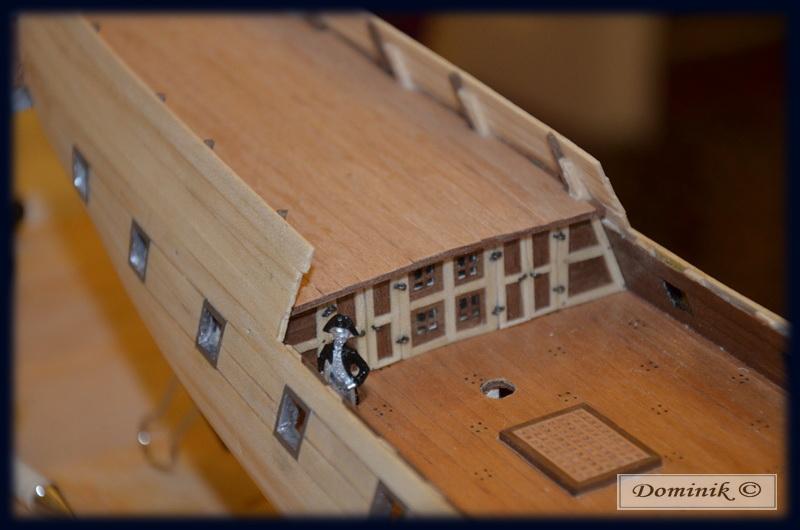
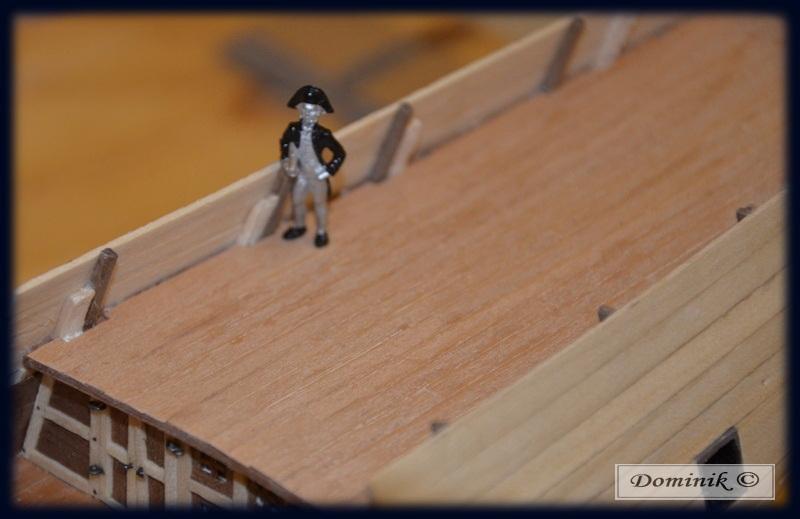
Well, the captain has some buddies but they are still a bit "nude" Will have to get some colours over the weekend to make them look proper.
-
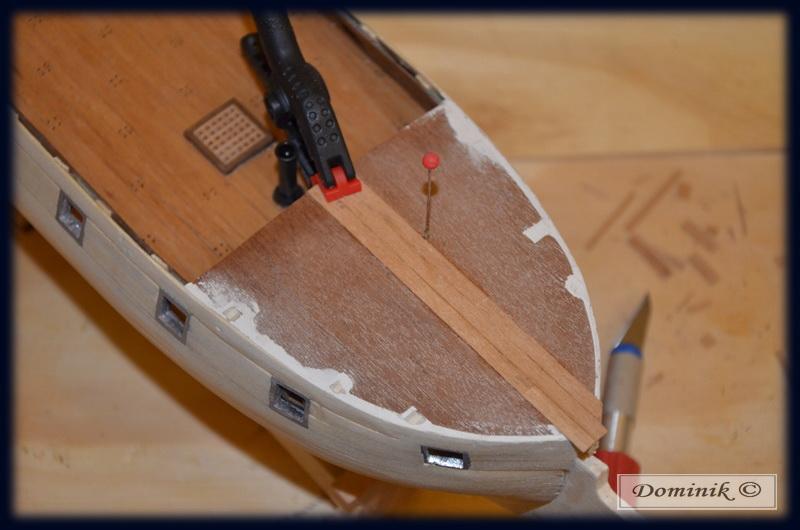
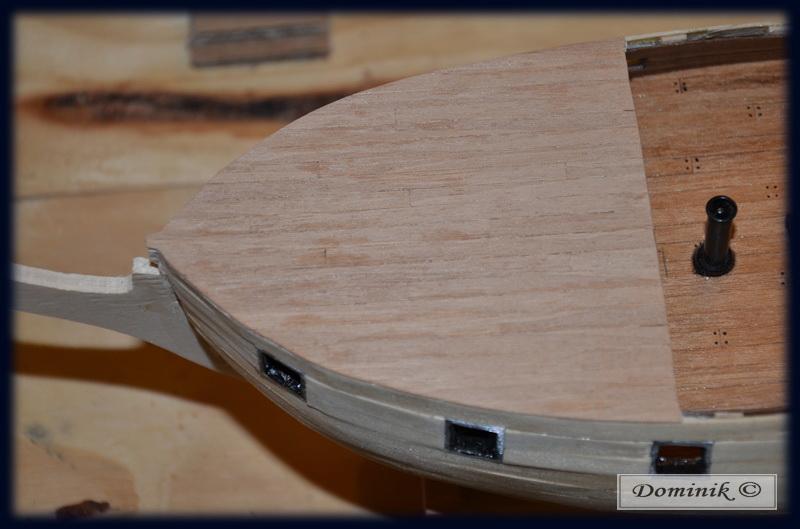
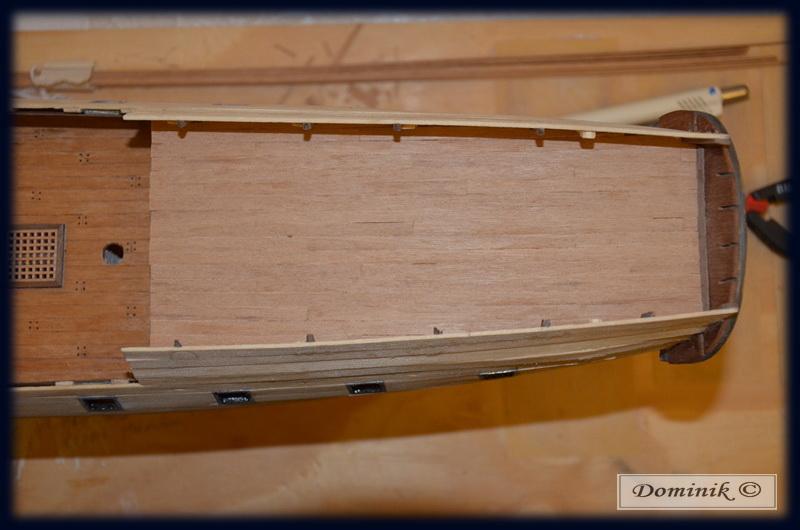
Here follow some pictures from the planking of the quarterdeck and the forecastle. For the planking I used the same pattern as for the main deck, see the earlier picture in post no 3 (page no 1 of this build log). It is slightly more sophisticated than the pattern suggested by the instructions from Mamoli but it felt like the right thing to do after studying online some additional plans of the Rattlesnake. The pictures also show the polished wood which will eventually also be treated with the varnish I used for the planks of the main deck. Did I mention that the ship now also has a "real" captain who relieved the "paper version" of his duties


-
Well, you did a nice job with these details. And even if not much of it will be visible, do continue with it. I am looking forward to more updates on your progress! Best, Dominik
-
Hi RiverRat, The cabin looks very nice with all the details you have made. And I just realized that the cabin is indeed small; did you make yours extra small as the instructions show that the cabin should hold at least six cannons... Also, nice that you added the rigging on the cannons. The Mamoli instructions do not mention this but I think one should really add this detail (at least on the visible cannons) to get a more realistic feel to the whole model. Keep up the good work and let me know if I can assist with anything, seeing that we are building the same ship from the same brand. Best, Dominik
-
Thanks for your comments, guys. I have not yet decided how many switches to install, or indeed whether anything should be connected. However, I do not want to overdo it so I am currently thinking of connecting all lights and only have the smoke generator separate. In a model of this size, and considering that this is my first build, it should be enough to switch all lights on/off with one button. Although now that I think of it, it would be nice to just light up the cabin... Let's see, as the cables all come out from the body of the ship, I can still play with that later on. As to the mounting of the finished model, I will probably put it on some simple wooden construction (see, e.g., here http://www.shipmodel.com/files/rattlesnake-privateer-webrattlesnake28.jpg), instead of pedestals. Although there are some good pedestals out there with holes in them through which would hide the cables perfectly, I think the ship should rest on wood Call me old-fashioned if you want. As to the smoke generator, I have not really thought of how the smoke might affect the finish... I tested the generator once and the smoke did not seem to much or too sticky that it would actually pose a threat to either the wood or the finish. However, the generator is surrounded by a tiny iron ring which will protect the surrounding wood from the heat. And finally, I do not expect to use the generator all that often. It is more of treat that I will use every once in a while to impress visitors
-
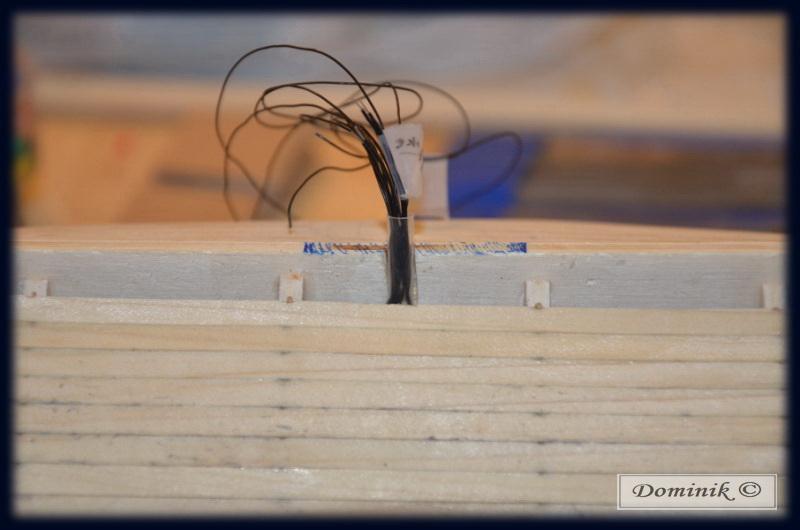
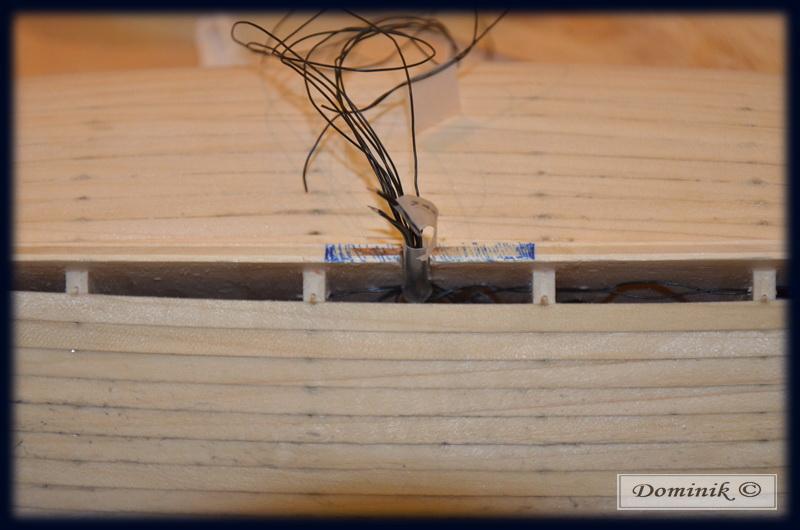
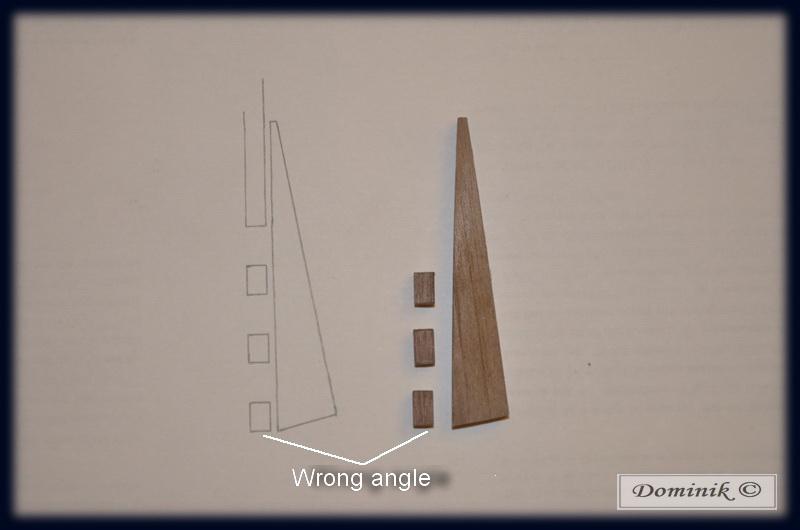
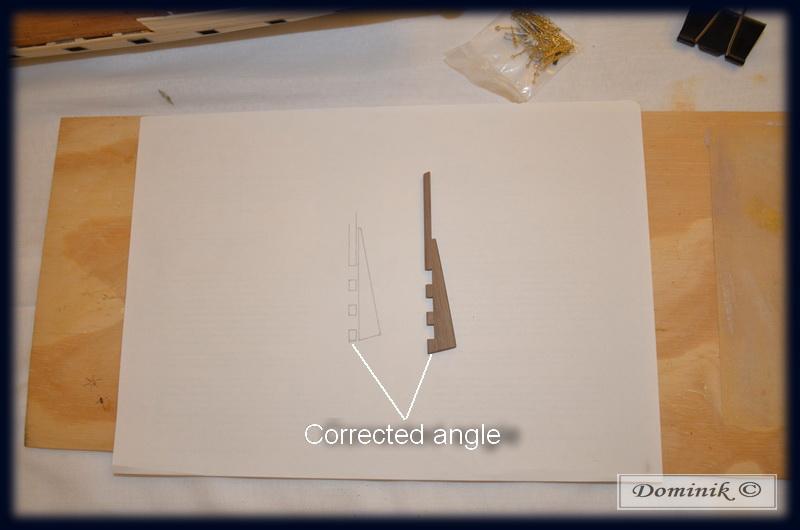
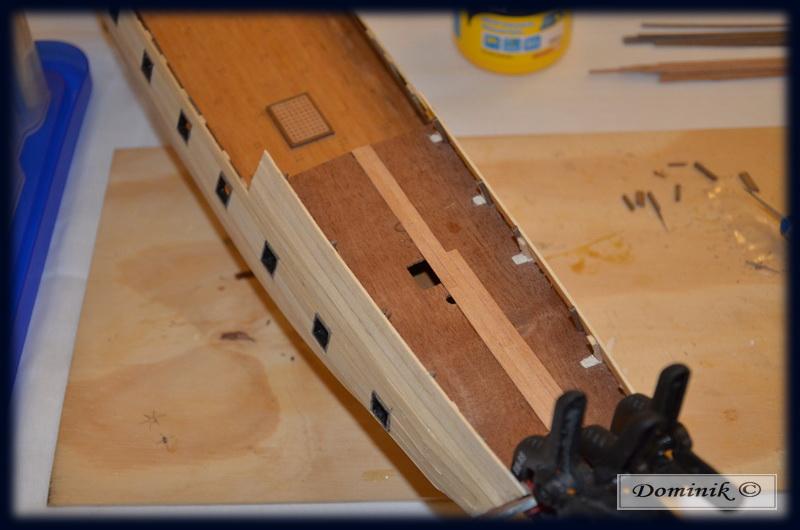
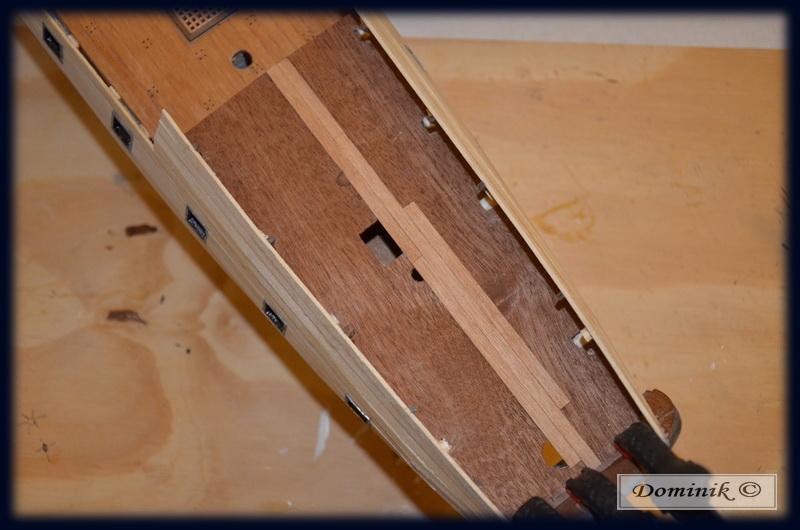
Here follows a short update on my build. Not much, since other things keep me busy as well. Have begun to close the first layer of planking, which was a bit tricky due to the cables that need to exit the body of the ship somewhere and, if possible, in a nice and organized way. The first two pictures show the solution I have chosen, with a small plastic plastic pipe through which all cables are channeled out from the ship. I wonder what happens if one of the cables breaks inside the ship... I have also finished the rudder and really like the result. As you can see on the pictures, I first made the mistake of choosing the wrong angle on a small piece that faces the keel. But corrected it before the assembling and gluing began. I have also begun with the floor planks on the "cabin roof" (in the lack of the special, nautical terminology). Should not take me too long to finish that.

-
Bay Gokcay, cok güzel! I have to say, this is some very impressive craftsmanship. May I ask how you have reached these skills? /Dominik
-
Hi md1400cs, indeed very solid craftsmanship! I see that you have some pictures of the real Wasa on your laptop there. Nevertheless, do have a look at the pictures I uploaded in the following forum: http://modelshipworld.com/index.php?/topic/236-wasa-museum-pictures/#entry1924 I am also very much looking forward to your overall assessment of the Corel kit. /Dominik
-
Thanks for the compliments. Well, I sort of overdid it with the furniture. Although I am quite satisfied with the objects as such, the tiny cabin (still wonder how anybody could move in there) does not really allow for any of the interior design to be visible. Once the cannons are installed, you won't be able to see much. Nevertheless, the functioning doors, the windows I added at the rear end plus the lamps I installed in the cabin, will hopefully allow a small glance. /Dominik
-
Beautiful ship and a beautiful start you have made. I am looking very much forward to your progress! /Dominik
-
Indeed a wise decision, to have some kits available for the near future. Not at least cause it might proof helpful to have something to do if/when you are bound to the home with your toddler Hope all works out well with the child (and yes, with the build as well )
-
fish reacted to a post in a topic:
Rattlesnake by Dominik - Mamoli - (Massachusetts Privateer)
-
fish reacted to a post in a topic:
San Francisco 2 by fish - Artesania Latina
-
Very nice first layer of planking Aaron! May I ask if you used some sort of putty to make the first layer even? Also, nice to see that you have the Rattlesnake on the shelf
-
Very nice build so far. If you haven't done so already, I recommend you visit the Wasa museum in Stockholm. Not only do you get a lot of inspiration (not that you would need it), but it is also impressive to see the ship in real. Keep up the good work!
-
Good to see that you are back! I am looking forward to see some progress on your build, since I am building the same ship and we appear to have made some of the same changes to the original Mamoli plans.
