
MORE HANDBOOKS ARE ON THEIR WAY! We will let you know when they get here.
×


Cap'n Rat Fink
-
Posts
829 -
Joined
Content Type
Profiles
Forums
Gallery
Events
Everything posted by Cap'n Rat Fink
-
 Looks Good Popeye, but i am more amazed on how you keep your head straight with all the builds you have going at once.....
 -
Hi John, I'm gathering that maybe you see i placed 4 frames at once. It's just my way of thinking about how to approach marking out all the scores Chief. I am in no hurry. So here is my explaination Chief, I was just tired last night and forgot to add how I cam about doing what I did.... I SHOULD OF EXPLAINED MYSELF BETTER AS TO WHY I TEMPORALY ADDED 4 FRAMES INSTEAD OF ONE AT A TIME. MY APOLOGIES FOR THIS. MY DAD WAS A MASONARY AND I WAS HIS APRENTICE. I WAS TAUGHT TO GET THE ENDS CORRECT FIRST AND EVERYTHING ELSE IN BETWEN WILL FALL INTO PLACE. GET THE ENDS RIGHT AND YOU HAVE A TRUE LINE LEVEL.....
-
WELL HAD THE DAY-OFF TODAY TO DO A FEW THINGS, BUT ALSO MADE A LITTLE PROGRESS ON THE CROSS SECTION TO. THIS IS A REALLY FUN SCRATCH KIT THAT ADMIRALITY MODELS OFFERS. THANKS DAVID AND GREG... I AM LEARNING A LOT FROM IT....
-
HI JOHN, MARK, GREG, and RUSTY, THANKS GUYS and THANKS GREG for the thumbs up that i am doing it correctly....
-
LOOKING GOOD POPEYE!!!!!!!!!!!!!!
-
Tim , Rusty, Thanks guys for your kind remarks and onward i go.... Well frames 4 n 5 are completed. I builT the square from a display type board material, the type which is used for science projects in school..... I added 1/16" spaced horizonel lines to assist me in keeping the port n starboard sides of the frames level with the horizon.. "SWEETIN BULLETS TIME NOW..... once the DEAD FLAT "0" was glued in place I went ahead and temporarly placed DEAD FLAT "01" and FRAME 01 FORE so I could mark out the locations for the 2 scores of the port n starboard sweep port sills..... I pulled all measurements from the DISPOSITION OF FRAME drawing which I glues to a scrap piece of display board so i could stand it on end and adjust my measuring tool accordingly.... I will then remove frame "01" fore and the dead flat "01". then use my chisel to create the scores..... ALL I CAN SAY FROM HERE ON IS """"I HOPE I KNOW WHAT I'M DOING!!!! and I HOPE I AM DOING IT RIGHT!!!"""" ALL ADVICE IS VERY MUCH WELCOMED......
-
Thank You Aldo nice to hear from you my buddy.... Hi Buck, believe it or not all i used was flat black acrlic from walmart(arts n craft section. I let it dry and scuffed it up a bit with one of my tweezers and seal with matte finish varnish....hope this helps you out...
-
THE BOMB, THANKS FOR THE KIND WORDS. IF YOU NEED ANY INFO PLEASE JUST LET ME KNOW.....GLAD TO HELP OUT....
-
Hey Borge I found your DRAGON and she is just beautiful. Just love to see your metal work, outstanding my friend
-
Hi Amfibious, Thank you very much for your kind words. It was a lot of fun building Bligh's Launch.............. Hi Borge nice to see ya and Thank You, I have to go search for your log, I hope you put it back up my friend...
-
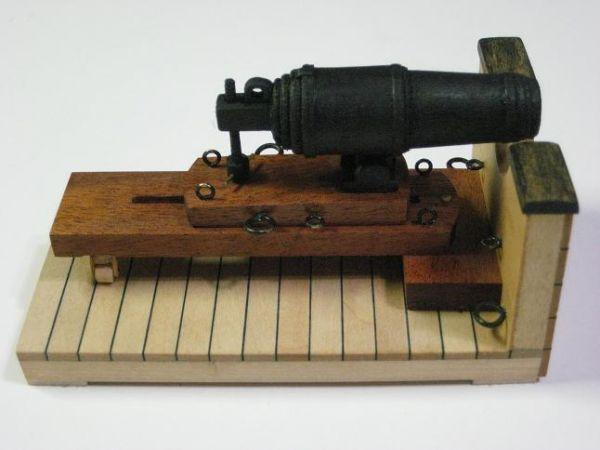
Sinan, Poplar is very versital for model building, it also turns well.....my smasher barrel is poplar.....
-
Mark, JP, John, Good to see you guys stop by. got home late last night so i will finish off frames 4 n5 tonight and add updates today after work. I decided getting home late last night, so I went and added my Bounty Launch build back in to help others out.
-
Hi Jp, Your planking is coming along nicely. IMO with very little issues but we all them. The hull going to look great when completed...
-
JP, Greenstone, Thank you both for stopping by. I added the build back because I had been getting a couple of PM's on the build back on MSW 1.0 , so to help the others I had a fail safe and put the build back, though it is missing some texted but better then nothing I always say....
- 53 replies
-
- 1
-

-
- bounty launch
- model shipways
- (and 1 more)
-
Echo by jml1083 - cross-section
Cap'n Rat Fink replied to jml1083's topic in - Build logs for subjects built 1751 - 1800
HI Jim, You are doing the right thing weather it be a kit or scratch build....."THINKING AHEAD".... I also plan on adding a bit more support before i fair the frames. They are very fragile and thats what worries me the most, breaking one during the fairing process. On the backboard square you made I to plan on adding a center line, but I also plan on adding serveral horizontal lines about a 1/16" apart. That way i will stand a better chance of keeping the toptimbers level to the horizon.... take care -
Hello All, A couple of small things left to do. But she is pretty much complete. i will add more detailed and close up picture in the completed Forum later this week. Thank you all for watching cheers Mario Well I'm all done. some pic's may be out of order and some text might not make sence but it's better then nothing.....you all fun now!!!
- 53 replies
-
- 4
-
-
- bounty launch
- model shipways
- (and 1 more)
-
well i finally got my act together and i am starting my diorama display case. plus i have started stowing the supplies onboard.......cheers Mario
-
So a few more photos! cheers Mario
-
and a few more...One little hint. It worked out fantastic.
- 53 replies
-
- 1
-
-
- bounty launch
- model shipways
- (and 1 more)
-
Now i decided to make a spar n sail 3rd hand jig.....here is my result
- 53 replies
-
- 1
-
-
- bounty launch
- model shipways
- (and 1 more)
-
cheers Mario a few more pics