Cap'n Rat Fink
-
Posts
829 -
Joined
Content Type
Profiles
Forums
Gallery
Events
Everything posted by Cap'n Rat Fink
-
 and 5 more...............
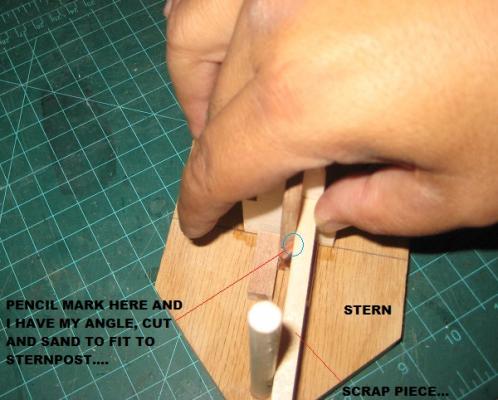

-
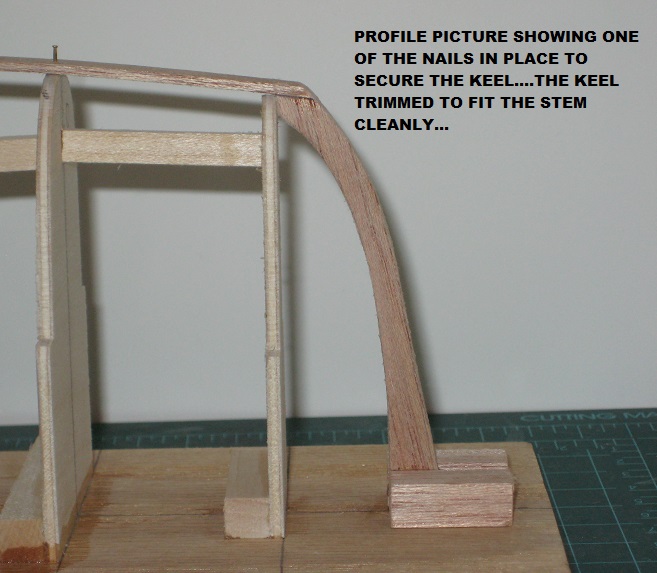
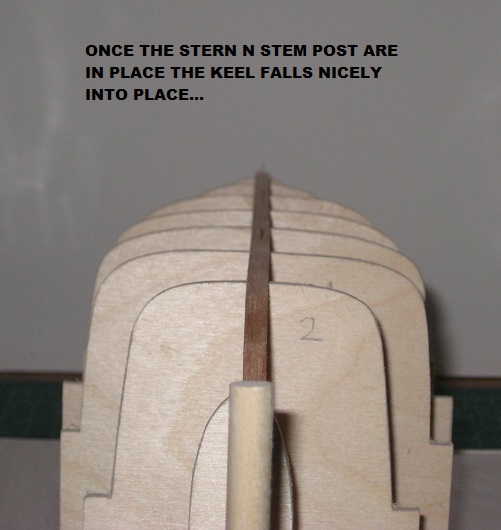
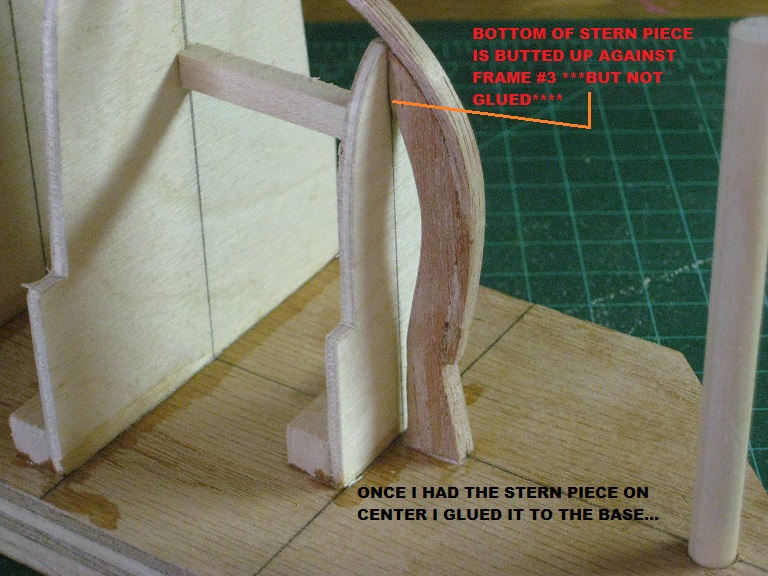
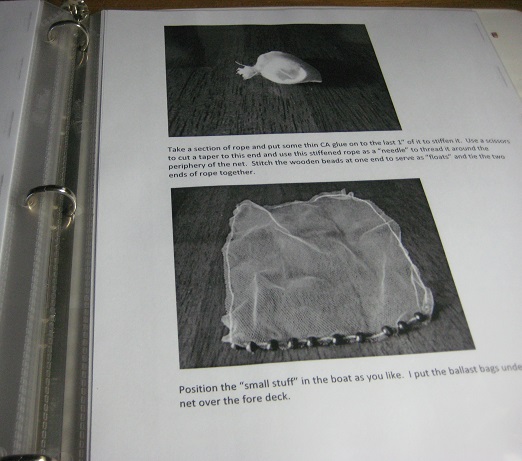
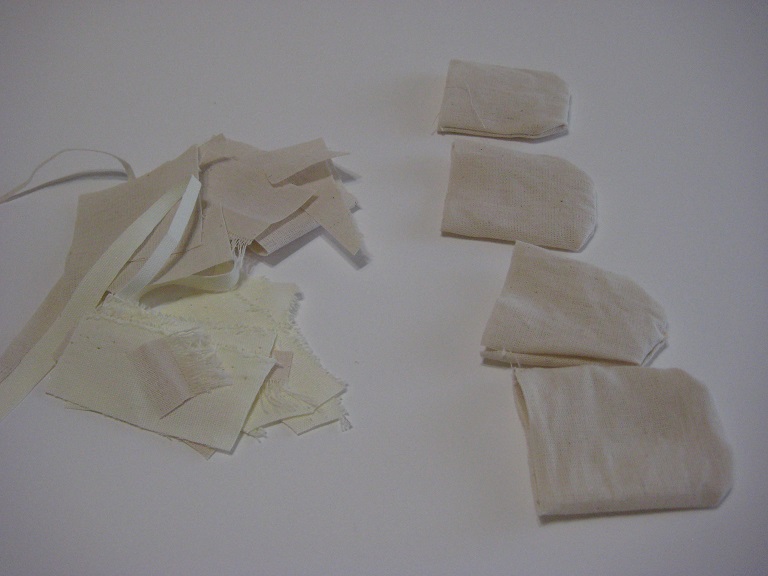
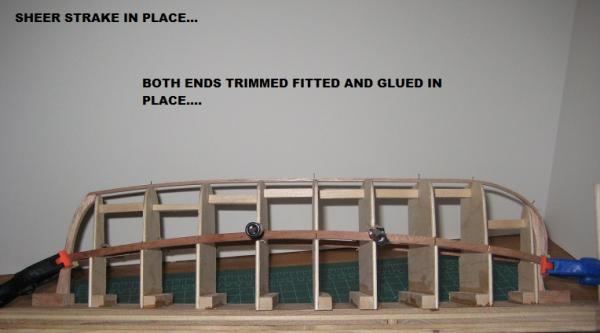
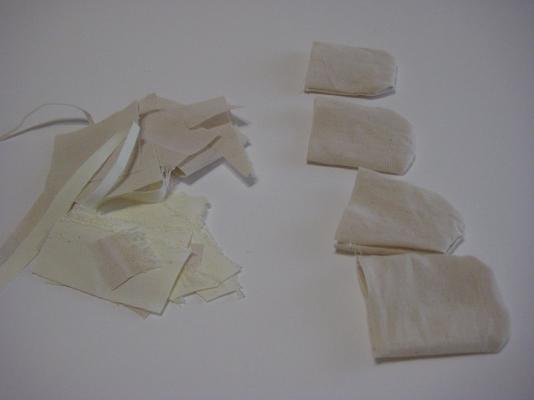
Here's a few more..............any questions or remarks are very welcomed..


-
runner63... Thank You i hope to make it interesting..... Hi Mark... Funny you should that. Just got home from work 1030pm. I'm a little wired so not sleeping. So I will start posting some pictures. So here we go..............


-
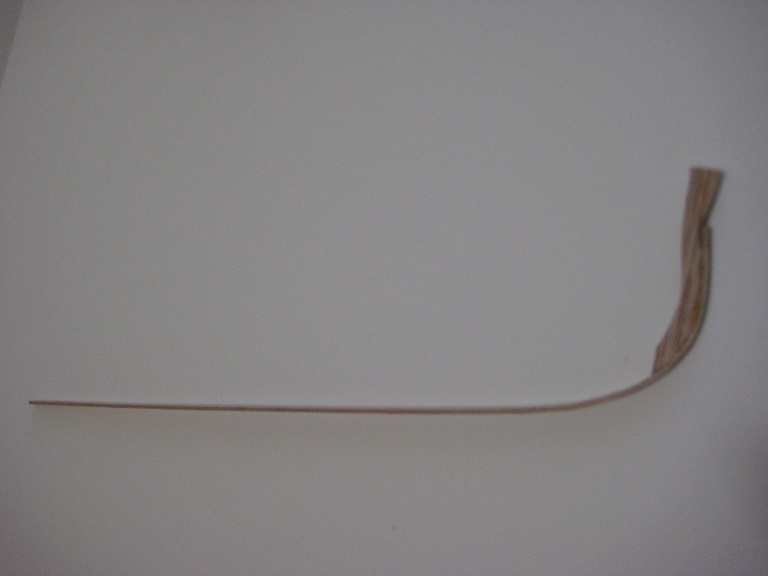
Ok thank goodness for smart phones. I am on top of a mountain looking at nothing but wilderness. Who the heck needs a 4g networks out here. I thought I would answer some of your questions why’ll I have a chance… HI SJORS…. Ok let me see if I can explain. This ancient boat when finally assest they figured it existed anywhere from 50bc to 70ad. Well back in those days these boats were built using a mortise tendon system. There was no rabbet line, the garboard strake was mortise tendon and so was every strake after that, all the way to the gunwale. Once completed they flipped the hull over and then added the frames, just think POF, but in my boat it is FOP. So I will try to glue all the strakes without gluing them to the strong back, which I was successful at doing… They came up with this from an ancient boat they discover in the Mederanian Ocean. They call it the”Kinneret Boat”. At 1/24 scale the mortise tendon style (shell method) would for me be kind of difficult to do, but I will show you an example later on in the build. HI ANJA…. Your right barehook is doing one too, but his is scratch where my is from a prototype kit.(NO WORRIES ANJA I SHALL RETURN TO THE DARKSIDE SOOOON) That Scott Miller developed. His MSW ID is “scotticus”. He asked me to test it for him. So I am posting my test build of the kit. You will enjoy it I think… ADAM…. Thanks for stopping by. I hope you enjoy my build thread as much as I did building this boat… Thank you all for stopping by and will add to my thread here over the weekend…
-
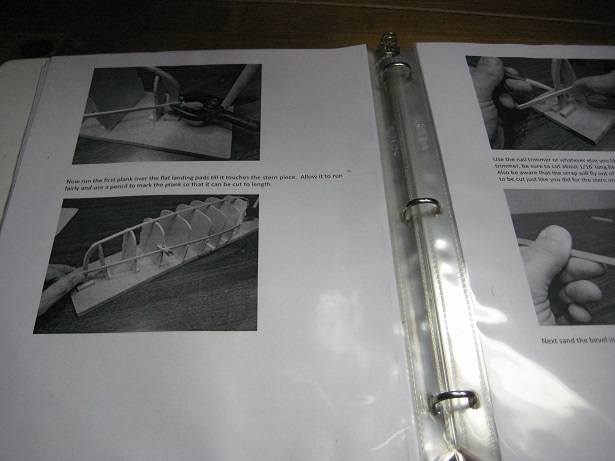
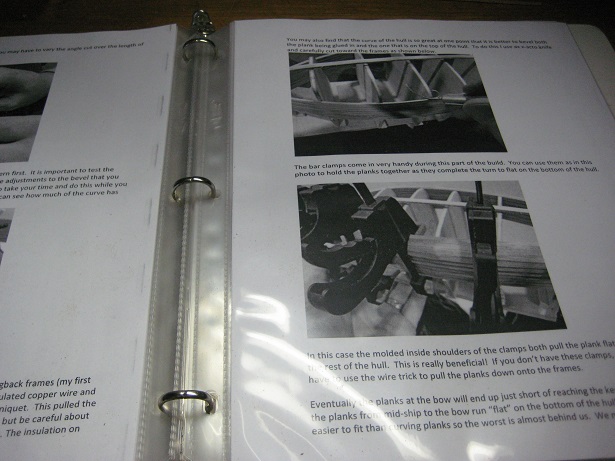
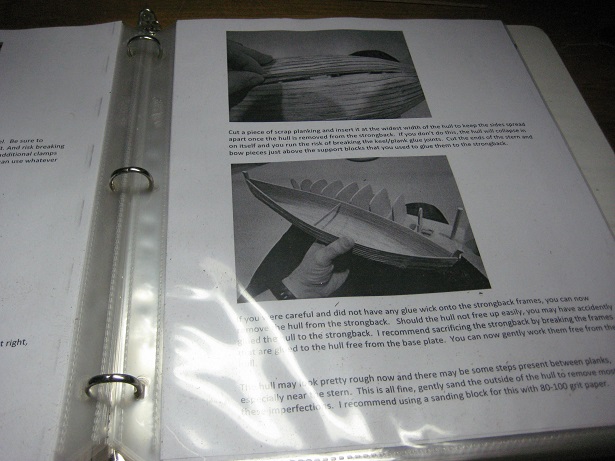
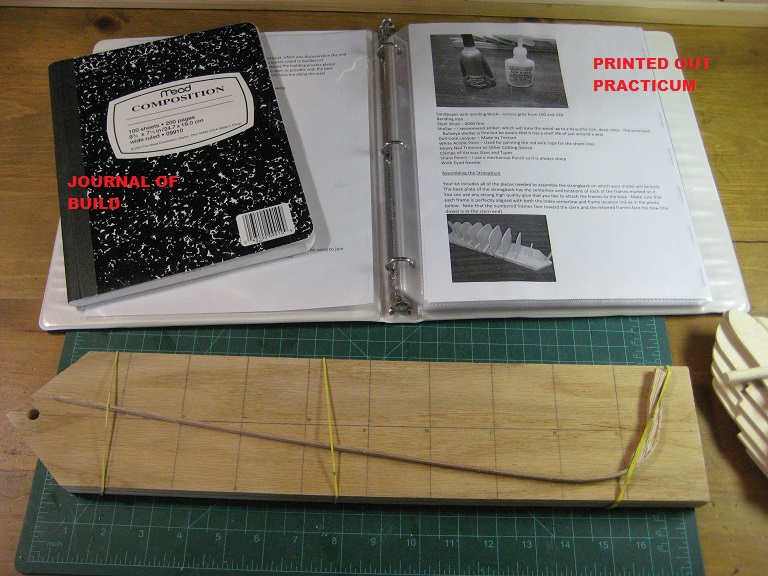
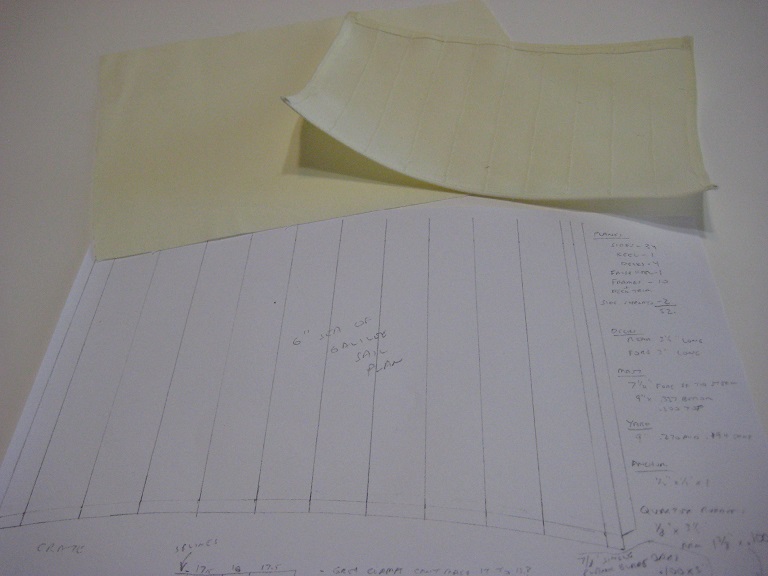
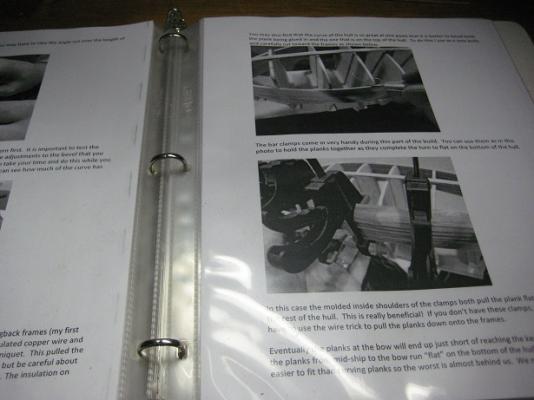
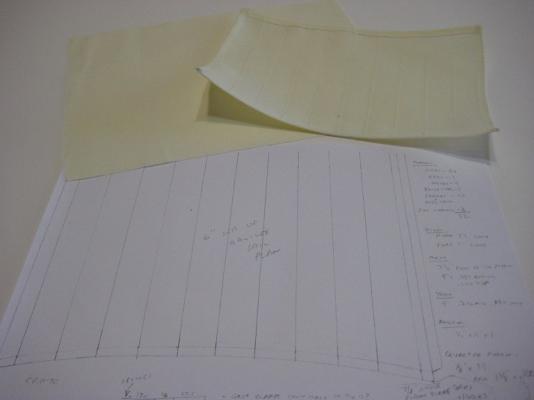
Since I am already short on time again I thought I will add a few photos of the praticum that I will be following.... ANY QUESTIONS OF REMARKS ARE WELCOMED......

-
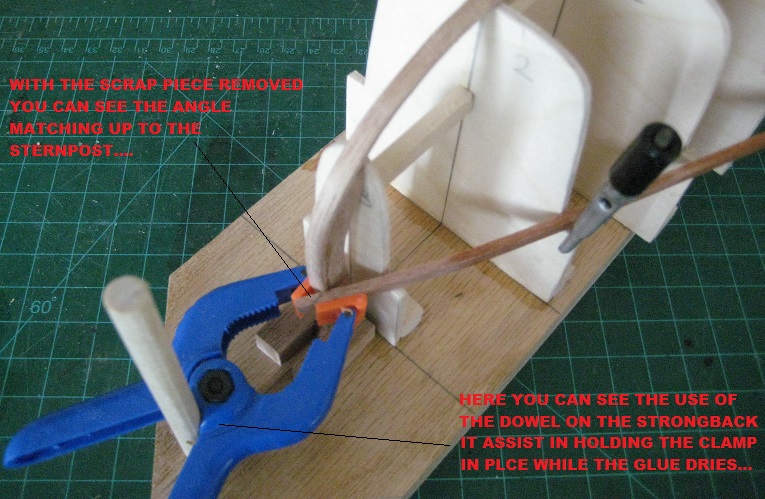
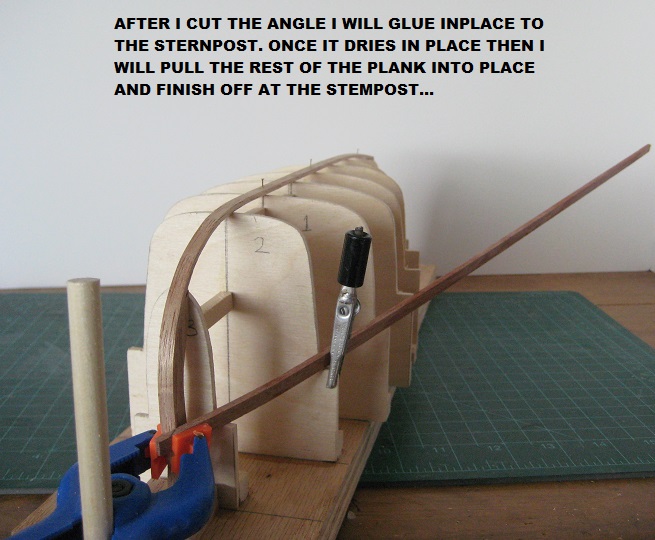
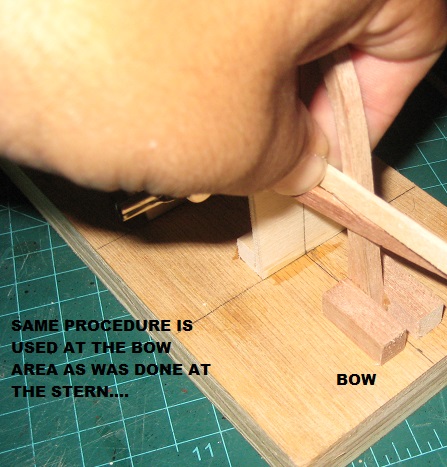
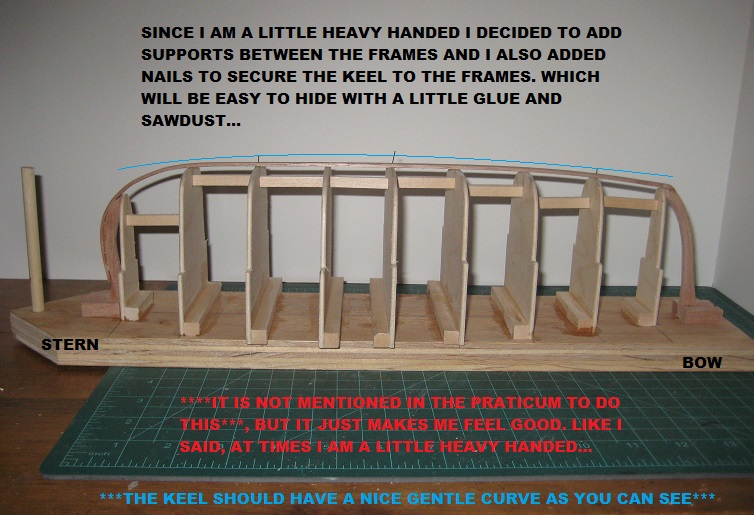
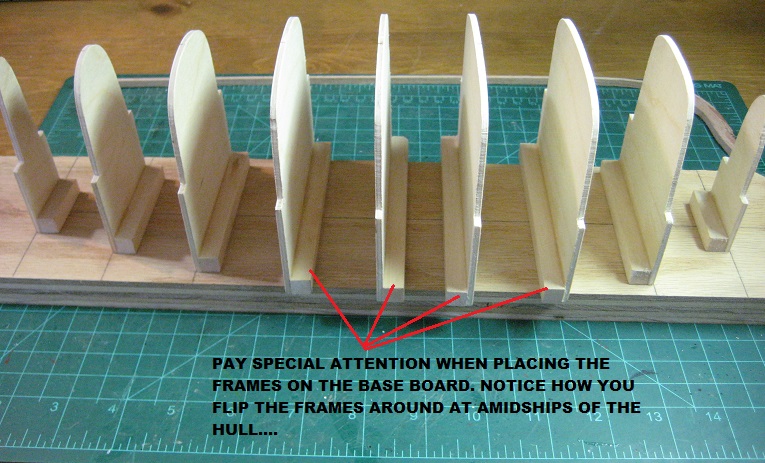
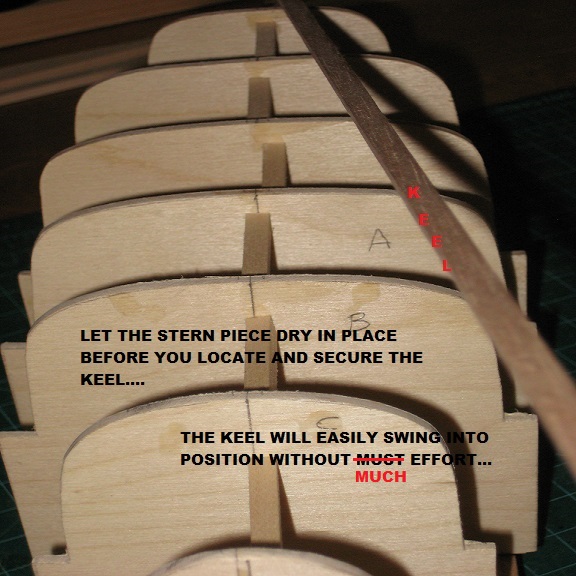
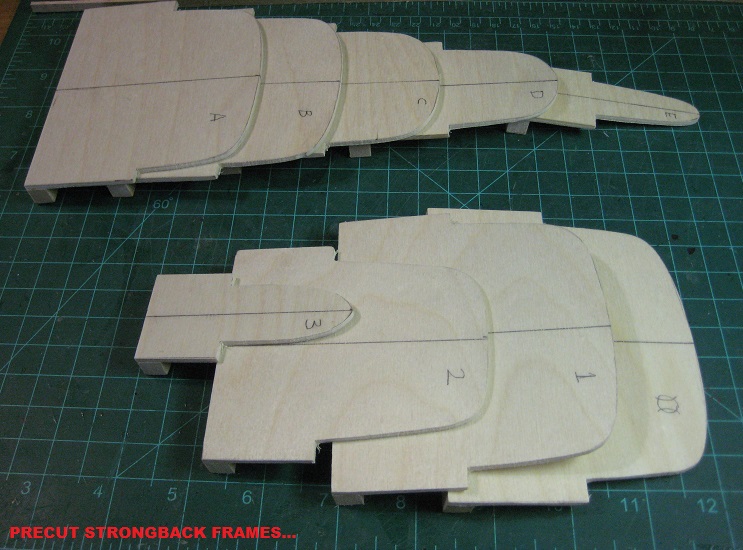
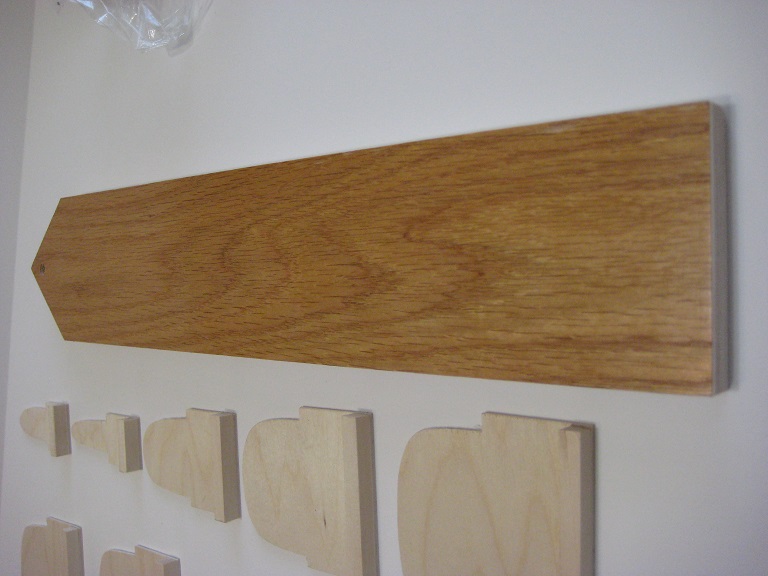
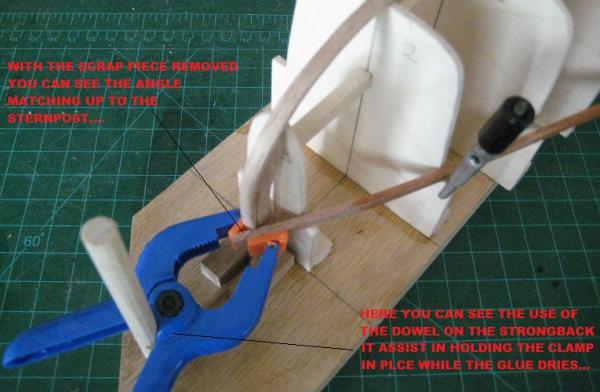
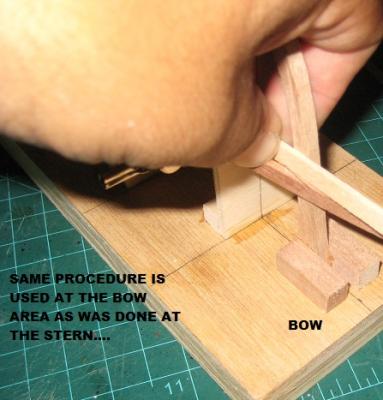
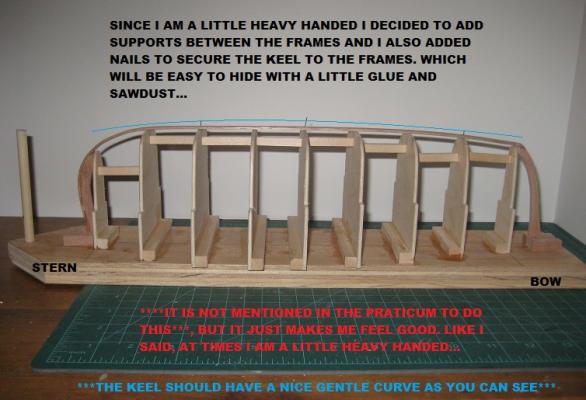
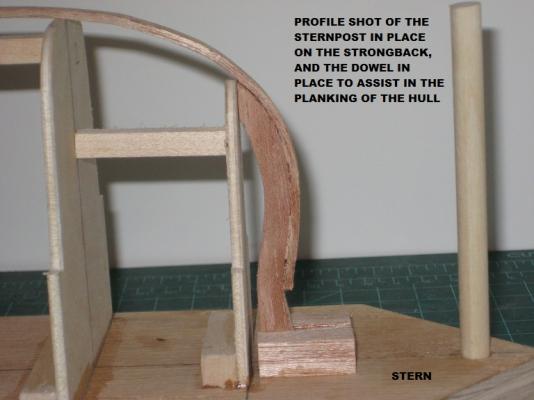
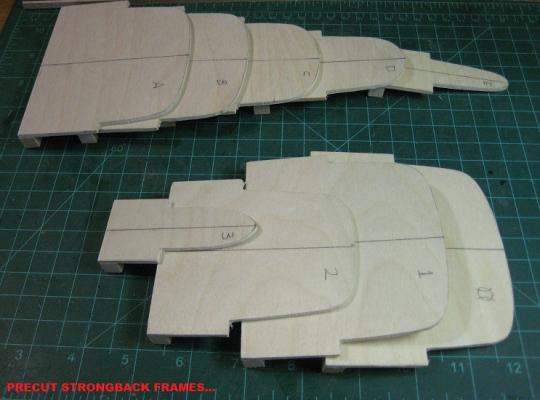
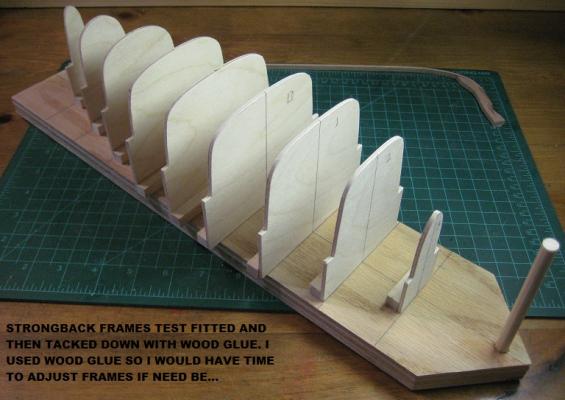
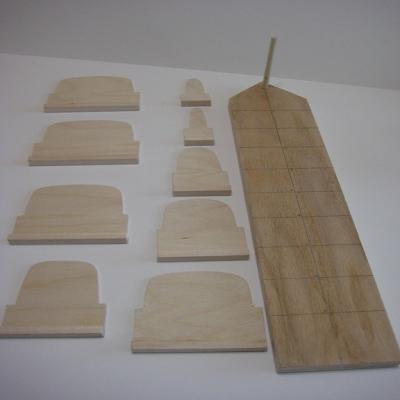
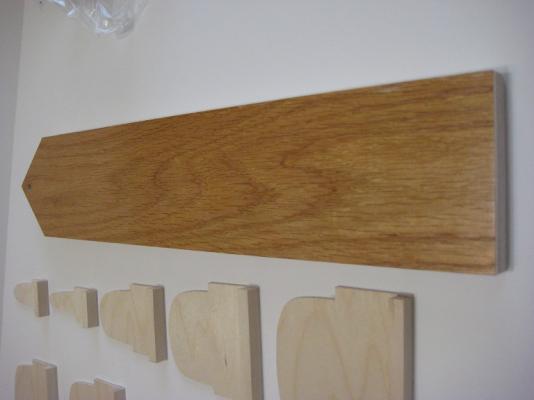
HI JOHN......Yes it is a lot of fun doing another one of my work boat obsessions here!!! HI MARK.........Well it's really not 2 for the price of one. the other will be built off camera...but i will show the completion of it later... WELL HERE WE GO. I HAVE A SMALL WINDOW OF FREE TIME TO ADD MY PROGRESS….. AS SOME KNOW I USUALLY BUILD AND POST A SHORT TIME LATER. BUT WITH MY NEW JOB ASSIGNMENT I HAVE SHIFTED TO BUILDING TILL MY MODEL IS JUST ABOUT DONE. INSTEAD OF STARTING A LOG AND LET IT SIT FOR WEEKS BEFORE I UPDATE…. MY SPARE TIME IS NOW LIMITED, SINCE I AM AVERAGING 60 TO 75 HOURS A WEEK AT WORK. I HOPE THIS WILL NOT BE MY LAST BUILD. BECAUSE OF WHAT FREE TIME I HAVE, I DEVOTE IT TO MY WIFE AND KIDS. IF IT BECOMES MORE DIFFICULT TO SPEND TIME MODEL BUILDING., THEN I WILL HAVE TO LEAVE MODEL BUILDING FOR A VERY VERY LONG TIME. (WHEN CRUNCHING THE BOOKS, LOOKS LIKE I STILL HAVE ANOTHER 10YRS TO BEFORE I CAN RETIRE.) SO I AM HOPING THIS DOES NOT HAPPEN. IM HOPING MY JOB GETS BACK TO A NORMAL WORKLOAD. I WILL STILL BE BUILDING MODELS BUT PLASTIC CAR, TRUCKS, AND SUCH. BECAUSE MY YOUNGEST BOY HAS TAKEN AN INTEREST IN THEM, AND MY FAMILY COMES FIRST NOT ME…. SO HERE ARE A FEW PICTURES SINCE MY FREE TIME IS JUST ABOUT UP, AND WILL TRY TO ADD MORE AT THE END OF THIS HOLIDAY WEEKEND… IF YOU HAVE ANY QUESTIONS FILL FREE TO ASK ME, AND I WILL ANSWER AS TIME PERMITS. THANK GOODNESS I HAVE A SMART PHONE TO USE ON MY BREAK TIME AT WORK. The practicum is very detailed and comes with lots of pictures which i will post some of them up for you... the strong back frames are mode of basswood ply... once the frames are aligned and the wood glue dried , i will add extra security by adding CA glue to the base of the frames..... The dowel is there to help assist holding the clamp at the stern of the boat....

-
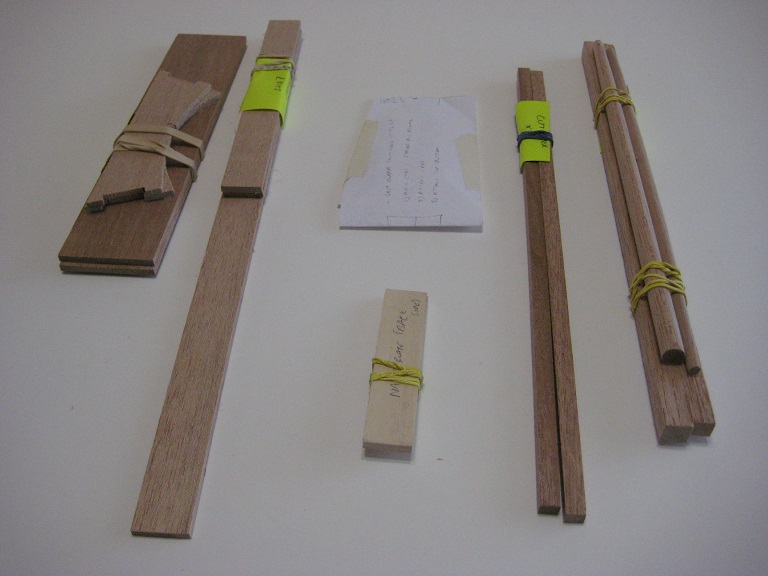
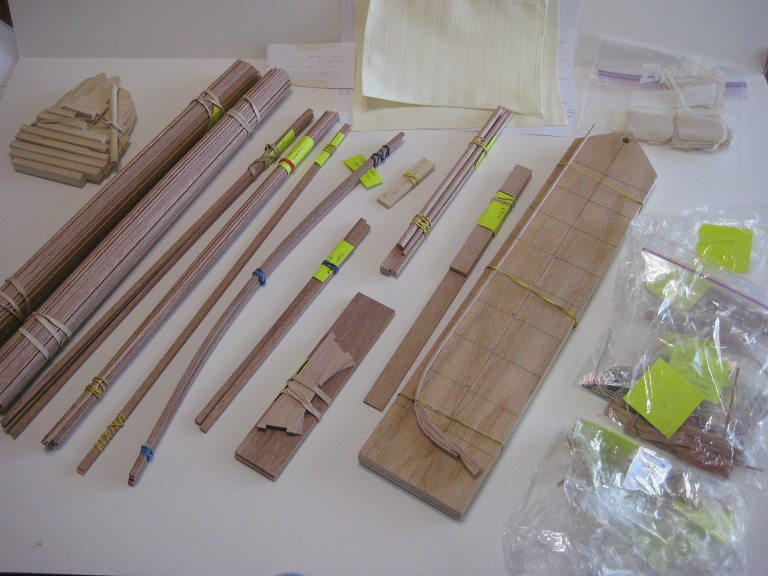
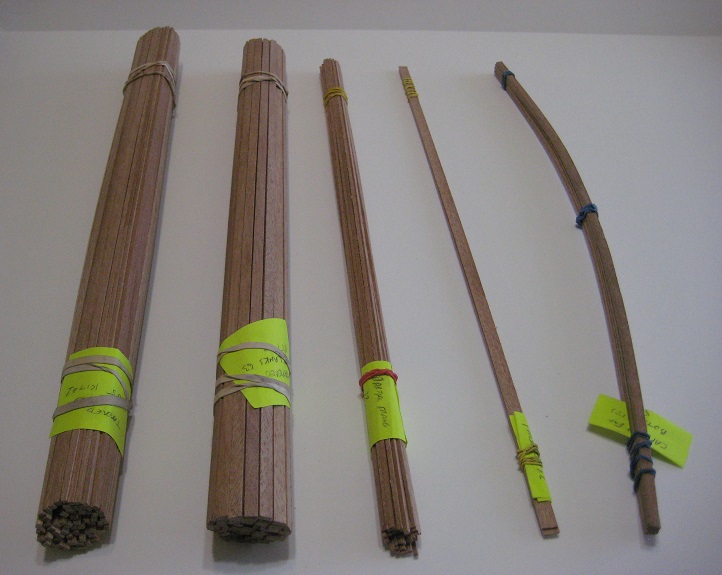
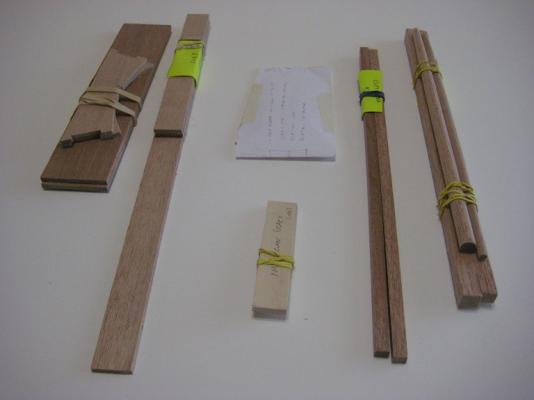
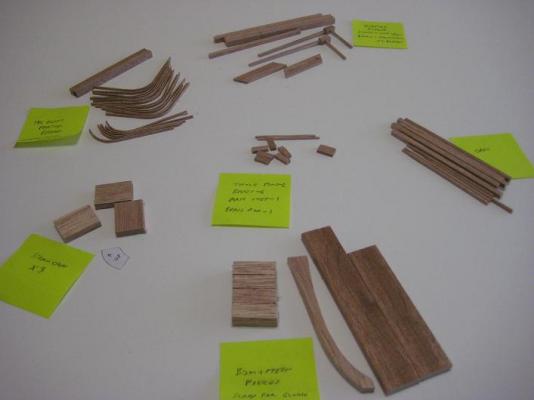
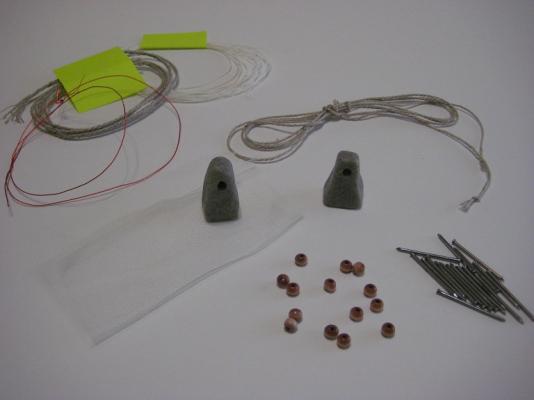
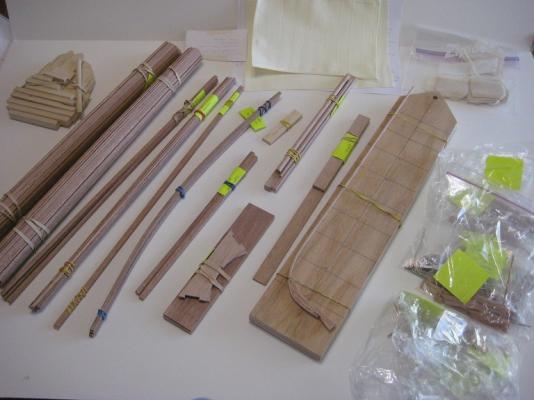
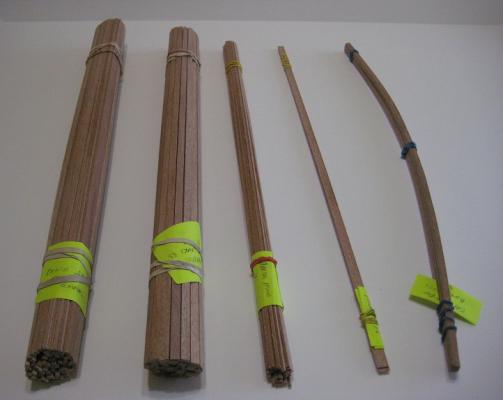
and a few more pictures of the kit. PLEASE REMEMBER YOU ARE LOOKING AT THE CONTENTS FOR 2 MODEL BOATS!!!!
-
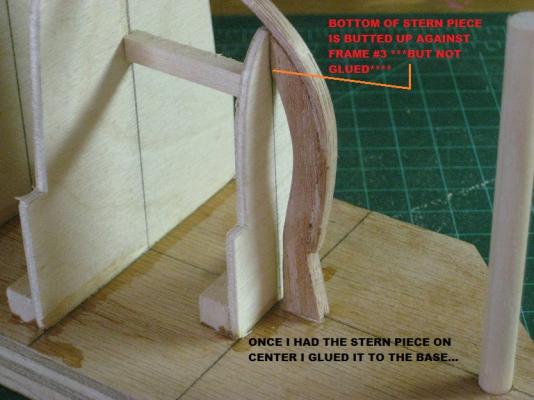
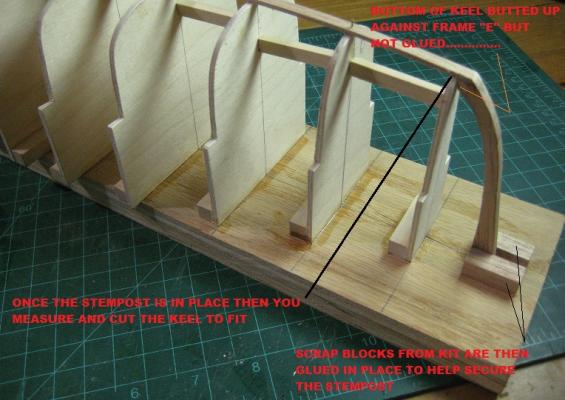
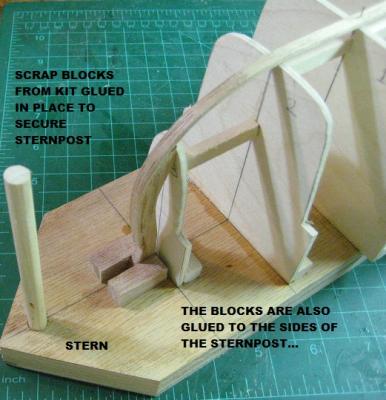
I started this kit about a month ago. I was asked by Scott Miller if I would like to test his newly designed kit and practicum. As I love the work boats of any era, I was pretty much willing to go for it. I will add a few photos of the kit here, and later this week I will start adding the progress of my build of this wonderful ancient boat. What interested me about this kit was I will be constructing the hull using the shell method. I will be using a strong-back with the keel and stem n stern pieces in place. Then I will be adding the strakes first and then the frames afterwards. Just like ancient times. The other reason is because Scott’s practicum has me using nothing but CA glue to construct this boat. I thought this would be a nice challenge to get my cuts and measurements right if I was going to use CA, because once the part is placed there is no turning back. This kit is rated by Scott for the intermediate to expert builder because of the hull construction being a challenge. My opinion…..this hull is not for young… What you are seeing are the contents for 2 boats. One will be donated after it is completed.....!!!!!!!!!!!!!!
-
Hello All this will be the build log of “THE SEA of GALILEE BOAT”. Instead of using my lousy typing to describe the history of this ancient boat, I thought a couple of videos would be good enough to explain a little of the history of this archeological find… part 1 http://www.youtube.com/watch?v=66BKA9bWjHI part 2 http://www.youtube.com/watch?v=A6dbRr7VYs4
-
HEY BOB SHE CAME OUT GREAT... AS FOR THE LITTLE GUY.......WAIT A MINUTE YOUR AVATAR SHOWS YOU WITH NO MUSTACHE!!!
-
Very Nice Richard, very Nice....! I really like this kit from Model Shipways. It has a lot of detail in it and provides a lot of fun with it. I prefer the more difficult kits like this one to build. It involves a great detail of framing and pushes the modeler. I also like the link to the Library of Congress. Most don't know about going there for boats. I didn't for a long time... I AM ENJOYING YOUR BUILDING PROGRESS!!!
-
Nice progress Robbyn, My buddy that retired a few years back has a 30 ford. His girls aren't interested in it. He says when hes too old to drive it anymore He will let me have first shot at it. Thats what you get when you work together for 25yrs. first dibs!!!
-
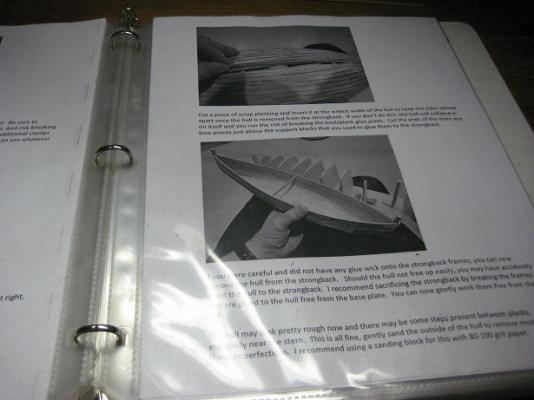
Hi Tom, Hey looks real good. I noticed your broken ones. If I remember right I think I broke 6 to 8 of them. Your also using the iron I use. So are you trying to see if you can pull the hull off without distroying the strongback when your done Tom? I was lucky mine peeled off pretty easy. Just a couple of spots I applied water with a wet brush and it broke off fairly easy. Looking forward to your next update Tom.
-
Thanks Mark great idea for the work boat i'm in the middle of building right now. I was just thinking how I could make it a little easier sanding the inside of the boat...
-
Hi Ben good to see starting your cross section....!
-
Echo by oneslim - cross-section
Cap'n Rat Fink replied to oneslim's topic in - Build logs for subjects built 1751 - 1800
Nice work Bob, she looking real good..! -
Echo by jml1083 - cross-section
Cap'n Rat Fink replied to jml1083's topic in - Build logs for subjects built 1751 - 1800
Hi Jim, It's a while since my last visit, work modeling skills are just excellent. Your C.S. is coming along nicely...... -
it's been a while since my last visit buddy. Popeye you are doing a beautiful job on the sails and rigging.
-
Hey Jp, Your hull turned out very well. Hull planking I enjoy very much. it offers a great challenge for me. I don't find it a pain. But then again i enjoy ratlines too. Maybe I'm weird.... BUT JUST LOVING YOUR PROGRESS JP......GOOD GOING
-
Hi Bob, i liked your remark that you took a step back. Looks to me that you acually took a step forward not back. To answer your question yes i do have several more w. boats planned from the C.B. area. But I am switching to an ancient work for right now, it's the Sea of galilee work boat. Just about have my building room back together, then i will get things going with it...
- 86 replies
-
- 1
-

-
- muscongus bay lobster smack
- Midwest Products
- (and 1 more)
-
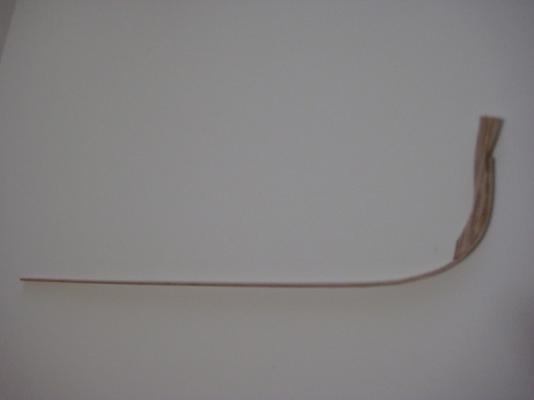
HI Tom, That real good start to your B.L. It's good your going to give the cherry frames a try. What I did was cut my lengths out and let them soak over night in water and then I heat bended them. I place my iron on the frame piece and slowly moved it back n forth over a small area. Once it got hot enough I could all of a sudden feel the wood starting to give and I easily work the curve of the frame in. IMO MS was asking a lot of cherry to take a hard bend like this(but it can be done) as thin as the material is. But it worked. They give you more then enough to do it. Most of my broken frames during this process was because they shipped material that was cross grain cut. thats a no win situation there. P.S> just remembered once the matertial started to give I placed it in the notch just under the keel and slowly bent it form around the build board frames. I hope this helps you out. I will keep track of your progress Ken. If you need anything just let me know...
-
Just beautiful Bob
-
"CHUCKY BLOCKS".........................what a great name..................!!! IIT INTEREST ME VERY MUCH, SINCE I HAVE NO MILLING MACHINE TO MAKE THEM FROM YOUR OTHER THREAD CHUCK
-
Nice progress Jp....I like the idea of the sanding sealer finish. I have gone that route with a couple of my builds with min-wax sanding sealer and i to also deluted it with spirits. You will like the finish....
-
Just beautiful Jim...Congrats and enjoy your Stage Coach. I build a wooden back when i was a teenager. It was a lot of fun... At that time I also built the Robert E. Lee but in plastic. I find the same kit on ebay but now they call it a vintage kit. So why am i called OLD???