


TBlack
-
Posts
1,123 -
Joined
-
Last visited
Content Type
Profiles
Forums
Gallery
Events
Everything posted by TBlack
-
 I'm working on the fore top. I won't take up your time with that; it's the same as the main top. Also, I've been working on making top masts. The first two were duds. I started with 3/8" (9mm) cherry dowel and made the square parts first on the mill. Then trying to reduce the round parts down to 5 mm on the lathe, too much stress on the thinner square parts...disaster (firewood?). OK, do the round parts first. Second try.... screwed up the square parts. 3rd try will involve a purchase of 1/4" dowel (from where else but Amazon!). Be here next week.
- 270 replies
-
- 3
-

-
- Sophie
- Vanguard Models
- (and 1 more)
-
Thank God for slow setting glue.
-
I didn't look at the whole video, but a couple of thoughts: will that base plate fit on your lathe bed and is there a way to lock it down, and is the tool height compatible with your lathe? Tom
-
I'm impressed with folks like Keith and davec who can turn out product using, basically their hands. I have to use my mill to do the square parts and my lathe to do the round parts. And, actually, the mill with rotary table works pretty good on the round parts as well. Tom
-
Keith, You're progressing nicely, and I'm impressed with your camera work. What are you using to get such good close-ups? And why can't I? Tom
-
Did you see that? I got a like from Chris Watton! I feel like I've arrived! You have to understand that I'm taking his wonderfully made kit; pieces that fit with zero tolerance, impeccable instructions. And I'm butchering up his transom; not following his paint scheme; not always using his wood supplies; yet I still get a like! YES! Tom
- 270 replies
-
- 9
-
-

-
- Sophie
- Vanguard Models
- (and 1 more)
-
I've overlaid and cemented the rim piece and pierced the top for the crows feet. As I mentioned, I'm not doing the battens justice. To see how it should be done, please visit Theodosius' log of Speedy, his post #99 and subsequent back in September Now I'll taper the battens according to Lees.
- 270 replies
-
- 9
-
-
- Sophie
- Vanguard Models
- (and 1 more)
-
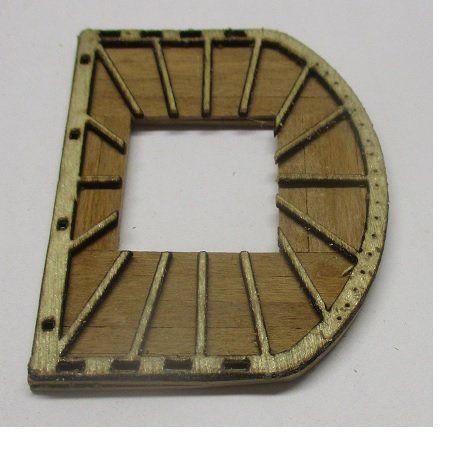
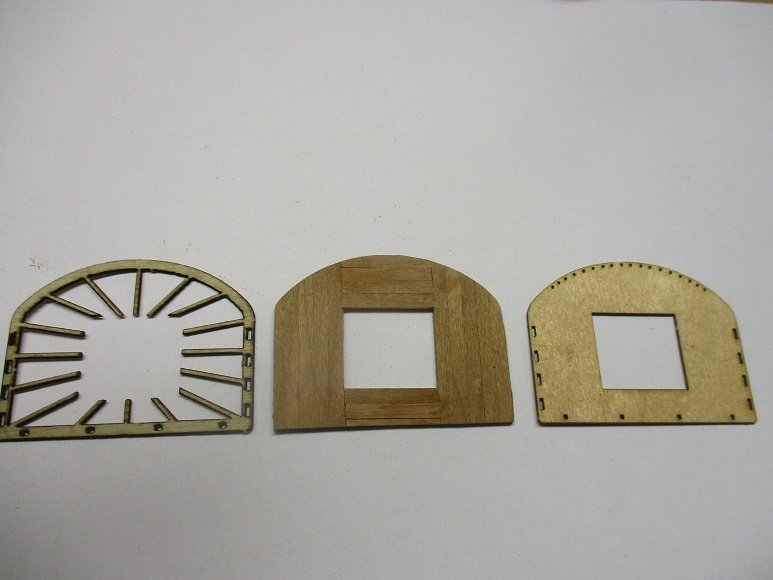
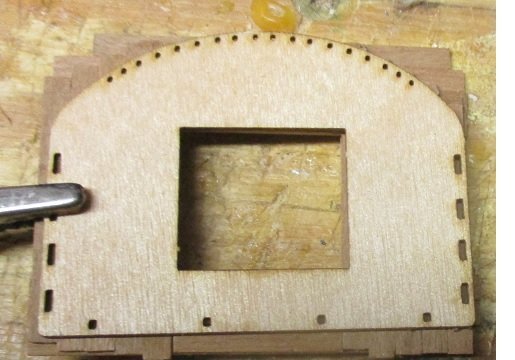
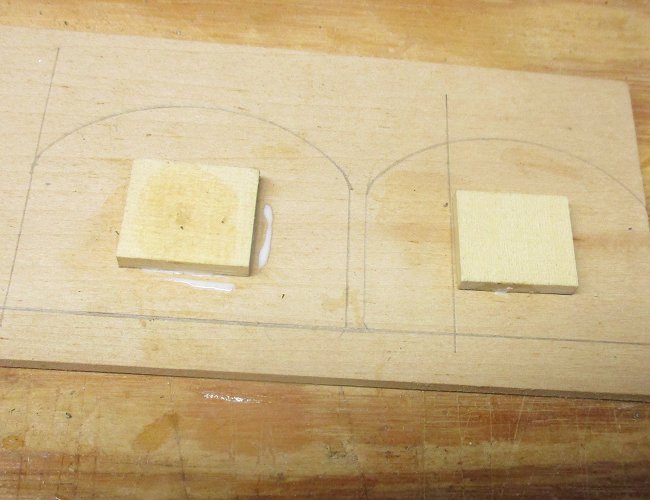
According to Lees, the rim plank is 1.5" thick. The kit supplied rim is 1 mm, which is approximately 2", close enough. So I'm faced with this: My top in the center, the kit supplied rim/batten assembly on the left, and a template for the crows feet holes on the right. The battens aren't strictly correct, and they need to be tapered, but it all gets painted black where detail will be lost. In other words, I'm going with the kit piece. As to crows feet, it's not clear to me whether Sophie qualifies; she's right on the cusp of not having them, but it's extra detail and not too hard to do at this scale (I did a euphroe block at 1:96 for my Sphynx class). So, I'll overlay that template to position the holes. Tom
- 270 replies
-
- 6
-
-
- Sophie
- Vanguard Models
- (and 1 more)
-
Once I've flipped the top it looks like this on the bottom: I fill in the spaces like before: Then I can take it off the former to work on the outboard shape. Blessedly, I have a template for that exercise: And then it's on to the rim. Tom
- 270 replies
-
- 9
-
-
- Sophie
- Vanguard Models
- (and 1 more)
-
Here I've filled in the athwartship planks. What I've done is simulate the scarfed joints that make up the top. Next is flip the top over and do the same on the underside.

- 270 replies
-
- 8
-
-
- Sophie
- Vanguard Models
- (and 1 more)
-
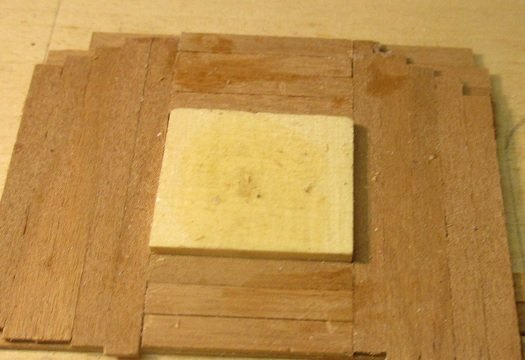
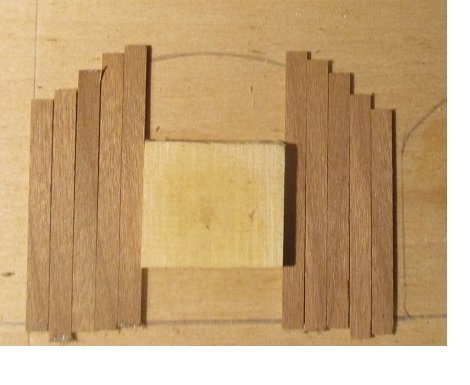
Finish the long planks, which are 1/4" wide, BTW.: The next thing is to fill in between the longitudinal planks.
- 270 replies
-
- 4
-
-
- Sophie
- Vanguard Models
- (and 1 more)
-
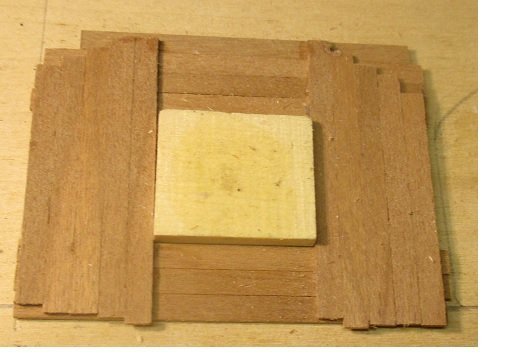
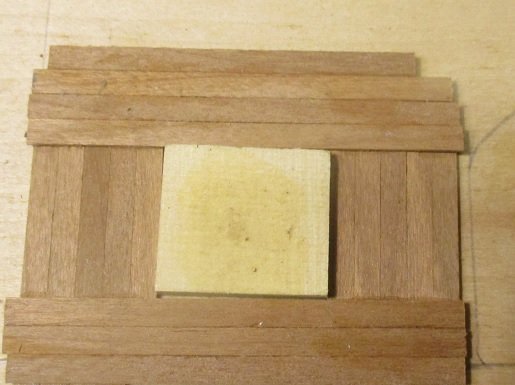
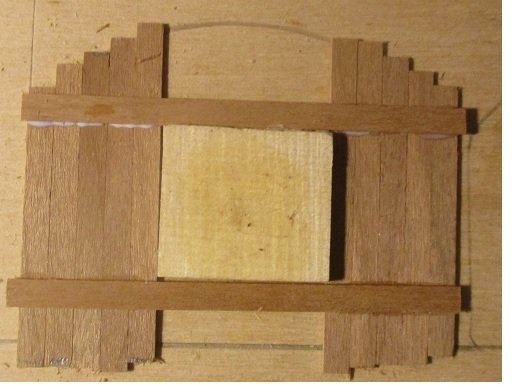
As to the planking, I'm using 1/32" thick planks. I can't find anything in Lees that suggests width. Longridge uses 1/32" as his thickness and 3/16" as his width at 1:96 scale. Druxey's tops are a 3 layered sandwich of 1/32" stuff, while mine are 2 layers of 1/32". Anyway, the first steps are like this: Those planks are just laying there. They are not glued. I'm not worried about the precise length at this point. The next phase is this: That cross piece is glued and locks everything in place, and I will now proceed to put the rest of the athwart planks in place maybe after dinner or maybe tomorrow, but not now. Keith will hate me for this, but it's cocktail time! Tom
- 270 replies
-
- 5
-
-
- Sophie
- Vanguard Models
- (and 1 more)
-
As to the tops, we are blessed that there are templates to start from: We punch out the center squares and use those to make identical squares, except 1/8" thick and glue them to a backboard: Next comes the planking, but for later, because it's my bedtime now! Tom

- 270 replies
-
- 6
-
-
- Sophie
- Vanguard Models
- (and 1 more)
-
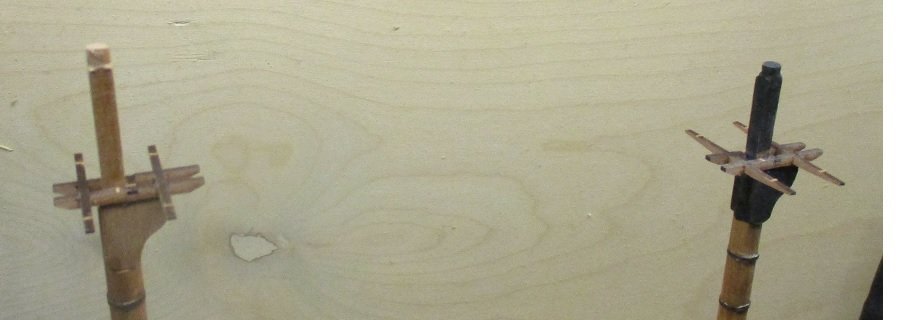
Got the trees assembled. A little black paint next, but my focus is on the tops. I'm going to depart from the kit here. I followed Longridge, page 171, in building tops for my 1:96 scale version of Sphynx which turned out great. They are built up from individual planks, and not too difficult especially now at 1:64. I'll document it.
- 270 replies
-
- 3
-
-
- Sophie
- Vanguard Models
- (and 1 more)
-
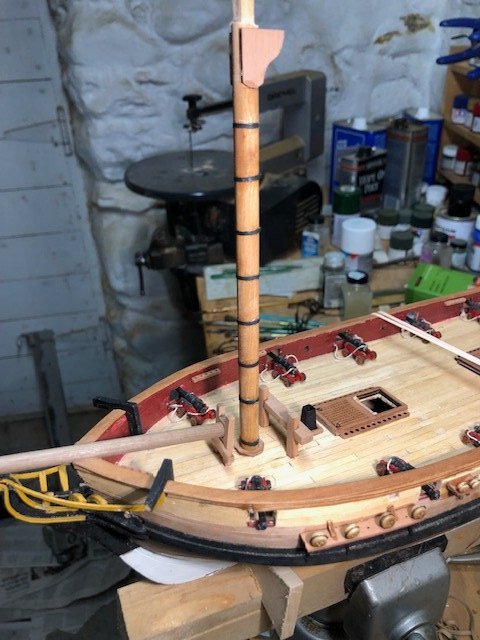
Yes, Ian, just dropped in for the color comparison. I'll make the bowsprit out of the cherry as well so all will match, hopefully. Tom
- 270 replies
-
- 2
-
-
- Sophie
- Vanguard Models
- (and 1 more)
-
Keith, Thanks for the support. I think you can see from the photo that, color-wise, the mast matches the rest of the wood on the ship. Whereas, the bowsprit, which is in the kit supplied wood, is a little off. Glad I went the way I did.
- 270 replies
-
- 4
-
-
- Sophie
- Vanguard Models
- (and 1 more)
-
Must be cold and windy in Manitoba about now, Anyway, back to my masts: after due consideration, I’ve decided to make them out of the cherry dowels that I have on hand. Making them out of pear would have required that I first repair my 55 year old Rockwell Delta 9” table saw, and then borrow the use of a friend’s wood working lathe. All of that was getting too complicated for a minor color difference. I’ve sized the two masts and will put in the flats this afternoon. Tom
- 270 replies
-
- 2
-
-
- Sophie
- Vanguard Models
- (and 1 more)
-
So, Keith, I see we have an Uncle Bob (knocklouder) in Manitoba who, hopefully, is over his sickness and back on to Pegasus, mice notwithstanding. And, Bob, welcome to the family! Tom
- 270 replies
-
- 2
-
-
- Sophie
- Vanguard Models
- (and 1 more)
-
Keith, bro, The spars are painted and the masts only at the doubling. Tom
- 270 replies
-
- 2
-
-
- Sophie
- Vanguard Models
- (and 1 more)
-
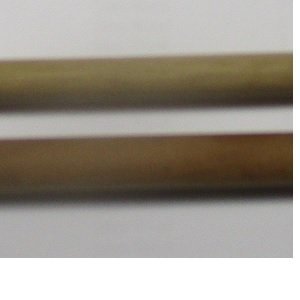
On pages 98-101 of my edition of the book bo'sun mate Mowett is explaining to Stephen Maturin the various masts of Sophie. He states that the main mast is 56 feet long. In 1:64 scale that's 10.5". Chris has the mast of Speedy at just under 10": OK close enough. The foremast, according to Mowett is 49 feet, or 9.2". Chris has it at just under 9, again close enough. For mast material I'm at a quandary. Here is a comparison of what is in the kit vs. a cherry dowel: The picture doesn't really show the difference, but the kit supplied dowel has a gray tint to it while the cherry is a reddish brown. What are mast supposed to look like? I just noticed that in Ron Neilson's build of Camilla, he uses Swiss pear for his masts. I might try that as well. Tom
- 270 replies
-
- 2
-
-
- Sophie
- Vanguard Models
- (and 1 more)
-
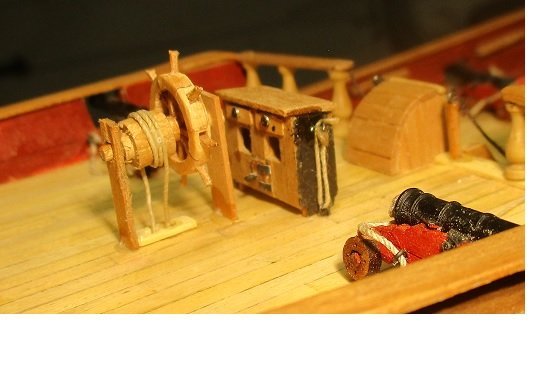
Now I've completed the helm and on to the spars and/or boats. For boats it will be a 12' jolly boat, an 18' cutter and a 24' launch. I'm going to take a shortcut and buy the resin hulls, just doing the finish out.
- 270 replies
-
- 5
-
-
- Sophie
- Vanguard Models
- (and 1 more)
