


TBlack
-
Posts
1,305 -
Joined
-
Last visited
Content Type
Profiles
Forums
Gallery
Events
Everything posted by TBlack
-
 I’m impressed with your ability to draw those green lines so accurately. Tom
 -
Much better. On the Vanguard website you can see a picture of them. Tom
- 95 replies
-
- 1
-

-
- flirt
- vanguard models
- (and 1 more)
-
Walter, You are doing a magnificent job on this ship! You and I have the older version of blocks from Chris. If you look at your #72 post, that’s what they are supposed to look like. Shopping at Chris’s site and Chuck Passaro’s site shows that decent blocks are out of stock. So, we are out of luck. I might try knocking off the corners. I’ll let you know how I do. Tom
- 95 replies
-
- 1
-
-
- flirt
- vanguard models
- (and 1 more)
-
Good point, Greg. I hope you are doing well, dear pal. Tom
-
So, Chuck, your technique is to use a laser to cut the “teeth” for the gratings. I suppose by the time you program the computer and adjust the laser I might have been able to do the same on my mill? Tom
-
Chuck, I’d be interested in your technique for building gratings. Tom
-
Keith, are you happy with your cooking, or are you relieved that you now have help? Tom
-
What Keith said is spot on. I find getting those wedge pieces just right a horrible task. Tom
-
Great photography, Gary. You continue to show great attention to detail in this model, following a fine tradition Tom
-
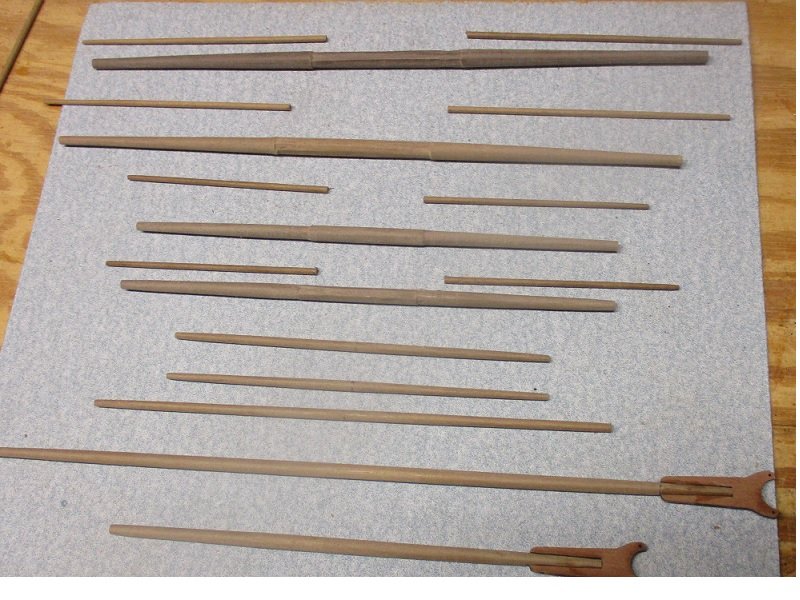
Various spars/yards shaped. Next is to add hardware and paint. I'm going to join several others that thought the PE fittings for the stun'sl booms didn't look right But on closer inspection it turns out that they're perfect.
- 341 replies
-
- 12
-
-
- Sophie
- Vanguard Models
- (and 1 more)
-
Those are the buntlines. If you were to add a sail to the yard, the line (knotted end) would be attached to the sail. Tom
- 95 replies
-
- 3
-

-
-
- flirt
- vanguard models
- (and 1 more)
-
How do I get to be friends with her too?
-
I’m not sure from where you are starting, but alligator clips are a good place. Additionally, if you have a vice into which you can secure the clip by its tail, then you can secure the block in the jaws of the clip. This eliminates the number of moving parts. Stropping becomes easy now. Enough info, or more needed? Tom
-
I couldn't get the text in the right place around those pictures, so this is a continuation of my previous post: I'm on to yardarms. I've made the two lower ones with the help of my mill for the octagonal section and my lathe for the tapered round sections. The top mast yards are too delicate for the mill, so hand filing for the center sections. Pictures later. Tom
- 341 replies
-
- 3
-
-
- Sophie
- Vanguard Models
- (and 1 more)
-
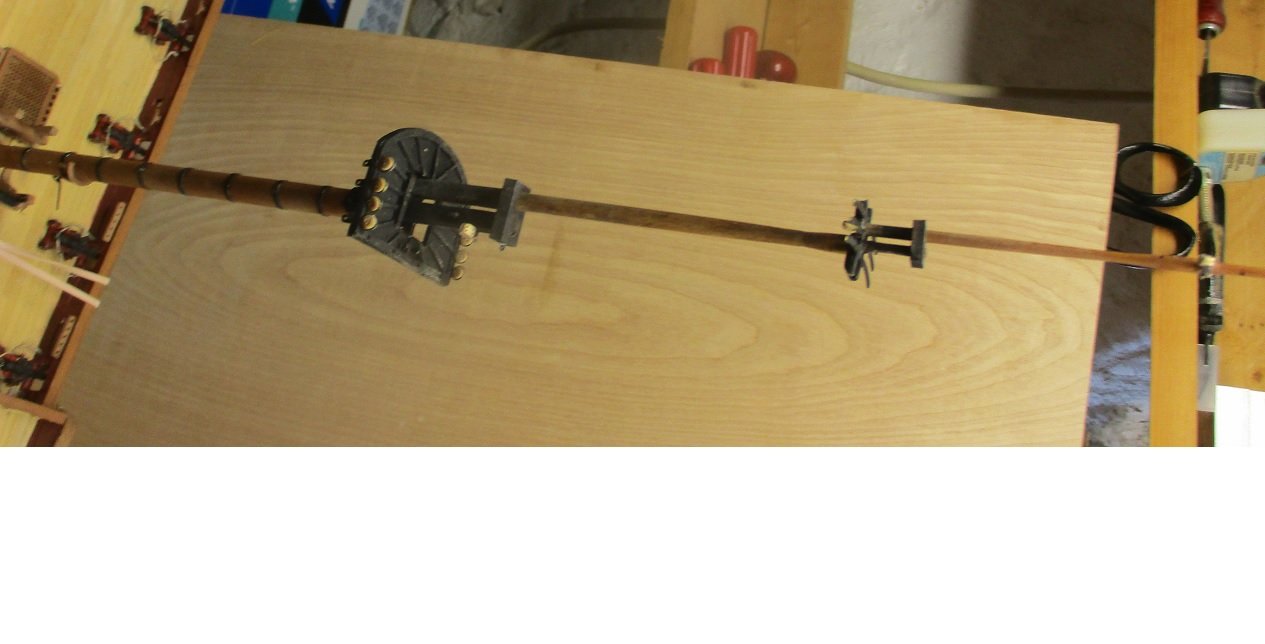
I meant to mention that Ron Neilson (Hollowneck) seems to be our resident interviewer, and he deserves a lot of credit for the aforementioned interview. I wonder if he went to England to conduct it? On other fronts, I've finished the hardware on the main masts. None of the masts are glued together yet.
- 341 replies
-
- 6
-
-
- Sophie
- Vanguard Models
- (and 1 more)
-
Toni, This is a fantastic tutorial that you are doing. No wonder that you are the head of the NRG. Tom
- 80 replies
-
- 9
-
-
- rigging/masts
- NRG
- (and 2 more)
-
Tom, The cutter looks great, well done. You’ve positioned it perfectly; let the crew worry about getting below. Tom
- 144 replies
-
- 1
-
-
- HMS Speedy
- Vanguard Models
- (and 1 more)
-
Keith, You continue to exhibit the old saying about “think outside the box”. I’m in awe. Tom
-
Tom, we’re about at the same stage in our models (mine is HMS Sophie). I’ve left off the fences on the tops until,later as I know I’d knock them off during the rigging. Fortunately, I have a milling machine to do the flats on the yards. Let’s see if I can duplicate your excellent results. Tom
- 144 replies
-
- 2
-
-
- HMS Speedy
- Vanguard Models
- (and 1 more)
-
I see I’ve still got Chris Watton’s attention, which reminds me to salute him for the wonderful interview in the recent issue of the NRG magazine. Also, nice to put a face to all of his communication on this site. Tom
- 341 replies
-
- 7
-
-
- Sophie
- Vanguard Models
- (and 1 more)
-
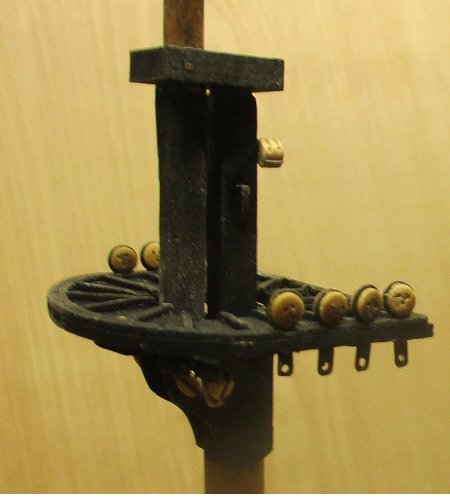
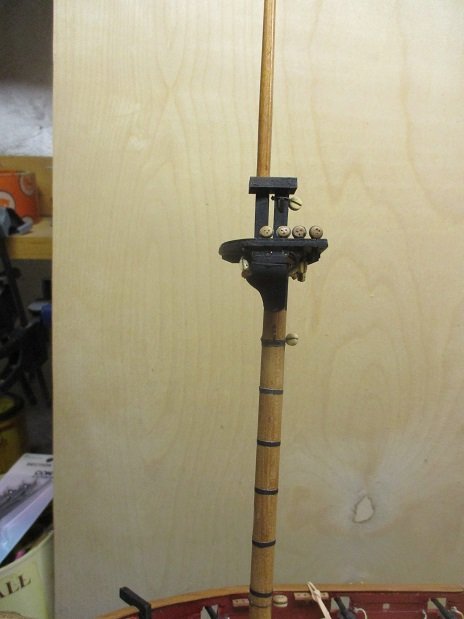
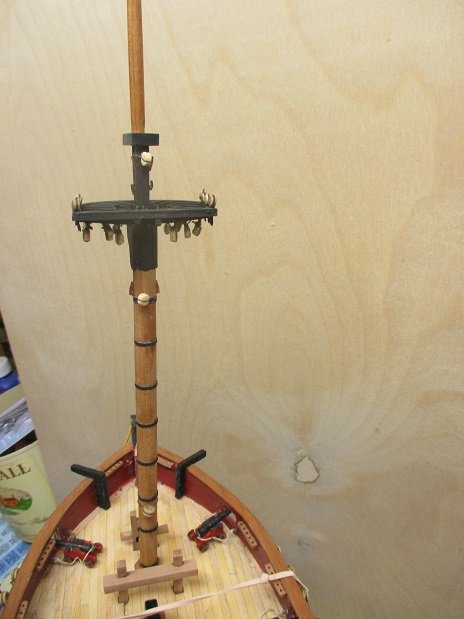
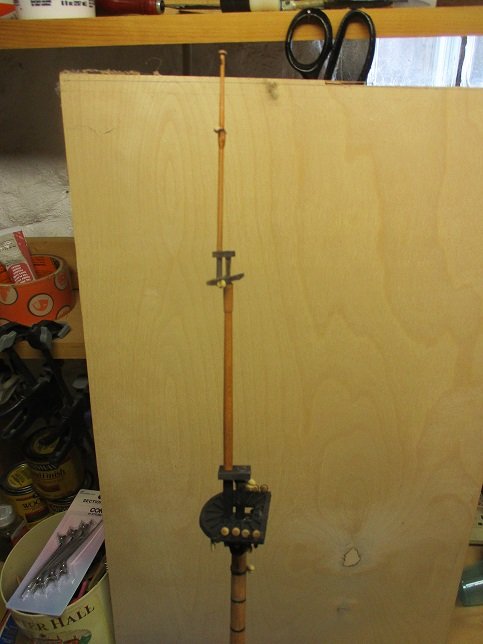
I've gotten all the hardware on the various fore masts: The topmast is posing, it's not affixed yet until after the lower shrouds and stays are looped around the foremast. I'll turn to the hardware on the main masts now. Tom
- 341 replies
-
- 13
-
-
- Sophie
- Vanguard Models
- (and 1 more)
-
That laser level is neat! I need one of those. Think waterlines?
-
I'm in awe of your talents, and eager to see you in New London! Tom
- 200 replies
-
- 3
-
-
-
- Whaling Bark
- Charles W Morgan
- (and 1 more)
-
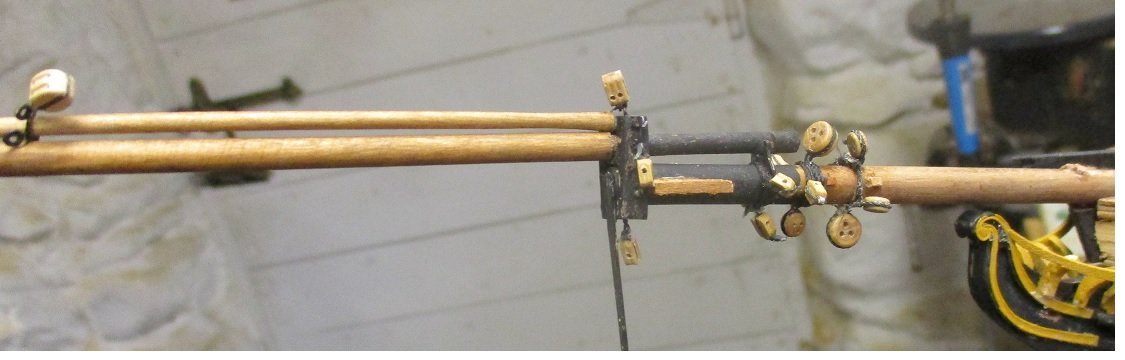
I've gotten the hardware on the bowsprit/jib booms. At one point there is a need for 4 deadeyes in one loop around the bowsprit. Again, I'm resorting to Derek's method of getting them in the right positions: 12 o'clock, 4, 6, & 8. I managed it, although maybe the one is at 3:30. Always good to be a little early! Now I'm on to the fore masts.
- 341 replies
-
- 11
-
-
- Sophie
- Vanguard Models
- (and 1 more)
-
I don’t remember ever disagreeing with Keith A. Or cathead, for whom I have great respect, but try “food wishes” on YouTube.

