Mark Pearse
-
Posts
840 -
Joined
-
Last visited
Content Type
Profiles
Forums
Gallery
Events
Everything posted by Mark Pearse
-
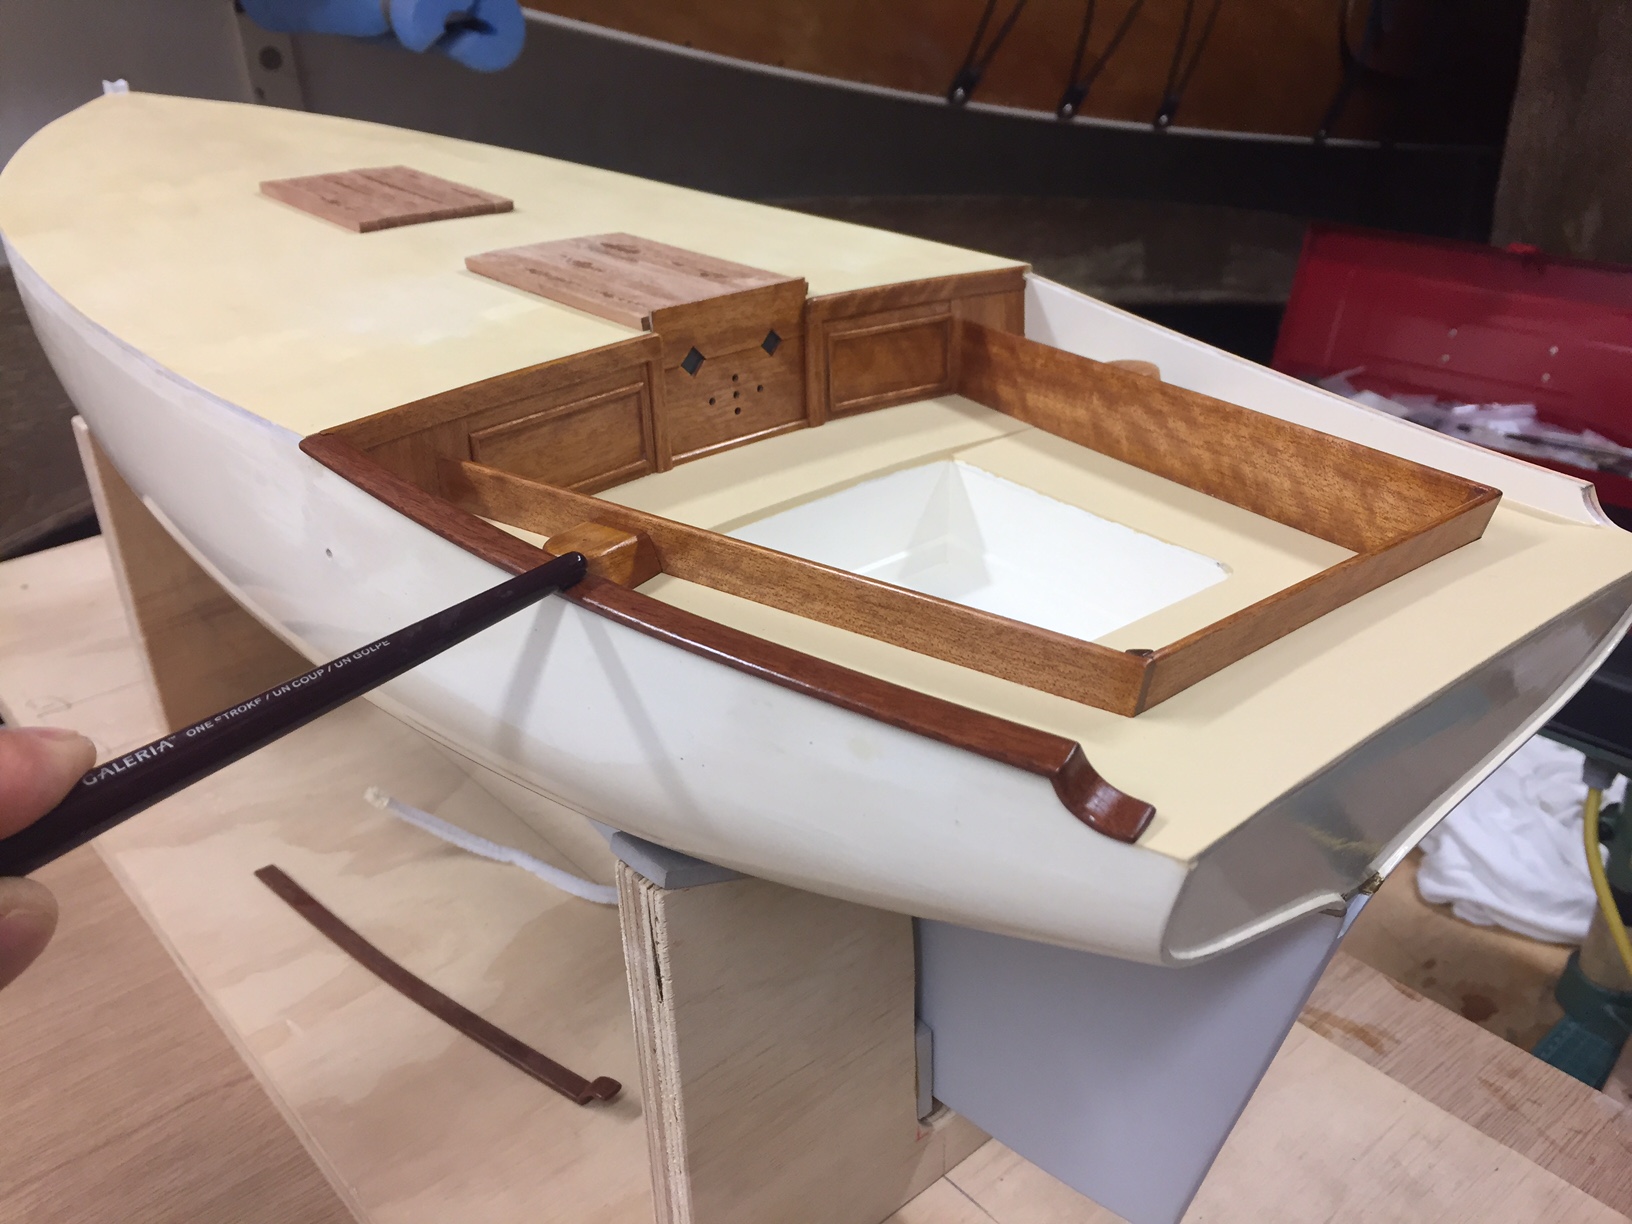
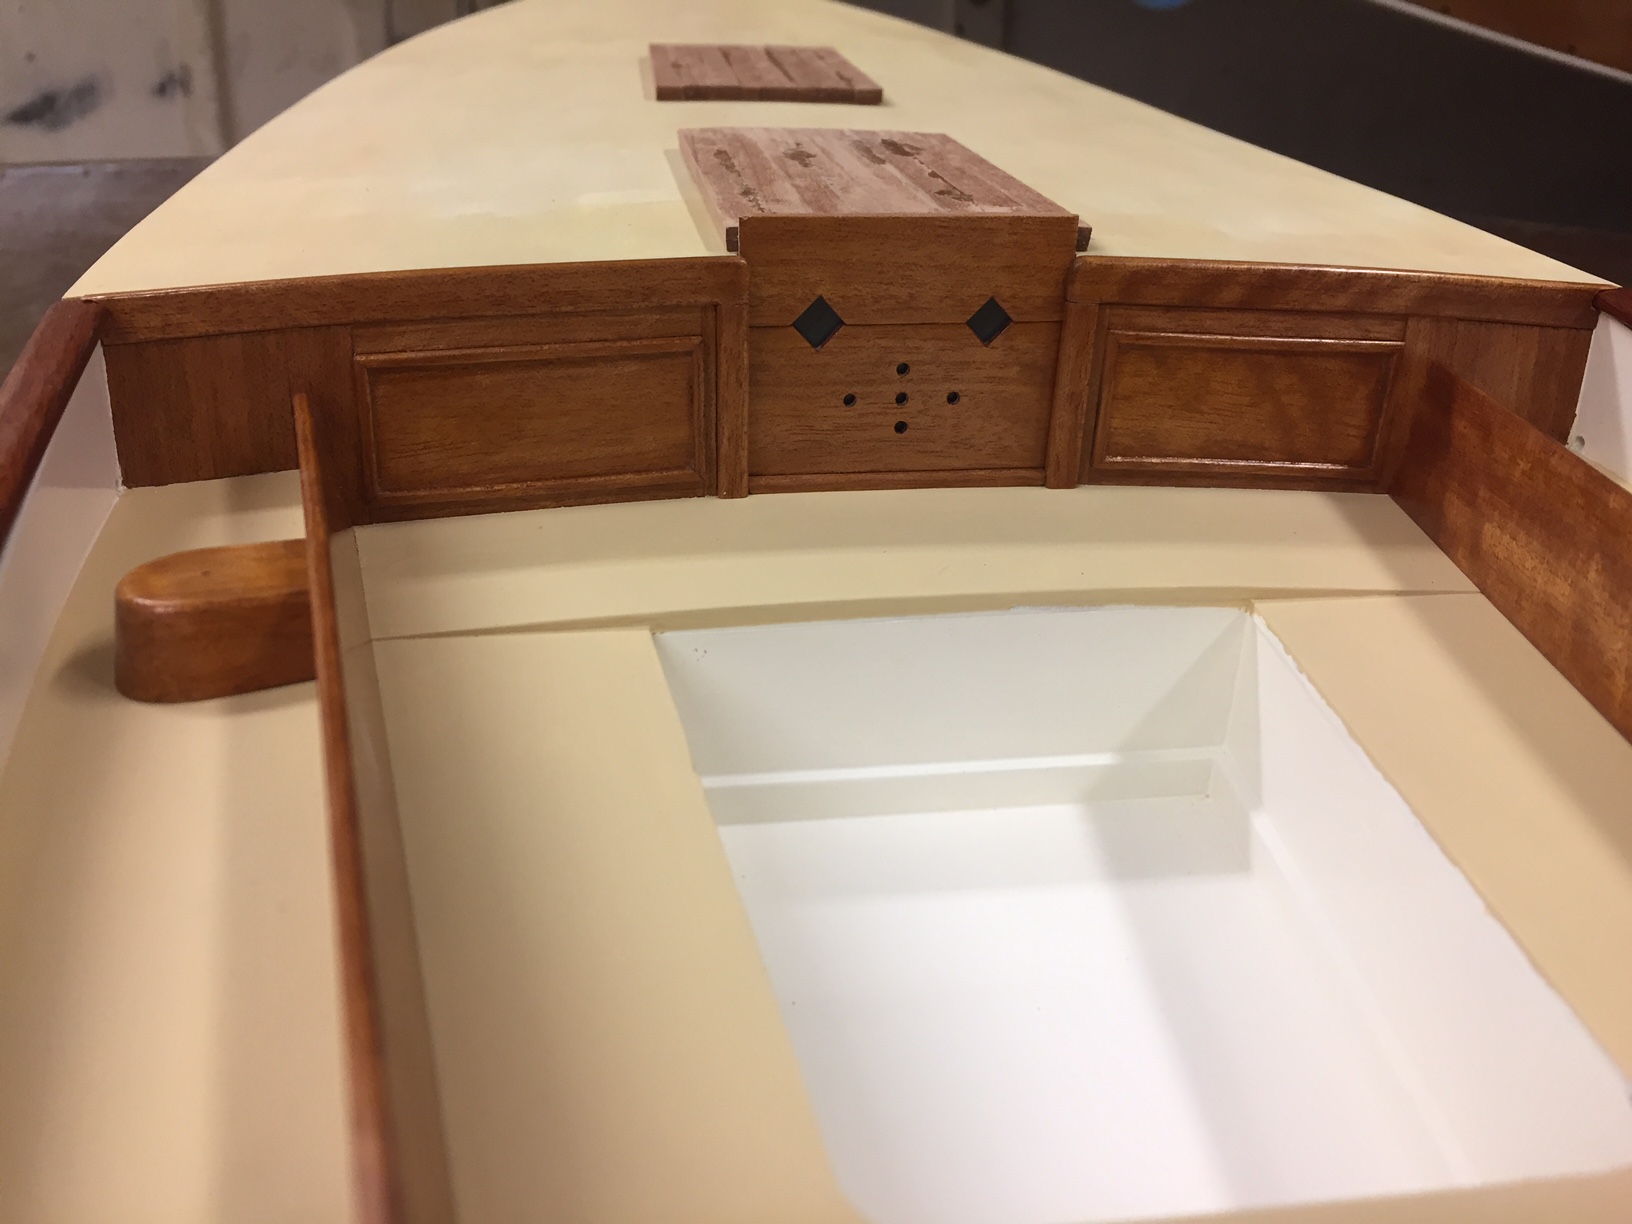
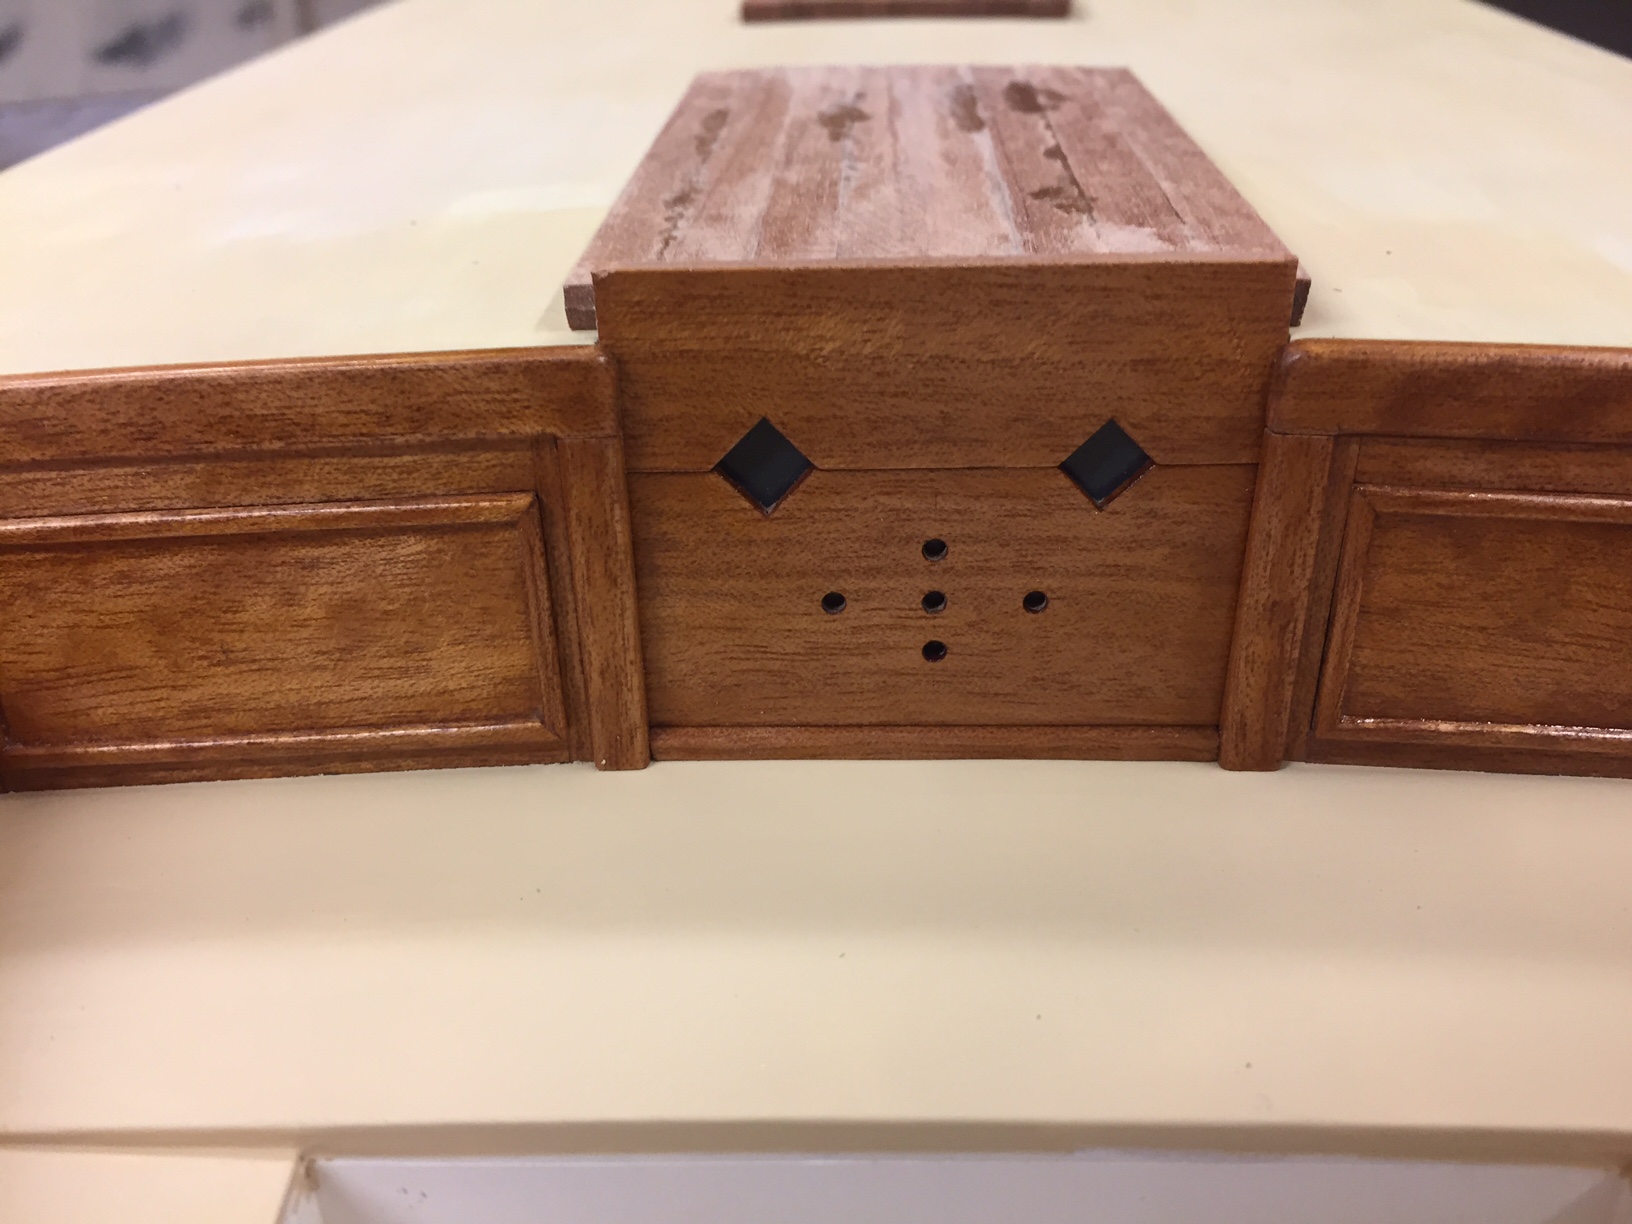
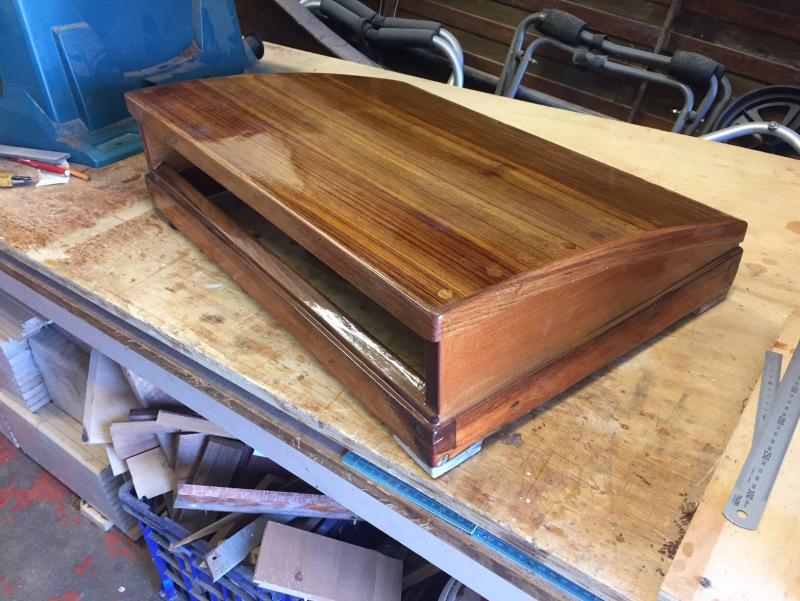
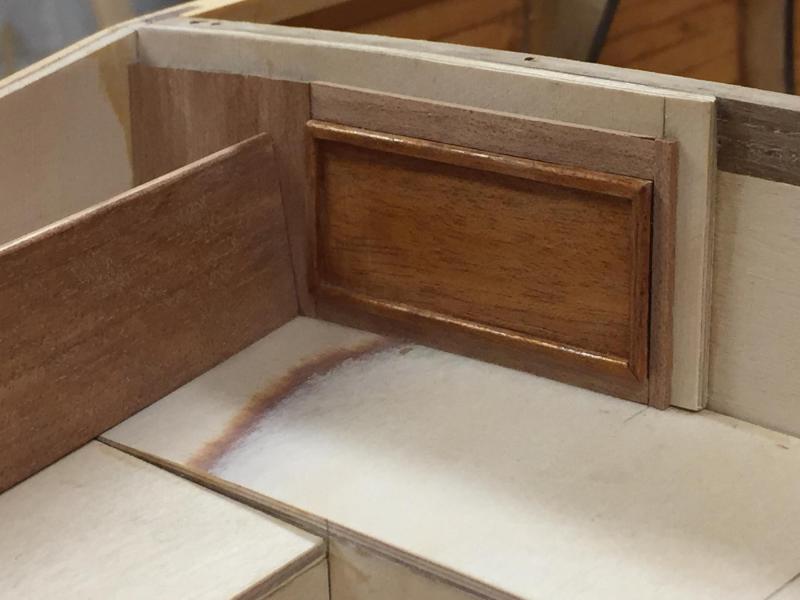
 Most of the finished raised deck cockpit parts have been installed. I'm happy with the shellac finish on the timber, about 8 coats well sanded, the final one with steel wool; & finally a thin coat of clear polyurethane finish was wiped on with a cloth to give satin finish, slightly glossy. The deck in the cockpit area has been painted with the final colour, a matt cream colour. The edge of the seating footwell will be trimmed in timber, where the colour changes from cream to white. The side rectangular panels are removable in the design, hence their beaded edging. The storm boards are simple, true to the intention that the boat was used mainly for the harbour & some short coastal trips. I've left the top part over-height to be trimmed down later. The 2 main deck hatches are started, I'll stain the timber a colour to replicate teak. The hatch details will be simple, a lot of boats here of that time had fairly poor hatches - I suppose that if it doesn't get too cold then it doesn't matter so much if it leaks air. The capping pieces are not glued on yet, I may wait until after the topsides are repainted first, to be decided. thanks
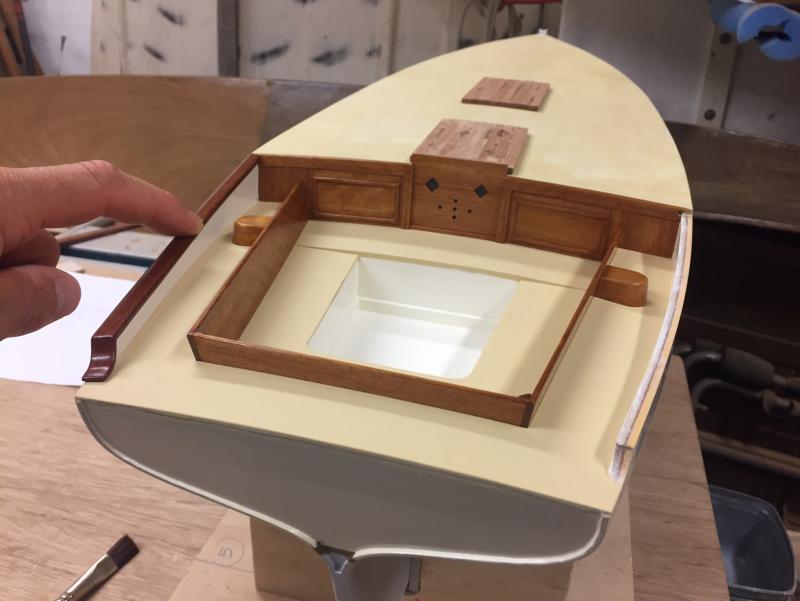


- 411 replies
-
- 14
-

-
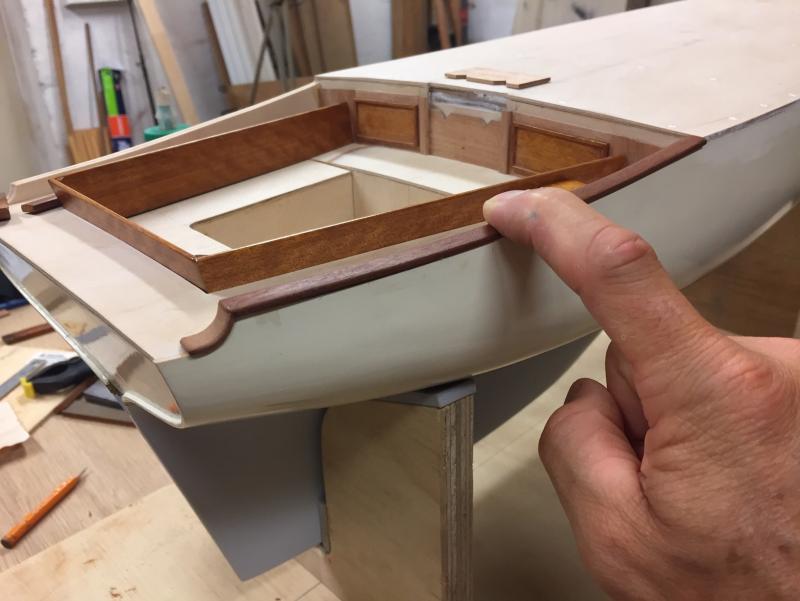
Yet another hiatus from the model, this time it was to rebuild a 1:1 hatch into a ventilating one. It's no lightweight, but neither is the boat. I've been working on the capping pieces that trim off the topsides besides the cockpit. Visually incredibly important for this boat, so it's nice to have completed one side. Some of the timber has some shellac on it, & the raised deck step has some more pieces done or underway - storm boards & the vertical frames either side. thanks, Mark
- 411 replies
-
- 14
-
-
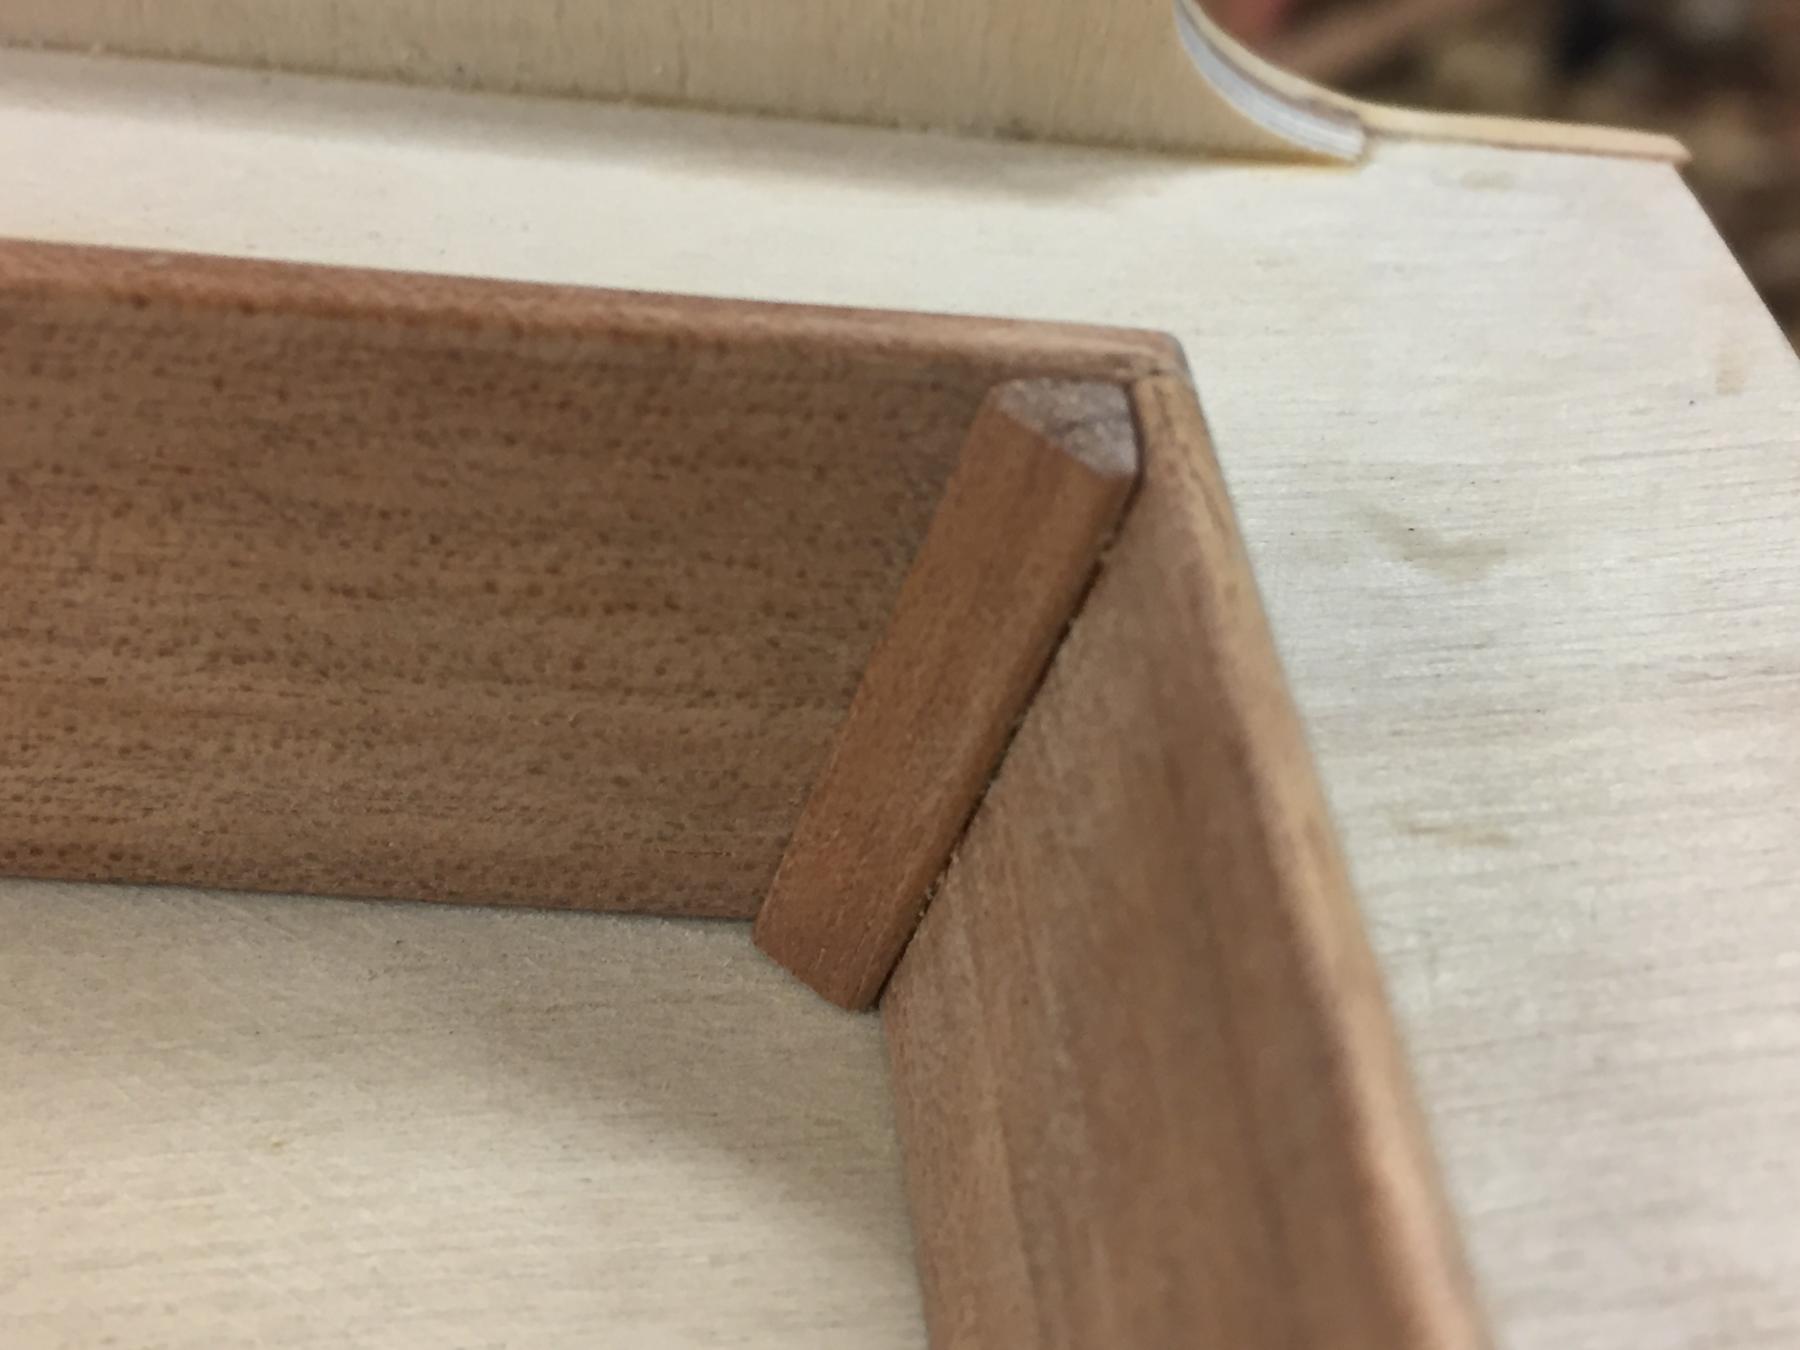
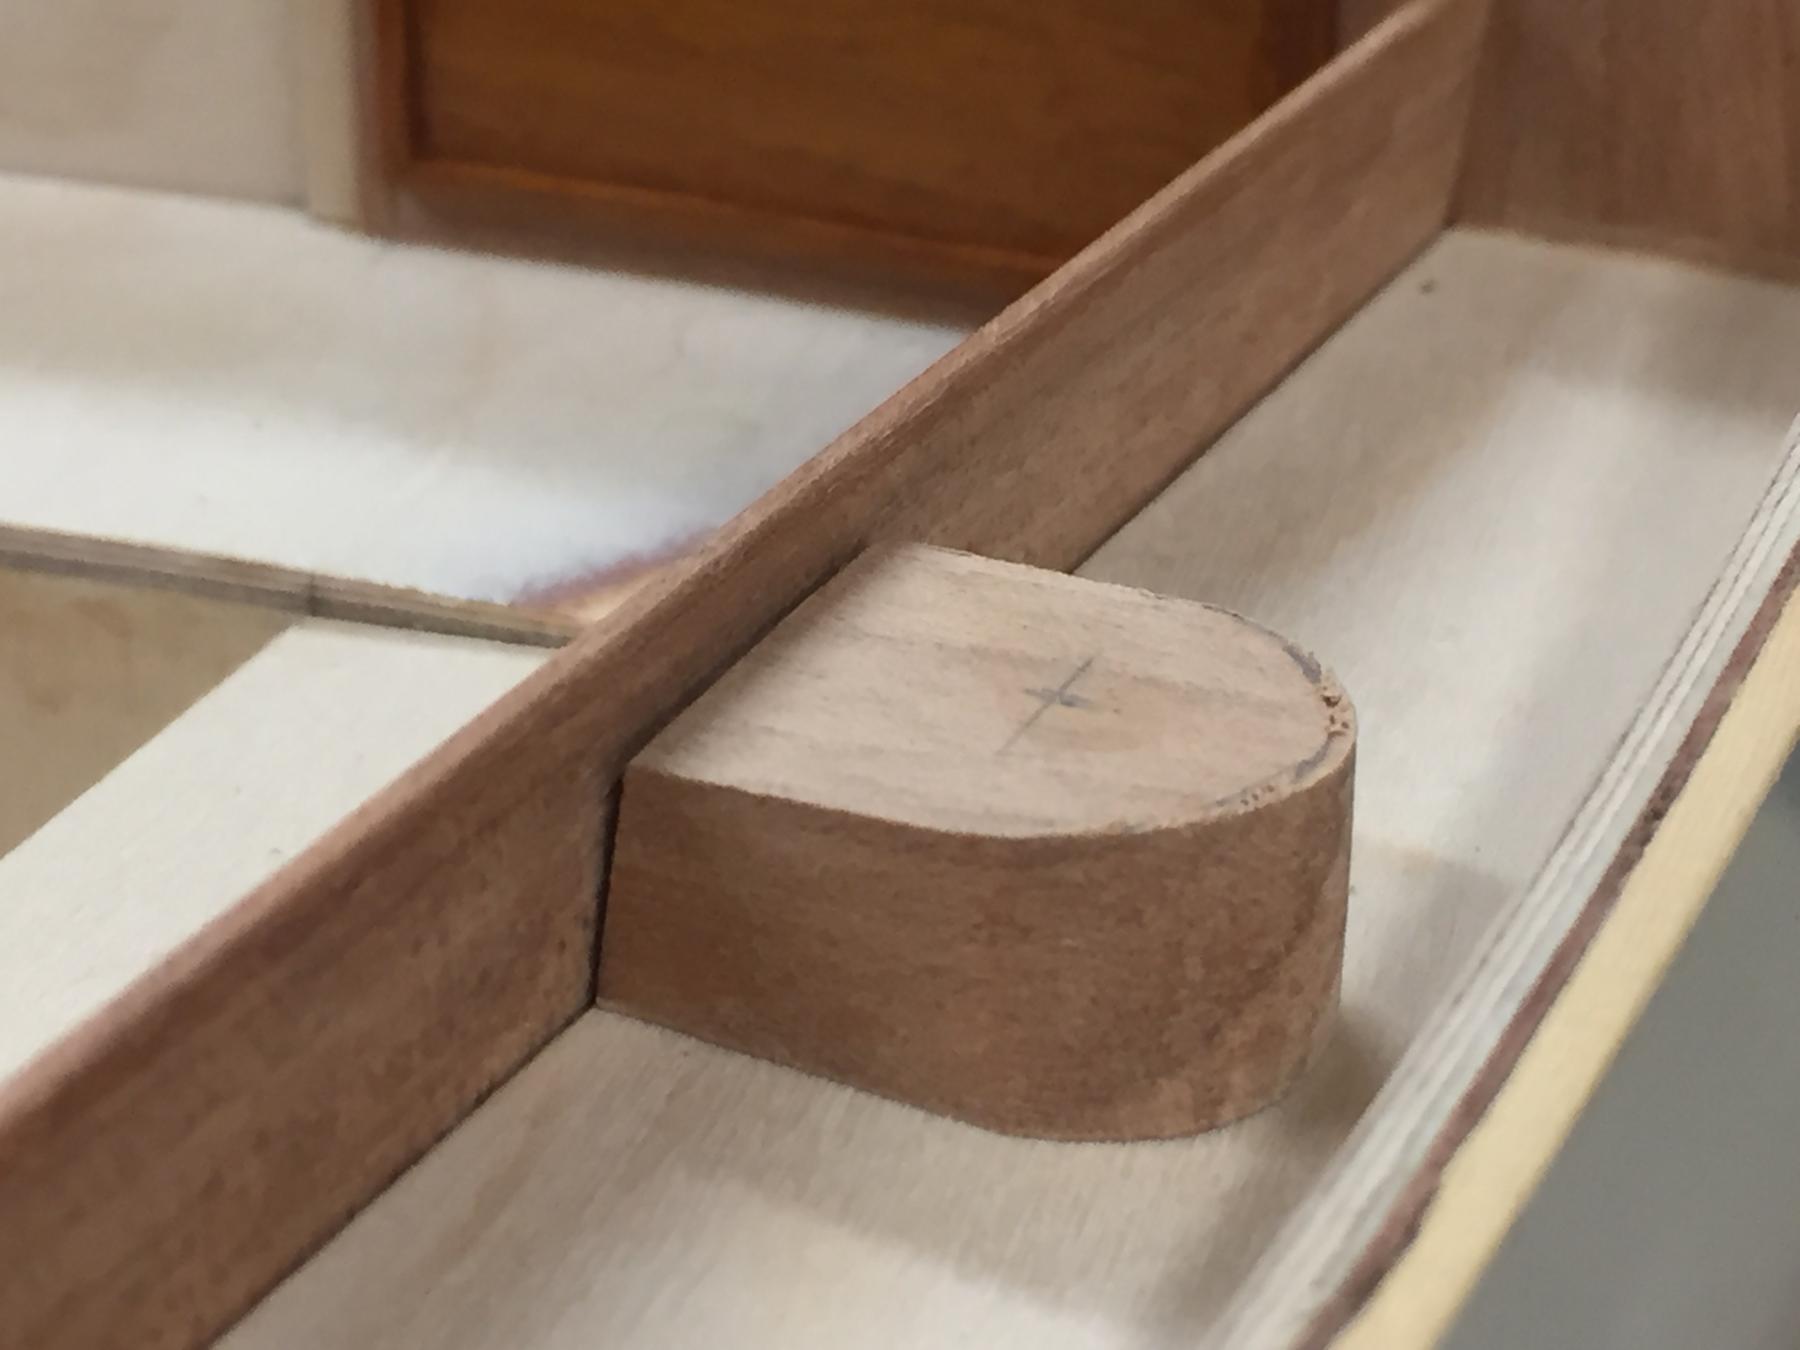
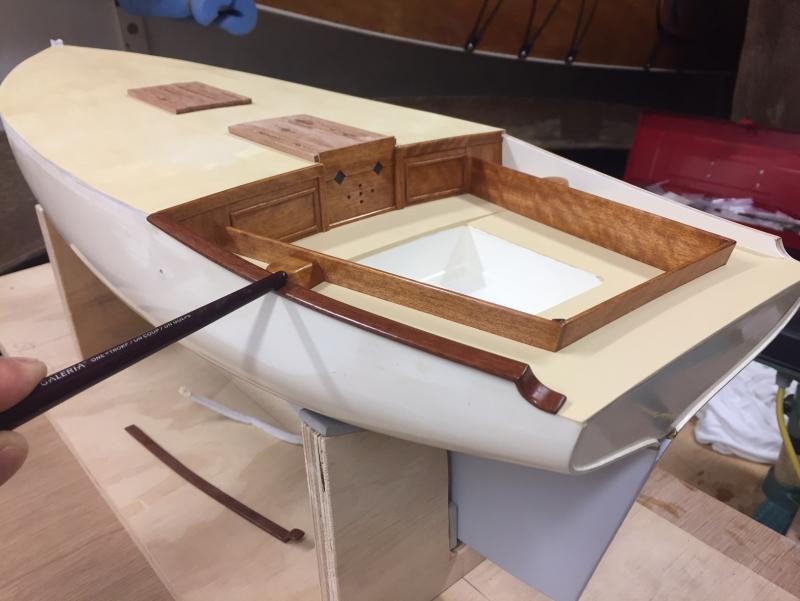
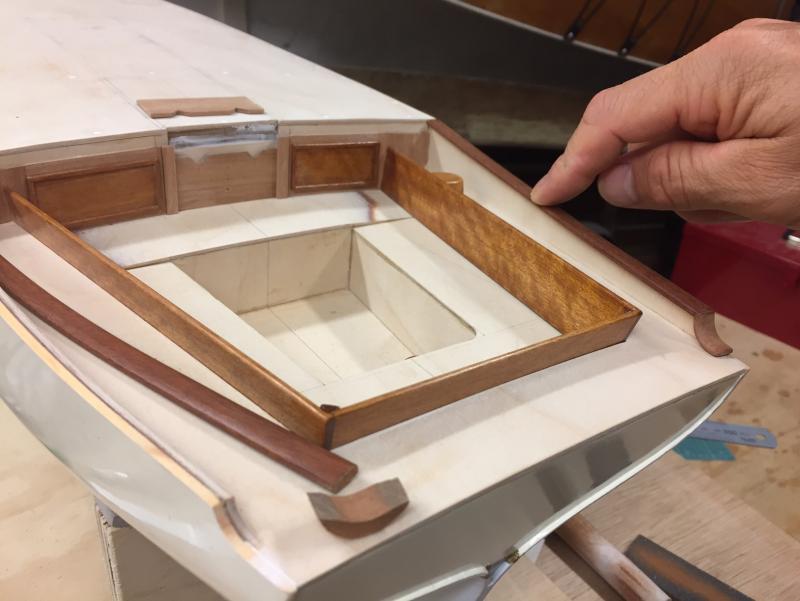
I've started doing the timber work details, initially in the cockpit area & probably move on to the deck & the topsides timber work last. I'm using some Queensland Maple for most of it, ripped into strips of various thicknesses. The finish will be shellac, it's versatile, quick & the finish is good when it's finally rubbed with some steel wool. I've noticed that a full gloss finish is glossier when you are close to it than when you are further away, so I reason that to "scale" a gloss level, it should be reduced from full gloss to match the scale of the distance. So, there won't be full gloss on the model even though the varnish would be full gloss in reality. Not having done this before, I'm being cautious & will make as many parts as I can without installing them, to do the shellac finishing separately & then glue them in after paintwork has been done. For the timber to be glued in & then finished insitu, I'll be as careful as I can & let the paint go over any shellac on the wrong areas. The seat backrests, hatch panels, winch bases are just sitting there loose. The removable hatches have a few coats of shellac to see the colour, they are not glued in yet. The finish has a light sanding. Detail of the seat backrest corner. Winch mounting block underway, the sides will be tapered upwards. thanks for looking, bye for now MP


- 411 replies
-
- 10
-
-
34ft Danish Cutter by adamdt
Mark Pearse replied to adamdt's topic in - Build logs for subjects built 1901 - Present Day
looks great Adam, Mark -
Well done on the award. That's very enjoyable to look through - really great work & a work of art. (from another Jaws fan, an underrated film) thanks for showing it off Mark
-
Hi John I've got a couple of ideas on the spreaders: do you think it's possible they ran a line to the mast head & used a boom as an occasional crane for loading? Another possibility is to do with the gaff - the peak halyard would run from the masthead & load the mast to the side a lot of the time - probably all of the time given old canvas sails. It would almost never pull straight aft with much load because as soon as there's some wind the gaff would pivot around the mast, esp given the likely sails. If this hunch is correct, the tip of the mast wouldn't be loaded pulling aft, the real risk of breaking the tip off would be to the side....If the wind was so light that the gaff was sitting more or less straight aft then there would be no need to support the mast tip. best, Mark
- 745 replies
-
- 3
-
-
- francis pritt
- mission ship
- (and 1 more)
-
there is a lot to enjoy in looking at the photos, an interesting design & a lovely model thanks
-
soldering iron or torch? advice please
Mark Pearse replied to Mark Pearse's topic in Metal Work, Soldering and Metal Fittings
thanks Steve, Allan this has been very helpful -
soldering iron or torch? advice please
Mark Pearse replied to Mark Pearse's topic in Metal Work, Soldering and Metal Fittings
that's huge help everyone, many thanks for your assistance -
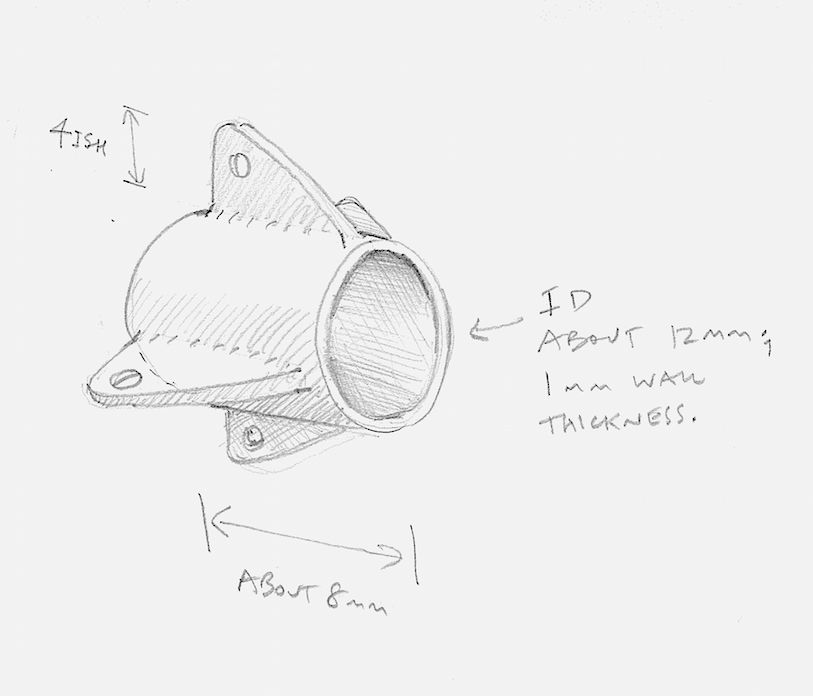
I want to make some metalwork parts for the model, & some of the parts have multiple flanges where they probably can't all be attached at the same time. I have't done any soldering or brazing & was wondering if an iron would be better if there's more than one flange to attach...would a torch tend to soften any joints already done? thanks, below shows one of the parts
-
34ft Danish Cutter by adamdt
Mark Pearse replied to adamdt's topic in - Build logs for subjects built 1901 - Present Day
lovely lines Adam, but maybe check the keel thickness, it looks very thin. best, Mark -
Hi Jon looks great, well done. I think the lee helm is because your clew is very loose to the boom & not at the boom where it should be, you can see that the main is not getting much of it's potential power whereas the jib is. I might be wrong, but is the clew on the full sized boats tight to the boom (or a bit loose when it's light)? This would have the effect that Bob describes Mark
-
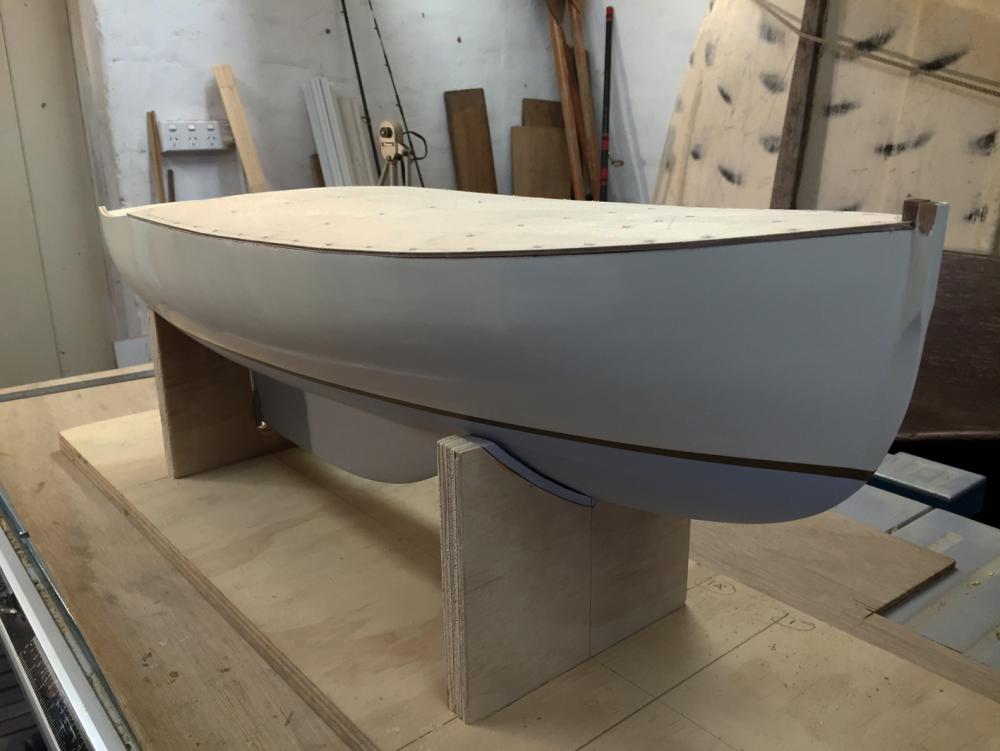
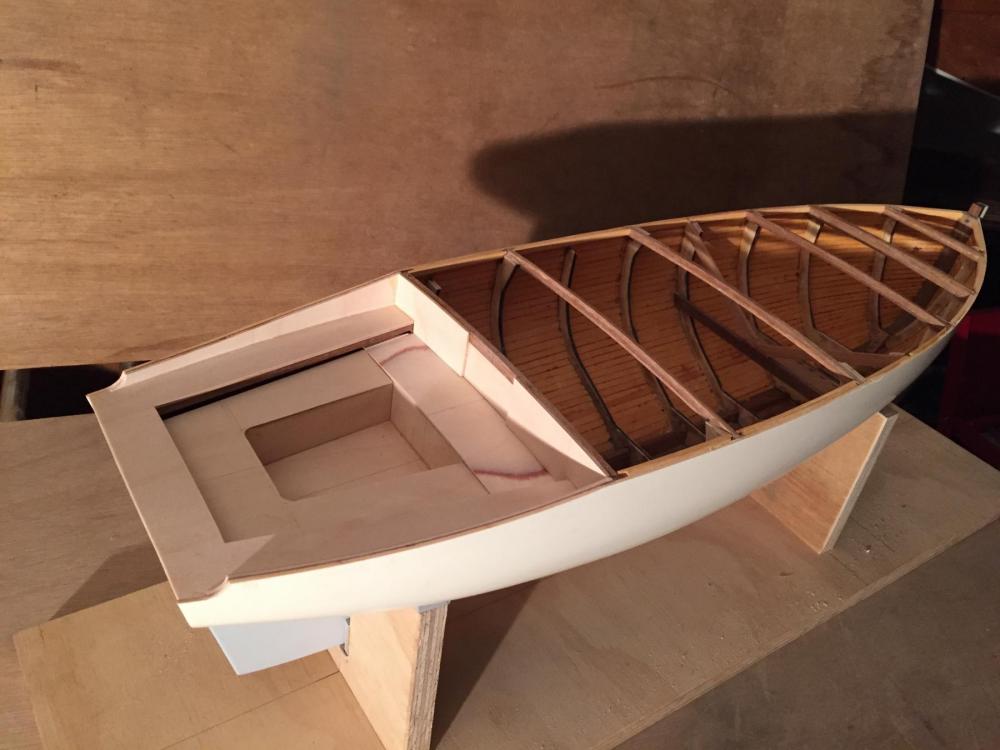
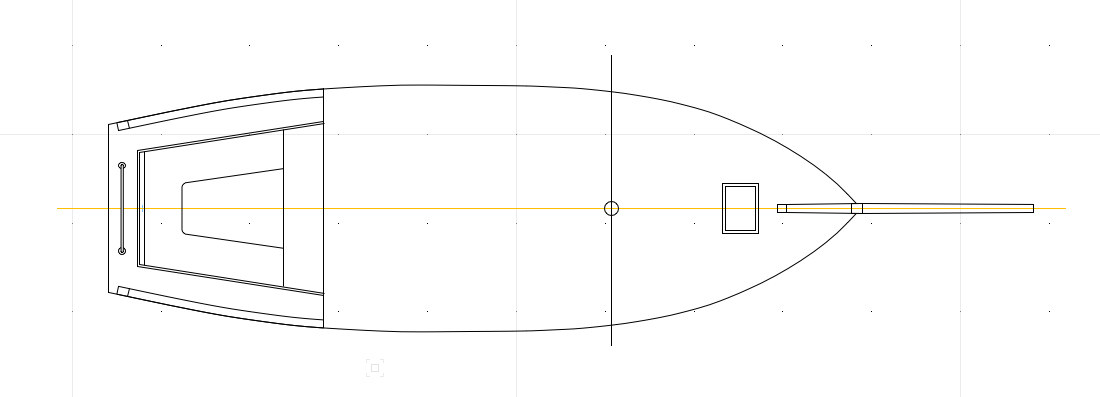
I've cut the deck & in the photos it is temporarily fitted with small screws. The screw heads will be filled over, but the 2-way deck curve needs more than just a little clamping. Some of the deck parts have been pencilled on, but there's still some thinking to do: review the mast position again. It's not going to have to sail, but if the mast setout looks wrong it'll really bug me, it's looking a little too far forward, but the bowsprit isn't on yet. A long bowsprit looks nice, but I'm assuming a hanked jib luff, so it puts some emphasis on actually being able to reach the forestay without drama. Sometimes they put a wide rectangular bowsprit so that stepping on it was easier, & it also meant that whisker stays were not necessary, which makes using an anchor a bit simpler. If I put on whisker stays I will good to put the whisker chain plates on before the deck. I'm thinking to deck step the mast, it doesn't really make sense to put it to the keel step it now. What's next: mast / whisker chainplates, finish setting out the decks, glue the deck & fit the gunwales & sponsons. thanks for the interest

-
Hi there, I've not done what you are asking about, but I would definitely recommend a test run - I have done fibreglass & epoxy sheathing on a full sized sailing boat & I wish that I'd practised first. You (probably) can't take it off, you might only learn what thickness would be right after having done it. good luck with it,
-
thank you Patrick I wasn't planning to do the interior fitout, & I say that somewhat sheepishly having seen the detailed interior fitouts that you do. But I have planned the interior in my head - 2 full bunks forward, with a 4' zone with a wet locker or heads one side & a 4' galley the other side, then 2 full bunks that doubles as a saloon. Nils & Michael, thanks. I am always interested in how the subtle details change the way a boat's hull looks. In this case having multiple curved horizontal lines, working in balance will be even more interesting. The same hull can look very different with fairly minor visual differences.
-
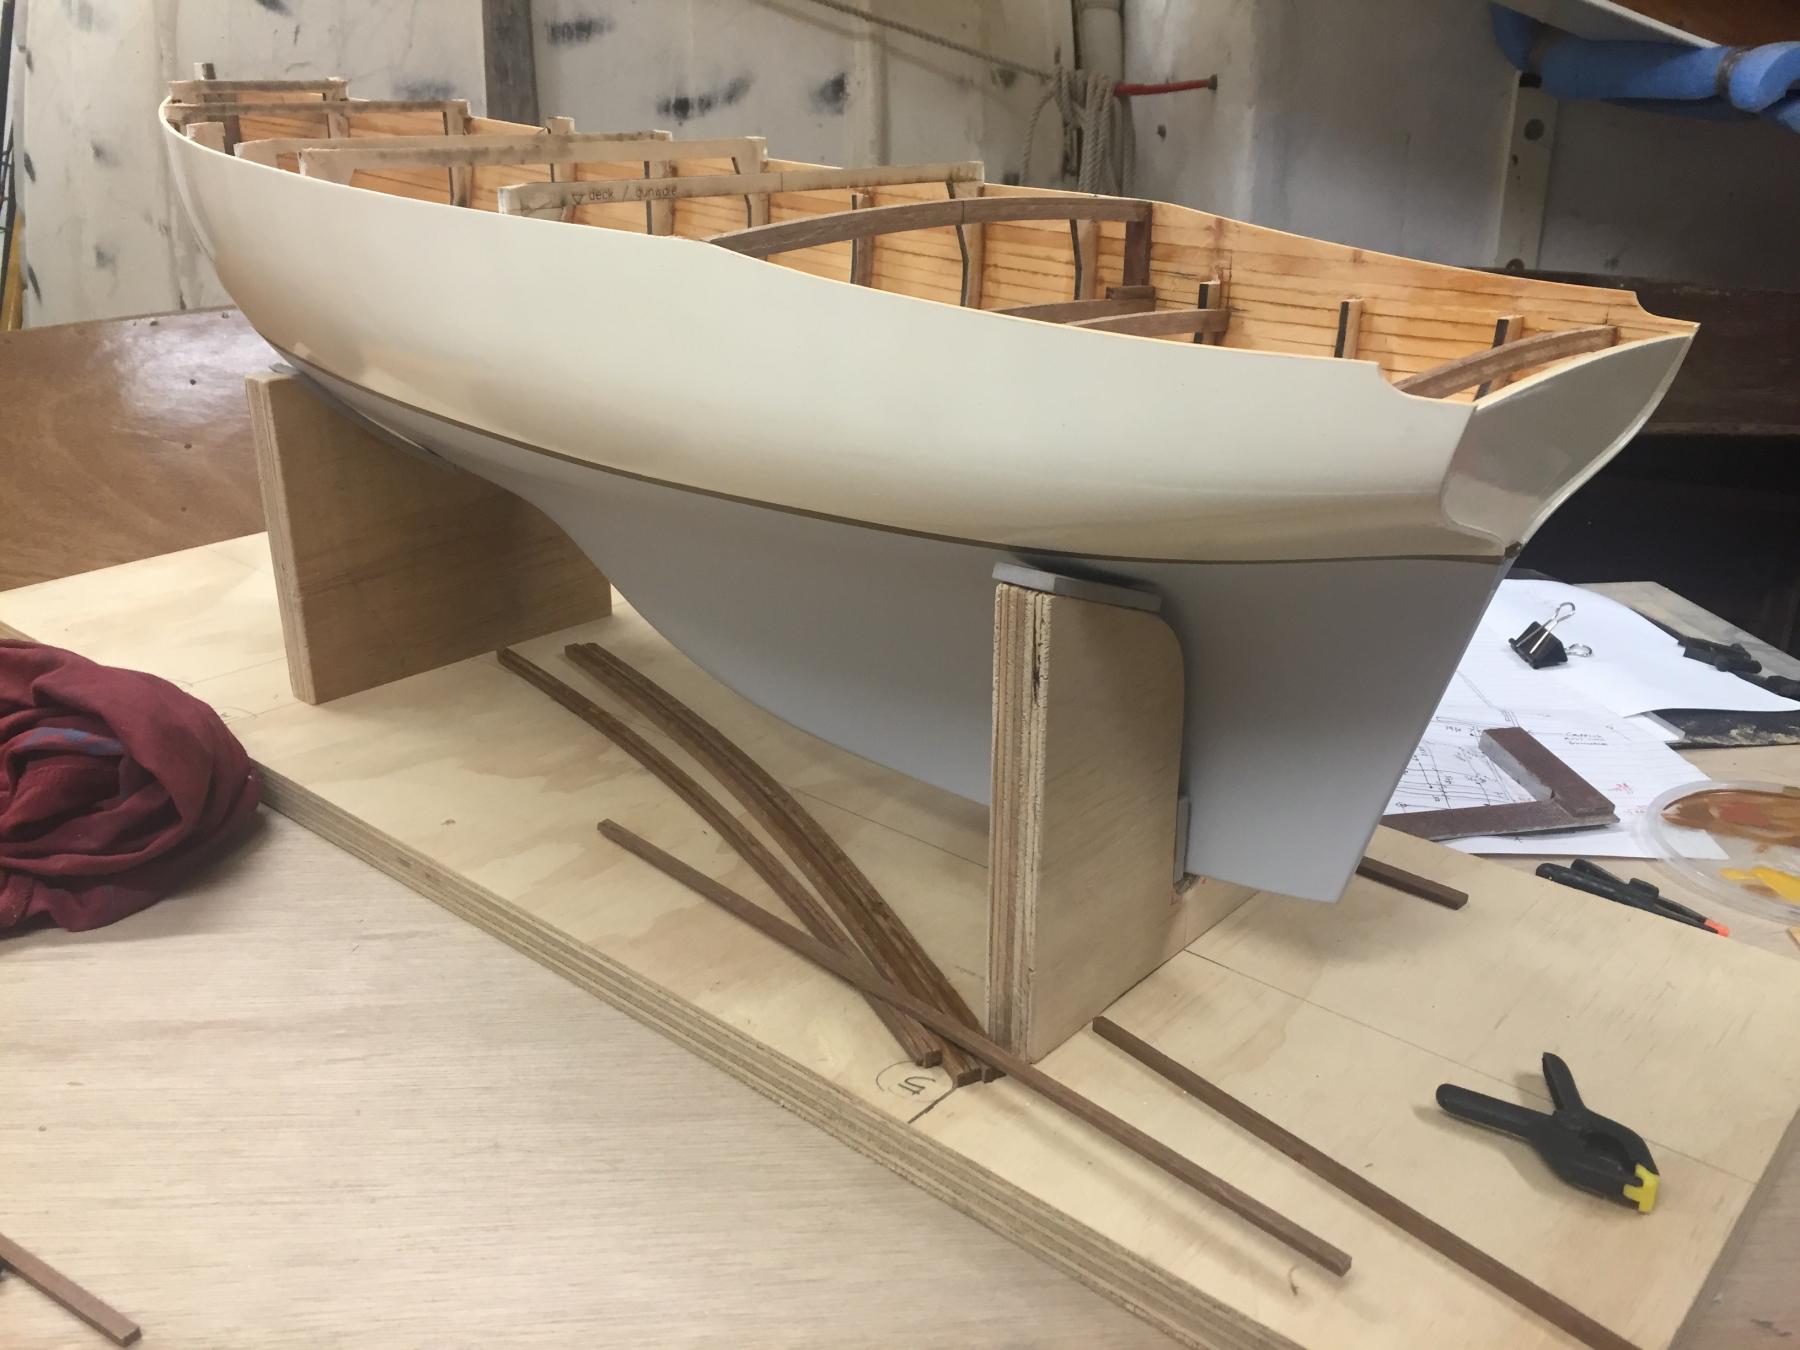
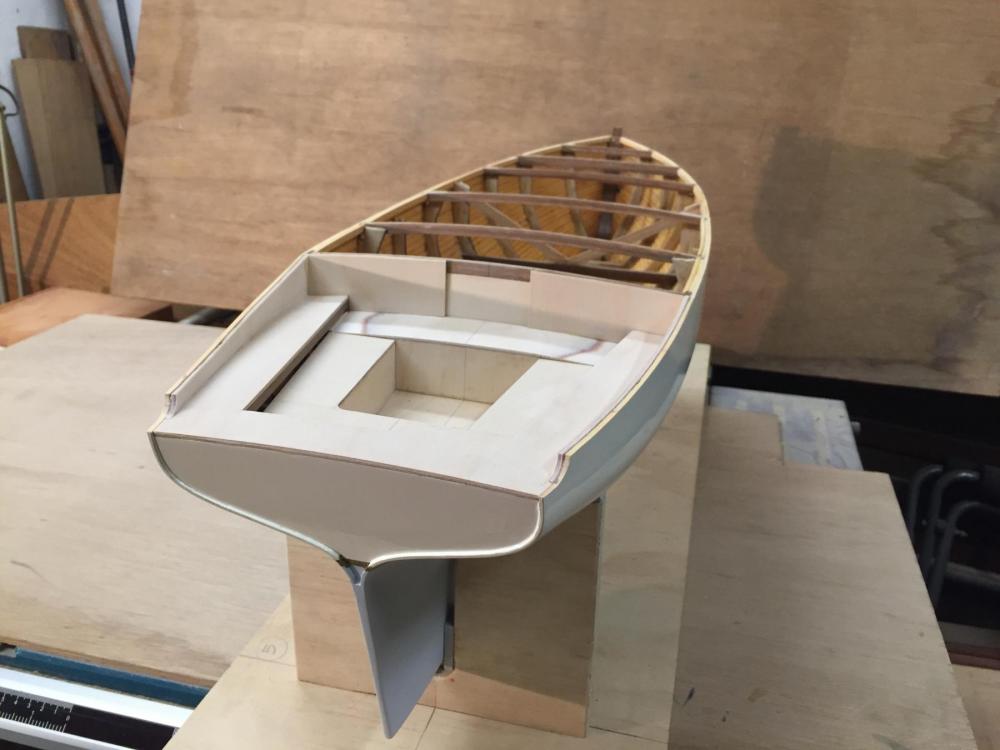
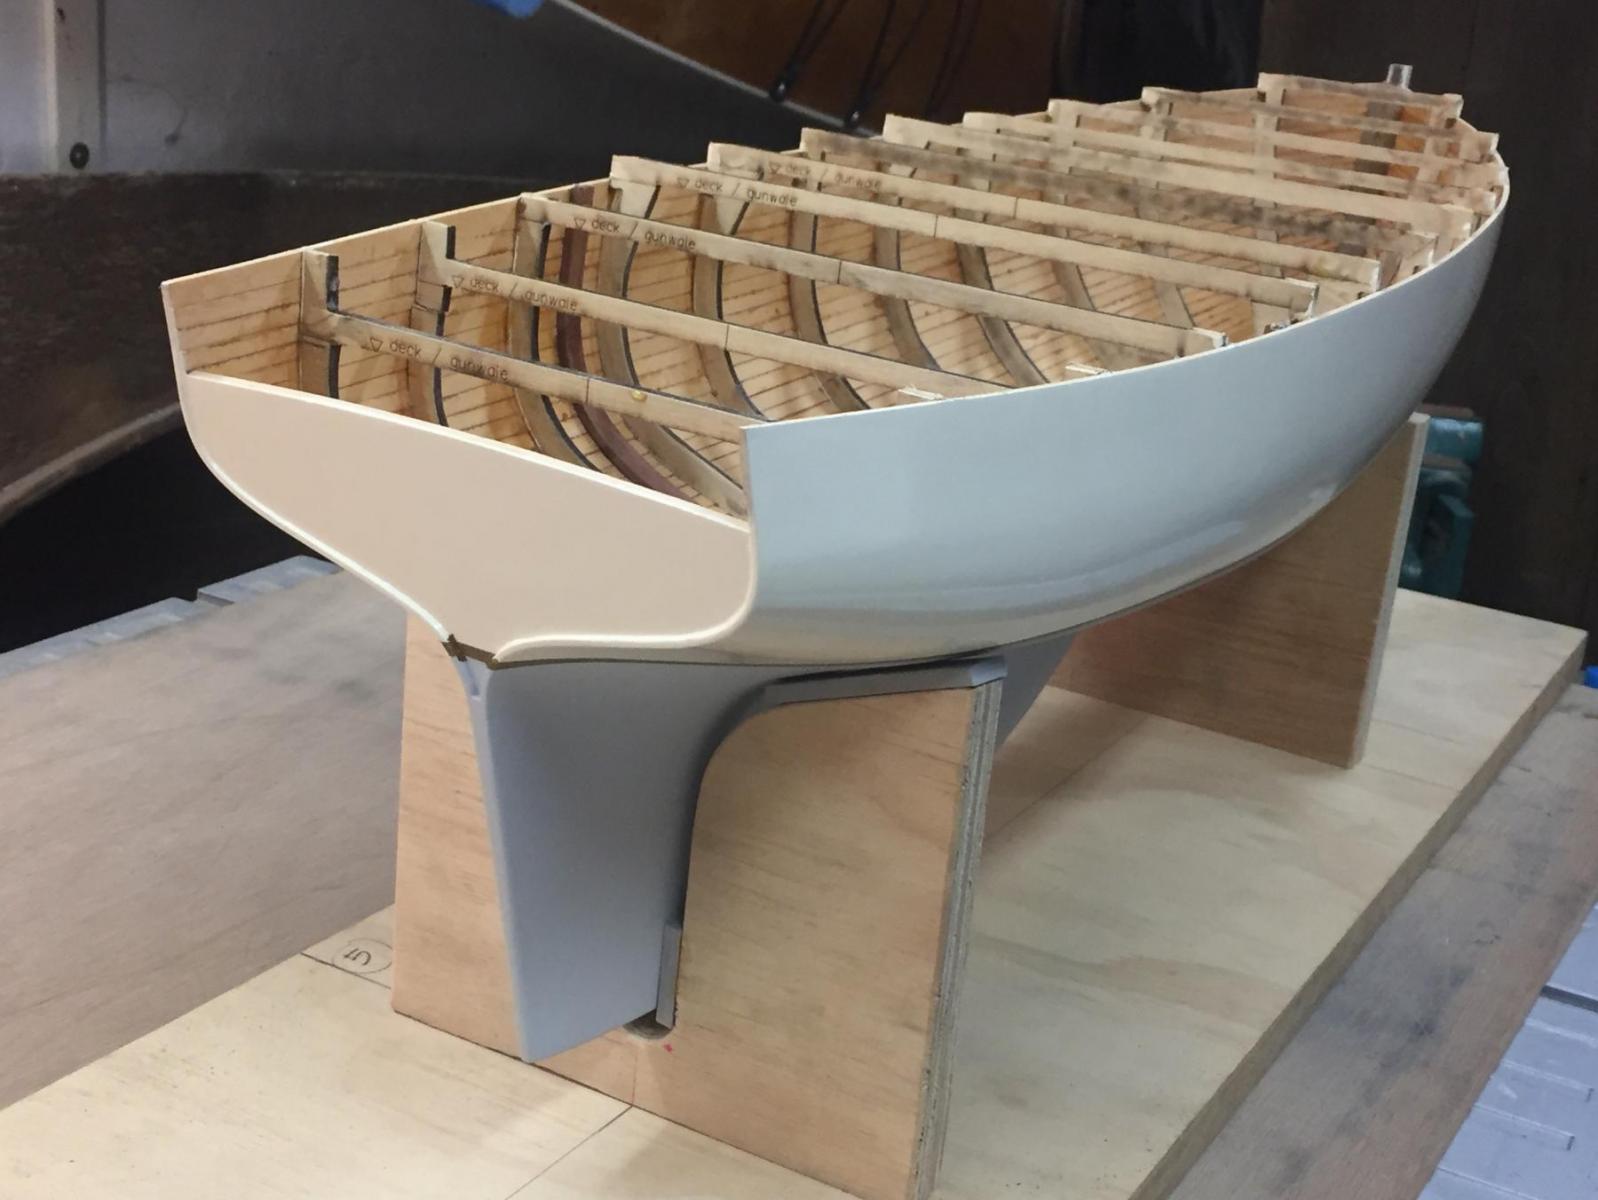
thanks all, I've lined off the cockpit area in some lovely Finnish 2mm ply, it will all be painted. The varnished timber details will be added after painting, & haven't been made yet. The deck beams are in, spaced to suit the model not a real yacht, the interior will be enclosed & not visible. The V beam you can see is because the mast position would intersect that beam, & the rake is sufficient for the base of the mast to miss the lower part of the V. It will ensure that the hull width doesn't move while I'm making it. You can see that I had to sand the thwart that is immediately aft of the raised deck, after massing it up I realised that it would have had a step in the underside edge varnished seat backrest, which wouldn't look so good. The deck will go on soon, the deck fittings won't need backing as they won't be functional. thanks

- 411 replies
-
- 11
-
-
Hello Russ an interesting shape - do these boats have a particular use? They look very stable & yet they have quite a long narrow bow section. Mark
-
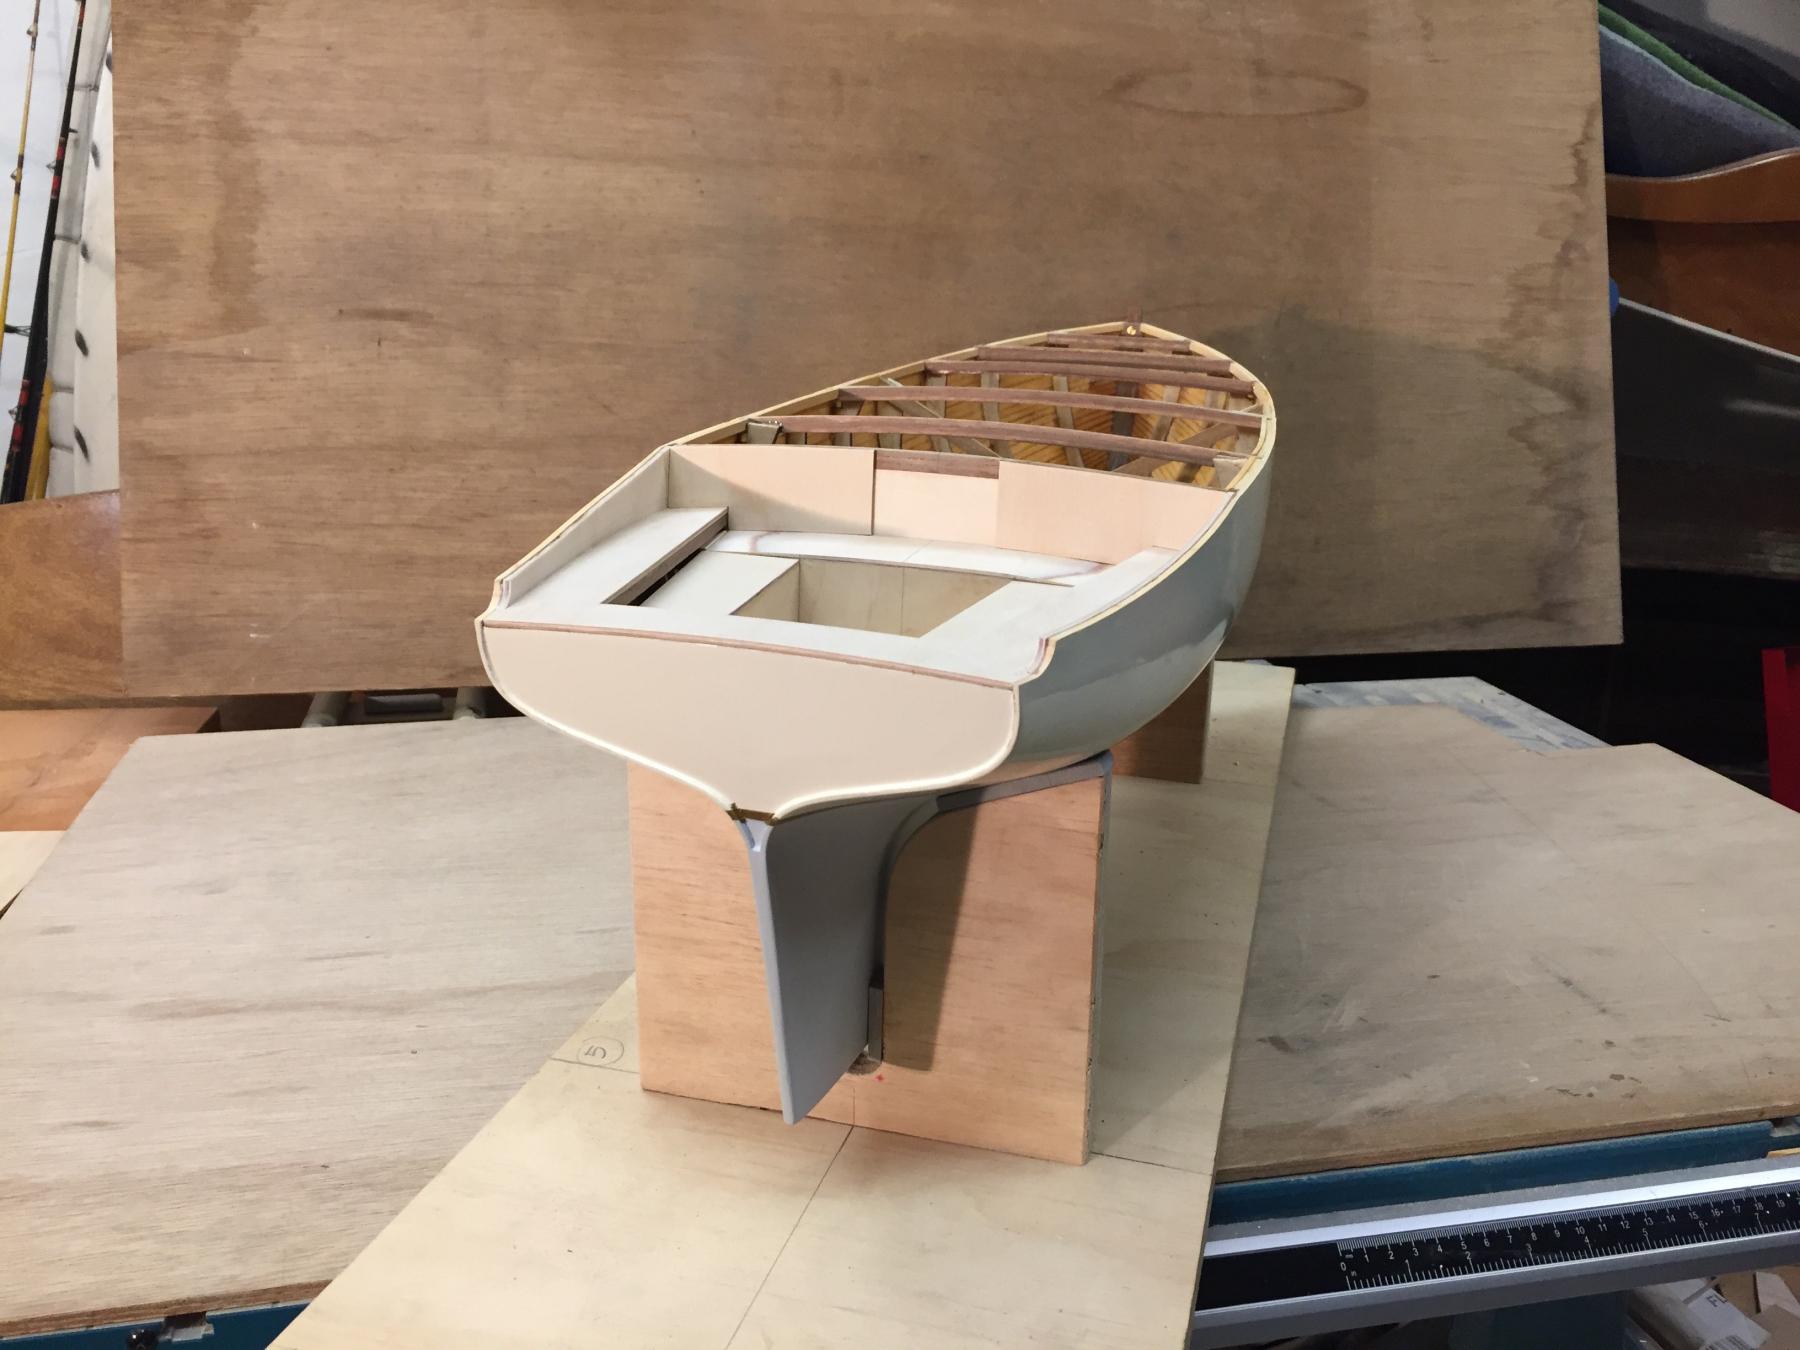
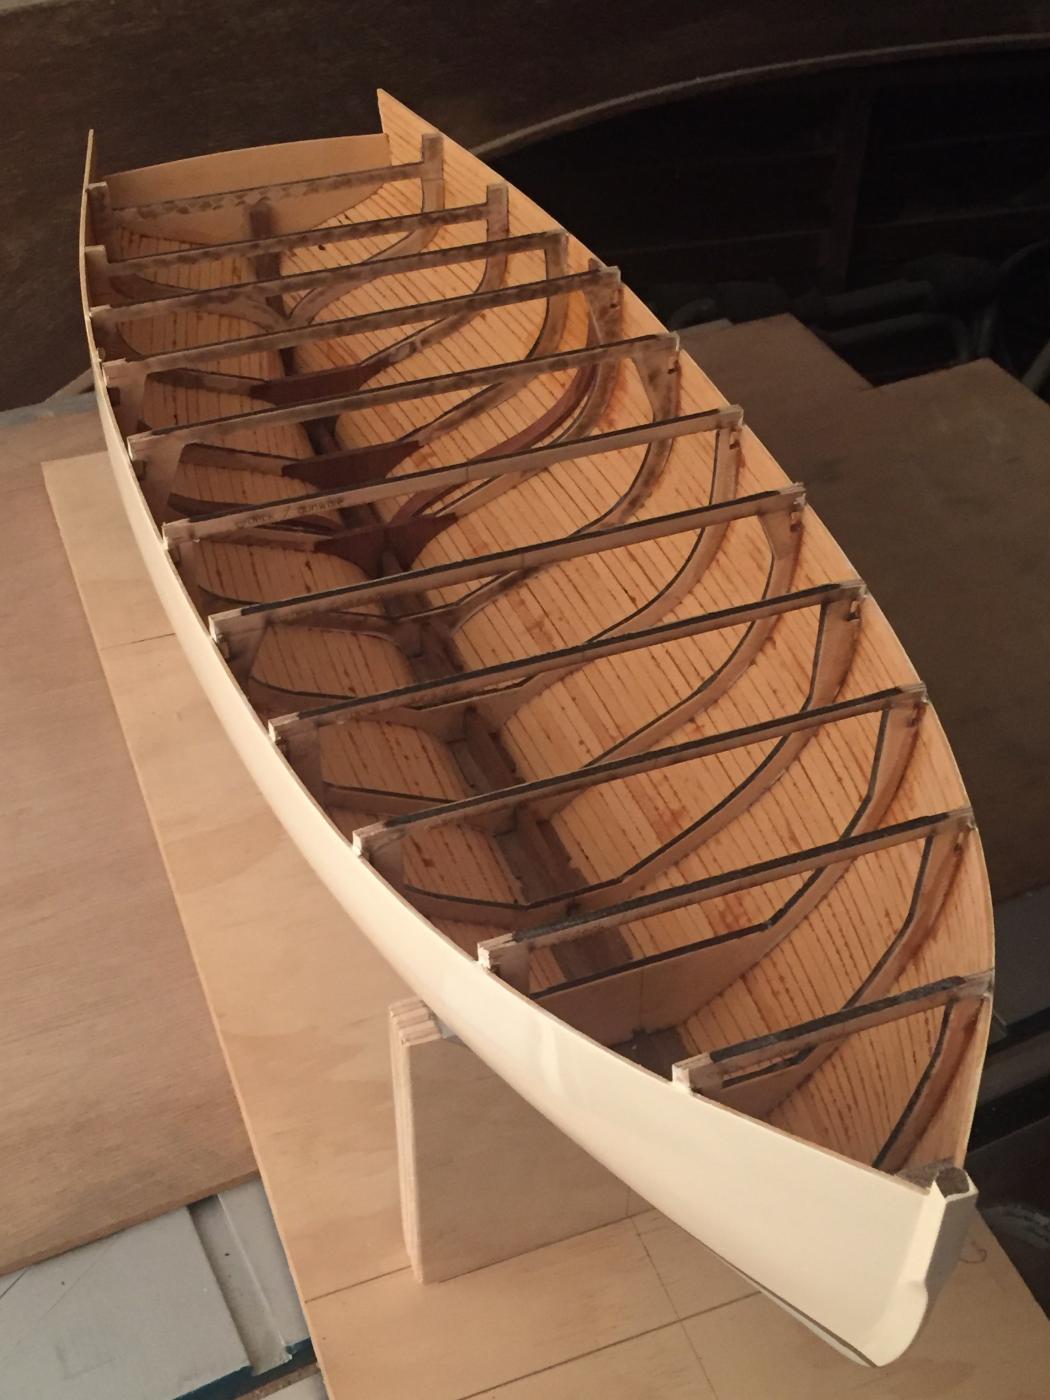
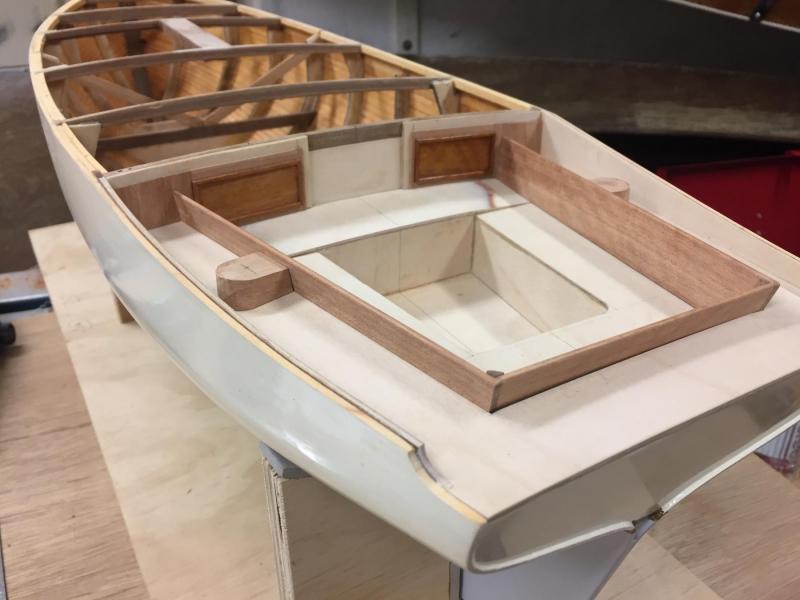
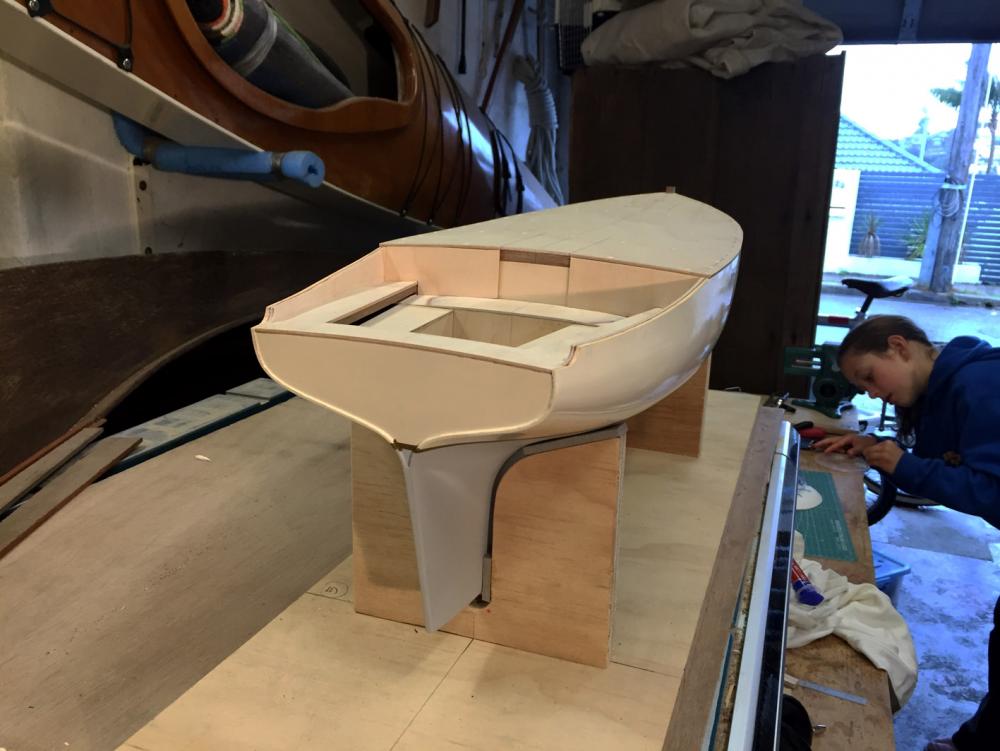
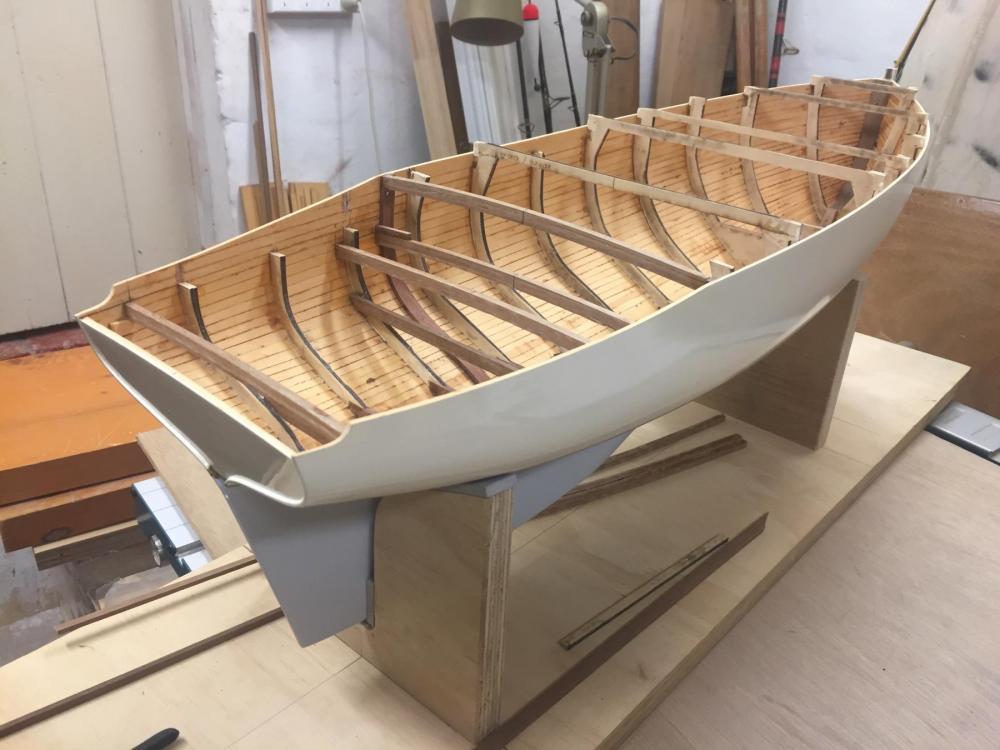
HI everyone, thanks for the interest. The hull profile has been cut down, & I've started to put in the deck beams & cockpit area supports. The cockpit area has a series of different heights: a scuppers area that is the same as the top of the transom; a bit lower is the seat tops, with a slightly higher curved-top thwart at the front of the cockpit, & lowest the cockpit sole height which is just a little above the waterline. The framing & beams are glue-laminated curved & straight beams, all in Spotted Gum. The sizes are not meant to be to scale but they are probably not far off. It will be lined in 2mm plywood & painted, with clear finished details. I've added a photo that helps show the final layout. One nice detail is the removable timber panels either side of the hatch.

- 411 replies
-
- 13
-
-
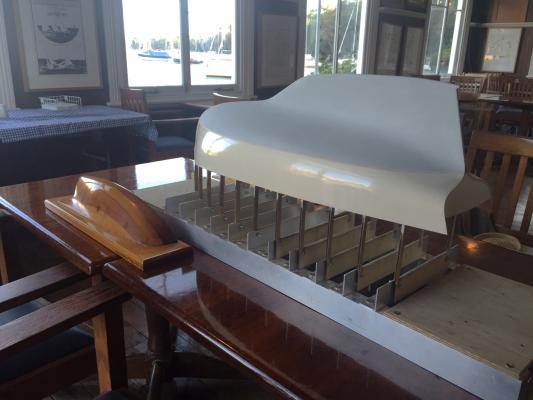
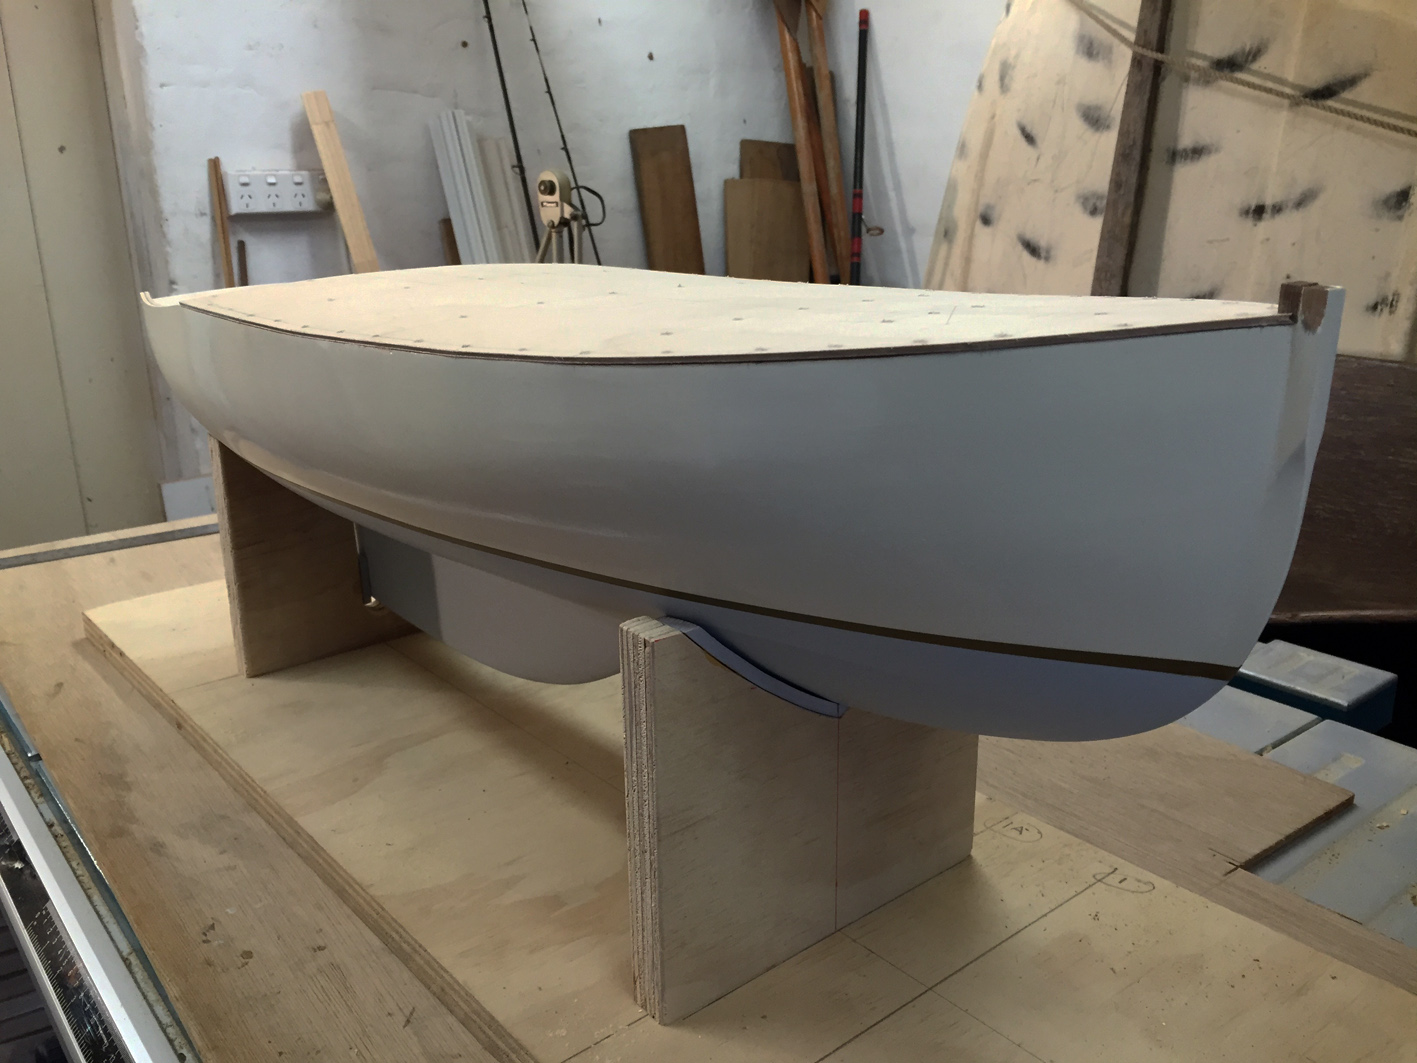
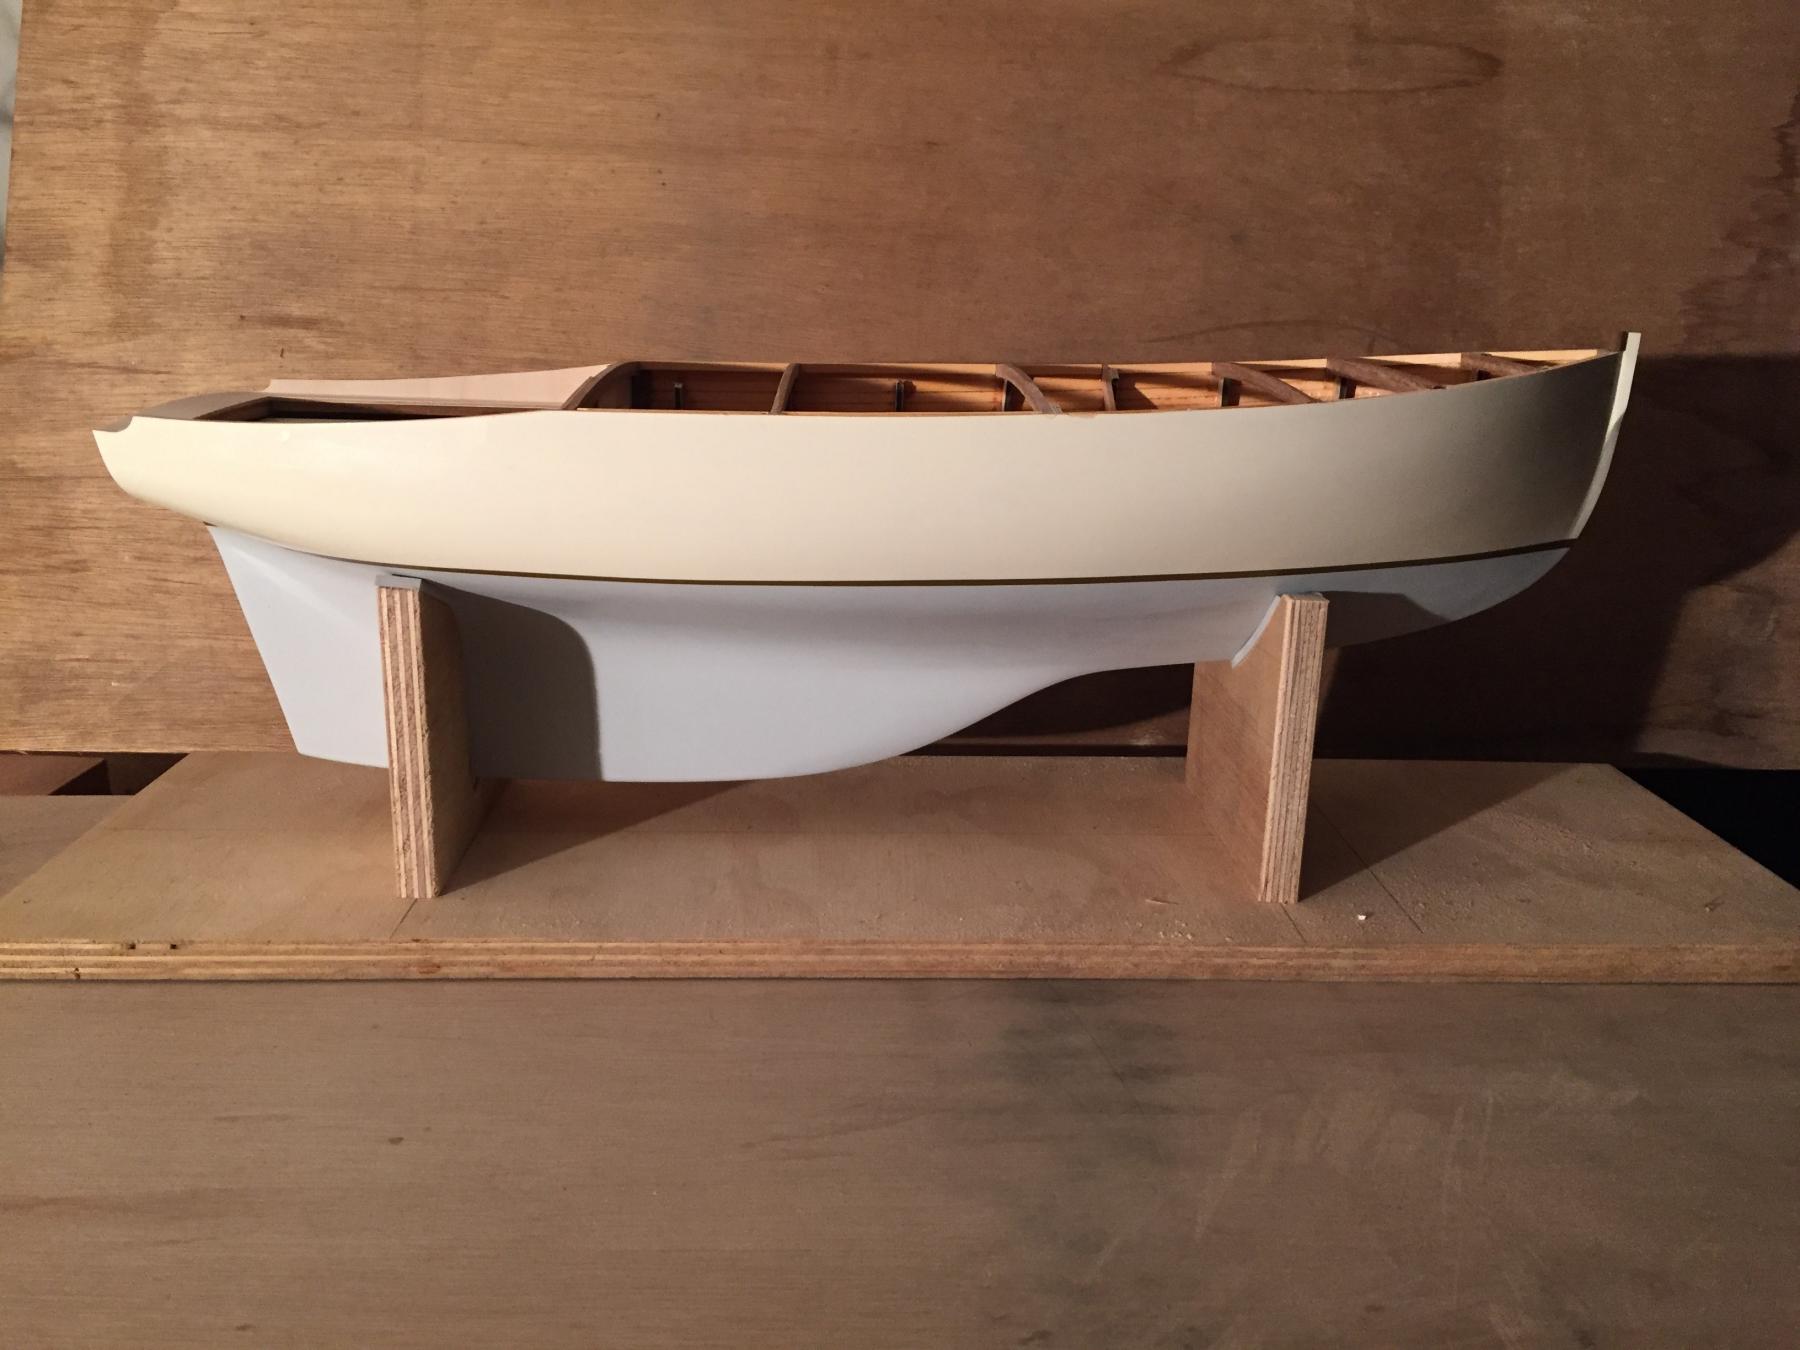
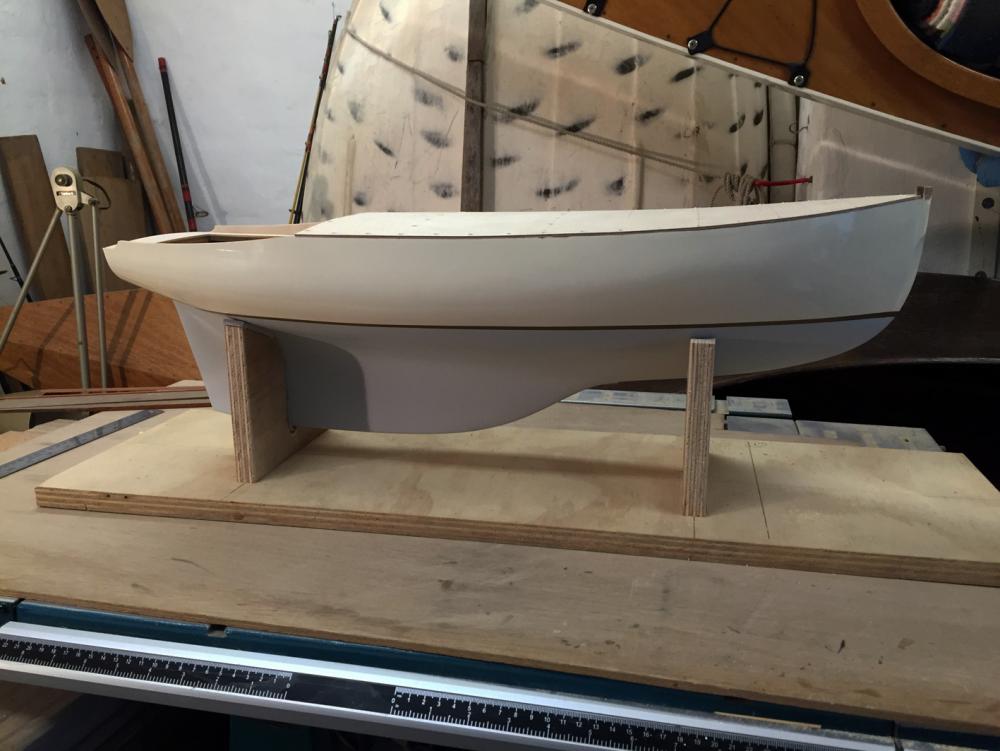
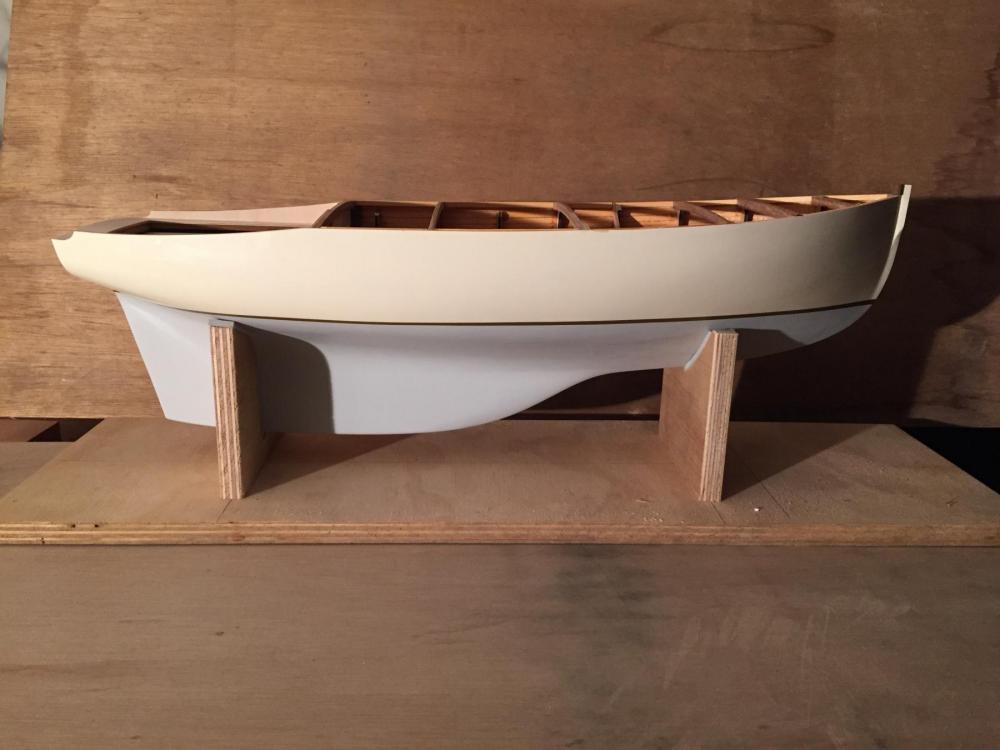
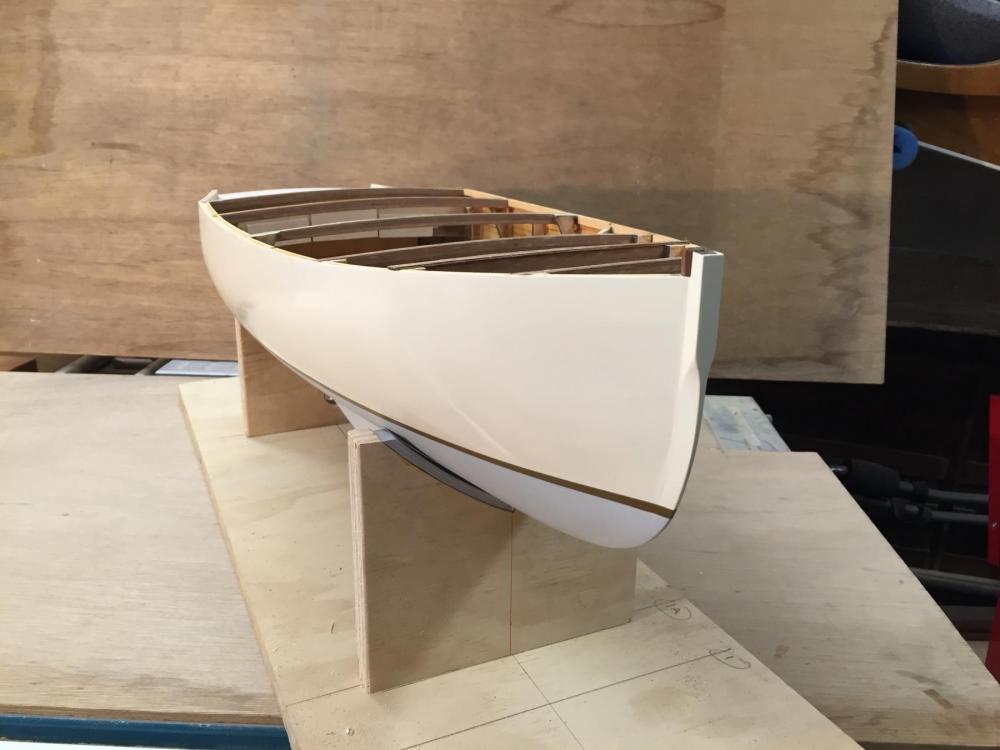
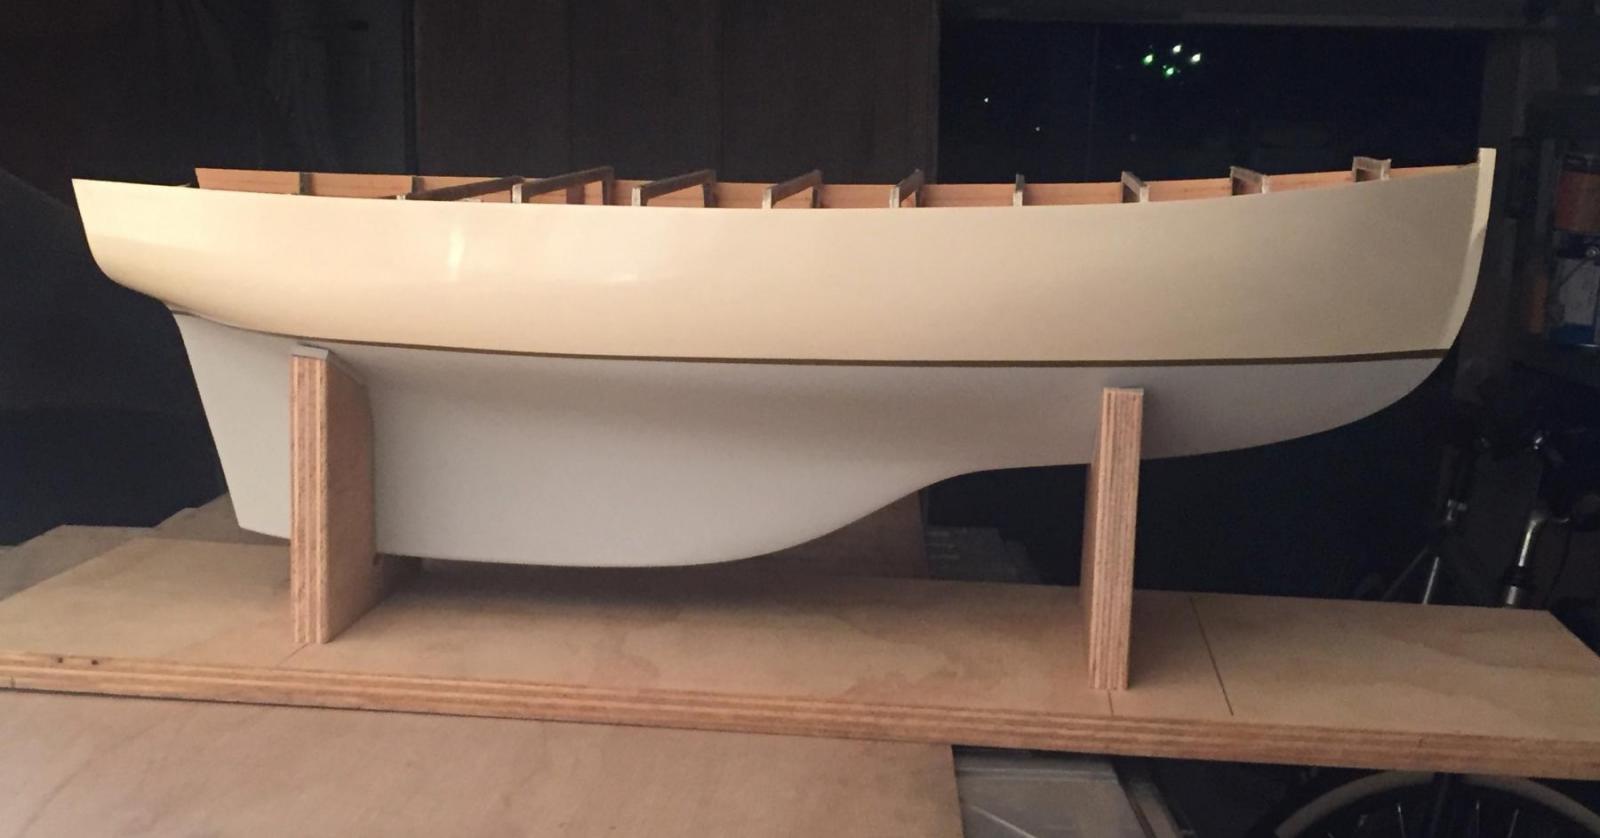
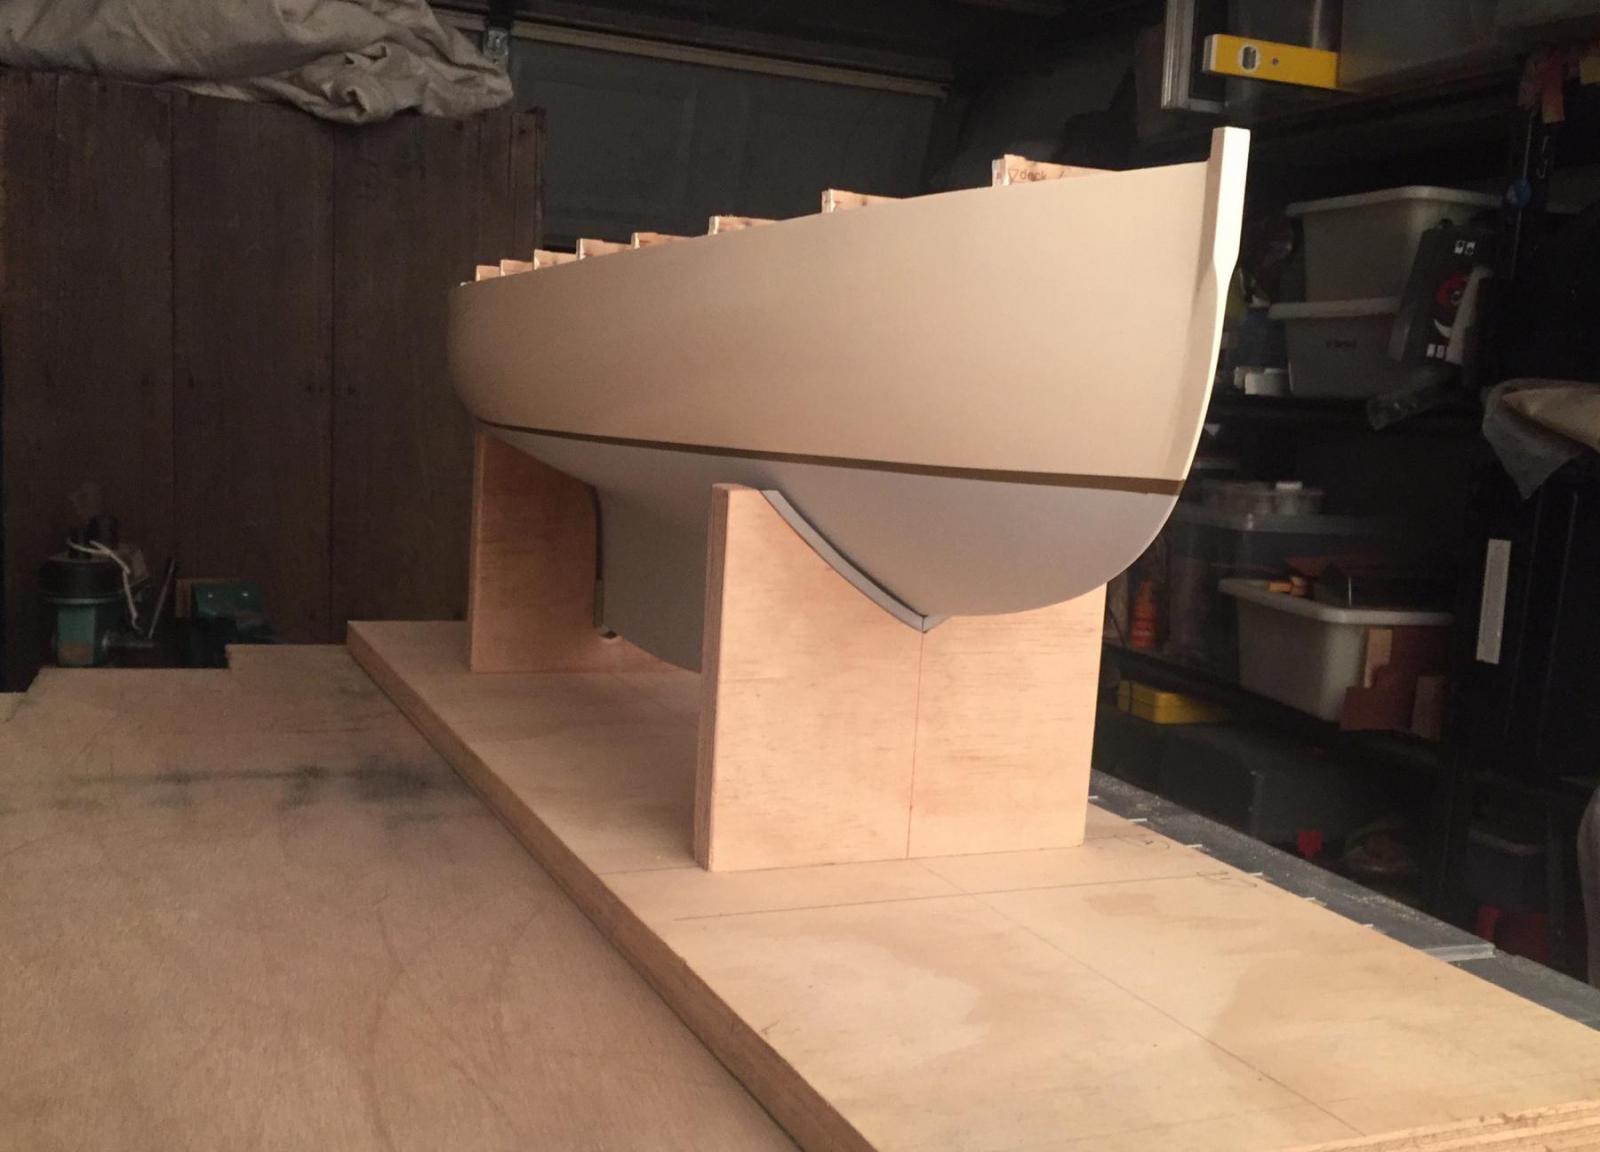
I reshaped the profile of the keel line to a smooth curve - it is probably not what would have been built, but it looks nice & does reflect the drawings. The painting has been redone, & is probably not over yet; I'm sure there will be some damage, & the topsides might be too cream but it's hard to tell at the moment. The paints are all mixed, gloss enamel for the topsides & matt acrylic for the underwater parts. The boot top is a mixture of an opaque enamel with some metallic added, the colour will make sense when the gunwales & sponsons (lower gunwales) are added. The antifouling colour in enamel wasn't working out well, it wasn't matt enough & the colour was blue rather than pale grey. When the hull shape on a boat doesn't change shape dramatically near the waterline, I like an underwater colour that isn't a huge contrast to the topsides, so that you can see the shape into the water as an extension of the above-water shape, hence the pale grey. The boot top line masking bled a bit, & the transom part seems to be off a bit, so some touching up required. Also, it might not be obvious in the photos but the line itself is not as good as I'd hoped, but when you realise that it's actually only a very small deviation from a the curve, it might not be practical to amend it by such a small amount as the change might not look so good. As you can see, the right-way-up support frame is made & she was cut off the build frame - it's very nice to see the lines - it is hard to appreciate the lines upside down, we are probably so used to seeing them one way. The next steps, I think, will be to cut the profiles as the hull steps down from the raised deck. Also deck beams & mock up the deck & cockpit area in 2mm plywood. At the bottom is the start of a deck plan, at the moment it just shows the basic shapes that would be in ply - the cockpit seating & edge of the raised deck etc. The cockpit seats are solid, not hollow under. I will shape it all in ply & add timber & veneer sheets as required. I have some Queensland Maple veneer & some timber as well. Thanks for looking, MP

- 411 replies
-
- 12
-
-
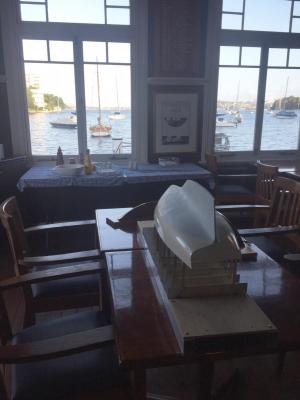
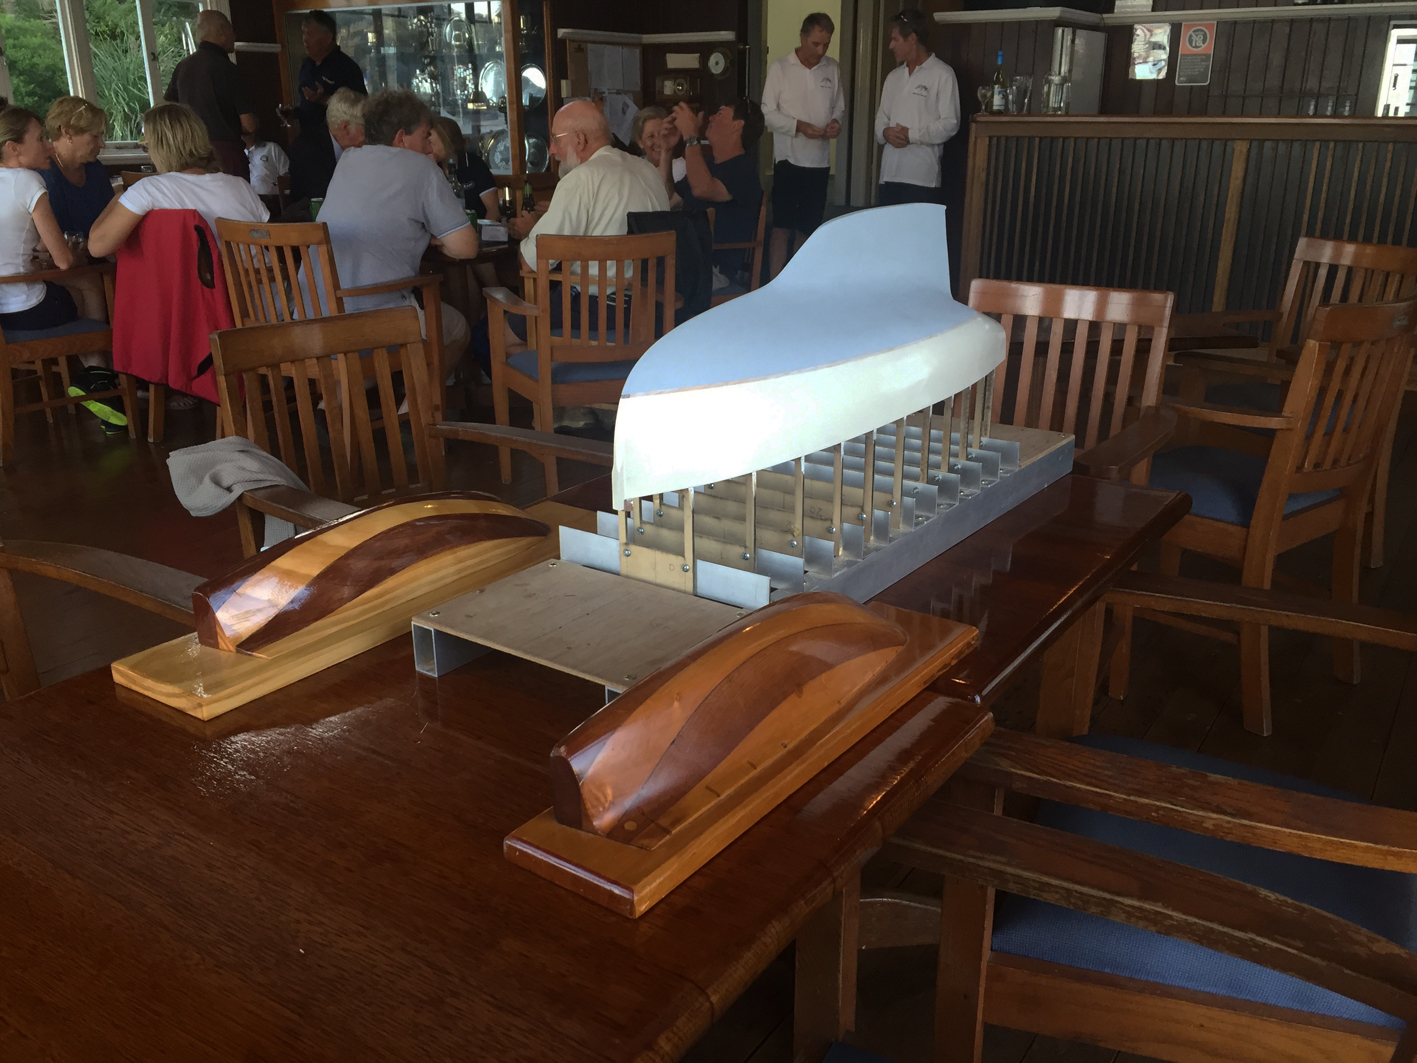
Hi Patrick thank you, I'm glad you like the colour, I'm happy with the direction. The photos are at the Sydney Amateur Sailing Club, where the half-model lives - last Sunday there was a race day for some of the Ranger yachts plus a couple of Couta boats & it was a good day to show the shape to people that are familiar with the smaller 24 footers. I decided today that the bottom profile of the keel line seen from side on looks a bit ugly, but I believe it's what they would have built. I gave the bottom of the keel a long flat horizontal base that would suit going on to an old style tray cradle that rolls up tracks out of the water. However it looks pretty ordinary & in this case I don't think it's worth persisting with a fairly obscure detail that detracts. I'm going to give it a long slow curve instead.
-
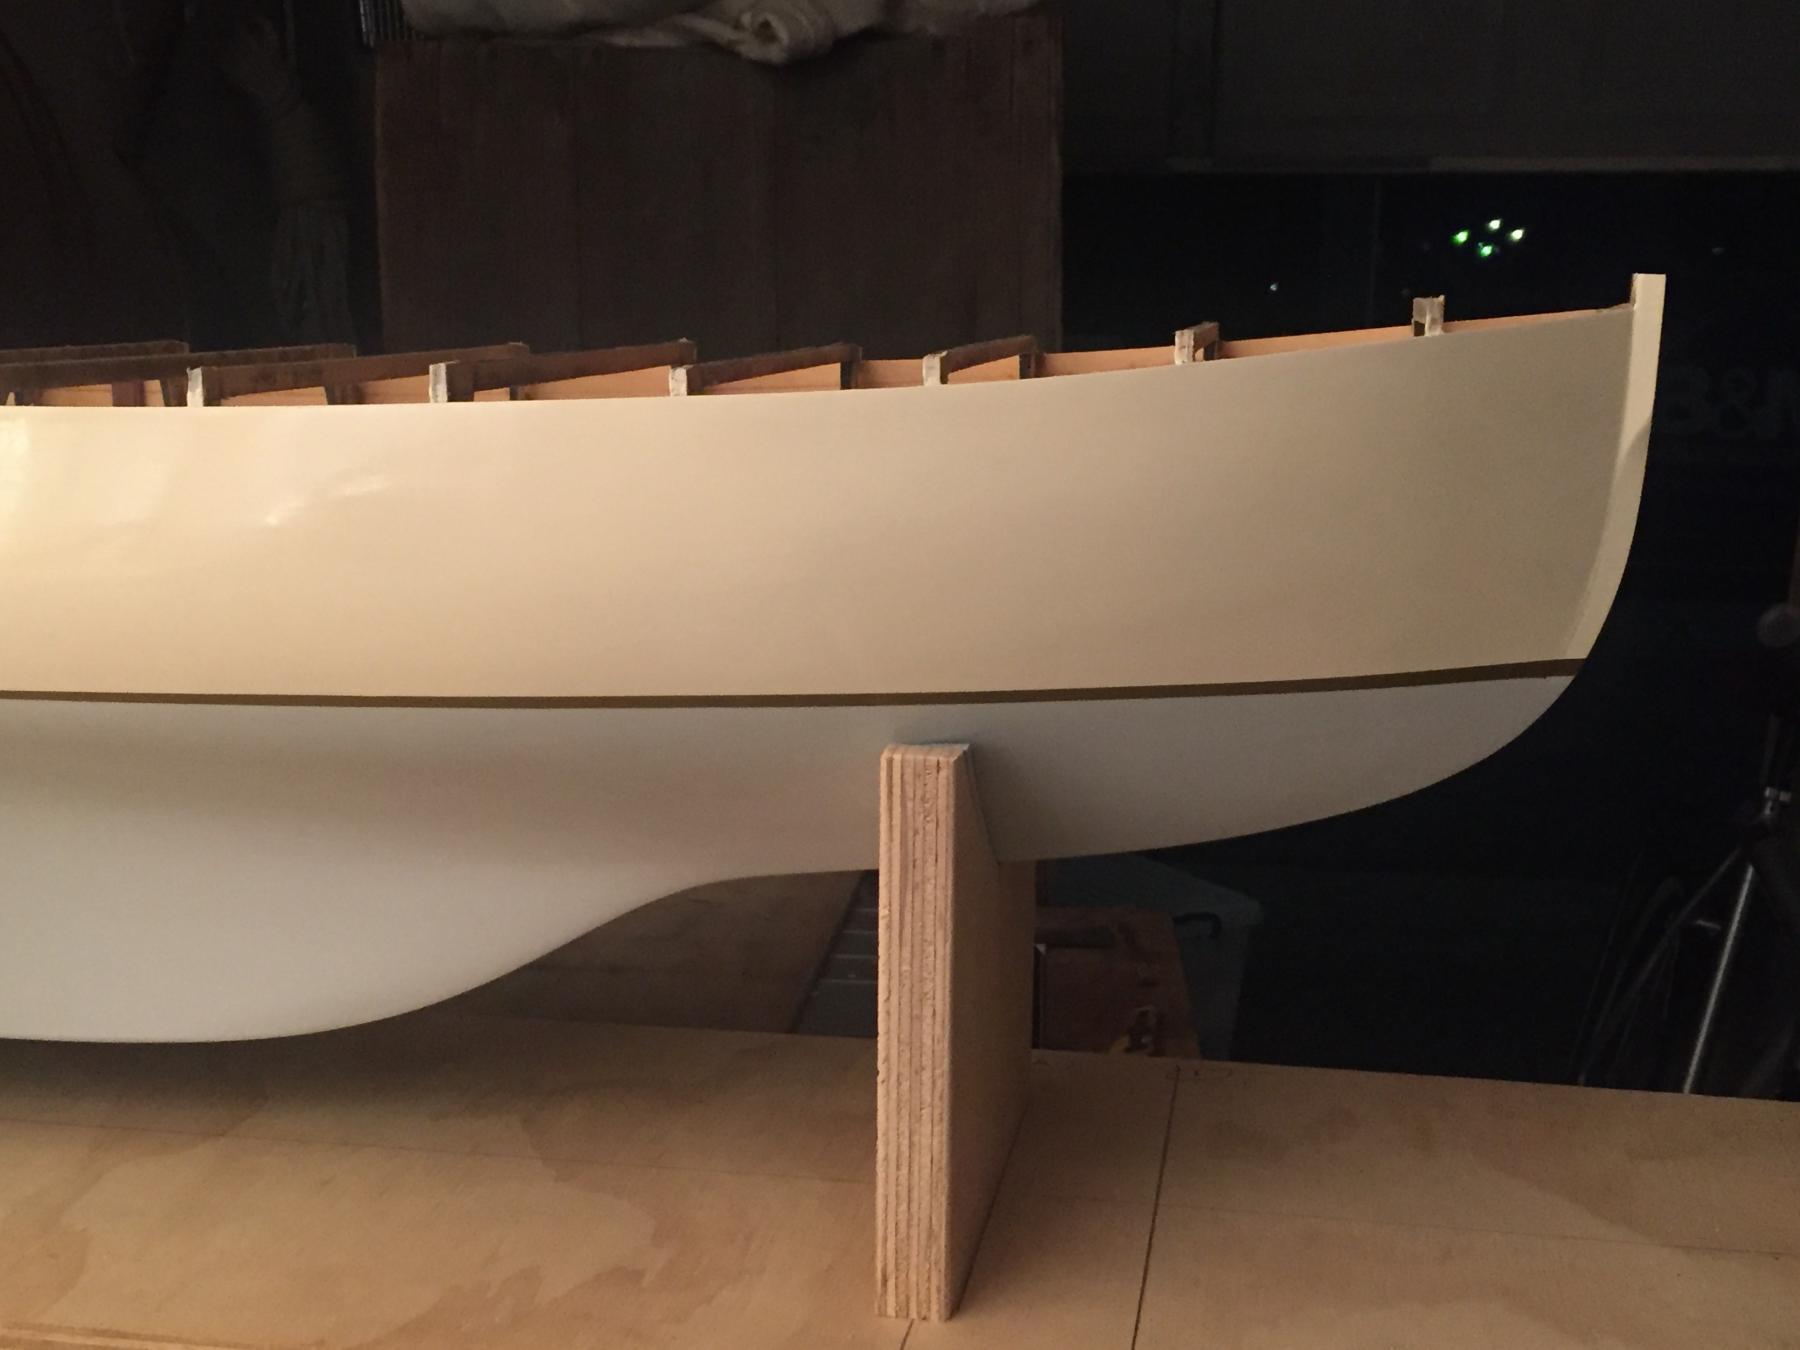
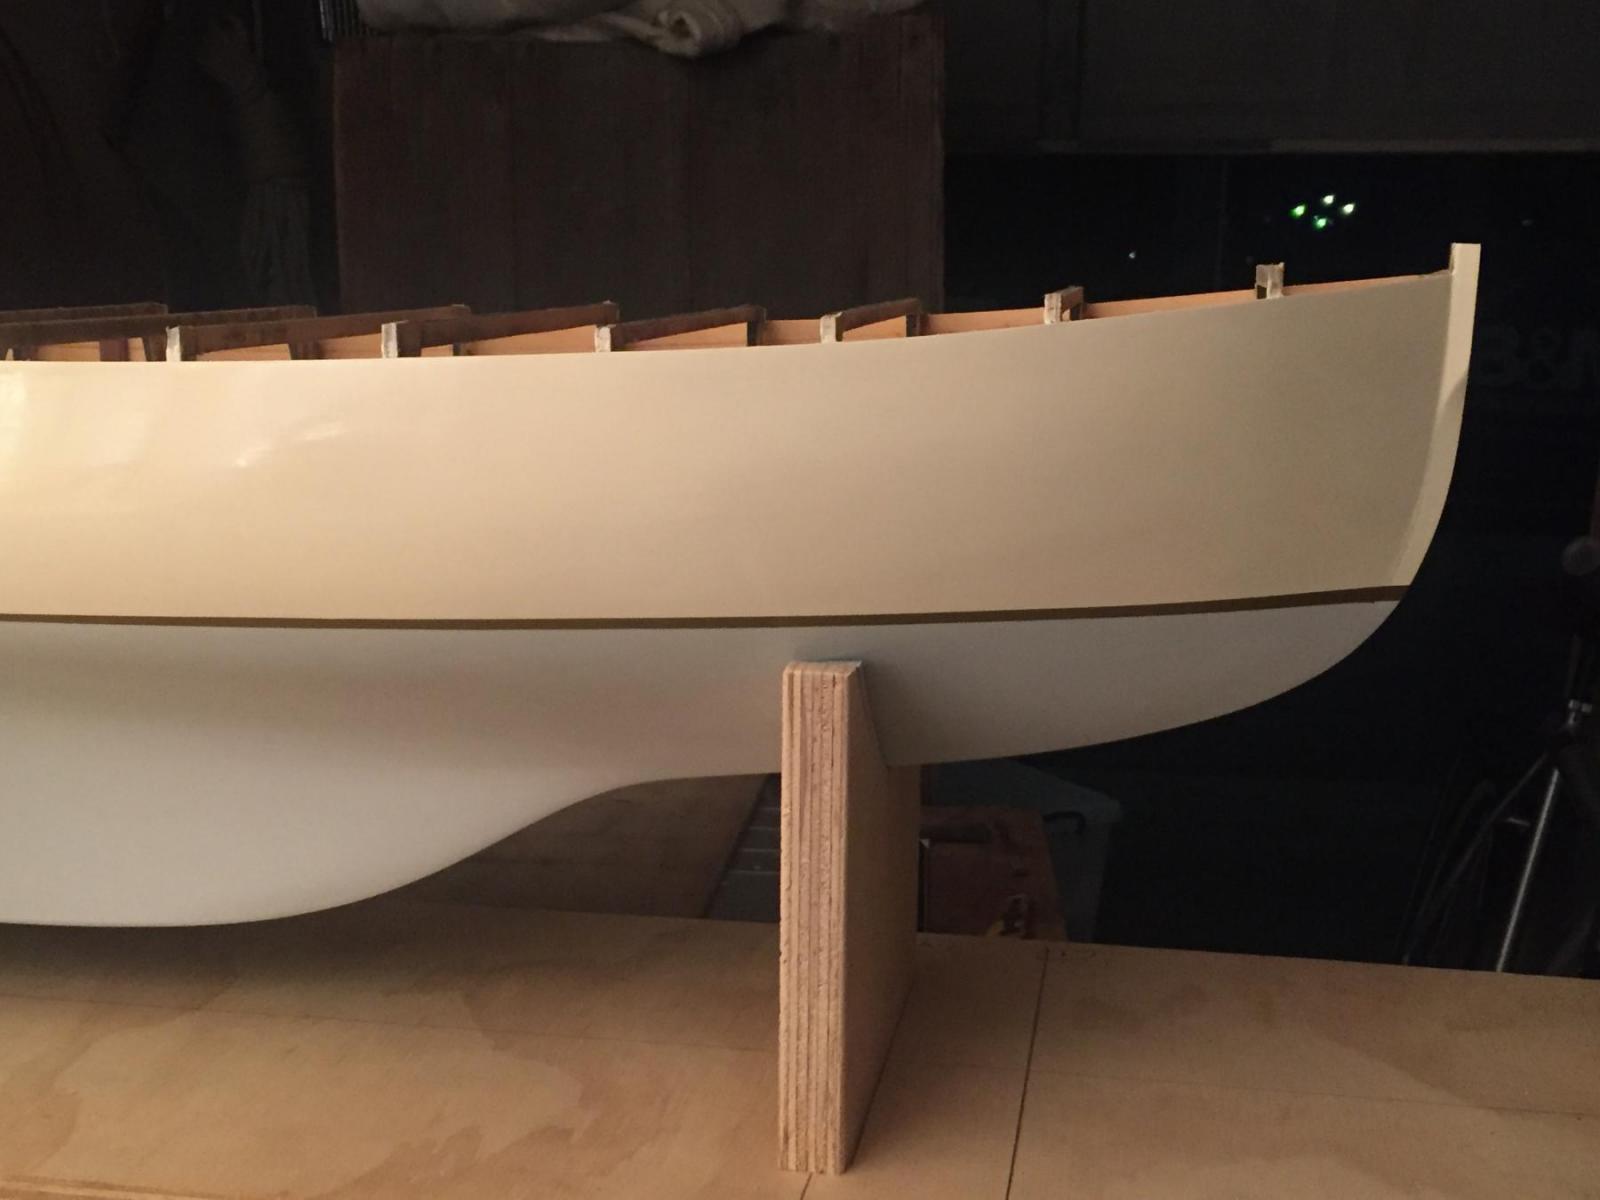
A minor update: some more painting with colours closer to what I had in mind: cream topsides with a white / pale grey antifouling. The boot top line hasn't been done but I have some coppery colours for that. White antifouling isn't true to the period of the boat, but neither will the winches be that I am going to indicate. I just like the effect of the antifouling being a similar colour to the topsides, you can see the continuity of the hull shape more clearly as it goes down into the water, or when a boat is heeled. The issues with paint drying I think were to do with not stirring the paint enough before I decanted it into another jar - which I did to make a mix of colours. Thanks to those in the painting forum that helped out. You can see below that the matt paint that I've used for the antifouling is more uneven in finish than the gloss. If it's still uneven after another I'll investigate spraying the matt paint, blotchiness in finish will make a smooth shape look uneven I will probably do one more coat to each before removing the model from the base. Some very fine splits between planks are showing through the paint, as joints with insufficient glue are moving. It's not so different to a real planked hull, so the sort of 'defect' that is true to a real boat of this sort of construction standard is being accepted. Anyway, here they are: the model with the original designer's half model of Ranger, the half model must be getting close to 100 years old now again, showing the half model off the half model, the 28 footer, plus Ranger herself through the window Thanks all, MP