HOLIDAY DONATION DRIVE - SUPPORT MSW - DO YOUR PART TO KEEP THIS GREAT FORUM GOING! (Only 13 donations so far - C'mon guys!)
×


Mike Dowling
-
Posts
1,234 -
Joined
-
Last visited
Content Type
Profiles
Forums
Gallery
Events
Everything posted by Mike Dowling
-
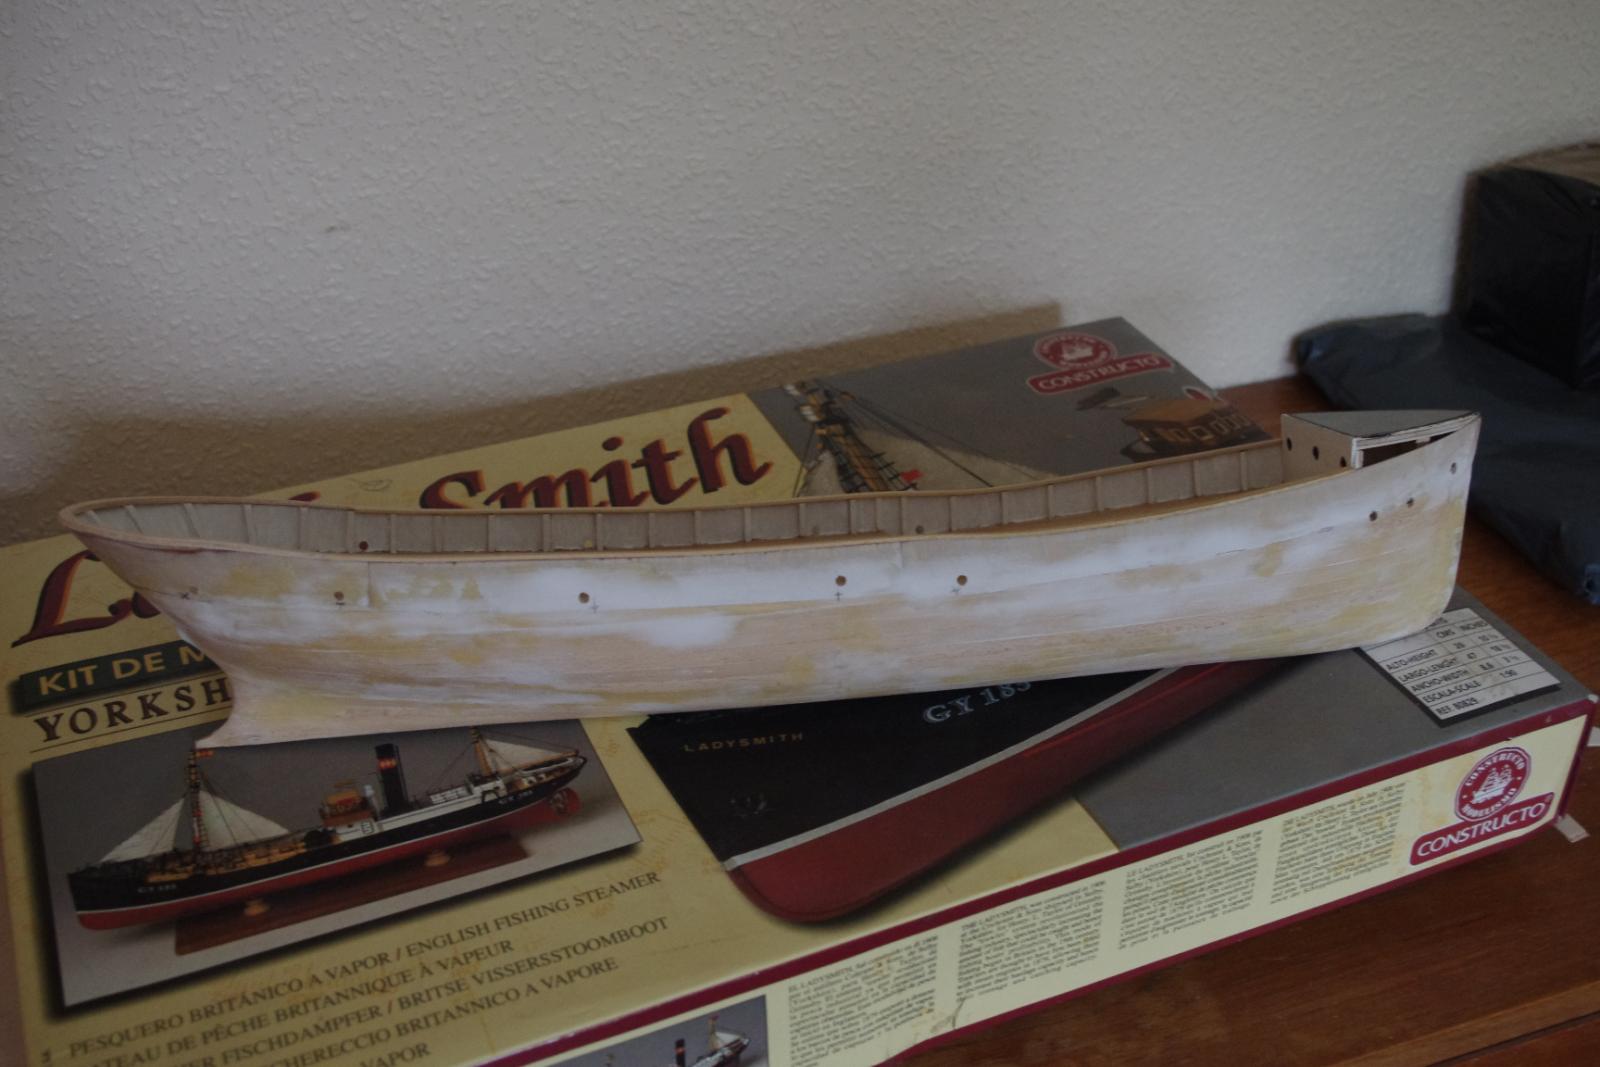
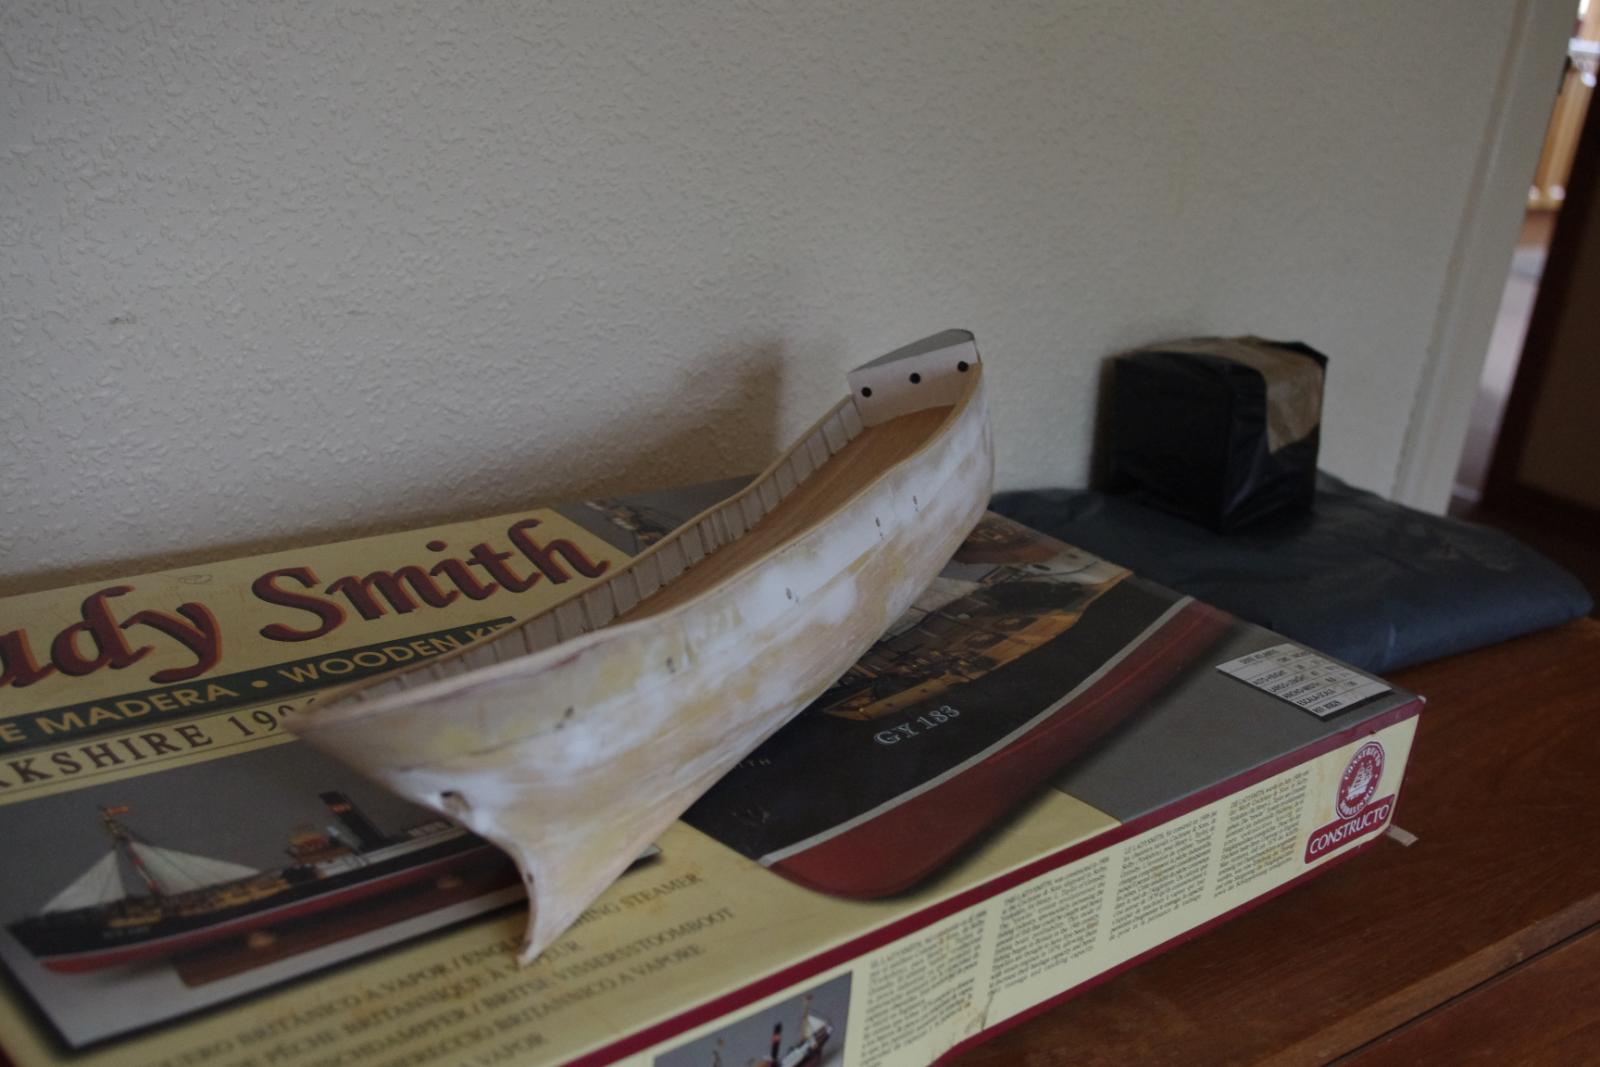
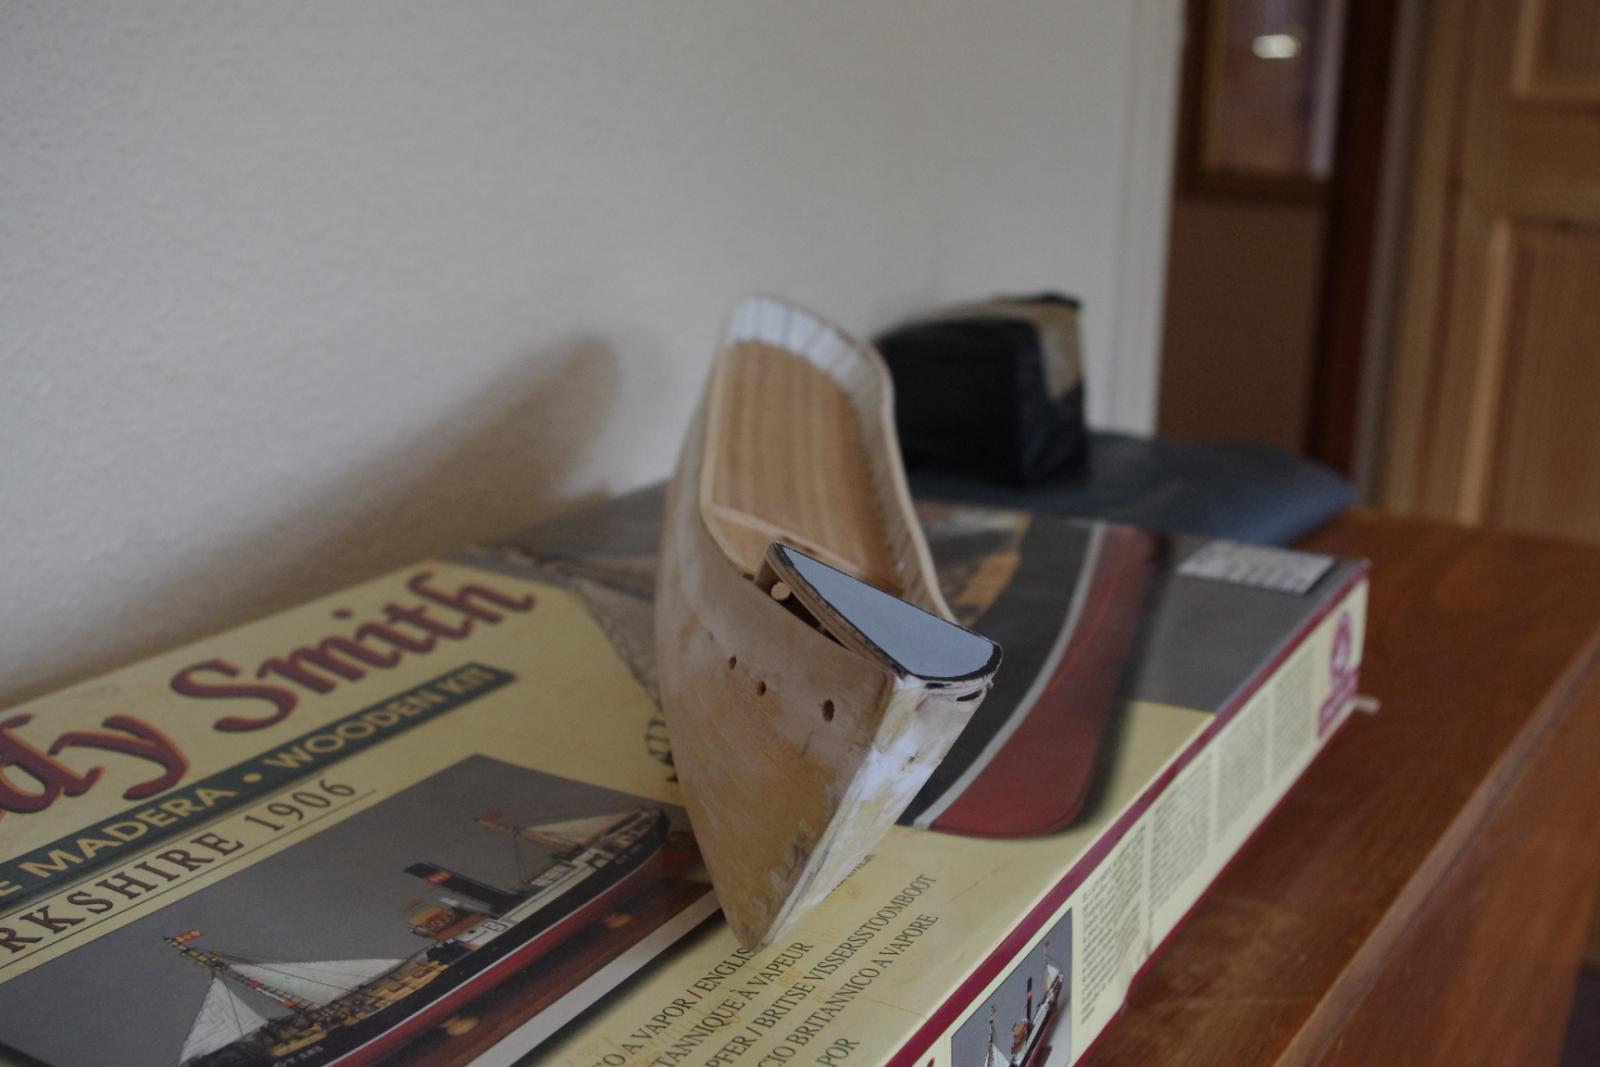
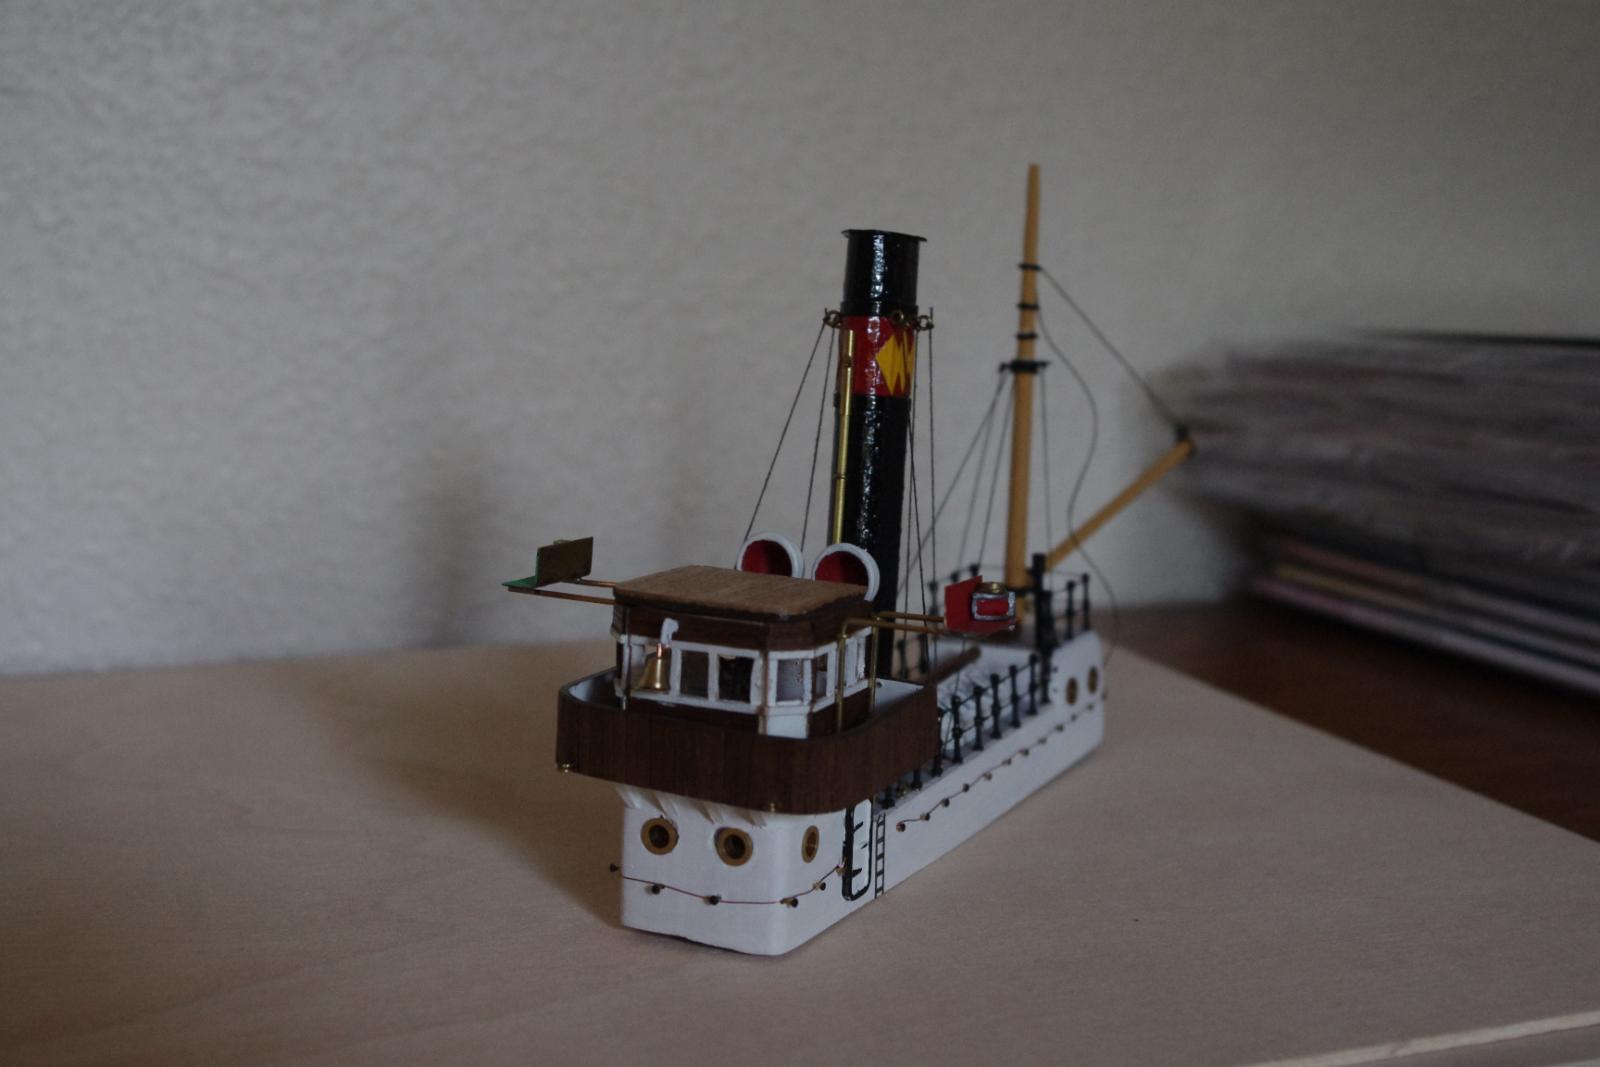
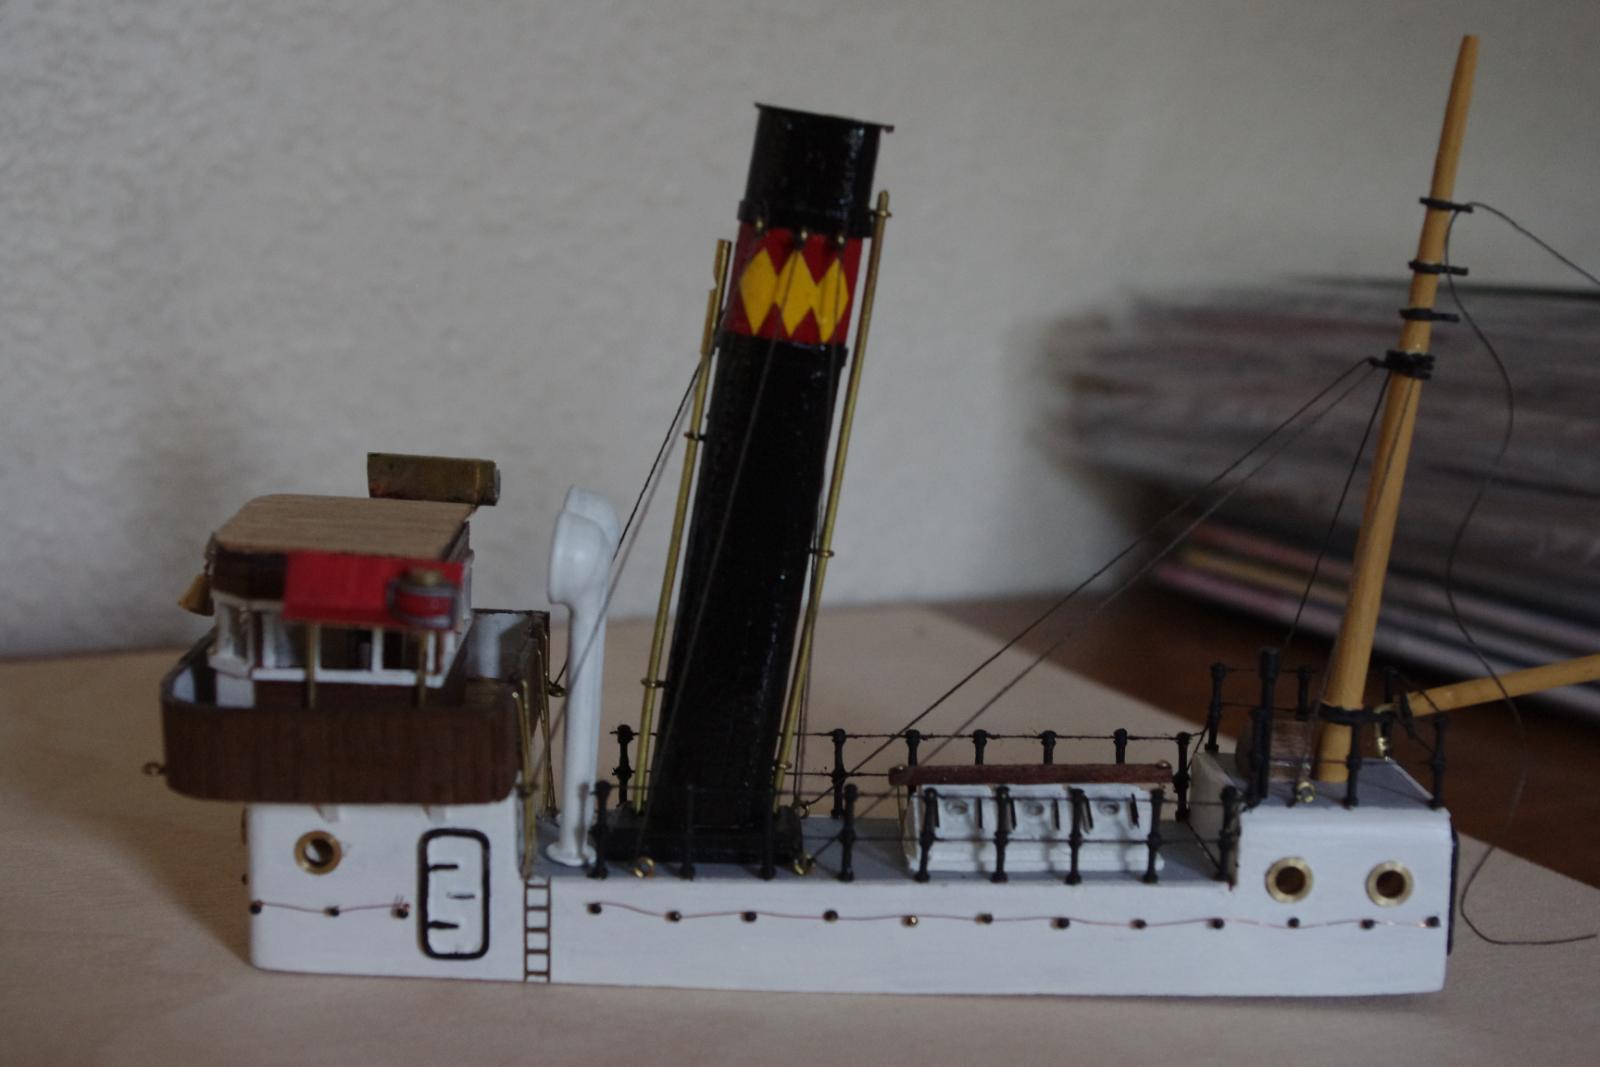
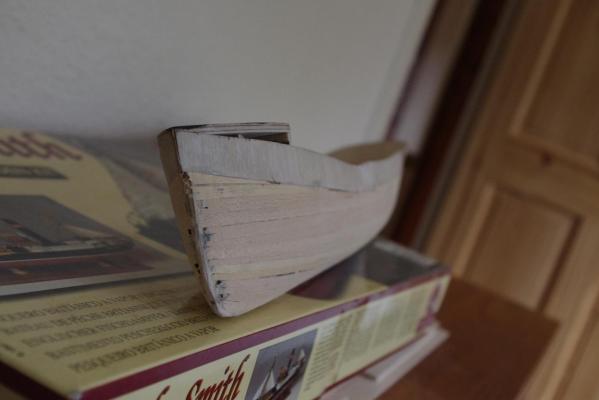
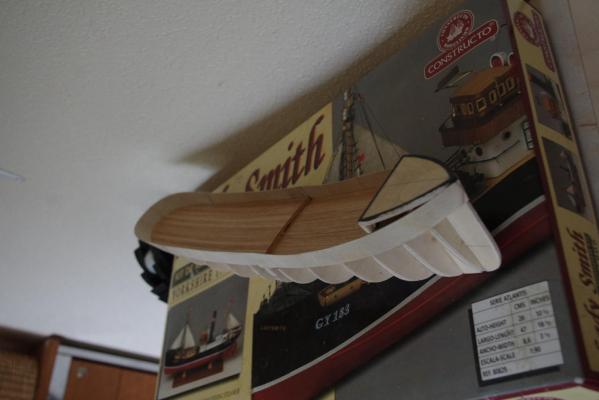
Next installment folks! The poor hull has been filled and sanded to within an inch of it's life but it is now as smooth and lovely as a babies bottom ! I decided to wait for the acrylic undercoat for a bit longer. I really did make the bulwarks out of way to thin wood which has meant a constant source of panic as they cracked and wriggled under my ministrations. They just about survived to have stantions added and the gallant rails glued on top. I did paint the bulwarks and stantions before putting the rails on which I reckon was a good idea. The scuttles and hawseholes are also cut. The stem is drying in what I hope will be the correct shape and then I can add it and the keel. Anyway - some pics for you.


- 48 replies
-
- 5
-

-
- lady smith
- constructo
- (and 1 more)
-
I realise that my friend. So far she has had two fillings and sandings but I have now laquered her to make her less absorbent for what I hope will be the last filling/sanding. I then intend to give her a coat of acrylic undercoat which is pretty thick and I hope that will fill any remaining blemishes before a final sand. I also want to fit the stantions and gallant rails before I try to paint her properly.
- 48 replies
-
- 2
-
-
- lady smith
- constructo
- (and 1 more)
-
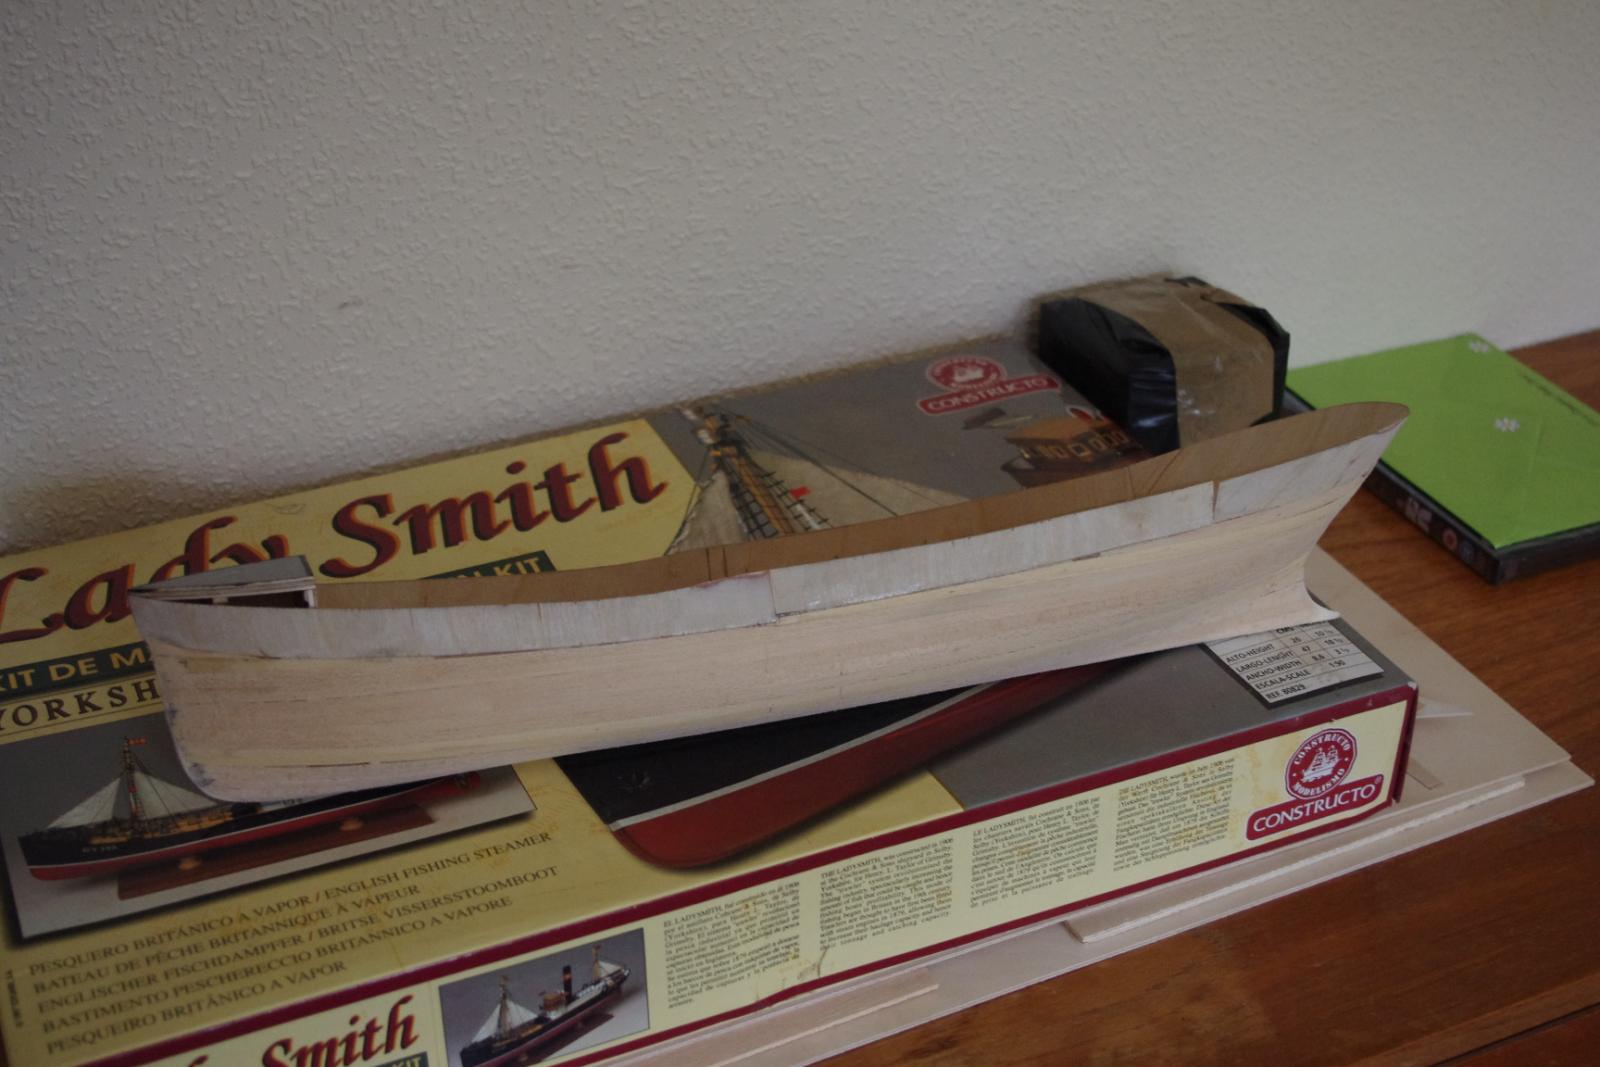
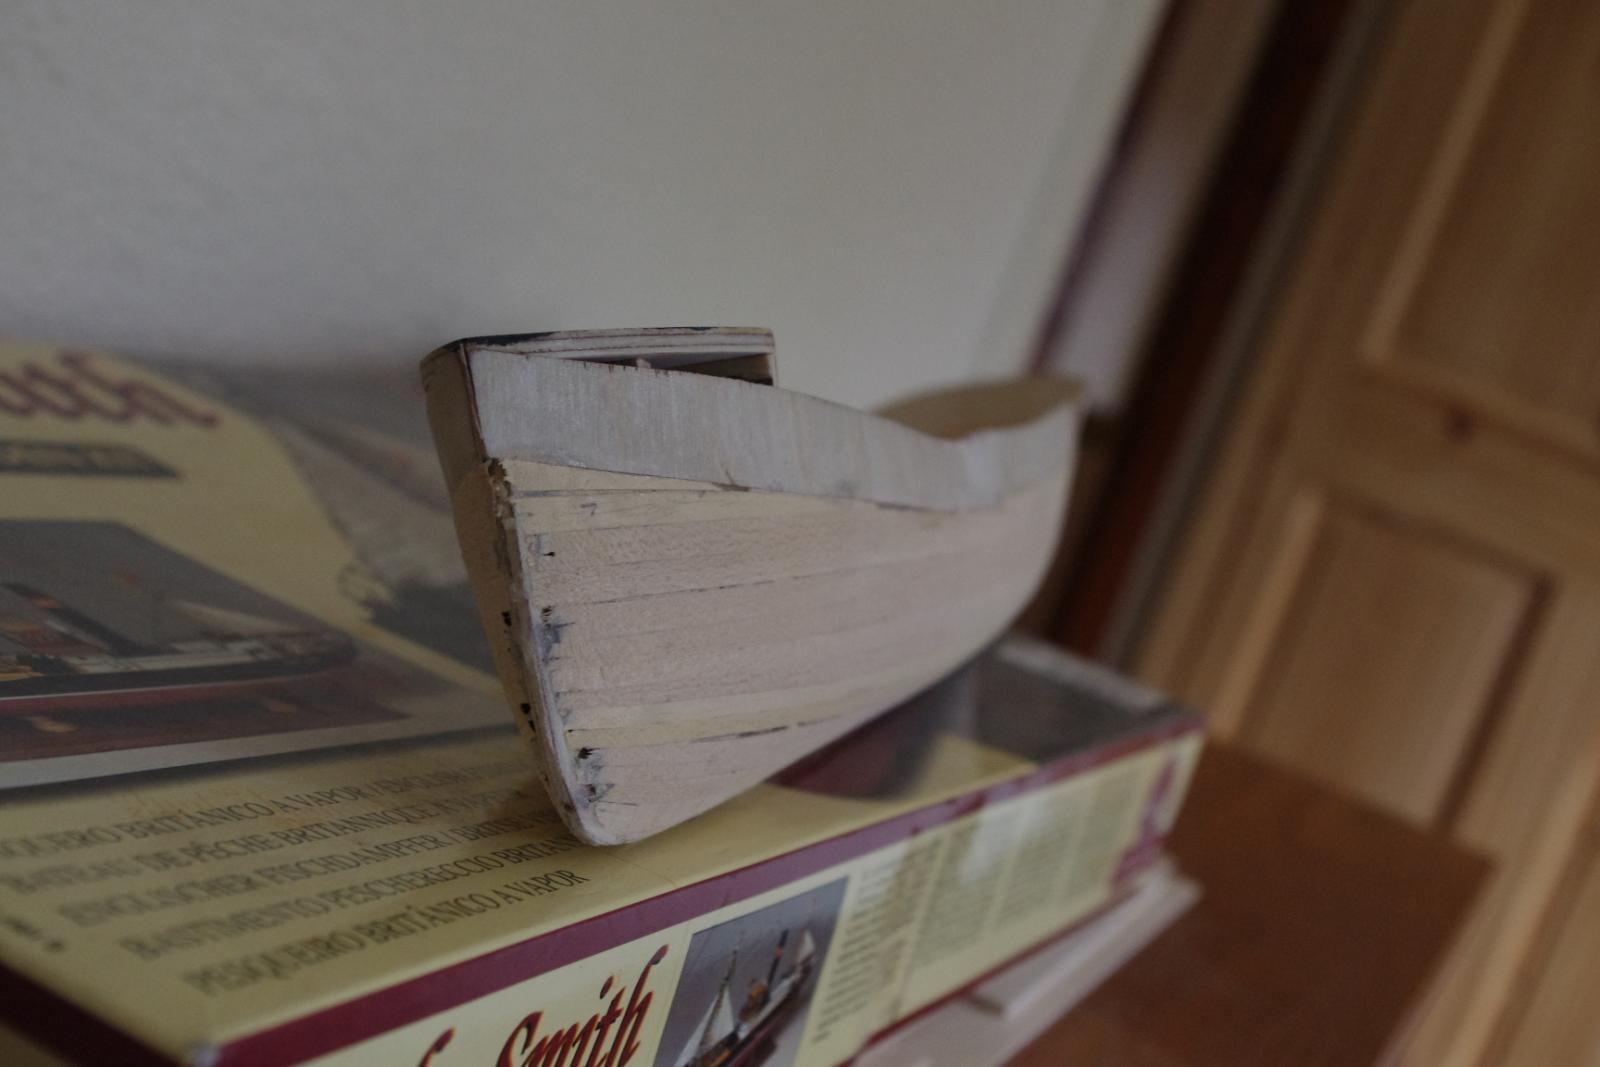
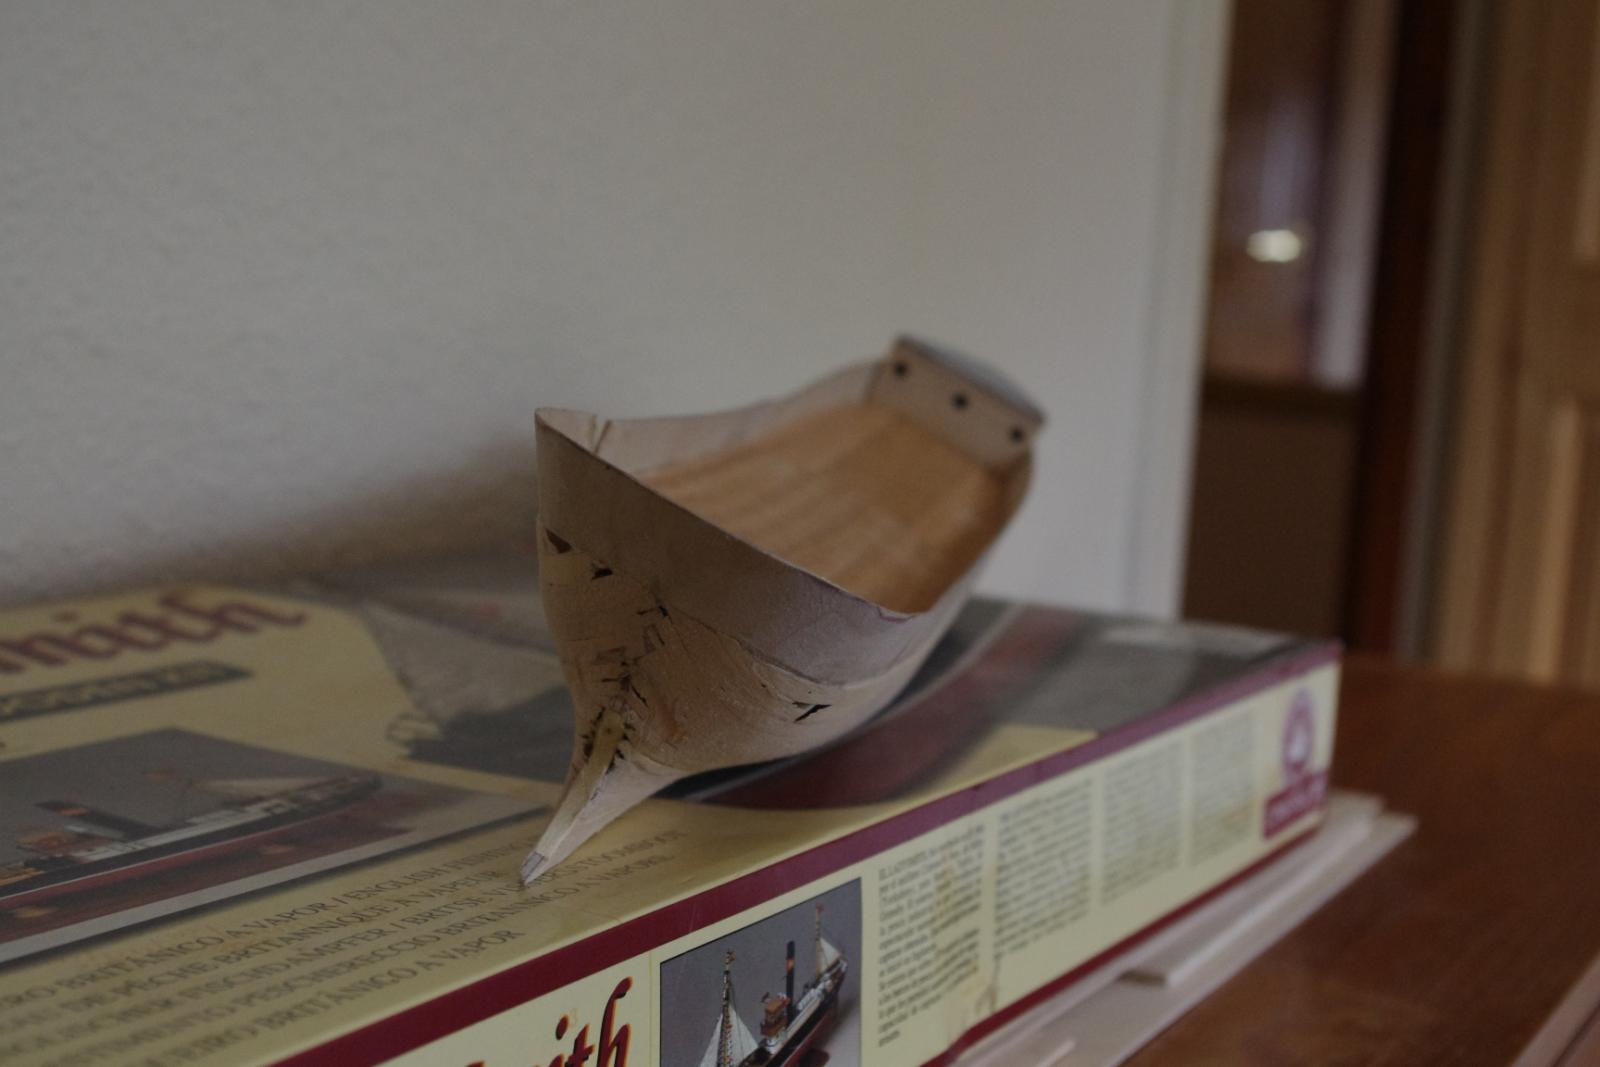
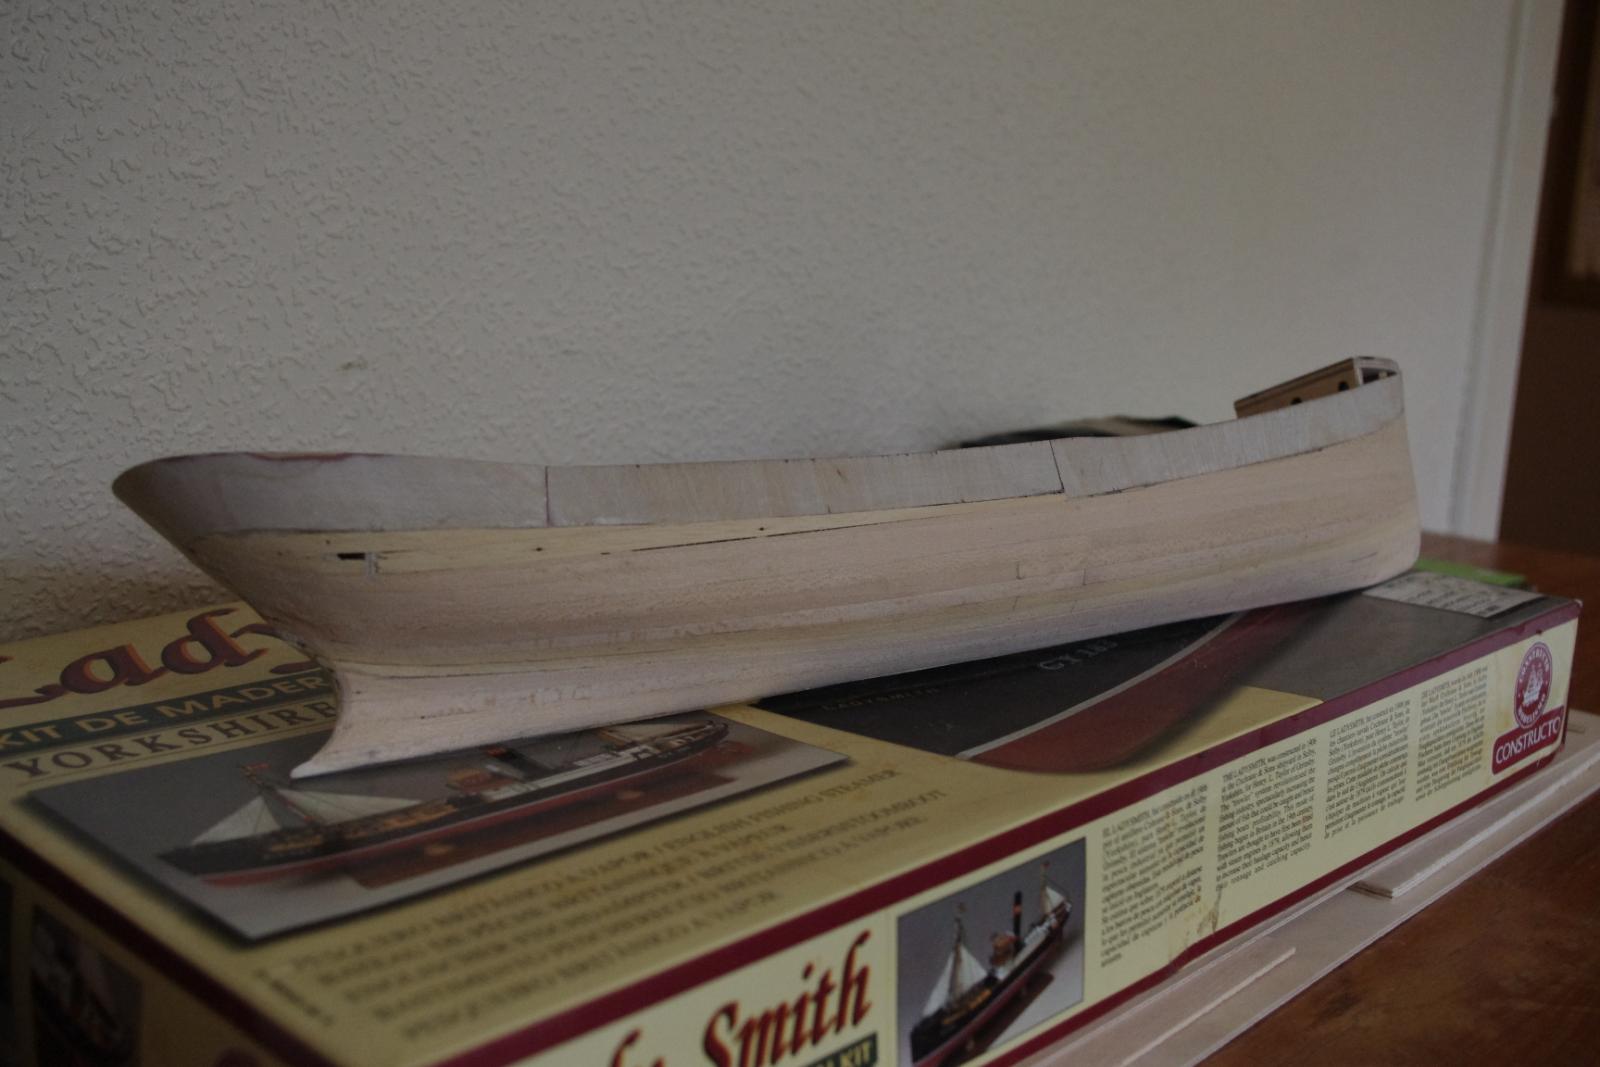
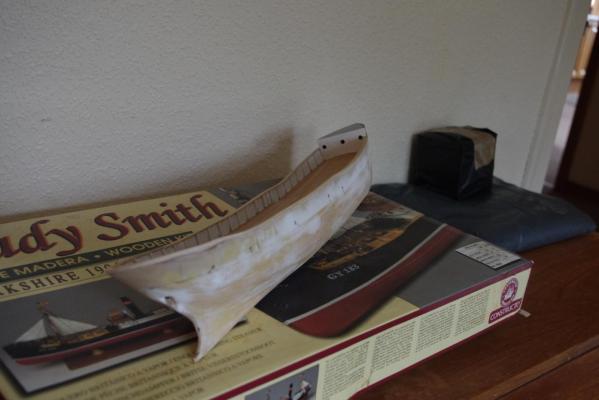
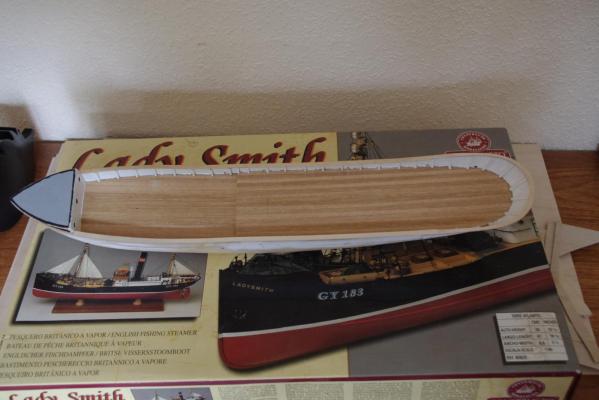
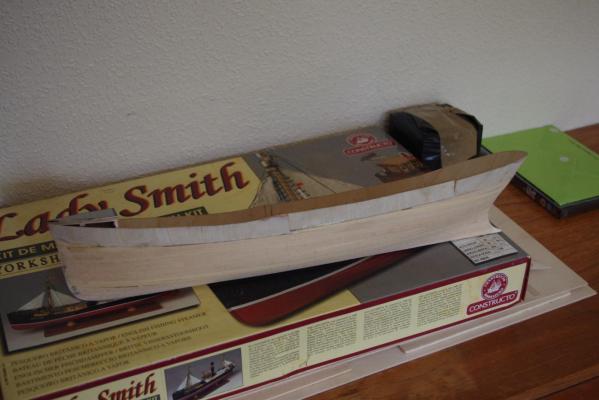
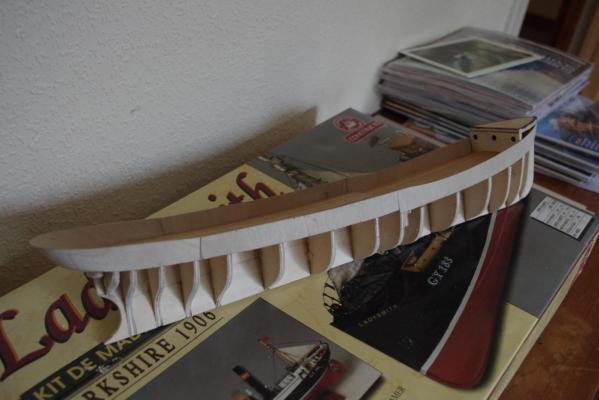
Well folks, the hull is lined ! Nothing like the best planking in the world but, as this hull is to be painted, as far as I was concerned it just needed to be covered. It has had it's initial brutal sanding. There is some filling to do as you can see but nothing too spectacular. So next job is to do that and then I will sand it down again and give it a coat of sealing laquer before first coat of paint.

- 48 replies
-
- 6
-
-
- lady smith
- constructo
- (and 1 more)
-
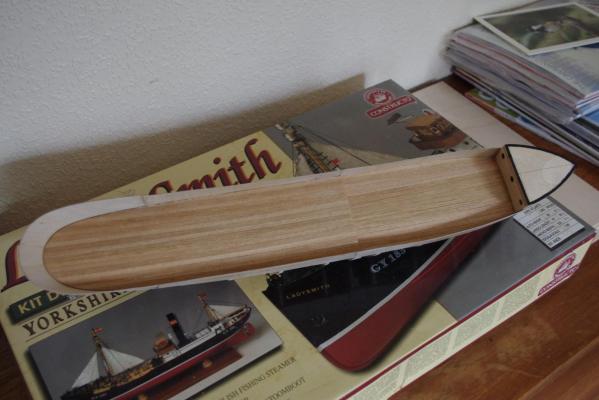
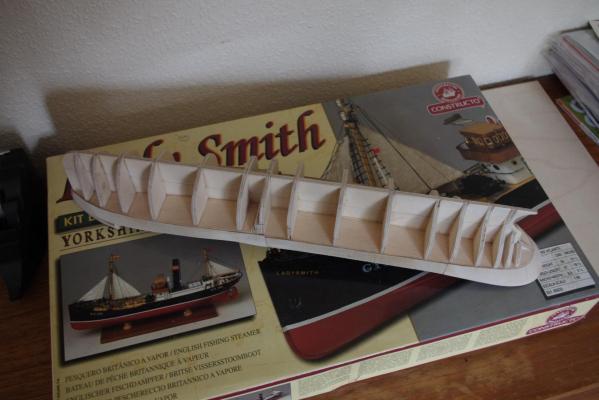
I finished the deck planking and decided to put the bulwarks on. The wood I cut them from was a bit thin but I hope they will be OK. Next thing, as I can't put it off any longer is to plank the hull. Problem is, I haven't done this for ages so can anyone tell me where to start ?
- 48 replies
-
- 6
-
-
- lady smith
- constructo
- (and 1 more)
-
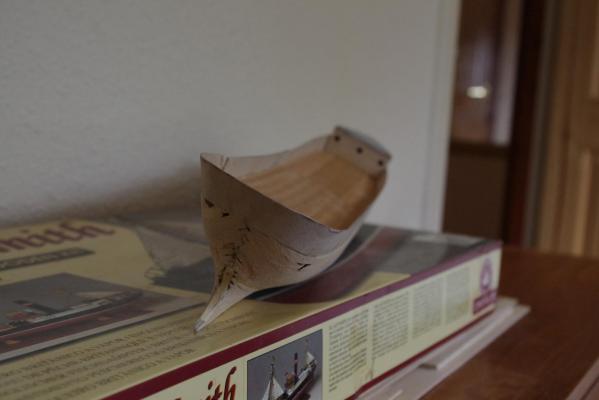
I tried to dry fit the bulwarks but as they only glue to the decks at this stage there is precious little wood to glue them to. So, despite my previous plan I decided to plank the decks first just to give a bit more thickness to glue the bulwarks to. I will post some more pics when I have trimmed the deck planking and it looks posh !!
- 48 replies
-
- 1
-
-
- lady smith
- constructo
- (and 1 more)
-
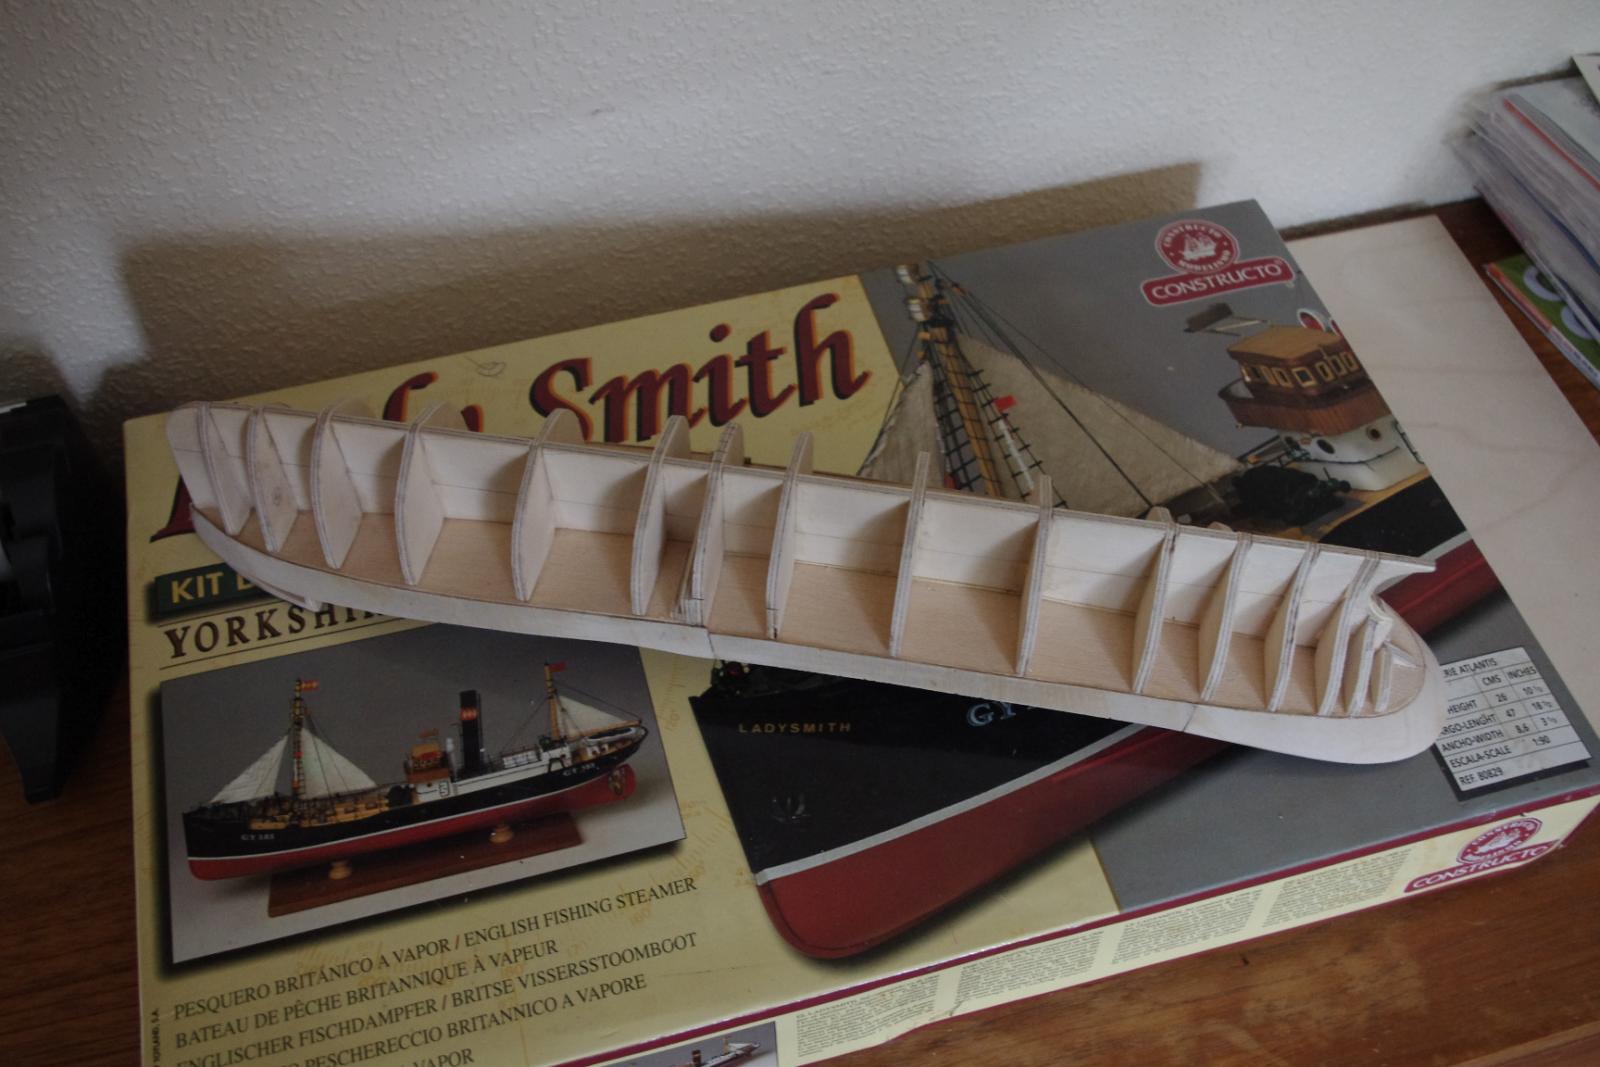
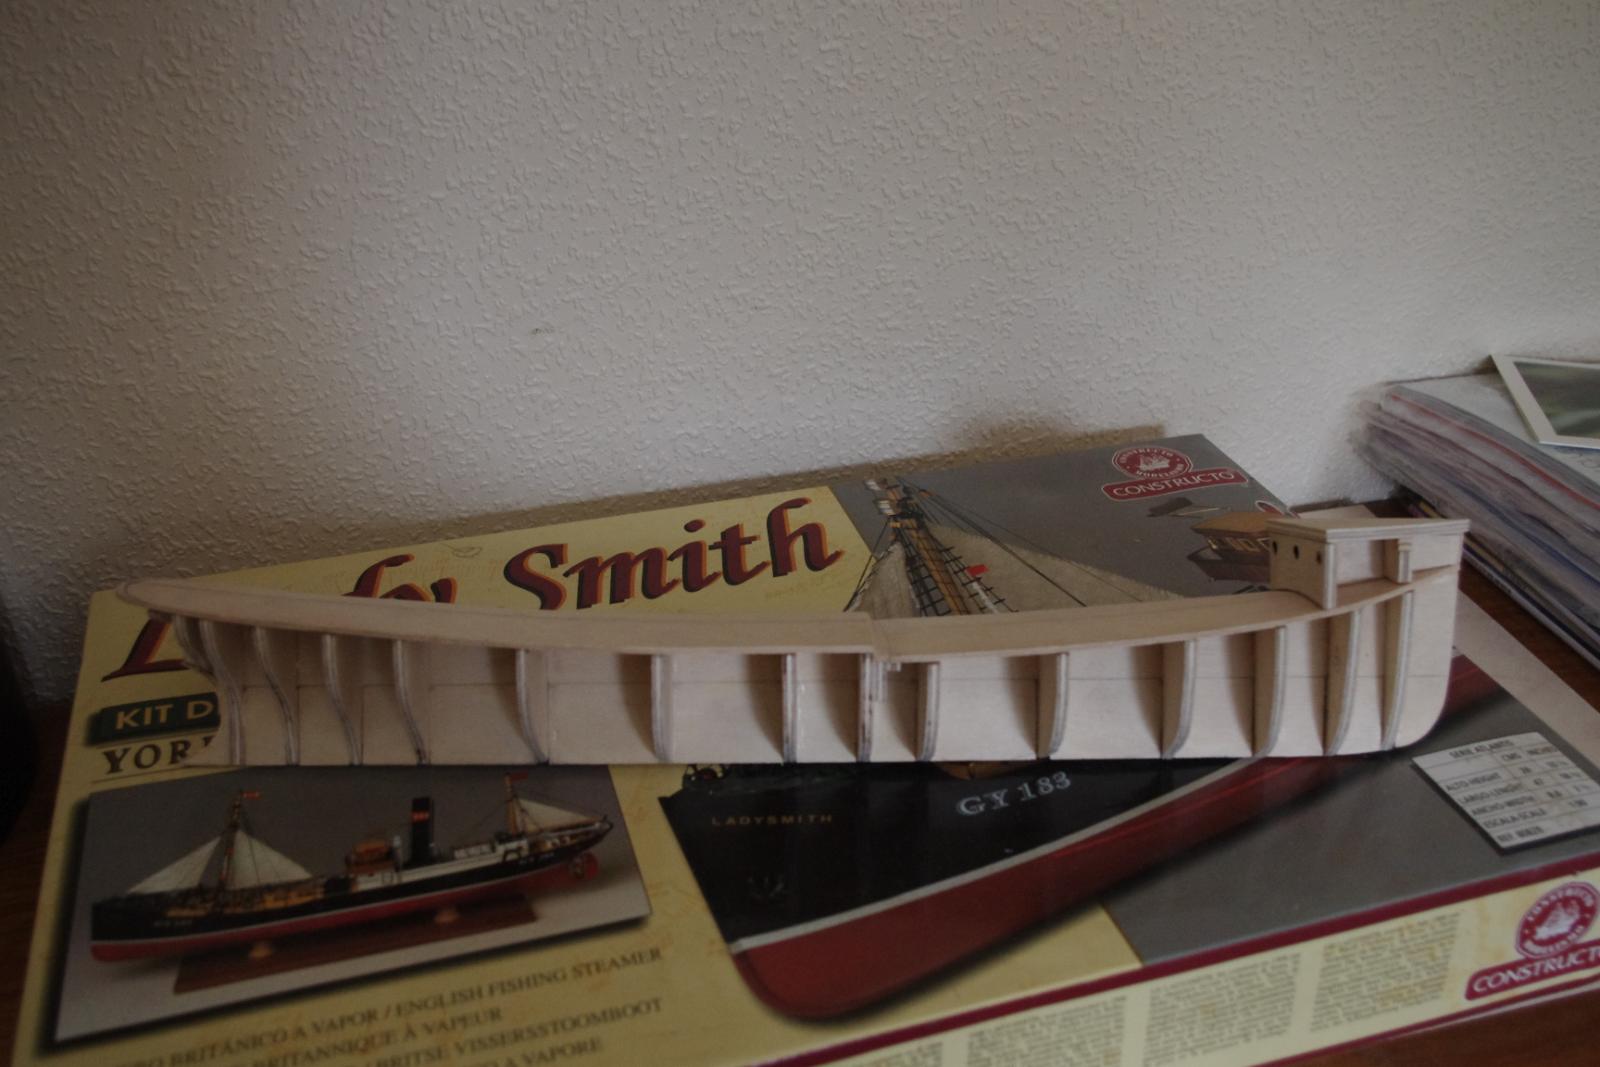
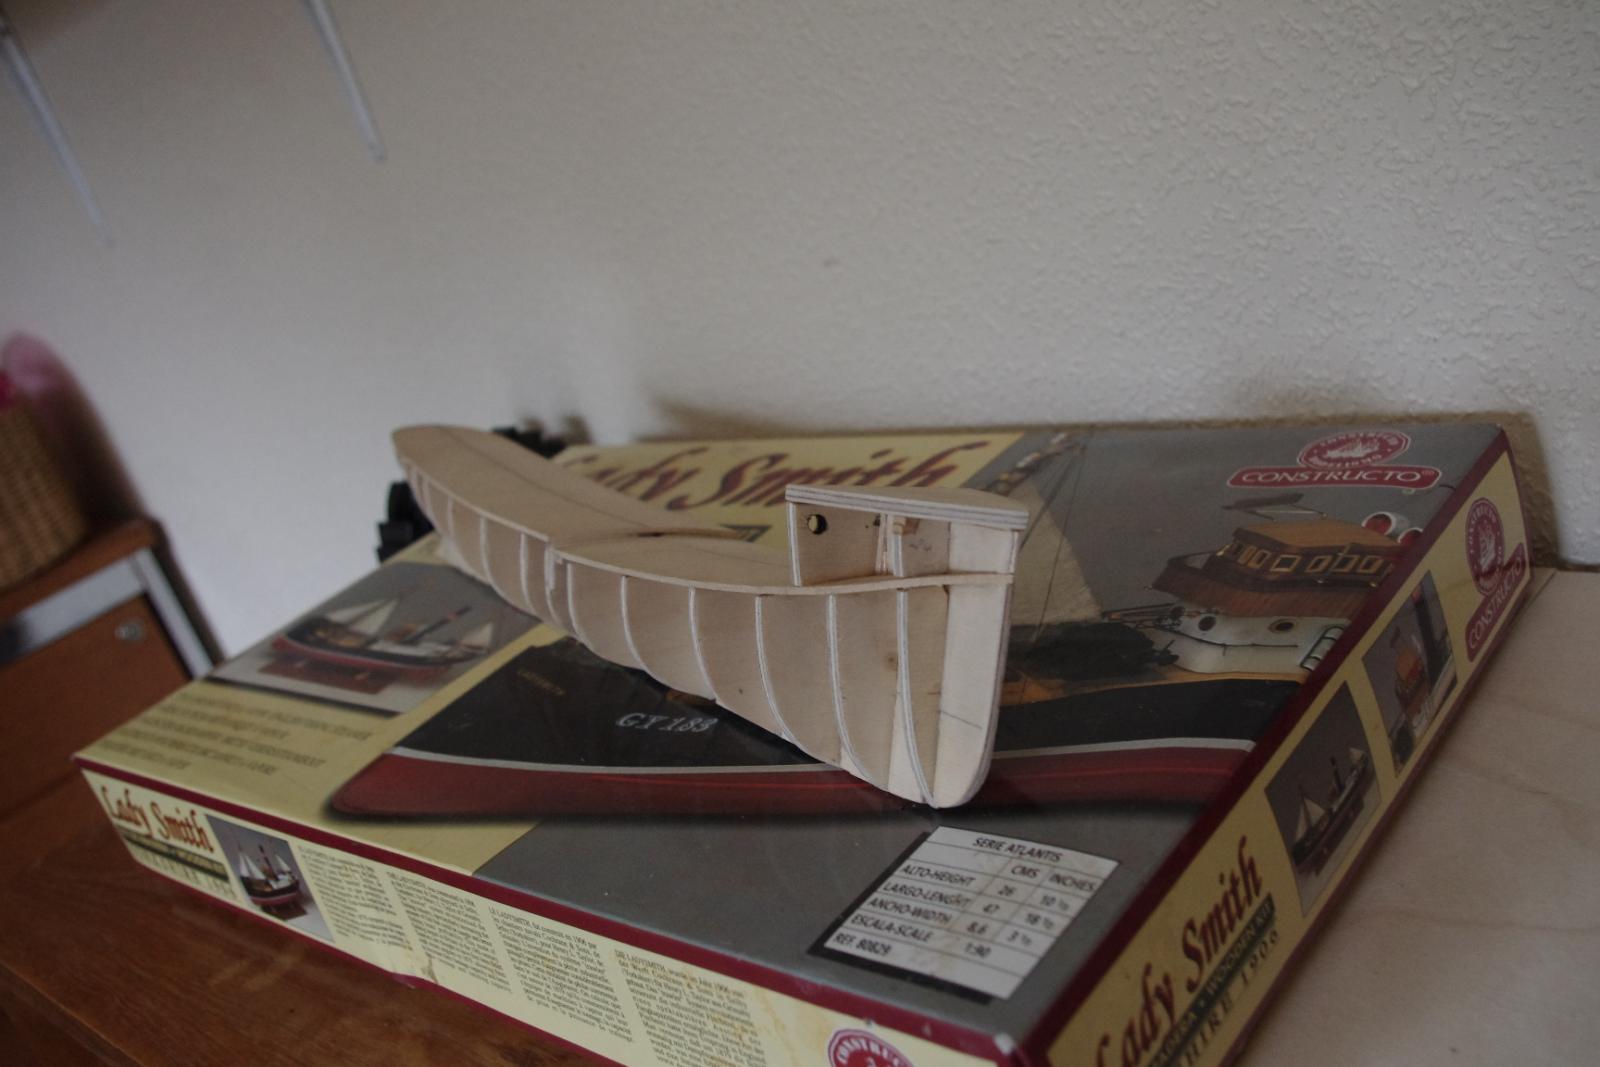
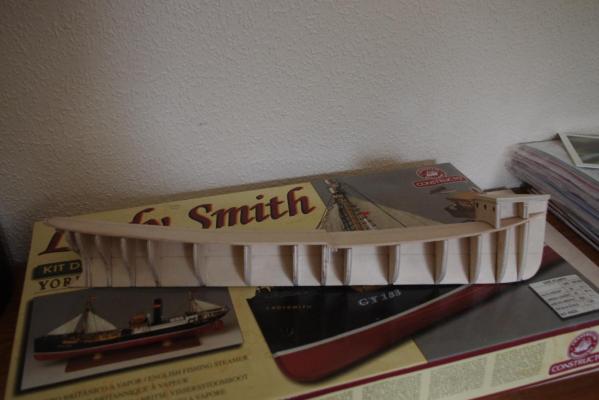
Well folks, having cut all the frames I have now fitted them to the false keel without too much hassle I have had to slightly 're-design' the front end and use a few shims here and there but I think it should work. The next job according to the destructions is to put on the bulwarks but I think I am going to combine that with the planking and besides, I have to do the fairing first. So far you will all be thrilled to know is that I haven't broken my second dremel moto saw - yet !

- 48 replies
-
- 5
-
-
- lady smith
- constructo
- (and 1 more)
-
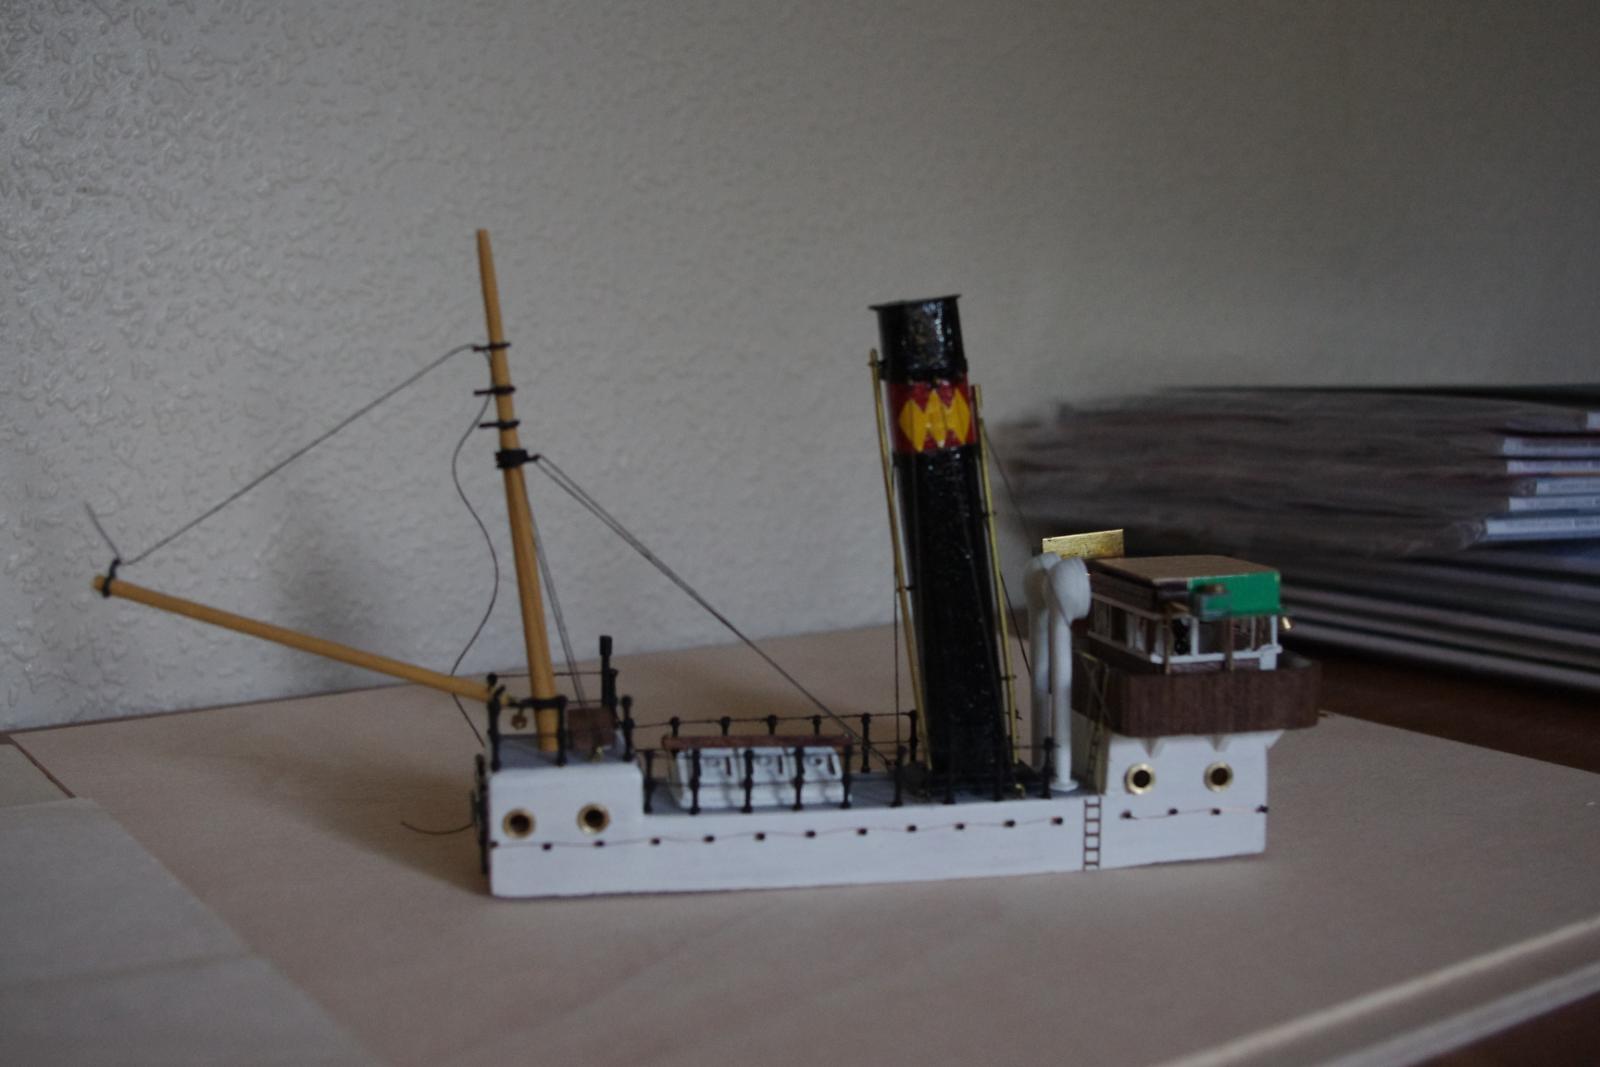
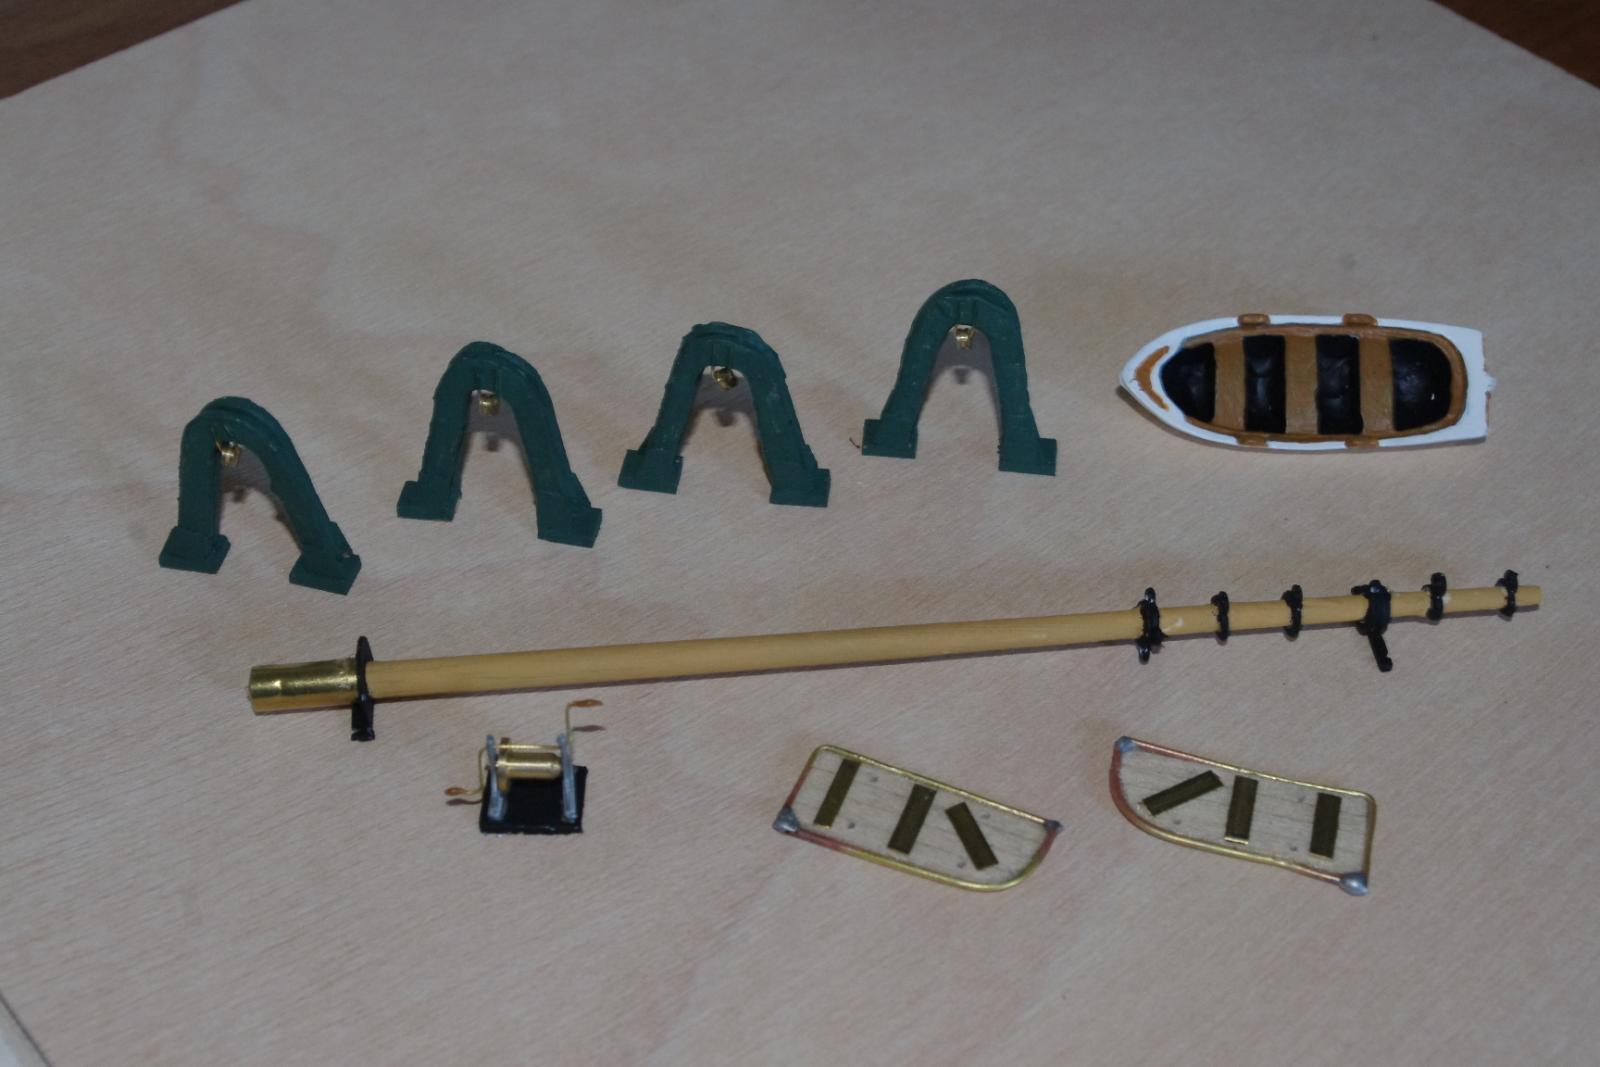
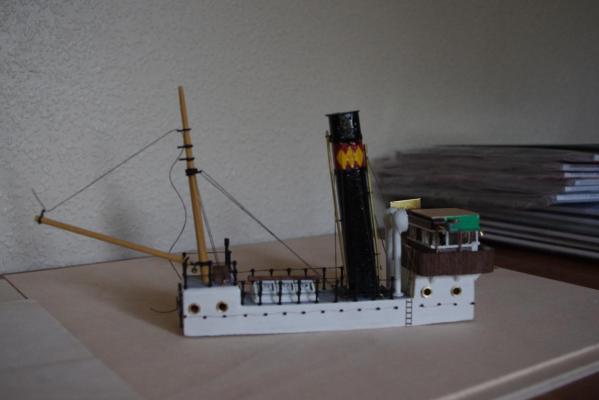
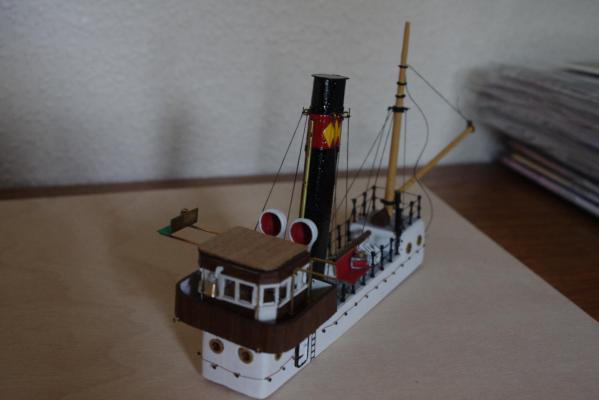
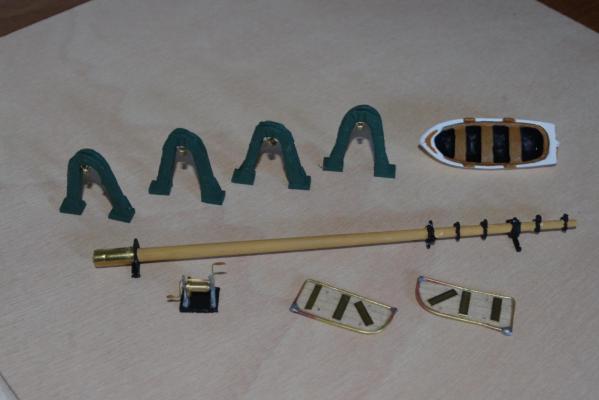
Thank you very much betamale for your comments. I may be asking for help. I do agree with you that it is an interesting and unusual boat which is really why I am persevering with it. Today I sanded those frames and you will all be pleased to hear that they now fit the template. I just have a couple more bits to cut and sand and I should be ready to start sticking them onto the false keel !! Are we excited or what ? Anyway, I did also threaten you with some pics of the bits and pieces so there are some of the bridge, wheelhouse, funnel etc. The masts are done, the strange green things are called 'trawl davits'. The wood they were supposed to be cut from was so badly marked out that I had to make the u shaped bits out of card which I then painted with pva glue to give them some strength. There is 1mm wire sandwiched between 2 u shapes and the feet were made from 0.5mm veneer and 2ml base. The little pulleys are wired onto to the tops. The oddly shaped pale pieces are 'trawl doors' and are awaiting some rope. There is also a wee winch which will go on the front of the boat later The observant amongst you will notice that I have been practicing my soldering skills on the wire round those doors and on the platforms holding the navigation lights on the wheelhouse. Anyway, enough of my blether - here are the pics!


- 48 replies
-
- 5
-
-
- lady smith
- constructo
- (and 1 more)
-
You are telling me !!!! Today I have managed to cut out the 'slots' with my new dremel motosaw. I didn't break any blades (so far so good) and by doing that I am able to try to fit my bits into the template. I have some trimming sanding to do to get them to fit but so far nothing that can't be overcome. Whilst waiting for all this stuff I have been making some of the deck bits and pieces like the bridge, wheelhouse and masts. I will try and get some pics of those tomorrow for your amusement. There are 2+ 1/2 pages of instructions (ha,ha,ha) for this kit which have detailed information like (and I quote) @Give the masts a conical shape and fit all the iron items on the masts and spanker boom'. For the cabin 'Fit and glue all the parts of the assembly including the inner re-enforcements'. You can see I am overwhelmed by the amount of information. I do however have one sheet of plans but, these are not to scale and there are no measurements in the parts list. The box has a few pictures on it and the advice given for that is 'The best guide to you is the box, so keep it handy while you are working on the boat'. Now you begin to see why I rashly swore never to do a Constructo kit again. Anyway, it is more than time that I became brave and attempted a scratch build, it certainly makes life interesting. Anyway, more pics tomorrow you lucky lot !!! By the way Mirabelle, I can't believe you are watching this when you are such a brilliant model builder !!
- 48 replies
-
- 3
-
-
- lady smith
- constructo
- (and 1 more)
-
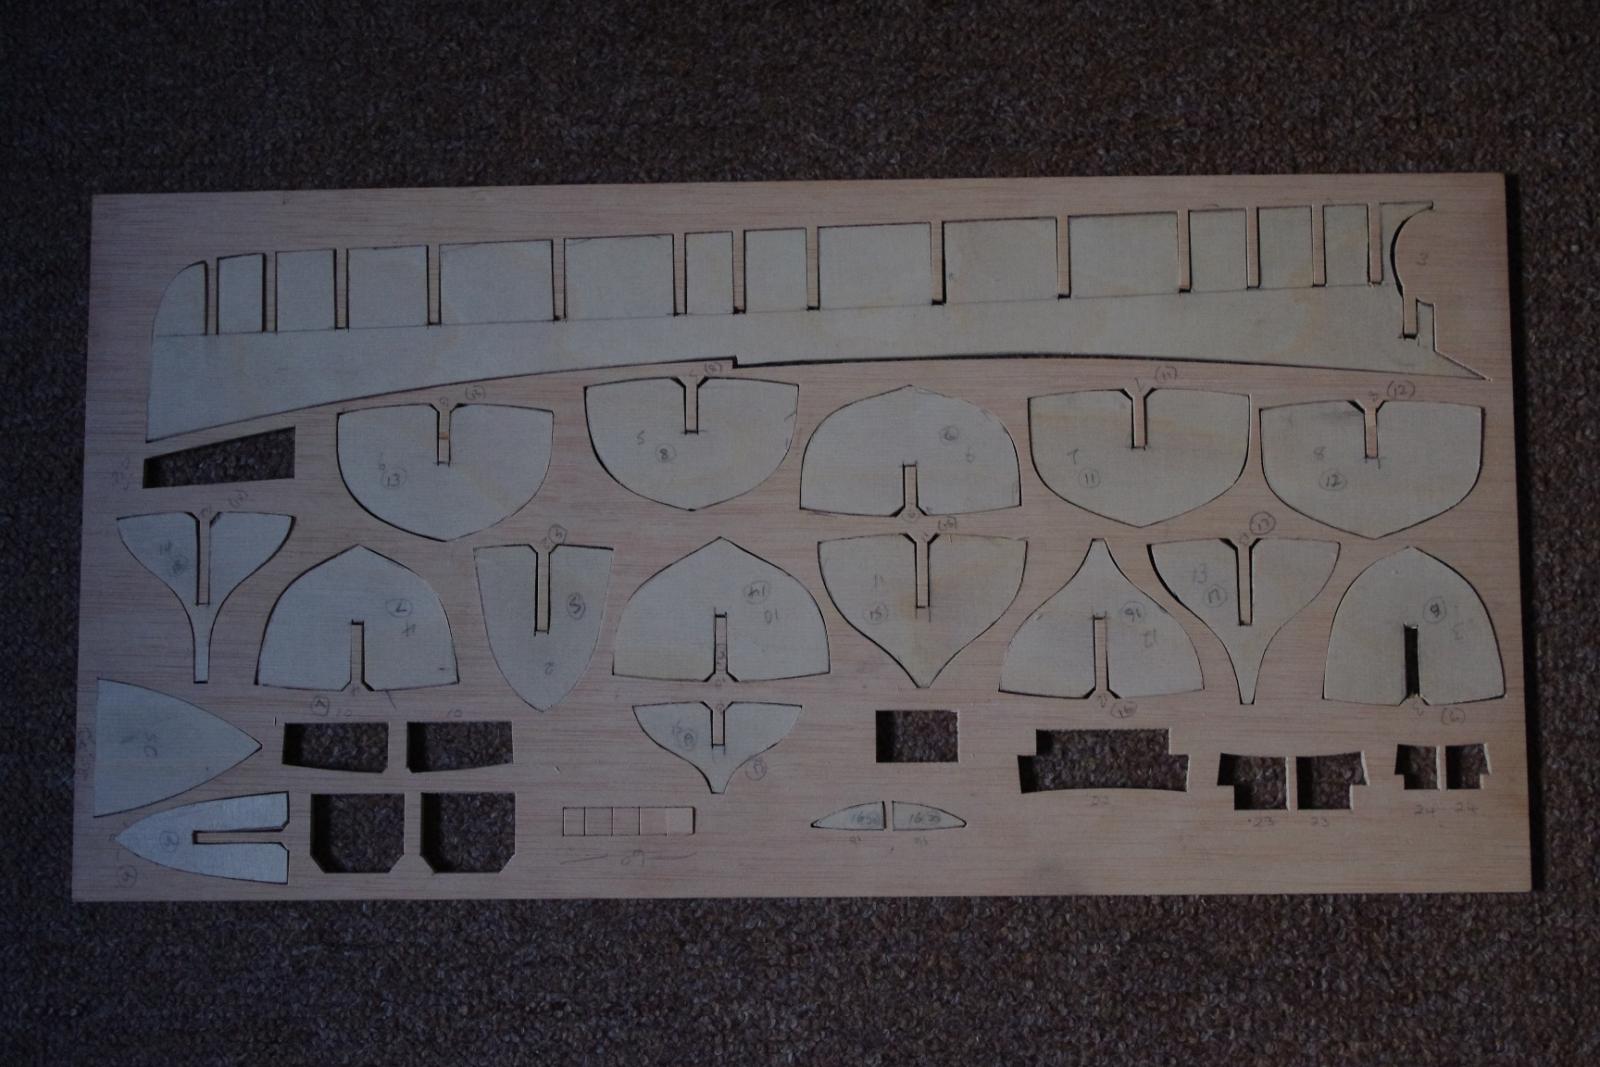
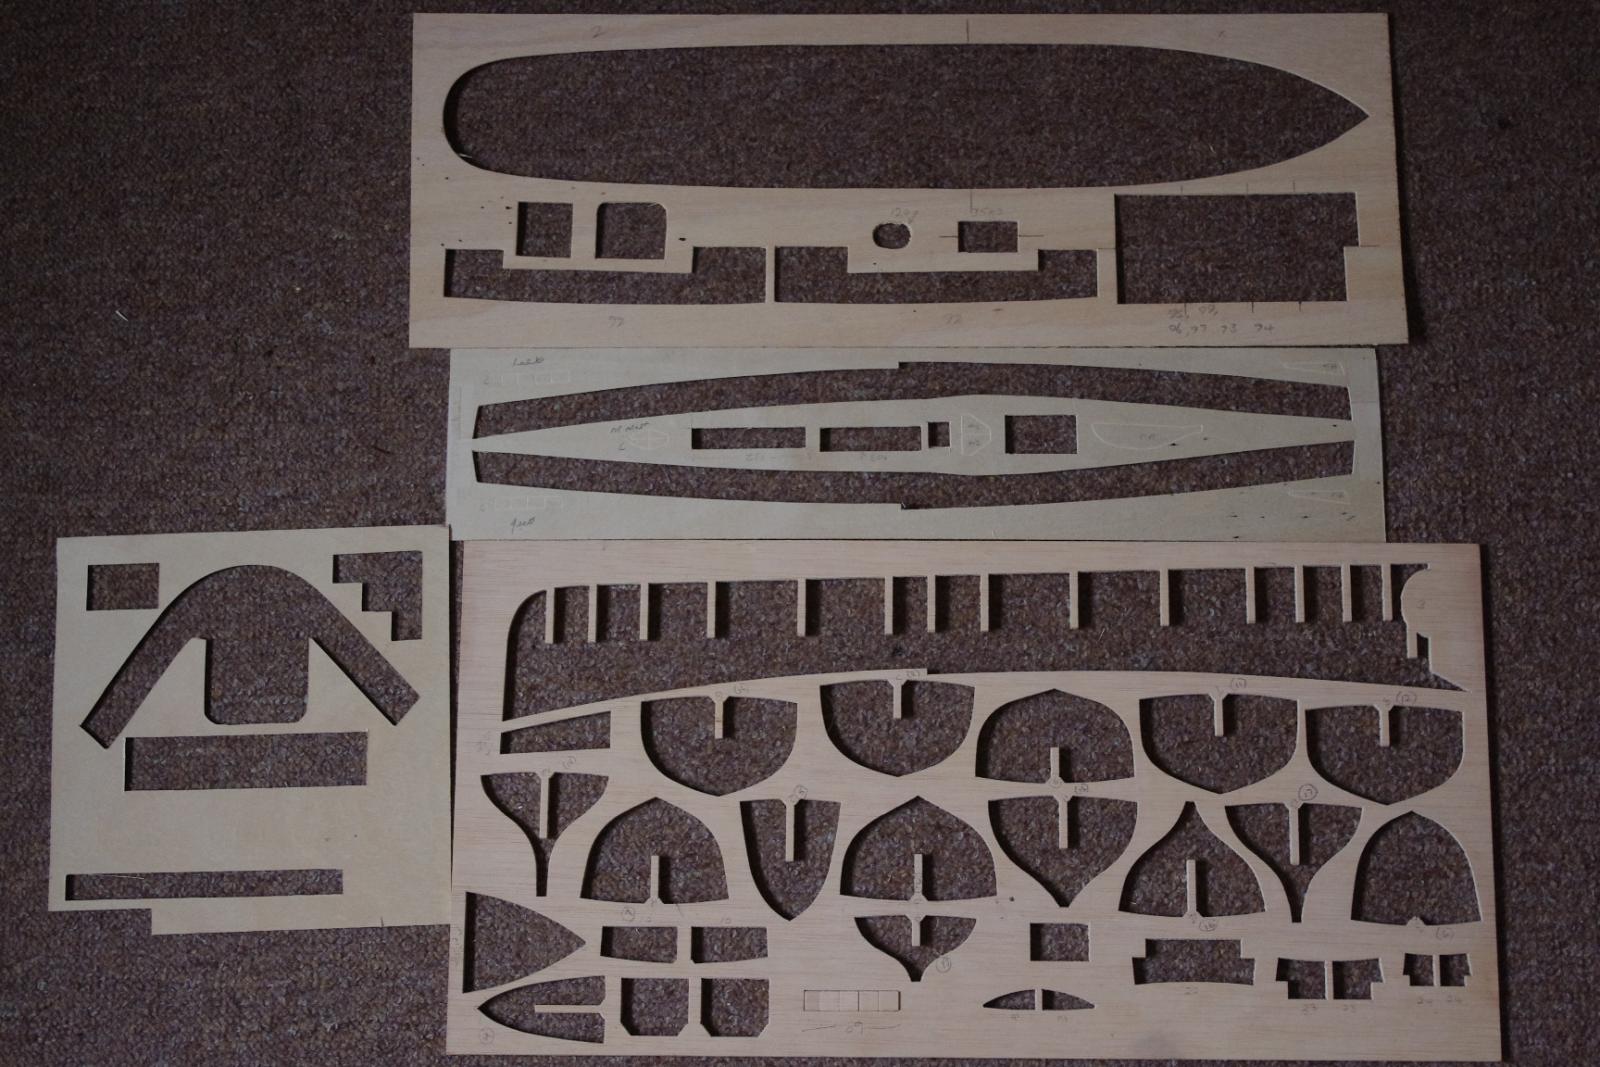
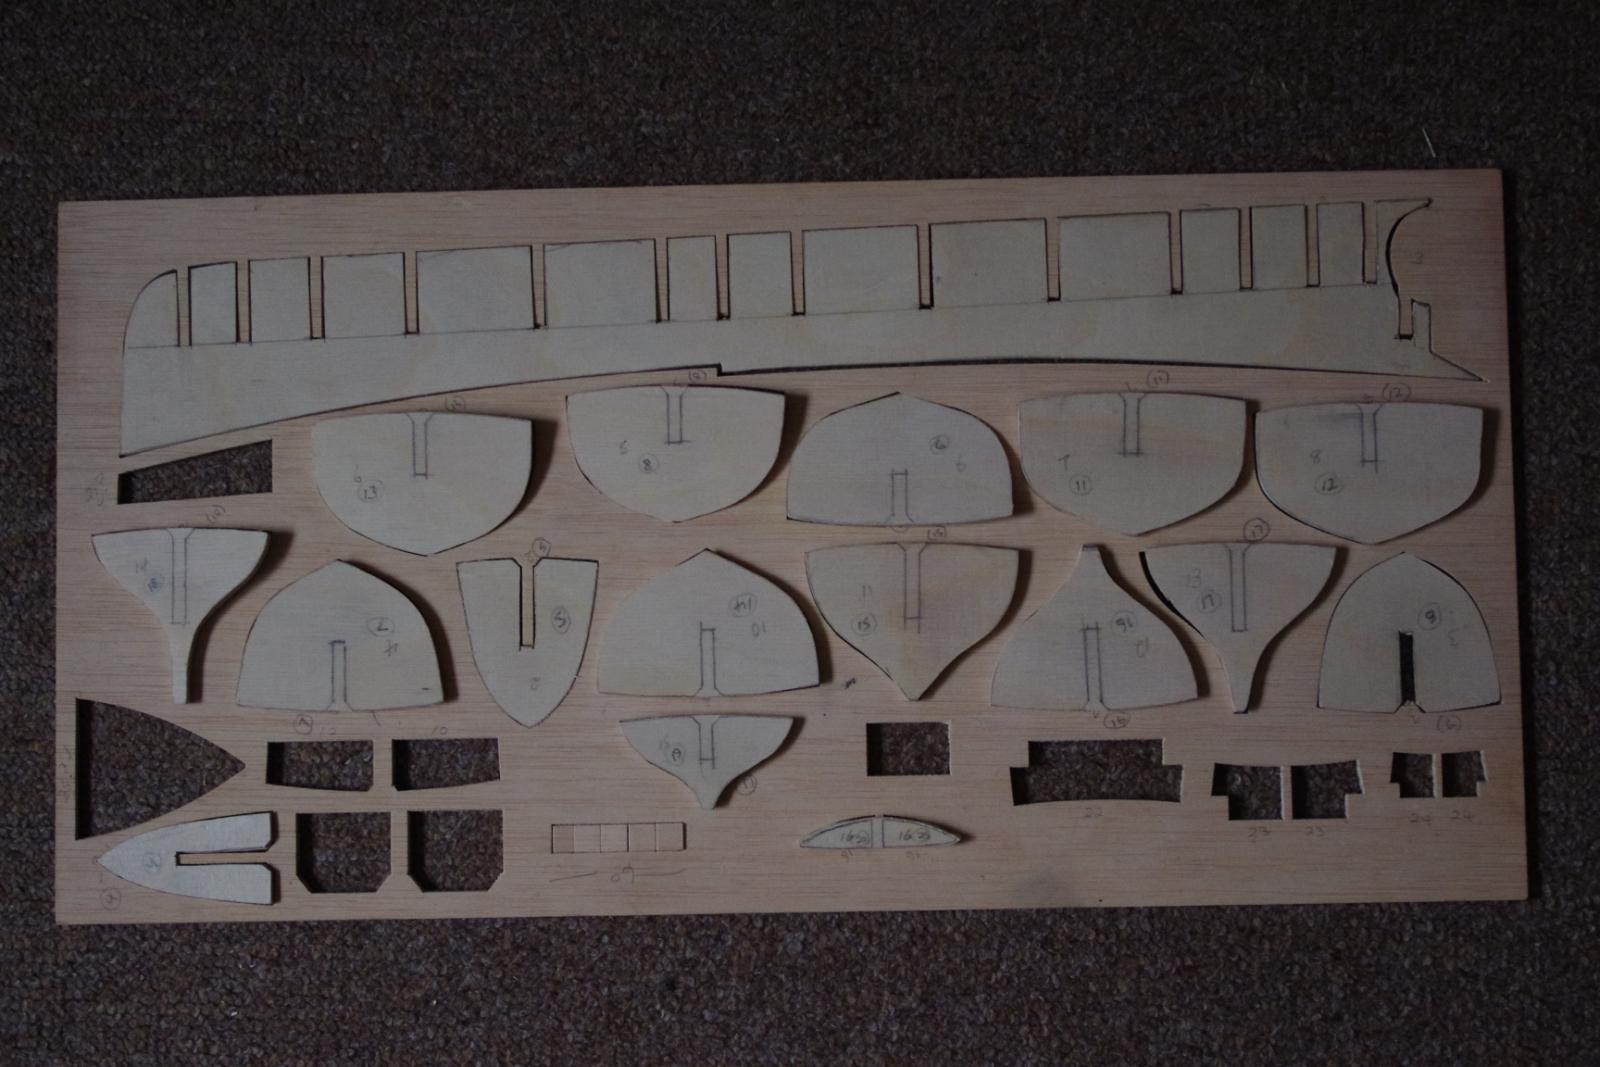
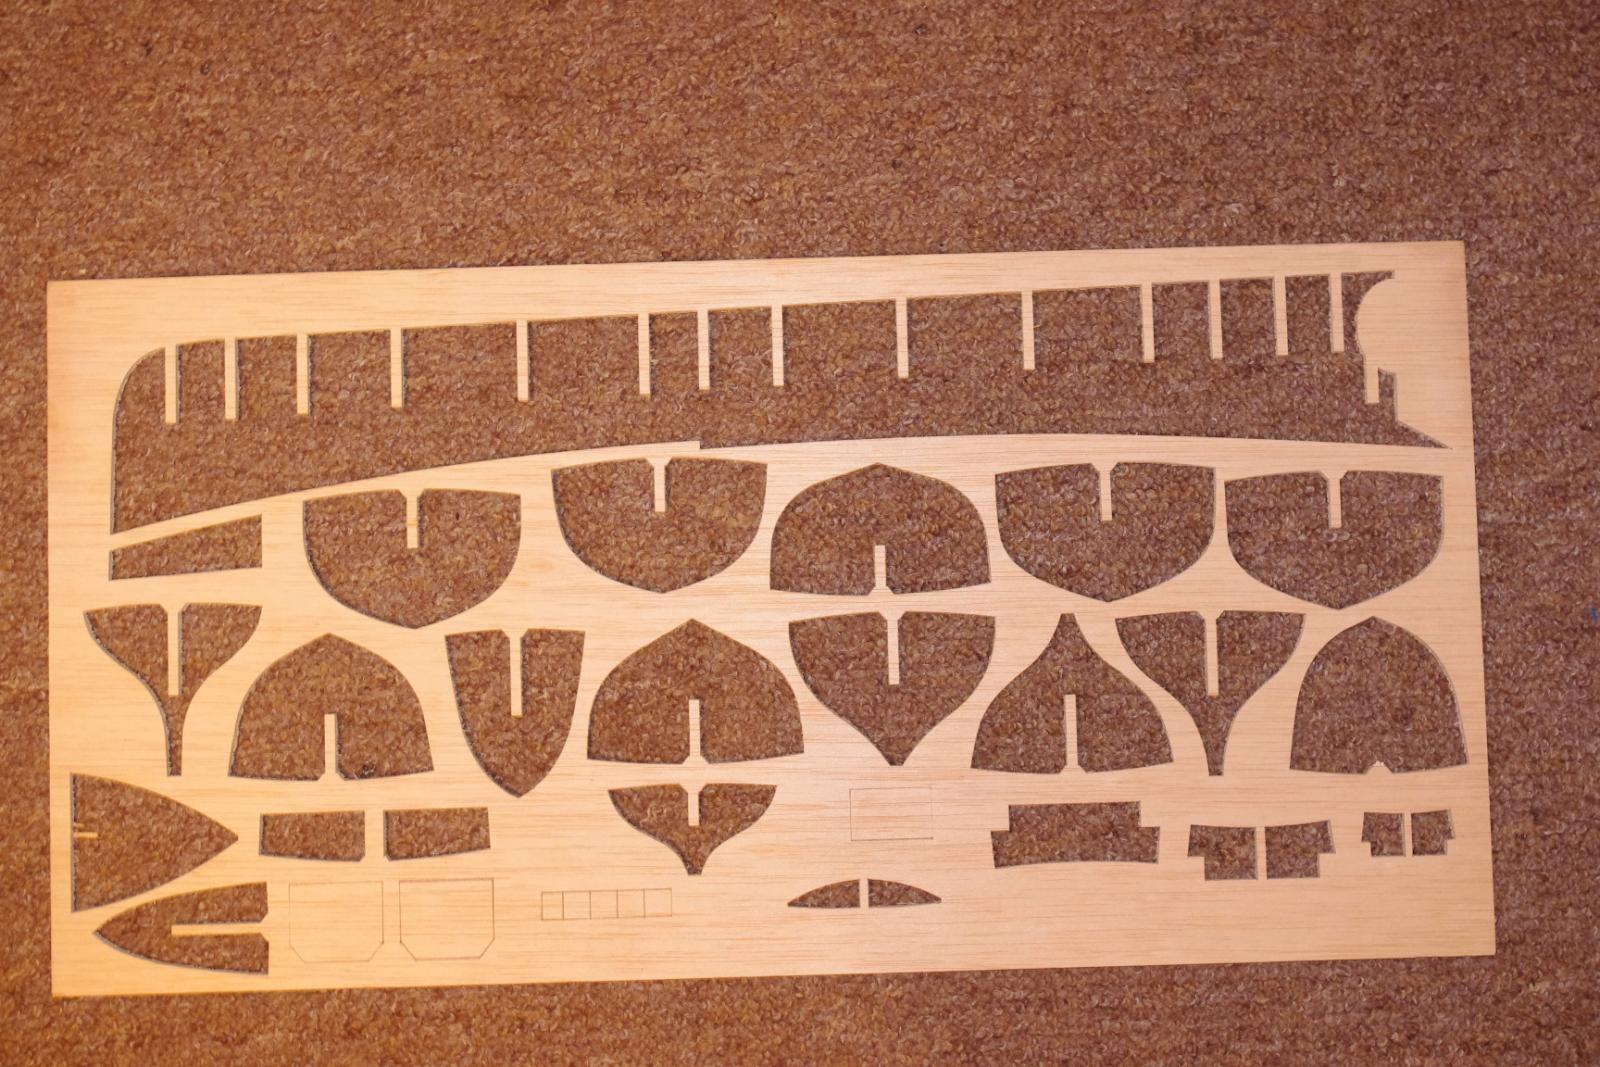
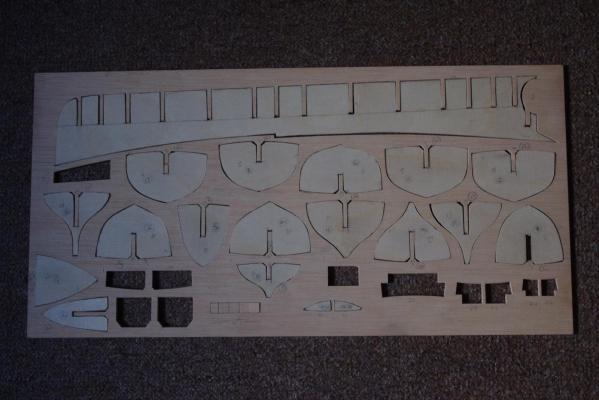
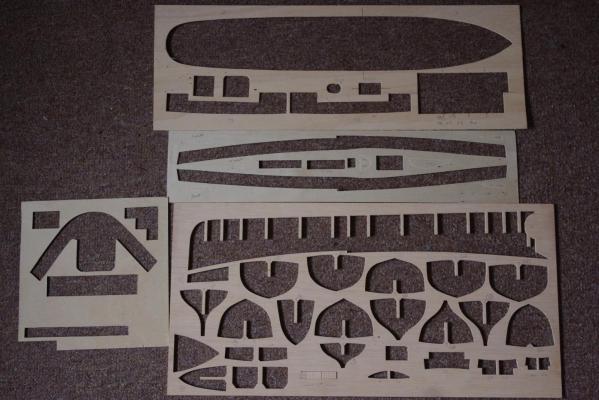
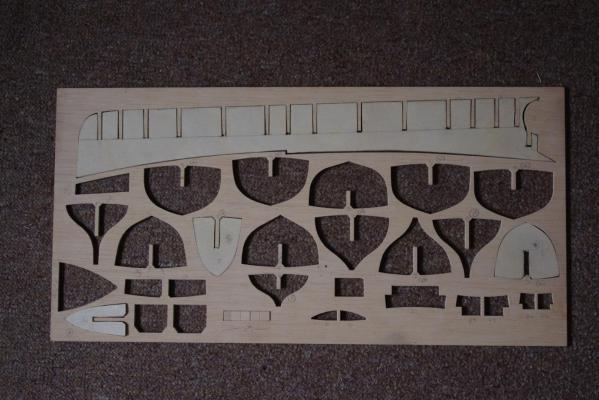
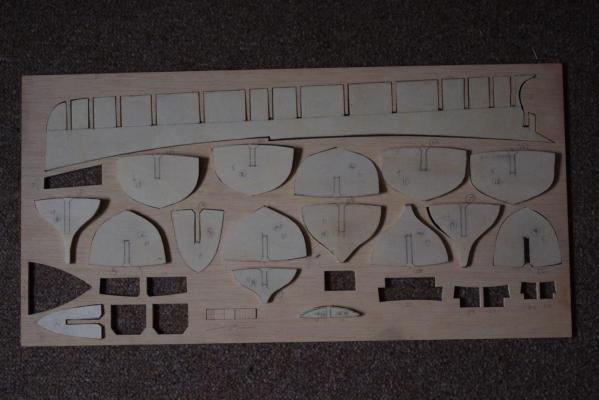
Here we go then !! The first pic is of the empty 'templates' which I have to fill as it were. The second and third are my attempts so far, three pieces fit and all the rest have yet to be trimmed but, as my new saw has arrived I hope to be trying it out later !!!! The other thing of course is that no loose wood arrived with the box. Fortunately I have quite a store of left over wood from other builds which I plan to make use of.
- 48 replies
-
- 3
-
-
- lady smith
- constructo
- (and 1 more)
-
I thought some mean person might want some pictures !!! I will post some soon and give everyone a good laugh !
- 48 replies
-
- 3
-
-
- lady smith
- constructo
- (and 1 more)
-
So, like a nutcase I have still decided to scratch build the boat !!! There is just no hope for some people and I discover that I can be very stubborn and refuse to give up !! I purchased an Einhall scroll saw. What a complete load of rubbish !!! The saw action was so slow even on maximum setting that it wouldn't have cut a bar of chocolate !! Added to which, despite the blade tension, the blade moved off in practically a sideways direction as soon as I tried to cut something. Needless to say it has gone back. I cut out most of the frames with a coping saw and after huge amounts of sanding they are nearly right - still some work to do though and some pieces so small that I just can't do them that way. So, (!!!!!) I ordered another dremel moto saw working on the principal that lightening doesn't strike twice in the same place. I plan to try it out tomorrow. Basically it is a very good idea for a machine as it is neat, fixes solidly to my work desk (!!!) and has very good variable speeds. Of course it only takes dremel blades which are a not standard length but I guess you can't have everything. It packs away into a very neat carrying case which is always a bonus I think. I just hope it survives my attempts. Anyway for those who are interested - you sad lot - I will let you know how I get on. By way of a PS. I now know why Constructo stopped manufacturing this particular model. The instructions are definitely not suitable for a novice and their method of marking, not cutting parts is horrendous. This has to be a scratch build - I don't believe anyone could do this as kit.]
- 48 replies
-
- 3
-
-
- lady smith
- constructo
- (and 1 more)
-
The scroll saw was bought through Amazon and, despite the delay their customer service dept. issued an immediate refund and returns label. Can't ask for better than that ! I doubt I will replace it with another Dremel if they break that easily but the idea of having a scroll saw hasn't gone away - seems like a very useful piece of kit. I just need to find a good make. I could of course progress this kit with a coping saw and sandpaper but I wonder if it is worthwhile. I did buy the kit on ebay and on finding it incomplete again got an immediate refund without return. So, in fact I have lost nothing so far other than replacement wood which I am sure I will use at some point and a bit of temper loss at such an early breakage. I think I will put all the bits back in the box for another day and get on with some of the other kits I have in my stash !!
- 48 replies
-
- 2
-
-
- lady smith
- constructo
- (and 1 more)
-
Thank you matey !!! I really have looked everywhere that came with this 'savaged' kit and the numbers for the parts really don't exist on the instructions, plans or anywhere. That is why I was hoping to find someone out there in the bright blue yonder who had done the same kit and survived the problems !! I had vowed that I wouldn't do another Constructo kit as their die-cast cutting is pathetic at best so, it probably serves me right and I should have stuck to my vow!! The thought is appreciated though, I didn't mean to sound rude.
- 48 replies
-
- 2
-
-
- lady smith
- constructo
- (and 1 more)
-
Oh great !!!!! I cut out one piece and all the vertical lines on the false keel to take the frames and sure enough my first piece fitted beautifully. Then the blade broke on my brand new, Christmas present Dremel moto saw. For reasons best known to others this has broken the blade holding and tensioning mechanism on the saw so you can't get a new blade in at all now. Isn't life wonderful ?!!! My dilemma now is, do I try to cut out all those pieces with a coping saw by hand and use loads of sandpaper afterwards. Do I get a replacement Dremel - I don't think so if they break so easily !! Do I get a different make of scroll saw (recommendations welcomed) or do I just bin the project, put it down to experience and forget scratch building ? All hints and suggestions warmly welcomed.
- 48 replies
-
- 2
-
-
- lady smith
- constructo
- (and 1 more)
-
The piece you numbered 3 I have surmised is actually a piece of deck at the focsle which would then explain the two number 8 pieces which will go in about the middle of the hull. The two curvy bits (upper middle on the picture) would be number 16s and the bits on the upper left are frames which go below piece number 3 at the focsle. Anyway, this all leads to your help being invaluable - thank you very much. As a matter of interest, is this a vessel that you are familiar with or did you work out the numbers from experience ?
- 48 replies
-
- 2
-
-
- lady smith
- constructo
- (and 1 more)
-
Thank you very much for that, I think I can make sense of it. I reckon as this boat has comparatively parallel sides that the nearly identical pieces will run around the middle of the hull. The false keel is shown as one piece and I don't think it splits but the deck has two levels, roughly in two halves so that would make sense. Anyway, I will have a go and see how good I am with a motorised fret saw !! Never used one before but got one for Christmas. Fingers crossed !!
- 48 replies
-
- 2
-
-
- lady smith
- constructo
- (and 1 more)
-
No I am afraid not, there are photos of the construction process but they won't really help as it is unclear from them which frame is which.
- 48 replies
-
- 2
-
-
- lady smith
- constructo
- (and 1 more)
-
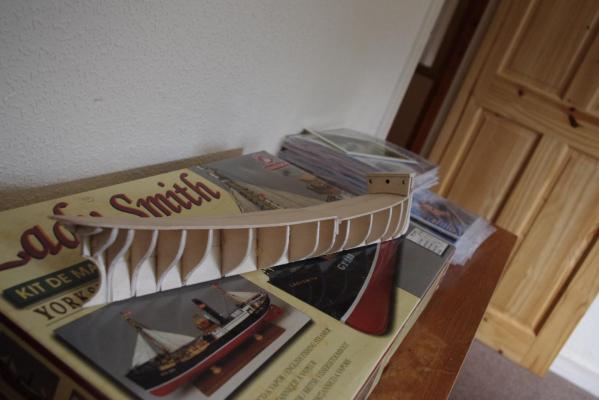
I could take a photo of the empty sheet showing the outlines. Is that what you meant ?
- 48 replies
-
- 2
-
-
- lady smith
- constructo
- (and 1 more)
-
Can anybody help me with a problem I have. I have obtained a used kit of the Constructo Lady Smith boat but nearly all of the die-cut and laser cut pieces have been removed. I am left with the wood sheets with only the outlines to play with. I am going to try to scratch build the parts using the 'empty' sheets as templates, brave huh ? My real problem is that the sheet which would have contained all the hull pieces and frames would I guess have had the part numbers printed on them as there is no reference to this sheet in the instructions. Can anyone help me with numbering these parts ?
- 48 replies
-
- 2
-
-
- lady smith
- constructo
- (and 1 more)
-
I would not use super glue at all on second planking, it will always show through varnish or whatever finish you decide on.
-
If it is of any help I don't use contact adhesive at all. Just PVA (white glue). I also don't use pins but have found that sticky tape works well without leaving holes in the planks for the second planking.
-
I agree completely. I think the length of the yard would look very strange if shortened. I think it will look fine once rigged but quite rightly GLakie has pointed out that you might want to keep going up. You have got to make good use of your lathe after all !!!! Still jealous !
-
With a name like 'Dowling' I know all about this Irish stuff!!!! As for using a lathe, I haven't done that since I was at school, a very, very long time ago!! It's no good you being flashy because you have one and I don't. I am jealous though !!
-
Are you going to put the first 'layer' of yards on ? Don't ask me what they are called but you know what I mean.