


usedtosail
-
Posts
2,421 -
Joined
-
Last visited
Content Type
Profiles
Forums
Gallery
Events
Everything posted by usedtosail
-
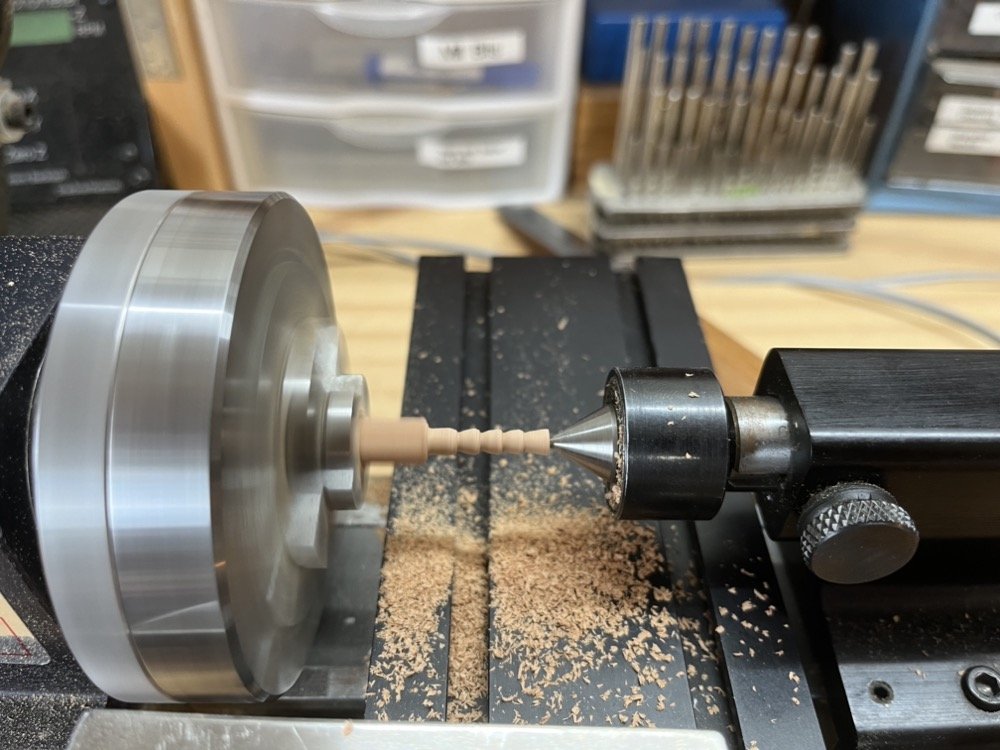
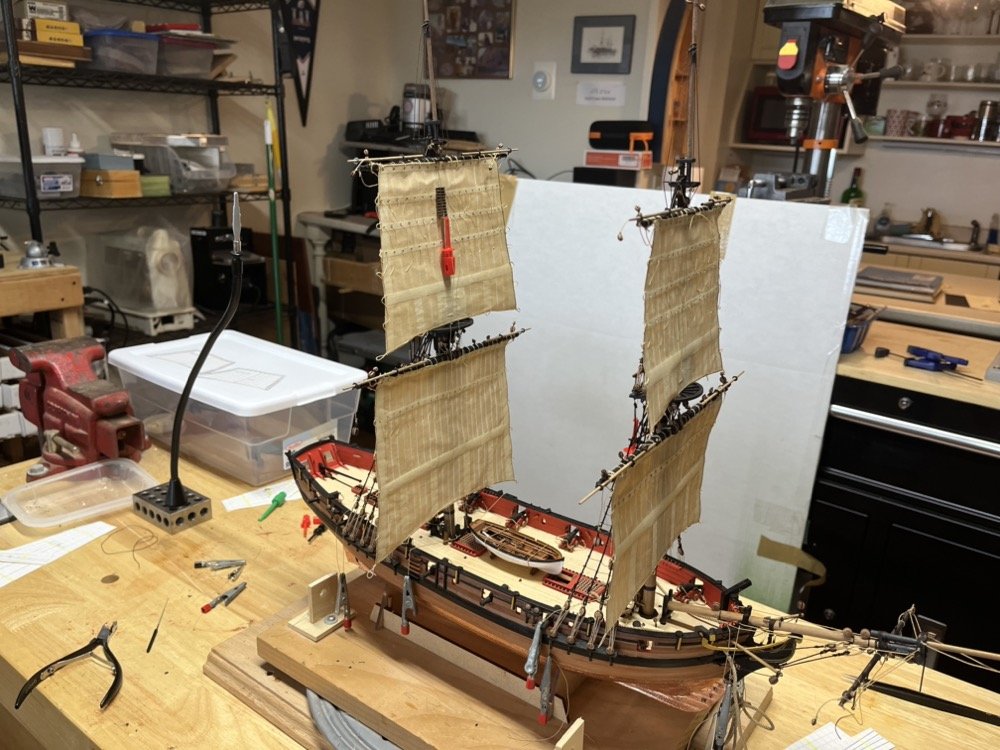
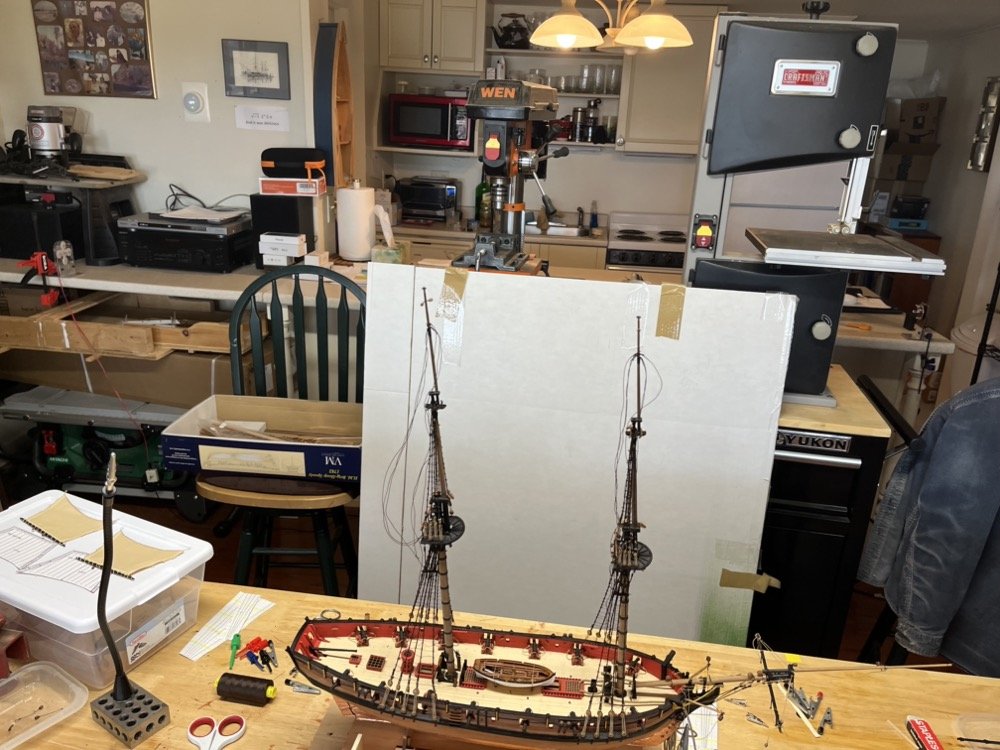
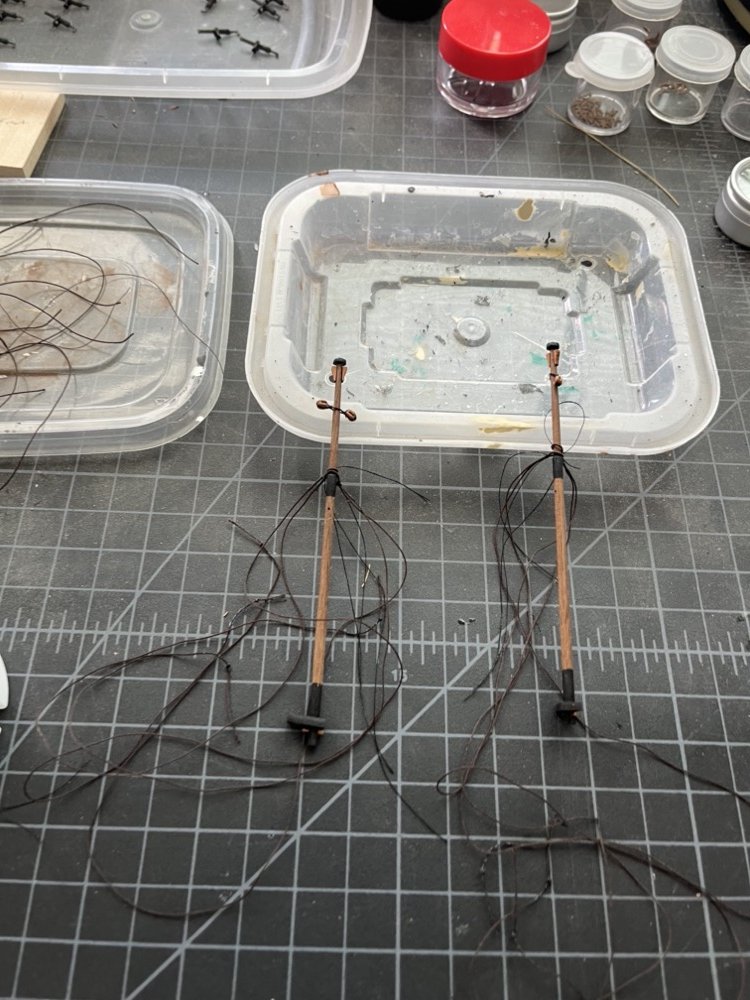
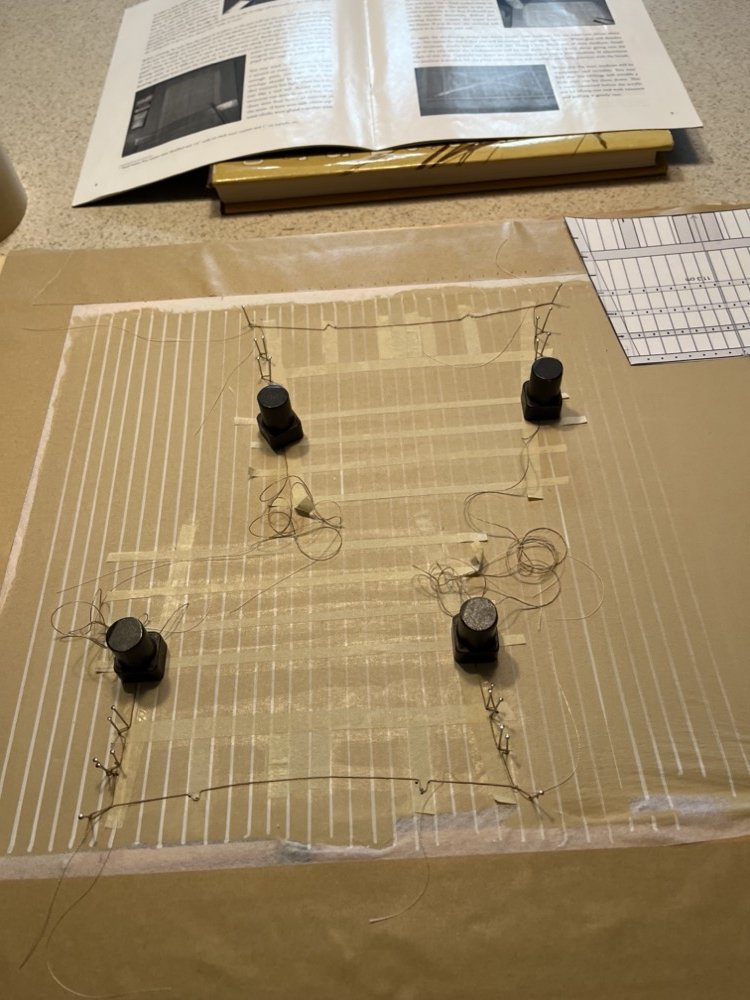
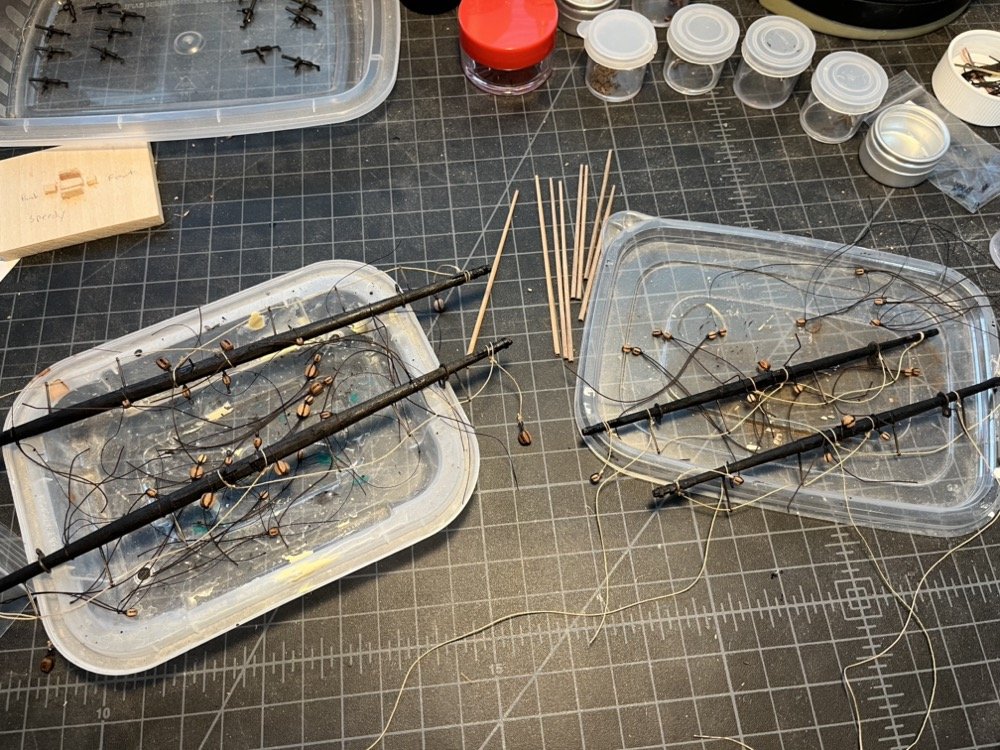
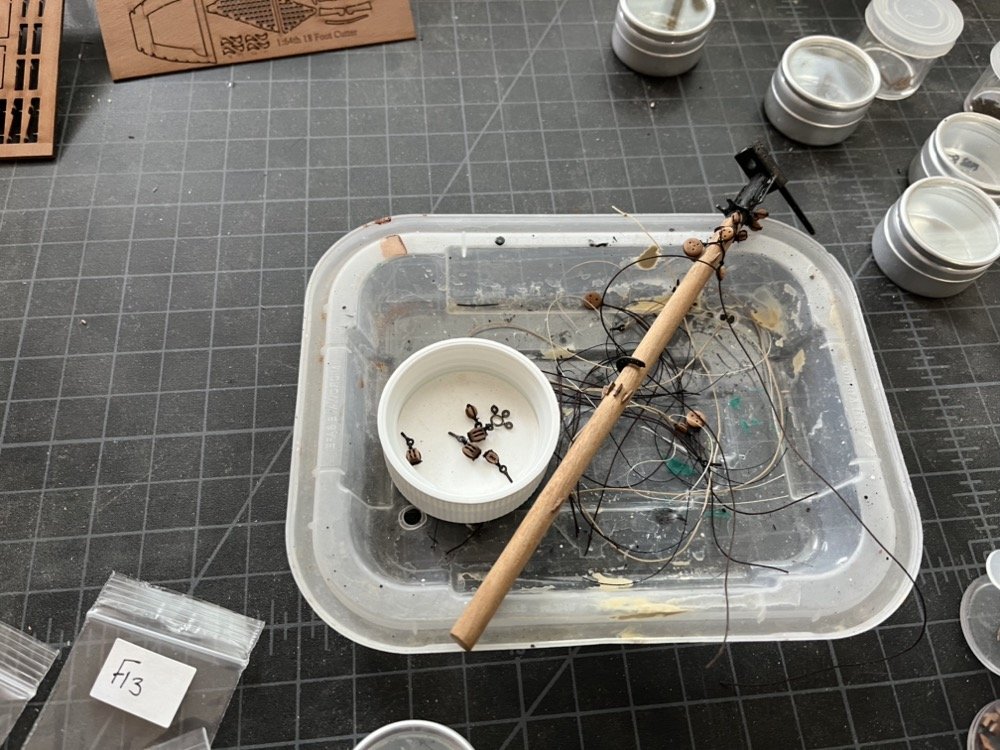
 I have all the yards installed now with the parrels and yard ties. I am also finishing up the back stays and flying back stays, so I am preparing for the stays and preventer stays. I wanted more realistic looking mice than the supplied beads, so I chucked a piece of pear wood in the lathe and turned 4 large and 4 smaller mice. After I cut these off I stained them to darken them and reamed out the holes to fit the lines for the stays.
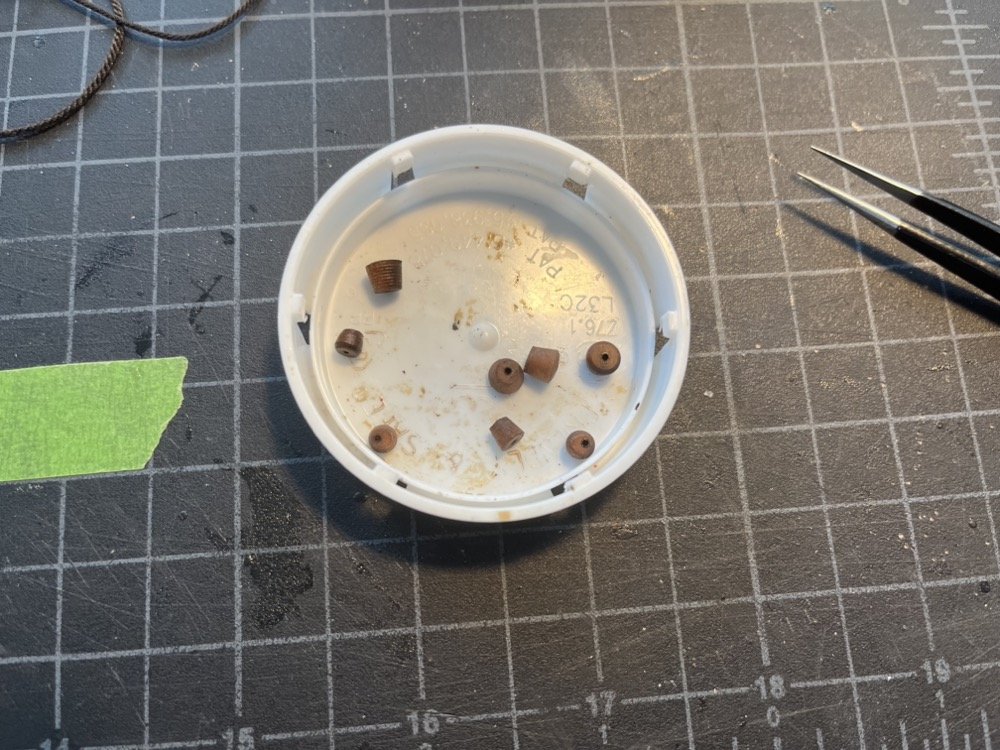
- 144 replies
-
- 5
-

-
- HMS Speedy
- Vanguard Models
- (and 1 more)
-
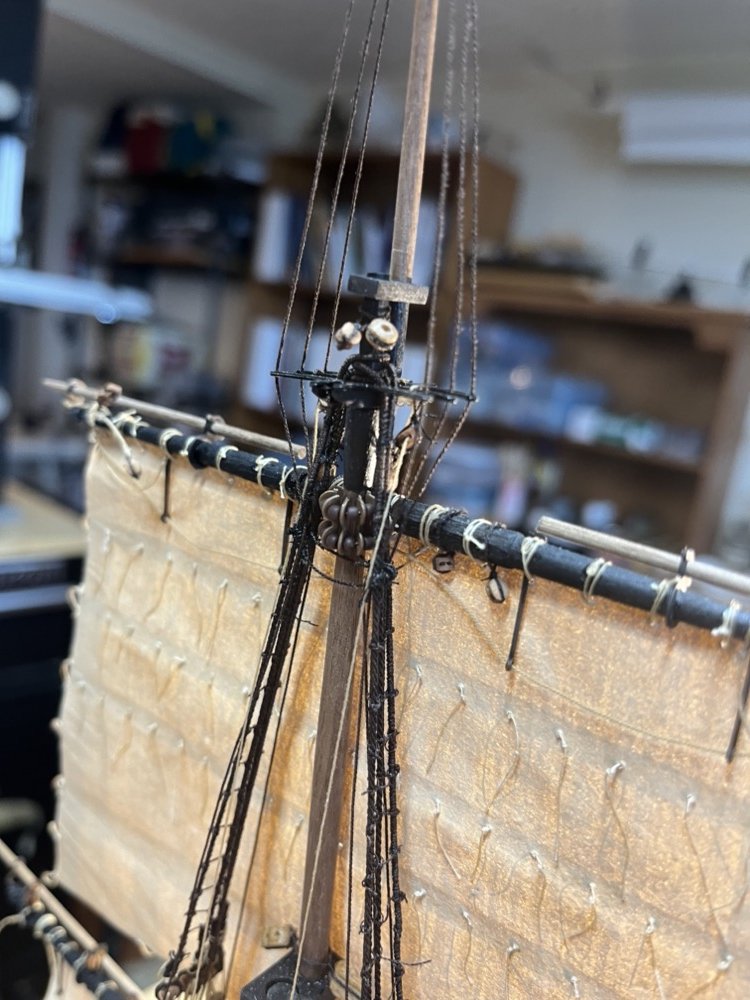
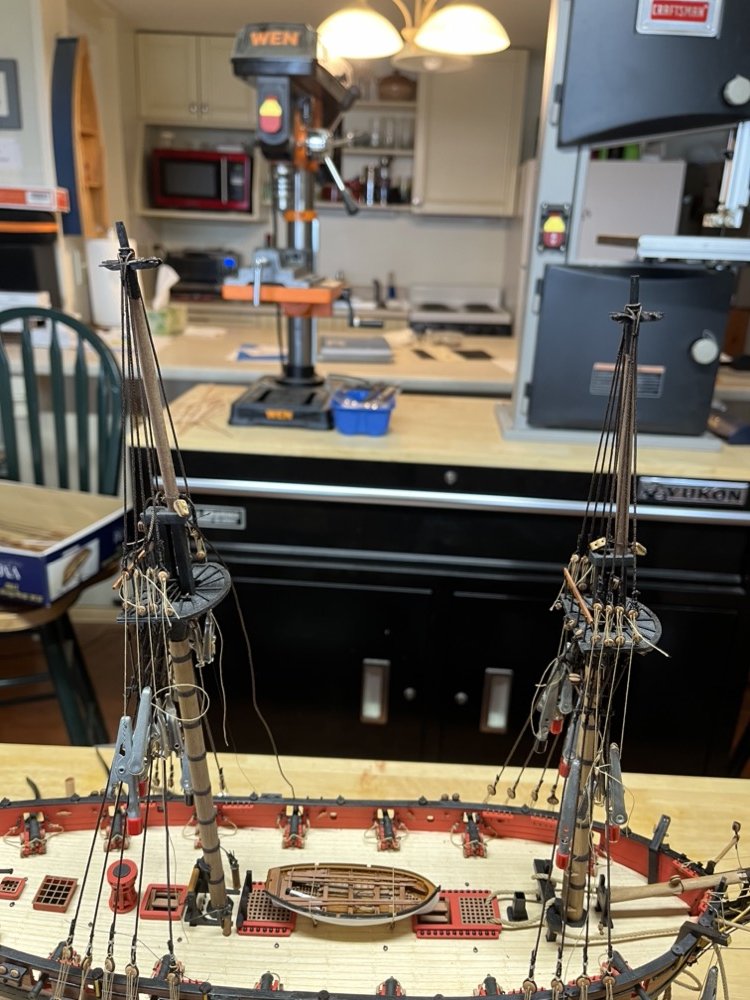
Thanks Tom. I have to add some running rigging now when adding the yards, but I still have a lot of standing rigging to add. After securing the main and fore yards to the masts using the trusses and the ties, I added the main yard and topsail yards next. I also had to fix some things that I wasn't happy with as well as fix some mistakes, like forgetting to add the blocks that hang from the upper crosstrees before I added the topG shrouds. I had them all ready to go so I only had to slip them on before threading the shrouds, but now I had to strop them in place instead. Not too hard to do but just annoying. I have added the parrels and parrel beads to the main and fore topsail yards and I didn't even drop any of the pieces during installation, which is a first for me. You can see the how I added the line to one side of the yard, threaded everything, and then wrapped the whole assembly around the masts and tied them to the other side. You can also see the ties that hold these yards up. I haven't added the tackle lies to these next but will wait until later when they won't get in the way of the other rigging. I pinned the lower and topsail yards to those masts which helped keep them in place during their rigging. I have now also added the topG yards which have a tie line that goes through a hole in the topG masts. I did not pin these to the masts because they are pretty thin and I didn't want to compromise them with another hole. The parrel beads are hanging from one side of the yards and ready to be threaded around the topG masts. I may wait to add the gaff and driver boom until later so I can reach into the center of the deck easier, so I may add the backstays next.
- 144 replies
-
- 12
-
-

-
- HMS Speedy
- Vanguard Models
- (and 1 more)
-
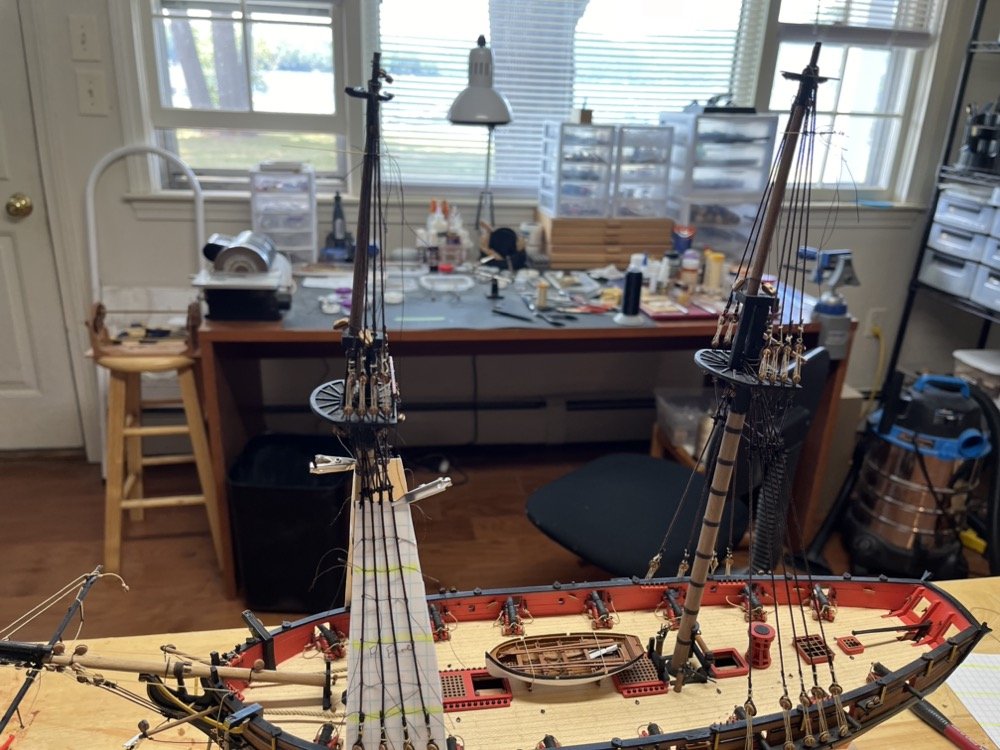
I threaded the topG shrouds through the crosstrees after reaming the holes in the crosstrees so the line would fit. I then tied them off on the topmast deadeyes and trimmed the excess line. The instructions now have you add the yards then the backstays and mast stays. Since I have bent the sails to the yards I am going to have to work around them as I add the rest of the rigging.
- 144 replies
-
- 10
-
-
- HMS Speedy
- Vanguard Models
- (and 1 more)
-
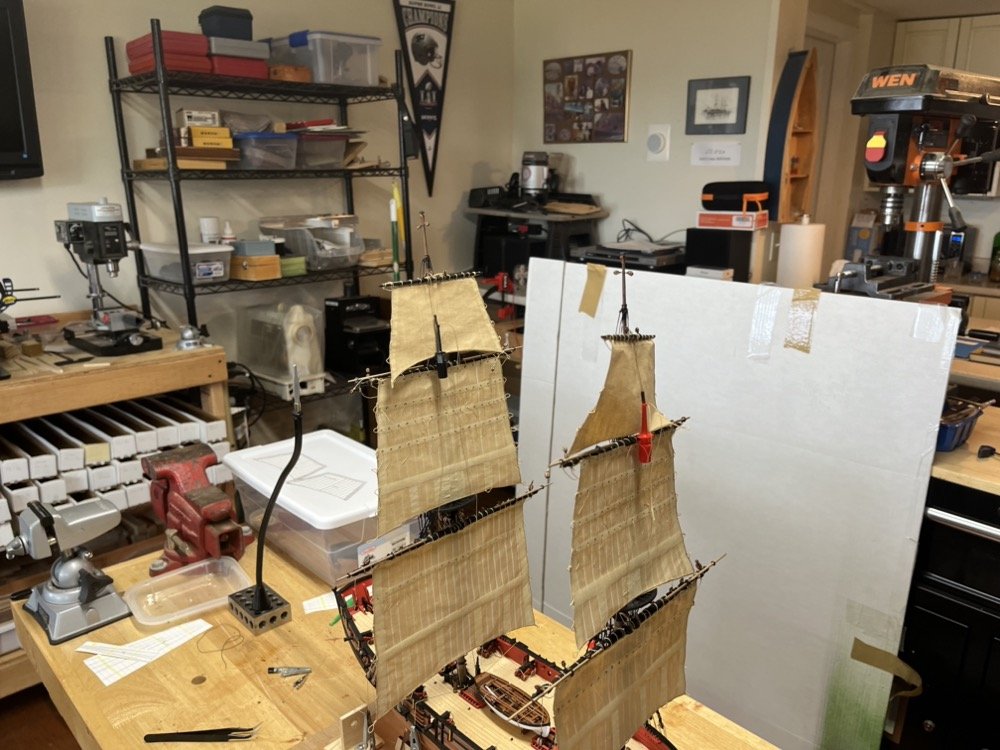
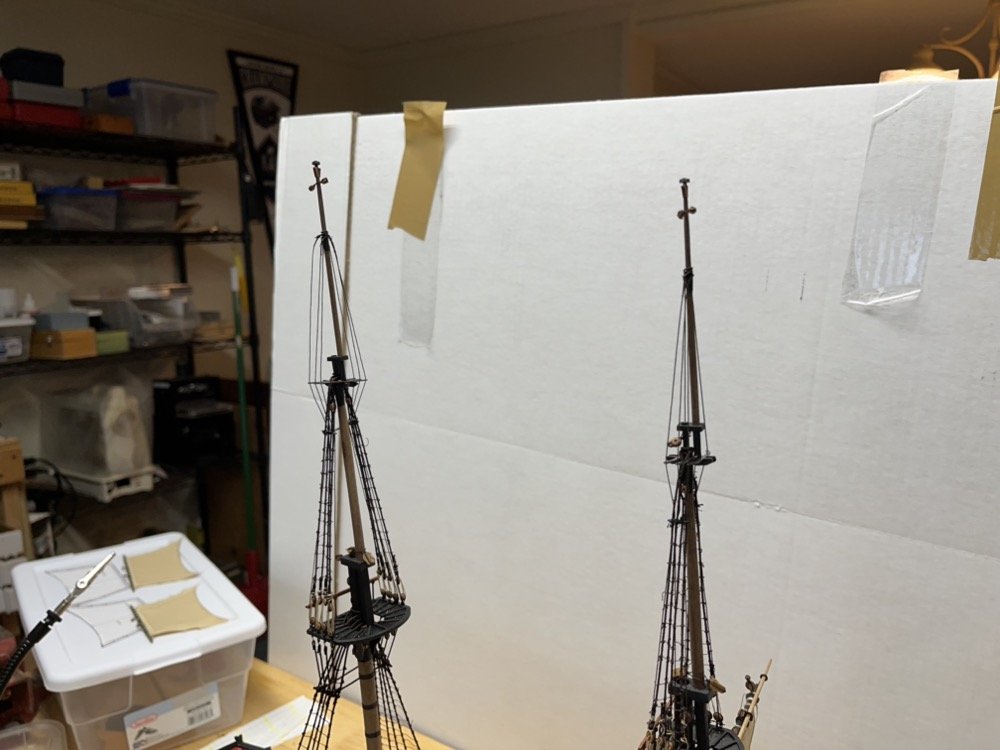
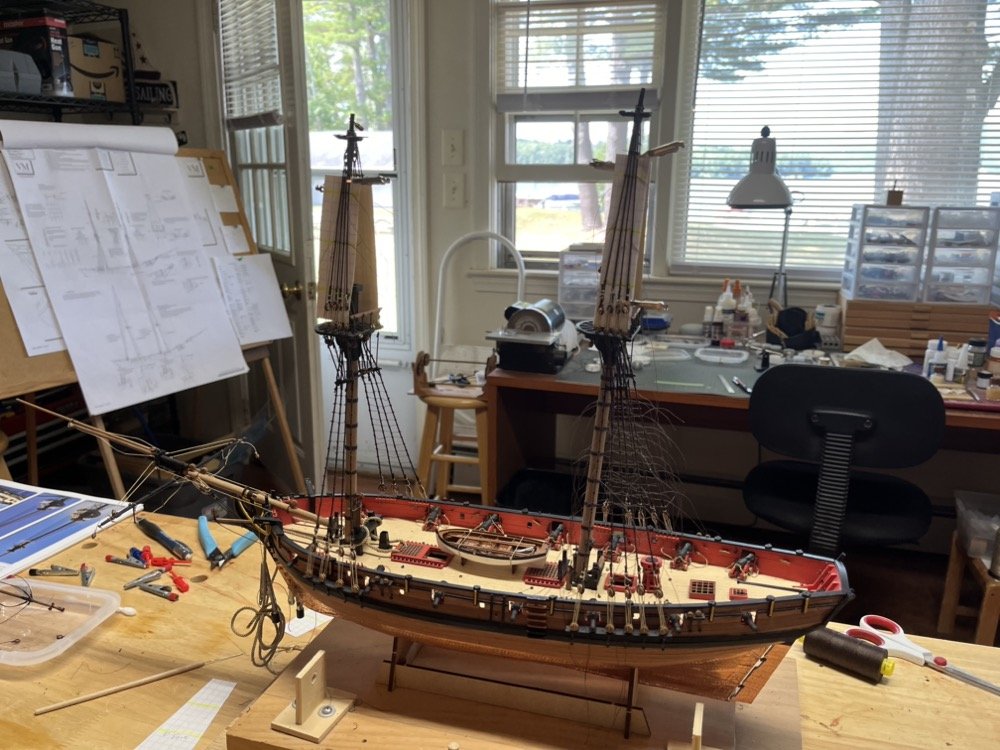
I found a better background for these rigging photos so hopefully it will be easier to see the progress. I finished adding the topmast ratlines and trimmed all the excess lines. I had already added the topG shrouds to the topG masts, so I glued the masts in place and will run the shrouds through the crosstrees when it dries. I also trimmed the topmast futtock staves and painted them black.
- 144 replies
-
- 8
-
-
- HMS Speedy
- Vanguard Models
- (and 1 more)
-
I have finished adding the ratlines to the lower shrouds, except for trimming the excess line from the main shroud ratlines, and I have started adding the ratlines to the topmast shrouds.
- 144 replies
-
- 10
-
-
- HMS Speedy
- Vanguard Models
- (and 1 more)
-
Thanks Tom. I have bent all the sails to the yards so they would be a hindrance for me, but if you have no sails you should be fine.
- 144 replies
-
- 1
-

-
- HMS Speedy
- Vanguard Models
- (and 1 more)
-
I had added the topmast futtock staves and the catharpins, then tried seizing the small single blocks between the first two shrouds on each side. I had served a piece of .5mm brass rod for the staves. I was having all kinds of problems getting those blocks in because I did not leave enough room above the staves, and the seizings on the served rod just looked a mess. So, I removed all that and started again. This time I first seized all the blocks to the shrouds, and now I am adding the staves and the catharpins. I am using unserved brass rod for the staves with less loops on the seizings. So far it is going and looking much better. While waiting for things to dry I have started adding the ratlines to the lower shrouds. I also served lines for the topG shrouds and am adding them to the topG masts off the model. I had to ream out the holes in the topG crosstrees to make sure the shrouds will fit in the holes when I install these masts.
- 144 replies
-
- 7
-
-
- HMS Speedy
- Vanguard Models
- (and 1 more)
-
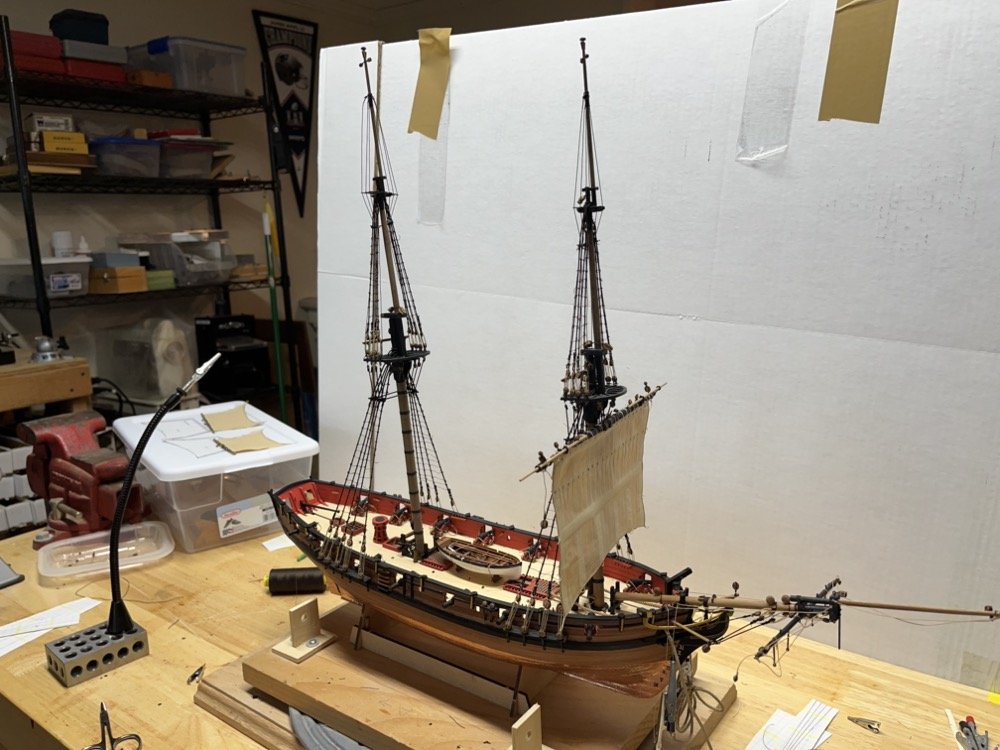
Just a quick update. I have been working on adding the topmasts and topmast shrouds. I need to tie off the lanyards and add the futtock staves. There are also blocks tied into the first two topmast shrouds on each side.
- 144 replies
-
- 7
-
-
- HMS Speedy
- Vanguard Models
- (and 1 more)
-
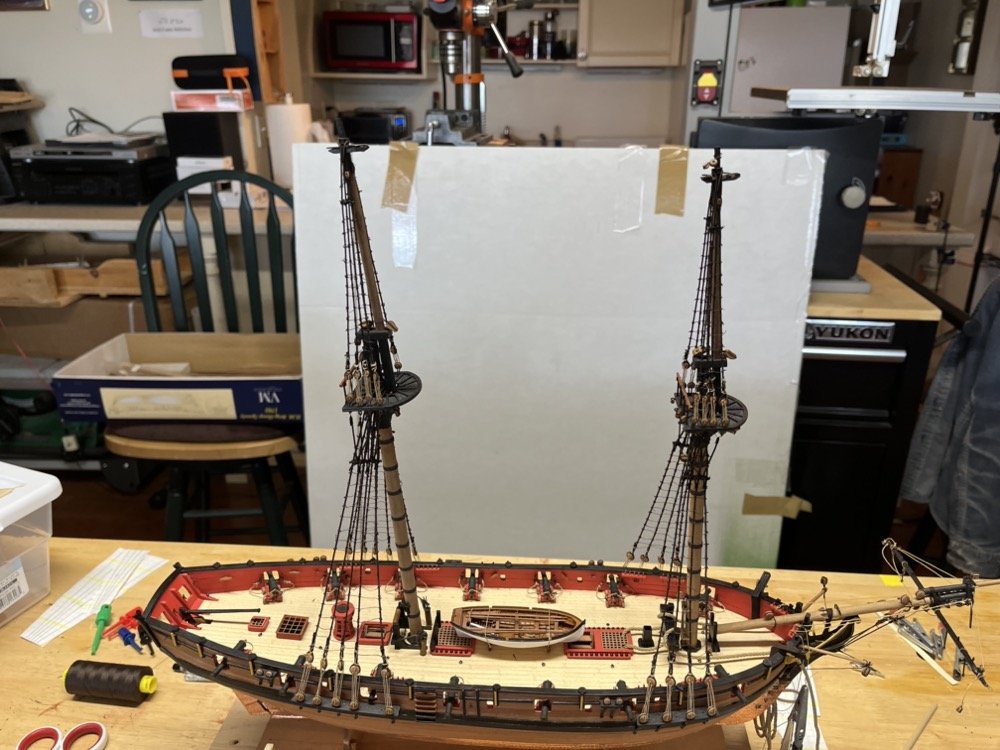
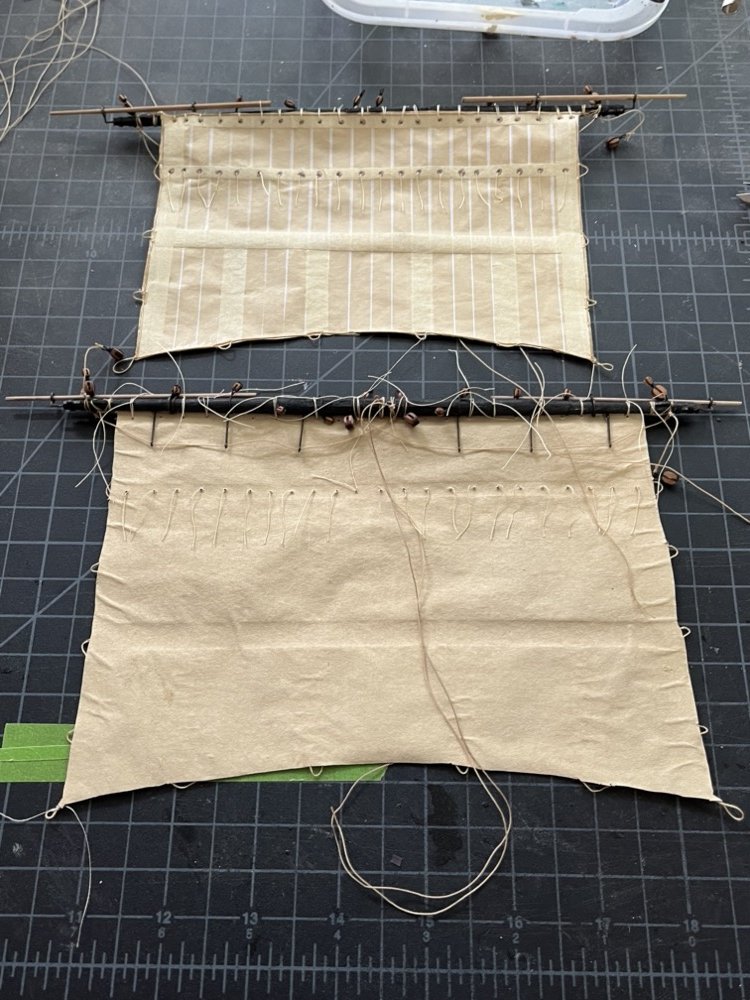
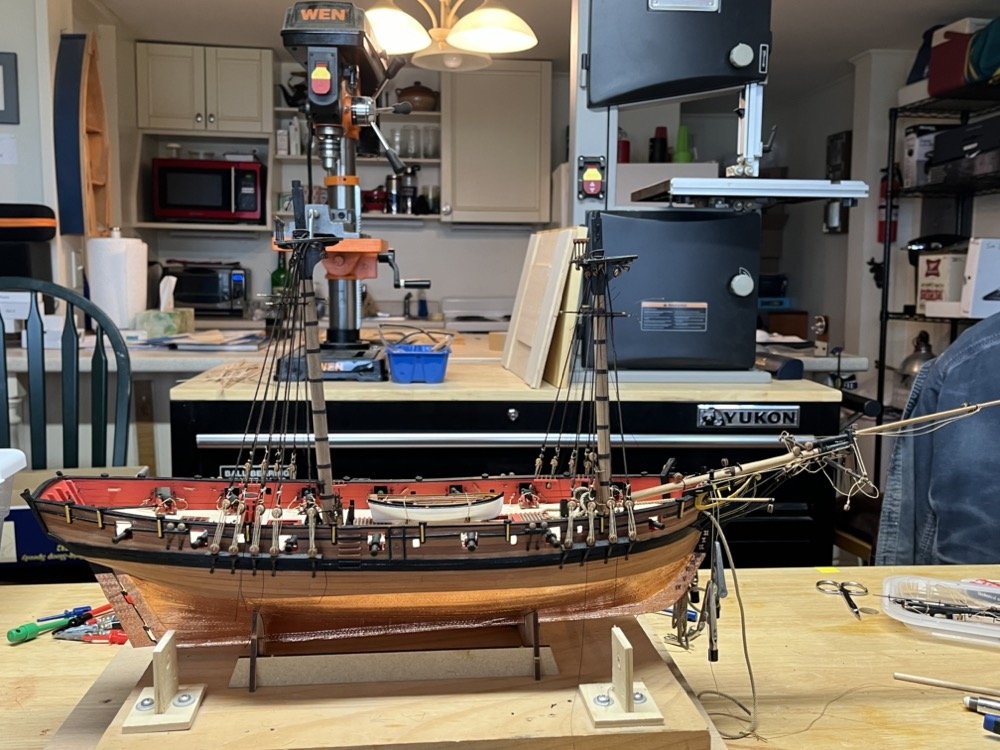
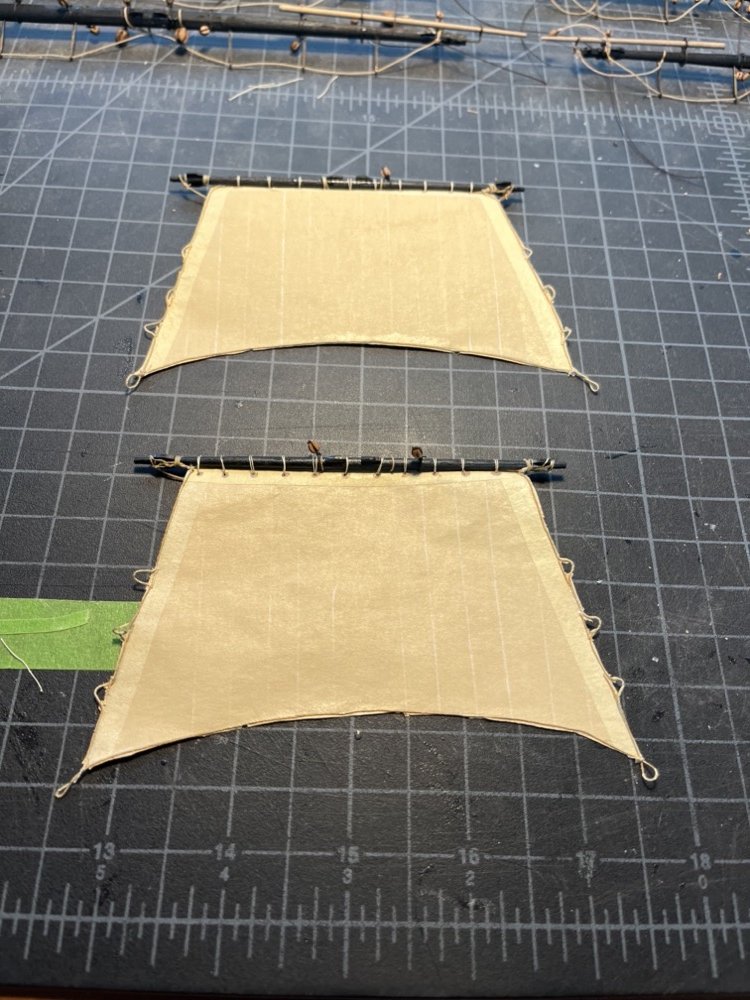
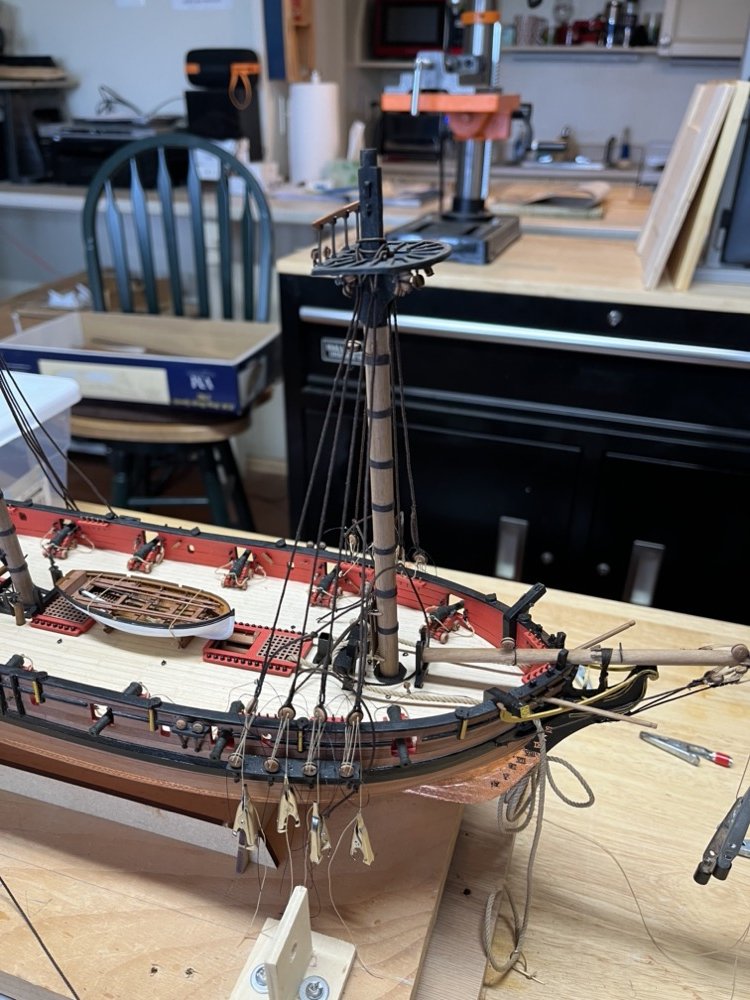
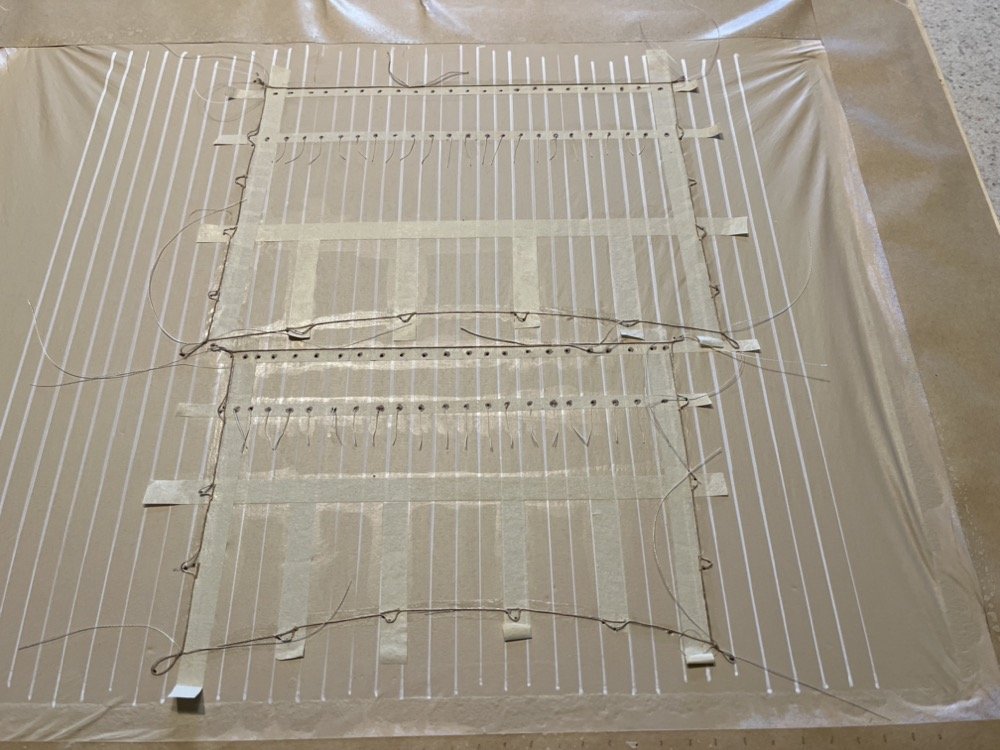
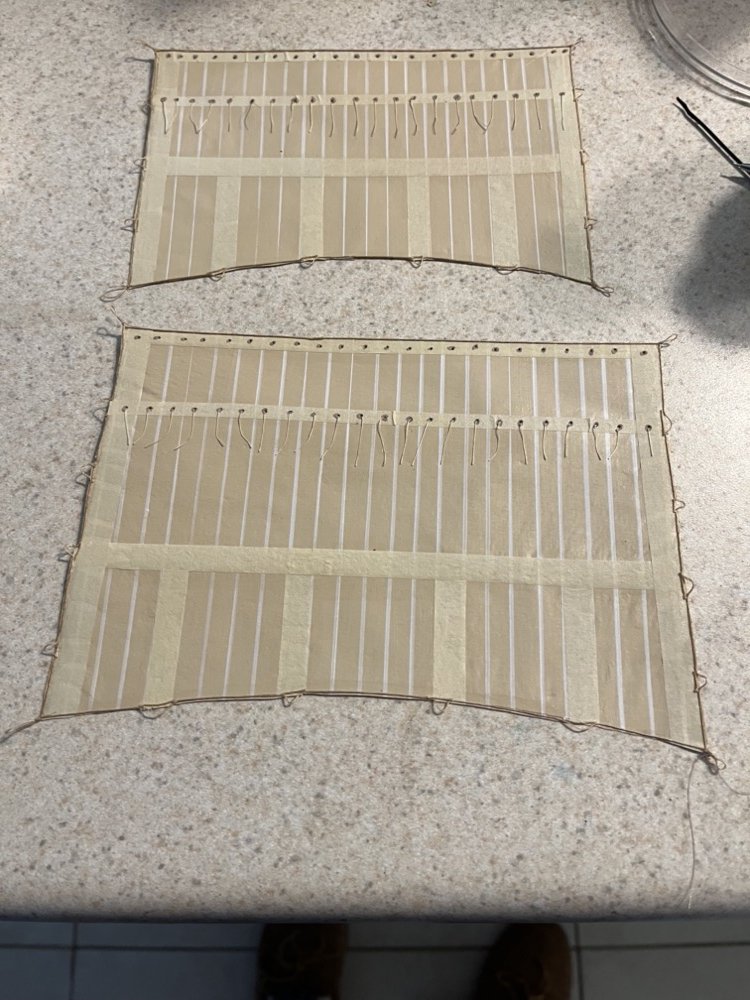
After a short trip to New Orleans and some beautiful summer weather here in New England, work on Speedy continues a few hours each day. So as of today I have finished adding and trimming all three rows of reef points to the two topsails, with only a few that need some additional attention. These are ready to be cut out from the panel. I have also bent the fore course to the fore yard and I am in the process of bending the main course to the main yard. I have added the fore and main shrouds to both masts, adjusted their lengths and tied the lashings off. I am in the process of adding the futtock staves to them, using served brass rod. The bumpkins have also been rigged . Here is how the model currently looks. Have a nice weekend.


- 144 replies
-
- 13
-
-
-
- HMS Speedy
- Vanguard Models
- (and 1 more)
-
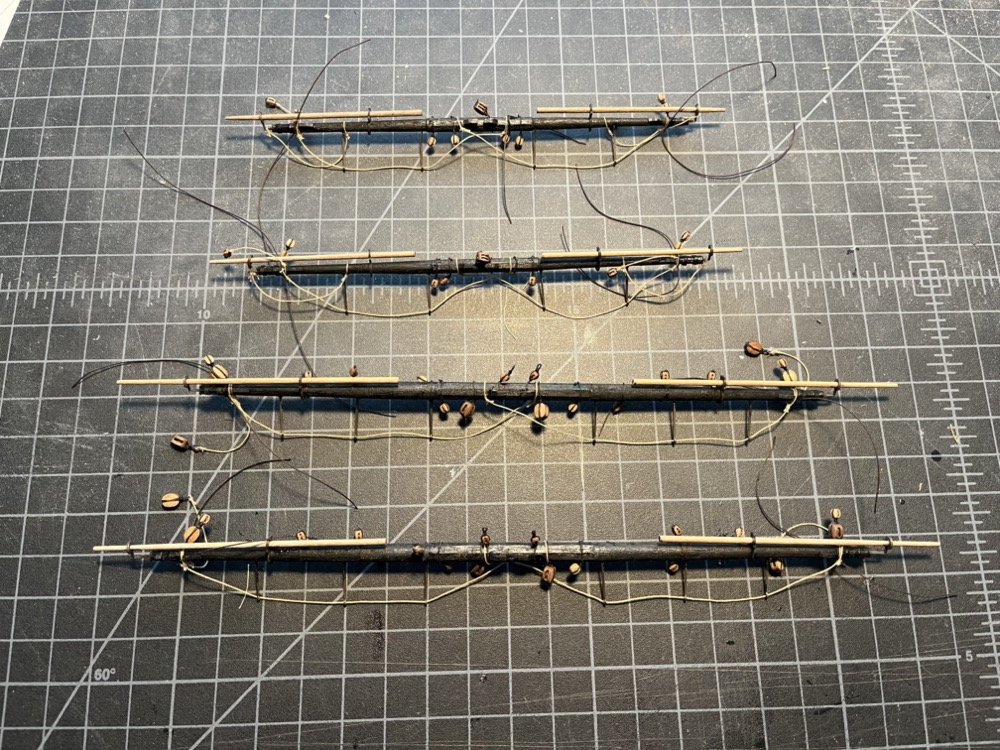
I was able to get a lot done this week. Firstly I finished added the bolt ropes and grommets to the topsails so I can now add the reef points to finish them up. I also finished bending the topG sails to the topG yards. The topsail and lower yards are now completed, with all the blocks, man ropes and studding sail booms installed. I added the spritsail yard and rigging to the bowsprit. And have the fore shrouds seized to length and the lanyards threaded. I am in the process of adding the rigging to the boomkins, finishing up the fore shrouds, and starting to rig the main shrouds.

- 144 replies
-
- 9
-
-
- HMS Speedy
- Vanguard Models
- (and 1 more)
-
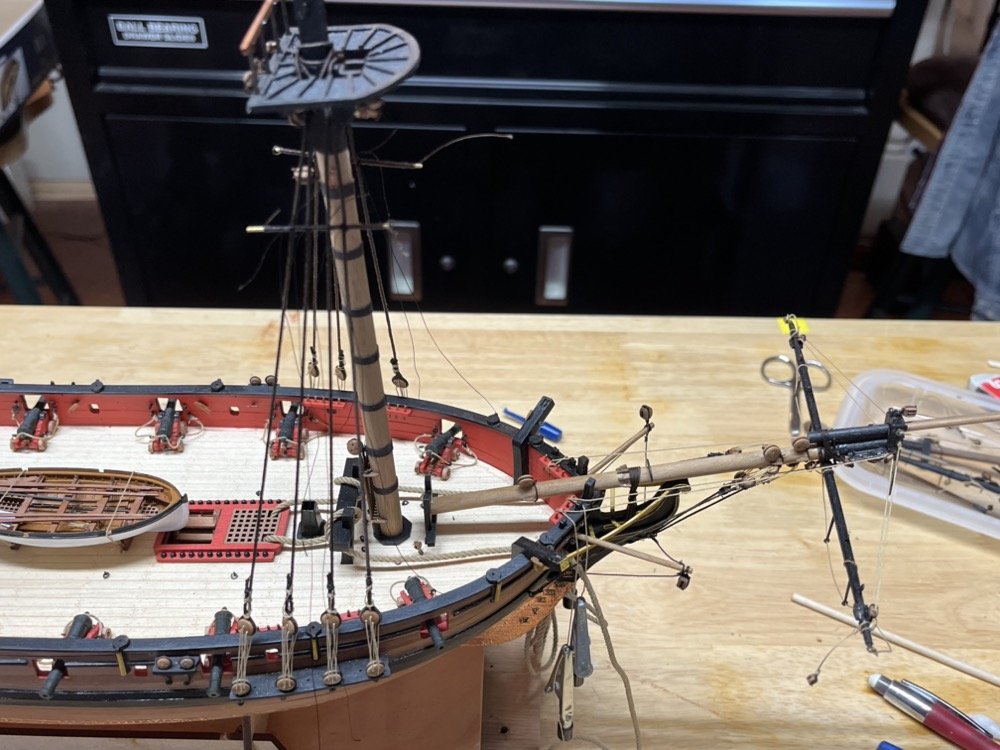
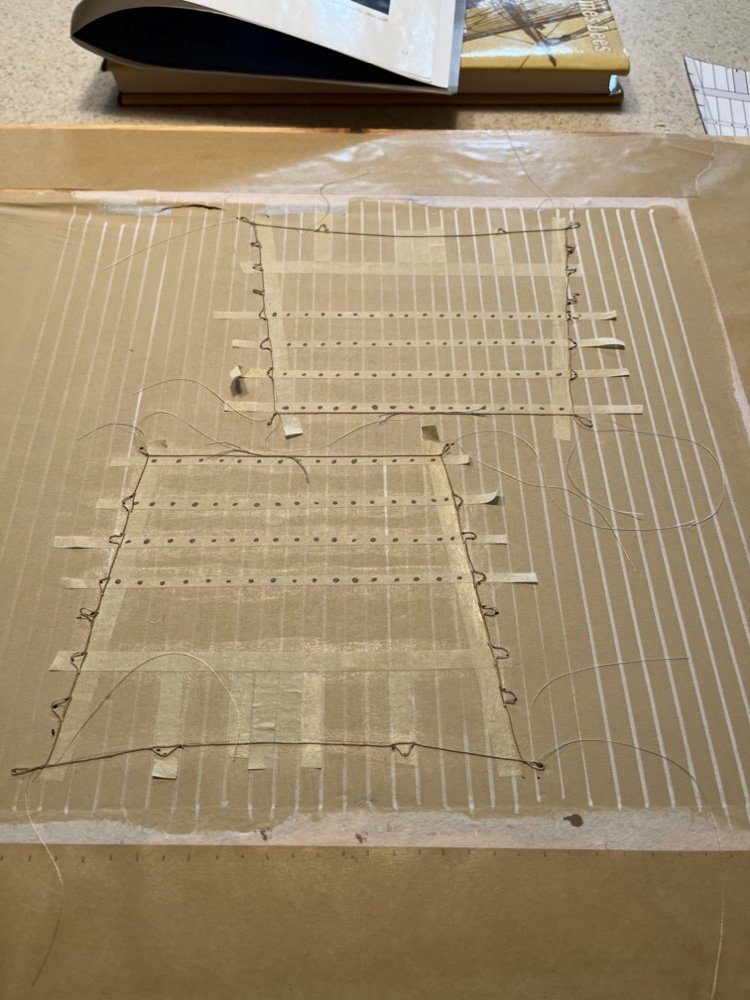
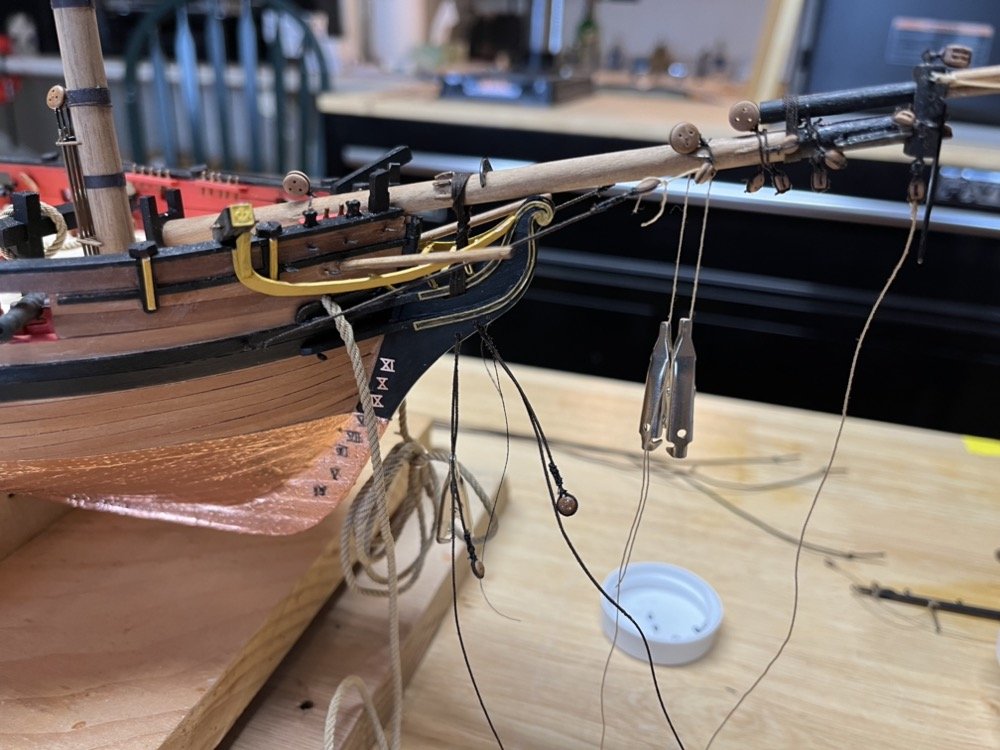
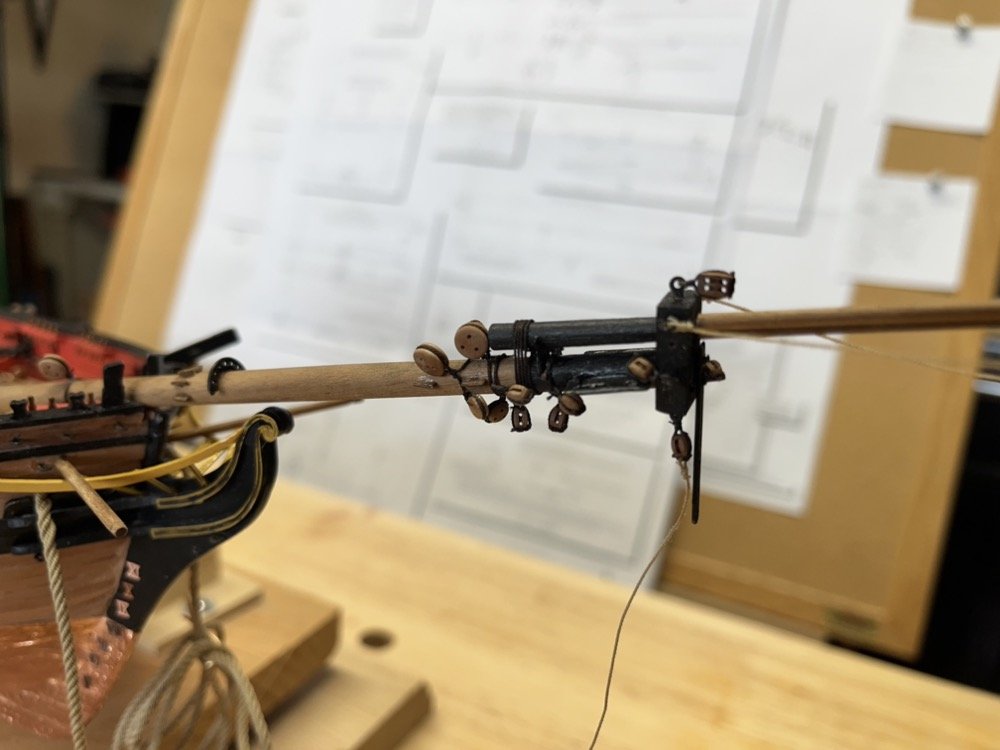
I have a good start on the last two sails which are the topsails. I am currently working on adding the bolt rope. I don't know why I didn't think of this for the previous sails but for these I started adding the bolt ropes from the middle of the bottom of the sail so I could work on both sides up to the top of the sail. This will speed up this process by half. These sails have three rows of reef points so they will take a while to add. I am still adding blocks and man ropes to the topsail yards and lower yards, although they are almost done. The studding sail booms will be added after all the blocks are on. I have put the bowsprit in place and added the gammoning. I am in the process of adding the bob stays and bowsprit stays. I have the bob stays temporarily tied to the deadeyes on the bowsprit so I can get them all even. I have the lower shrouds for the fore and main masts served and ready so I will be adding them soon too. I will also be tying the topG sails to the completed topG yards to get that process started.
- 144 replies
-
- 6
-
-
- HMS Speedy
- Vanguard Models
- (and 1 more)
-
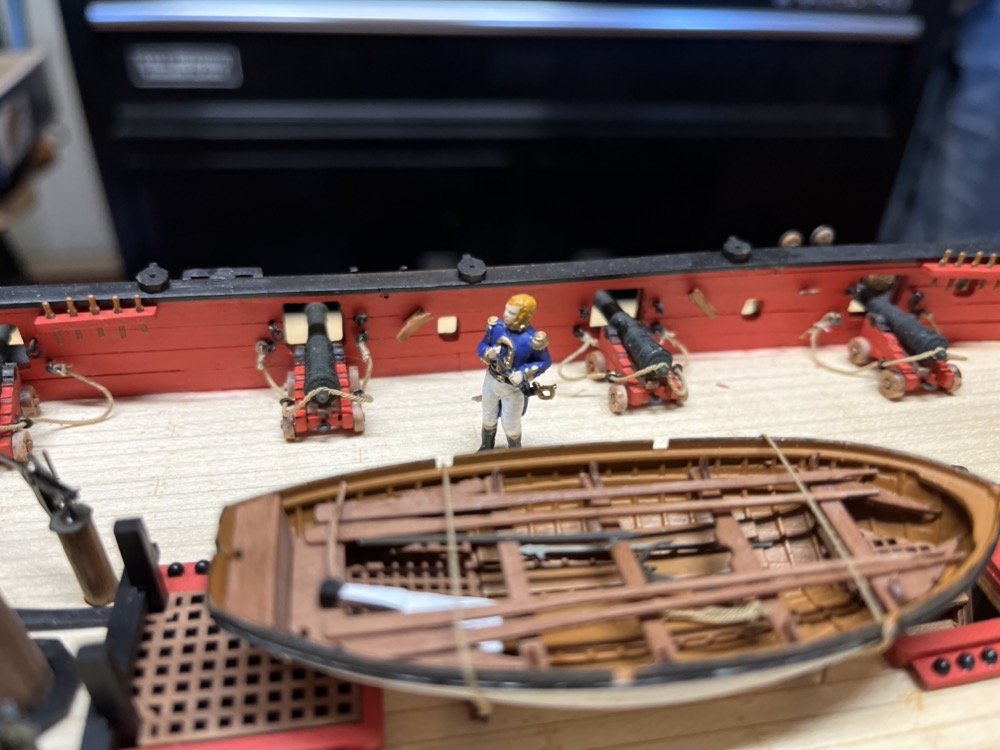
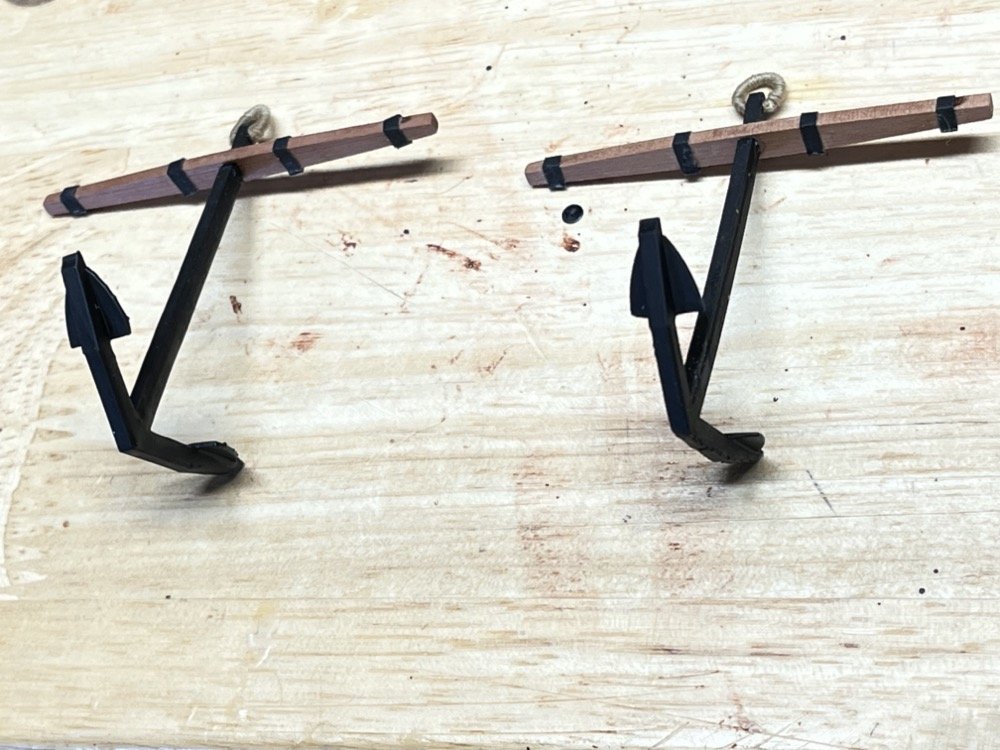
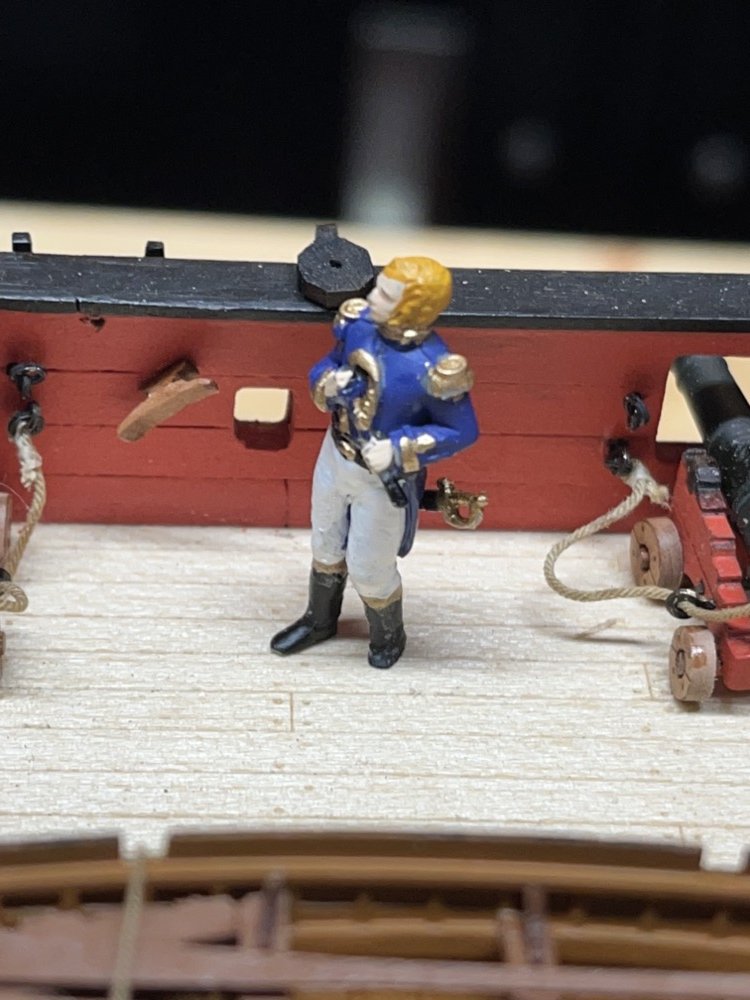
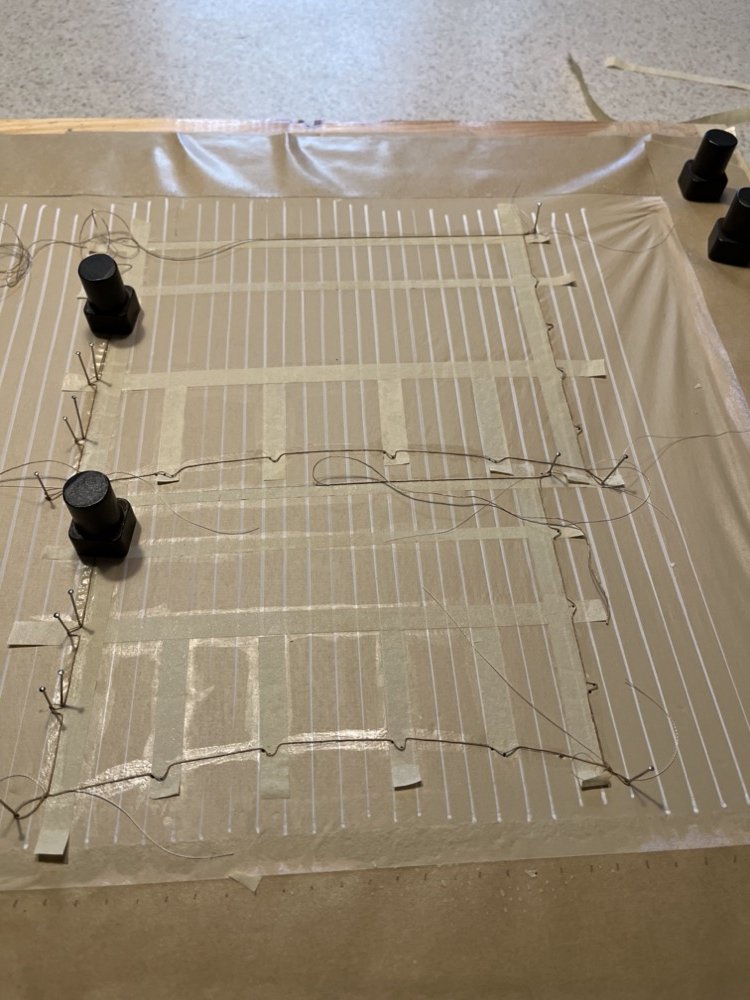
Thanks Tom and Mugje and the likes. More progress to show. I finished making the fore and main courses, then carefully cut them off the frame. The topsails will be next to be made. I painted the Captain Cochraine figure, although I have never painted anything like this before. I think it came out respectable. I used a disc sander to remove most of the base, then an X-Acto knife to cut the rest away from around the boots. Here he is just placed on the deck temporarily, wondering when the rigging will get done. He has been put away until much later. I gave him yellow hair as a nod to Captain Aubrey. Finally I have competed the anchors. I made all four but have decided to only put two on the ship. I picked the two best then wrapped line around the rings (puddened?). These have also been put away until later. Work continues on the yards. I have the PE parts installed on all of them and am in the process of painted them black. I will then add the blocks and man ropes to them. I have also been making rope in preparation for rigging the shrouds and backstays. It is all starting to come together now.
- 144 replies
-
- 11
-
-
- HMS Speedy
- Vanguard Models
- (and 1 more)
-
Thanks Tom. I have a mill attachment for the lathe but I don't have a good way to hold and rotate the dowels when using the mill. I have a rotary table but it does not have a hole through the center so can only hold the dowel on the very end, which is nowhere near secure enough. I am a little worried about the fences on the tops but I wasn't sure how hard it would be to add them later. Hopefully I won't break them off too many times. Just a quick update on the cutter. I drilled the holes in the deck and slid the pins under the supports in place. I added the oars, rudder, boat hooks, and grapple to the inside of the cutter too. I am not sure how well that ladder works with the cutter in the way. Onto the anchors and upper yards.

- 144 replies
-
- 7
-
-
- HMS Speedy
- Vanguard Models
- (and 1 more)
-
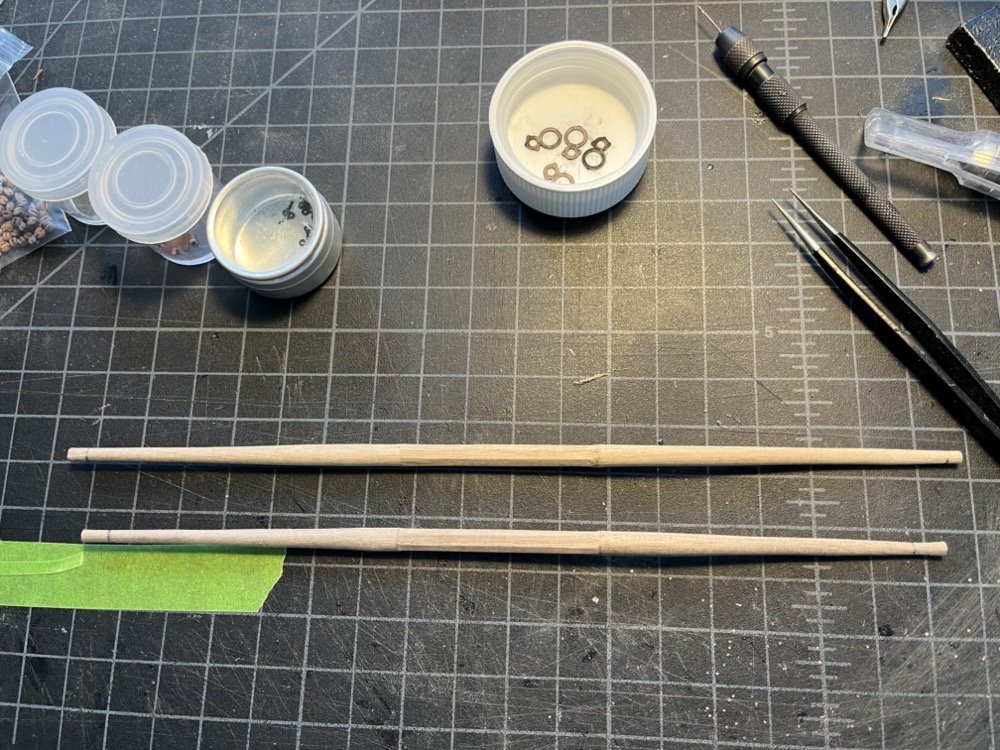
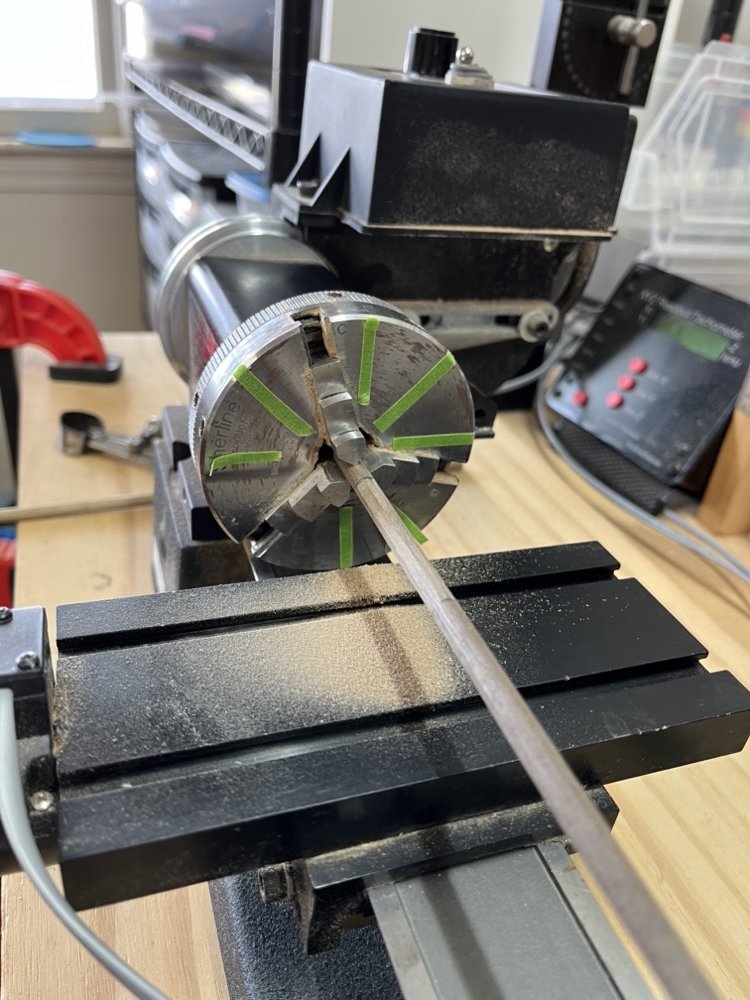
I don't find this stage hard, in fact this is what I really like - adding the small details, making the masts and yards, and all the rigging. I also like being able to work on many parts at the same time. As you will see I don't put the whole mast together before adding them to the model. I like to add them in sections (lower masts, topmasts, topG...), rig those sections, then add the next one. Then I add the yards starting with the lower yards and working my way up. I do add the whole bowsprit at one time though, as it is harder to add it in sections. Anyway things are progressing nicely. Let's start with the cutter. I added the wooden interior pieces and gave them a coat of wipe on poly. I also rounded off the oars and painted the rudder, blackened the grapple and boat hooks that came with the kit, and glued and tied the cutter to the chokes. I did all this off the model so I still need to drill the holes in the deck and place this assembly to the deck, but I will wait a bit to permanently install it. All of the mast sections are completed but only the lower masts are installed. The bowsprit is also completed and is ready to start rigging. I have started working on the yards at this time too. I started with the lower yards. These have an octagon section in the center but they are made from wooden dowels. I know how I would do this if I started with a square section of wood, but this is the solution I came up with for the dowels. I marked off 45 degree angles on the 3 jaw chuck for my lathe, then used them to index the dowel as I filed the top of the dowel in each position. This worked out really well. When I had the octagons done I then rotated the dowels in the lathe to shape them. The sails are almost done. I am in the process of adding the reef points, which is the last step before cutting them out. I'll have photos of the competed sails when I cut them out.


- 144 replies
-
- 6
-
-
- HMS Speedy
- Vanguard Models
- (and 1 more)
-
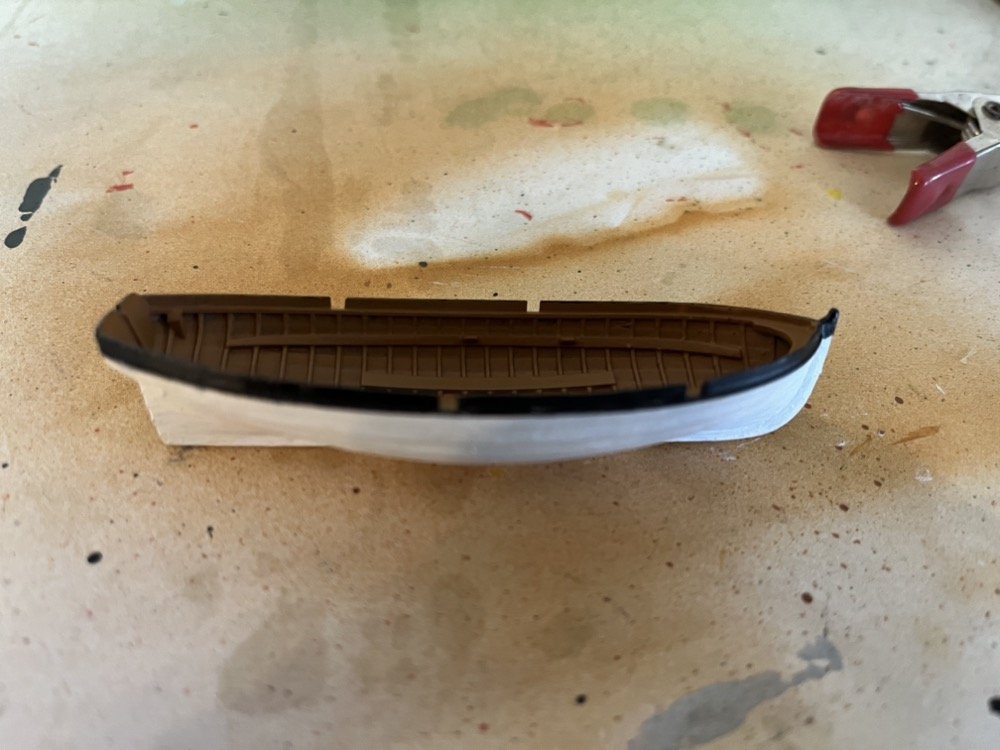
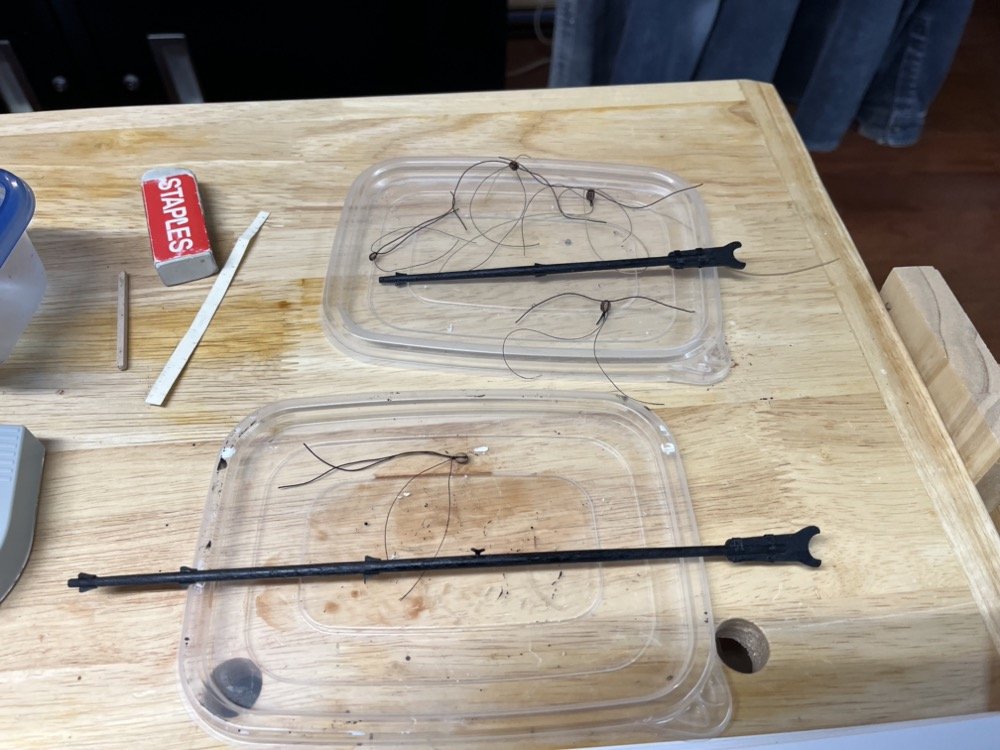
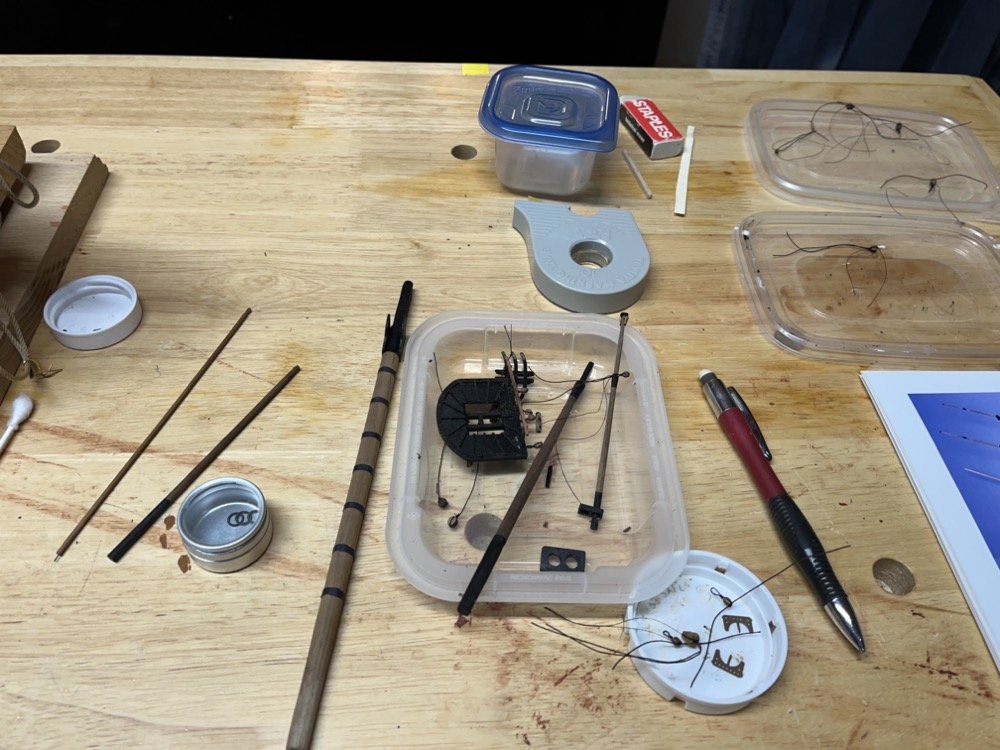
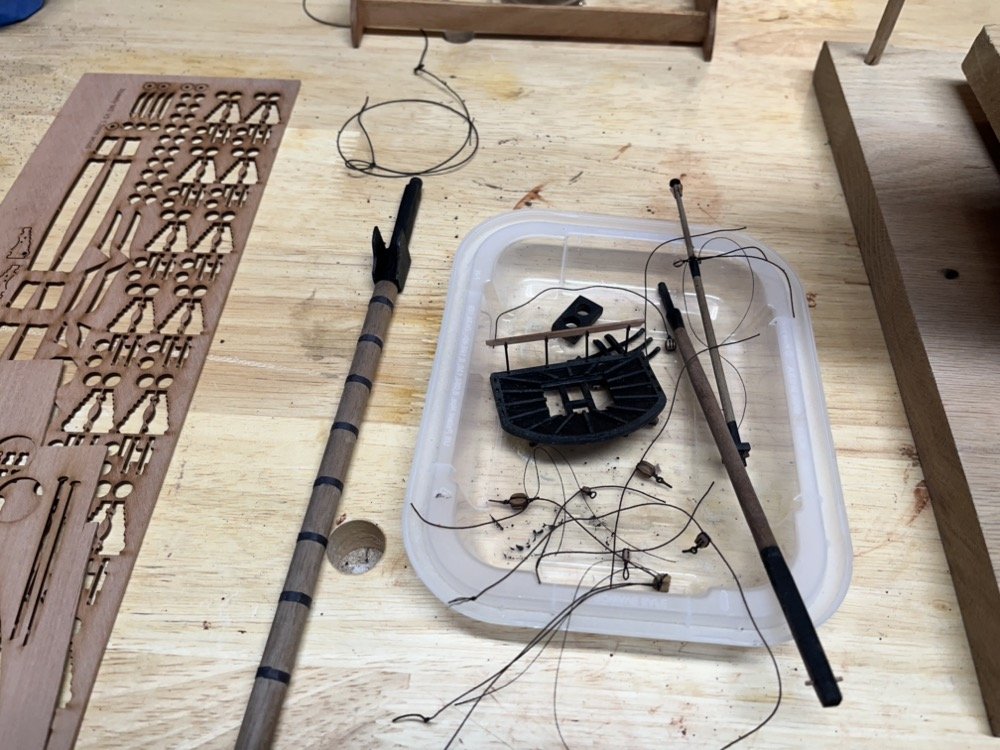
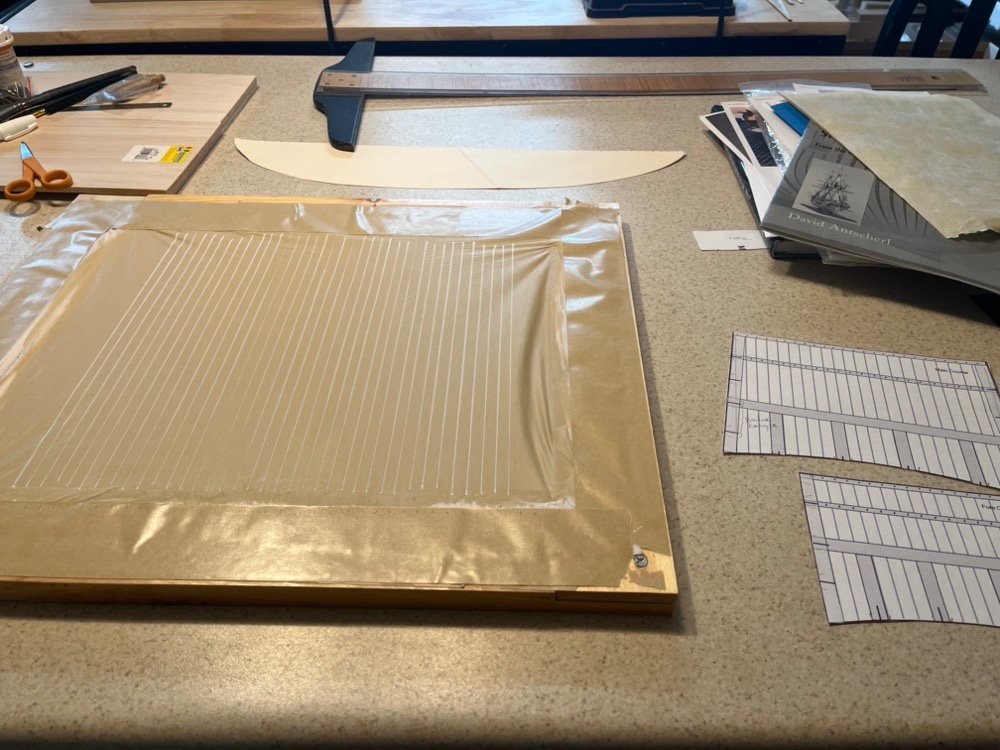
I have been making progress on many fronts but nothing completed yet. I wanted to provide a status of the build up to this point though. First the sails. I am in the process of adding the bolt rope to the fore and main courses, after adding the reinforcement pieces. I have been progressing from loop to loop on each sail so I can do about three loops a day because of the time for the matte medium to dry. Once the bolt rope is done I will be making the holes along the top of the sails and in the thin reinforcement strip for the reefing points. I have finished painting the 3D printed cutter. I used a bright white paint for the outside of the hull but gave it a wash of diluted unbleached white paint as a final coat. I painted the rub rail and the hull up to the gunwales black. I have started adding the interior wood pieces so I should have that finished up soon and lash it to the deck. The rest of the activity has been focused the bowsprit, masts, and booms, I have the sections made and finished, so I am adding the details and stropping and adding the blocks and deadeyes. Bowsprit: Booms: Main mast: Fore mast: Hopefully I'll have some completed items to report on soon.
- 144 replies
-
- 10
-
-
- HMS Speedy
- Vanguard Models
- (and 1 more)
-
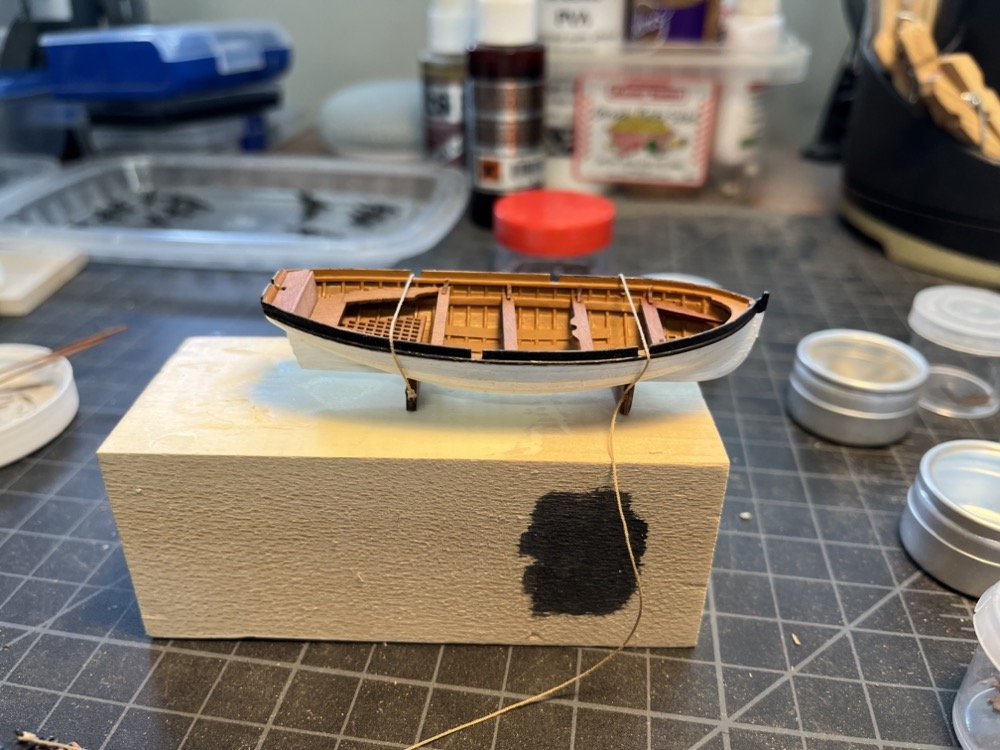
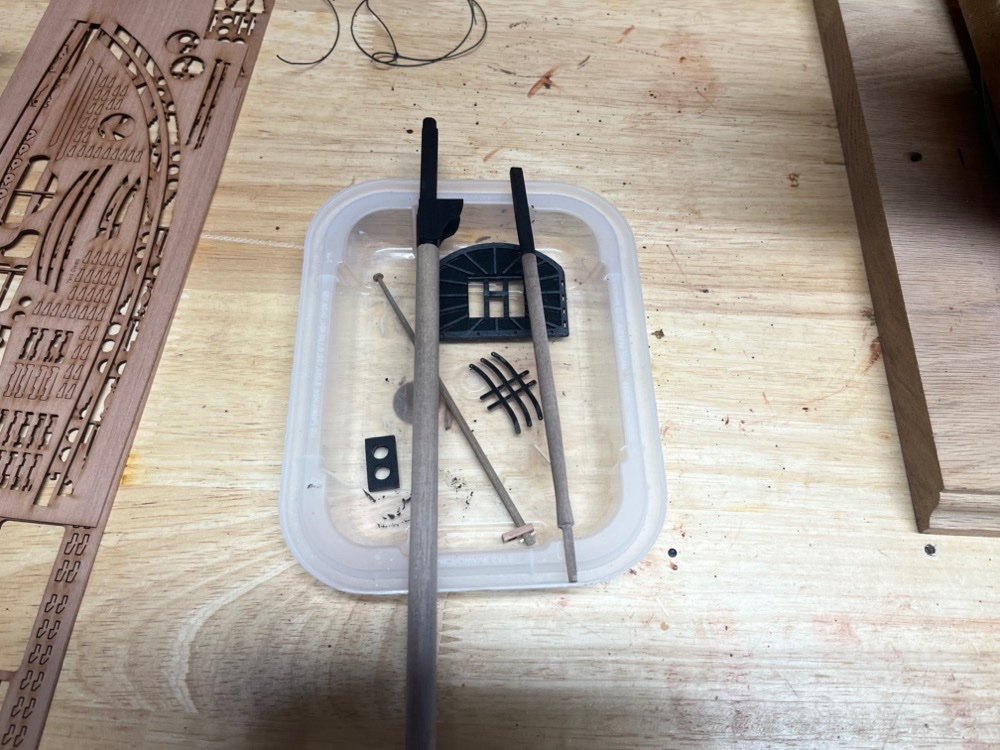
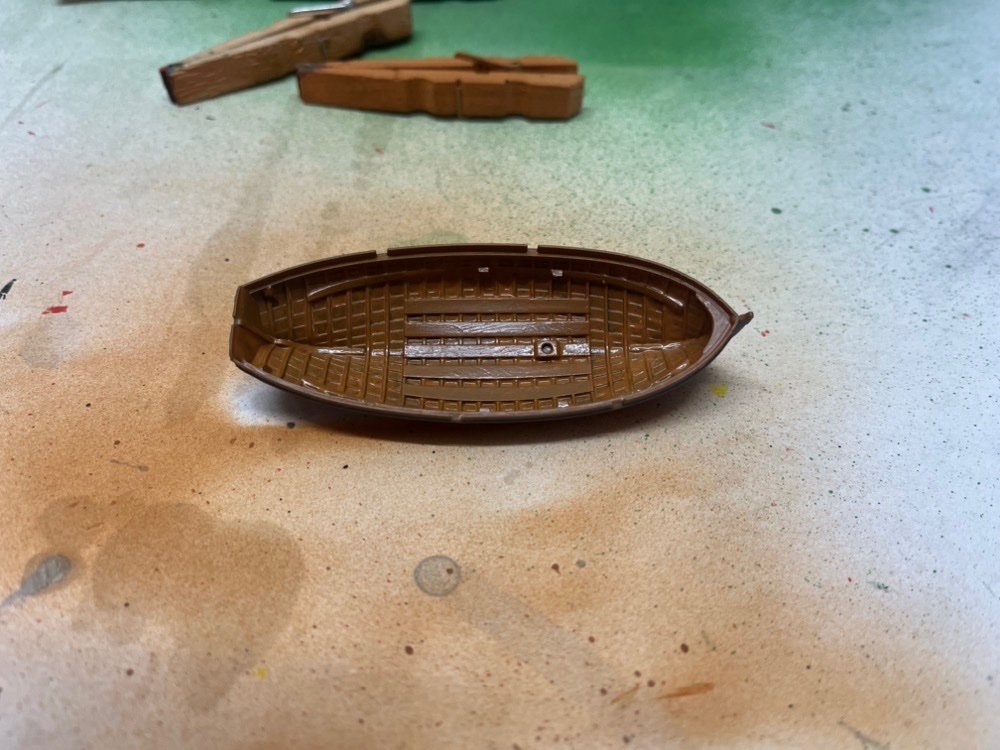
Yes I bought this kit about a year and half ago so it is the vintage kit. So for the cutter I decided to order a 3D printed version from Vanguard which arrived last week while we were away on vacation. It has a lot of detail. I am putting the cutter kit aside for now but will probably assemble it sometime in the future when I don't have so many other things to work on. The 3D printed hull needs to be painted so I started with the interior which is a brown wood color. The exterior will be off white with black trim. The paint was still wet when I took this picture so it looks shinier and darker than it is now. I have the two masts and the bow sprit pieces shaped and dry fit, so I painted the black sections before adding the details to them. I started with the bow sprit, adding the metal parts for the jib boom saddle, sieves, and fair lead. I have also activated the sail making again, now that I have the exact dimensions for the courses. I have the silk span ready to go and I think I can make both sails at the same time from this one piece.
- 144 replies
-
- 7
-
-
- HMS Speedy
- Vanguard Models
- (and 1 more)
-
I do have the sheet with those items Jeremy, but it does not include any planks. The instructions say to use the same planking as used on the hull.
-
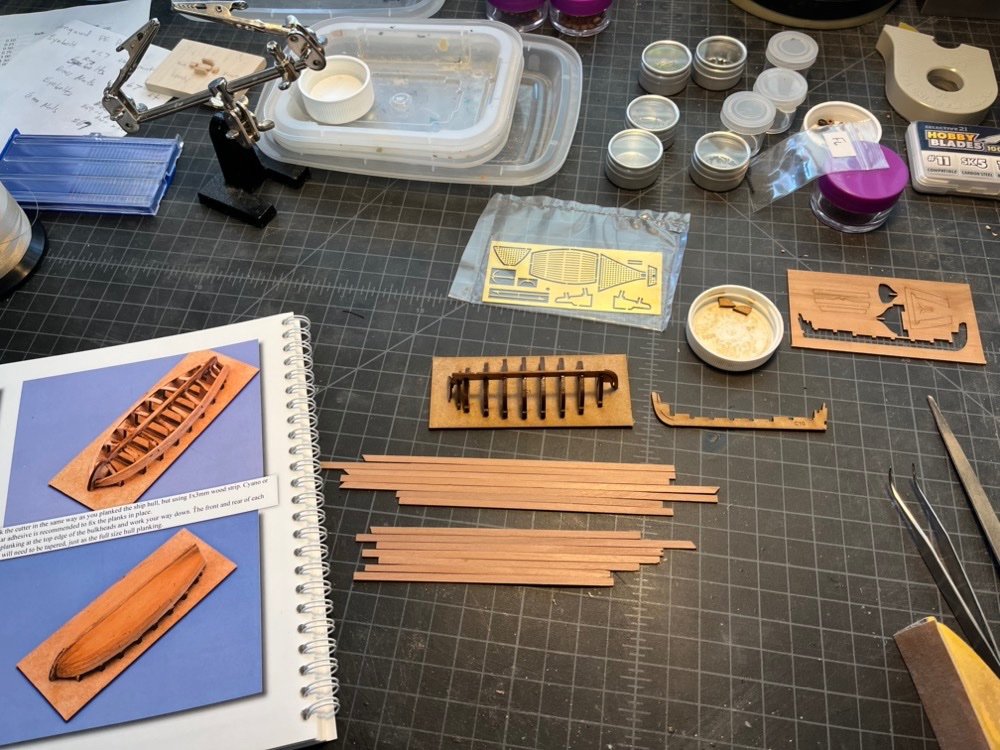
I have started building the cutter using the parts that came with the kit. My kit came with two keels pieces, one in MDF the same width as the frames and a thinner one in pear. I glued the frames to the thinner one but the slots are bigger than the keel, so I also used some thin CA with the wood glue to help hold the frames to the keel. The two transom pieces fit perfectly though as their slots were cut for the thinner keel. The instructions say to plank with 3mm wide strips, but my kit only came with 4mm pear strips for all planking. I have enough end cuts from planking the hull so I ripped these down to 3mm using the Byrnes saw. I have also shaped the two lower masts and one of the topmasts (they are both the same on this ship according to the plans). I started by shaping the square sections by hand using files, then used the lathe to shape the round sections. No pictures yet though.
- 144 replies
-
- 6
-
-
- HMS Speedy
- Vanguard Models
- (and 1 more)
-
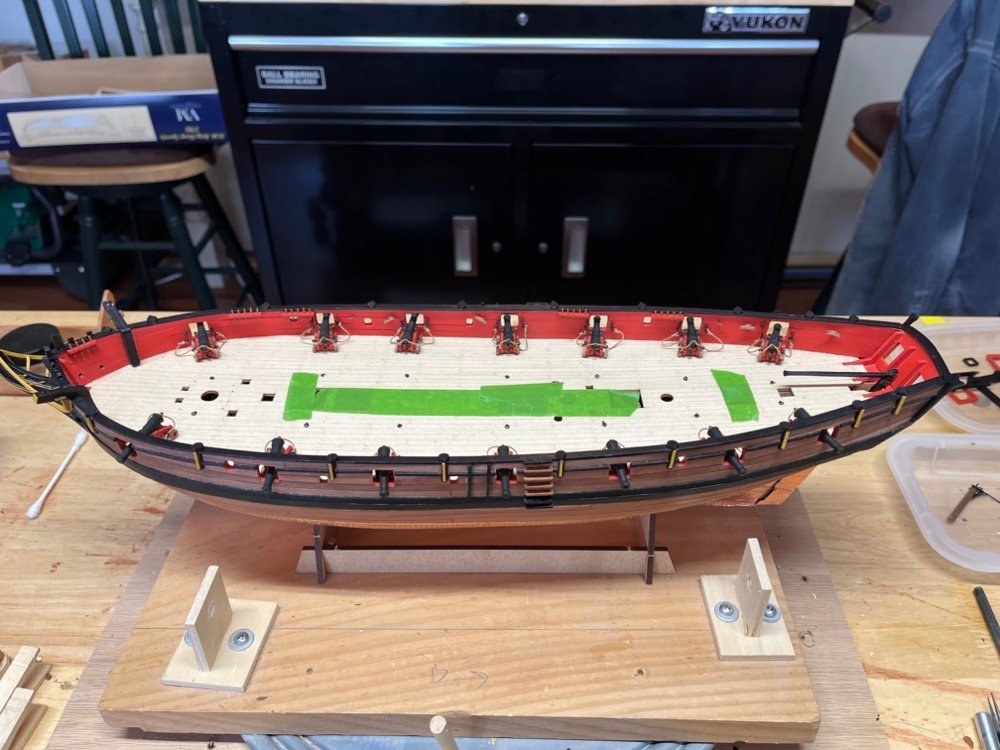
Thanks for your responses guys. I know I didn't do that. After taking more measurements yesterday I think this is a cautionary tale about small errors adding up - the wales are a bit too high, the channels are a bit too low, the bottoms of the gun ports may have been filed down a bit too far, etc. creating about a 2mm error in the location of the chain plates. Oh well, time to move on. I added the rest of the deck fittings today, which was pretty straight forward. The aft ladder was too tight in the coaming so I filed the sides of the coaming and deck a bit until it fit nicely. The anchor lines I made from 0.076" line I made when I built the Duchess of Kingston model. I am going to build the ship's boat next but also the masts at the same time. I have four sails still to make and I have to make them one at a time, so I would like to get started on them soon. But I need the exact heights of the mast sections and stays to size them accurately.
- 144 replies
-
- 7
-
-
- HMS Speedy
- Vanguard Models
- (and 1 more)
-
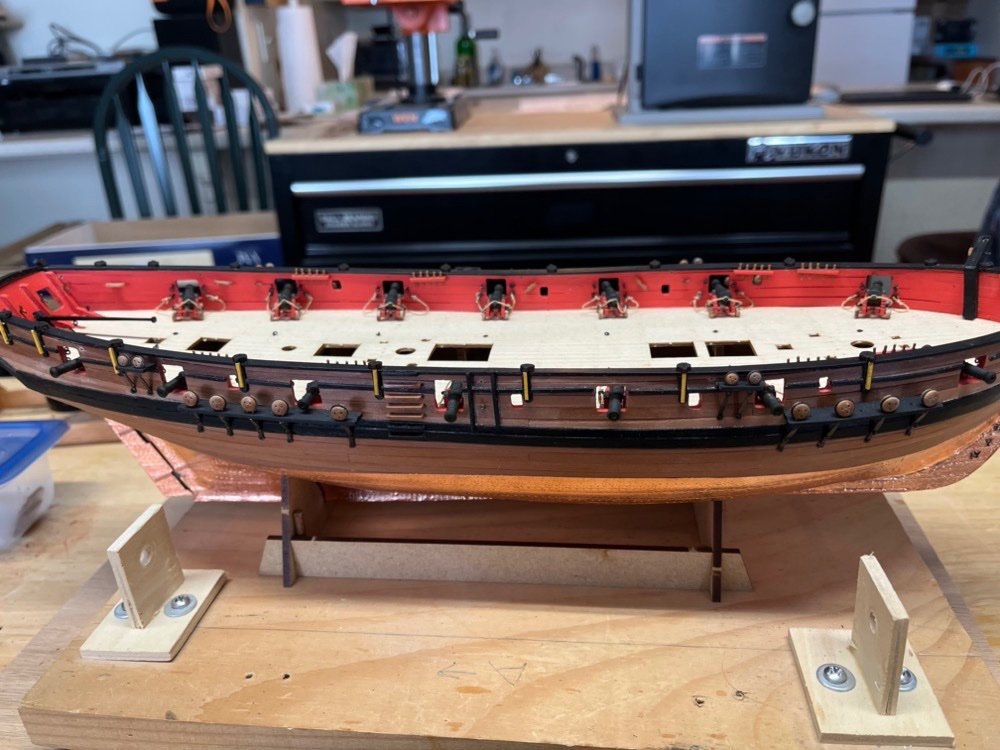
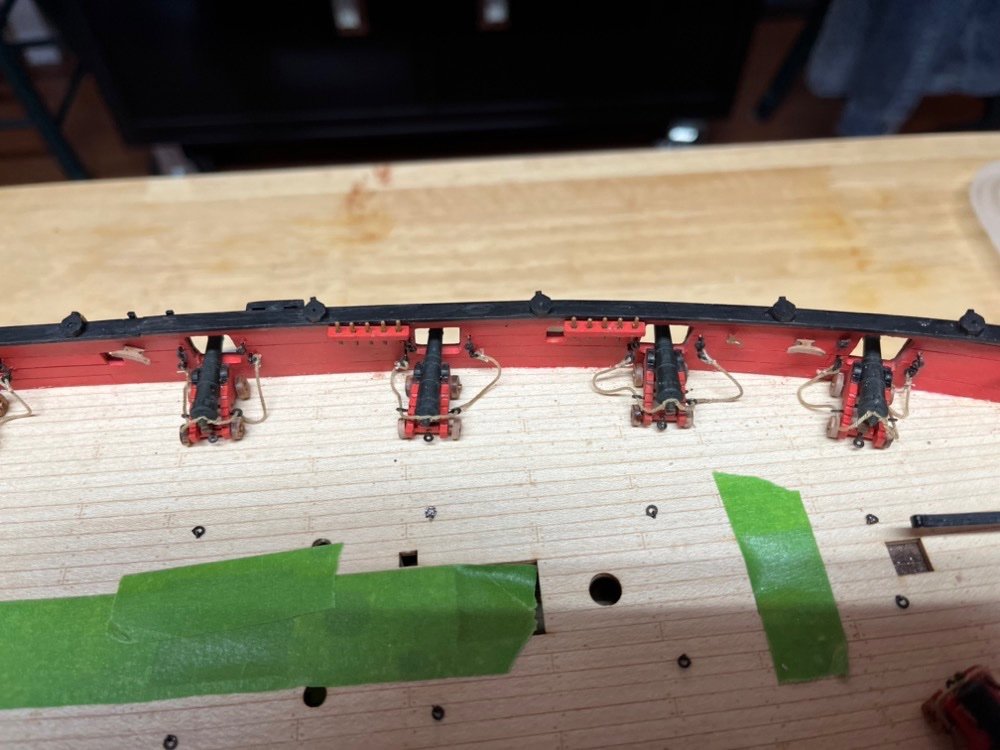
I added pins to the channels and glued them to the hull. I added the deadeyes to the chain plates and slipped them into the holes in the channels, then used a piece of dowel with a string on it to get the angles of the chain plates. I drilled holes in the wales and glued in cut off nails to hold them. You can see that I was only able to get the top holes on the wales for the large deadeyes. The height of the channels is set by the lower edge of the gunport and the position of the wales was marked on the outer bulwarks so I am not sure why they didn't match up unless the chain plates are a little too long. I went ahead and added a nail through the lower holes under the wales which looks OK to me. These holes are come out under the deck so I could use a whole nail for them, unlike the chain plates for the small deadeyes that go through the bulwark. These holes have to be pretty shallow so they don't show on the inside, so it is tough getting the small cut off nails into these holes. I will be adding all the deck items next. My kit came with wooden gratings along with the PE ones. I am using the wooden ones, which I gave a coat of wipe on poly. They fit the coamings perfectly and look great. I am also adding the cannon balls to the rakes on the coamings before adding the coamings to the deck.
- 144 replies
-
- 5
-
-
- HMS Speedy
- Vanguard Models
- (and 1 more)
-
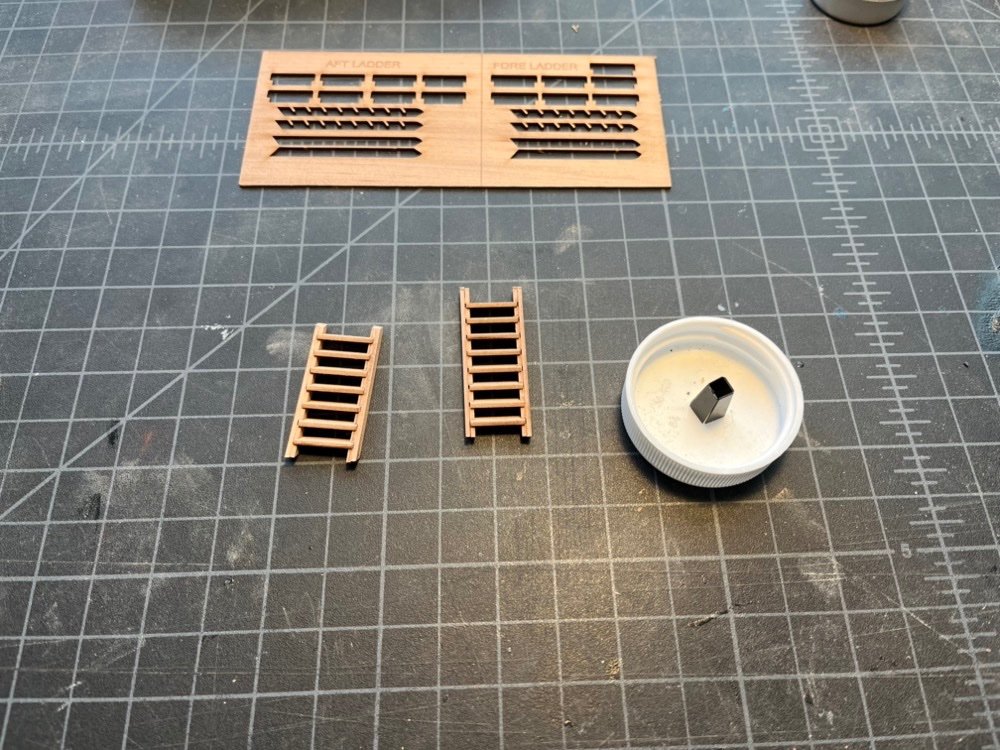
Thank you Theodosius. I have to give another shout out to @chris watton on the ladder kits that came with this ship kit. Again they are different than what is shown in the original instructions, but they fit together sooo nicely and look great when completed. The steps fit into the side rails with just enough pressure so that they hold together even before gluing. These were the easiest ladders I have ever built and also the best looking. Thanks again Chris.
- 144 replies
-
- 6
-
-
- HMS Speedy
- Vanguard Models
- (and 1 more)
-
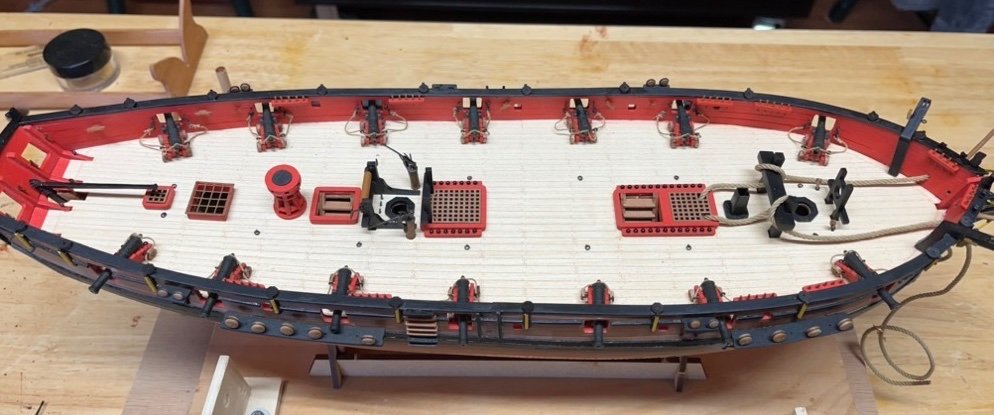
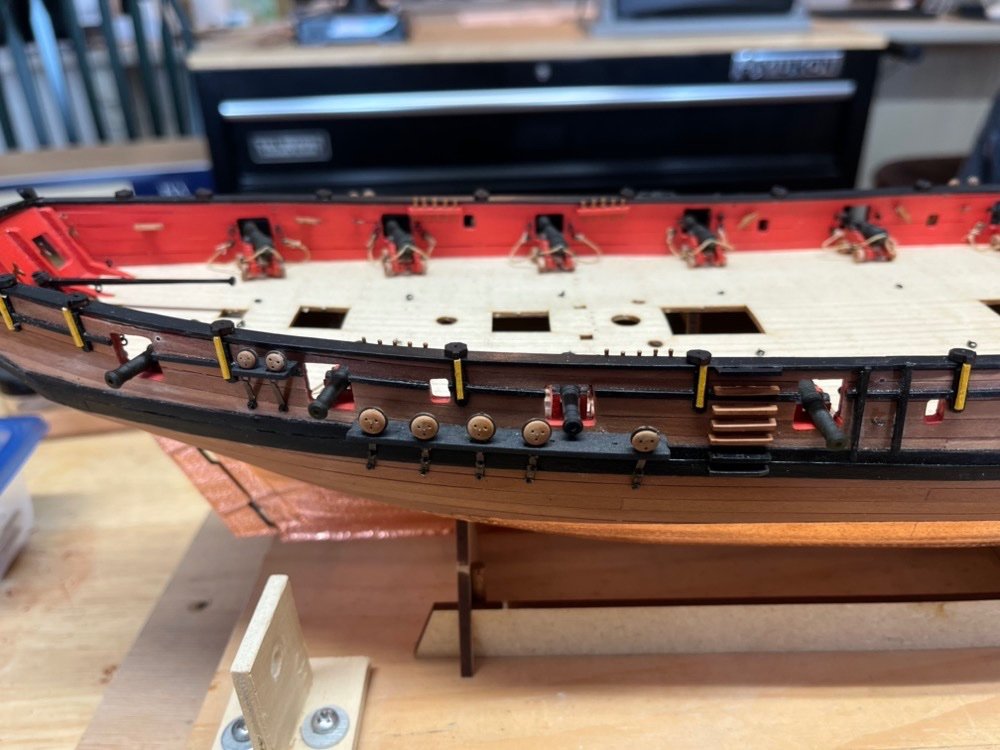
Making progress on the deck and bulwark fittings. I have secured the cannons and attached the ring bolts on the ends of the breaching lines to the bulwarks. I have also added the tackle ringbolts to the bulwarks, as well as the metal and wooded cleats. The starboard pin rails are installed too. I installed the first couple too low but was able to remove them and move them up higher so the tops of the belaying pins were above the rails. I drilled out the marked holes in the deck (thanks Chris) and pushed in the deck ring bolts I made. Here is how they came out.
- 144 replies
-
- 6
-
-
- HMS Speedy
- Vanguard Models
- (and 1 more)
-
Wow your workshop is as impressive as your models.
-
Chris I am glad you provided both cap squares. I was really happy with the way the painted wooden cap squares looked when painted black and much less fiddly, but having both options was good.
- 144 replies
-
- 2
-
-
- HMS Speedy
- Vanguard Models
- (and 1 more)