usedtosail
-
Posts
2,403 -
Joined
-
Last visited
Content Type
Profiles
Forums
Gallery
Events
Everything posted by usedtosail
-
 You have created a true masterpiece, BE. Very well done.
- 857 replies
-
- 5
-

-

-
- Sphinx
- Vanguard Models
- (and 1 more)
-
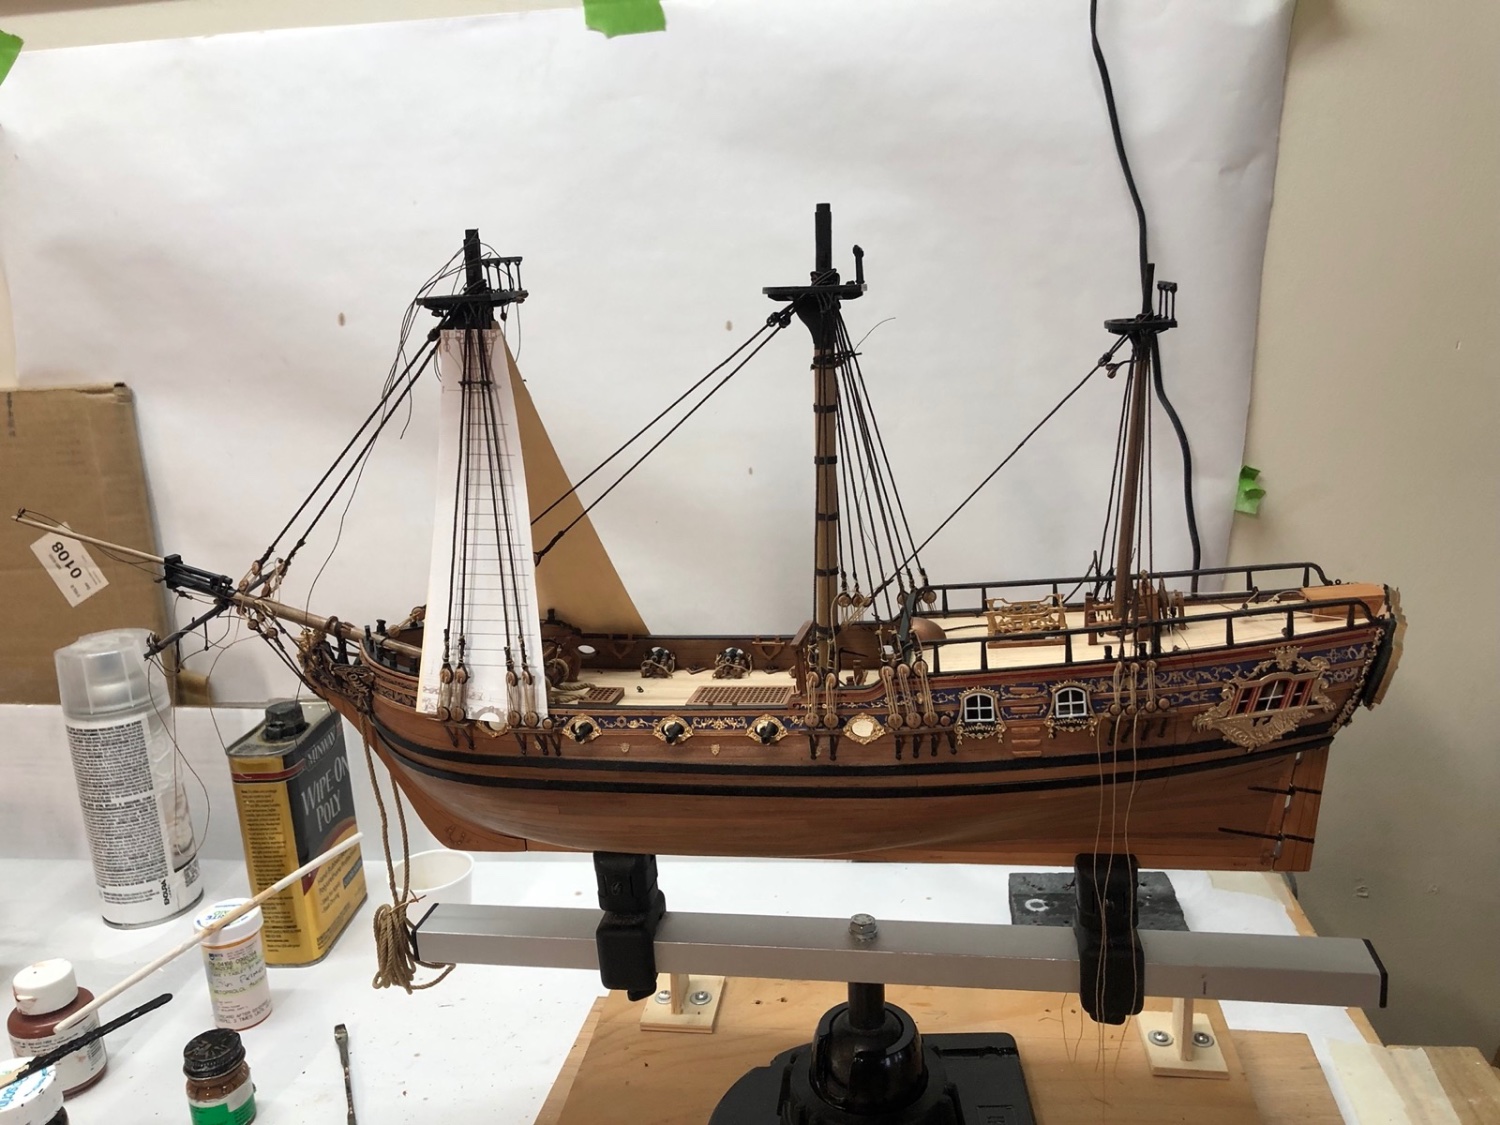
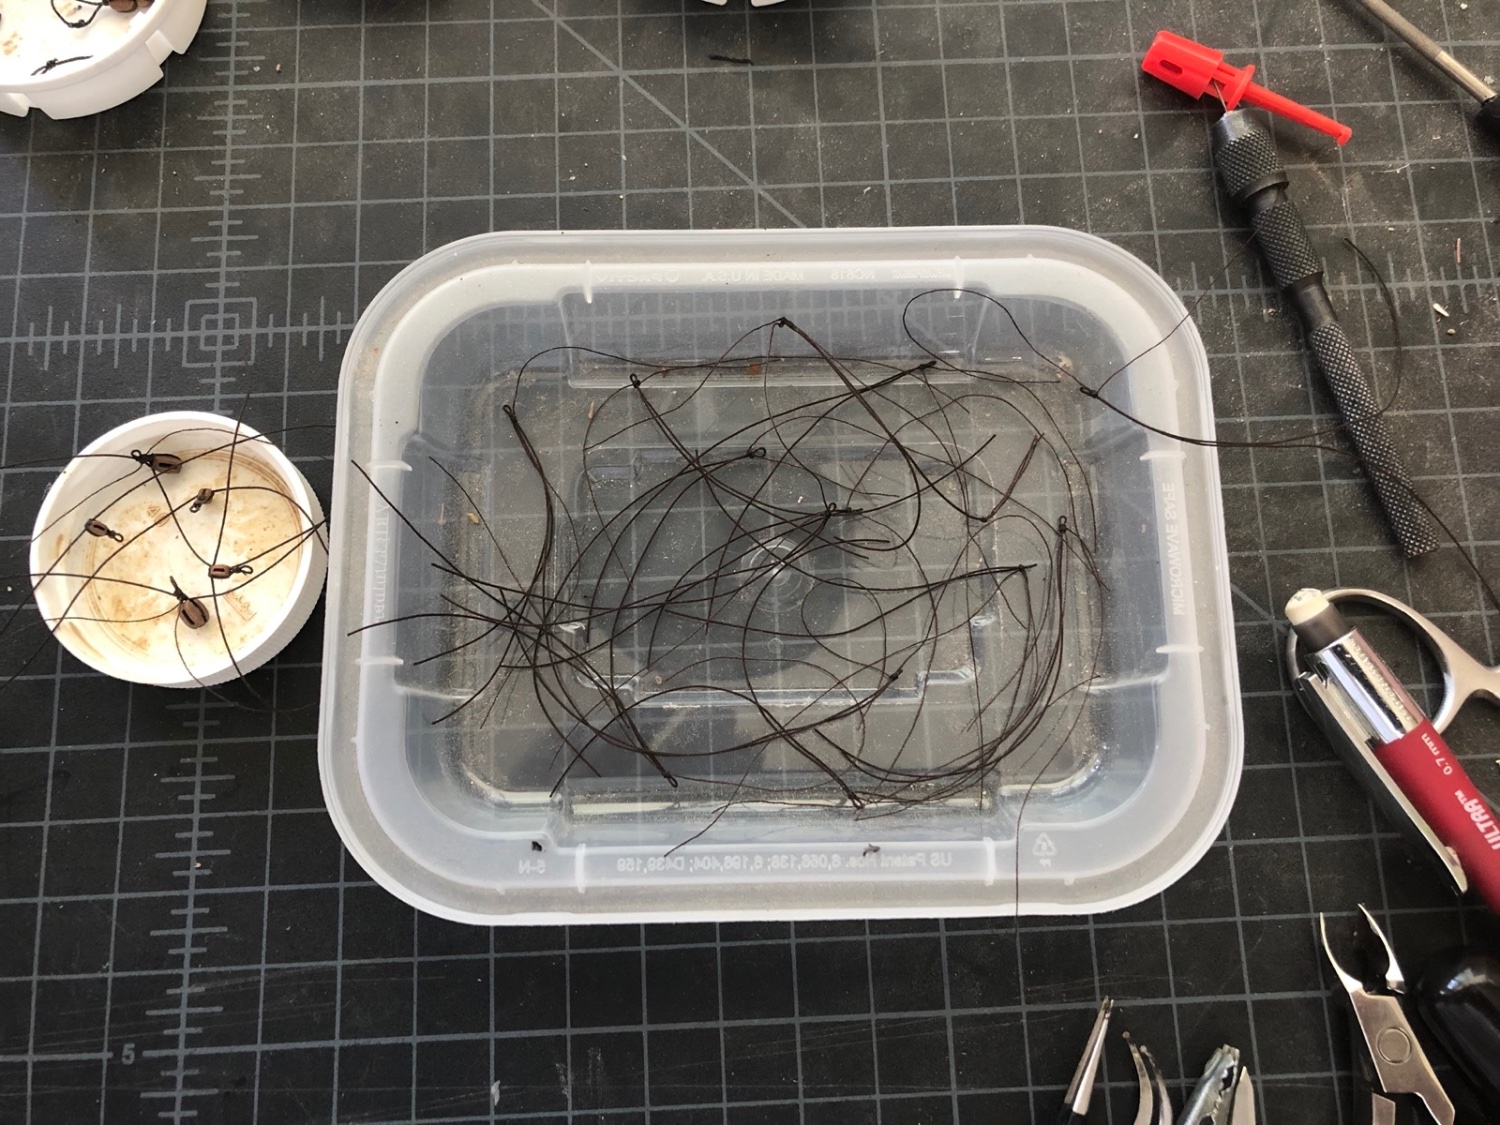
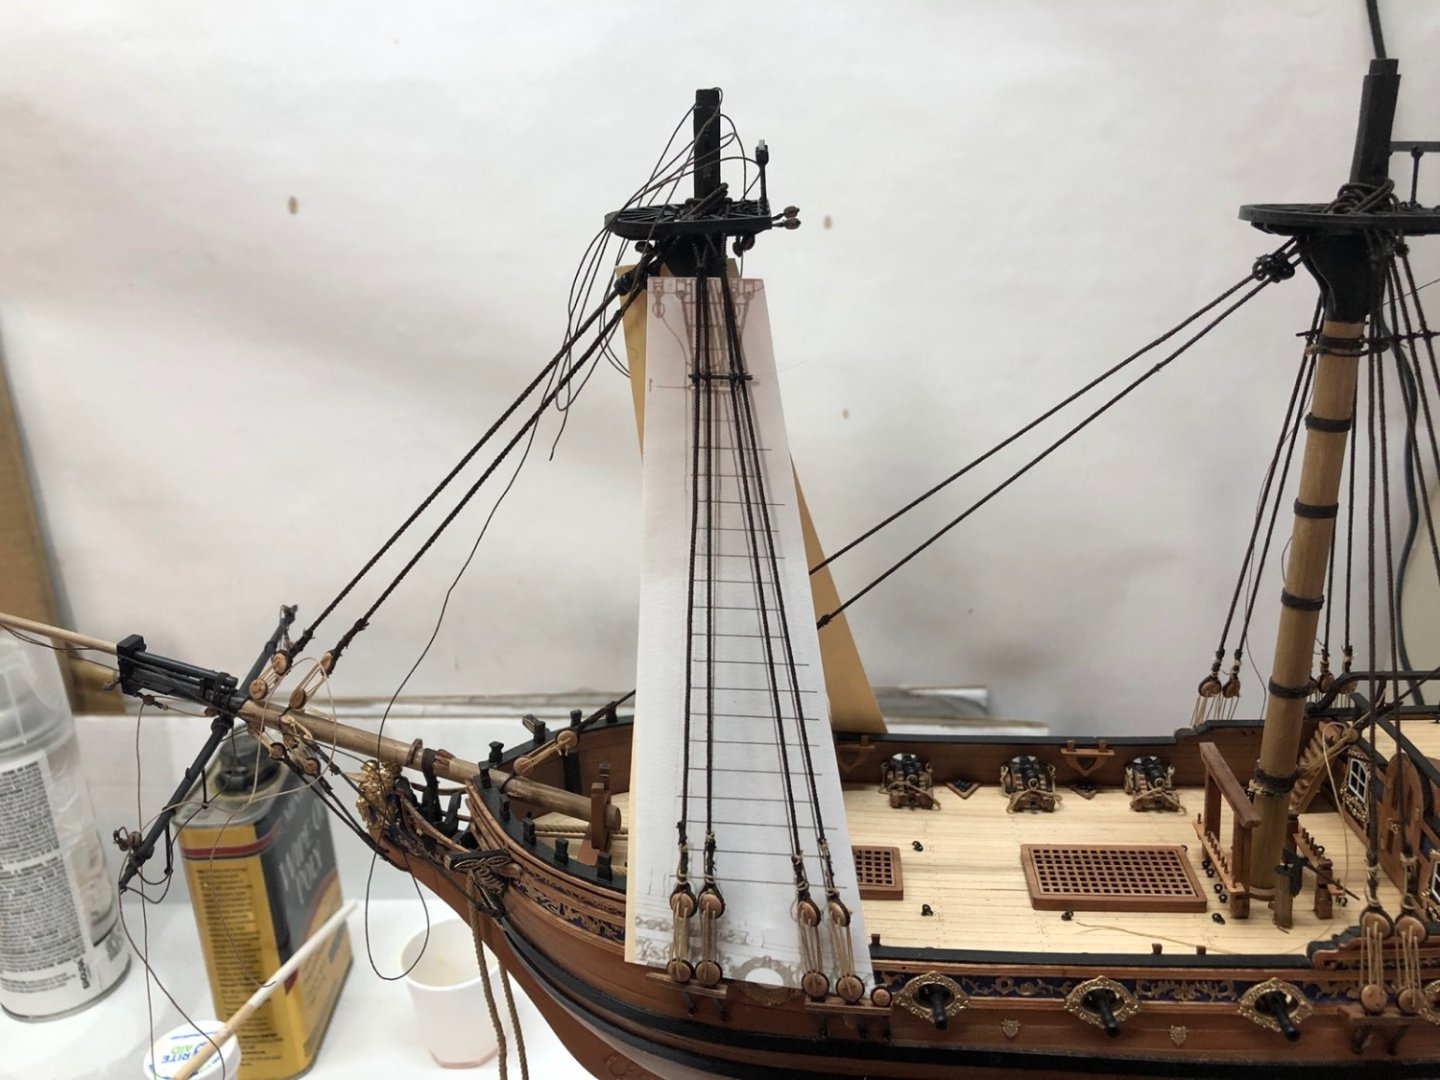
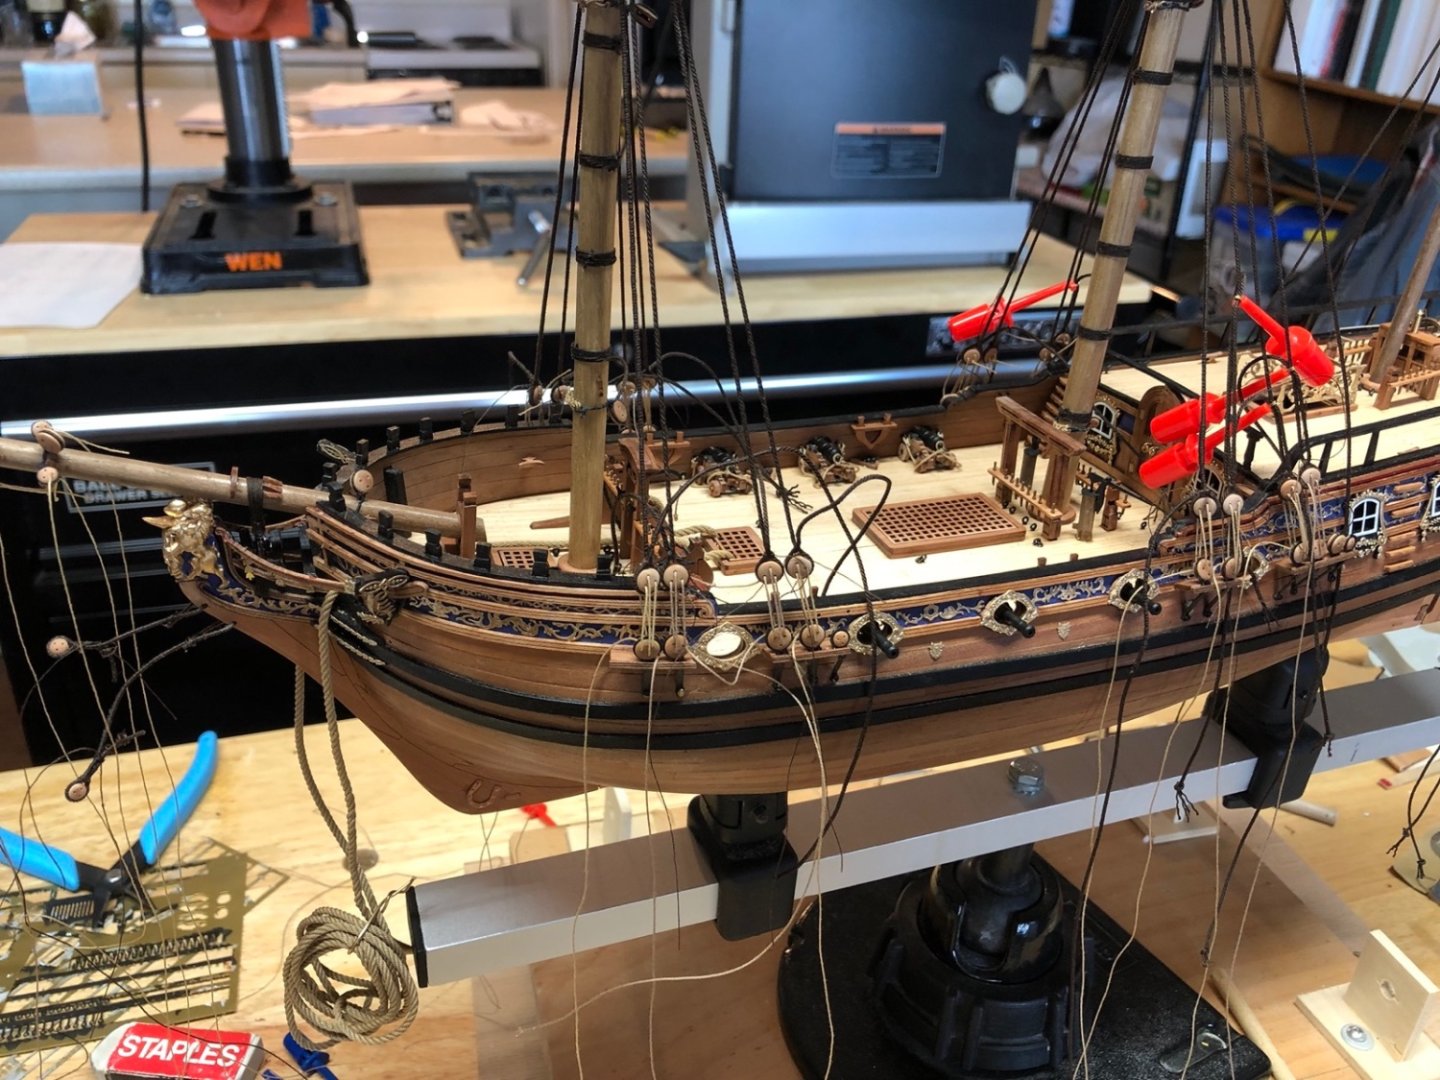
Its been a while since the last update but I have been making some progress with the rigging. I finished rigging the lower shroud deadeyes and the stays. I started to move onto the futtock staves and ratlines by first enlarging the supplied plans that show the ratlines to the same scale as the model, cutting out the shroud sections and gluing them to some manila folder material. I trimmed them to fit behind the shrouds and immediately saw that the mizzen mast was too high! The mizzen mast top was almost as.high as the main top, so I should have noticed it sooner. I made the mast the correct height but it did not fit all the way into the hull when I installed it. So off came the mizzen shrouds and stay and out came the mast. I trimmed the bottom of the mast to fit more into the hull and checked the height, which was now good. I was able to salvage most of the shrouds but I did have to remake one pair and the stay. These are now re-installed and I just need to tighten the shroud lashings and tie them off to the shrouds. While I was reworking the mizzen mast I also started adding the futtock staves to the fore and main shrouds. I have also started making the futtock shrouds using the supplied PE hooks. I did have to carefully drill out the holes in the hooks to fit the line for the shrouds.

- 118 replies
-
- 8
-
-
- Duchess Of Kingston
- Finished
- (and 1 more)
-
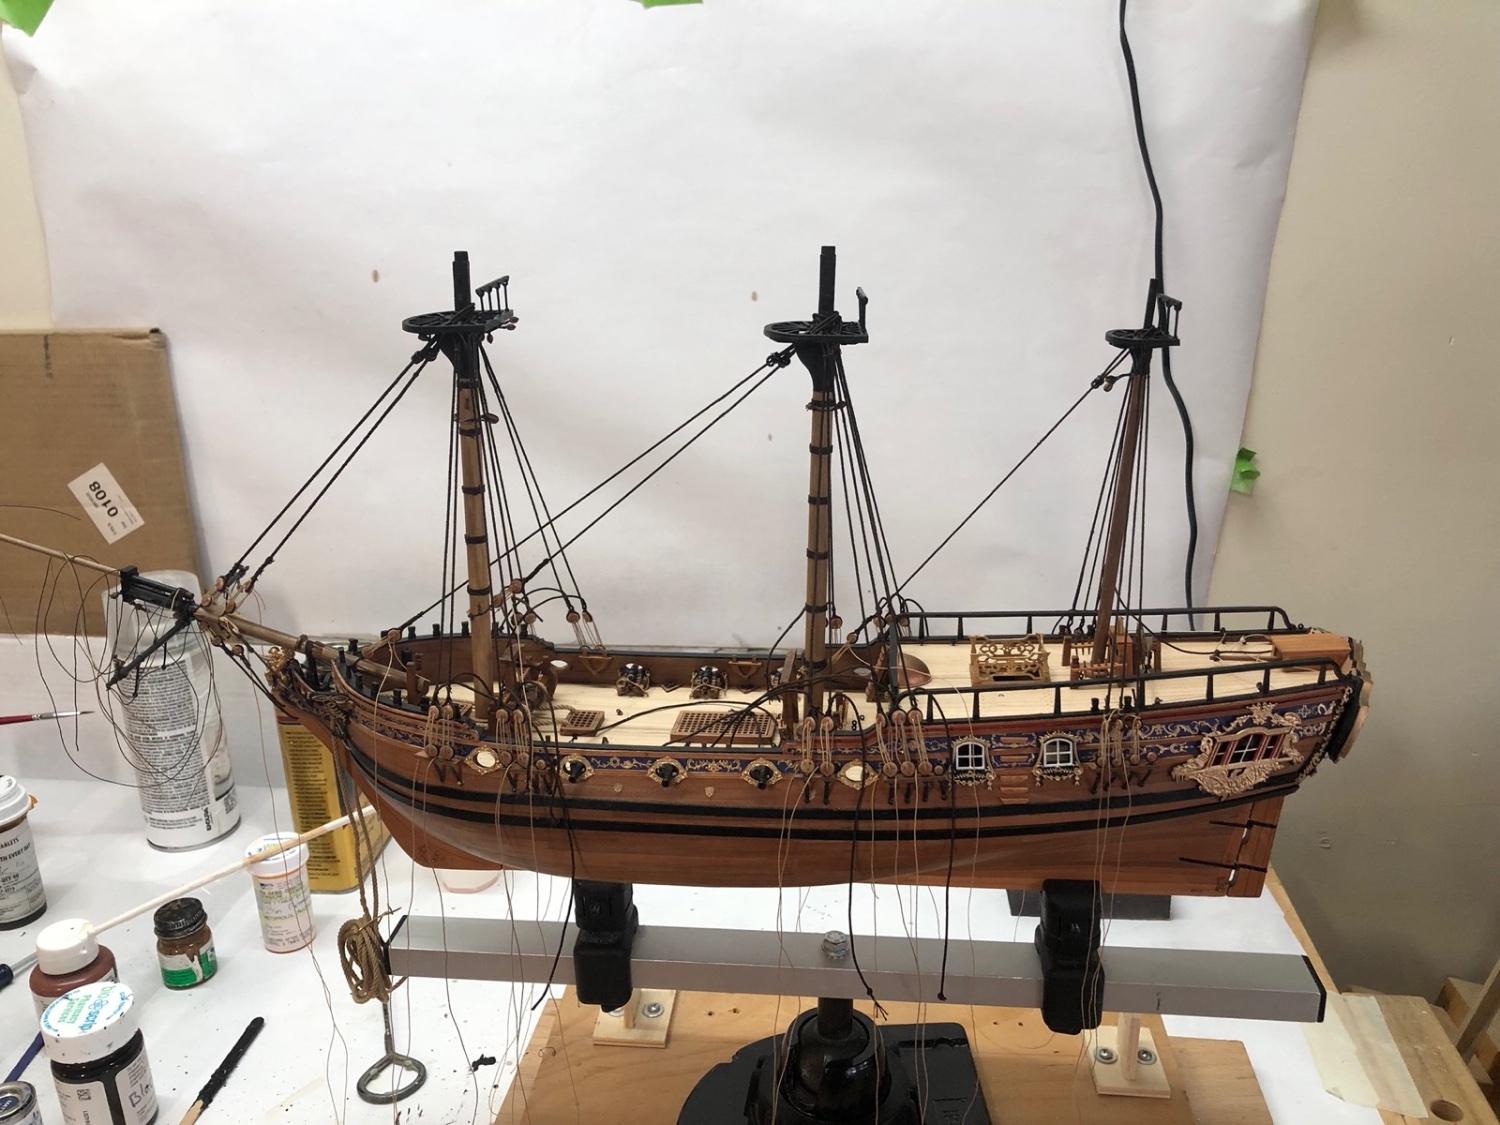
The bowsprit rigging is completed as are all the lower mast stays. I can now tighten and tie off the deadeye lanyards, then start the ratlines.

- 118 replies
-
- 5
-
-
- Duchess Of Kingston
- Finished
- (and 1 more)
-
Thank you Glenn. They took a bit of time but were fun to make and rig. I am working on the rigging of the bowsprit shrouds and stays and the lower mast shrouds. I had to drill out the holes in the stem for the bowsprit stays because of the serving on the lines. I was a bit apprehensive about it but I just drilled half way from both sides and it worked out fine. I also had to drill out two eyebolts so the served line would fit through them for the bowsprit shrouds. I am working on a lot of lines at the same time as it takes time for the lacquer to dry on the fixed seizings.
- 118 replies
-
- 6
-
-
- Duchess Of Kingston
- Finished
- (and 1 more)
-
I finally finished the yards with all the blocks and foot ropes. I'll leave the parrels until I am ready to add each yard. I have started rigging the bow sprit by adding the gammoning. Adding the stays and sprint sail yard will be next.

- 118 replies
-
- 7
-
-
- Duchess Of Kingston
- Finished
- (and 1 more)
-
So in the last couple of weeks I have managed to clean up the yards and paint them black. I have also stropped all the blocks for the yards and added the stirrups for the foot ropes. I added one foot rope to each of the topGallant yards and will start adding them to the other yards soon. I have also added all the lower shrouds to the masts and have started adding the upper deadeyes to the shrouds. I am using a throat seizing to attach the deadeyes initially, which I can slide to get them even. I am also using two twisted pieces of wire to hold the upper and lower deadeyes while I get the seizing tight. Once all the deadeyes are on the shrouds I will start doing a final height check and fix the seizings to hold them, then add two round seizings to hold the loose ends of the shrouds to themselves.
- 118 replies
-
- 6
-
-
- Duchess Of Kingston
- Finished
- (and 1 more)
-
So I was planning to build the Vanguard Speedy kit sometime in the future but not necessarily as the next build, but we found out recently that we are going to be grandparents for the first time and it is a boy, so I want to build the Speedy as a gift for the baby. WIth luck it will be completed by his first birthday. I ordered the kit today to take advantage of the discount that Chris has going on now, but I won't start it until this model is done and in its case. Perhaps the baby will have some of the traits of Sir Cochrane when he grows up.
- 118 replies
-
- 6
-
-
- Duchess Of Kingston
- Finished
- (and 1 more)
-
Thanks Glenn. It helps to have other build logs like yours to refer too. I have turned all the yards on the lathe and glued the chokes in place. I have most of them cleaned of char except for a few that fell off while sanding them. I glued them back on and will clean them up tomorrow, then paint these all black. I have also started stropping the blocks for the yards. Many of these have loops for other ropes (I can't remember what these are called at the moment) so I started by making a bunch of strops with small loops, as shown on the right. I then used these strops for the blocks, as seen on the left. That is all but one block for the fore yards that have loops.

- 118 replies
-
- 6
-
-
- Duchess Of Kingston
- Finished
- (and 1 more)
-
I served all the lines for the fore, main and mizzen shrouds. I also finished the bowsprit with all the deadeyes and blocks. Now I will make all the yards before I start rigging the masts.
- 118 replies
-
- 8
-
-
- Duchess Of Kingston
- Finished
- (and 1 more)
-
I put the anchor cable in place. I had to drill out the inner hawse hole to get it to fit but to did fit in the hatch grating with no problem. I glued the hatch grating in place but left the anchor cable loose for now after wrapping it around the windlass.

- 118 replies
-
- 6
-
-
- Duchess Of Kingston
- Finished
- (and 1 more)
-
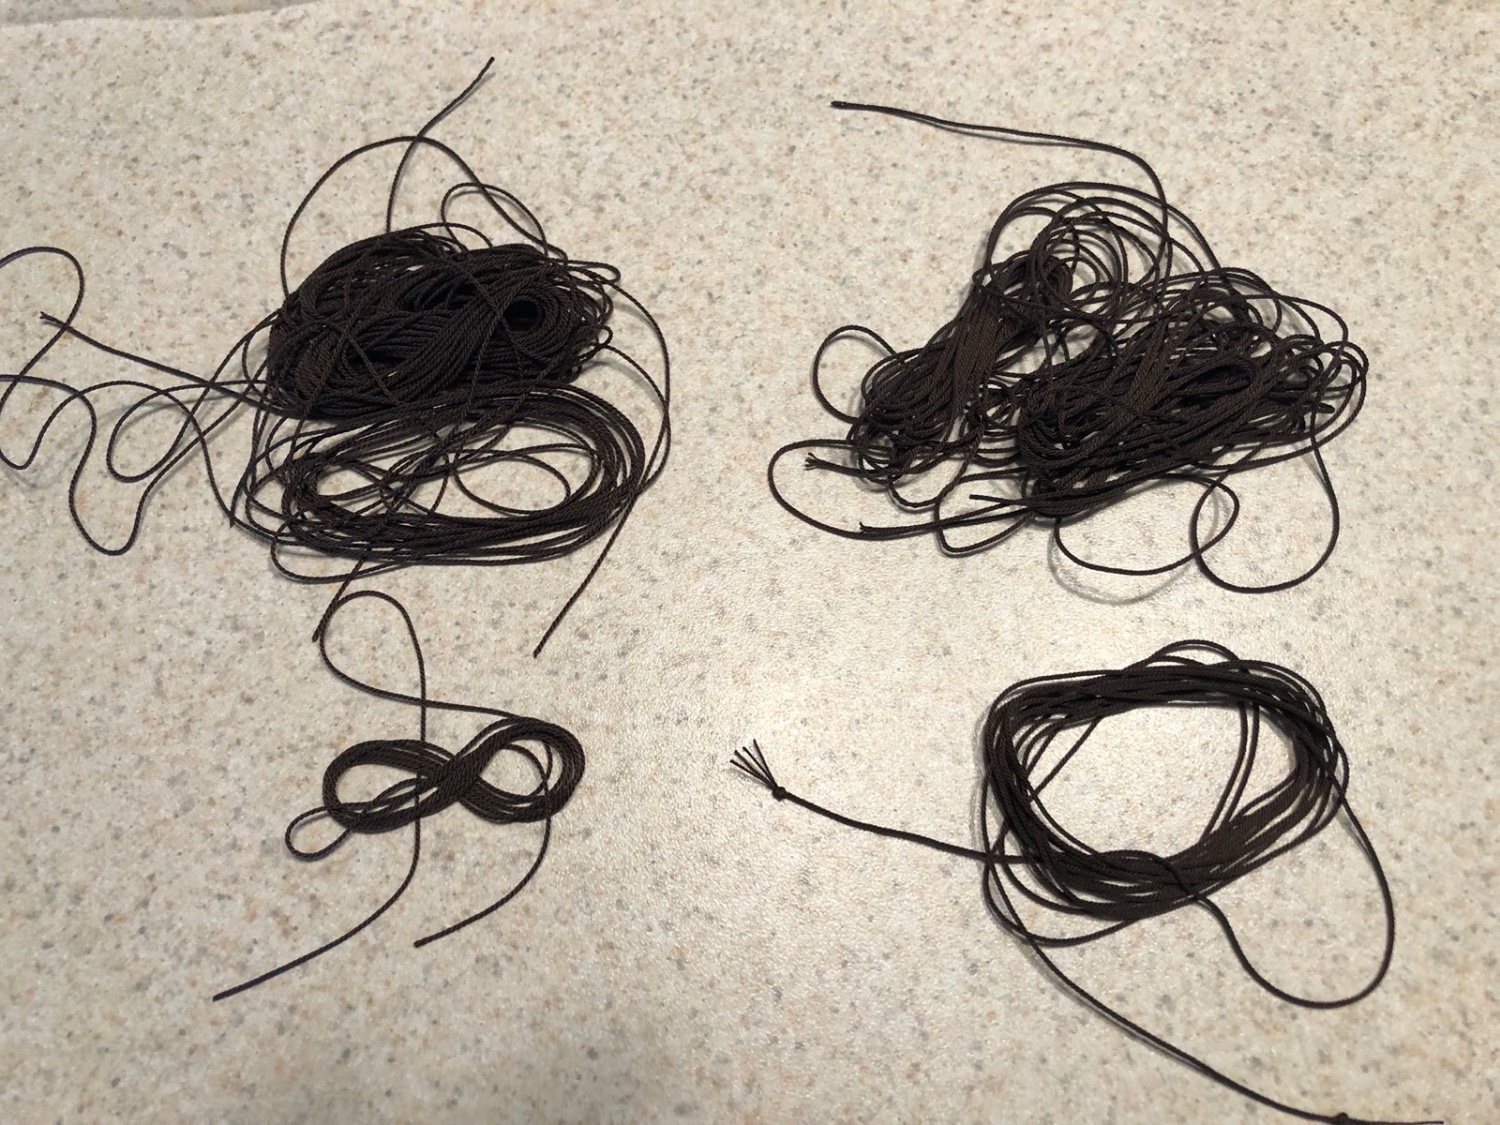
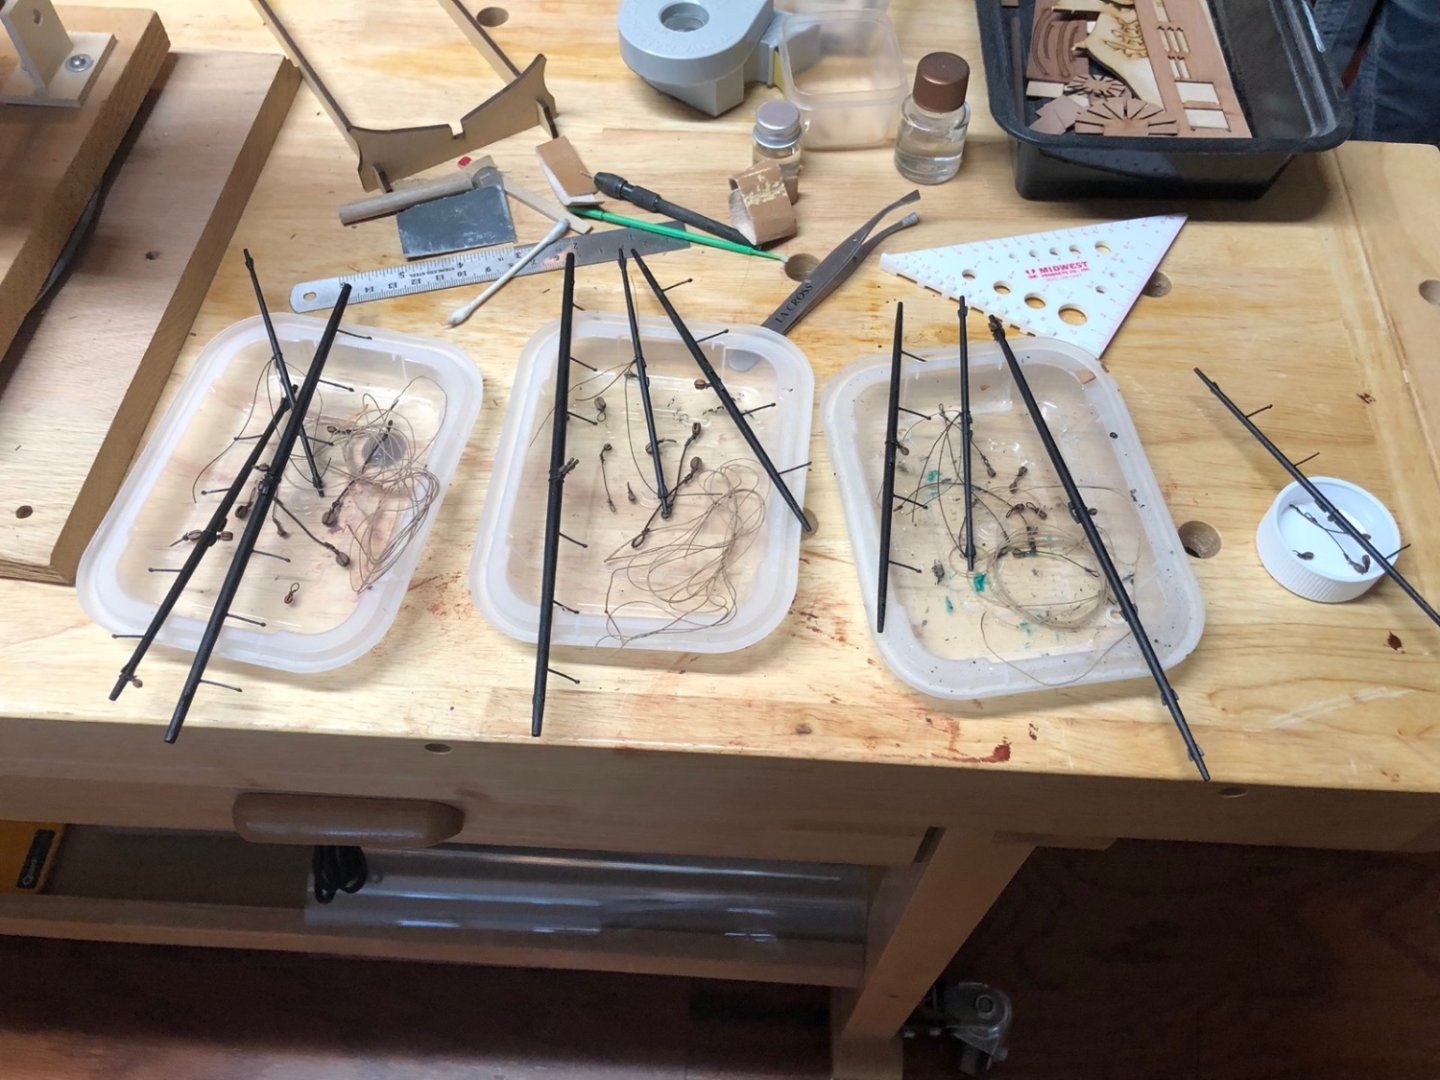
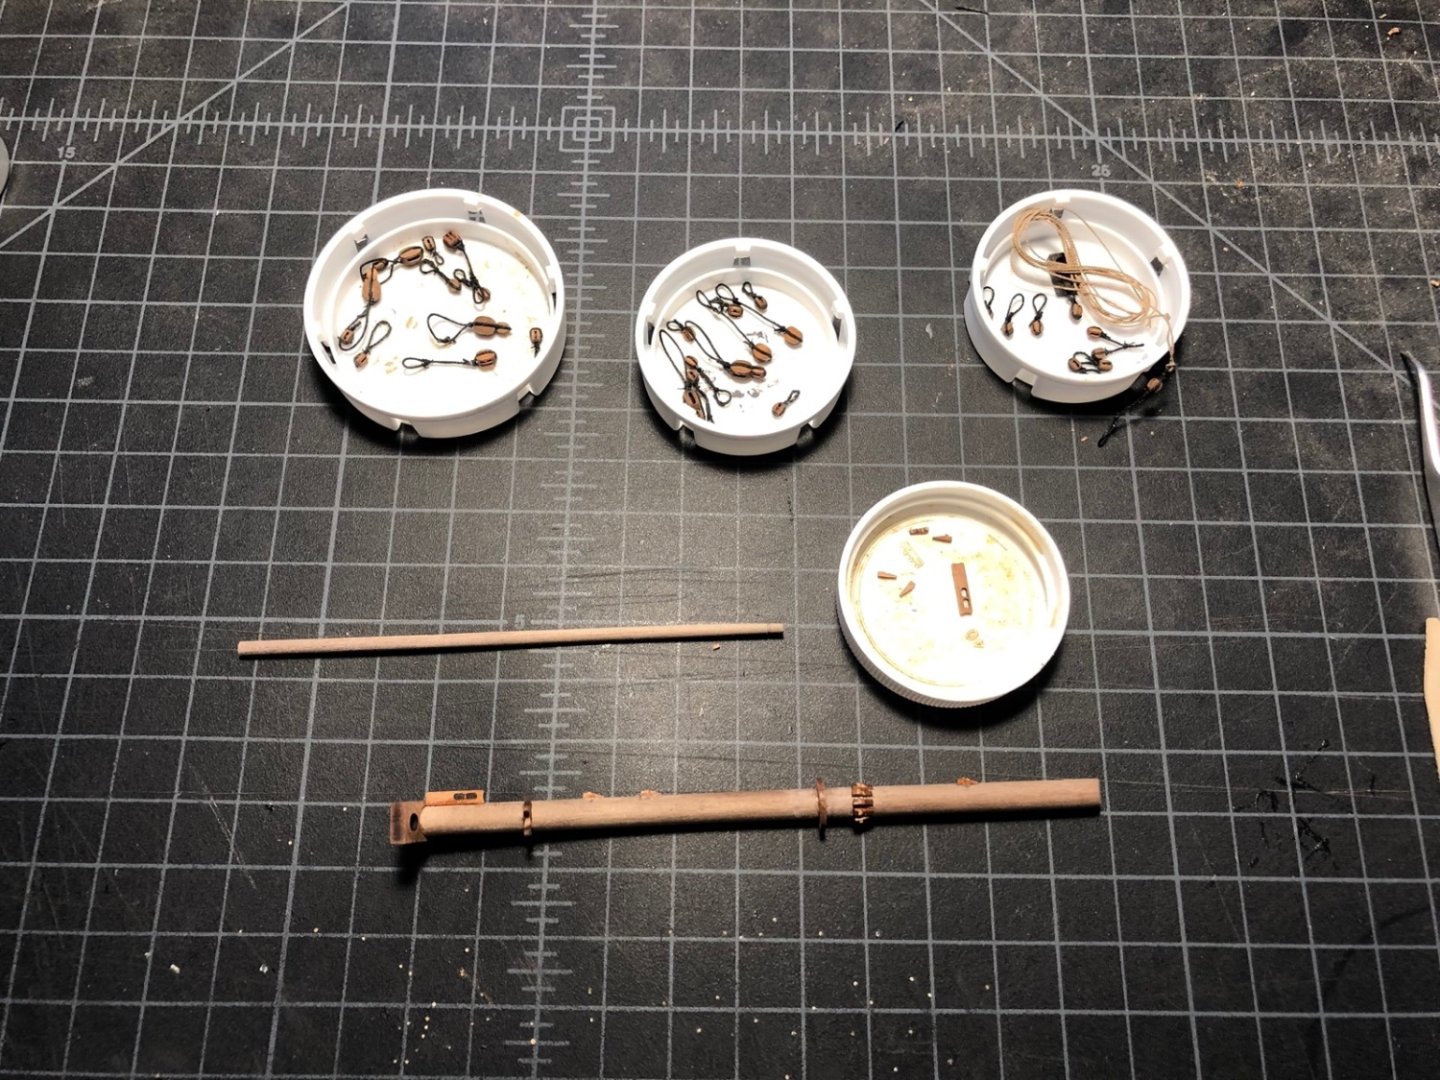
The really hot weather finally broke here this week so I have had more time in the shop. I finished adding the various chocks and other bits to the bowsprit and gave it and the jib boom a coat of wipe on poly. While waiting for that to dry I made a new anchor cable line to replace the one that came in the kit, which was just a little too loose for my liking. I started by making four strands of 0.035" tan line, then twisted these together counter clockwise to make the cable. Since I had the rope walk out, I started making the lines for the shrouds and backstays. I am using 0.035" line for the fore and main lower shrouds, and 0.030" line for the lower mizzen shrouds. I already had some lengths left over from my last build but I need a few more lengths of each. The 0.030 line is on the left. I painted the first coat of black on the bowsprit and jib boom and will continue stropping the deadeyes for it when the painting is completed.

- 118 replies
-
- 6
-
-
- Duchess Of Kingston
- Finished
- (and 1 more)
-
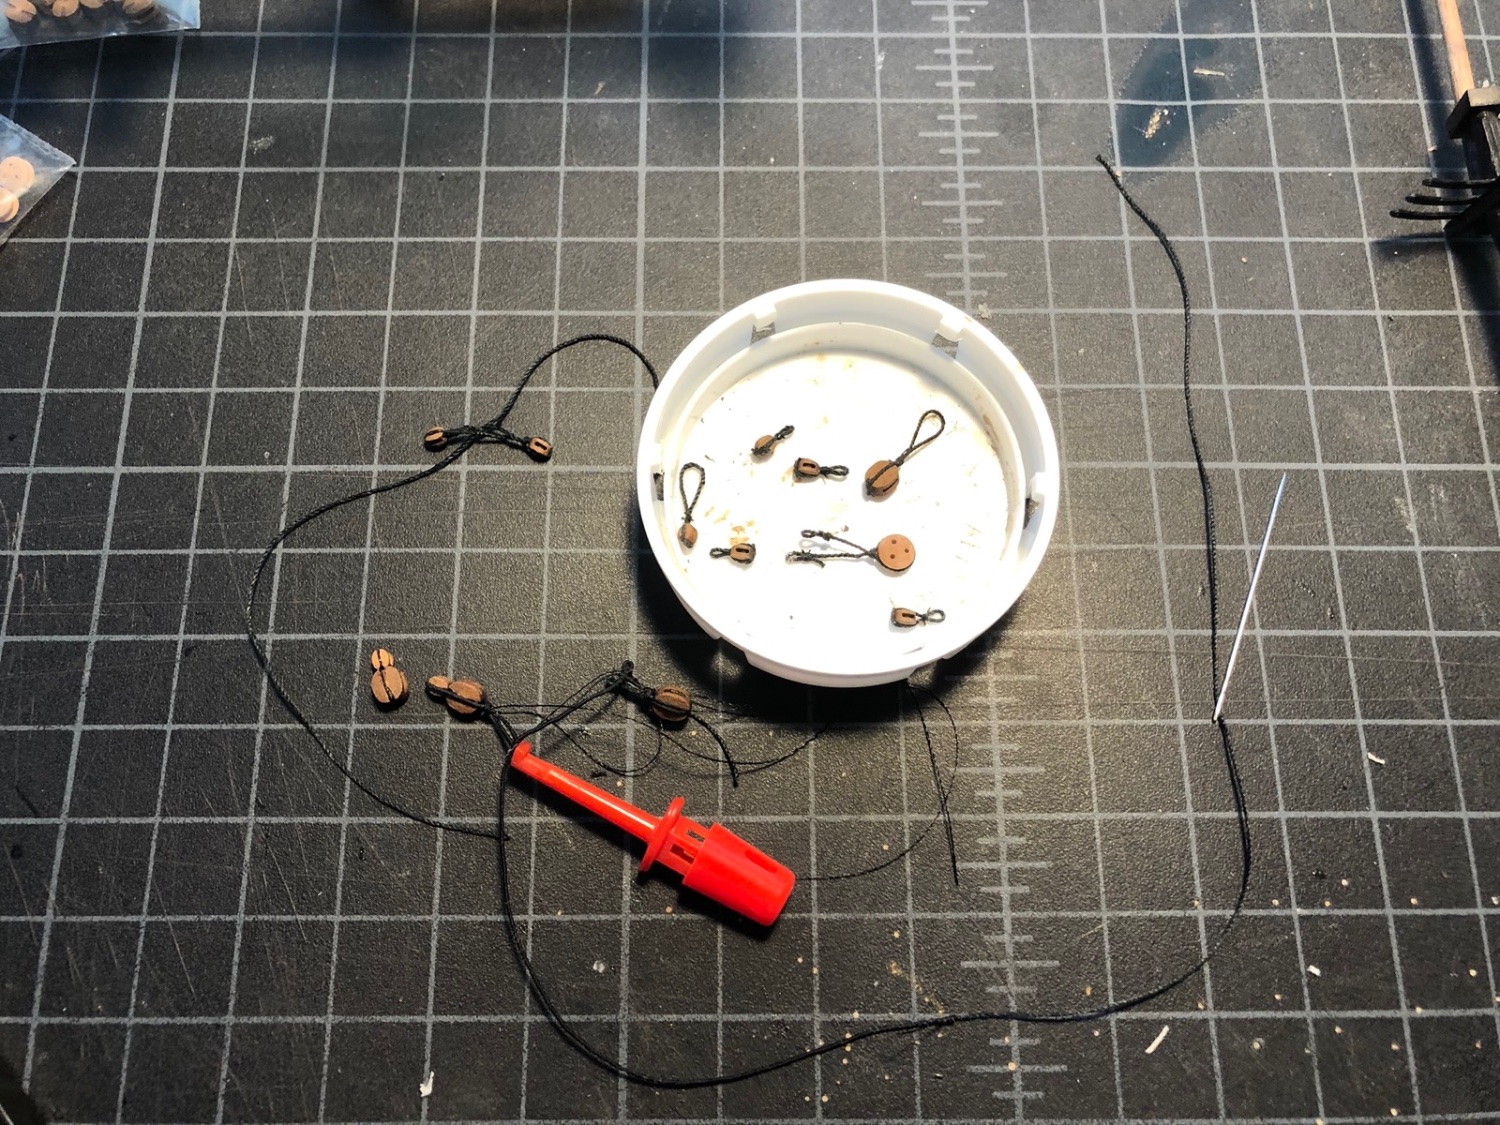
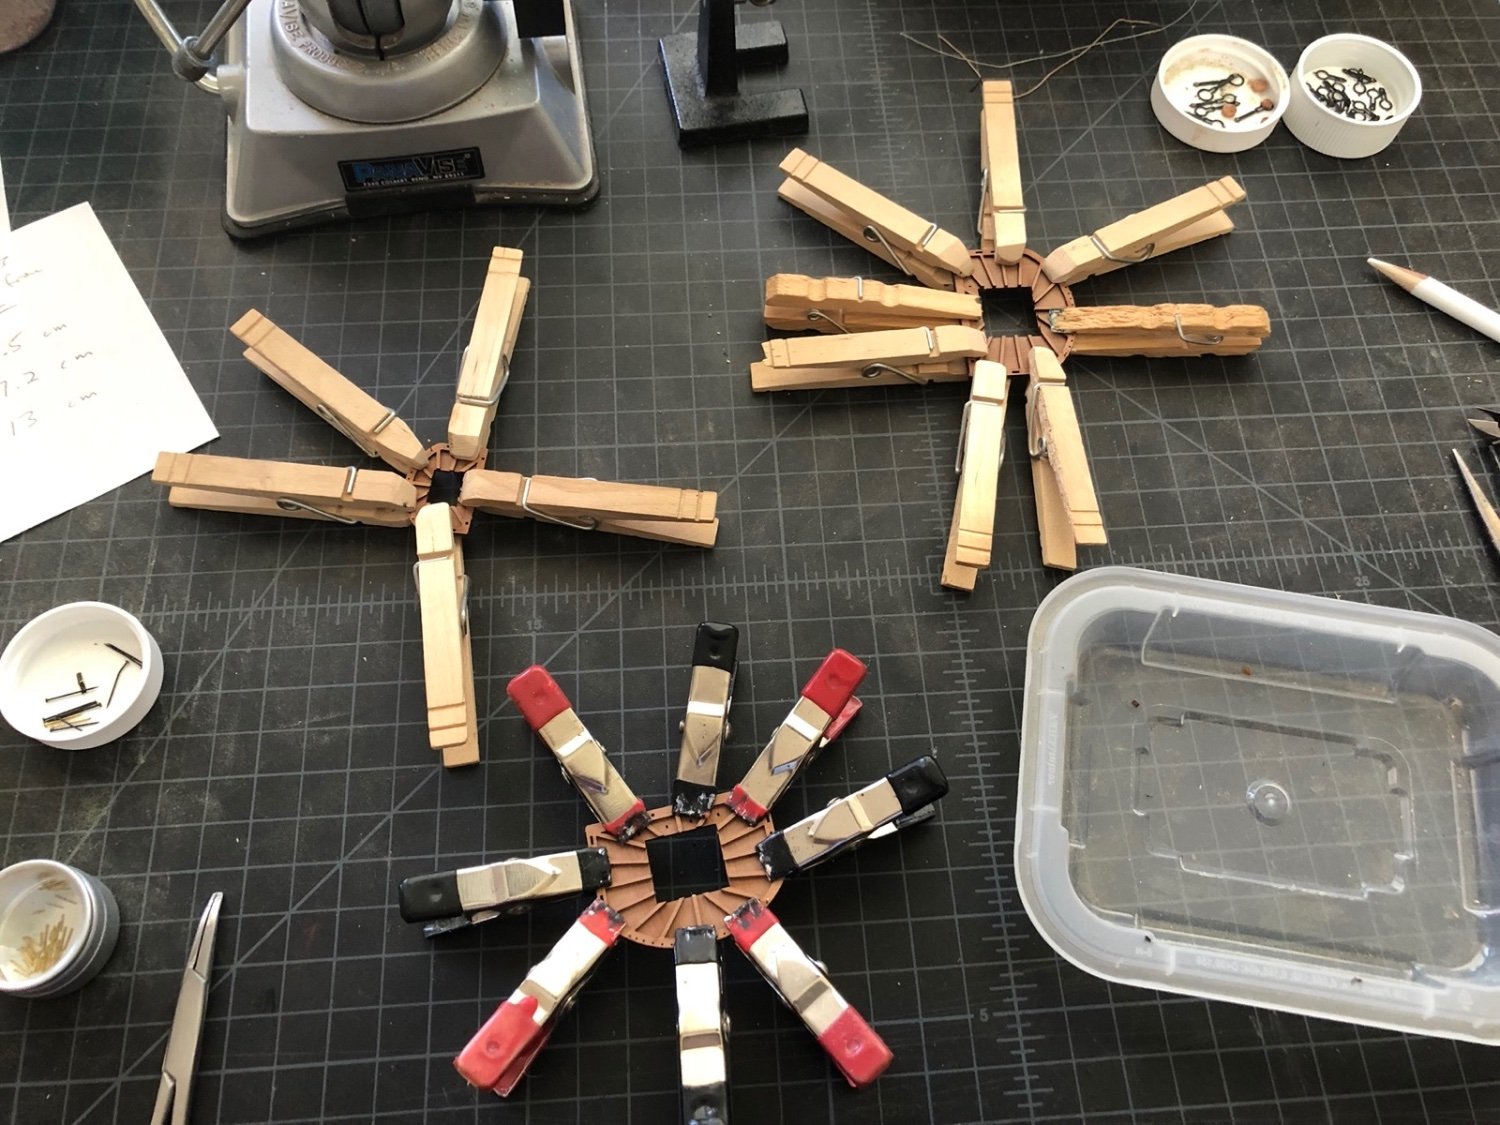
After a few weeks I have finally finished stropping all the blocks and deadeyes for the masts. This has taken a bit more time than I expected but then again I have only been working an hour or so a day because the weather has been so hot. I am now working on finishing the bowsprit and stropping the blocks and deadeyes for it. I reverted to using seizings for the smaller blocks. I was able to make a single loop that went around the block and the mast with a single seizing to hold it all together, which to me looked better than the fake eye splice. I am currently serving a length of line to use for the bowsprit deadeye strops.
- 118 replies
-
- 9
-
-
- Duchess Of Kingston
- Finished
- (and 1 more)
-
I finished adding the wooldings to the fore and main lower masts. I used 0.5mm dark brown line that I made from poly thread instead of the supplied black 0.5mm line. I will be making my own line for most of the rigging. I then started stropping the blocks and deadeye for the fore mast. I am using the supplied 0.25mm black line for stropping the smaller blocks, but for the larger ones I served the 0.25mm line with thin black thread. I started by serving a length of the black line then started adding blocks and the deadeye to it. I first started making the loops by serving them but later changed them to use a fake splice, where I thread the line back onto itself in two places. It is a little tough getting the served line back through itself but with a bit of perseverance I was able to do it. I think these loops look better and hold better than the seized loops. Here are the blocks and deadeye in various stages of stropping. The deadeye still has the seized loops. You can also see how I am making the two block sets for the lifts. I first tied the two blocks together with thin thread, then added the strop over the thread to hide it. I also started the fake splice but left it loose until the stropping was set around the blocks. I then adjusted the loop to the right size and added the second part of the fake splice. After these are finished I get to make most of them again for the main mast.

- 118 replies
-
- 7
-
-
- Duchess Of Kingston
- Finished
- (and 1 more)
-
Thanks Rob. Here are some bad photos of the mast parts painted and dry fit together. I have started adding the wooldings to the lower main and fore masts. It is not much different than making seizings. Oops - seems the mizzen mast cap has slipped down to the top. It will be glued in the correct place later, after the mizzen shrouds have been added.

- 118 replies
-
- 9
-
-
- Duchess Of Kingston
- Finished
- (and 1 more)
-
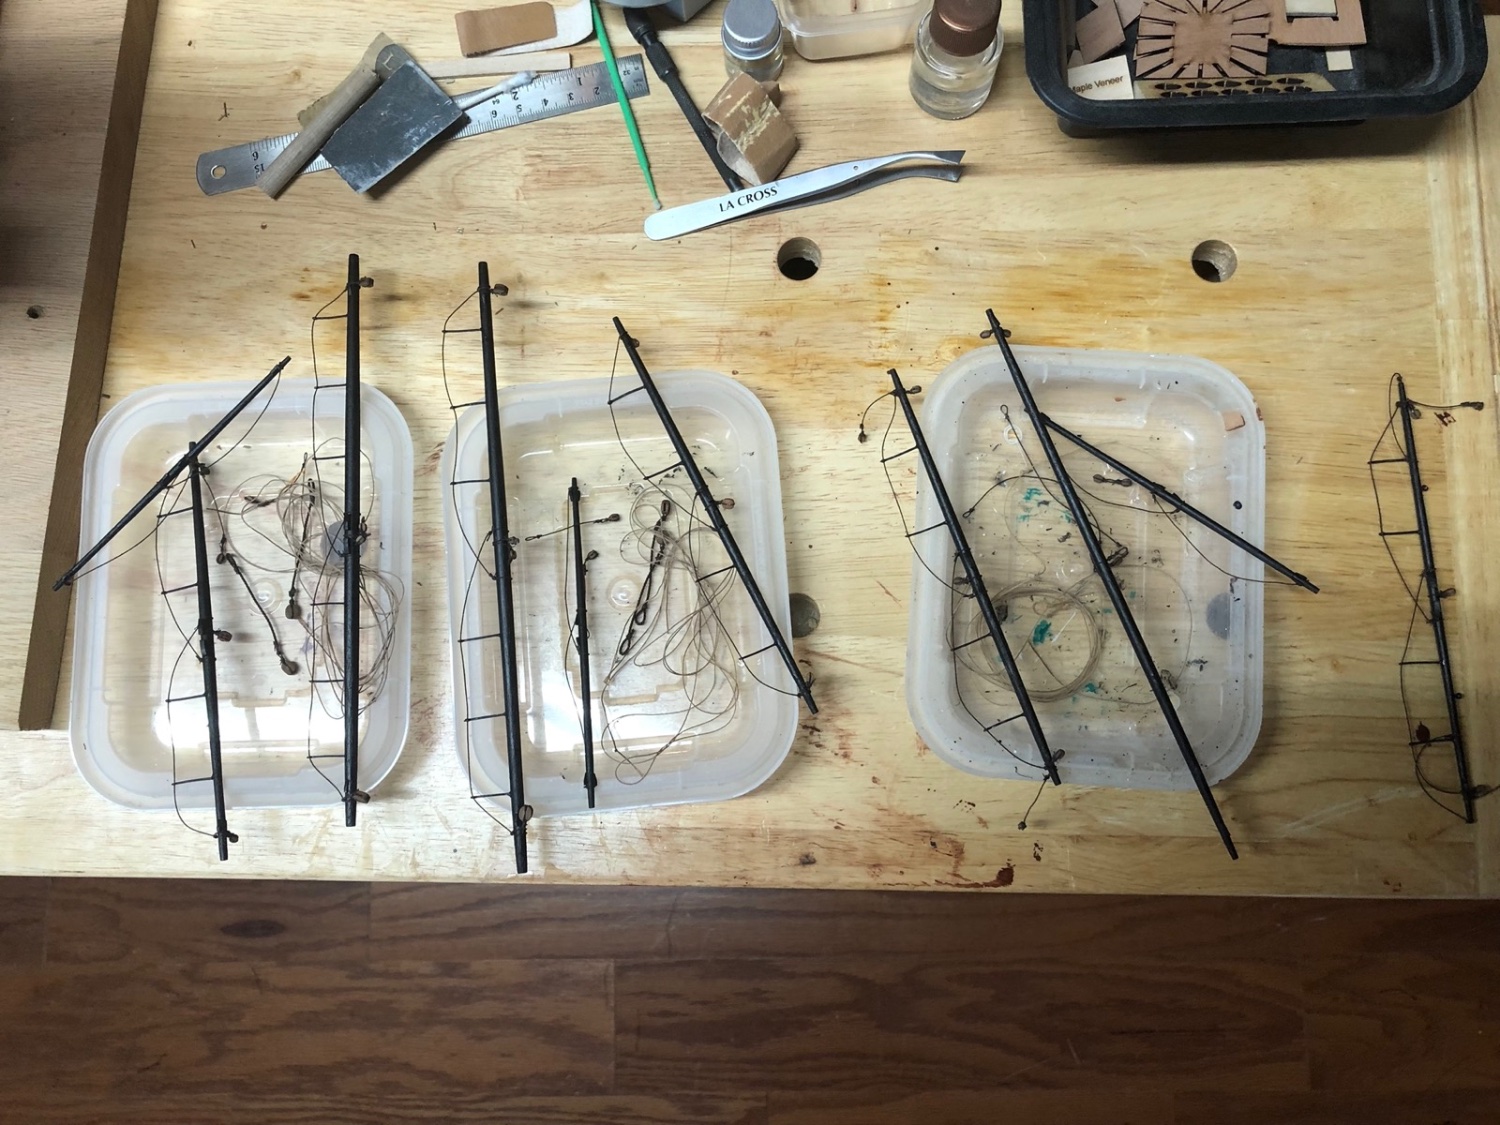
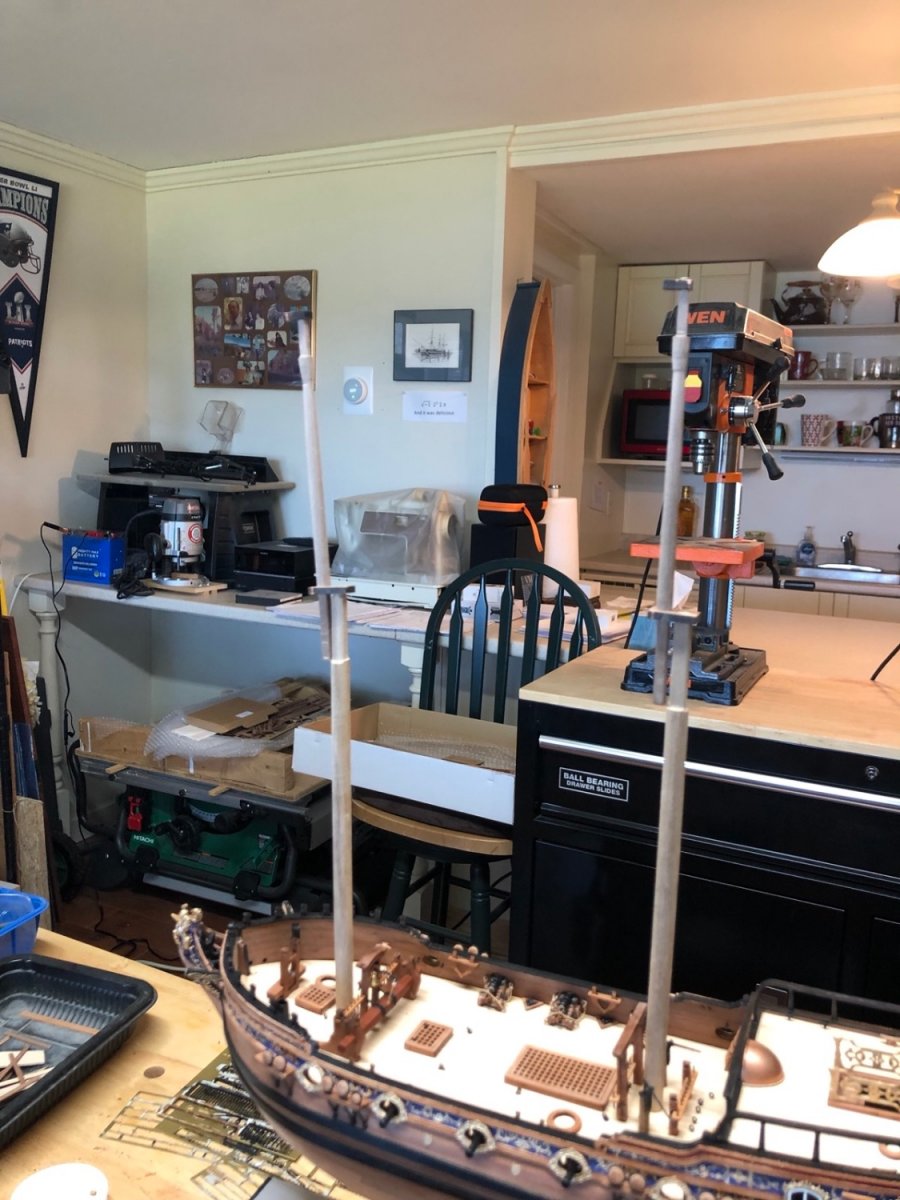
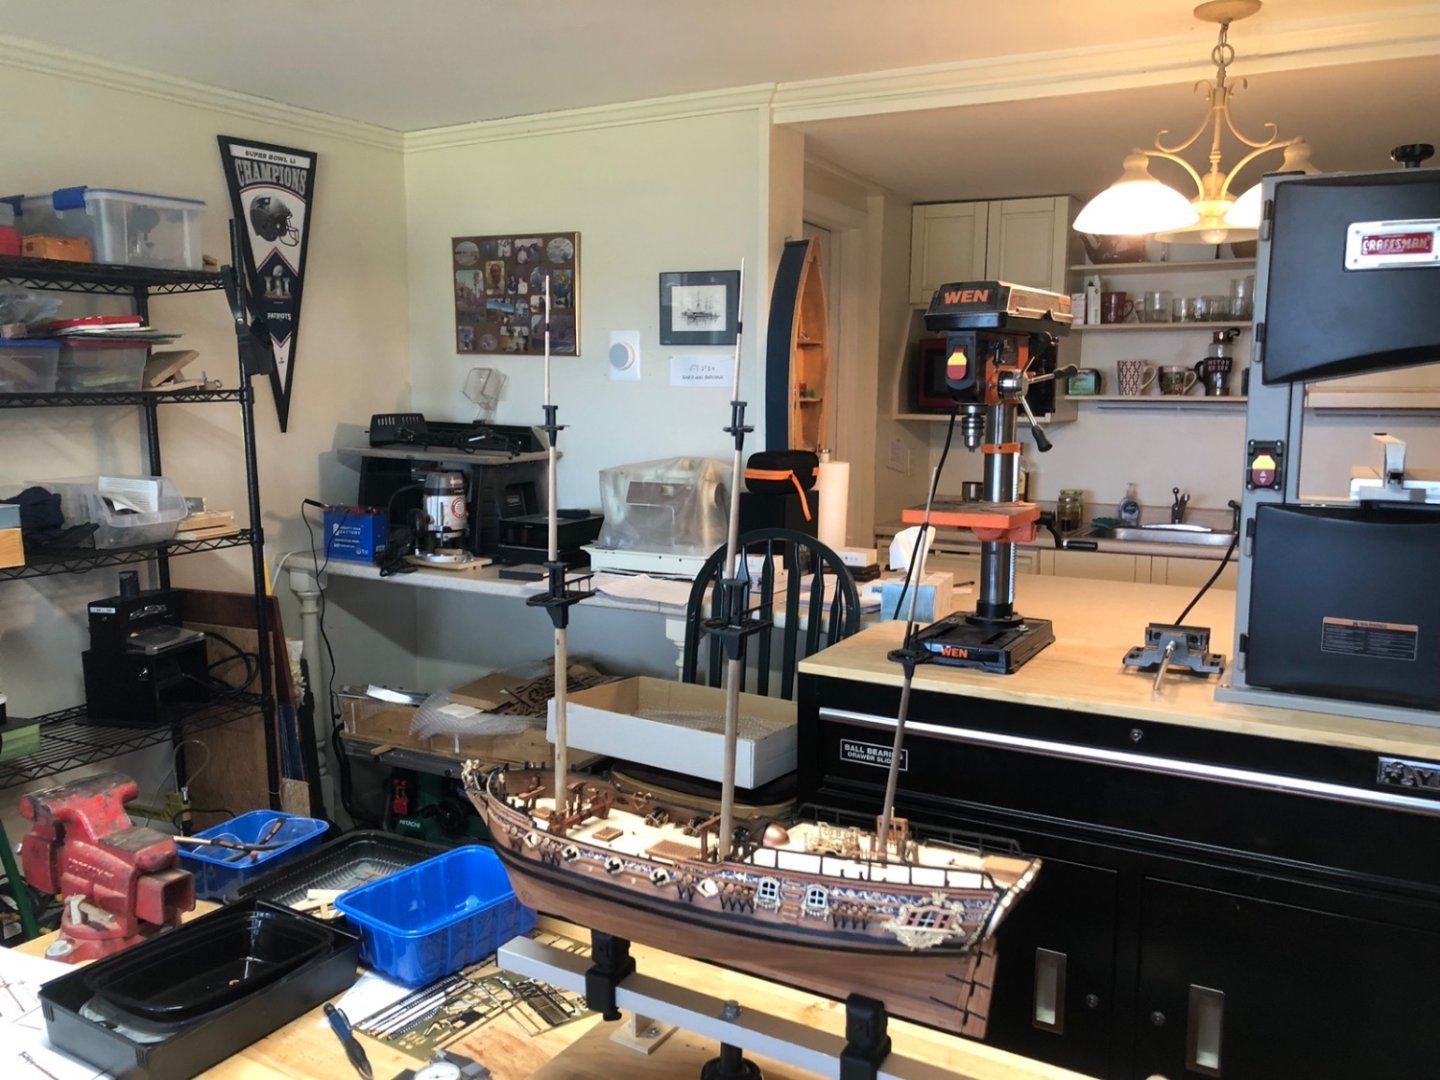
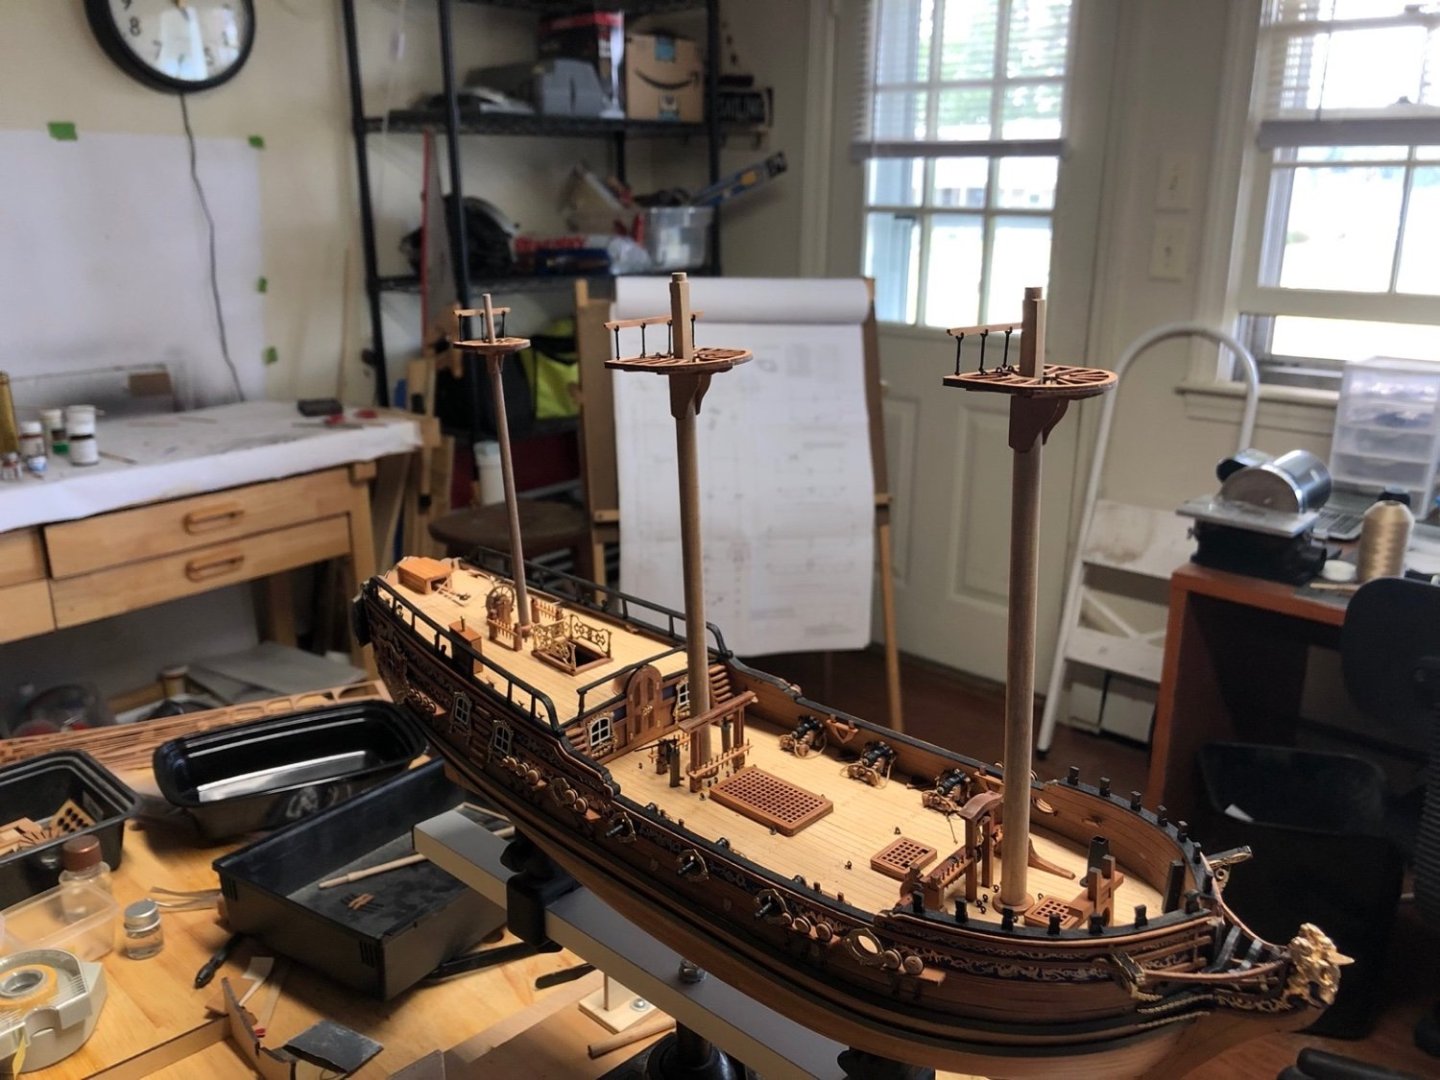
I am slowly working on the masts between lots of family visiting over the 4th weekend. I have made all the parts of the masts but will not assemble them totally now. I am assembling the lower masts first so that I can slip the shrouds over them instead of seizing them on the masts. I have added the eyebolts and railings to the mast tops and glued the tops to the lower masts. I also had to modify the lower mizzen mast to get the correct rake angle. I notched the bottom to still fit into the hole on the inside lower deck, but part of the open hole could be seen, so I made a mast coat that covers the opening. I was able to manipulate it over the hole with tweezers and push the mast through it.
- 118 replies
-
- 9
-
-
- Duchess Of Kingston
- Finished
- (and 1 more)
-
Thanks Rob. It is funny because right after I posted that I saw your build log and thought the same thing. You will do well with the Proton mill. I had one but then upgraded to a Sherline mill and lathe combo a few years ago that I like even better. It was a pre-retirement present to myself. The only complaint I had with the Proton mill was that the mill bits only went up to 1/8" wide, so you have to do multiple passes along the length of the mast. I used a 1/2" end mill bit in the Sherline and was able to do the square sides in one pass.
- 118 replies
-
- 3
-
-
- Duchess Of Kingston
- Finished
- (and 1 more)
-
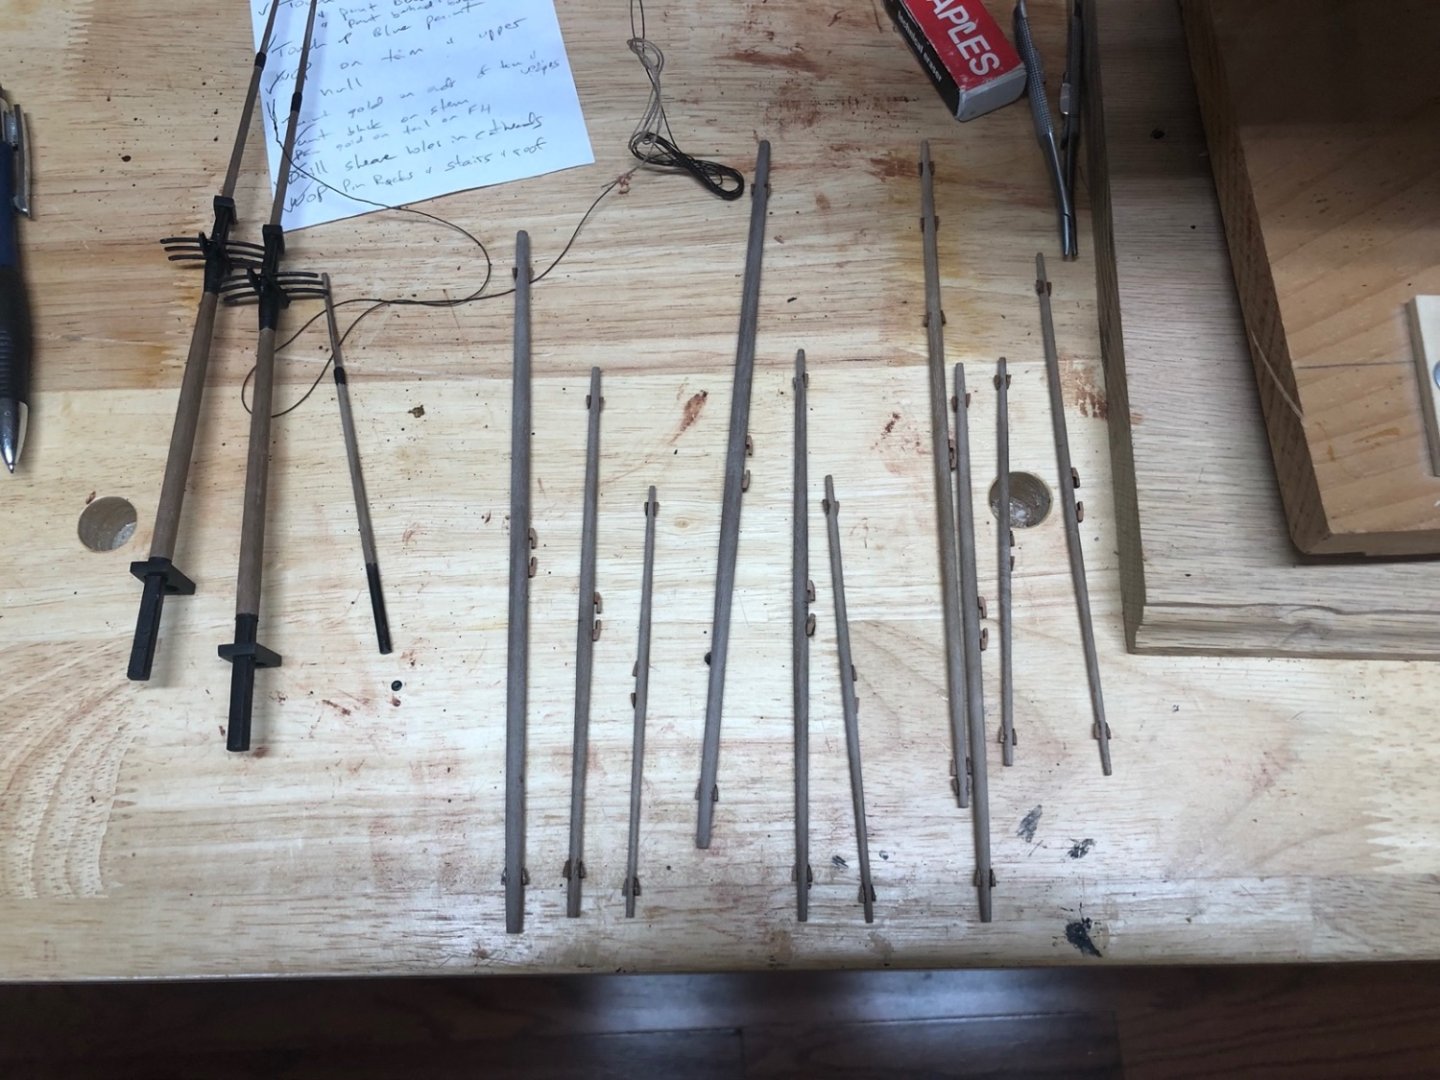
Thanks Glenn. You guys that have already built this model have been a big help. I started working on the various mast sections using a combination of the mill for the square sections and the lathe for the round ones. Here are the fore and main masts and topmasts which are ready to go. I have the mizzen mast ready and am working on the mizzen topmast. I made sure all these sections fit into the various holes in the tops and caps so I won't have to fiddle with them when it is time to assemble the masts. I do still have to file the flats in the lower masts for the hounds but I will do that when the tops are ready to fit.

- 118 replies
-
- 8
-
-
- Duchess Of Kingston
- Finished
- (and 1 more)
-
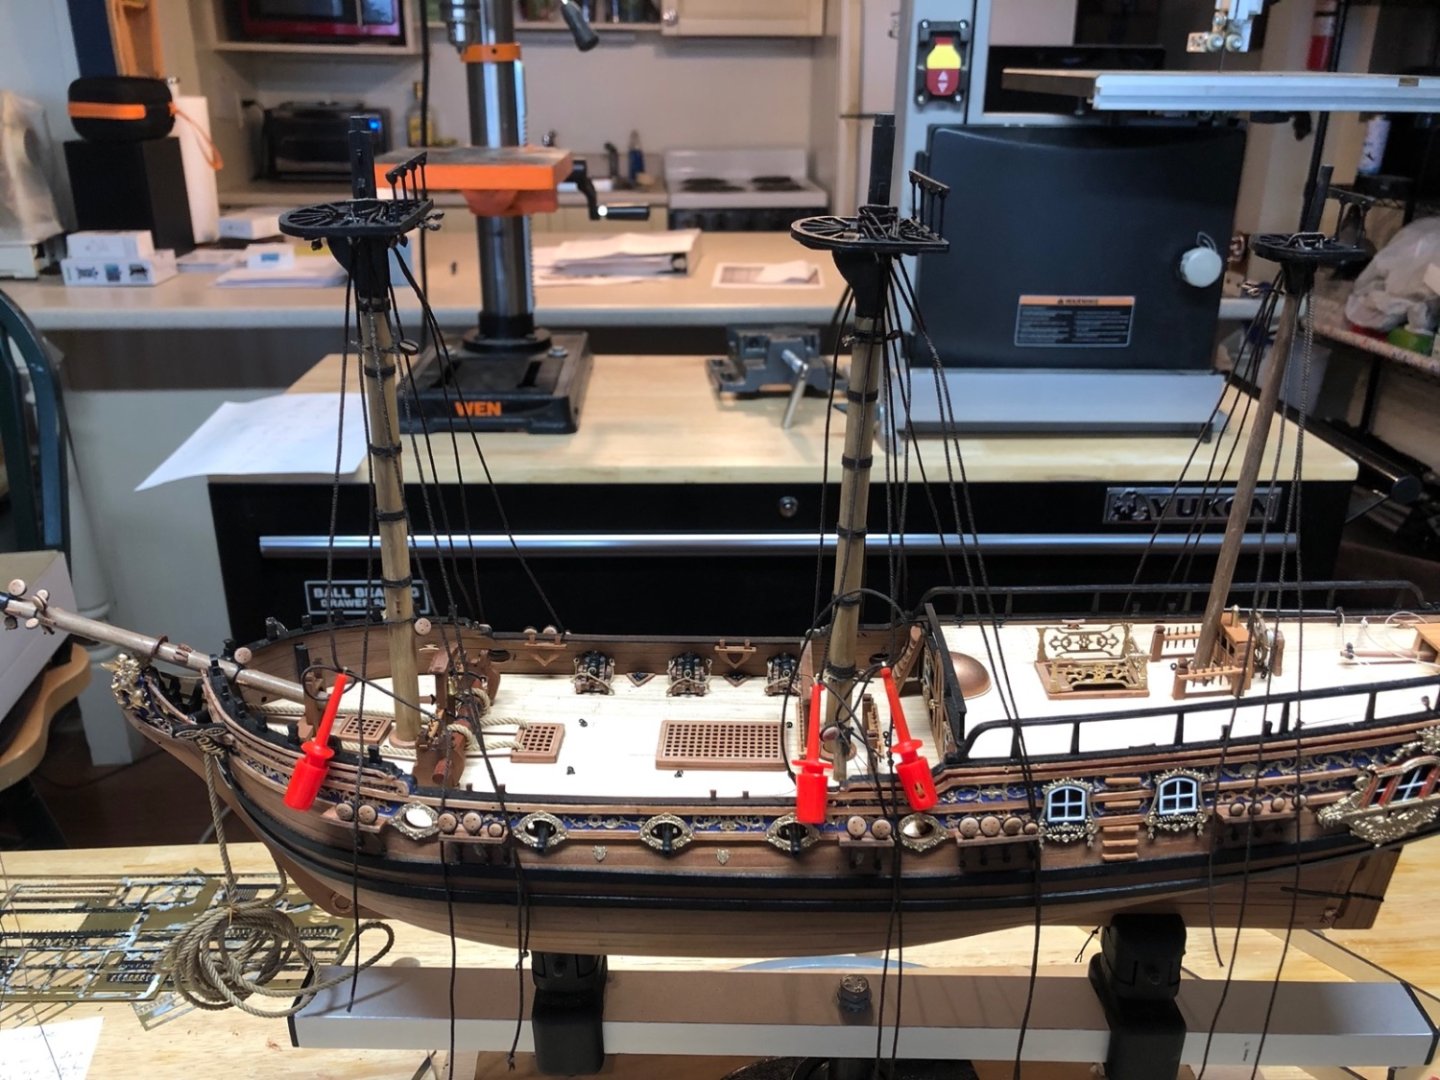
I have stropped the lower shroud deadeyes and added them to the channels. I don't have any of the included brass nails left so I used some others I had around which are a little thicker, so I drilled out the holes in the strops to fit them. I did this when they were still on the PE sheet. I really liked the PE strops as I found it very easy to fit the deadeyes into them after opening them slightly. I am now working on the masts, starting with the tops. Here I am gluing the two halves of the top platform together. Today I started gluing up the crosstrees and trestles.


- 118 replies
-
- 9
-
-
- Duchess Of Kingston
- Finished
- (and 1 more)
-
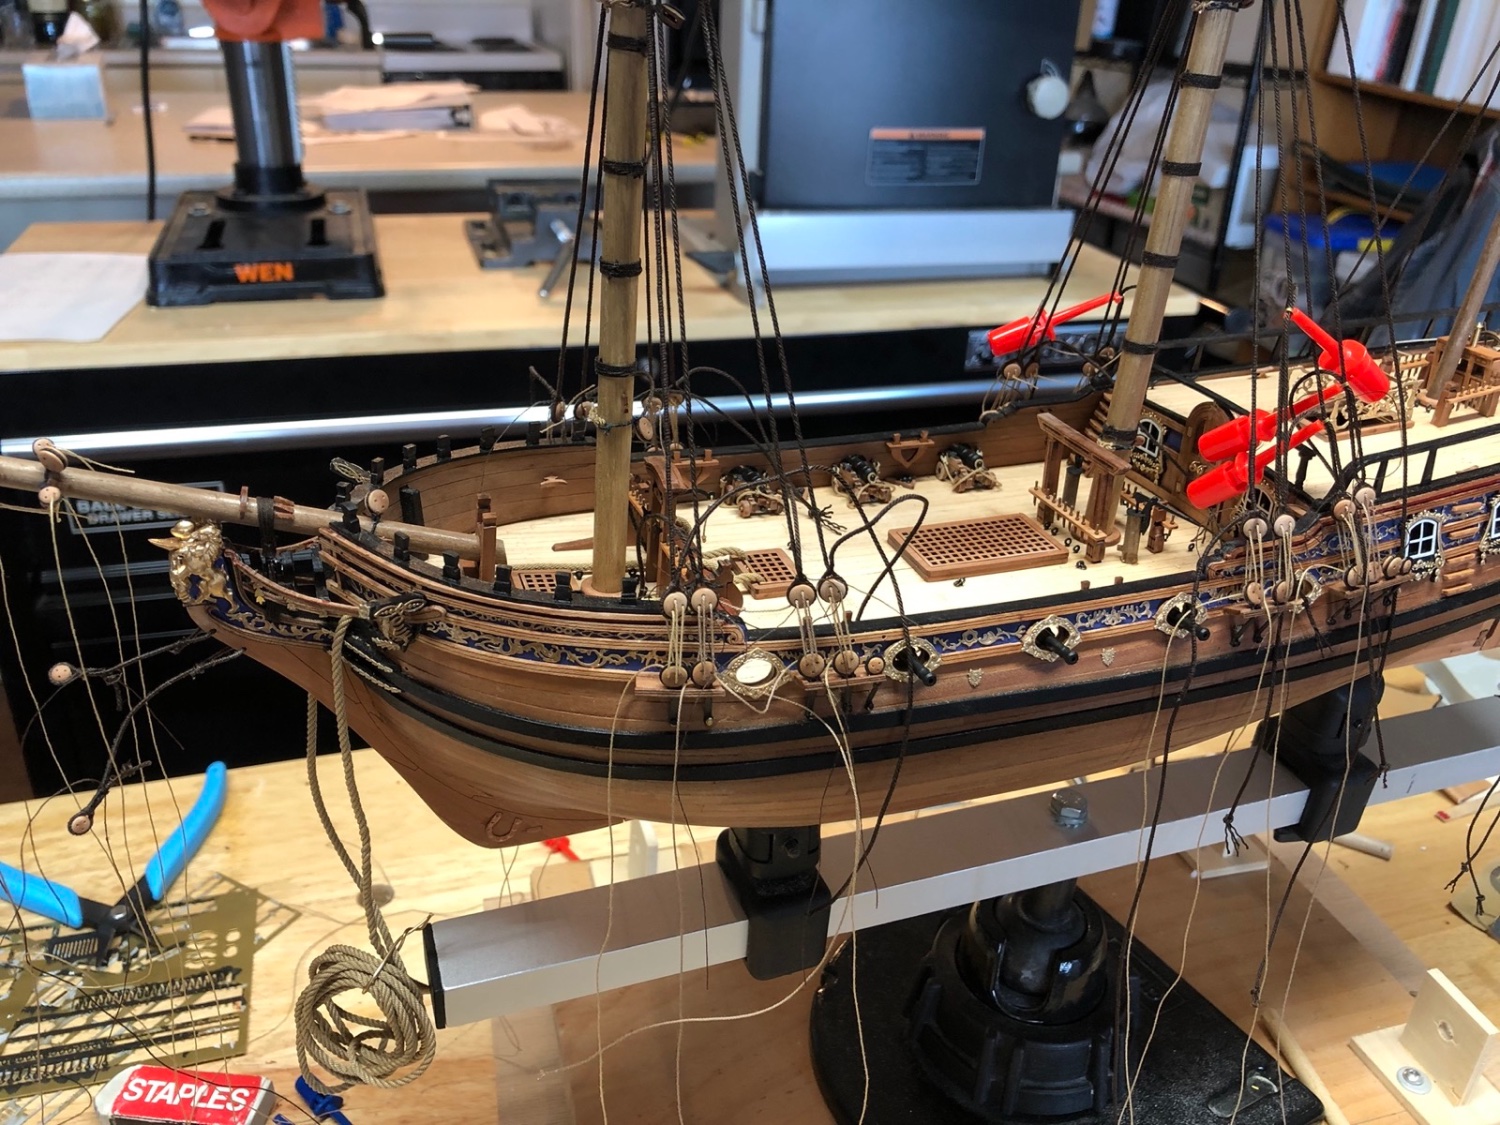
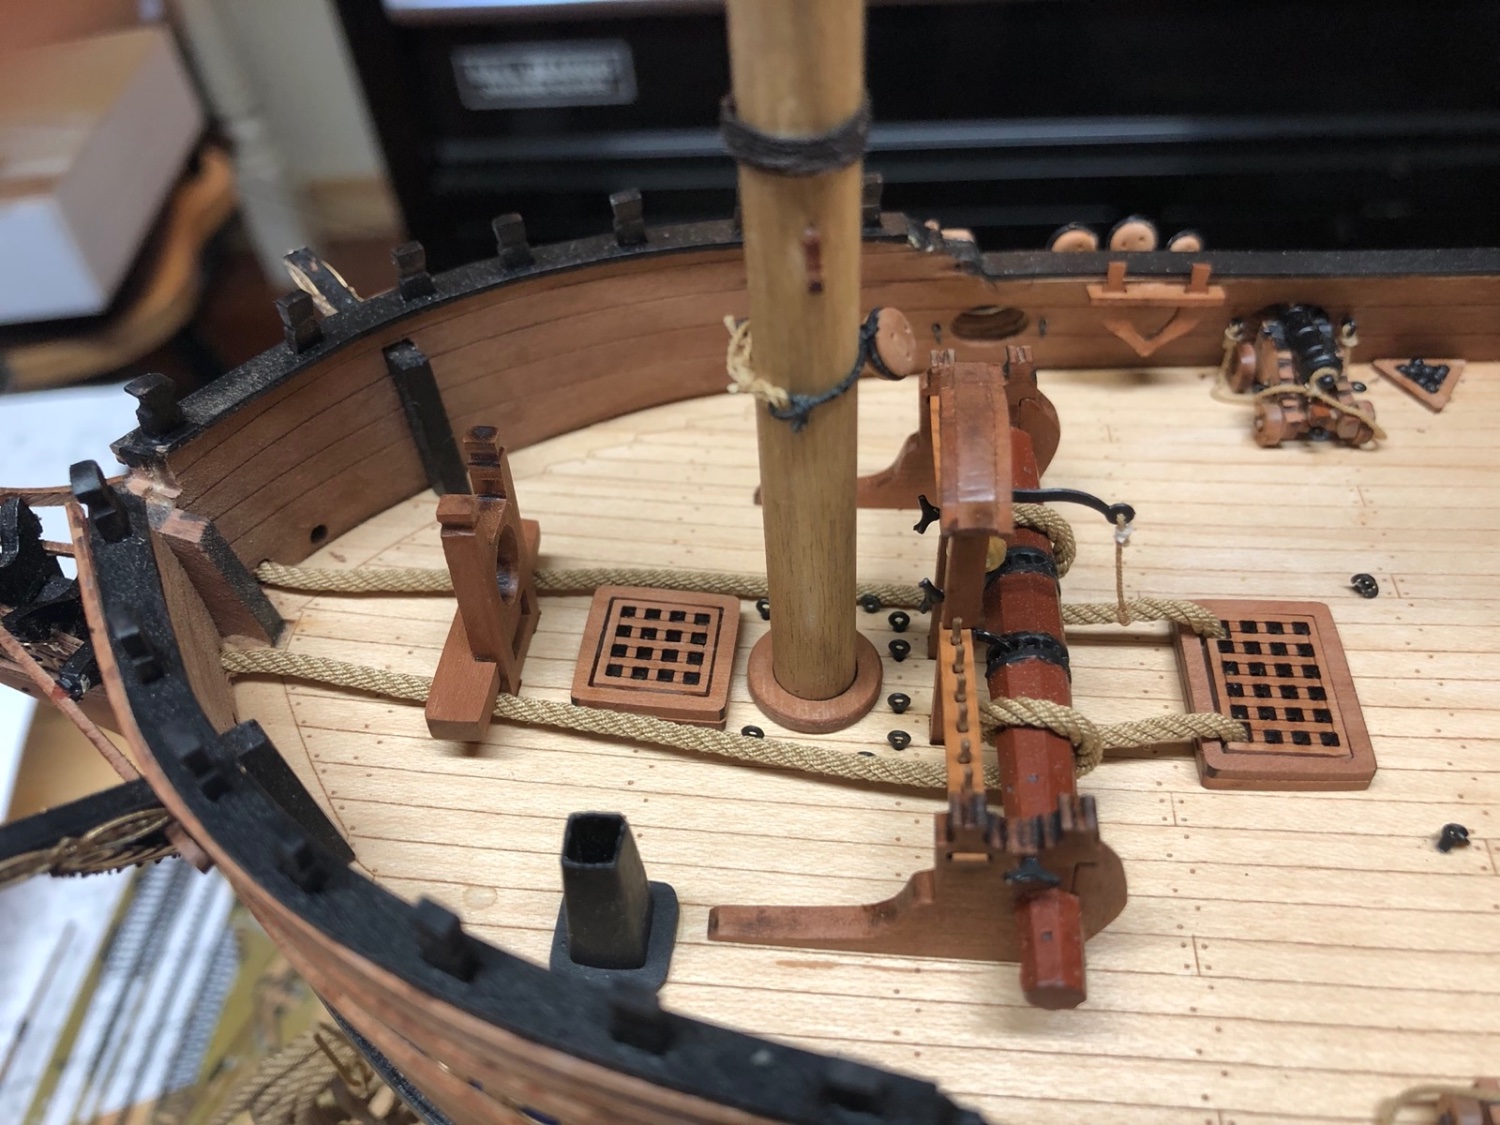
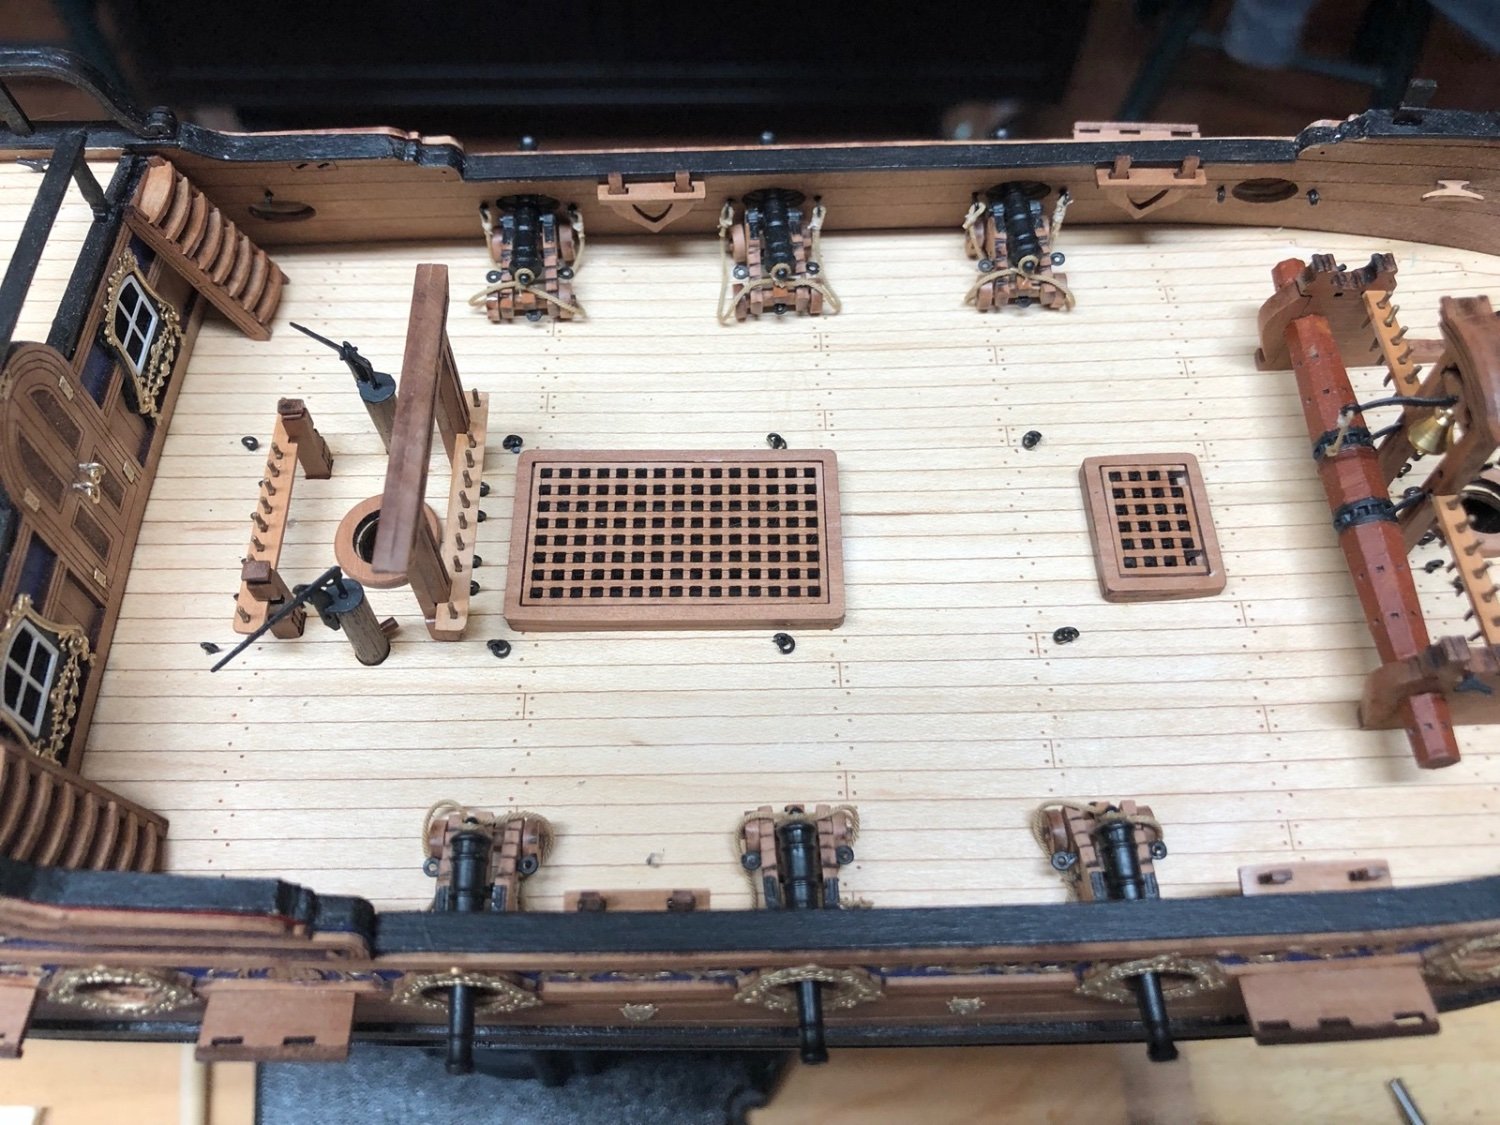
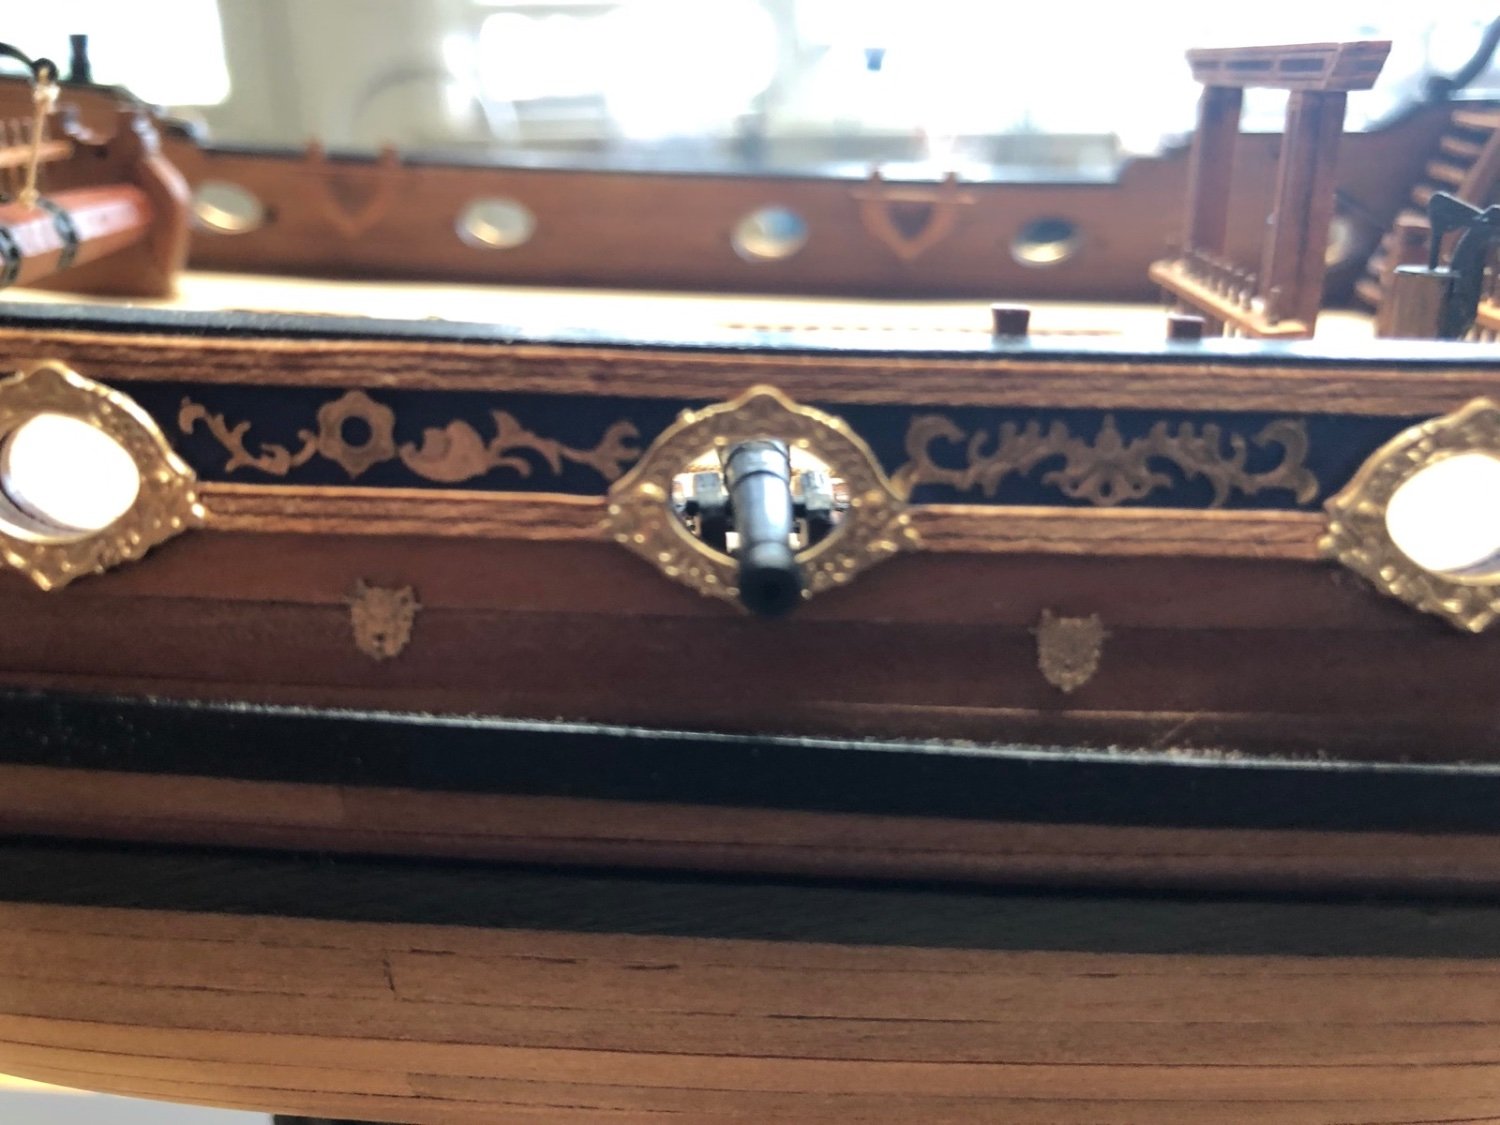
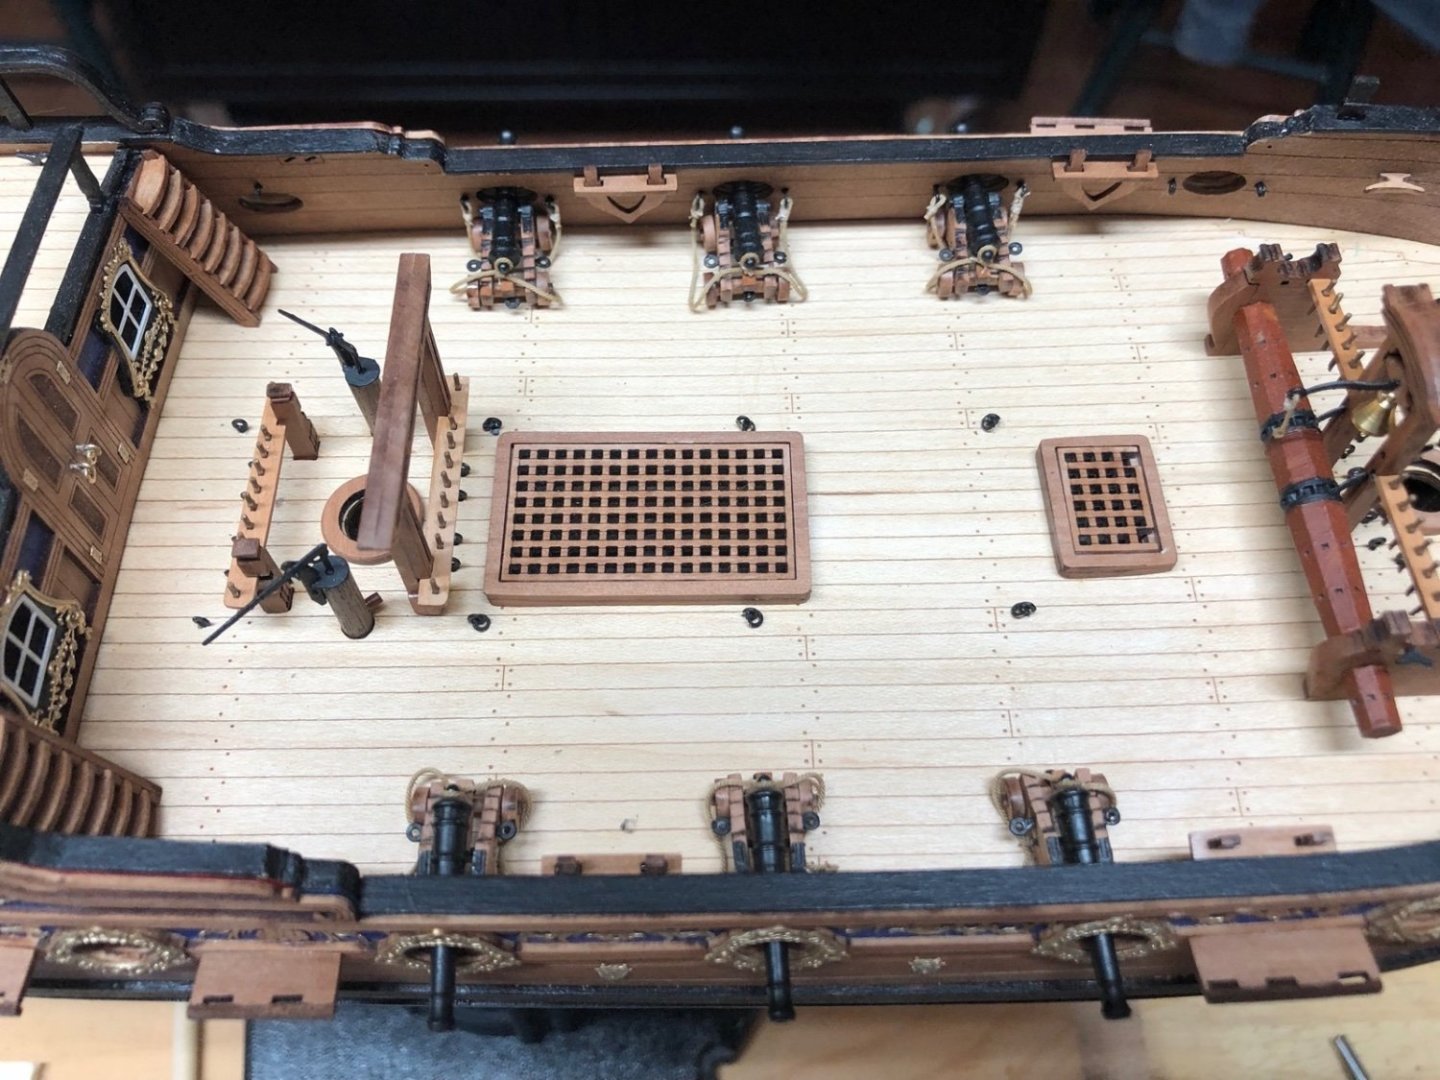
All cannons now in place. Shot holders will be added next.
- 118 replies
-
- 7
-
-
- Duchess Of Kingston
- Finished
- (and 1 more)
-
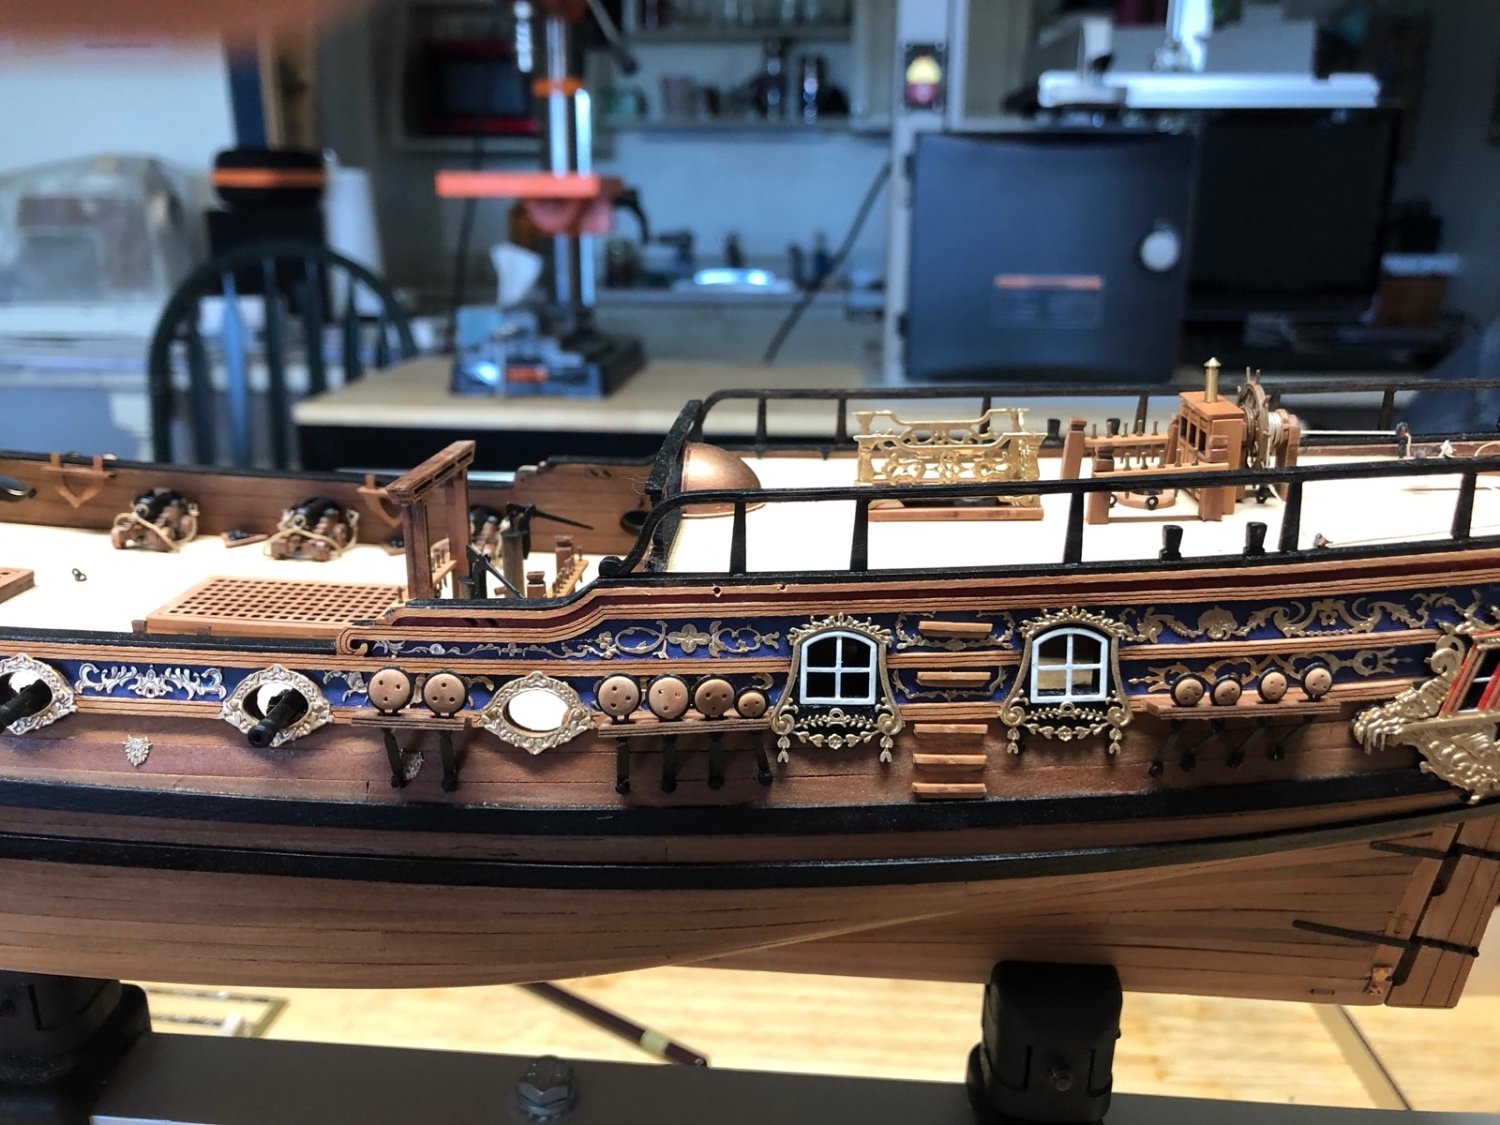
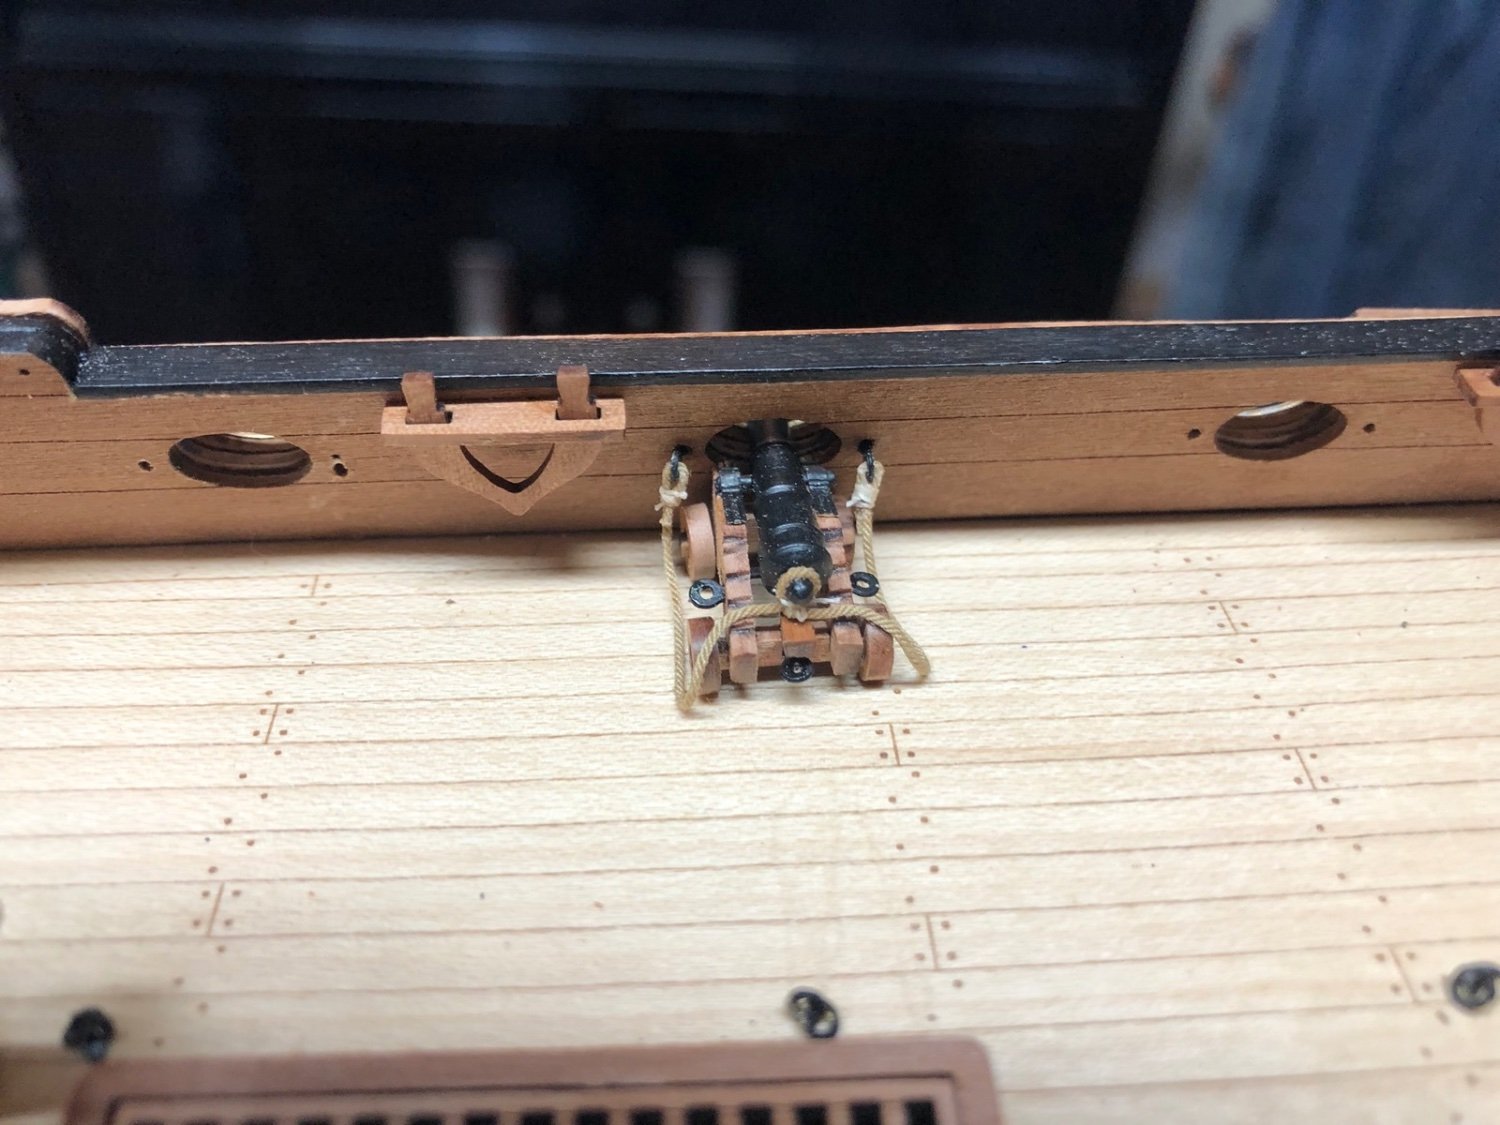
The cannons are assembled and I have added breechings to them. To make the breechings, I first tied a throat seizing to a piece of line to make a loop then seized eyebolts to the ends of the line. I didn't fix any of the seizings so I could slide them to make adjustments. I slid the center loop over the cascabel of a gun barrel then tightened and fixed the throat seizing. I then adjusted the eyebolts to get the length of each side of the breeching right (about 3cm), then fixed those seizings. Here is the first gun installed. I glued the trucks to the deck first then glued the eyebolts into the holes in the bulwarks. I was happy with the way the line played down onto the deck. Here is how it looks from the outside. Only five more to install. I have the shot holders ready to install too with the shot inside. I found it tricky to get the shot to stay in the holders when I put lacquer on them to hold them together, but with some persistence I got them fixed inside the holders and reasonably flat. I also added all the interior eyebolts and cleats and drilled the holes for the exterior eyebolts, although I won't add those until I rig the lines that they attach to, so I can do those seizings off the model.
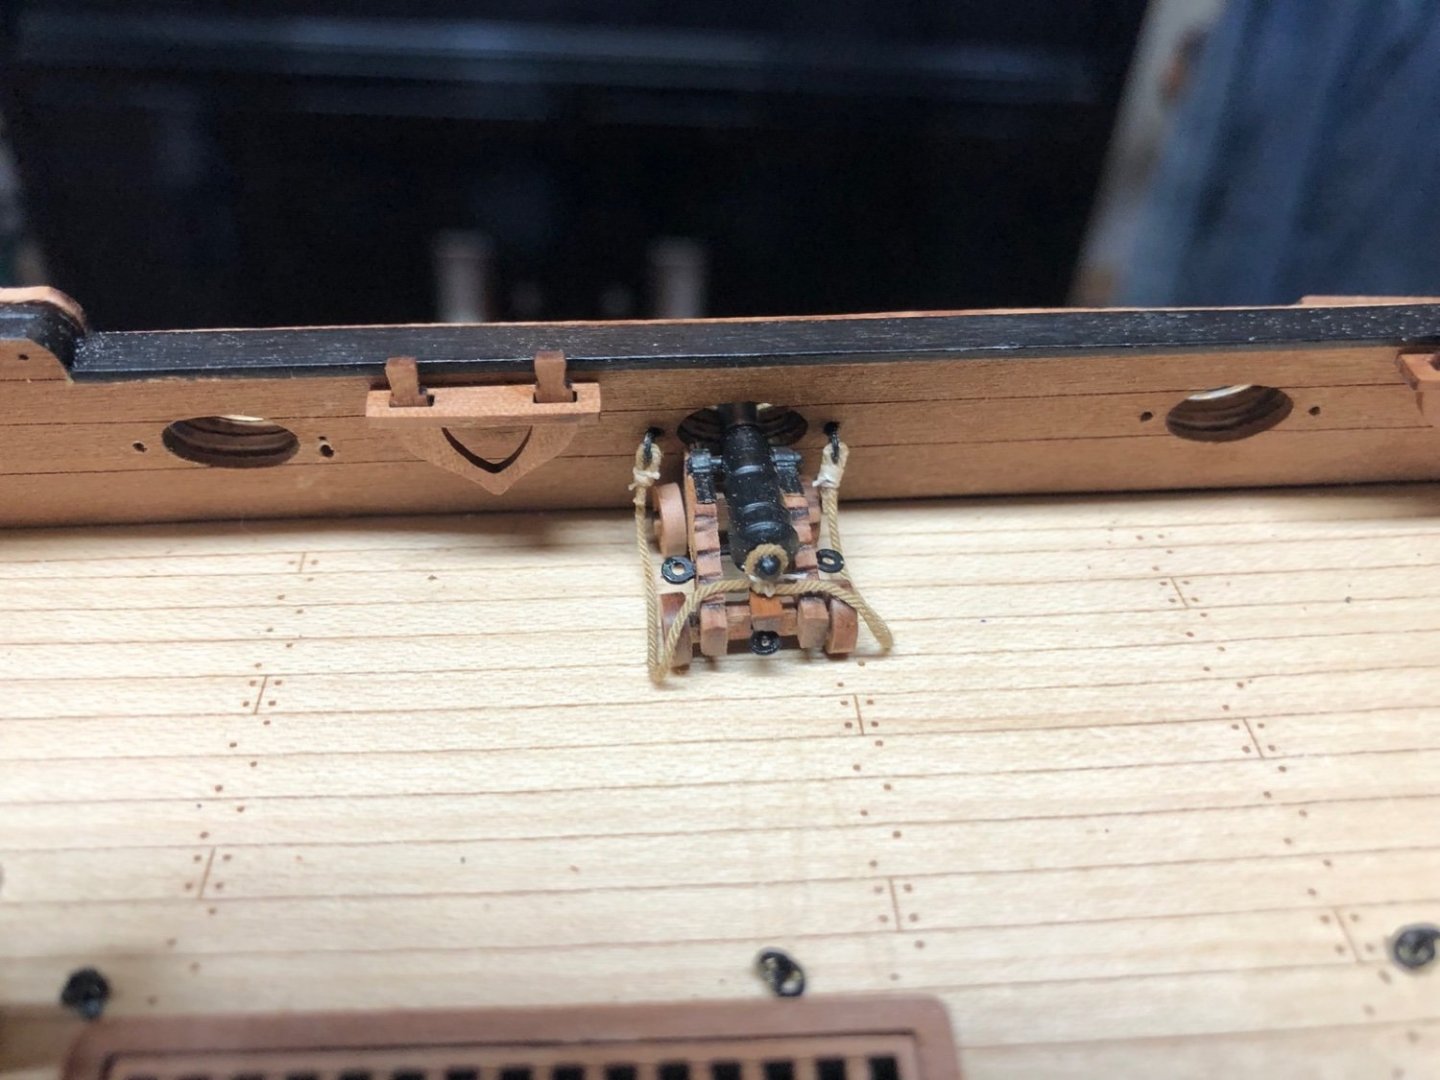

- 118 replies
-
- 7
-
-
- Duchess Of Kingston
- Finished
- (and 1 more)
-
That is a nice build Rob. Looks like you figured out the signature, too. Well done.
- 118 replies
-
- 3
-
-
-
- Duchess Of Kingston
- Finished
- (and 1 more)
-
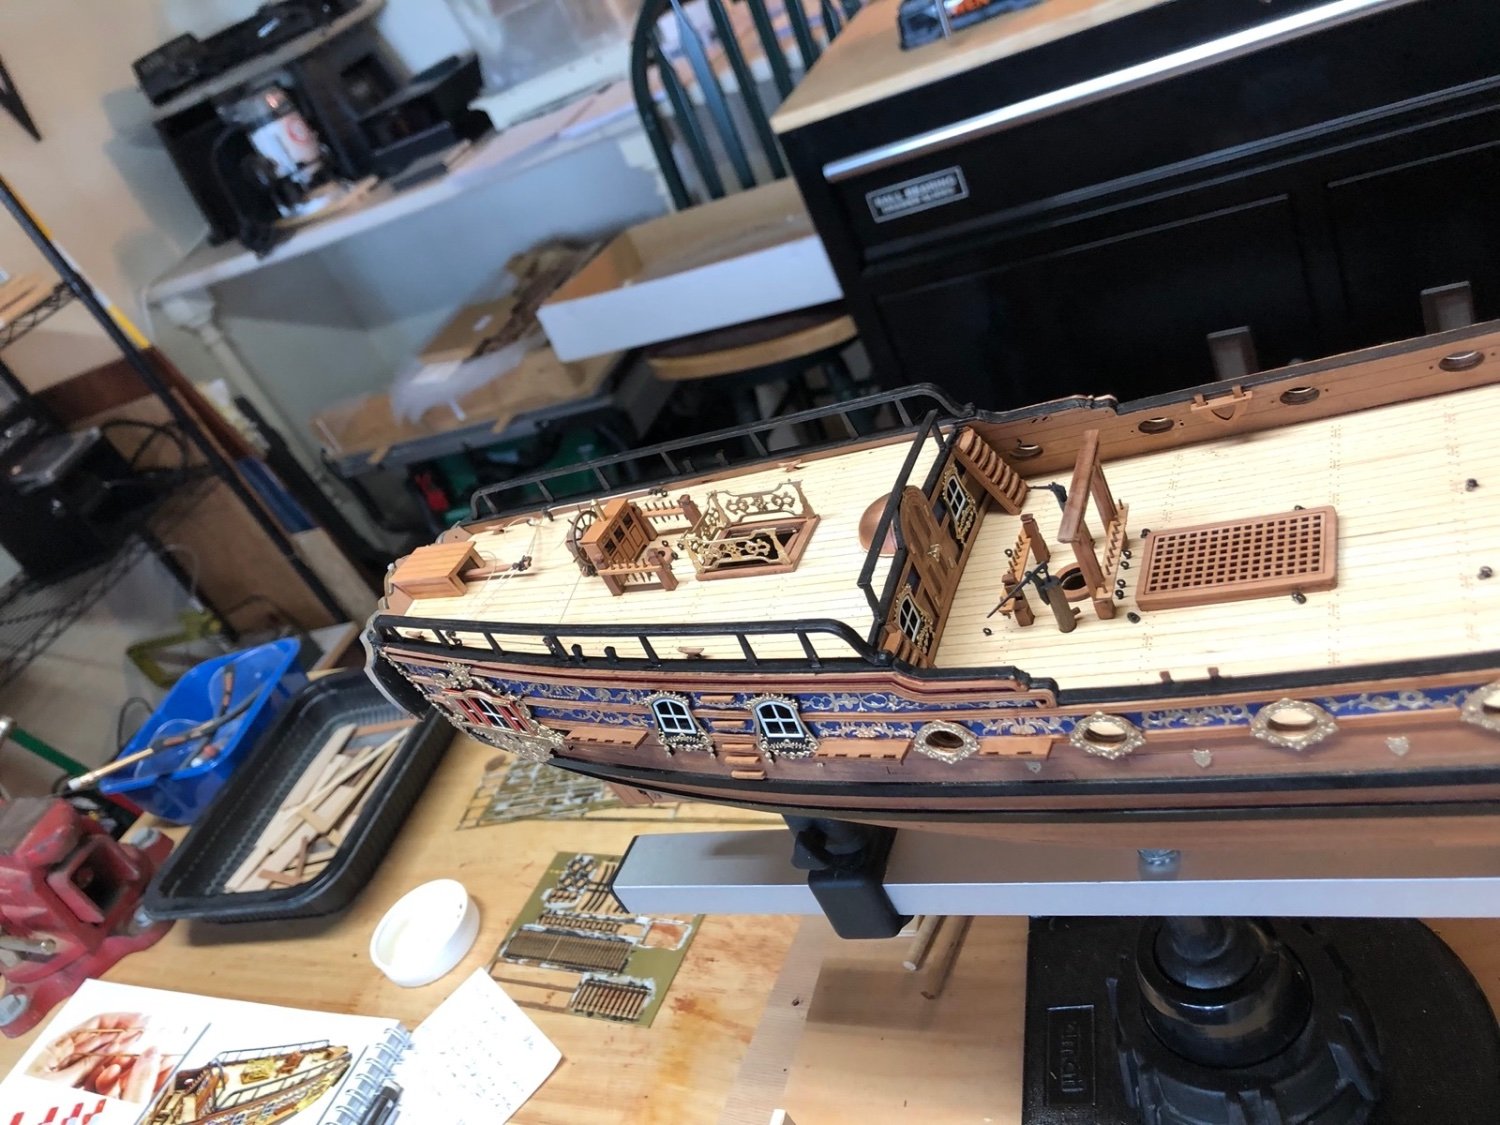
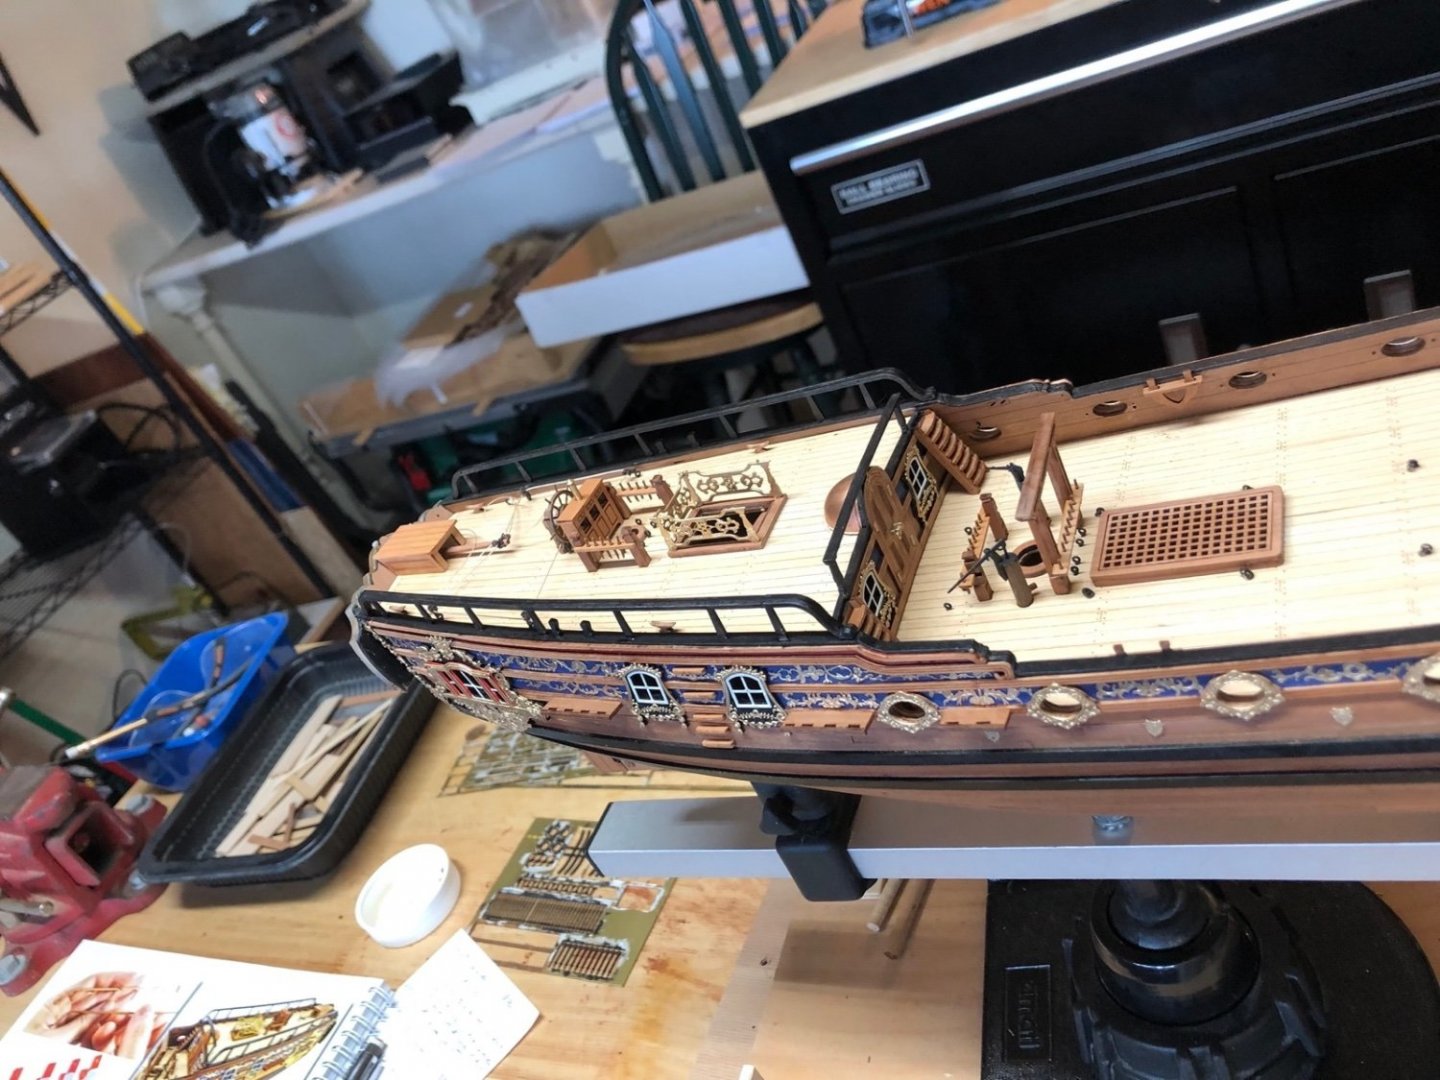
Thank you Rob and the likes too. Rob, keeping the builds clean is something that has taken me quite a lot of time and I am still not totally there yet. Do you have a build log? I'd love to see your build. I have the quarterdeck stairs and side railings built and installed and the cannon carriages are in the process of being built. I thought the cannon barrels looked a little shiny so I gave them a coat of flat black paint. Here is a weird photo of the stairs and railings.
- 118 replies
-
- 10
-
-
- Duchess Of Kingston
- Finished
- (and 1 more)