HOLIDAY DONATION DRIVE - SUPPORT MSW - DO YOUR PART TO KEEP THIS GREAT FORUM GOING!
×


Chuck Seiler
-
Posts
1,876 -
Joined
-
Last visited
Content Type
Profiles
Forums
Gallery
Events
Everything posted by Chuck Seiler
-
 I expect to have pics showing progress on cookstove, deadeyes and mast support beam by tomorrow.
 -
Mike, How does this compare to the row galleys used on Lake Champlain at the same time?
- 175 replies
-
- 1
-

-
- washington
- galley
- (and 1 more)
-
Bob, Welcome back online. Looking forward to the build continuing. When is the house warming/shop warming party?
-
Brian, I have had the MS RATTLESNAKE kit for years, sitting patiently in the closet. I look forward to your build.
-
Dave, Which paintjob are you talking about? The longboat or cookstove? Chuck
-
Guy, I still have not loaded IE 11 yet, so have not yet attempted to get on. I plan to do that this weekend. I will let you know if I have similar issues.
-
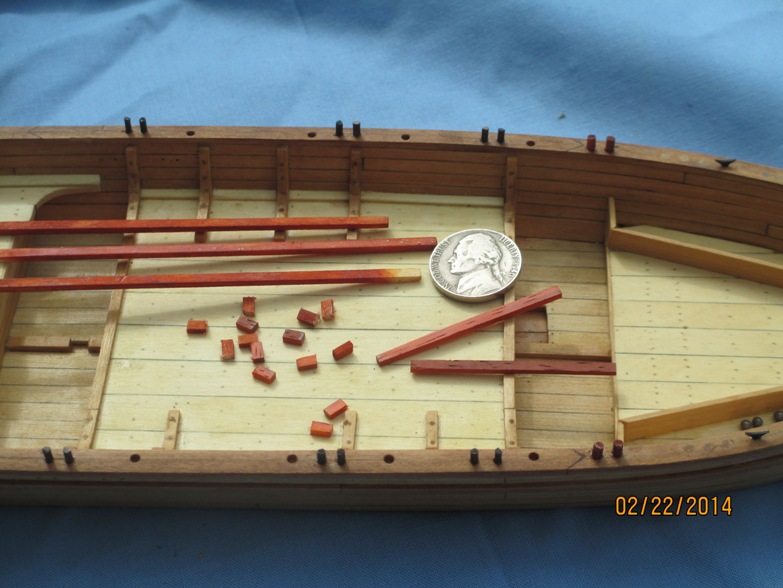
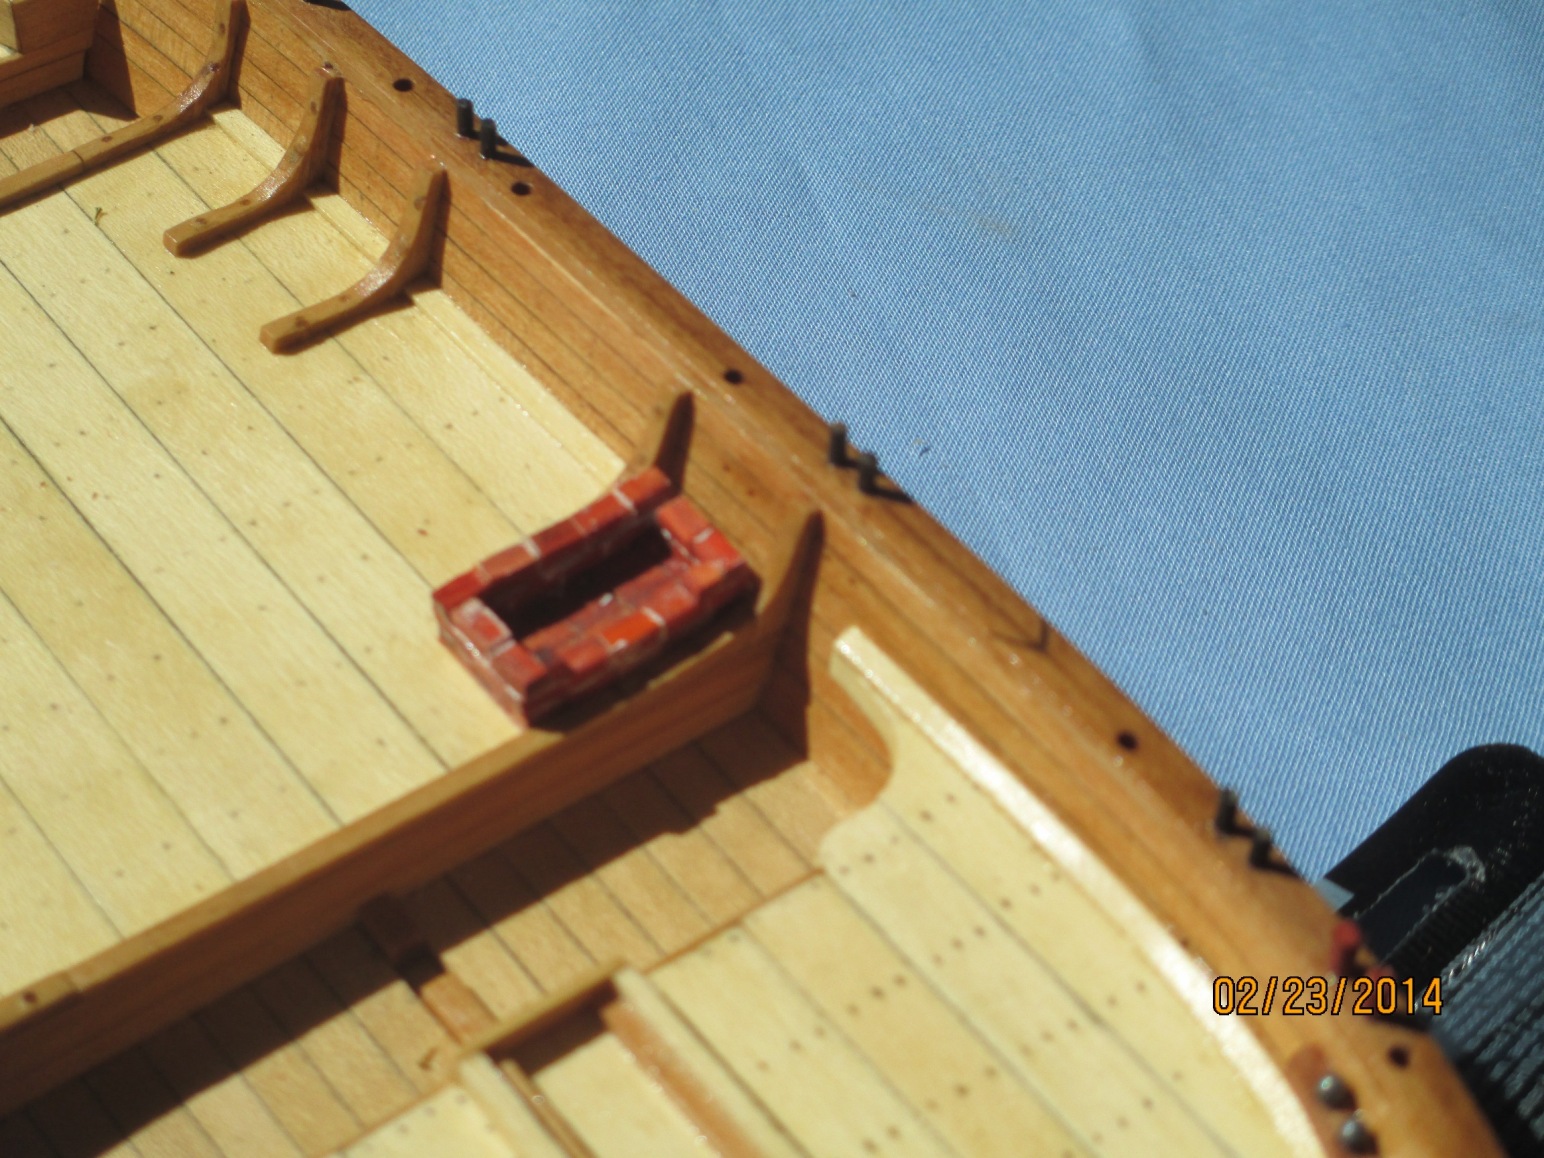
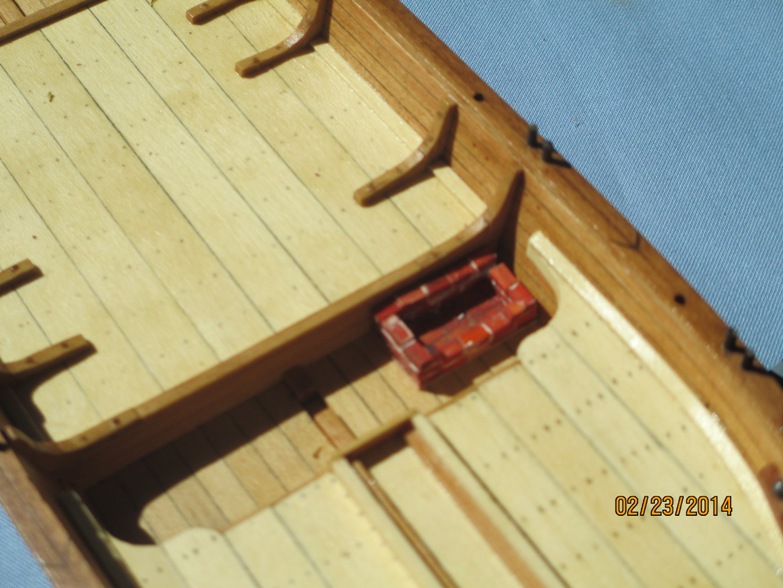
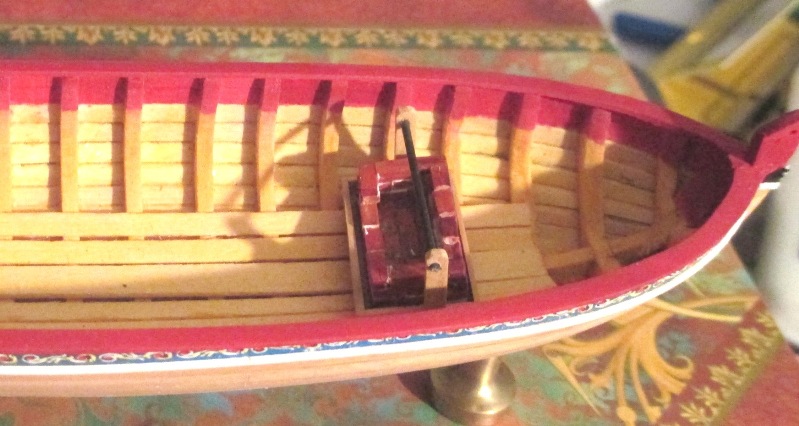
MacGyver was unable to find matchsticks, so we used these. I was unable to find suitable bricks, so I made them from wood. (Having said that, 250 people will direct me to the bricks I needed.) I remember having small scale individual bricks many years ago. I tried hobby stores, train scores and Google to find them. I was able to find adequate brickage from a fine company in UK at a reasonable price, but the shipping/associated cost were just too much. I used padauk wood and stained holly. Mr. Jefferson looks on, wondering if Mr. Franklin has that stove thing patented yet. The hearth and first couple courses completed. This is where the cook stove sits on the PHILDELPHIA in the Smithsonian. Here is where it sits on the plans. The athwartship mast support is in place. What could POSSIBLY go wrong here???? Don't let the safety guys see this!!!! I'm not sure why the PHILLY didn't burn to the waterline or explode long before the battle. This does not look like a very good place for a cook stove, but my readings indicate this IS where it was. They are able to see the charring on the underside of the mast support. Maybe this thing will work on the 18th Century Longboat (same scale). What do you think????? Maybe I can sub-contract to Chuck P so he can provide an after market add on to the longboat kit.


-
Your job, Mr. MacGyver, is to build this with match sticks and chewing gum.
-
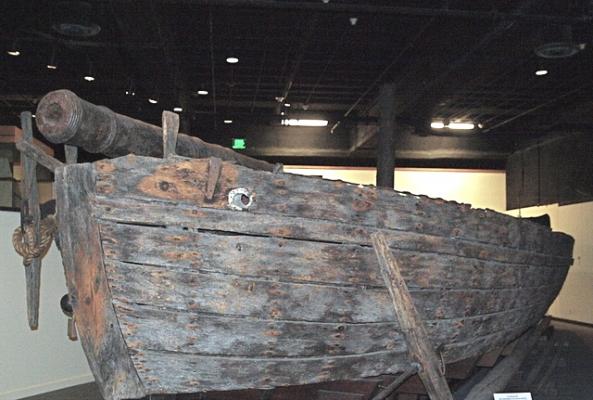
Here is a close-up pic of PHILLY's bow and the corroded nails. By tracing the nails you can also see where the frames are.
-
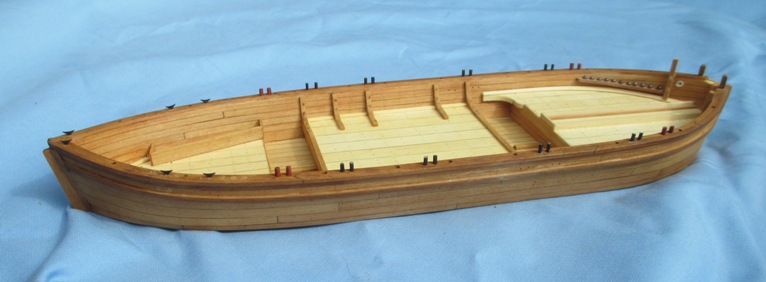
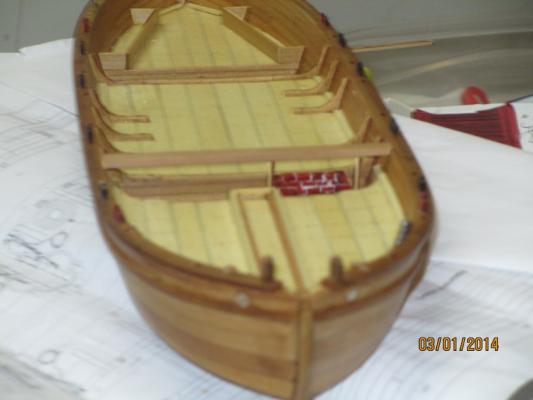
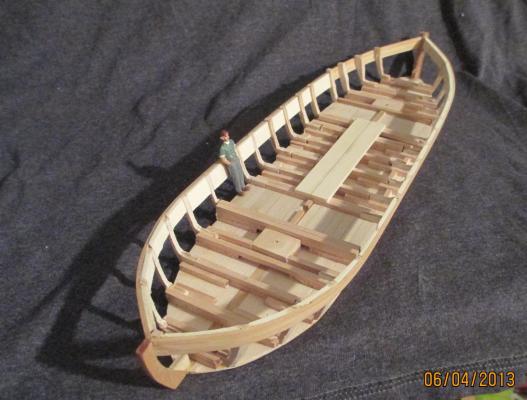
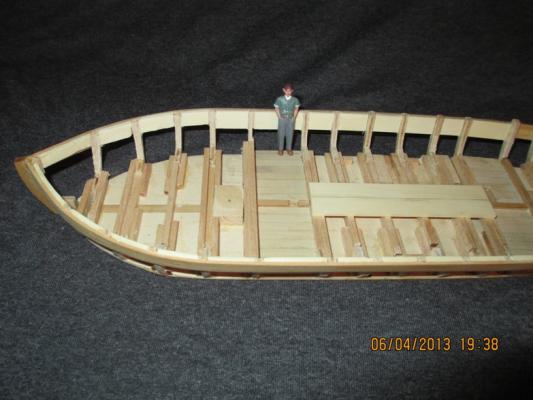
I forgot to mention in the previous pic that while the interior planking is stained with GOLDEN PECAN, the exterior is PECAN. It provides a dirtier brown finish, giving the rustic color I am working for. I will endeavor to get a good exterior shot. Another lengthwise shot of the completed hull. Thole pins bitts and cleats are mounted. A close up shot of the bow section. Shot rack with 12lb shot is mounted. Note nail heads in the deck planking. Iron nails were a lot easier than traditional tree-nails to make and use. They were not too concerned about them rusting away since they didn't anticipate the ship being around long. Ironically (IRON-ically...get it) the nails still exist..a bit corroded...in the actual ship. (See early picture) A lot of nails were used to keep the thing from coming apart every time they fired the guns. Close up shot of the stern. The arms locker hold spare shot and a few drill bits. Holes in the caprail are for awning stations. Next step....the cook stove.

-
THAT LOOKS LIKE A MIGHTY FINE CARGO HAULIN' BATEAUX. ARE YOU SURE IT'S A GUNBOAT? You have a keen eye my friend! the gunboats were pretty much designed after the bateaux used in the area. Allegedly, Arnold wanted the gunboats to be like the ones on the Delaware River but nobody had the plans and didn't have time to get them. He redesigned the boats because the shipwrights and carpenters available had been building bateaux for a year in order to ferry troops and supplies up and down Lake Champlain. It was more important to have hulls in the water than have masterpieces sometime in the future. WOW! Indeed.
-
Thanks David. I hope you enjoy the progress.
-
Fast forward to 22 FEB 2014

-
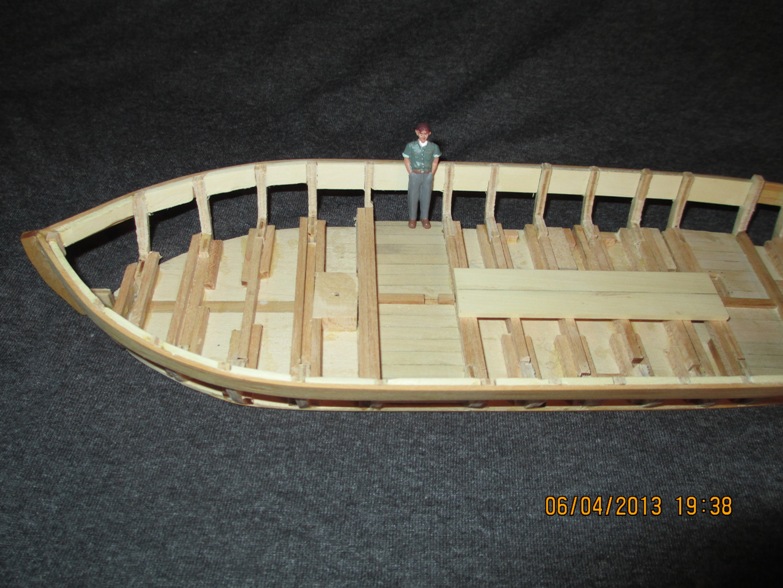
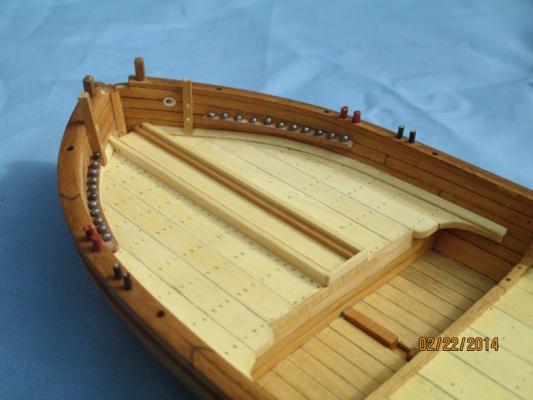
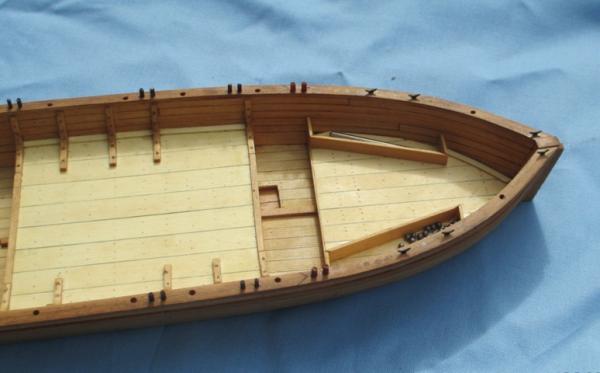
Not a whole lot got done between July and December. I took some pics in December and they came out blurry. They are the only ones I have, so..... Forward gundeck in the process of planking. The 'slide' for the 12 pounder is in place. Note the large 2 foot wide planks here as well as the center deck. A lengthwise shot showing all decks. Support stanchions for the center gundeck (heretofore called the POOP!!!!! deck) are taking shape. After most deck planking is narrower than other two decks...a mere foot and a half. Weapons lockers are marked out aft.

-
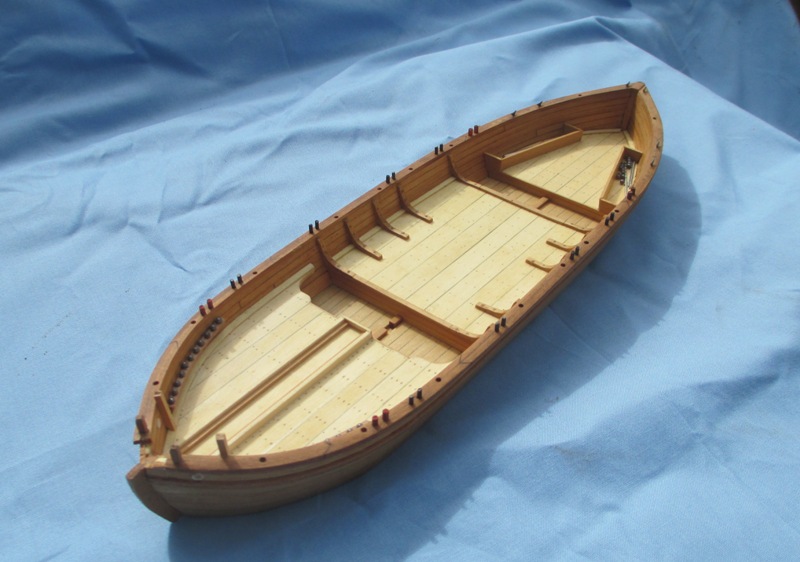
It is almost at the end of the Fair....1 day to go. I have the interior planking done and stained. I did not go all the way down to the bottom with the interior planking because I wanted space to be able to work the exterior planking. The interior is stained with Minwax "Golden Pecan" You see work on the middle deck planking progressing. On this model, this is the poop deck. I had the planking completed and I placed a prototype of the 9lb gun on it... "Poop" <I sez>. The muzzle did not clear the caprail. I had to add another layer of planking to make it work. On the actual ship, the forward deck is the poop deck. When they loaded the 12 lb gun forward, "POOP!!!!!" it failed to clear the stem and caprail. They ended up having to cut away that portion of the caprail and a piece of the stem. Unless I tell you, you would never know I had an extra layer of planking. It is hard to miss the cut out stem. Exterior planking takes shape. Planks are same size (scale wise) with the same buttjoints as the real ship. The upper three strakes are slightly different widths, but approximately 1/8" (6 scale inches). The lower 4 strakes are all 1 foots. except here narrowed. Interior planking is all 1/8 inch (6 inches).
-
Then what will I bring for the Wednesday meeting?
-
Edge bending planks
Chuck Seiler replied to ortho85's topic in Building, Framing, Planking and plating a ships hull and deck
Check out BoBF's build log for the 18th Century Longboat. He discusses edge bending. -
Another way to do it is to position the basswood blocks at the edges of the bulkheads so they overlap the edges. They would have to be sanded down to match the curve. The end result is not only a more stable frame but a better surface area for planking.
-
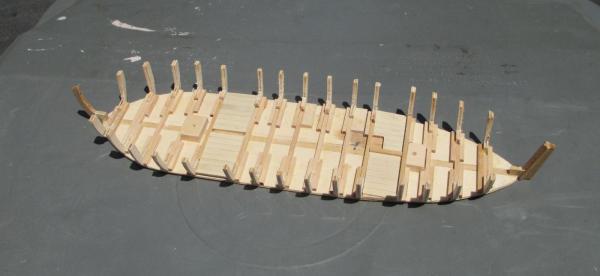
The previous stage was late May 2013. I was on a building binge so that the model was ready for me to take to the County Fair. By early June I had the upper three strakes of exterior planking installed, the center cross supports are all raised to the correct level (I thought) and the middle two planks on the center gundeck. If they look overly wide, they are. They are about two scale feet wide...but that is what the plans call for...because that is what the ship has. Deck planking is holly. Exterior and ceiling (interior) hull planking is boxwood. I took some basswood the thickness I wanted my frames and ran them between the bulkheads, attached to the exterior planking. I would then sand the bulkheads down to the proper thickness...making them frames. There are a little over twice the number of frames on the real gunboat as I have. Here you see the bulkhead sanding process almost complete. The master shipwright surveys his work. A look from a different angle. Note the cross supports forward have not been fully raised. I want to complete he ceiling planking before I do that. A look at the sternpost. Note 'wings' used to help anchor planks A look at the stem. No wings. The beastie is starting to take shape.
-
Ol' Salt, Arnold was wounded twice. First time was during the failed assault on Quebec. The second was at Saratoga...same leg. After he had turned coat and was working for the British, he was a brigadier in the Carolinas. He allegedly asked a captured American officer what he thought his troops would do if they captured him (Arnold). The response was 'Bury his leg with military honors. Hang the rest of him from the nearest tree.
-
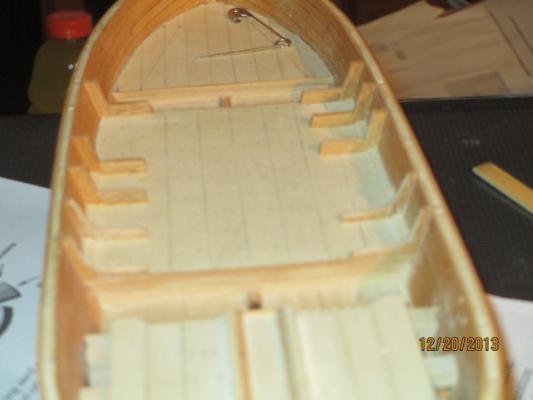
Next, I had to make and install the bulkheads. The plans had no good 2 dimensional diagram plan for bulkhead as some of the Model Expo plans do. Instead it had the 3D/from an angle diagrams. So I improvised. In the past I have build bulkheads using the line and sheer plan normally embedded on most plans. In this case, I would only make the sides and connect them using built up cross member pieces. As it turned out, all bulkheads except the forward 2 and aft 2 had the exact same curve. The only difference was height. Easy to make. I installed cross supports at the bulkhead locations and eventually added the sides. Care was taken to ensure they did not tilt, thereby changing the curve. The bulkheads were made much wider than I would eventually need. This provided a more stable base for mounting and provided more meat for faring. This was particularly important in the bow and stern. Cross supports would eventually be built up to support decking. Fore and aft cockpits have been planked. The "keel" is sticking up in aft cockpit (right). Notice the Bailing Pit in aft cock pit (square dark colored wood). This was a cutout section that gave access to the bilge/bottom planking area in order to bail out water with a water scoop they had. Scoop to bucket-pour over the side. This might have been fine for day to day dewatering, but it failed when needed most. If you look at the picture of PHILADELPHIA sinking at the top of the thread, you will see it sinking by the bow as a result of (1) the hull being holed by a 24 shot in the bow and (2) the weight of the 12lb gun and related gear. They know it was a 24lb shot because it was still wedged in the hull when the wreck was brought up. It is also on display in the Smithsonian...wedged in the hull. Solid basswood blocks placed for future use (to support pedestals).
-
Let's begin!!! The model, like the gunboat itself, is pretty simple. Start off with a flat bottom and work your way up. Using the Model Expo plans, I made two identical half bottoms and glued them to a center false keel. This was to provide me with a completely symmetrical hull. (yeah, so how did that work out?) The bulkhead locations were marked on the bottom to help line up the two pieces. As you can see from the photo date stamp, I started this project almost a year ago. The two pieces were affixed to the false keel inside-side down. This allowed the wood to stick up and serve as a guide for bottom planking. Before planking the bottom, bulkhead locations were transferred to the inside side. Once the bottom was planked, the whole shebang was sanded flat. I did this so the model would sit flat on the work surface. Eventually I will add the keel, which is only about 3 scale inches. It was more for structure than anything else and didn't contribute much to its sailing qualities. The PHILADELPHIA only sailed in one direction--directly downwind, but when you could, it was better than rowing.


-
Howdy Cap'n Bob.
-
Ano, I noticed you are building a 1:48 HMS FLY. It our County Fair, our of my Guild associates was building a 1:48 FLY as well. We would point out to the passers by that they were the same scale, same year but PHILADELHIA was much smaller but had larger guns.
-
From John Fox from one of the other discussion groups: "Check this out! http://3d.si.edu/explorer?modelid=47 Pan, zoom, top, bottom, P&S views of Philadelphia as she sits in the Smithsonian. There's a measuring tape you can use to find dimensions and spacing of chosen features, like beam and frame spacing. Now that is truly a cool thing to view!" It requires Internet Explorer 11 to view (which I don't have yet...but I see it in my Update queue to download).