Chuck Seiler
-
Posts
1,878 -
Joined
-
Last visited
Content Type
Profiles
Forums
Gallery
Events
Everything posted by Chuck Seiler
-
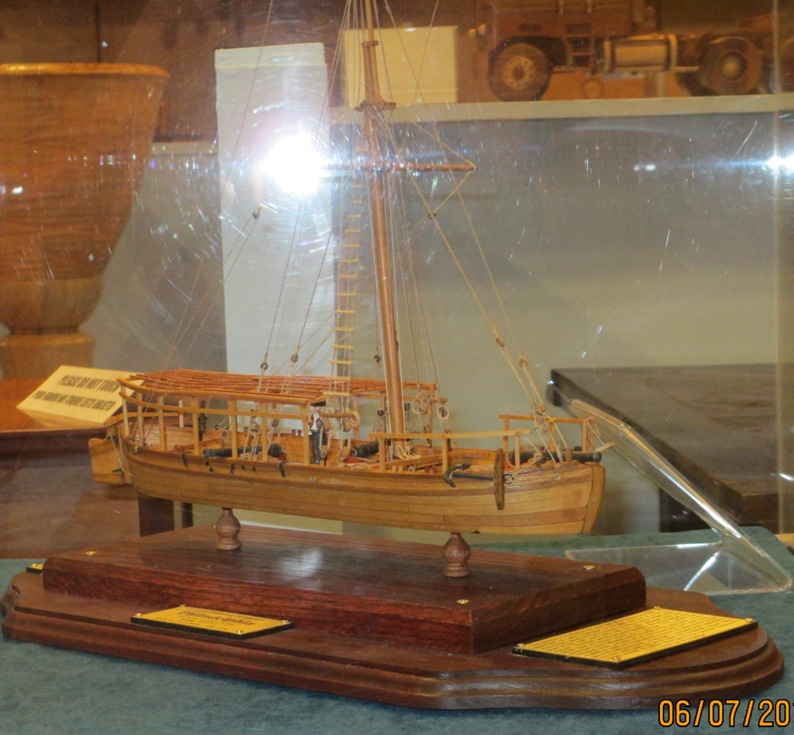
 Thanks Pete. You arrived just in time for closing. Actually, some time after July 4th I will get the model back from the County Fair and will install: Sweeps rack, sweeps, folded awning, add 3 more swivel guns, add a few more rope coils (can never have too many rope coils). I am debating whether or not to add barrels, crates, etc.
 -
Black Strake
Chuck Seiler replied to Chuck Seiler's topic in Building, Framing, Planking and plating a ships hull and deck
I agree. For the most part I don't paint much...mostly natural wood or stain. I would prefer to plank the wale and black strake in ebony. I have some that I will try out, but have found it hard to work with. Barring that, the wale will be painted. I have noted Chuck's (and others) method of multiple coats of thin acrylic paint and really like the result. -
Black Strake
Chuck Seiler replied to Chuck Seiler's topic in Building, Framing, Planking and plating a ships hull and deck
Thanks Chuck. -
Looking at various build logs, I see sometimes the black strake is black and sometimes it is not. What is the 'rule' on this? Is it according to ship/class or personal preference?
-
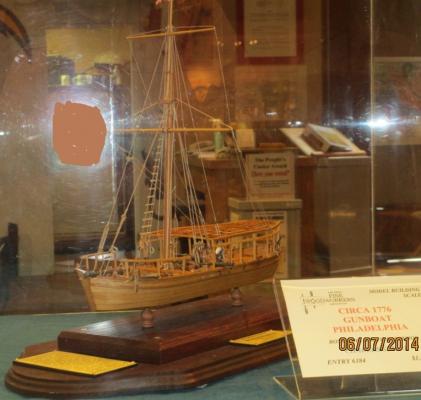
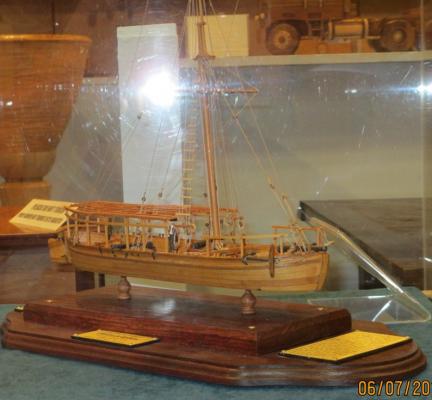
Mike, Thanks, I appreciate it, particularly since (a) you have seen it up close, (2) you are an accomplished modeler and ©you took 1st. Well, it's on to PROVIDENCE (which you will see Sunday). (I guess I can change my signature now to indicate "PHILLY-Completed")
-
Mark, I understand and appreciate. Thanks. I am trying to remain realistic. Beside, the feedback I am getting from this group, folks at the Fair and even some of those who placed ahead of me is worth more than the actual ribbon.
-
Martin, When working in wood, virtually ALL mistakes can be corrected. Not a happy prospect, to be sure, but true. However, sometimes it takes skill and effort beyond the basic modeler (as well as extra pieces-parts). BUT...this is how you learn. As I tell people when I am demonstrating ship modeling, I have not made a model yet where I have not needed to pull it apart at some point. In my younger days, I would work around it and would settle for 'whatever'. Now I endeavour to fix it, before the error compounds. Mobbsie is correct. Post your build here and if there aer any issues you will get plenty of knowledgable feedback.
- 1,279 replies
-
- 4
-

-
- agamemnon
- caldercraft
- (and 1 more)
-
Mark, Additionally, At least two of the winners have posted those builds here on this site...so they are not shabby modelers either.
-
Dave, My pleasure. Hey, I remember Lumberton. I passed thru there driving between Jacksonville and Philly alot, before the interstate went in.
-
Pops, I now use Firefox as my browser and I have subsequently visited the site. I learned alot. Thanks for the complements. Mark, In fairness to the judge (who is the former curator of models at the San Diego Maritime Museum), it is a woodworking competition rather than a model competition. Scale models happens to be the category we were competing in. I will know more when I review the 'judges notes' next Sunday.
-
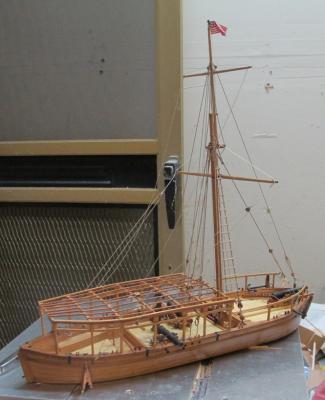
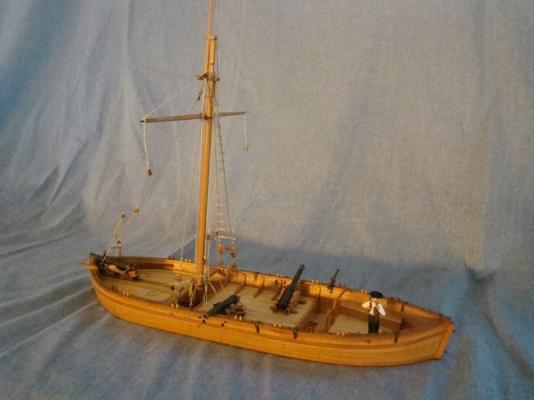
Philly at the Fair. I got some horrendous "blooms" from reflection. Sunday (when I am back at the Fair) I will see If I can remove the case and get some shots. Meanwhile, I tried to blot out the worst of them. I managed to eek out an honourable mention.
-
THE BLACKEN-IT TRIALS
Chuck Seiler replied to Erebus and Terror's topic in Metal Work, Soldering and Metal Fittings
I had the same thought as jud, is the acetone bath really necessary after the muriatic acid bath? -
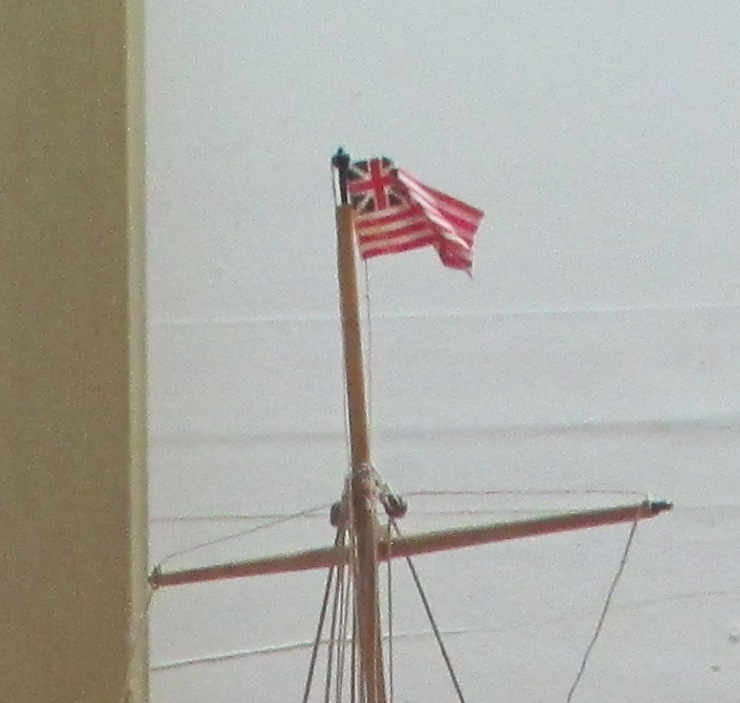
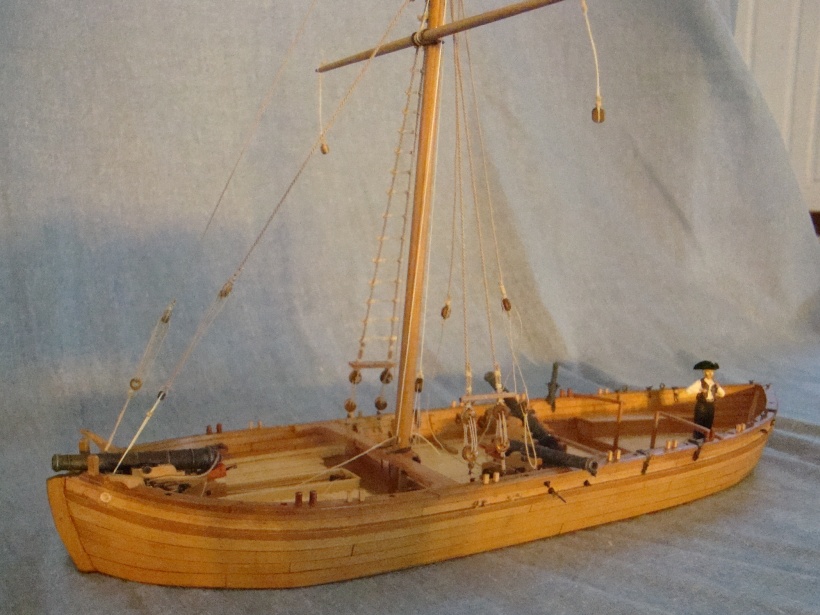
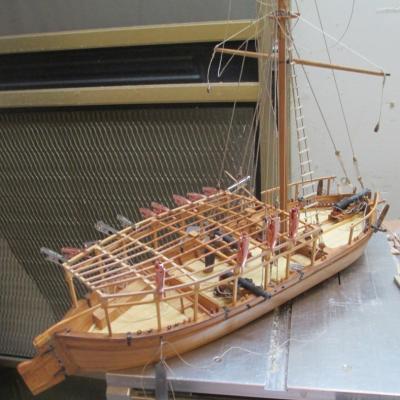
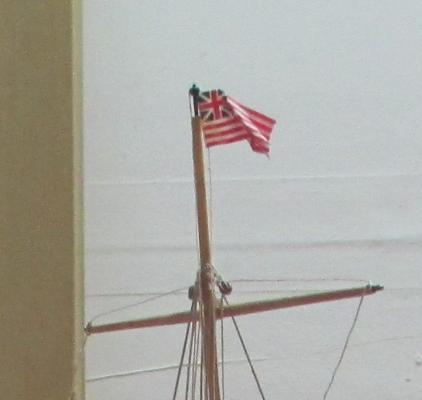
Wee hours of the Morning, Thursday 29 May. 'Tis mere hours before I have to deliver the model to the County Fairgrounds. All nighters are not as easy as they used to be. Work on the awning structure is pretty much as complete as it is going to get. I still need to add the rolled up awning, sweep rack and sweeps, but that will have to wait until the Fair is over. Rigging is complete! Hoist the ensign and we sail into battle!!! <poop> No sail. We row into battle <poop> No sweeps. We get towed into battle...Call AAA. This page will be on hiatus until after July 4th, when I get PHILLY back. I will complete the model and get pics posted. My intent was to get a good set of shots prior to taking the model to the Fairgrounds from work....but I forgot my camera.
-
I don't travel much.
-
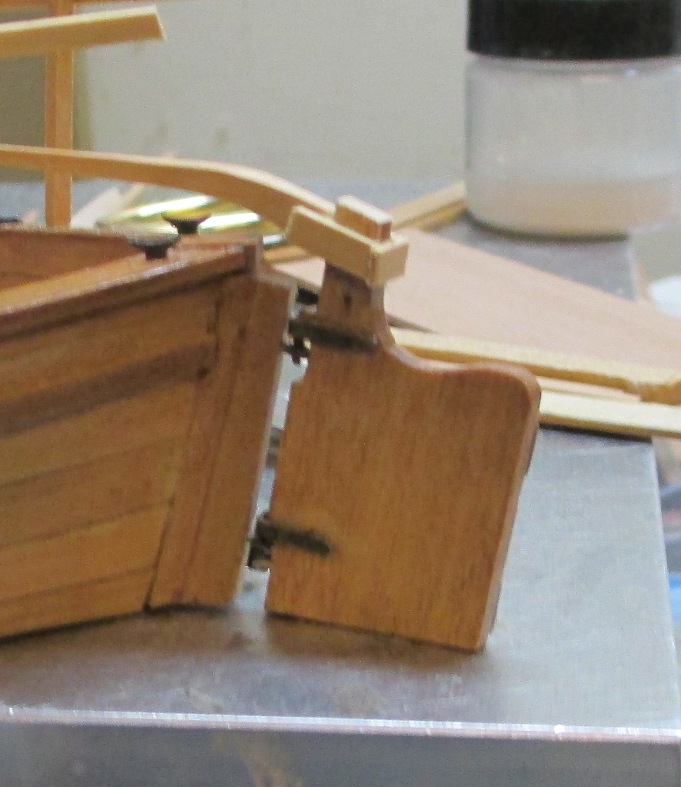
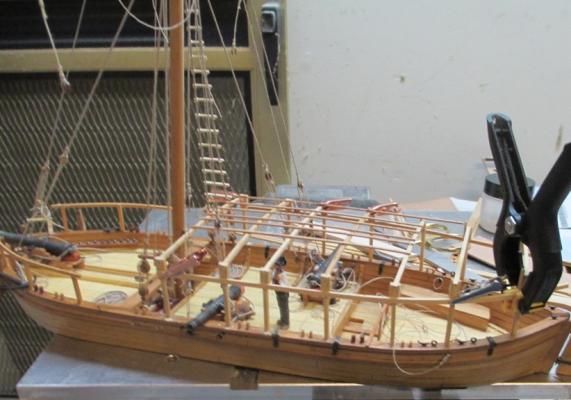
The awning structure-in progress. We have steering!!!!! The rudder still needs a little refinement, but it is functional.

-
Was that Dave Yotter from the SMA? He has been building since....let's put it this way, it was going to be the 'admiralty model' used by General Arnold to show the workmen what he wanted built. I forget the exact scale, but it is 3 times my Philly, so, about 1/16 scale? He even cast his own cannons. He is using the plans from the Smithsonian. Its an interesting build with surprisingly alot of documentation.
-
Thanks Bob, In this case I doubt that it was EVER inspection ready. ...manned by soldiers who, a year before, were farmers, in the middle of nowhere.
-
Thomas, I can poll our club members to see what they use. Some go bulk and would knw where to get what you want. ...or you can come to our next meting ad ask yourself.
-
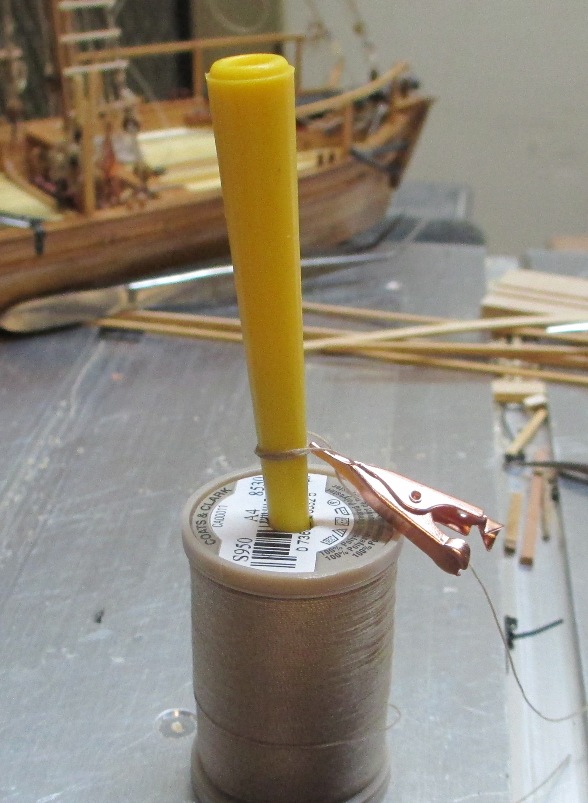
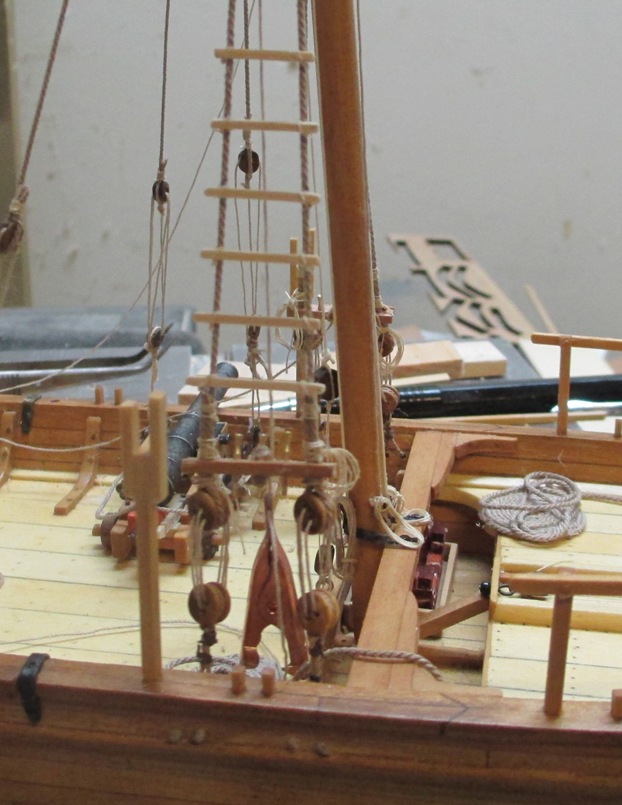
Coil making jig. It wasn't so much the making of the coils, it was placing them that gave me problems. I think the resulting fiturative knots were way too big, but otherwise theywould have come undone...evenwith a soaking of diluted white glue. I will puruse the forum for better examples of doing this next time. Fortunately, this is a pretty simple rig. I can ony imagine a square rigger.

-
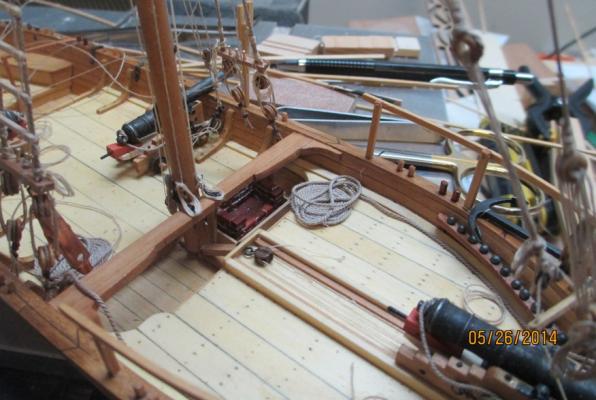
I grow weary of rope coils. Progress as of today. All the shrouds and stays are in place. Forward railings have been installed. Anchors installed and 'housed'. At this point not much going on aft of the starboard 9 pounder. Alot of rigging (for this model) andassociated rope coils. As I mentioned earlier (either here or elsewhere) as I was grappling with the crowded confines of the area below the mast,I realized I needed to rig the blocks, etc from the perspective of the folks on the ship,as opposed to the way it would be easier to do. I managed to snag existing rigging and rope coils on several occasons, but with minimal damage. A gander at the opertion from the port side. Note: The stock on the anchor is nailed together (simulated). Stairway to heaven...or at least to the topmast. When I was working on this, I mentioned to several fellow modelers that I was attaching the rungs to the shrouds. They felt compelled to correct me, "You mean ratlines?" "No, I mean rungs." This was only on oneside, for some reason. Perhaps they got as tired as I did working on it and gave up. Another view of the fore deck area. More rope coils. Anchor cable not so neatly coiled up on deck for folks to trip over.


-
Later that same night...... I thought I would post these, but later decided not to because I would have more up to date pics. <not> The build goes on at a fast pace, but the photgrapher appears to be on vacation. I hope to have some pictures later today if, for nothng else, to keep me off page 4. What started as a simple build has become quite cluttered. Alot of knots and alot of rope coils (non perfect version). While I am pressed for time, I need to remember to let the glue dry before moving on. Critical at this point isto remember to perspective of the rig. How would that block be rigged and how would that belaying pin be tied off by people ON the ship, not what is easy for a modeler OUTSIDE the ship. Thankfully I have a good supply of tweezers, forceps and mini alligator clamps. Film at 11.

-
I guess that's what happens when you slap a fleet together with what is available. I have similar issues with PHILADELPHIA that I will explain on my blog when I finally get my ducks in one sock. Long story short, there are alot of design flaws that make it look awkward. Somethng apparently as simple as not having enough ringbolts/eyebolts forces them to double up the use of several bolts causing non symetrical rigging and (in my mind) a less than crisp looking appearance. They didn't build the shils/fleet to make life easier for modelers...but it sure does make an interesting build. Great work so far Mike. I'll see you at Valcour.
- 175 replies
-
- 2
-
-
- washington
- galley
- (and 1 more)
-
Rusty, How many misingpieces did you find in that dust bucket?
-
Which Chuck? I used Elmer's Stainable Wood Filler. I got it at Home Depot.
-
One might say that it doesn't REALLY matter unless you are doing a diorama where all the facets of the model are set in a single moment in time. Otherwise, you may have various pieces of the model displayed in a manner inconsistent with how another part of it would be at the same time; elmtree pumps with the handles installed but nobody manning them, ditto windlasses, guns rigged for sea on one side and run out on the other. This is done to show off some of the features that might not normally be seen, since the model is a display, not a real. Line coiled on deck as if awaiting the admiral's inspection is not far fetch since the model is 'ready for inspection' by the public. I think any way is correct if that way would have been done at some point on the real ship.