HOLIDAY DONATION DRIVE - SUPPORT MSW - DO YOUR PART TO KEEP THIS GREAT FORUM GOING!
×


Chuck Seiler
-
Posts
1,876 -
Joined
-
Last visited
Content Type
Profiles
Forums
Gallery
Events
Everything posted by Chuck Seiler
-
 Maury, What changes did you make?
 -
I think the Longboat would look GREAT coppered.
- 100 replies
-
- 1
-

-
- model shipways
- 18th century longboat
- (and 1 more)
-
Are there any issues with the MOROPE stretching out of shape over time?
-
Robbyn, One option for planking to consider is the "garboard to sheer" option. BobF and Toni Levine did this with great success. Starting at the garboard and working your way to the sheer strake as opposed to doing 2 at the top, 2 at the bottom and working your way to the middle, as Chuck has it in the instructions. I say this because I had all sorts of trouble with the final plank. (Of course if I had measured better, I may not have had the trouble.) Using a bit of wood filler and keeping it below the waterline so I could paint over it was my salvation in that regard. By doing this, however, you have to come up with some method to support the upper bulkheads until the planking is complete. Easy peasy.
-
Oh yeah/....Welcommen to the build.....
-
Robbyn, Before you get started in earnest, I would STRONGLY recommend drilling a small hole down the top of the stem piece and inserting a small treenail/down/peg. Because of the way the grain runs, this part is very fragile and is prone to breaking off. Option 2: Glue a long piece of thread to it so you can find it when it breaks off.
-
I had a lot of trouble with the strake or two north of the garboard strake. In retrospect, edge bending like Chuck and BobF did would have helped significantly. I loop forward to see your progress.
-
I was mistaken. I used Pau Marfin, not Boxwood. It edge bends easier.
-
I used boxwood as well. I did not have any issues with the sheer strake, although I may have had to slightly spile the one below. However, given the problems I had with the planking in general, I will defer to you ad Toni.
-
Mike, Looking good. I see Hewitt talked you into putting the horse below the tiller.
-
My point was that I was doing alot of building (although not as much as I would like) and not very much photo documenting of same. Altho, I admit that photo quality was a bit better. You may not see it here, but if you blow it up it is noticable.
-
Maury, Welcome to the build!!!! I am surprised you said you spiled the top planks. IIRC the top (sheer) plank goes in as is-unspiled. I do not recall doing anything special for plank 2 either.
-
Bob, Many thanks. I will experiment with my current project. Since it will have inner planking as well, any glitches can be forgiven.
-
Thanks Bob. This could help in another project I am working on. I will experiment with what I have...and keep an eye open for other options.
-
Bob/Toni, Are those Harbor Freight sanding disks or dremel?
-
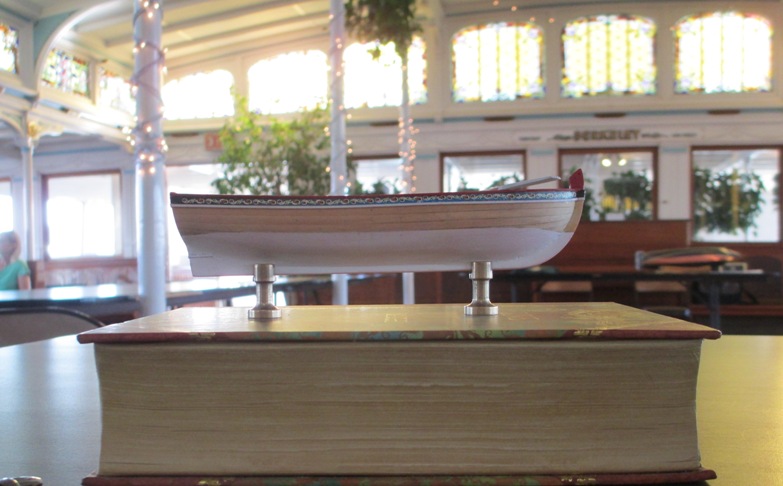
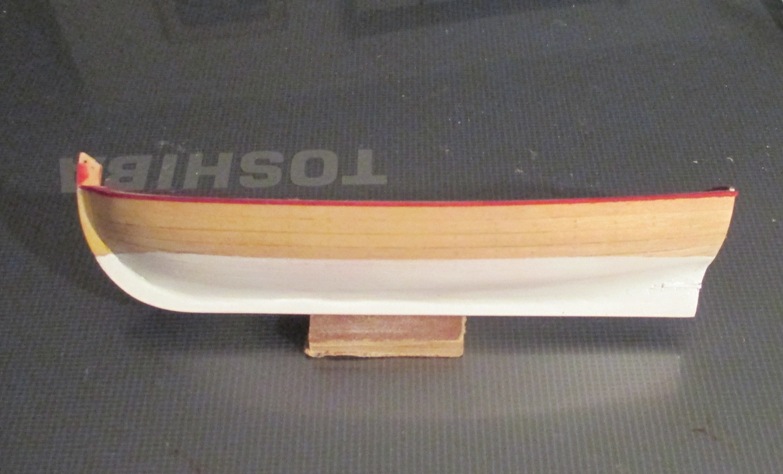
I have done more modeling than I have model photography. I took this pic t our Model Guild meeting. Friese and lower rubrail added. Here is a look at a proposed mounting scheme. Most people are using wire or thin tubing. As a contrarian, I am going with clunky. Whadya think? Book is not part of the base.

-
I think Mike is too busy working on FLY. We may have to strong arm him.
-
I forgot to mention...based on the care I am taking with the cap rail, I do not intend to paint the edge of the cap rail white. I thought about painting a 1/32" white line below the cap and above the friese. If I had decided to do this, I would have painted the top of the gun'l a bit more than the 1/32 inch BEFORE I applied the cap rail, thus giving a crisp line. The friese would have been applied so that the 1/32" white stripe showed. Maybe next time.
-
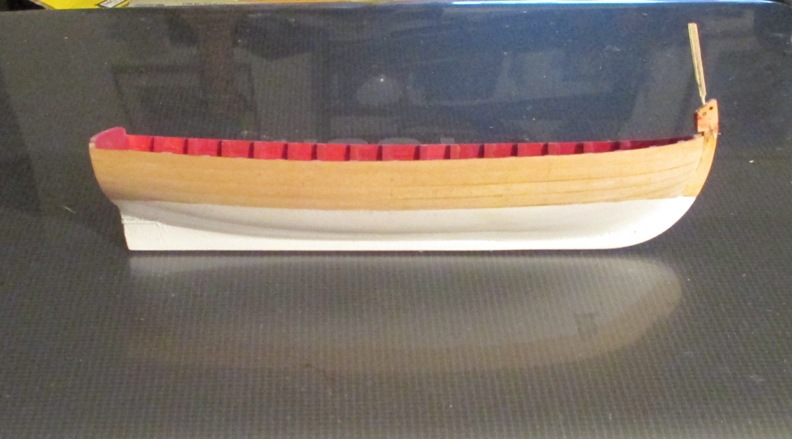
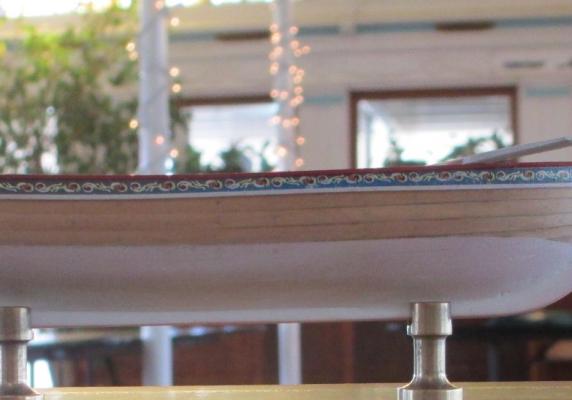
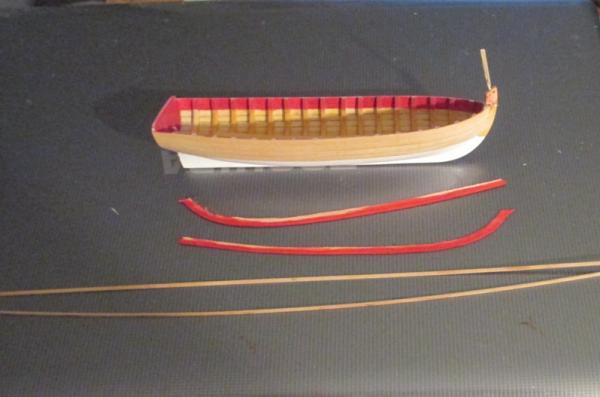
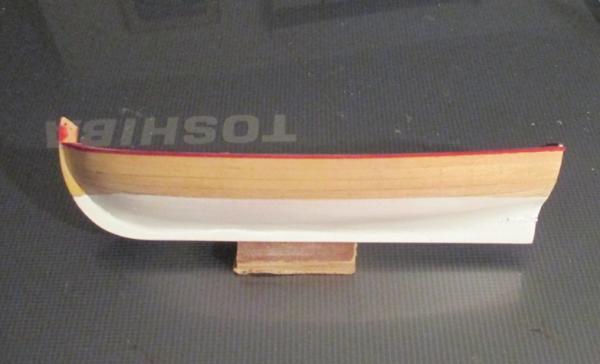
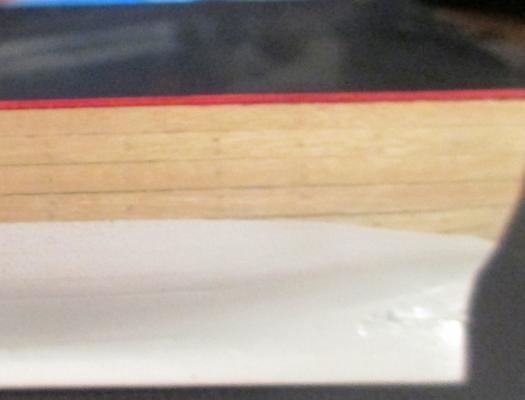
Since my past efforts to tape and paint without seepage on this hull have proven non-good, I decided to do something else for the top rail. Using red Trans Tint water based (or alcohol based) wood dye, I dyed the under side lip of the cap rails. My initial plan was to use two 1/16" x 1/16" lengths of wood. These would be attached side by side, bent along the whole length of the gun'l so that the wood grain would be always running with the cap rail. Once added, I would have sanded it down to 1/32 thick and as wide as it needed to be. I decided NOT to do that because it did not provide the little flare on the bow. Port side cap rail added. The water based/alcohol based dye does not interfere with gluing. A closer look. You can see how much crisper the demarcation line is versus that of the water line. I will eventually paint with caboose red on upper and side portions, but leave undersides untouch (and hence, unboloxed up).
-
Don't forget the Harold Hahn plans still sold by his family.
-
Holy Cow! Talk about pre-planning.....I'm impressed. Hello Kurt. It's good to see you again.
-
Bob, My efforts to fix the problem proved how true your statement is. I drilled a pilot hole in the piece that was to be glued BEFORE I glued it. Once the glue had dried 24 hours, I used my pin vise to drill the hole the rest of the way into the stem. The stem piece broke again; not a the glue joint, but above it. Apparently the force of the drill pushing into the wood (opposite reaction-pushing up on the stem piece) lifted it right off. All should be well now.
-
Great job Toni! Hopefully you are getting a case/dust cover for it. What is your next project?
-
This pic shows me inserting the peg in the stem piece. I had originally wanted to use 2 pegs, but it did not work out. My comic-sans font seems not to be working. :-(

-
Len Superb work. I will need to go back and spend more time on this. I really like how you did the transom castings.