DONATION DRIVE - SUPPORT MSW - DO YOUR PART TO KEEP THIS GREAT FORUM GOING!
×


Chuck Seiler
-
Posts
1,878 -
Joined
-
Last visited
Content Type
Profiles
Forums
Gallery
Events
Everything posted by Chuck Seiler
-
 Ano, I noticed you are building a 1:48 HMS FLY. It our County Fair, our of my Guild associates was building a 1:48 FLY as well. We would point out to the passers by that they were the same scale, same year but PHILADELHIA was much smaller but had larger guns.
 -
From John Fox from one of the other discussion groups: "Check this out! http://3d.si.edu/explorer?modelid=47 Pan, zoom, top, bottom, P&S views of Philadelphia as she sits in the Smithsonian. There's a measuring tape you can use to find dimensions and spacing of chosen features, like beam and frame spacing. Now that is truly a cool thing to view!" It requires Internet Explorer 11 to view (which I don't have yet...but I see it in my Update queue to download).
-
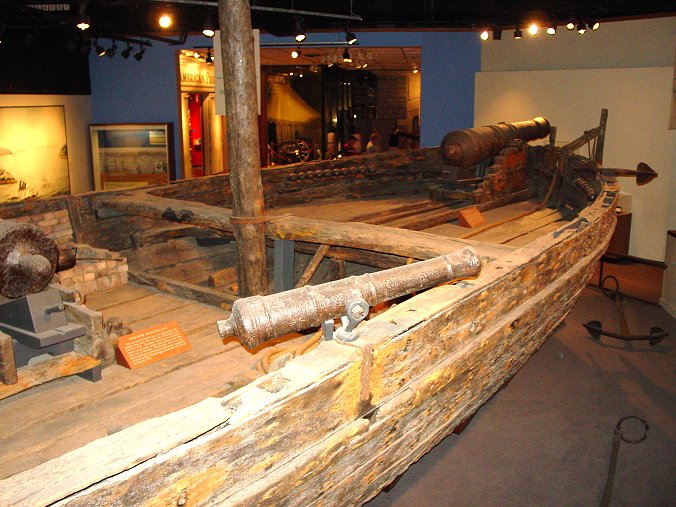
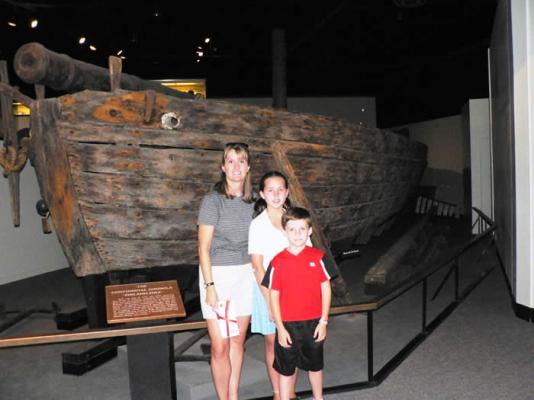
The PHILADELPHIA 's sinking was it's eventual salvation. Having sunk in cold, fresh water, the hull and ironwork was saved from major deterioration for 160 years. In 1935 Colonel F. Hagglund, an experienced salvage engineer from New York, located and raised the PHILADELPHIA. After Hagglund's death, Philadelphia was donated to the Smithsonian's National Museum of American History, where she is on display to this day. GUNBOAT PHILADELPHIA as it is today I have no idea who these folks are, but it demonstrates proportion.


-
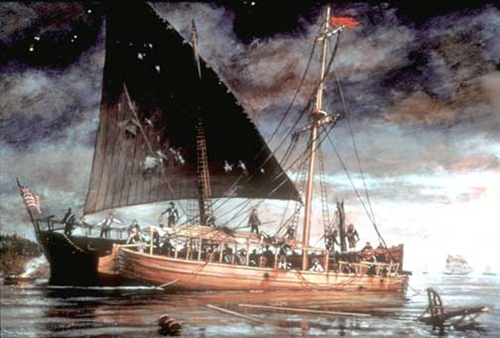
As early as mid 1775 it was understood that Lake Champlain was a key highway between British controlled Canada and lower New York. Fort Ticonderoga and defense of the lake were critical. After a failed attempt to take Quebec from the British and effort to lure the people of Canada into the war on the side of the Yanks, American forces retreated south on the lake. Defense of the lake was about to begin. Major General Philip Schulyler (commander of the northern department) had already started a 'ship building' industry on the site of a captured sawmill in Skenesborough (now Whitehall, NY). The site was used to build cargo batueax to transport troops and supplies up to Canada. The mission was quickly changed to the building of warships. Construction began in August 1776 at a slow pace. Carpenters, riggers were reluctant to leave their lucrative businesses on the coast. Finally lured by higher wages, and despite the heat, mosquitoes, black flies, and long days, these craftsmen completed eight 54-foot gondolas, including PHILADELPHIA, and four 72-foot galleys in just over two months. The hulls were fitted out at Fort Ticonderoga. Across the lake at Mount Independence, they were moored at the foot of a shoreside cliff; spars and guns were lowered from the top of the cliff into position on board. PHILADELPHIA carried three carriage guns, one 12-pounder, and two 9-pounders, and eight swivel guns. She had a single mast with a square-rigged mainsail and topsail. Her crew of 44 was captained by 25-year-old Benjamin Rue, from Pennsylvania. With little experience in boat handling and none in naval combat, Rue's men typified the troops described to Major General Horatio Gates, as "a wretched motley crew". This fledgling fleet spent the majority of their time that late summer and early fall of 1776 patrolling the lake in anticipation of the completion of the British fleet in Canada. Finally, on October 11, 1776, the British were carried southwards on a north wind. The American fleet was moored in a protected bay between Valcour Island and the New York shore in anticipation. The British did not enter the Valcour Island passage from the north, but instead ran south to the east of Valcour Island, which meant that to engage the Americans, the British would have to sail into the wind, putting them at a disadvantage. Despite this initial advantage, the British fleet was much more powerful than the Americans. At the end of the 6-hour battle, the schooner Royal Savage had been captured and burned, and the gunboat PHILADELPHIA sunk. Other vessels sustained damage, and sixty men were killed or wounded. The British decided to wait until morning to finish off this rebel fleet, which proved to be a poor decision. During the night, the cunning Benedict Arnold led his fleet in an escape, rowing silently right under the noses of the British. The British gave chase. Within a week the entire American fleet had been sunk, scuttled or captured. REPLICA GUNBOAT PHILADELPHIA PLIES LAKE CHAMPLAIN


-
Mark, I include Chuck P on my distro as well. I understand he is a busy guy. Floyd, send me your email address in a personal message if you want to get our newsletter.
-
Perhaps I should have said "Beloved Evil Guildmaster". We go thru the motions, but they are pretty much uncontested. How many peeps in your club? Wanna share newsletters?
-
Floyd/Bob, No, it is not done. I have made no further progress. Our club's Evil Guildmaster made me take over the club newsletter. Then he threatened us with all sorts of mayhem if we didn't get 12 models entered into the county fair this year. Oh the humanity!!!!! Seriously though, I didn't like the way it was going and wanted to incorporate changes I had seen in other logs. I had acquired a kit from one of our members who wanted to build, but ended up not being able to. I am using the semi completed boat as a demo piece that people can hold and look at. Meanwhile, build log for Gunboat Philadelphia has begun..........
-
Commentary on plans and references. My primary source document was/were the Model Expo plans; six sheets. I had them reduced from 1/24 to 1/48 at Kinkos, making several copies of the pages I knew I would have to cut up for templates, etc. At first I was disappointed with the plans. While it provided excellent detail in some areas in 3D and exploded view, it did not provide diagrams of the bulkheads so they could be easily made. Since these plans were for a kit in which the bulkheads were already provided, NOT for scratch building, I should not be too harsh. In general, the plans were/are VERY good. In addition to the ME plans, I acquired the following books for background and to fill in the holes regarding the ship/model/replica. --Benedict Arnold's Navy by James Nelson. This is an excellent book which goes into the history of events leading up to the battle, the construction of the fleet, the battle and it's aftermath. --The Gunboat PHILADELPHIA and the Defense of Lake Champlain in 1776 by Philip K. Lundeberg --The Gondola PHILADELPHIA and the Battle of Lake Champlain by John Bratton. Provides info regarding the making of the replica gunboat.
-
Gunboat PHILADELPHIA sinking after the Battle of Valcour Island, October 11, 1776, from a painting by artist Ernie Hass (courtesy Lake Champlain Maritime Museum). Things did not go well.
-
Based on Model Shipways plans Scale: 1/48 ¼”=1’ Circa: August-October 1776 Caveat. I start this build log with the understanding that I am better at building than I am at documenting…and I’m not all that good at building. As such, there may be large gaps in coverage. I actually started the model in the spring of 2013 so I would have a project to work on at the County Fair in June. After the Fair, I worked in dribs and drabs until I decided (got strong armed by our Guildmaster) it would be great to enter into the Fair in 2014. Some work got done without photographic documentation. So now you know. Background. I have been interested in the colonial gunboat PHILADELPHIA for many years. Having grown up in the Philadelphia area, I was interested in the Revolutionary War. I knew of the battle of Valcour Island, but it was more of a ‘backwater (literally) engagement’ (needs work). It is was more of a footnote to me than anything else. I really became interested in the model and the battle when I saw the in-progress model of PHILADELPHIA by Dave Yotter (Ship Modelers Association/SDSMG). He was building from scratch using the 20+ page set of plans from the Smithsonian. He even cast his own guns. Dave’s model is three times larger than mine will be. When Model Expo announced they were coming out with a model of PHILADELPHIA, I knew I had to build it. I saw that it was in 1/24 scale, which is a bit too large for my work/display area, so I decided to scratch build it in 1/48 scale (1/4”=1’). I would have preferred to build in 3/16” scale, the scale I have used for colonial ships LEXINGTON and SULTANA, but it was a bit too small. The ¼” scale is perfect, however, because it is the same as fellow SDSMG member Mike Lonnecker’s HMS FLY from the same era. Hey Mike, my ship might be smaller than yours but my guns are bigger!!!! Take that!!!
-
Using a false deck
Chuck Seiler replied to Poppi's topic in Building, Framing, Planking and plating a ships hull and deck
I use a method very much described by Russ by using strips (1/2" to 1") of thin wood run lengthwise. This allows the false deck conform to both camber and sheer curves with no buckling. I have used both thin (model aircraft birch) plywood and basswood. If the size of the model requires you to reduce something in order to achieve the proper thickness, I choose to sand down the bulkhead a little rather than make he planking thinner. This gives you a more stable base for planking. The thicker deck helps when securing deck furniture, eyebolts, etc. -
I have found boxwood harder and potentially more brittle than basswood. When bending, I would recommend soaking it a little-10-20 minutes depending on thickness. Not too much because it may washout color. It sands well and finishes well. When using basswood, I usually use a sanding sealer to keep the surface from fuzzing up. Boxwood does not require that. Be sure to use dust mask when sawing and sanding. While we should avoid inhaling ALL sawdust, I find boxwood dust (like most exotic hardwoods) causes temporary respiratory issues. Chuck
-
Floyd, With regard to length of rod: pick a length that will lift your model off the base a distance which makes the model look good. I would think 4 to 6 inches, depending on the base. Experiment.
-
Floyd, I think you will be very happy with the result if you go with the boxwood planking. If you look, you can see I started building the kit and posted a build log. I stalled when I was unhappy with some of the results and decided to try again using a kit one of the folks from our group build bought, but did not start. I plan to start again using the lessons learned in these various build logs. The long boat built was not a waste! I use it when our Model Guild does show and tell sessions at the county fair. I let people handle it and get a close look...even kids. They are amazed that it is so light and delicate, but apparently quite strong. The boxwood lends to that.
-
Table Saw Hand Safety
Chuck Seiler replied to rtropp's topic in Modeling tools and Workshop Equipment
...and while we are on the subject, don't forget the safety glasses. -
Bob, Looking good. I'll see you Tuesday.
- 100 replies
-
- 1
-

-
- model shipways
- 18th century longboat
- (and 1 more)
-
Clare, Looking good!!! I know what you mean when you say you thought the kit was just okay, until you started to work on it. It certainly provides some challenges that, once mastered (or in my case semi mastered) improve your modeling skills in general. Chuck PS. How is that newsletter coming?
-
Mast foot?
-
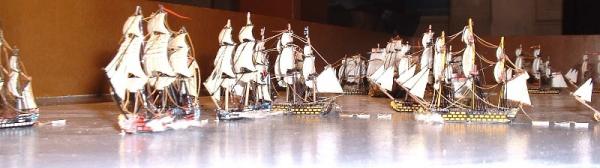
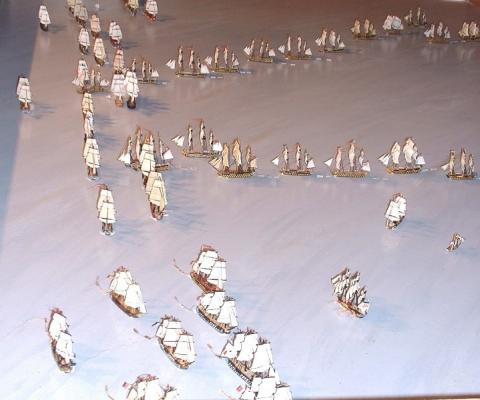
If I recall correctly, as of the noon log VICTORY was only doing 1.5 to 2 knots...and that was with the wind almost directly astern. The FRENCH/SPANISH fleet, with a much worse aspect to the wind, had to be doing a fraction of that. As we know, a huge storm hit shortly after the battle. The long, deep rolling swells that preceeded the storm wer ehitting the BRITISH form astern and the FRENCH/SPANISH from abeam. Good times were had by all.
-
Spanish news blimp gets a picture of HMS VICTORY as it cuts the line.
-
It is now 12:45, 21 October 1805, twelve miles off the coast of Cape Trafalgar...and you are there.
-
Bogey, I believe that is the method used by the folks in the Southern Hemisphere.
-
I think Grolz has an unstarted kit he is trying to get rid of. Hey!!! What do you mean you are in Japan? Who is going to run the meeting Wednesday?
- 277 replies
-
- 1
-
-
- model shipways
- 18th century longboat
- (and 1 more)
-
ouch
-
Sounds reasonable to me. Now that I think about it, how much time would be spent under oar vice under sail? I would think most of the work would be done under oar. The sail would be used for long distance point a to b. Probably not a lot of maneuvering required.